A Quotation Template is a previously described quotation format that can be utilized for quickly sending quotations. The Odoo 16 platform helps you create and manage various templates and will be very helpful for rapidly placing sale orders.
In the Odoo Sales module, you can view the Quotation Templates option in the Settings window. To access the option, you can click on the Configuration tab and select the Settings menu. From the Settings window, activate the Quotation Templates option that can be accessed under the Quotations & Orders section.
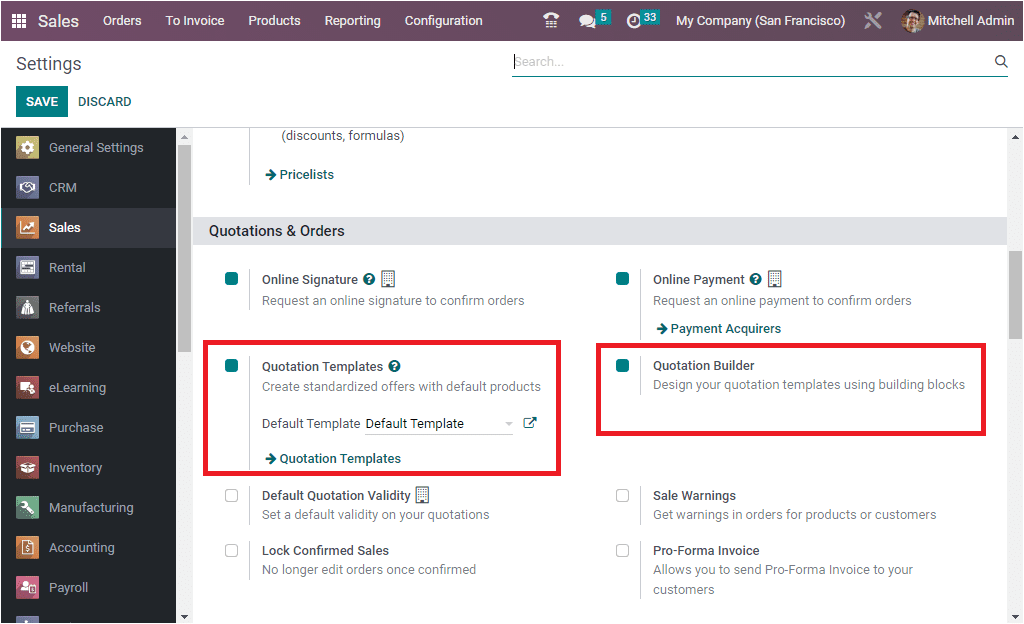
To get more advanced options, you can activate the Quotation Builder option. With this feature, Odoo enables you to personalize your quotation templates from your point of view with the most cutting-edge business software. This Odoo platform’s Quotation Builder has a special feature that makes it possible to edit and design quotation templates in the simplest manner possible while also eliminating all other complications. The operation can be done directly from the window for quotation templates. Make sure the Quotation Builder option in the Settings menu of the Odoo Sales module is turned on before utilizing this feature. This feature will enable you to quickly produce quotes that are more professional-looking.
As soon as you activate the options, the system displays a new menu called Quotation Template under the Configuration tab of the Odoo Sales module. Let us have a sneak peek at the menu.
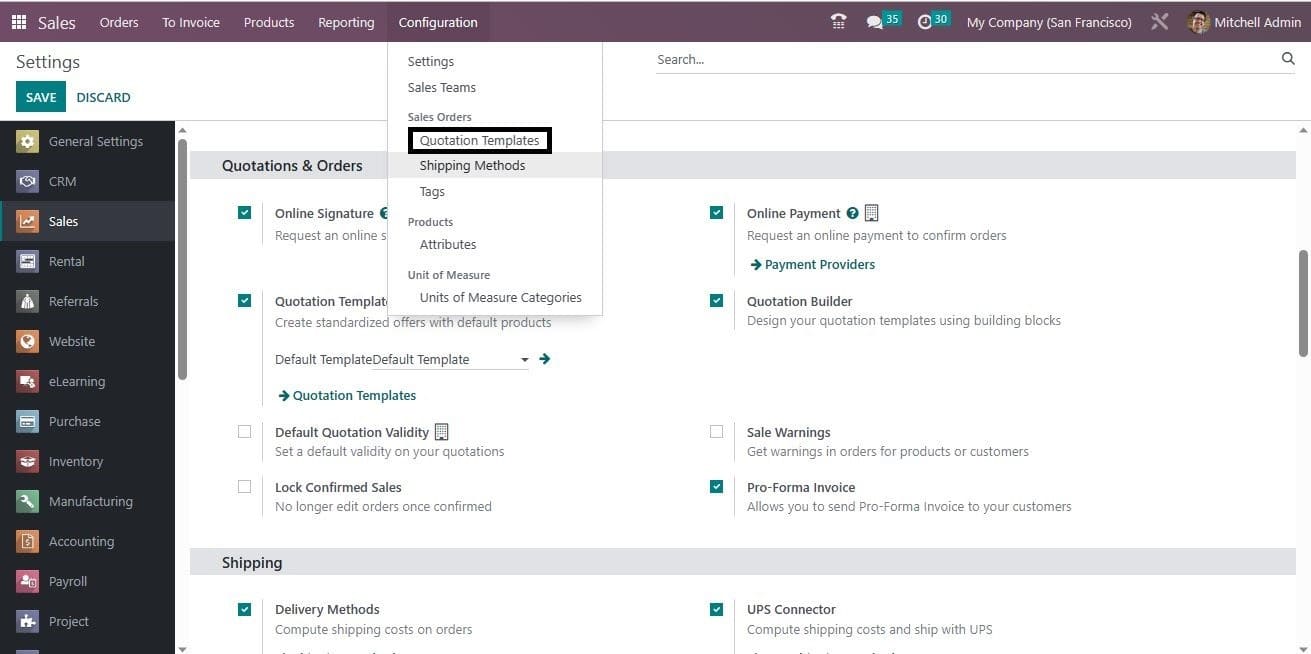
A gentle press on the Quotation Template menu is enough to open the window. The window will look like the image below.

The window depicts all the previously created Quotation Templates. The window also provides you with all the Search, Filter, and Grouping functionalities along with other additional options such as Export All, Save current search, Import All, Link menu in Spreadsheet, Insert list in Spreadsheet, Add to my Dashboard, and Add to my Google Spreadsheet.

If you want to create a new Quotation Template, simply click on the NEW button. When you click the NEW button, you will see the Quotation Template creation form, as shown below.
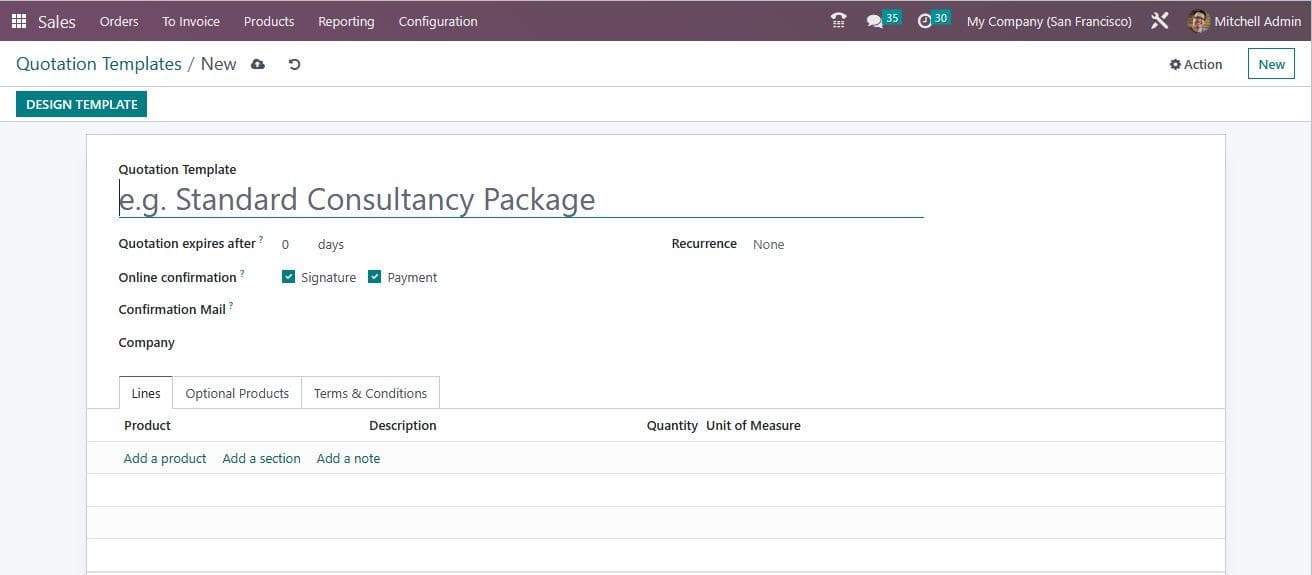
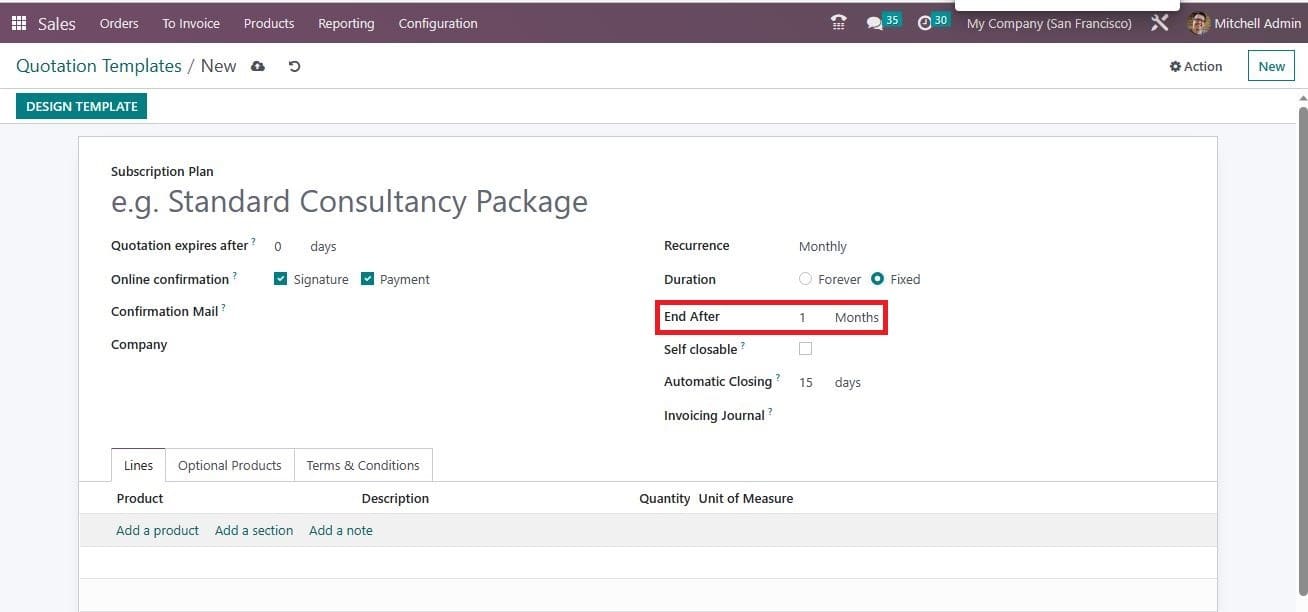
In the form view, you can enter the Quotation Template name in the provided space. Then you have the option to mention the quotation duration. For adding the quotation duration, you can use the Quotation expires after field where you can allocate the number of days for the validity date computation of the quotation. Then you have to select the company name in the Company field. Then you have the Online Confirmation field. Here you have the option for activating the Online Signature and Online Payment. This option is very useful for requesting an online signature or payment to the customer in order to confirm orders automatically. Similarly, the Online Signature option allows you to request an online payment in order to confirm orders automatically. Then you have the Confirmation Mail field. In this field, you can include an email template so that this email template will be sent on confirmation. You can also leave this field empty to send nothing. Next, you can see the Recurrence field. When you click on this field, you will get a dropdown menu. Here you have different options such as Daily, Hourly, 3 Hours, Monthly, Quarterly, Weekly, 2 Weeks, Yearly, and many more, as you described earlier. Choose the required period. Then set the Duration to either Forever, or Fixed. If you choose the Forever option, you will also have to fill in the Self Closable, Automatic Closing, and Invoicing Journal fields. If you check the box near the option Self Closable, the user will be able to close their account from the front end. Then you can also allocate the Invoicing Journal.
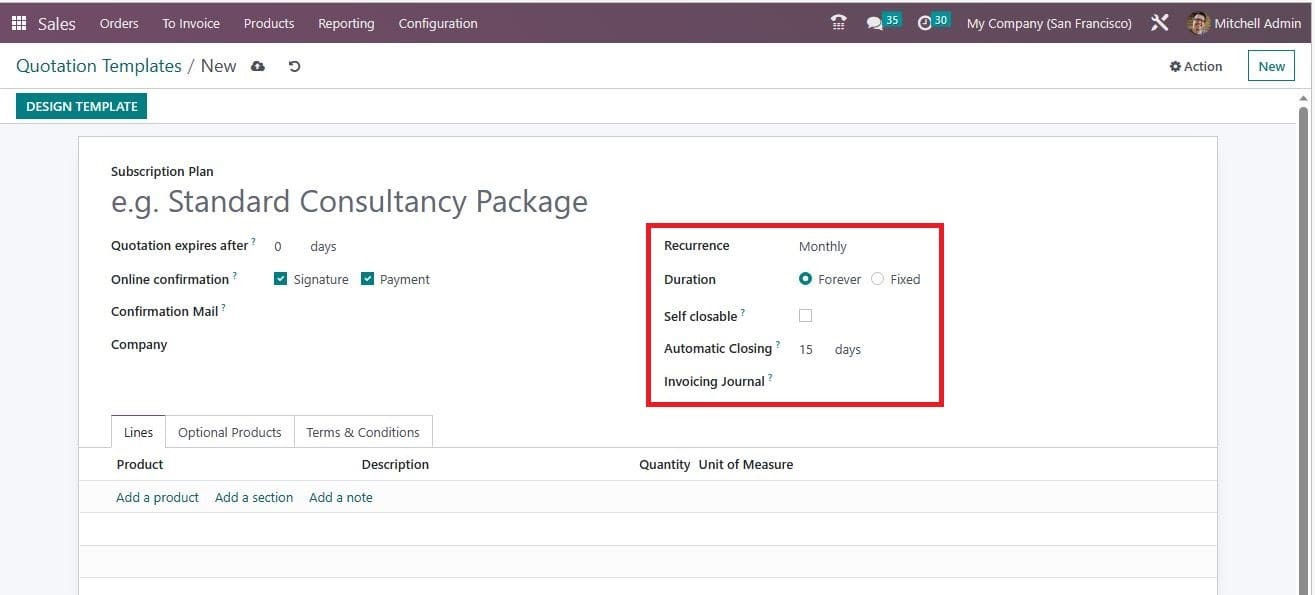
In case, you select the Duration as Fixed, the system will display one more field where you are required to mention the duration.
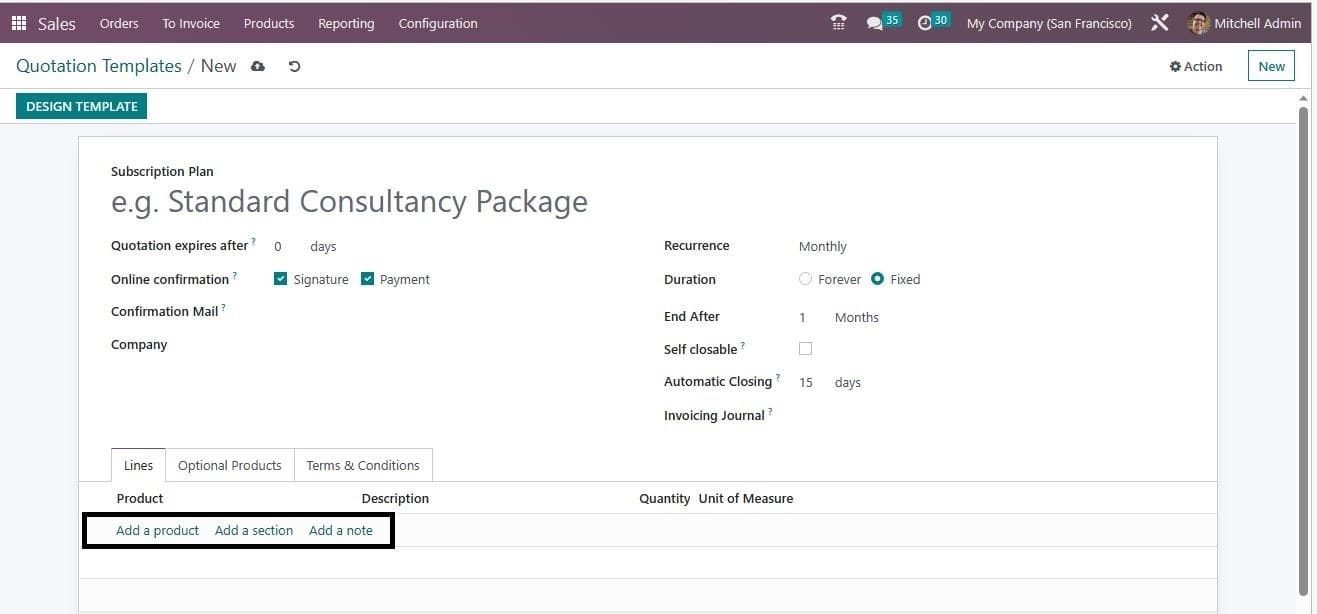
Inside the Lines tab, you have the option to include the details of the product. So just click on the Add a Product menu. Then you will get a new line where you can include the details of the product. All the product details ( the details of the product that you created and saved in your system) will be displayed in the dropdown menu. You can choose the required product from the list. Likewise, you can include a section and a note using the Add a Section, and Add a note option, respectively.
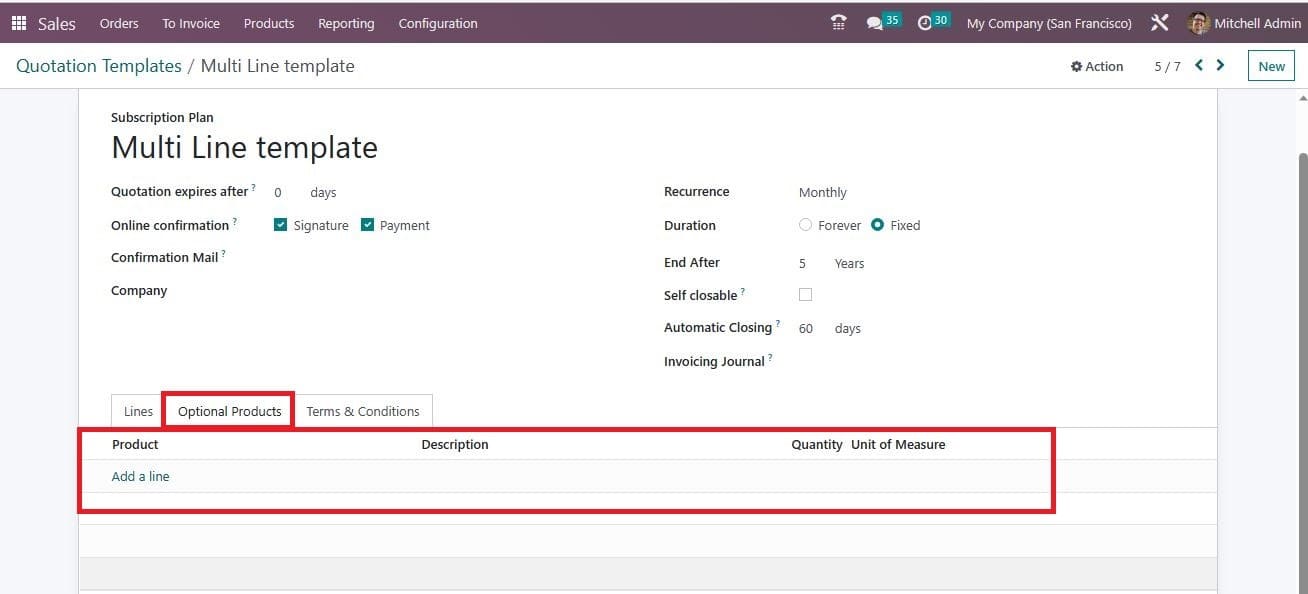
Similarly, the Optional Products tab allows you to add optional products (if any) for the main product. This can also be added by clicking on the Add a line option.
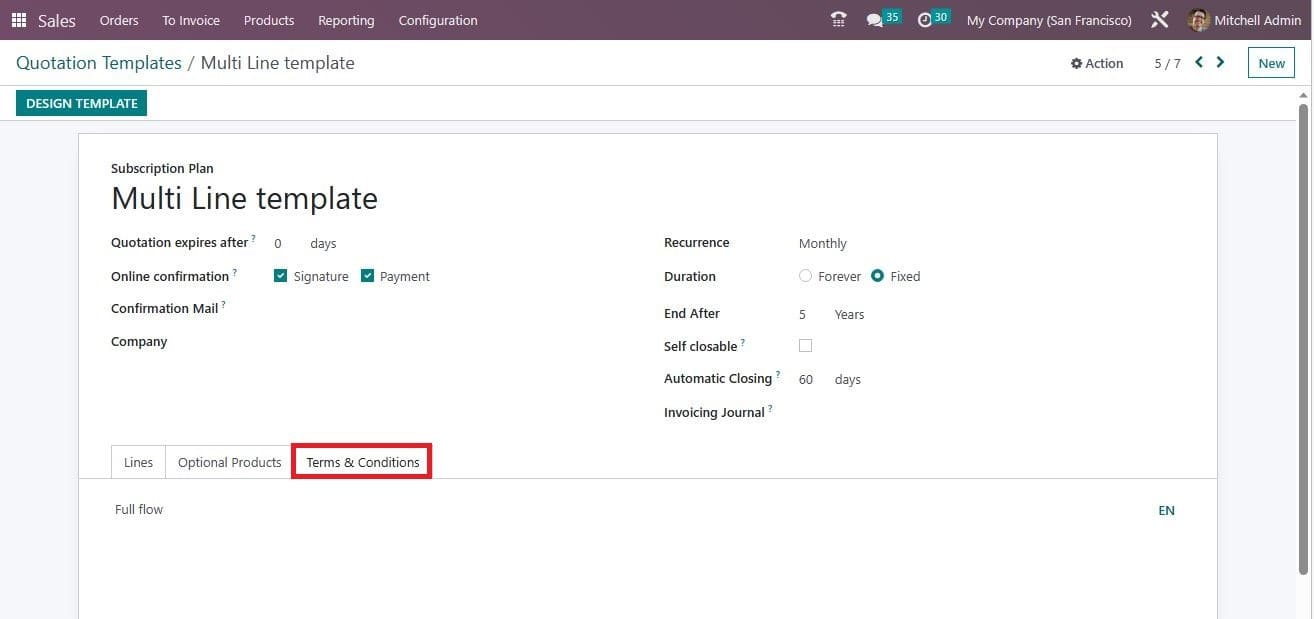
Now under the Terms & Conditions tab, you can include the terms and conditions, and instead of showing the default terms and conditions that the administrator set in the Sales Settings, these terms and conditions will be displayed. These terms and conditions that we set here are only applicable and visible for this Quotation template.
To design the templates, you can select the DESIGN TEMPLATE option in the top left corner of the window.
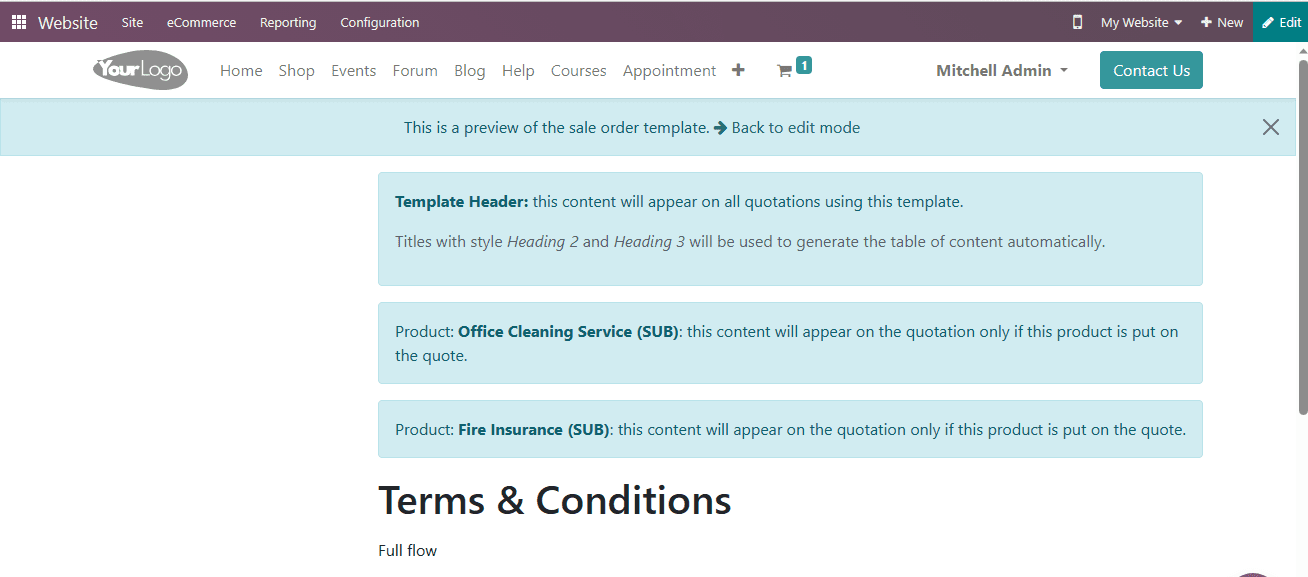
This window includes various options, and when you choose the Edit button, the window will be turned into edit mode, as shown below.
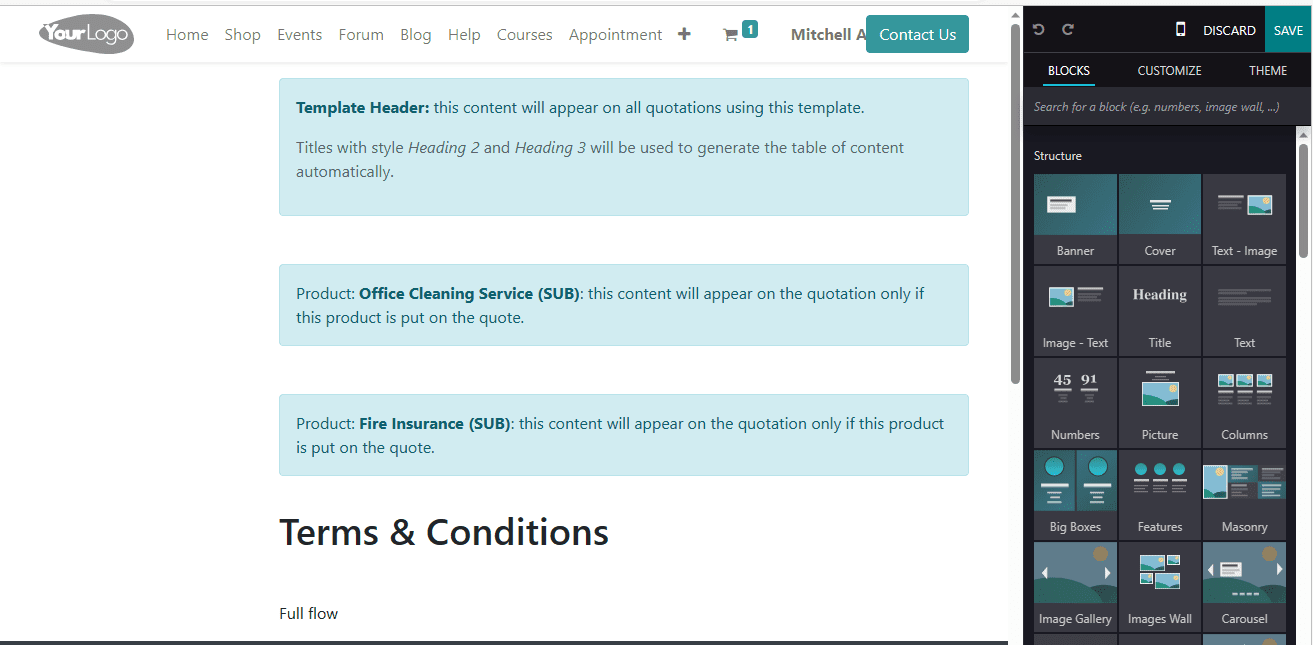
You can design every product in the quotation template lines using the different building blocks over here. Here you have different blocks, customization options, and themes. You just need to drag and drop the blocks. After designing your quotation template using the powerful building blocks, you can save it by selecting the SAVE button available in the building block section.
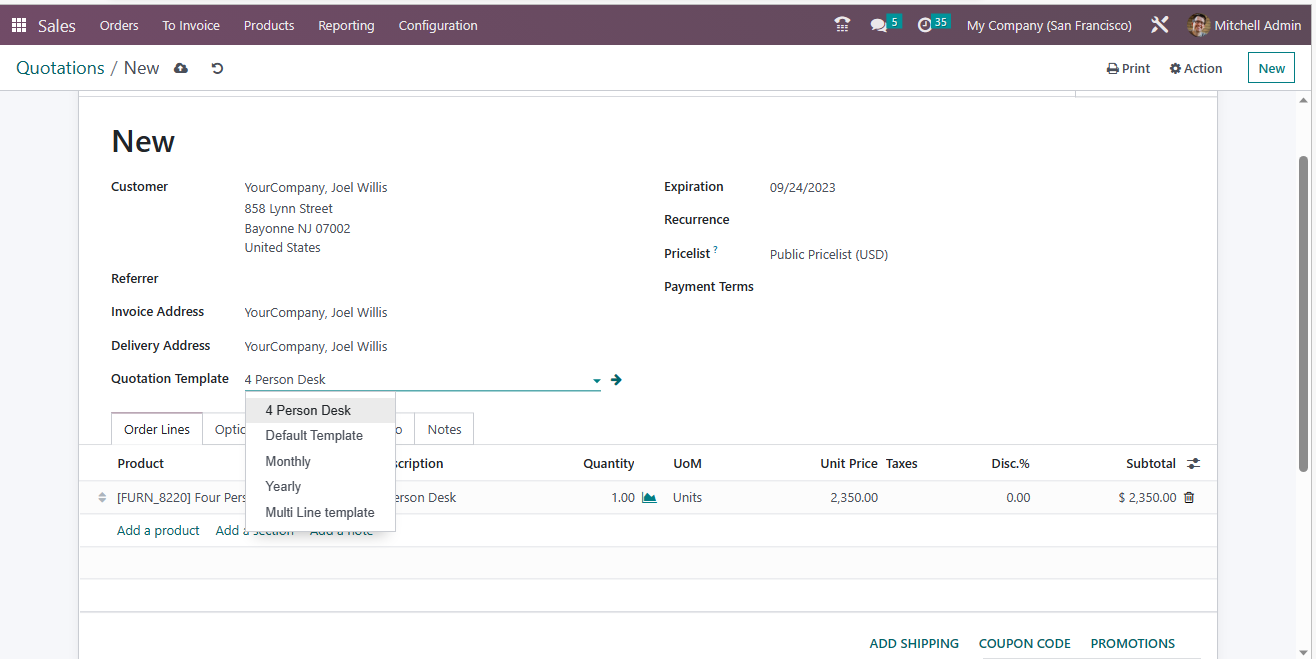
Now back to the Sales module and choose the Quotation menu under the Orders tab. And give all the information regarding the new quotation. In the Odoo Quotation Template field, you can view all the configured Quotation Templates, as shown in the screenshot below.
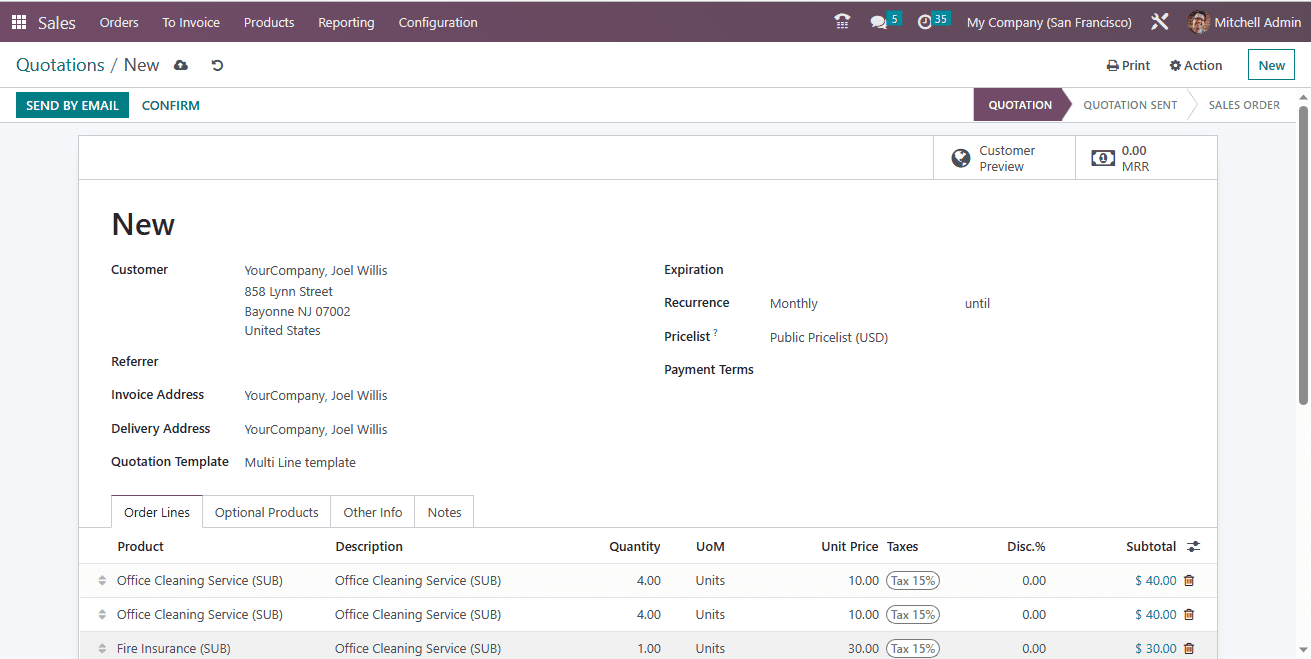
When you choose the ‘Multi Line template’ as Quotation Template, all the product details in this particular quotation template will be displayed here under the Order Lines tab.
So this is how you can configure and design quotation templates using building blocks in the Odoo 16 platform.


