Odoo, a popular open-source business management software, offers a powerful Helpdesk module to streamline customer support operations. One of the key features of the Odoo 16 Helpdesk module is ticket assignment and visibility, which play a significant role in optimizing support workflows.
In this blog post, we will explore how the Odoo 16 Helpdesk module enables ticket assignment and enhances visibility, ultimately leading to improved customer service.
Understanding the Odoo 16 Helpdesk module
The Odoo Helpdesk module is designed to help businesses manage customer inquiries, support requests, and tickets efficiently. It provides a centralized platform where customer support teams can track, prioritize, and resolve customer issues. With Odoo 16, the Helpdesk module has undergone significant improvements, making it even more user-friendly and feature-rich.
Benefits of Ticket Assignment and Visibility in Odoo 16 Helpdesk
The effective use of ticket assignment and enhanced visibility in the Odoo 16s Helpdesk module offers numerous benefits for businesses.
* Improved Efficiency: Automated ticket assignment reduces manual workload, enabling support teams to focus on resolving issues promptly.
* Enhanced Customer Satisfaction: With better visibility and tracking, support agents can provide faster and more accurate responses to customer inquiries, leading to higher satisfaction levels.
* Optimized Workflow: Support managers can use data-driven insights to fine-tune support workflows, allocating resources where they are needed most.
* Increased Accountability: Ticket tracking and reporting help identify bottlenecks and areas of improvement, fostering accountability among support teams.
* Scalability: As businesses grow, the Odoo 16 Helpdesk module can adapt to changing support requirements, ensuring scalability and consistent service quality.
We must first configure a team before we can set visibility. So we can go to the Helpdesk module. For configuring the team, let us click on the Configuration tab. Under this, we can view the ‘Team’ as shown in the screenshot below.
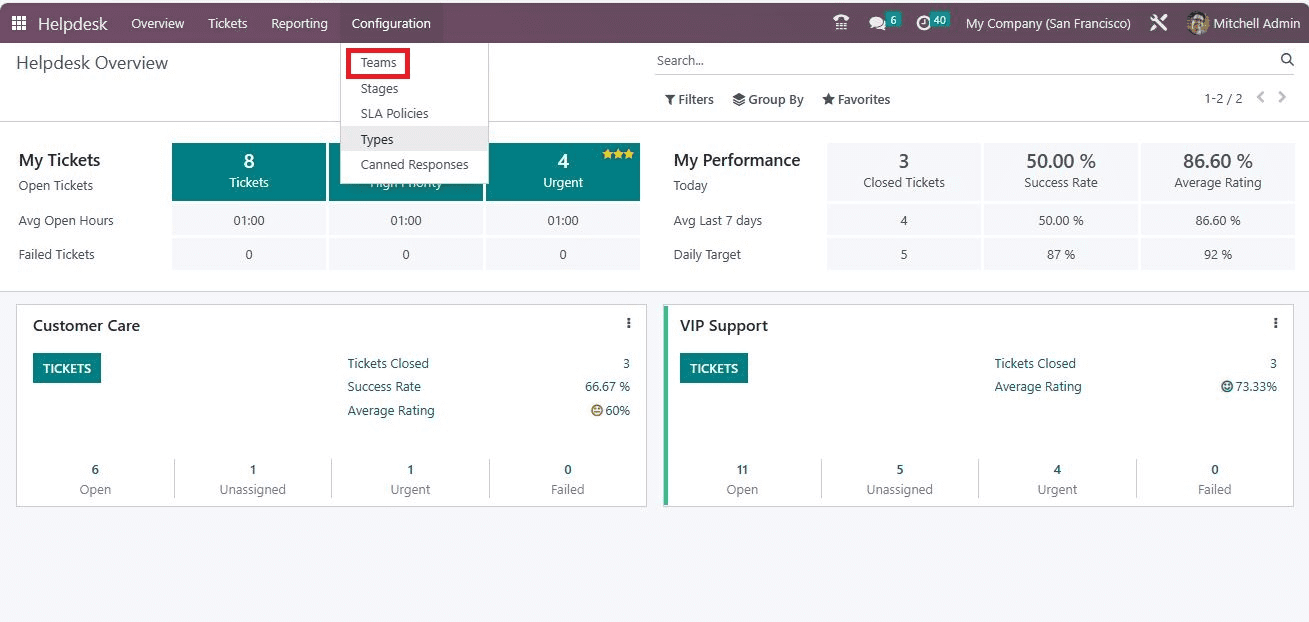
In the Team window, you can see the records of previously created Teams with their essential details, such as Name, Email Alias, and Company.

To view the details, let us open the Customer Care team, under which you can view the information shown below.
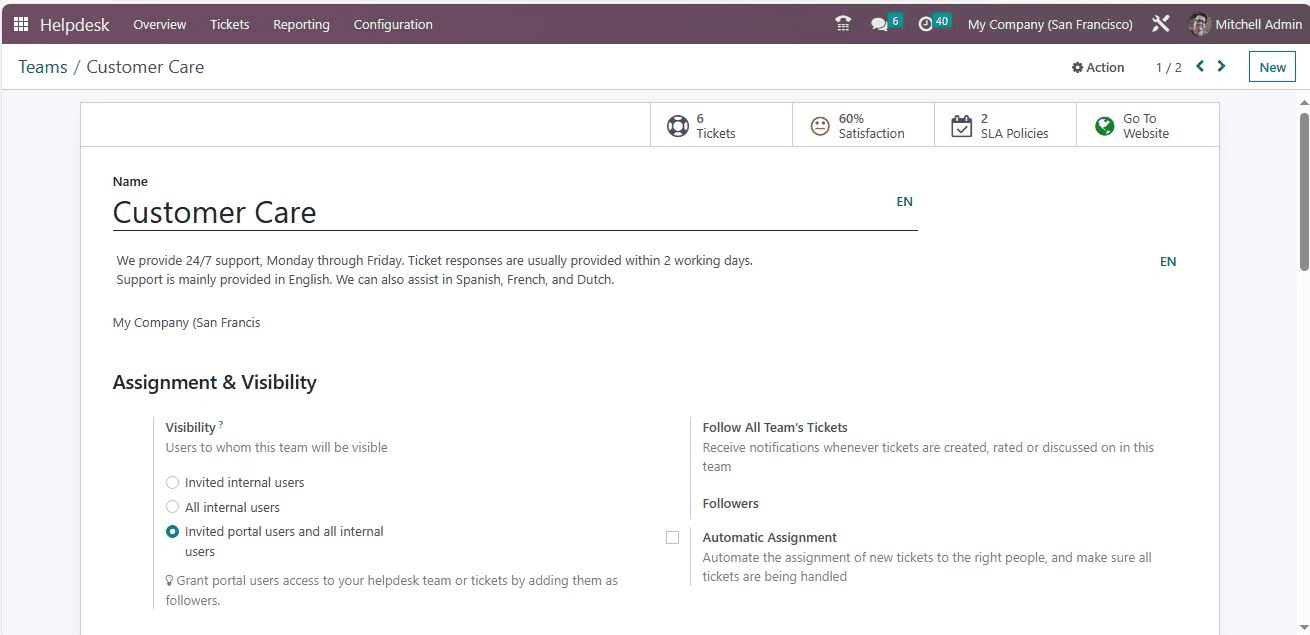
Here, you can view the section named ‘Assignment & Visibility’, under which you will get options to configure assignment and visibility. The Visibility field allows you to set the people to whom this helpdesk team and its tickets will be visible. Here you have three options, such as ‘Invited internal users’, All internal users, Invited portal users and all internal users’.
* Internal users who have been invited can view the team and the tickets they are following. This access can be altered on an individual ticket basis by adding or removing the user as a follower.
A user with the helpdesk administrator access right level can still access this team and its ticket, even if they are not explicitly part of the followers.
* All internal users: All internal users can access the team and all of its tickets without distinction.
* Invited portal users and all internal users: all internal users can access the team and all of its tickets without distinction. Portal users can only access the tickets they are following. This access can be modified on each ticket individually by adding or removing the portal user as follower.
The visibility field helps you grant employees access to your helpdesk team or tickets by adding them as followers. Let us discuss it in more detail.
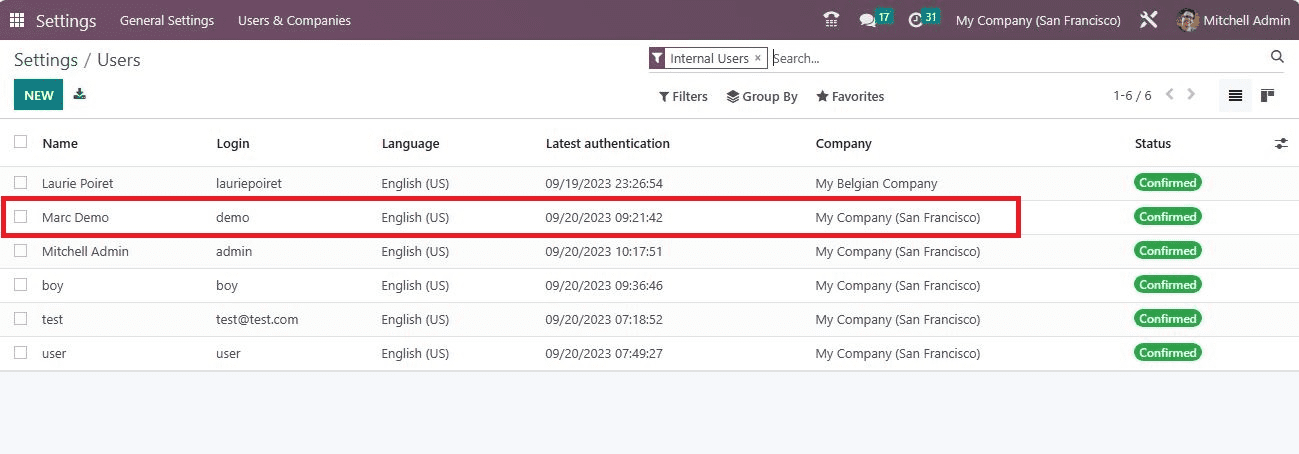
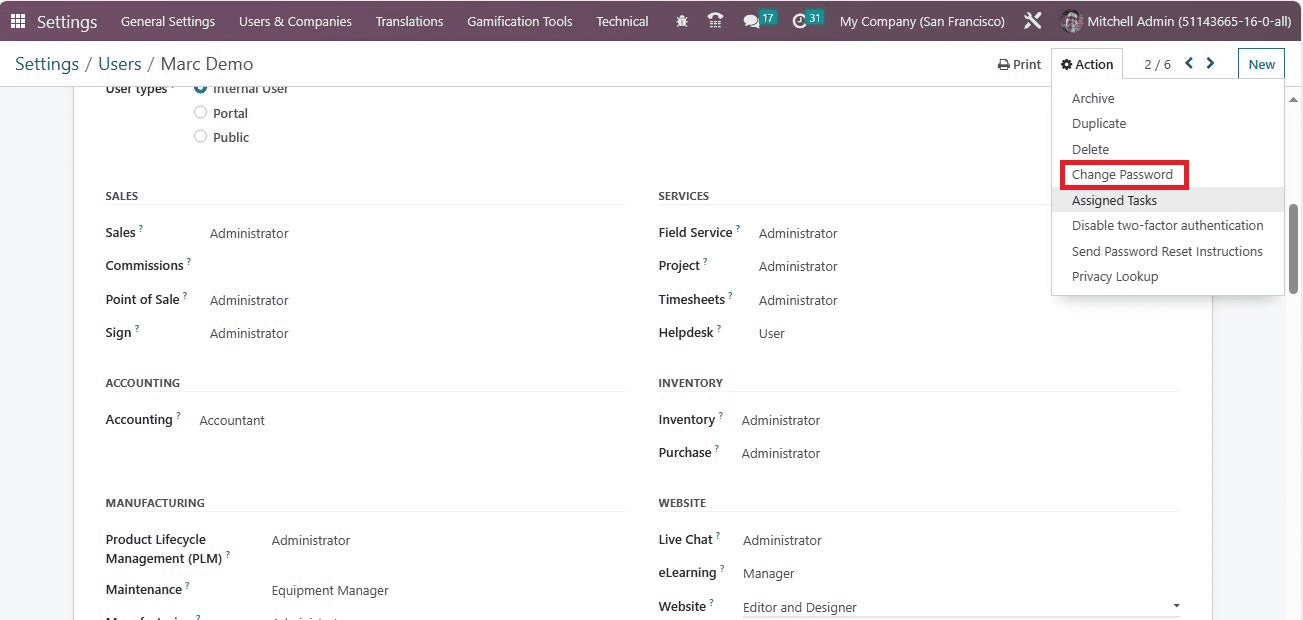
After setting the visibility ‘invited internal users’, create an internal user. For that, you can go to Settings. In Settings, you can manage the users. Here, we can choose Marc Demo as a user.
Then, set the User Type to Internal User.
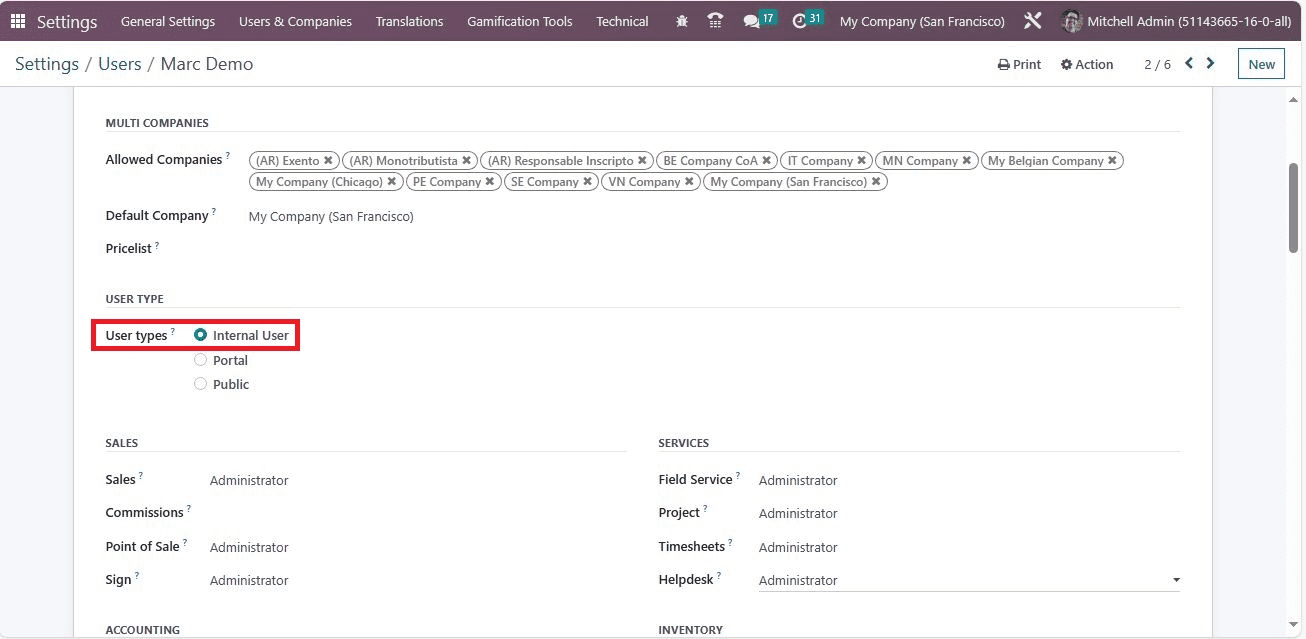
Then, in the Helpdesk field, you can set the right as ‘User.
After that, you can change the password of Demo with the help of the ‘Change Password’ menu available under the Actions button.
Once it is done, go back to the Helpdesk module and need to generate tickets. Here, we can generate a ticket ‘Table legs are unbalanced,’ and the team associated with the ticket is mentioned in the ‘Team’ field. The assignee is marked in the ‘Assigned to’ field. The priority can be marked as medium, high, or urgent. The type of ticket can be defined and allocated in the Type field. Here, we can mention it as ‘Issue’. Additionally, the Tags can be given for filtration needs. Using the Property field, you can add the field that you want to include.
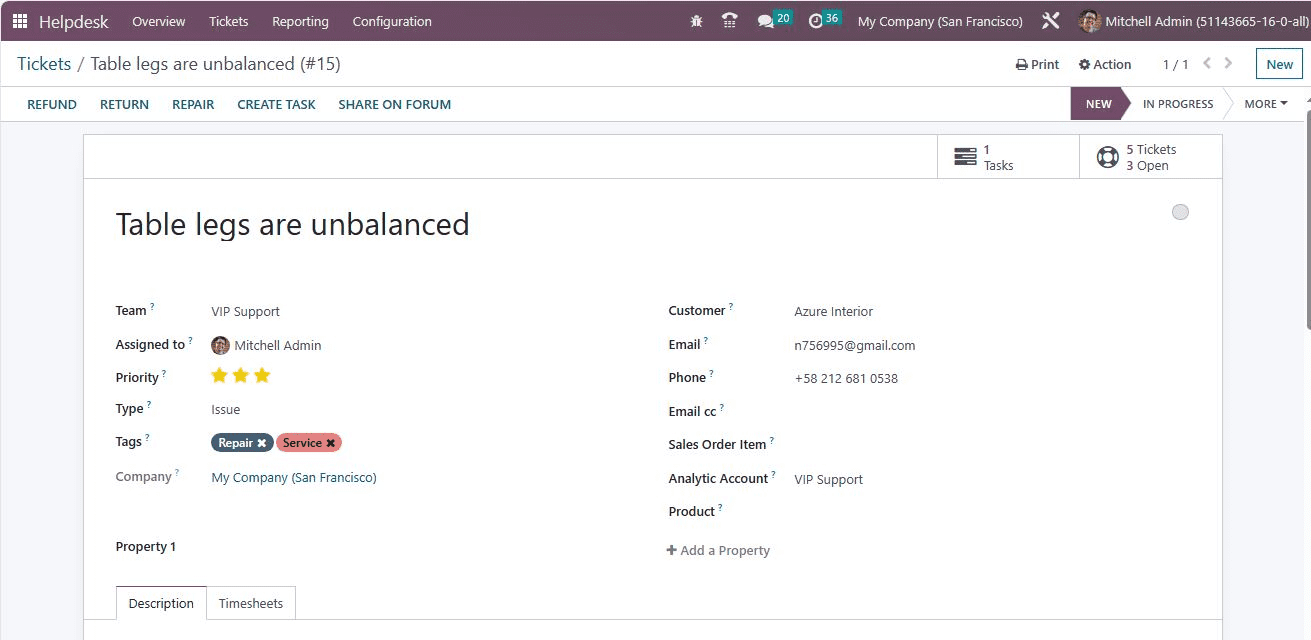
If you are required to include the customer’s details in the ticket, they can be provided in the Customer field. It is also possible to add Email, Phone, Email cc, in the provided field. Additionally, you have the Sale Order Item, Analytic Account, and Product fields to fill in the details.
When you scroll down, you will see an option to add followers.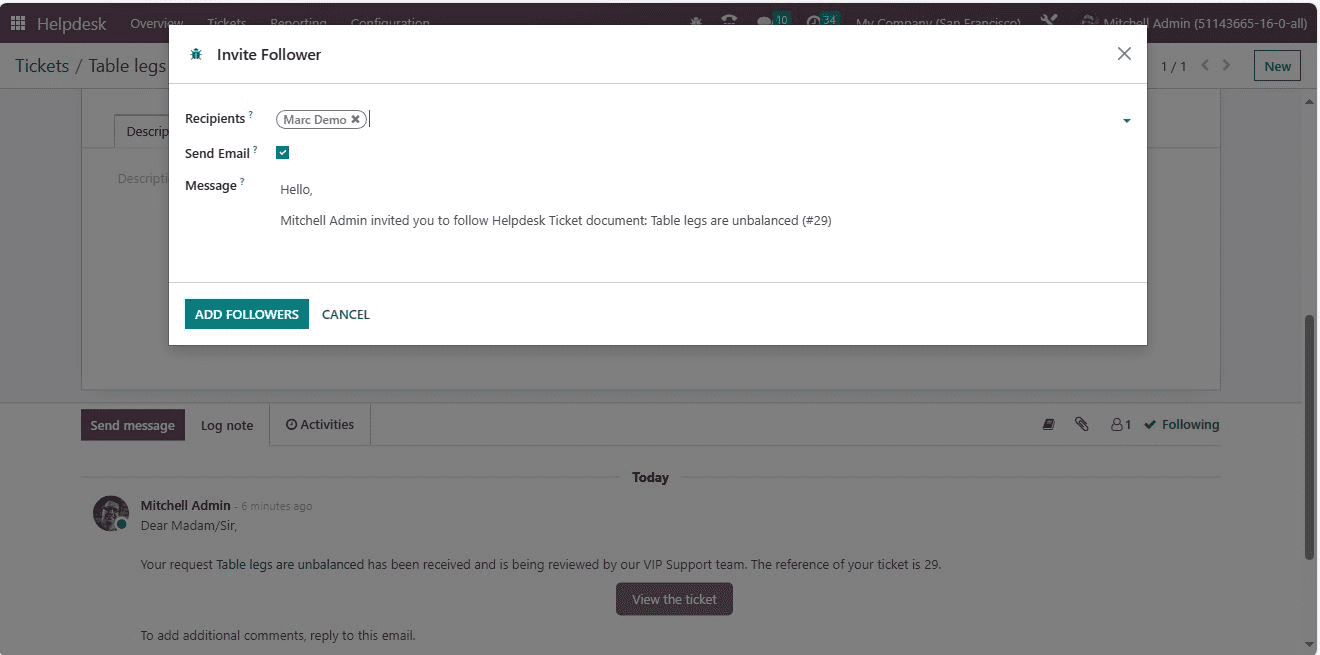
Here, we can add Marc Demo as a follower, as shown in the screenshot below.
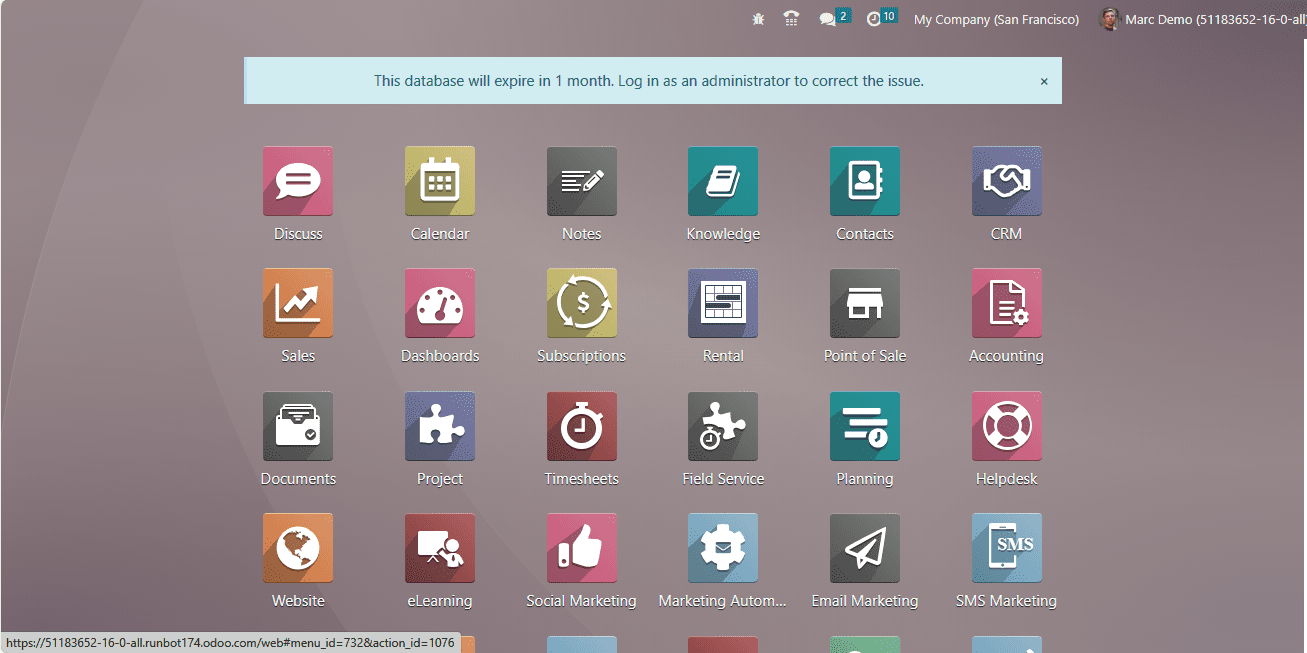
Now, let us log out of the Mitchel Admin account and log in as Marc Demo.
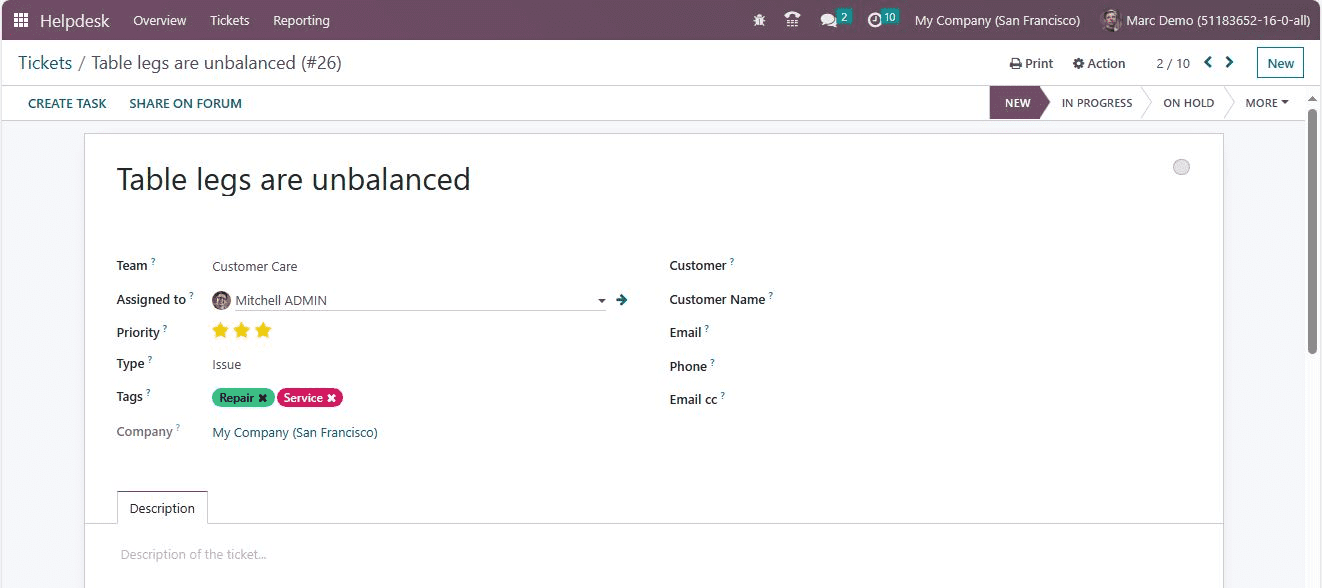
We assigned Marc Demo as the internal user, so we can view the generated ticket in his account. So, let us check it in the Helpdesk module. Under the Tickets feature, you can view the generated ticket as shown below.
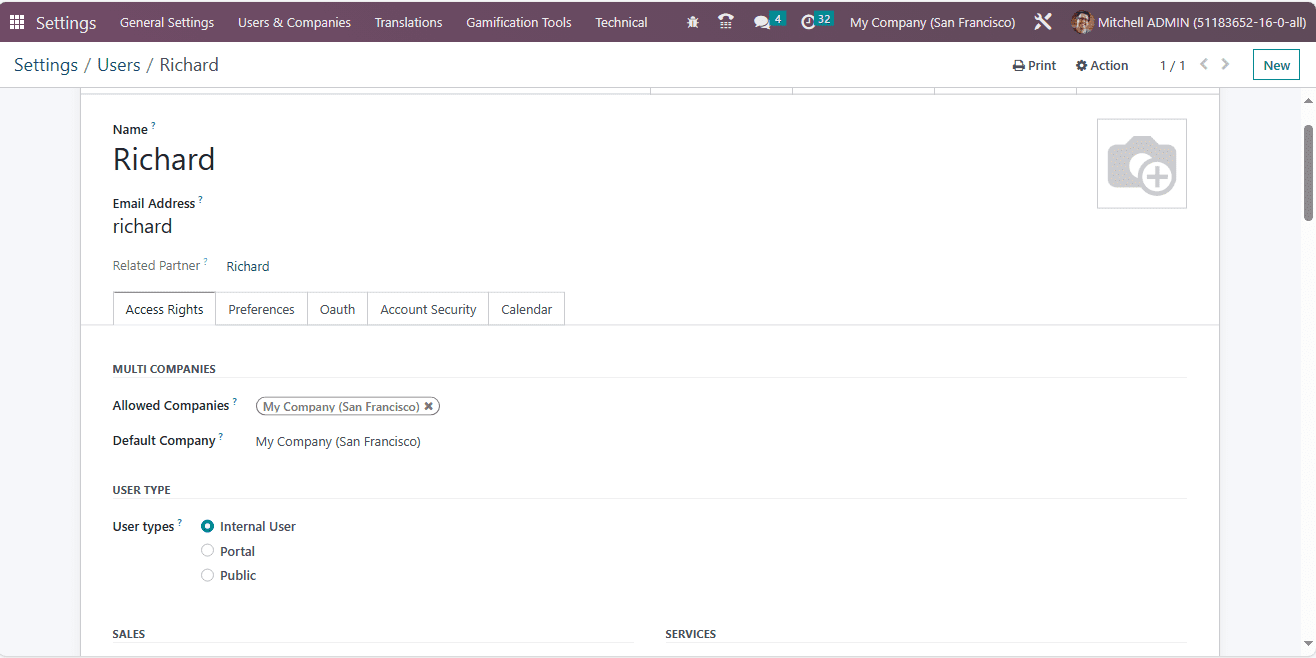
Now we can log out of Marc Demo and Log in as Mitchel Admin. Again, we can create a new user other than the internal user. So, for that, we need to set him up as a public user. In order to do this, let us create a new user. For that, let us open Settings and create a new user.
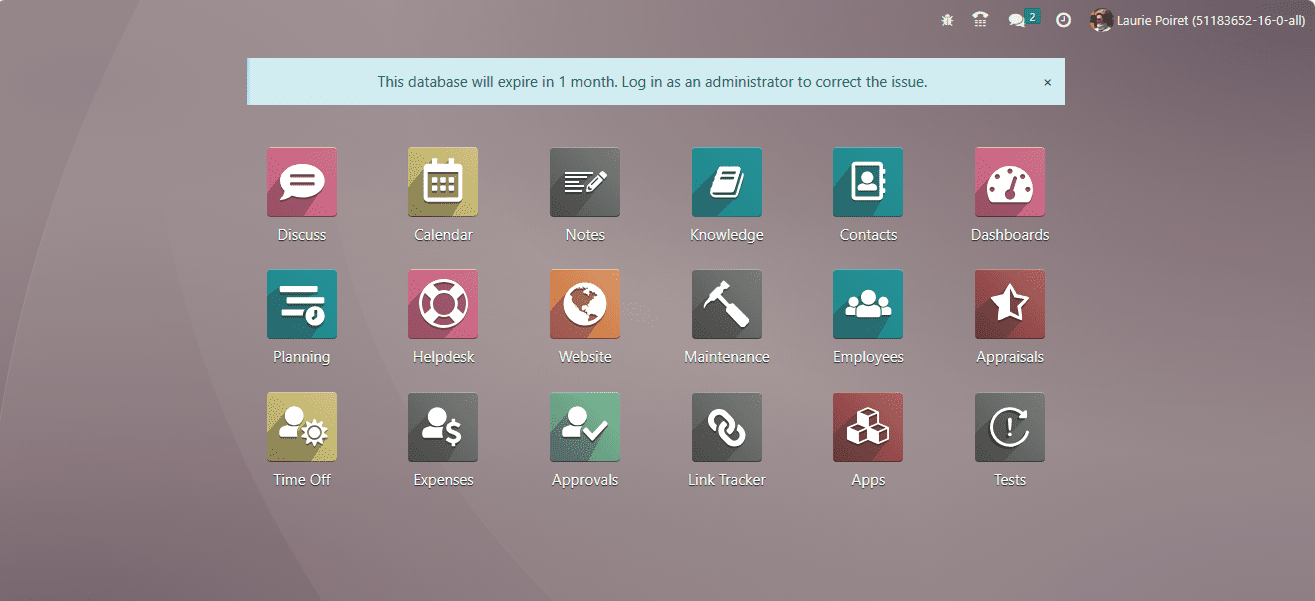
Now, let us log out of Mitchel Admin and log in as the new user ‘’.
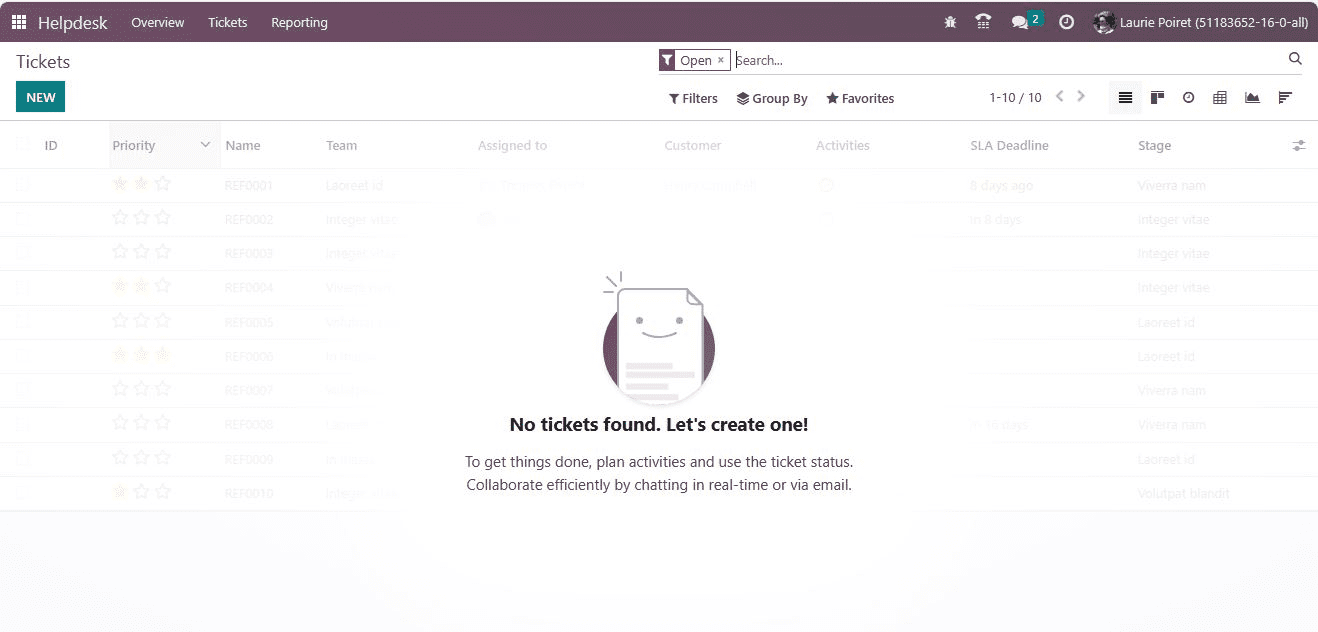
After that, let us open the Help desk module and try to view the newly created ticket. But here, you can’t find any ticket.
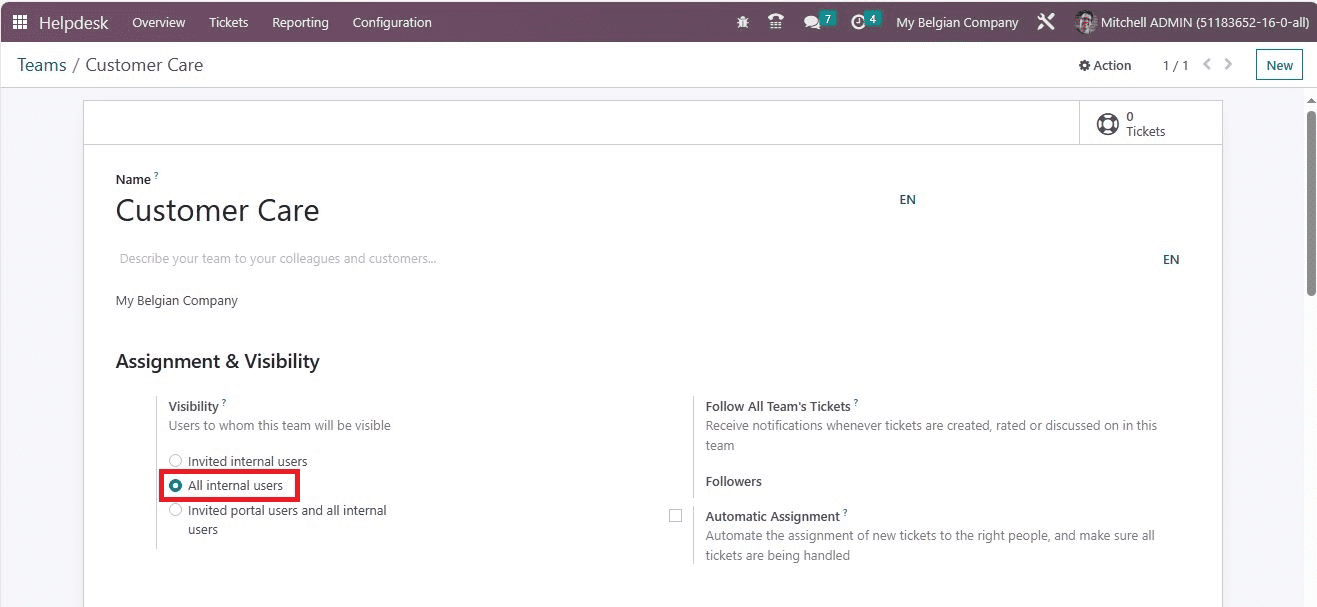
This is because the user ‘ Laurio Pierot’ is not a follower of this ticket. After confirming this, let us log out of this user and log in as ‘Mitchel Admin.’ The next step is to change the visibility. For that, let us go to the Helpdesk module and open the Team window from Configuration. Here, under Visibility, we can set the visibility as ‘All internal users’. So the ticket can be visible to all internal users.
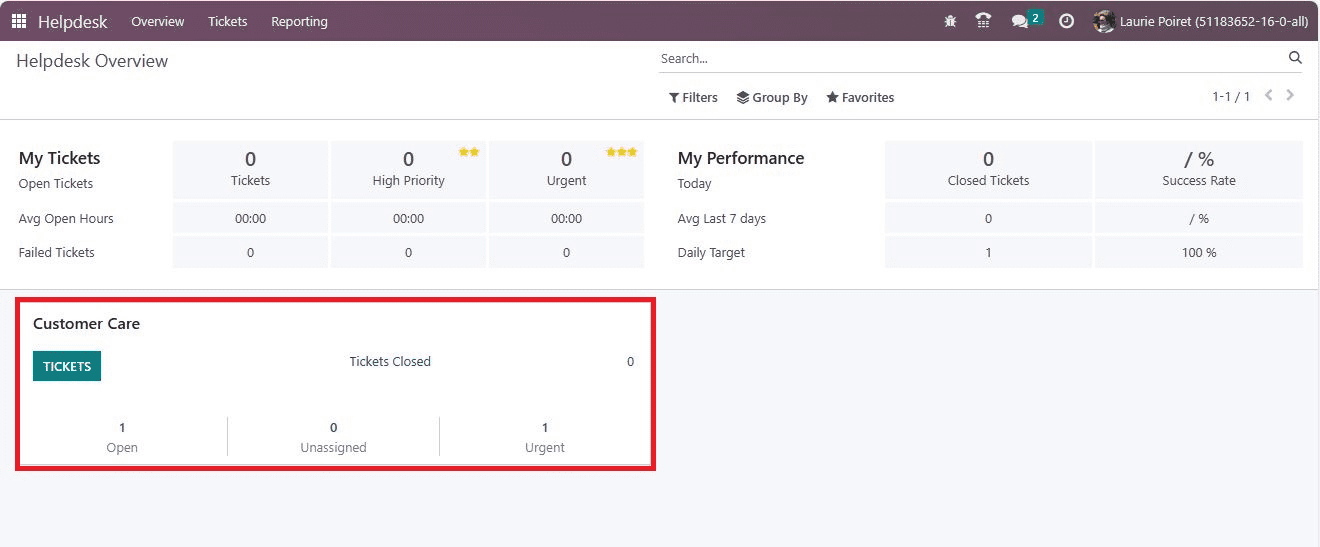
In this case, the ticket can be viewed by all internal users without the need to add followers. Now we can log out of Mitchel Admin and log in as the newly created user’Laurio Poiret’. Here, you can view the new tickets visible in the Helpdesk Overview, as shown in the screenshot below.
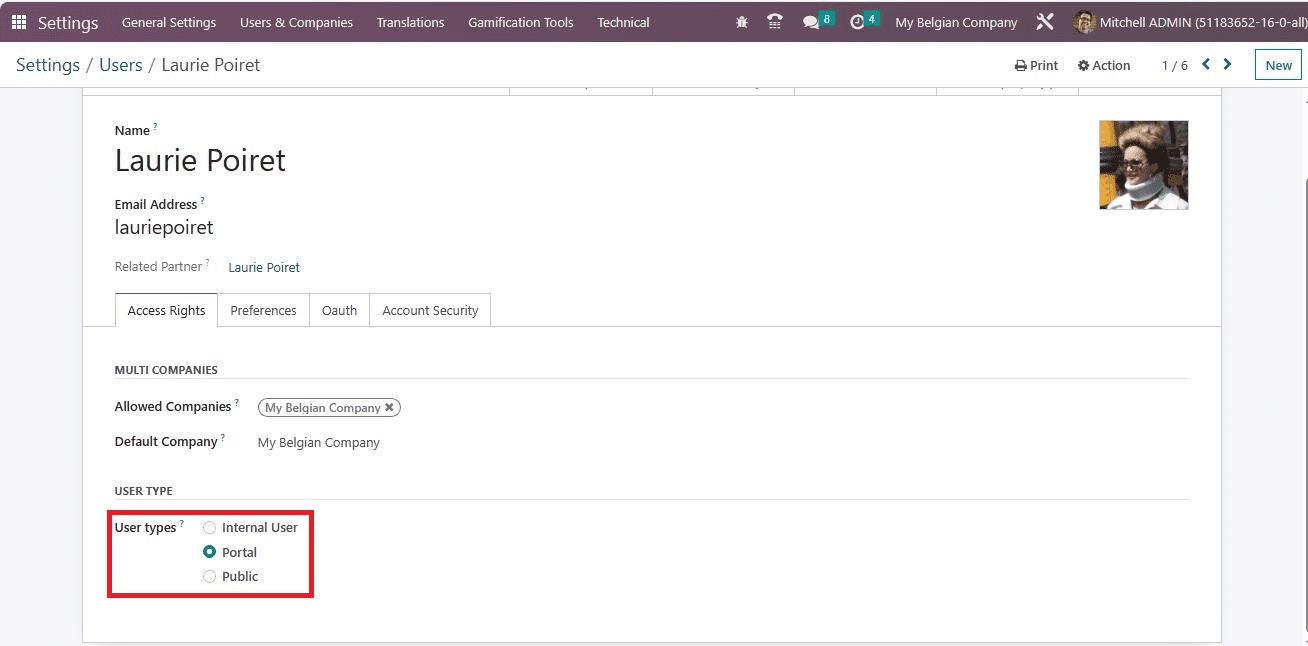
Now let us log out of the new user and log in as ‘Mitchel Admin.’and we can set the third visibility option ‘ Invited Portal users and all internal users’. Now, under Settings, we need to set the portal user. So for that, we can go to the Settings window. Click on ‘Manage users.’ We can choose the user’ Laurio Poeriet’ and change to a portal user.
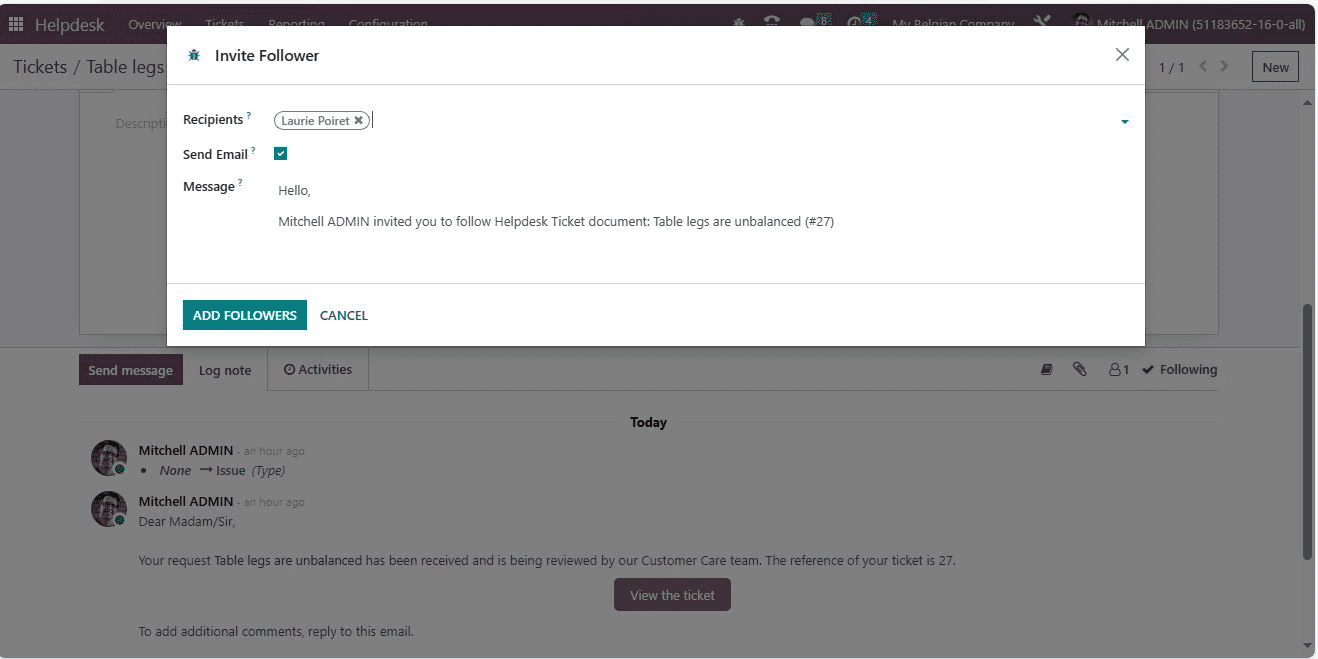
Go back to the Helpdesk module and add a follower to the ticket. And let Laurio Poiret follow the ticket.
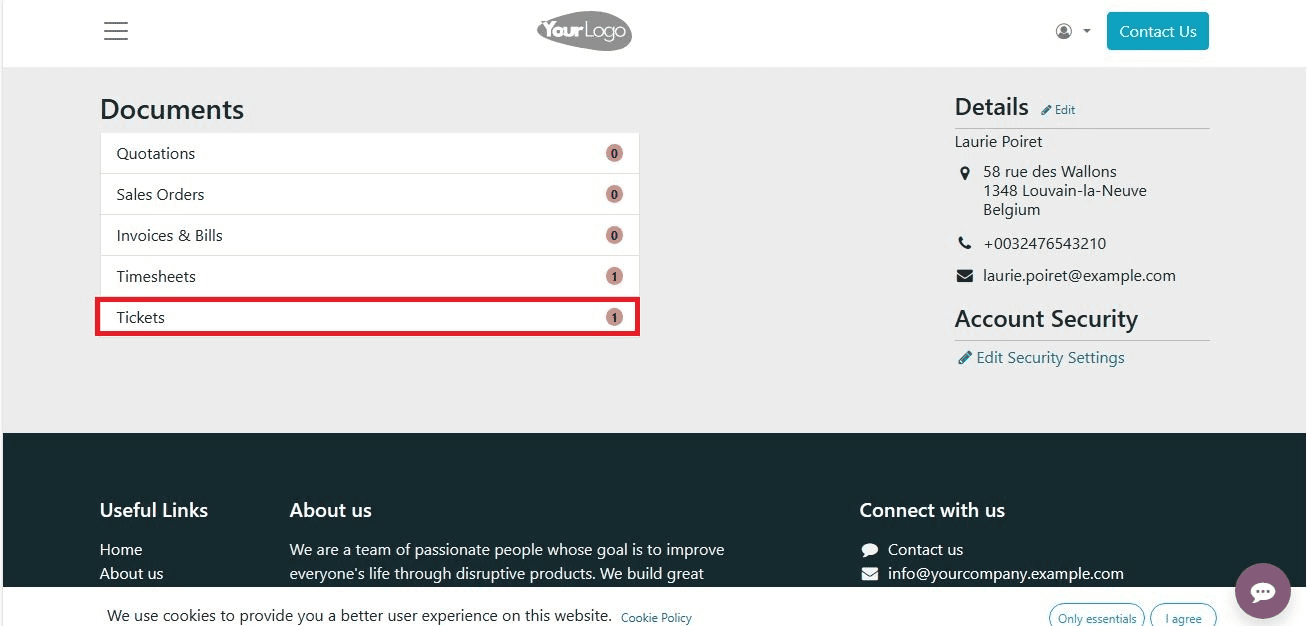
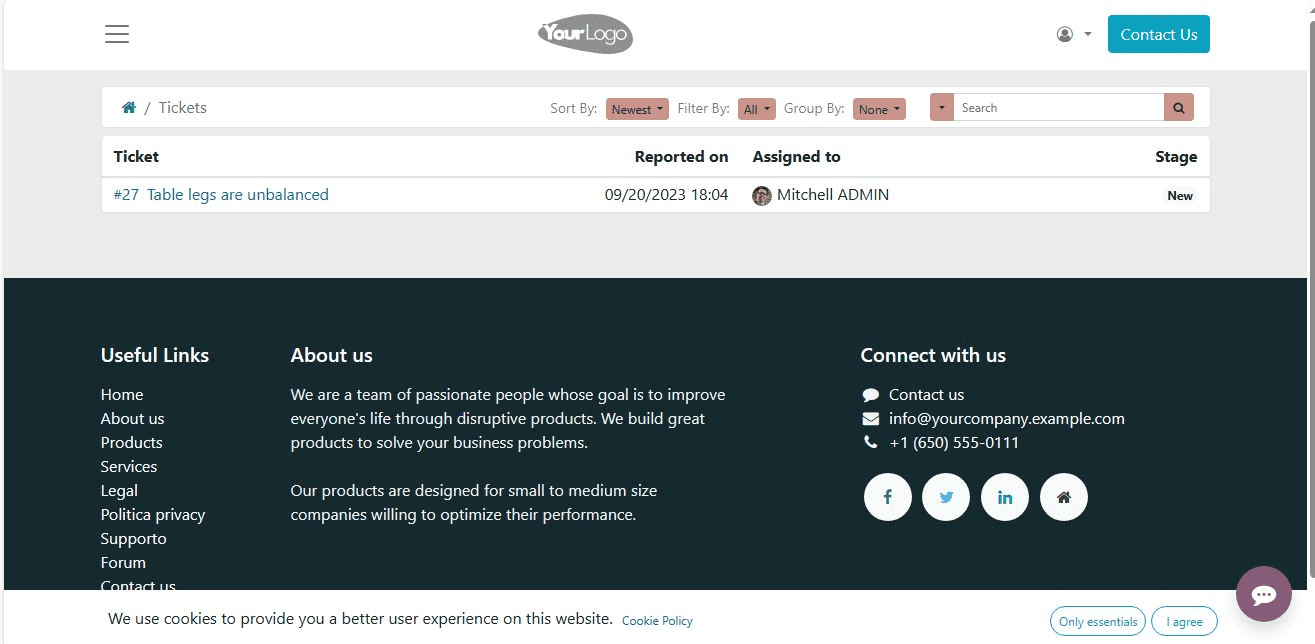
Now log out of Mitchel Admin and log in as LaurioPoeret. As she is a follower, she can view the ticket as shown below.
The Odoo 16 Helpdesk module empowers businesses to streamline customer support operations through efficient ticket assignment and enhanced visibility. By automating ticket routing, monitoring performance, and providing valuable insights, the Odoo 16s Helpdesk module equips support teams with the tools they need to deliver exceptional customer service. Embracing these features can lead to improved customer satisfaction, higher efficiency, and better overall support operations.


