Gmail plugins
With the help of the Gmail Plugin, users can keep track of all their work between Gmail and Odoo without losing any data by integrating an Odoo database with a Gmail inbox.
Odoo Online Users
Follow the instructions below to configure the Gmail Plugin for databases hosted on Odoo Online (or Odoo.sh).
Install the Gmail Plugin
To connect a Gmail account to Odoo, first log in to that account.
To access add-ons from the Gmail inbox, click the More from Google button in the right side panel. Click on the icon in the top right corner of the inbox to make the side panel visible if it is not currently available.
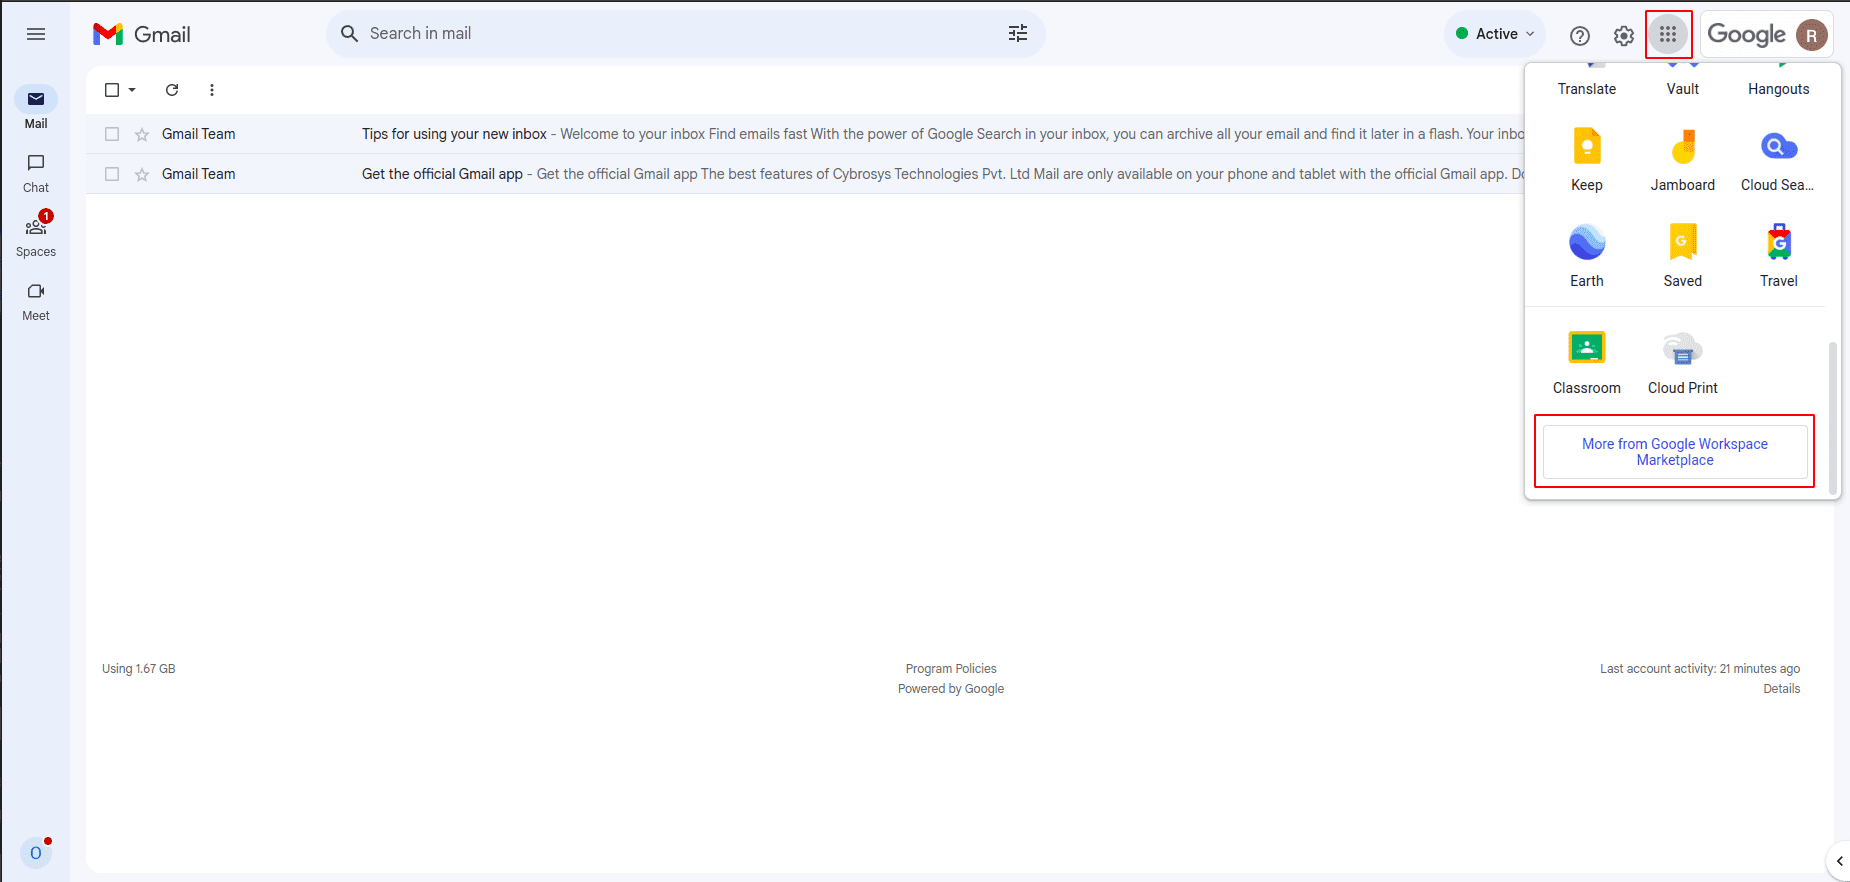
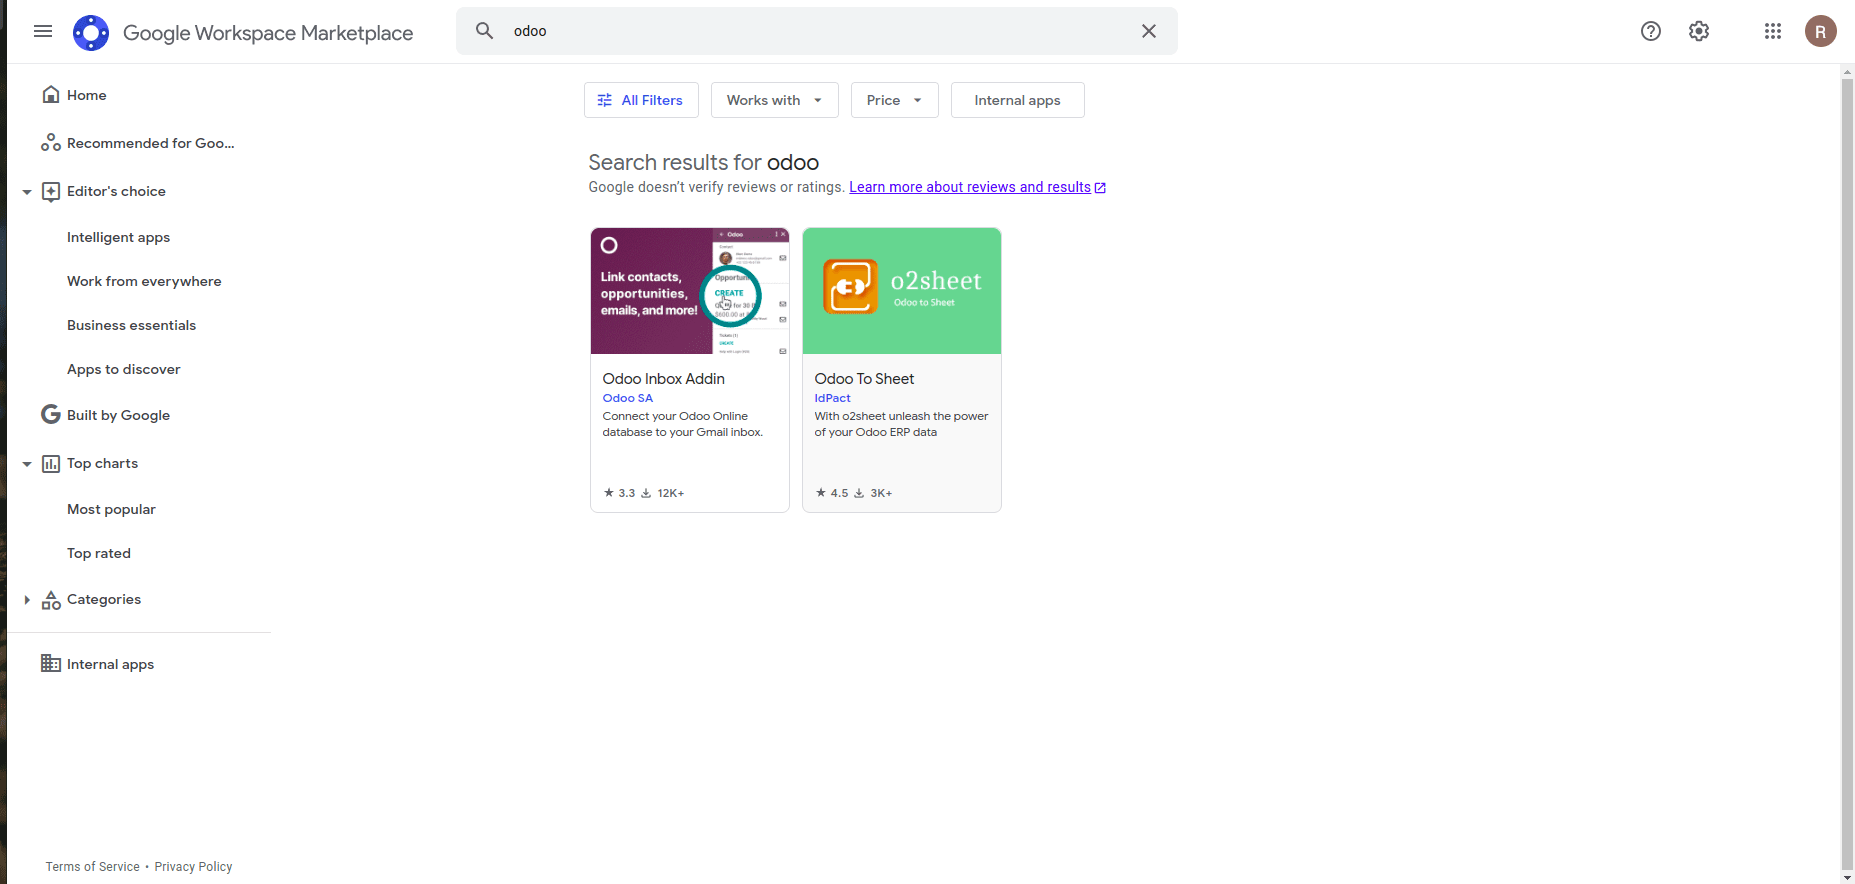
Then, search for the Odoo Inbox Addin by searching for Odoo in the search field.
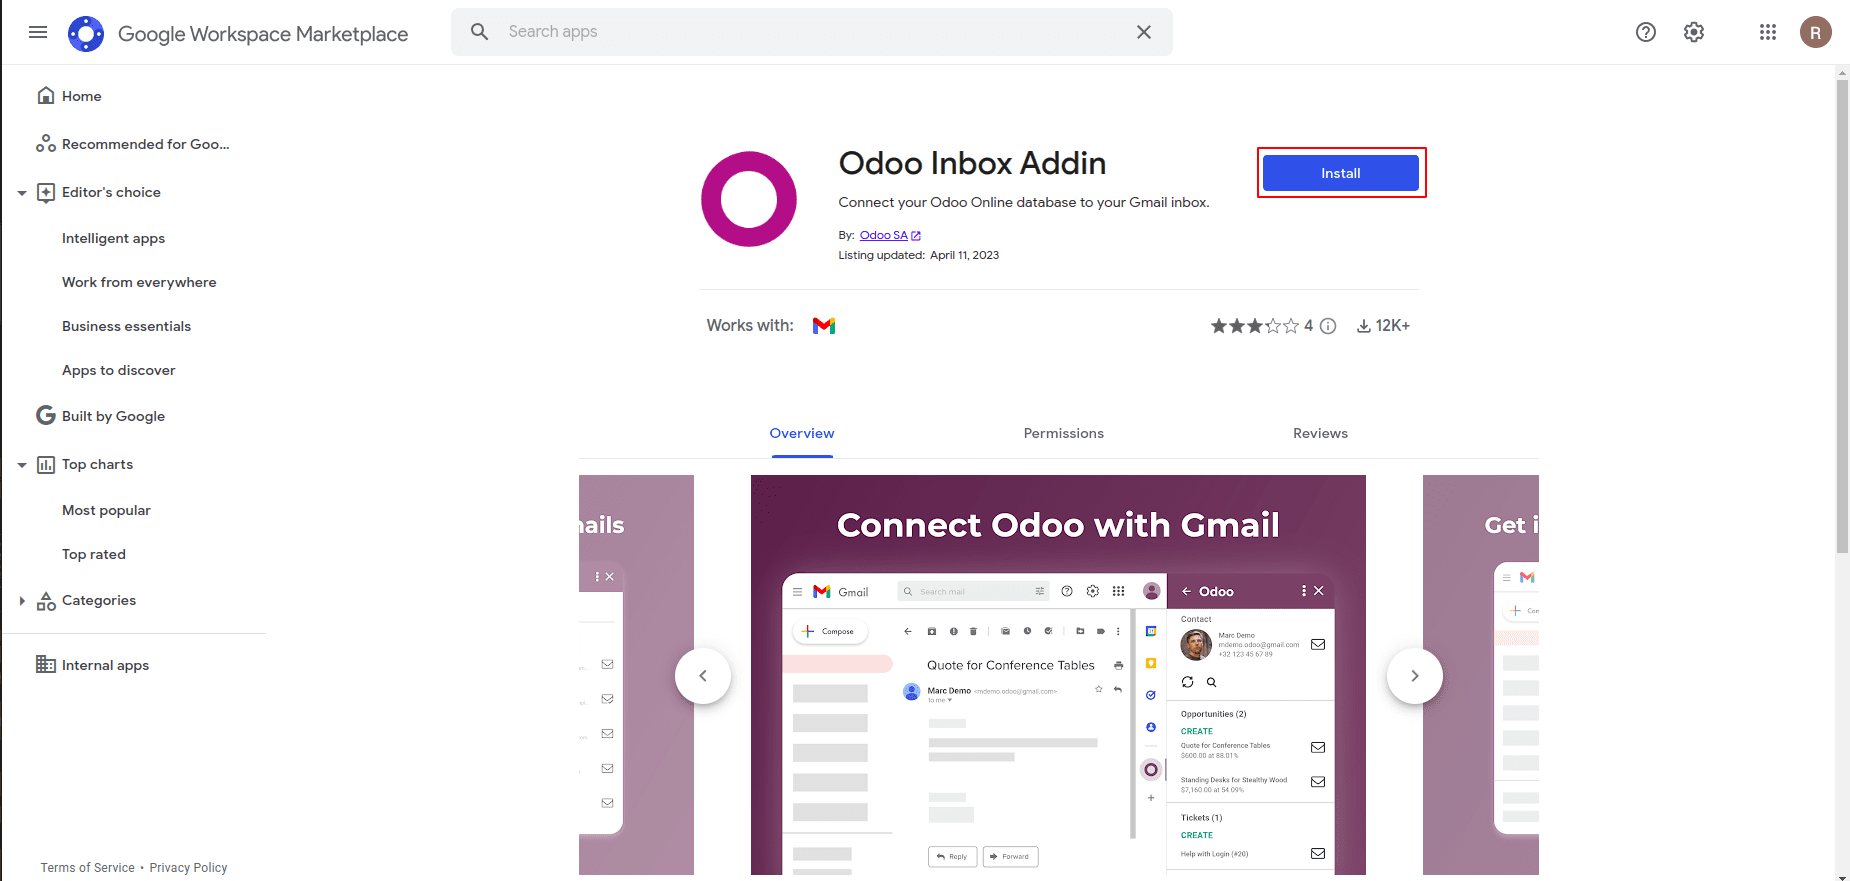
Click Install when you’ve chosen the plugin. Once the installation starts, then click Continue.
The user should then choose which Gmail account they want to link to Odoo. Next, click the Allow to grant Odoo access to your Google account. After that, Google will provide a pop-up window stating that the installation was successful.
Odoo Database Configuration
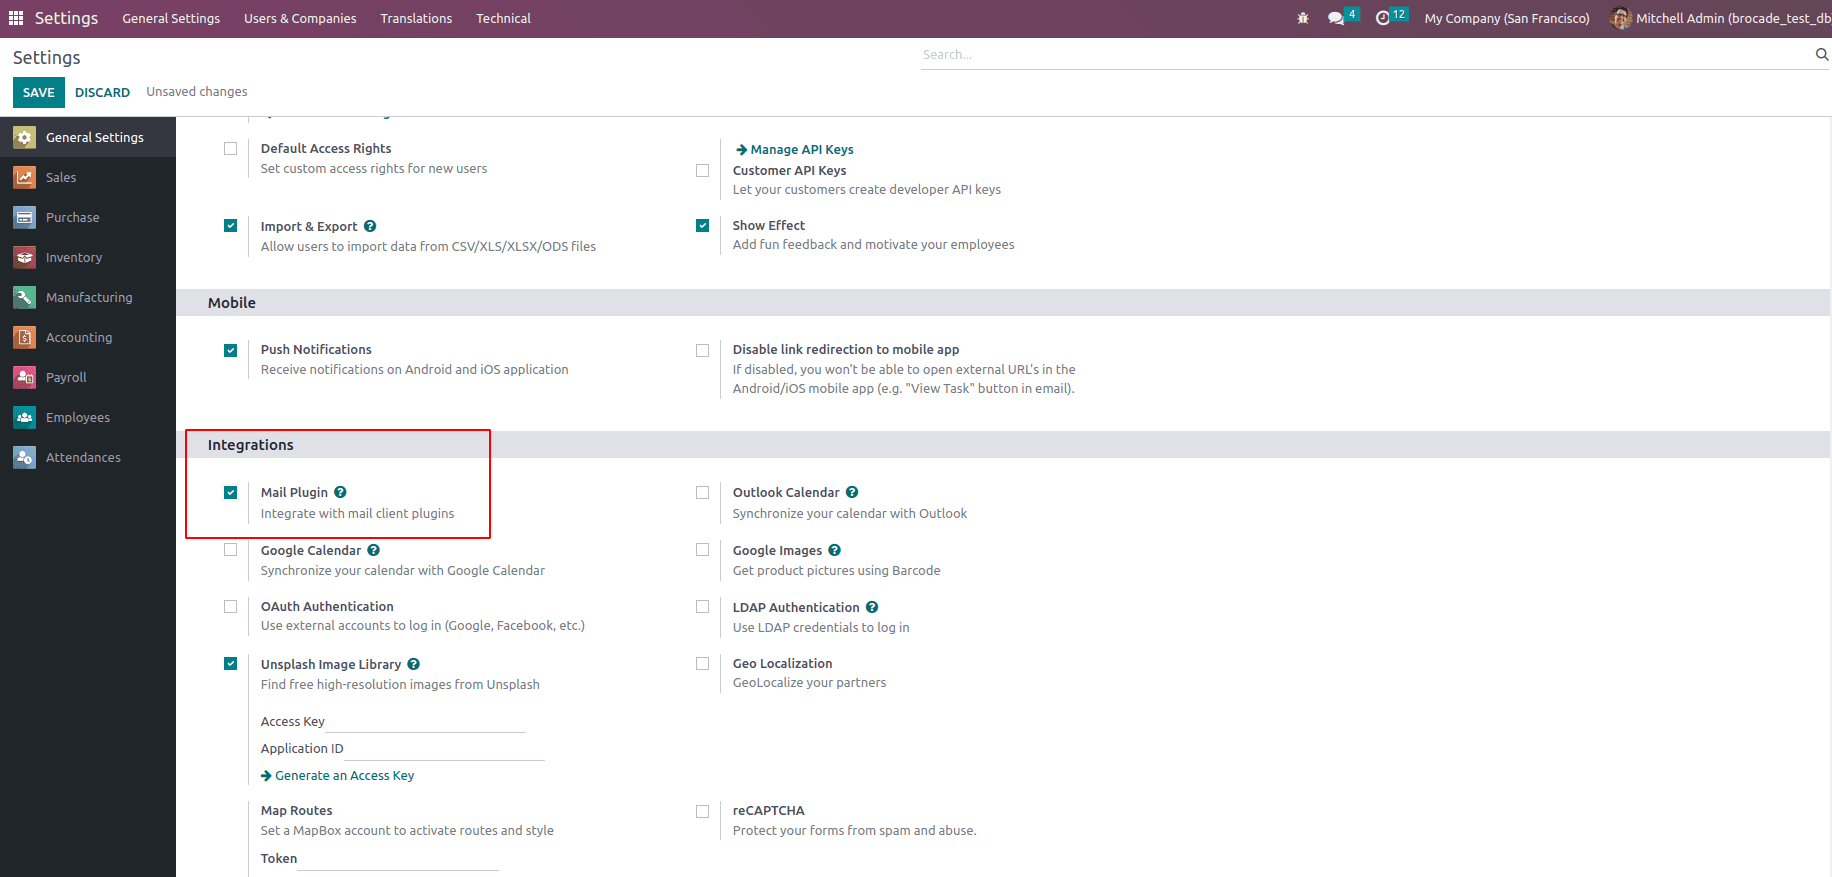
The Mail Plugin feature in the Odoo database must be activated in order to access the Gmail Plugin. Go to Settings > General Settings. Activate the Mail Plugin under the Integrations section, and then click Save.
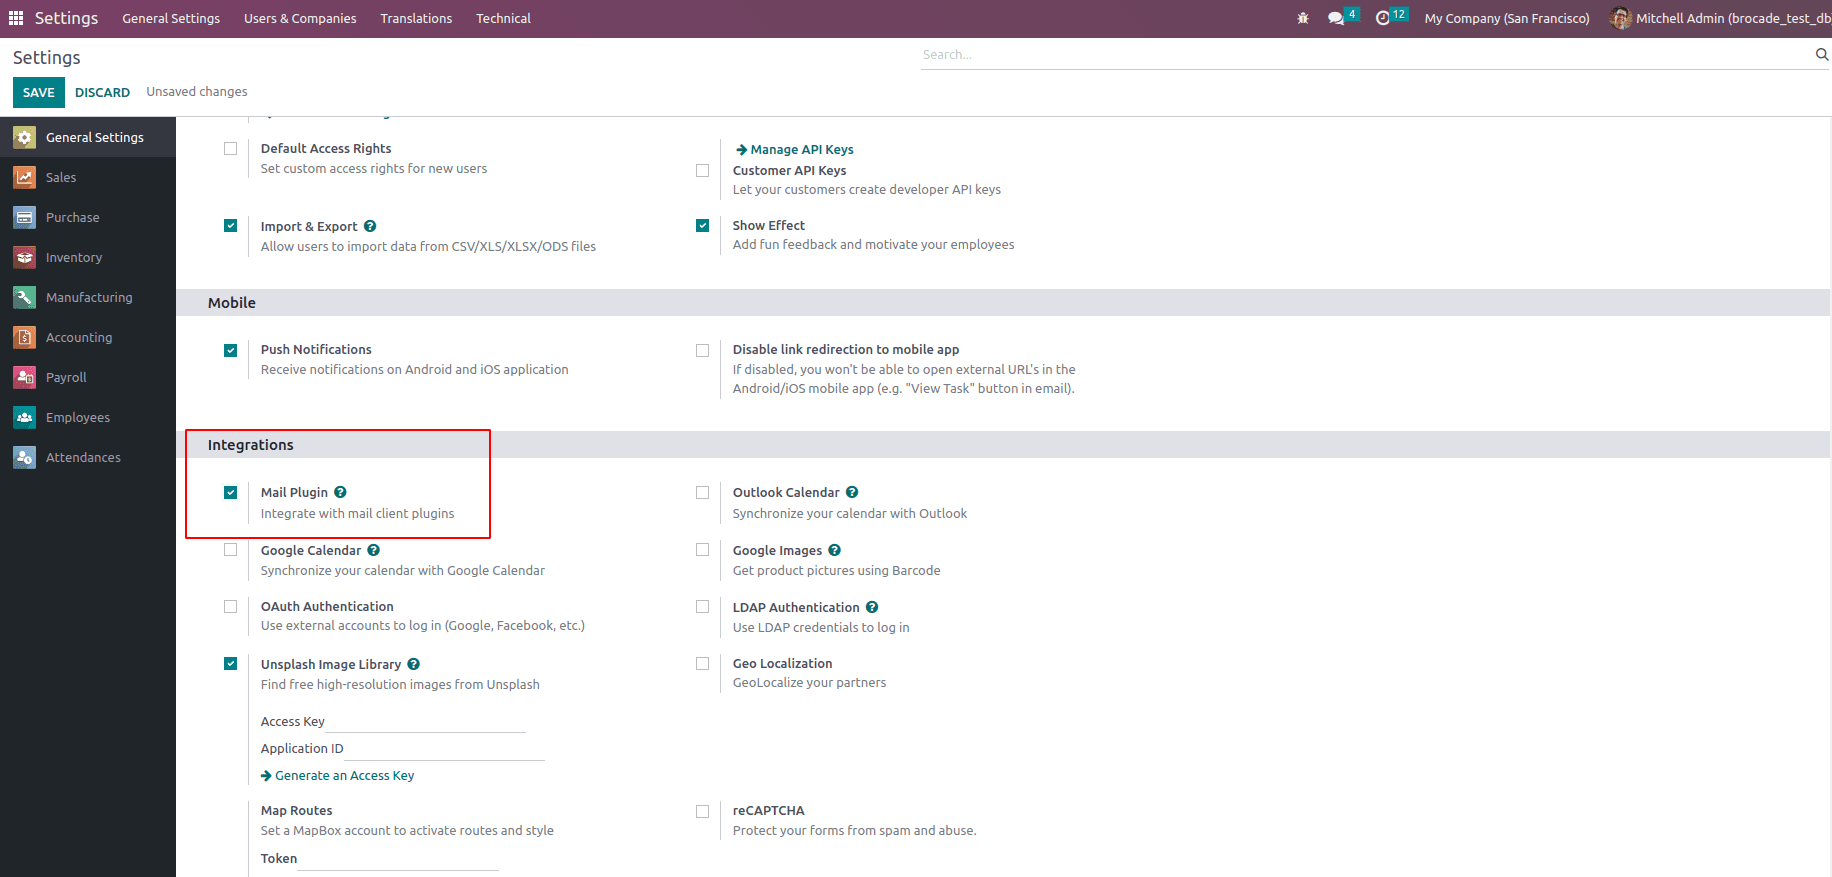
Gmail inbox Configuration
A purple Odoo icon is now visible on the right-side panel of the Gmail inbox. To access the Odoo plugin window, click the Odoo icon. Next, select any email in your inbox by clicking it.
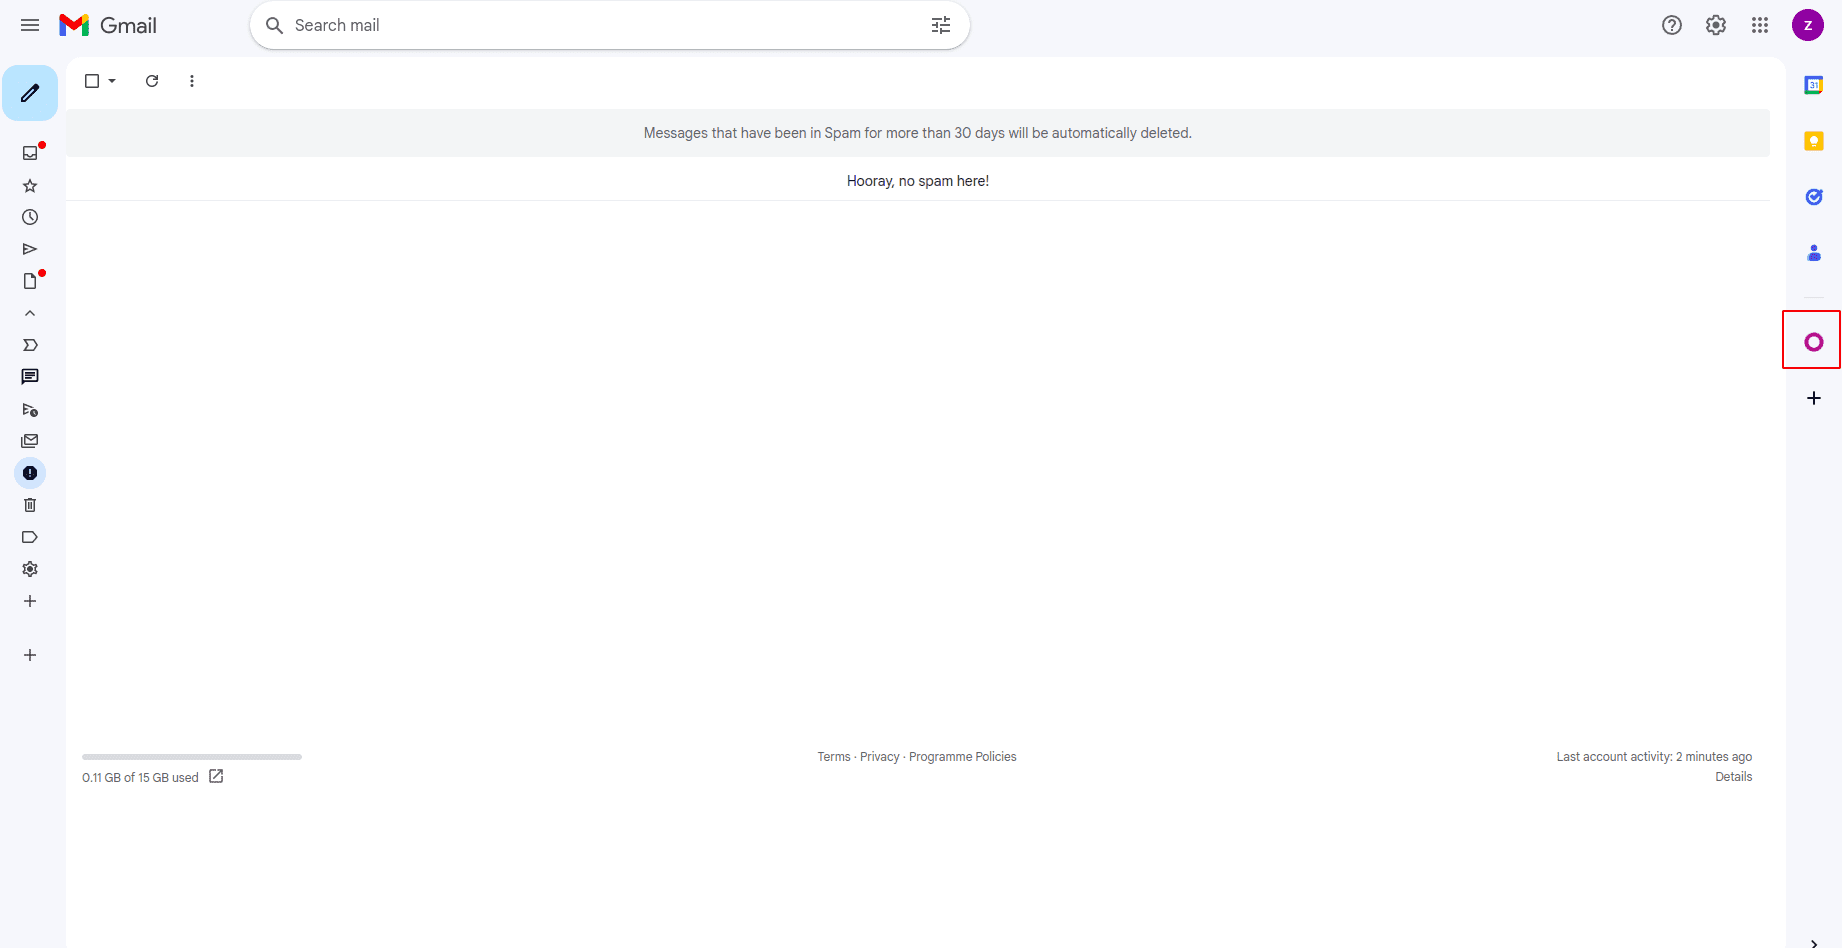
Next, click Login. Then, input the URL of the Odoo database that the user wants to link to the Gmail inbox, and log in to the database.
Finally, click Allow to grant Gmail access to the Odoo database. The browser will then display a Success! message. After that, shut the window. The Odoo database and Gmail inbox are now integrated.
Odoo On-Premise users
Follow the instructions below to set up the Gmail Plugin for databases hosted on servers other than Odoo Online (or Odoo. sh).
Install the Gmail Plugin
First, go to the Odoo Mail Plugins’ GitHub repository. After that, click the Code button. Then click Download ZIP to download the Mail Plugin files to the user’s computer.
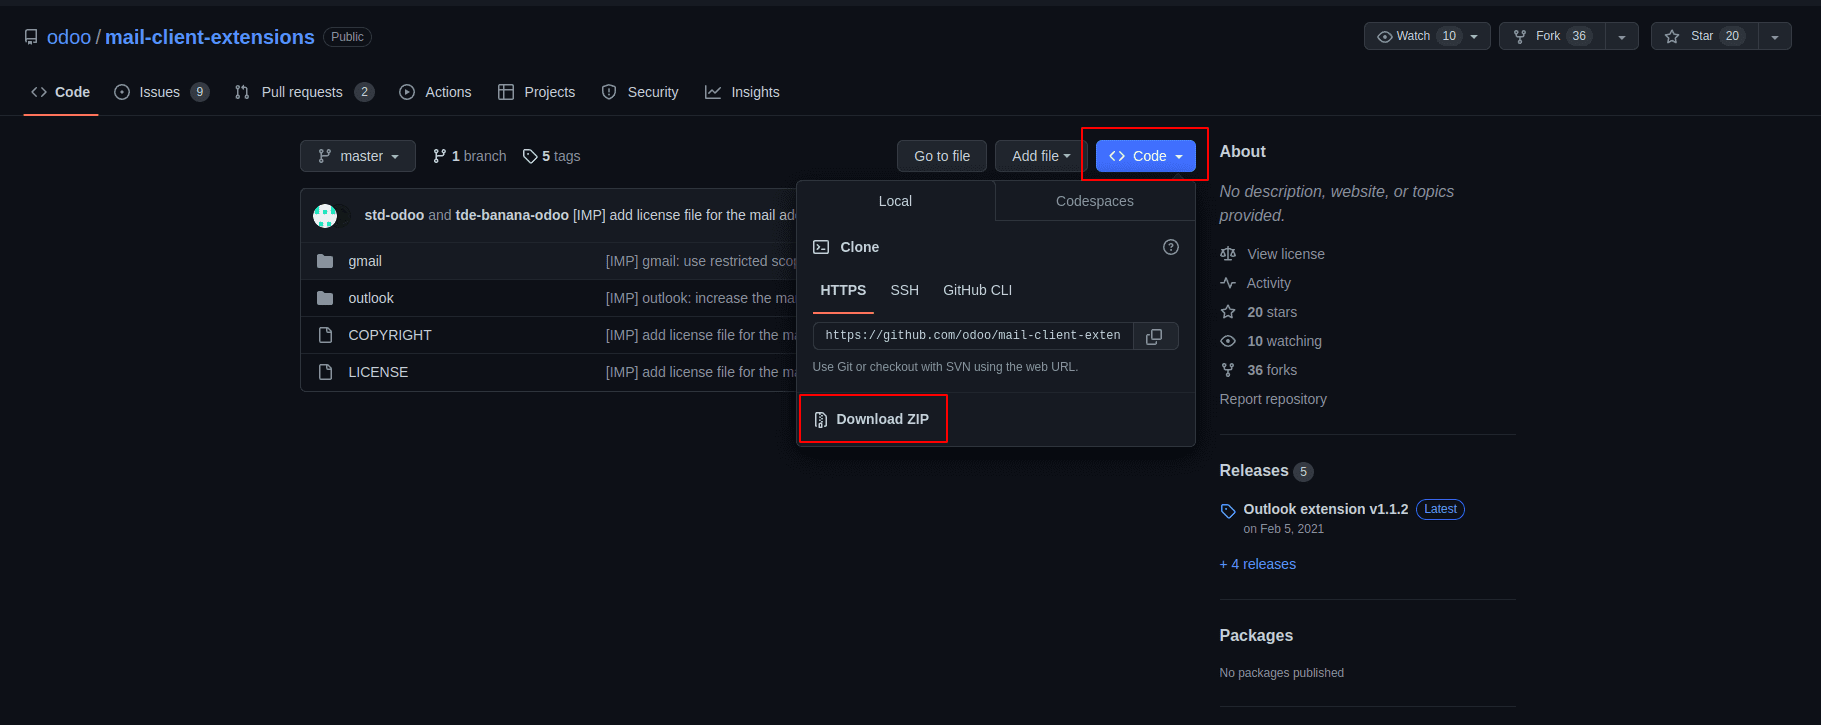
On the computer, open the ZIP file. Then, go to mail-client-extensions-master > gmail src > views and open the login.ts file using any text editor such as Notepad (Windows), TextEdit (Mac), or Visual Studio Code.
From the login.ts file, delete the following lines:
 if (!/^https://([^/?]*.)?odoo.com(/|$)/.test(validatedUrl)) {
        return notify("The URL must be a subdomain of odoo.com");
  }
As a result, the Gmail Plugin program removes the odoo.com domain.
Go to mail-client-extensions-master > gmail in the ZIP file, and then open the appsscript.json file. Change all references to odoo.com in the urlFetchWhitelist section with the Odoo customer’s unique server domain.
Open the README.md file located in the same Gmail folder. Push the Gmail Plugin files as a Google Project by following the directions in the README.md file.
Share the Google Project after that with the Gmail account the user wants to use to connect to Odoo. After that, click Publish and Deploy from the manifest. Finally, to install the Gmail Plugin, select Install the add-on.
Odoo Database Configuration
The Mail Plugin feature in the Odoo database must be activated in order to access the Gmail Plugin. Go to Settings > General Settings. Activate the Mail Plugin under the Integrations section, and then click Save.
Gmail Inbox Configuration
A purple Odoo icon is now visible on the right-side panel of the Gmail inbox. To access the Odoo plugin window, click the Odoo icon. Next, select any email in your inbox by clicking it. To allow access to the Gmail inbox for Odoo, click Authorise Access on the plugin window.
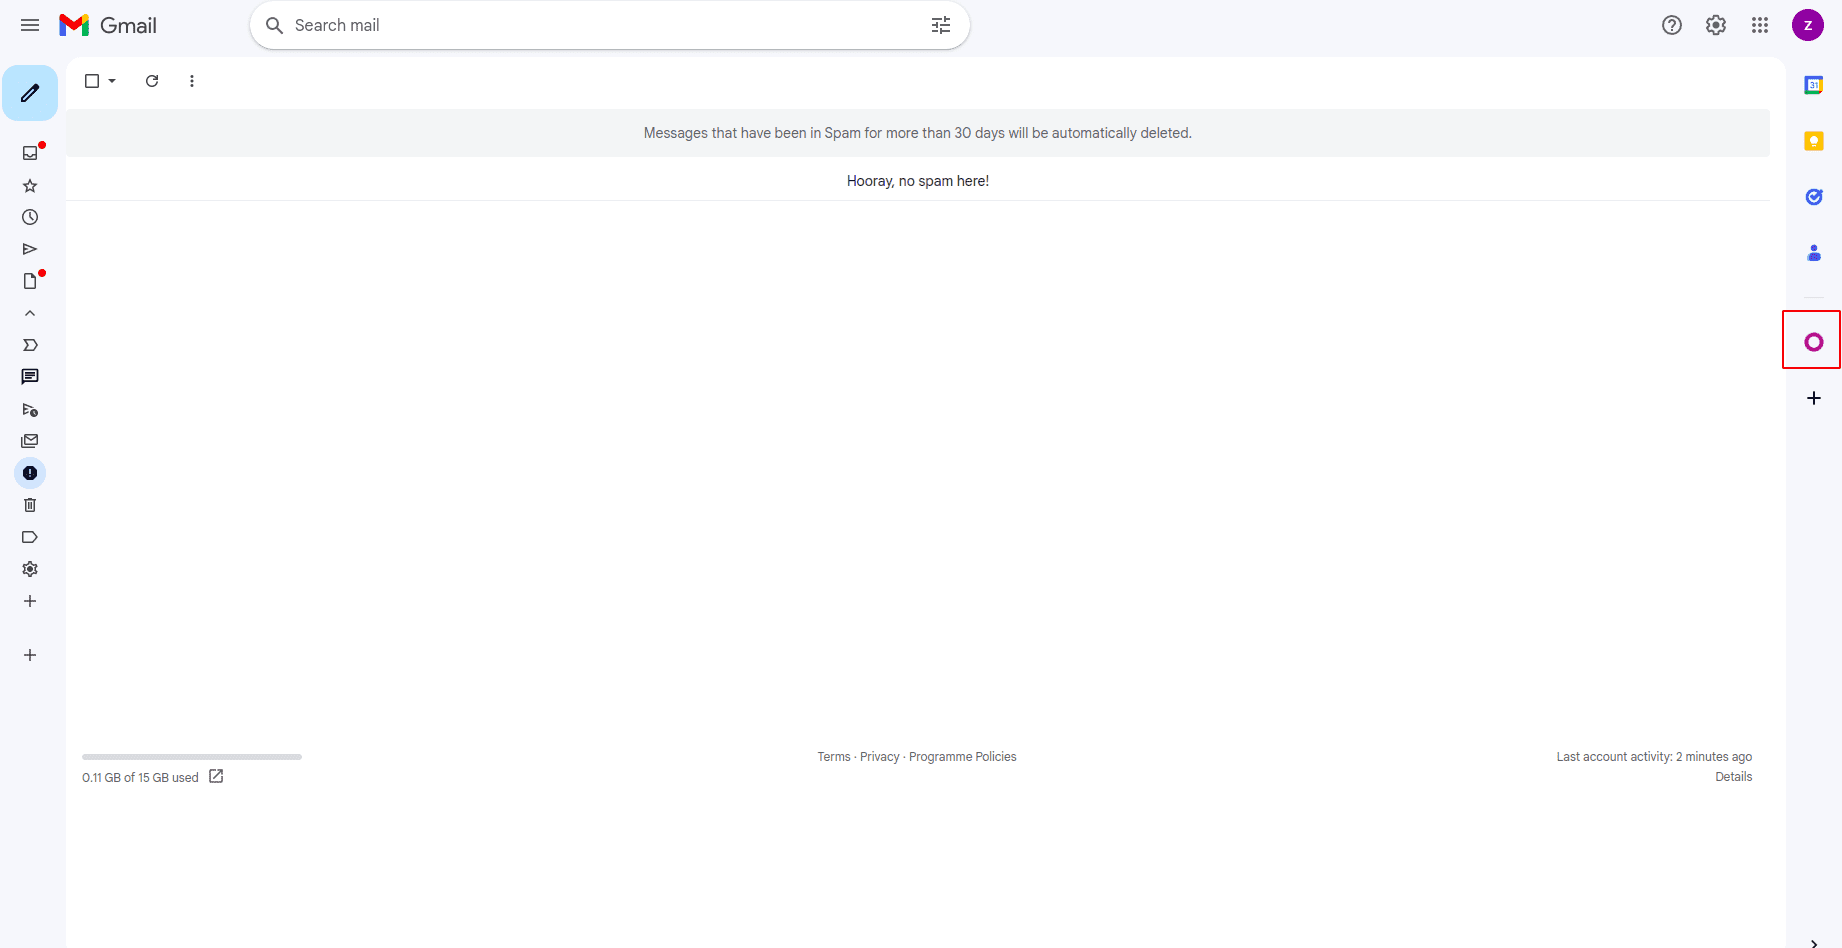
Next, click Login. Then, input the URL of the Odoo database that the user wants to link to the Gmail inbox, and log in to the database.
Finally, click Allow to grant Gmail access to the Odoo database. The browser will then display a Success! message. After that, shut the window. The Odoo database and Gmail inbox are now integrated.


