Whatever be your industry and the type of operations, the company needs to maintain a record of the movement of products from the inventory. The company should also trace the movement of products towards the inventory and within the inventory.
This will help the business to make necessary adjustments in the inventory based on the availability of the products in the inventory. This can be done in a more accurate way with the help of a software system to manage and trace the inventory.
For the smooth operation of a company, there should be minimum stock availability in the inventory. Whenever the product is moved out of the inventory or moved into the inventory we will need to record this movement as these changes get reflected in the inventory. In short, every change in the inventory should be traced and the changes should be managed efficiently for the smooth operation of the business.
Odoo Enterprise Resource Planning software with a dedicated inventory module will help the business to ensure smooth functioning by allowing the user to record the changes and do inventory adjustments based on the physical stock of the product.
Odoo Inventory Adjustment
Now we can check how Odoo allows the user to manage inventory adjustments.
To make use of this feature we have to first install the Odoo Inventory module from the Odoo Apps

Then we have to click on the module to enter the dashboard.
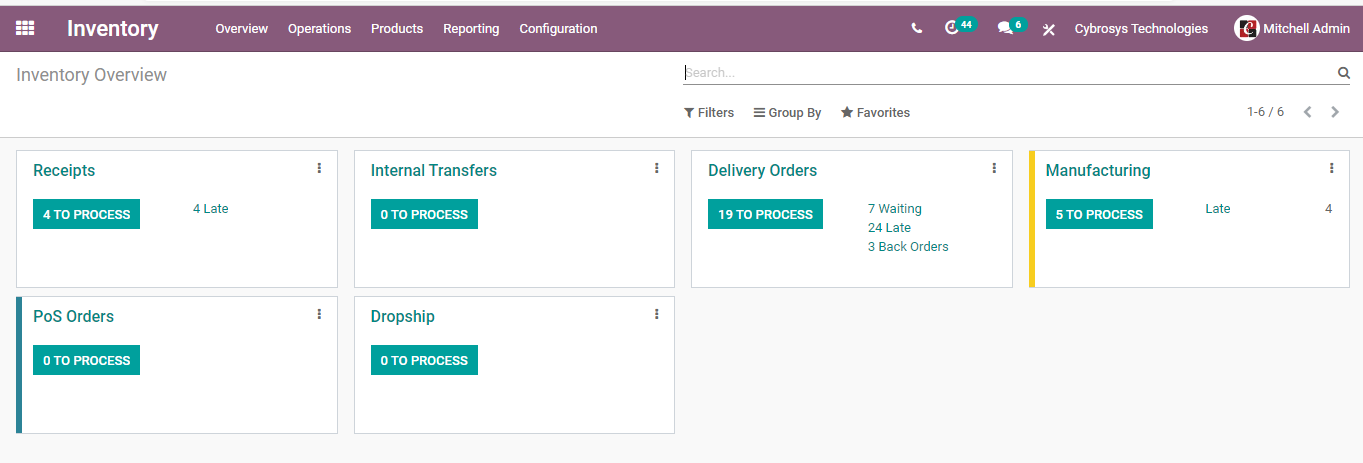
In the dashboard, we can find Overview, Operations, Products, Reporting, and Configuration.
Here, Operations indicate different operations taking place in the inventory. So we have to go to Inventory> Operations> Inventory adjustments

On selecting Inventory Adjustments will get
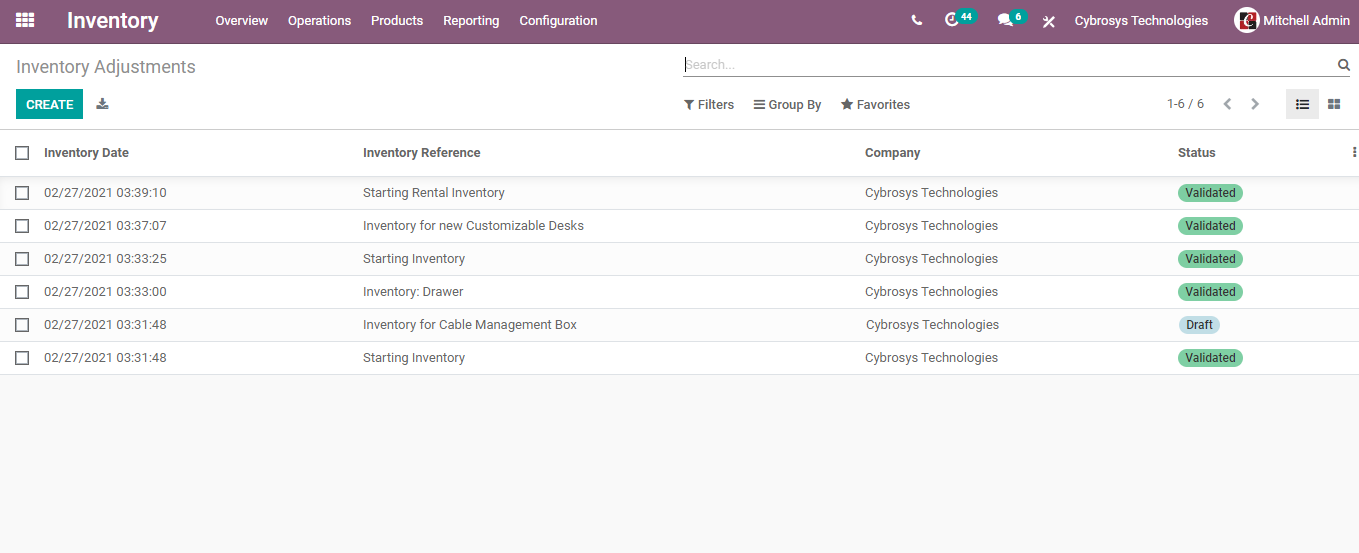
Here, in the above image, we can find some of the already created inventory adjustments with status as validated which means these inventory adjustments have been validated. We can also find some inventory adjustments in the draft stage.
The next task for us is to generate a new inventory adjustment. You can see the CREATE button there and this can be used to open the create form.
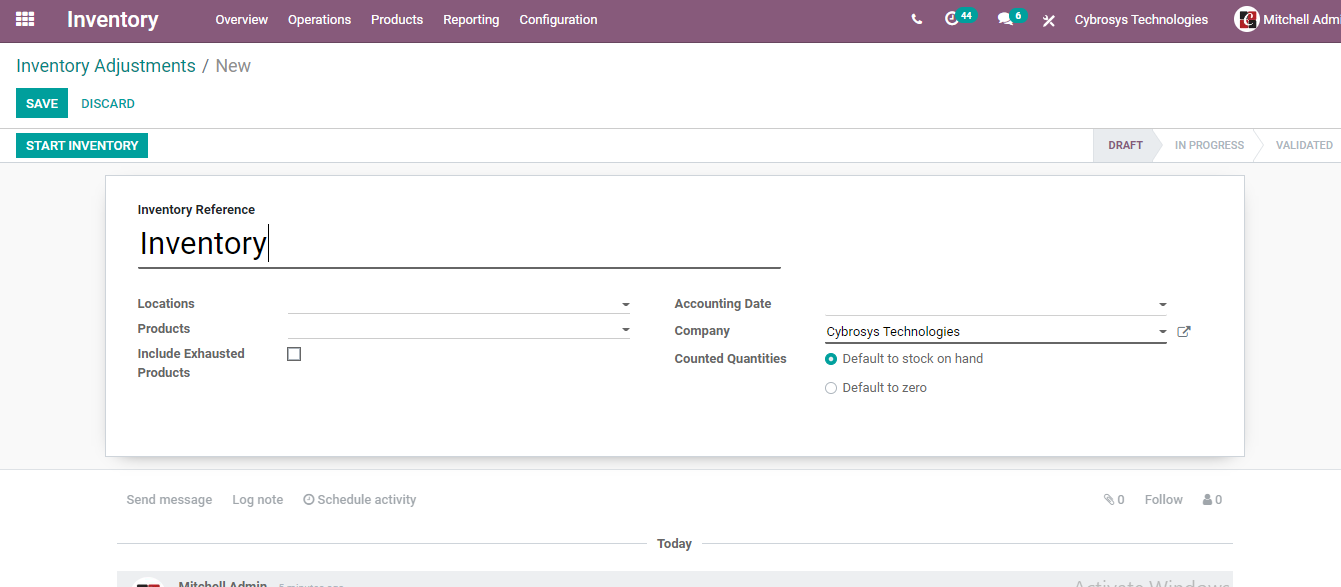
To do this we can first set the Inventory reference. Here, we can fill the reference field by giving a reference name. Let me give the reference as Inventory Adjustment March/2021.
Then we will add the location and mention the products for which we are going to make inventory adjustments. What we have to be cautious of is that we can make inventory adjustments for storable products.

Products: Here, I have selected three products for inventory adjustments and they are a Customizable desk, large cabinet, and cabinet with doors.
Then we can find a field ‘Include Exhausted products’. On enabling the field we will be able to automatically add all the products with zero stock in the inventory.
Accounting Date: This is the field where we can add the date on which the inventory adjustment will be made
Company: The name of the company
Counted Quantities: Here, we can find two options, Default to stock on Hand option can be used when we choose the products, and the Default to Zero option can be chosen when we want to make inventory adjustment automatically for all the products, the stock of which is zero.
Let us first set the counted quantity. There are two options from which we can now choose Default to Stock on Hand.
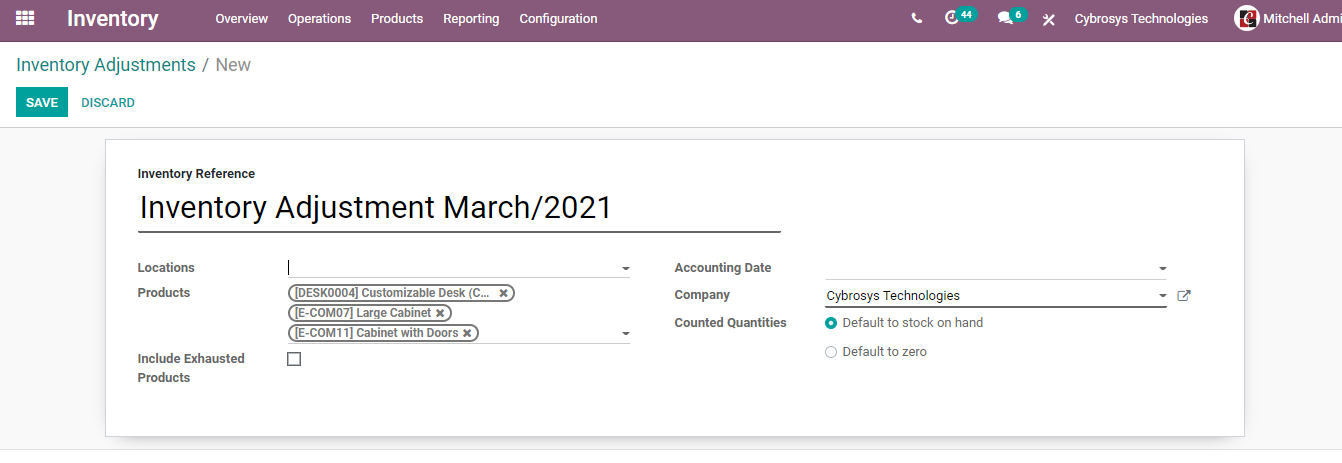
On completing the form we can save it now.
Now, we can find that the inventory adjustment is in a draft state. Check the below-given image.

As the inventory adjustment is in the draft stage we have to continue the process.
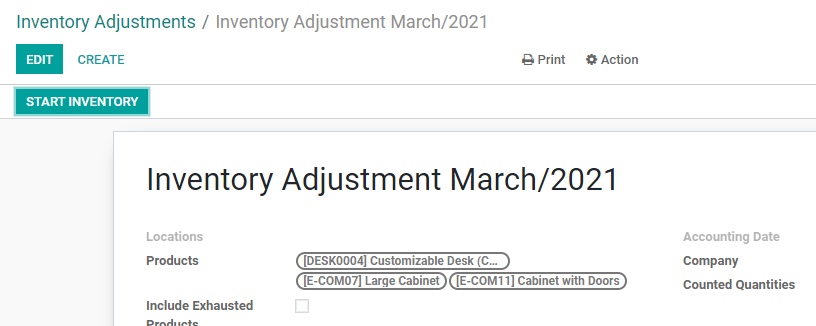
We can find an option Start Inventory and click on it to get the below given page
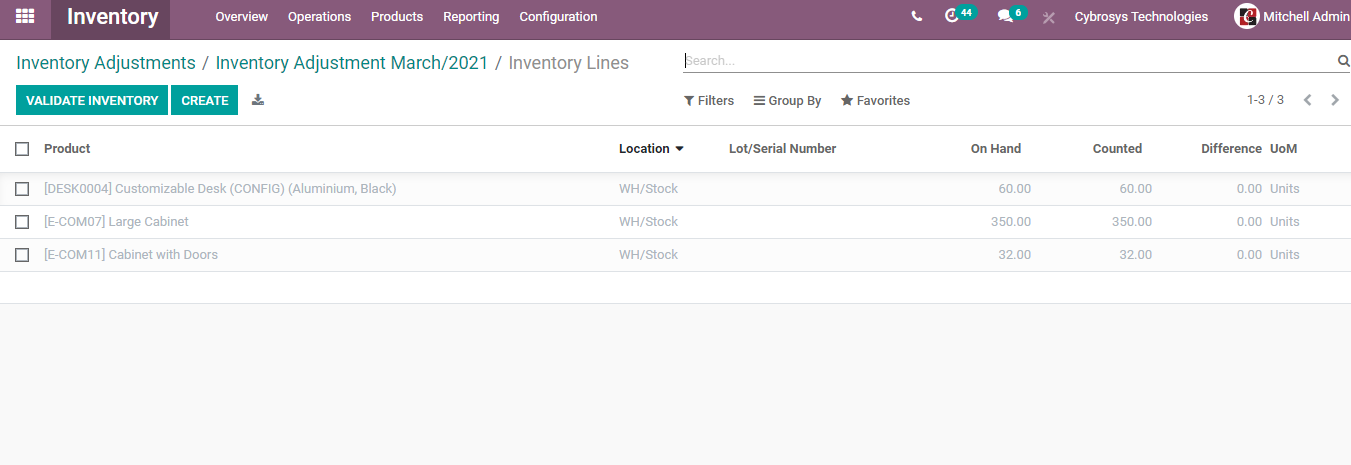
Here we can find three products in the list. The products were chosen by us while creating inventory adjustment.
Apart from product details, there is Location, Lot and Serial number, On the hand, Counted, Difference UoM

On Hand: The available stock
Counted: The number we want to add
Difference UoM = Counted- On Hand
In the above image, we can find the on-hand quantities are 60, 150, and 32 respectively. We have added 70, 380, and 50 as the counted quantities. Check the difference or the inventory adjustment below the Difference UoM.
In the above image, we can also see the location of the product. This will be automatically added to the field.
The Lot/ Serial number will also get added automatically if the numbers were set.
In case you want o to add more products we can make use of the Create button available on the page
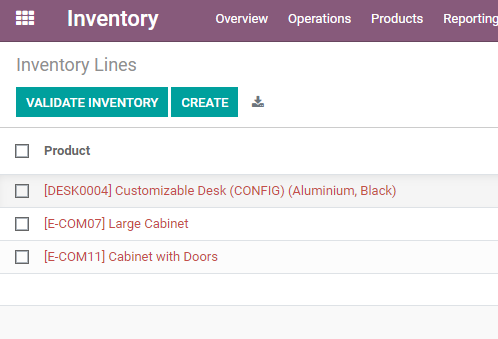
On clicking the button we will get a new window
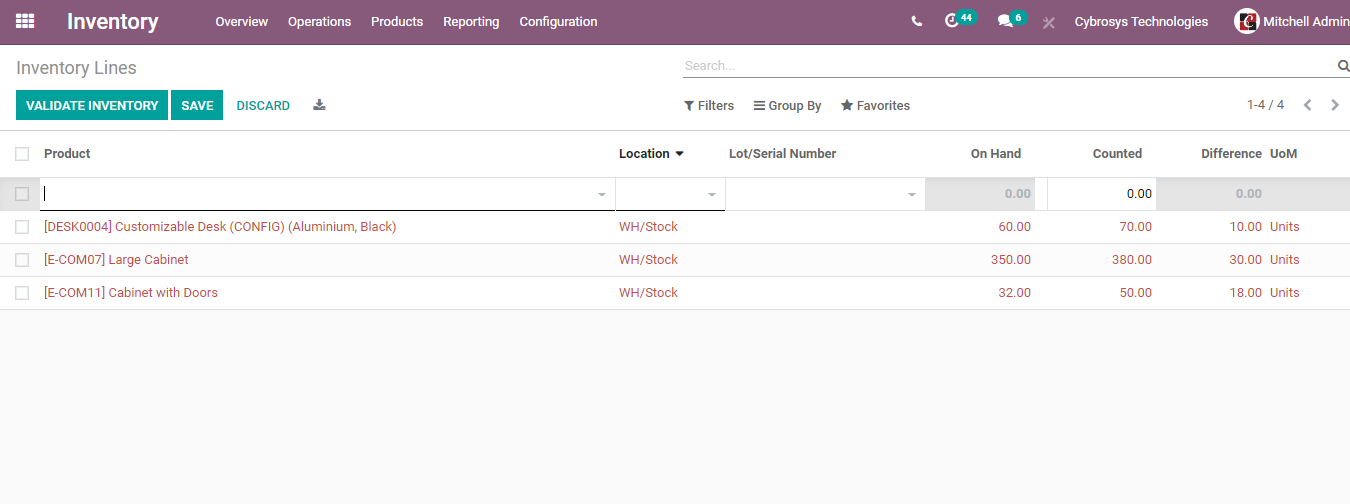
Here, we can add as much new products as we want.

Here we can make other adjustments with the help of Group by and filter options
Group By offers the below-given options
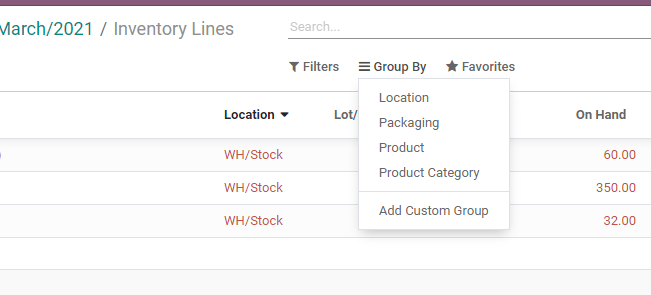
The filter allows the user to filter by

After making all required adjustments, we can Validate Inventory
We can make use of the VALIDATE INVENTORY button to perform this task

Now the status changes to Validated

Now let us move to Inventory> Products and check the changes in the inventory
WE can first check the Large Cabinet. Earlier the number of products was 350. As we have adjusted the inventory to 380 the products on hand has changed to 380

This is how we make inventory adjustments. This helps us to track the movement of products from the inventory to the inventory and within the inventory.
Before concluding, I will explain to you how to make inventory adjustments for all products.
For that, we have to go to Inventory> Operations> Inventory adjustments
Then we have to create inventory adjustment as in the above case
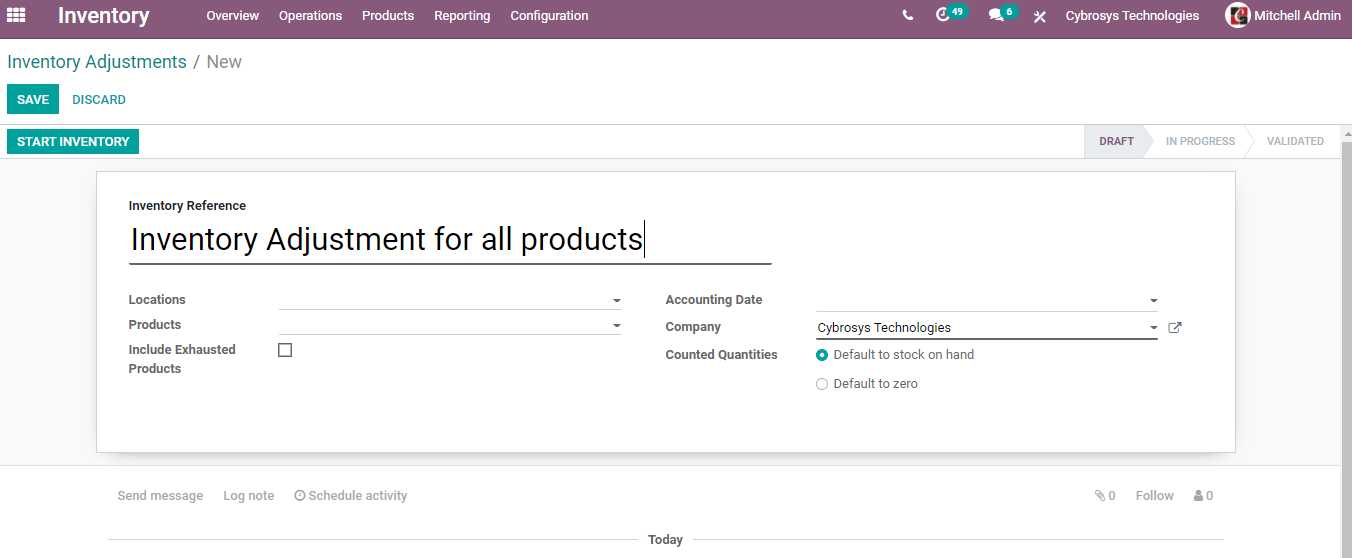
Then, instead of selecting a few products, we can leave the product field blank and directly click the START INVENTORY button.
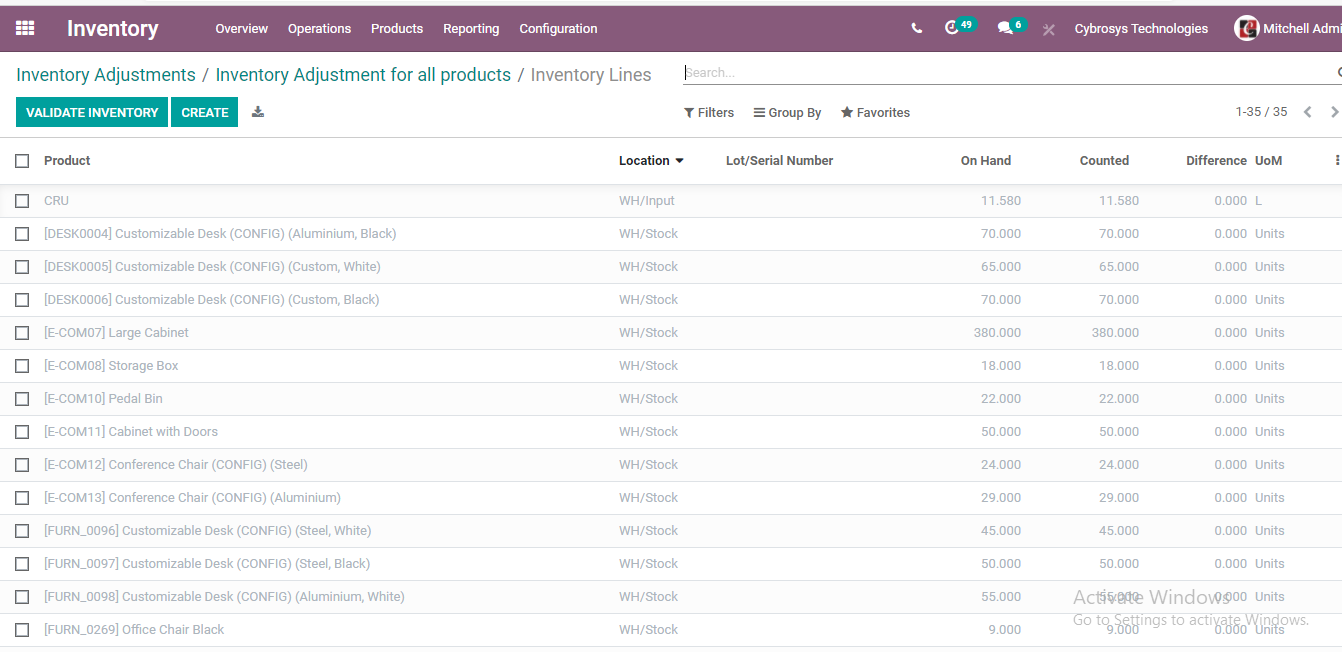
As seen in the above image all the products will appear in the list then. From here we can make adjustments to the products we want.
We can follow the procedures we followed for making adjustments for selected products
This is how we can make use of the inventory adjustment feature of the Odoo 14 Inventory module.
Don’t hesitate to contact us to know more about this.
You can also have a glance at our youtube channel to get a demonstration of the use of the feature.


