The Subscription module in Odoo streamlines recurring billing and subscriber administration so that companies can concentrate on their products, services, and relationships. For a smooth user experience, the platform includes automated contracts, invoicing, payments, and tax administration. Businesses may increase revenue and concentrate on strengthening client interactions by cultivating strong ties with subscribers. The Subscription module offers a simple login process for users, a user-friendly data-gathering gateway, the ability to set up automatic payments, and subscription administration features. The platform aids in predicting business growth, understanding progress, and supporting goal achievement by analyzing the company’s data.
In the Subscription module, you may design appropriate subscription plans for your consumers before initiating a new subscription. The Odoo 16 Subscription options serve as a model for new subscriptions. You can quickly generate new subscriptions for consumers using these plans. You may go to the Configuration menu and choose the Subscription Plan option to build templates for subscriptions. As seen below, the platform will display several pre-configured designs.
Managing Subscription products
The products menu, which is featured in the Odoo Subscription module, as seen in the picture below, allows users to create and manage anything associated with their subscription goods or services.
Products
You can choose the “Products” option from the “Subscriptions” menu. This product menu can be used by users to establish new subscription-based products or services. From the product’s homepage, as seen in the picture below, we can access the dashboard views of numerous product items that have been created before.

On the website, a list of activities is shown in a Kanban format. Users may control their chosen products by just clicking on them to carry out various tasks according to company needs.
As seen in the screenshot below, selecting the “New” button will launch a form view where you can fill out information about your new product or service.
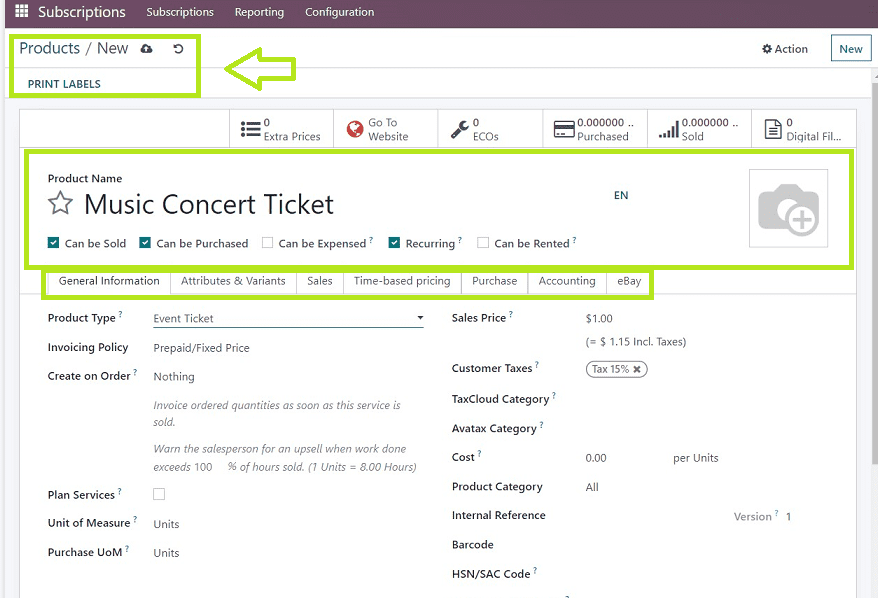
The “General information,” “Sales,” “Time-based Pricing,” “Purchase,” and “Accounting” tabs make up the product form view’s six sections. First of all, we can provide the name of a product or service and select whether they want to sell, rent, buy, or use it again. Now, let’s look into each of the tab sections in detail.
General Information Tab
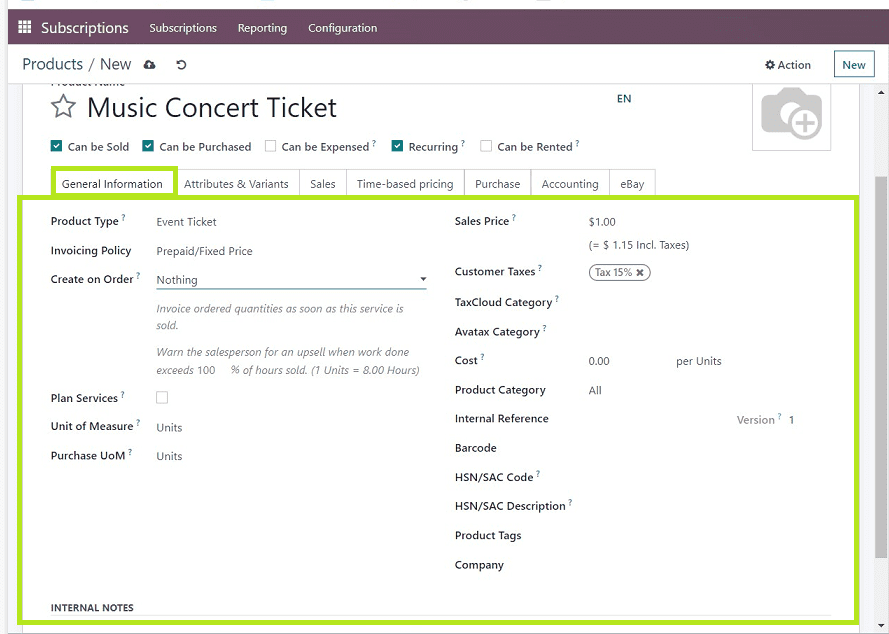
This tab requires some of the relevant data, including the “Product Type,” such as consumable, service, or product. Select an “Invoicing Policy” from the available options. Configuring an appropriate option in the “Create on Order” will generate a Project, Task, both, or nothing according to your selected option. Choosing the “Plan Services” will create a shift when confirming the sales order. Fill up the other fields, such as “Unit of Measure,” “Customer Taxes,” “Cost,” “Product Category,” “Internal Reference,” “Barcode,” “Product Tags,” and “Company Information,” etc., in accordance with your company needs. Also, you can provide any notes in the “INTERNAL NOTES” section, as seen in the picture below.
Attributes & Variants
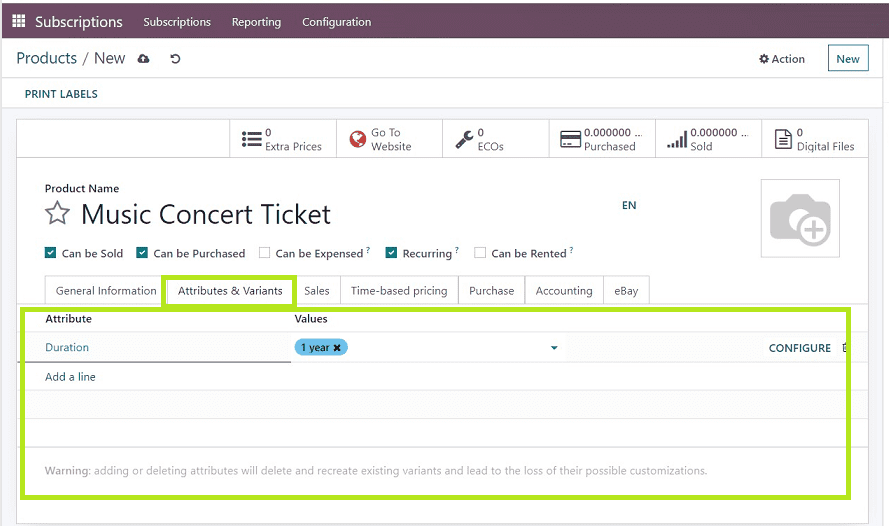
You can additionally assign different variations and attributes for particular items as well as values based on particular attributes. In the “Attributes” part, for instance, you can enter brand names, colors, sizes, patterns, fabrics, and so on; in the “Values” area, you can give multiple brand names, sizes, colors, or values related to an attribute. It is a fully adjustable option, allowing values to be assigned in accordance with specific versions, brand names, etc. Input the attributes and values as seen below in the “Add a line” section and save the details in the form.
Sales
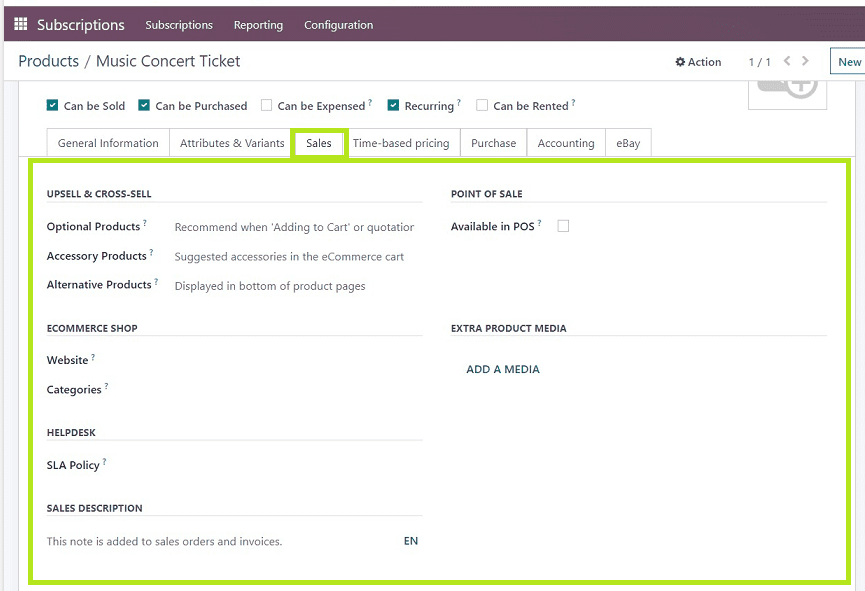
This tab section includes many fields that, include “UPSELL & CROSS-SELL,” “E-COMMERCE SHOP,” “HELPDESK,” “SALES DESCRIPTION,” “POINT OF SALE,” and “EXTRA PRODUCT MEDIA.”
UPSELL & CROSS-SELL- Possibilities, such as optional items, companion products, and alternative products.
E-COMMERCE SHOP- Information about the website and the category under which the goods must be shown on e-commerce websites.
HELPDESK- You can enable the SLA Policy in this field. SLA(Service-Level Agreement) outlines expectations, products/services, and delivery between service providers and customers.
SALES DESCRIPTION- Any remarks or descriptions pertaining to the selling of the goods are considered sales descriptions.
POINT OF SALE-:-Check the box to display availability in POS.
EXTRA PRODUCT MEDIA- Add product images and videos to your uploads.
Time-based pricing
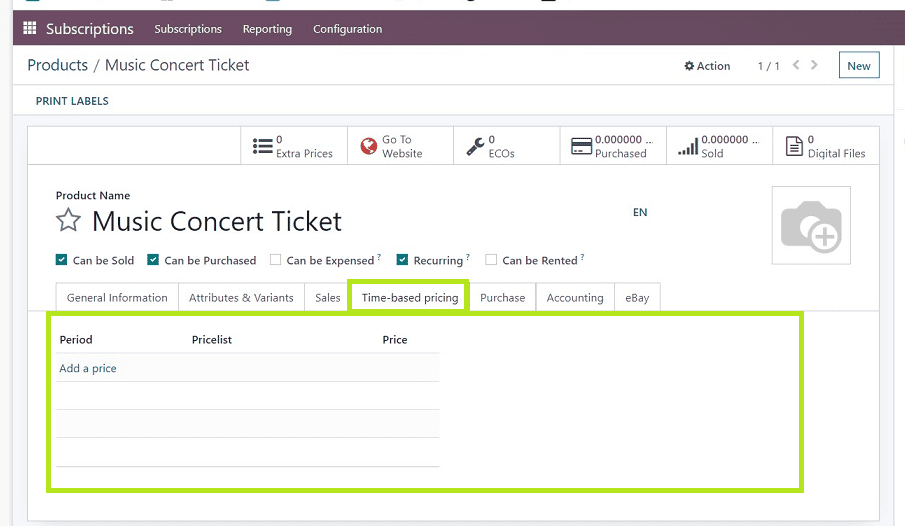
You can include time-based pricing for some things depending on the demands of the business. For example, you might base payments on the number of hours, days, weeks, months, quarters, months, and years that a product was utilized. The screenshot below shows how the “Add a price” dropdown box in the program allows us to specify a “Period,” “Pricelist,” and “Price” for the chosen period.
Purchase
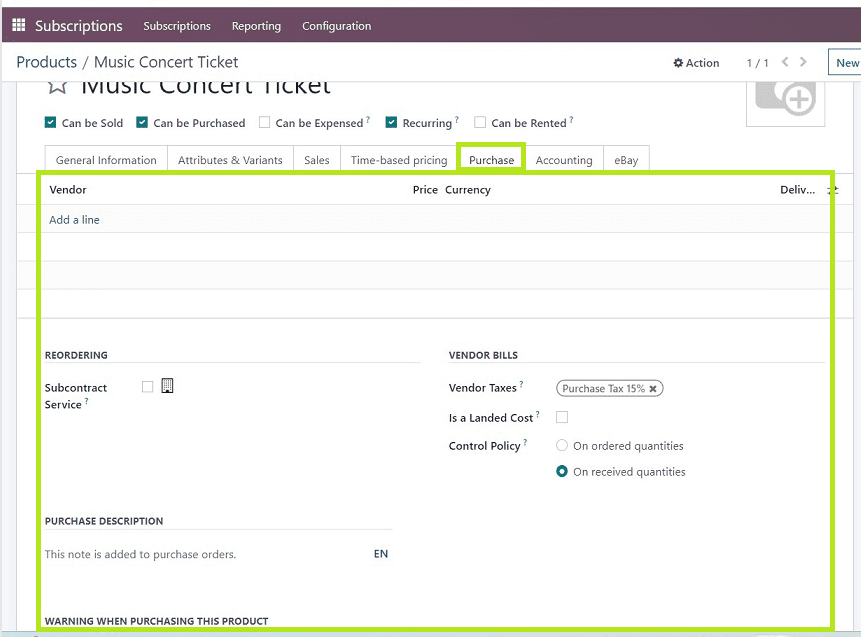
You have the ability to add and change vendor names in the vendor details area as well as create subcontract services and offer purchase descriptions. Users can additionally include vendor bill information, such as taxes and control procedures. An RFQ is required for the subcontracted service in order to place a sales order for the product. Additionally, you can include the purchase description and vendor bill information.
Accounting
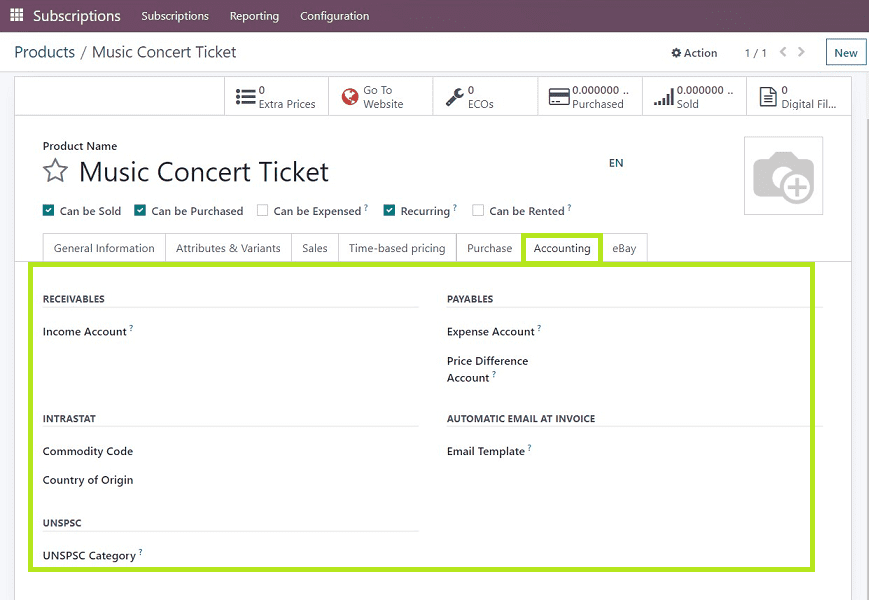
Information on the revenue, expense, and price difference accounts can usually be found in the accounting section. Enter the necessary information, then press the save button to save the changes. Create a magazine that can be bought and subscribed to by entering the necessary information in the appropriate areas.
eBay
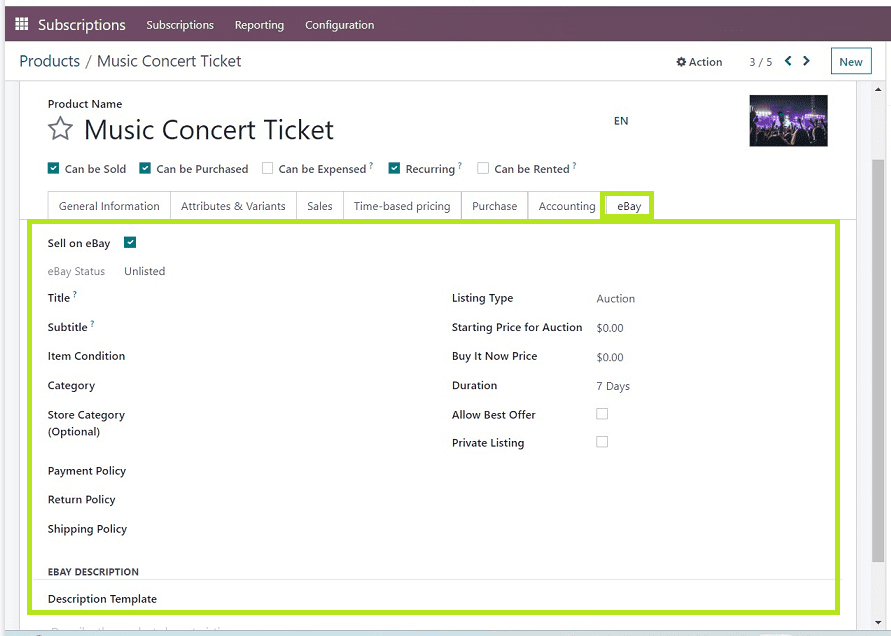
You can enable the “Sell on eBay” option to sell your subscription products or services through the eBay e-commerce site. In this tab section, you can give the product/service “Title,” “Subtitle,” and “Item Condition.” you can select a product “Category” and “Store category” to categorize the product. This tab section can also be used for configuring your product’s “Payment Policy,” “Return Policy,” and “Shipping Policy.”
You can edit any descriptions of your goods or services that appear on the eBay shopping site by editing them in the “EBAY DESCRIPTION” area.
Fill in the data columns entitled “Listing Type,” “Fixed Price,” “Starting Price for Auction,” “Buy It Now Price,” “Duration,” “Allow Best Offer,” and “Private Listing” with the price and offer information for your products that will appear on the eBay website. Never skip to save the details after editing the required details.
Now our new product has been created, and the corresponding data are added to the Odoo Subscription’s database. On the “Products” window, we can view our recently created product.

By just clicking the product’s kanban view, which opens the form view once again, we can control every step of their brand-new product development process.
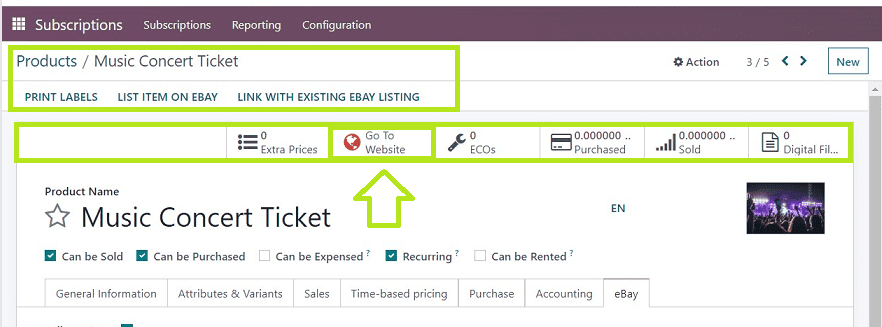
We can administer online publications, subscriptions, and customer portals by selecting “Go To Website” from the smart menu bar. As shown in the picture up top. This will take us to a page where we can alter the webpage templates, shopping, blog, etc., that are shown in the screen capture below.
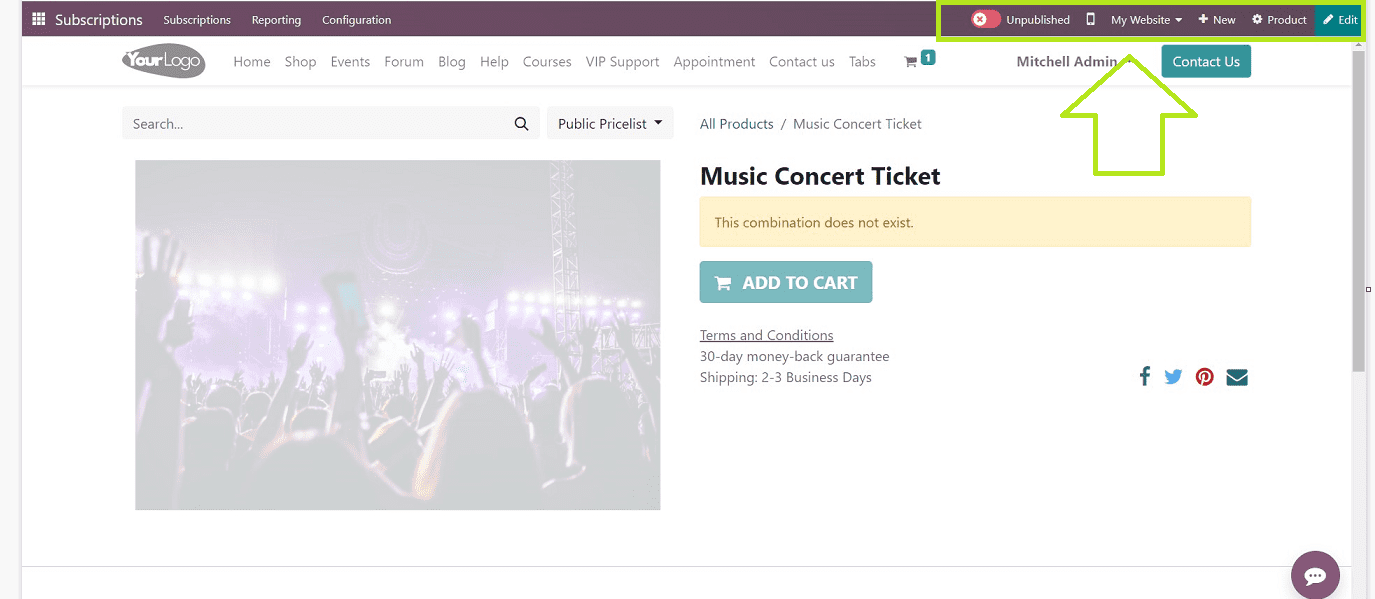
Administrative users can manage and update numerous modifications to their subscription product or service through the web portal, and regular users can purchase or sign up for the specific product or service.
By clicking the “Unpublished” button, we can publish the developed product, converting it from the “Unpublished” state to the “Published” state. Additionally, you can jump between websites by using the “Website” menu and get a mobile preview by selecting the mobile symbol from the page’s top right corner.
Subscription Plans
You can create a new subscription plan for your subscription-based business or service using the “Plans” menu option available in the “Configuration” menu of the Odoo 16 Subscription Module.

You can see the dashboard list of all the subscription plans organized in the “Plans” window with their “Quotation Template,” “Recurrence.” plus “Category.” In order to establish a new subscription plan, click the “New” button. Using the configuration form, you can modify the new plan’s specifics, as shown below.
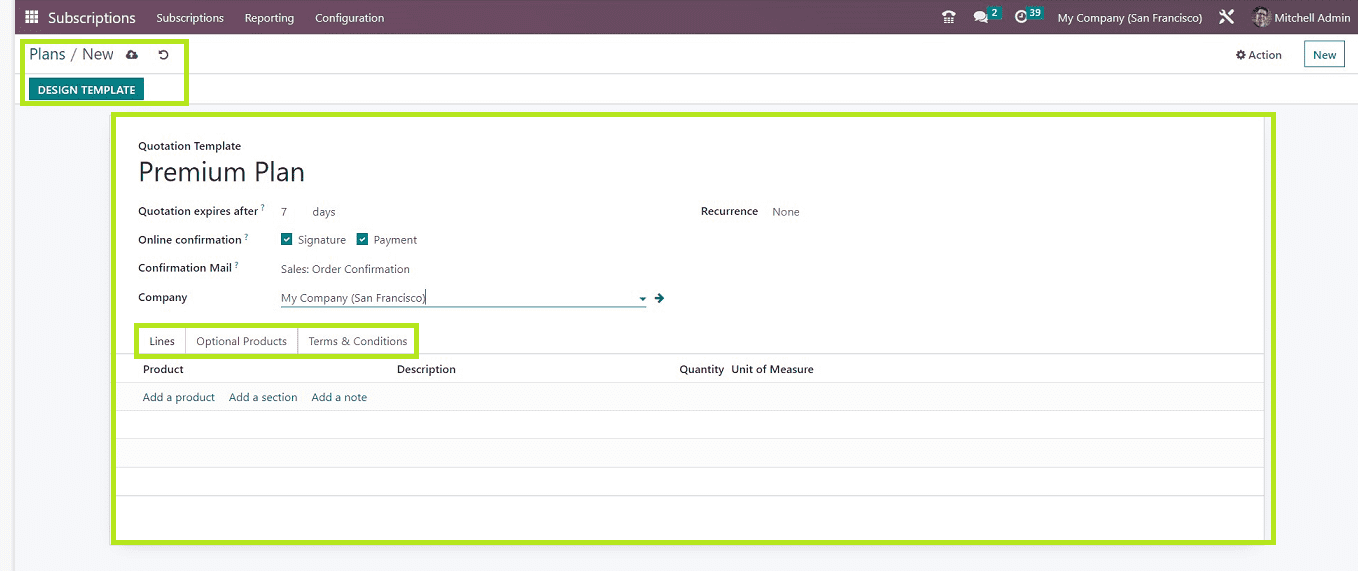
In the displayed form, Type your “Quotation Template” as the plan name and provide the duration of the plan in the” Quotation expires after” field. The “Confirmation Mail” area help you to add an appropriate email template used for sending confirmation notification. Also, you can add the “Company” and a “Recurrence” period on the respective fields. This form section contains some tab actions named “ Lines,” “Optional Products” and “Terms & Conditions.”
Lines Tab
In this tab section, you can add your product or services that are going to add to the subscription product category.
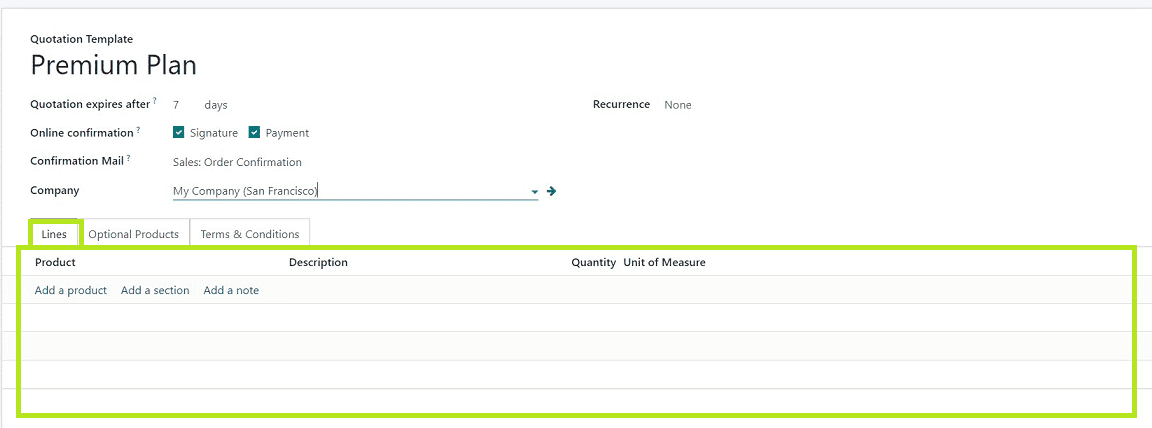
You can specify your primary product by clicking the “Add a Product” button. You can add any product category in the “Add a section” area additionally, it is very convenient to give any product description in the “Add a note’ area. You can additionally include the items “Quantity” and “Unit of Measure” using this tab section. Once the process is finished, don’t neglect the saving procedure.
Optional Products Tab
Utilizing optional items is a marketing tactic for upselling products in addition to a primary product. This tab section will help you to add optional products. Hitting the “Add a line” option will allow you to add optional goods or products.
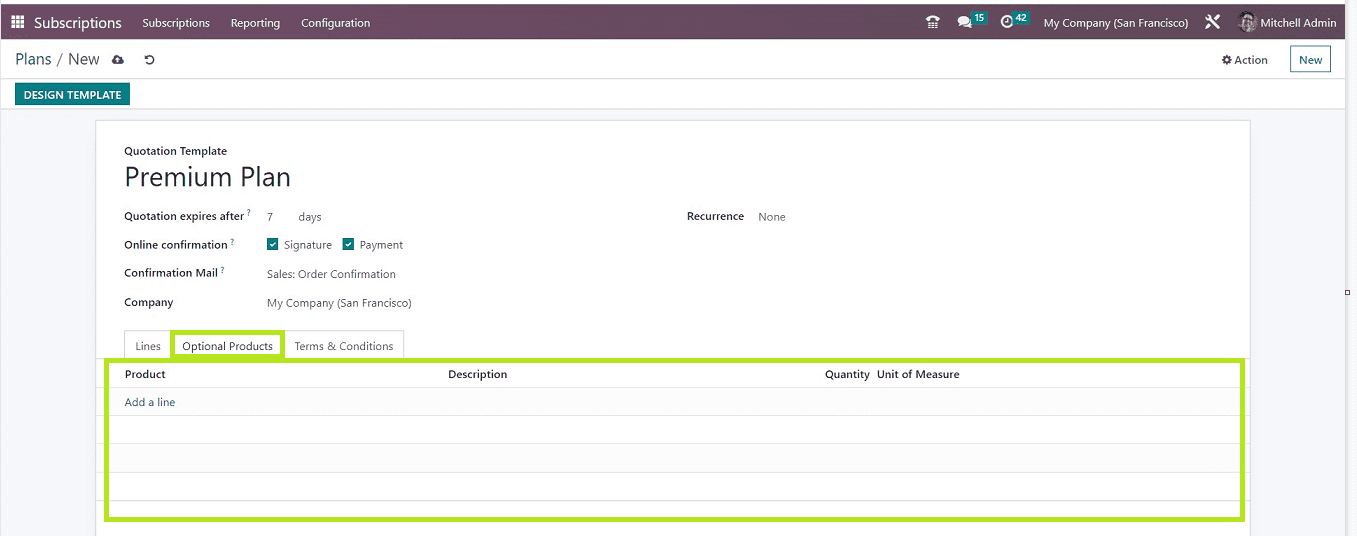
Here also, you can give the product Description, Quantity, and Unit of Measure.
Terms & Conditions Tab
This tab section can be used to edit the descriptions, terms, and conditions regarding the products or services.
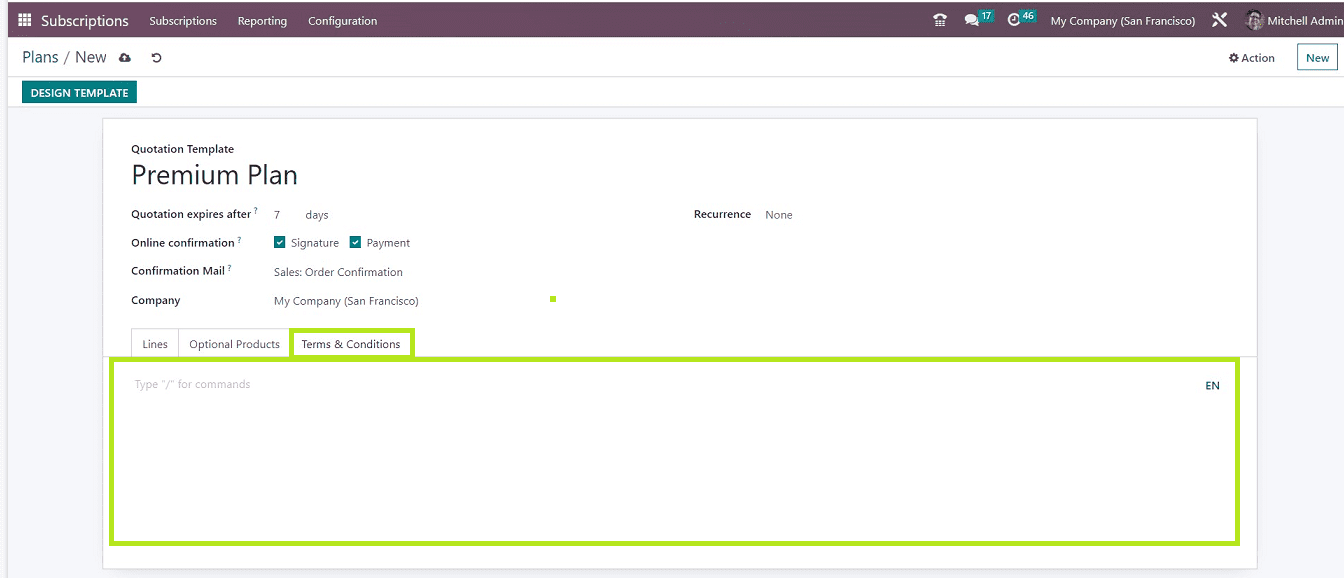
After editing the details, save the data using the Odoo save icon. After that, you can click the “DESIGN TEMPLATE” button to edit the website preview of the subscription plan.

You can edit the website design and templates using the “Edit” menu tools available in the website preview, as shown below.
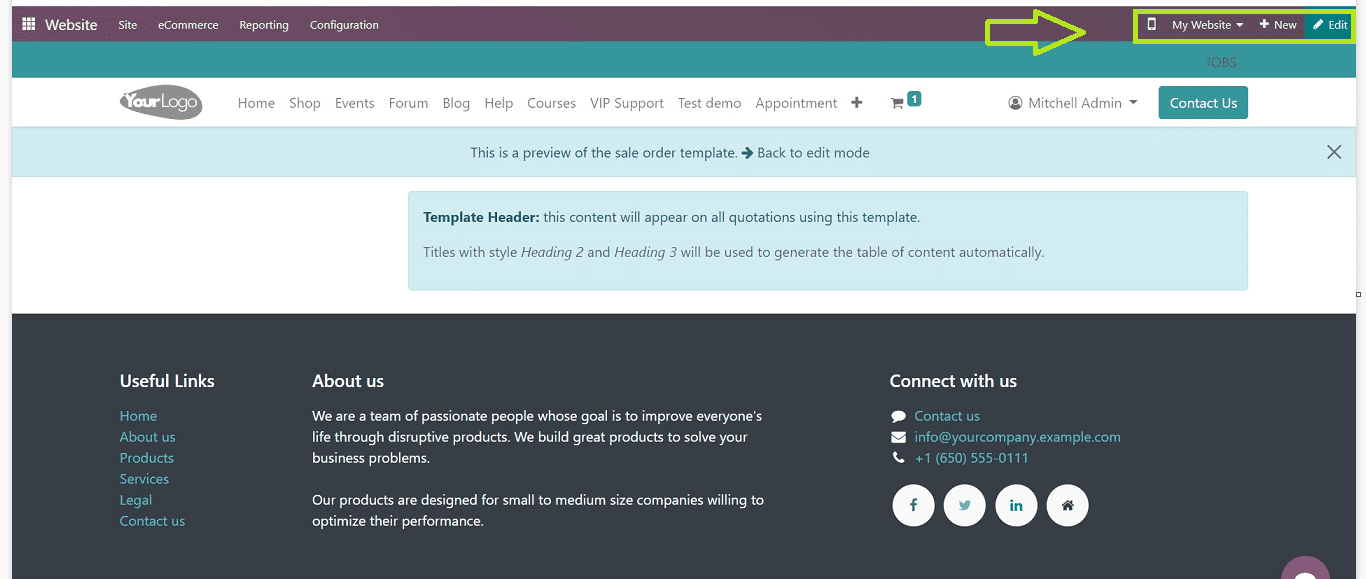
Now our new subscription has been created, and the details are saved into the odoo platform.
These are the procedures involved in creating and managing Subscription Products, and Subscription Plan functions available in the Odoo 16 Subscription Module.


