Online signatures are an easier, faster, and more secure way to carry out business transactions. It is an advanced way to move forward with business activities, quotations, sale orders, and agreements. This type of customer-centric digital signature option will be very beneficial for both business owners and consumers. Higher conversion rates and lower customer acquisition rates are some of the benefits of digital signature technology. The more efficient and safer process stipulates a better user experience.
The best ERP software, the Odoo Sales module, provides a complete solution for all of these complexities. Odoo supports online creation and validation in a highly professional way. The importance of online transactions and online business in the global market is highly significant. The online signature can be considered as the digitalized transaction validation method, and it is an integral part of an online business. It is essential for sales quotations, sales orders, and agreements.
When a quotation is sent to a customer, the online signature option is very convenient for accepting this quotation. If an online signature option exists, the customer can perform this immediately by signing the document. The customer’s digital signature indicates that the customer has agreed to the deal, and the vendor can proceed with the further functions of the sale or service.
In this blog, let us have a look at how to request an online signature to confirm Orders in Odoo 16.
As we know, a Sales cycle starts from creating a quotation to confirming the quotation to a sale order. After securing the sale order, we should make a delivery on this sale order. Later, generate an invoice and then receive payment from the customer.
When we create a Quotation and submit it to the customer, the customer will analyze the quotation and, if satisfied, will confirm it and accept the quotation.
In Odoo, there is an option to request an online signature to confirm sale orders. To view the option, let us go to the Odoo 16 Sales module.
Under the Configuration tab of the Sales module, you will find the Settings menu. Click on the Settings menu to obtain the Settings window. Scrolling down the Settings window, you will find the Online Signature option under the Quotations & Orders section.
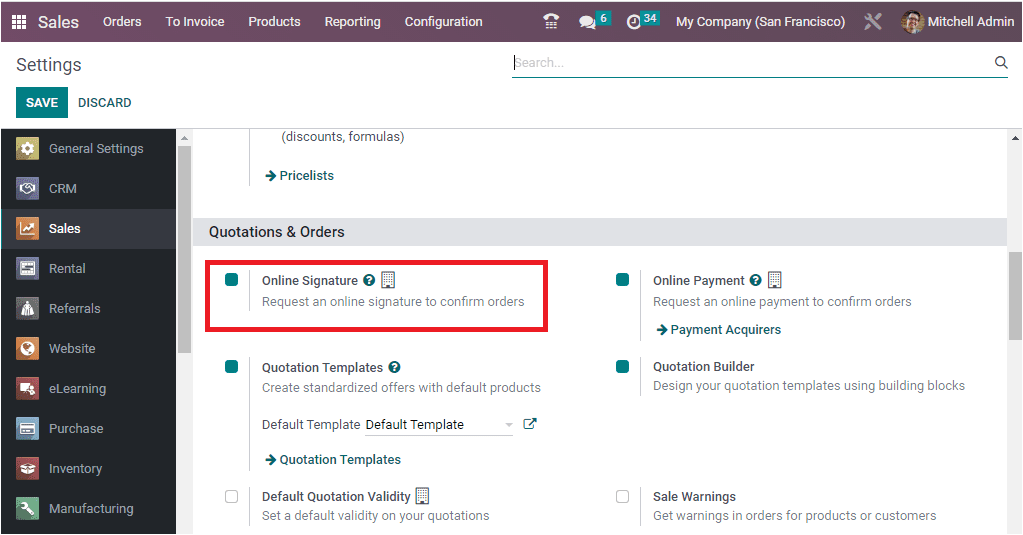
For requesting an online signature to confirm sale orders, you can activate this scrupulous feature. To activate the feature, you can check the box displayed on the option. Then save your changes by clicking on the SAVE button available in the top left corner of the window. All types of documents, such as legal documents, invoices, and any other documents, can be signed using this option. By doing this, we have activated the online signature option.
To view the functionality of this online signature, let us create a Sales Quotation. For that, Let us go to the Orders tab. Under the Orders tab of the Sales module, you can view the Quotations menu. Using this menu, open the Quotations window.
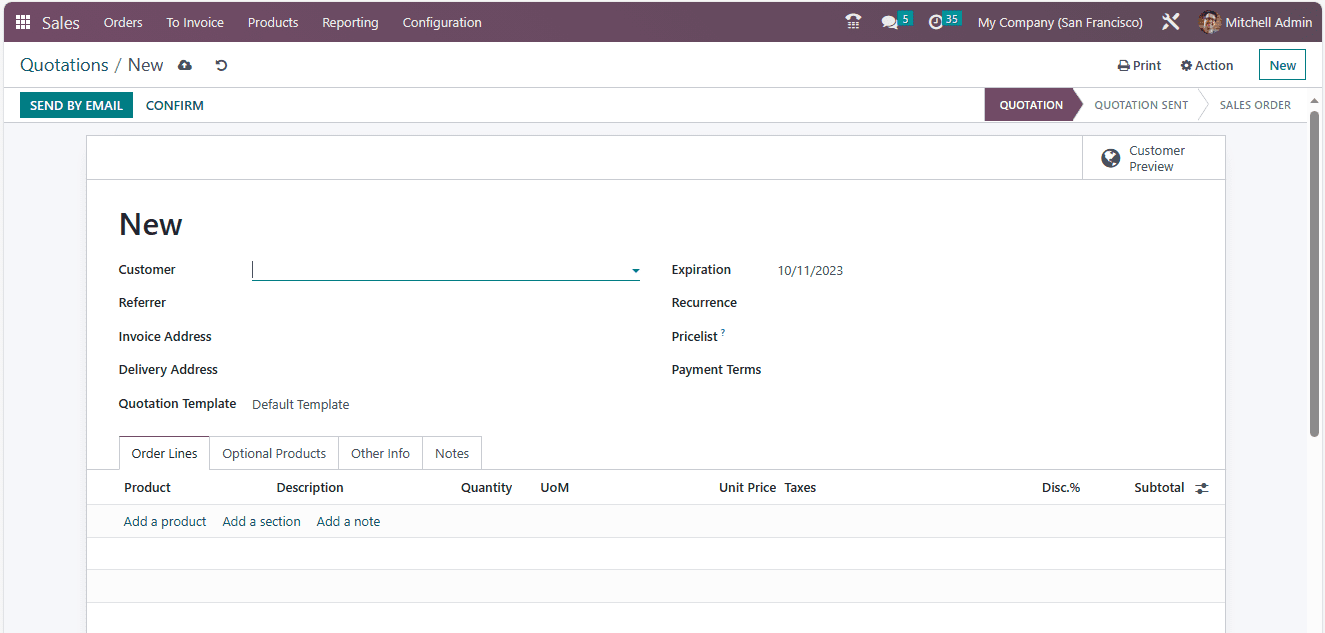
First, choose the Customer. Then, provide the details such as Referrer, Invoice Address, Delivery Address, Quotation Template, Expiration date, and Pricelists. The details such as Pricelist and Payment Terms can also be mentioned. Here, we can select Azure Interior as our customer. The details of the product can be added under the Order Lines tab. Let us add the Acoustic Block Screen as a product. The Description, Quantity, Unit of Measure, Unit Prize, Subtotal, and other details will be displayed. Now let us open the Other Info tab.
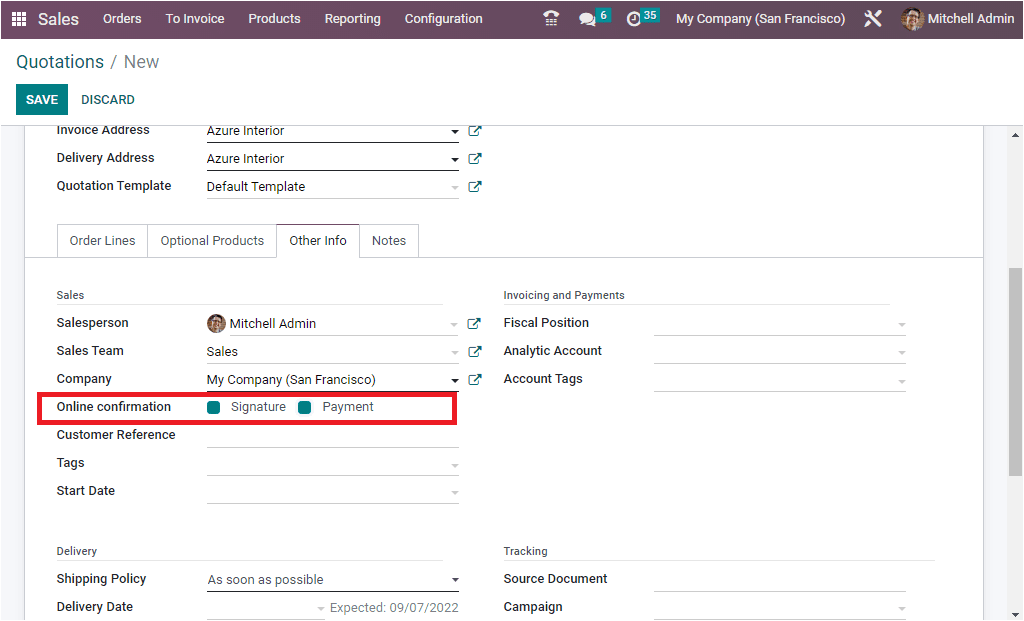
Under the Other Info tab, you can see the Online confirmation option for both Online Signature and Online Payment (to view the online payment option, you should activate the online payment option from the Settings window as we did for the Online Signature option). You can enable this field to request an online signature from the customer in order to confirm orders automatically.
Then, you can give all the details that you want to include in your quotation. After giving the details, you can save the quotation by clicking on the SAVE button. After that, you can send the quotation by email by clicking on the SEND BY EMAIL button
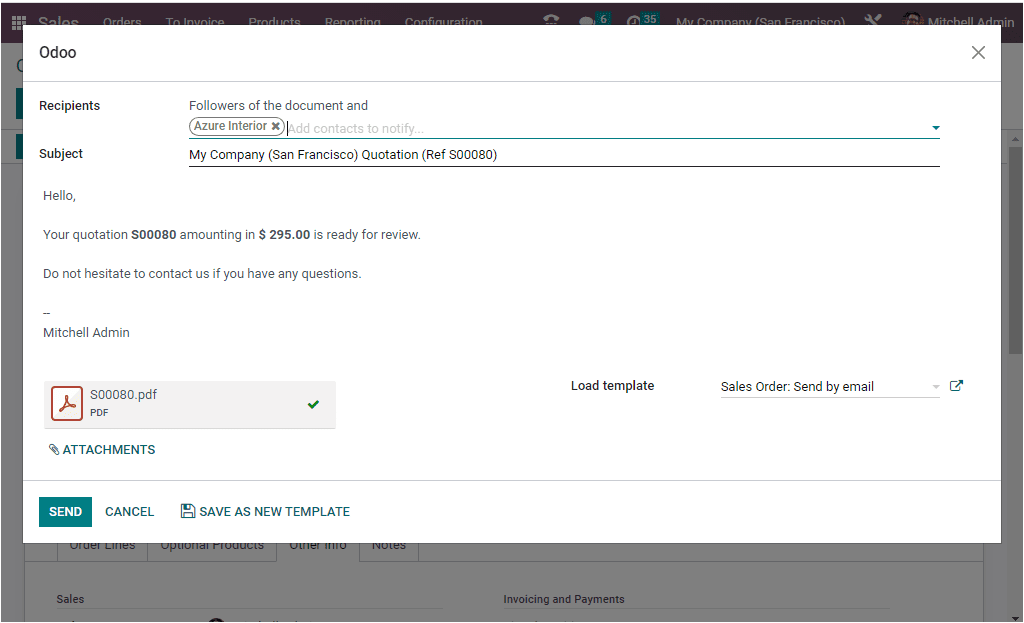
After viewing and confirming the email, send the email to the customer by clicking on the SEND button. Now, the Status of the quotation will be changed from QUOTATION to QUOTATION SENT, as shown in the image below.
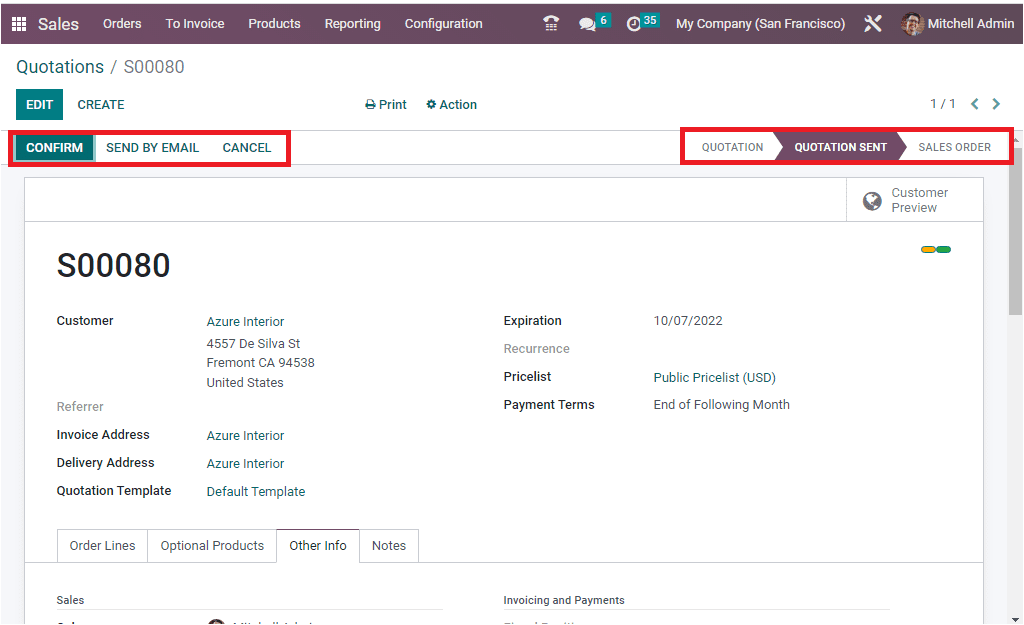
If you check the Chatter section, you can view the details of the quotation we sent to the customer.

Now under the Actions tab, you will be able to see the Share button. The share button allows you to send another email to the customer.
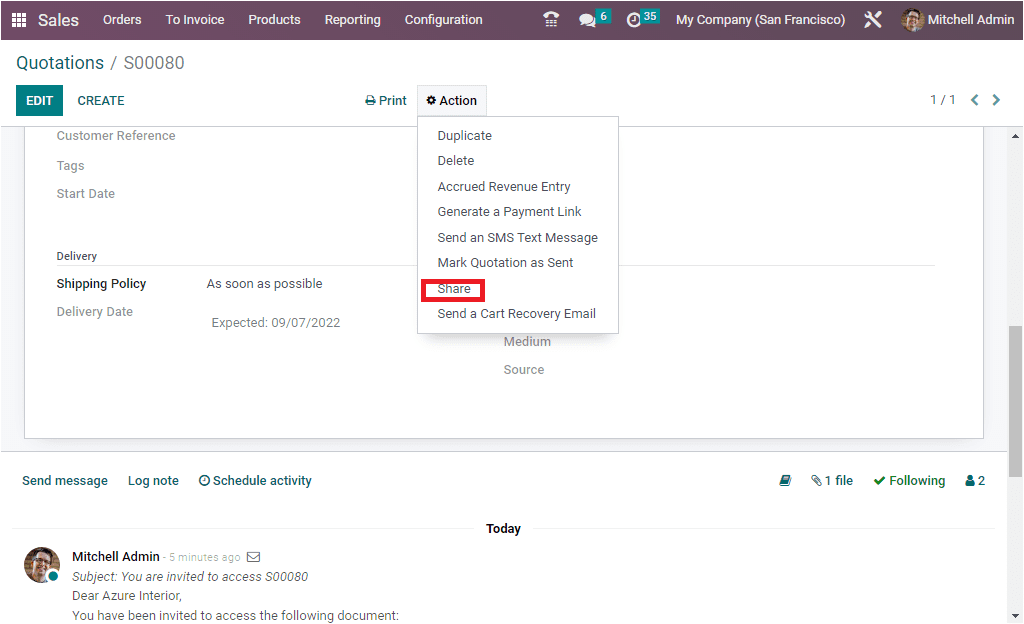
You will get the option to share the document by clicking on the Share button. Here you can give the recipients.
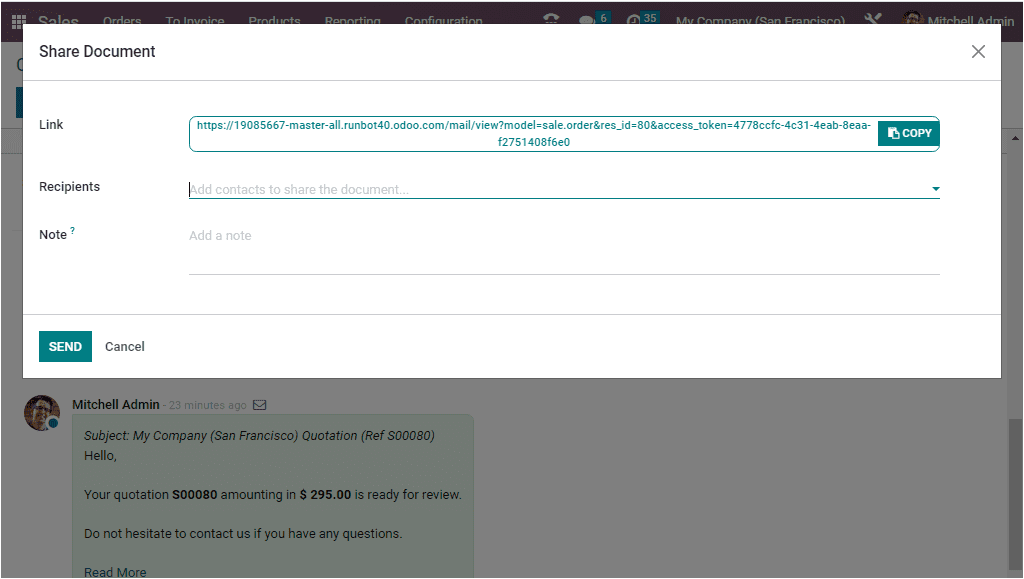
Then click on the SEND button. The moment you click on the SEND button, another email has been sent to the customer. Under the Chatter section, you can view the details. The customer has been invited to access the following link.
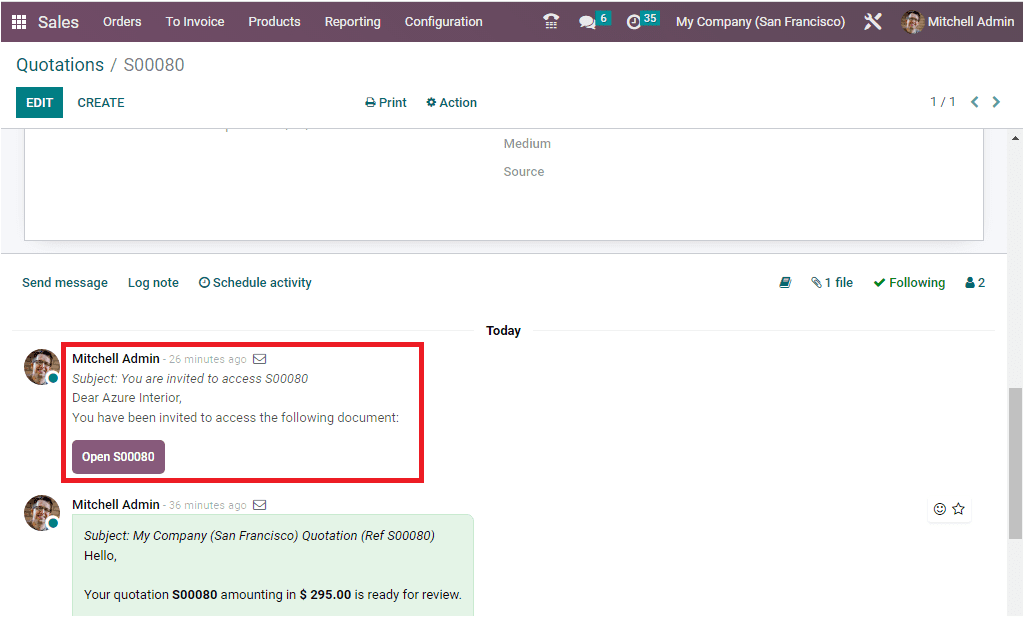
This is the first method to access the document. In another method, the customer can log in to their portal and view the details.
Here to view the preview of the customer portal, you can click on the Customer Preview button.
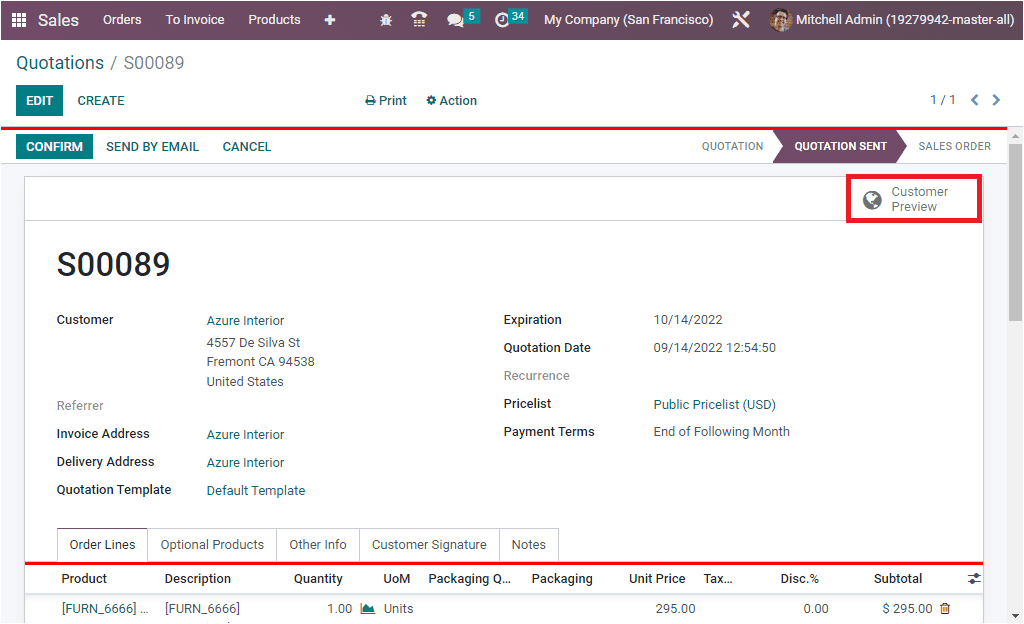
The moment you click on the Customer Preview button, the system will take you to the new window as shown below.
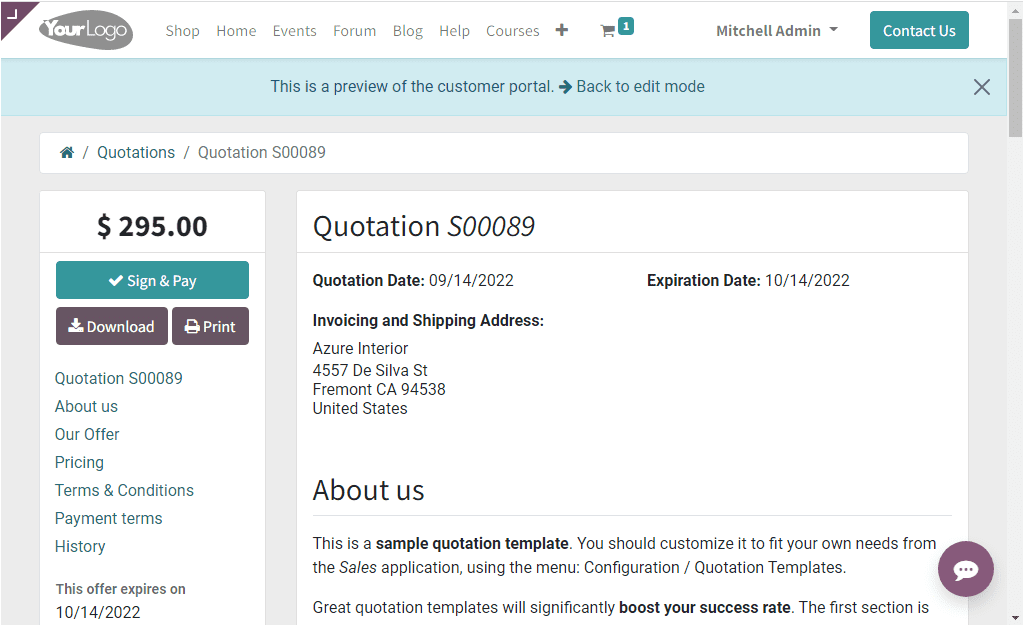
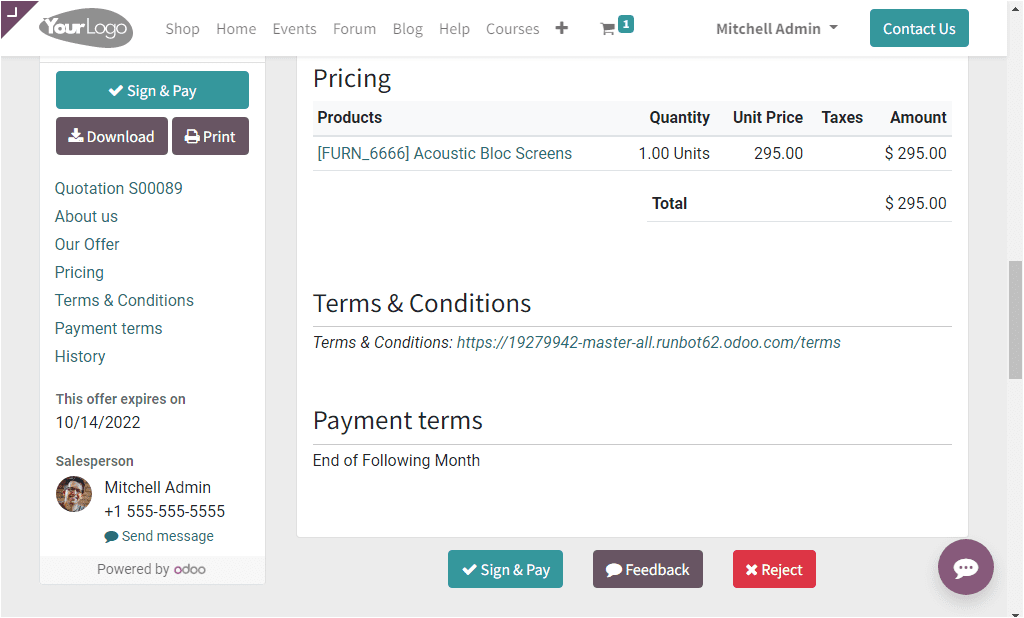
When the customer opens their customer portal, they will be able to see the details as shown in the image above. Here, they can view the Quotation Number, Quotation Date, Expiration Date, Invoicing, and Shipping Address. Further, they can view the Pricing details, Terms and Conditions, Payment Terms, and other details. In the left portion of the Quotation, the customer can view the Download, Print, Sign&Pay options.
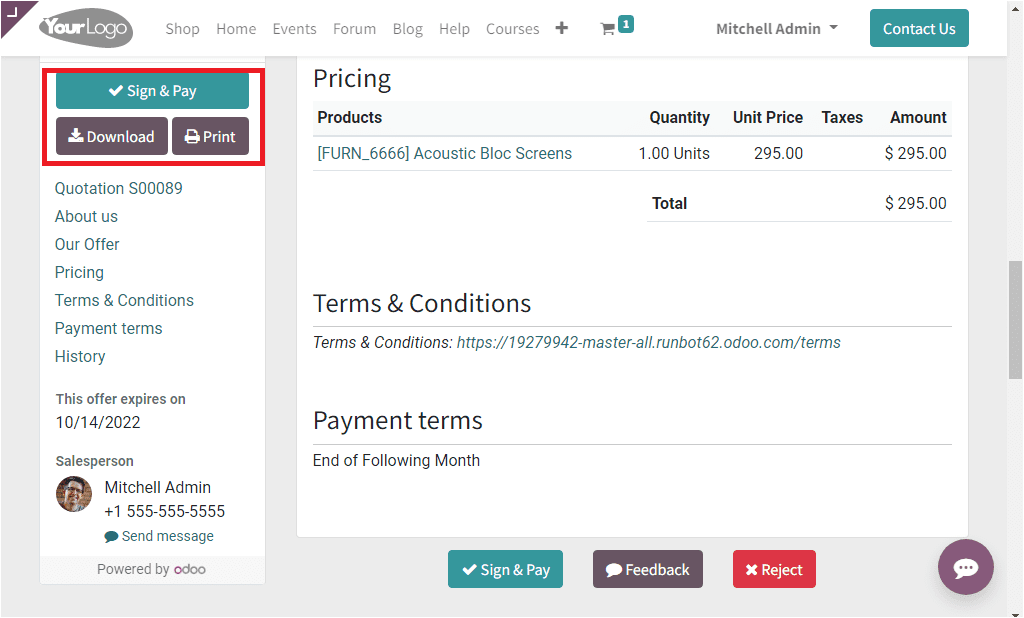
The Print option allows the customer to print the document, and the Download option allows them to download the document. The Sign & Pay option can be seen on both the left side and the bottom of the right side. Also, the document contains the Feedback option and the Reject option. If the customer is ready to accept the quotation, they can use the Sign&Pay button. When the customer selects the button, the system depicts a pop-up window, as shown below
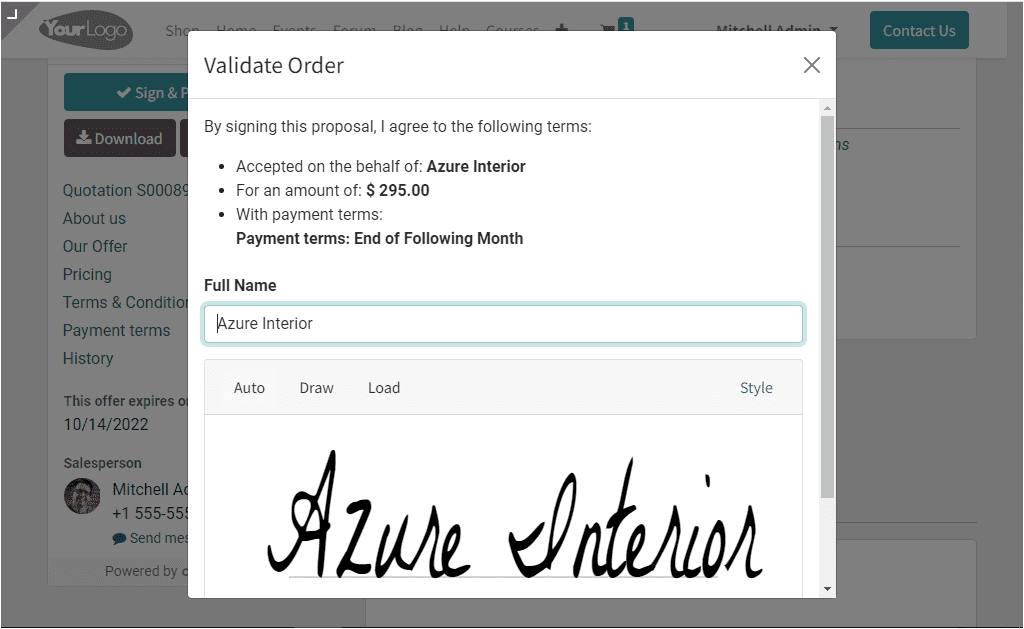
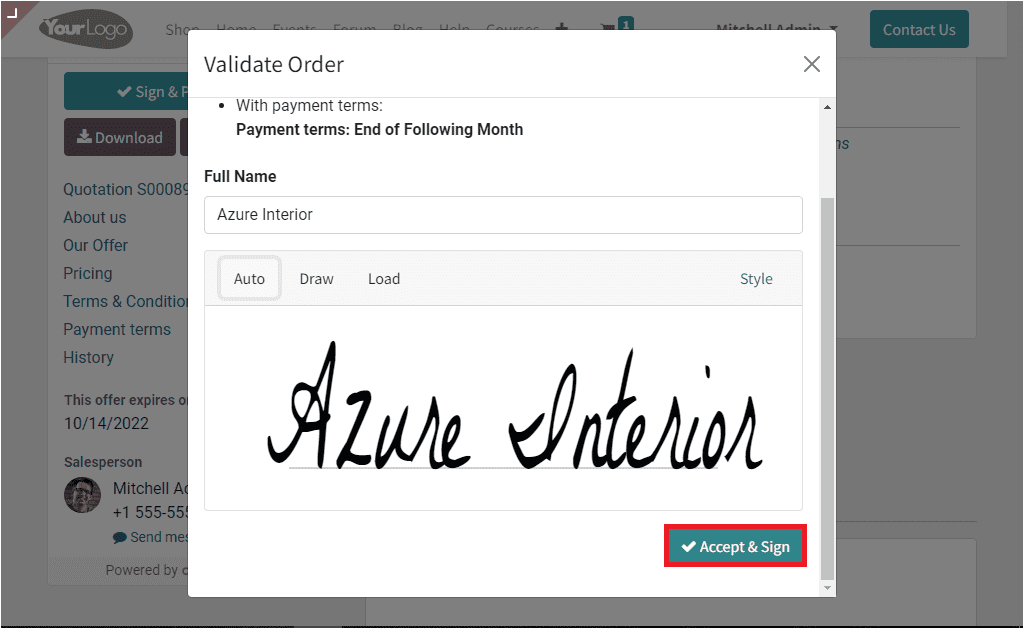
By signing to the proposal, the customer is getting ready to accept the quotation for a sale order. Here, there are different options and styles to sign, such as Auto, Draw, and Load. The Draw option allows you to manually put your signature. The Auto option enables the customer to auto-sign. If the customer wants to upload a signature, they can use the Load option. Using this option, the customer can load the file containing the signature. After putting in the signature, the customer can click on the Accept & Sign button.
Now, the customer can view the notification informing them that the order has been signed and they need to be paid to confirm the order. So, the customer needs to make payment against this order to confirm.
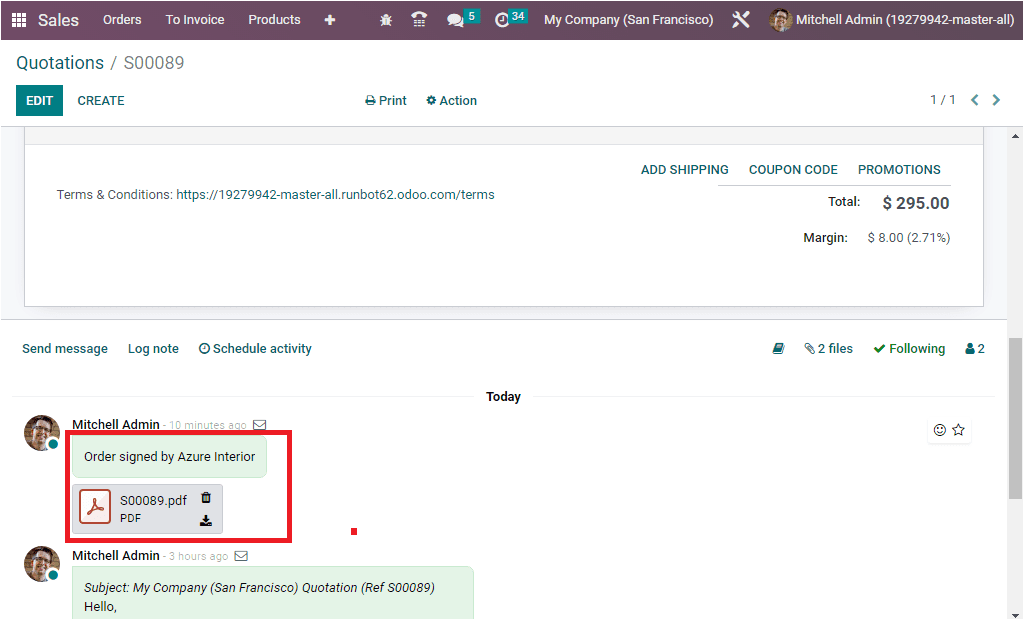
Now, when you come back to the back end, in the Quotations window, you can see the order signed details in the chatterbox section. The pdf will also be attached here, as shown in the image below.
Likewise, you can see the signed details under the Customer Signature tab, as shown in the image below.

By viewing these details, you can understand that the customer has an interest in your quotation and has accepted the quotation.
Then, on the customer’s side, they can confirm the order by making payment. So the customer can validate the order by clicking on the Pay Now button.
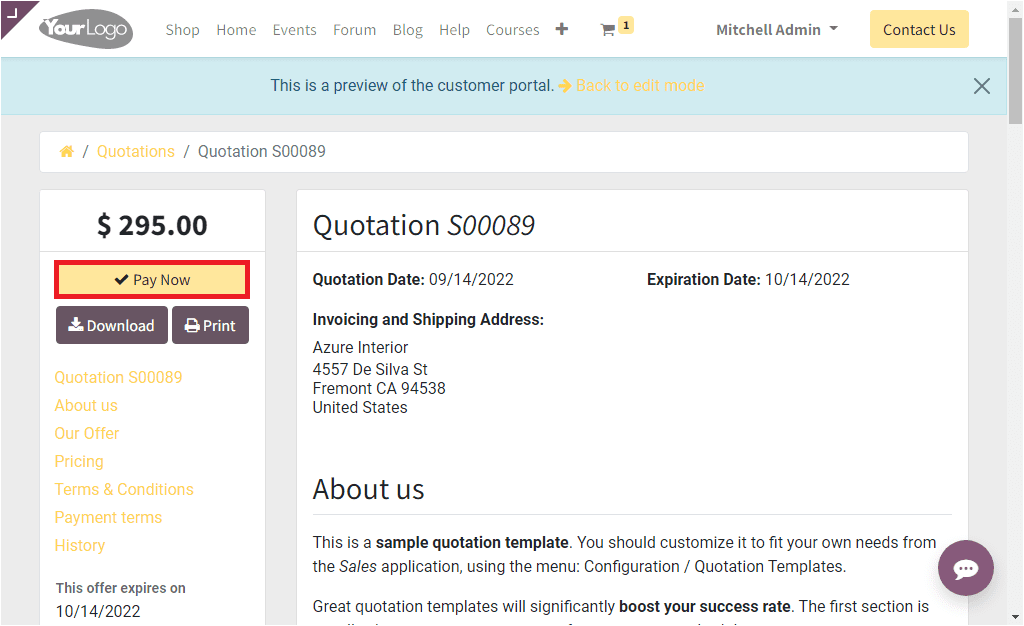
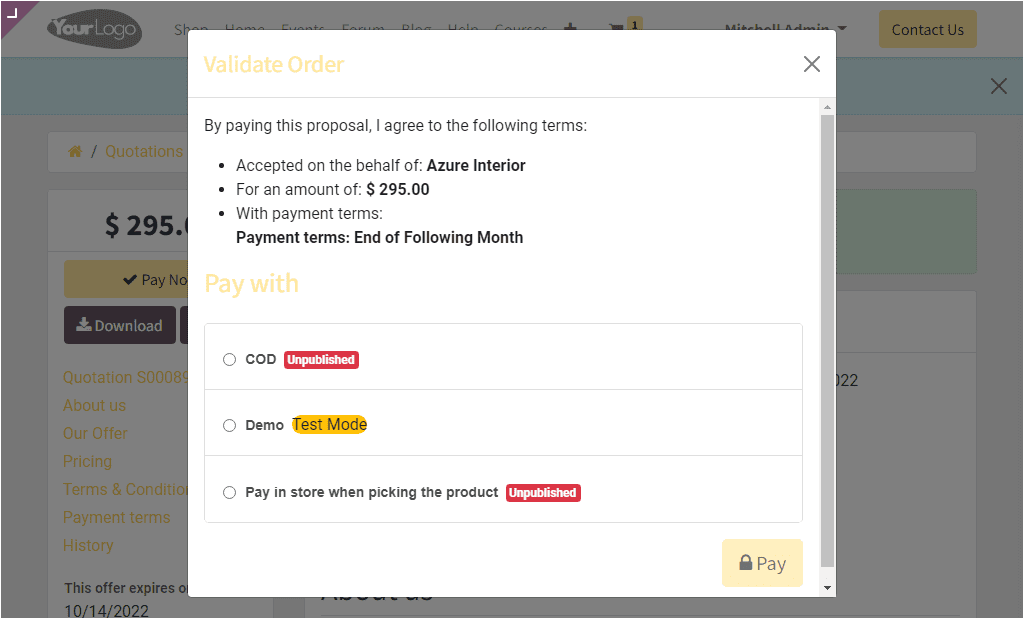
When you click on the Pay Now button, the system will display another window, as shown in the image below.
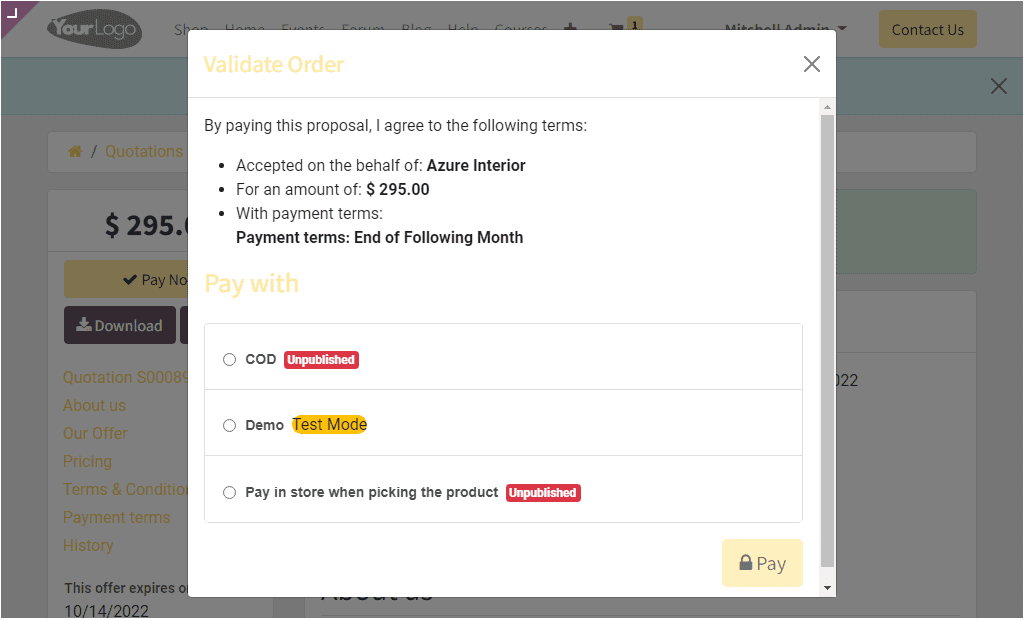
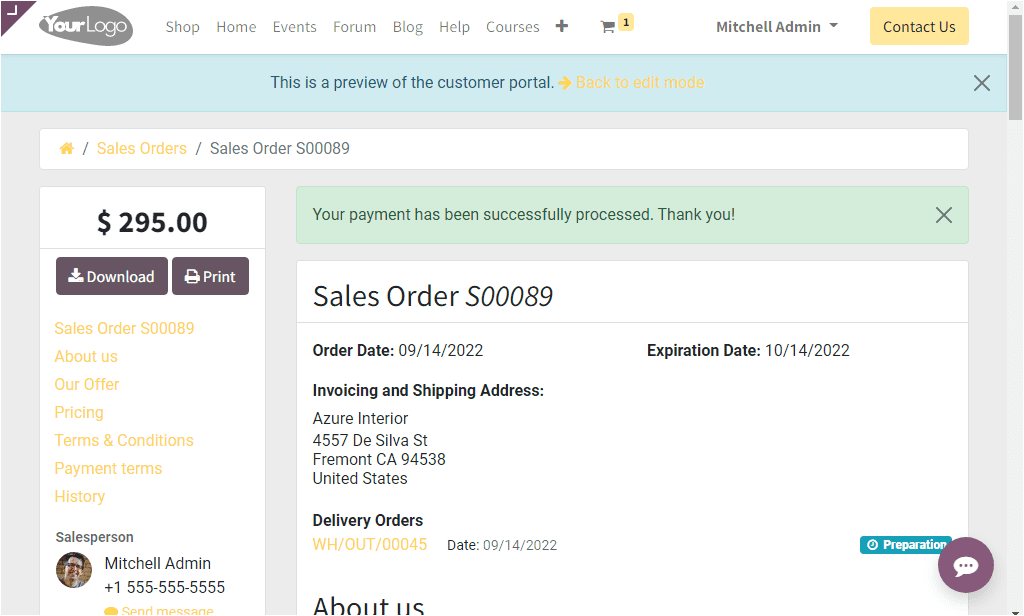
Here, the window depicts the details of the available payment acquirers. Choose the suitable payment acquirer and click on the Pay button. Now, the customer will get a notification that the payment has been successfully processed.
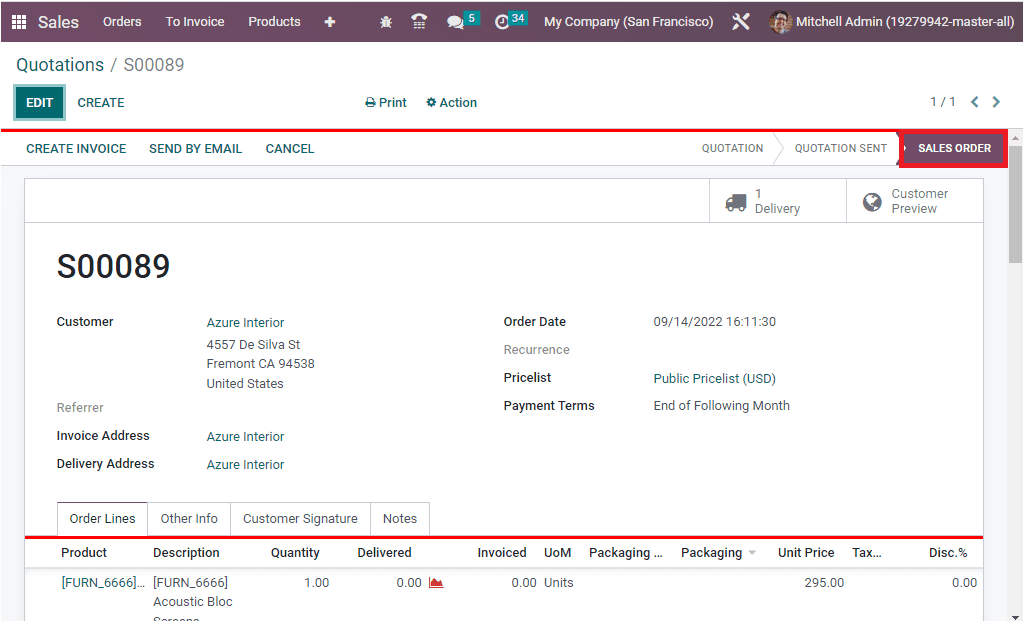
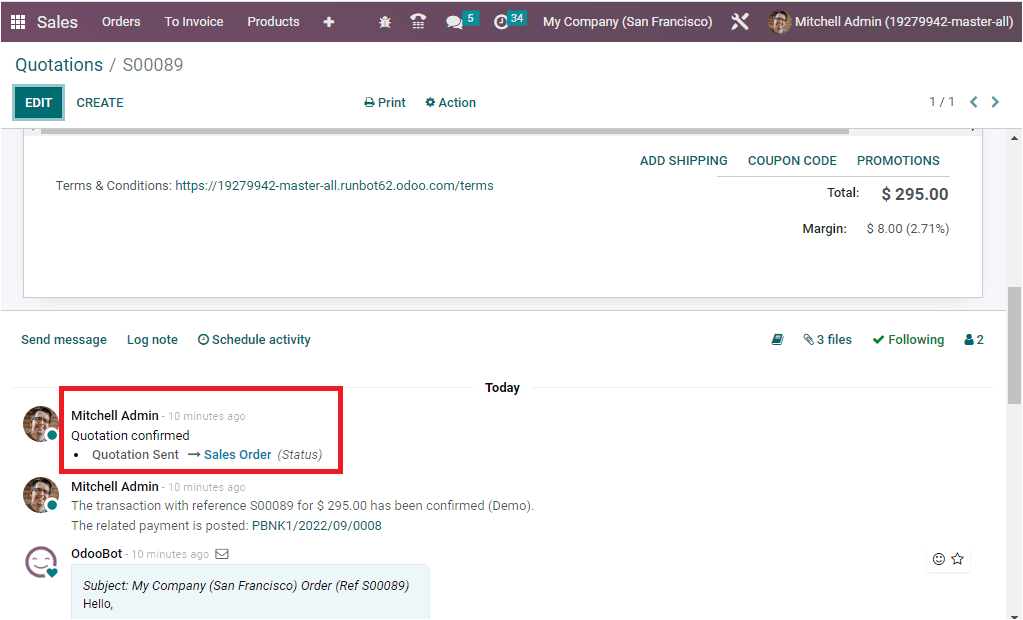
Now let us go back to the Quotation window. Here, you can see that the status of the quotation is automatically changed to the SALES ORDER state.
In the chatter section also, you can view the details.
This is how the online signature option works in the Odoo 16 Sales module.


