The relations with employees and customers in a business increase with proper scheduling. Every company schedules several meetings or activities from the start to year-end. The organization’s performance boosts by conducting several meetings. One of the inevitable parts of relations among employees is meetings. We cannot work without any meetings and especially for marketing teams. An agreement between a company and customer for a future relationship enhances the meetings. This bonding keeps going with monthly and yearly meetings. Odoo 15 Calendar module ensures you can organize meetings at any time with your availability.
This blog assists you to schedule a new meeting with the Odoo 15 Calendar module.
You can manage all the meetings inside the Meetings window of the Odoo 15 Calendar module. Users can conduct new activities on a specific date for a business purpose from the Odoo 15 Calendar module. Let’s look at the detailed steps to create a new meeting with the Odoo 15 Calendar module.
Calendar
Users can access the Calendar dashboard once they install the calendar module, and all the scheduled activities are visible in the Calendar dashboard. Online Appointments, Configuration and Reporting, are the Odoo 15 Calendar module features. The Calendar view of the Meetings window shows all scheduled meetings as depicted in the screenshot below.
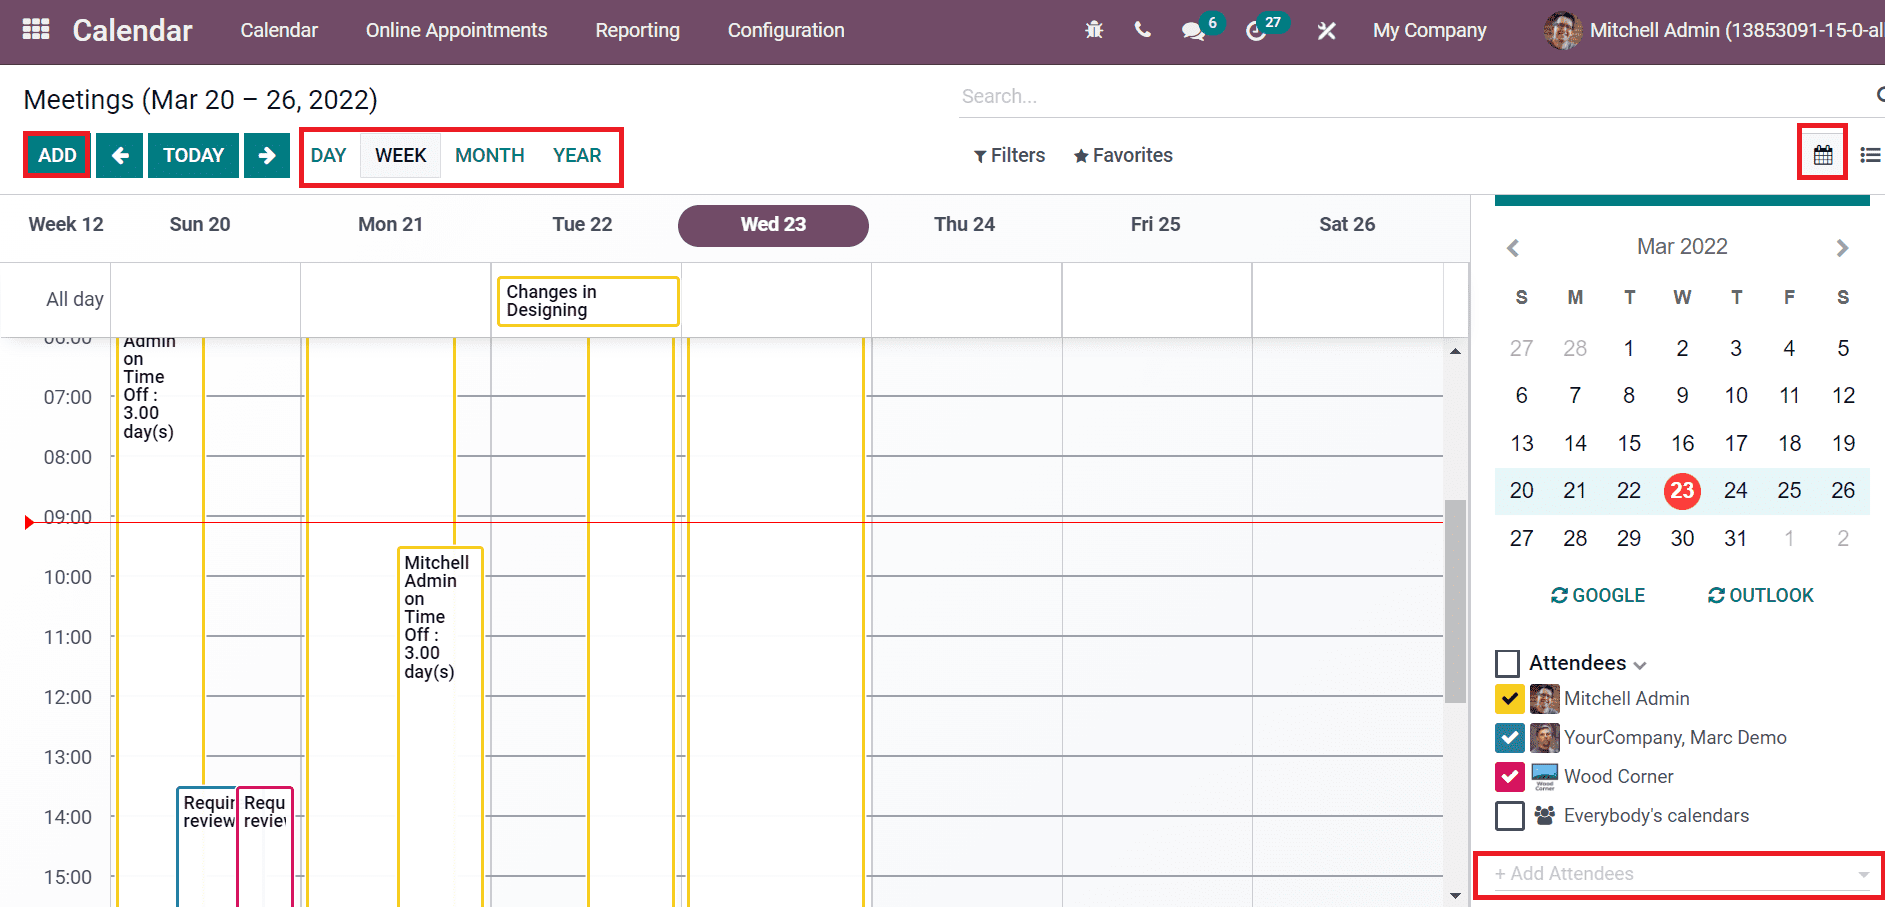
You can access the attendees’ details at the end of the calendar and add more attendees by clicking on + icon. It is possible to search the meetings based on year, week, day and month. In this way, the time and day of a meeting are easily caught by you. A new window appears before you regarding meeting information by clicking on a particular meeting in the calendar, as displayed in the screenshot below.
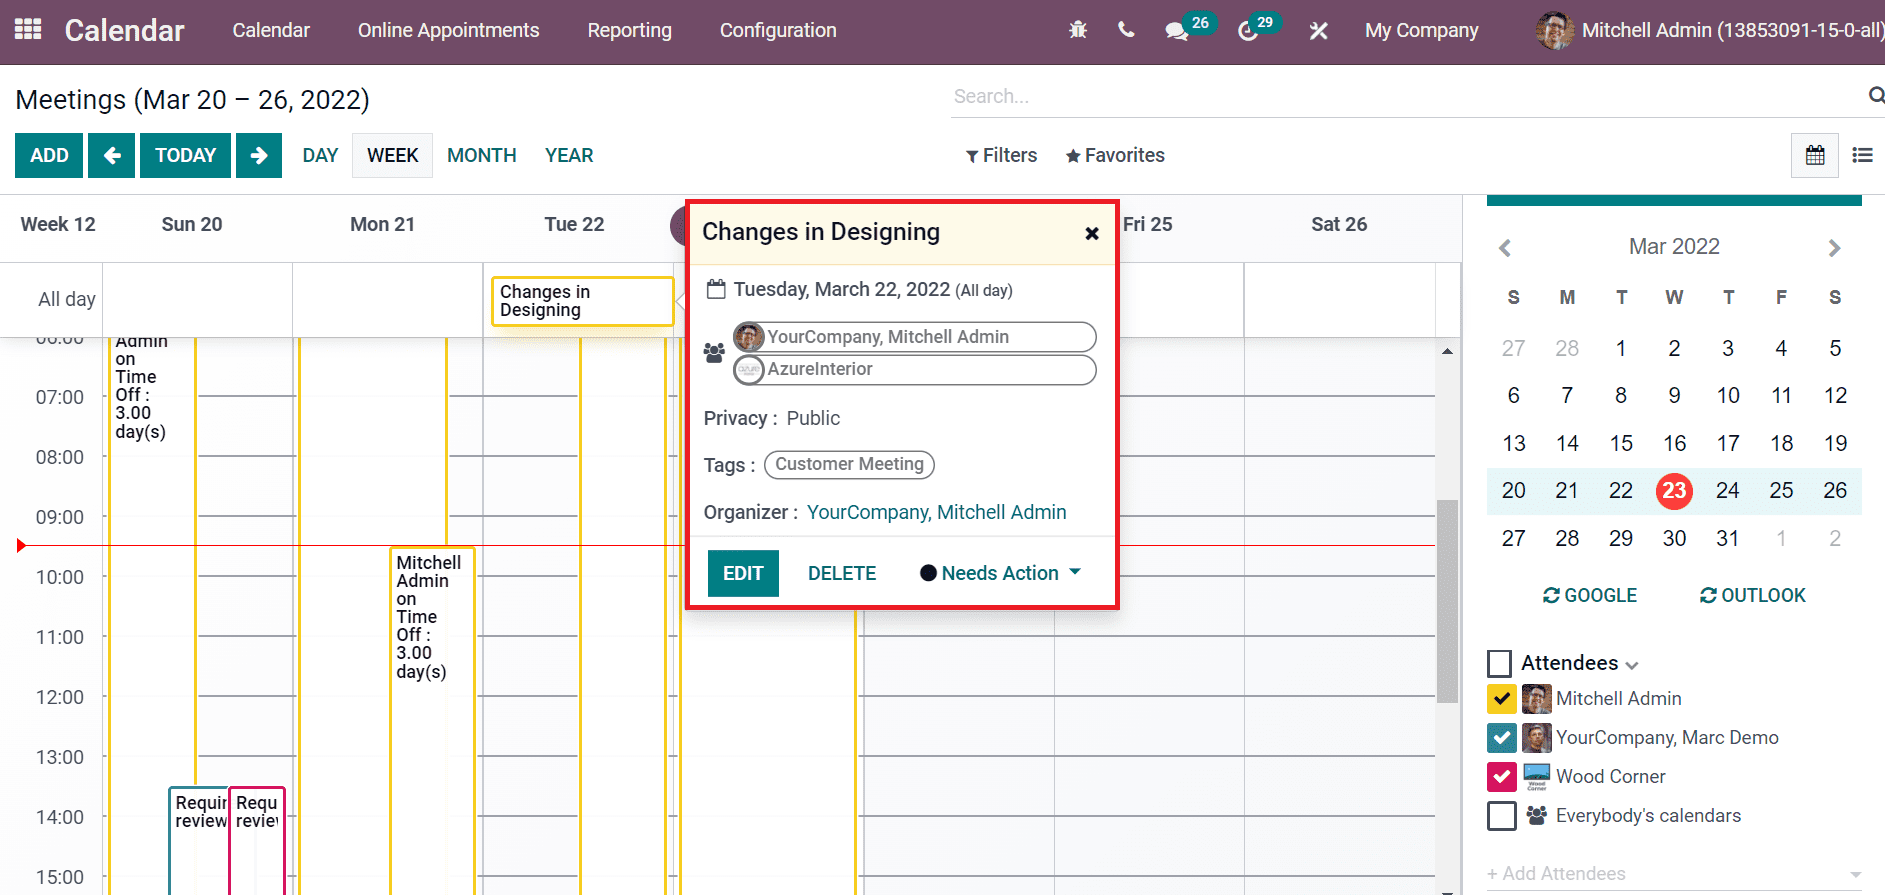
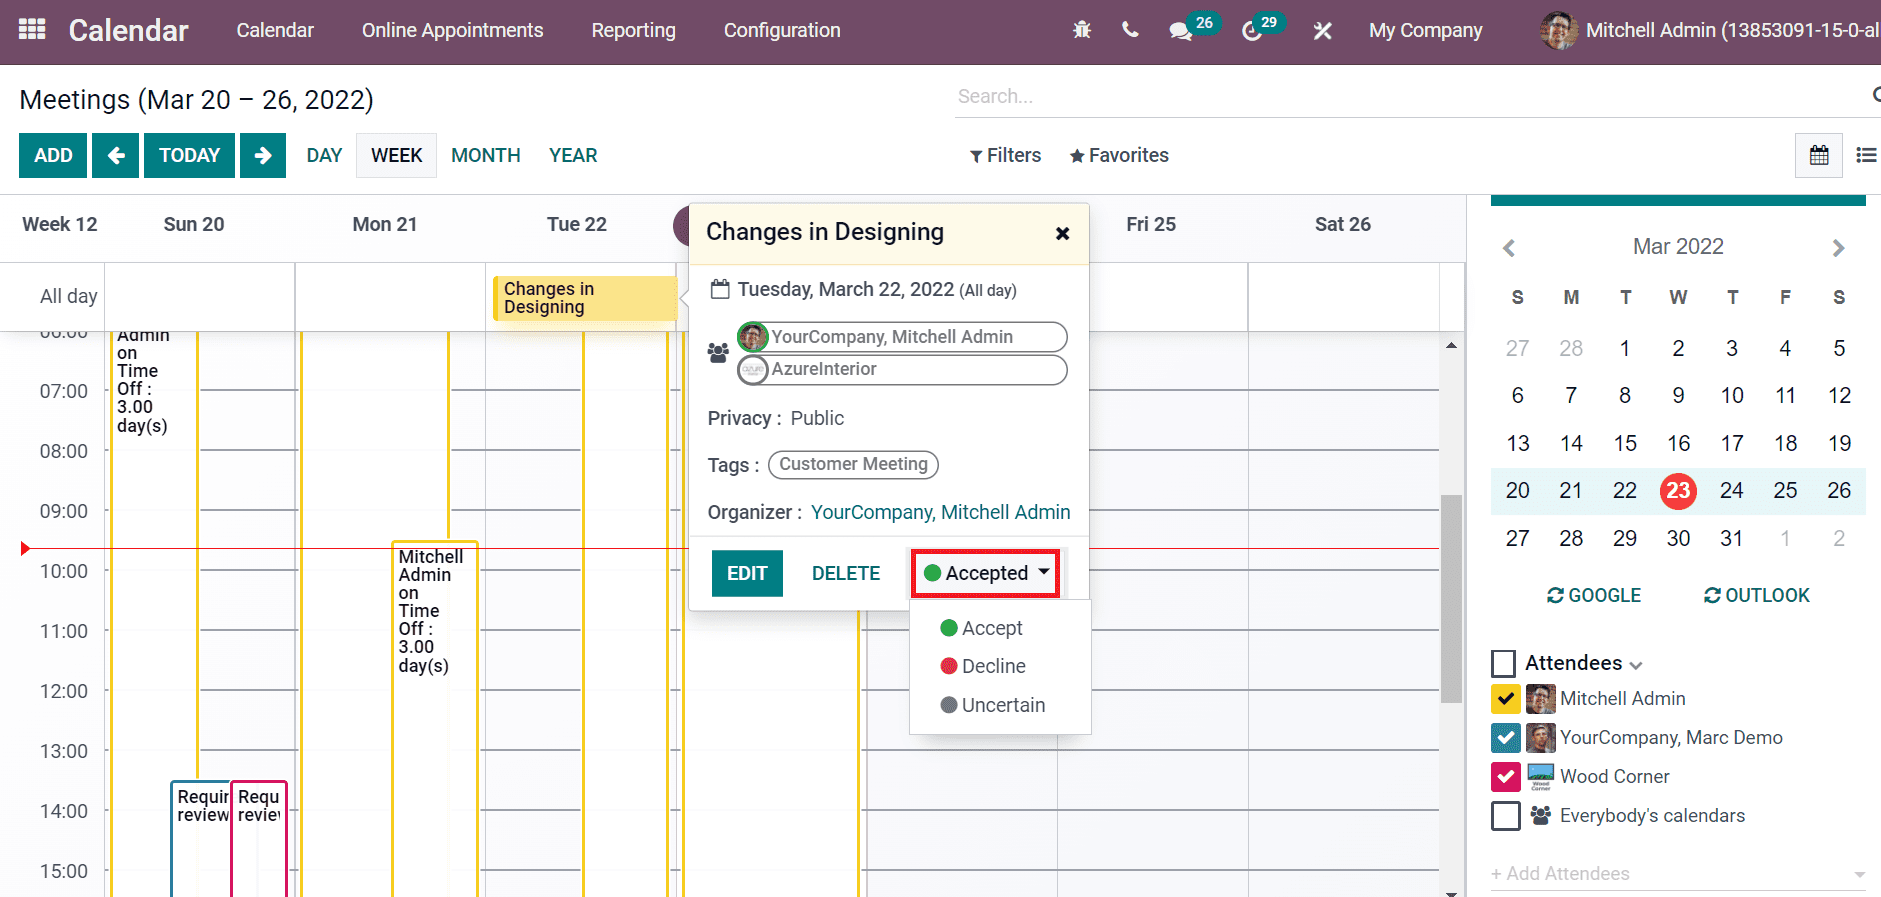
Here, we can see the Organizer of the meeting and respective tags. The privacy, date and time are displayed in the pop-up box of the meeting. In addition, the Edit icon ensures to make changes in the details and the Delete button assists to delete meeting details. Need Action button contains several sub-options such as Accept, Decline and Uncertain. It assists you to take necessary action for a specific meeting. You can participate in the meeting by clicking on Accept invitation and a green icon with Accepted option viewable in the box as depicted in the screenshot below.
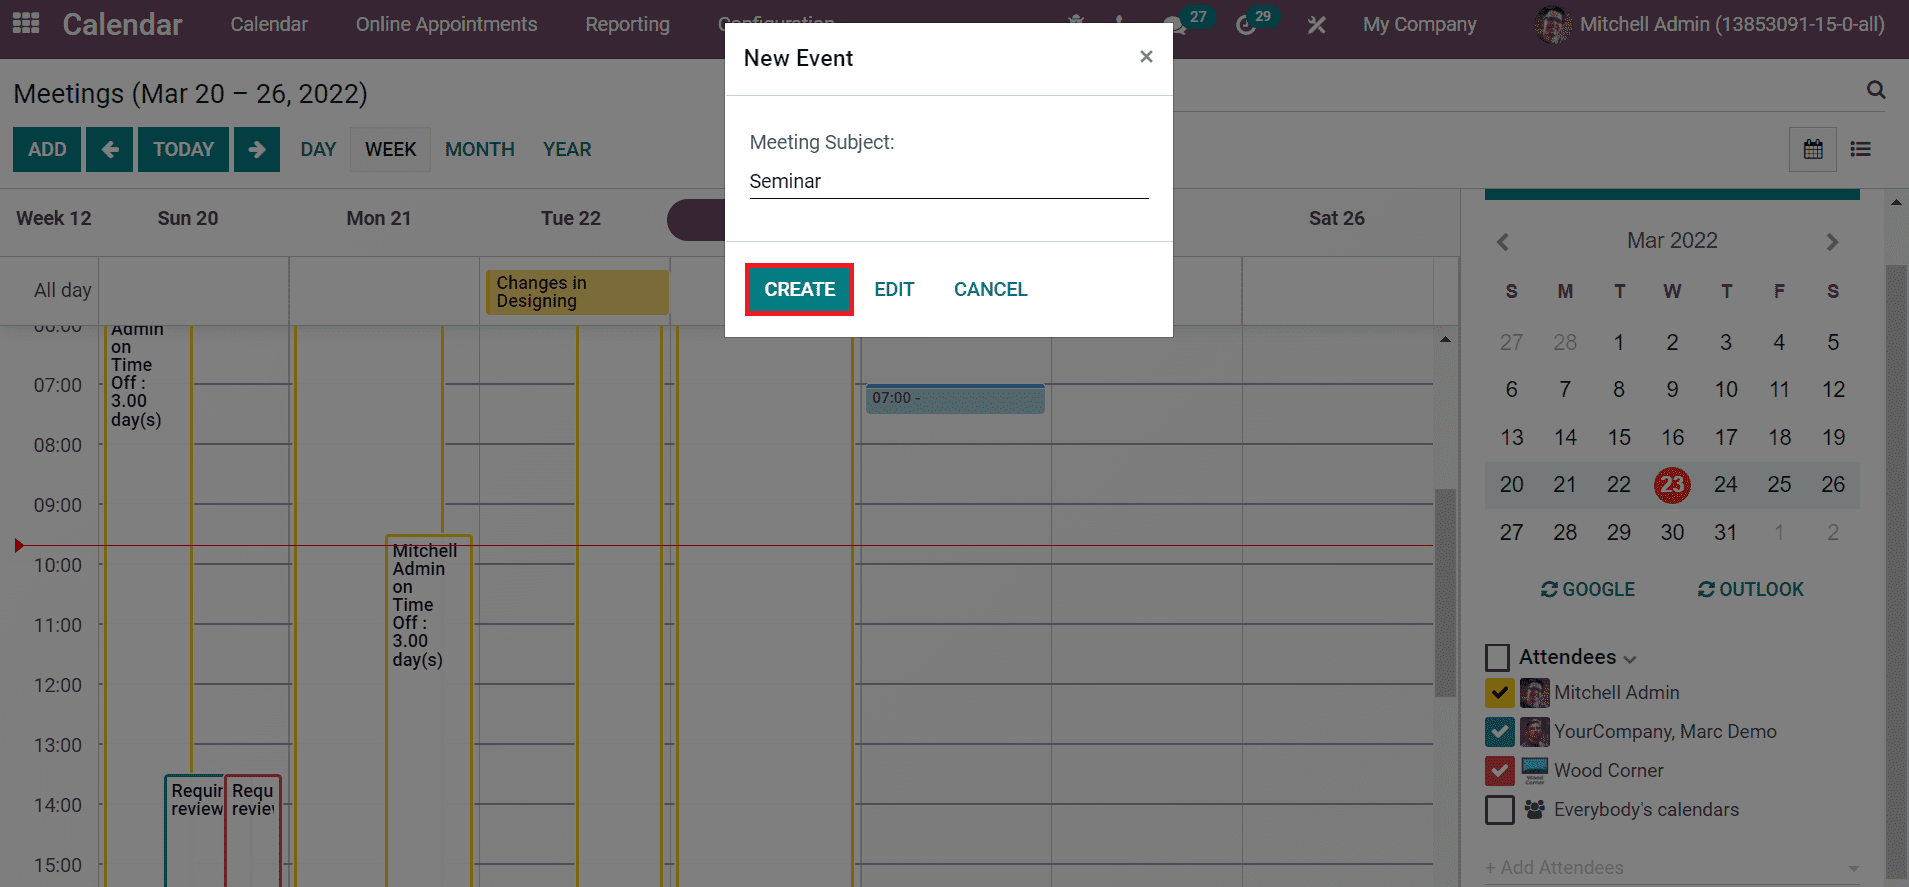
Users can develop a new event by selecting a specific date, and a new window opens in the window. Here, add the Meeting Subject of the event and click on Create icon as depicted in the screenshot below.
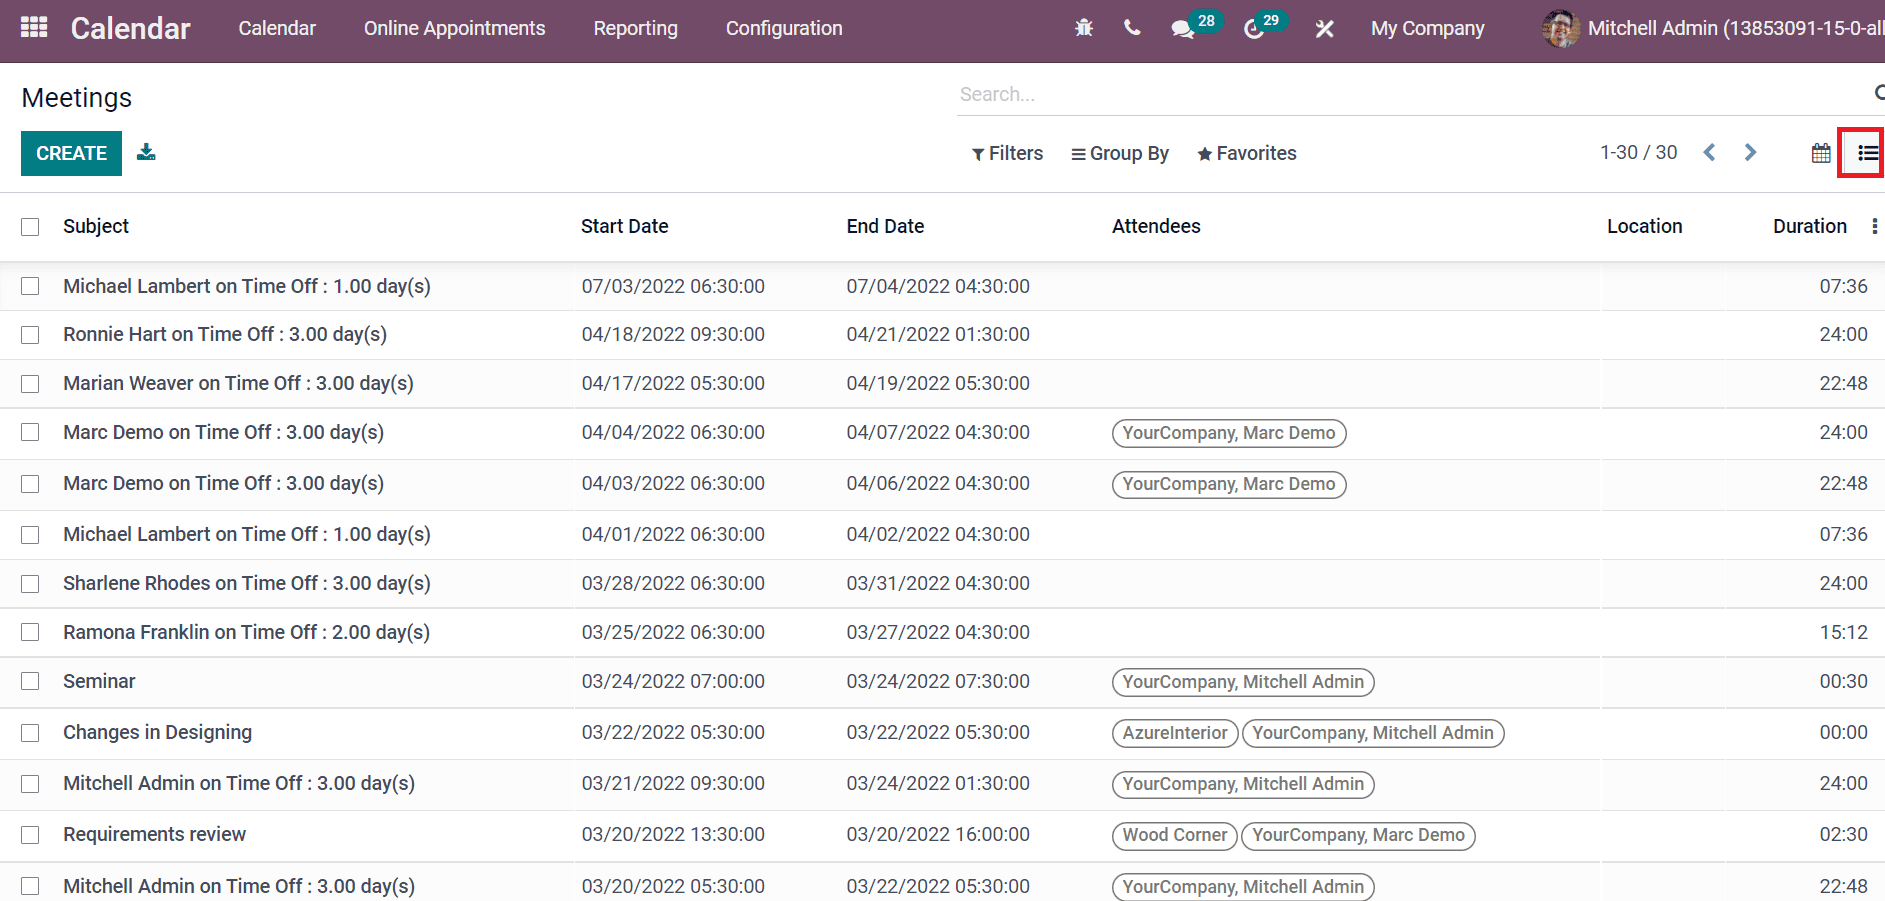
We can see the created new event in the Meetings window. All the lists of meetings are viewable in the List view of Meetings window. The details regarding the meeting, such as Subject, Attendees, Start Date, Location, End Date and Duration, are visible in the Meetings window as portrayed in the screenshot below.
To Schedule a New Meeting
Users can regularly arrange meetings or at a specific time with the Odoo 15 Calendar module. In the Calendar dashboard, you can develop a new meeting by clicking on the Add icon. A new Meeting window is visible before selecting the Add button, as displayed in the screenshot below.
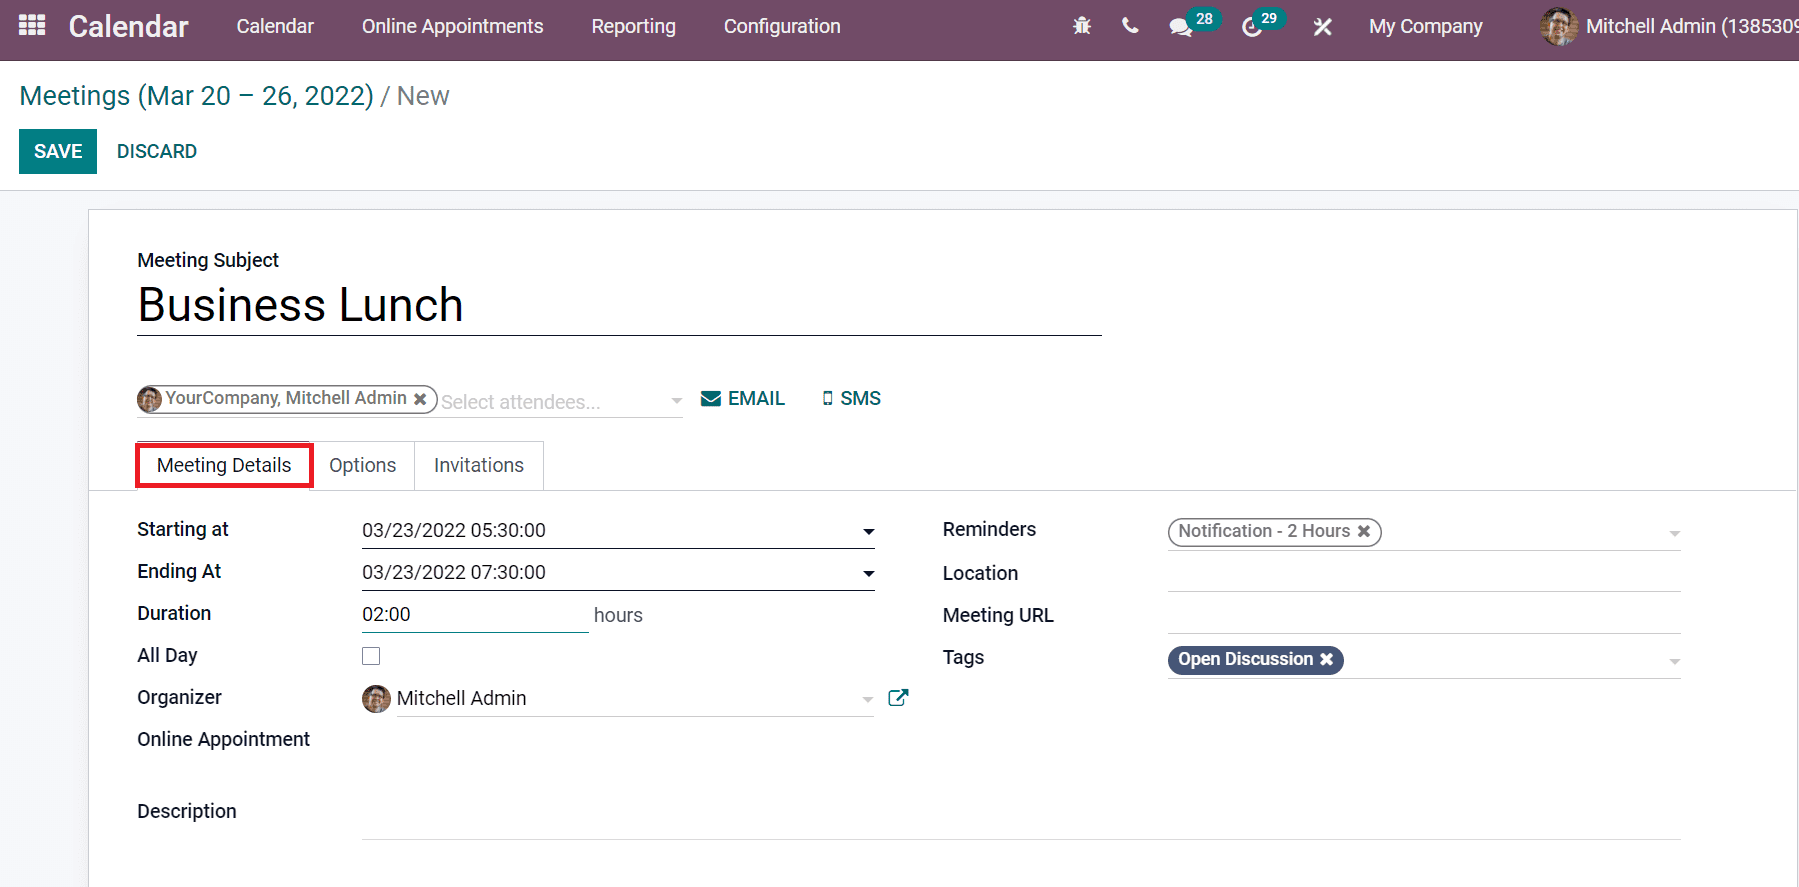
Let’s look at creating a Business Lunch meeting in the Odoo 15 Calendar module. Here, add the Meeting Subject as ‘Business Lunch’ and choose the attendees for your event from the drop-down menu. We can enter the details regarding the event inside the Meeting Details tab. Select the event’s start date inside the Starting at the option and stop date at the Ending At field. Later, enter the Duration for your meeting and enable the All Day option to conduct the Business Lunch meeting on all days. Choose the Organizer for the Business Lunch meeting.
We can set the details of the Business Lunch meeting for attendees inside the Description section. After that, you can send notifications to attendees to remember them about the meeting. You can put reminders in several forms of Email, SMS Text Messages and Notification inside the Reminders field. Moreover, add the event location in the Location field and choose some Tags regarding your Business Lunch meeting.
Now, let’s move to the Options tab in the Meeting window, as depicted in the screenshot below.
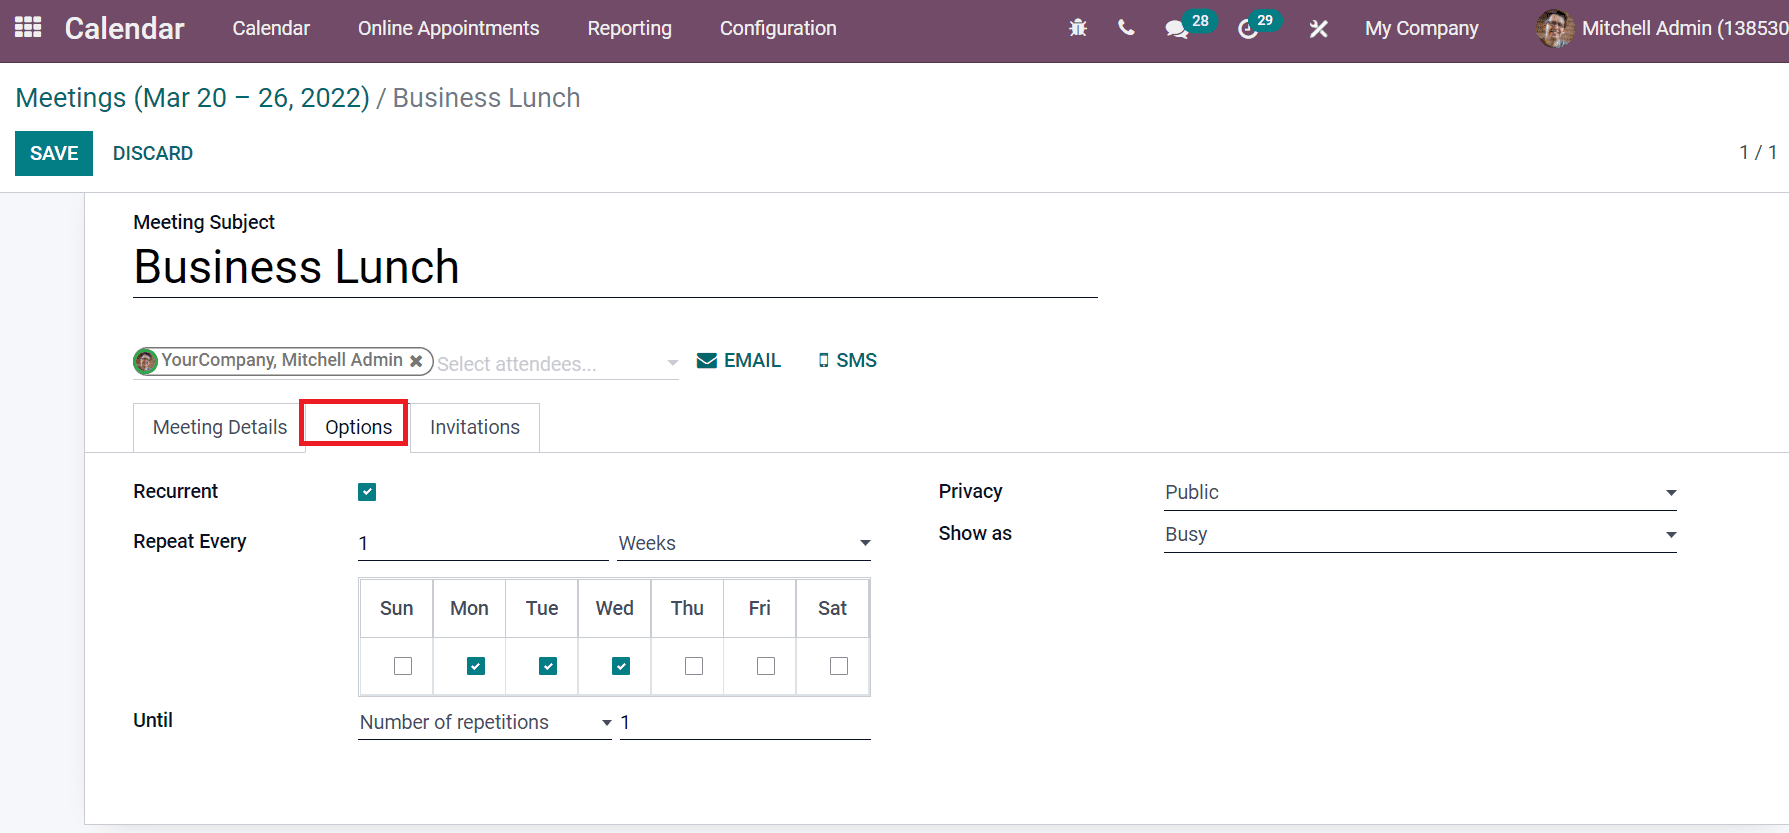
You can repeat the meeting at regular intervals by activating the Recurrent field. It is possible to set the repetitions based on month, week, day and year in Repeat Every field. Users can choose the days from the small box below the Repeat Every field. We can set it until the number of repetitions, forever or end date inside the Until option. The visibility of the Business Lunch event for people is set inside the Privacy field, and you can set it as Public, Only internal users or Private. On the other hand, we can apply the availability of meeting organizers as Busy/Available in Show as a field.
The information about attendees invited to the meeting depicts inside the Invitations tab. You can view the details such as Attendee Name, Phone, Email, and Status as Accepted or not, as shown in the screenshot below.
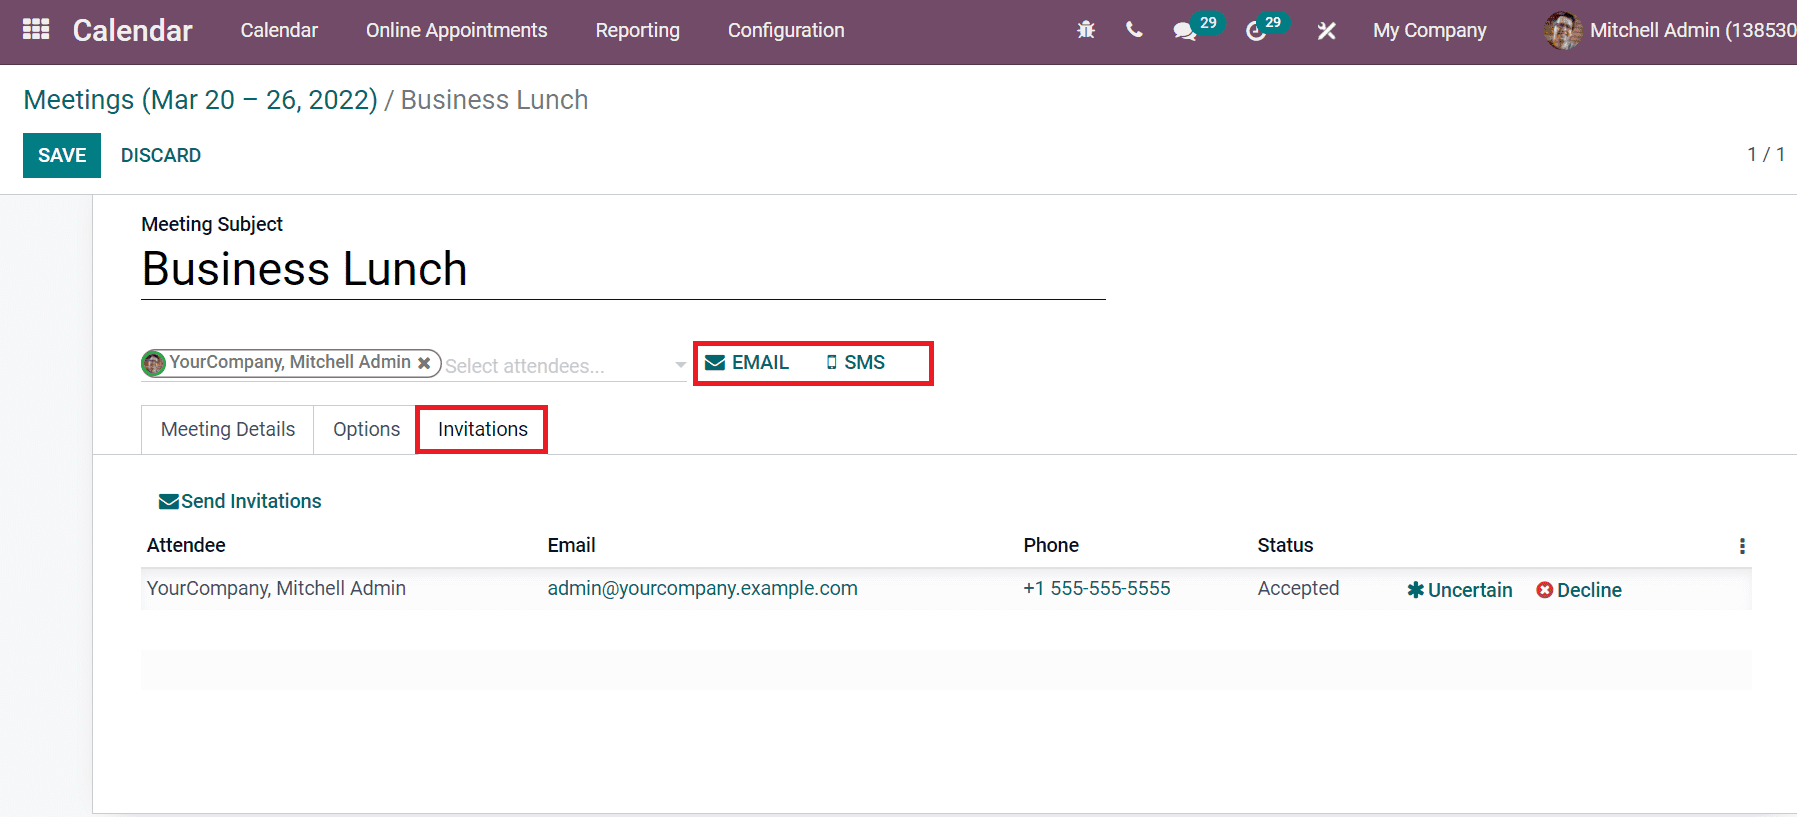
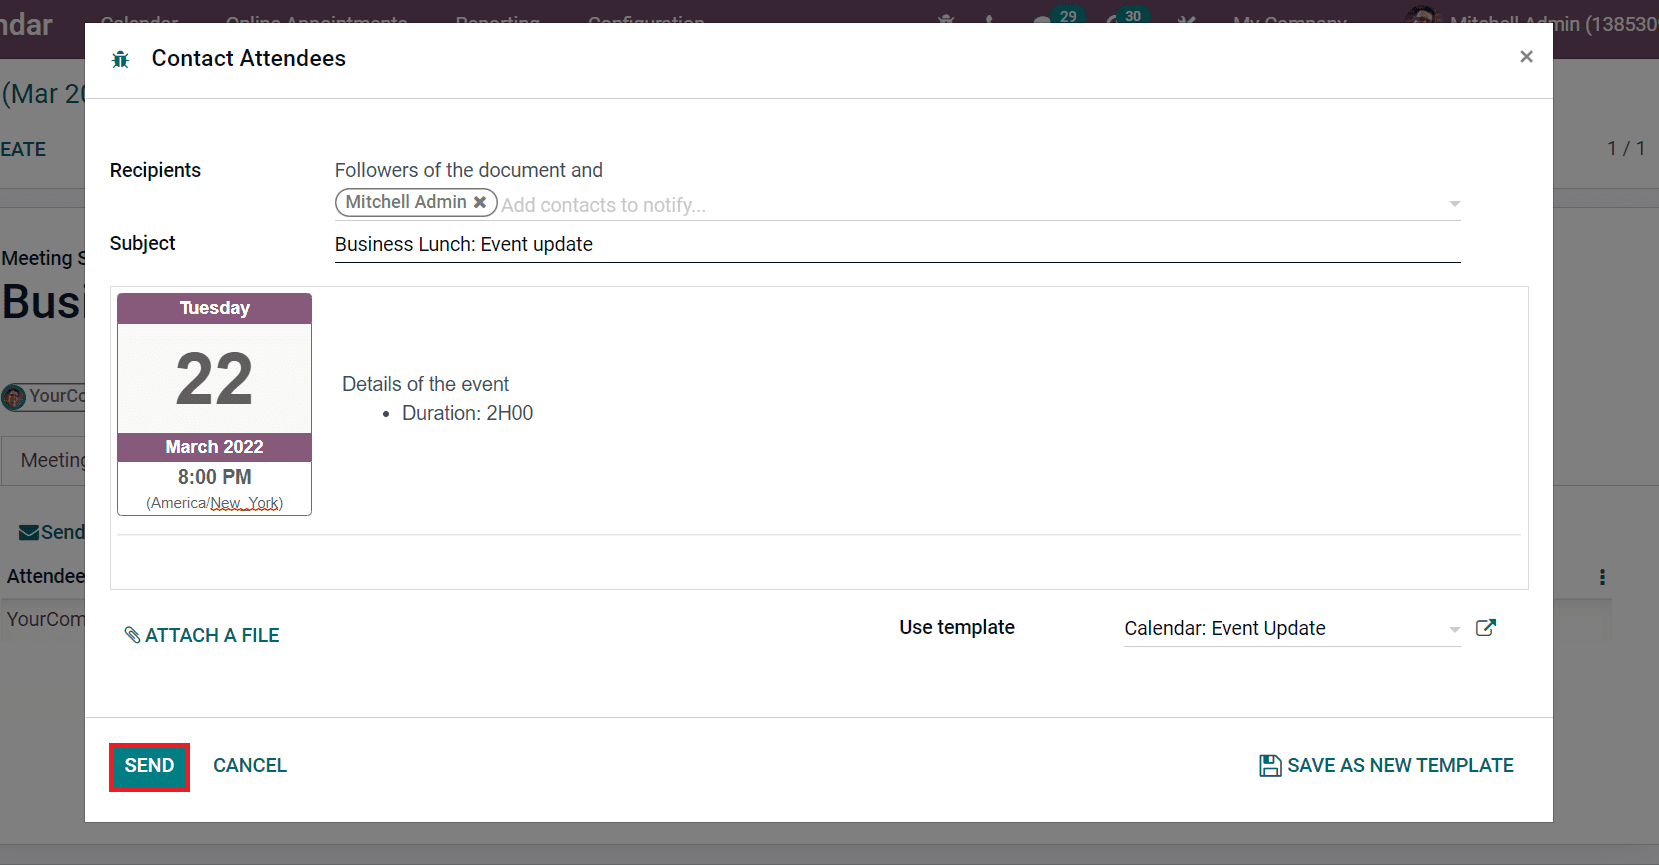
You can contact the attendees for your event by clicking on the Email icon. In the Contact Attendees window, add the contacts needed to notify about events in the Recipients field and the meeting Subject. It is able to apply information concerning Business Lunch meetings in the Contents section of the Email. At last, choose your template and click on the SEND icon as displayed in the screenshot below.
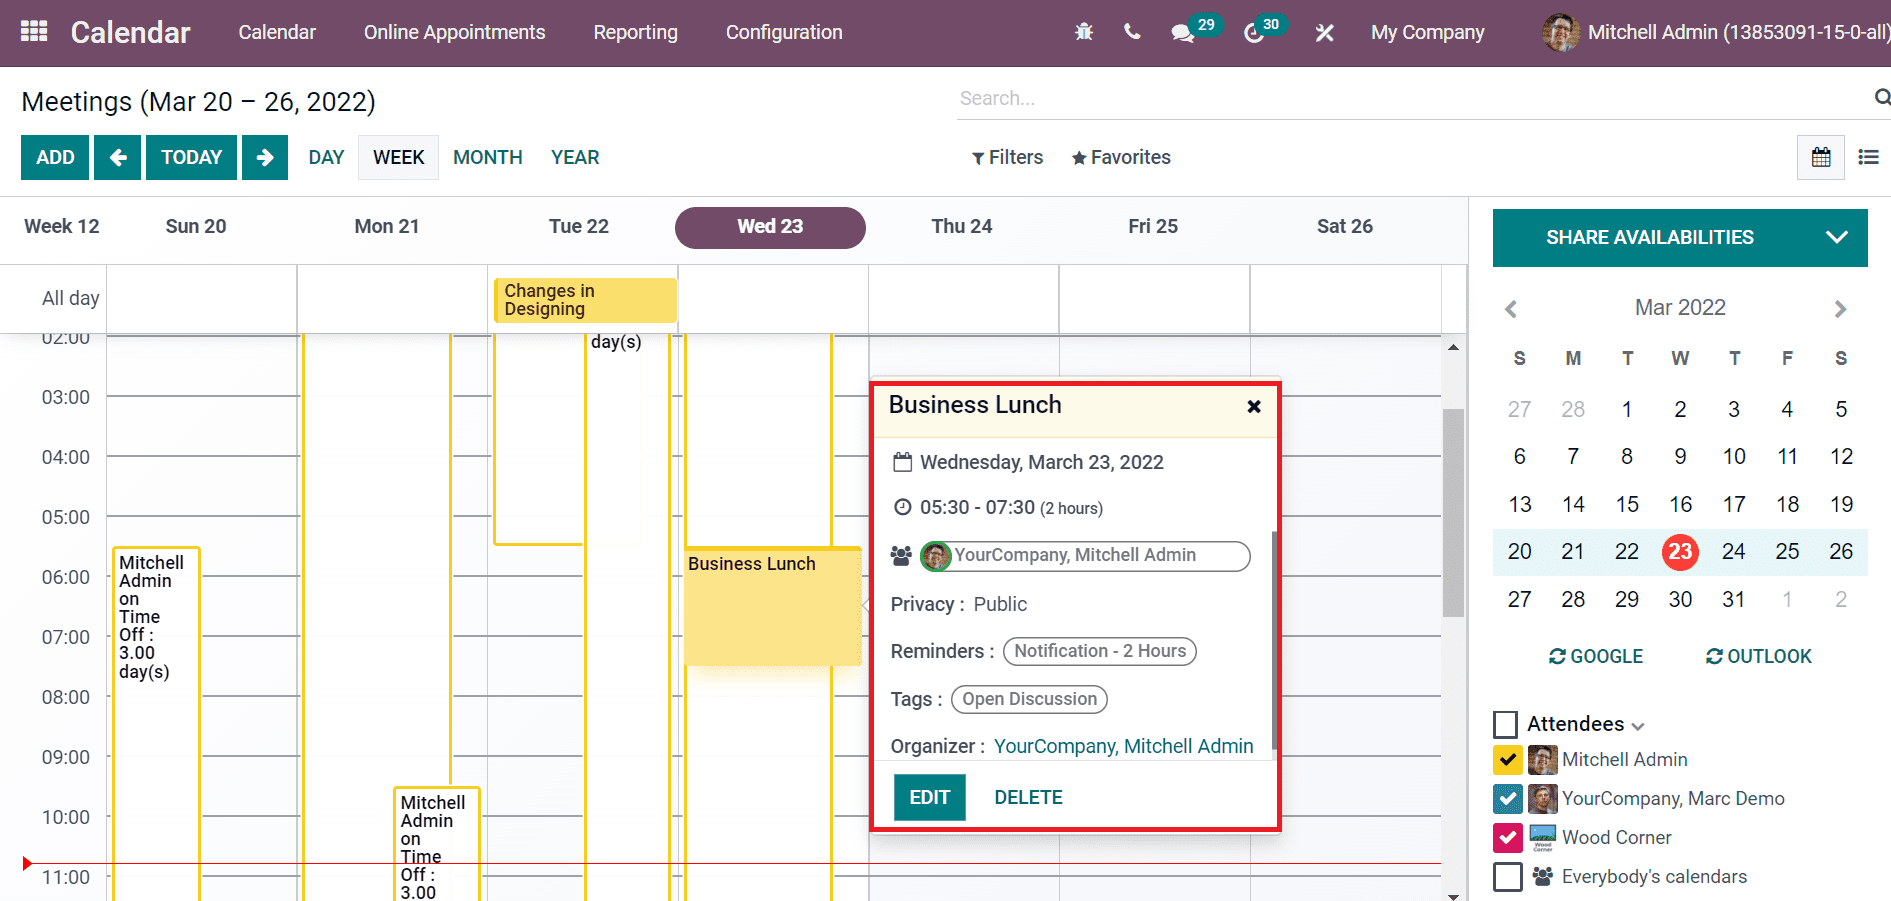
We can send SMS Text messages for recipients after clicking on the SMS icon in the Meetings window. Click on the Save icon after setting the structure related to the Business Lunch Meeting. Now, let’s check out the created meeting in the calendar. Go back to the Calendar dashboard, and you can view the Business Lunch event here.
Odoo 15 Calendar module enables you to generate new meetings for any business purpose. Users can manage meeting details and invitations when developing a meeting. Inviting attendees for an event through Email or SMS with the Odoo 15 Calendar module is easy.


