Mass Mailing With SendGrid
Mass mailing with SendGrid comes under the Email Marketing module in Odoo. It will be used to send emails and could be suitable for bulk mailings and single mailings. Email templates are used for constructing email content. It includes a mail report and a bouncing option. Here users can know the mail status.
Usage/Features
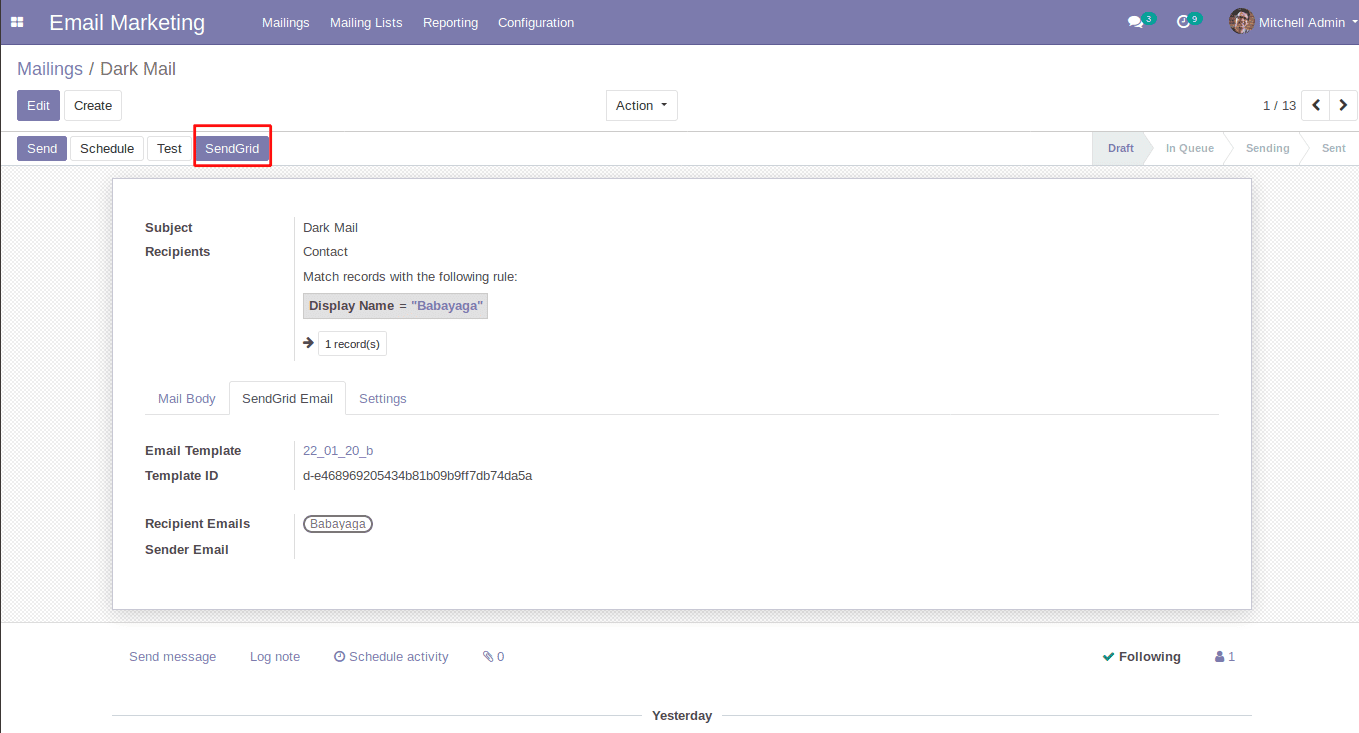
After the installation in the email marketing module settings, the user can see a SendGrid API settings field. By ticking the checkbox, a new text field will appear where the user can set the API key, and by saving it, the key will be saved in the system. a submenu called “SendGrid From Email” in emails. This menu is used to create new emails for mailing purposes. In the configuration, we have another menu called “SendGrid Template Details” for emails. This menu is used to create new email templates for mailing purposes. Make a new mailing in the mailing menu. Here the user can see a new page called “Email Content.” Here we can set the template. If we select the template, the template ID will automatically be filled. We can set the recipient and sender email addresses. It has a button inside this page called “Send Grid.” To send, click here.
Configuration
It works with the API key. It can be set in the configuration.
Storing From Emails
The “SendGrid From Emails” submenu in email marketing configuration uses SendGrid for storing emails.
Sort The Recipient Emails
We could use the Recipients field to sort the recipient emails.
SendGrid Send Emails
SendGrid Send Emails submenu in the Email Marketing Reporting menu can be used for viewing Mail Details.
Email Marketing Configuration
Email templates are created using the SendGrid Template Details submenu in the Email Marketing configuration.
SendGrid Email
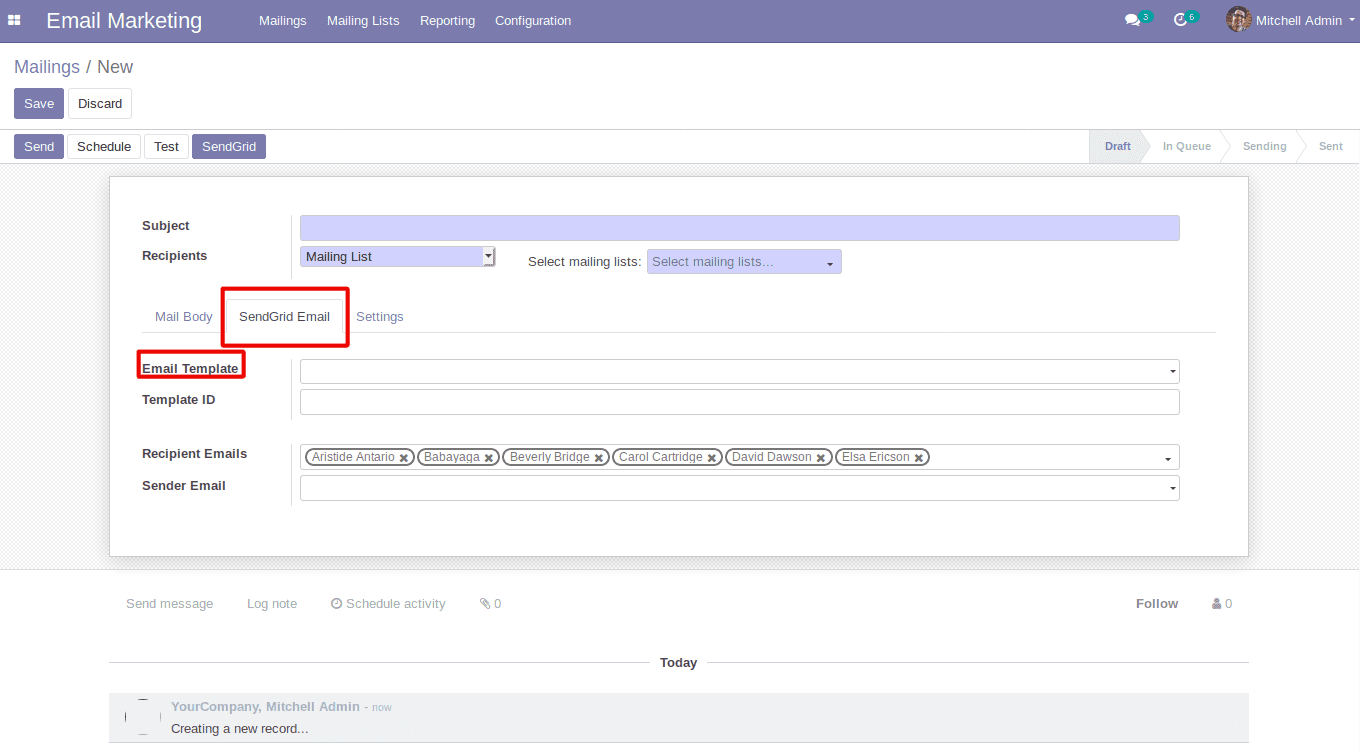
In email marketing, the mailing form contains a page named SendGrid Email. The sending template can then be selected.
Email Marketing Reporting
There is a submenu called “SendGrid Send Emails” in the Email Marketing Reporting menu where the user can get the mailing details done by SendGrid Service.
Bounce Check
The bounce button is enabled. Will show the cause of the bounce Email in the page view
Error Emails
In SendGrid, sent emails will show the error messages and the cause of the error in the record. It also includes Mail Bounce Check.
Resend Error Emails Button
Error emails are being sent out. Once more button in the action menu can be used for resend the selected error emails
How To Configure SendGrid Email API
In Email Marketing Configuration, have a checkbox field. By checking it, the SendGrid API will display another text field.
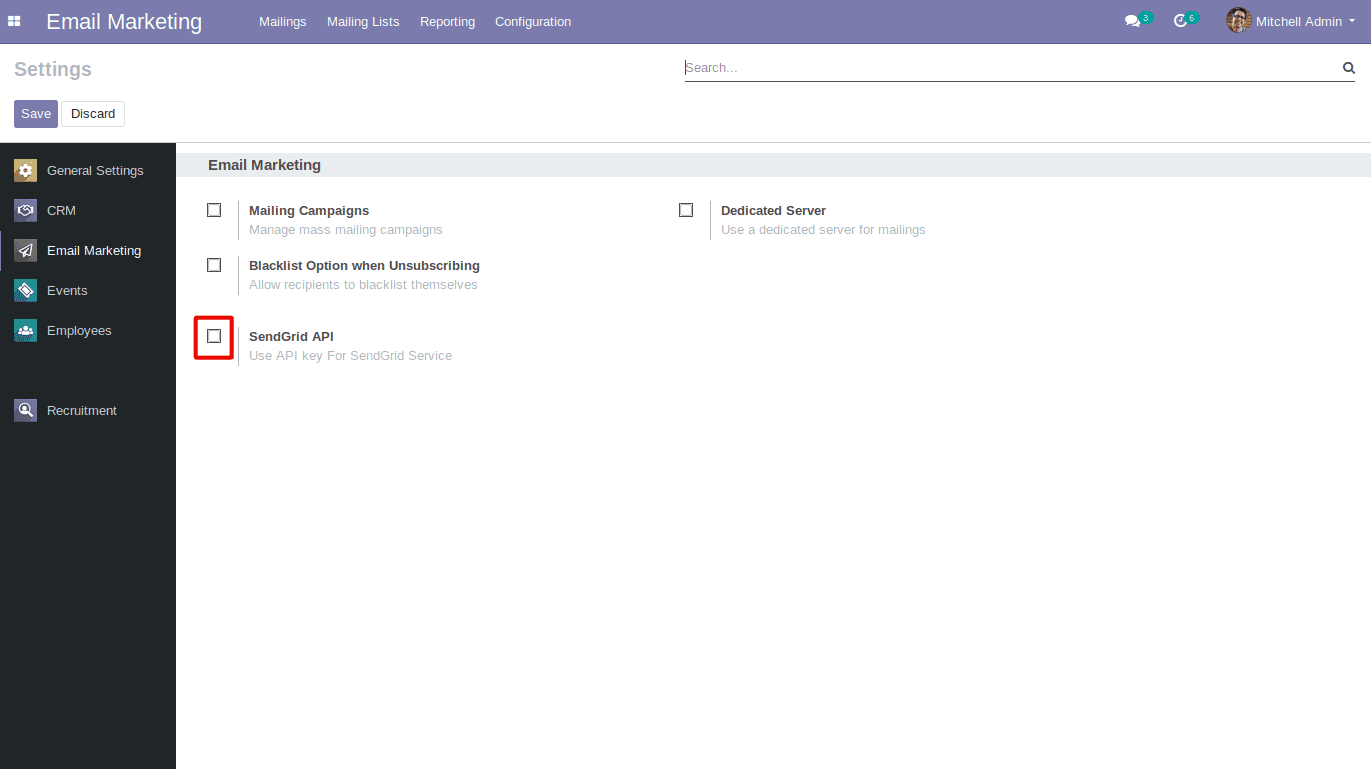
Here we can set the API key and click the “Save” button. If you save it, it will be saved in the system if you do the same thing again. The key will be modified.
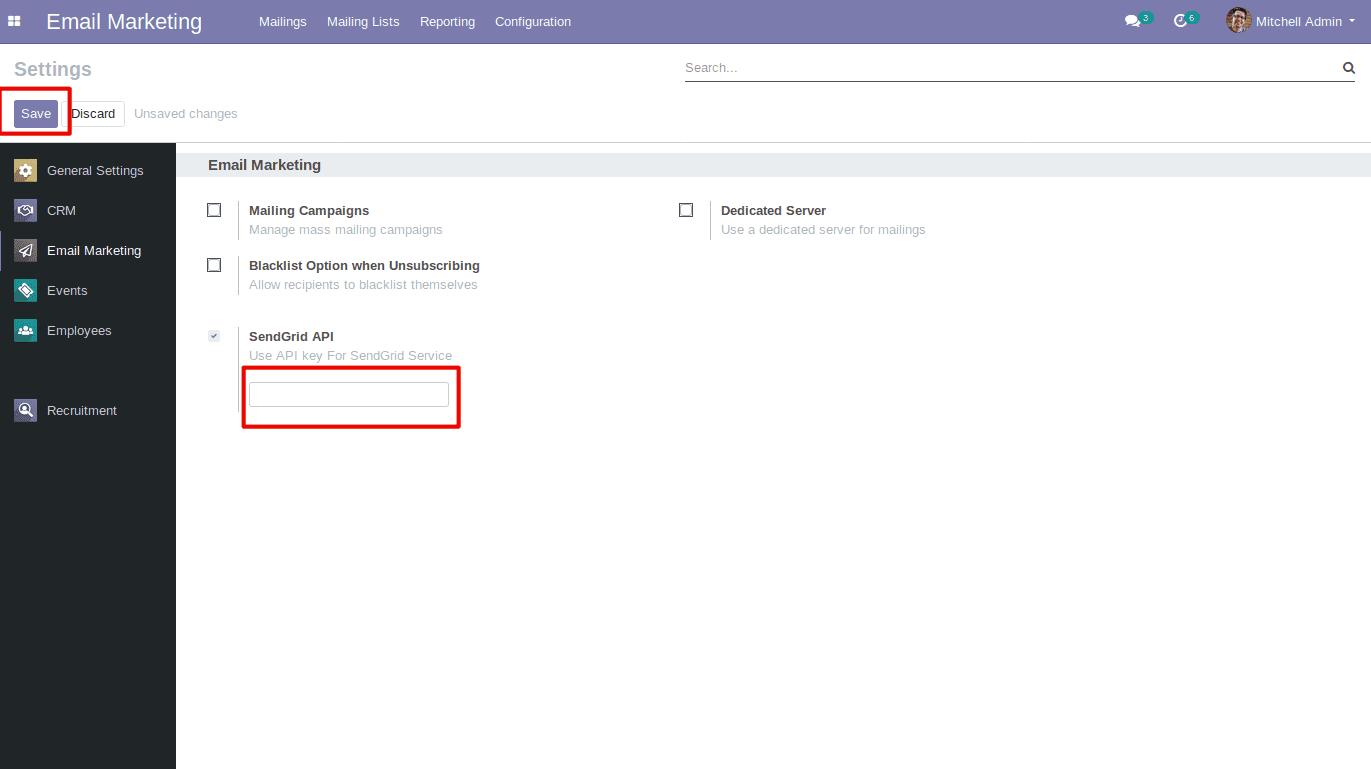
Storing Email Records
The mailing configuration menu has a submenu called “SendGrid From Email” that it uses for storing email records. This can be accessed via email on the mailing page. It also includes “SendGrid Template Details.” This menu is used to create new email templates for mailing purposes.
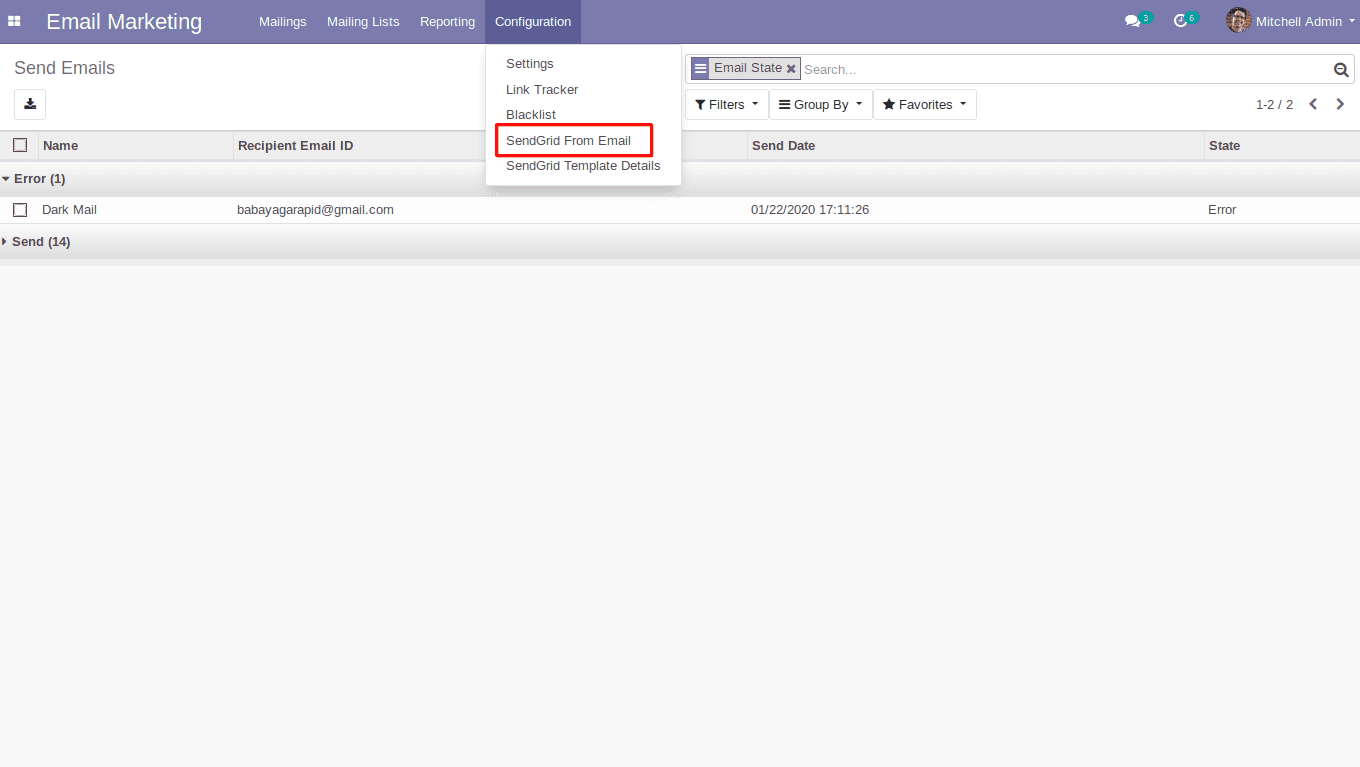
In Email Marketing Configuration, there is a submenu called “SendGrid Template Details.” In the email template details, show a tree view like the one below. By clicking the Create button, you can make a new template. The email template form view is shown below; here you can fill in all the fields. Fill in the subject field and content box with the email subject and content, then click the save button.
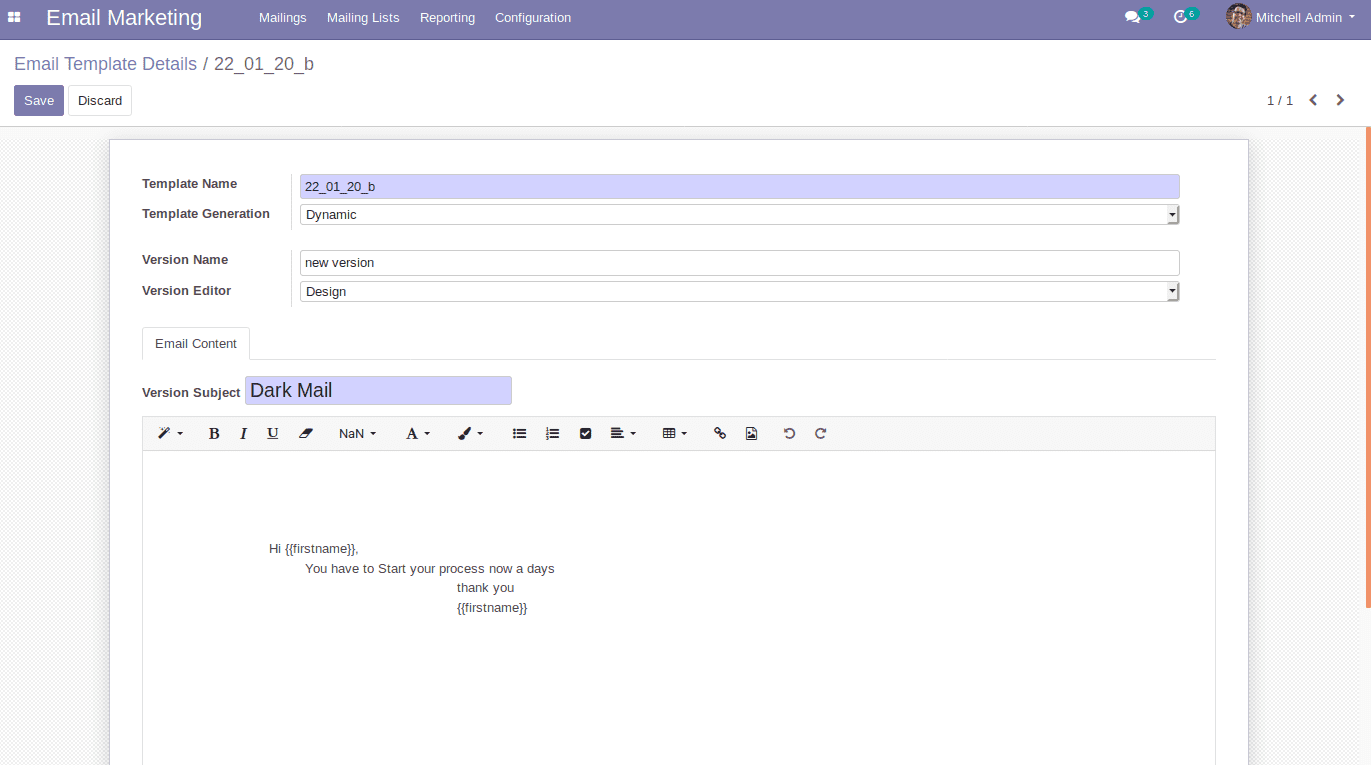
Template create button
The Template Create button is used to make the template.
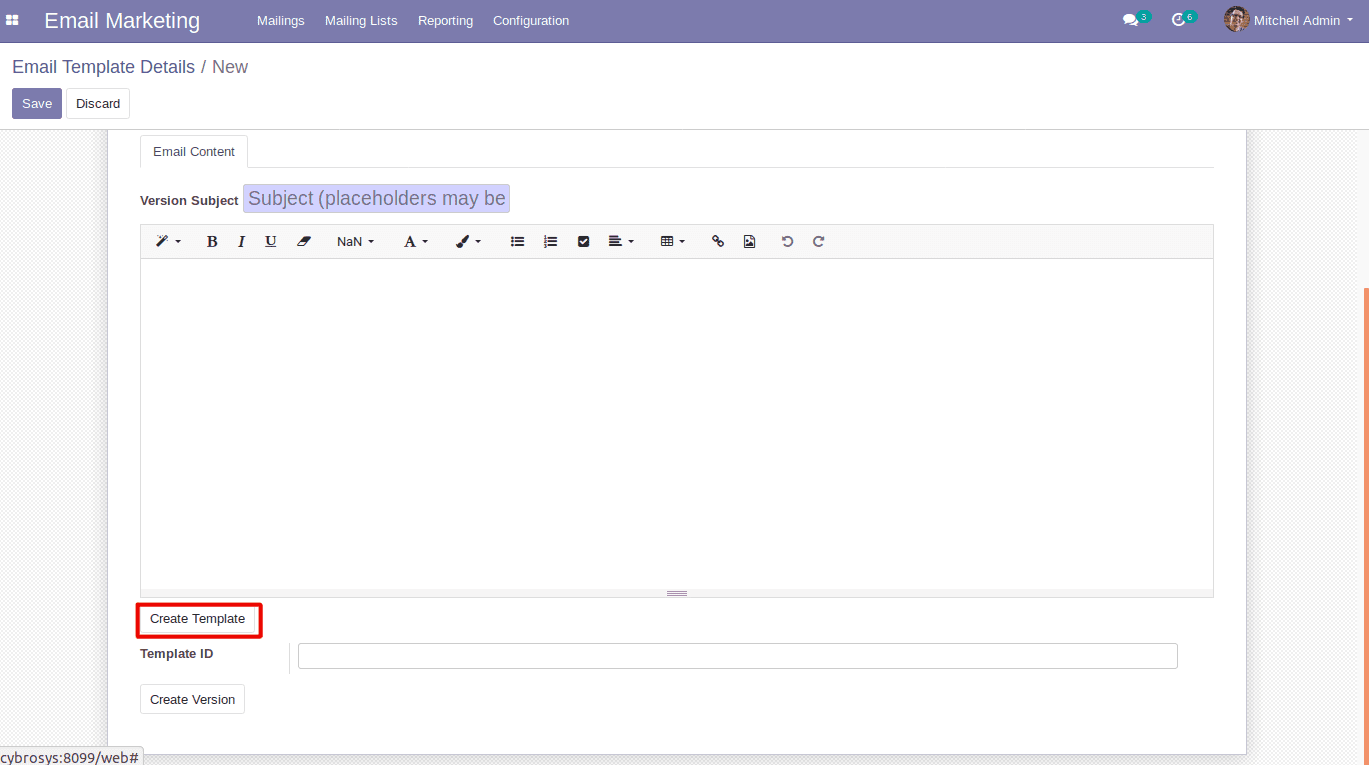
Create Version Button
The Template ID field will be filled after you click the “Create Template” button. Using the Template ID, we can write the template content by clicking the Create Version button.
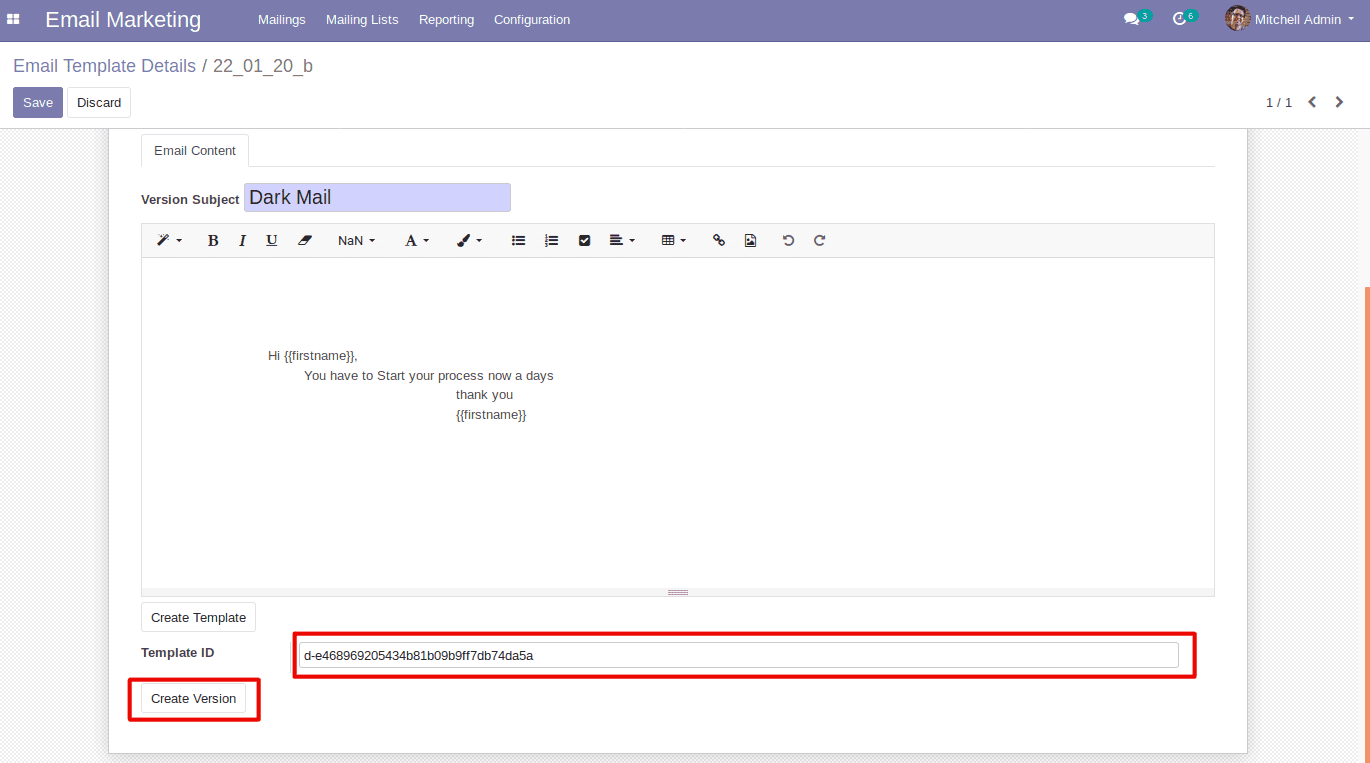
Configure Email Template
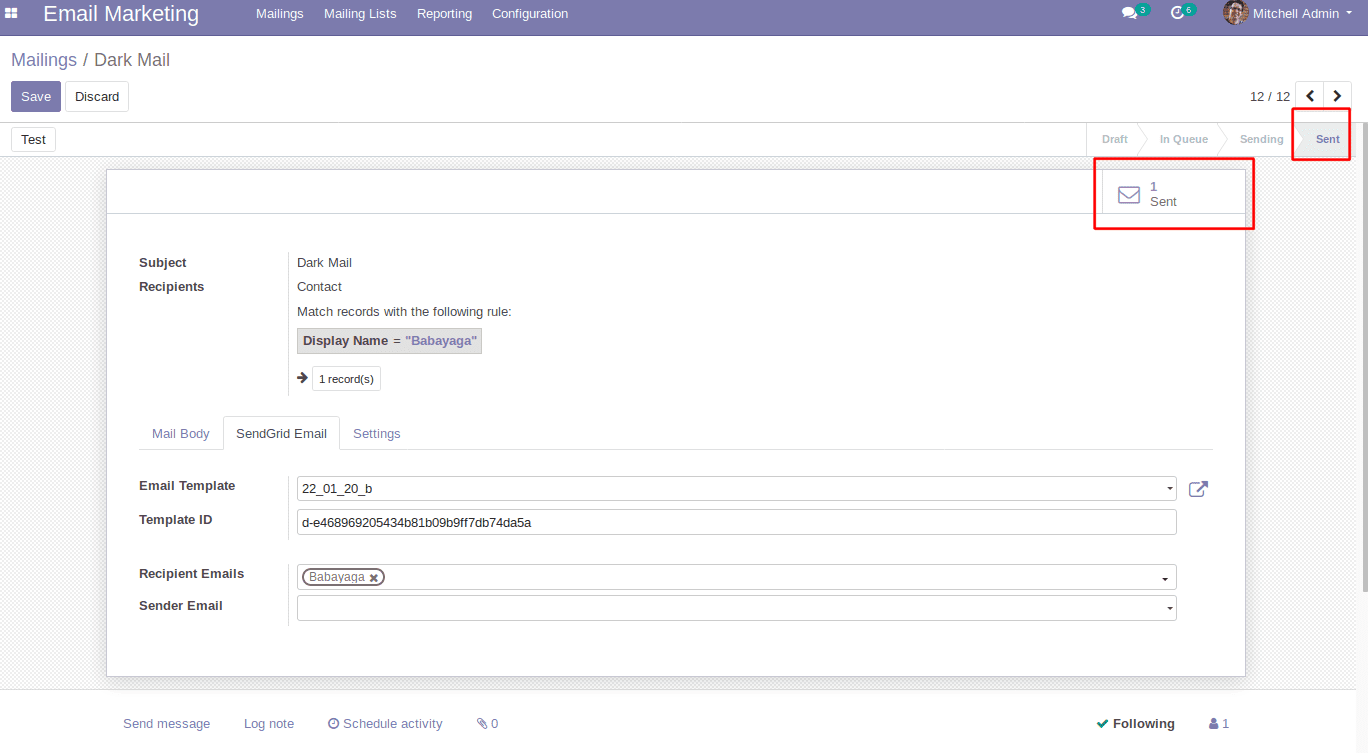
In the mailing form view, we can see a page named SendGrid Email. Here, we configure the email template and other fields. By selecting the email template in the page view, it will fill in the template ID. When you select the Email Template field, the mail body of the mailing form is also filled in.
After setting recipients and templates, users can send mail by clicking the SendGrid button.
From Draft to Send State
If the message is delivered to the recipient, the draft state is changed to the send state. Users can see which recipients have sent the mails in the sent smart button on the mailing form.
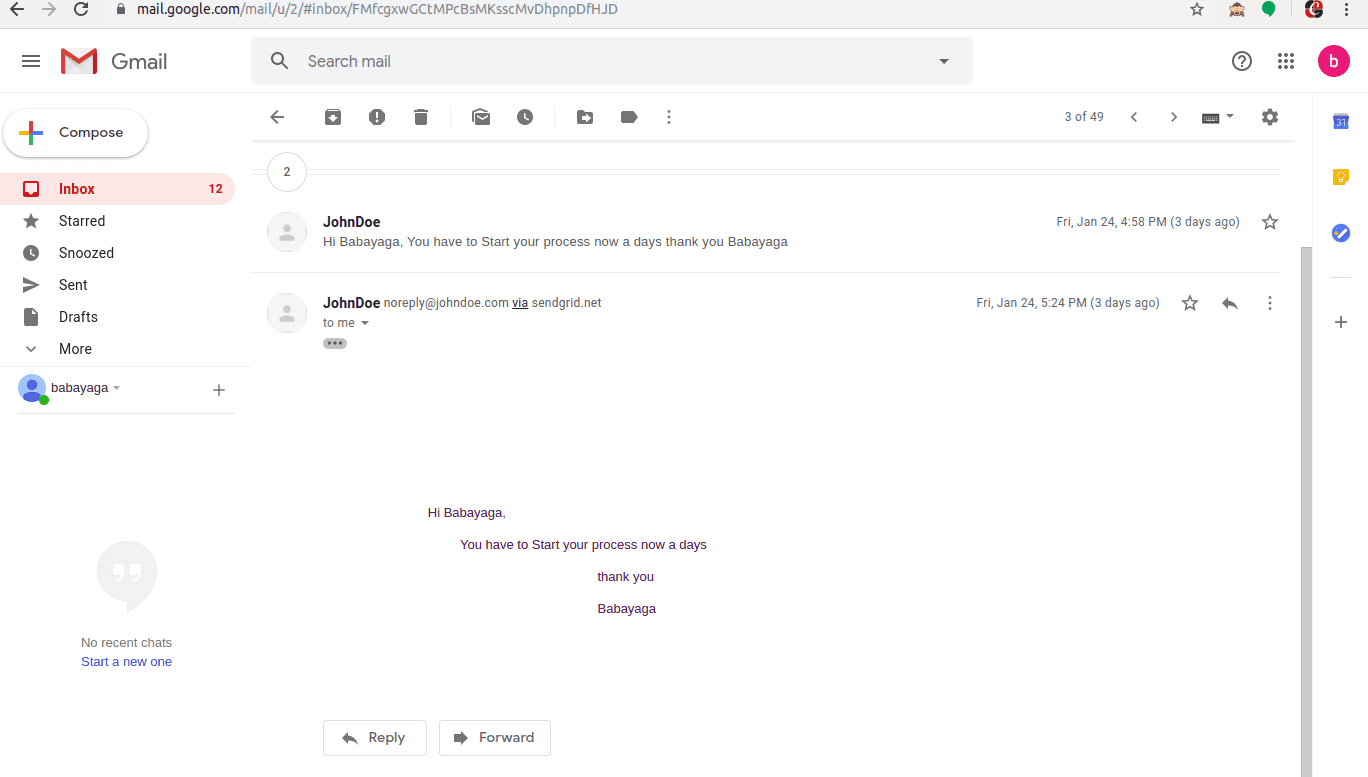
In the mail, users can see a new message like the one below.
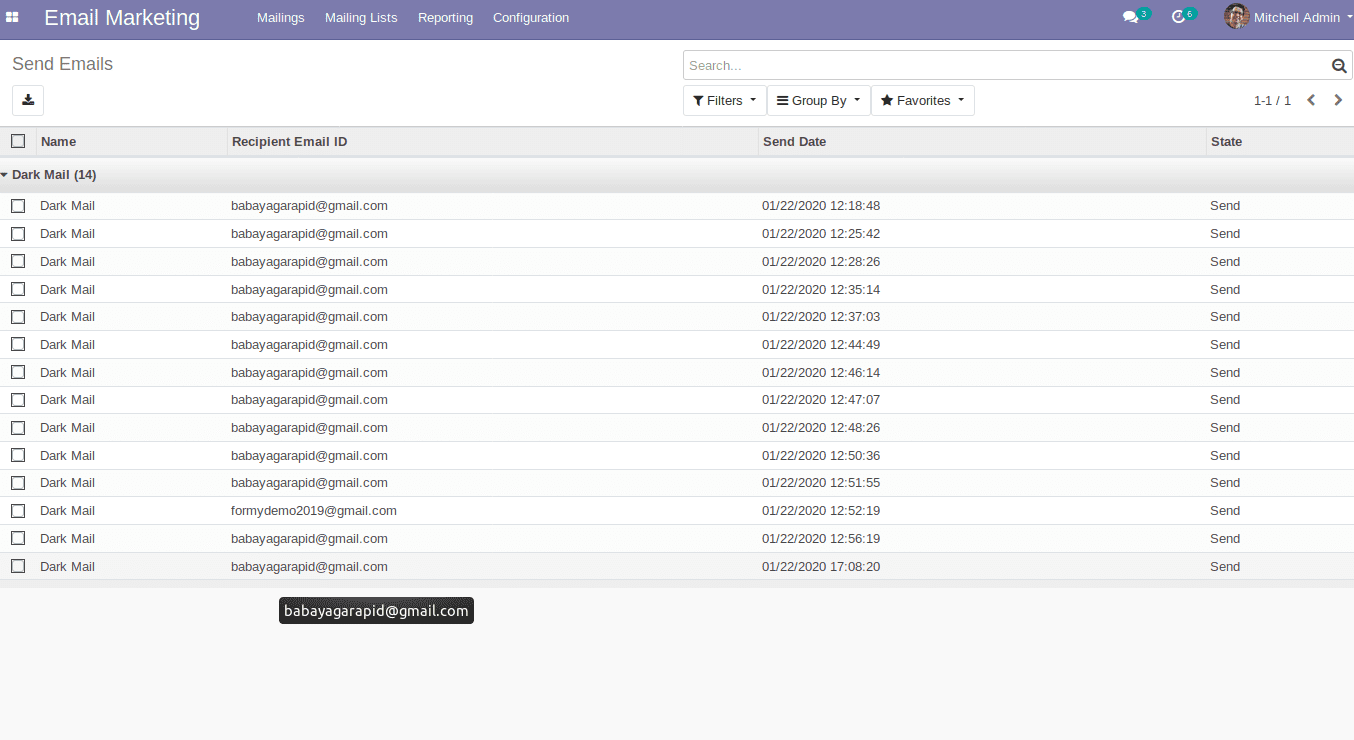
Email Marketing Reporting
There is a submenu called “SendGrid Send Emails” in the Email Marketing Reporting menu where the user can get the mailing details done by SendGrid Service. By clicking the SendGrid Send Emails submenu, it will show a tree view like the one below. Here the user can see mailing records and what they state.
Bounce Check
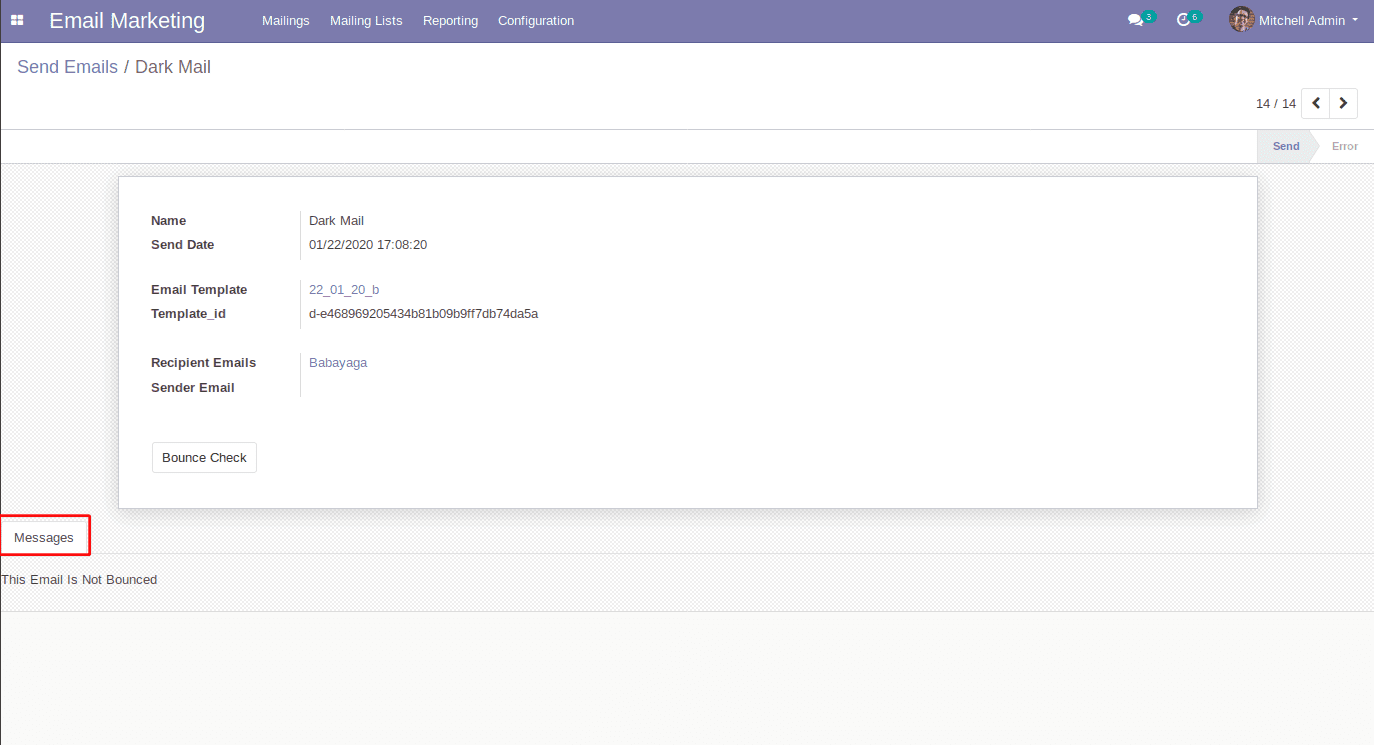
The state record will look like this. Here we can see a button called “Bounce Check.” It can be used to determine the status of a bounced email.
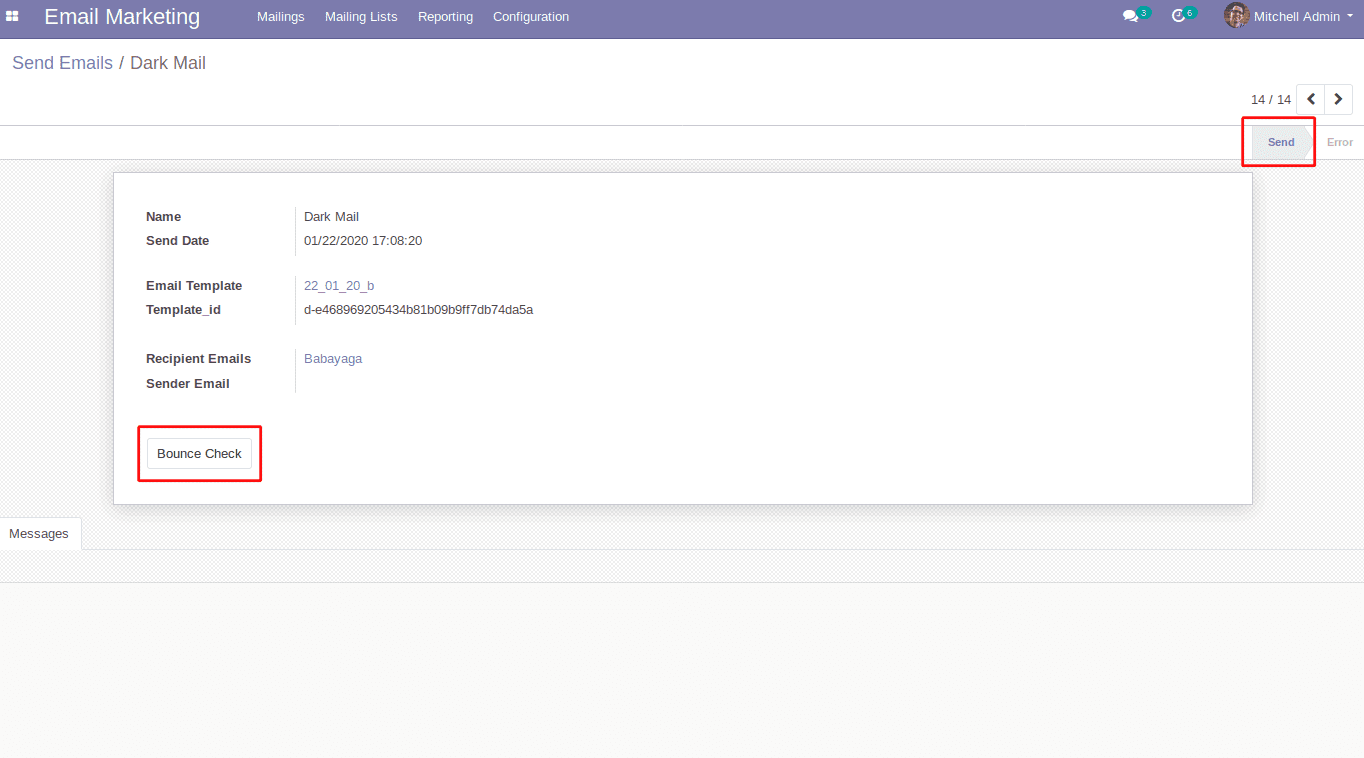
By clicking the Bounce Check button, the bounce status will be displayed on the Message page in the form view. If it has some errors, they are also shown in the message.
Resend Mail
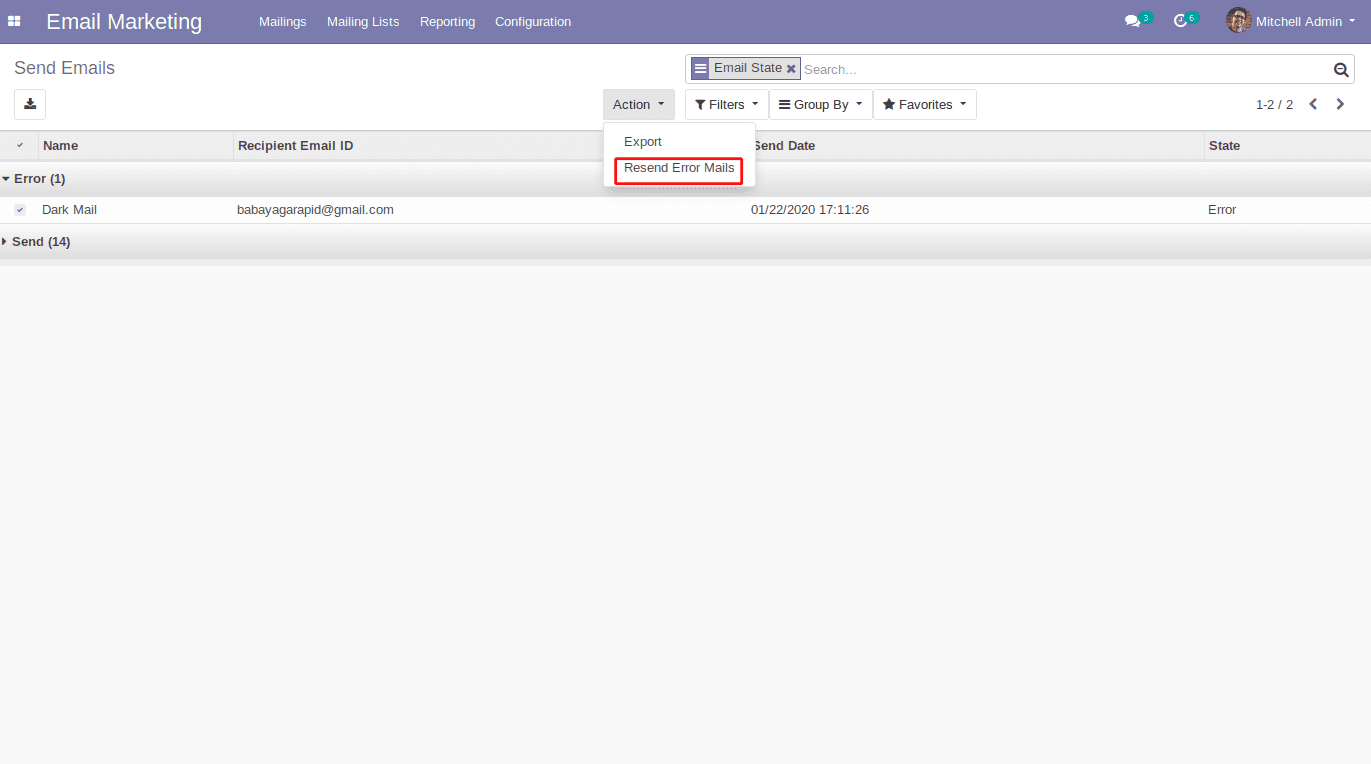
If an error record is found, it can be resent to that email address. The “Resend Error Mails” button in this action will resend an email to the selected error records. If the error record sending is completed, the state will change to “Send.”
Through the use of this module, it will be used to send emails and could be suitable for bulk mailings and single mailings. Email templates are used for constructing email content. It includes a mail report and a bouncing option. Here, users can check the mail status. Have a look at the following blog to explore more about How to Setup Outgoing Mail Through Twilio SendGrid. How to Setup Outgoing Mail Through Twilio SendGrid


