Expiration is always related to stocks. A standard and qualified product will have some important dates related to its expiry. We need a serial number or lot concept to separately identify each stock of the product. So, the first move is to configure the serial number or lot.
Setup lot/serial number
To set up a lot and serial number we have to have it checked in the settings of inventory.
Inventory -> Configuration -> Settings -> Lot & serial numbers
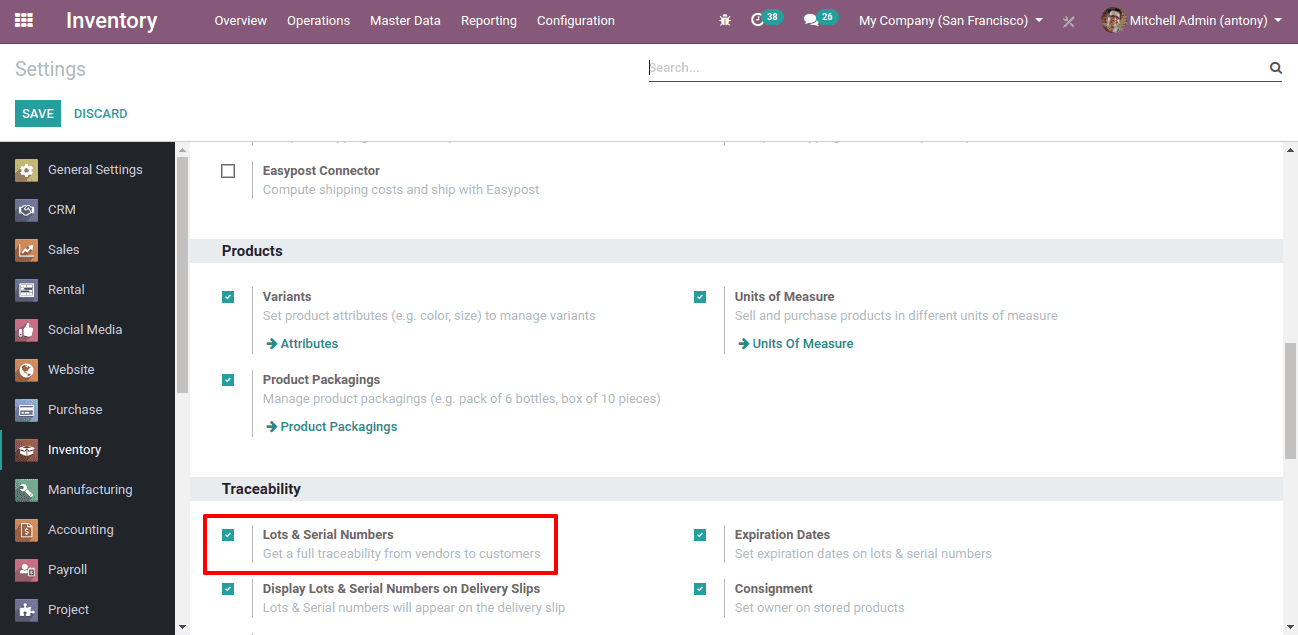
After saving this, we shall go to a product that we are about to track. There we have an option under the ‘Inventory’ tab for opting for the tracking method.
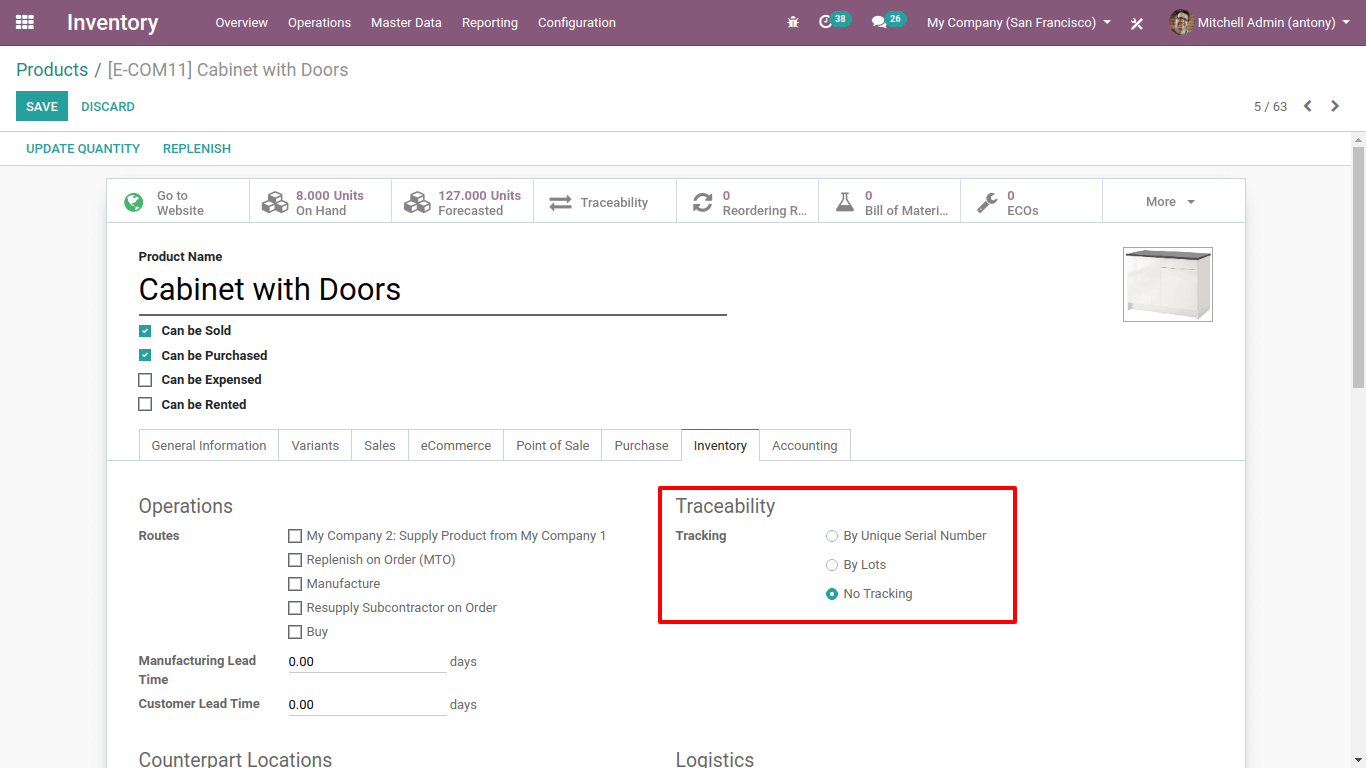
Here we shall select any one of the options.
* Suppose if we select the option of “By unique serial number” we will have to give unique numbers to the products that are coming to our stock.
* If we select the option of “By Lots” we can have a number of products under one lot number.
Now when we make a purchase order we will have to give serial number/lot at the time of stock receiving.
For that click here,
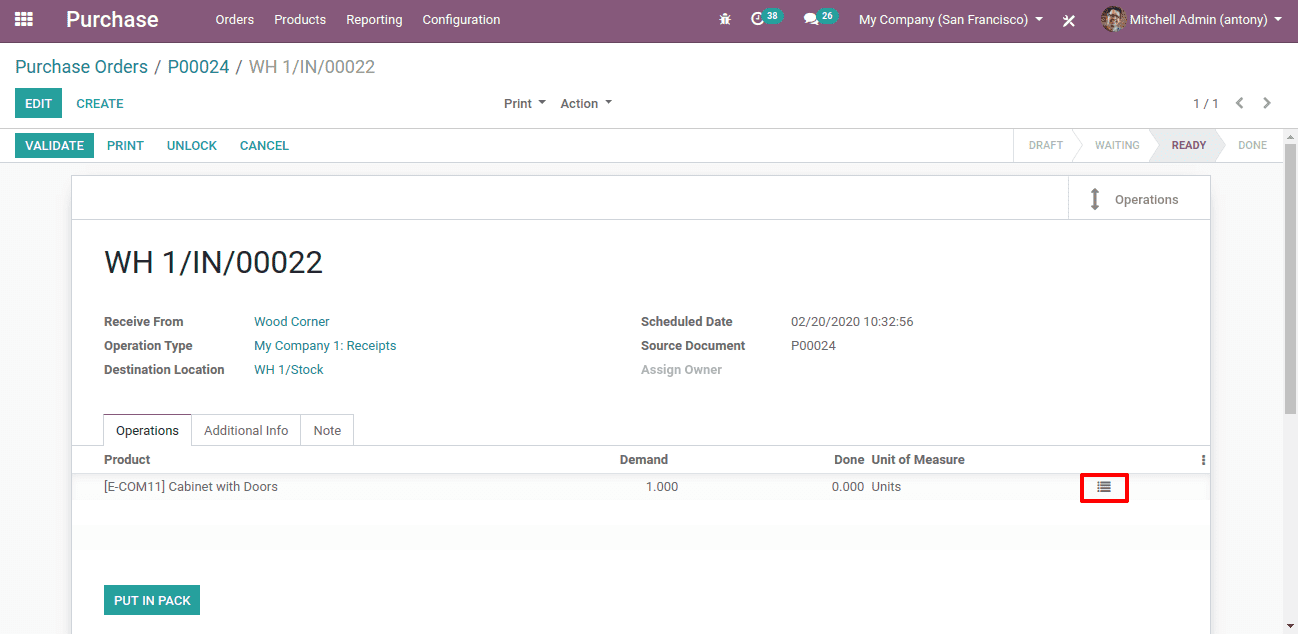
Then a popup window will appear. There you can assign the serial number.
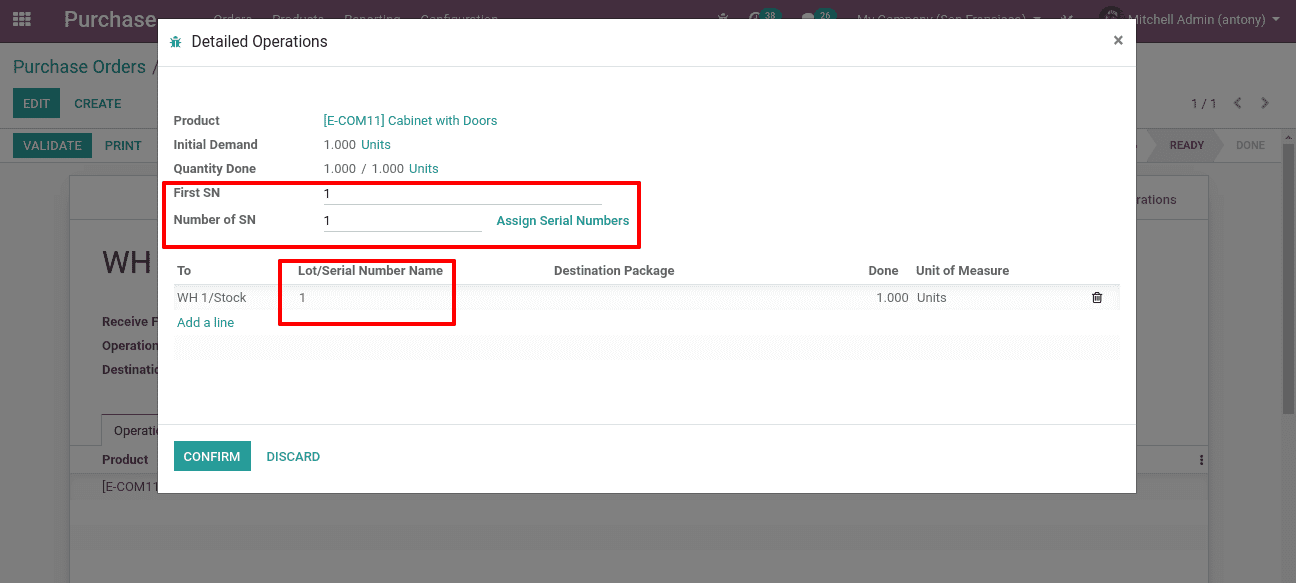
After confirming the serial number and done quantity. We can we the Traceability Report of this product. For that click on “Traceability”.
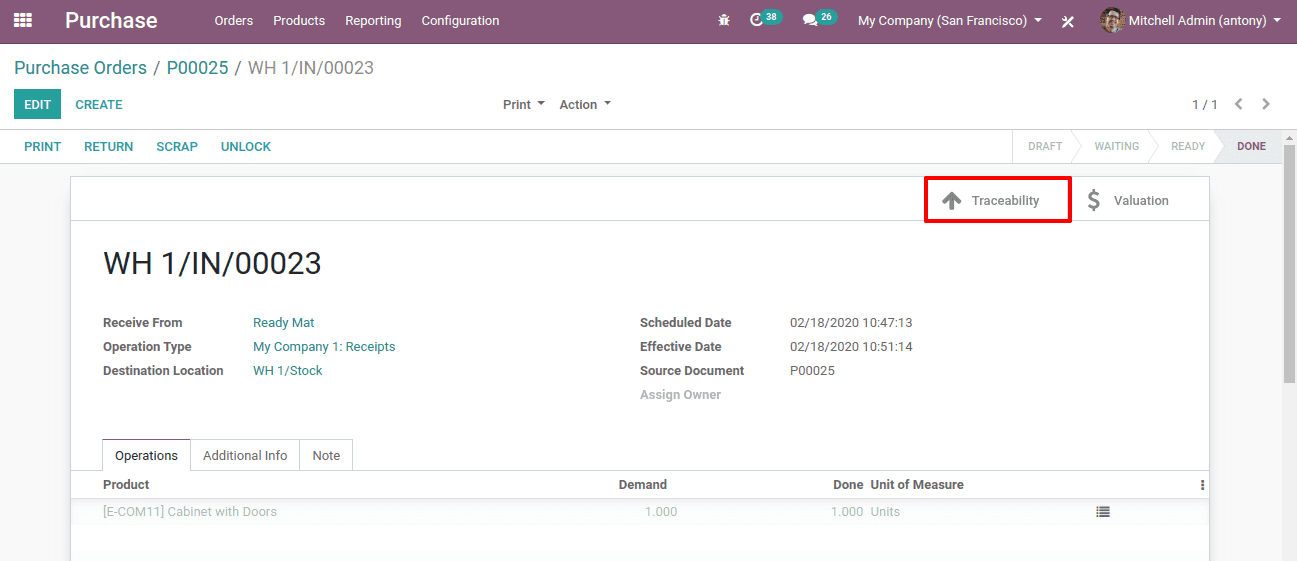
When we click on it we will get the Traceability Report of that particular product.

We are able to see this serial number in Inventory -> Master Data -> Lot/serial number.

Click on it.
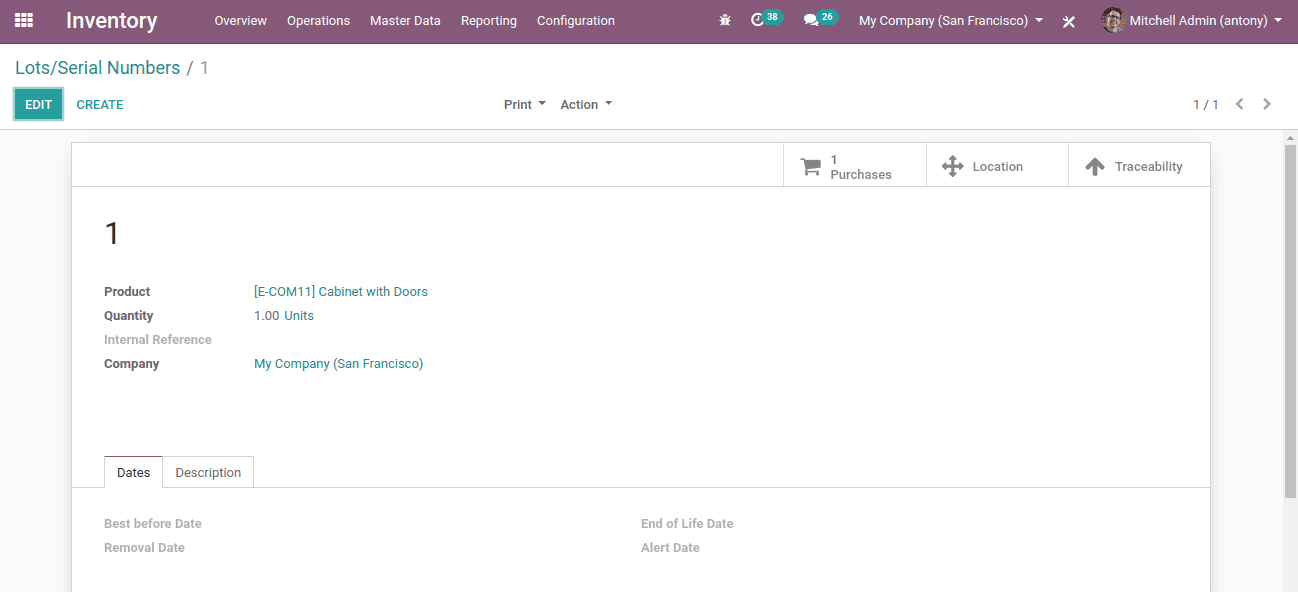
Here we can see the full details of that product with a unique serial number.
Now when we sell this product we can sell it by the serial number.
At the time of sale order picking, we have to give a serial number.
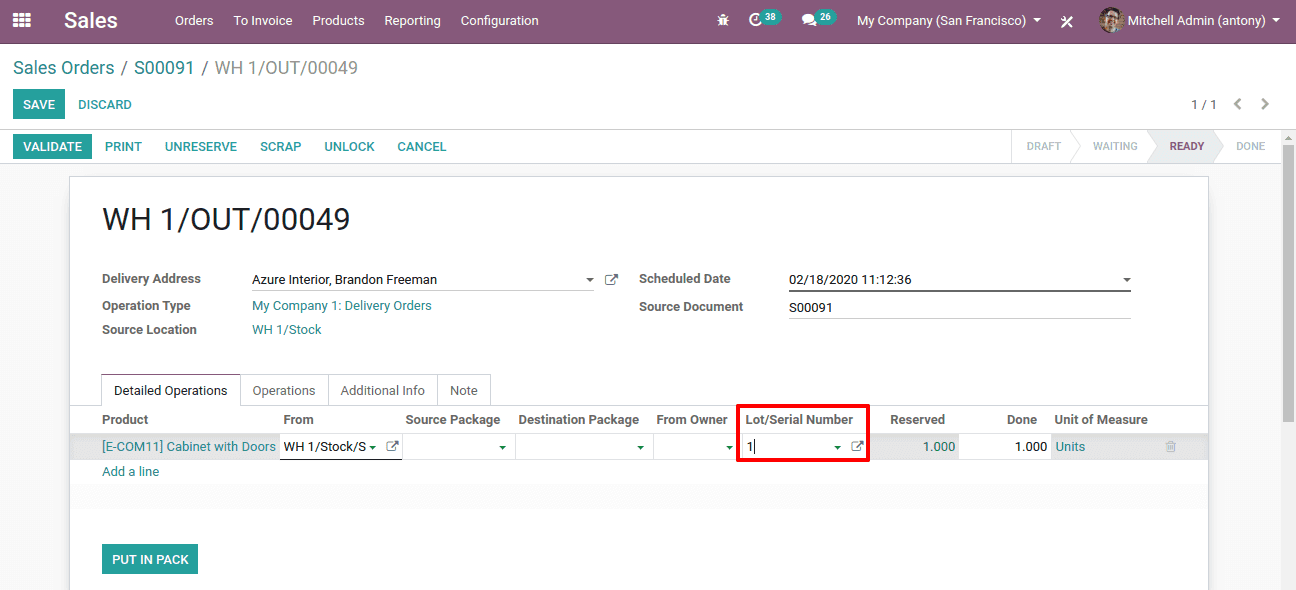
So this is how we configure lots and serial numbers in Odoo 13.
Set an Expiry date for a product
After setting Lot and serial number, we shall move on to set the Expiry date for a product.
For that, we shall go to Inventory -> Settings -> Expiration dates
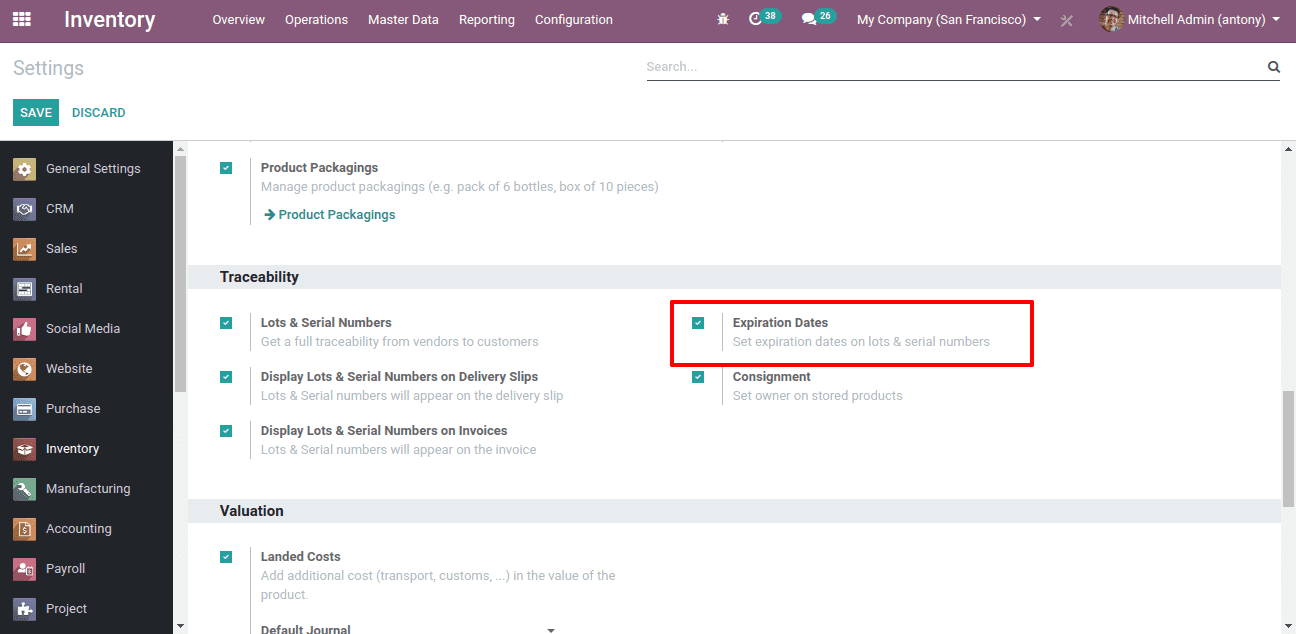
After saving this we shall go to the product page, under the Inventory tab, we have the options for adding the important dates regarding the product.
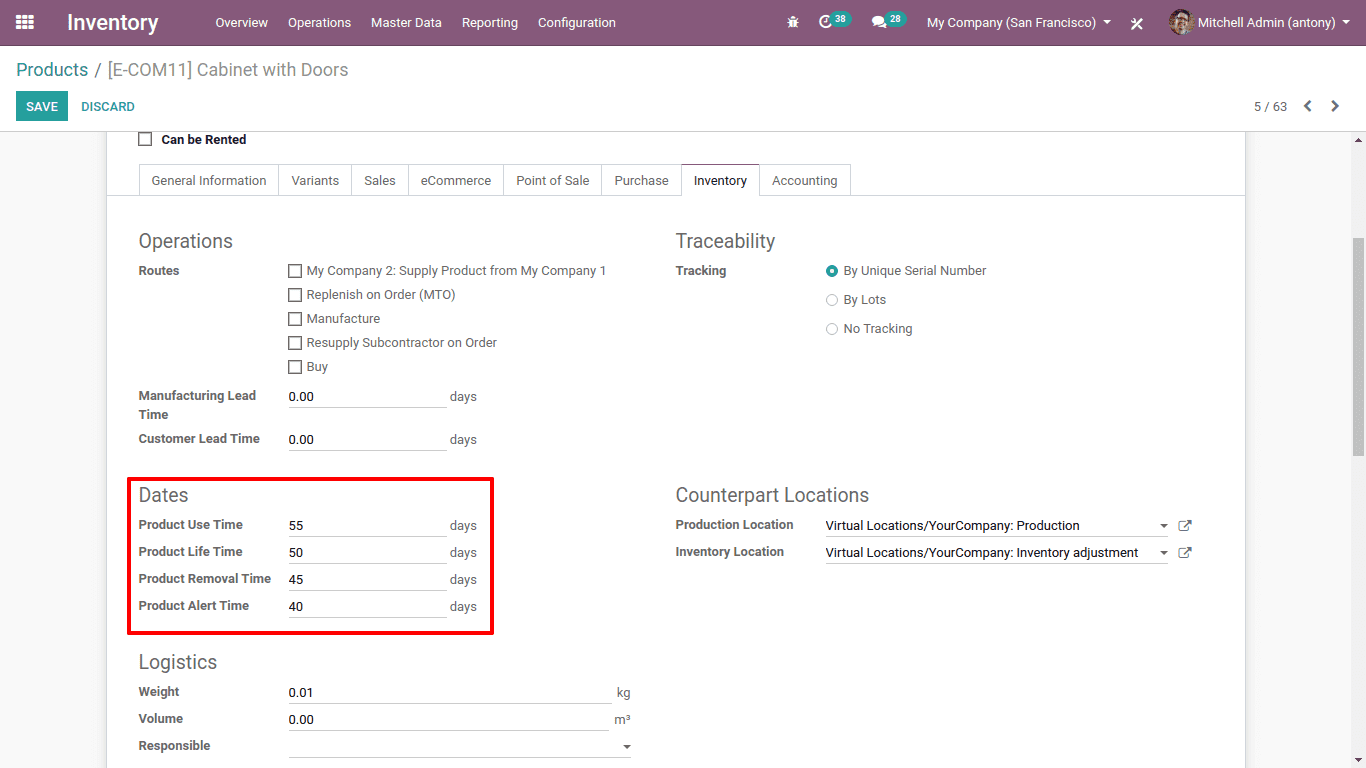
Here we have,
* Product use time: That is the number of days before the goods can become hazardous and must not be used.
* Product lifetime: That is the number of days before the degradation of the items, without being dangerous even
* Product removal time: This is the number of days before the items were to be taken out of order.
* Product alert time: This is the number of days to be informed of the warning.
So when we create a new serial number to this product these dates are automatically recorded and kept in the lot and a serial number of that product. And if we didn’t mention these dates at the time of product creation we can set it at the time of creating a lot and serial number for that product.
For that go to Inventory -> Master data -> Lot & Serial Number
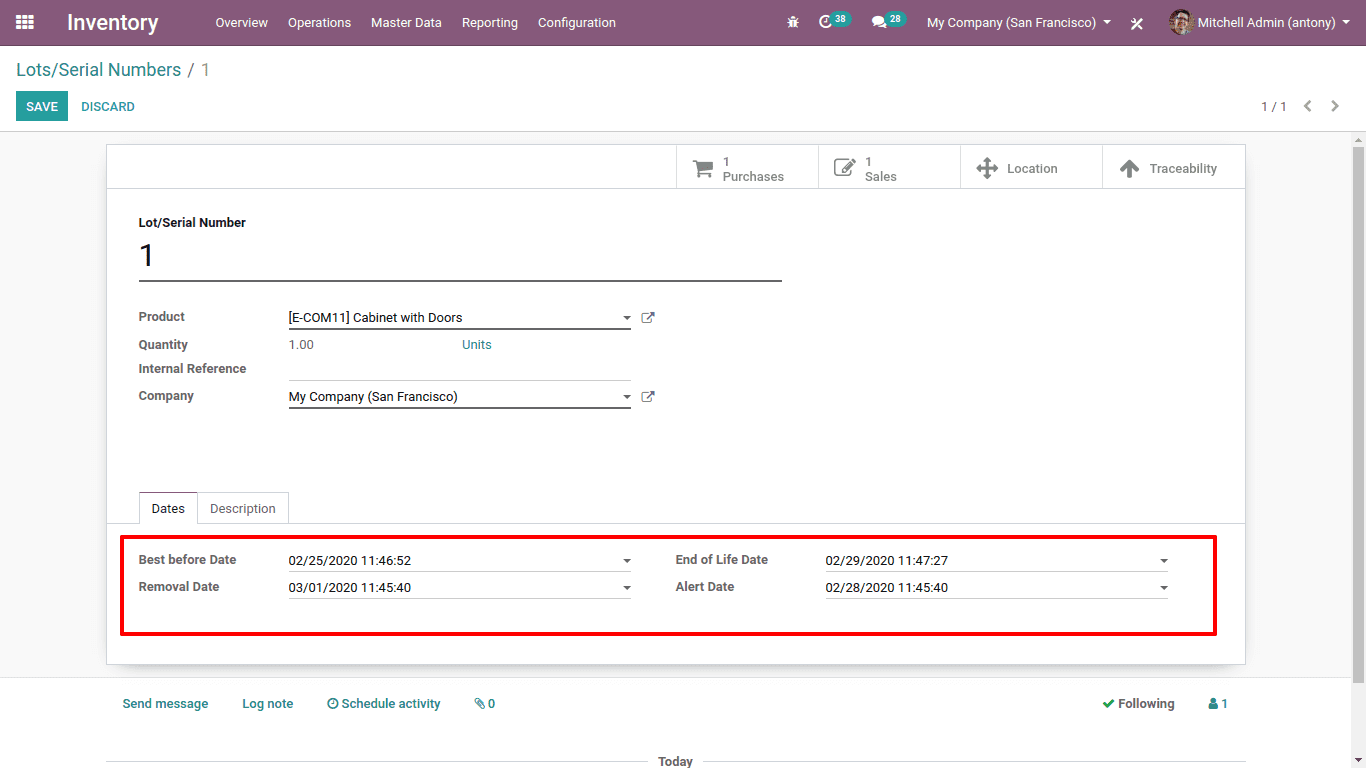
Here we can set all the important dates regarding the Product.
So this is all about the setting up of the Expiry date in Odoo 13.


