The latest Odoo 16 Accounting management system offers a complete package equipped with efficient tools and features which aid you in managing all accounting operations in a professional manner. Manual efforts and errors in financial management can be lessened by using the reliable accounting tools provided by Odoo ERP software. Proper usage of the Accounting module will improve the efficiency of financial management in your organization. In order to carry out the accounting operations in a systematic way, Odoo 16 allows you to integrate the Accounting module with other major modules in your database, such as Sales, Purchase, Point of Sale, Payroll, and many more. This integration facility enables the system to have an uninterrupted workflow. It will also help the company to manage and execute multiple accounting operations within the same platform.
We are going to take a look at customer invoice and payment management in Odoo 16 using the Accounting module in this blog.
Customer Invoices
In Odoo 16, you can generate invoices in multiple methods. The system allows you to generate customer invoices manually as well as automatically. Based on the module you use and the operation you perform, Odoo automates the generation of customer invoices. For example, while creating a sales order in the Sales module, you will get a draft customer invoice at the time of the confirmation of the sales order. In this case, all you need to do is validate the draft invoice and complete the payment procedure. Here, invoices will be automatically generated while confirming sales orders. You can also find options in Odoo to manually create customer invoices according to your convenience. All these invoices will be tracked and recorded under the Invoices menu available in the Accounting module of Odoo. To get access to this menu, you can click on the Customer menu of the Accounting module and select the Invoices option available in the drop-down.
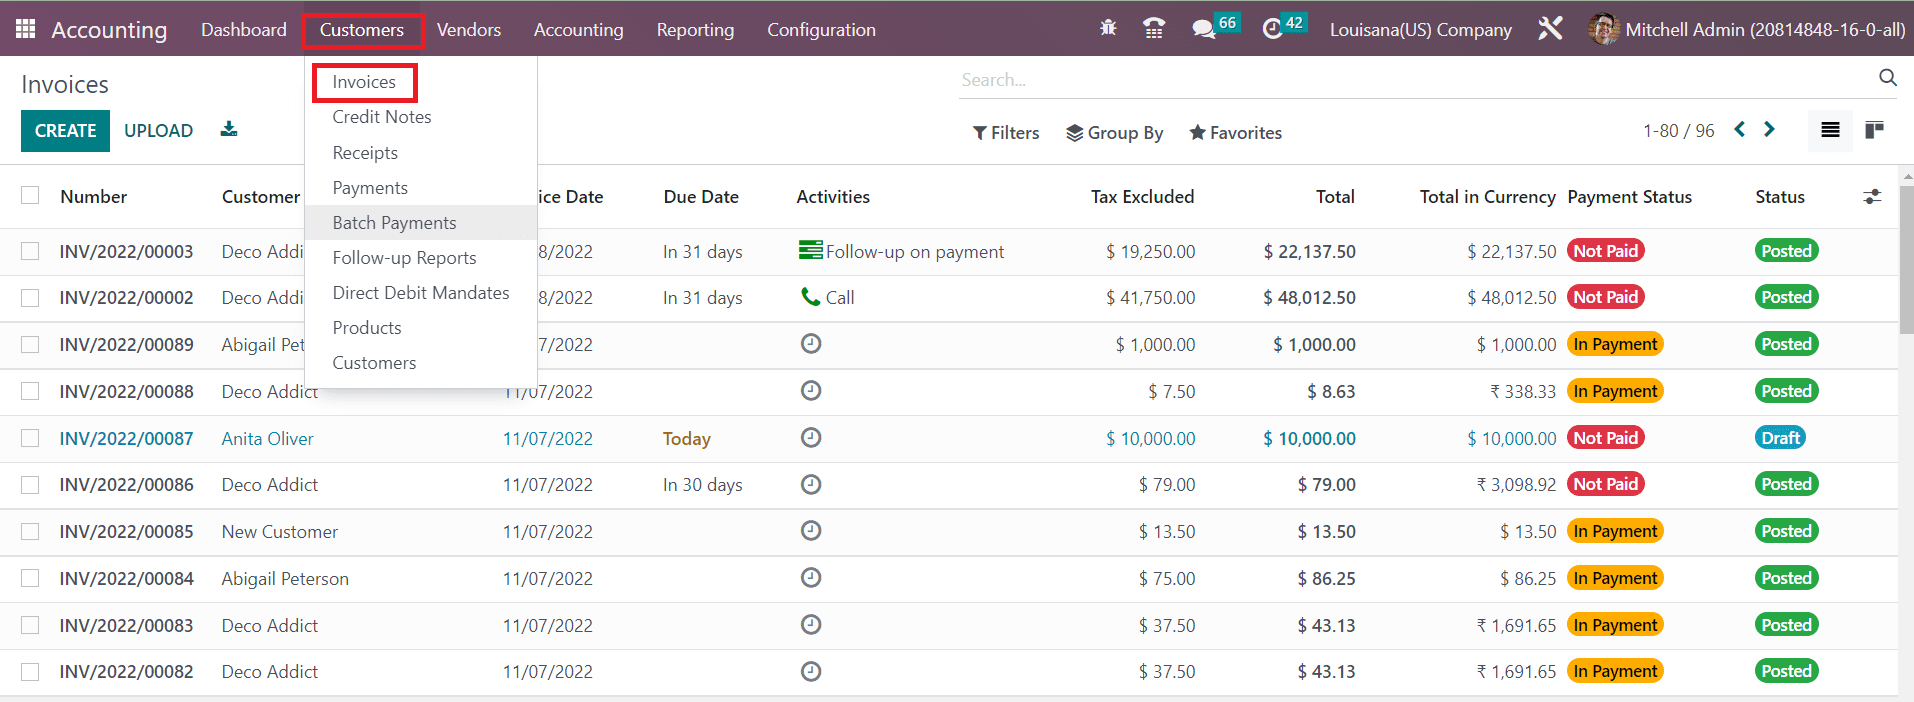
The screenshot shown above includes the list of invoices generated for various operations in different modules. As you can see, the list view of the platform displays the Number, Customer, Invoice Date, Due Date, Activities, Tax Excluded, Total, Total in Currency, Payment Status, and Status of each invoice. In order to expand the available list view with extra details about the customer invoice, you can use the small icon highlighted next to the Status field as depicted below.
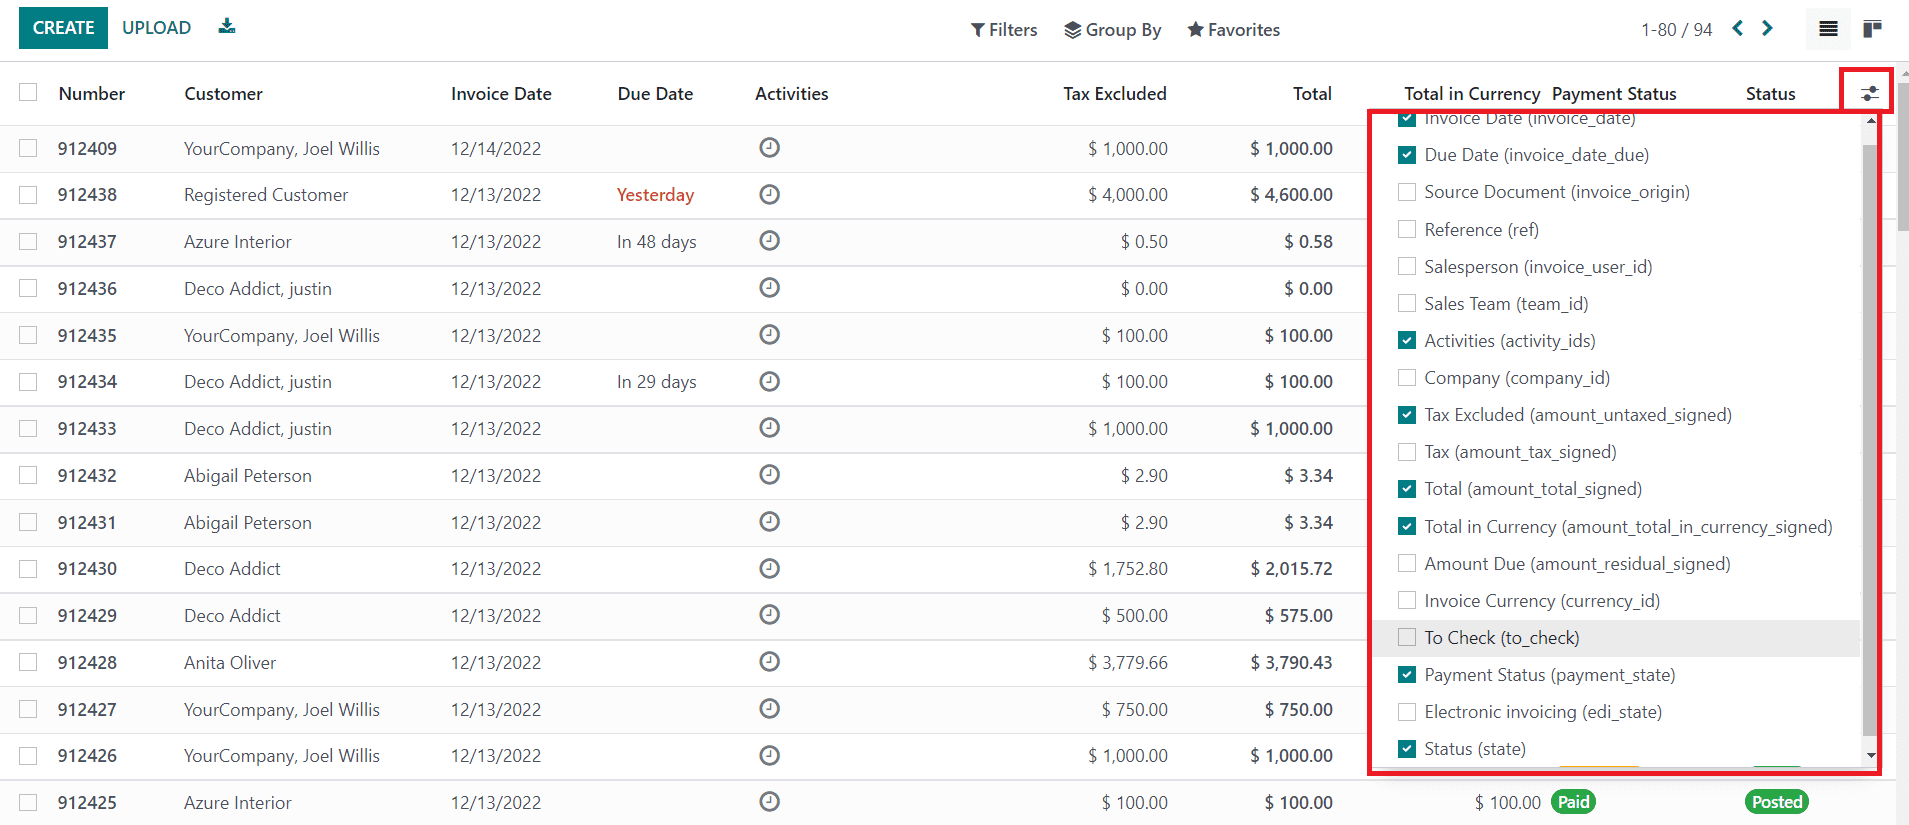
You can activate new fields from this list which includes the Invoice Date, Due Date, Source Document, Reference, Salesperson, Sales Team, Activities, Company, Tax Excluded, Tax, Total, Total in Currency, Amount Due, Invoice Currency, To Check, Payment Status, Electronic Invoicing, and Status.
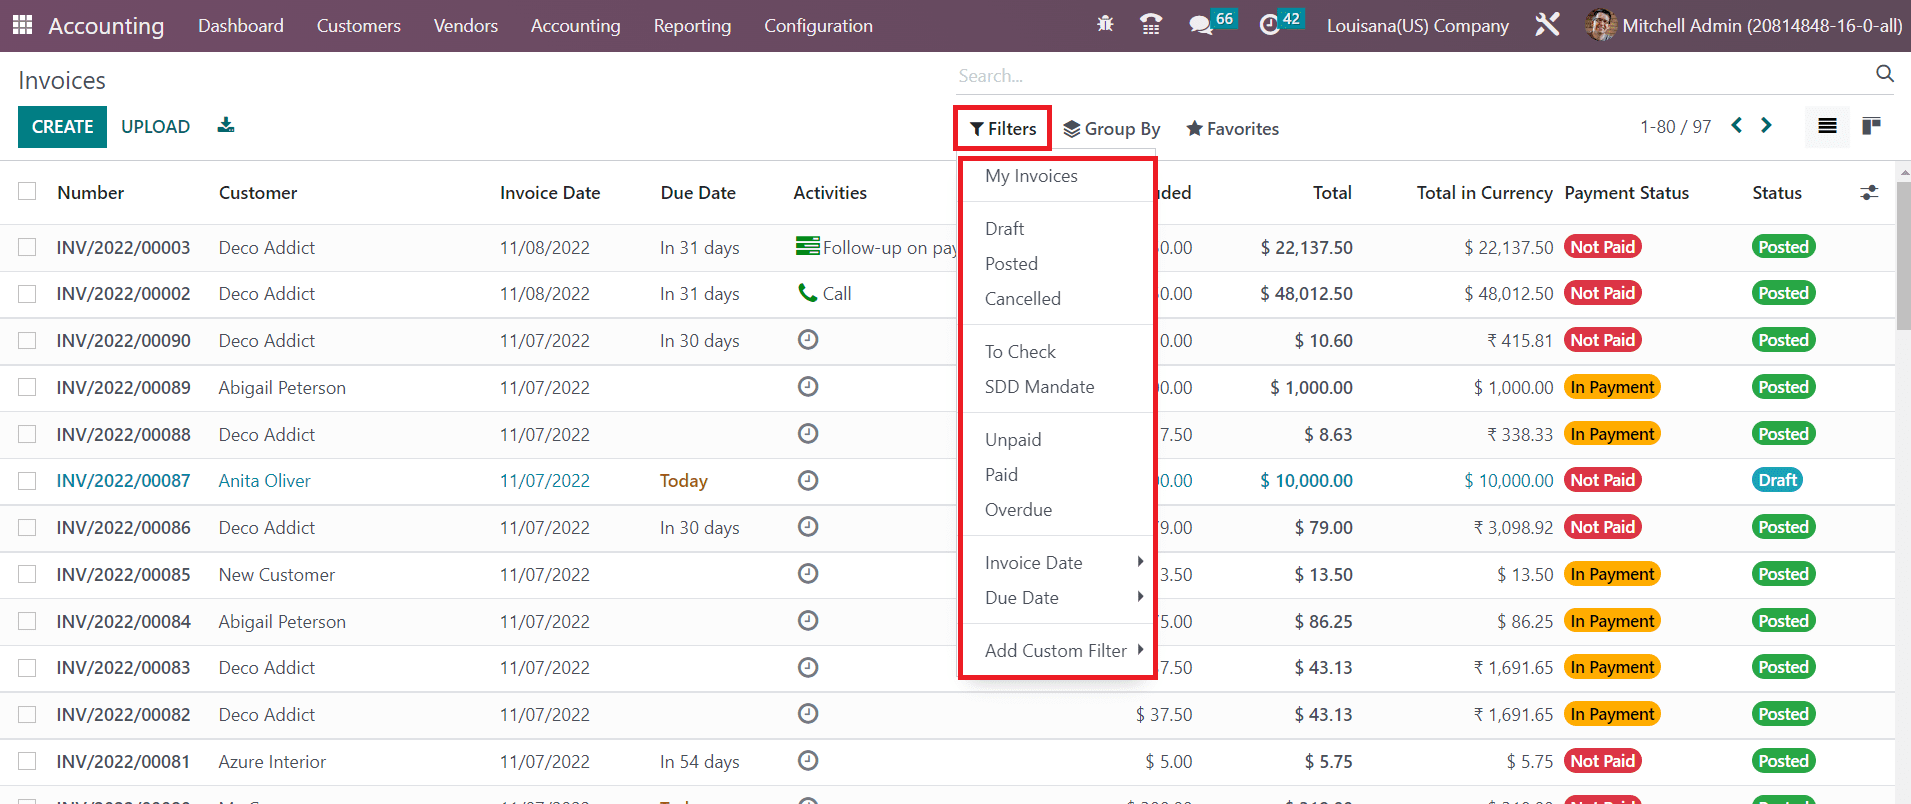
The default Filters will assist you in filtering the invoices based on My Invoices, Draft, Posted, Canceled, To Check, Unpaid, Paid, Overdue, Invoice Date, and Due Date. To create custom filters for invoices, you can use the Add Custom Filter button.
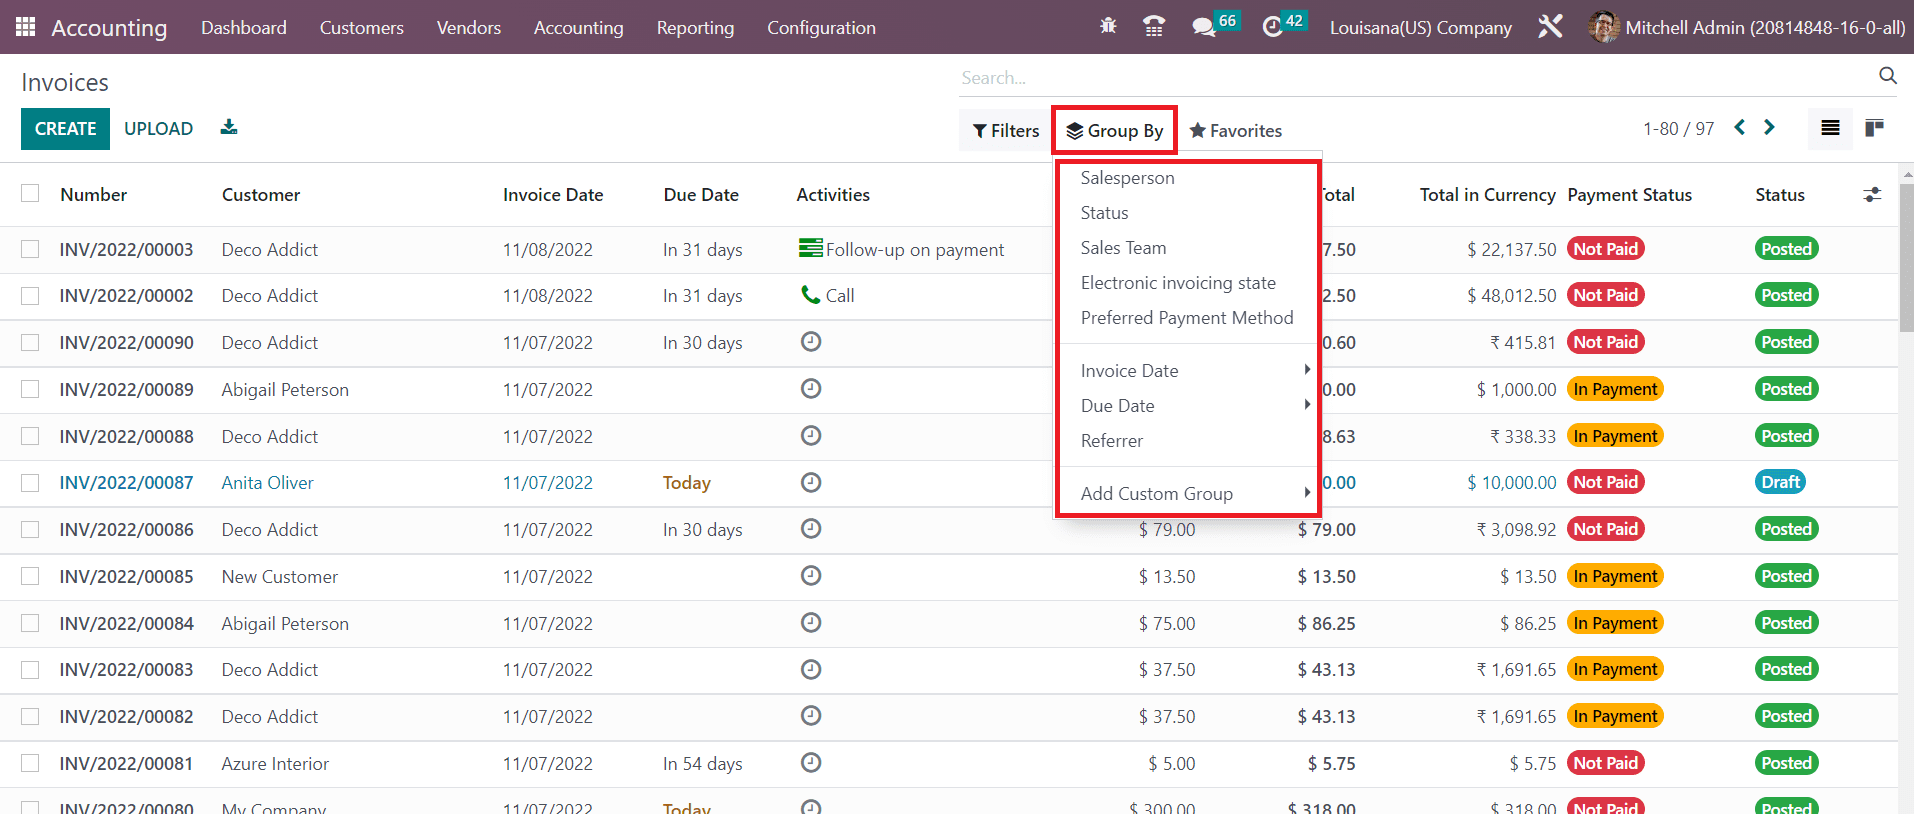
In the Group By option, you will get Salesperson, Status, Sales Team, Electronic Invoicing State, Preferred Payment Method, Invoice Date, Due Date, and Referrer as grouping options. The Add Custom Group button is used for creating custom group options.
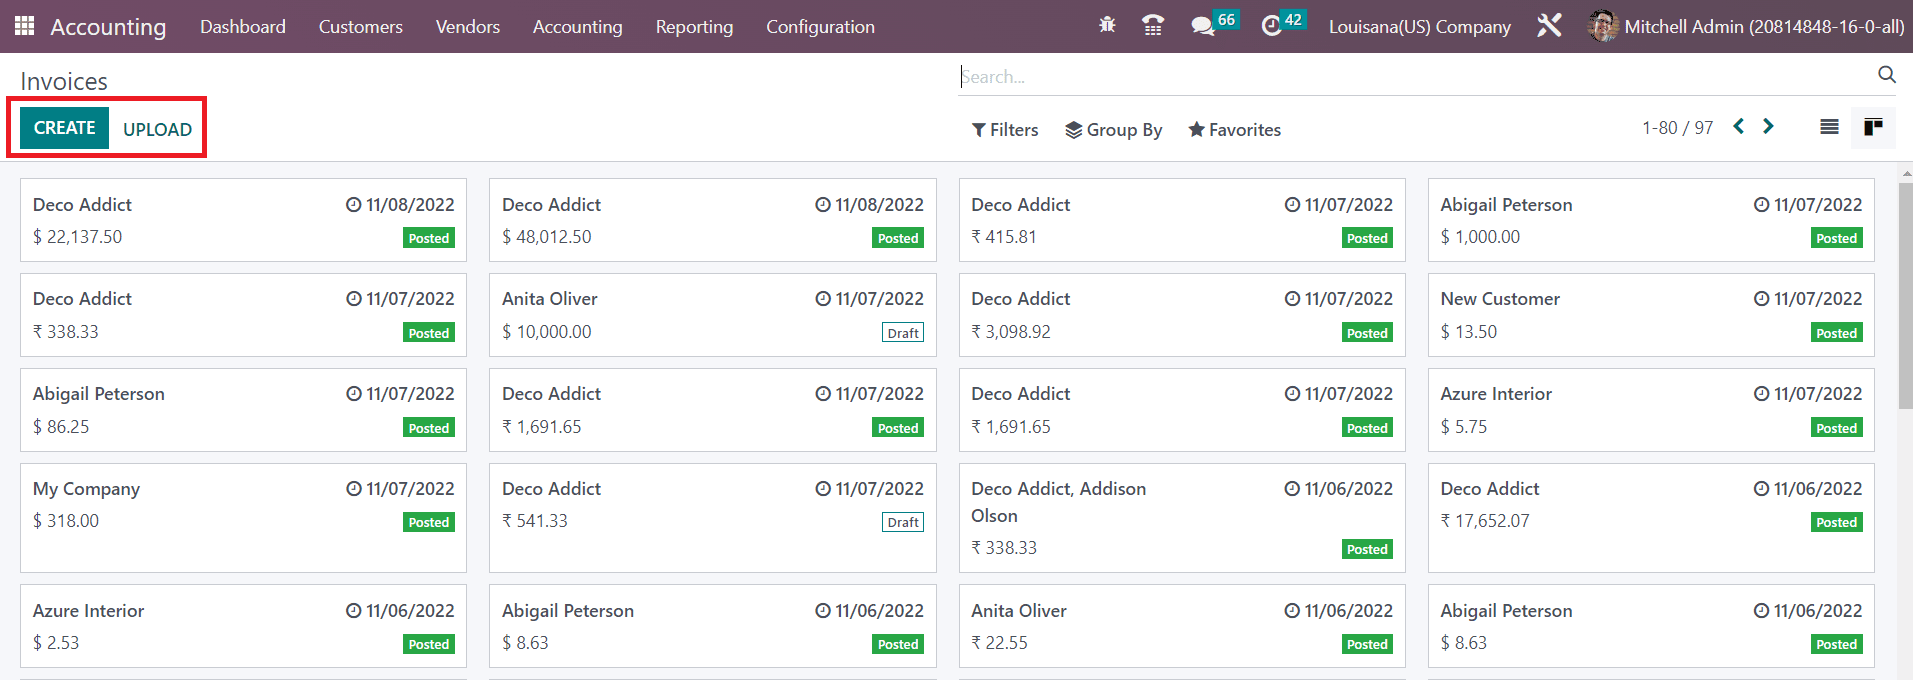
Here is the screenshot of the Invoices in Kanban view. As you can see in the image, you can find a Upload button to upload an invoice to the module. Use the Create button to create a new invoice manually. This will direct you to the invoice creation window as depicted below.
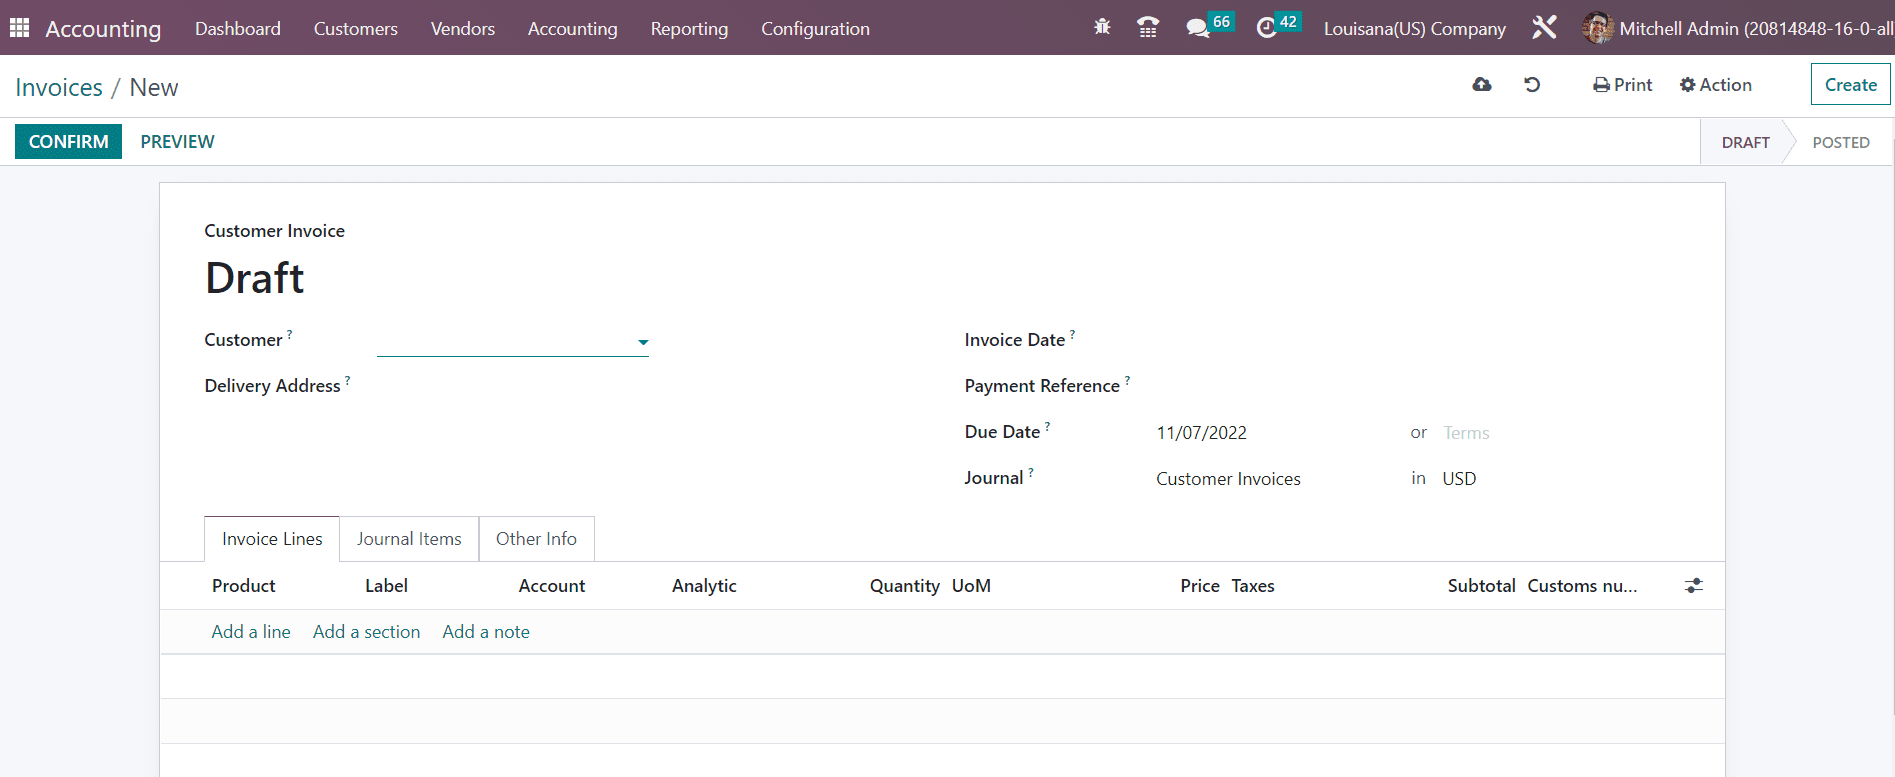
Let’s check how to create a draft invoice using this window. Mention the customer ID in the Customer field and their current delivery address in the Delivery Address field. It is important to set an Invoice Date and mention the Payment Reference to set on journal items in the respective fields. After mentioning the customer ID, the corresponding Payment Term will automatically appear in the invoice based on the configuration. Or else, you can set a Due Date for the invoice within which the invoice should be paid by the customer. Select a suitable Journal for the invoice in the respective field.
There will be three additional tabs such as Invoice Line, Journal Item, and Other Info in the window. Under the Invoice Lines tab, you can mention the list of products one by one using the Add a Line button. Here, you can add Product, Label, Account, Analytic, Quantity, UoM, Price, Taxes, and Subtotal. In the case of auto-generated invoices from sales orders, the Invoice Line will show the products that are included in the Order Line of the sales order.

Once you add products, you can observe the invoice’s Untaxed Amount, Taxes, and Total under the Invoice Line.
With respect to the products you mentioned in the invoice line, corresponding journal items can be seen in the Journal Items tab with the details of Account, Label, Origin, Reference, Analytic, Debit, Credit, and Tax Grids.

You can use the delete icon to delete one from the journal items and add a new one using the Add a Line button.
In the Other Info tab, you can provide invoice’s Invoice, Accounting, and Marketing details. Under the Invoice field, you can add the Customer Reference. This invoice can be assigned to a particular Salesperson and Sales Team by mentioning their ids in the given spaces. The bank account number to which the invoice will be paid can be defined in the Recipient Bank field. If you have any referrer for this sale, you can mention their id in the Referrer field.
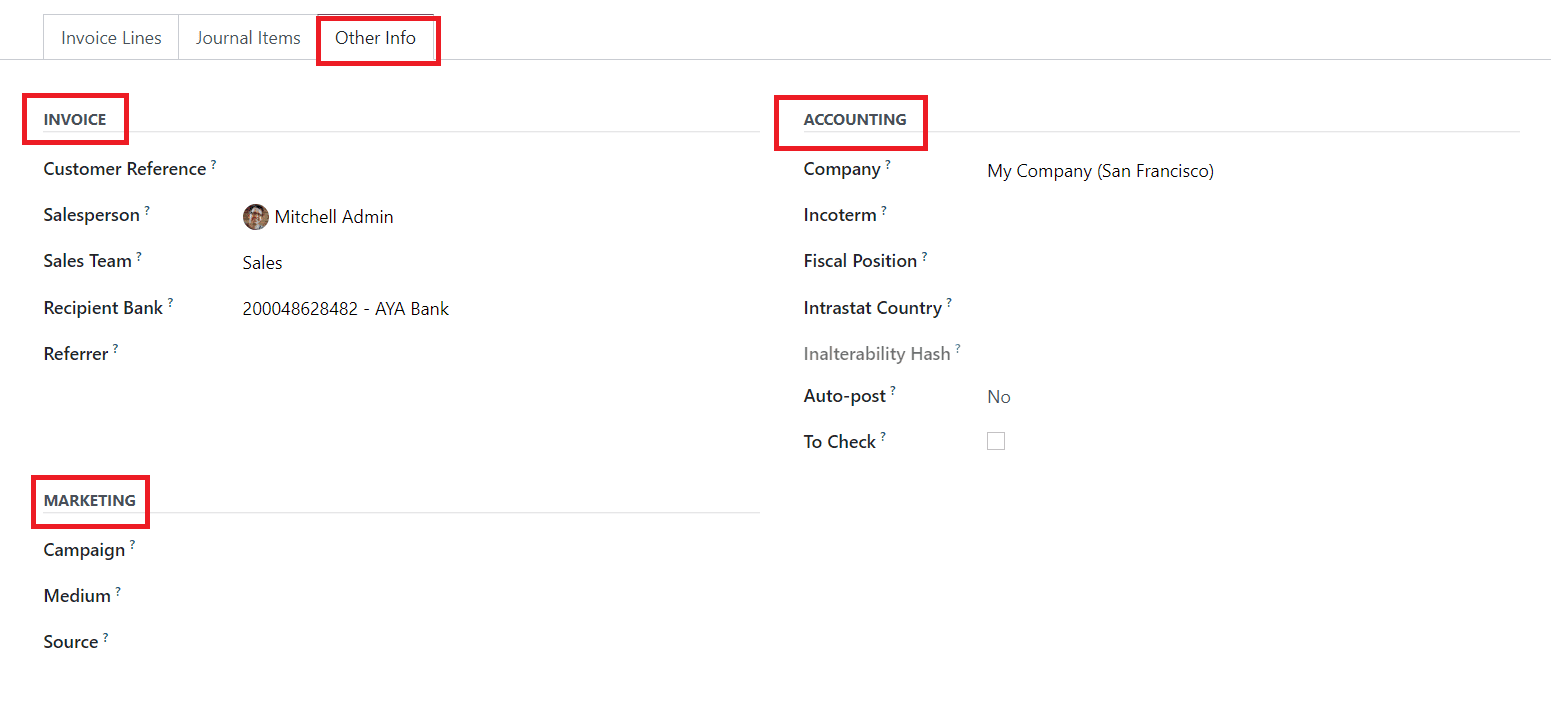
Add the Campaign, Medium, and Source of this invoice in the Marketing field. Your company ID can be mentioned in the Company field available in the Accounting section. Specify the Incoterms used for international transactions, Fiscal Position to adapt taxes and accounts for particular customers or sales orders/invoices, Intrastat Country (Arrival Country), and Inalterability Hash in the respective fields. You can post this entry automatically by selecting the period from the Auto Post field. This recurring move will be posted up to a particular date and you can set that date in the Auto Post Until field. If you want to do it manually, you can select the No option from the Auto Post field.
Activate the To Check field to indicate that the move needs to be checked again.
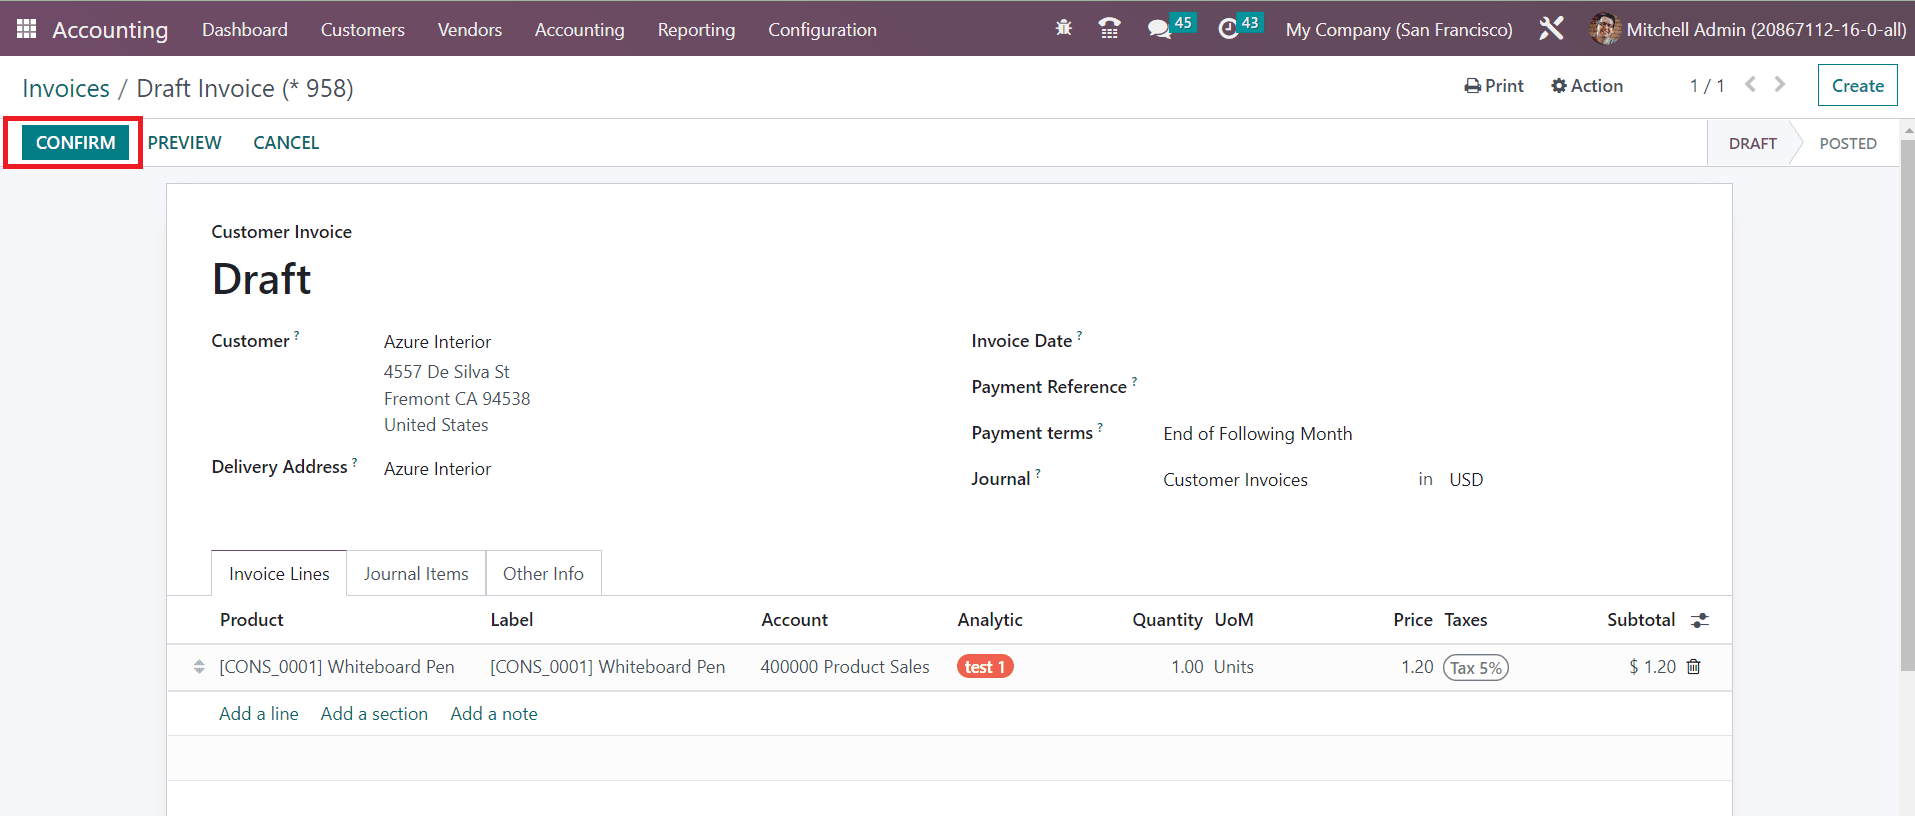
Finally, the draft invoice is ready. For confirming this invoice, click on the Confirm button which changes the status of the invoice from Draft to Posted.
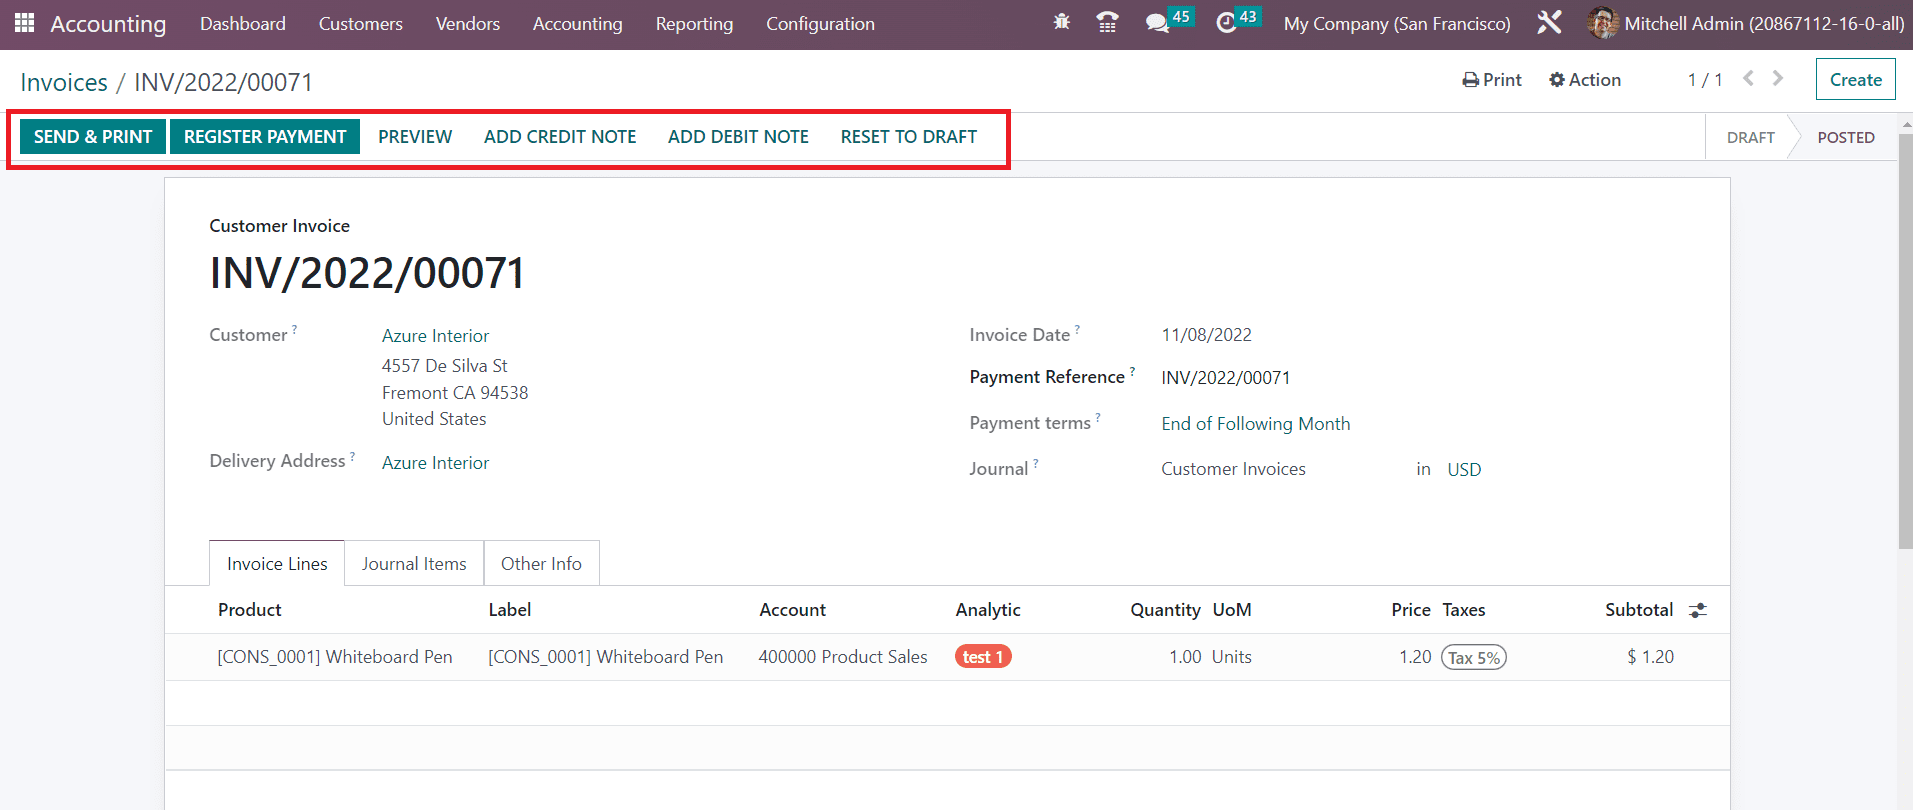
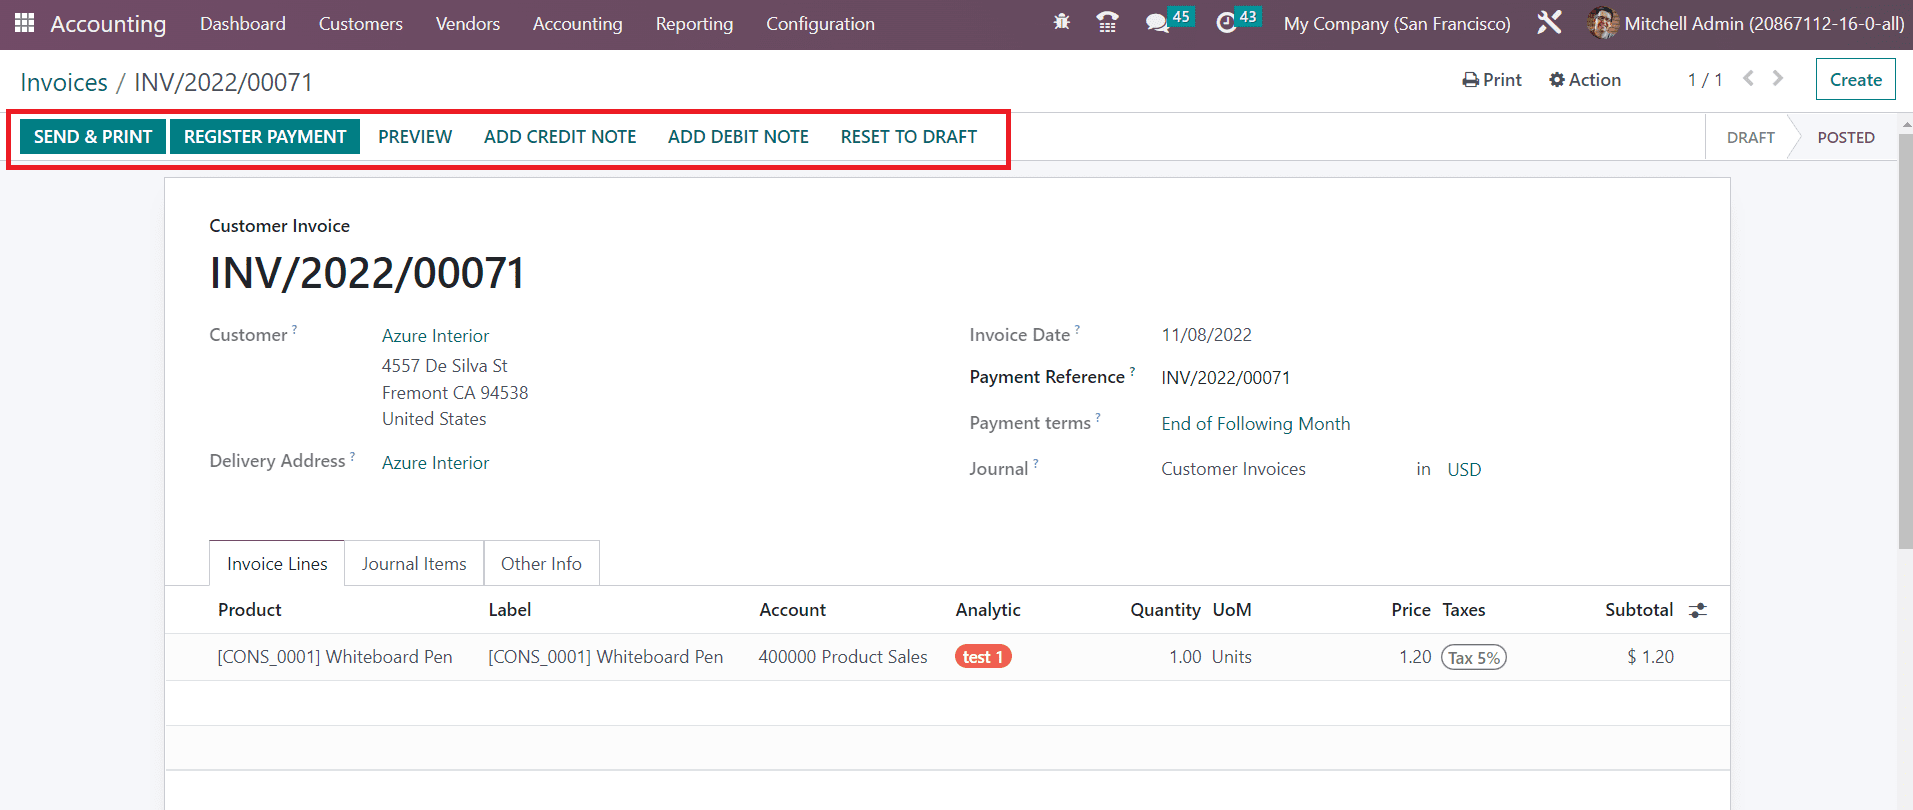
Now, the invoice is confirmed. To reset a confirmed invoice to draft, you can use the Reset To Draft button. If you want to get a customer preview of the invoice, use the Preview button.
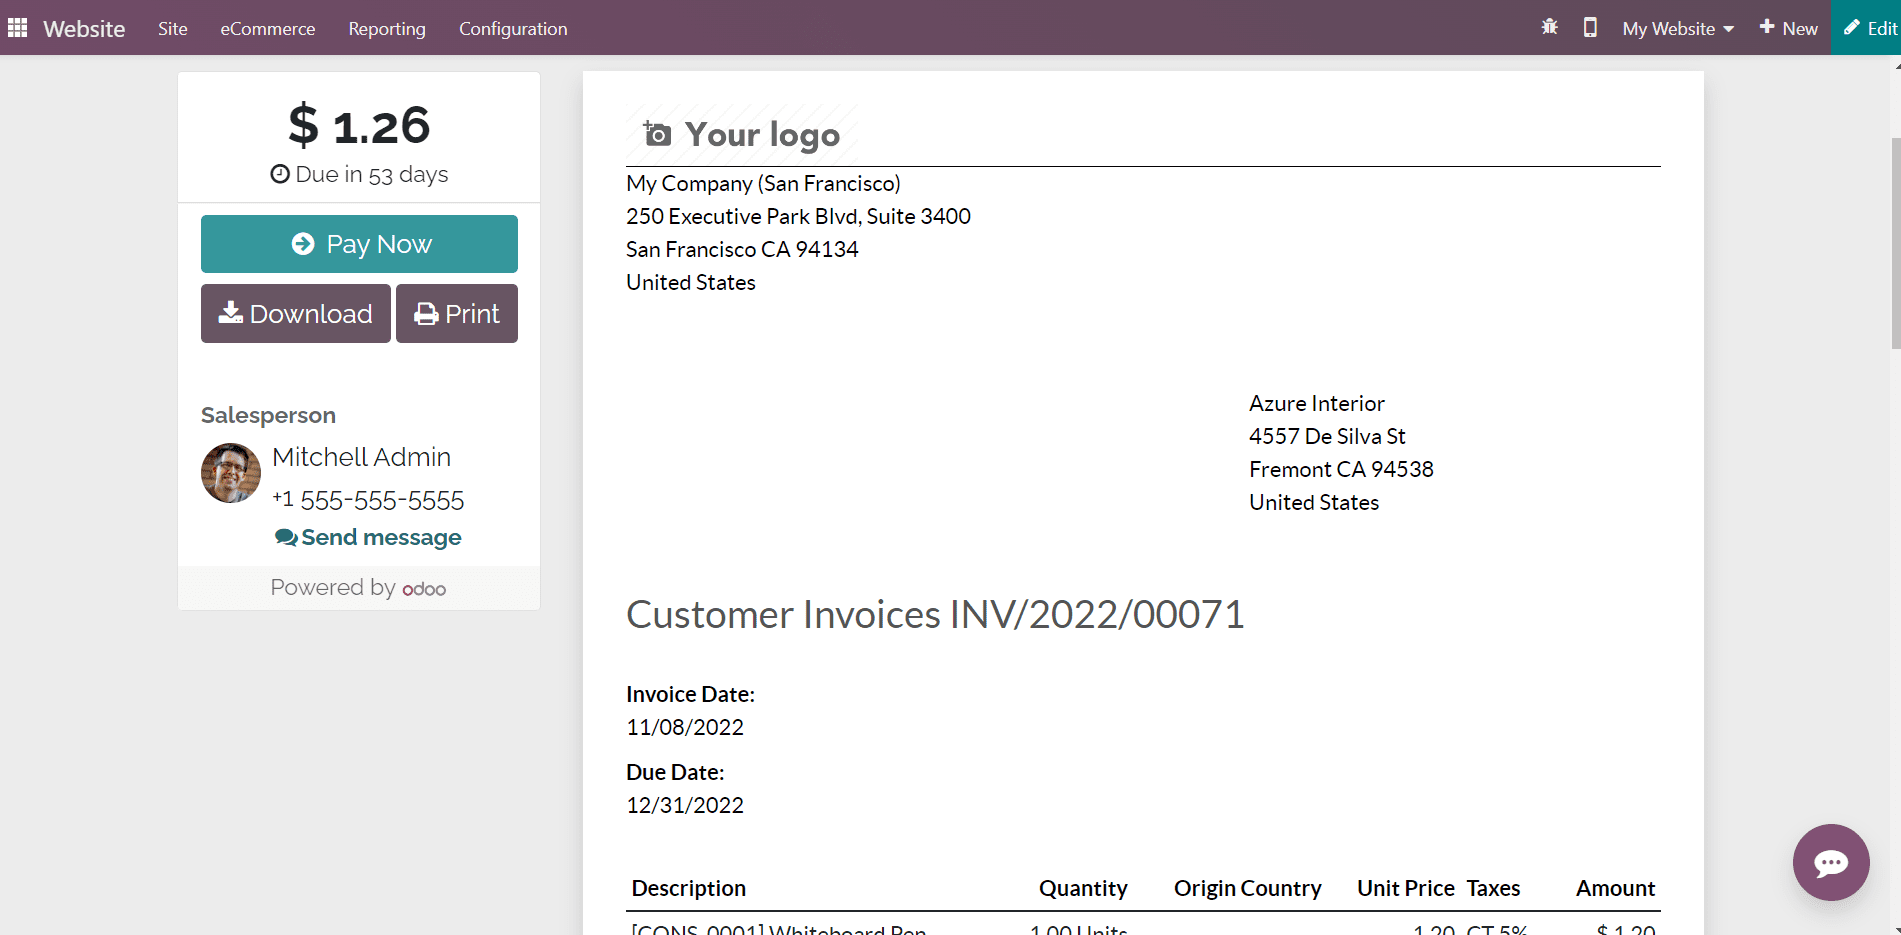
The image shows the customer preview of the invoice from the customer portal, where the customer can check the invoice and pay the amount using a convenient payment method. Here, you can find the options to Download, and Print the invoice and send a message to the respective salesperson.
The Send & Print button will allow you to send the invoice to the customer via mail. As soon as you click on this button, an automated mail will be generated as shown below where you can add the recipient’s list and change the subject according to your purpose.
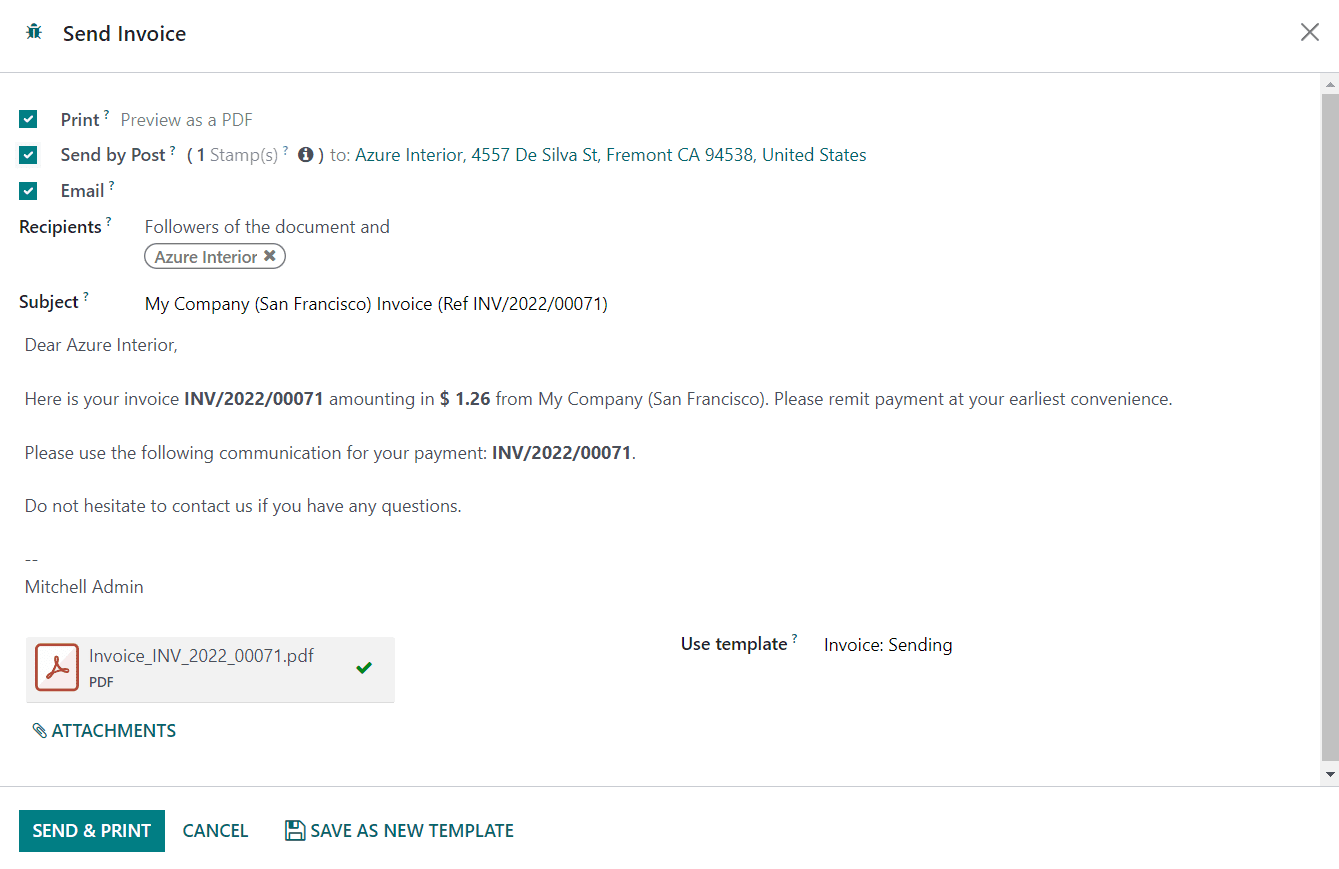
The invoice will be added to the mail as an attachment and you can click the Send button. The customer can check the details and pay the invoice after getting the mail. The Register Payment button can be used to register the payment from the customer. Odoo generates a pop-up window to confirm the details of the payment registration.

The window will show the Journal, Payment Method, Recipient Bank Account, Amount, Payment Date, and Memo as shown in the image above. Use the Create Payment button. The payment registration can be completed by this step. Once the customer pays the invoice, the status of the invoice can be observed as Paid.
Payments
In the Odoo Accounting module, you can check all payment records of various customer invoices from the Payments option available under the Customers menu. The preview includes the Date, Number, Journal, Payment Method, Partner, Batch Payment, Amount, and Status.
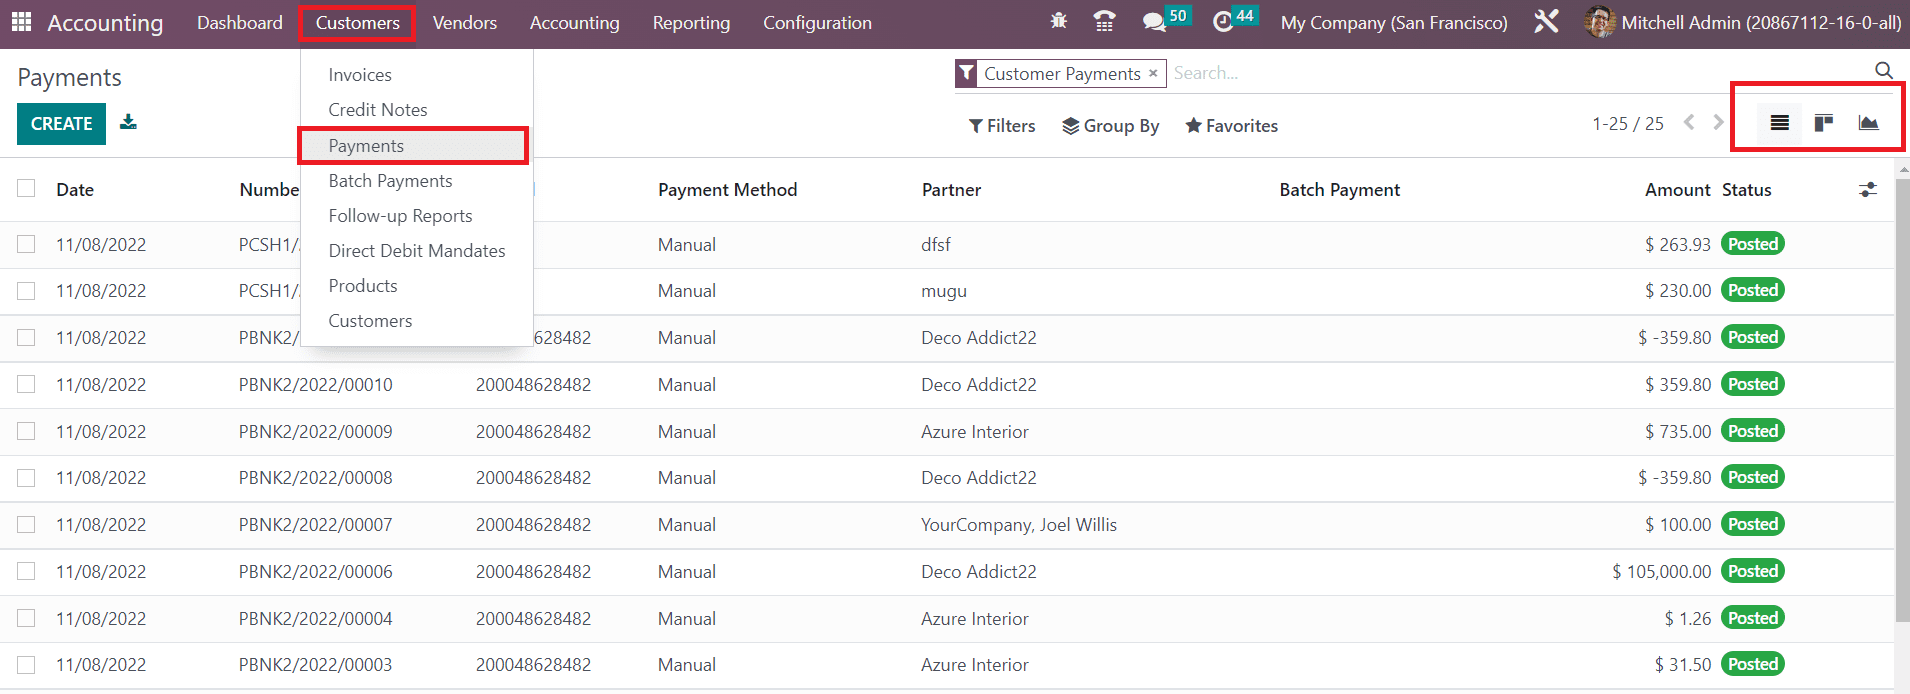
You will get List, Kanban, and Graph views which can be used as per your demand.
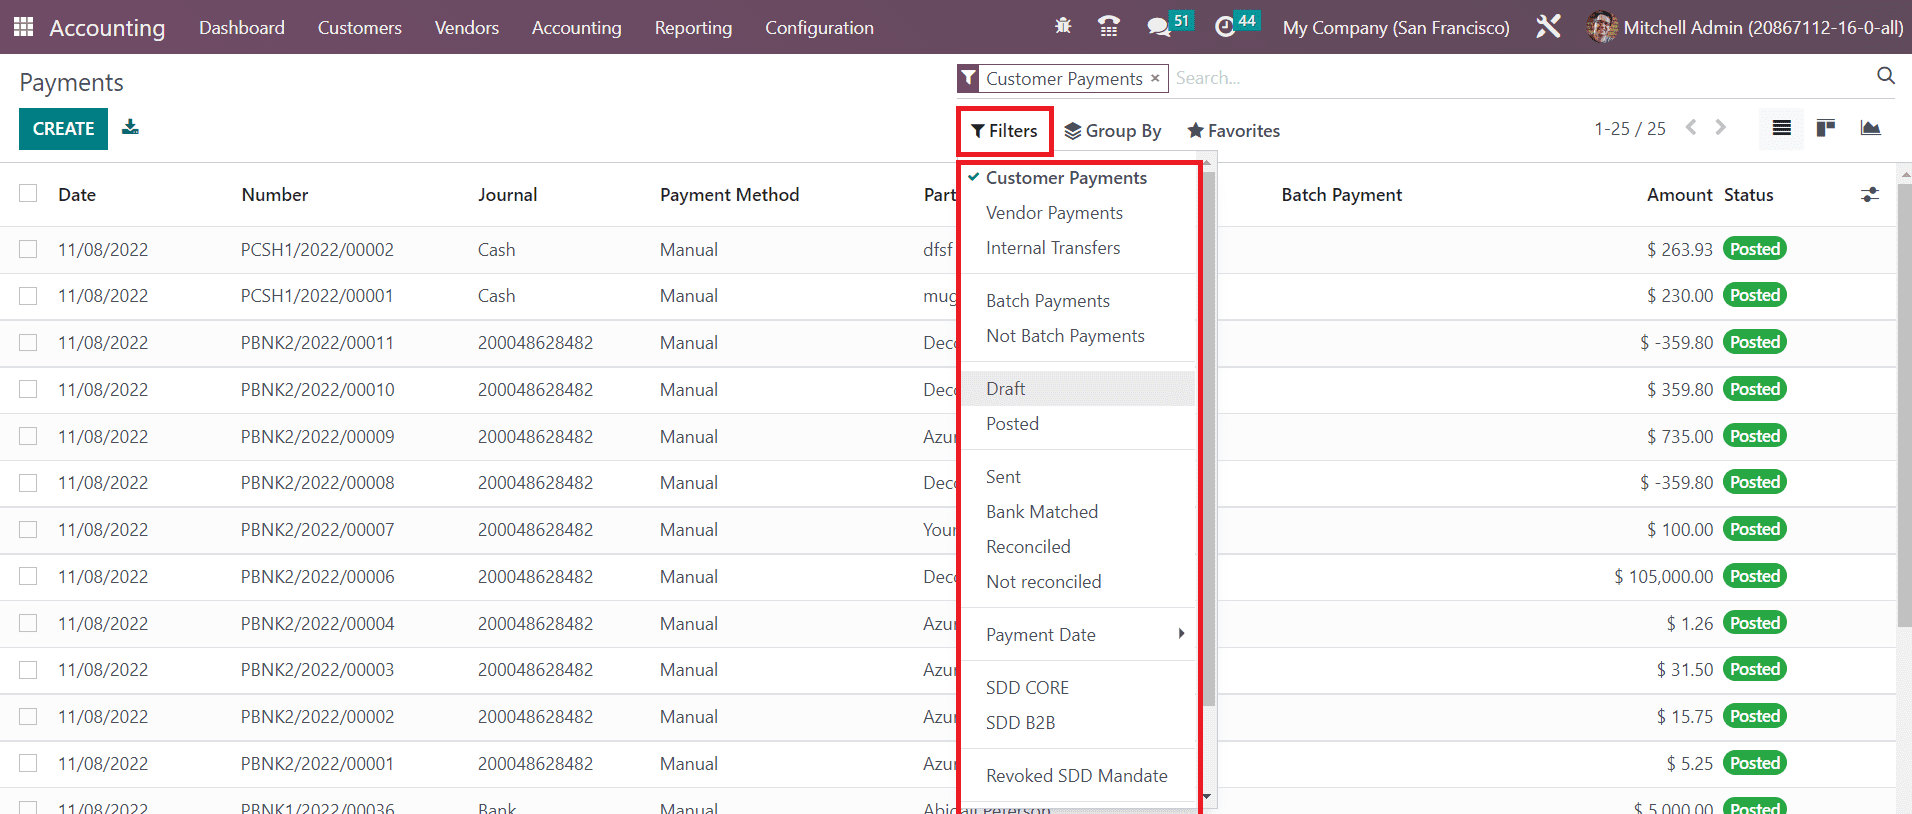
The user will get Customer Payments, Vendor Payments, Internal Transfers, Batch Payments, Not Batch Payments, Draft, Posted, Sent, Bank Matched, Reconciled, Not Reconciled, Payment Date, SDD CORE, SDD B2B, Revoked SDD Mandate, and Checks to Print as default filters.
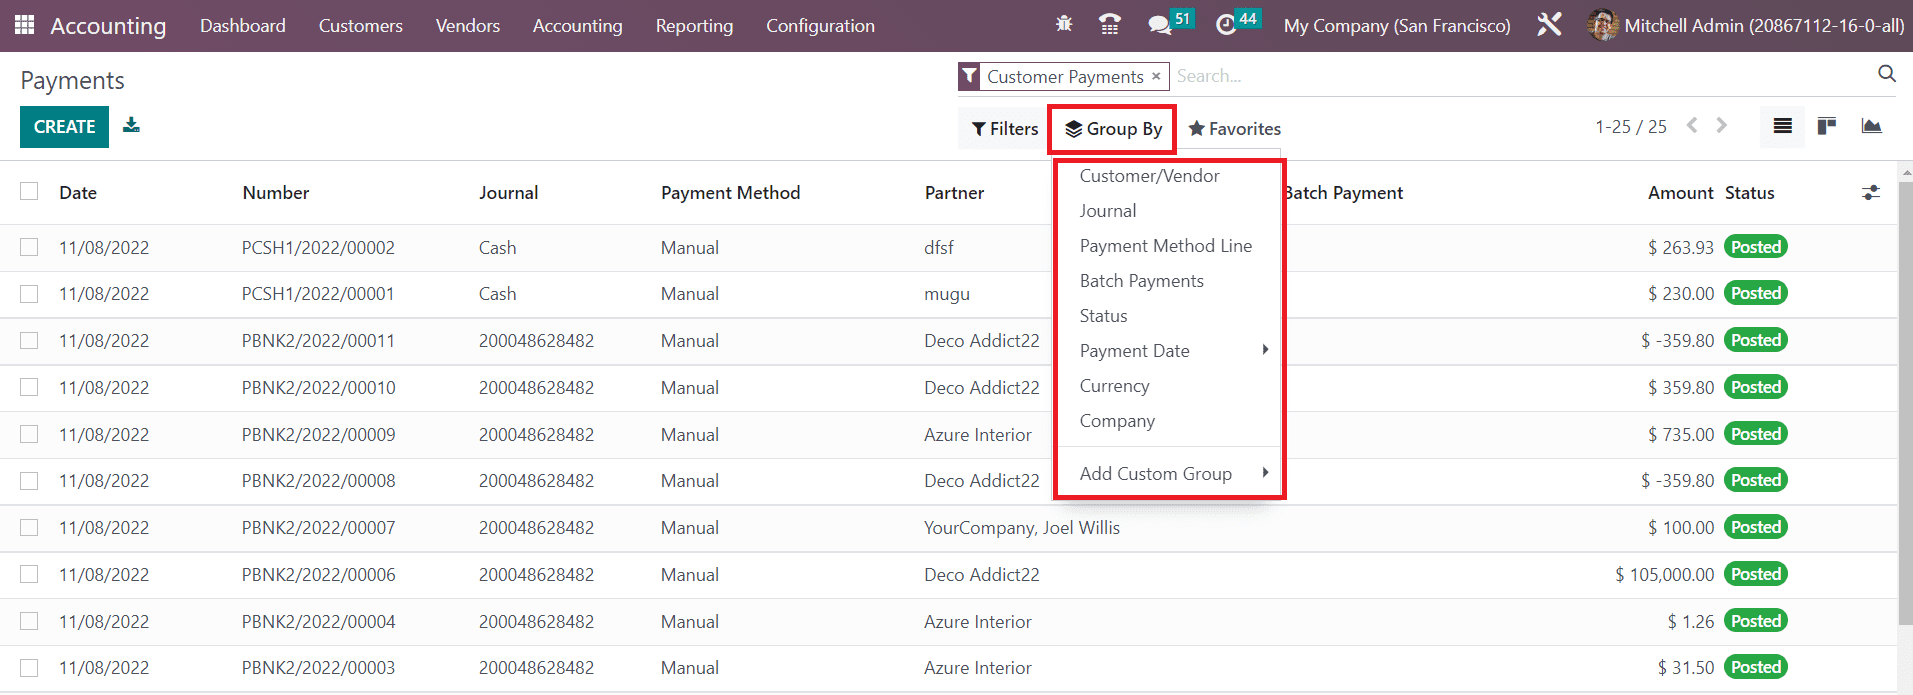
Customer/Vendor, Journal, Payment Method Line, Batch Payments, Status, Payment Date, Currency, and Company are the available default grouping options on this platform. You can select the Create button to create a new payment record.
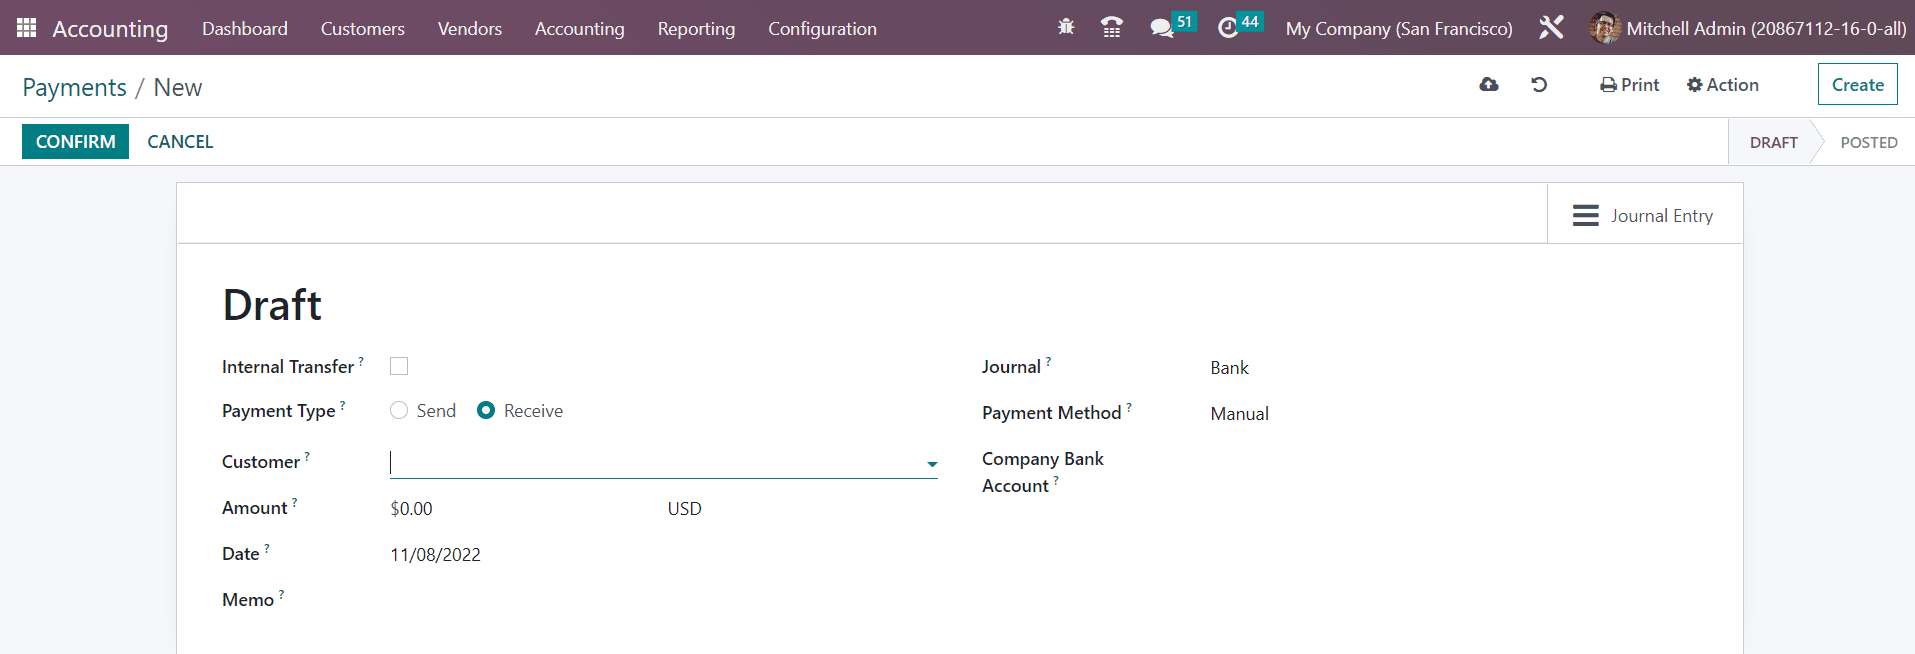
The Internal Transfer field can be activated for the payments of any internal transfer. Internal transfer indicates the transactions that move funds from one account to another within the company. Since it is a customer payment, the Payment Type can be selected as Receive. The payment type Send is used in the case of vendor payment. In the given space, you can specify the customer id. In the corresponding fields, you can mention the Amount, Date, Memo of the payment, Journal to record the payment, Payment Method, and Company Bank Account. The customer can choose manual, payment providers, check, batch deposit, SEPA credit transfer, or SEPA Direct Debit as the payment method to pay the amount.
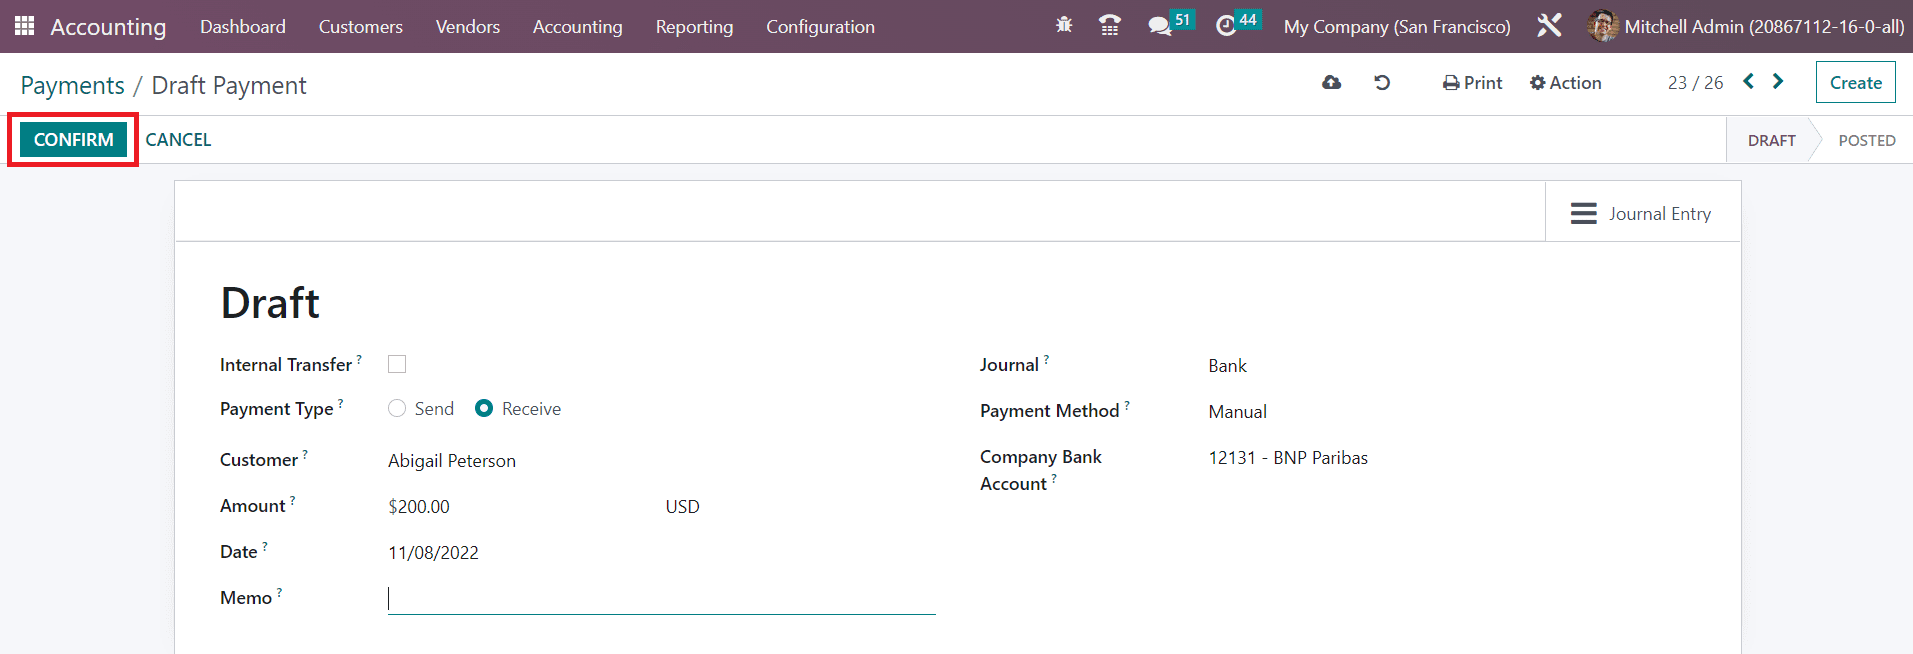
Confirm the draft payment by clicking on the Confirm button.
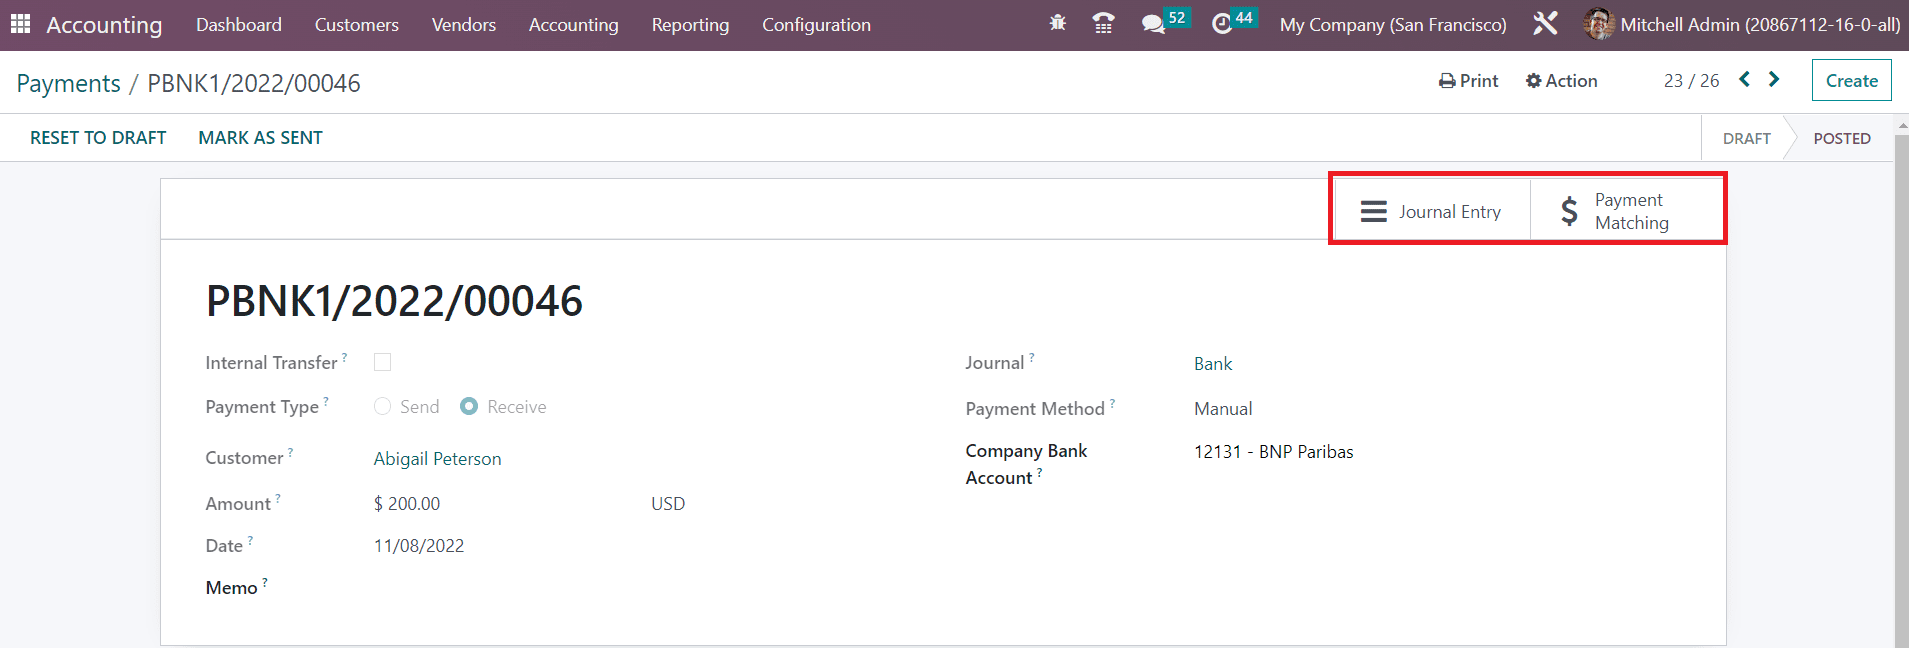
The Journal Entries related to this payment can be viewed using the corresponding smart button available in the window. Once the customer completes the payment, you can add this payment to the pending invoices of that particular customer by using the Payment Matching smart button. This button will display all open invoices of that customer. You can choose and reconcile an invoice from the list with the same amount. You can use the Mark as Sent option to label the payment as Sent and the Reset to Draft button to reset the payment to draft.
This blog has provided a brief overview of the invoice management in the Odoo 16 Accounting module. We have seen how the Accounting module allows you to generate customer invoices and payment management.


