Lunch management is crucial for all employees and staff in each organization. In some situations, the maintenance of lunch providing for employees becomes challenging, mainly in large industries. An Odoo ERP system avoids all worries about food management in your company. Odoo 15 Lunch module ensures food supply for individuals in a firm accurately. It is easy to give lunch coupons and offers quickly for them with the help of the Odoo database. We can meet the employee’s requirements in an advanced manner with the Odoo 15 system.
This blog discusses the usage of the Lunch module with the Odoo 15 platform.
Each employee in a firm can order and select the meals using Odoo 15 Lunch module within less time. Better relaxation and activeness available to employees through a well-organized lunchtime in a company. Hence, a positiveness spreads inside employees’ minds, and they can do work efficiently.
Odoo 15 Lunch Dashboard
Several orders created by employees are visible inside the Odoo Lunch dashboard. It is easy to sort out the food according to various categories depicted on the left side. You can access the product name, cost, description of ingredients, and other data separately, as displayed in the screenshot below.
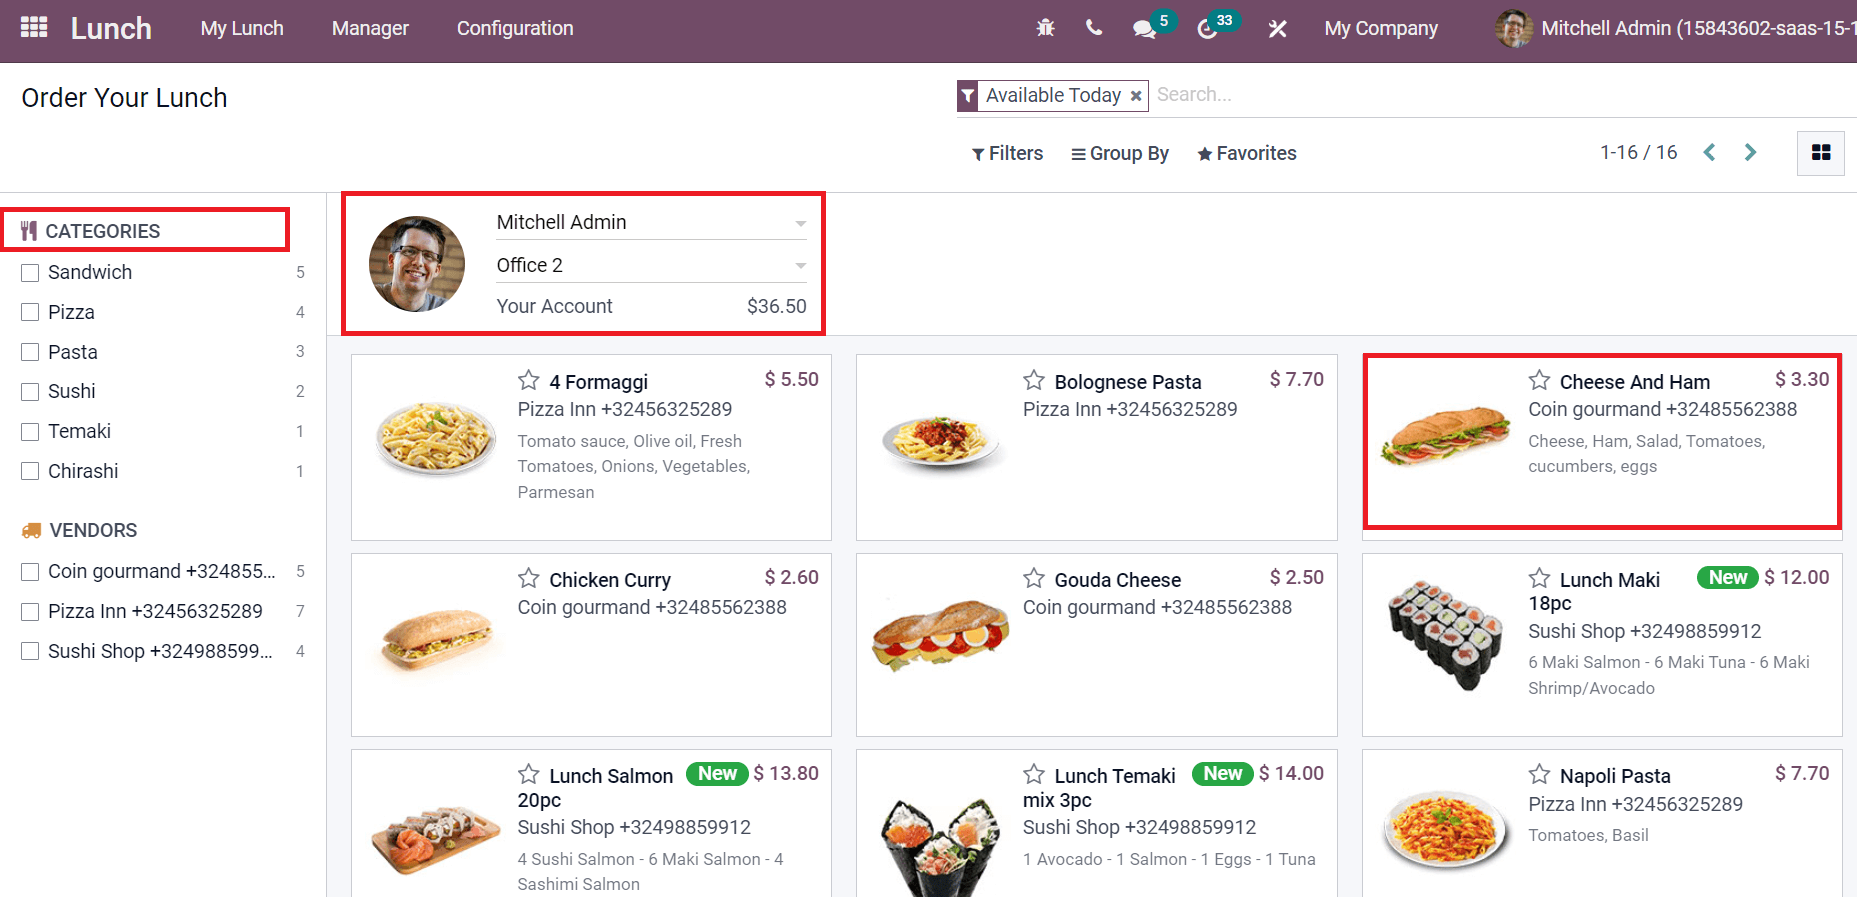
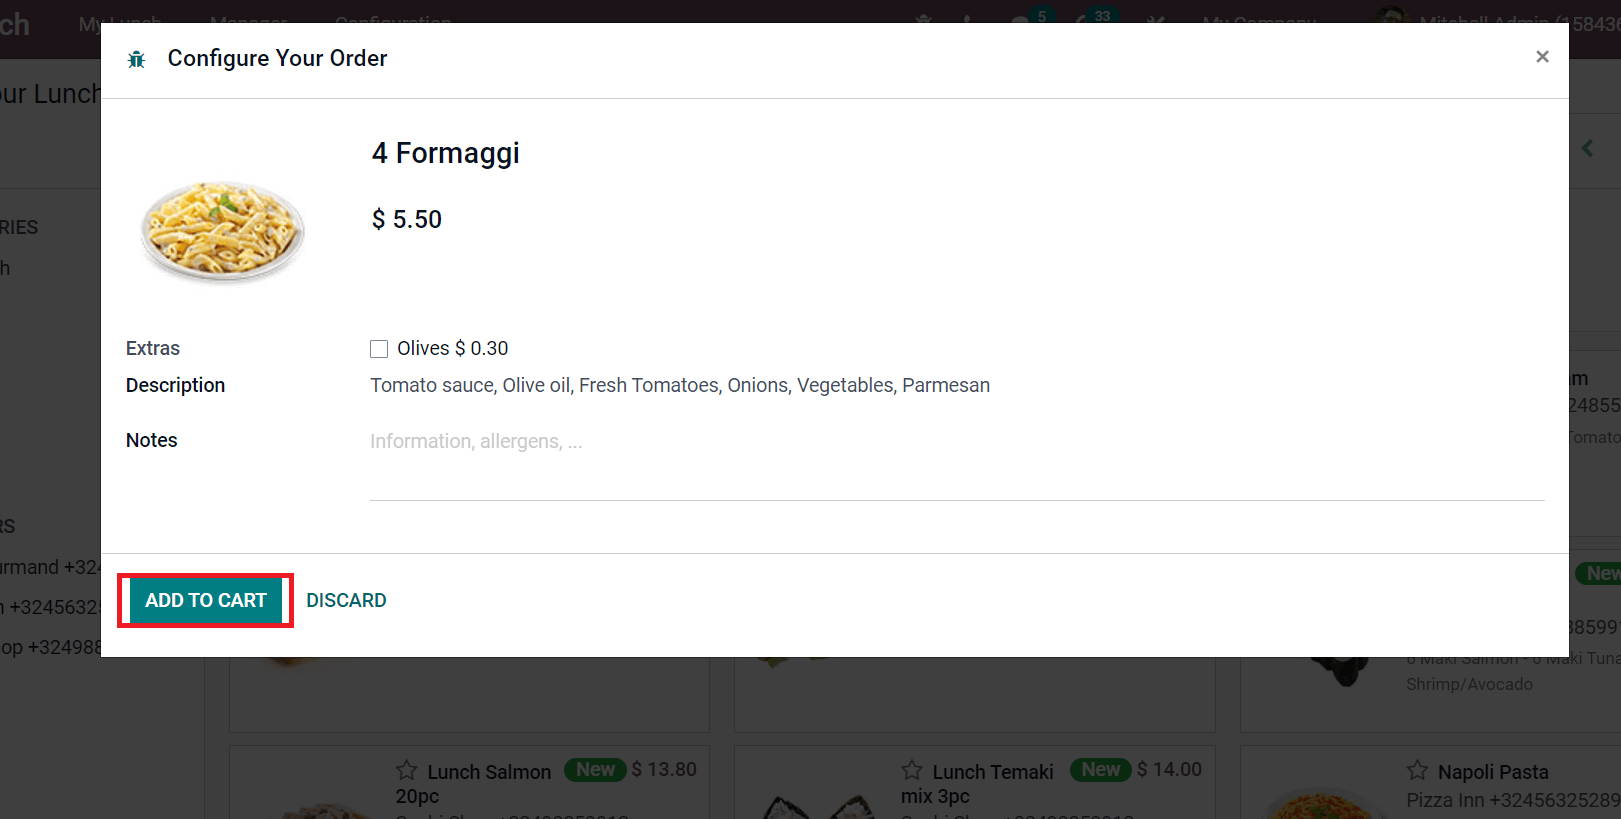
On the top page, we can see an account holder’s name, office, and total amount in the account. You can book the Order quickly by clicking on a specific food item. On the new page, click on ADD TO CART button as mentioned in the screenshot below.
After that, the user can see order details on the top right side, showing the total cost.
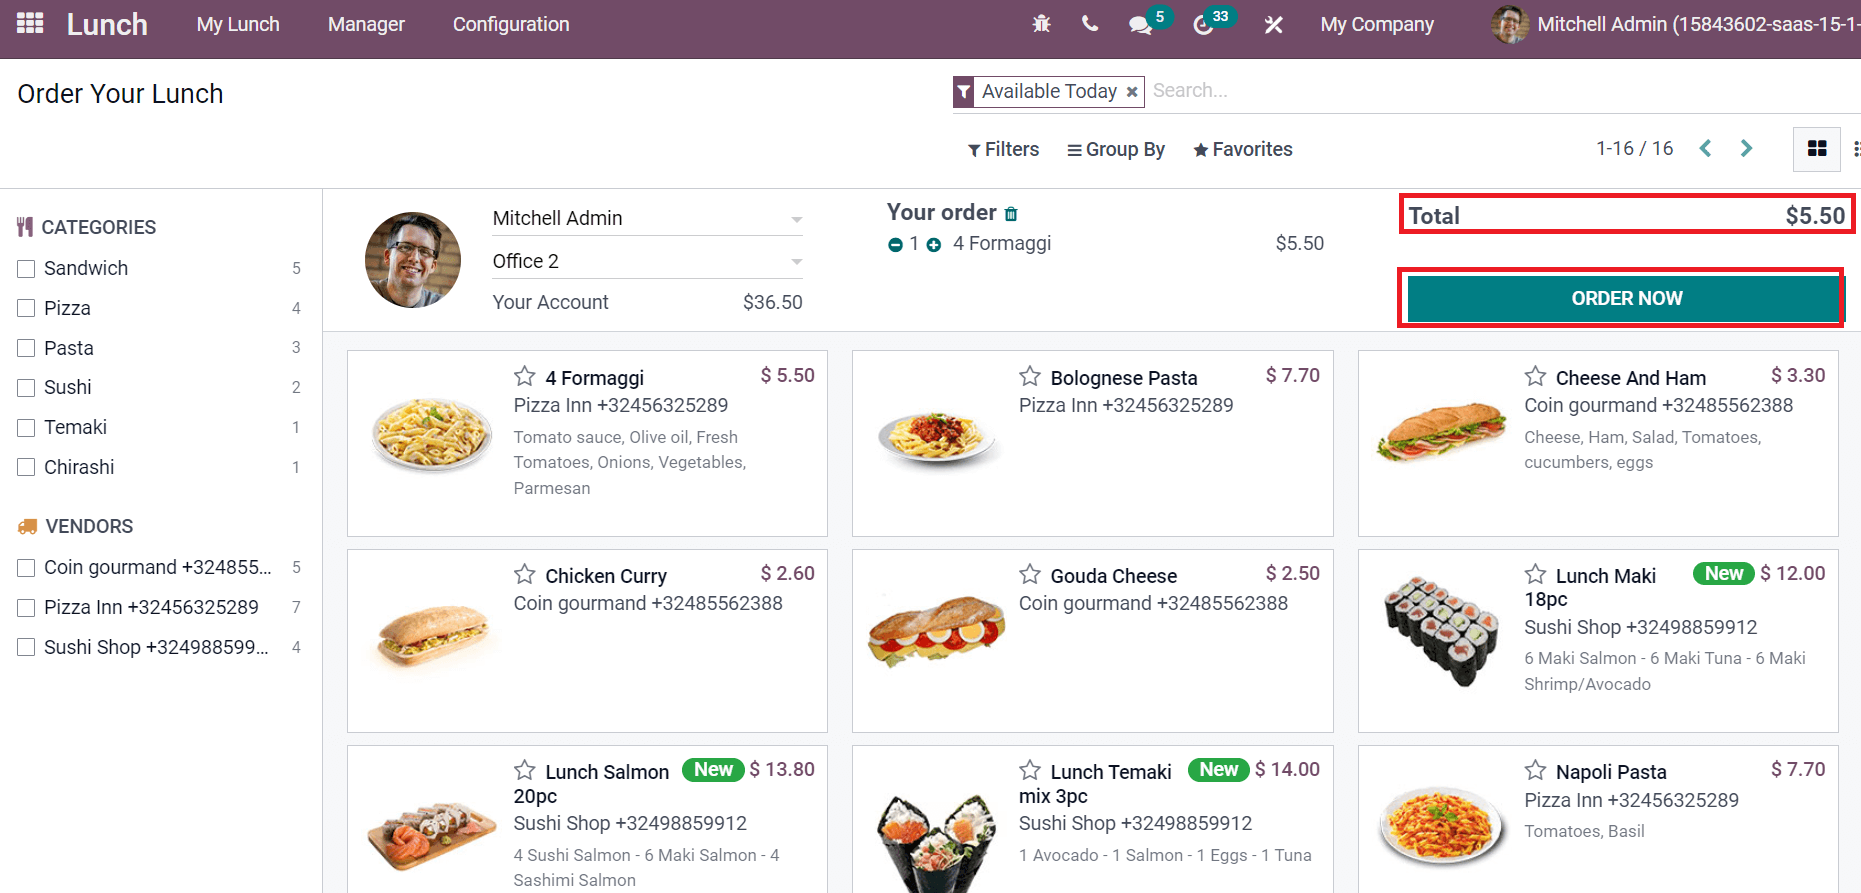
Choose the ORDER NOW button to book your order. The list view of the window shows the Product Name, Company, Vendor, Product Category, Description, and Price as in the given screenshot below.
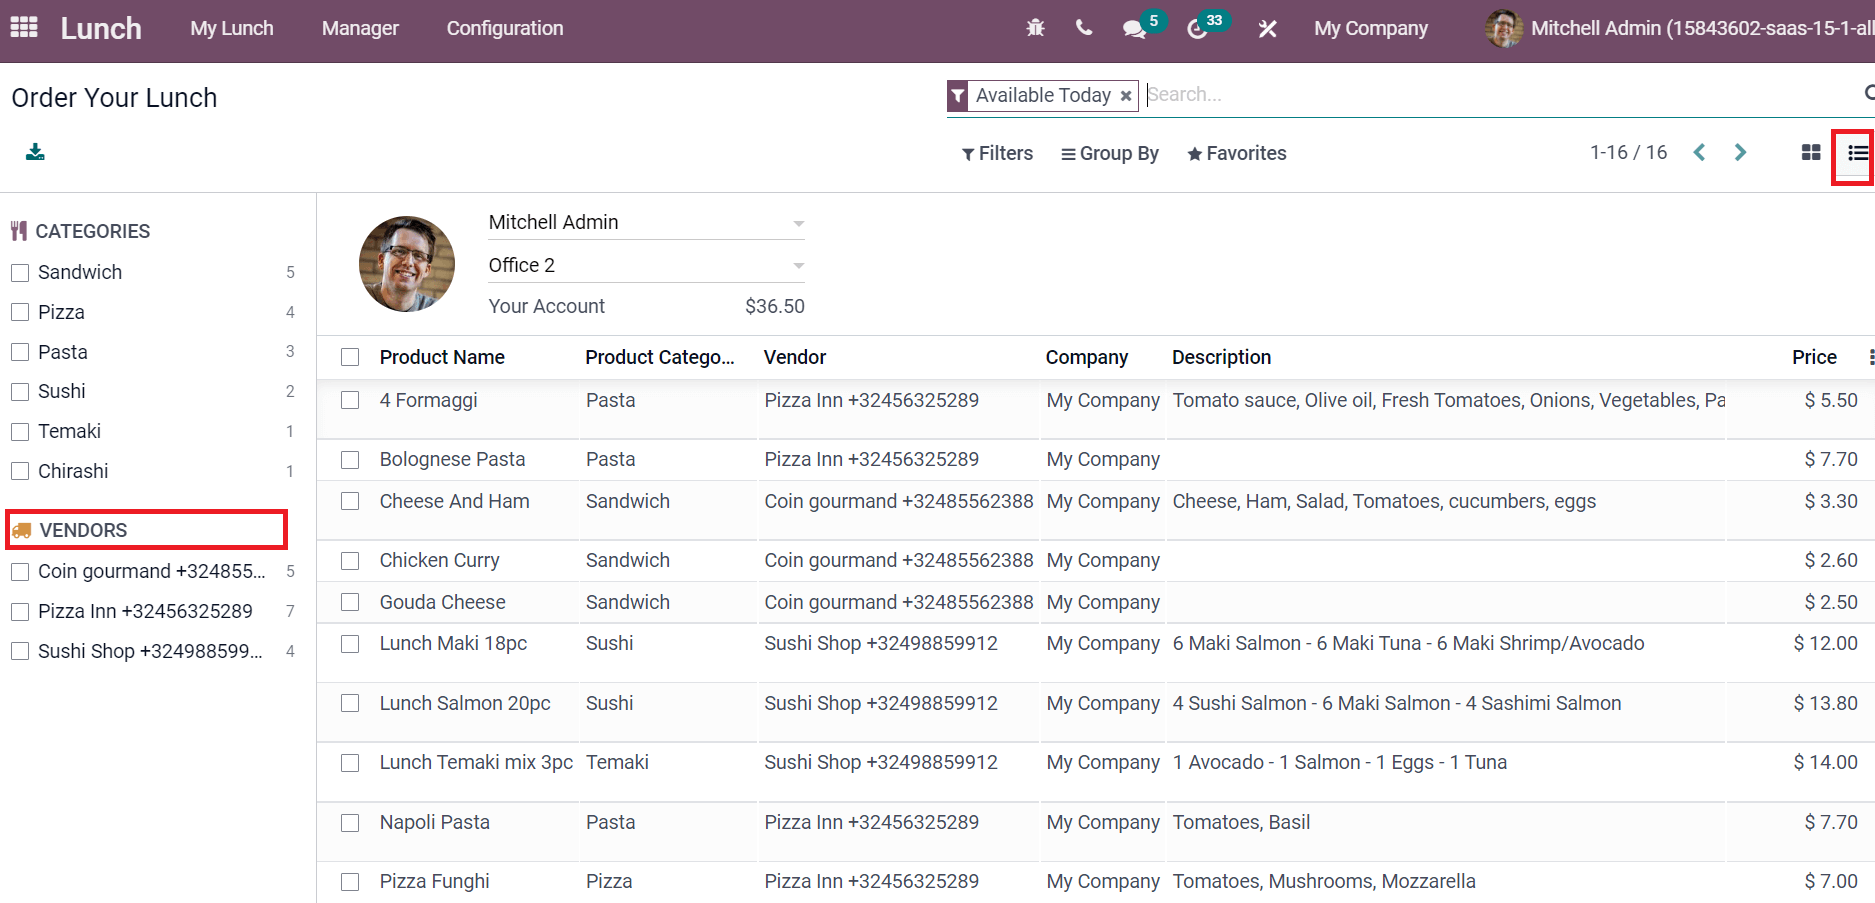
We can also see the Vendors’ information from the left side of the Order Your Lunch window.
To Generate Products and Product Categories
All product data in your Company are available inside the products window. We can access Product Name, Vendor, Product Category, Price, etc. from the List view as specified in the screenshot below.
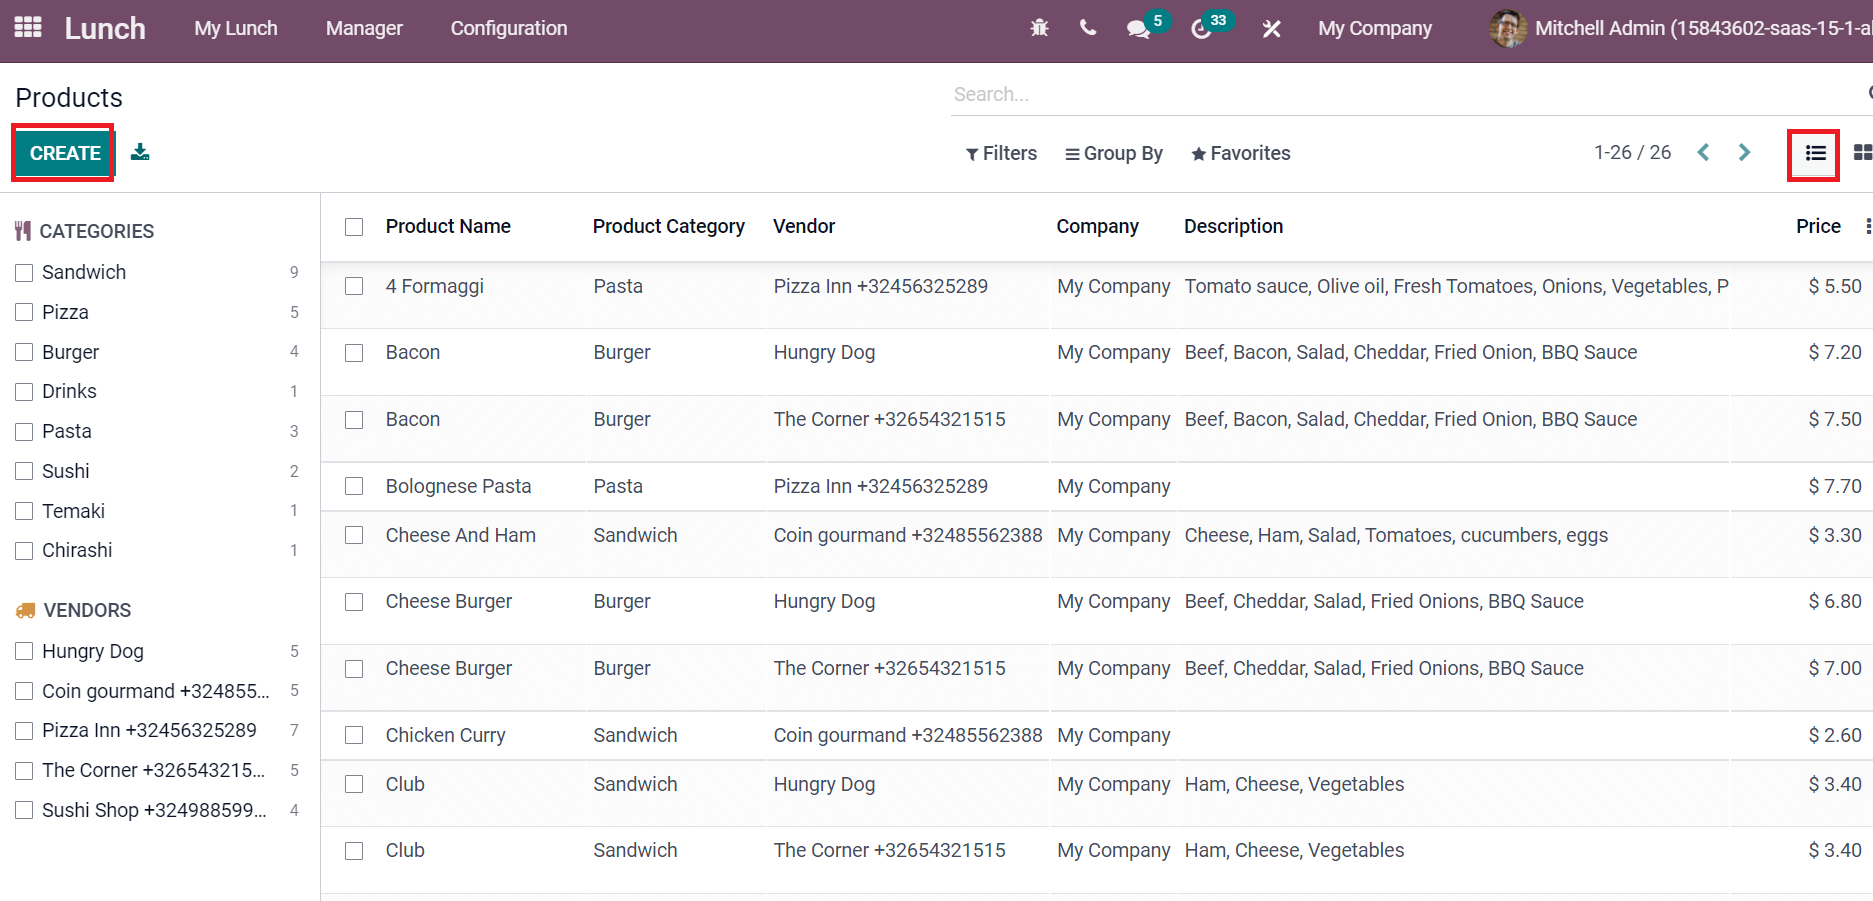
Users can quickly develop product information by selecting the CREATE icon. On the next page, let’s create a new product, ‘Paneer Burger.’ Before developing a product, we need to set a product category for the material. Select the Product Categories menu in the Configuration feature and select the CREATE icon, as portrayed in the screenshot below.
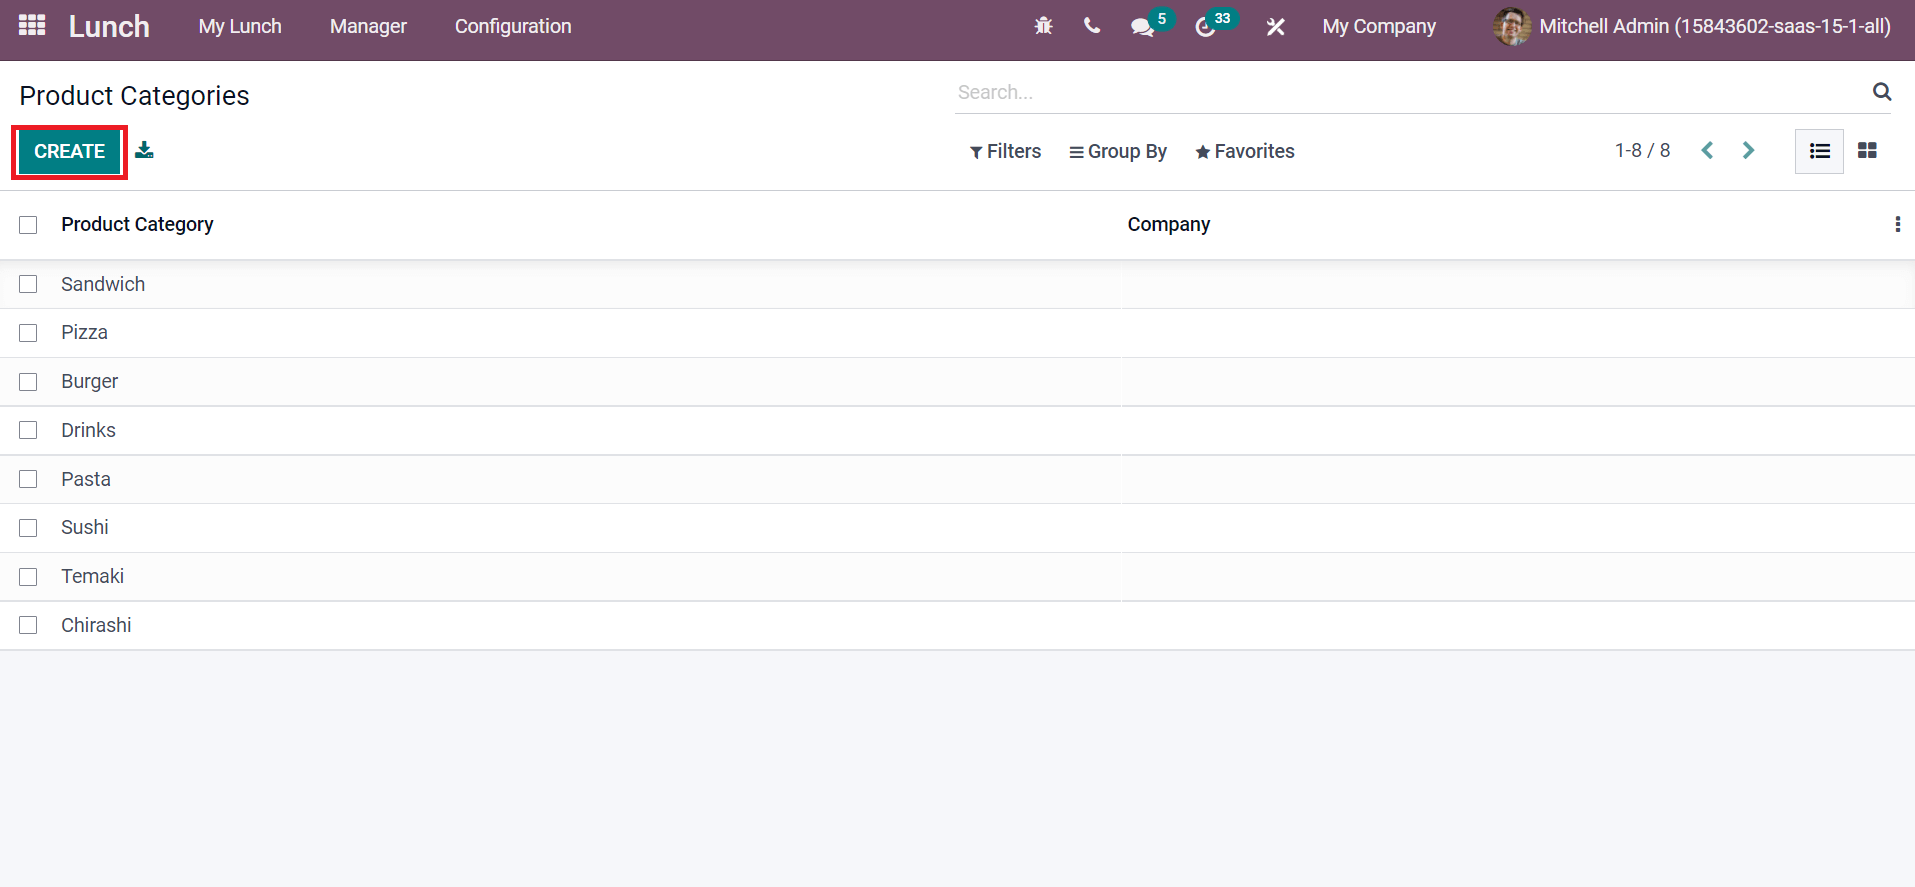
We can develop a Product Category ‘Burger’ in the new window. Add Product Category as ‘Burger’ and choose your Company as denoted in the screenshot below.
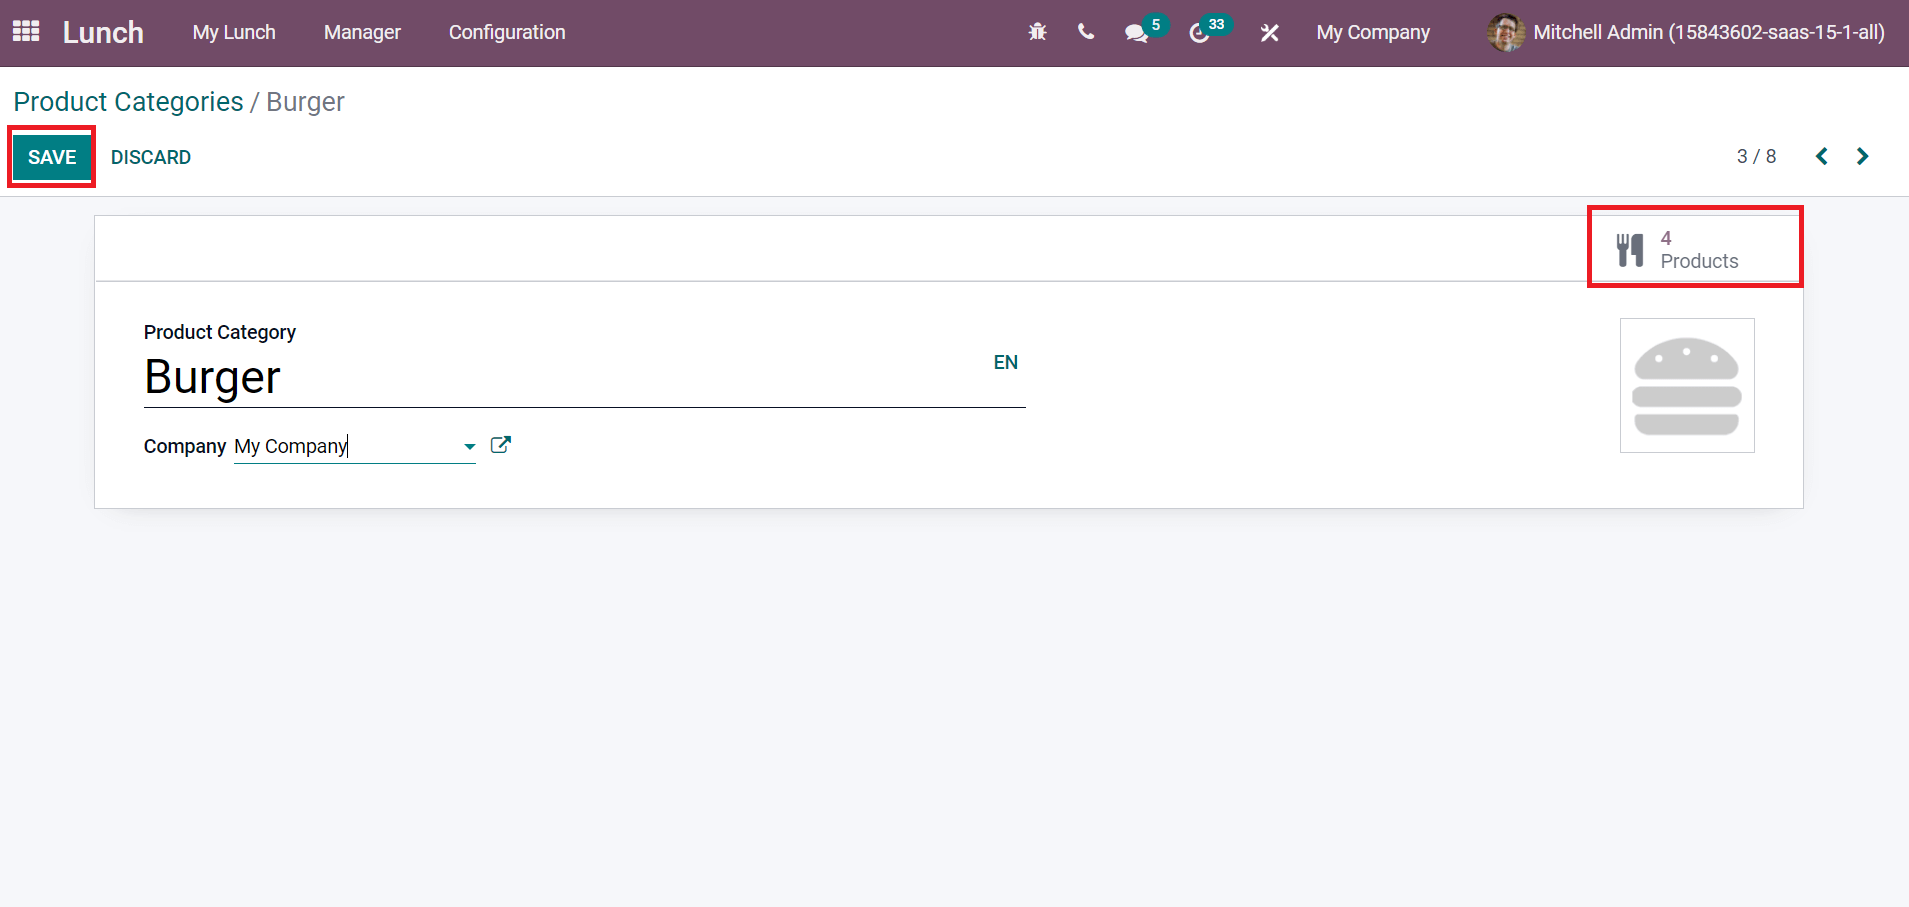
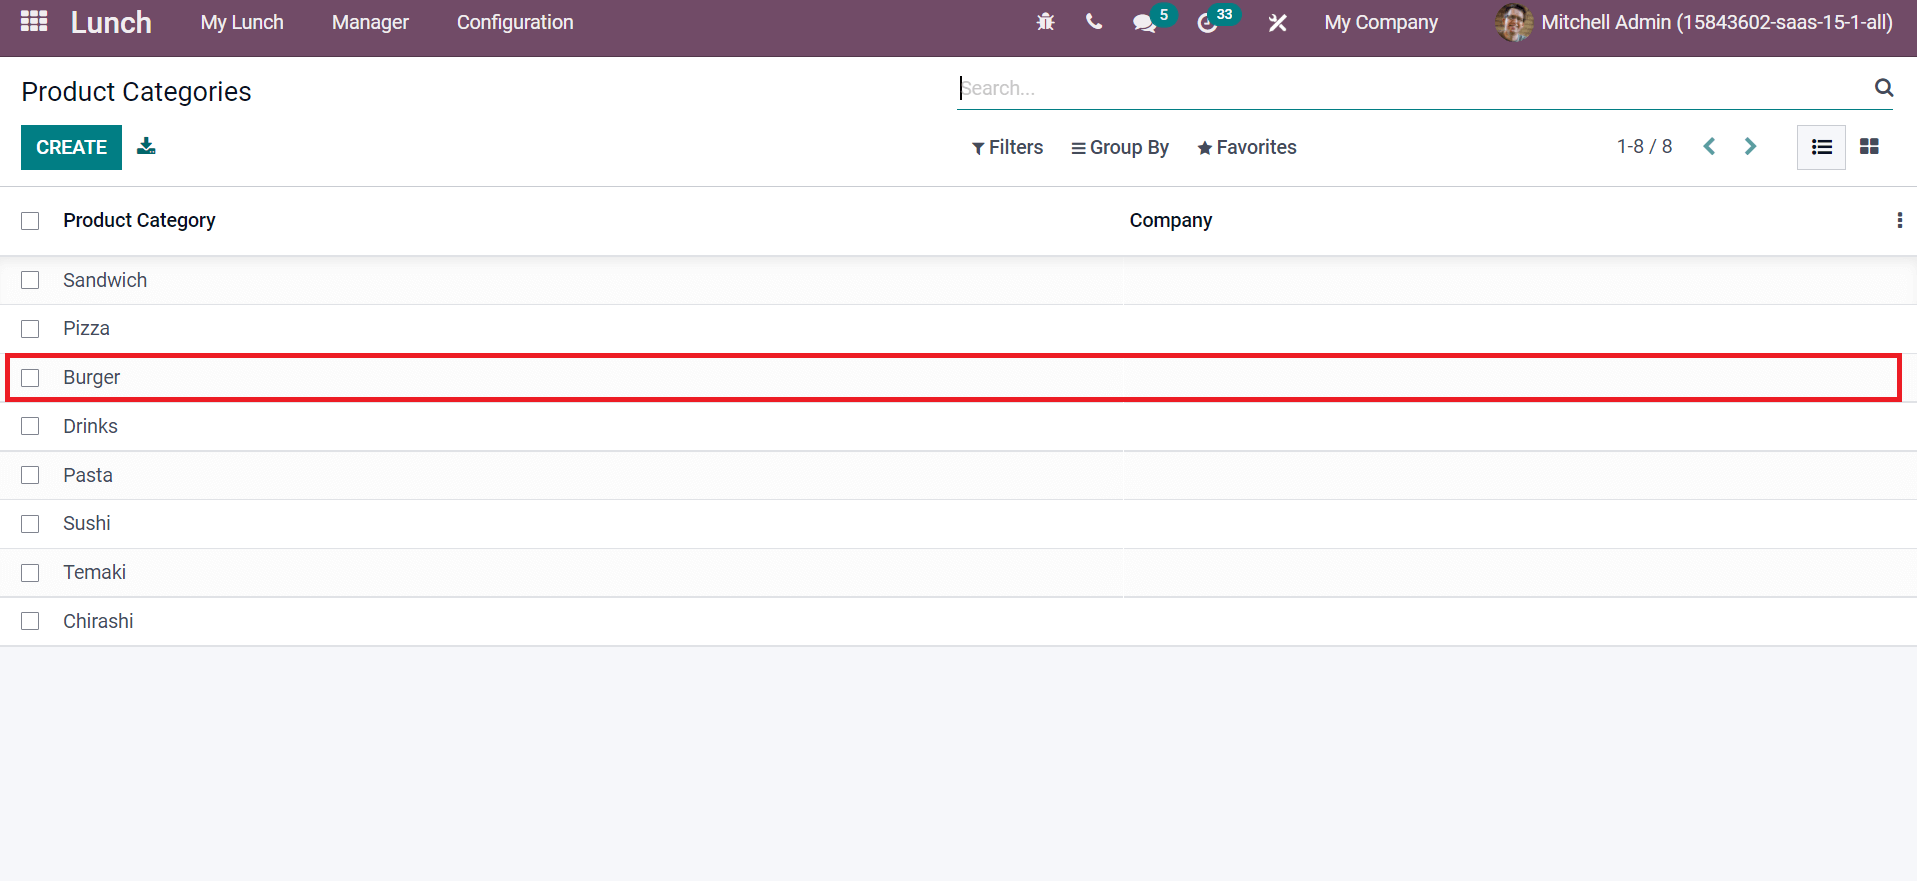
Choose the SAVE icon after adding these details. You can also view the number of items inside your product category by clicking on the Products smart icon shown in the above screenshot. The created category is visible in the Product Categories window, as mentioned in the screenshot below.
Now, let’s go back to the Product window and create Paneer Burger data. Apply the Product Name as ‘Paneer Burger’ and choose the Product Category as ‘Burger’ as we created before.
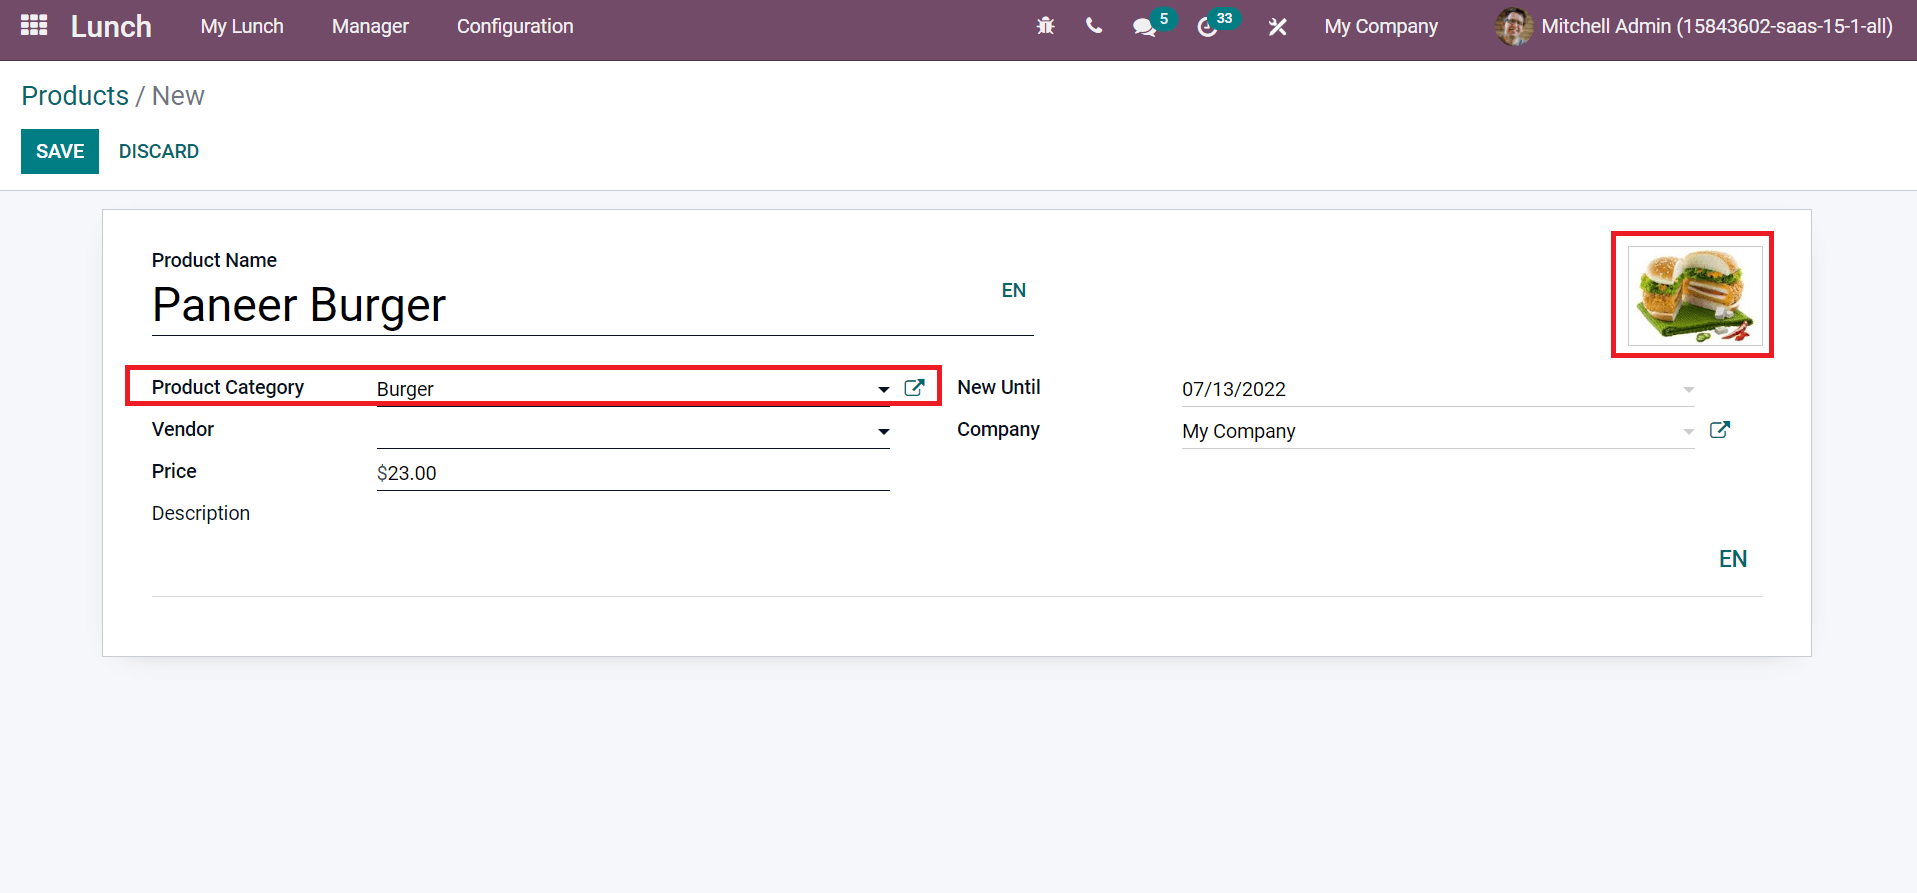
It is possible to add a product image on the right side, Vendor, Price, and information about the product in the Description field. Later, select the product date in the New Until field and pick up your Company as illustrated in the screenshot below.
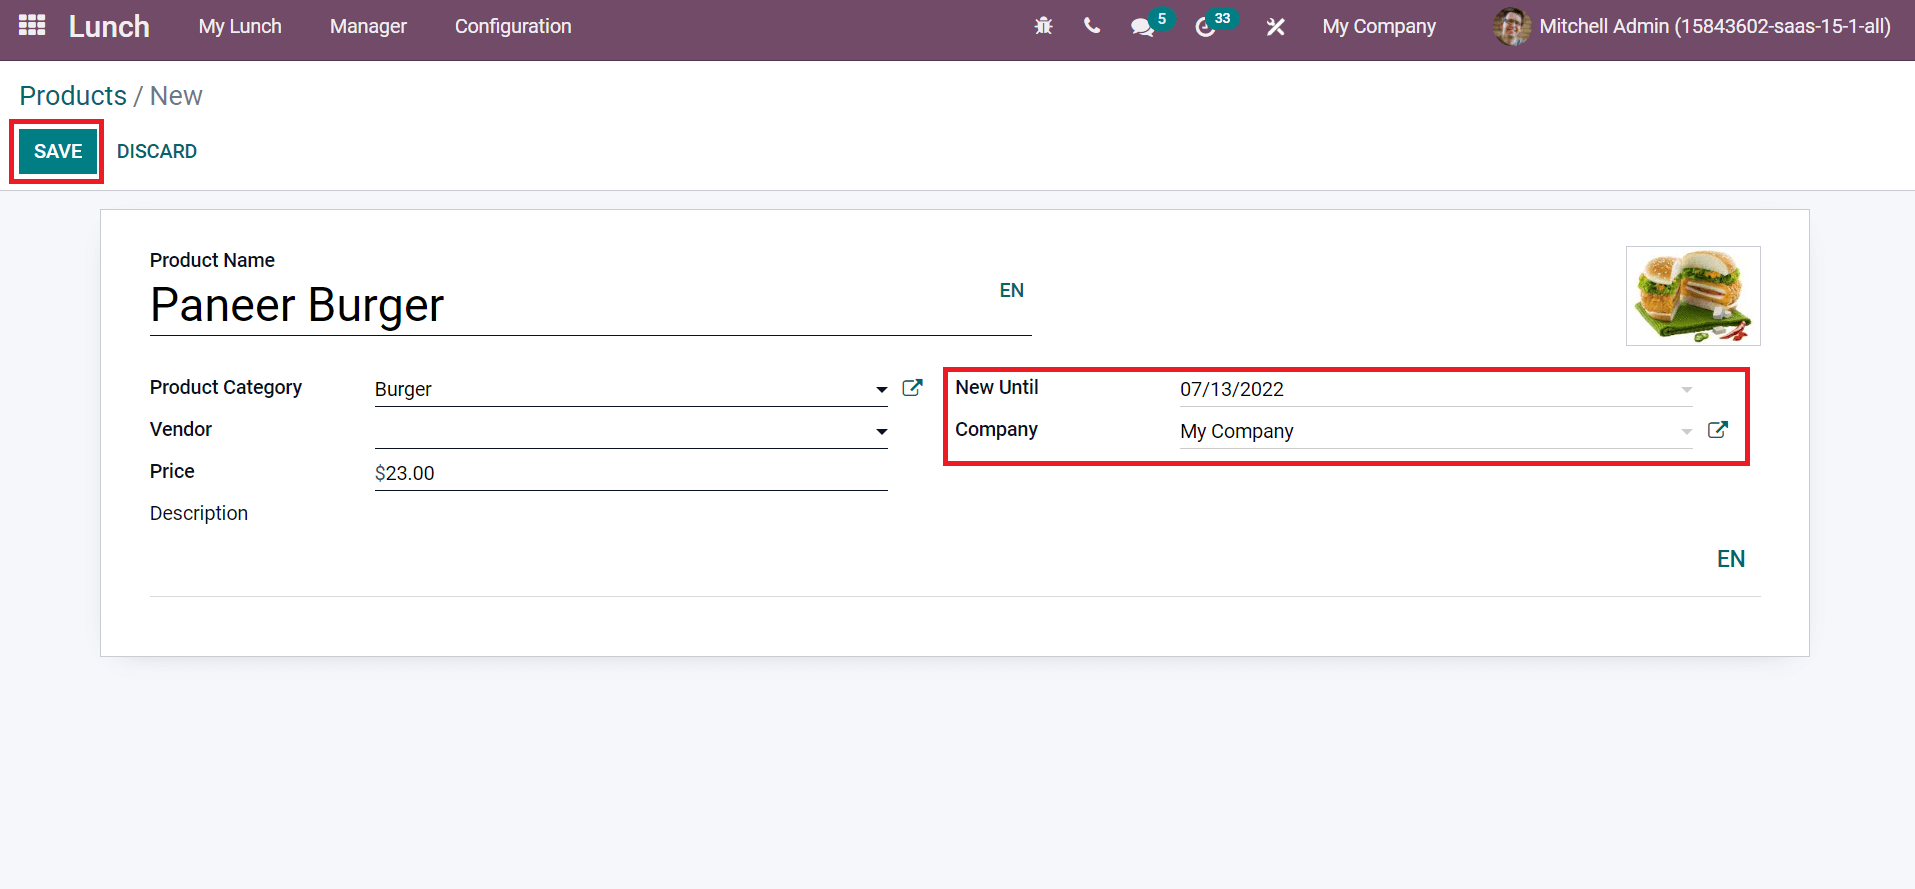
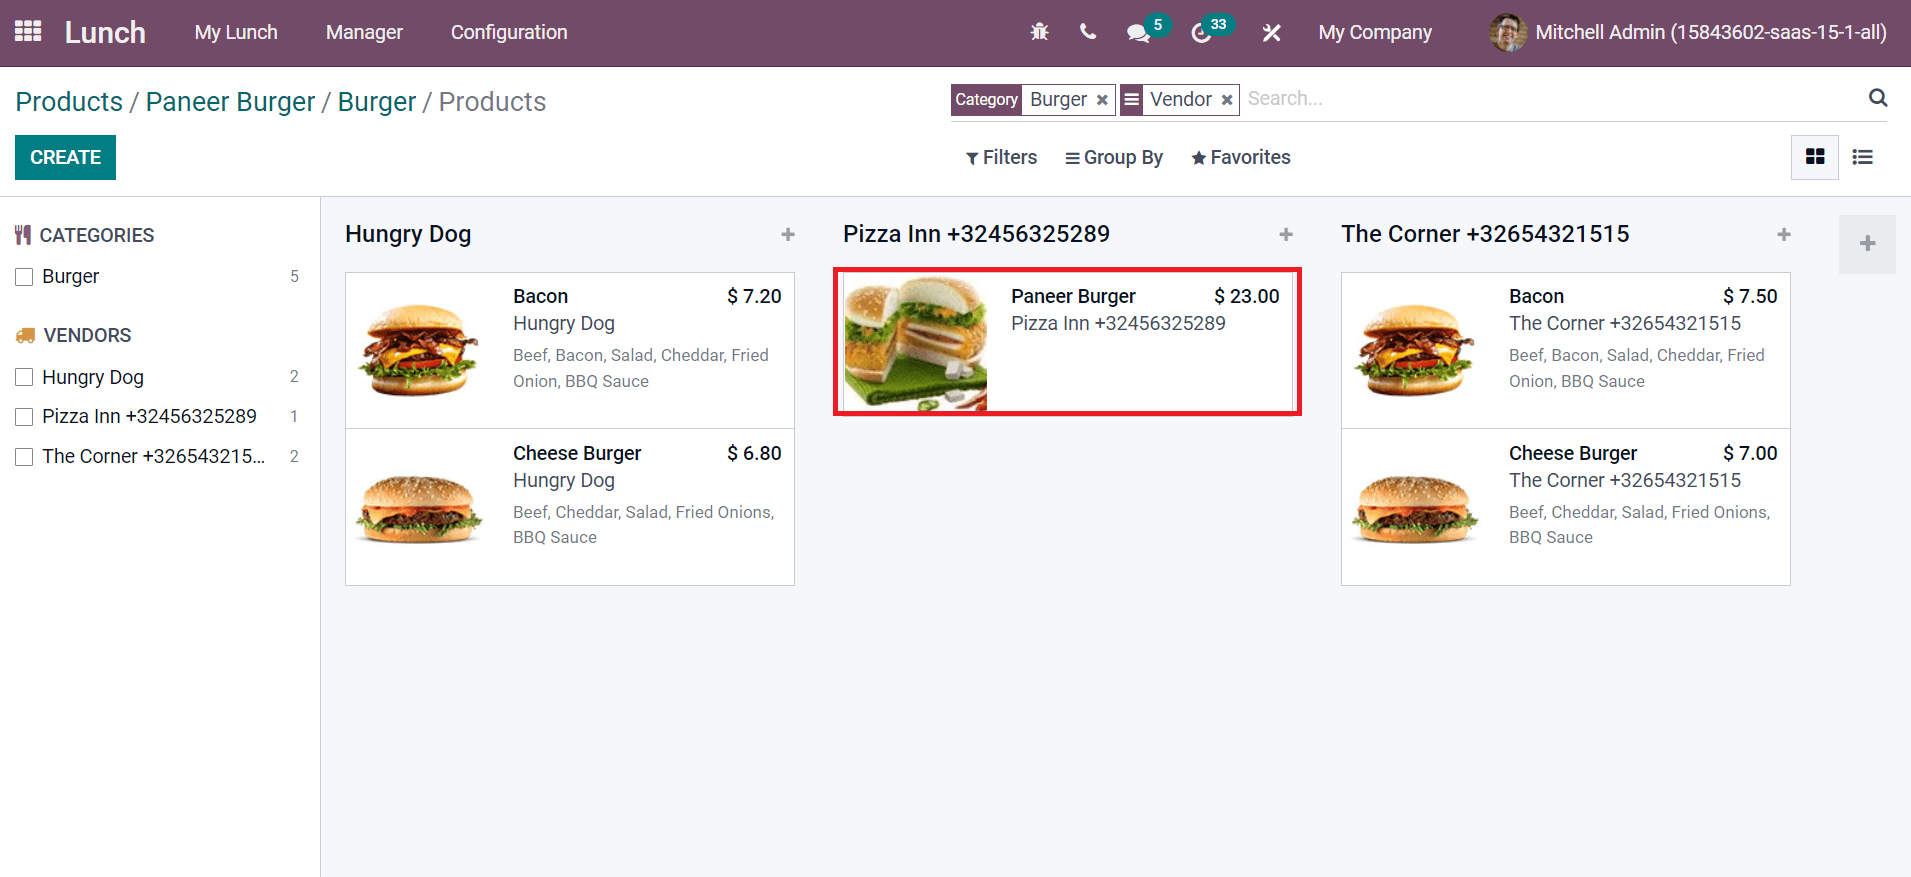
Click on the SAVE icon to formulate your new product. We can also see this product inside the product category ‘Burger’ as displayed in the screenshot below.
How to Set Alerts for your Product?
Employees get reminders about food orders through alerts, which is beneficial for food distributors. Within the Odoo 15 Lunch module, users can produce alerts for specific products to employees in a company. For this purpose, select the Alerts menu in the Configuration tab, and we can view all alerts in the Lunch Alerts window, as denoted in the screenshot below.
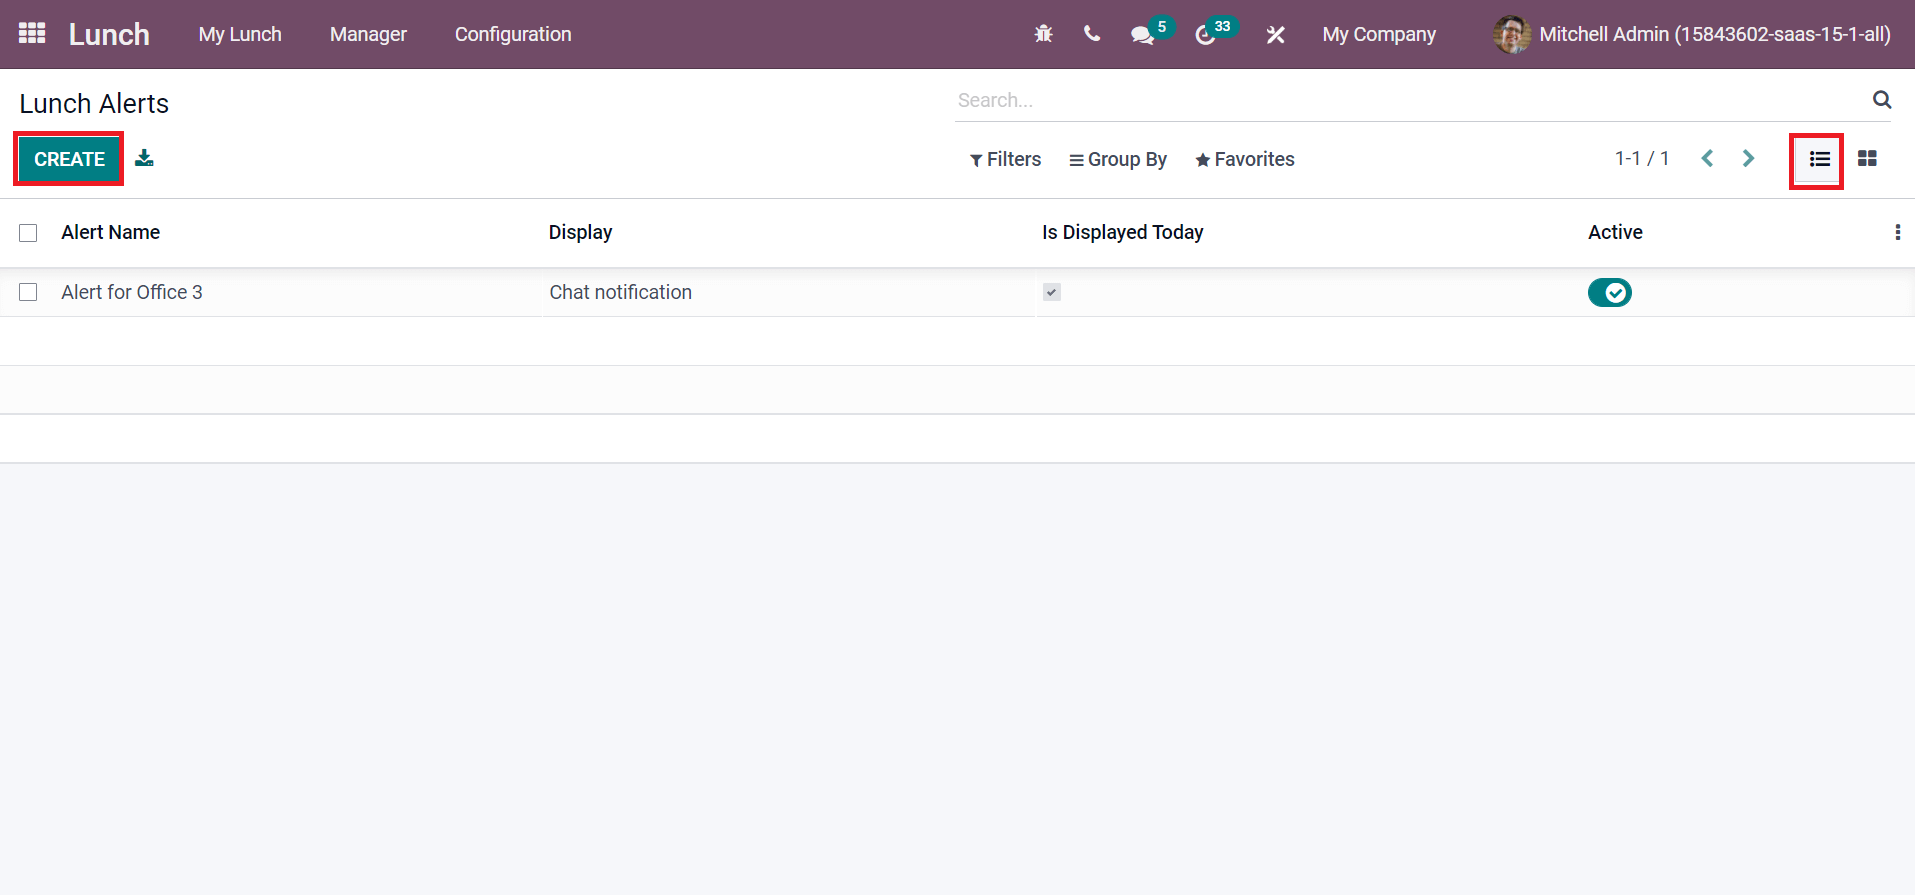
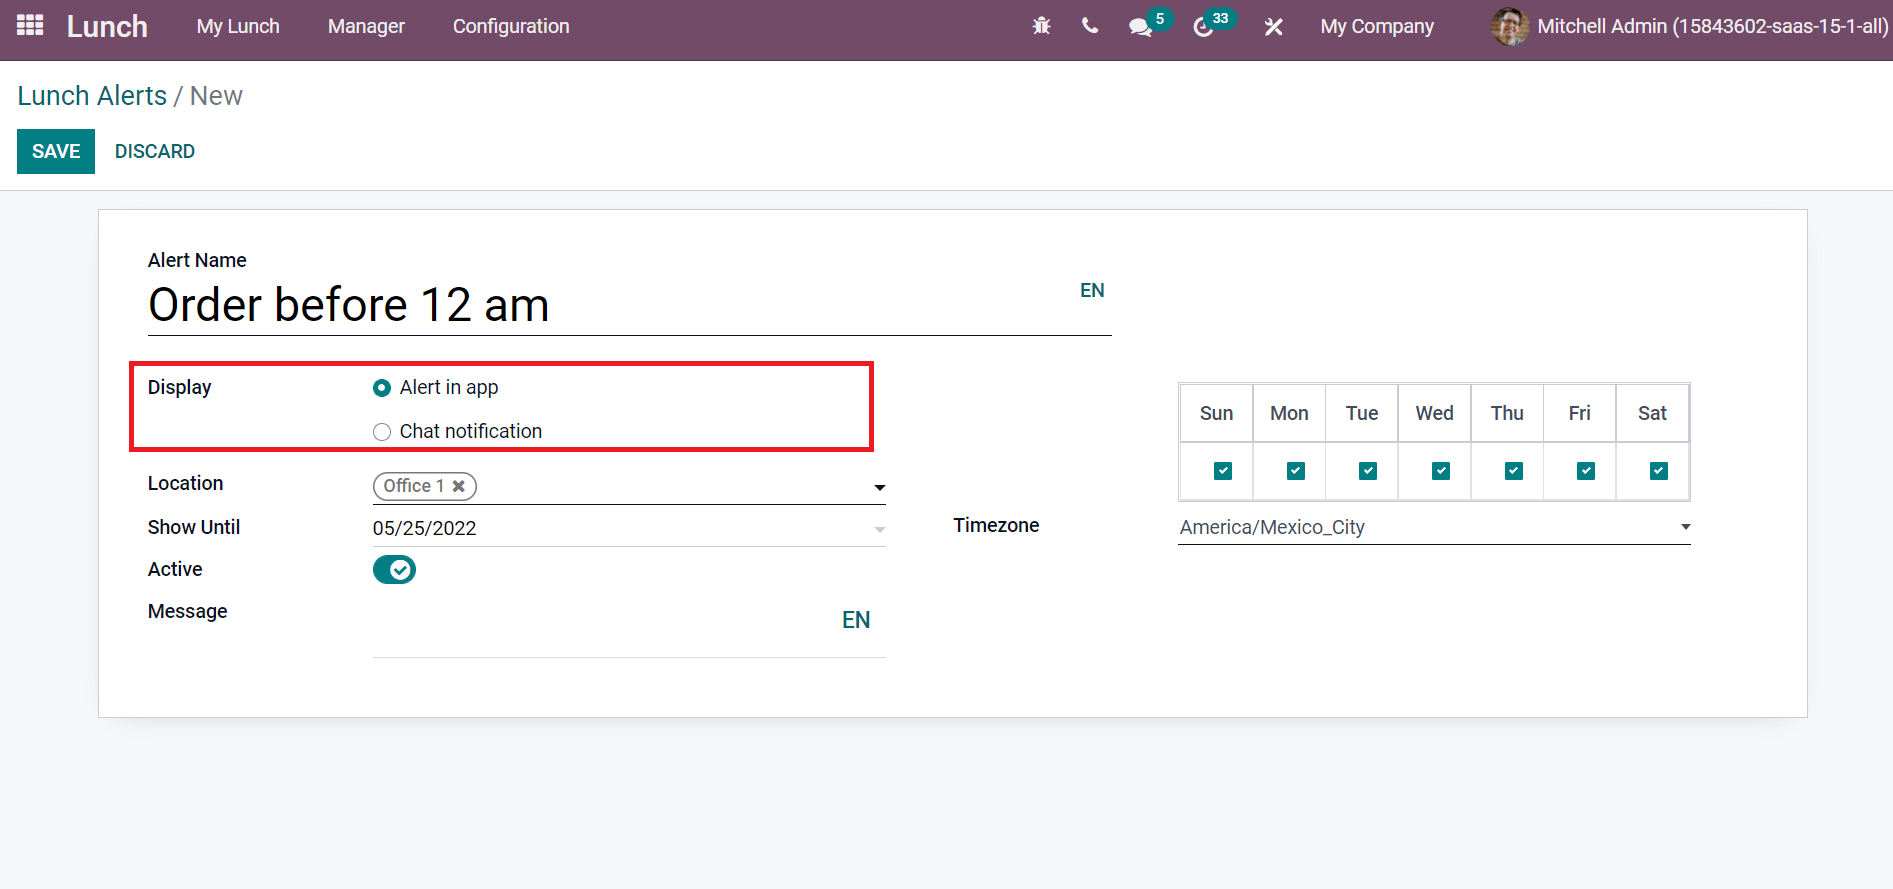
You can get the Alert Name, Is Display Today, Active, and Display details in the list view of the Lunch Alerts window. Choose the CREATE icon to develop a new Lunch Alert for your Order. In the new window, apply Alert Name as ‘Order before 12 am. As portrayed in the screenshot below, the Display is classified as a Chat notification and Alert in-app.
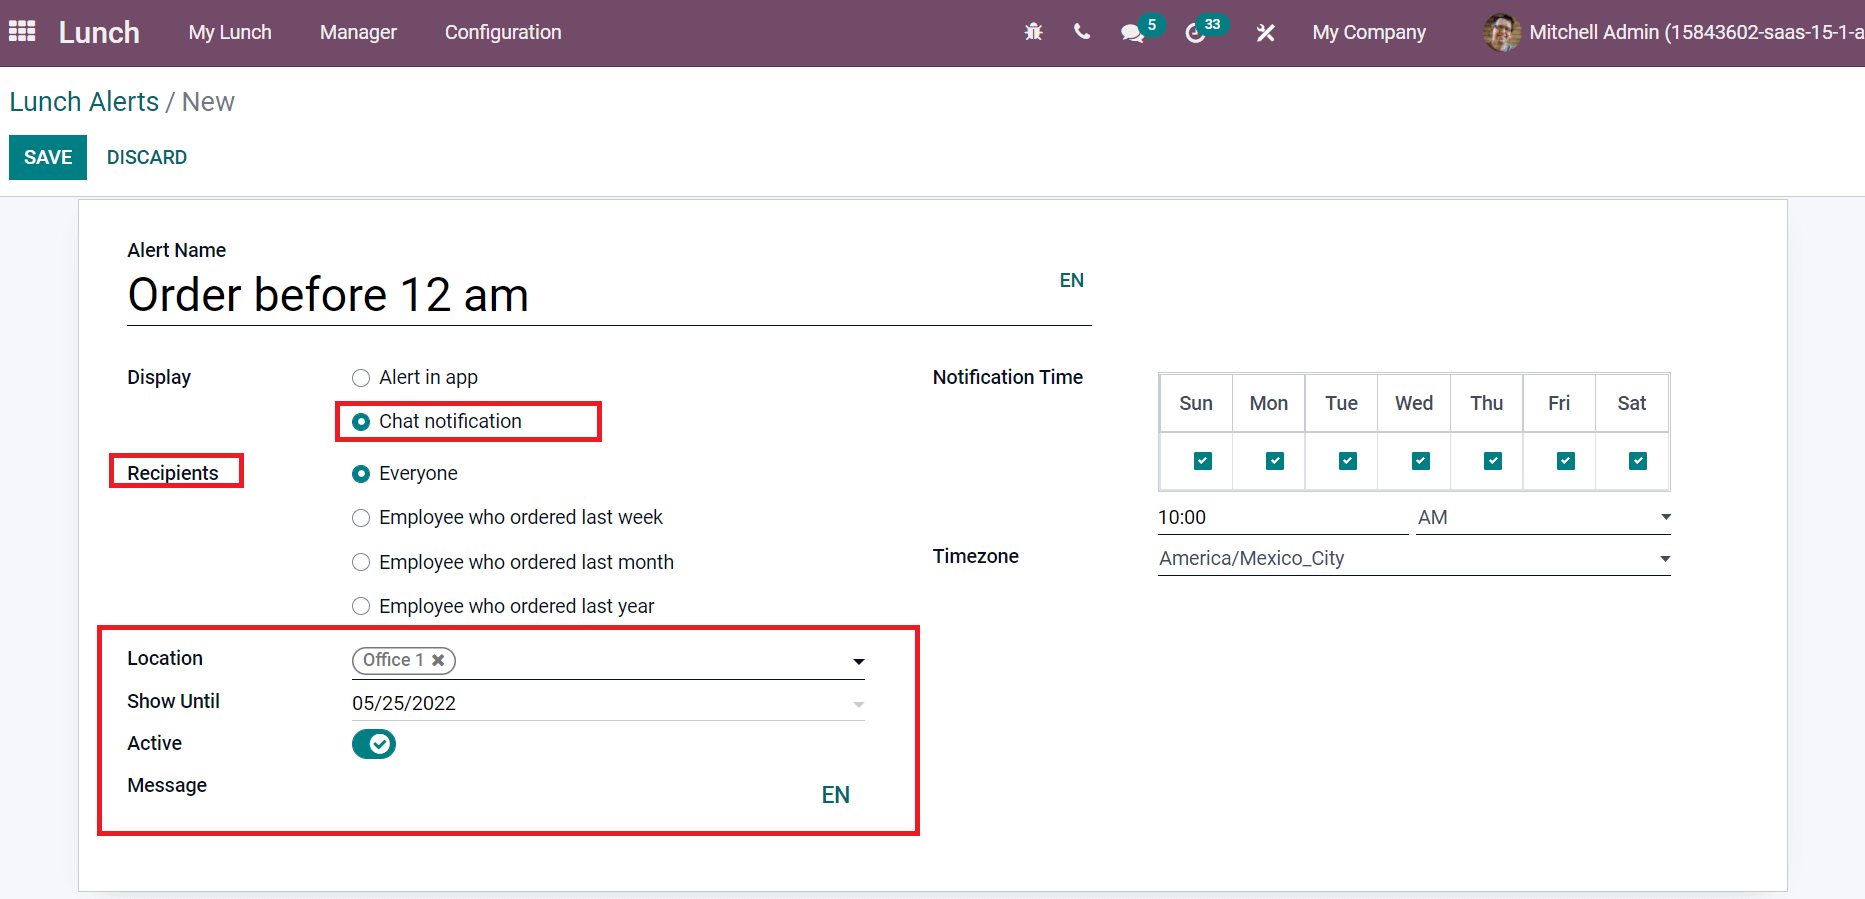
By choosing Chat notification as Display, a Recipients field is visible before you, and it includes Everyone, Employee who ordered last month, last year, or last week. We set the Recipients as Everyone here, as specified in the screenshot below.
You can enter Location, date in Show Until, and a note inside the Message field. We can apply the Notification Time depicted on each day of the week for a lunch alert on the right side. Later, choose your Timezone field for the Lunch Alerts as denoted in the screenshot below.
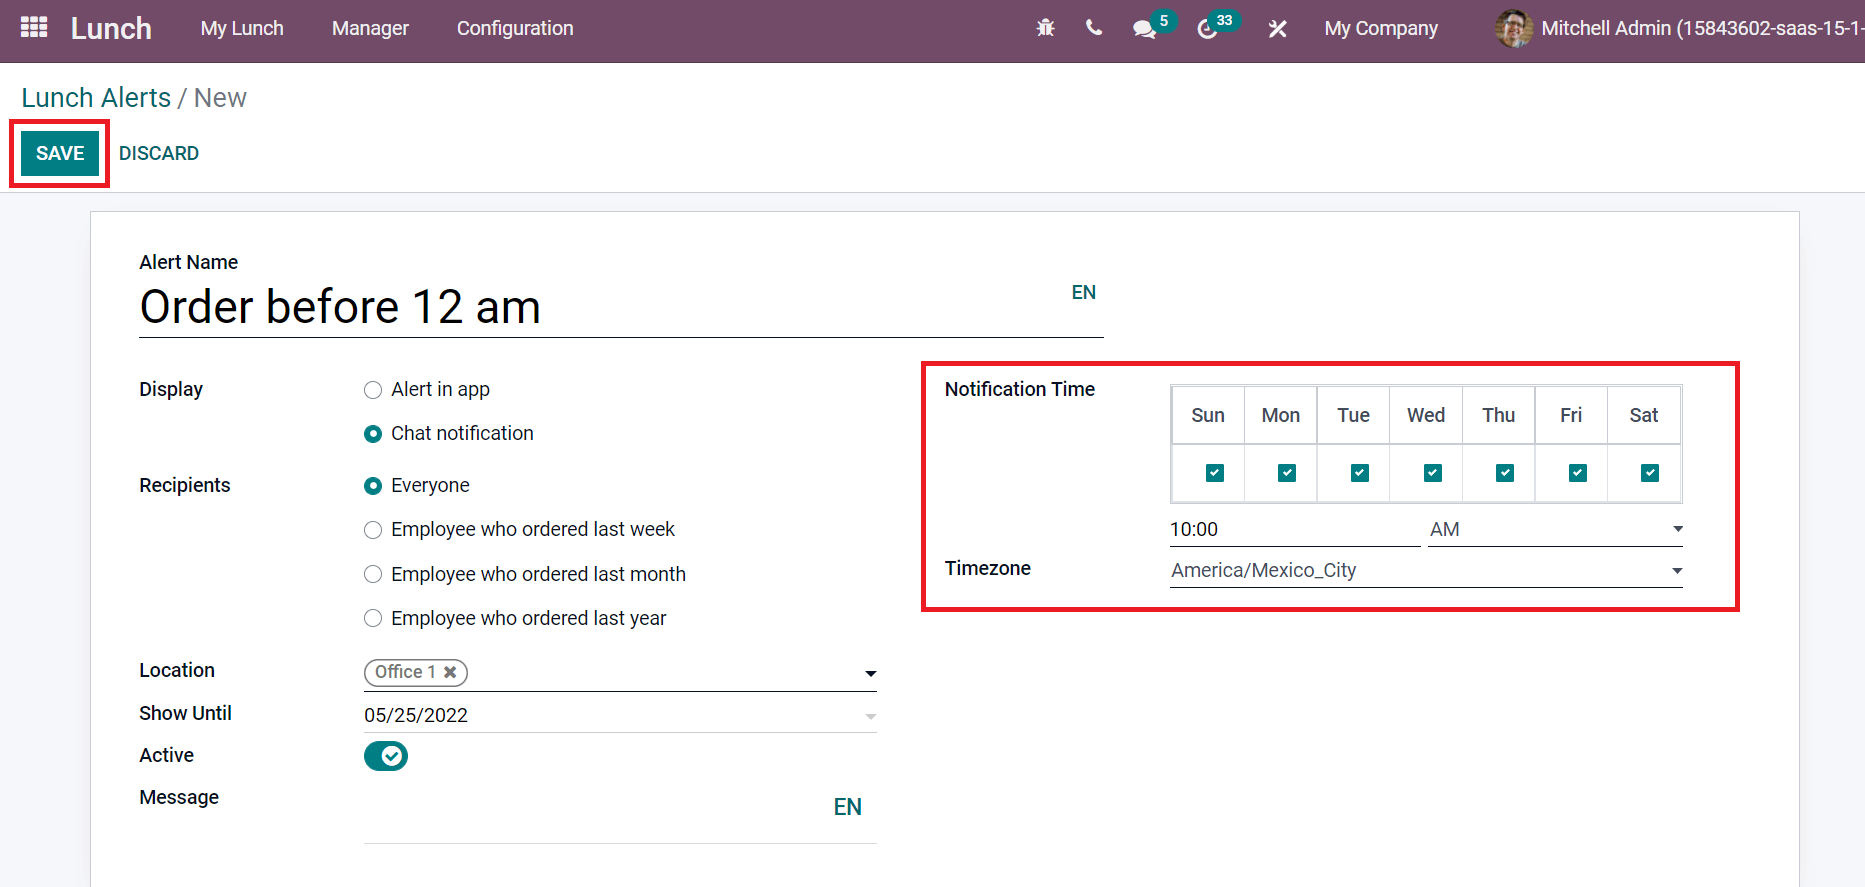
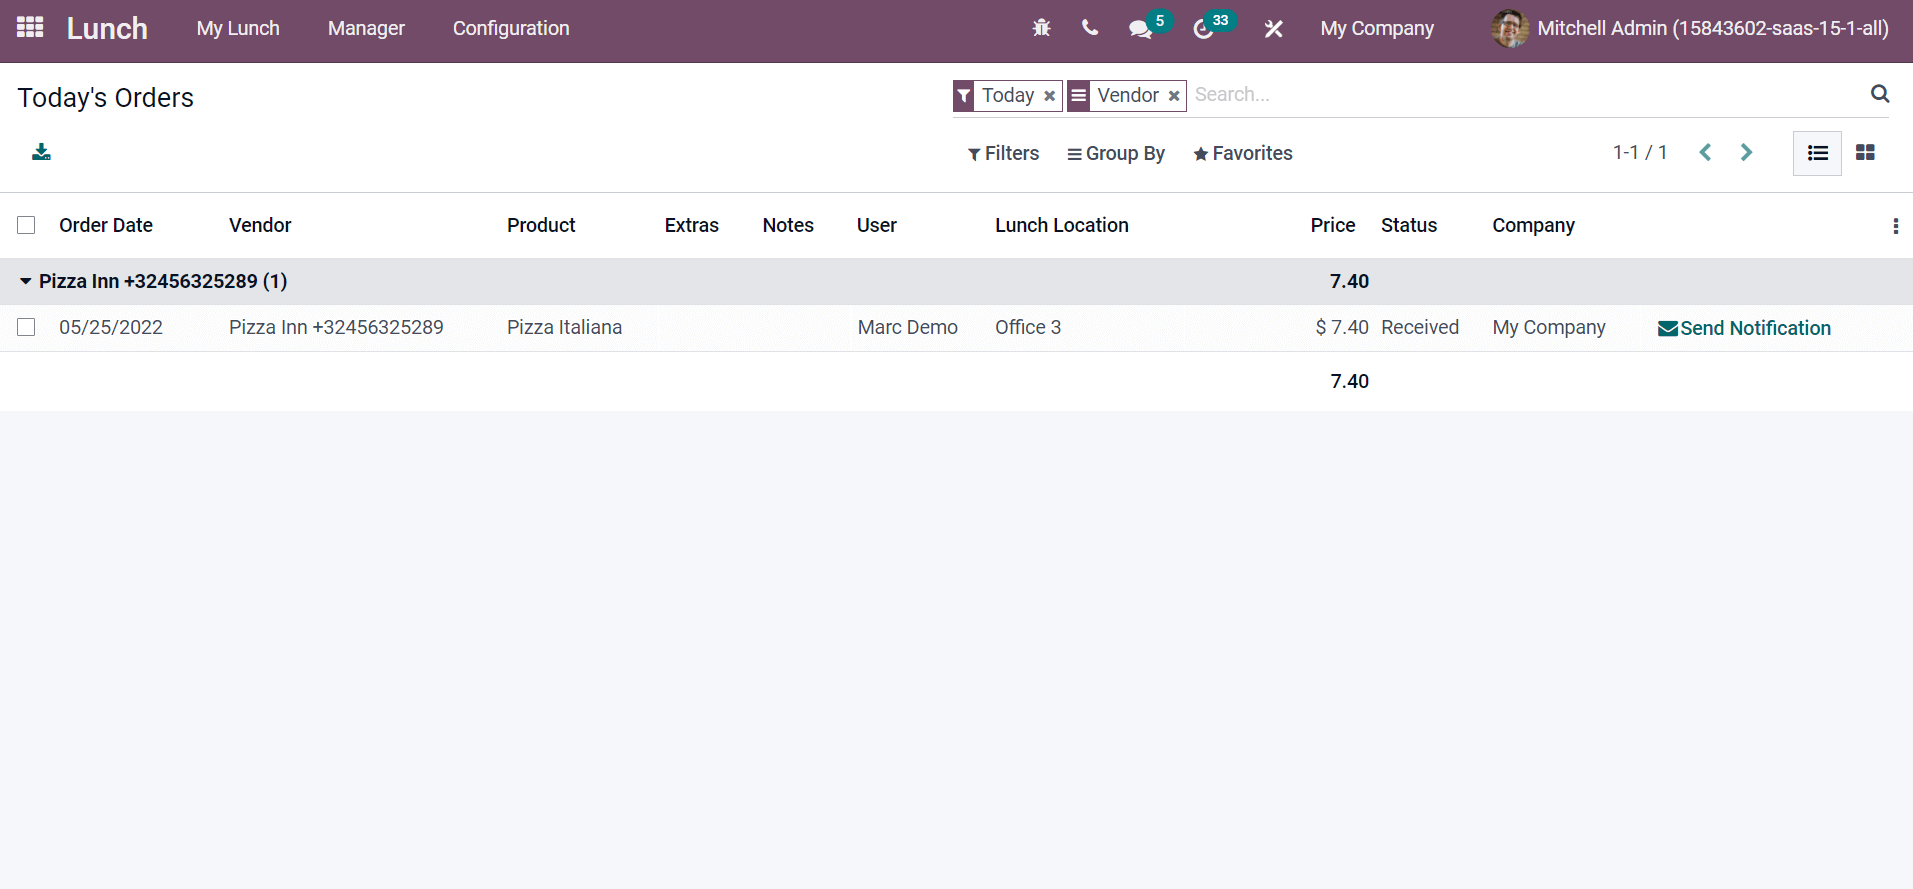
Select the SAVE icon after applying all data regarding your lunch alert. We can access today’s orders from the Manager tab and select the Today’s orders menu. In the Today’s Orders window, we can get Order Date, Price, Company, Vendor, Status, Product, and other data, as shown in the screenshot below.
To Configure Lunch Locations for your Order
Users can formulate lunch locations for orders from the Odoo 15 Lunch module. List format of Lunch Locations window denotes Address, Location Name, and Company as portrayed in the screenshot below.
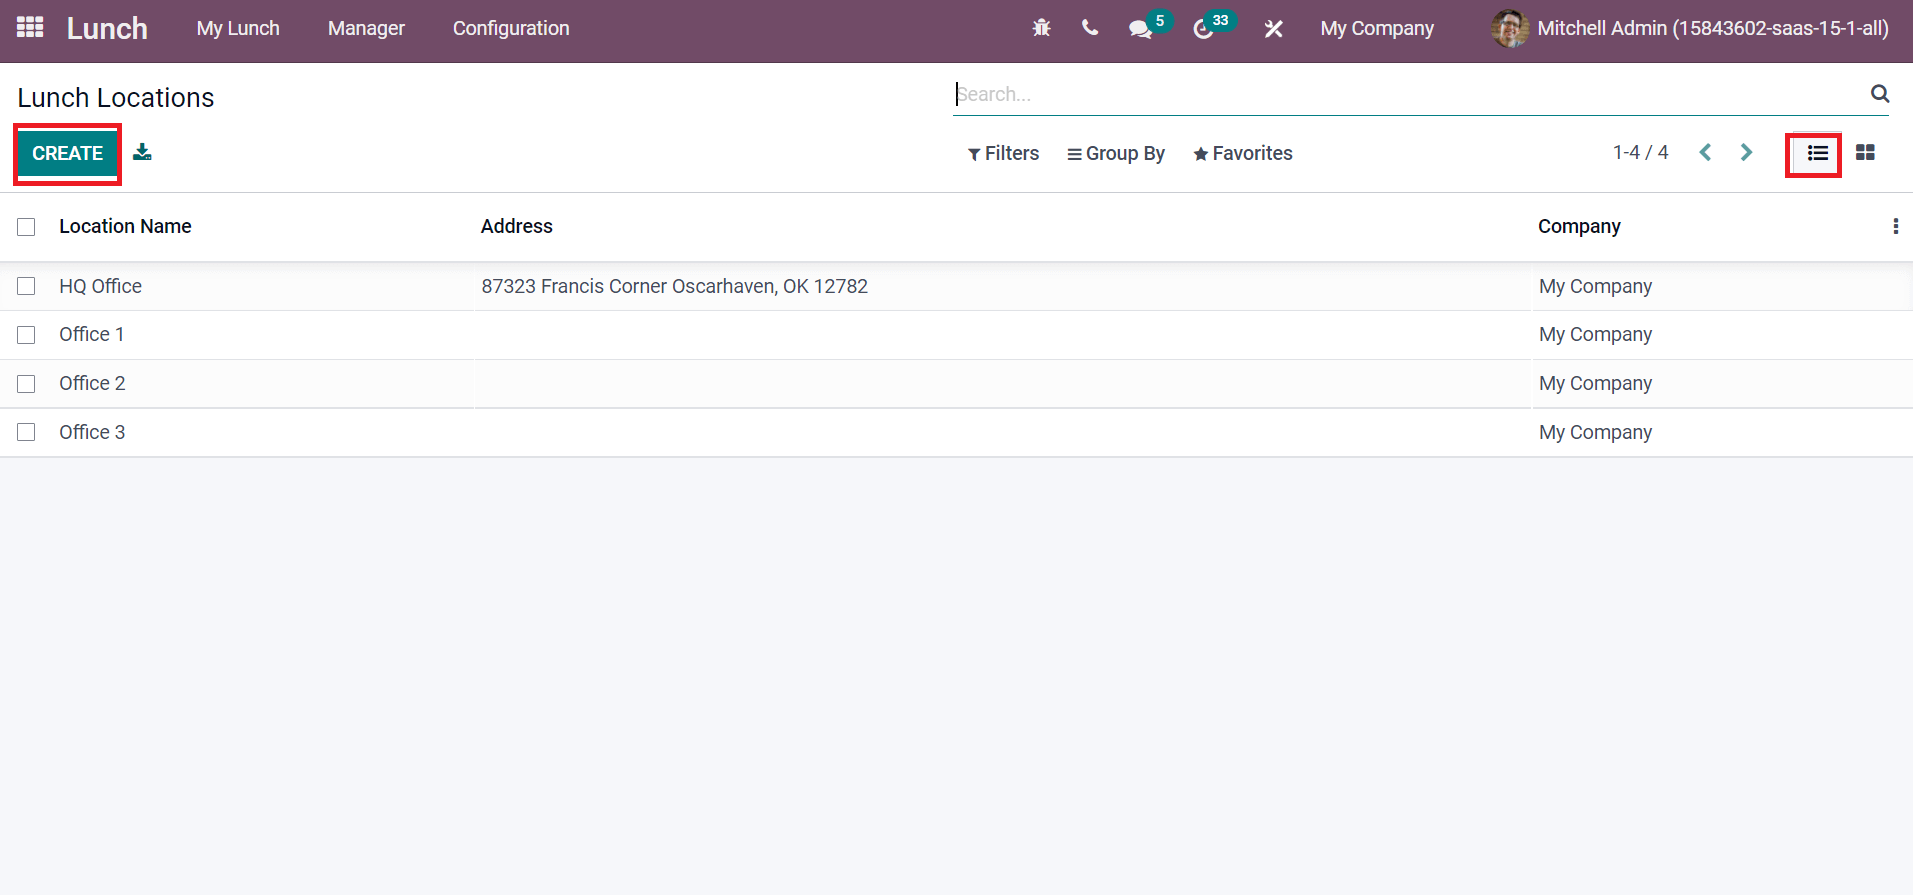
By selecting the CREATE icon, a space opens at the end of the window. You can enter your Location, Name, and Address in the open space, as mentioned in the screenshot below.
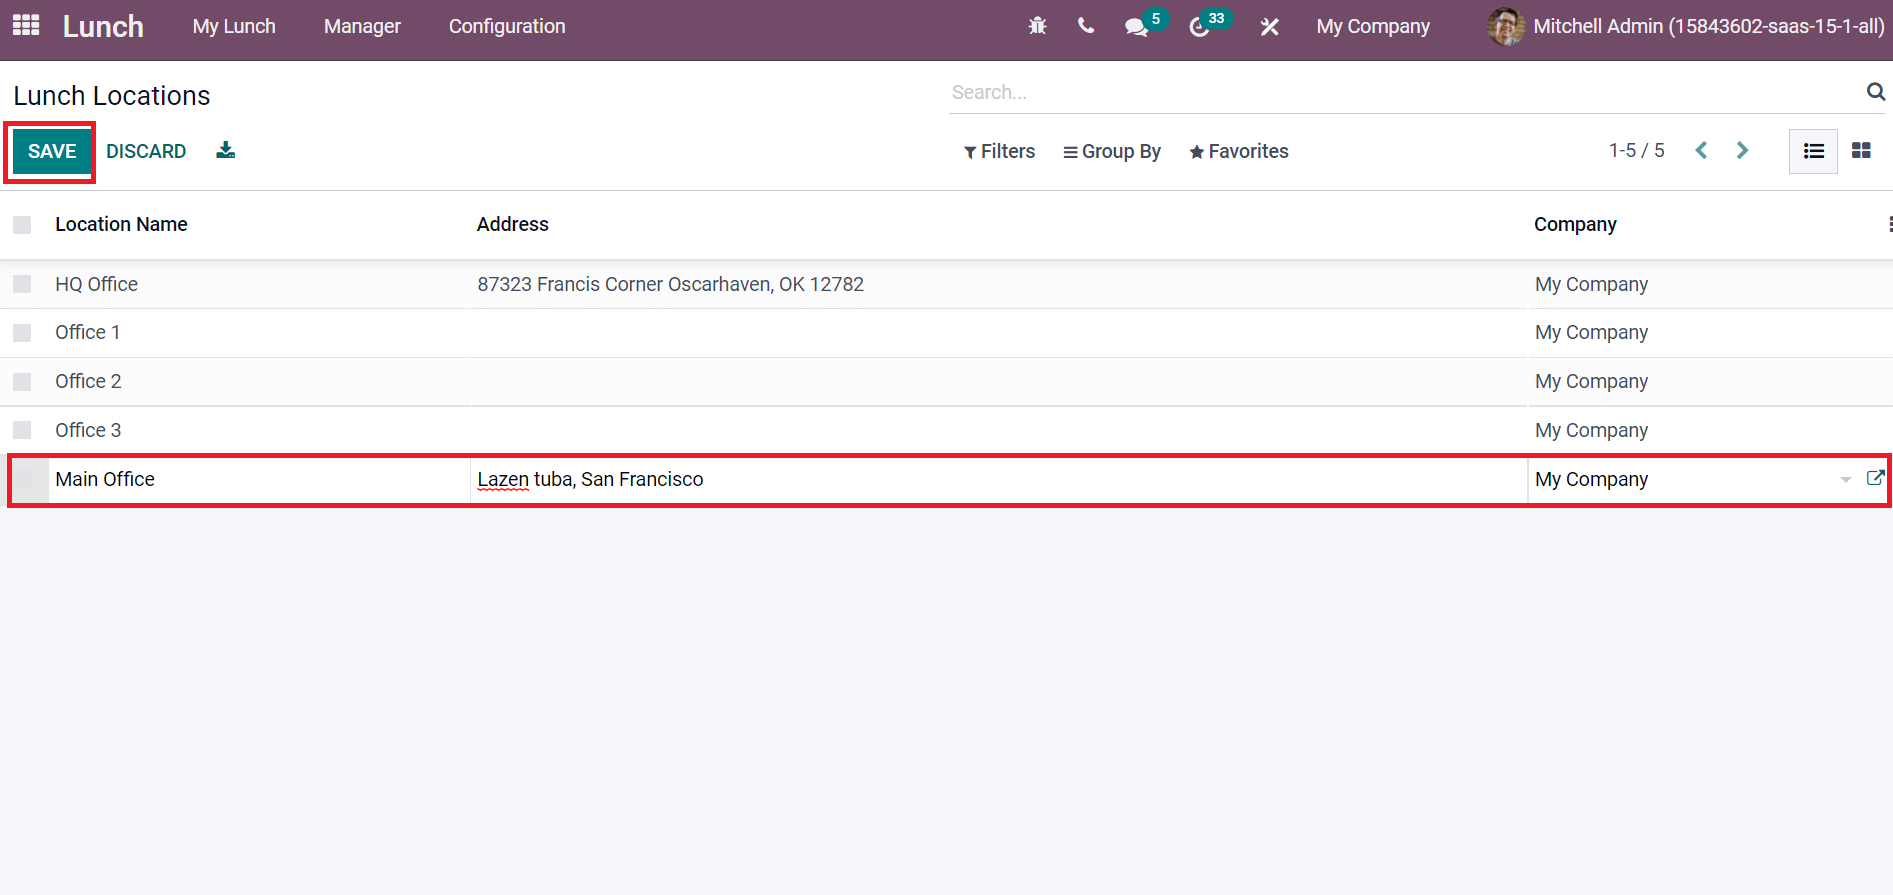
Click on the SAVE button to constitute your new lunch location.
Users can quickly maintain alerts, product categories, lunch locations, and products for a company with the support of Odoo 15. An organization offers healthy food and retains orders for employees using Odoo 15 Lunch module. The user-friendly module boosts your productive lunchtime and improves business growth. Refer to the given below blog to understand more about the Odoo 15 Lunch Module


