Odoo Accounting module automates the accounting operations of an organization and smoothens the workflow of the accountants. It is the best platform for tracking the company’s cash flows. The flexibility and highly integrated nature of the module make it a unique system.
This blog is a small insight into the home dashboard window of the Odoo 15 Accounting module.
The Dashboard window of the Odoo 15 Accounting module assists you in managing all the accounting features of the module. When you look at the Accounting dashboard window, you will find an onboard panel that Odoo designed as a configuration panel.
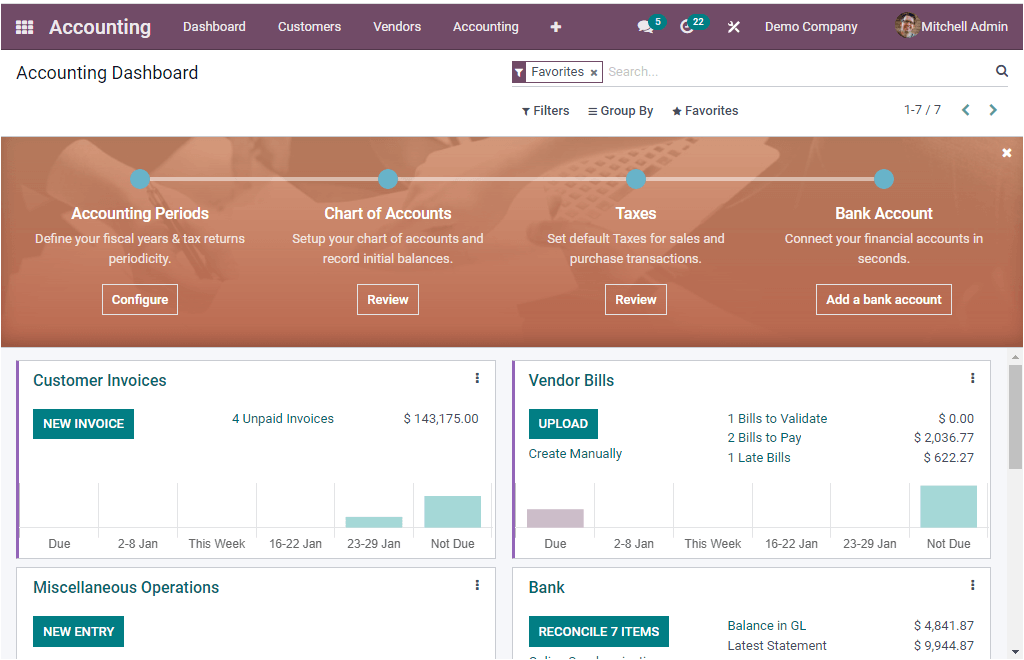
The image of the onboard panel is depicted below.

The onboard panel includes various functionalities such as Accounting Periods, Chart of Accounts, Taxes, and Bank Account. Let us have a look at each one below.
Accounting Periods
Accounting Periods is the first functionality that will allow you to define your fiscal years and tax returns periodicity. Using this tab, you can configure the Accounting Period. When you click on the Configure tab available under this functionality, you will depict a pop-up window for configuring Accounting periods, as shown in the image below.
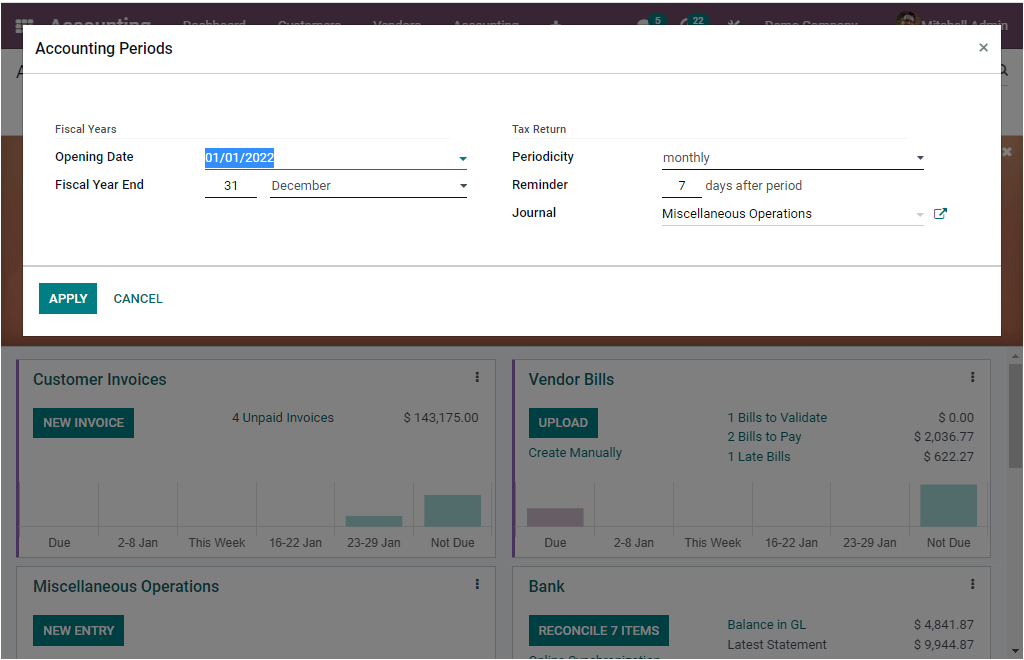
Chart Of Accounts
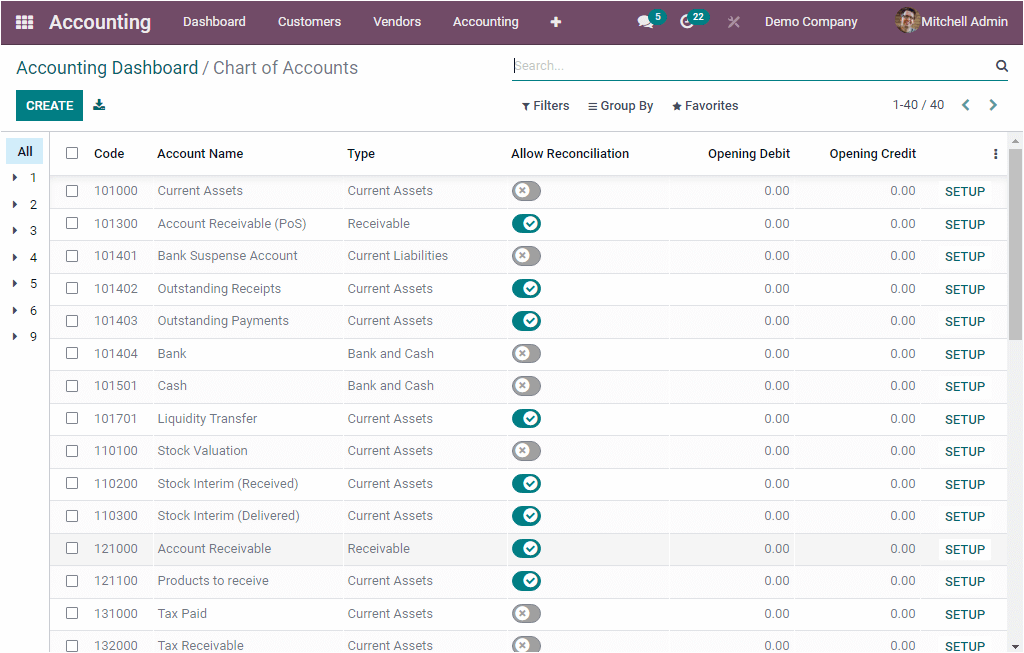
The Odoo ERP allows you to effectively manage all your company accounting operations with its excellent accounting module. The Chart Of Accounts option in the onboarding panel will allow you to set up your chart of accounts and record initial balances. In Odoo Accounting, you have to select your chart of accounts based on the area of your operations. Odoo enables various charts of account supports. You can easily set up your chart of accounts and record the initial balances. If you click on the Review button avaIlable under the Chart of Accounts tab, you will be directed to the Chart of Accounts page, as shown in the image below.
Taxes
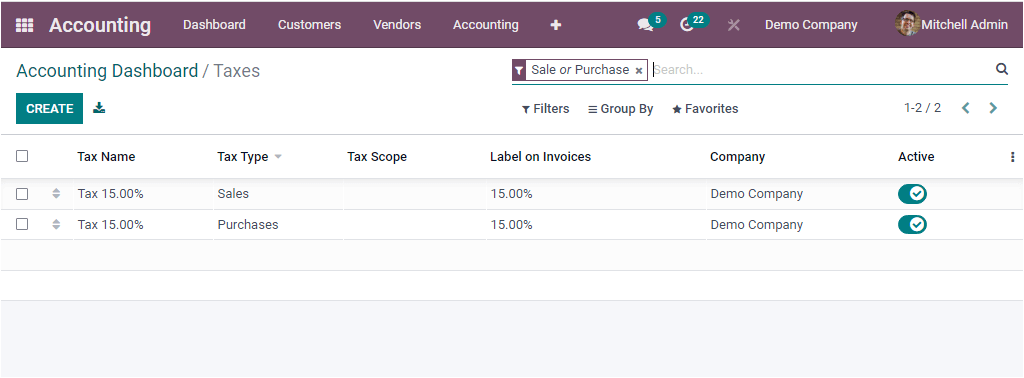
The next functionality available in the Onboard panel is Taxes. This option allows you to set default taxes for sales and purchase transactions. Here also, you can view the Review button. On selecting it, you can directly enter to the Taxes window.
Bank Account
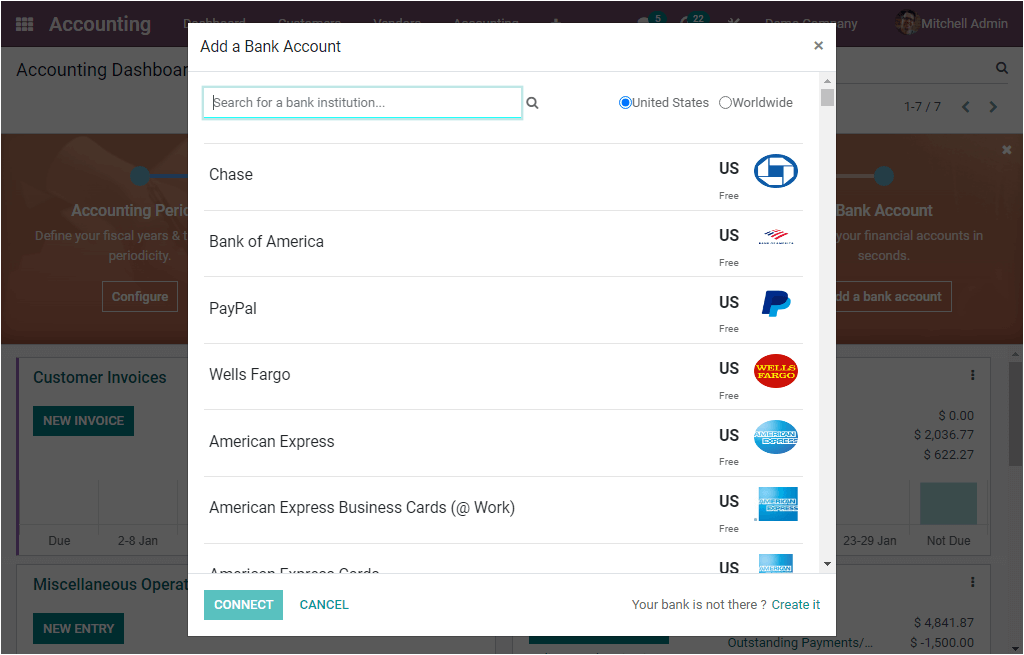
The last tab available in the onboard panel is the Bank Account. When you click on the Add a bank account button, you will depict a pop-up window for adding a bank account.
Under the onboard panel, Odoo arranged different types of journals. When you look at these journals, you can view the journal entries and a small description about each journal. All the journal details that are given in this window will give you an overview of each journal item. Let us have a look into them.


Here you can see all the preconfigured journals such as Customer Invoices, Vendor Bills, Miscellaneous Operations, Bank, Cash, Point of Sale, and Expense.
Let us have a glance at each of the journals.
Customer Invoices
Before describing it, let us take a look at the Customer Invoices journal.
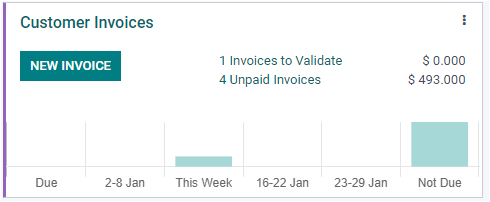
Here in the Customer Invoices journal, you have a button called NEW INVOICES. In addition, the journal will give you a graphical analysis and list the unpaid invoices. So that you can understand how many invoices are pending for validation and how many are unpaid invoices. You can also view the invoiced amount for the invoices.
You can find three dots on the top right corner of the journal. By clicking on these dots, you can access a dropdown menu that includes various other options. The image of the dropdown window is displayed below.
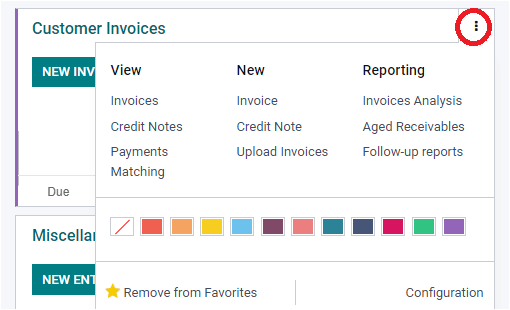
The details in the dropdown menu are arranged in three sections: View, New, and Reporting. You can view the Invoices, Credit Notes, Payment Matchings menus in the View section. Each of these menus can be selected, and if you click on them, you will be directed to the corresponding windows.
The View section includes the Invoice, Credit Note, Upload Invoices menus, and these can also be selected and viewed. In the New section, you can find the Invoice, Credit Note, and Upload Invoices menus. In the case of Reporting, you can view and access the Invoices Analysis, Aged Receivables, and Follow-up reports menu.
Moreover, the window includes various coloring options for marking your journal. You can see the Remove from Favourites in the left bottom, and in the right bottom, you can see the Configuration button. Always you only list the favorite or influential journal to the Dashboard window. It is also possible to remove a particular journal from the favorite list. To do this, you can use the Remove from Favourites option.
Vendor Bills
The Vendor Bills allows you to manage vendor bills from the dashboard window itself. When you look at the Vendor Bills in the dashboard, you will see a preview of the Vendor Bills in a kanban model. This preview will provide you the provision to upload new bills and support you in manually creating bills. When you look at the journal, you can see the UPLOAD and Create Manually buttons on the left
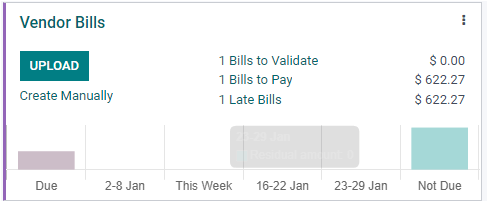
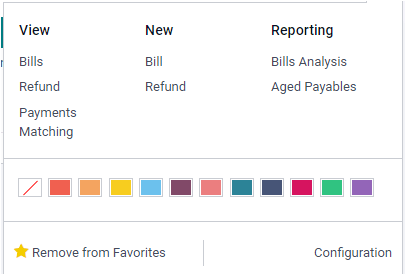
In the center, you can view the Number of Bills To Validate, Number of Bills To Pay, and Number of Late Bills. Moreover, the residual amount Due, 2-8 Jan, This Week, 16-22 Jan, 23-29 Jan, and Not Due are reported in both graphical and quantitative measures. You will get more options when you open the dropdown menu, as shown in the image below.
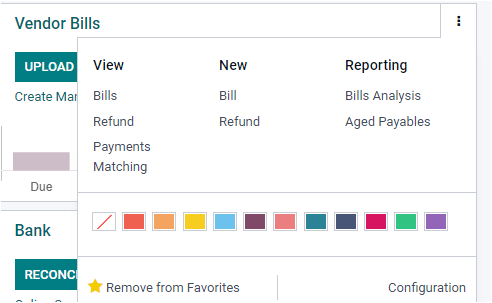
In the View section, you can have various options, and using these options, you can view all the created Bills, Refunds, and Payment Matching. Moreover, you can create new bills and refunds using the Bills and Refund options available under the New section in the dropdown menu. Similarly, you can view and generate various reports such as Bills Analysis, Aged Payables using the respective menu in the Reporting section. You can apply your required color for the journal using the different colors. The Remove from Favourite and Configuration options also will be there under the dropdown menu.
The Odoo Accounting module gives its users an excellent opportunity to create entries for each journal from the dashboard itself.
When you come into the case of a Bank, you can find the button that helps to understand the number of items to reconcile.
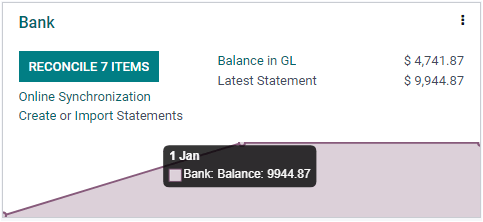
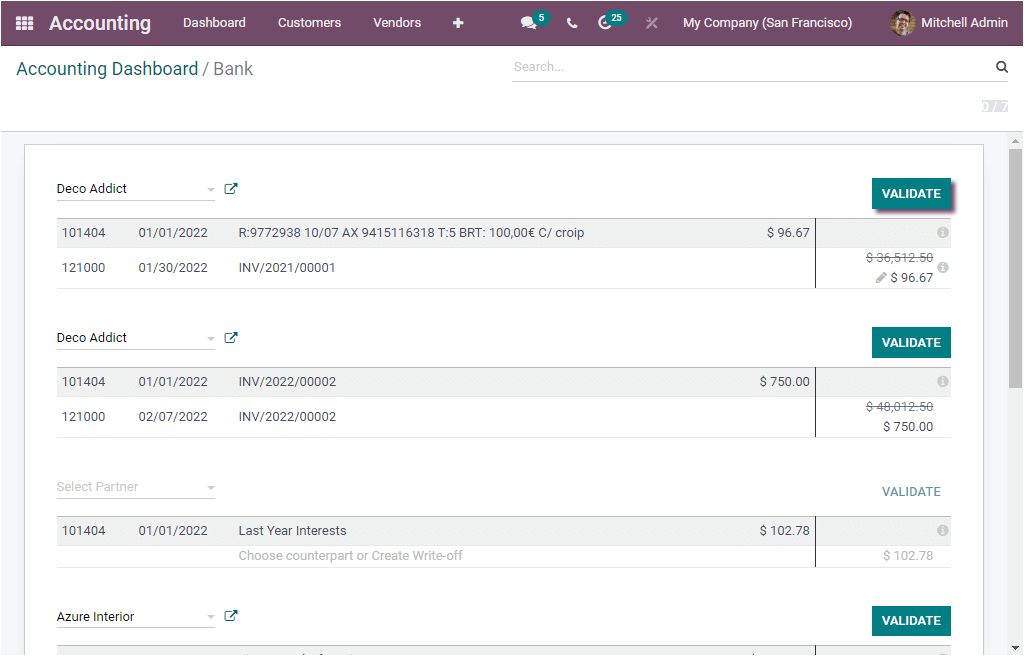
Here in the window, you can view the RECONCILE 7 ITEMS button. When you click on this button, you will depict the following window.
We can also conduct online synchronization by clicking on the Online Synchronization button. Similarly, the Create or Import Statements button can be used for performing the respective operation. In addition, the Balance in GL and Latest Statement options can be viewed in the center. When you look into the dropdown menu, you will find various options as shown in the image below.
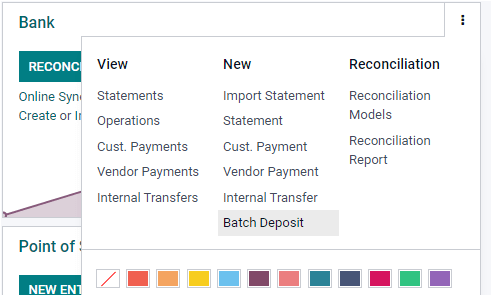

Using this dropdown, you can view all the configured Statements, Operations, Customer Payments, Vendor Payments, and Internal Transfers. Moreover, you can see the options for creating a new Import Statement, Statement, Customer Payment, Vendor Payment, Internal Transfer, and Batch Deposit. Similarly, in the Reconciliation section, you can view the Reconciliation Models and Reconciliation Report menu.
In the Expense, you can see the UPLOAD and Create Manually options. Also, the journal displays the Expenses to Process, and it will allow you to understand how many expenses are there to process and its details.
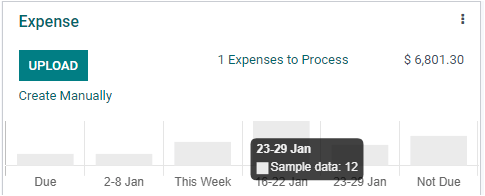
The dropdown menu includes various options as shown in the image below.
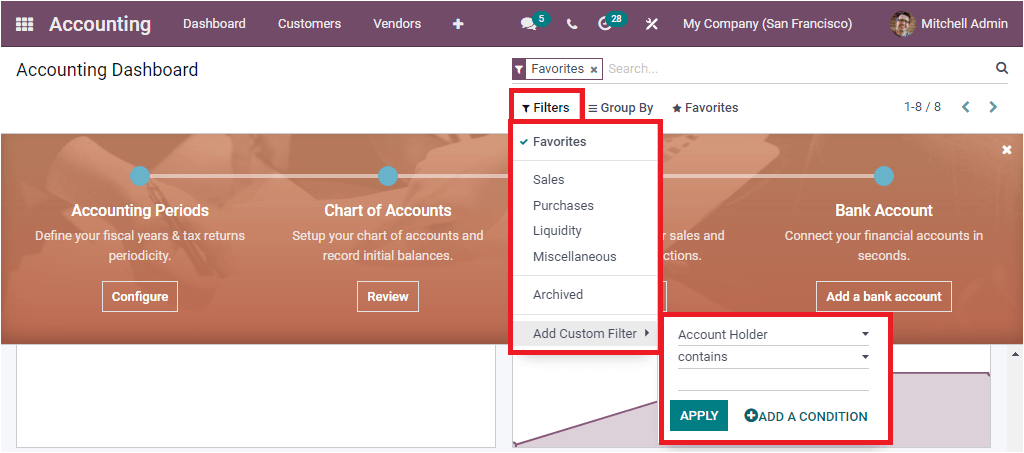
Apart from all these options, the window includes various sorting functionalities. When you look at the top of the window, you can view the Filters, Group By, Favourite, and Search options. You can apply various defaults as well as customizable filters to access the required data quickly. When you click on the Filters tab, you will find a list of default filters such as Favourites, Sales, Purchases, Liquidity, Miscellaneous, and Archived.
The above-described points are the critical functionalities of the dashboard window of the Odoo 15 Accounting module.


