Matching your Bank records with Account statements can be a hectic task and is prone to error if you analyze it manually. With a huge amount of data, it is hard to compare and contrast it between the bank data and the business data, and for that reason, it is a time-consuming process.
Odoo has an advanced solution for managing this issue. Odoo can easily compare and contrast your payment document and Bank data no matter how huge the amount of data that you are processing.
This blog will give you a detailed overview of how to set up and use the Bank Reconciliation models in Odoo 15
Configuration and usage
It is easy to perform the reconciliation process with the Odoo 15 Accounting module. There are two ways or options by which you can perform the Reconciliation in Odoo 15. You can directly Specify the Payment on the invoice and can Reconcile open invoices with bank statements.
You can create an Invoice in the Accounting module directly from the dashboard by clicking on the NEW INVOICE button, as shown below.
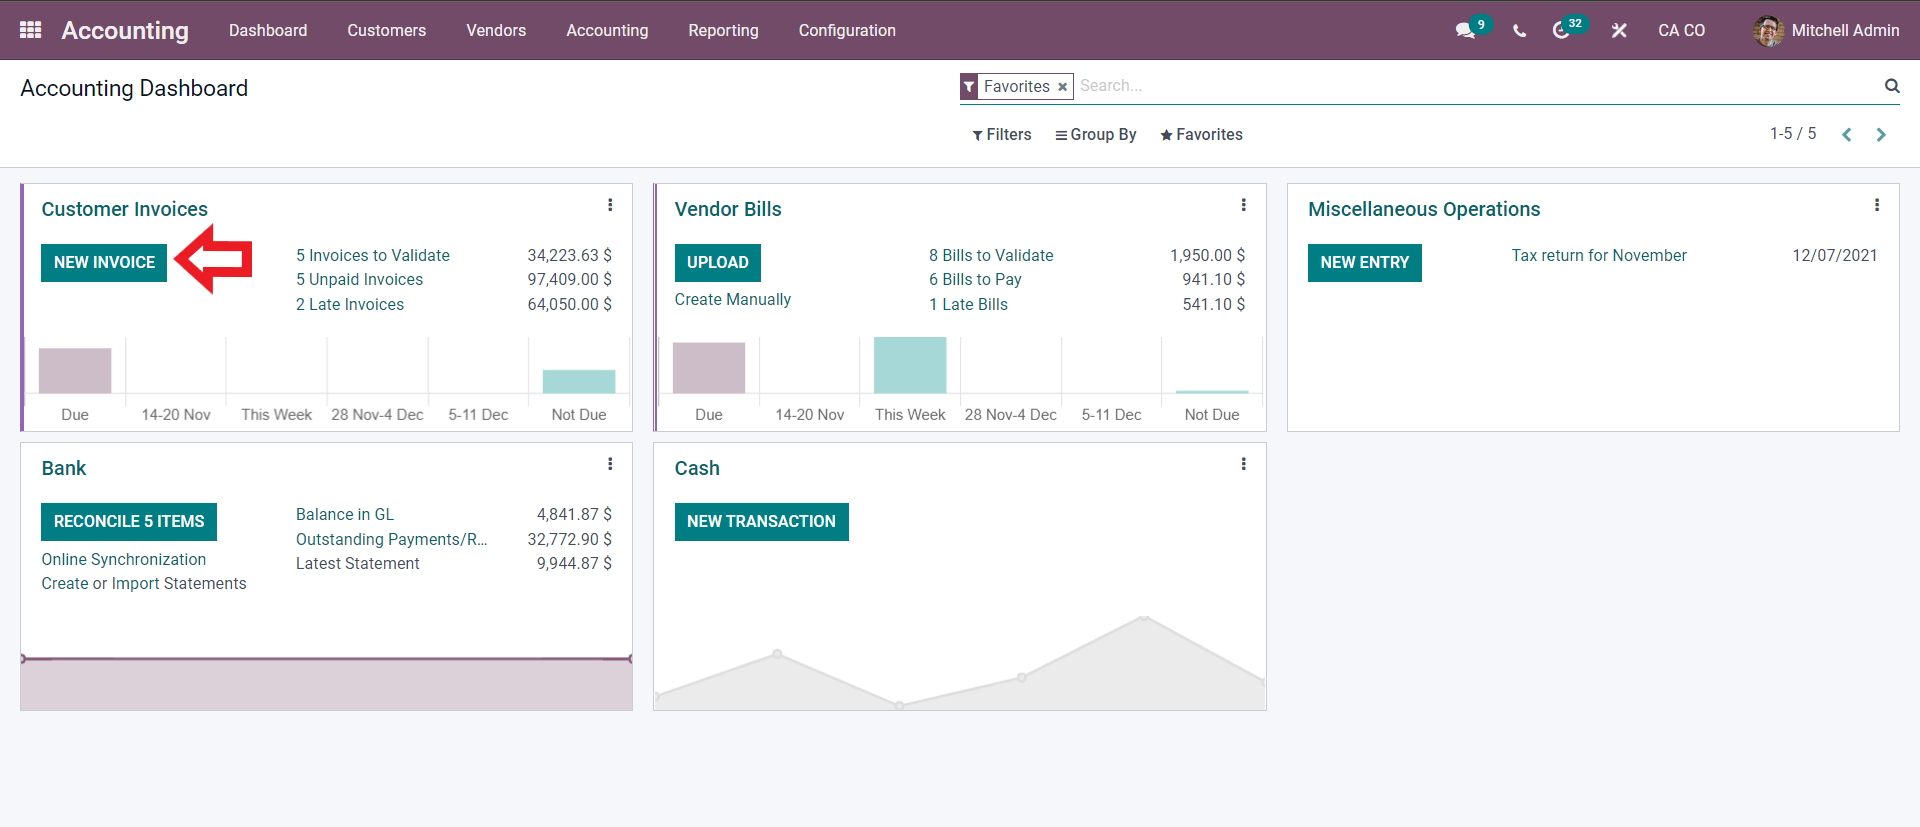
A page to create a new invoice.
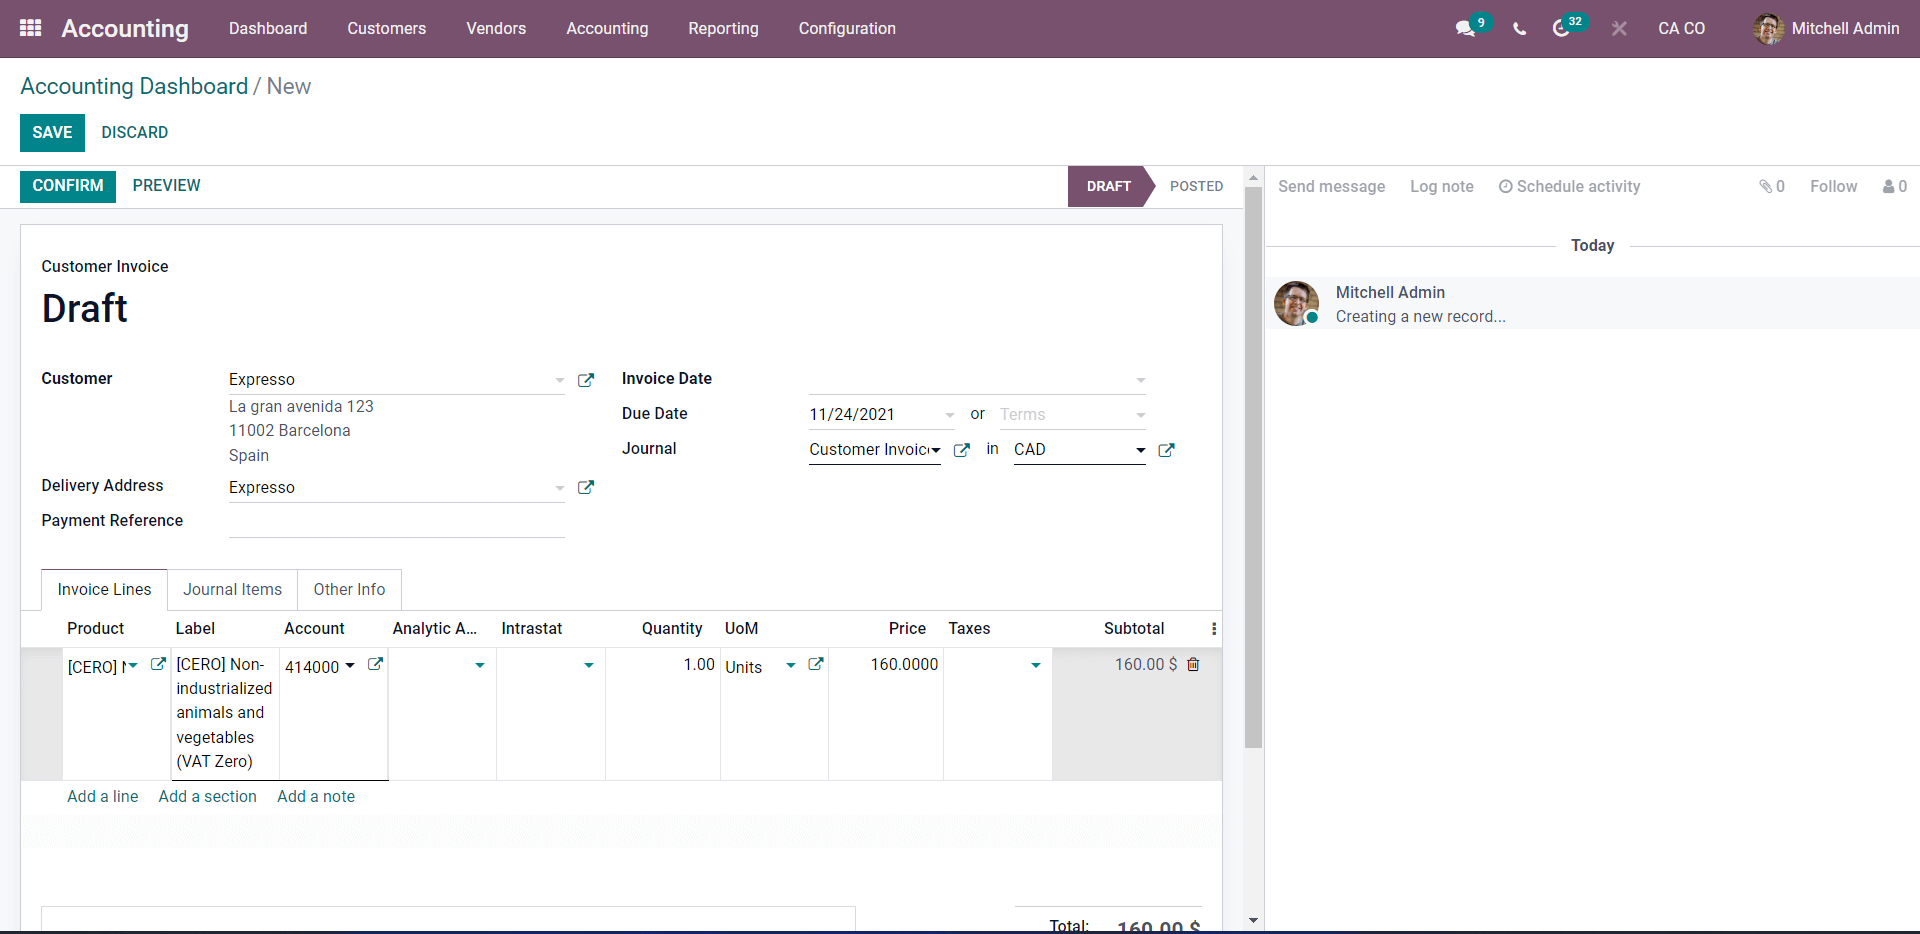
Enter the details on the customer and add the product. Press on CONFIRM after the configurations. This will set the customer for Payment which will take you to the next stage for Payment registration.
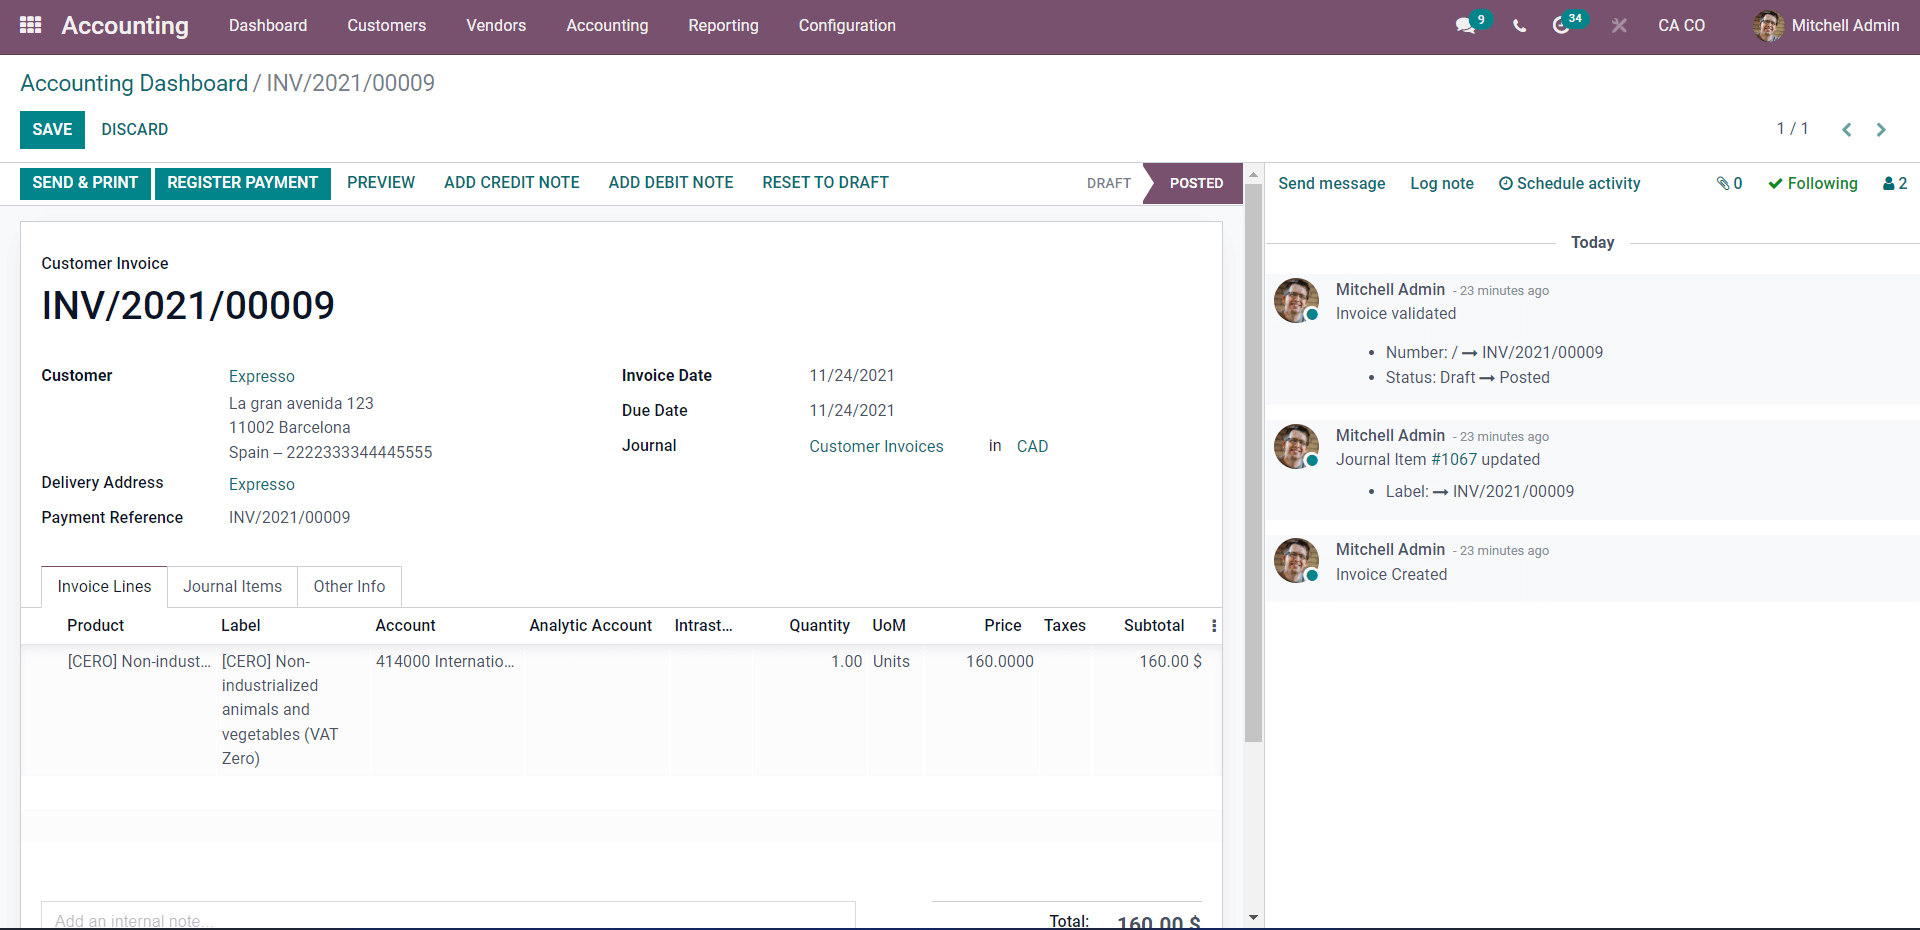
After the Payment Registration, we confirm to Odoo that the customer has made the payment in response to the customer payment. The REGISTER PAYMENT button from the invoice section shown below triggers the Reconciliation process. A quick configuration tab will pop up, as shown below, to configure the payment.
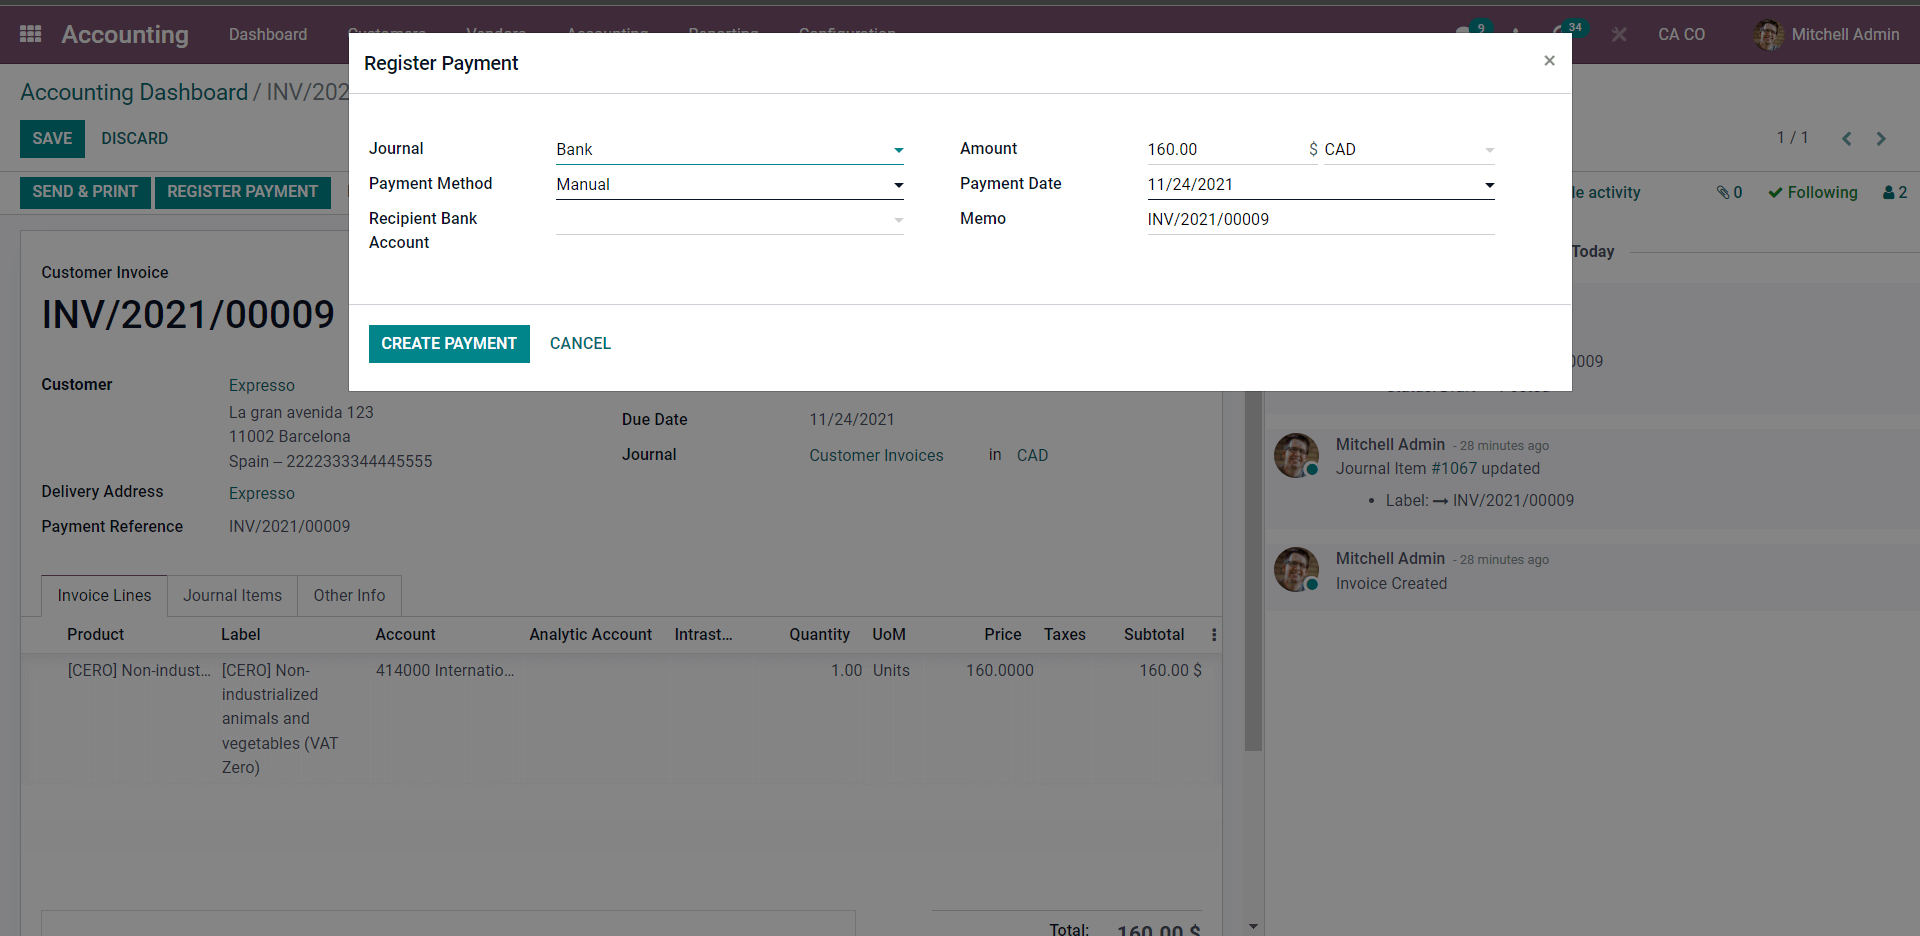
Enter and choose the configurations from this section and click on the CREATE PAYMENT button to configure the Payment. Your invoice will be noted with an IN PAYMENT banner after this.
For Reconciliations, you have to go to the module’s Dashboard and from the Bank, block click on RECONCILE as shown below.
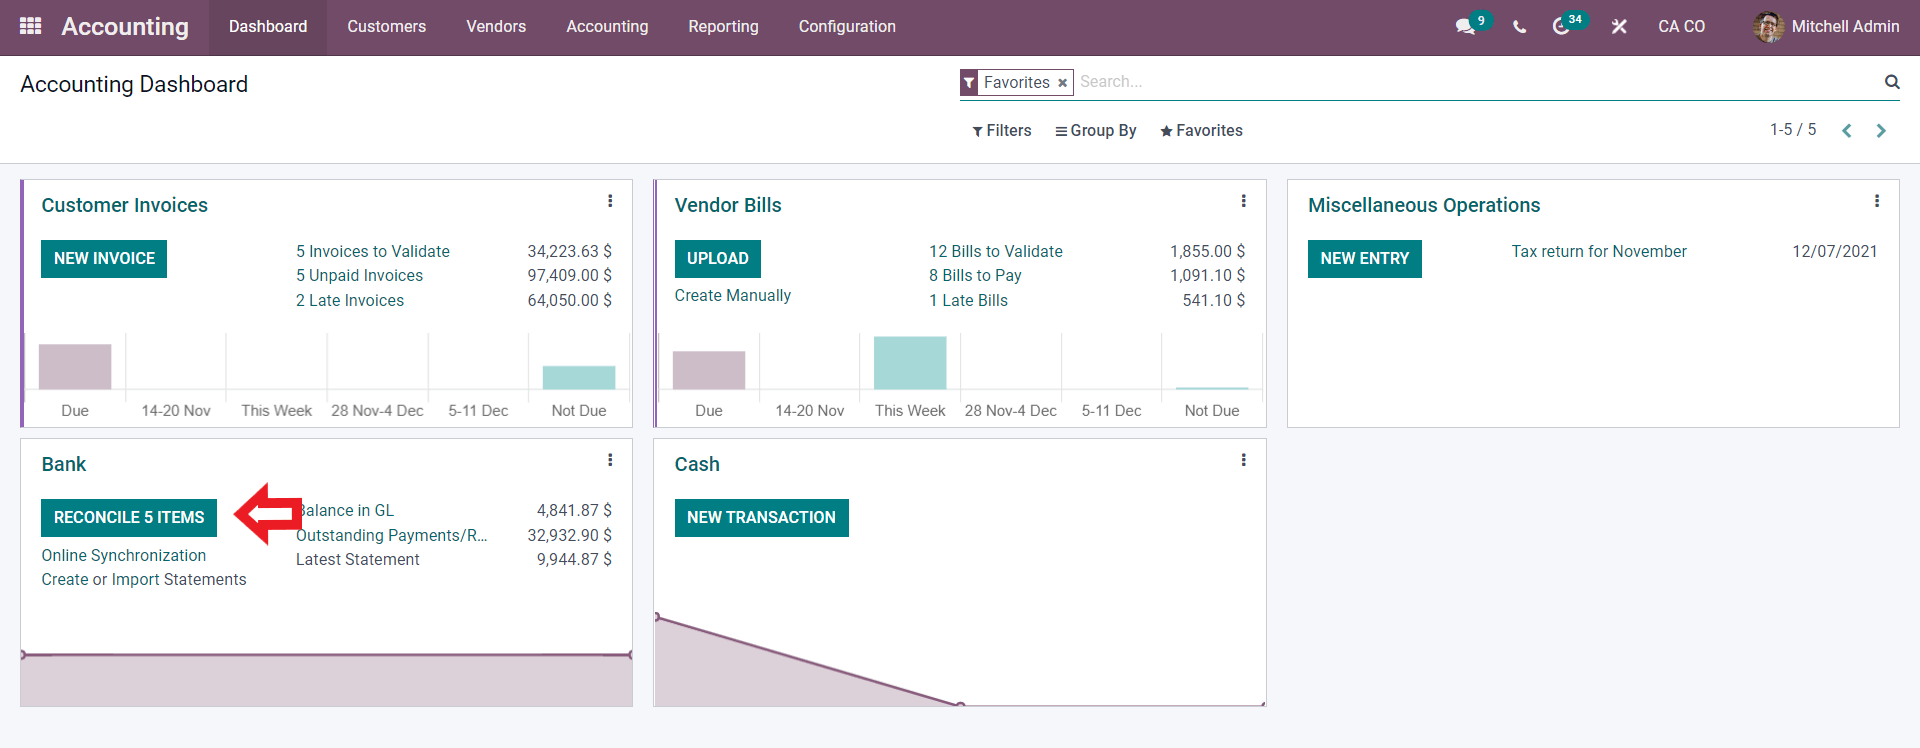
Click on it, and Odoo will give you a Validate section shown below.
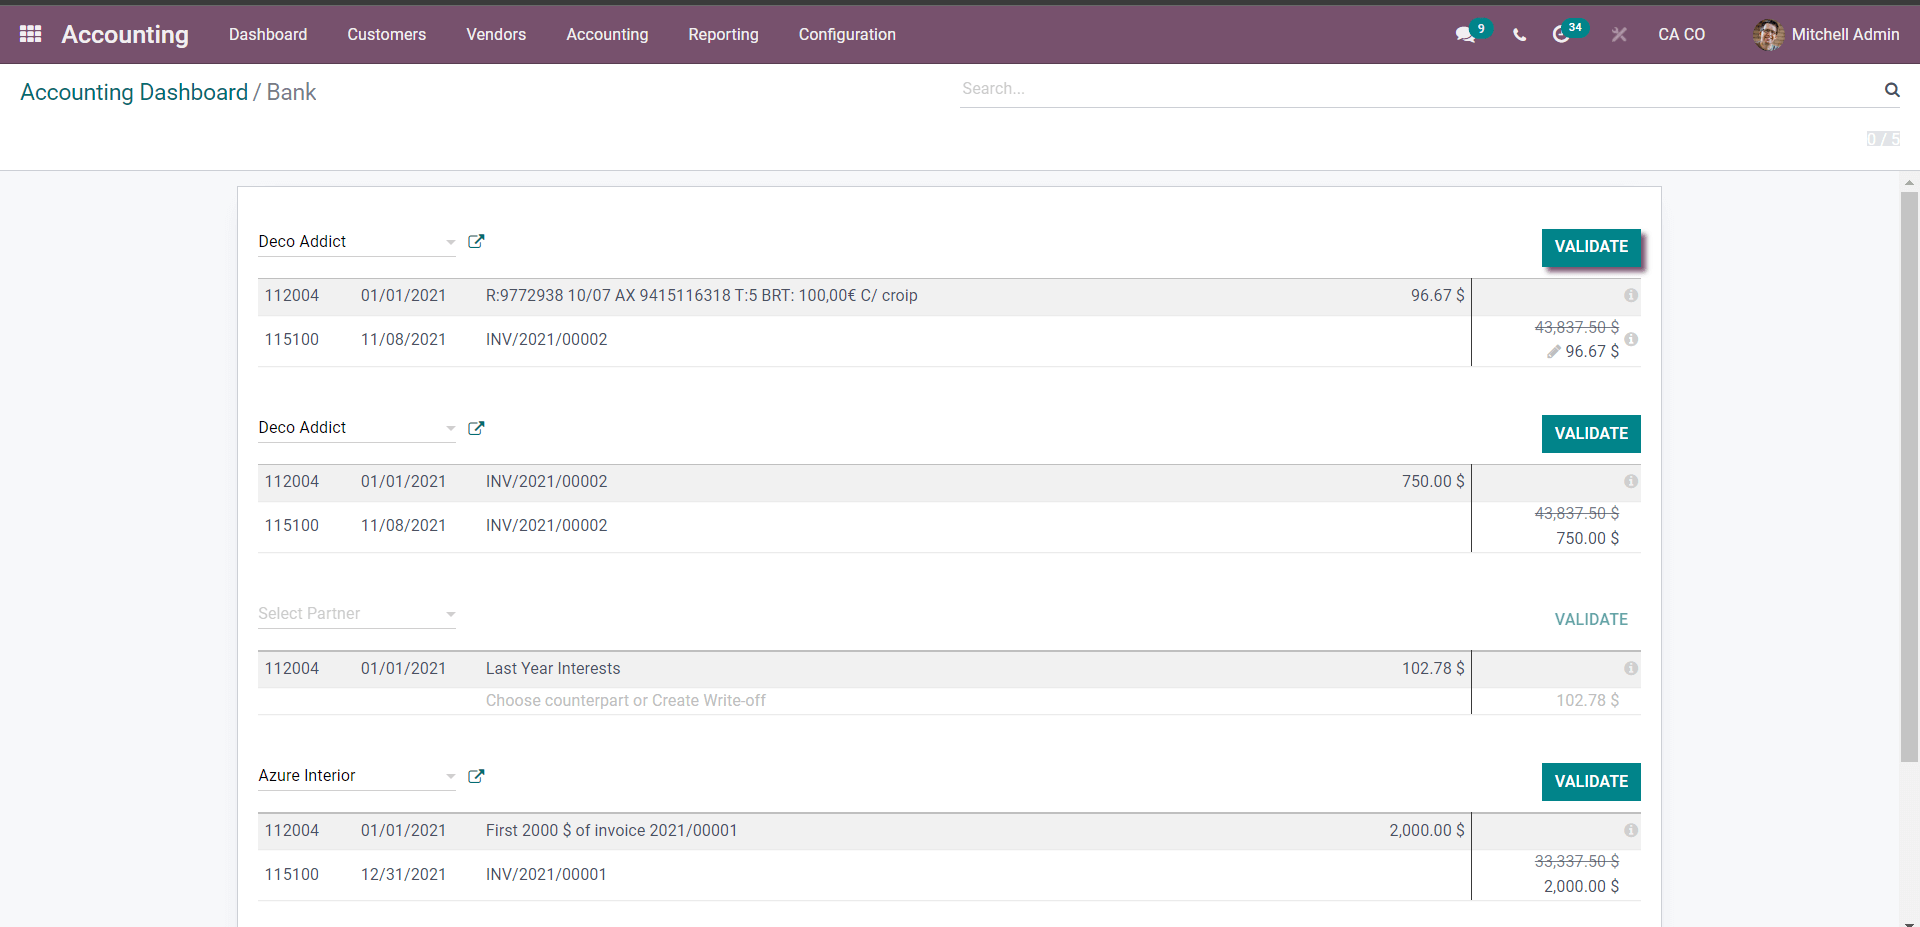
The statements that have to be reconciled can be validated by clicking on the VALIDATE button next to the statement.
Reconciliation Models
Reconciliation models can make the Reconciliation processes much more straightforward. You can easily set up the Reconciliation models on the Accounting module.
Reconciliation models can be configured by selecting Reconciliation models under the Configuration tab. A Reconciliation models page will open up.

You can create and manage Reconciliation Models from here. The new models can be formed by clicking on the CREATE button.
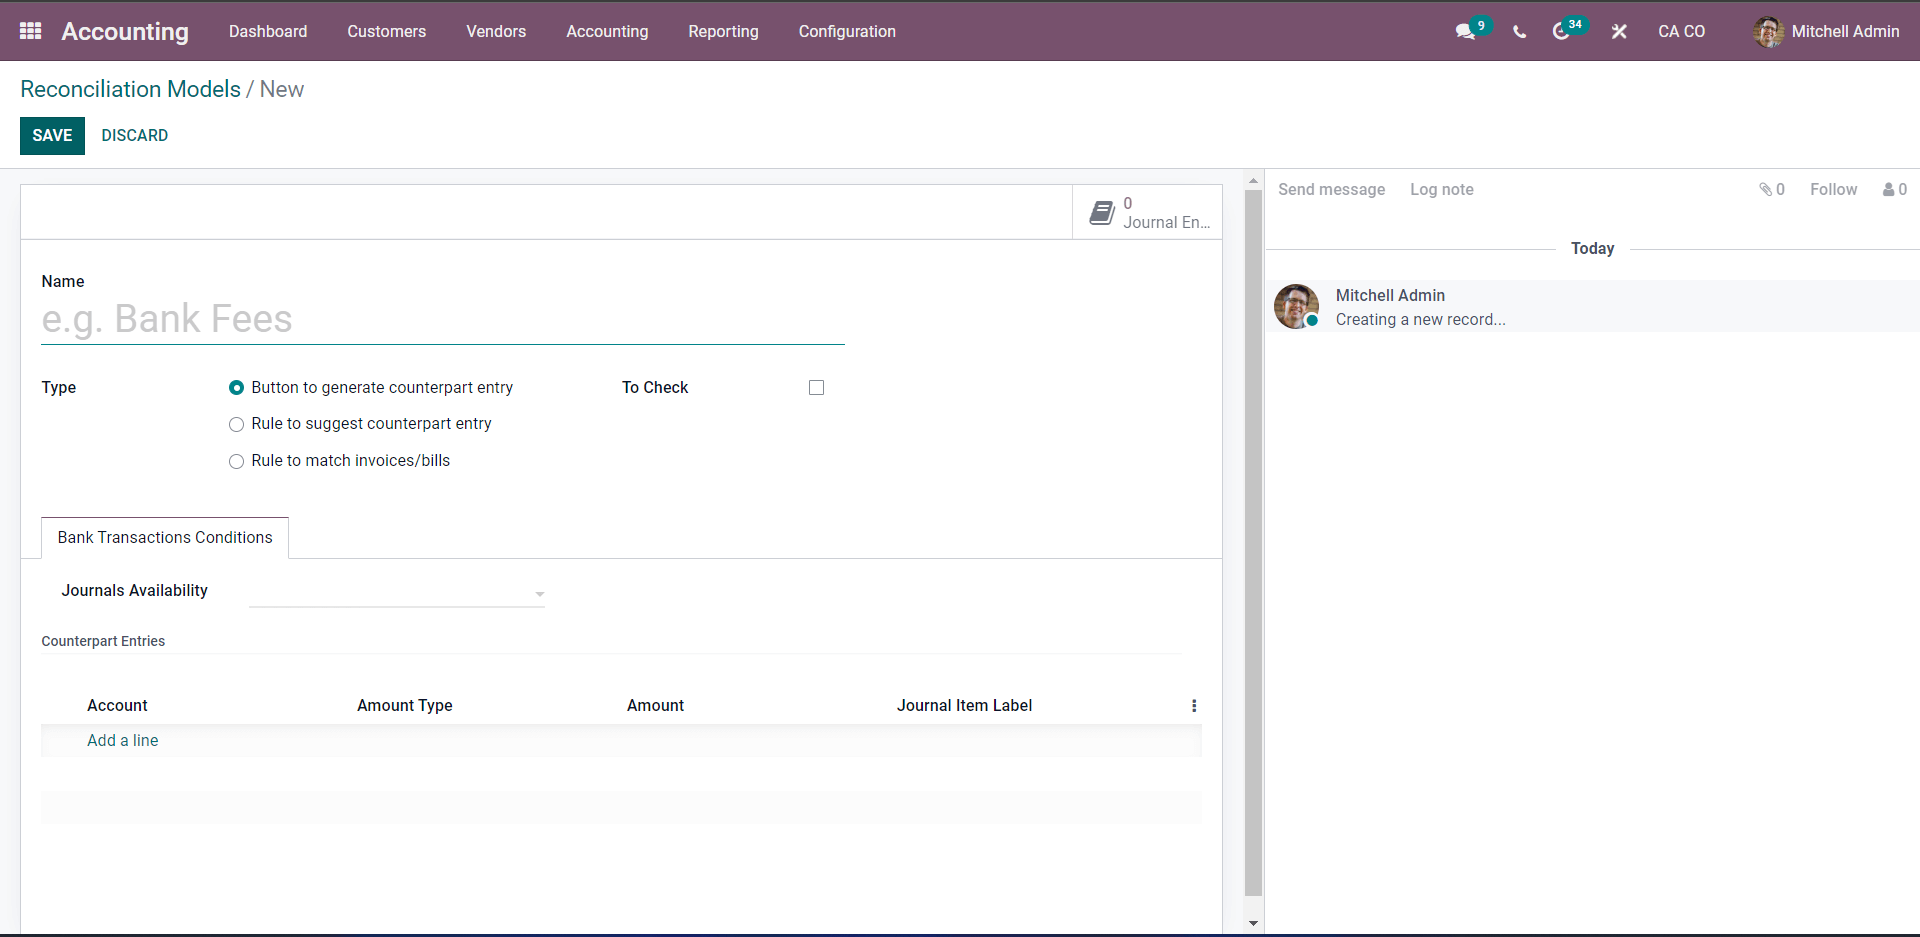
Give a name of the Model in the Name Field. Choose the type from the Type section. You can choose from the Three types, Button to generate Counterpart Entry, Rule to Suggest Counterpart entry, or Rule to match invoices/bills. Note that the configurations will change concerning the Type you choose from the Type section. So if you select the rule for match or Bills, then you can set whether the reconciliation is automatic or not. The bank transactions change drastically with the types chosen.
Button to generate counterpart entry
It is essential to know the configurations of all of the Types. If you choose the Button to generate counterpart entry, the structure would be below.
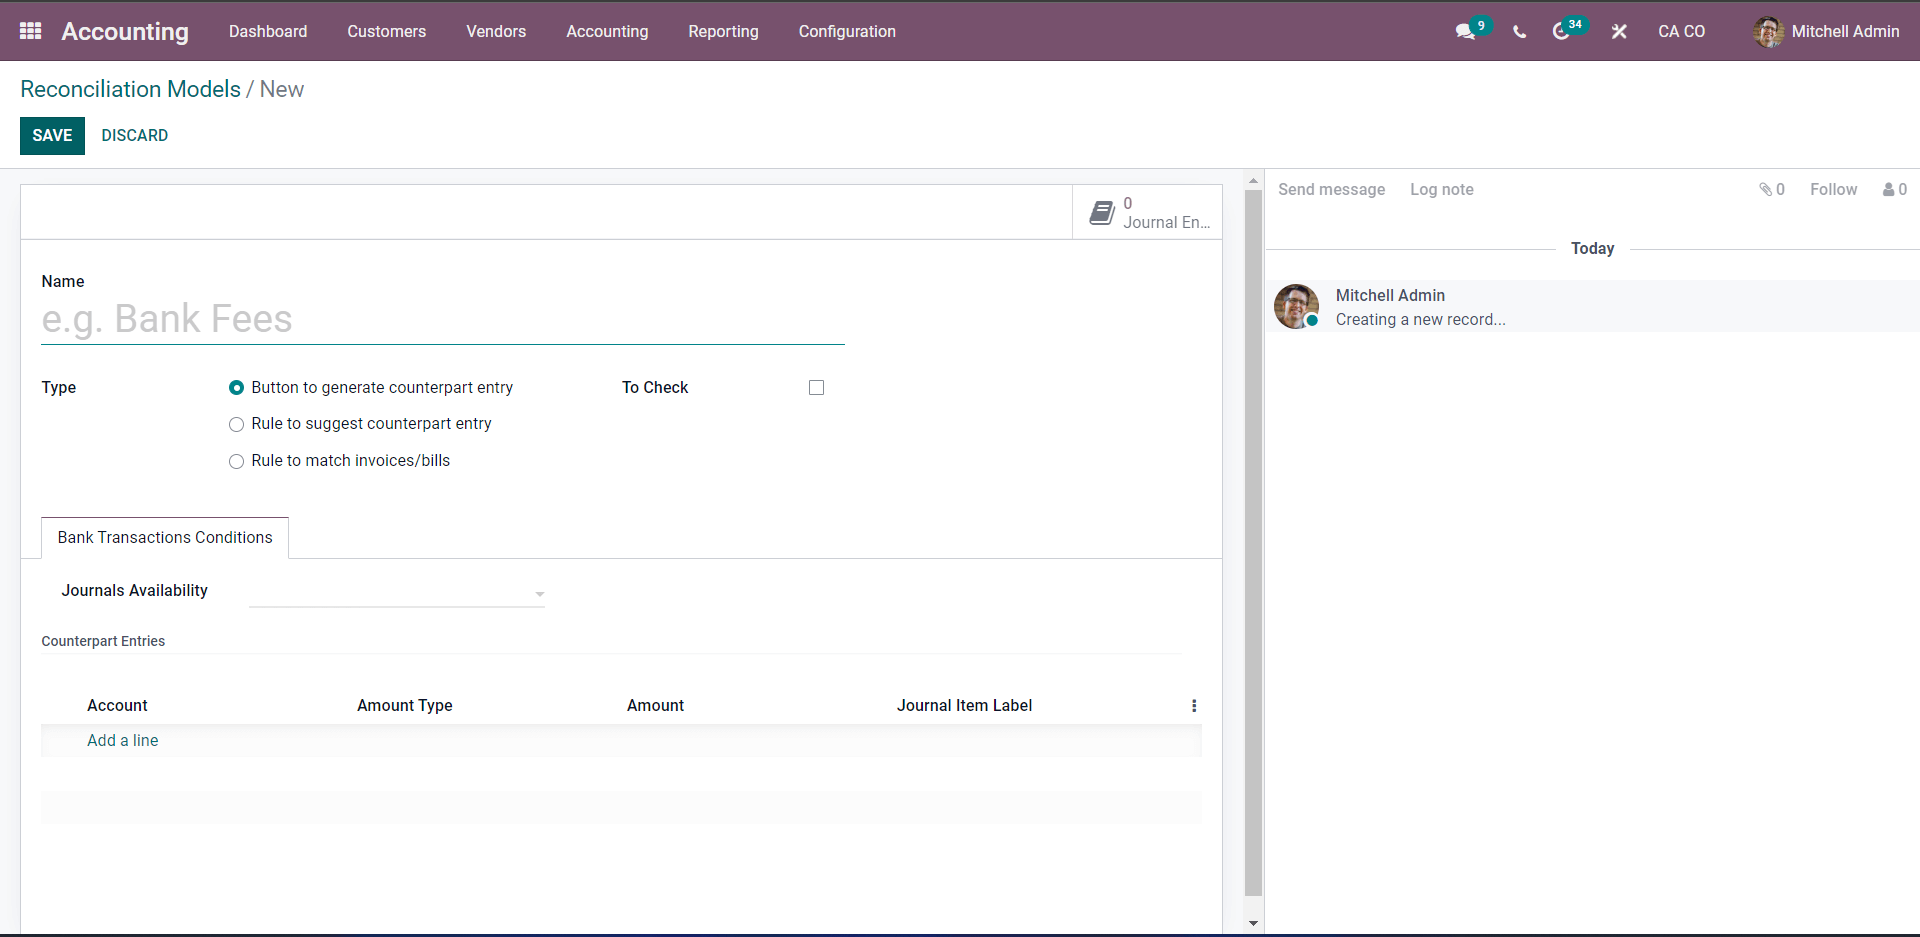
In this case, you can choose the Journals Availability from the drop-down options Bank or cash Journals under the Journal Availability field. Under the counterpart, Entries click on Add a line and add the Account below.
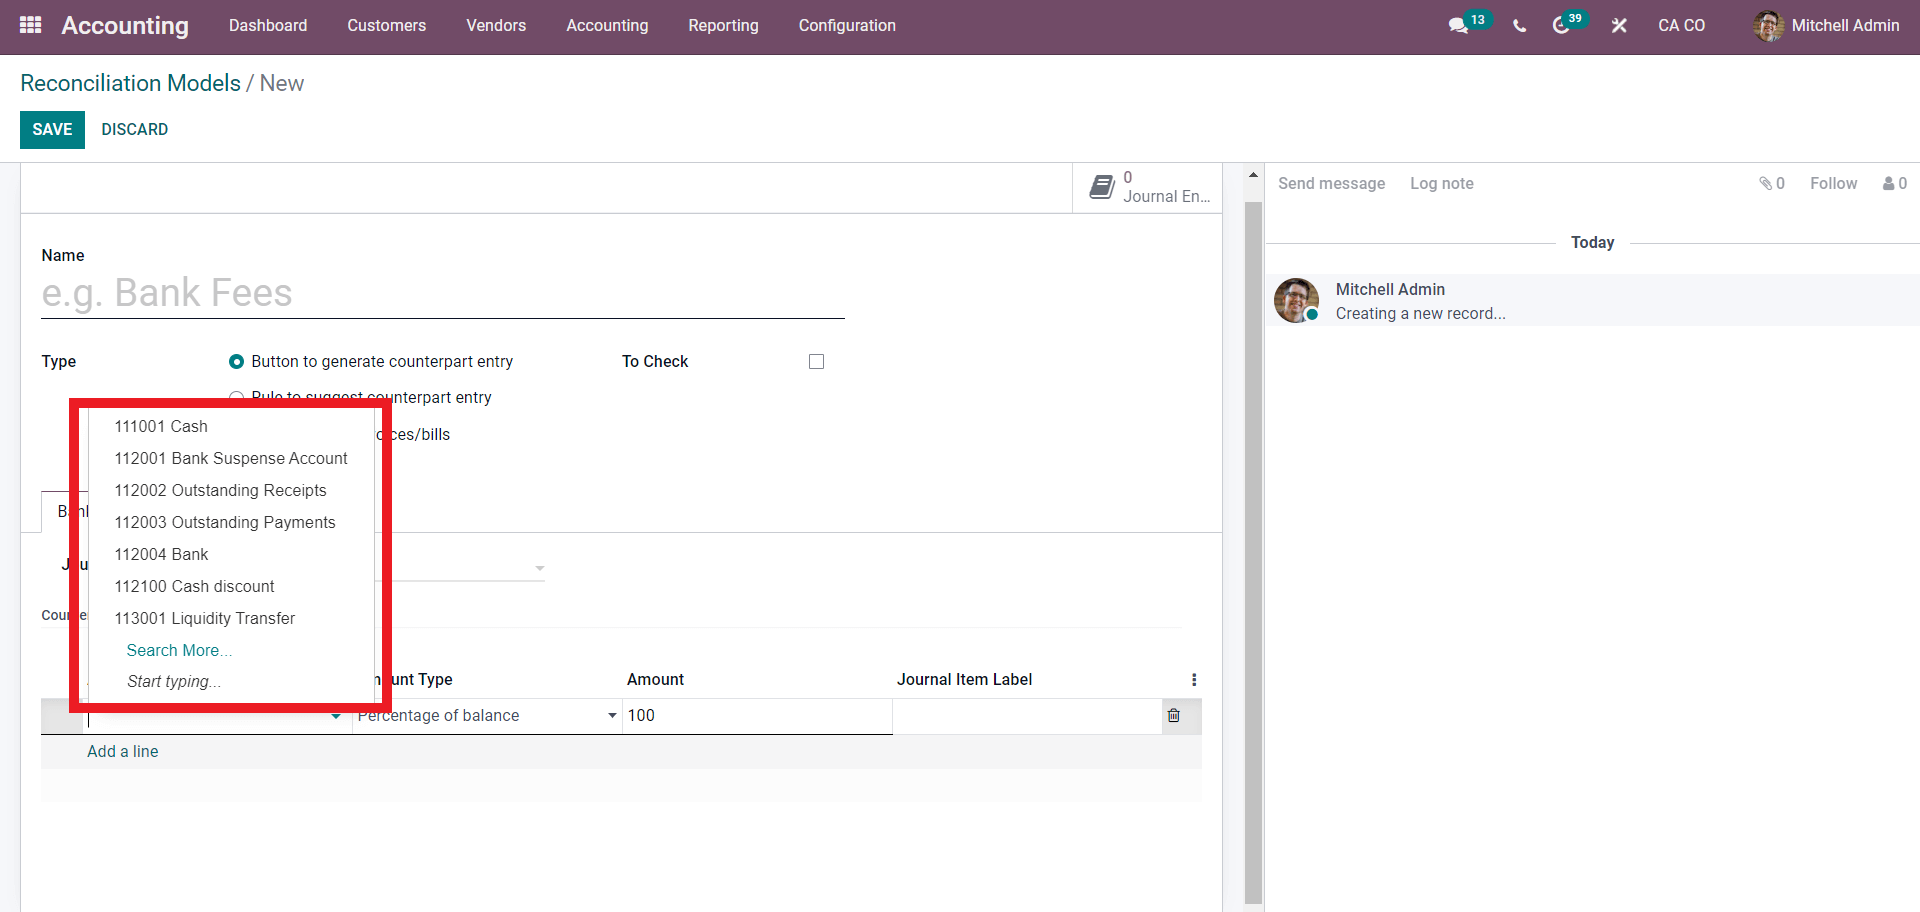
choose from the list of the available options to apply for it. Give the Amount Type from the drop-down options of Amount type, including Fixed, Percentage of balance, Percentage of a statement, or From label.
You can add more fields under the Bank transactions conditions. Click on the dots next to the areas shown below to add new fields.
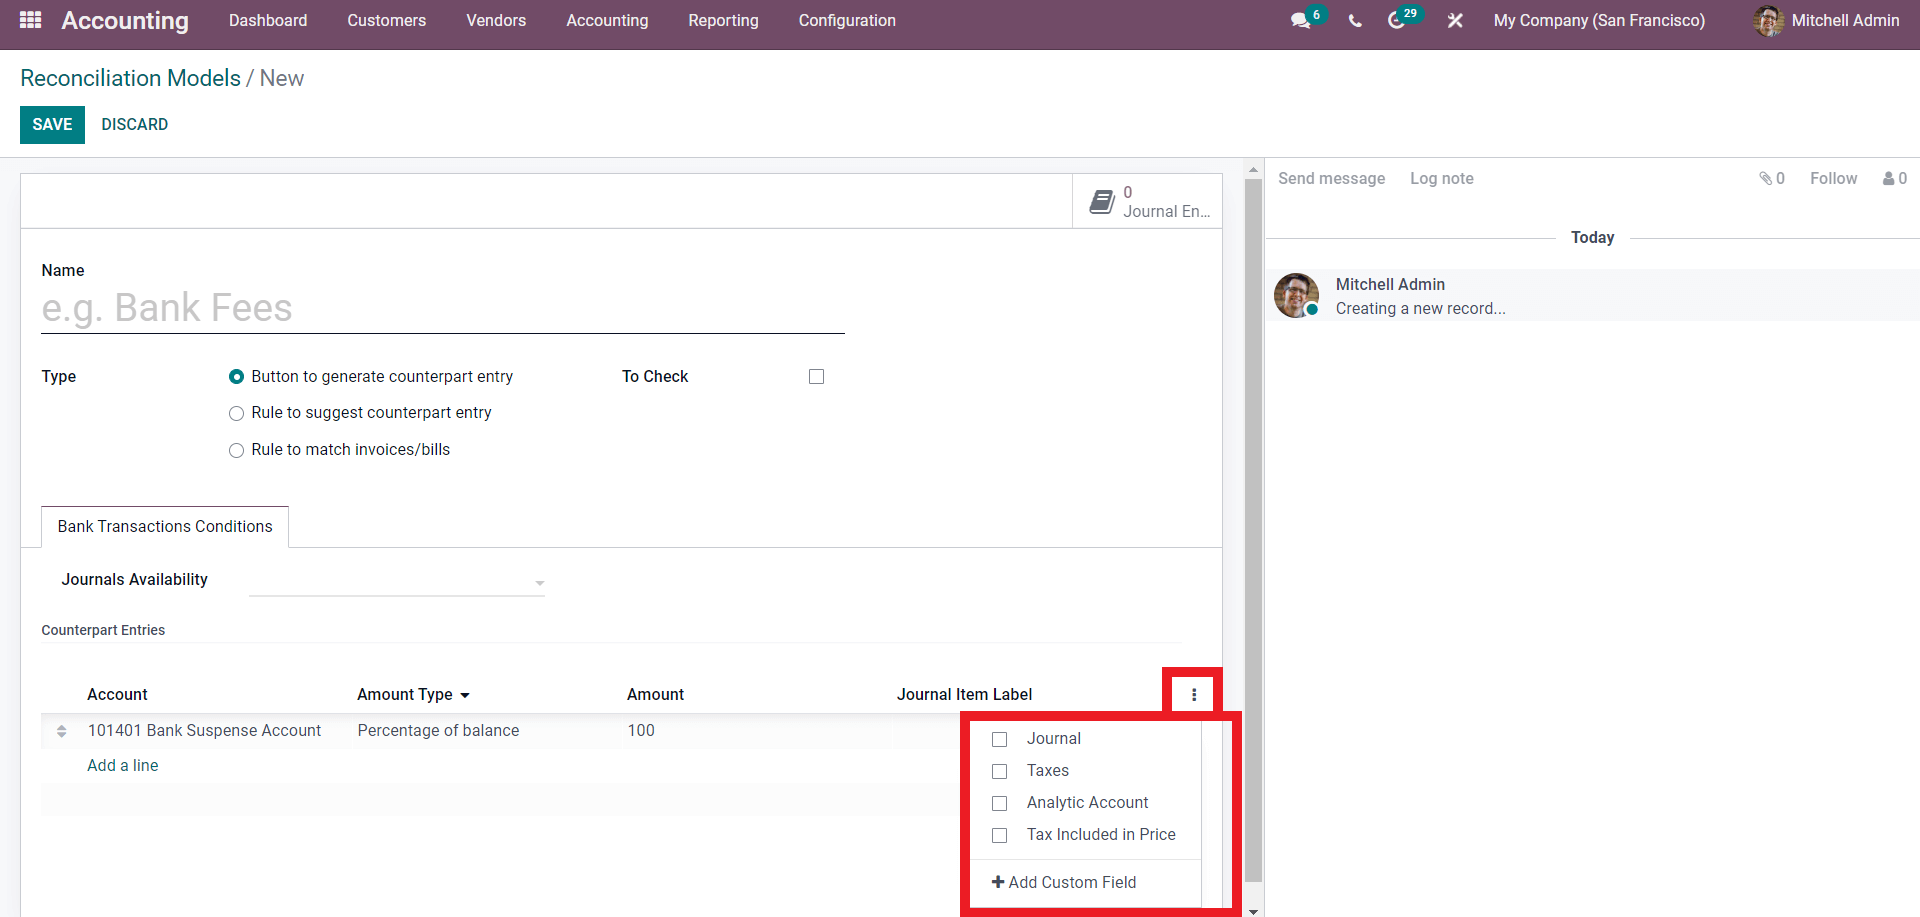
Choose the fields or create an area by clicking on Add Custom Field from the Dropdown options.
Usage
After the configurations on the Button generate counterpart entry, the Reconciliation model will be available to use. To test it out, let’s create a Customer invoice.
Go to the Accounting module dashboard and Click on the customer tab, and from the drop-down options, choose invoices which will give you the configuration tab for creating invoices, as shown below.
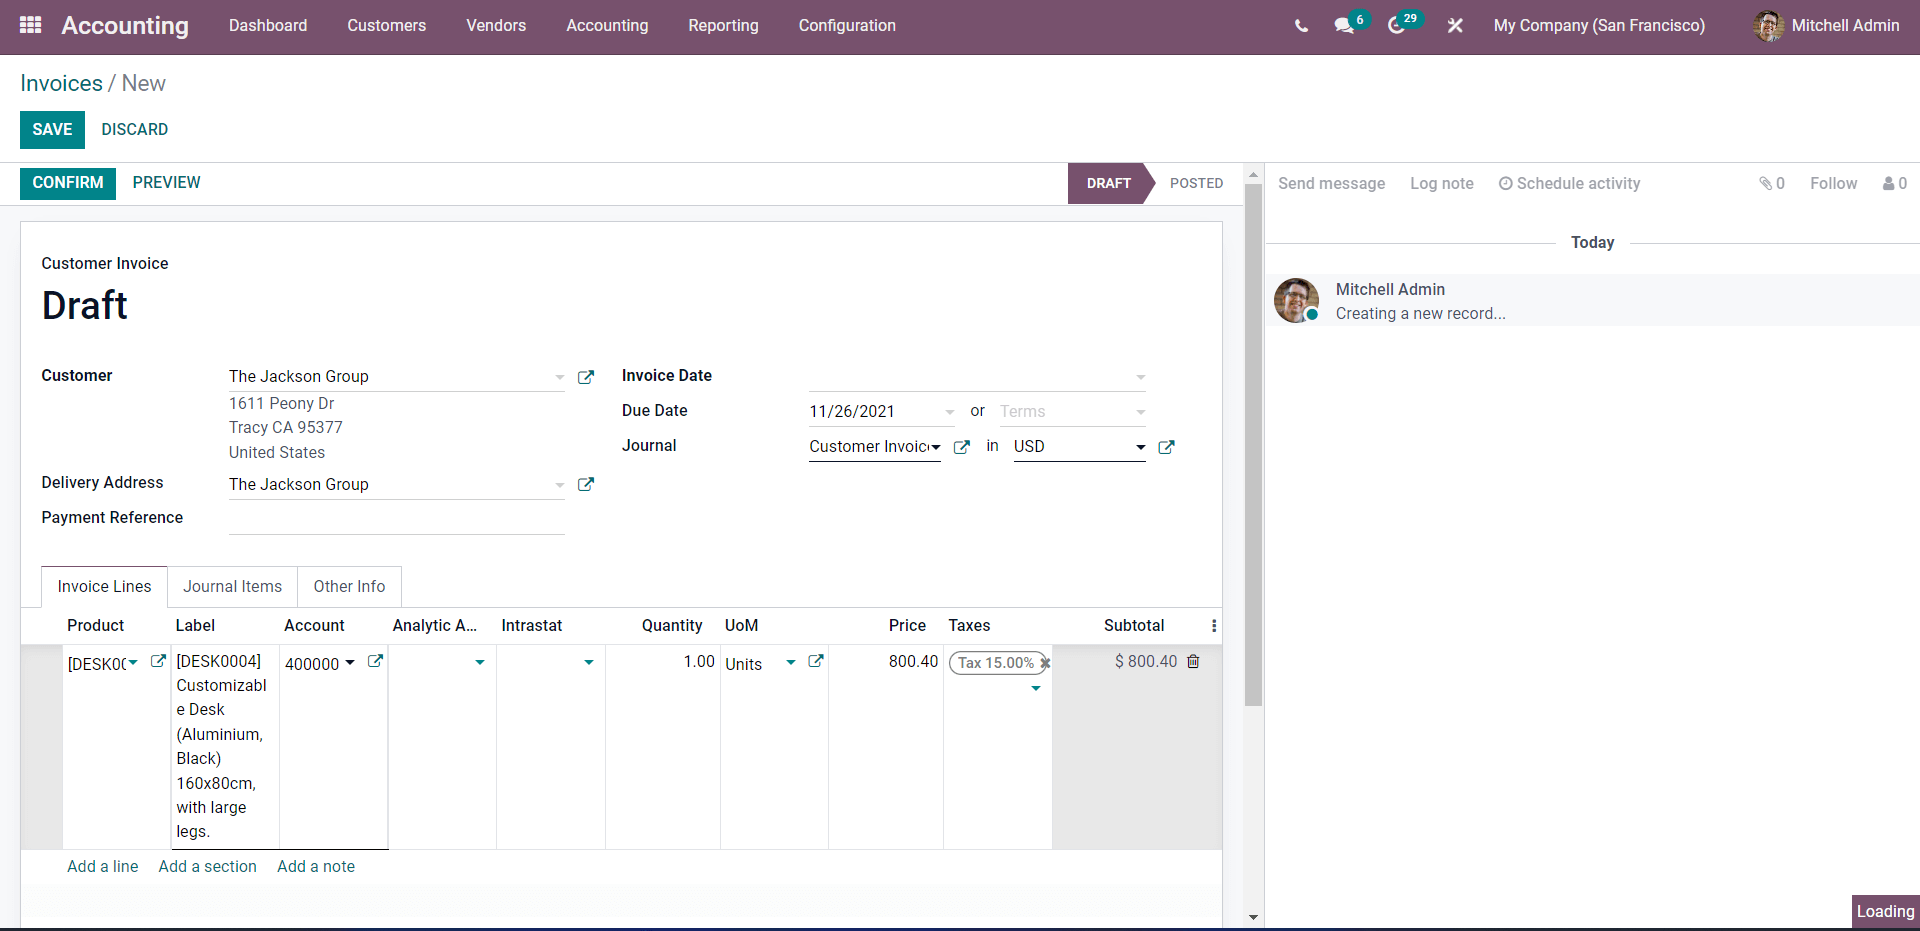
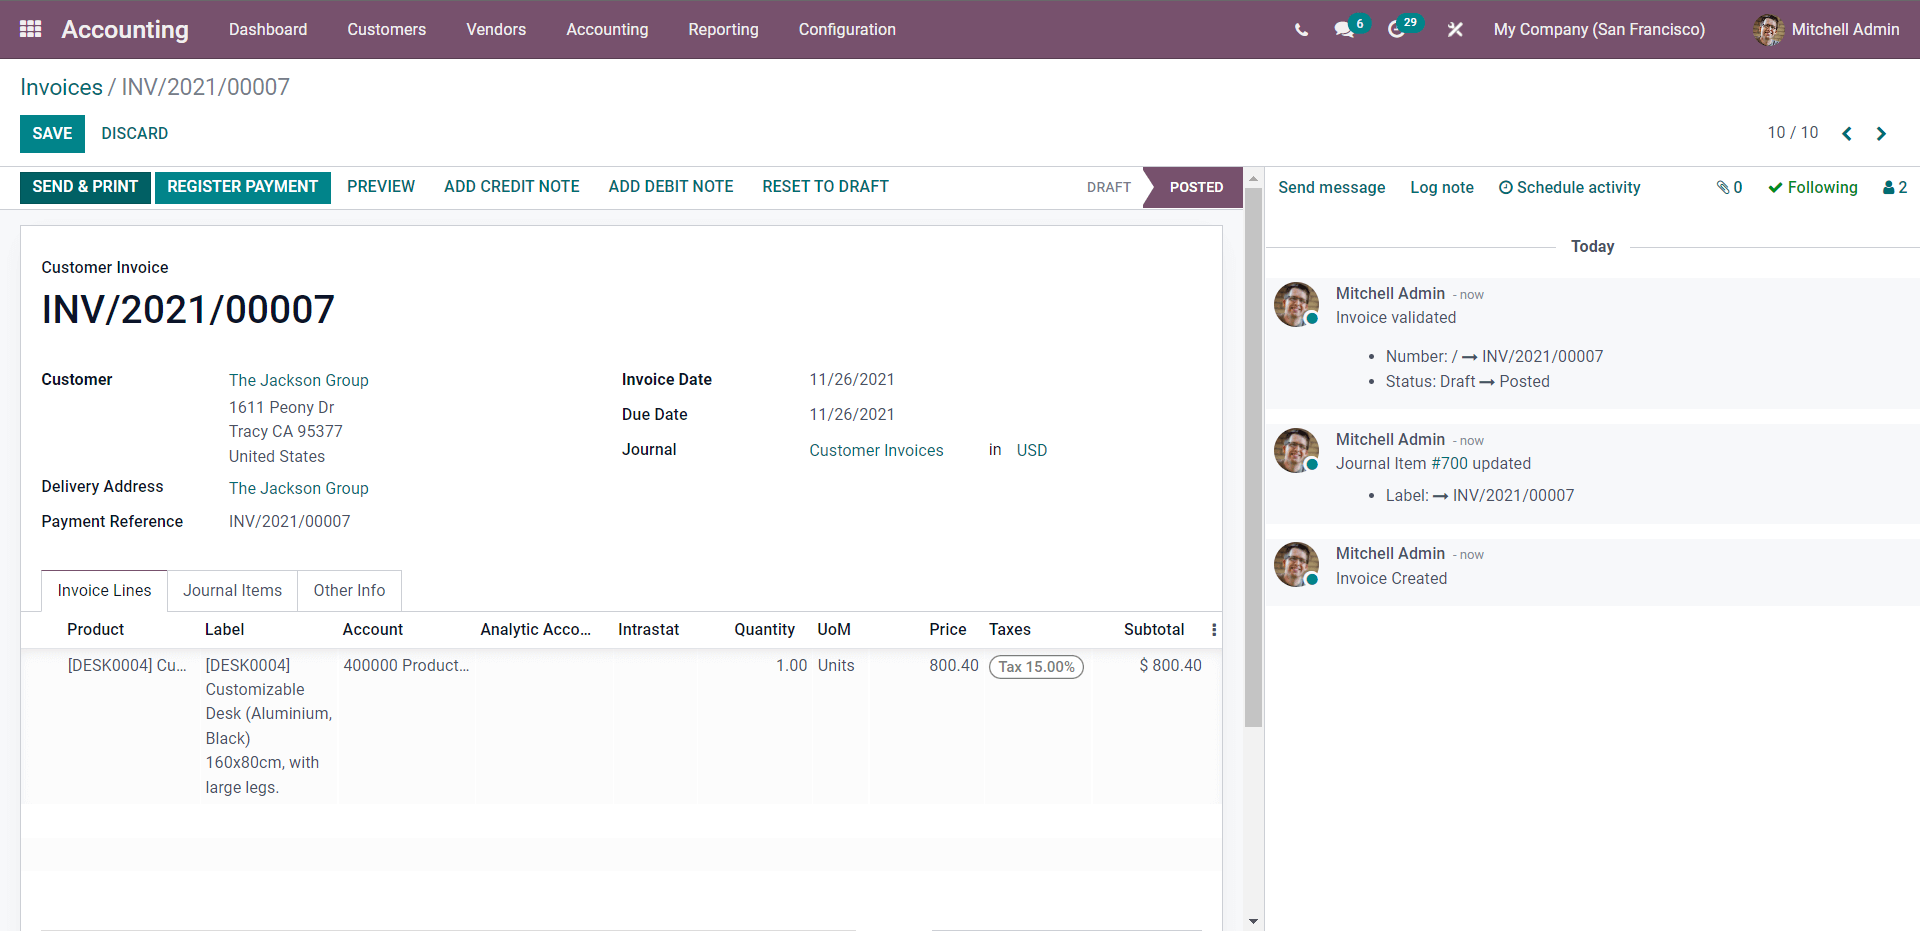
From the invoice section, choose the customer and the product and confirm the invoices by clicking on the CONFIRM button, which will take you to the next section, as shown below.
After this, go back to the Dashboard of the module
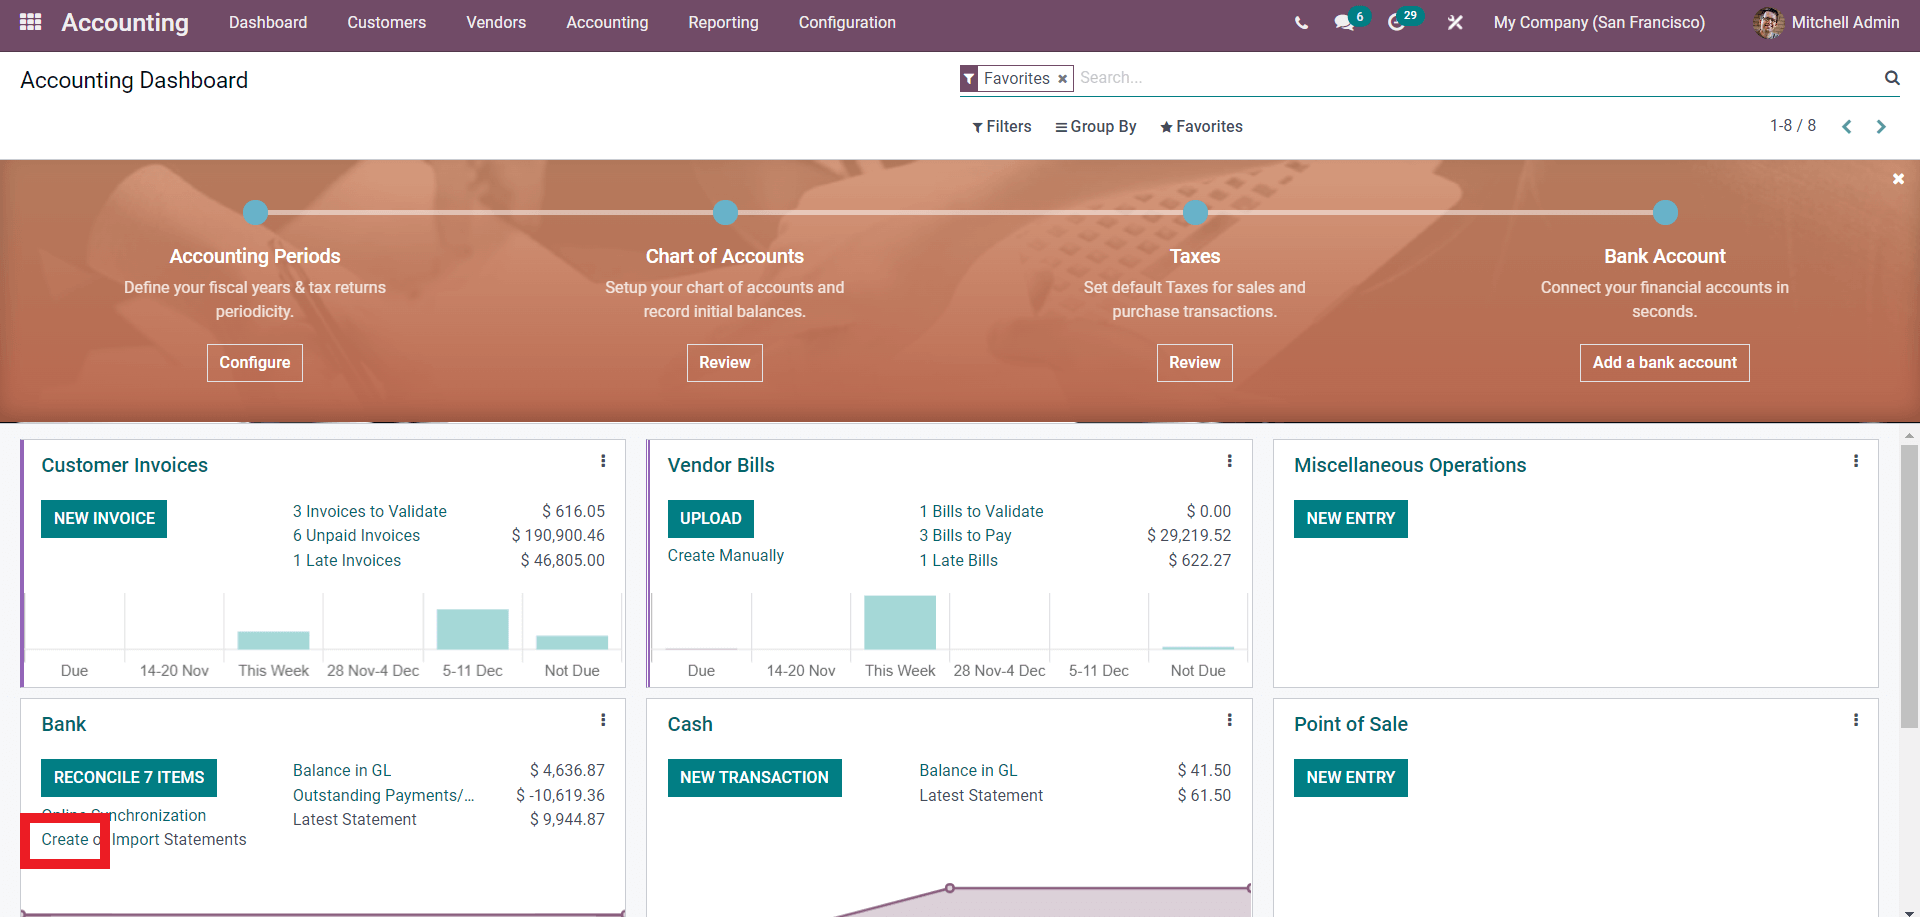
Go to the Bank section, press on the Create button as boxed above to form or create a new bank statement.
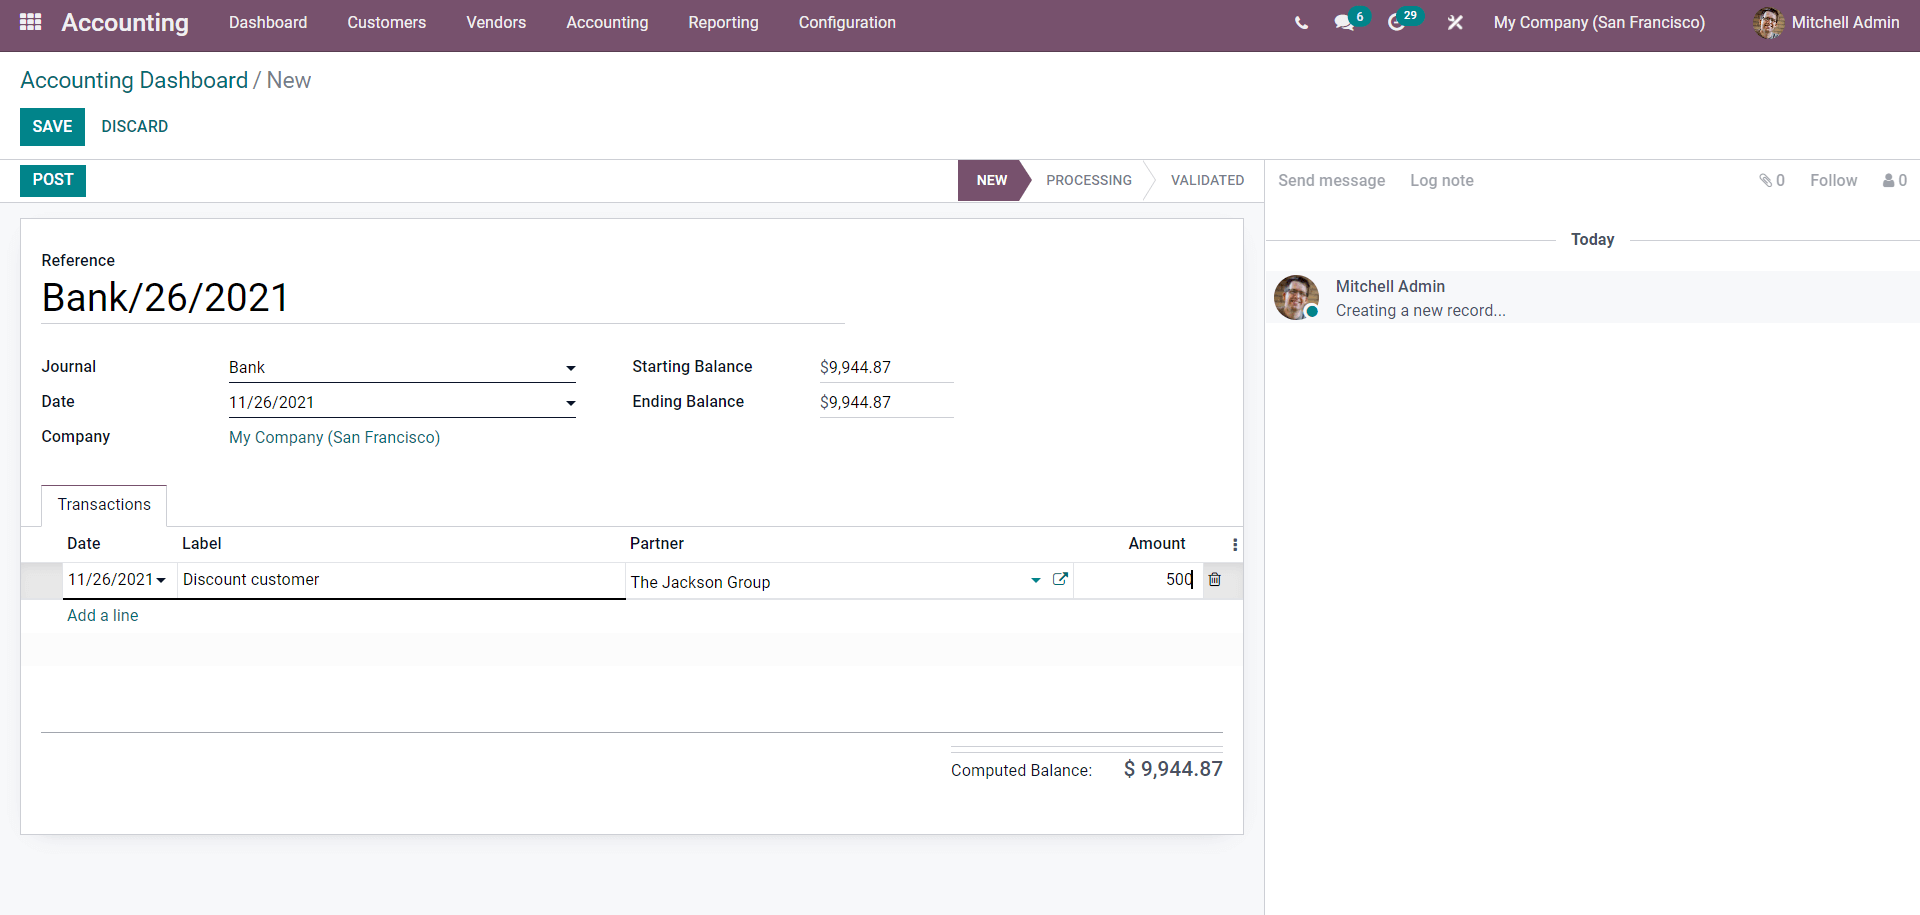
In the Reference, the field enters the date or the name for quick reference and identification of the statement. In this case, it is the statement creation date. You can also configure the date, starting balance, and ending balance.
In the transactions section, click on the Add a line button to add configurations on the transactions as in the above-given image. Add the date and the Label. In the above-given image, the Label is a Discount customer and adds the Partner as your customer. In the Amount field, enter the Amount, and press on the SAVE button.
Before Posting, change the Ending Balance in the Ending balance section. After this, click on the POST button to post and move to the following process stage, as shown below.
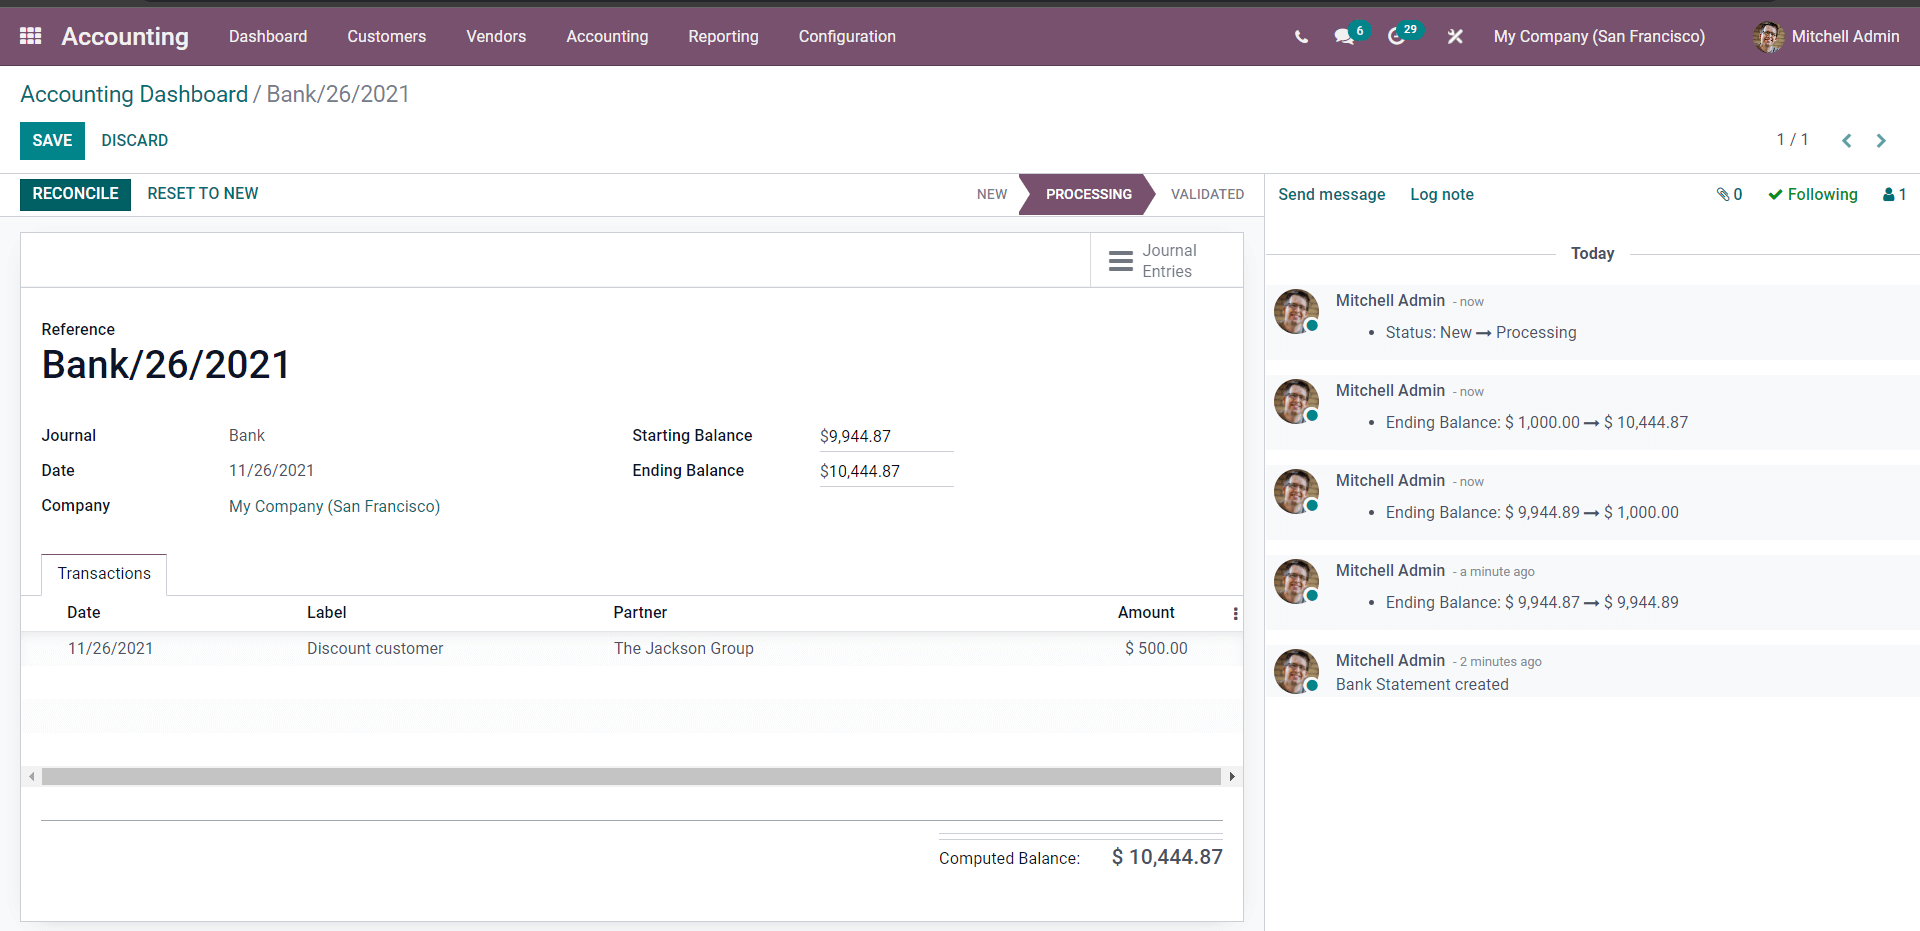
Go through the details and see if any configurations are required, click on the RECONCILE button to reconcile, and proceed to the next section to validate the statement as shown below
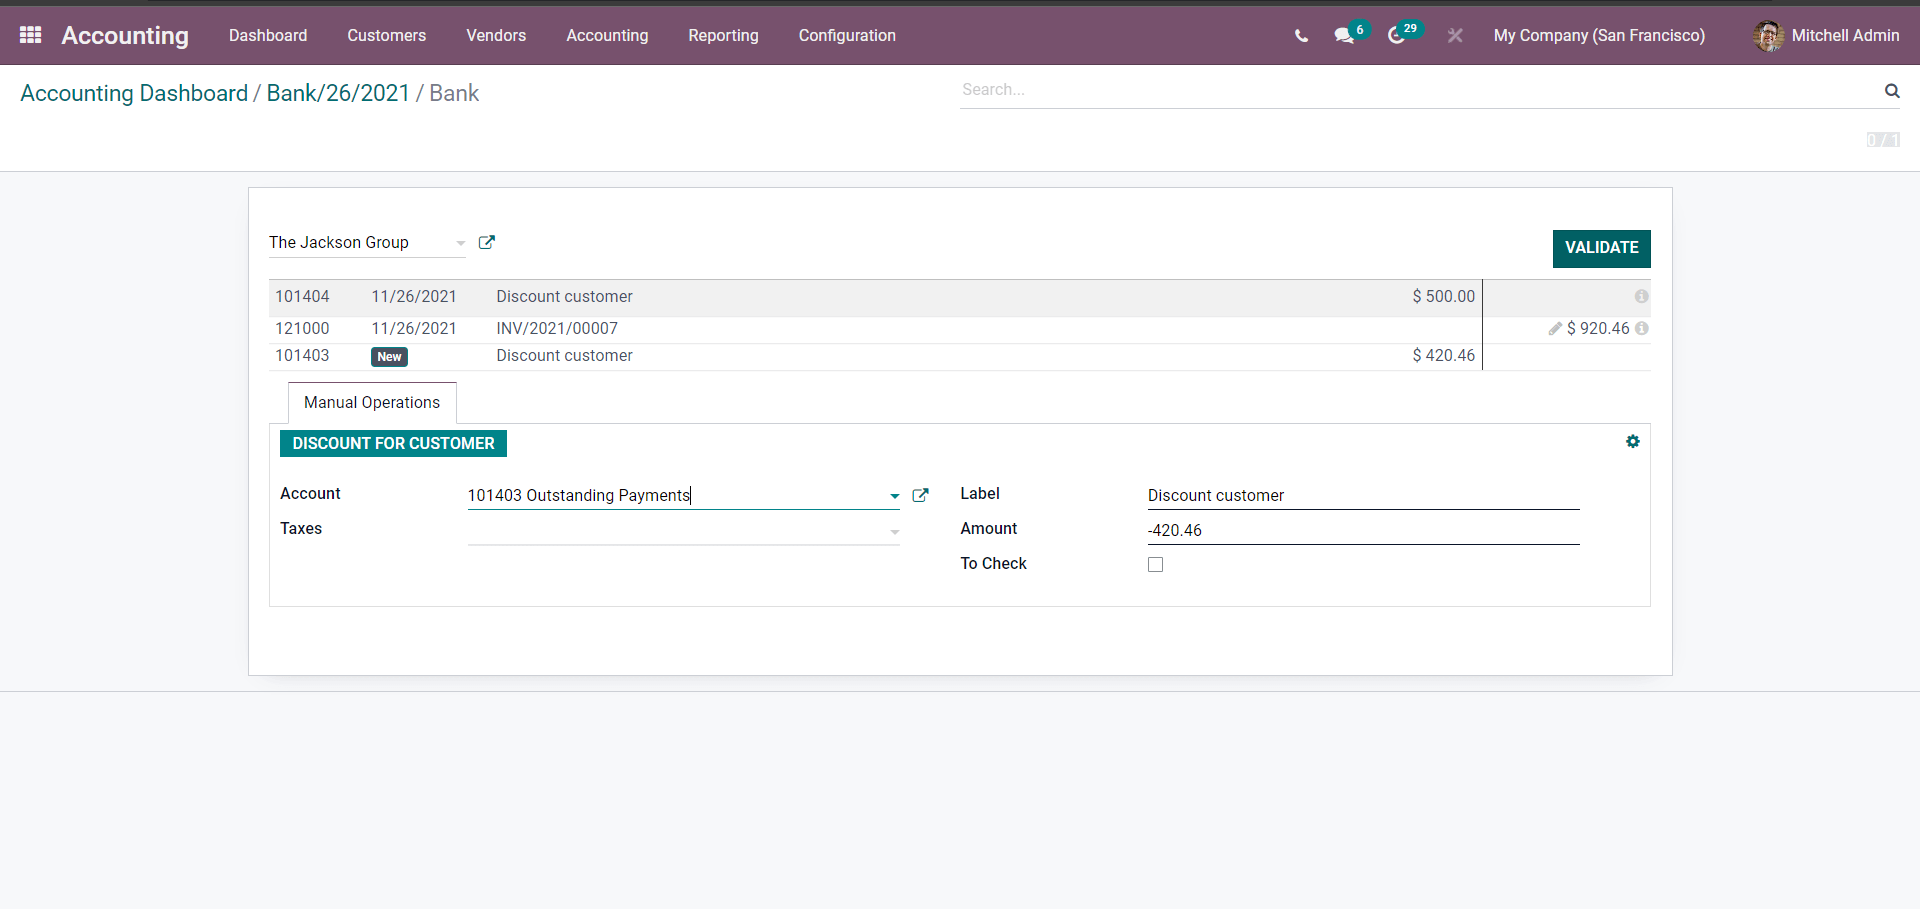
The amount near the Statement is shown as $500. Click on it to edit it, and the amount entered over here is $920.46, and the difference will be shown in the INV section just below the labeled statement as shown above, which is $420.46.
Under the Manual operations section, you can find the Reconciliation Model name DISCOUNT FOR CUSTOMER click on it, and the fields will appear. They will be auto-filled with the information you have configured in the reconciliation model section. After this, click on the VALIDATE button and the process will be validated, concluding the Reconciliations process. As shown below, a final page will open up to notify that the process is complete.
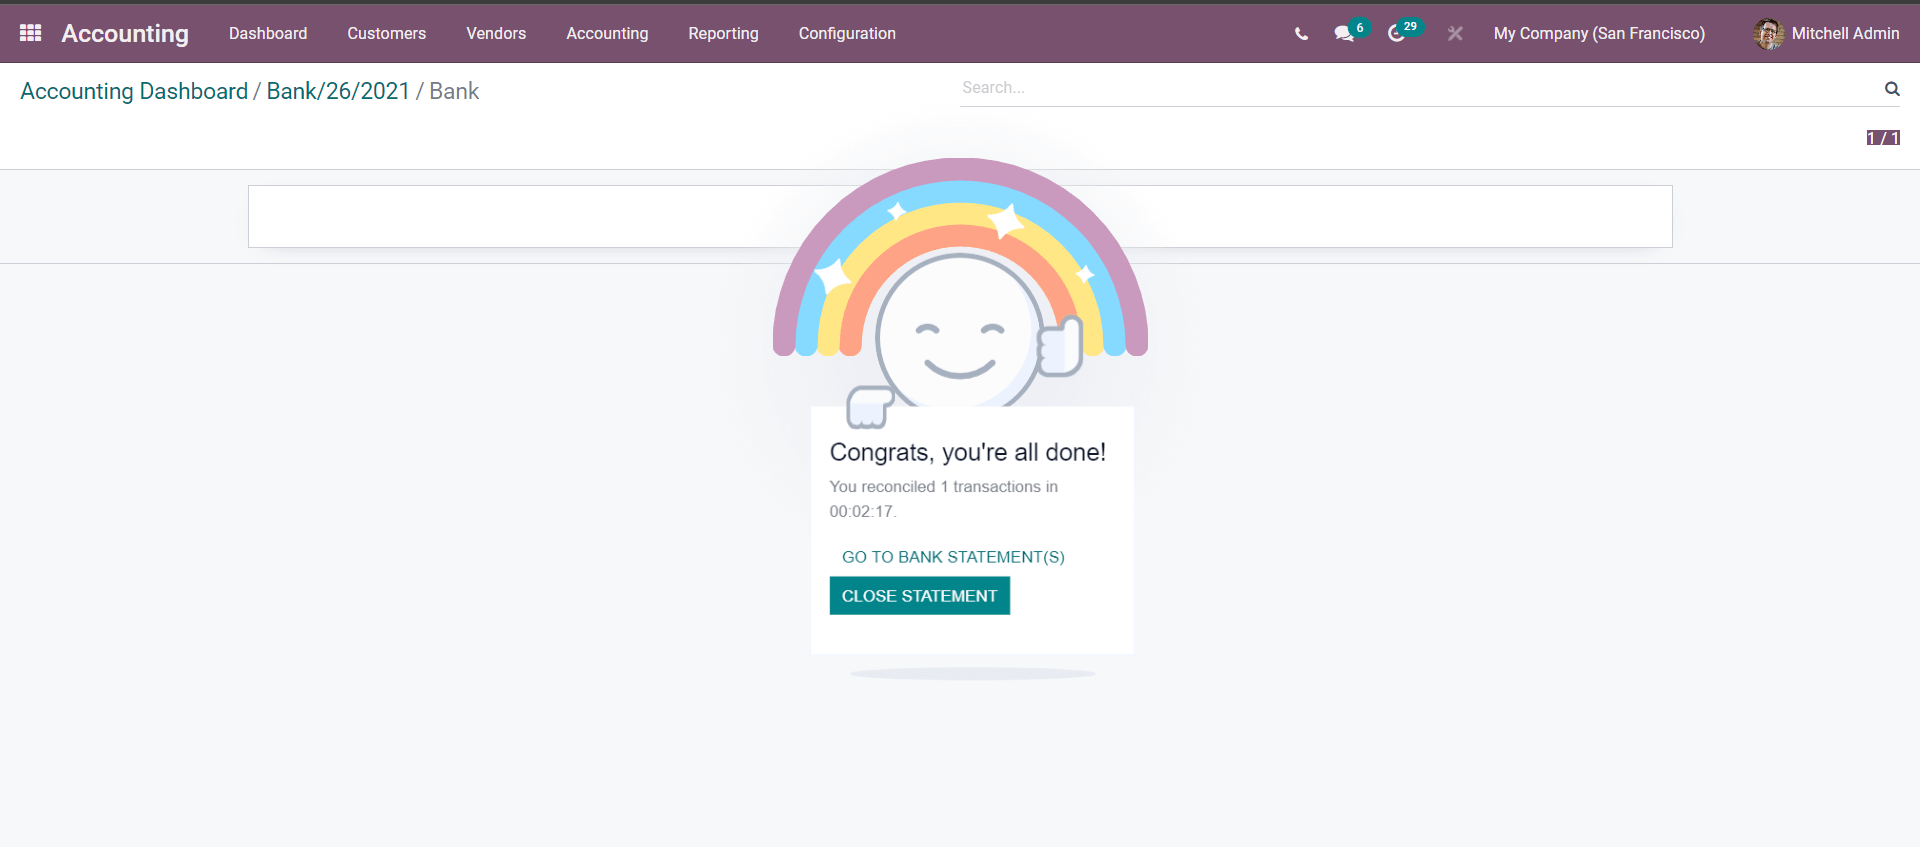
Go back to the Bank page.
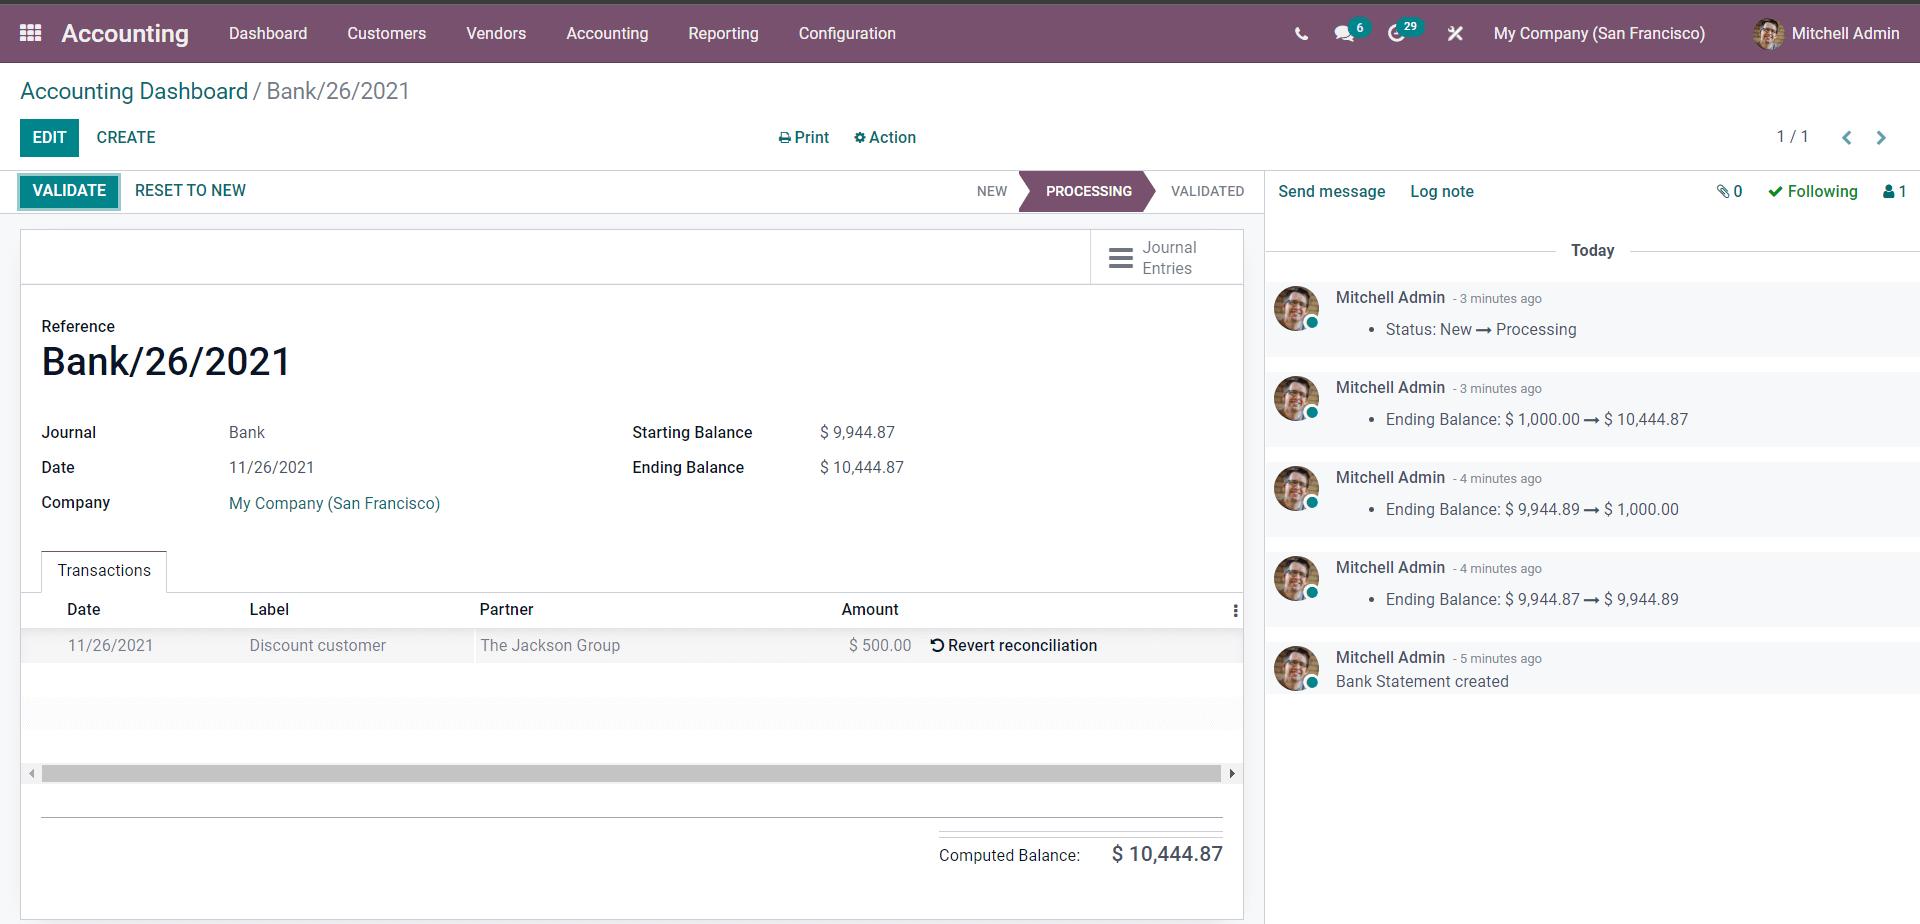
You can either Validate or Revert the Reconciliation from here. Click on VALIDATE to validate the process.
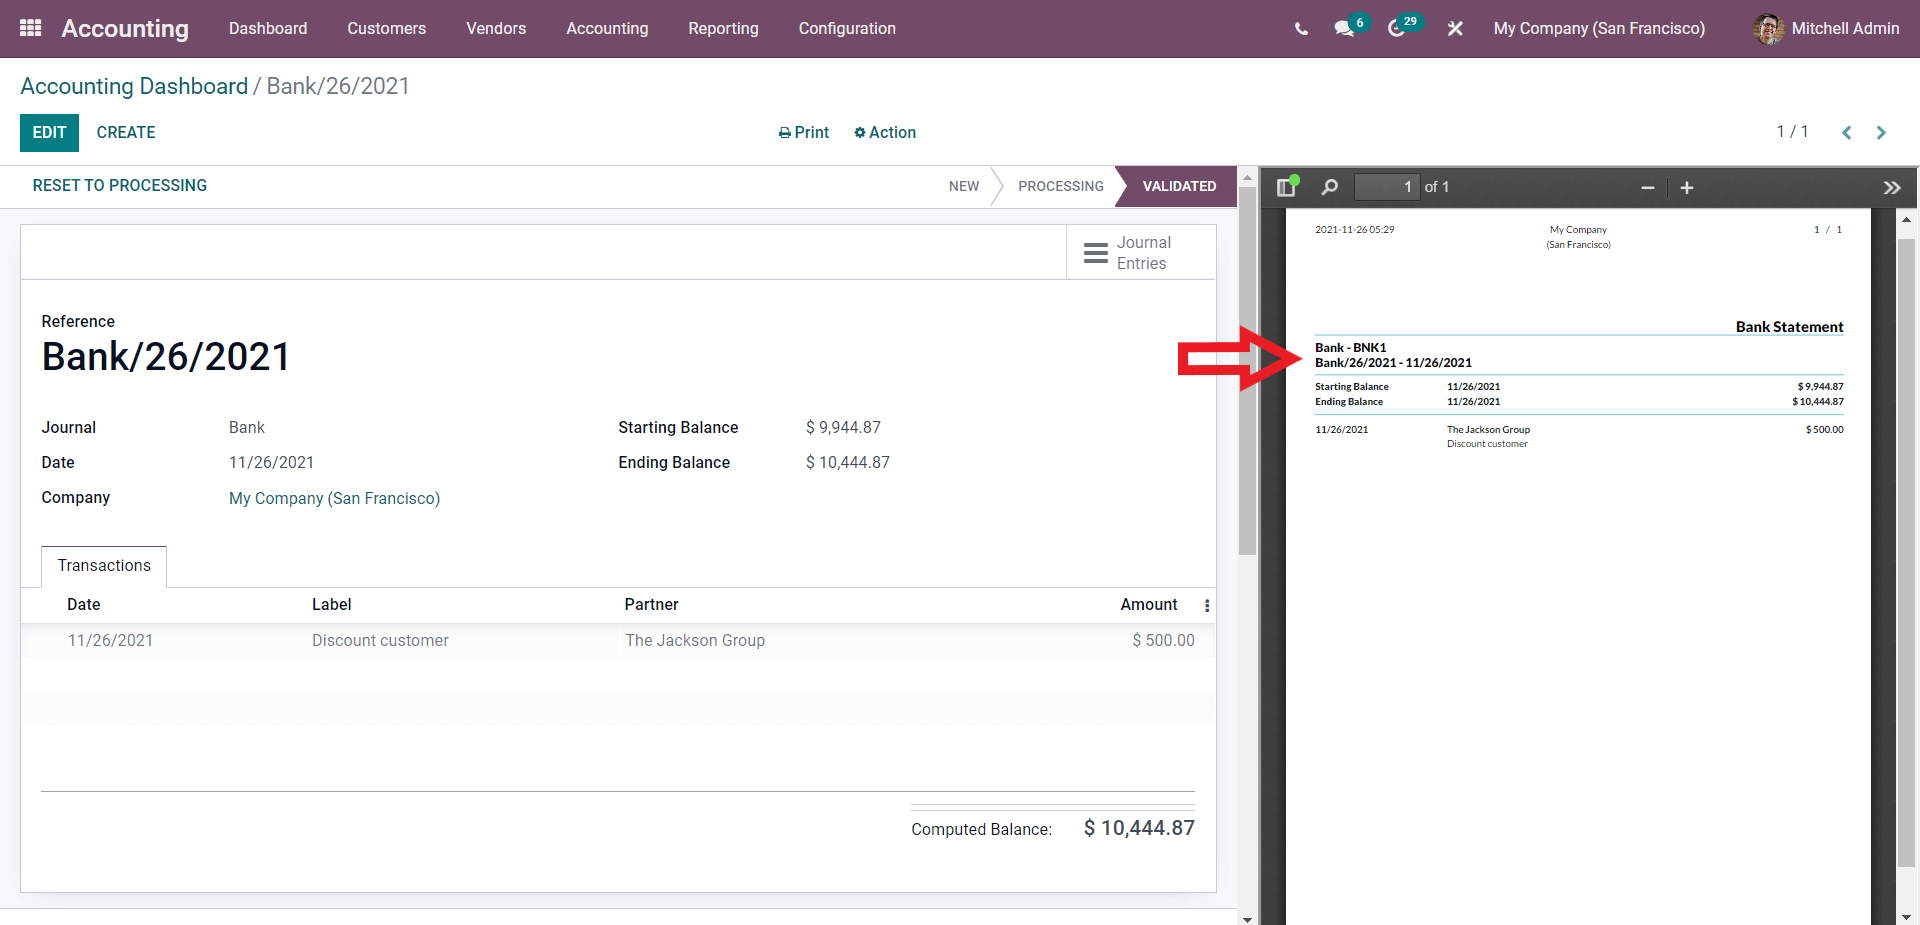
At the Right side of the page, you can see that the Statement is validated. This section will include the details on the starting and ending balance and the total amount.
Rule to suggest counterpart entry
If you choose Rule to suggest a counterpart entry, the configuration page will be shown below.
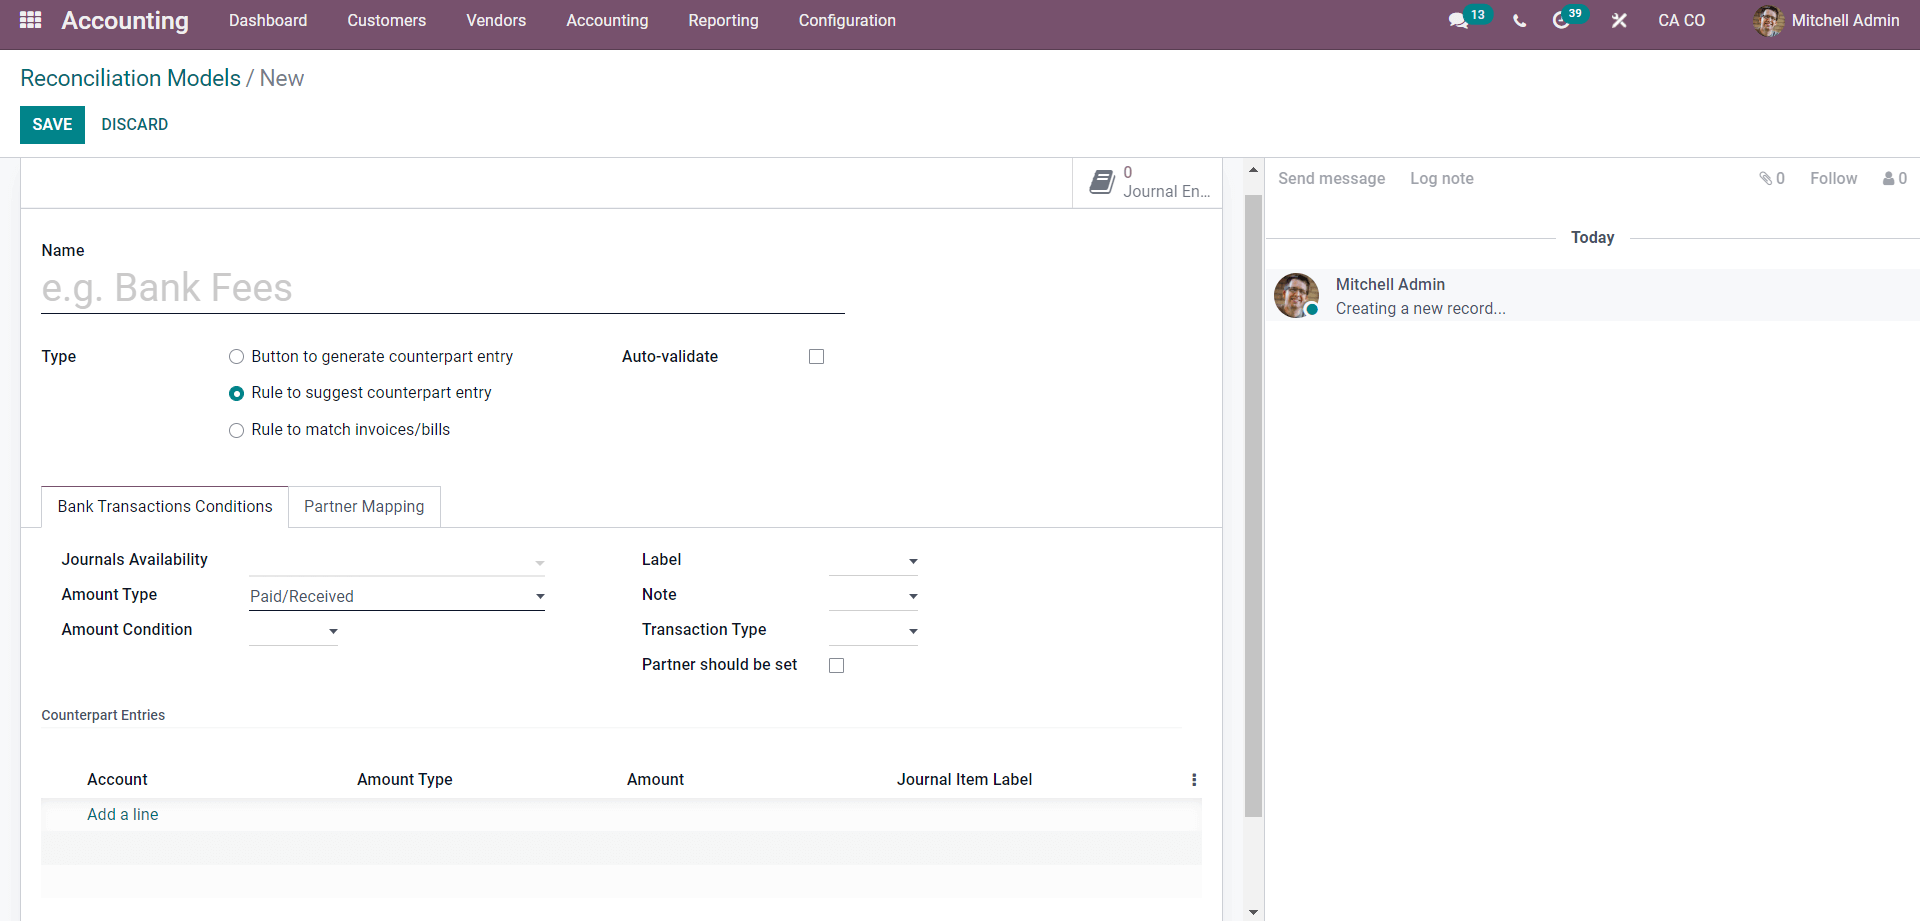
Under this Type, you can notice that more configurations are included. With the Rule to Suggest Counterpart entry type, you can set whether to Auto validate the Statement line or not. You can configure the Bank Transaction conditions.
Under the ‘Bank transaction conditions’ section, you can choose the Journals Availability. Choose the Amount type from the Received, Paid, or Received/paid list. For the reconciliation process to carry out, you can select the Amount condition from the three drop-down options, lower than or greater than or in between.
On the right side of the section, you can find the Label field, which has three options, Contains, Not Contains, and Match Regex. You can also set the Partners by clicking on the Player Should be set option, which will give you additional options as shown below to select the partners.
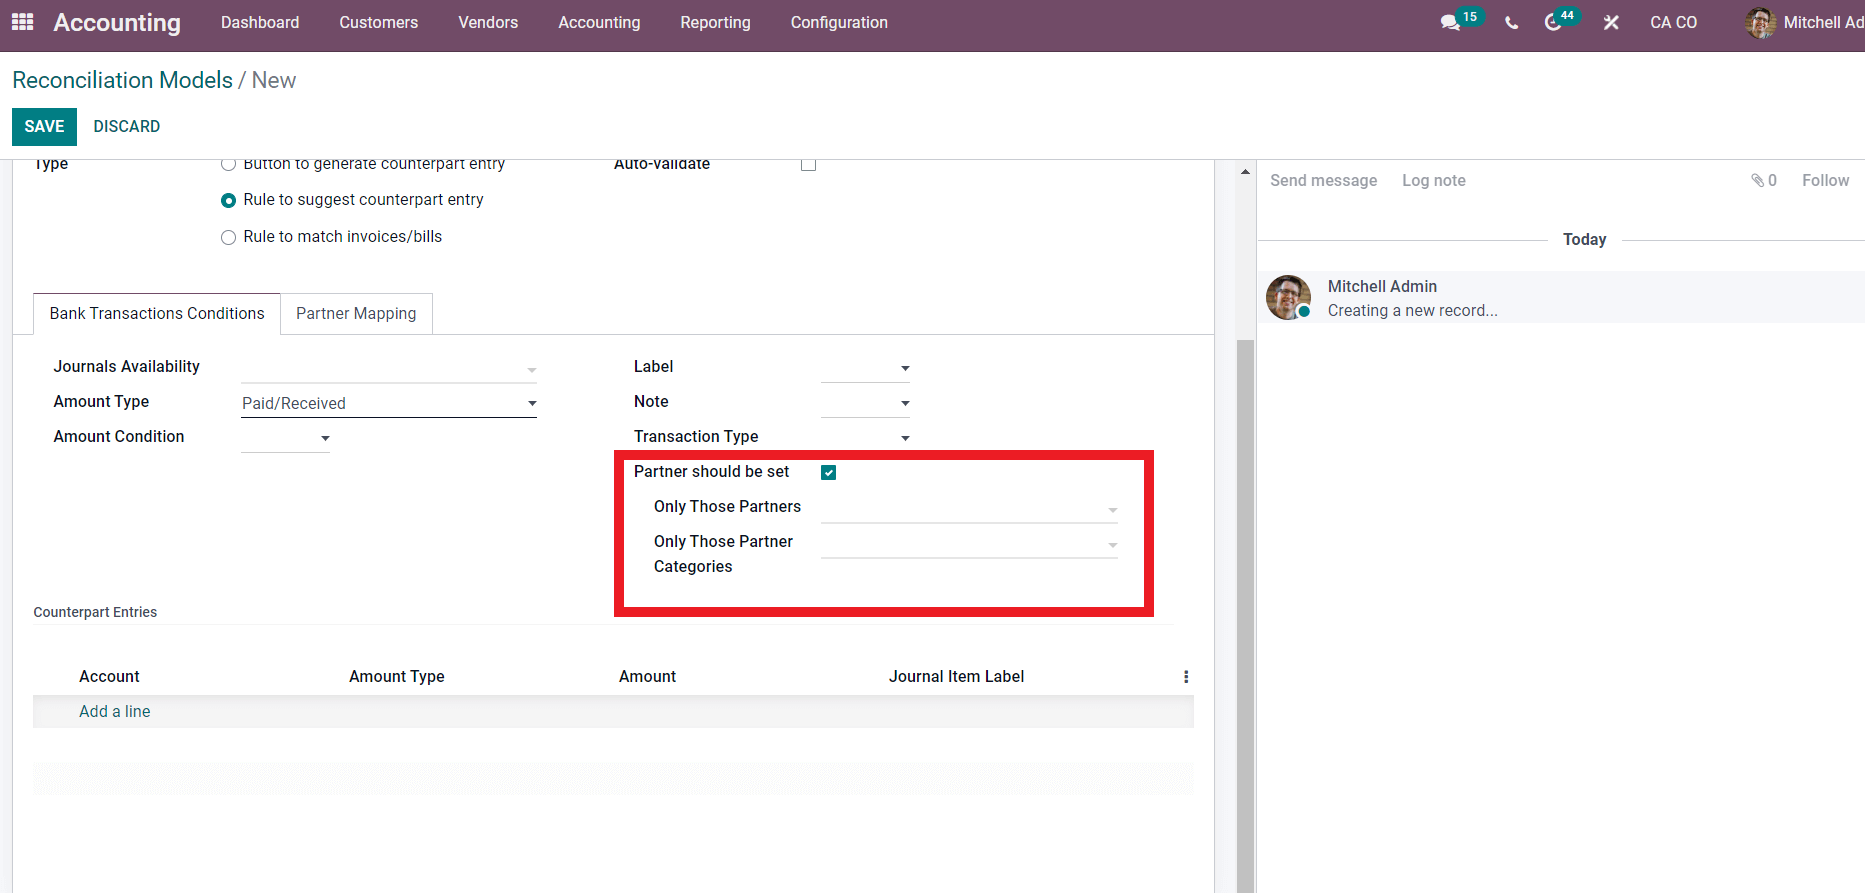
Choose the partners from here, and under the Counterpart Entries, use the Add a line button to add the Account after the configurations, move on to the subsequent section Partner Mapping.
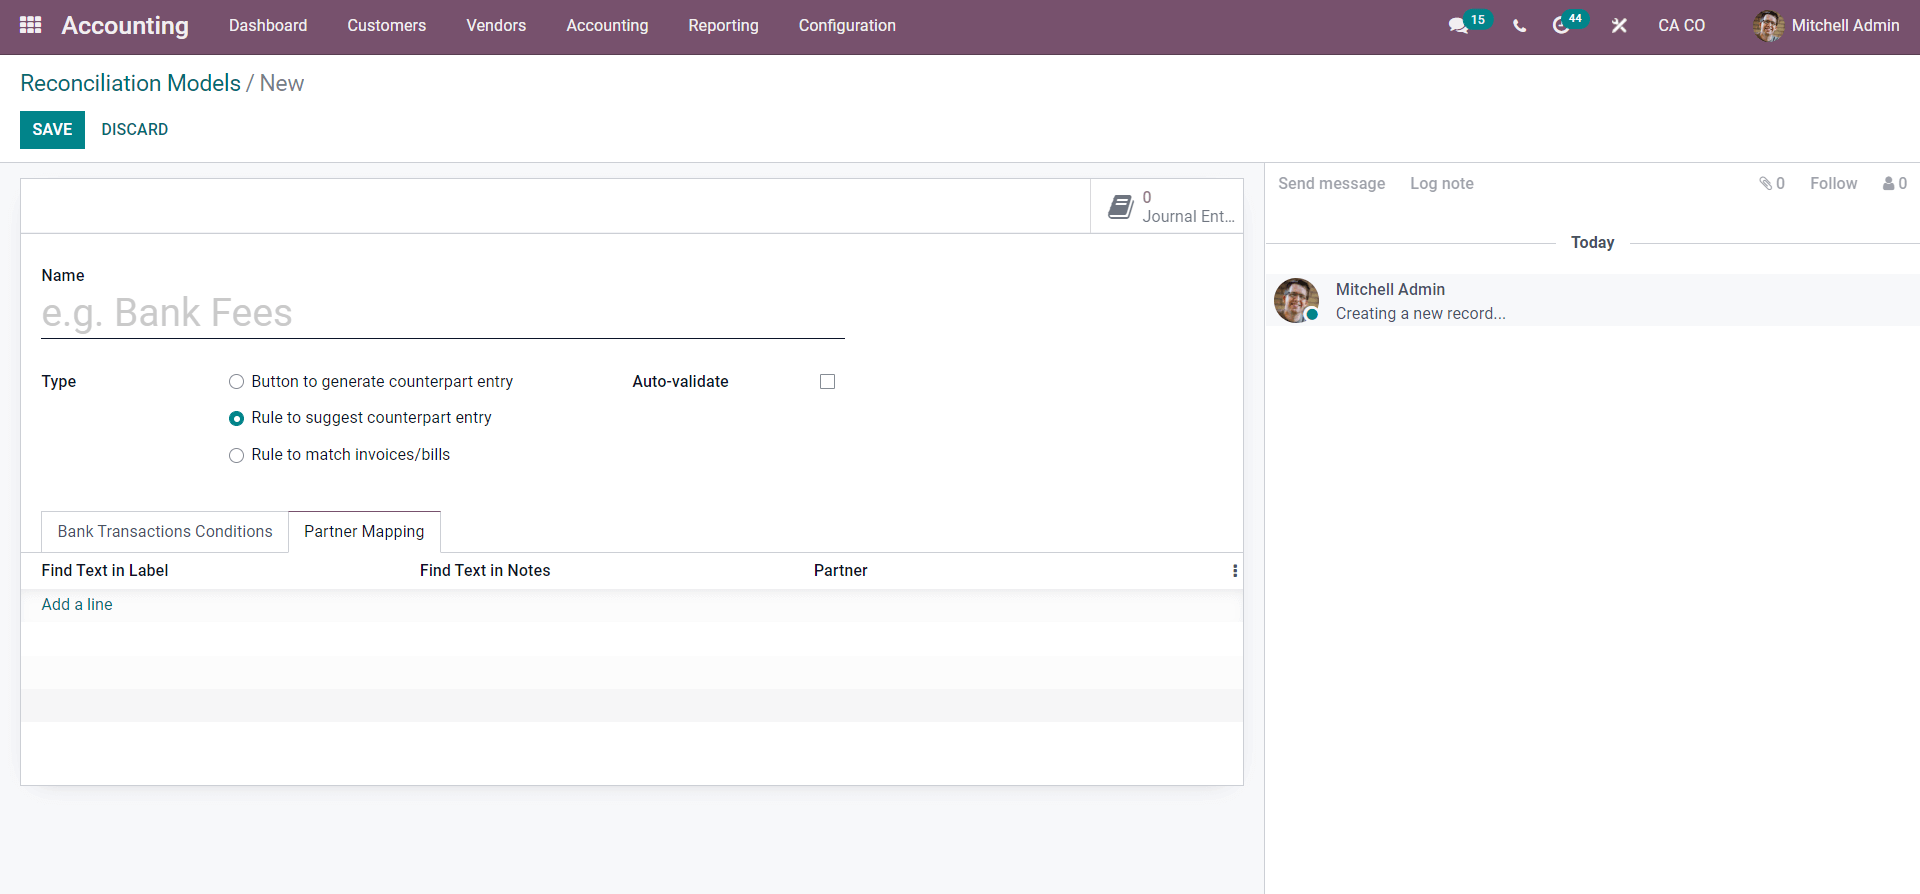
Click on the Add a line button to add the configurations. The configurations include Find text in notes and Partner. You can also add custom fields and the already available lots after the configurations; click on the SAVE button to save the Reconciliation Model.
Usage
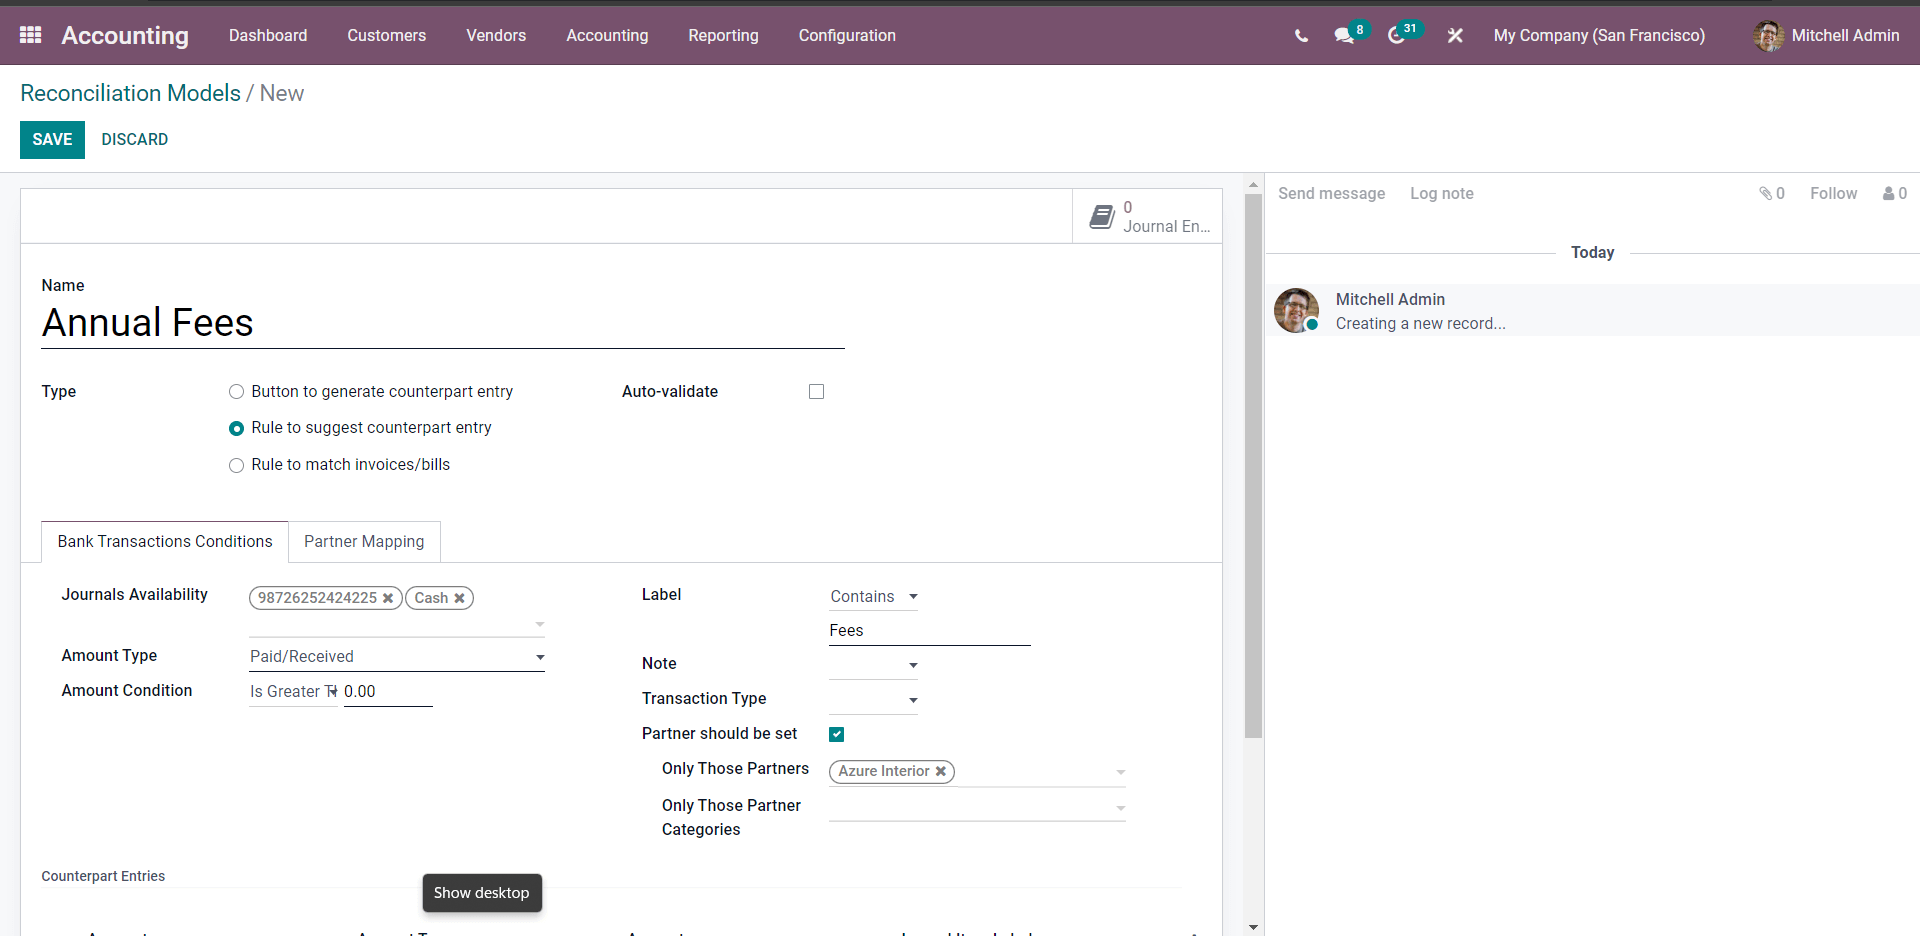
After the configurations on the Rule to suggest counterpart entry, click on the SAVE button to save the new Reconciliation model. After this, Go to the module’s Dashboard and Create a statement under the bank section, which will give you a configuration as in the page given below to Create the Statement.
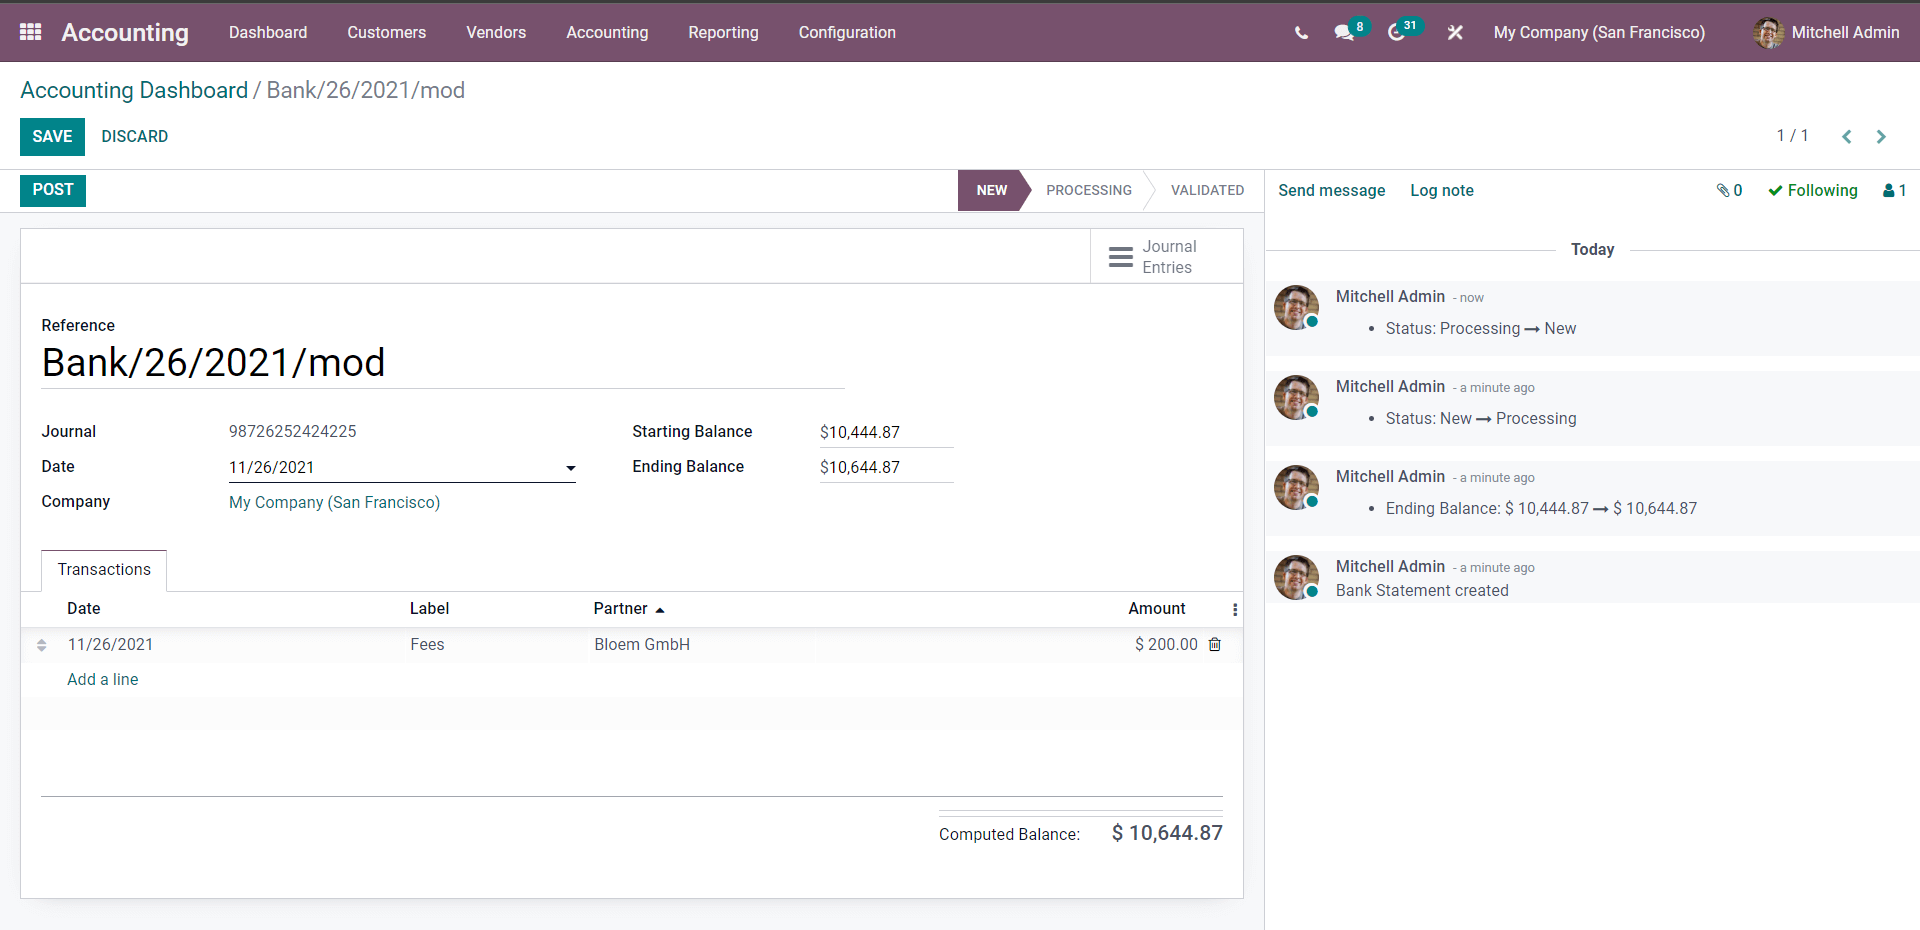
Add the Reference name, Journal, Date, Starting Balance, and Ending Balance. Under the Transactions section, click on the Add a line button and enter the details such as Date, Label, partner, and Amount.
Note that you can customize the fields in any way you want, as mentioned earlier. Ensure that your Ending Balance and Starting balance are not the same; if not, enter the Complete balance in the Ending balance section. After the configuration, click on the POST, to the next stage.
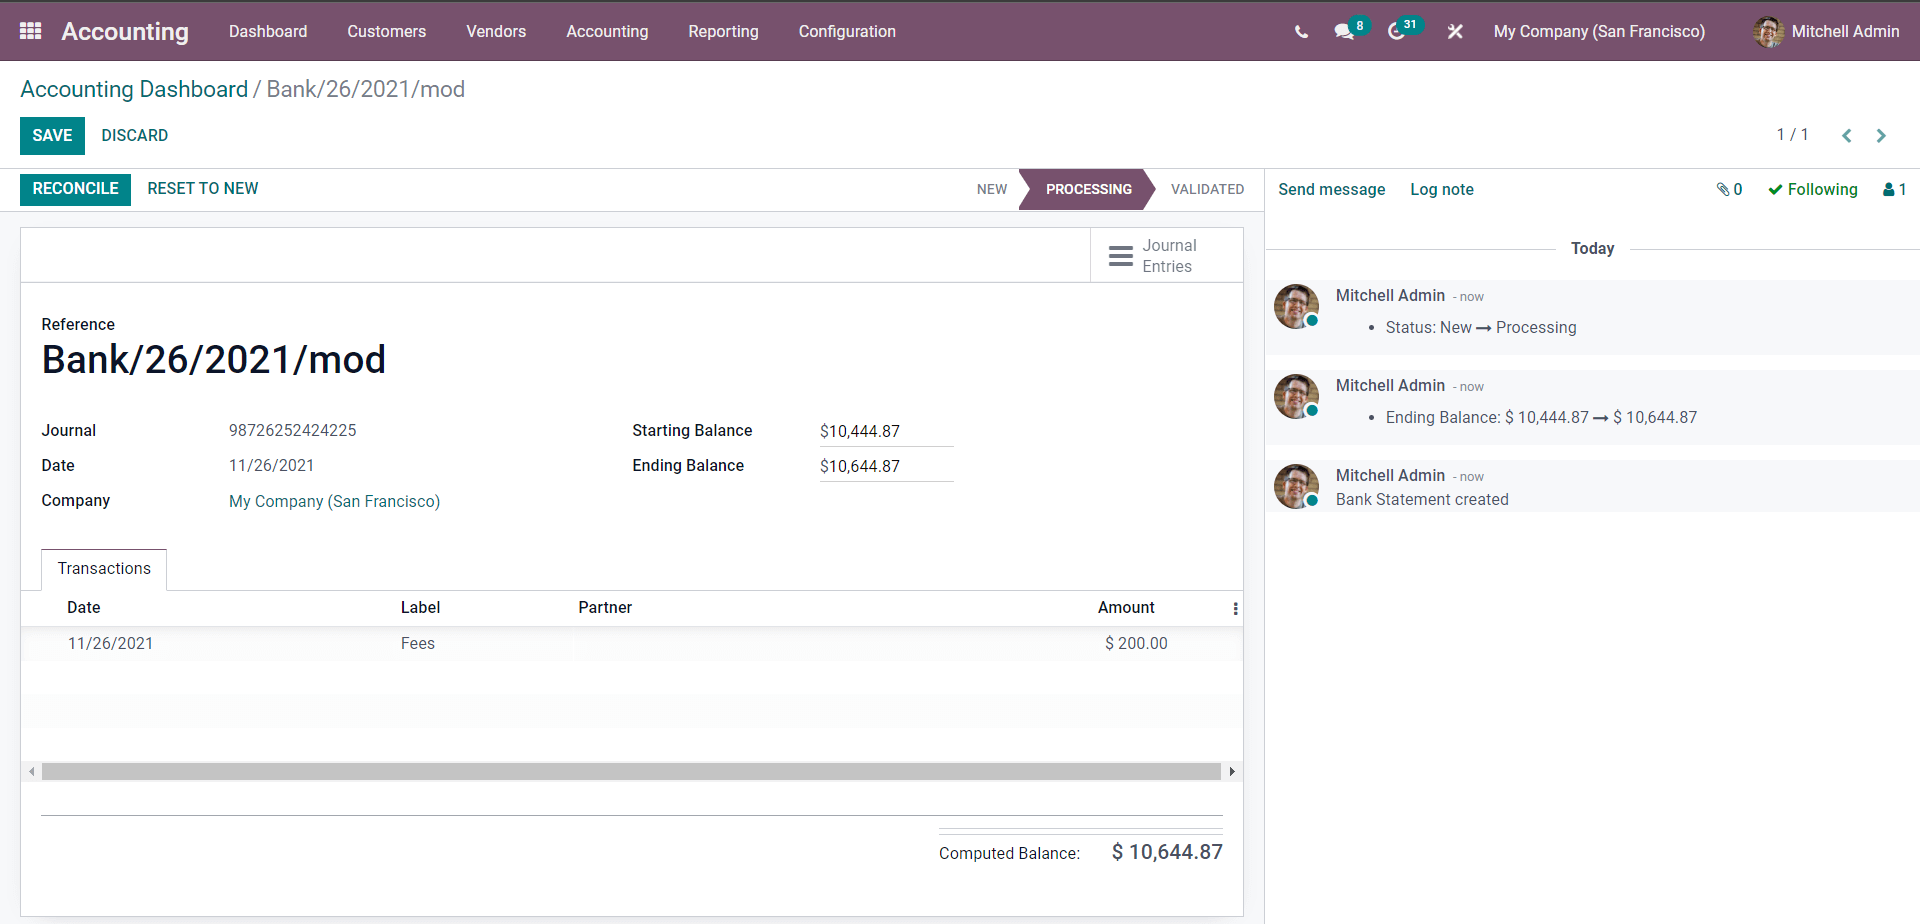
Check the details and click on the RECONCILE button to Reconcile the statement, which will take you to a Validation section as shown below.
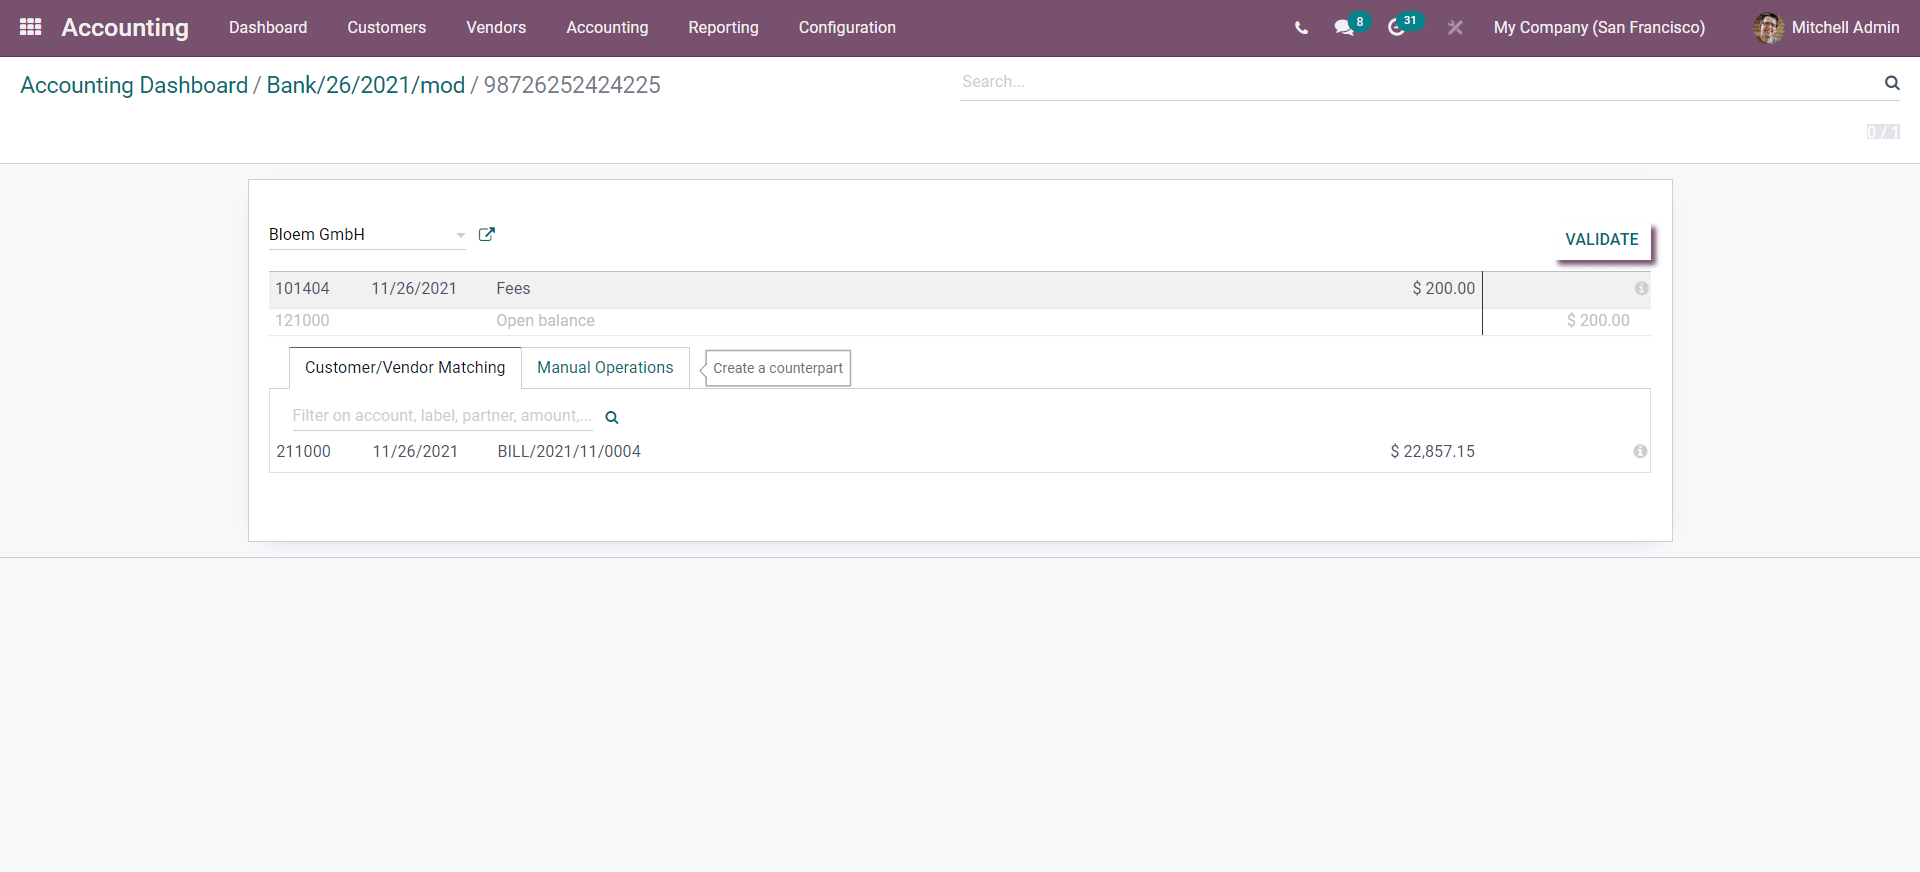
Similar to the Button to generate Counterparts type, you can configure the amount on the Validation page as shown above. You can also go through the Manual Operations and, after the configuration, validate the Statement by clicking on the VALIDATE button, which will validate the Statement instantly. A final page describing the end of the process will show up, as shown below.
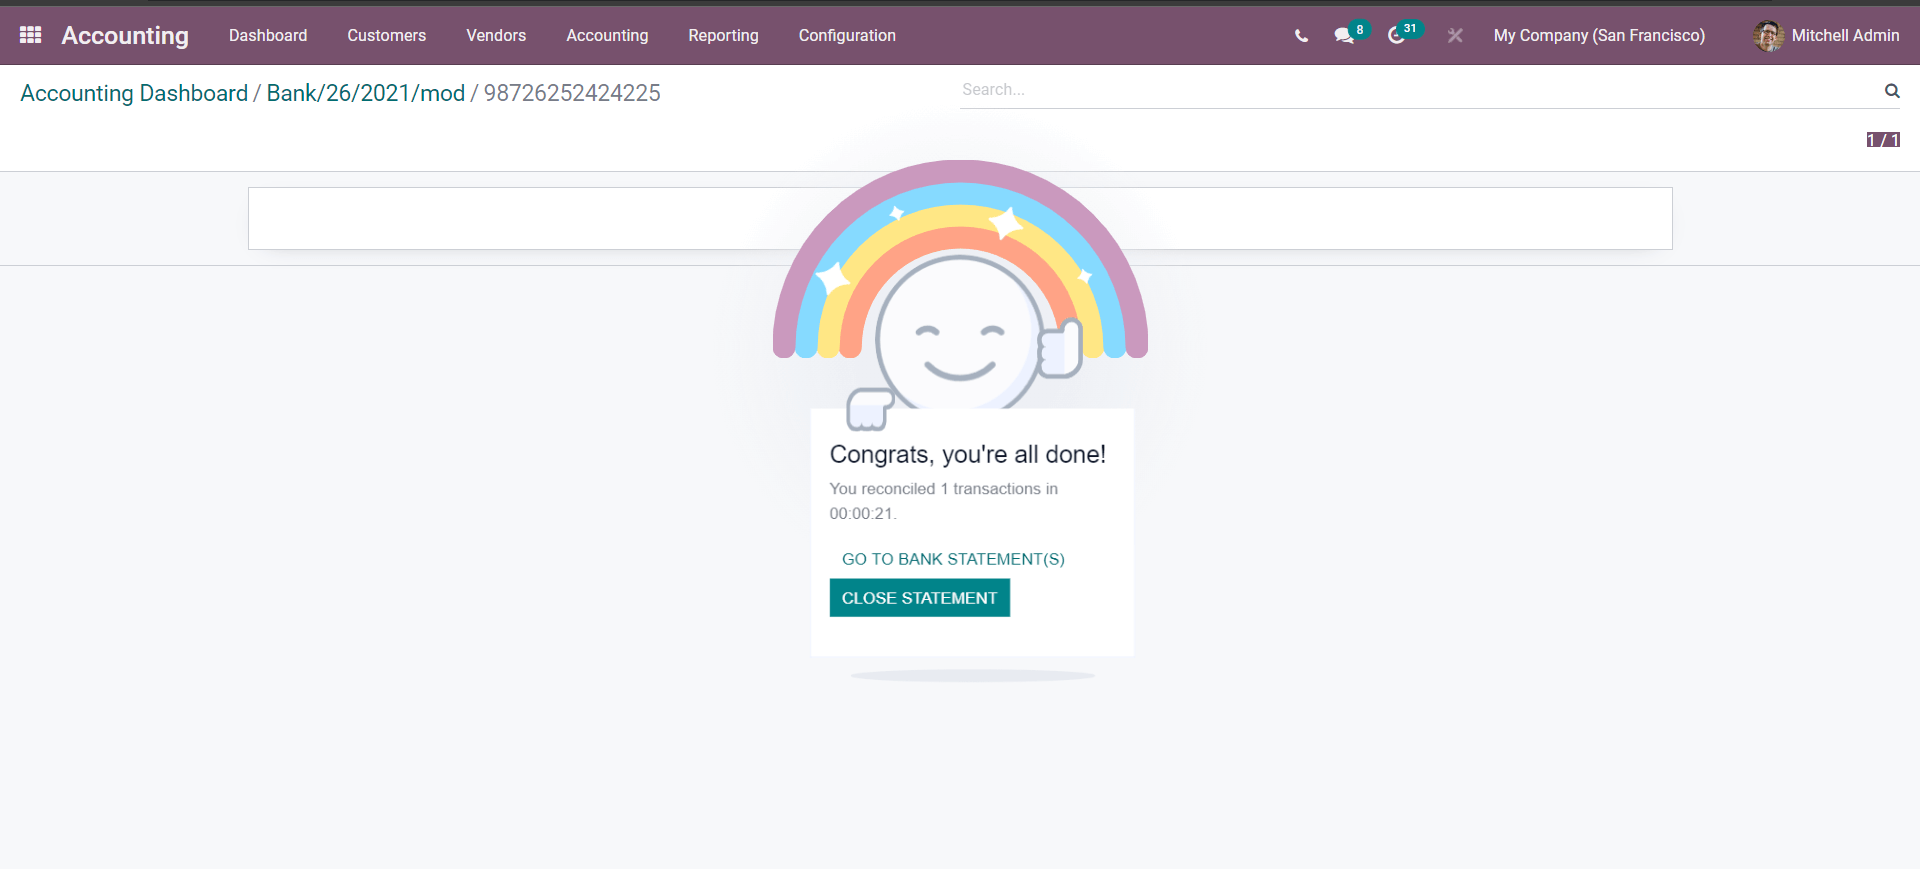
This represents the final stage of the entire process. The statement will be displayed in the Journals section of the Accounting dashboard.
Rule to Match Invoice/Bills
If you choose the Rule to match Invoice/bills, the configurations will be shown below.
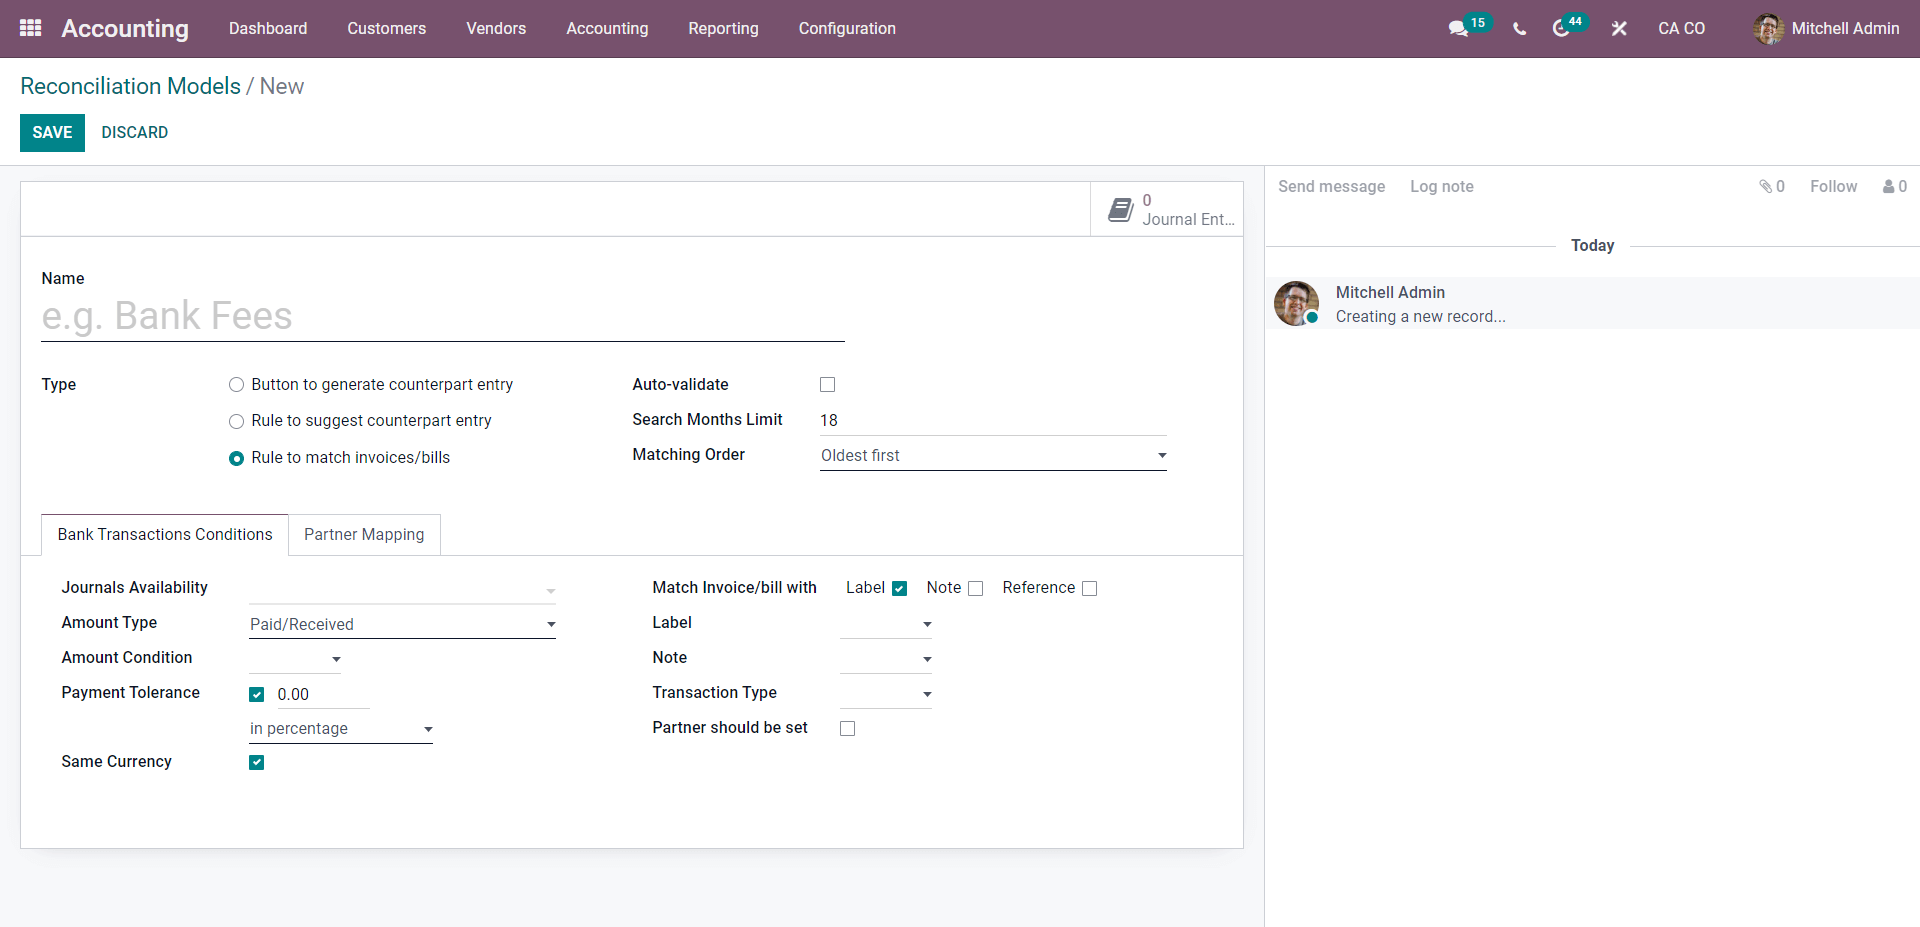
You can set the Model’s Name and choose Auto Validate or Not. Choose the Month limit from the drop-down list and Set the matching order.
Under the Bank transaction condition, you can configure the Journal activity. You can set the Payment tolerance and choose the unit you want to represent the payment tolerance. Configure, the other sections similar to the different types mentioned earlier; after the configurations, click on the Save button to save it.
Usage
Create an invoice and add the customer concerning the Partner category you have set in the Reconciliation Model configuration section.
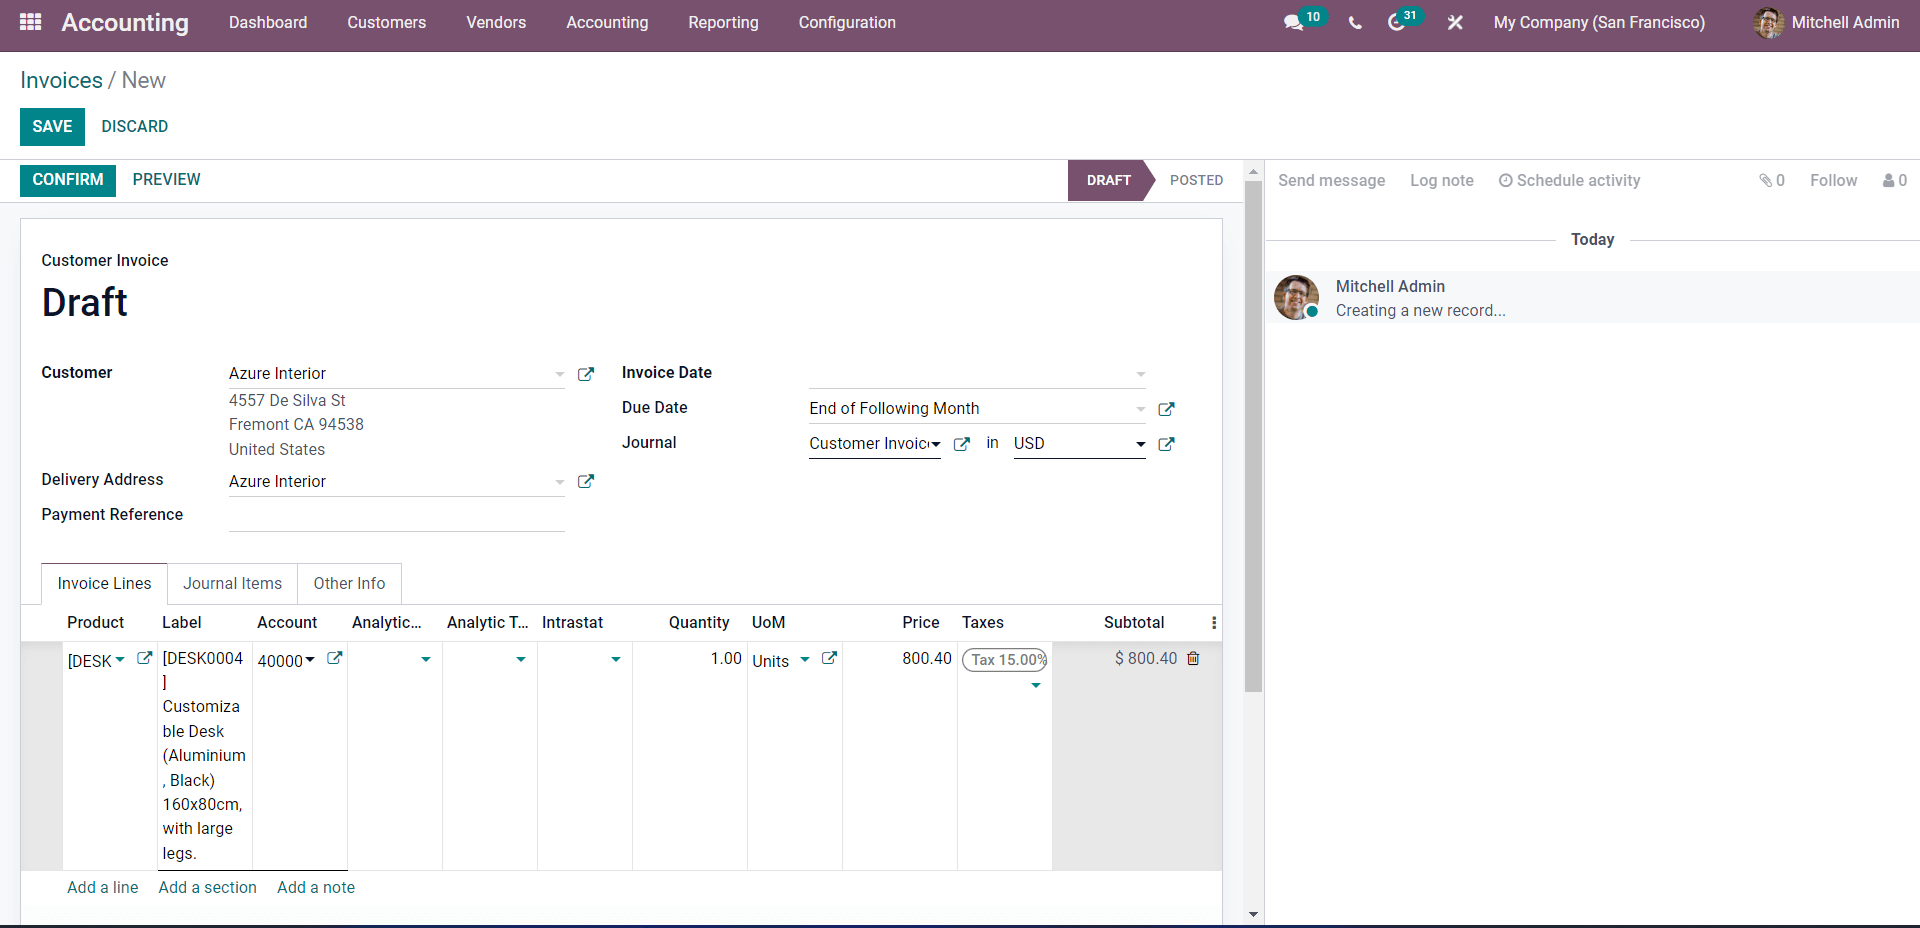
Configure the customer, add the product, and click on the CONFIRM button to confirm the invoice.
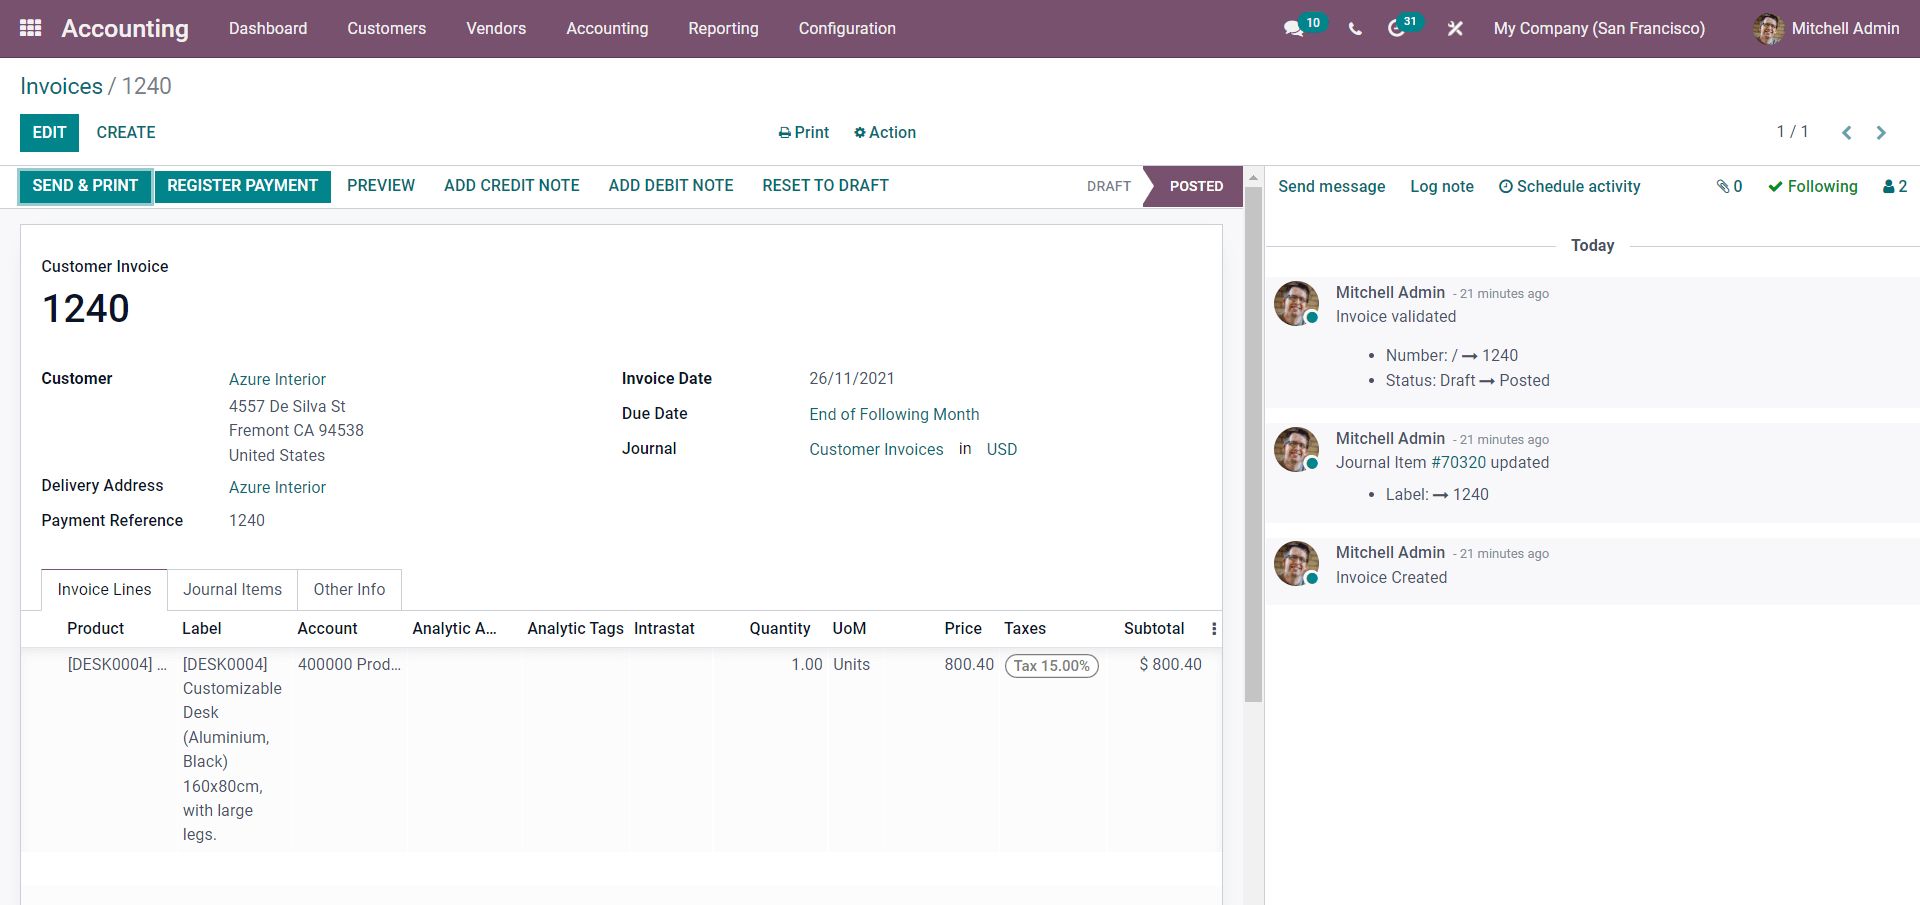
Copy the reference number under the Customer invoice section, go to the module’s dash, and Create a bank statement.
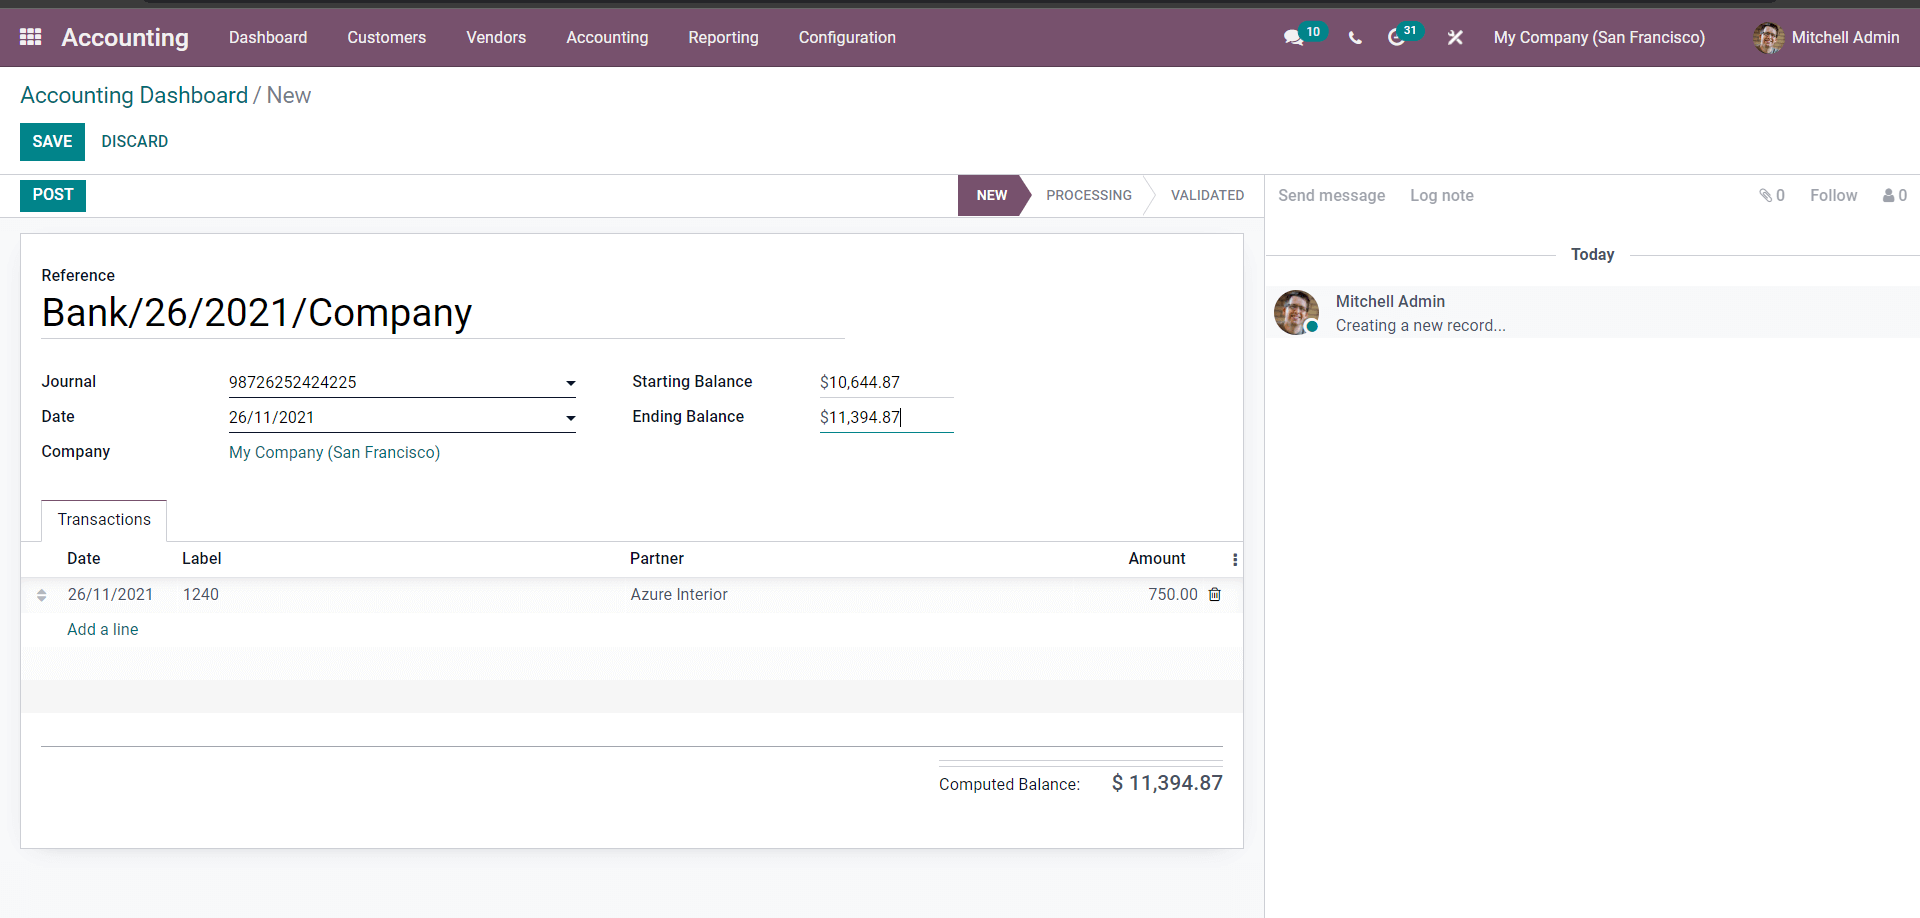
Configure the details shown above under the Transactions section, give the Label as the invoice’s reference number, copy it, and paste it here to match it. Press on the POST button after the settings.
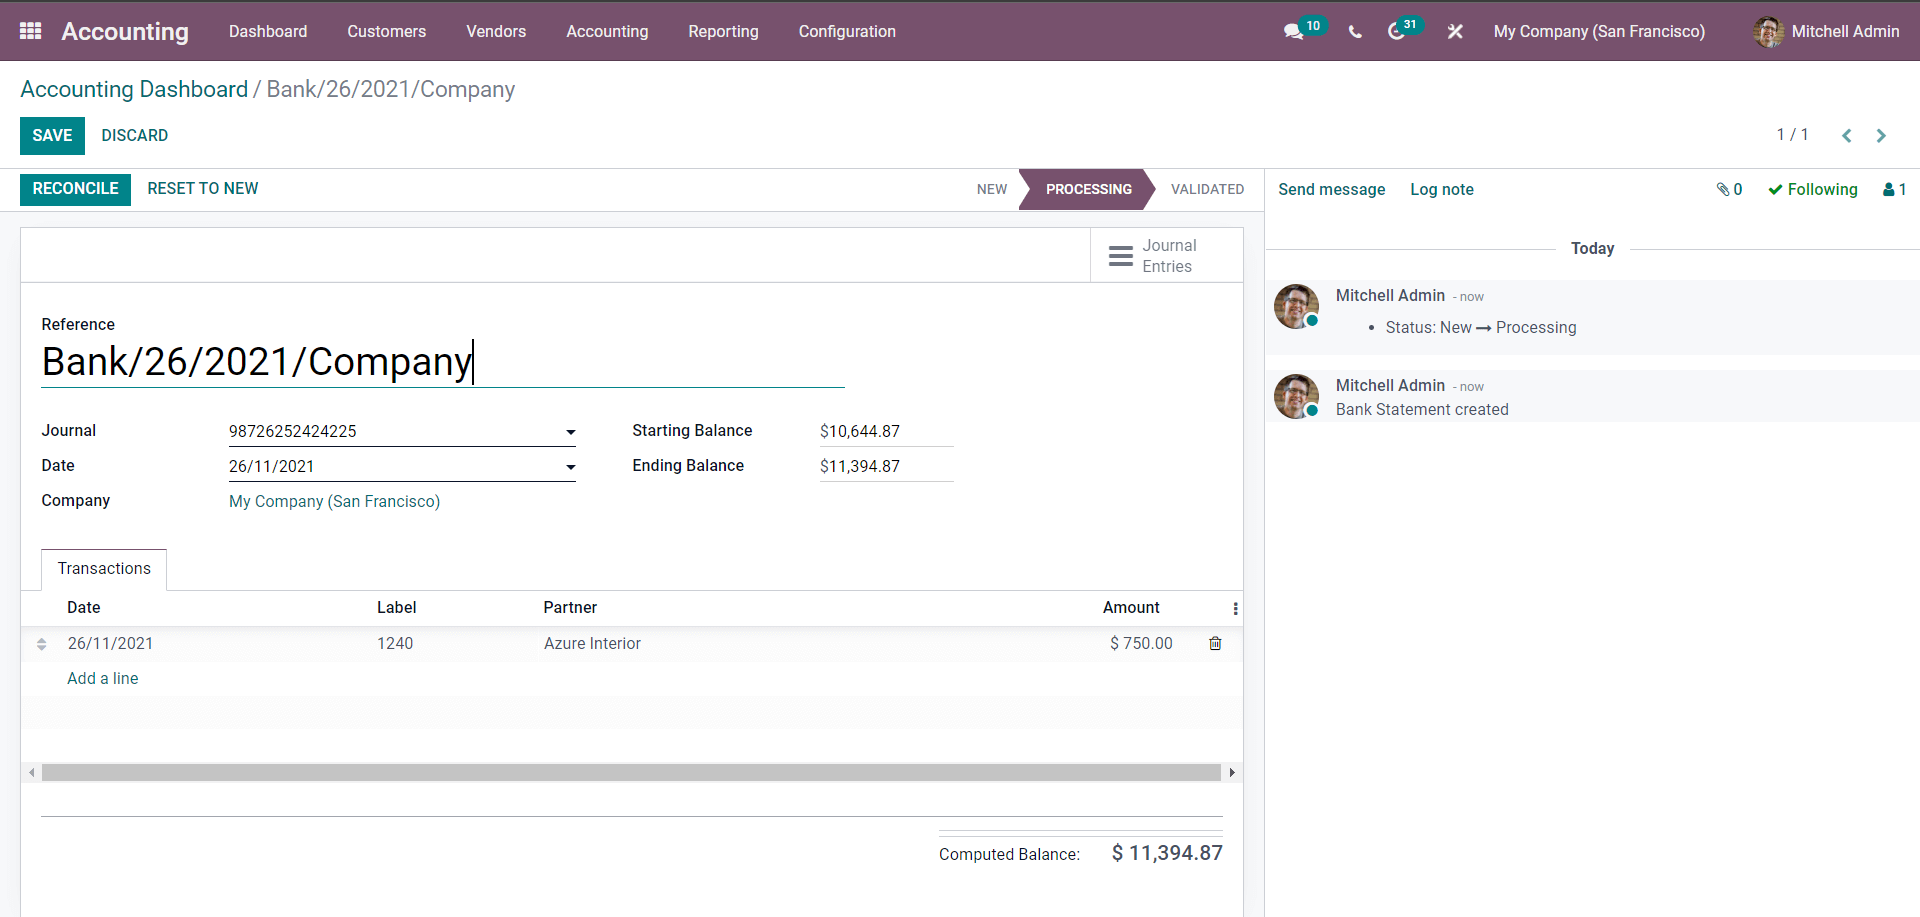
After changing the Ending balance to the Completed balance, click on the RECONCILE button. As in this case, the Validation is automated, so you won’t receive the Validation instead it will be done for you. Go to the customer invoice after the customer completes the copayment to have a view of the results of the Reconciliation.
Setting up Reconciliation models makes the entire Reconciliation process much easier and will also help you improve the efficiency in statement and invoice management. As you are less likely to mess up the details on the customers and products, you can easily carry out the Reconciliation processes without double-checking through every step.


