The marketing competition of companies rises each day due to advancements in technology. Firms organize various events such as business meetings, conferences, tournaments, and seminars to enhance their popularity among the audience. The customers and other stakeholders easily attract the advertisements and promotions of a particular company. A successful event is implemented through several stages, and a tremendous management team effort lies behind any program. Odoo 15 Events module ensures that events are accessible with various solutions to users. We can create, organize, sell tickets, and book events using the Odoo Events platform’s advanced features. The event you generate in the Odoo can be published on the website and attract a wider audience.
This blog helps you understand a detailed overview of the basic menus in the Odoo 15 Platform.
Odoo 15 Events Module
You can create several events like workshops, tournaments, conferences, meetings, and webinars in the Events module. It is easy to publish your event on the website and apply tickets for participants. Registration Desk, Configuration, Events, and Reporting are the tabs of the Events dashboard, and various menus rely on each tab.
Events
An overview of created events is visible in the Events dashboard, and you can access it by pressing the Events tab in the window. Here, we can see various stages of events in Kanban view, and a new stage develops using the Add a Colum button at the right end of the window. A new event inside a specific stage is created by pressing +icon next to the stage title. The details such as date, time, event name, and confirmed or expected attendees are visible in the Events window.
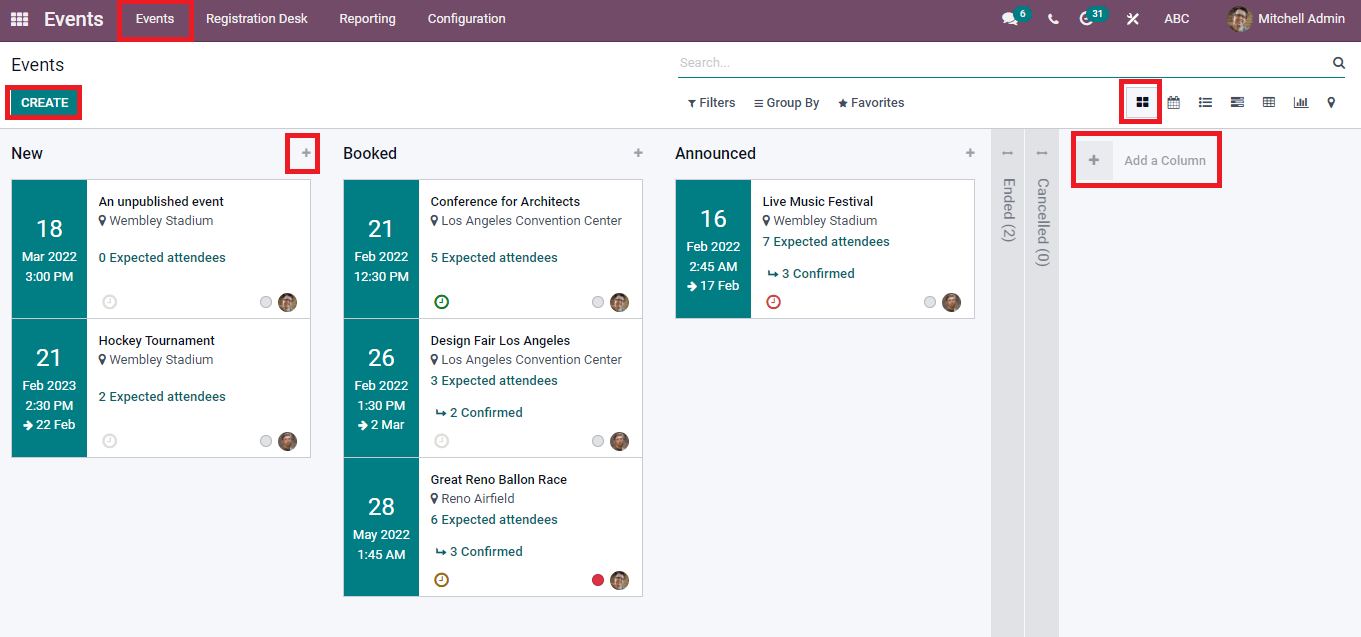
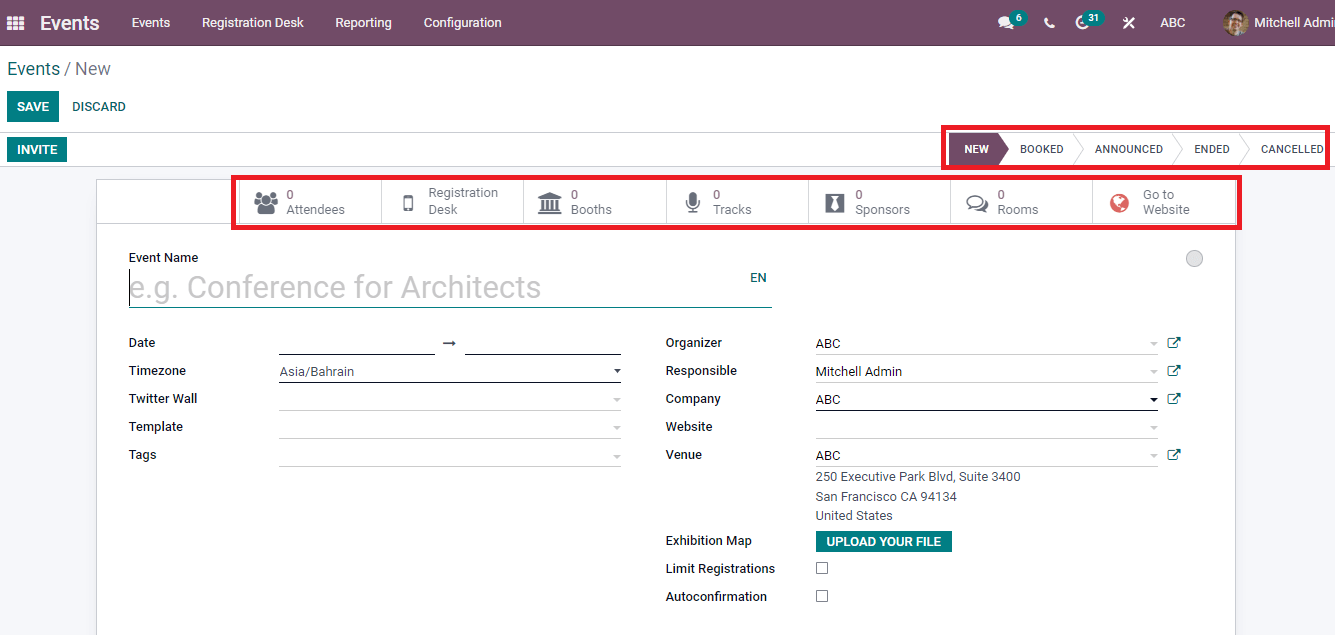
We can view the Events window in Gantt, Map, Graph, Calendar, Pivot, and List forms. A new event will be generated by clicking on the Create icon in the Events window. Specify the Event name, Template, Organizer, Timezone, Company, Date, Venue, and Tags in the new Events window. You can view different smart buttons below the invite icon, such as Rooms, Attendees, Booths, Go to Website, Tracks, and Registration Desk. These buttons are direct links for respective windows and are only visible based on the modules we installed. After creating an event, put it on corresponding stages such as new, announced, canceled, booked, and ended.
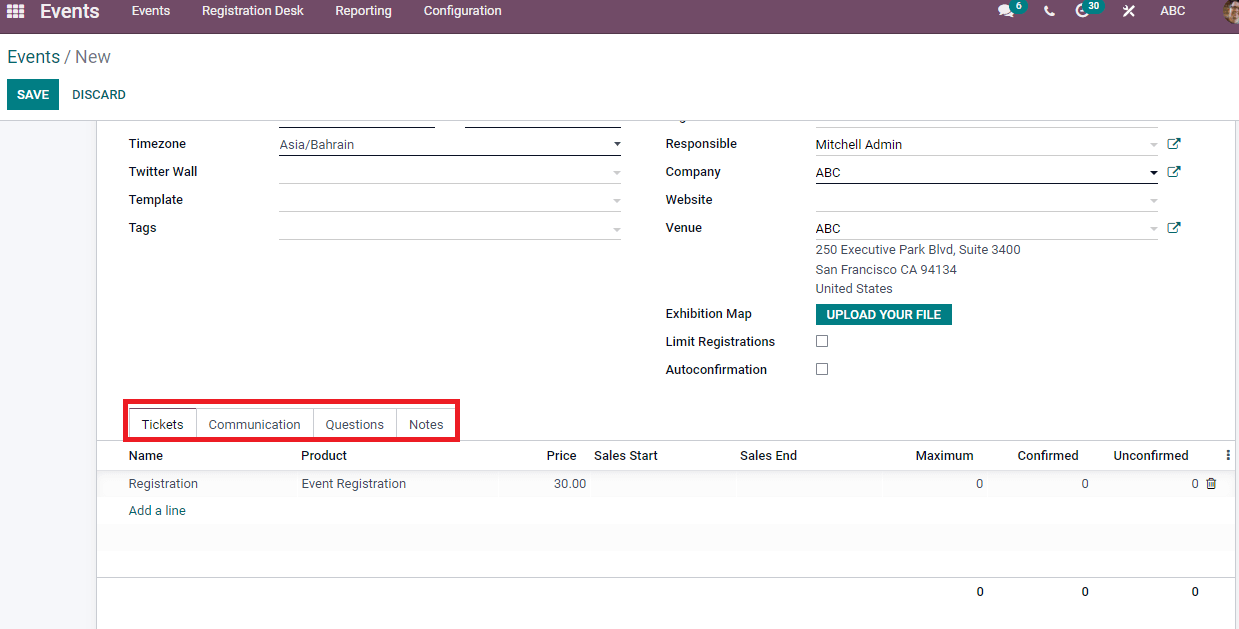
At the end of the Events window, you can see the tabs like Communication, Tickets, Questions, and Notes. You can generate tickets for your event inside the Ticket tab, and Communication Tab assists you to send Emails/SMS/Social posts to participants. Moreover, the Question tab helps create new questions for attendees, and you can add ticket instructions/further details inside the Notes tab.
Registration Desk
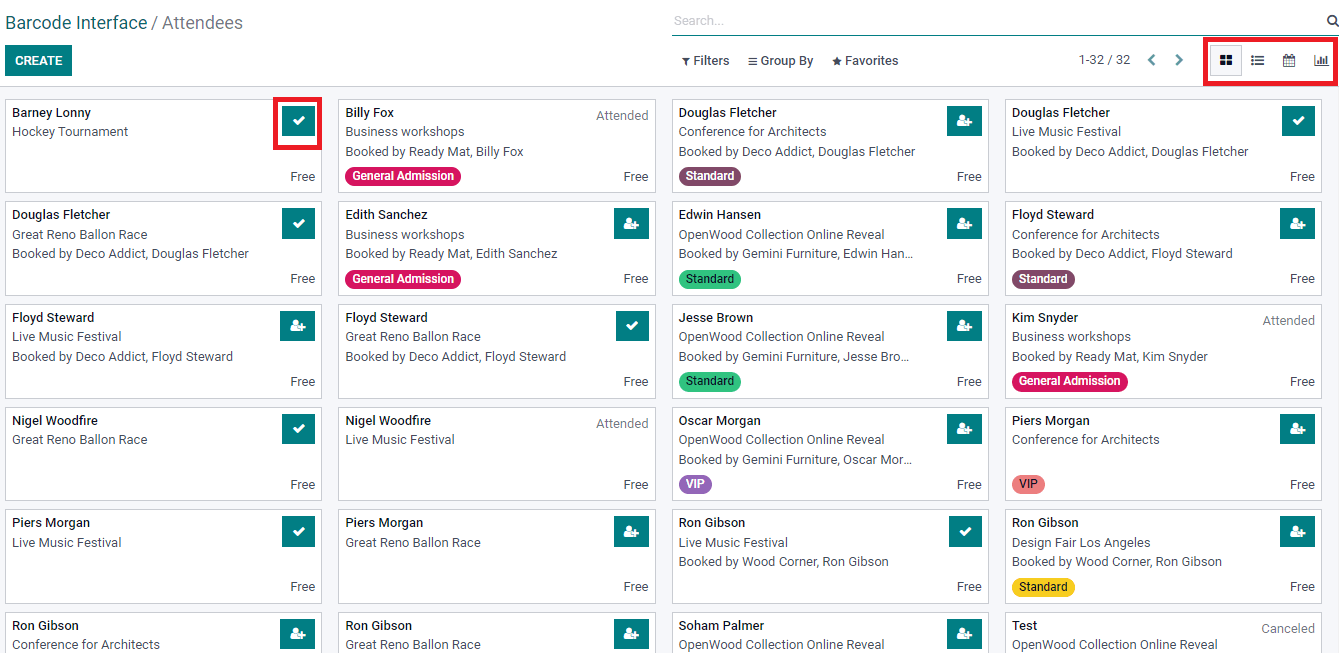
Select the Registration Desk tab from the Events dashboard and manage the attendees. You can choose Select Attendee or Scan a Badge in the new window. Press on the Select Attendee option and the Barcode Interface window viewable for you. The name of the Attendee, Event, and stage are displayed in the window. We can understand the attendee confirmation through the tick mark near the attendee title in the Kanban view of the window. It is possible to develop a new Barcode Attendee by clicking the Create icon. The Barcode interface window is also portraits in Graphical, list, and calendar formats.
Reporting
You can create reports of Attendees and Events in the Reporting menu of the Events module. The Reporting tab of the Events dashboard consists of two menus such as Events and Attendees. After analyzing the reports, you can implement good decisions for your organization or event.
Event Analysis
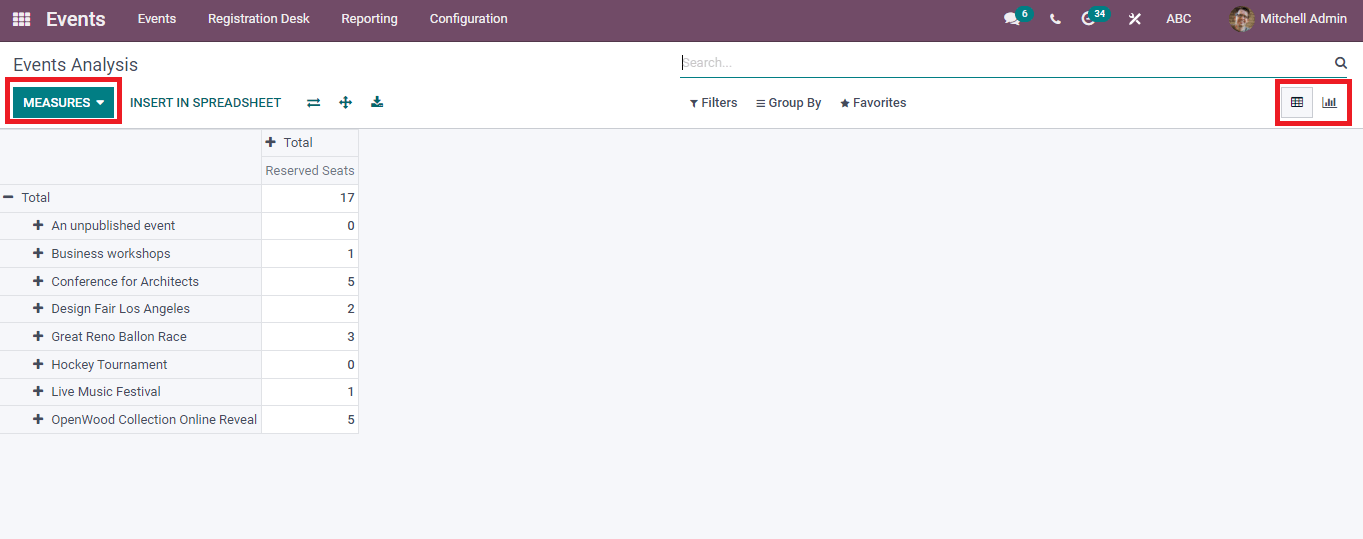
The Reserved Seats of each event are viewable in the Pivot view of the Event Analysis window. To enhance the analytical report, you can apply various measures such as Attendees/Participant numbers and Unconfirmed seats by pressing the Measure icon. The Report of Event Analysis is also visible in the Graphical view.
Attendees
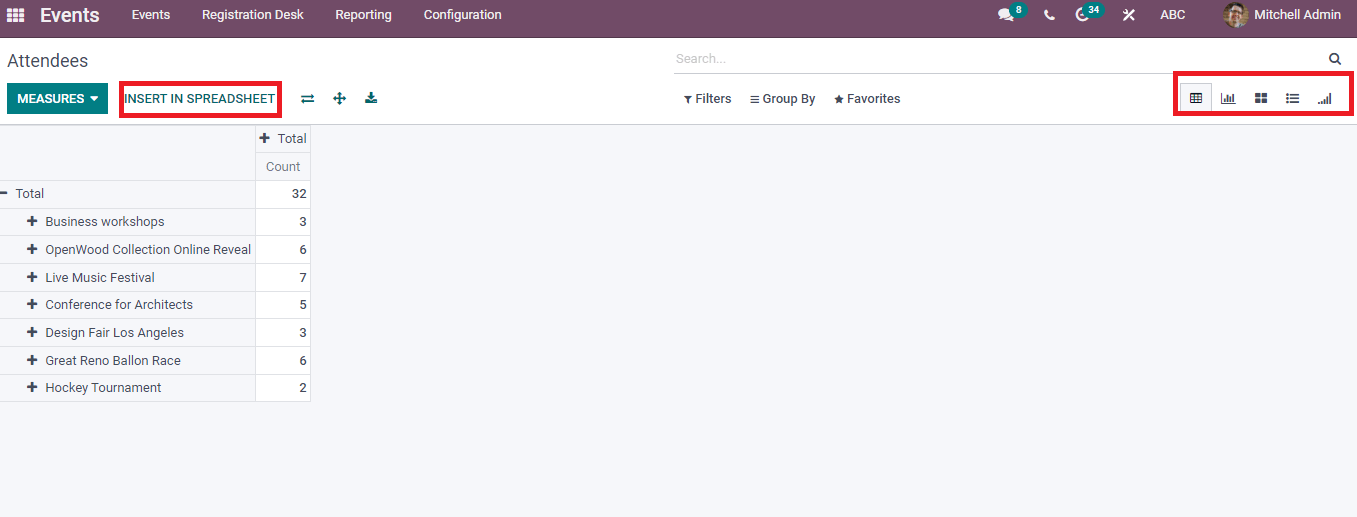
Select the Attendees menu from the Reporting tab and Count of attendees per event visible in the new window. The Attendees window sees various views such as Kanban, Cohort, List, and Graph. You can add a new spreadsheet by pressing on Insert in Spreadsheet option.
Configuration
The management of events is configured easily through the Configuration tab of the Events dashboard. Settings, Lead Generation, Event Tag Categories, Templates, Booth categories, and Event stages are the menus inside the Configuration tab.
Settings
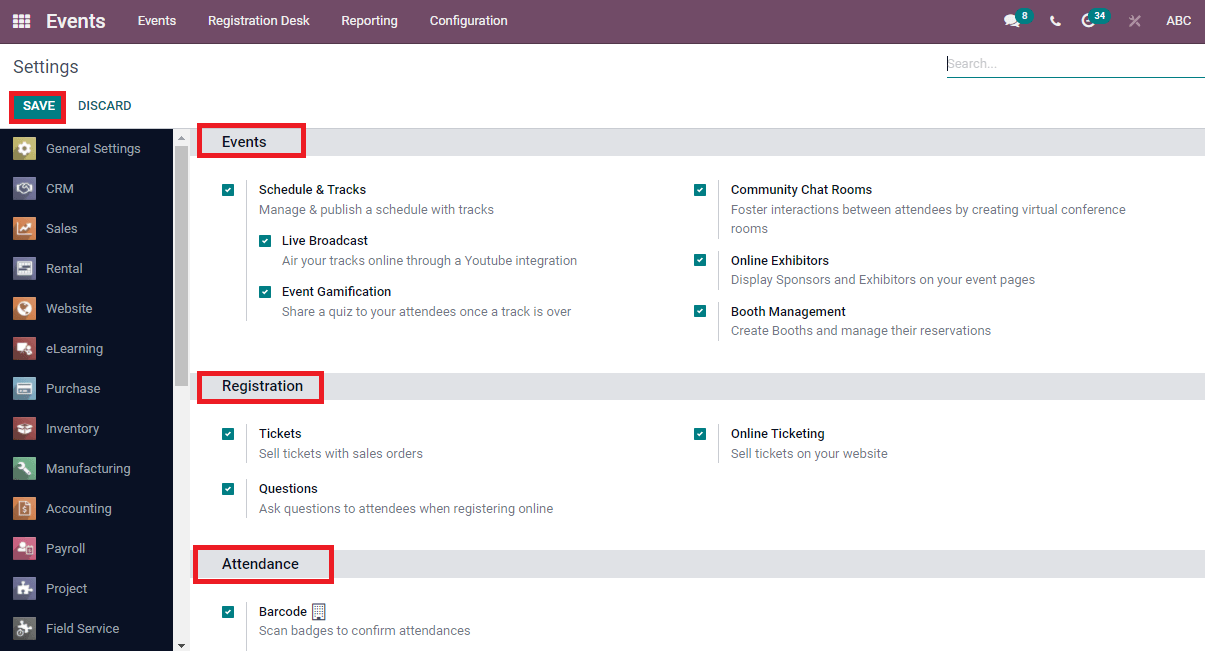
We can manage the Attendance and Registration of an event through the Settings menu. Click on the Settings menu in the Configuration tab, and you can activate options for the implementation of the event. You can handle the Booth, Chat rooms, exhibitors, Broadcast, and Schedule/tracks by activating these options below the Events title. Inside the Registration, you can start Tickets for your website and Questions to the Attendees. Enabling the Barcode option below the Attendance helps scan each attendee’s badges. After activating all these options, click on the Save icon, and the changes are visible in a specific Events window.
Event Templates
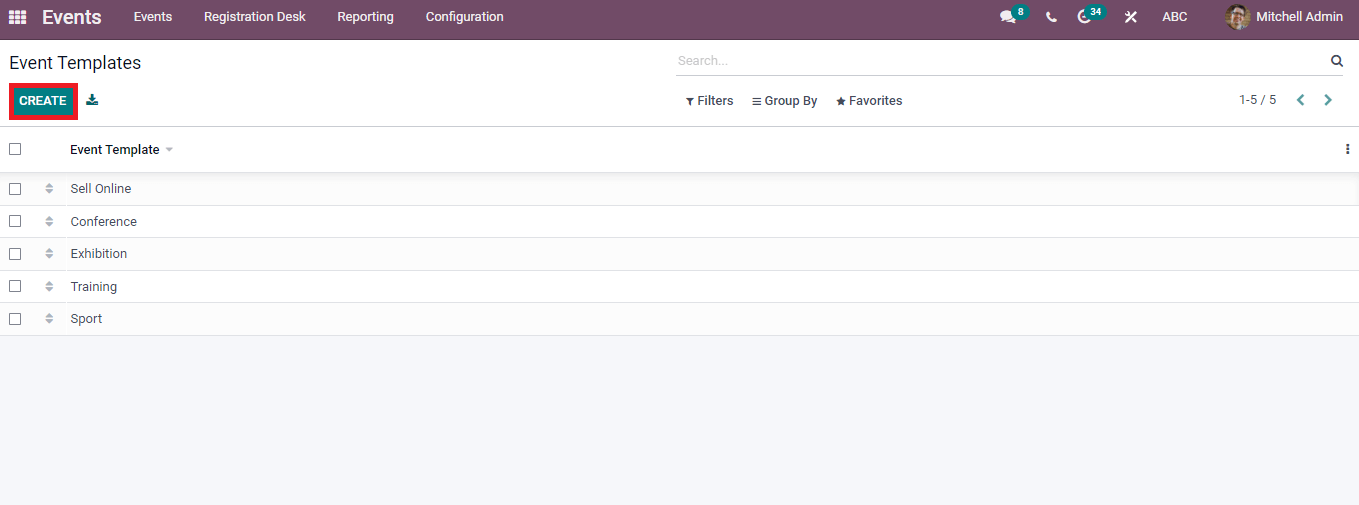
Select the Event Templates menu in the Configuration tab and create a new template for your event. The list of designed templates is available in the Events Templates window. By pressing on a particular template, you can see the detailed information.
Event Stages
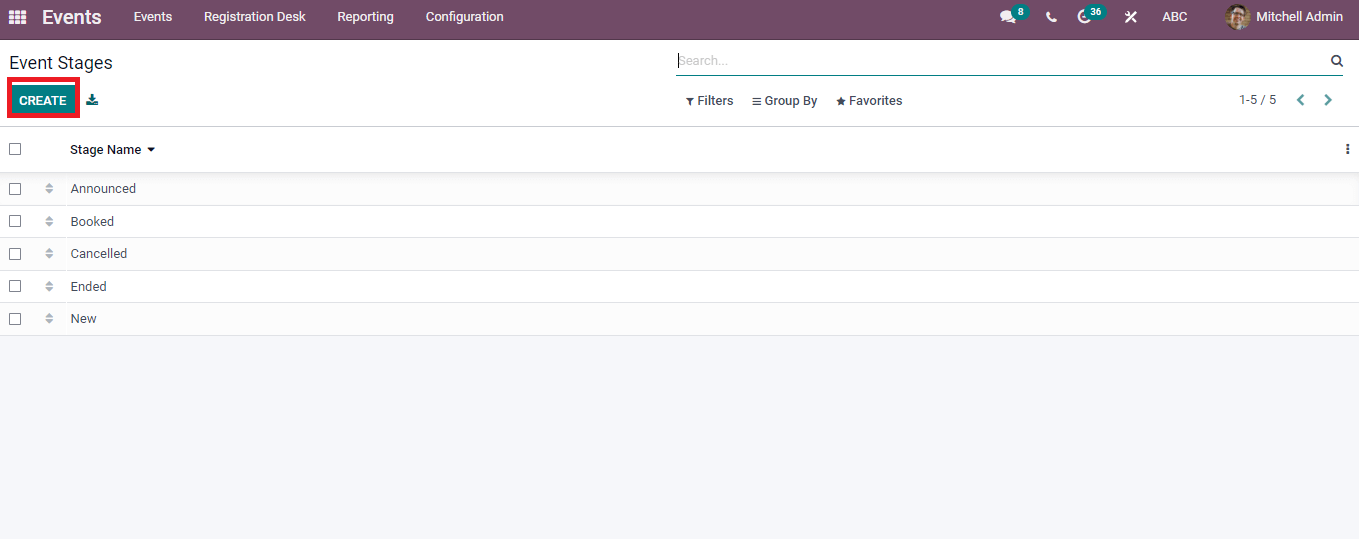
Various stages display in the Event Stages window, and you can get them by pressing on the Event Stages menu in the Configuration tab. A new stage can be created by clicking on the Create button.
Event Tag Categories
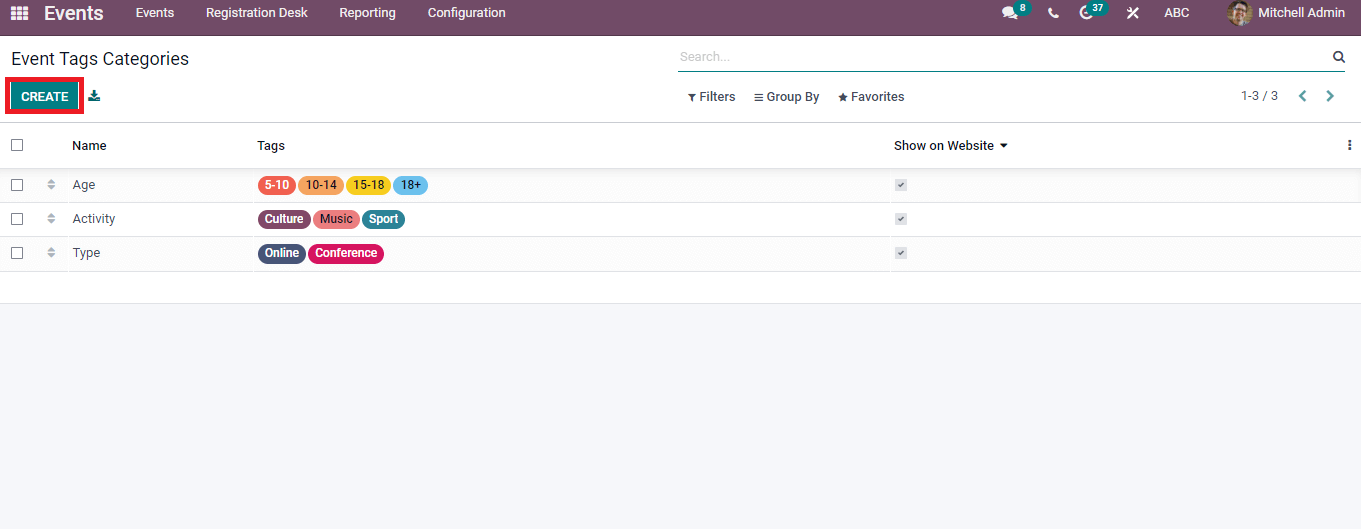
Press the Event Tag Categories menu in the Configuration tab, and we can see the list of Tag Categories. Information regarding Tag categories such as Name, Show on Website, and Tags are available in the Event Tag Categories window. You can also develop a new Event Tag Category using the Create icon.
Lead Generation
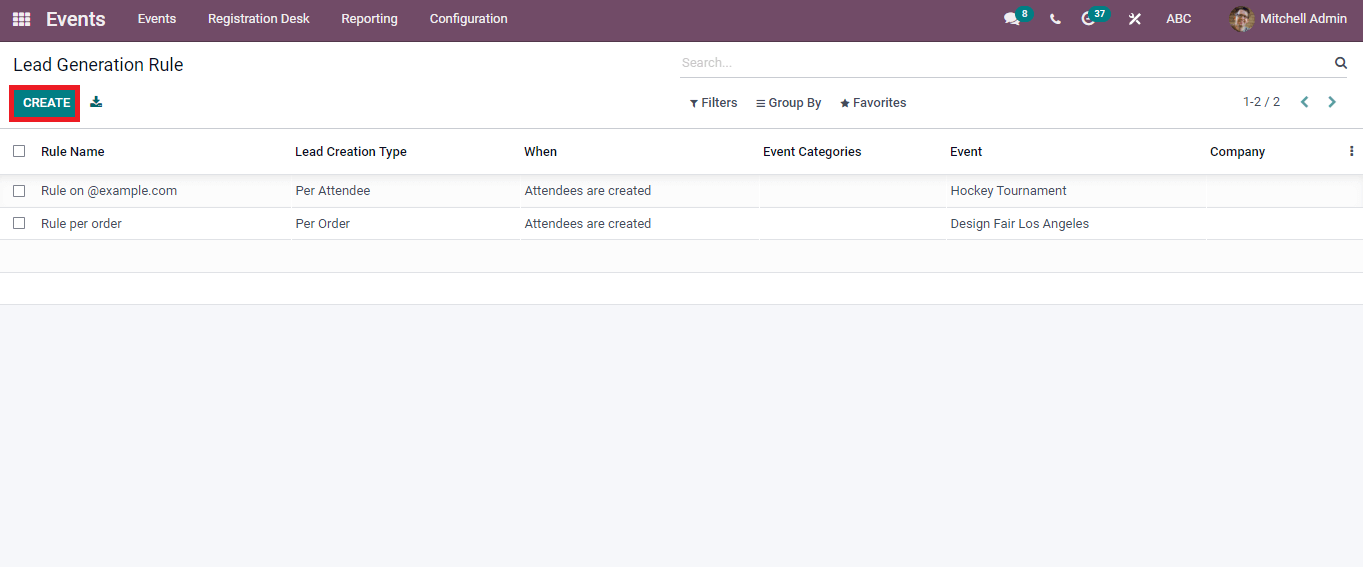
We can develop leads quickly through the Attendees’ details in the Events module. Select the Lead Generation menu in the Configuration tab and create a list of Lead Generation Rules visible in the window. It includes details like Event, Rule Name, When, Company, Lead Creation Type and Event Categories. Here, you can generate a new Lead Generation rule by selecting the Create button.
Booth Categories
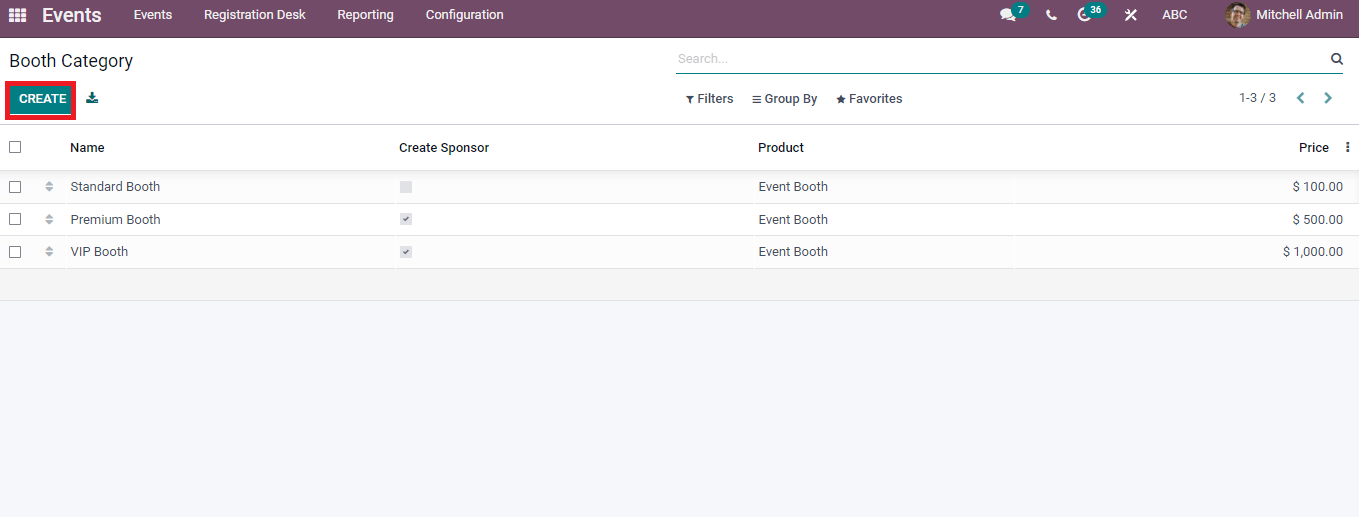
The information about each Booth of events is configured through the Booth Categories window, and you can see the Name, Product, Create Sponsor/Price of each Booth. In addition, Create an icon to assist in developing a new Booth Category for your event.
Odoo 15 Events module lessens your stress regarding the organization of events. It is a solution to manage, create, and automate tickets for an event and publish them on the website. Advanced Tools in the Events module make your work smoother within less time.


