Retail management is the administration process related to selling goods and services for customers in daily activities. Customers can pick up their desired commodities through retail, and businesses can achieve a profit vastly. The direct selling of goods to customers is known as retail, and sometimes its management in an organization becomes troublesome. By using ERP software, you can remove all worries related to retail management. An intelligent interface available in Odoo 15 PoS can be used easily by a retail company without any difficulty. It is entirely flexible and meets your needs precise way.
This blog facilitates the PoS Configuration for retail management with the Odoo 15.
You can quickly set up your retail store data with the Odoo 15 Point of Sales. It is easy to give customers rewards through gifts, points, and discounts for products. The integrated feature of Odoo PoS boosts your inventory and eCommerce growth of entrepreneurship. Next, let’s look at the PoS Configuration for a retail company in the US with the help of Odoo 15.
Activate Payment Terminals from Odoo 15 Point of Sales
Go to the Settings page inside the Configuration tab and activate your payment terminals. We enabled the Adyen option below the Payment Terminals section to proceed with transactions with Adyen, as displayed in the screenshot below.
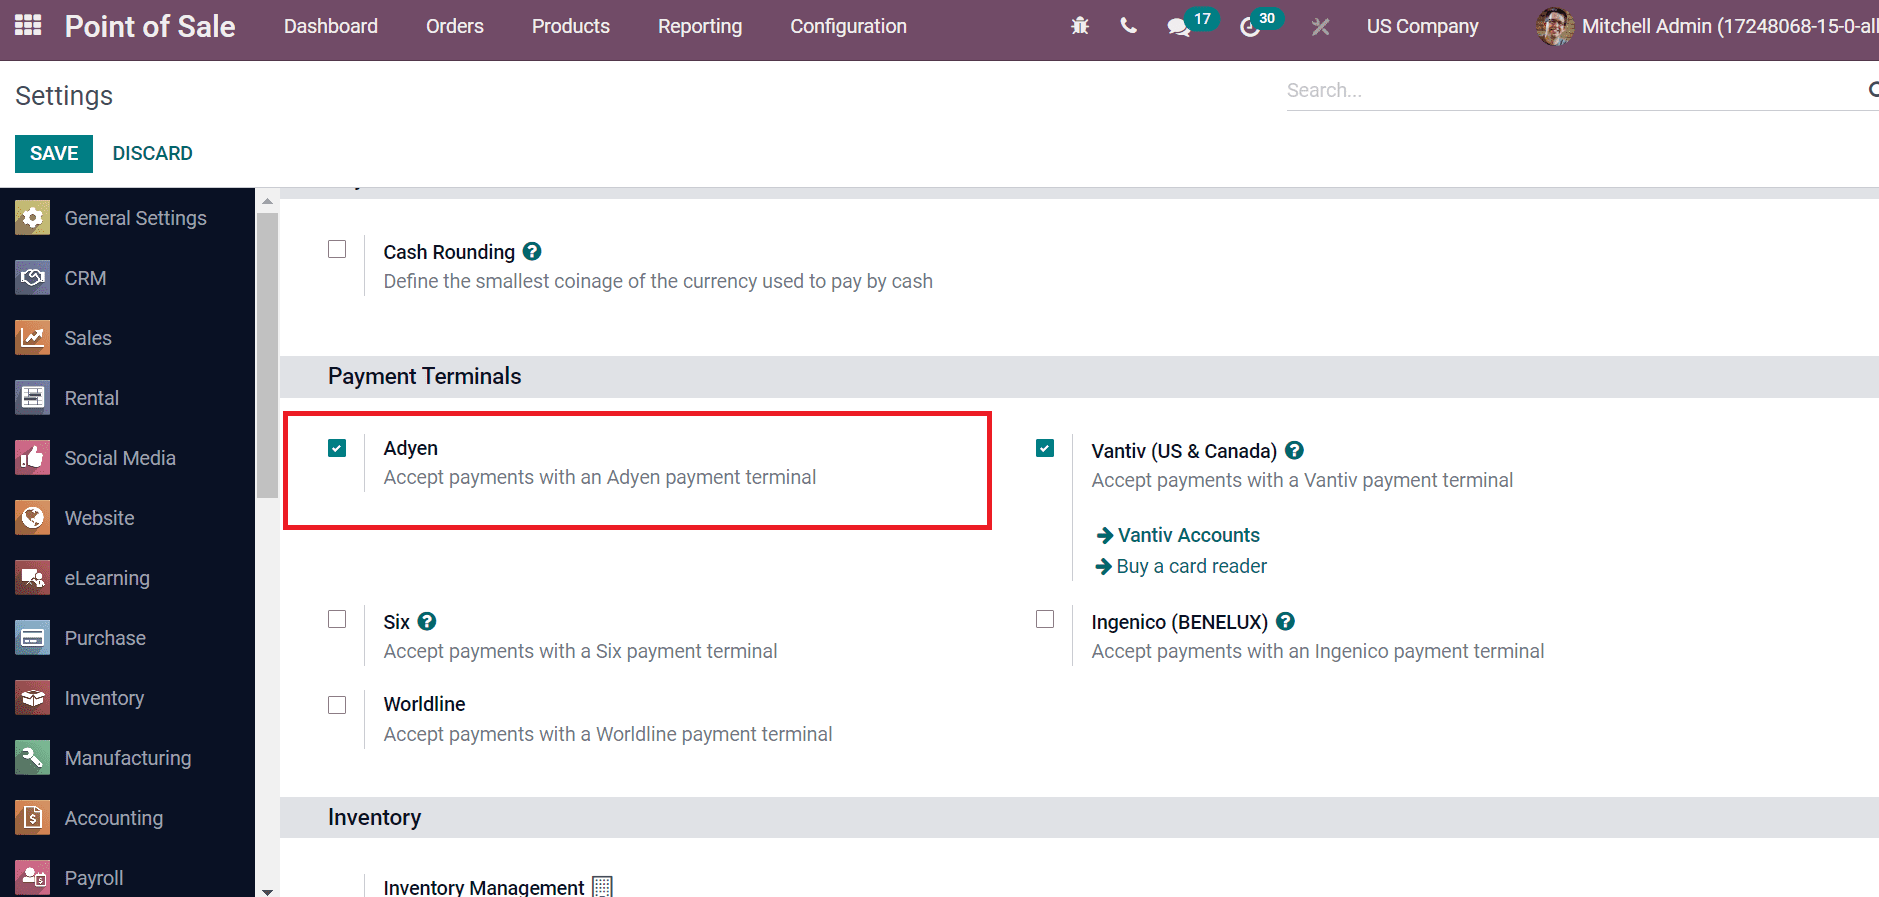
By activating the Adyen options, customers get many chances to pay for the owner, which is convenient for buyers. It is easy to accept payments by customers using the Adyen payment terminal. We are also enabling the Vantiv option for managing the payment process for US & Canadian companies, as marked in the screenshot below.
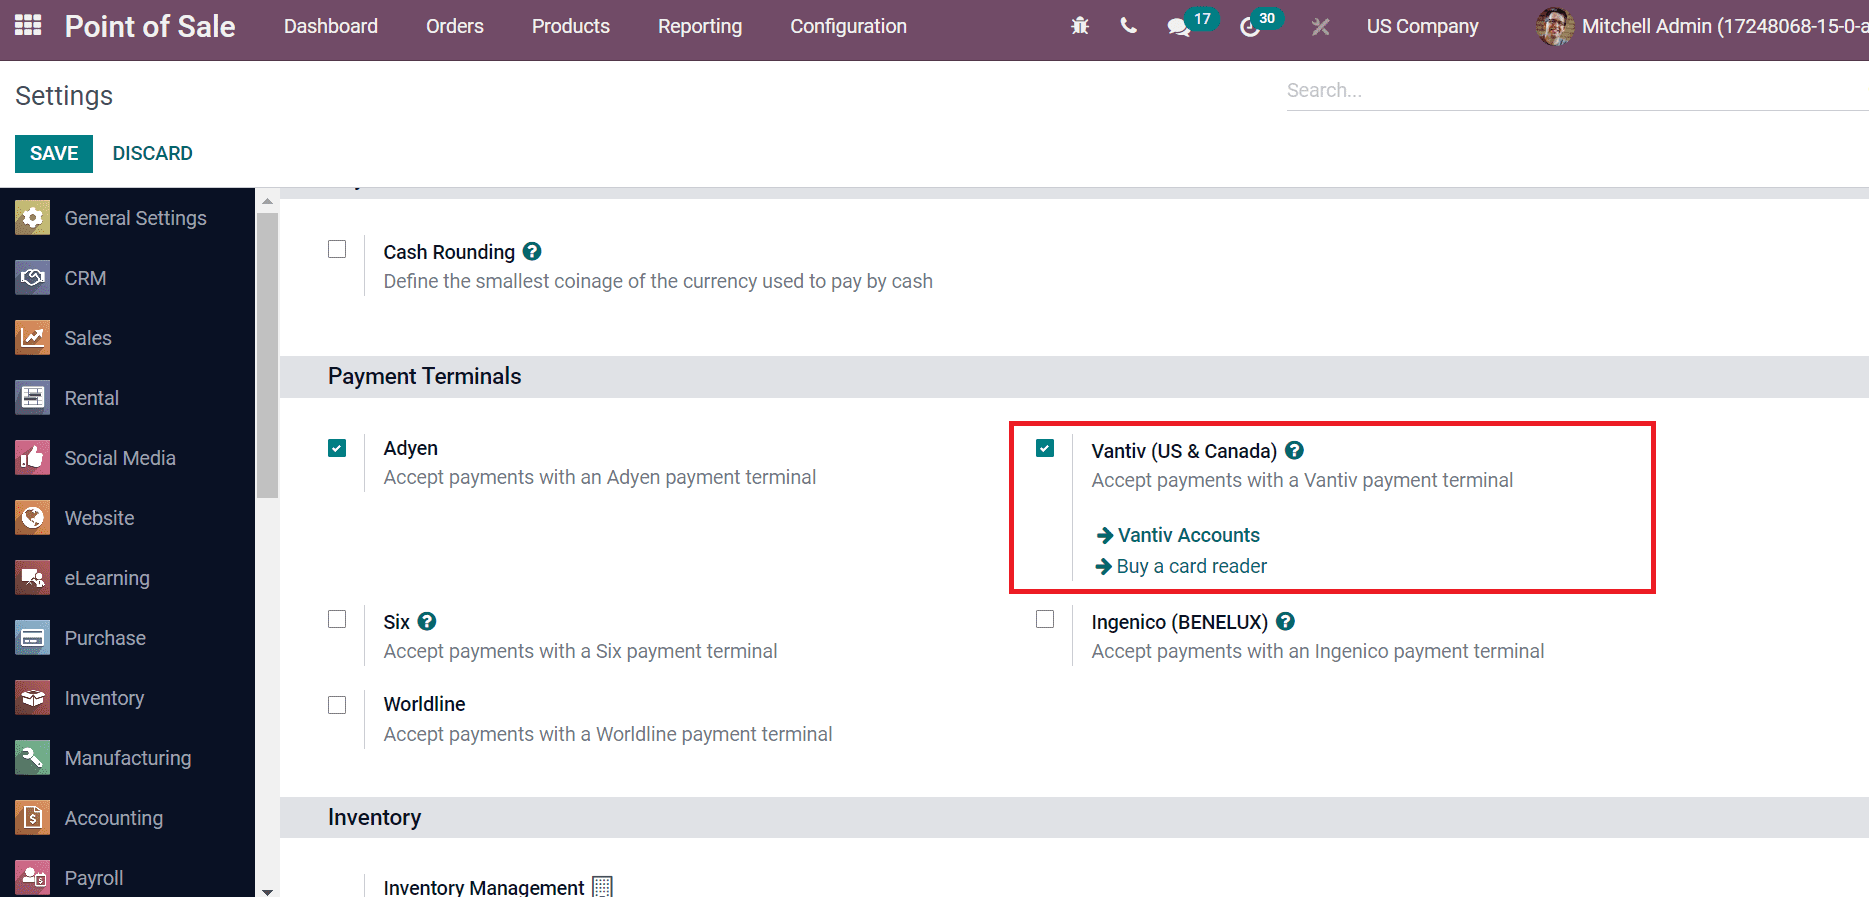
Users can accept payments through a Vantiv payment method by allowing the Vantiv (US & Canada) option. After activating your necessary payment terminals, we can save the changes and move to make product categories for your US retail company.
To Generate Product Categories in Odoo PoS for a Retail Company
We can describe a group of products on an eCommerce website under the Product Categories. A group of similar products with related features is a product category. Users can generate a new product category from the PoS Product Categories window by clicking on CREATE icon as specified in the screenshot below.
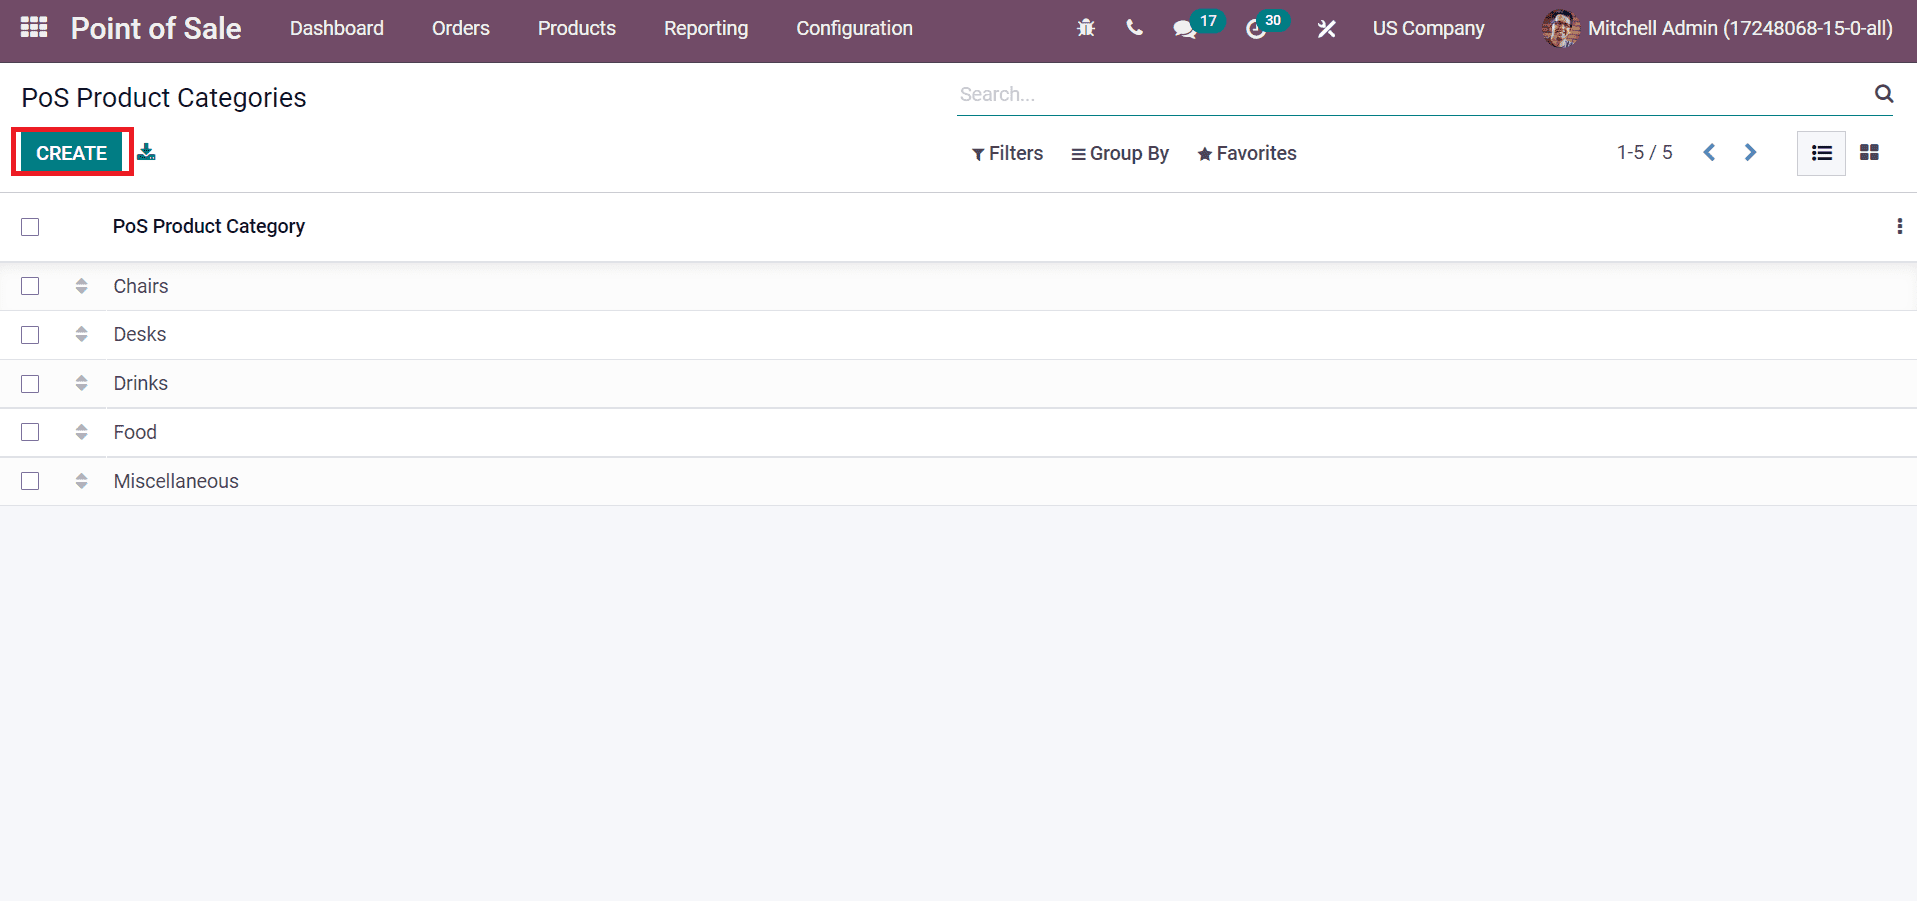
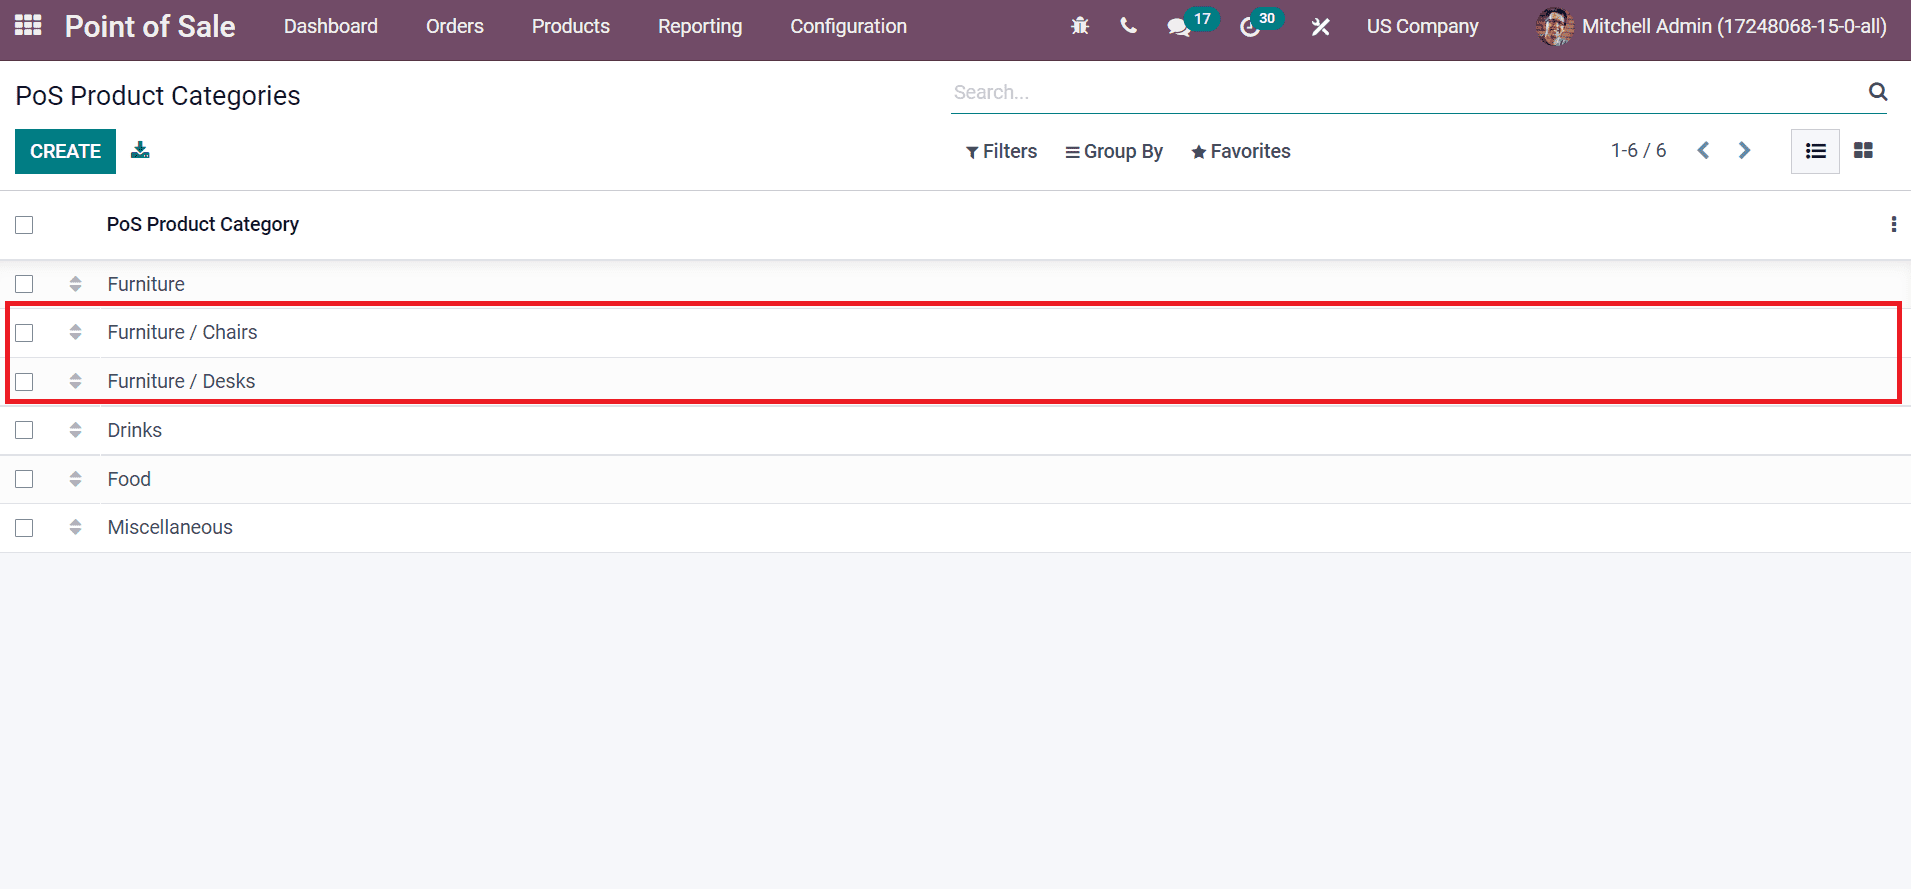
We have already created some product categories such as Chairs, Desks, Drinks, Food, and Miscellaneous. After selecting the CREATE icon, we will create a new product category, Furniture. In the new window, add Category Name as Furniture, and you can upload an image on the right end to display in the PoS Session as specified in the screenshot below.
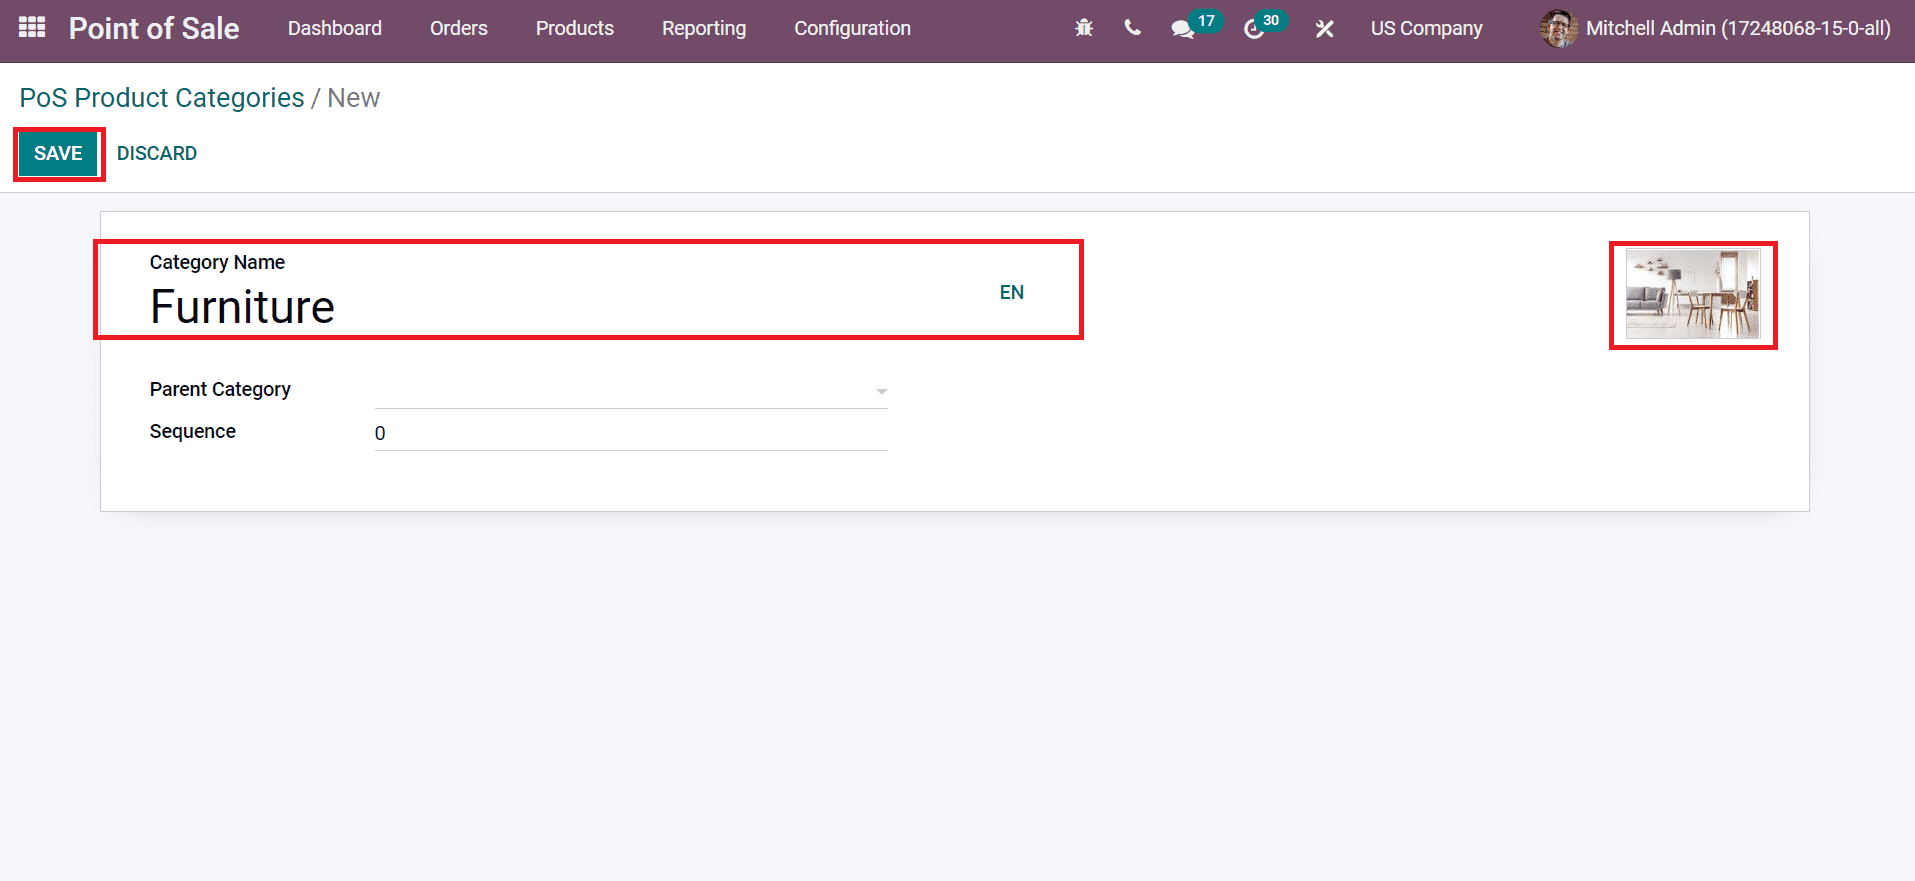
Click the SAVE button after entering your product category details. Now, you can set the Furniture as a Parent Category for Desks and Chairs. For that, select the Product category chair and choose Furniture inside the Parent Category field, as mentioned in the screenshot below.
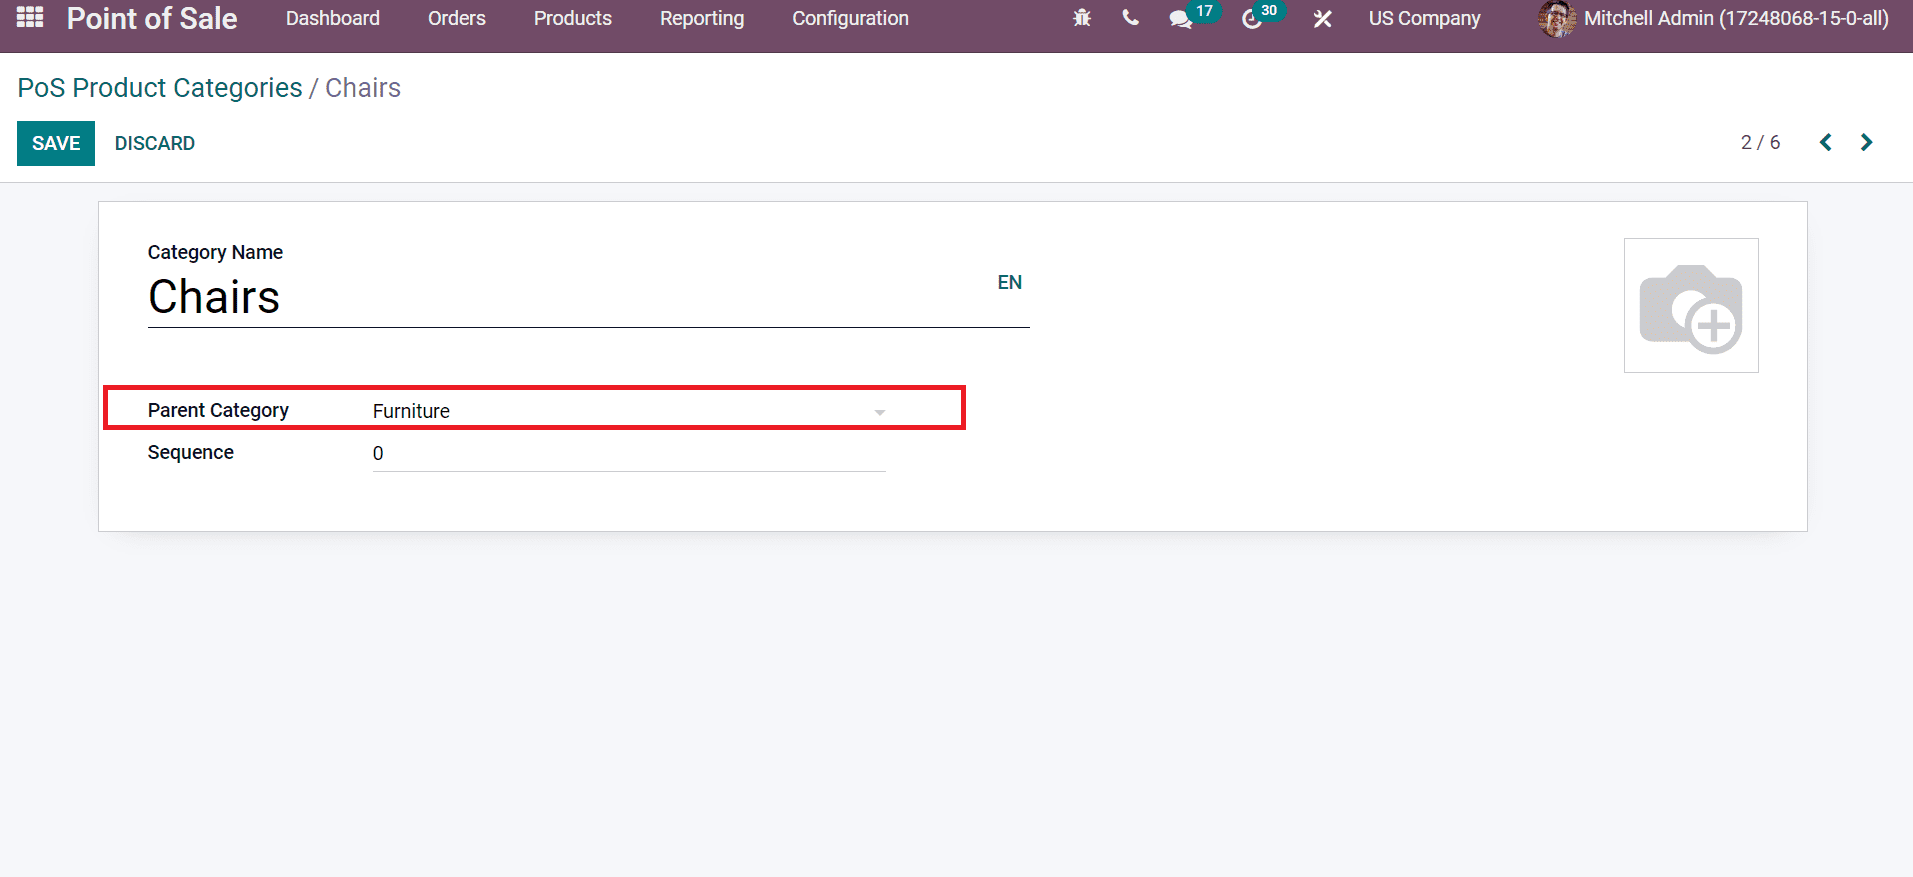
The created category and the parent category are visible in the main window.
Next, we can develop products for the specific categories in the PoS session.
To Develop a New Product for your PoS Session
You can access the Products menu in the Odoo 15 Point of Sales and click the CREATE button as denoted in the screenshot below.
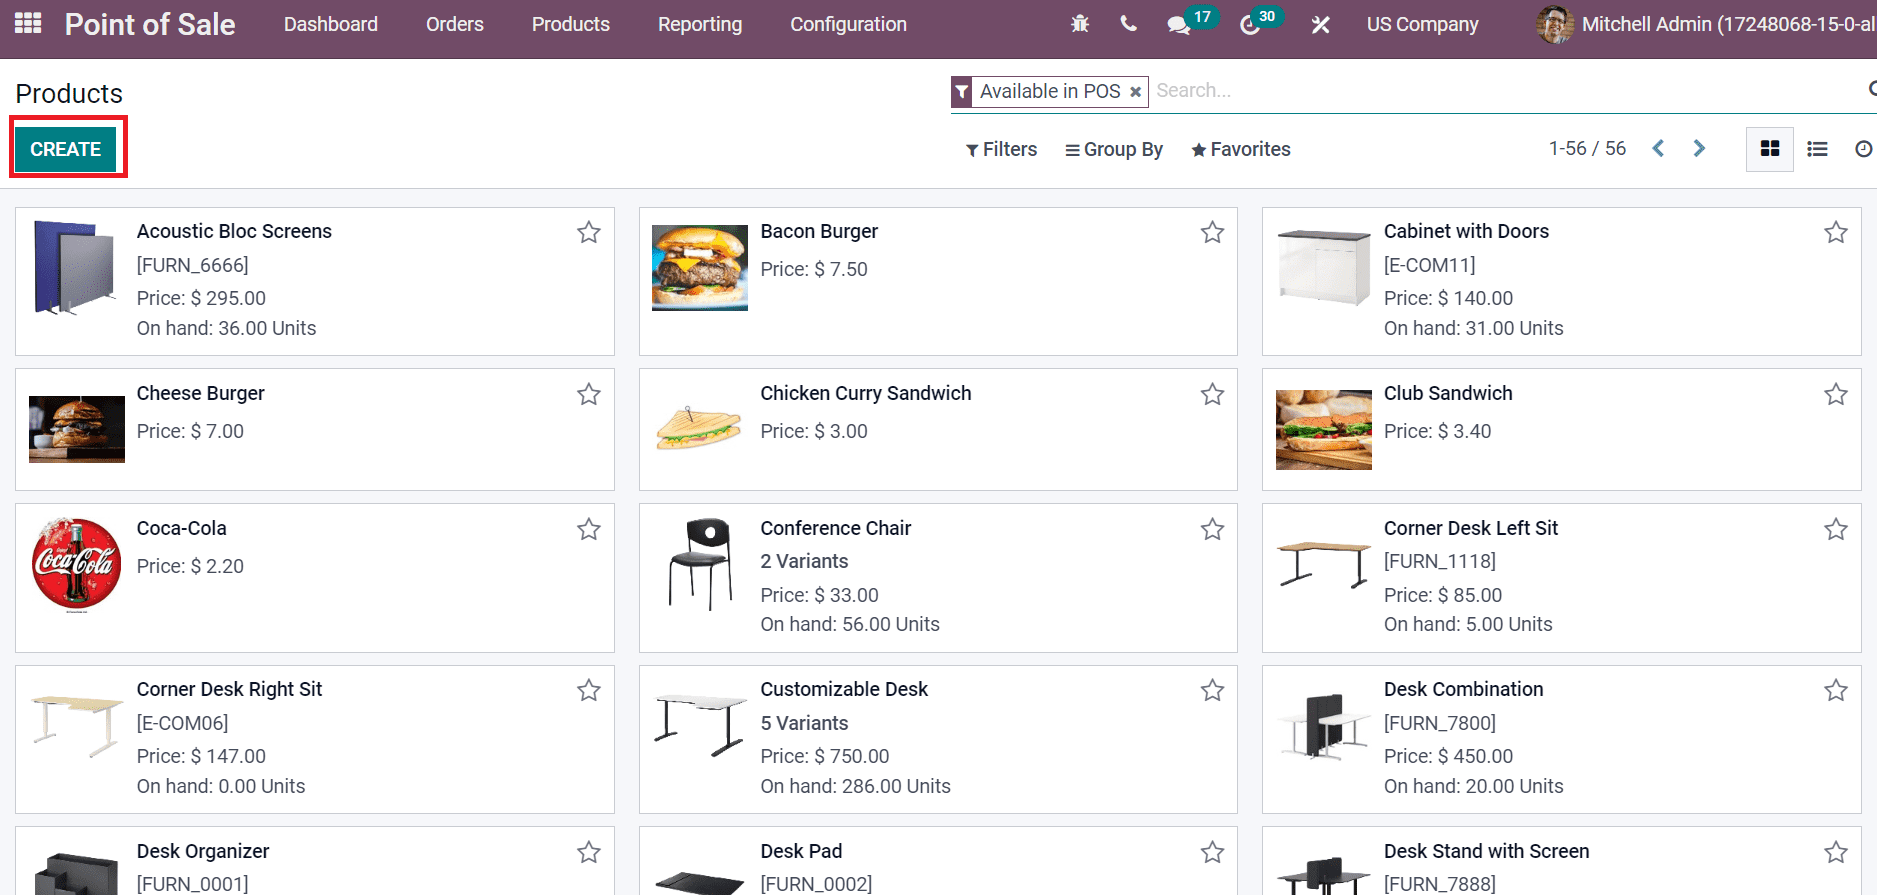
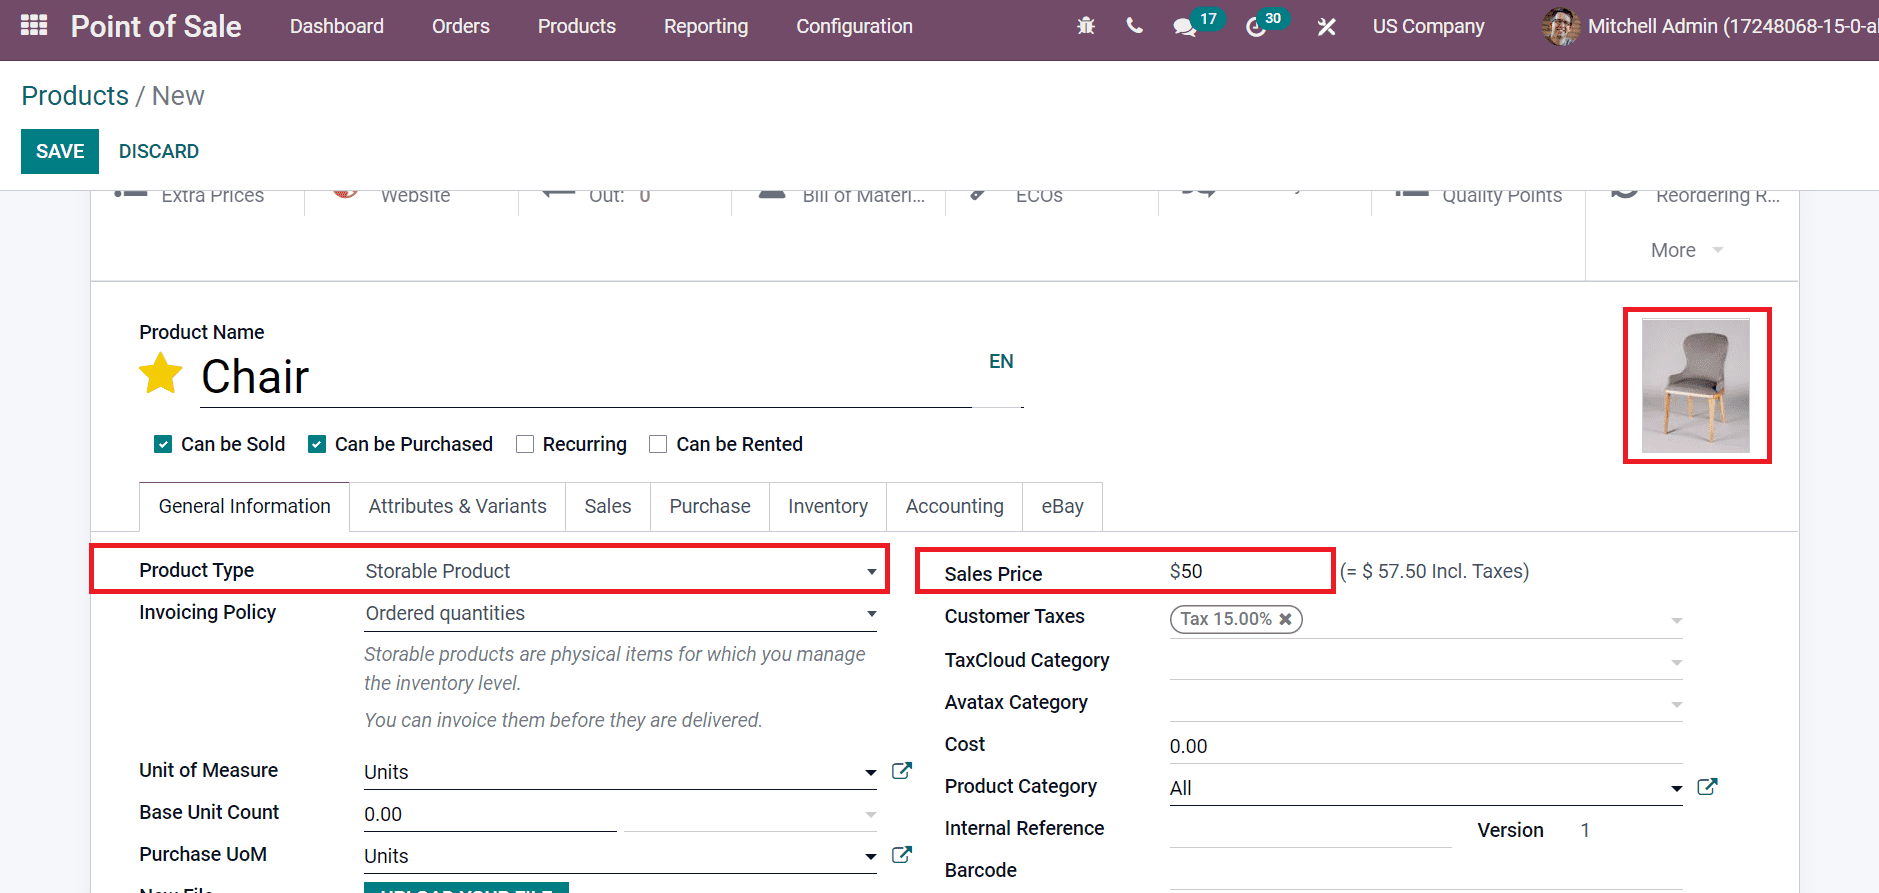
The products window shows details of each commodity separately, including price, variants, and on-hand units. Let’s formulate a new product Chair in the new Products window. Enter Product Name as Chair and upload the photo on the right side. Later, you can choose the Storable Product option in the Product Type field below the General Information tab. Users can manage stock using the storable product and easily invoice them before delivery. Also, add the cost of raw material sold to customers inside the Sales Price field as $50.
After applying general information on a product, select the Sales tab and enable the Available in the PoS option below the Point of Sales section.
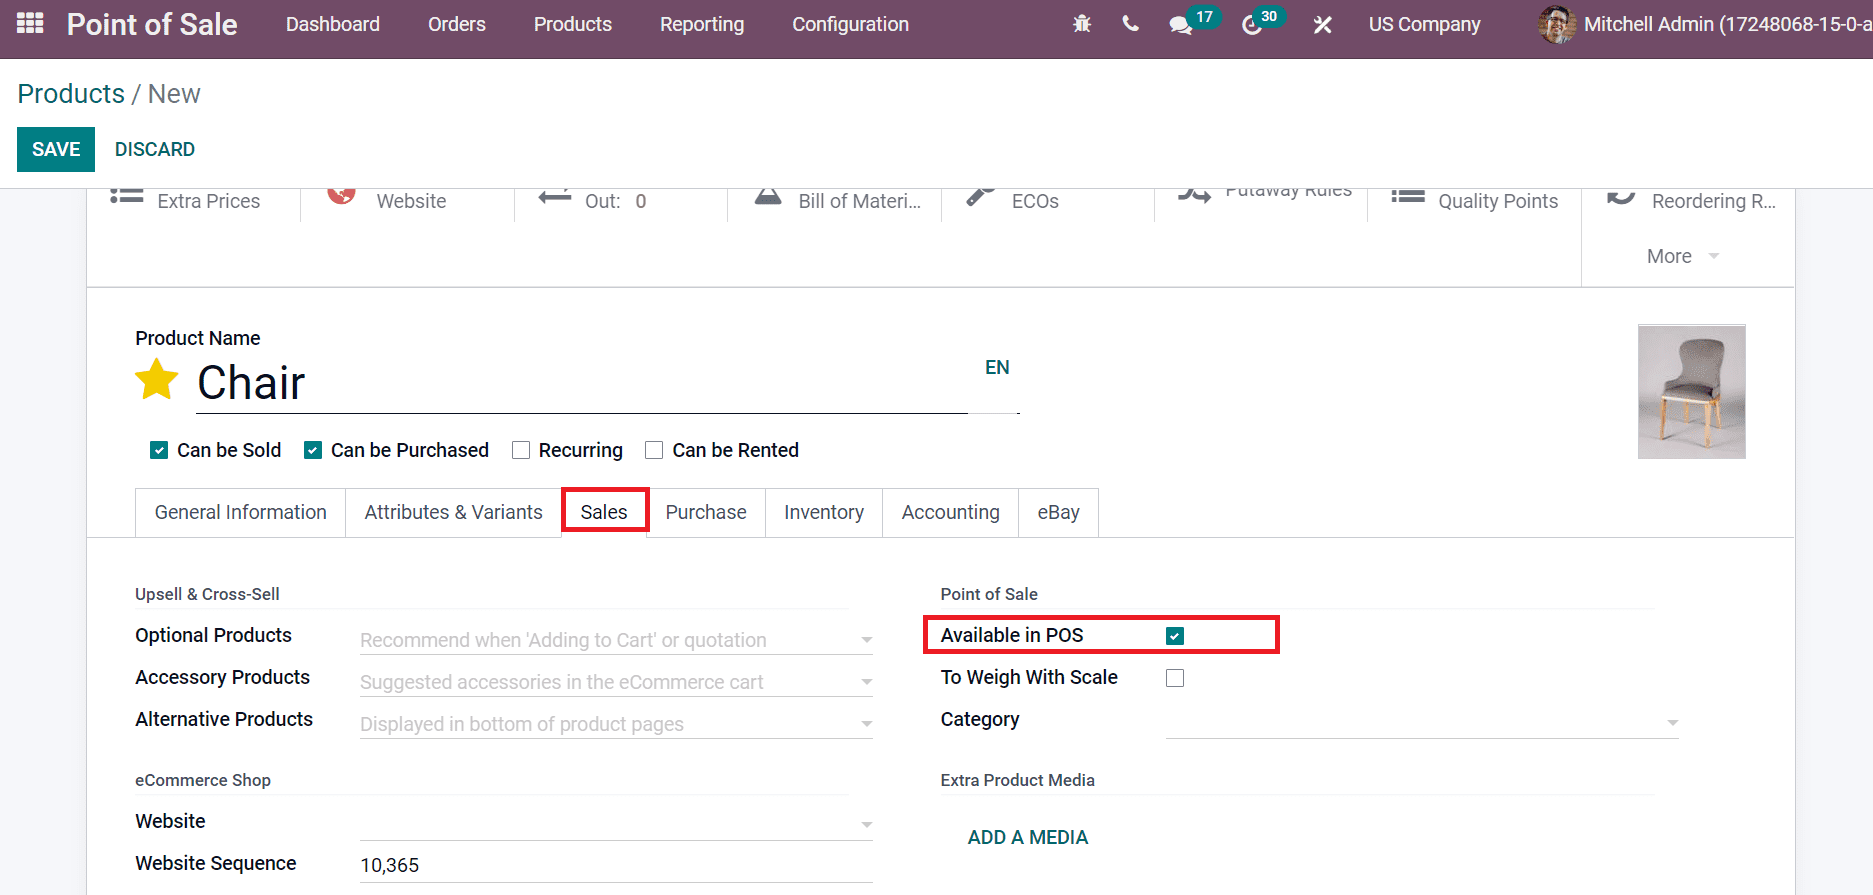
Users need to enable the Available in PoS option to appear in the product in PoS Session. Later, choose the category used in PoS inside the Category field, and we selected the Furniture/Chairs option as presented in the screenshot below.
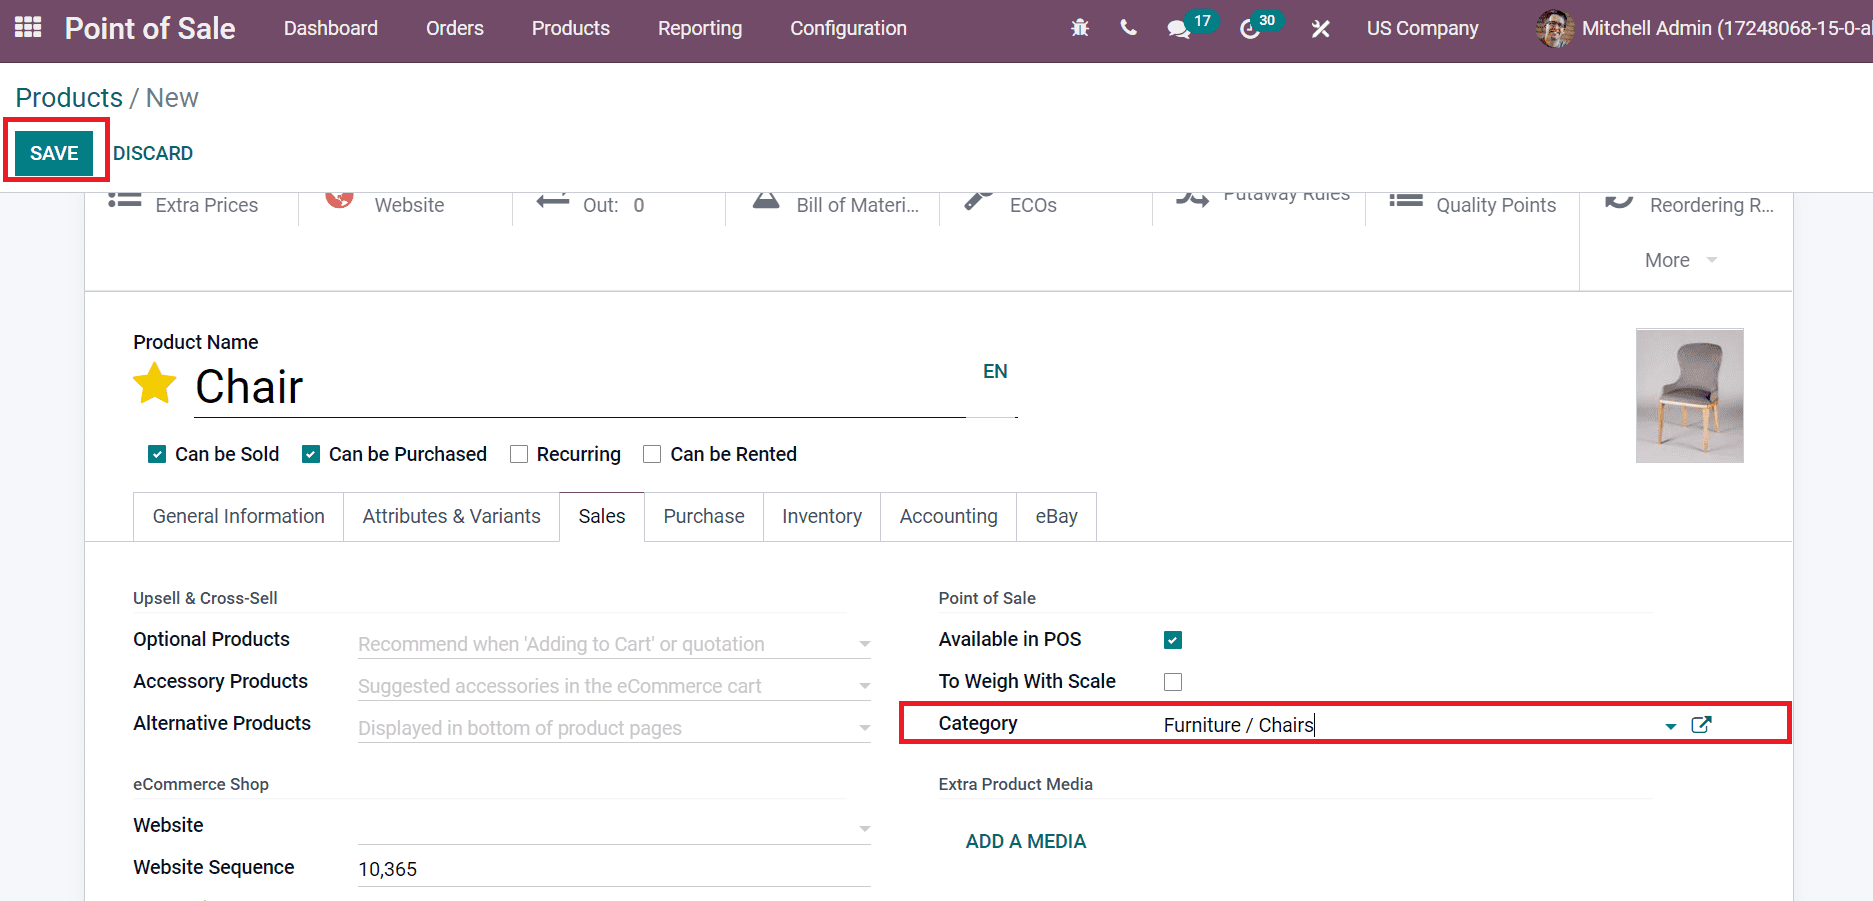
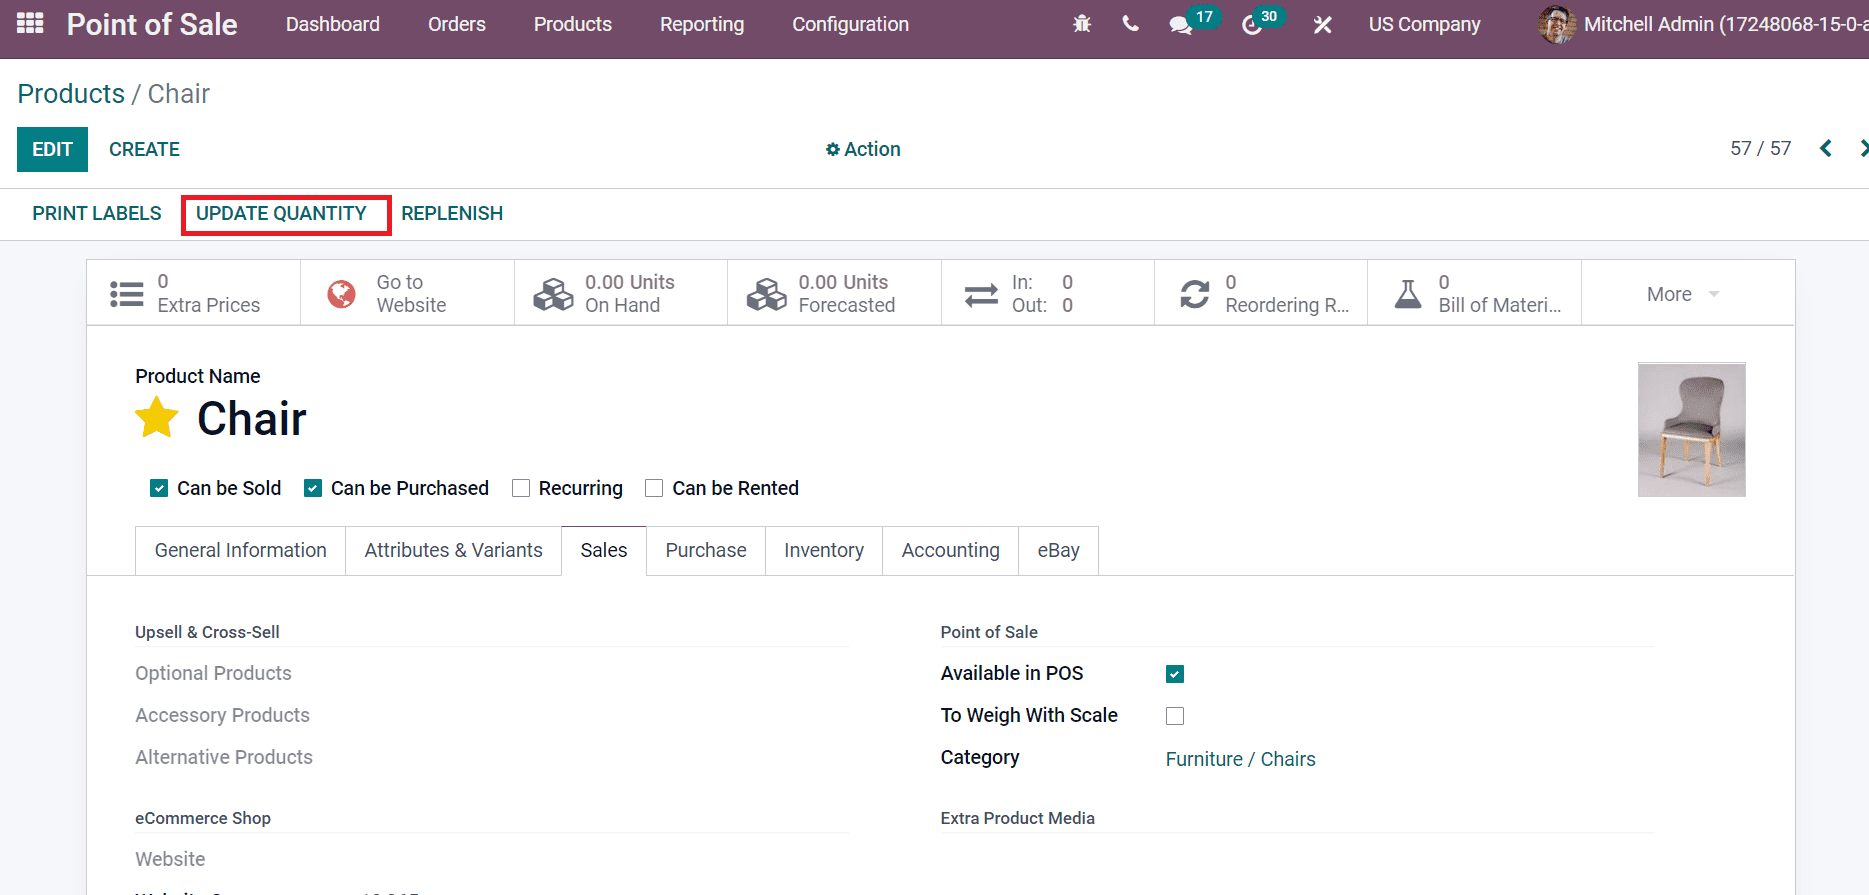
Select the SAVE button after applying your product details, and you can add quantity by clicking on the UPDATE QUANTITY icon.
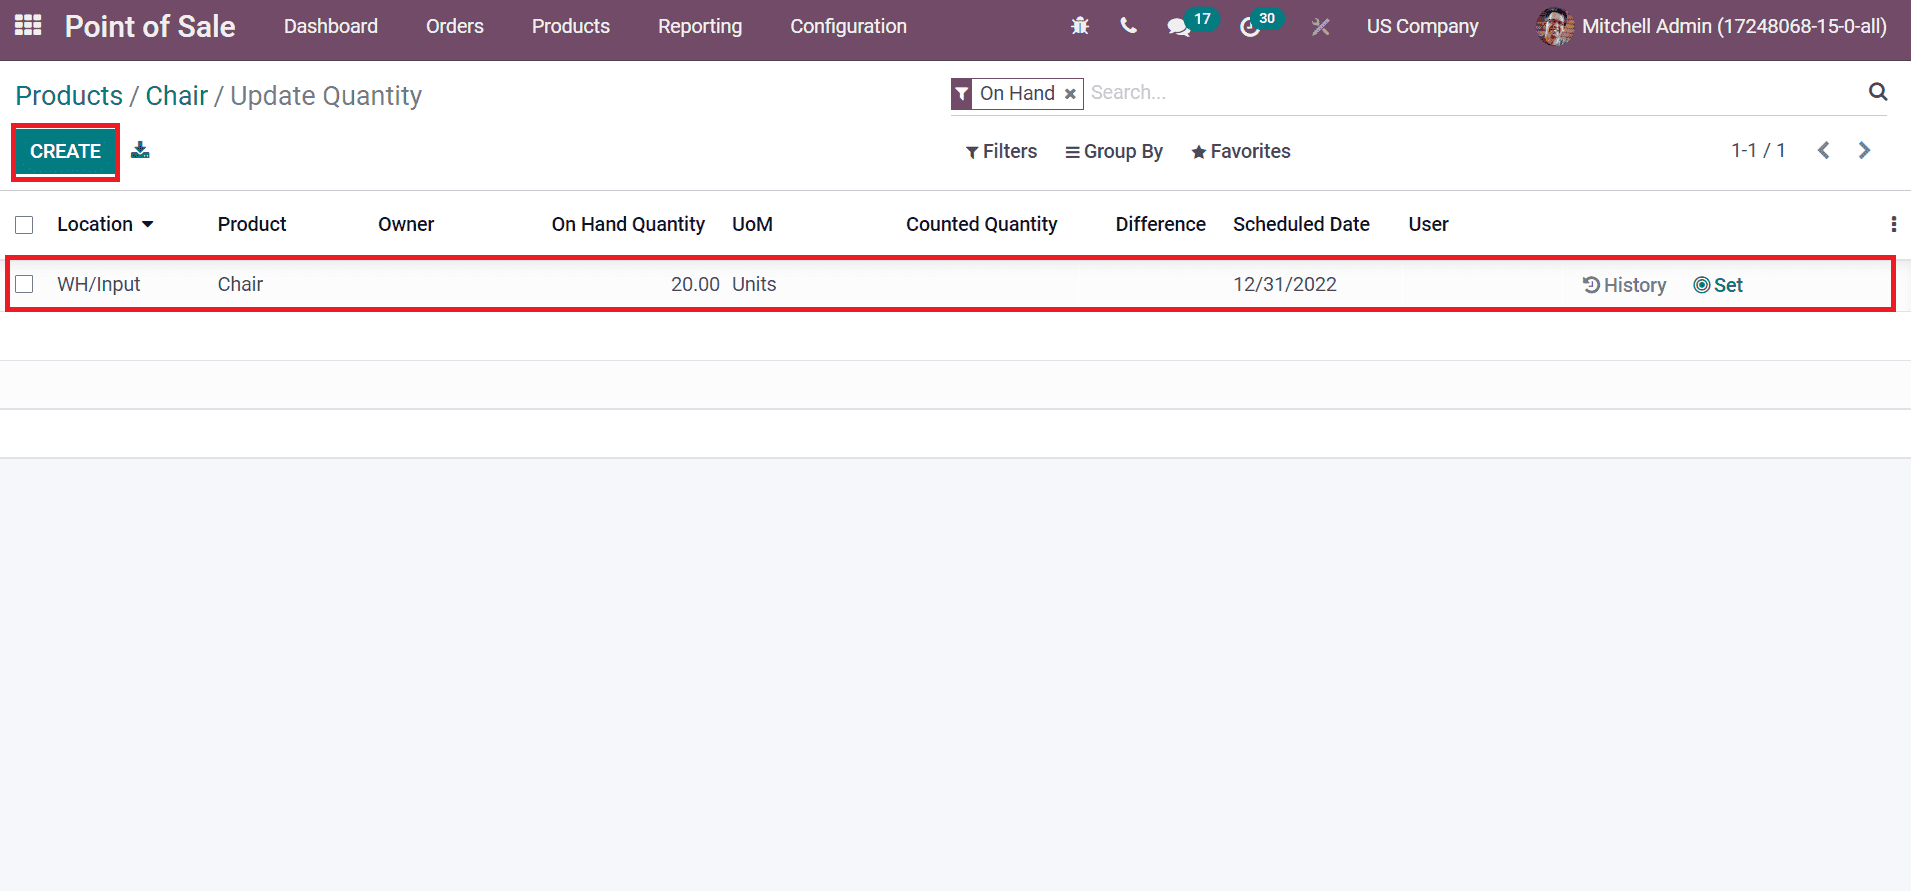
We added 20 quantities of a chair in the new window after choosing the CREATE icon.
Now, let’s set up the shop and add some features to help the whole flow of PoS configuration.
To Add a Point of Sale Session in Odoo 15
Select the Point of Sales menu in the Configuration tab, and you can see the list of all created shops in the Point of Sales window. Select the CREATE button to formulate a new Point of Sales session as marked in the screenshot below.
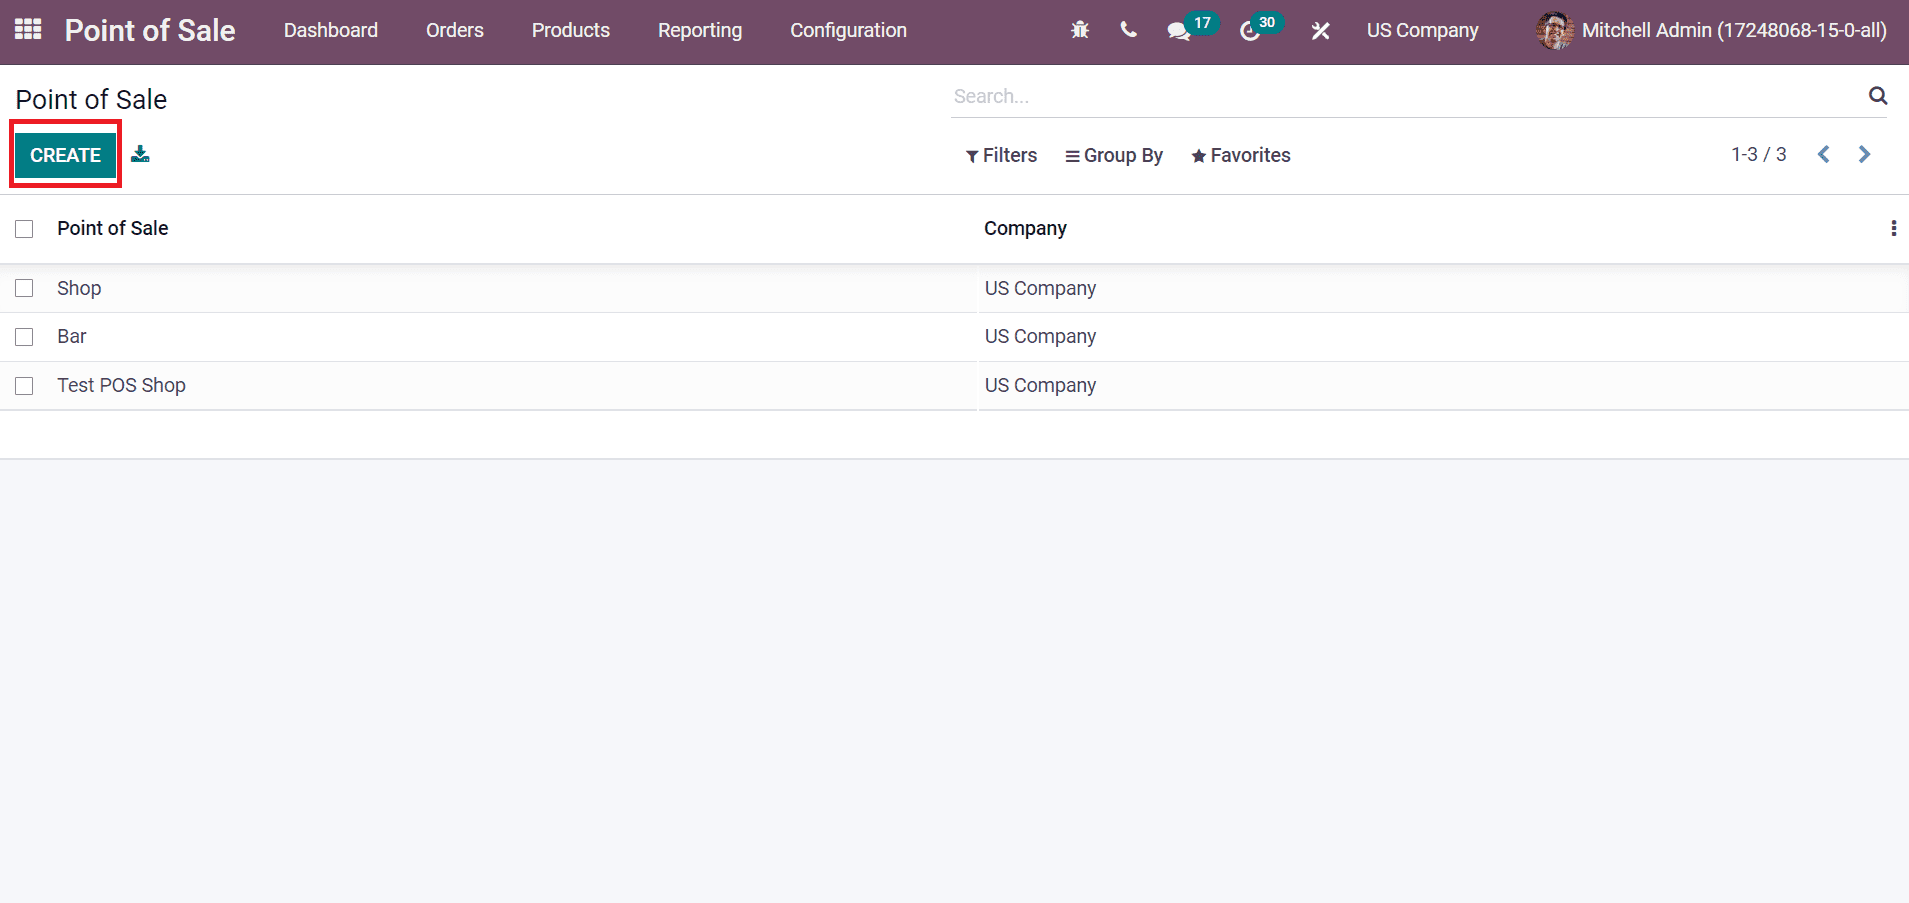
We selected the created Point of Sale’ Shop’ and clicked on the Edit button in the new window.
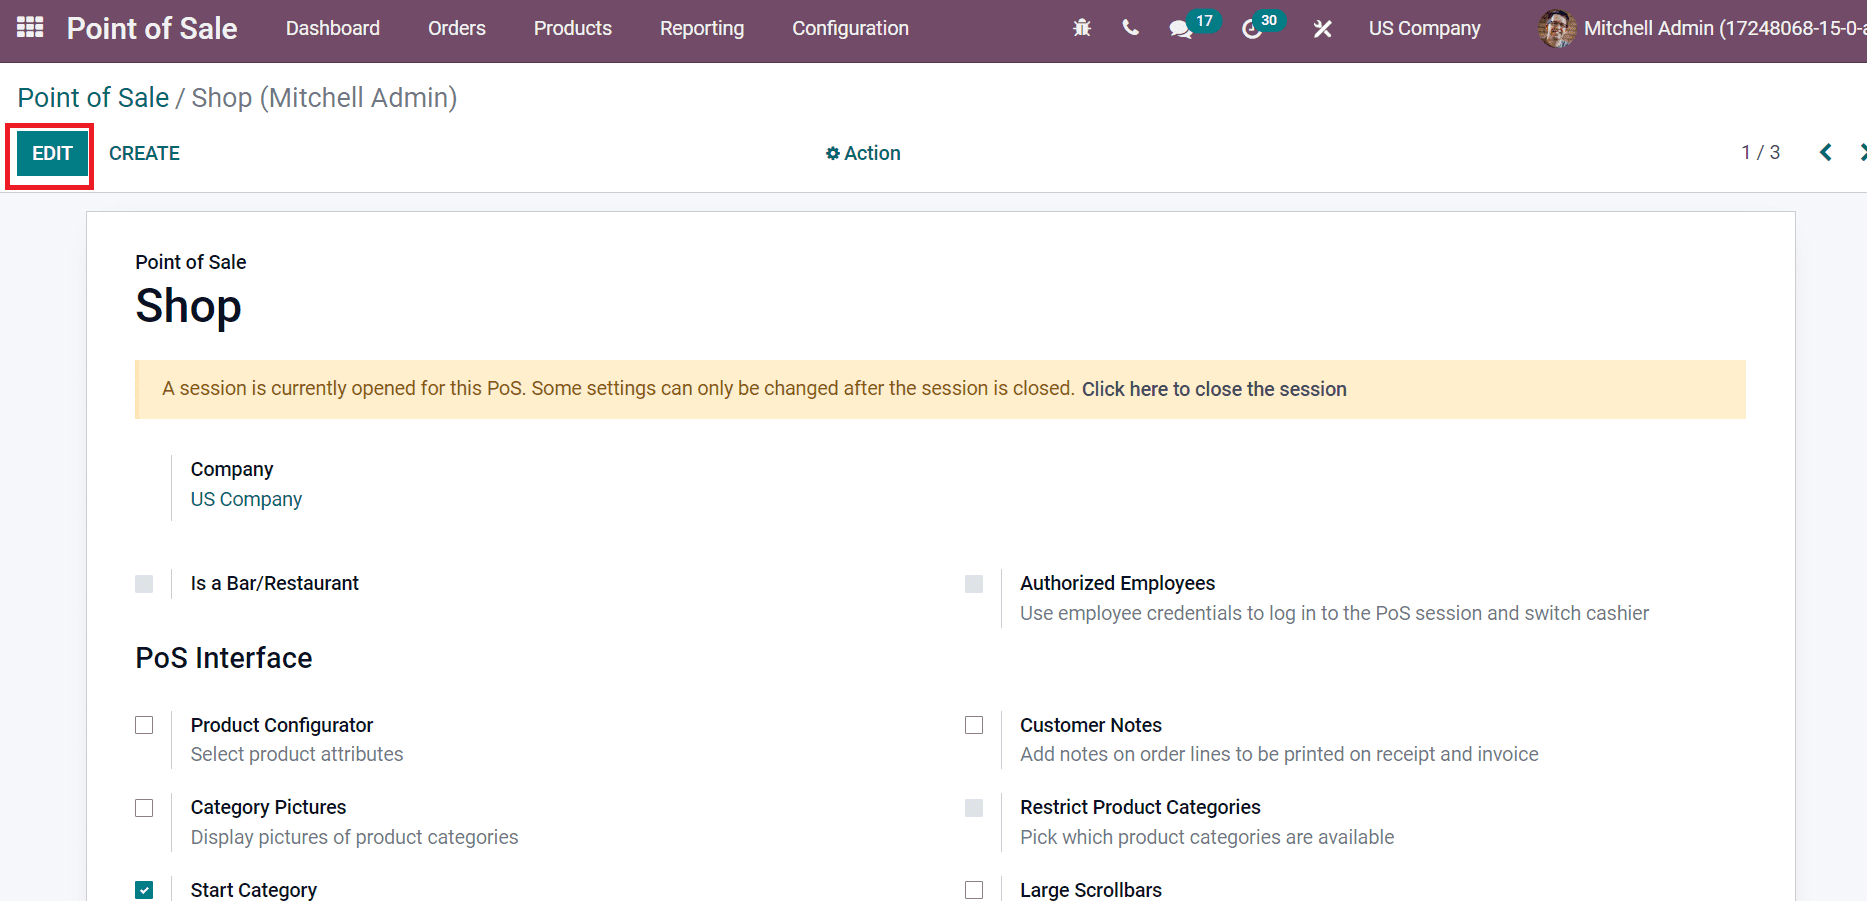
After the editing, you can enter your shop name ‘Wood Inc Shop’ inside the Point of Sale field as in the screenshot below.
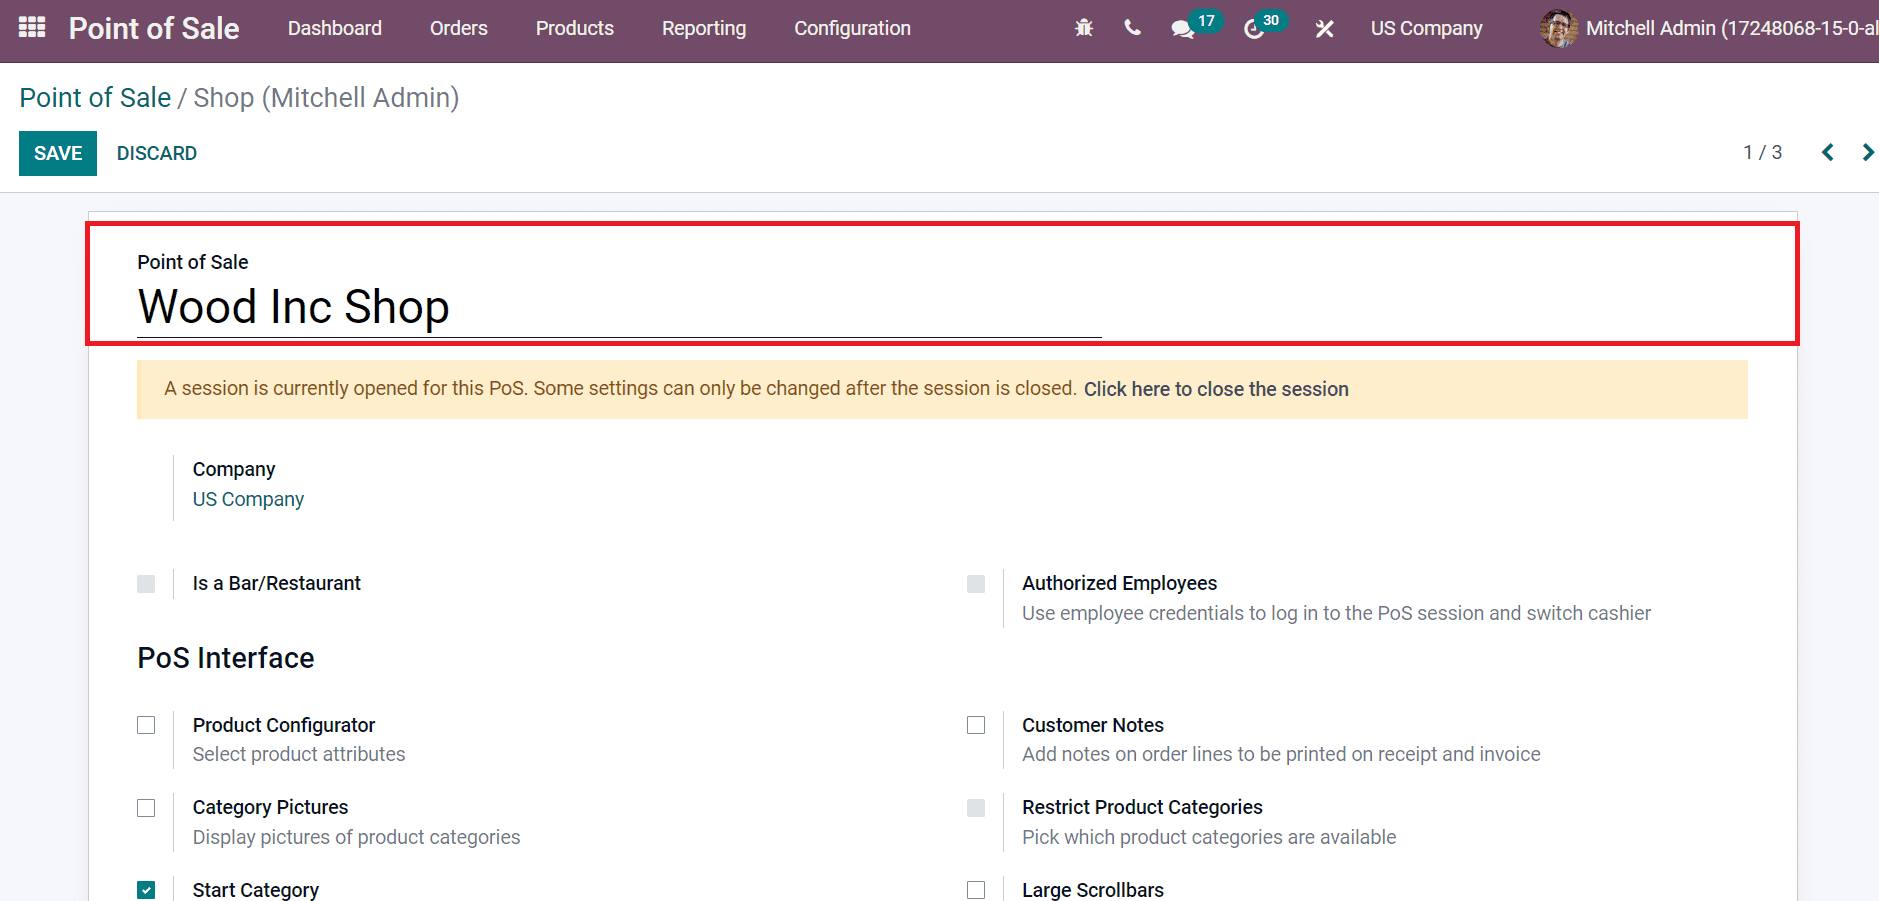
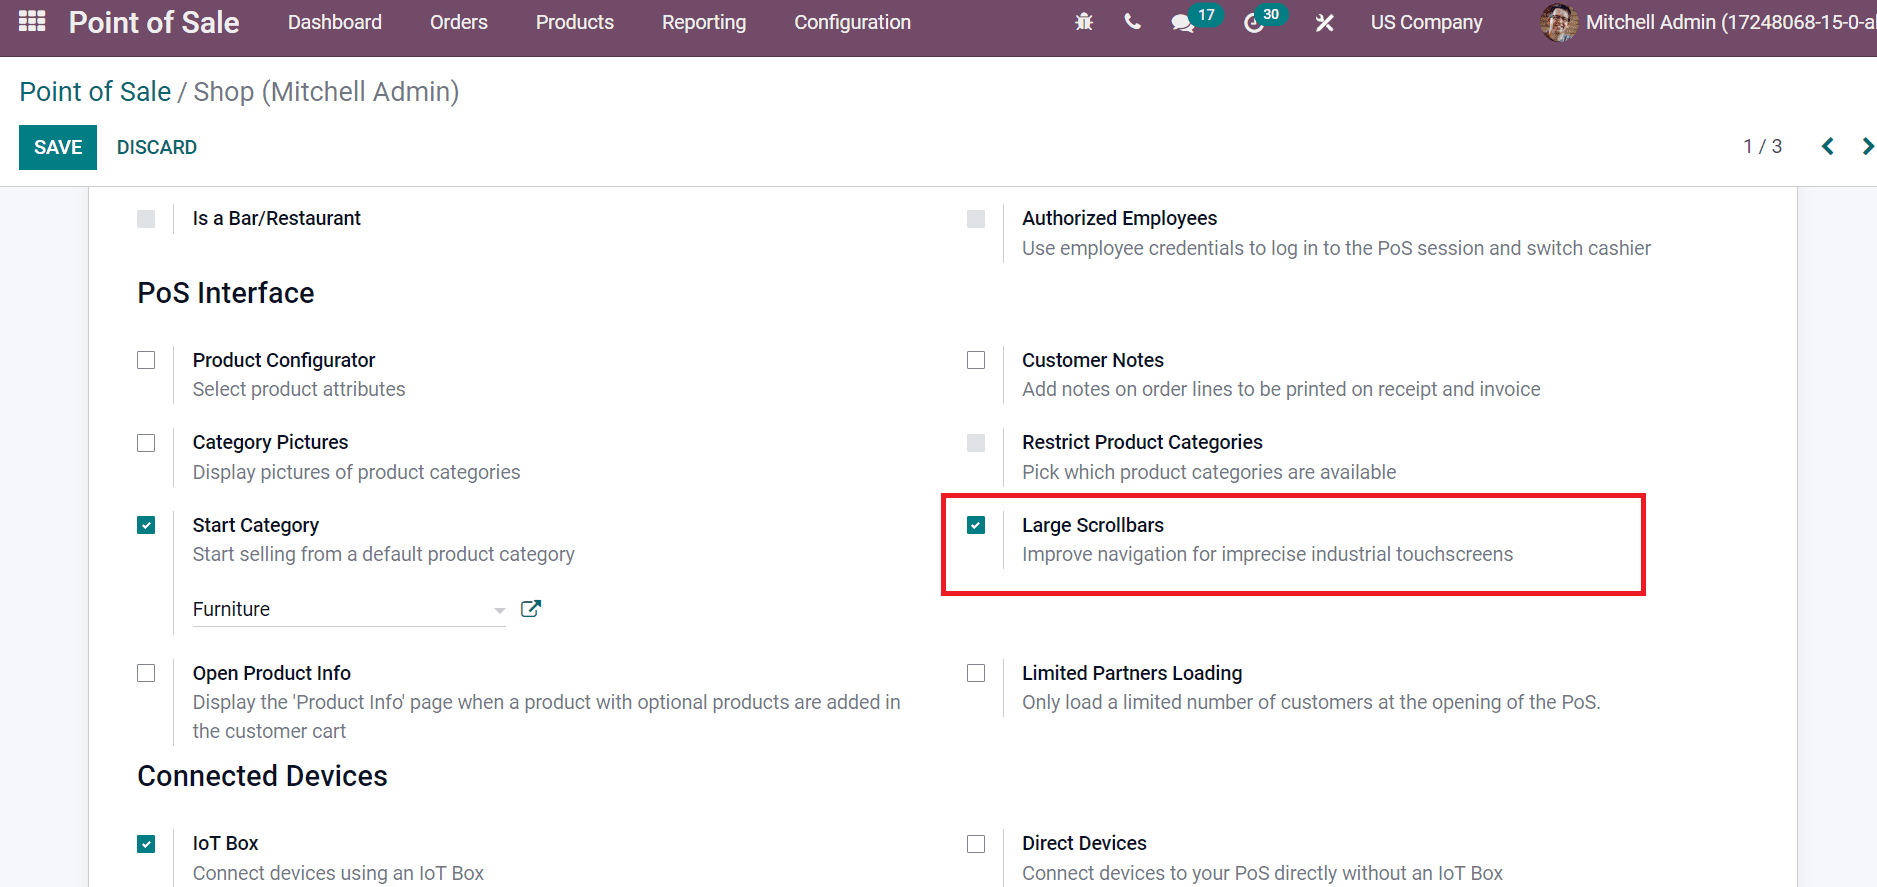
Below the PoS Interface section, activate the Start Category option to sell your products from a default category. Product category displays by point of sales in a default way. You need to specify the type after activating the Start Category option. All available products are visible if we do not select the category.
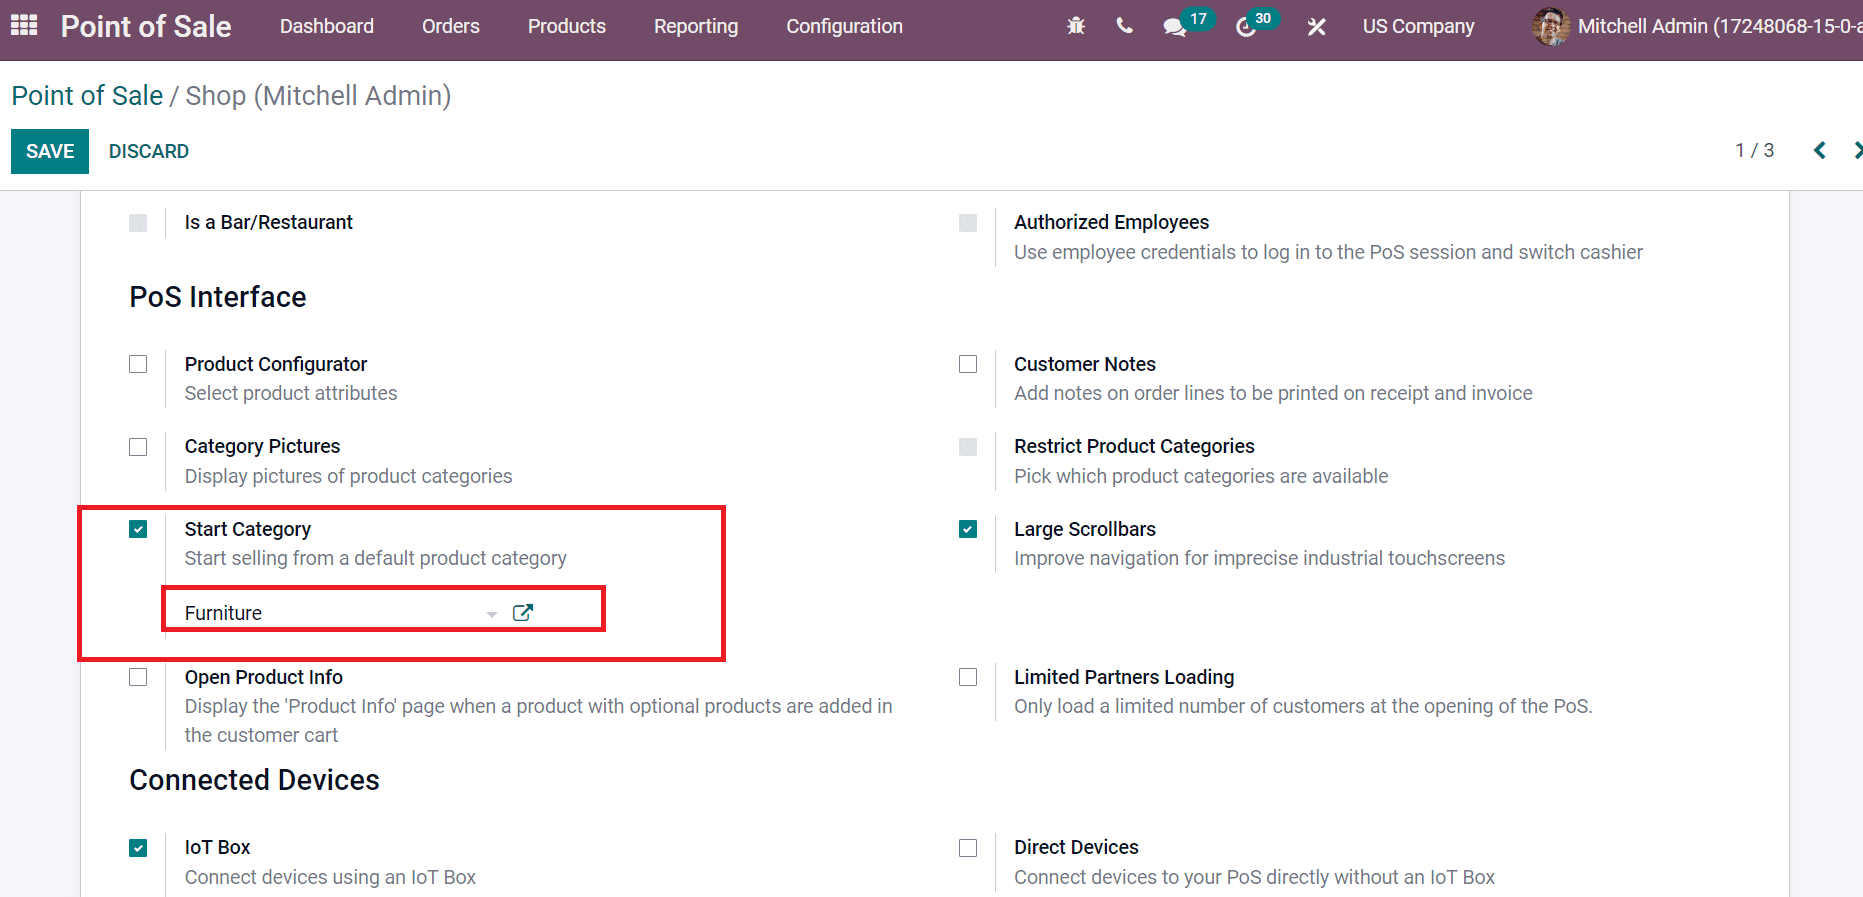
Here, we selected the product category ‘Furniture’ inside the Start Category field. Later, enable the Large Scrollbars option to indefinite industrial touchscreens. You can enhance the navigation for industrial screens by activating the Large Scrollbars option, as in the screenshot below.
Next, we need to specify payment methods for your shop under the Payments section. Choose the Payment Methods option in the Payments section, as shown in the screenshot below.
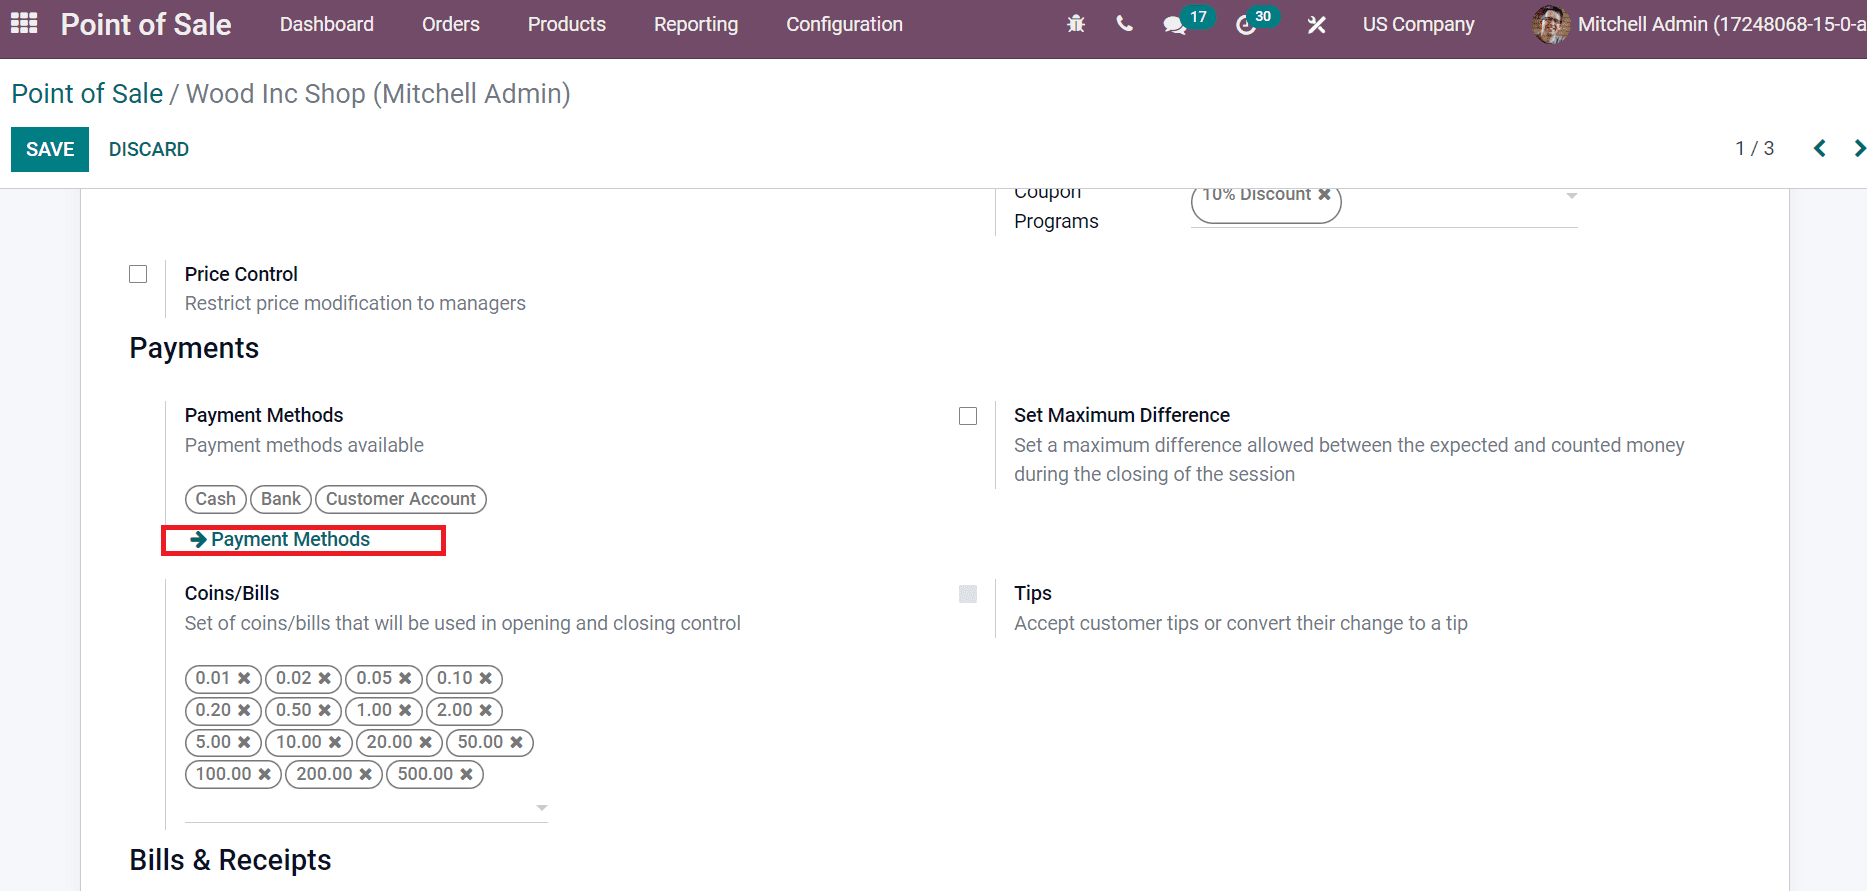
A newPayment Methods window opens before you, and all available methods are viewablehere.
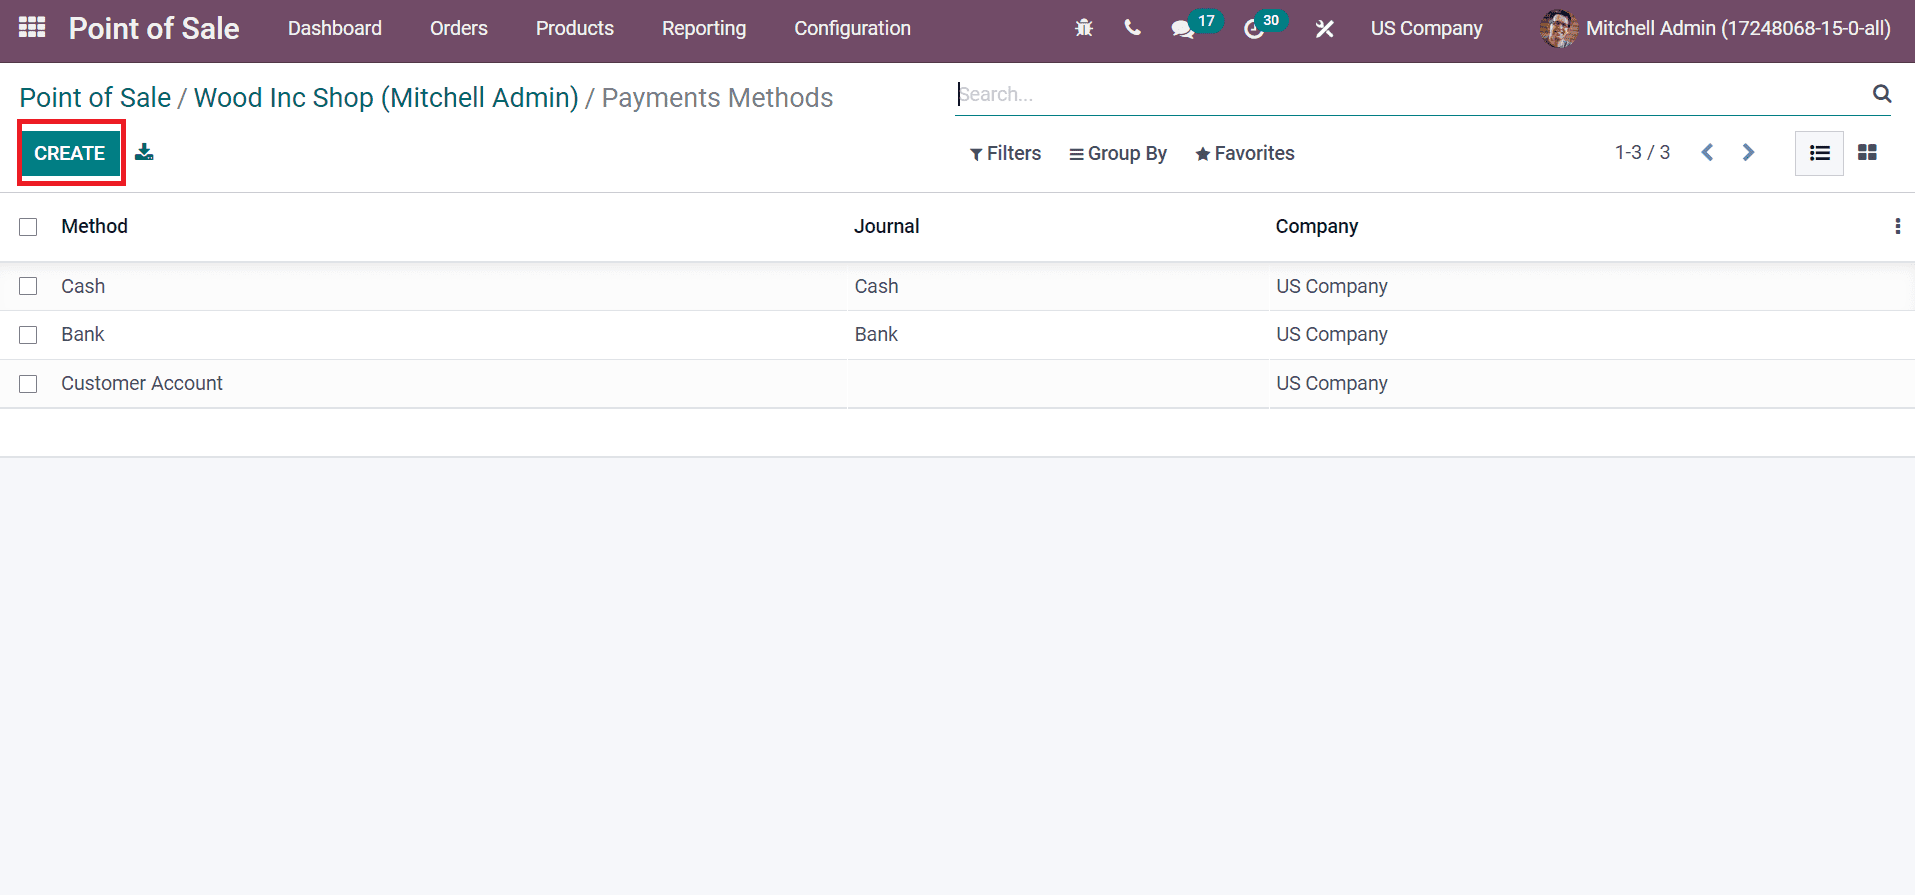
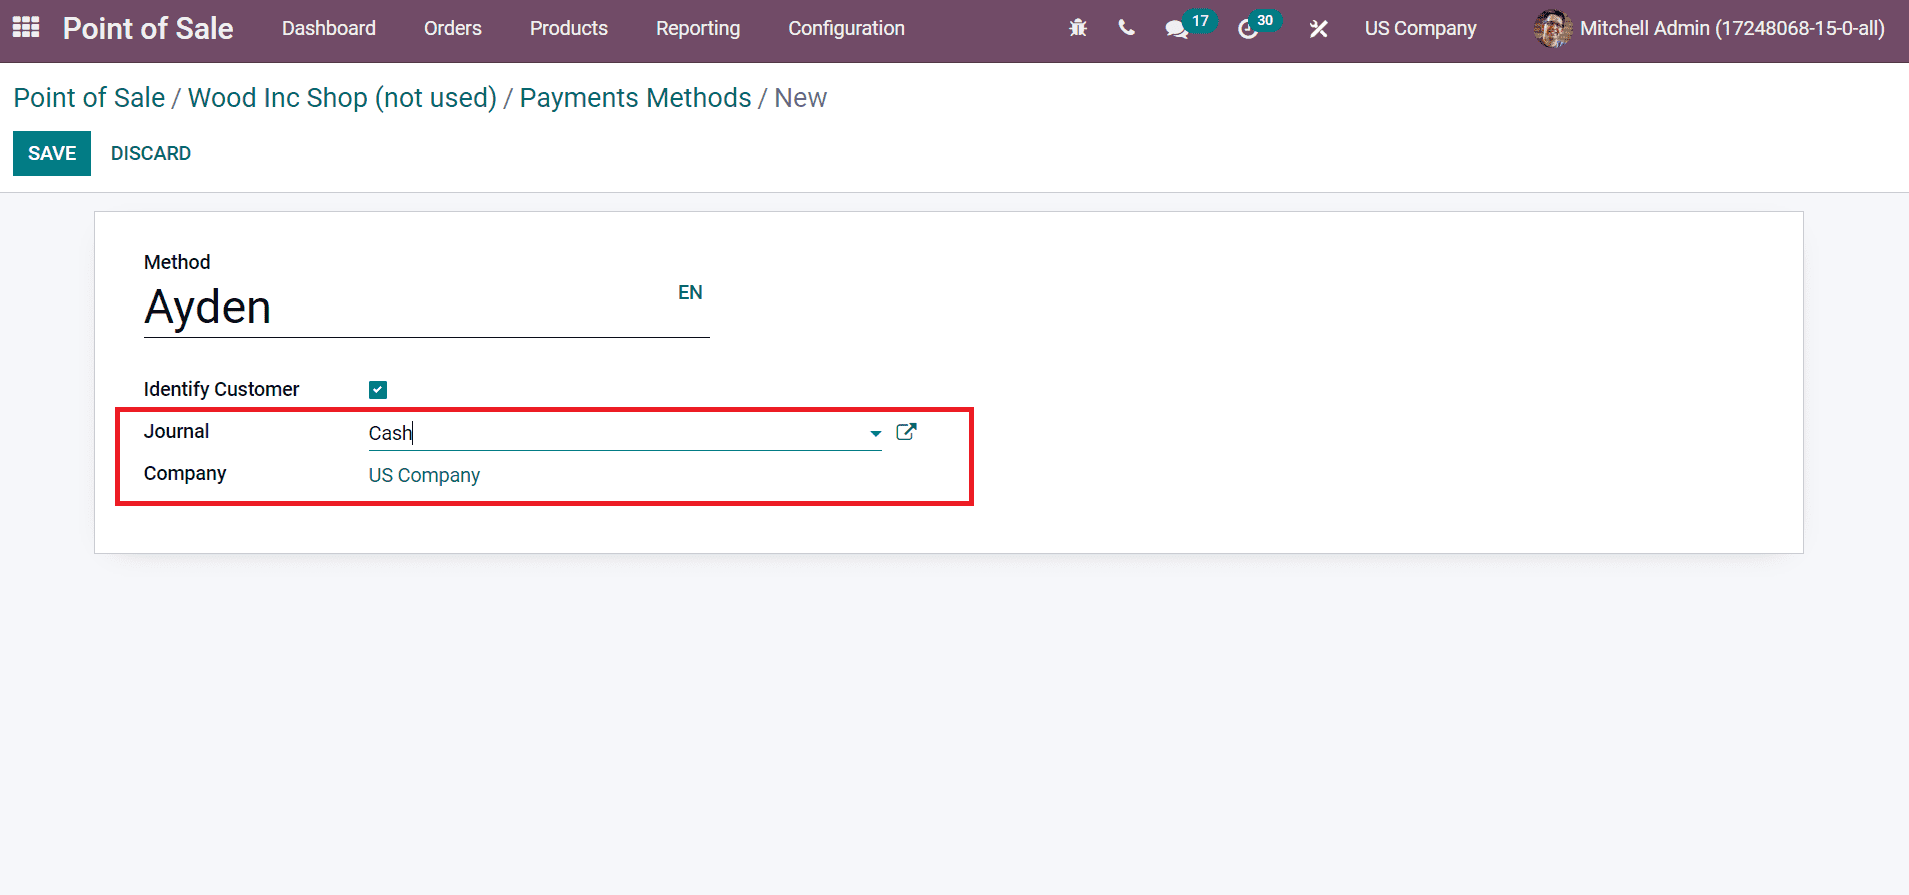
Select the CREATE icon to generate a new payment method, and a new page appears before you. Add the Method as ‘Ayden,’ and you can set a customer using the payment method by enabling the Identify Customer option. It divides the journal entries for buyers and slows down the closing process.
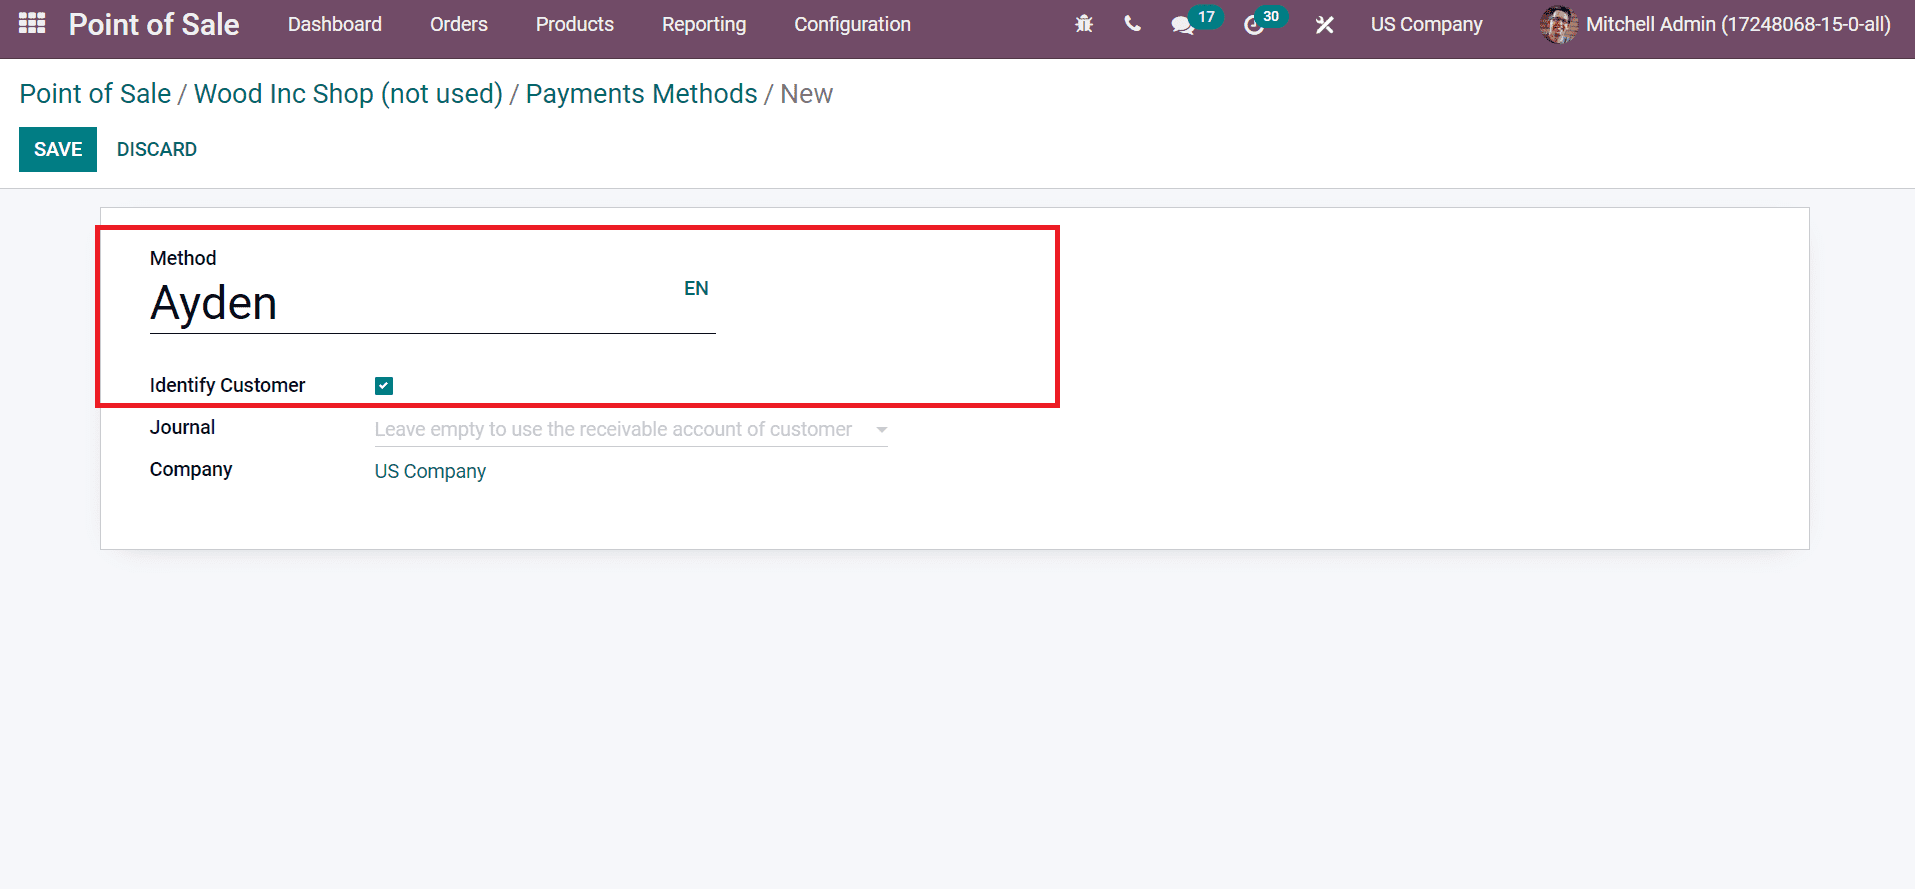
Later, you can choose the Journal to book payments after finishing the session. Cash and Bank Journals are allowed for the payment methods. By leaving the Journal field empty, the user can use a receivable account for the customer. We selected the Journal Cash, and Company data is visible here as portrayed in the screenshot below.
After saving the data, you can quickly select the Ayden below the Payment Methods inside the Payments section of PoS.
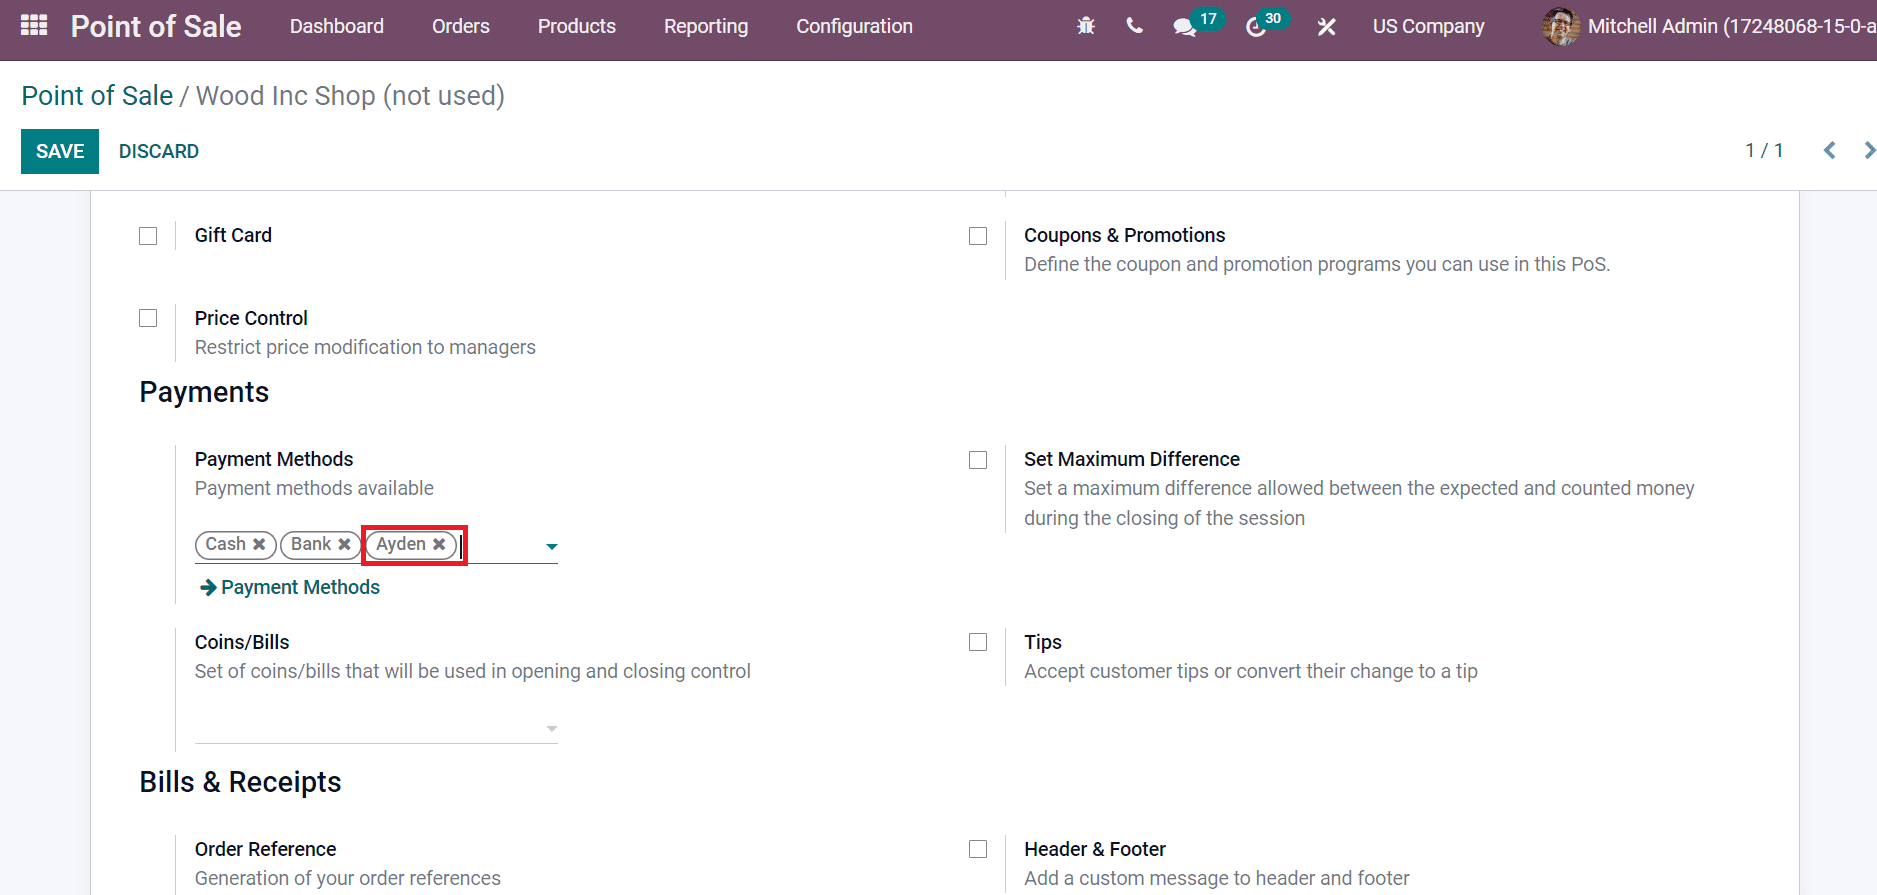
Users can also activate the Tips option to accept tips from the customer. After enabling the Tips option, choose your Tip Product as a reference on customer receipts.
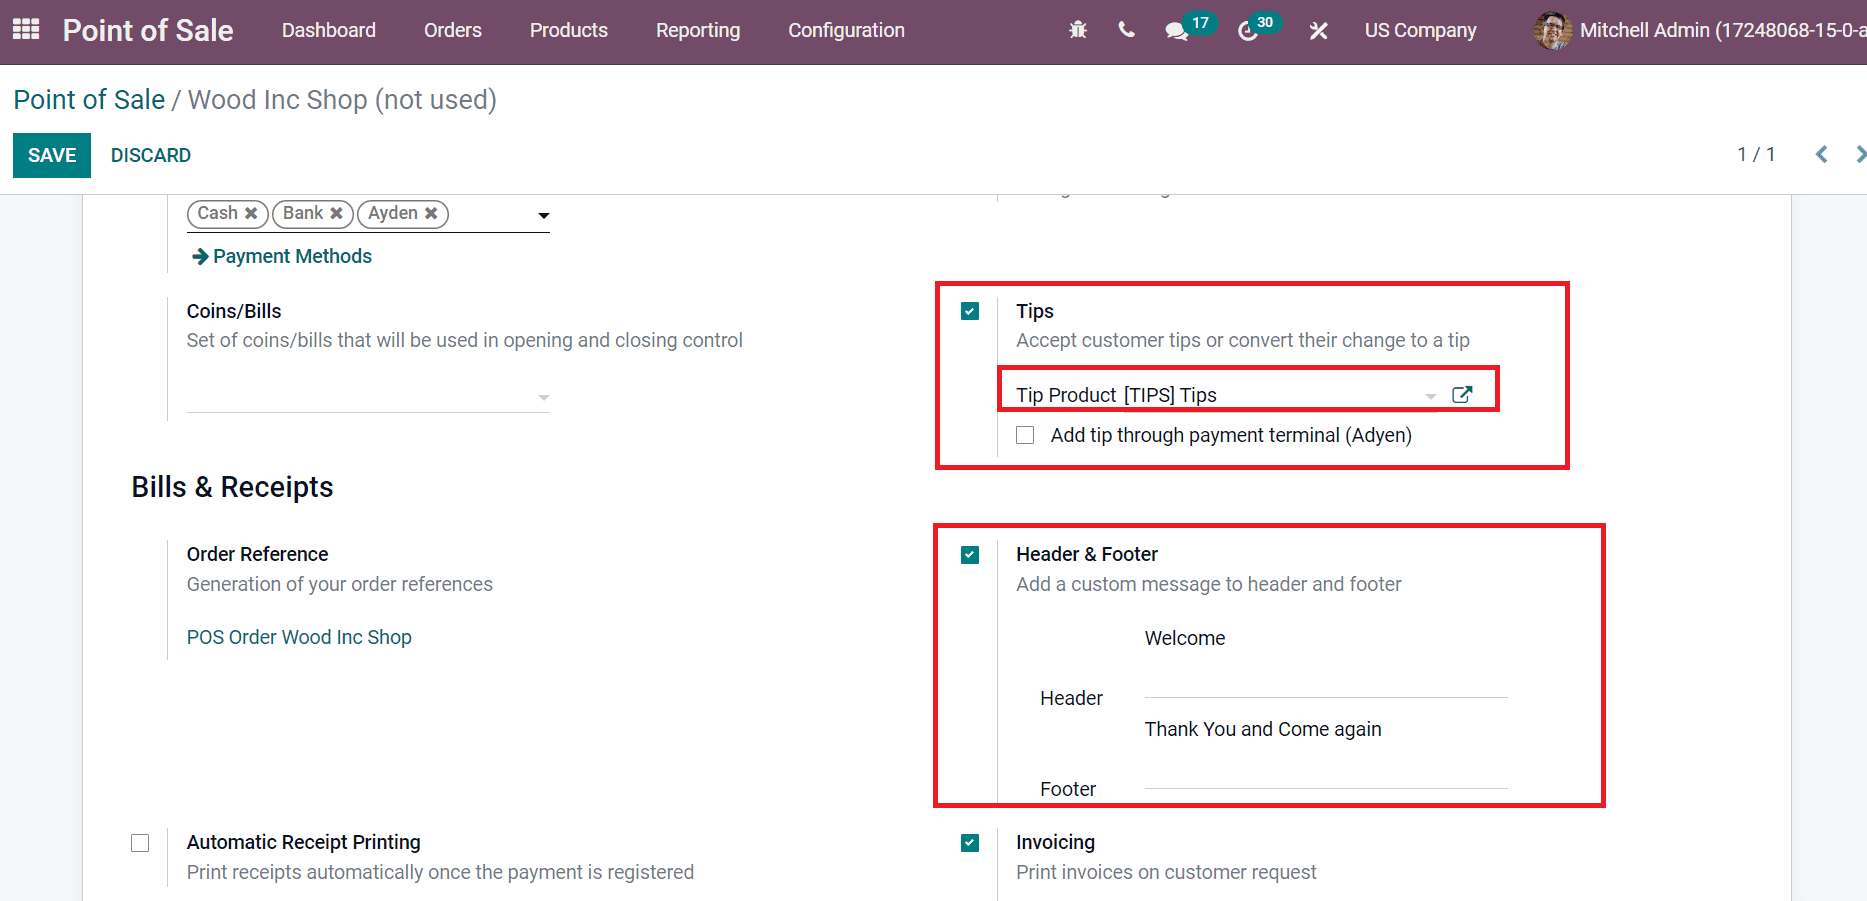
After that, activate Header & Footer option to apply a custom message for the customer. We added a message ‘Welcome’ in the Header option and ‘Thank you and Come again’ in the Footer option, as shown in the above screenshot. Next, you need to activate the Invoicing field below the Bills & Receipts action to print out invoices for customer requests.
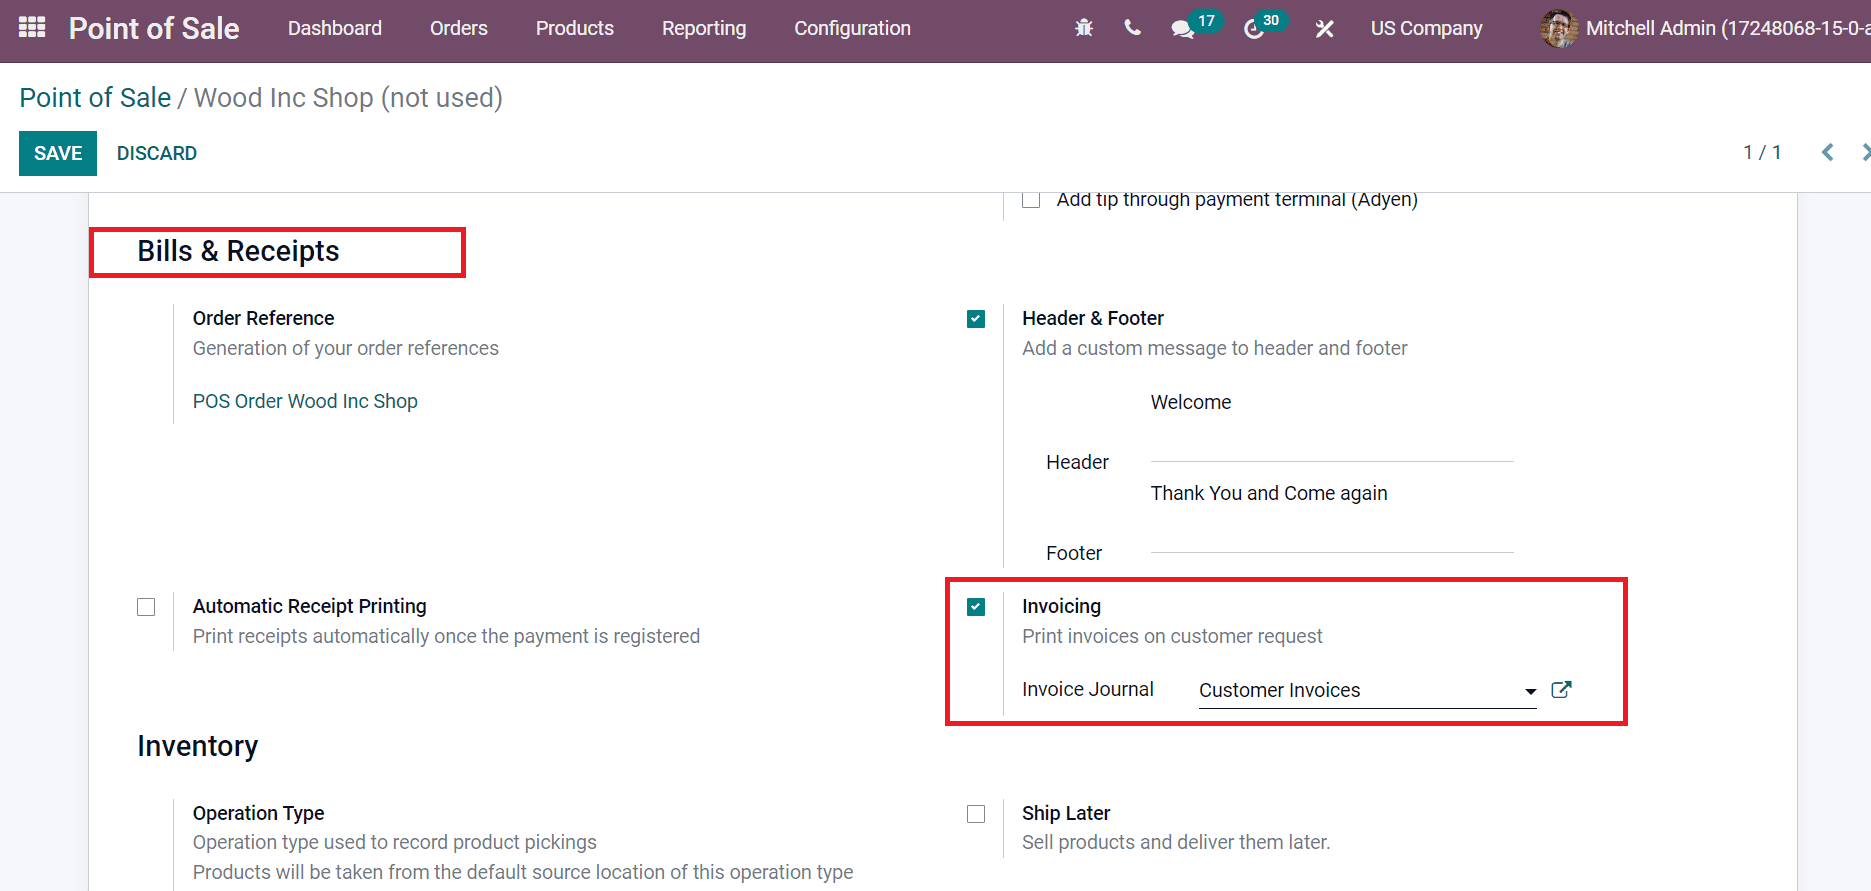
Users need to choose an Invoice Journal for managing the invoices for customers. Save the details after entering important information about your Wood Inc Shop. Next, we can move to the Dashboard window, and the created session will be visible to you.
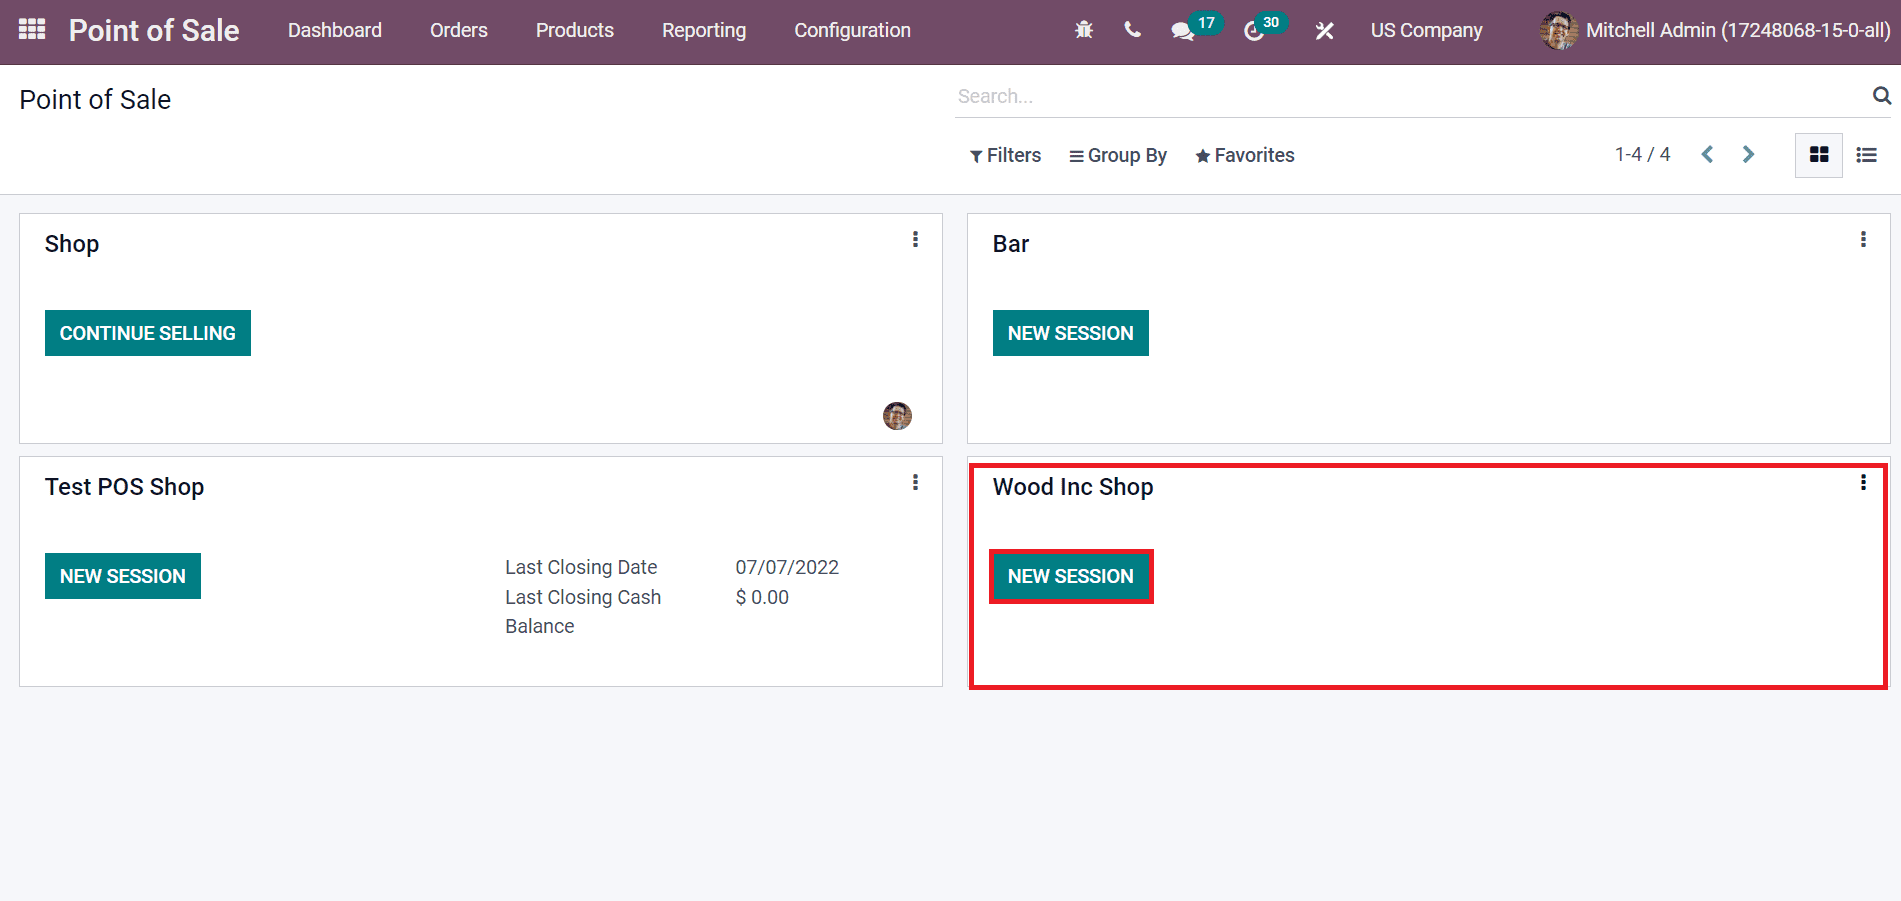
It is easy to generate your session by clicking on the NEW SESSION button inside Wood Inc Shop. In the PoS Session window, you can see Furniture’s parent category and all products underneath the main category.
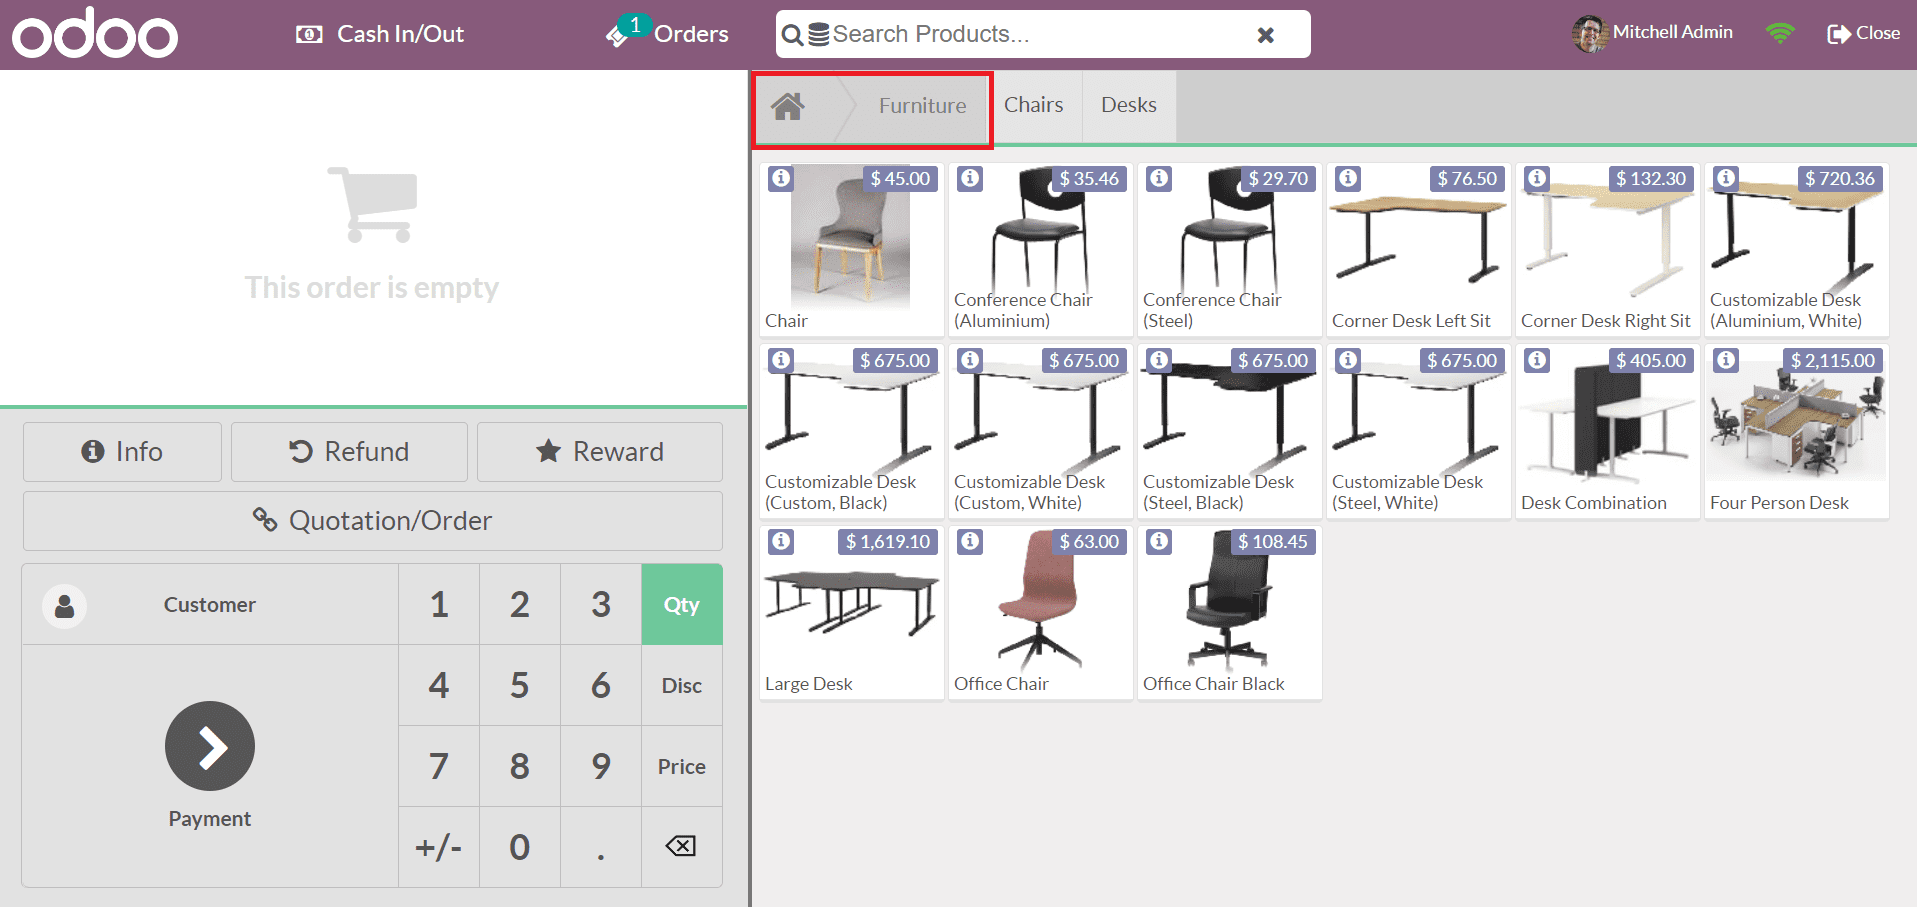
You can quickly access certain products based on the categories. Now, let’s look at how to order a product in PoS Session. Choose the product Chair inside the Chairs section, and you can see that one chair quantity is updated in the Orders section.
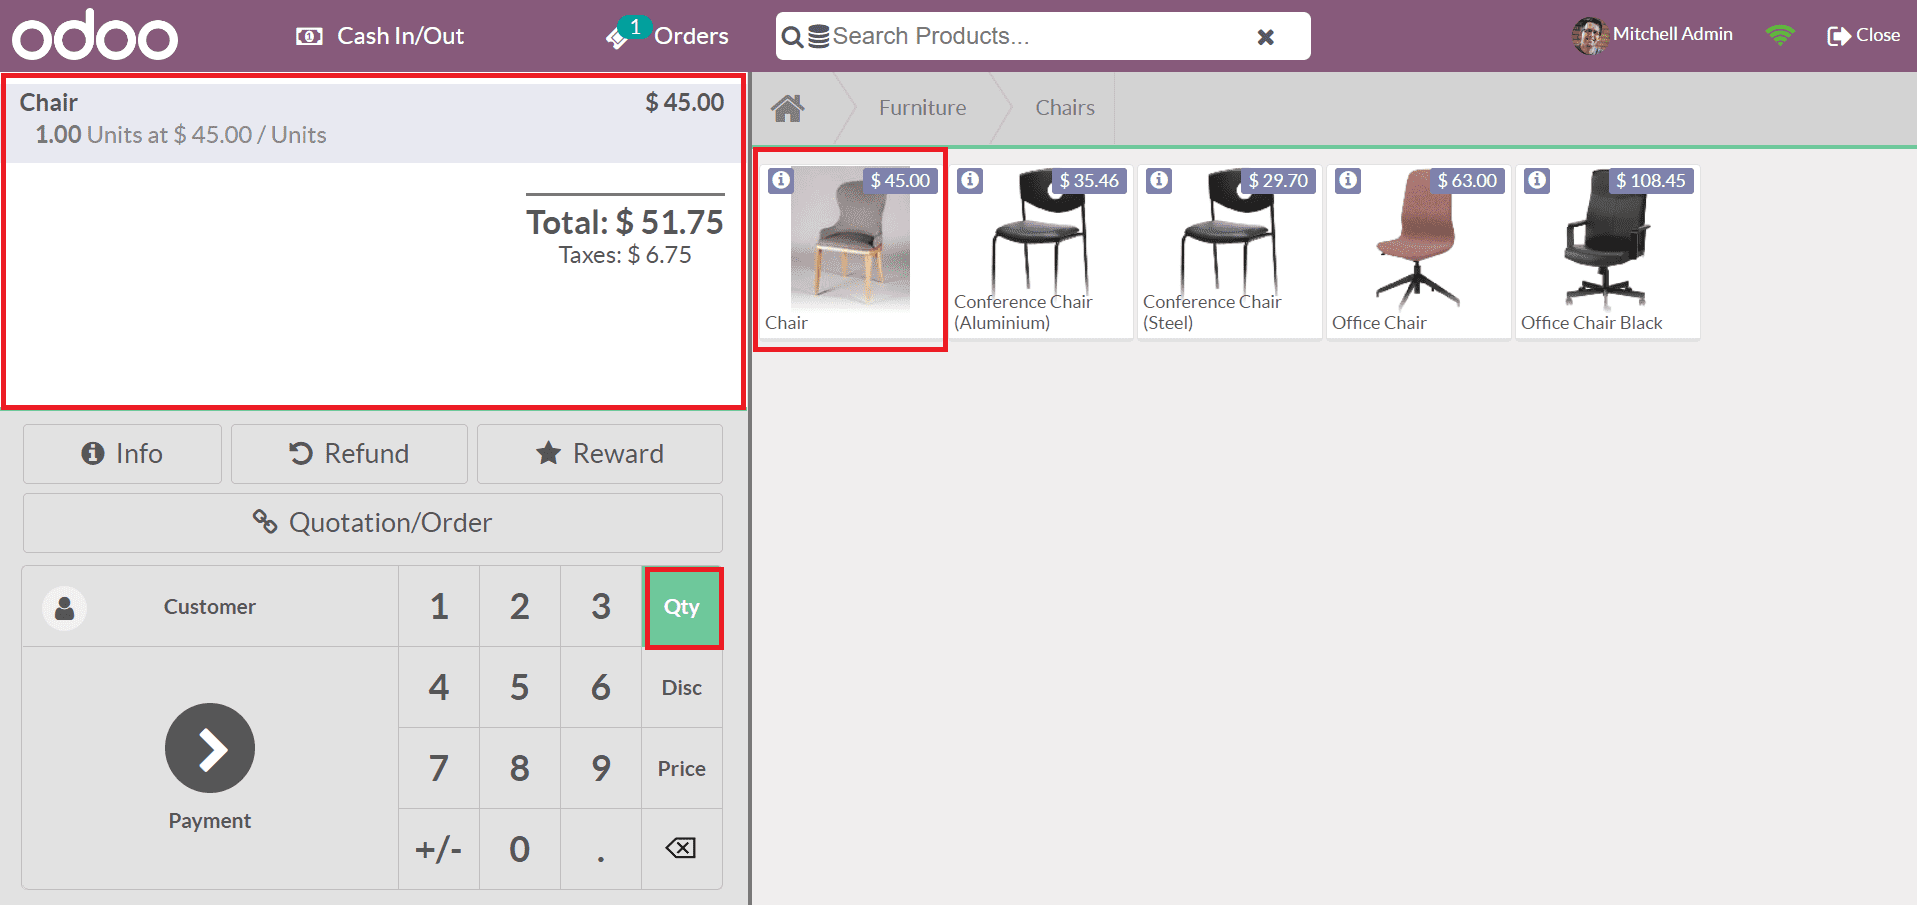
By clicking on the Qty icon, you can order more number of your products. After clicking on five on the keyboard, the cost of five units of a chair is viewable to you.
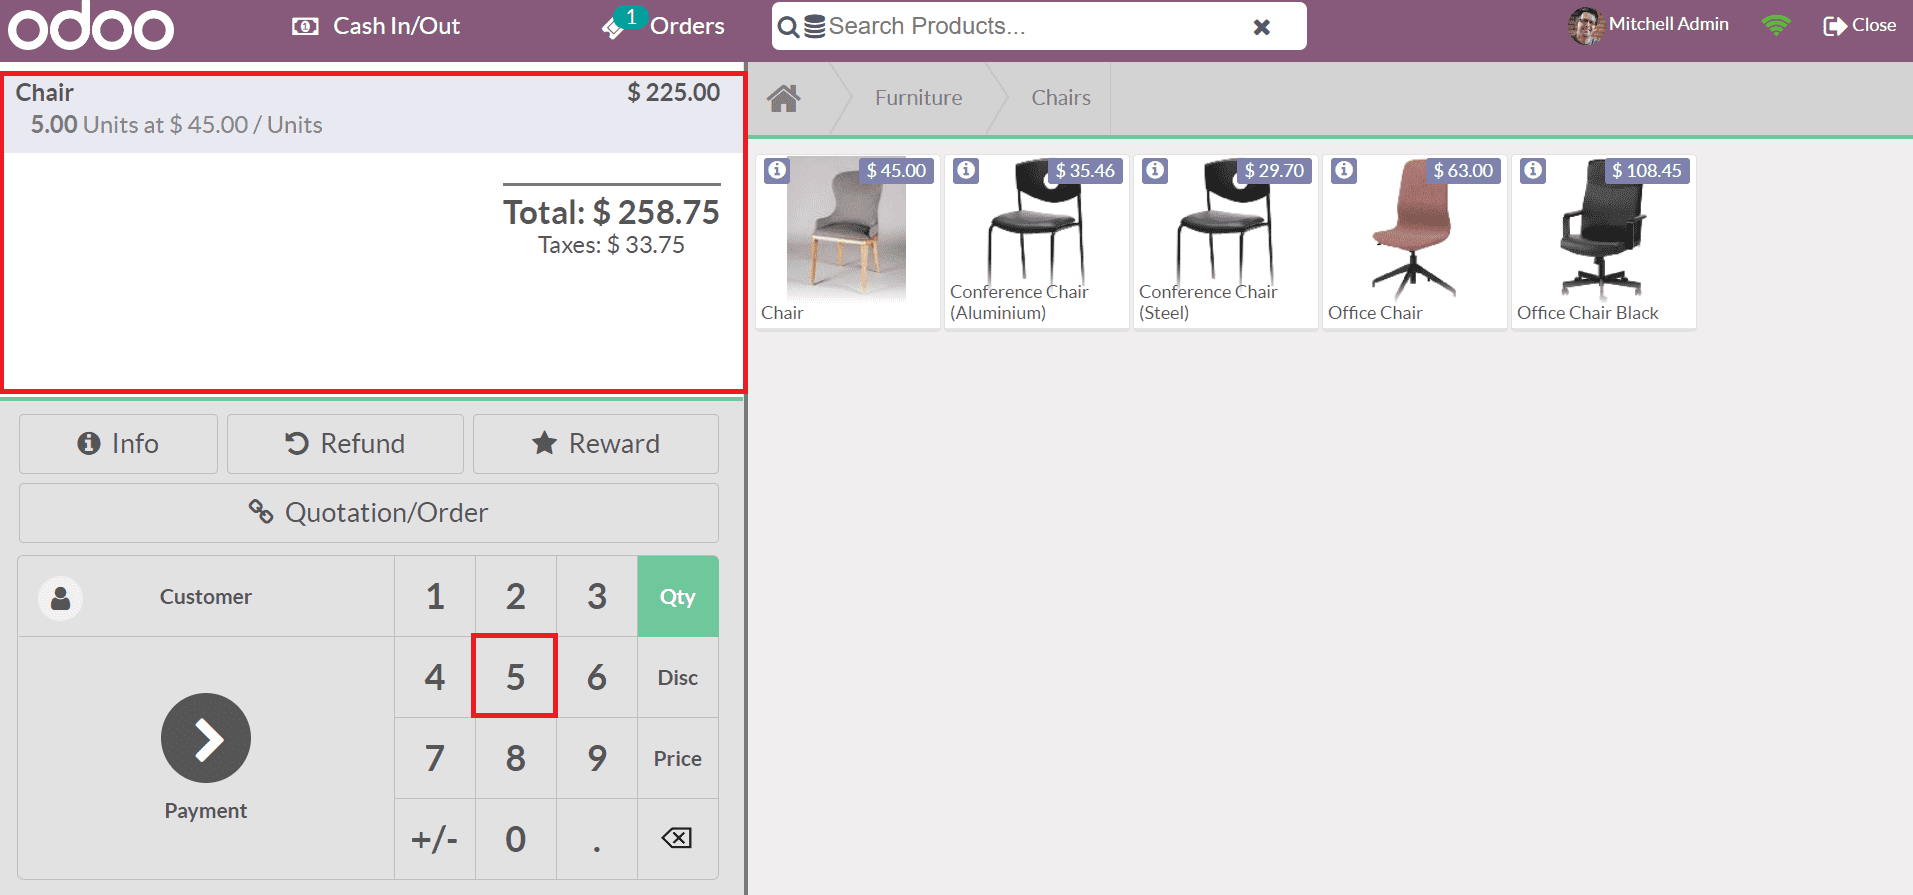
Users can also add a discount for the product by selecting the Disc icon on the keyboard, and a specific discount percentage is applied to your ordered item.
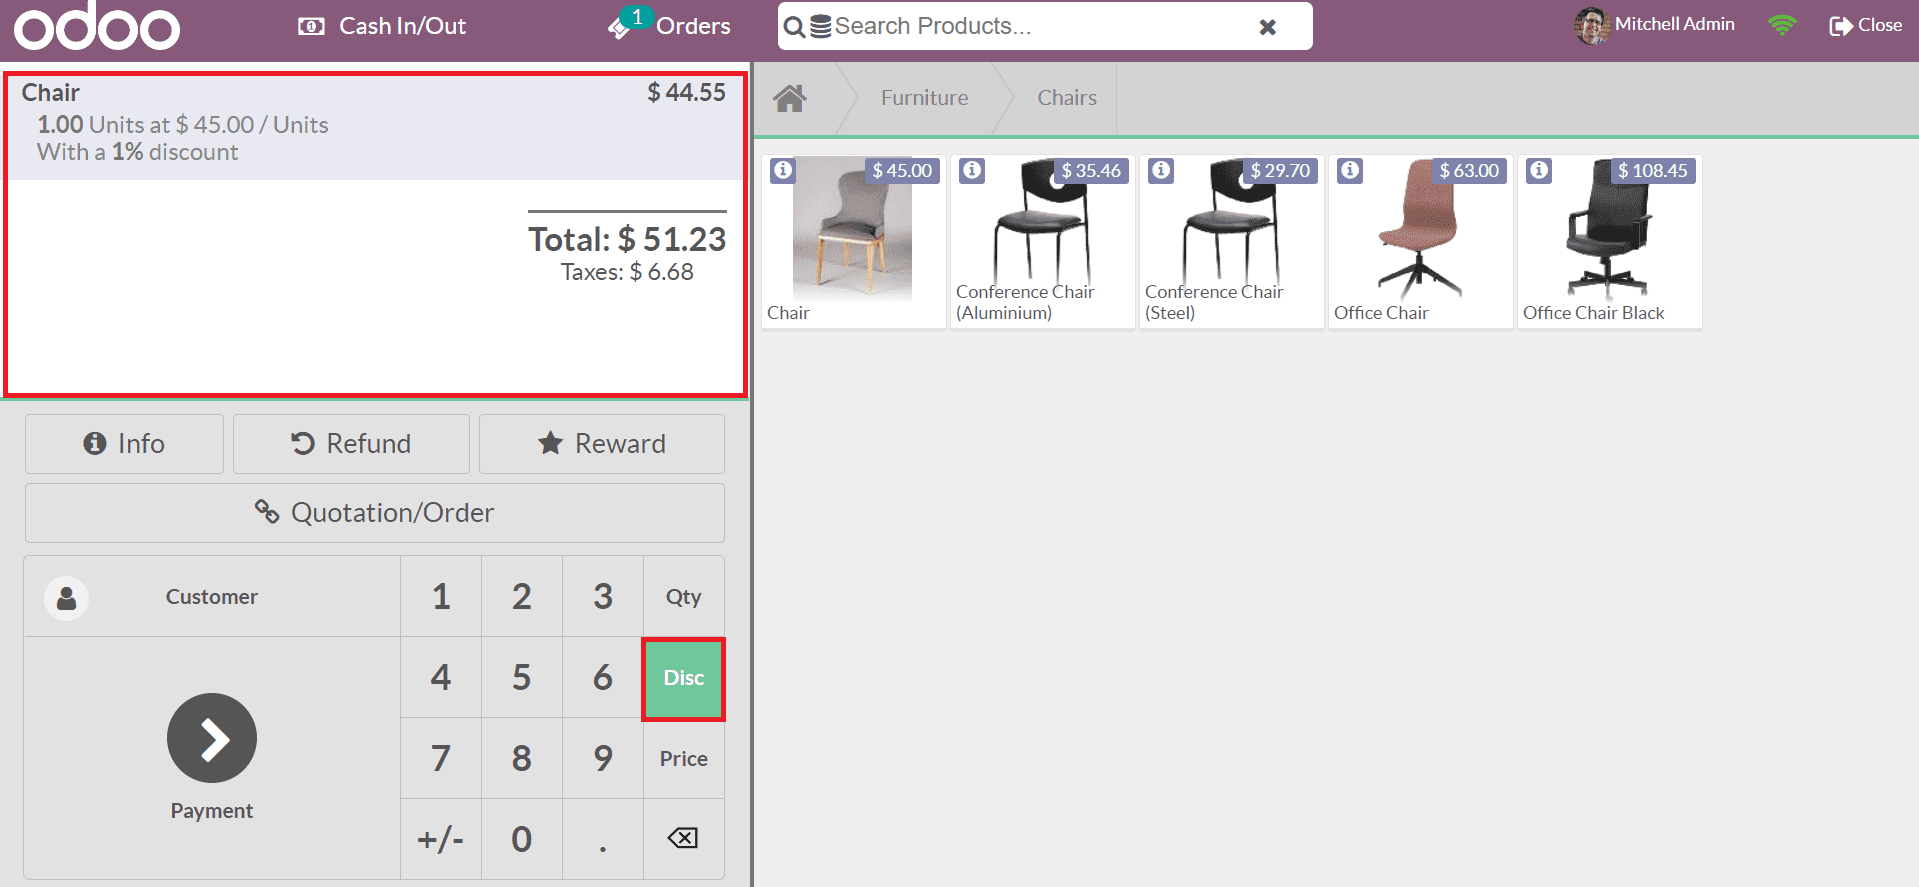
Here, we added a discount of 1% for the one unit of a chair with a price of $45, as shown in the above screenshot. Click the Payment option to continue with your order. On the Payment page, you can see the created payment methods such as Cash, Ayden, and Bank, as indicated in the screenshot below.
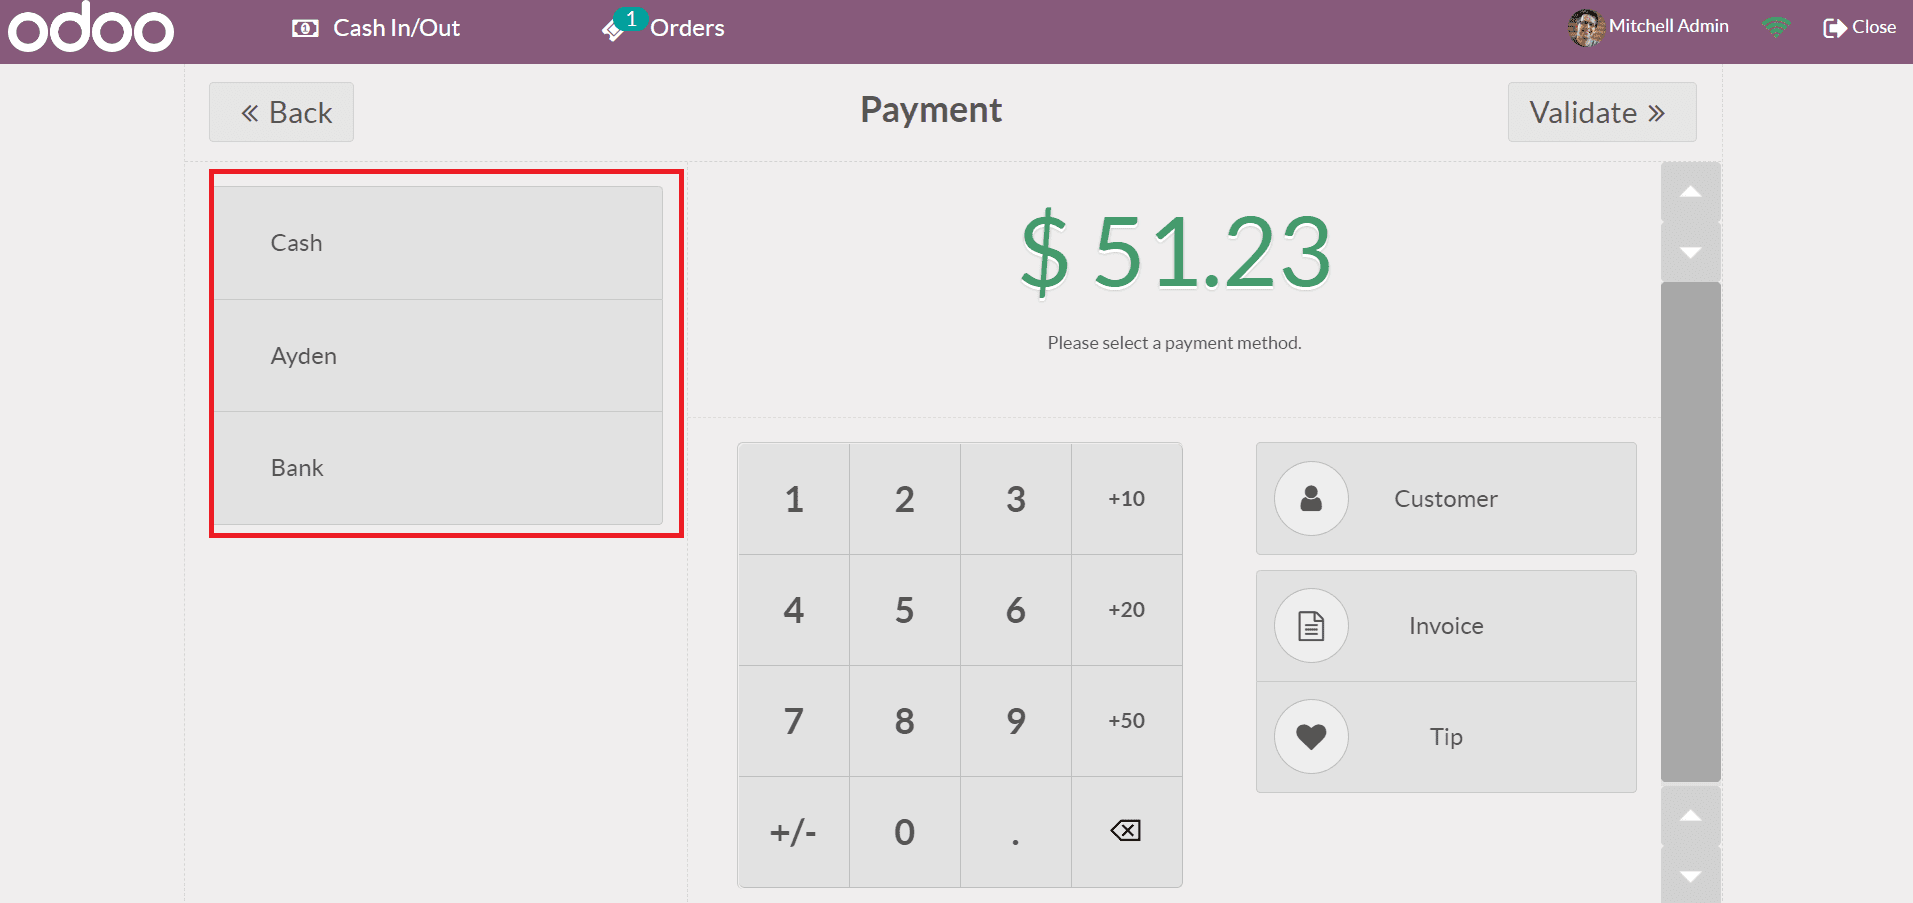
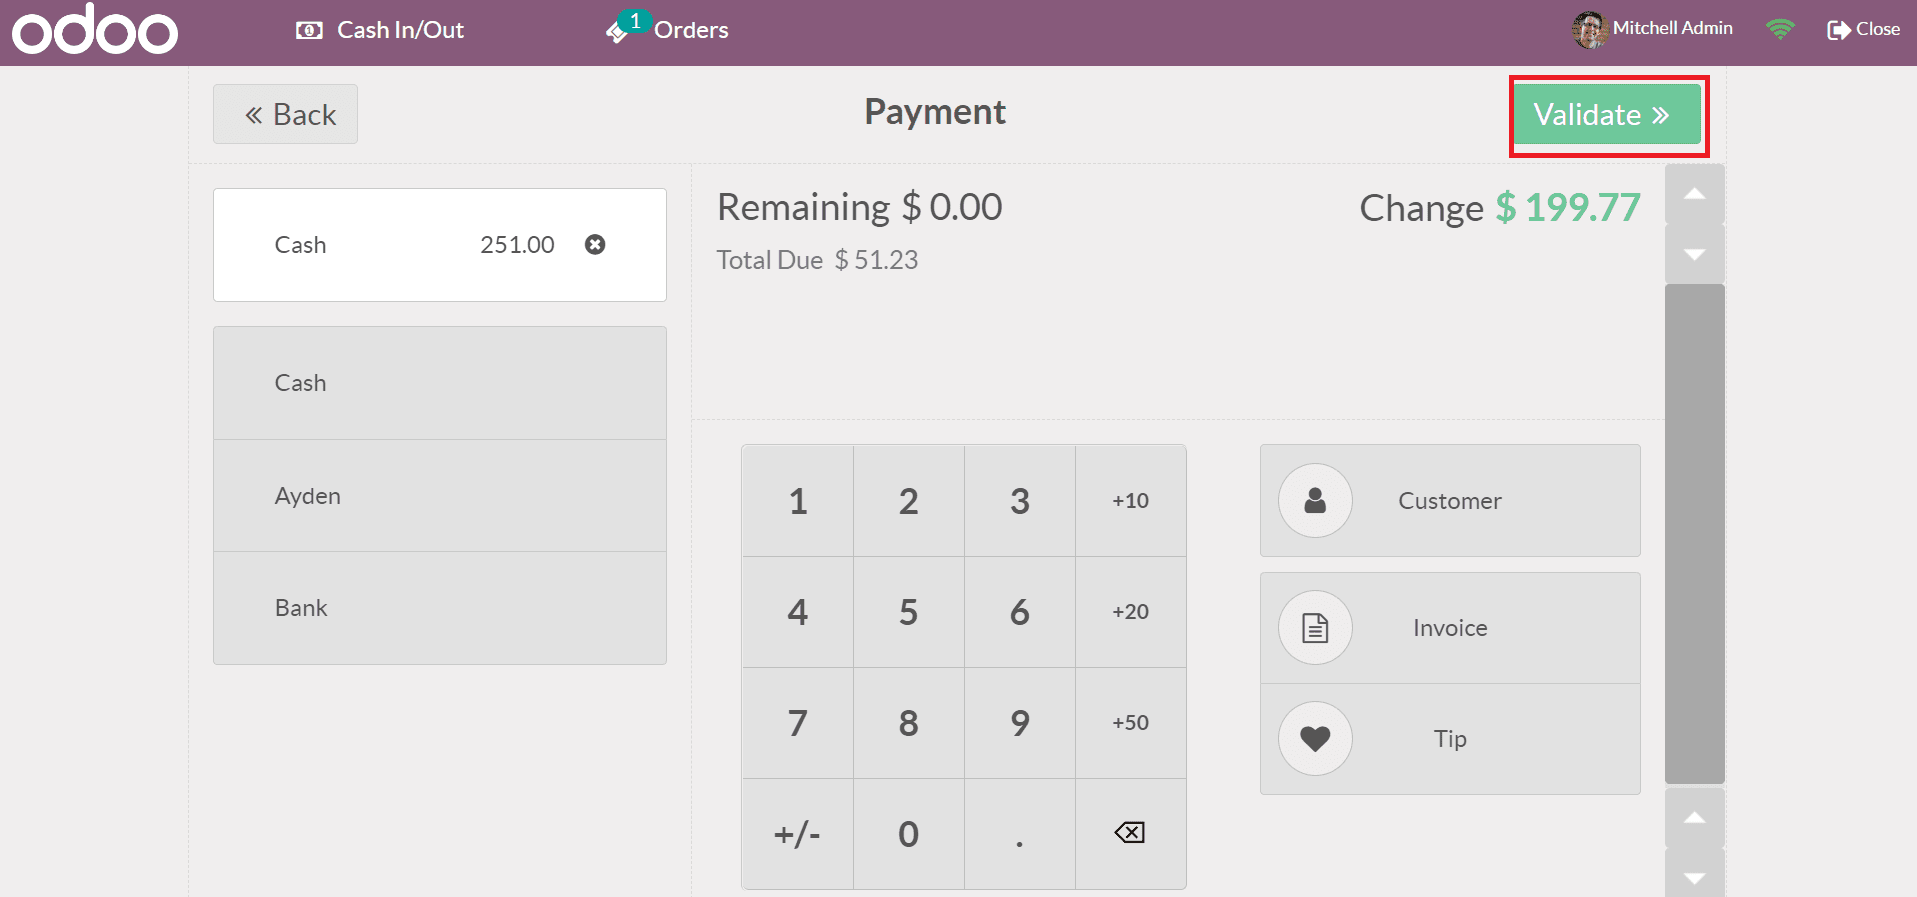
We are paying for the product through the cash method and click the Validate icon after selecting your cash.
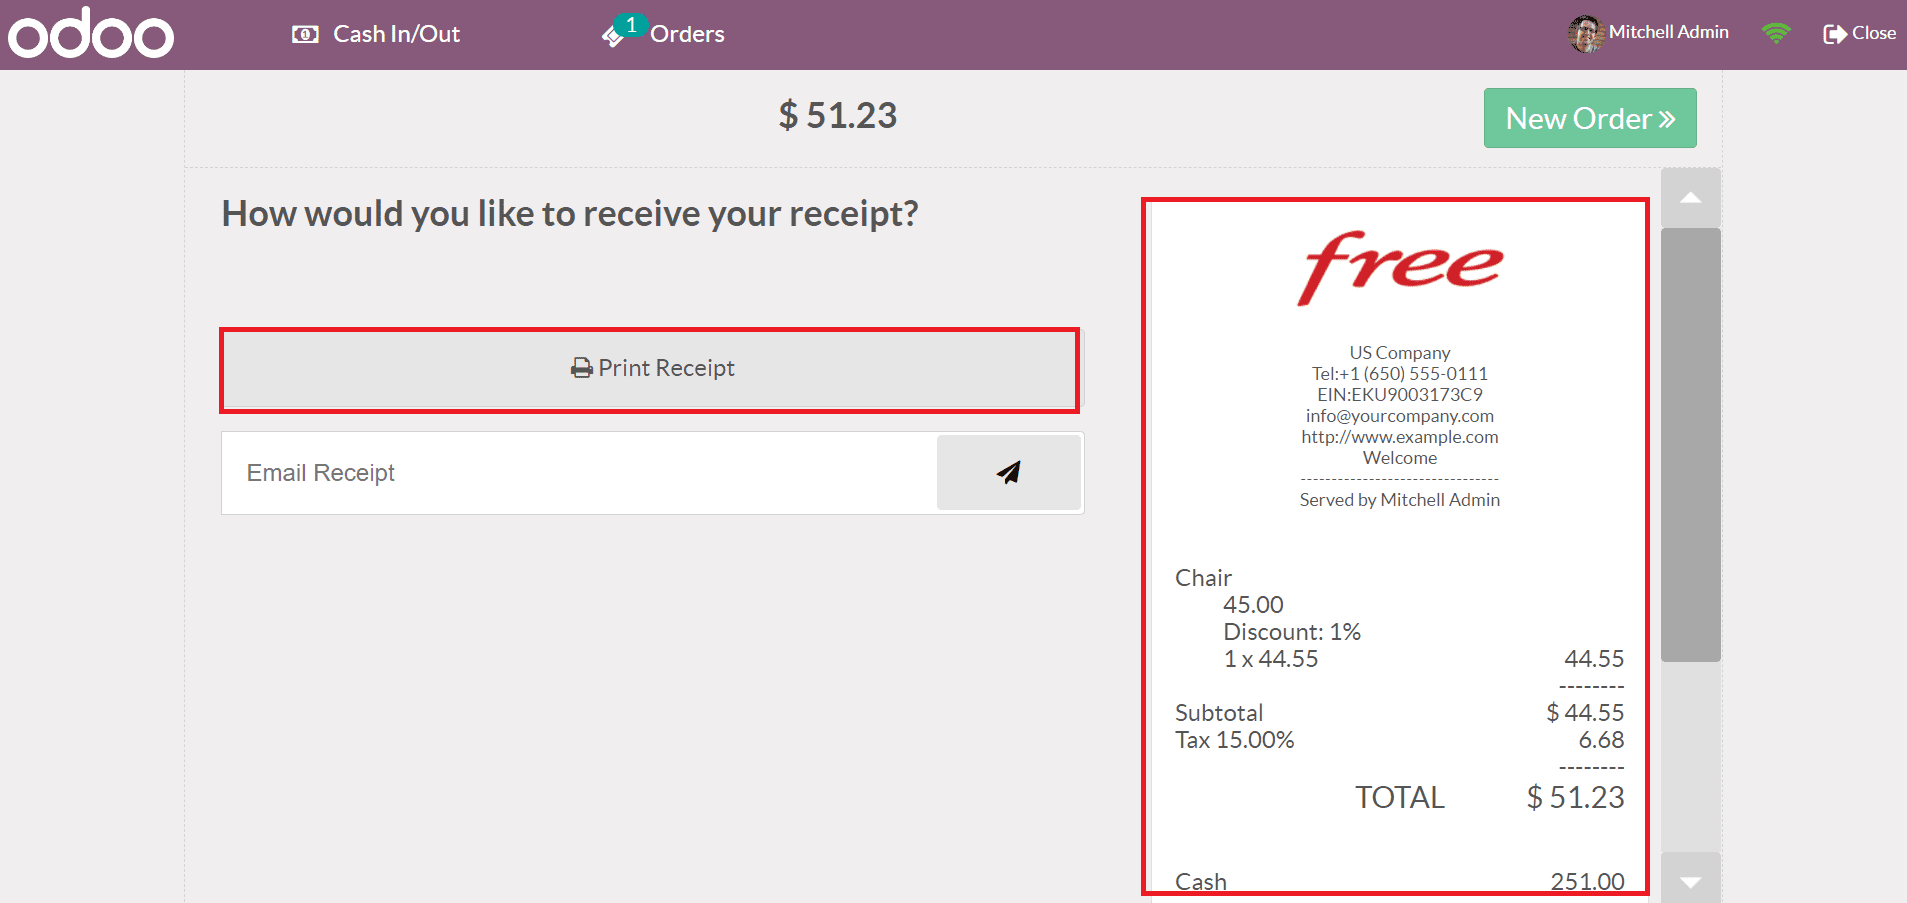
After validation, the customer gets a receipt, and it is easy to download the document by clicking on the Print Receipt icon as presented in the screenshot below.
Hence, you can manage multiple orders inside a PoS Session.
Odoo 15 Point of Sales module is beneficial for retail management. Users can create the PoS session and manage product categories or payments within the Odoo 15. Refer to the given below link to know more about Odoo 15 PoS


