Recruitment is one of the company activities associated with various organizational works and follow-ups. The recruitment management team is in quite a stressful stage to manage the recruiting process without the aid of software that deals with the recruiting procedures. Odoo HR facilitates a company’s overall recruiting process and makes it very easy to manage, apart from conventional recruitment procedures.
Odoo’s Recruitment module makes it possible for you to receive applications from a multitude of sources, facilitating the collection and cleverly choosing the candidate data. By examining the application, one can easily assess the source from which the candidate originates, thus optimizing the recruitment budget accordingly. Also, it enables you to monitor and follow up on submitted applications.
[wpcc-iframe loading=”lazy” width=”100%” height=”315″ src=”https://www.youtube.com/embed/SGGTmnlzNXM” frameborder=”0″ allow=”accelerometer; autoplay; encrypted-media; gyroscope; picture-in-picture” allowfullscreen=””]
Initially, we have to install the “Recruitment” module.
Open the recruitment module after installing the module, then the page of ‘Job Positions’ will be visible. There we can see all the job vacancies we are recruiting for.
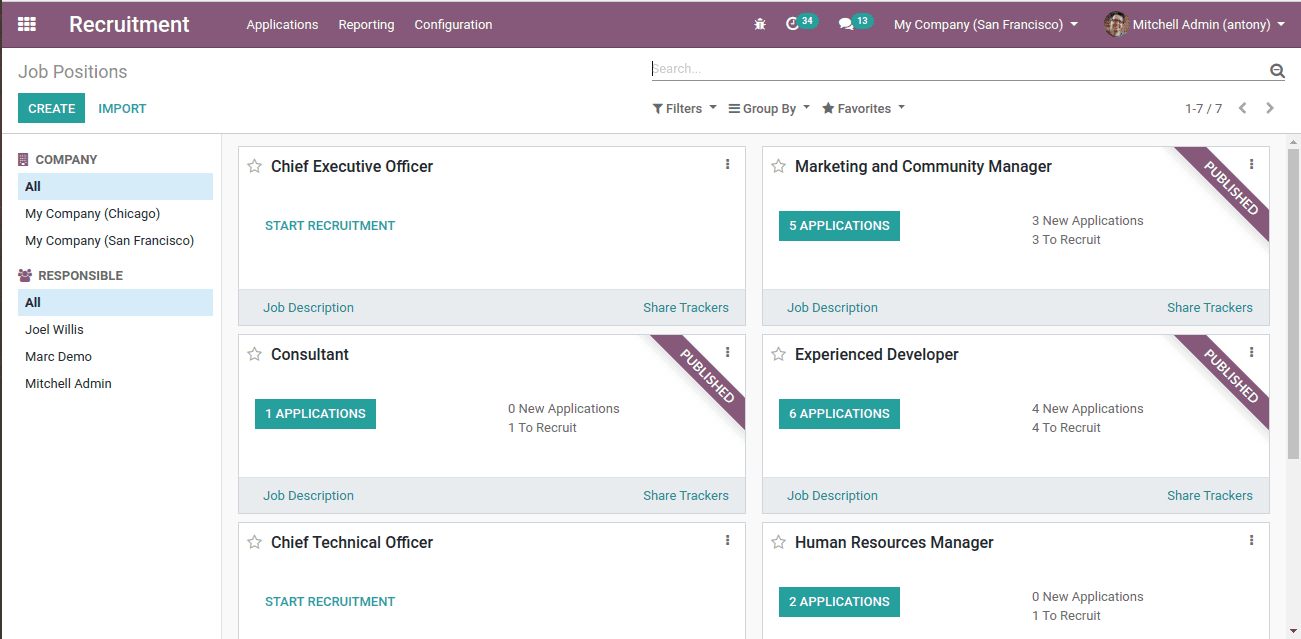
All the job positions can be seen here. Also, the job positions that are published on the website have ribbons named ‘Published’.
Here we have a “Create” button to create a job position. Or else, go to Recruitment > Configuration > Job Positions > Create
When we create job positions from the recruitment overview, we get a pop-up window.
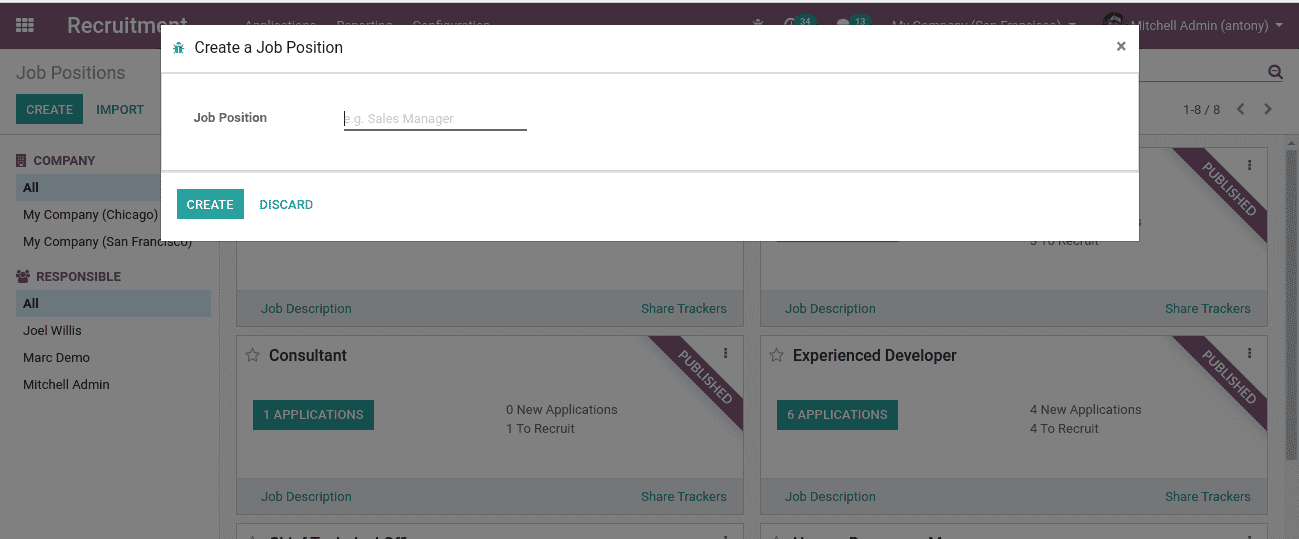
Here we can add the “Job Position” and click on “Create”.
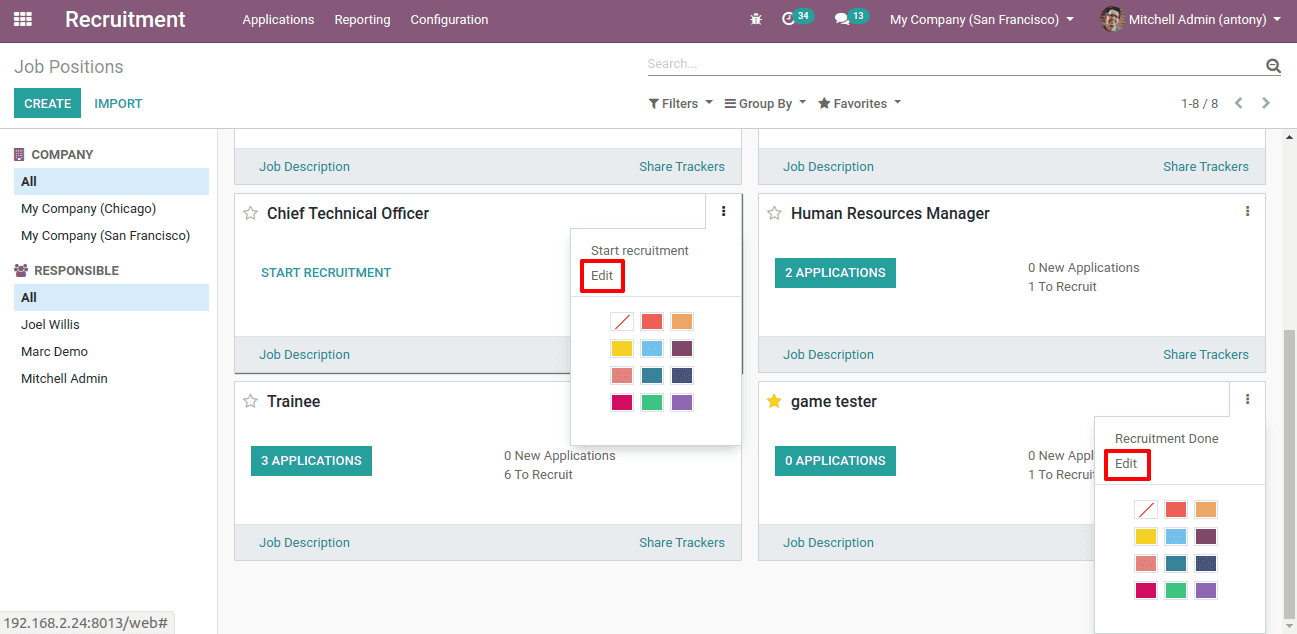
Then the Job Position will be created, after that, we have to edit and enter all other details by clicking on the edit button.
In other cases, if we go to configuration and create the Job Position, we will get the form to Create Job Position.
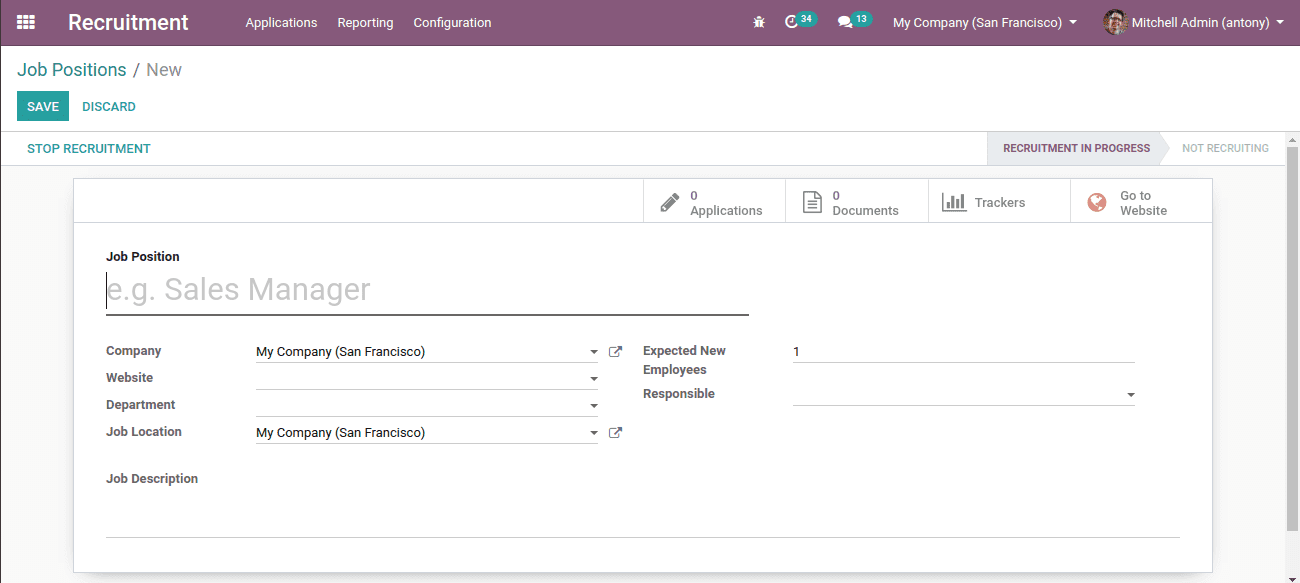
Here we shall add,
1. Job Position: Here we have to mention the name of the job position.
2. Company: We shall mention the company for which the job position is made.
3. Department: Mention the department under which the job position comes.
4. Job Location: We shall mention the job location.
5. Expected new employees: Here we shall mention how many vacancies are there for this job position
6. Interview form: Here we can add the interview form
7. Responsible: We shall mention the responsible person for this job position, mostly HR.
Then we shall click the “Save” button.
Now we shall see the status of the Job position as ‘Recruitment in progress’.
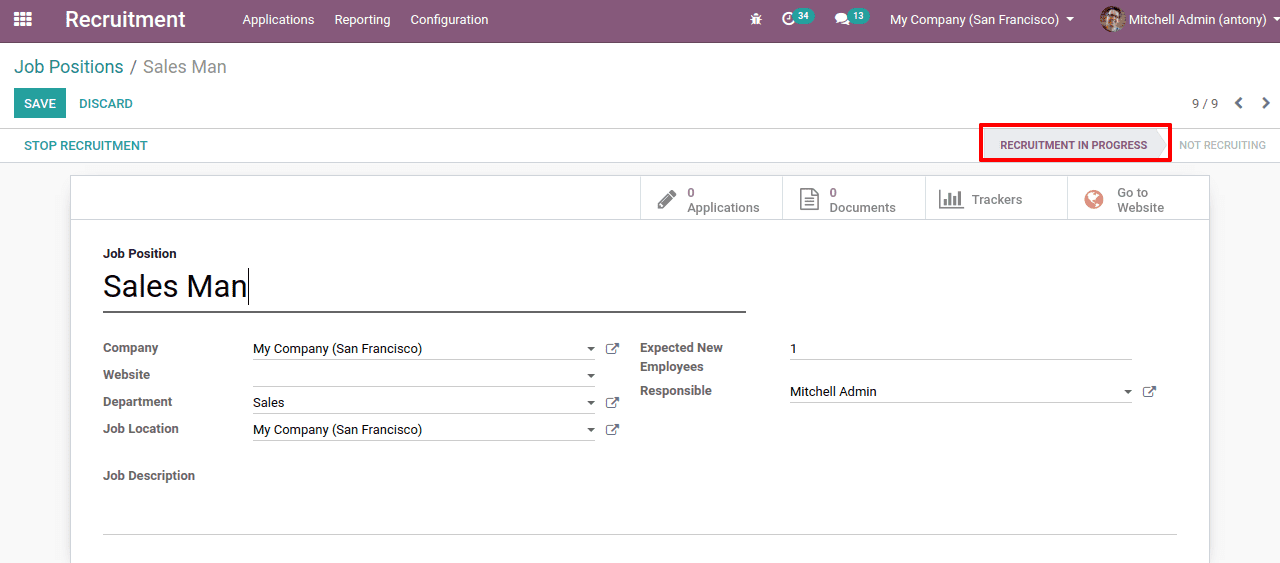
Here we can close the recruitment for the job position by clicking on the “Recruitment Done”.
We can edit the job position by clicking on “Edit” here.
By clicking on the “Interview form” we can directly go to the interview form.
How to publish the job position on the website?
For that click the smart button of “Go to website”
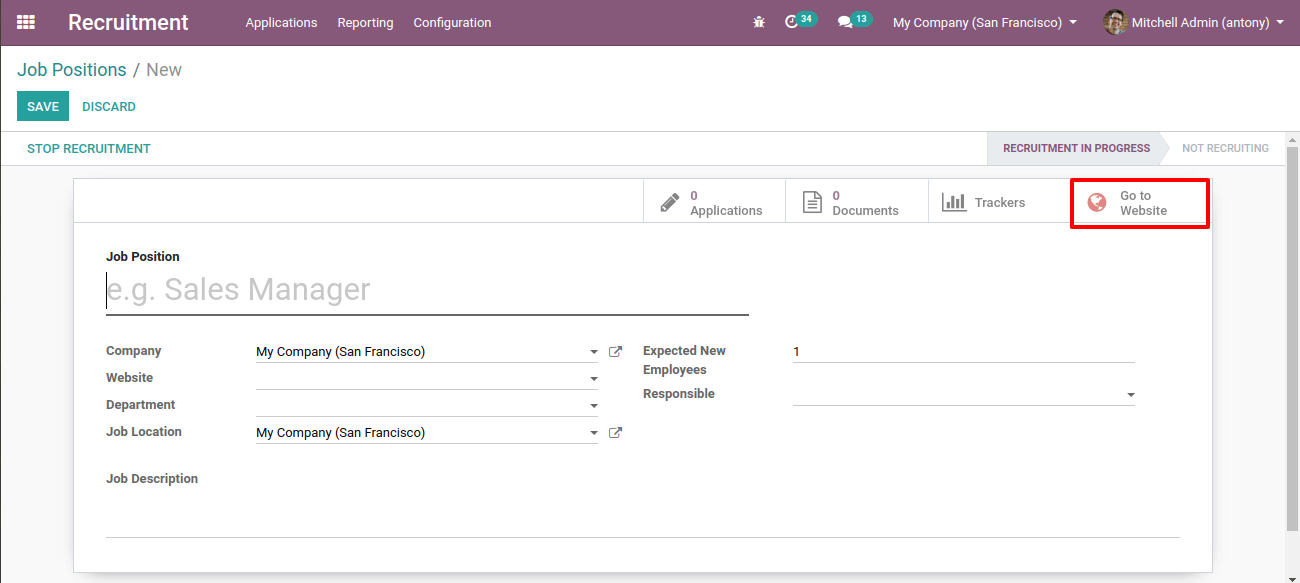
Then we will be redirected to the website. There we shall click on “publish”.
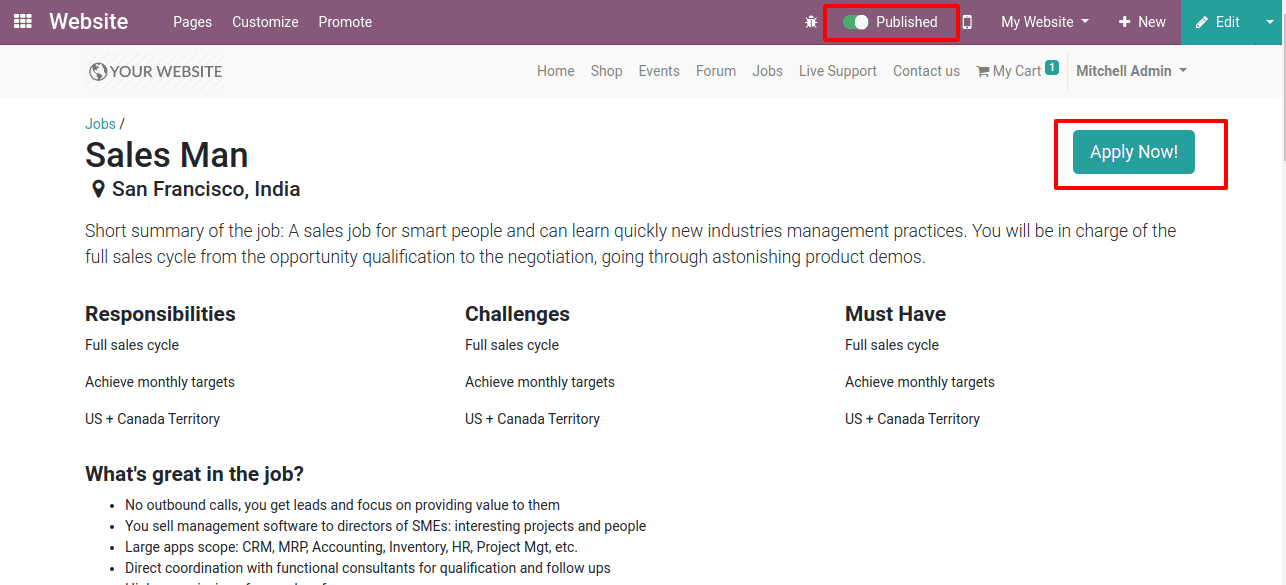
Then the job position is published on the website.
Now by clicking on the “Apply Now” we can apply for the job from the website.
Then we will get a job application form. We shall fill it and click the “Submit” button.
Here we can upload the resume also as a document.
When the application is submitted we can see it in the job position we have created.
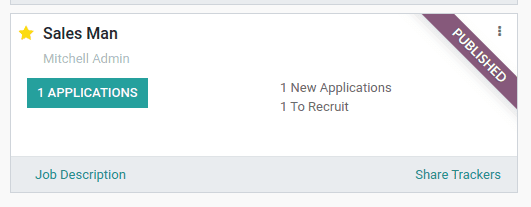
Here we can see 1 application has come. A ribbon of published can be seen.
We shall open it, by clicking on the “Application” button.

This is the view of the application received.
Here we can see different stages of the recruitment process. We can drag and drop the application to different stages here.
How to configure the recruitment stages?
For that go to configuration > stages

Here we can see all the stages. We have a “create” button here, so from here we can create stages.
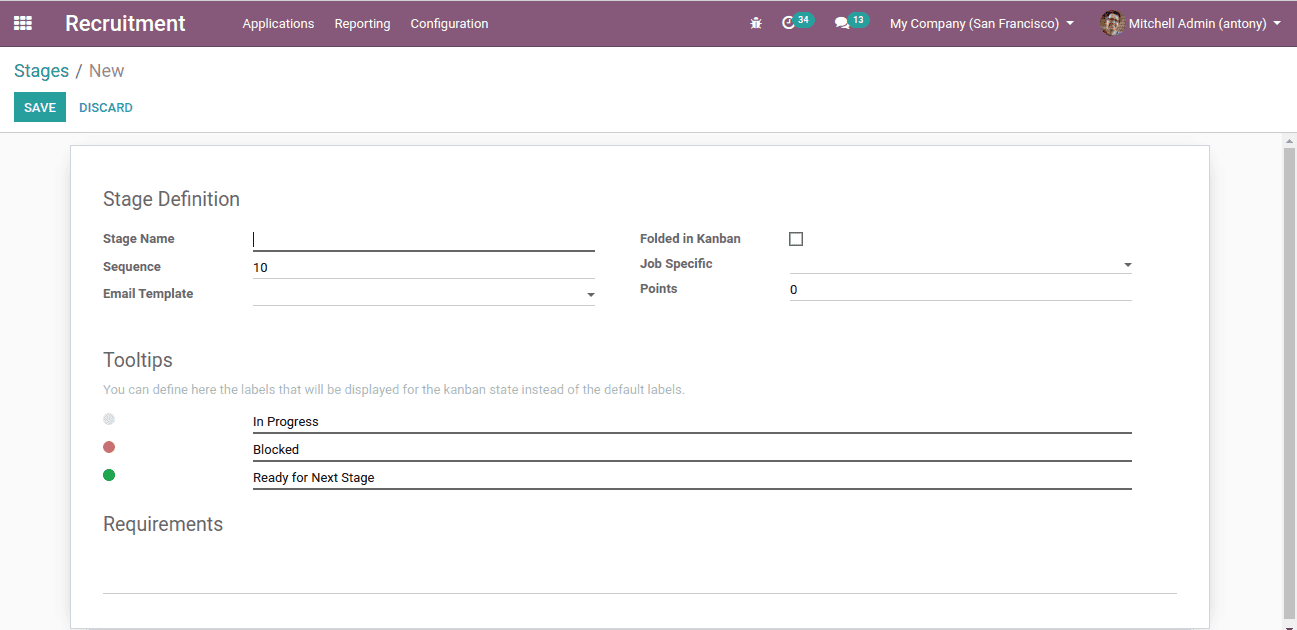
This is the form to create the stages.
Stage name: Here we shall give the stage name
Sequence: Sequence order shall give while there is a list of stages
Job-specific: Some special jobs that use this stage
Folded in Kanban: If we tick this stage will be folded or hid.
Email template: If we set an email template here when the application comes to this stage an email will be sent to the applicant.
Now when we open the application we can see many options there.
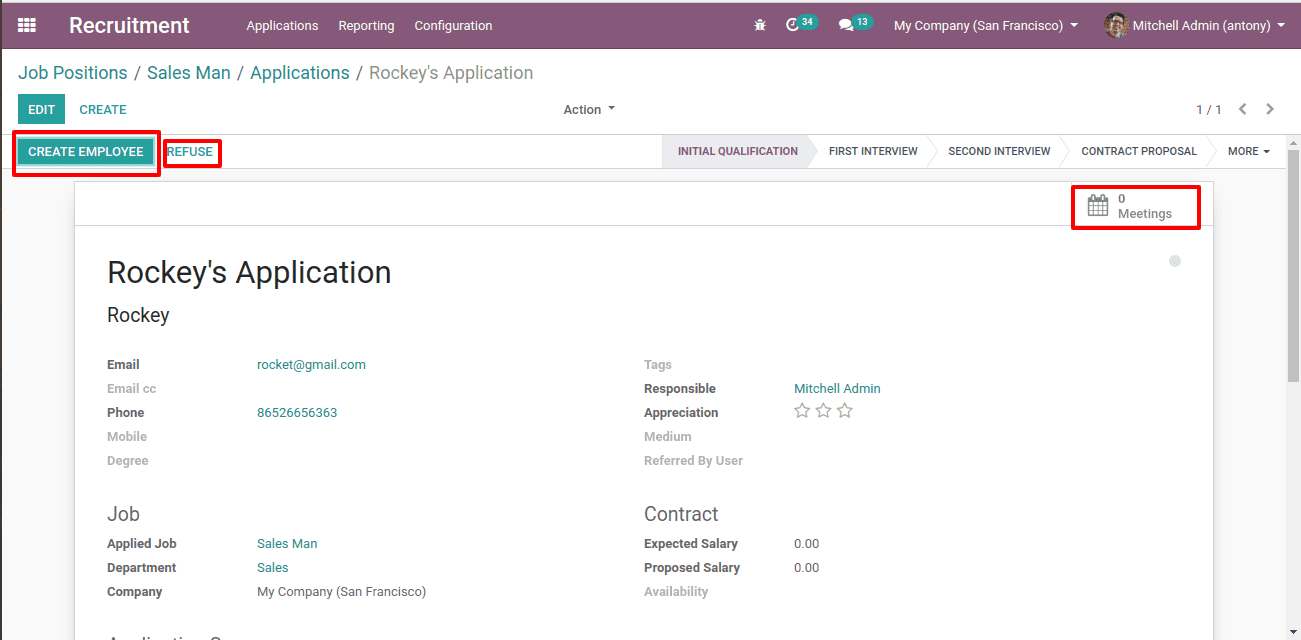
Here we can create the applicant as an employee by clicking on the “Creare Employee” button.
Or we have the “Refuse” button too to refuse the application directly from here.
Also, we have a smart button for “Meetings”. We can arrange a meeting with the applicant to conduct a face to face interview.
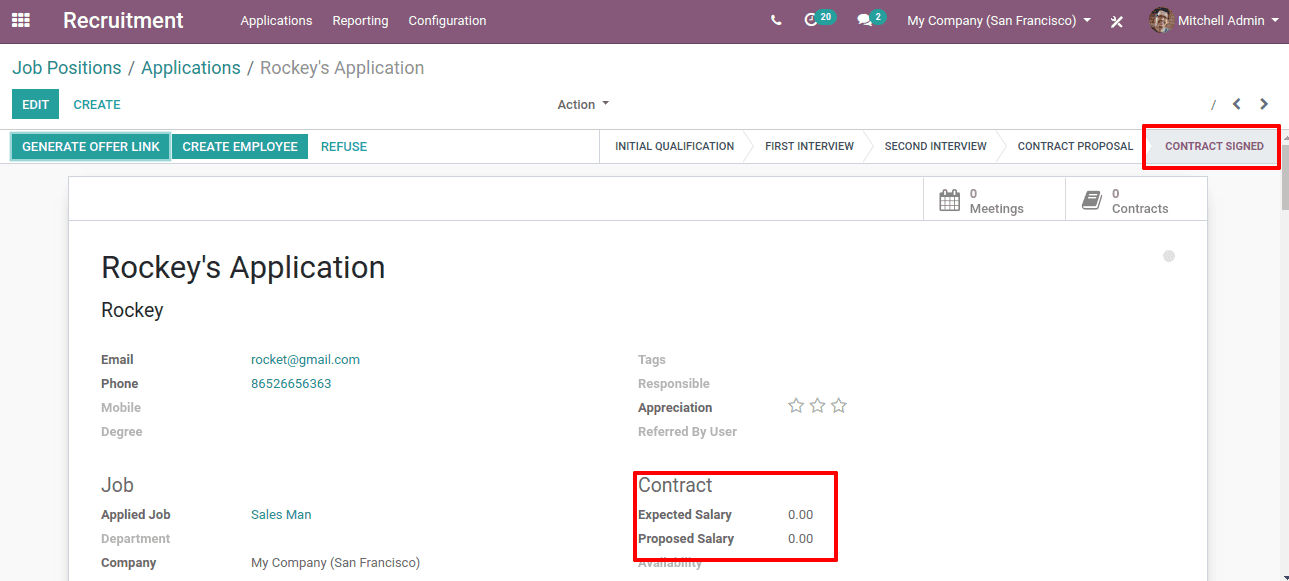
The company can sign a contract with the employee after the interviews. Then the application status will turn into “Contract signed”. The applicant’s expected and proposed salary also can be mentioned there.
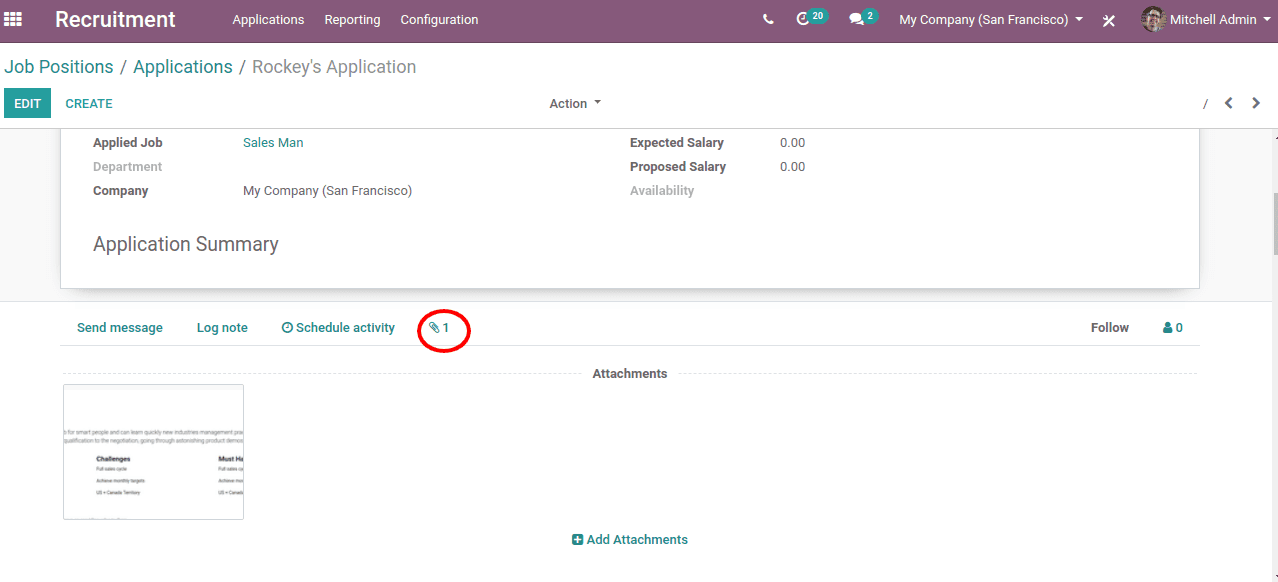
Also by clicking on the attachment option, we can see the attachment of the resume the applicant submitted.
Reporting
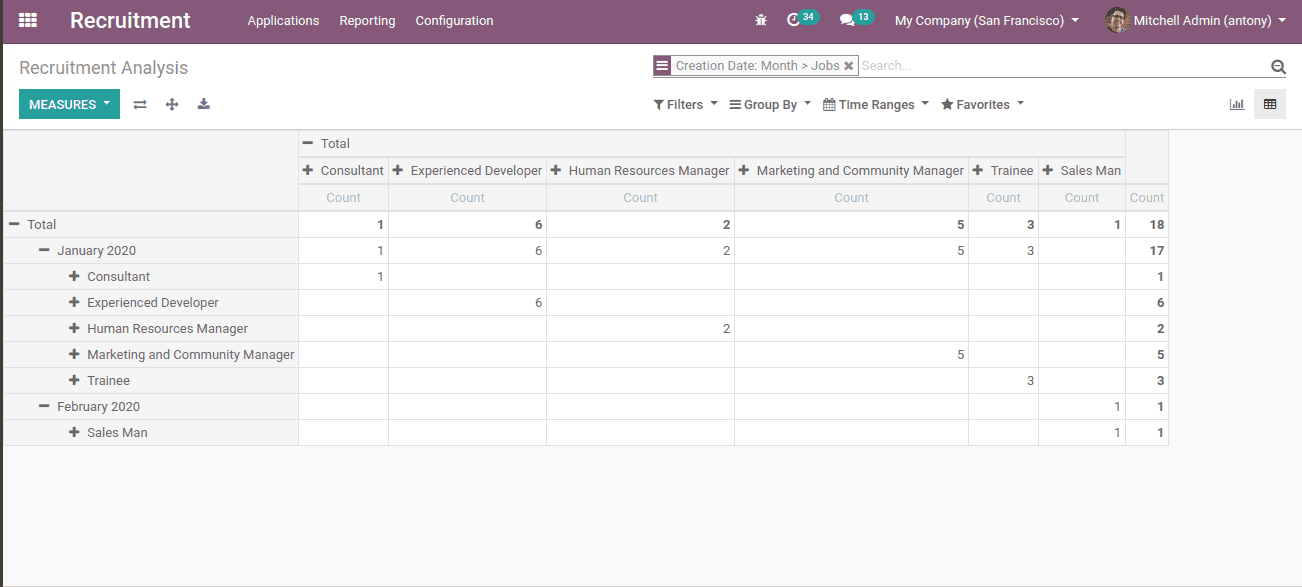
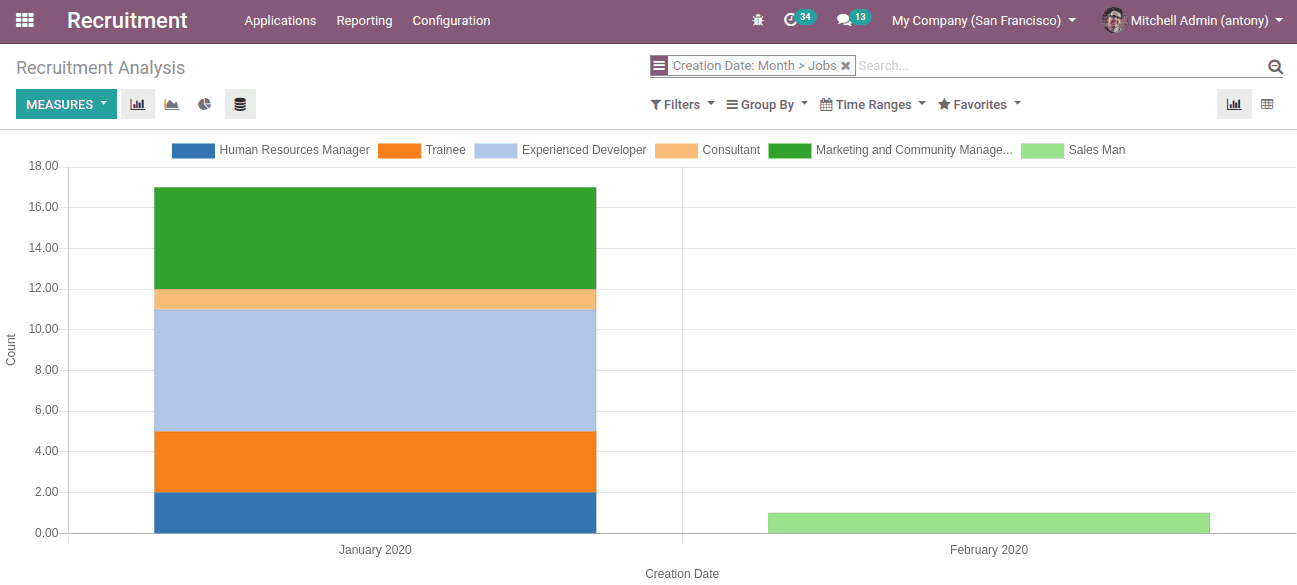
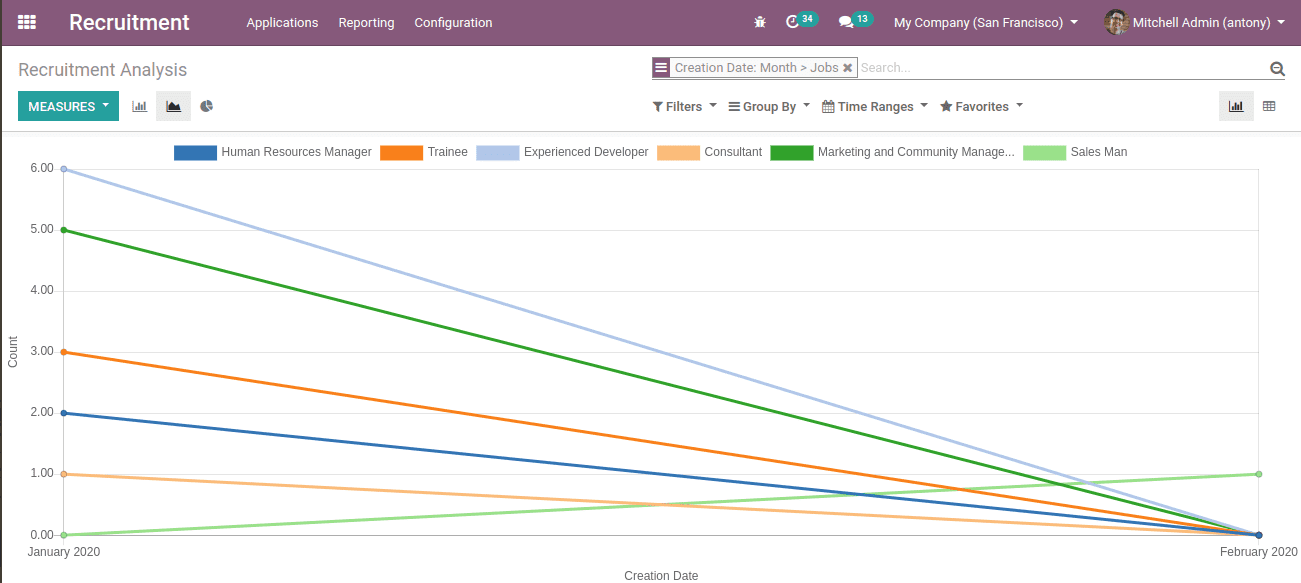
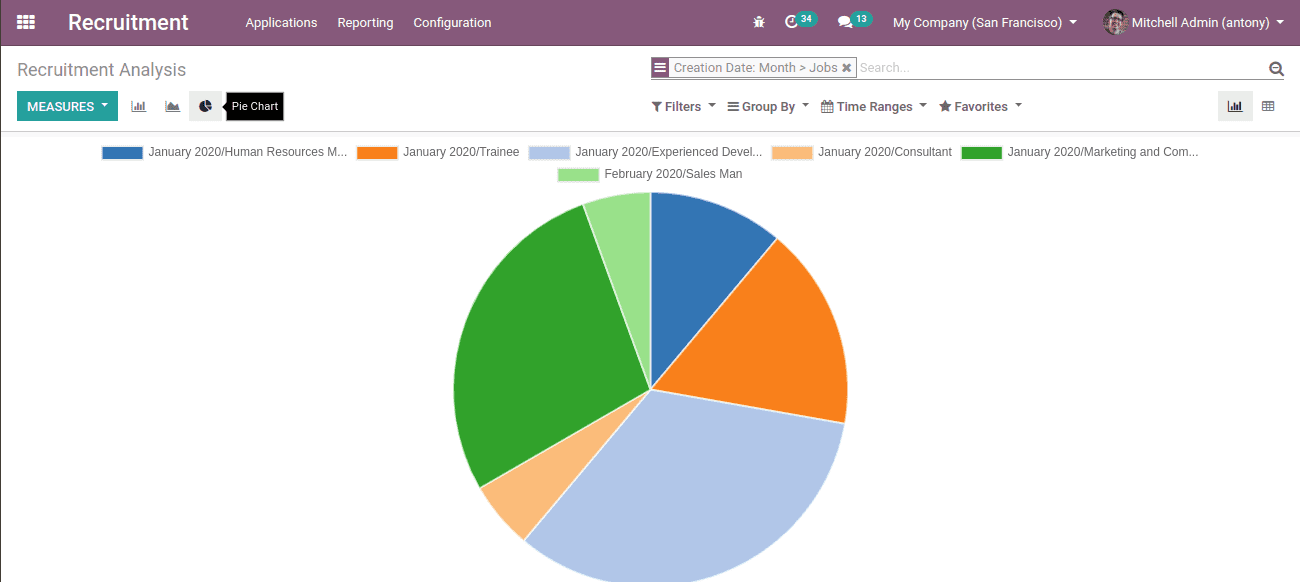
In reporting of recruitment, we can see various views of the recruitment analysis Recruitment > Reporting >Recruitment analysis
Here we have,
Pivot view
Bar chart
Pie chart
So, this is all about Recruitment management in Odoo 13.


