Odoo allows the end user to record the time spent by an employee over a project. Timesheet is a method of tracking employee working time. Utilizing this Timesheet feature in Odoo, one can easily analyze the employee working report, says the project-based working time and task-based working time.
Thus via tracking the working time, one can easily log into the activities of the employees and monitor their work progressions.
The feature triggers a quick overview of the time spent by an employee on tasks per day or per week. Simultaneously, the manager can monitor the employee based on the time spent on task and project.
While analyzing the timesheet, the end user gets to know about billable hours, billable amount, unvoiced amount and so forth.
Now, Let’s see how Odoo helps with Timesheet:
Prior to start, Install Time Sheets module from Odoo database.
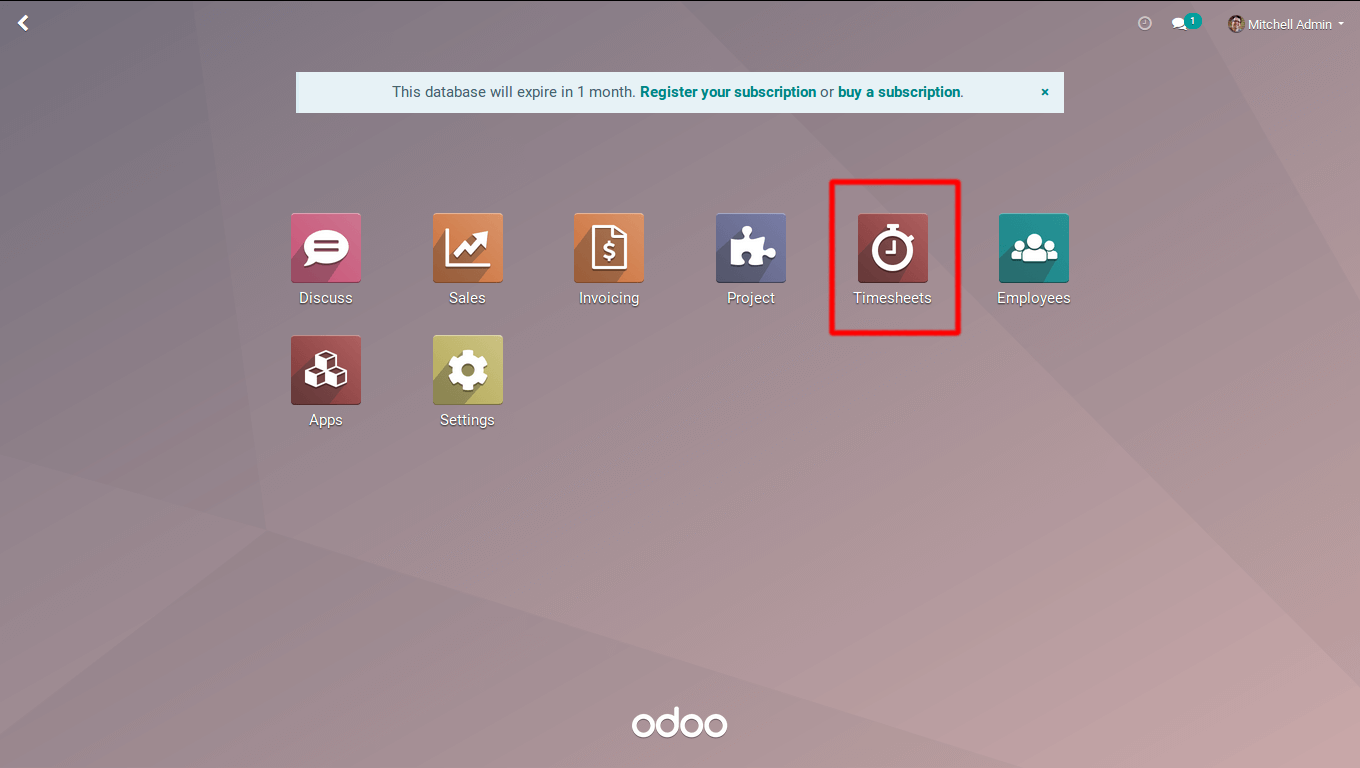
The functionality of the Timesheets comes under Project, Employees and HR module. Since Timesheets are created based on project, task, and leaves, one can also add timesheet cost for each employee.
Under Project Module, one can add timesheets for the projects and tasks. Let’s see how it works in the project module:
Go to -> Project module.
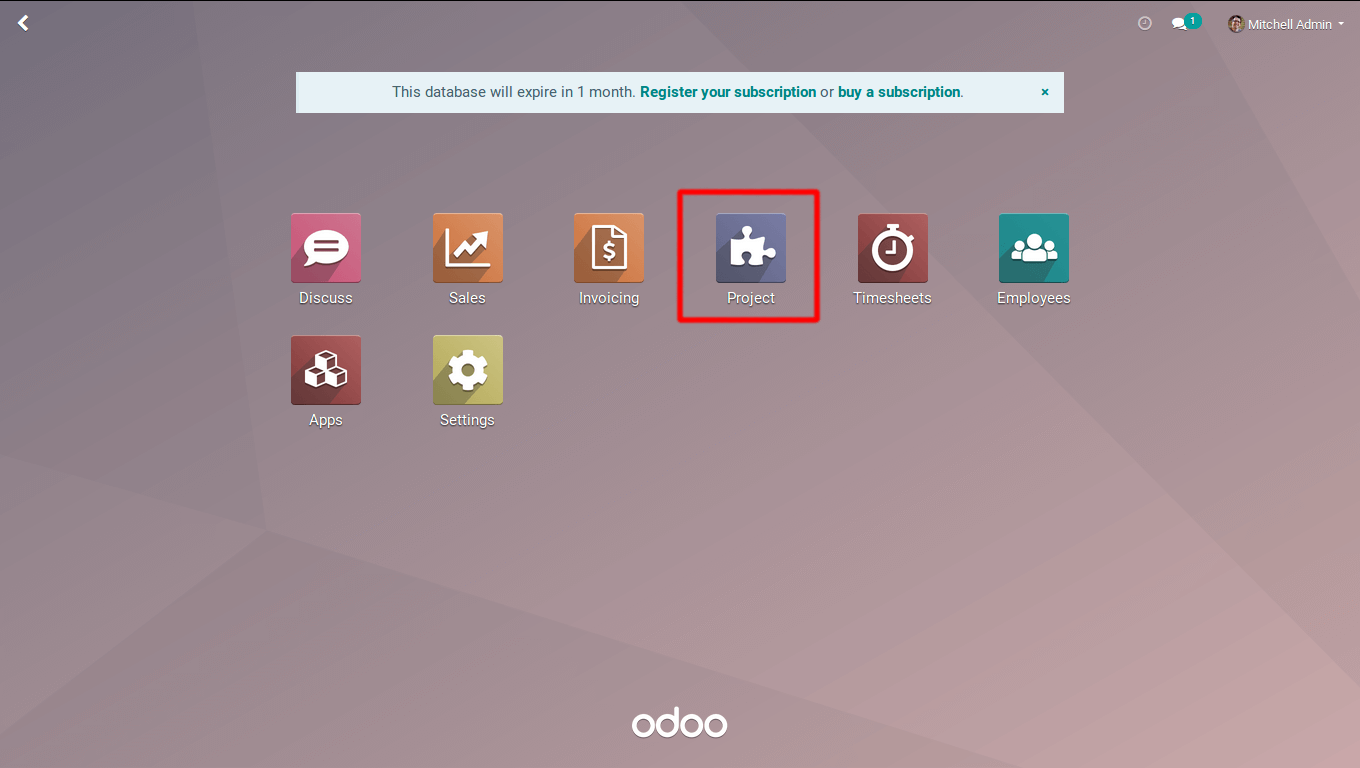
Firstly, create a new project. In order to create a new one, click on the CREATE button.
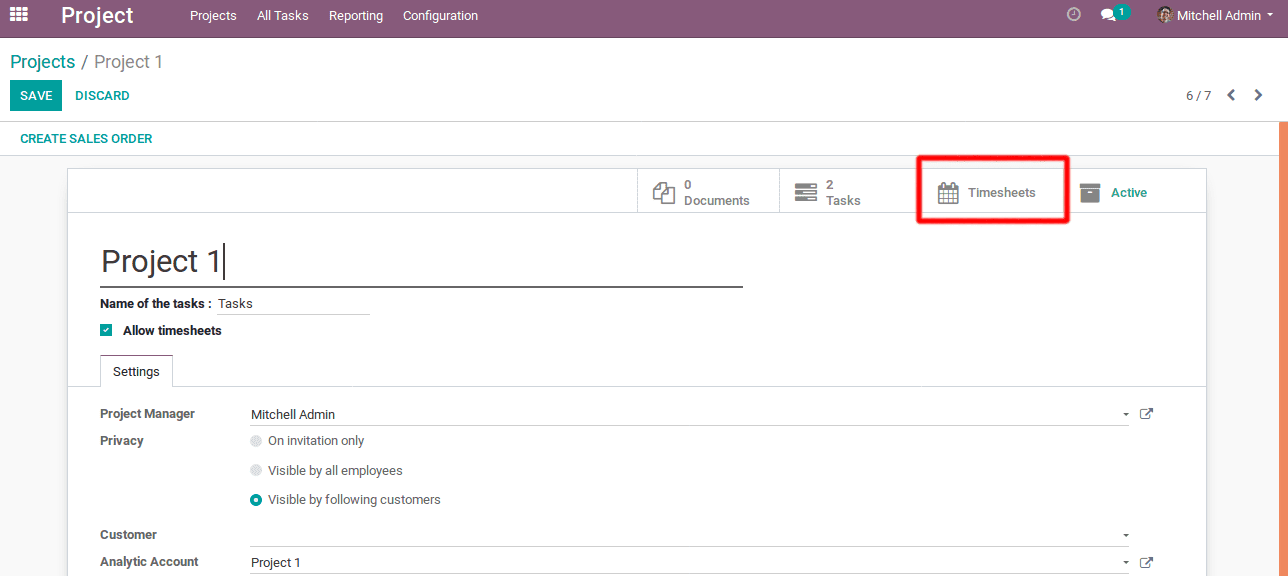
Here, one can assign a name for the project. Later check for Allow timesheets. Then only one can add the timesheets for the specific project and the tasks coming under the project. Now Click on create button to create Project 1.
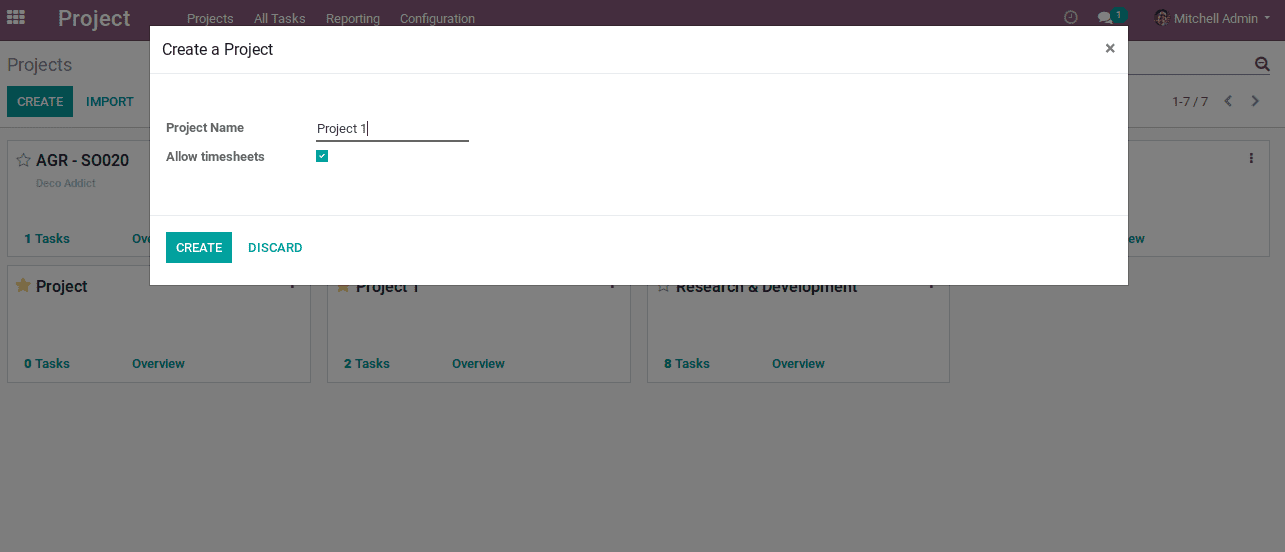
Project 1 is created. Now, the end user can add timesheets for Project1.
One can see a smart button Timesheets under project 1. Go to Project1 -> edit.
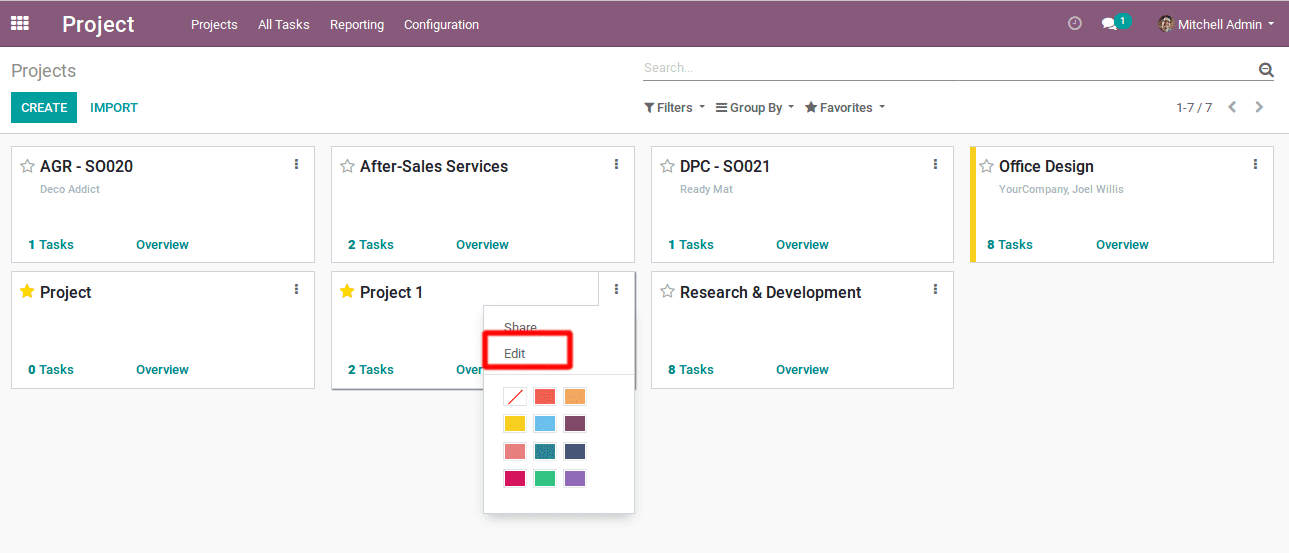
Here, one can see a smart button titled Timesheets. Click on the Timesheets in order to view and create timesheets.
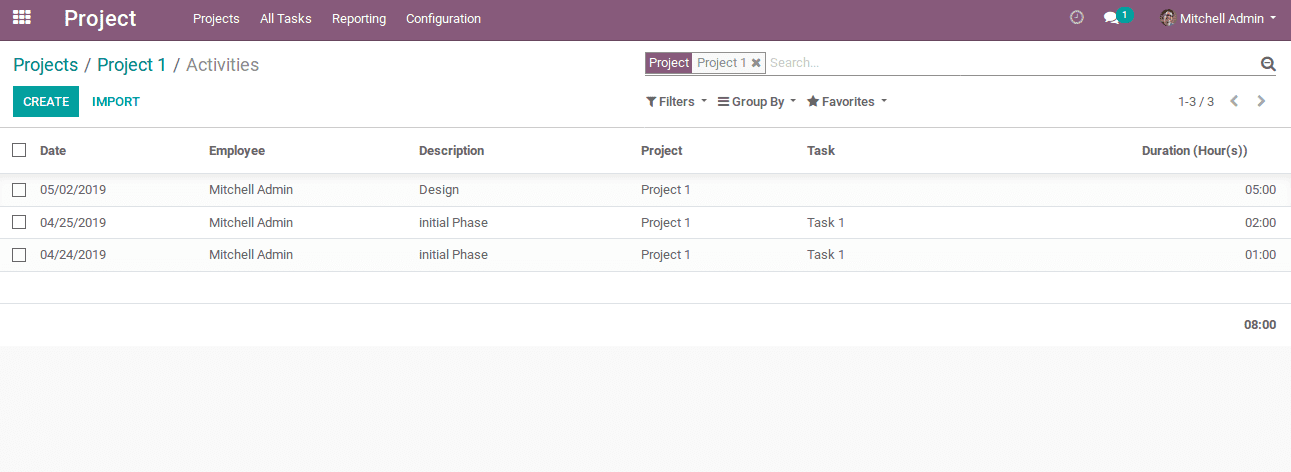
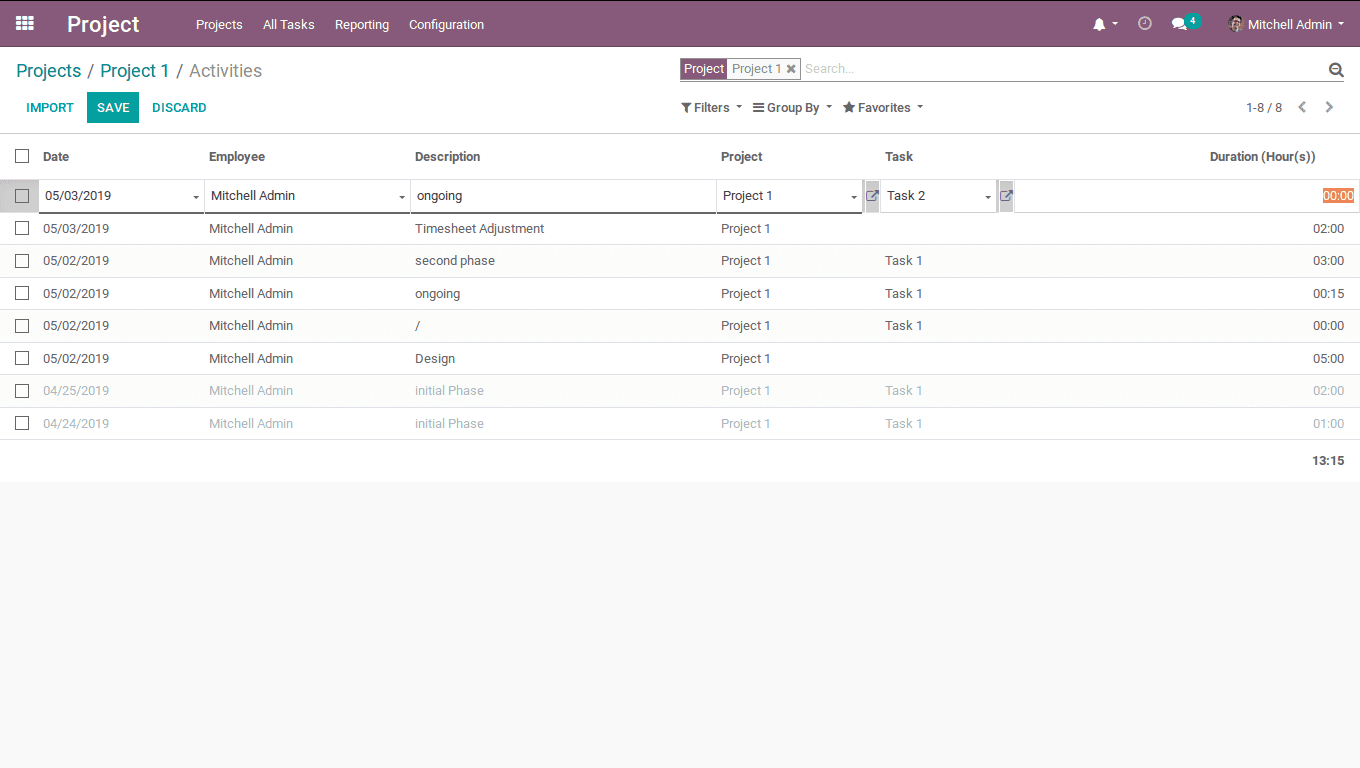
Here, one can create/view timesheets for that specific project ie, Project 1.
Create timesheet:
Under the section, one can choose the employee, jot a certain description about the phase at which employee is working, the time in hours here. One can also assign the task for the project.
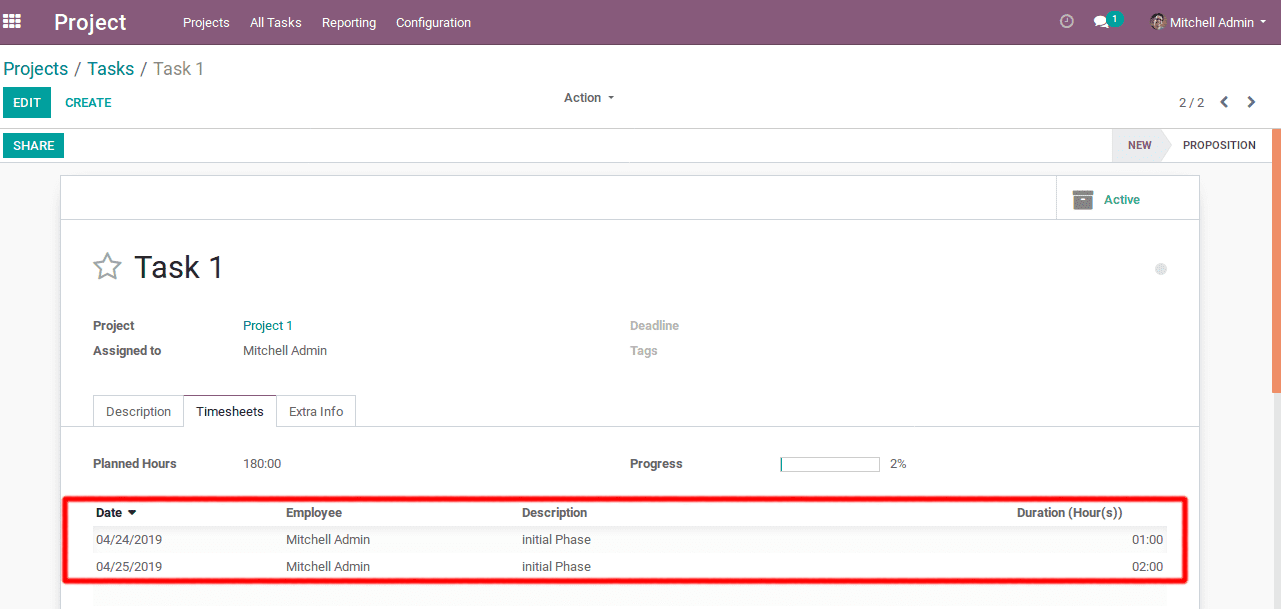
Odoo also provisions the end user to create or view the timesheets for a specific task. One can view them under the tab Timesheets under tasks. Here it is task1 for project1.
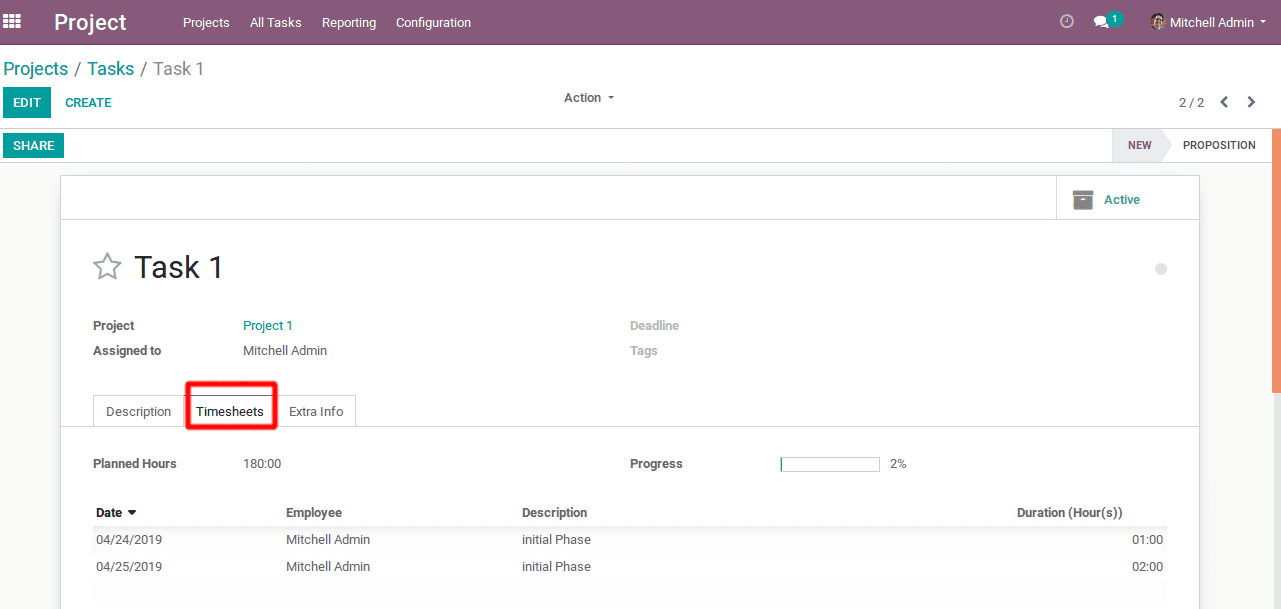
One can set planned hours for task1. Create timesheets for the tasks. On the basis of added timesheets, the progress of the task will be displayed.
Click on Timesheets tab, set planned hours and also add timesheets for Task 1. One can thereby choose the date, choose an employee and add description along with time.
Odoo provisions to choose the employee. Suppose, if an employee is working onsite and cannot access the office computer, in such cases, substitute to the employee, the team leader or the manager can add timesheets for him/her.
Timesheet Billing
Here, one can create a sales order and invoice it.
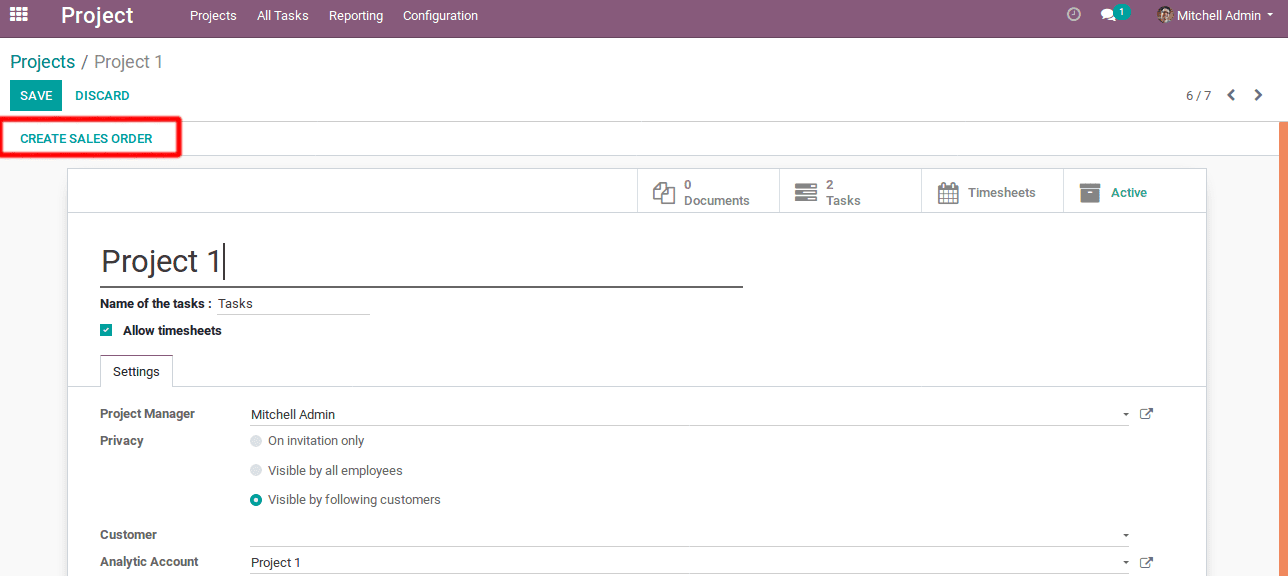
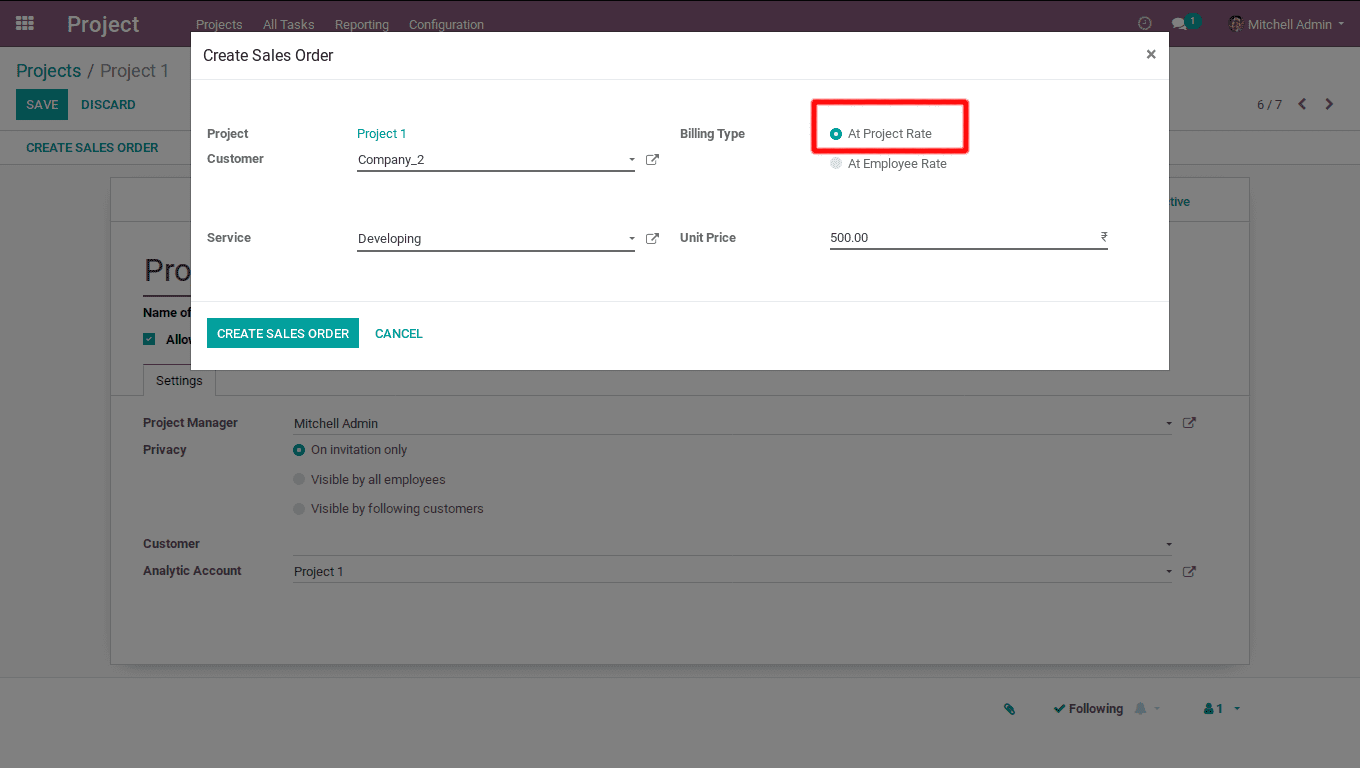
Create a sales order: Under the Project1, one can see an option Create Sales Order.
Click on Create Sales Order.
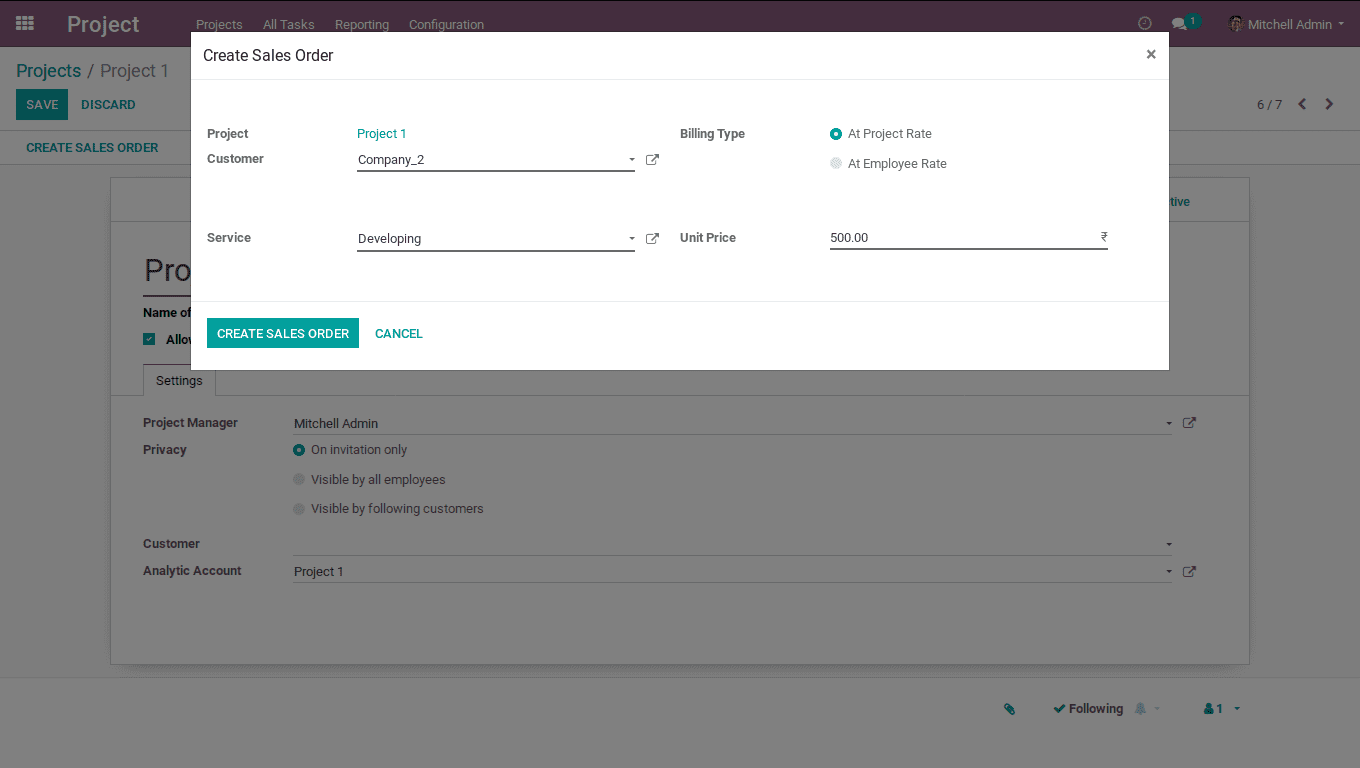
One has to choose a customer for the project, if not specified in the project.
Service: One can choose a service product. Here, I choose developing a service product.
Unit of measure for the service product should be set in hours.
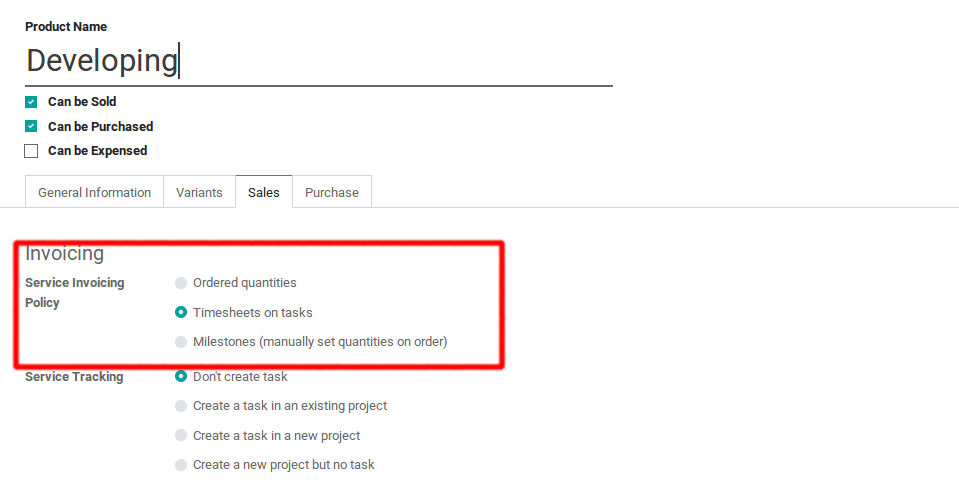
You can invoice them in 3 ways.
Ordered Quantities: Invoice based on the ordered quantity.
Timesheets on tasks: To invoice based on timesheets on task. If I add timesheets for 3hours and create sales order corresponding to it, the invoice will be based on that. Here,the delivered quantity will be 3.
Milestones: To invoice based on manually set quantities. If I add timesheets for 100 hrs and if I want to keep the invoice only for 50 hrs, in such cases, one can go for milestones. Under the option, one can manually set the quantities.
Billing Type
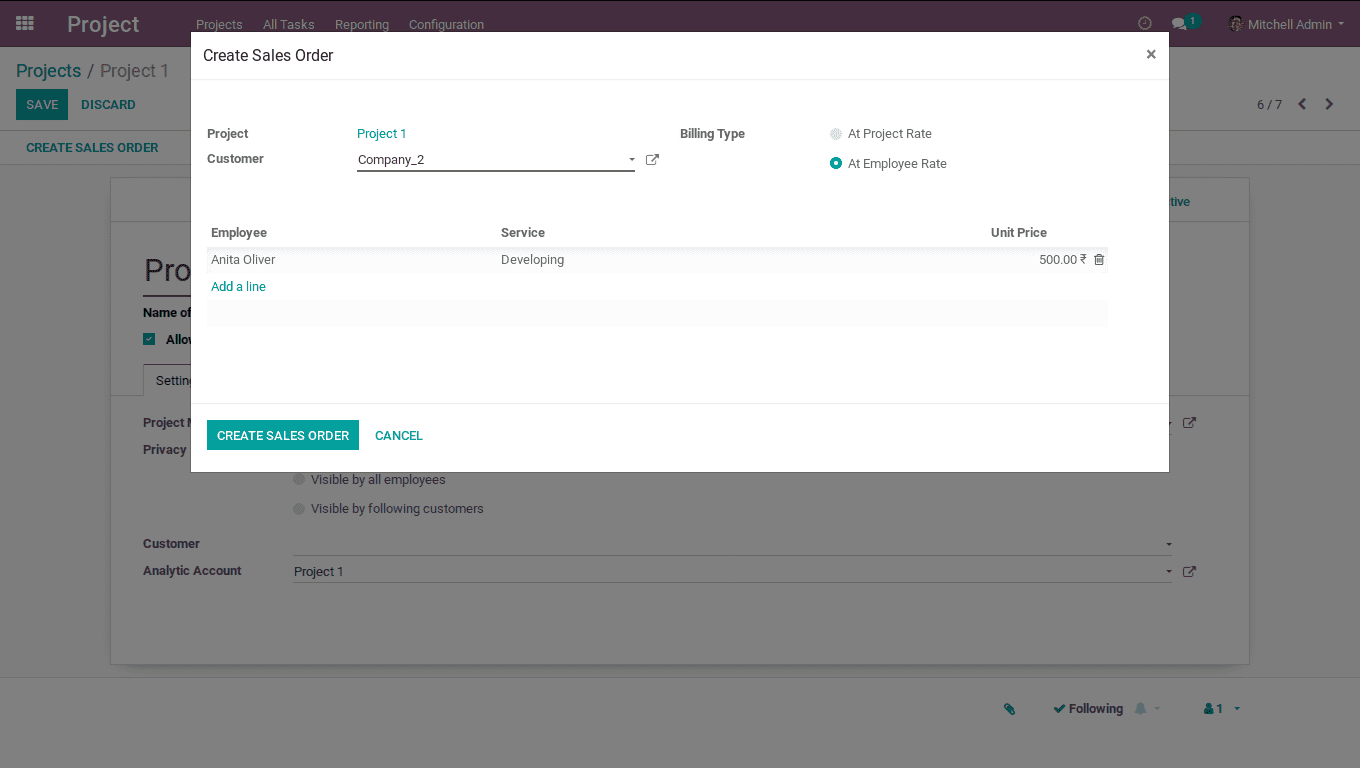
Billing Type is of 2 types. One can create them either at Project rate or at Employee Rate.
Project rate: For the project rate, choose a service product. Upon the sales price of the service product, a sales order will be created. Here, I gave the sales price of the product – Developing as 500.
Employee rate: For employee rate, choose the employee first and further add the unit price for the employee. Upon the basis of the employee, the sales order will be created. One can also choose service product for the employee and unit price will be calculated based on the service product. If the sales price of the service product is set as 0, one can add the unit price here.
After the sales order is created, one can invoice them. Once you invoice, eventually all timesheets created will be automatically validated. One can also add additional timesheets if any and then invoice them using the created sales order itself.
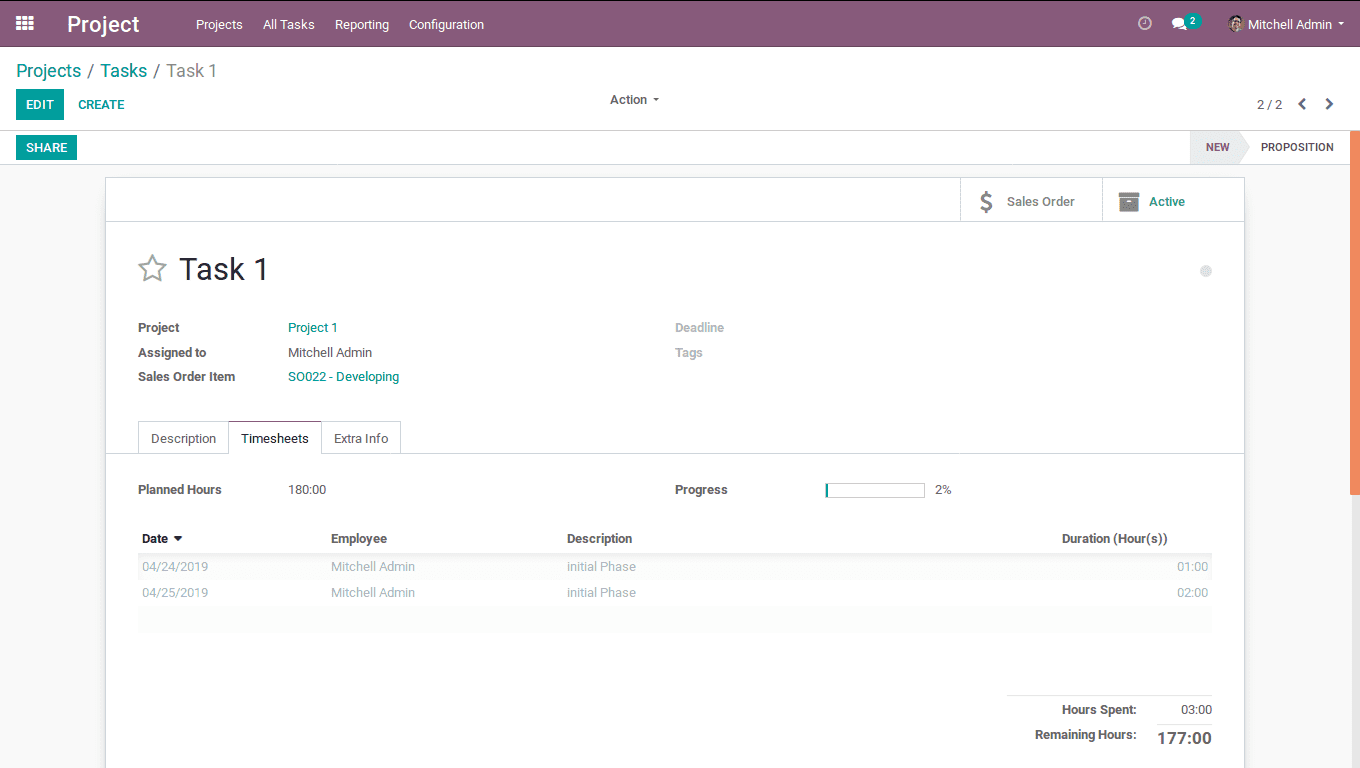
Add time-sheets -> Click on smart button Sales order-> CREATE INVOICE.
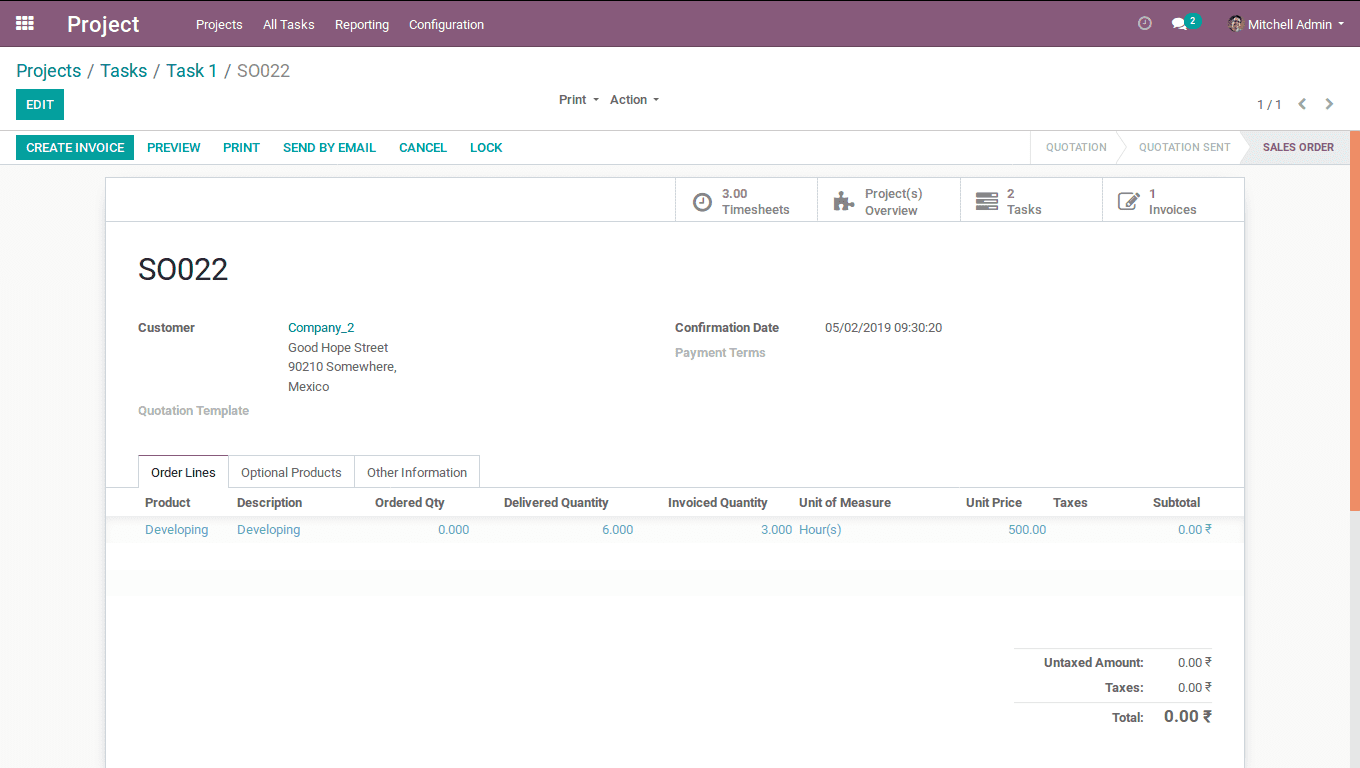
An invoice will be created for the added timesheets.
Reporting in Timesheets
Project Cost and Revenue:
You will get a report on the total costs and the revenue of the project.
Reporting -> Project cost and Revenue
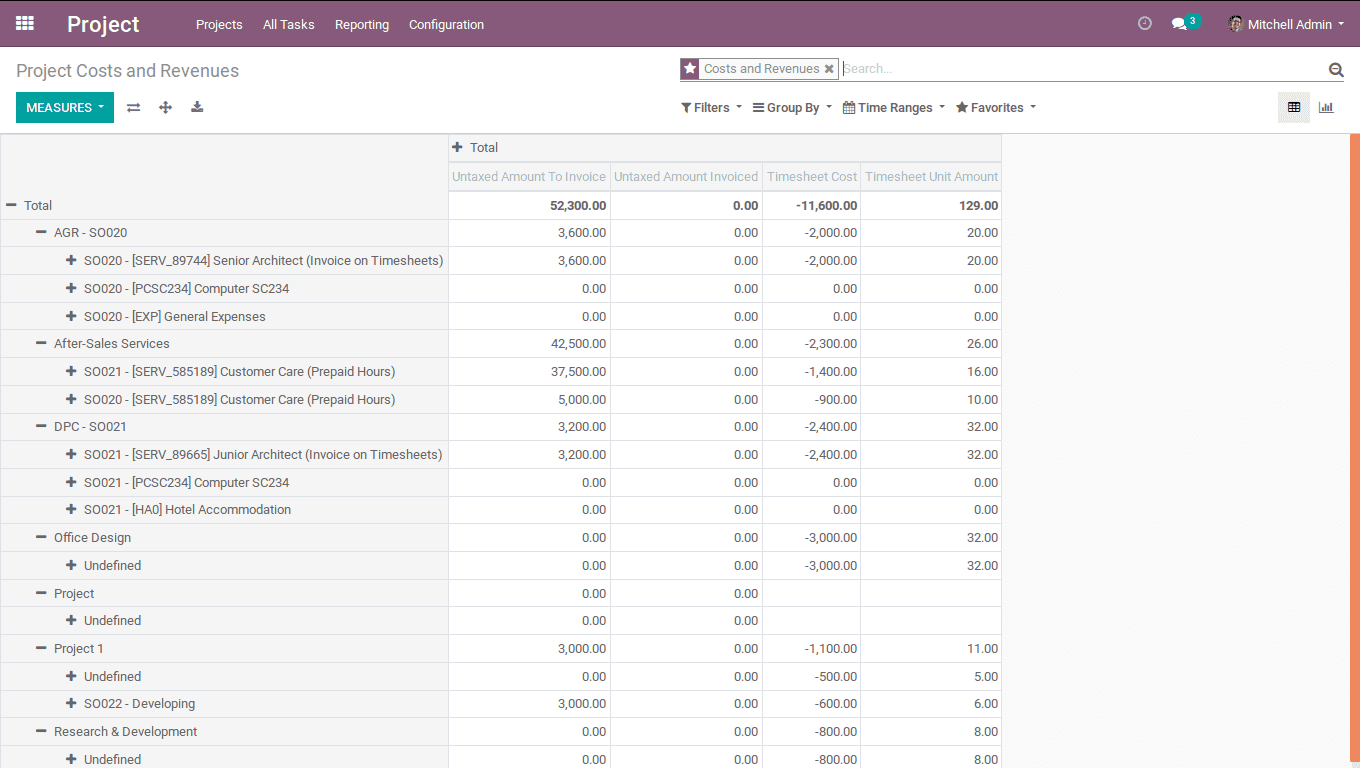
Here, one can see the report of the timesheet cost and the timesheet unit amount for the project.
One will also get an overview of the project. For details Refer the blog: project overview features in odoo v12
Next move on to the TimeSheets module.
Go to -> TimeSheets
One can create timesheets from My Sheets.
My TimeSheets:
A user permitted. Employees can add/view their timesheets.
To add timesheet: Click Add a Line.
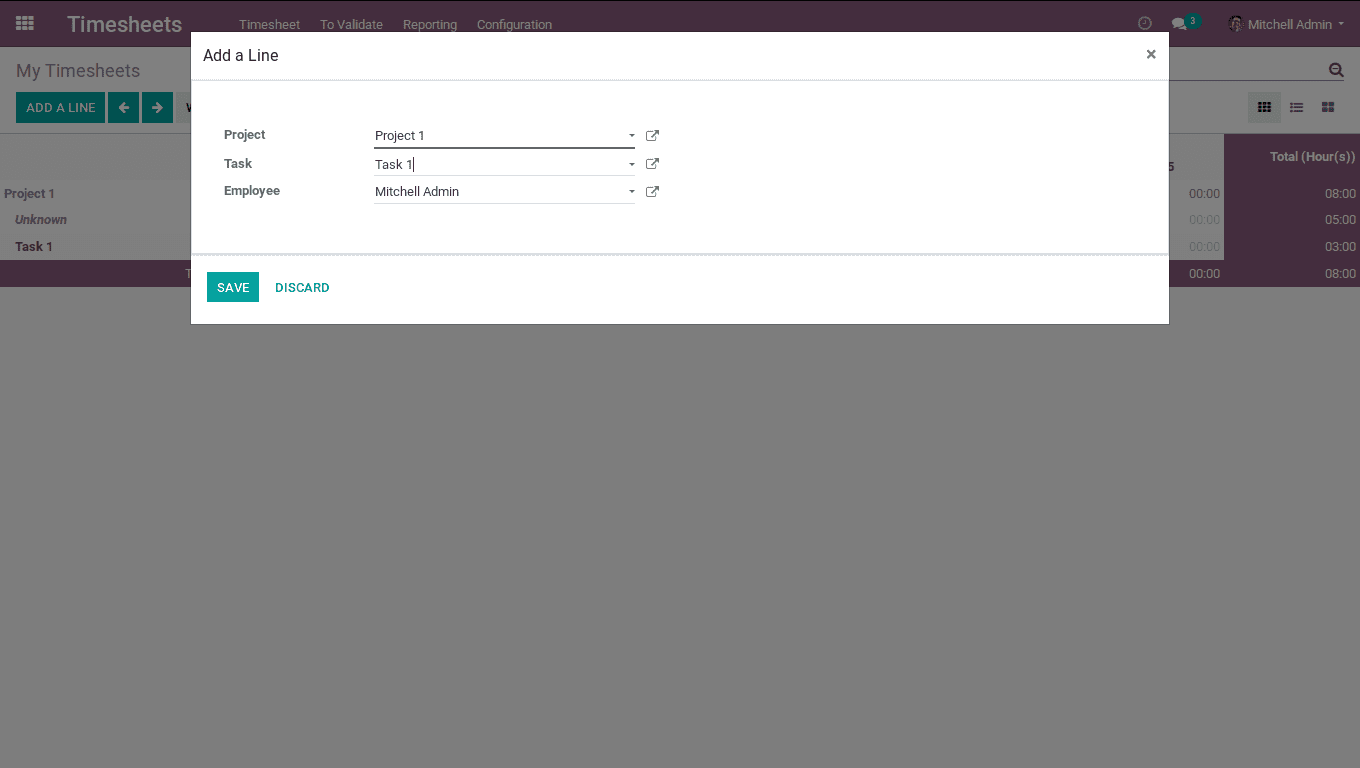
One can choose the project, task and add the timesheets to the corresponding dates.
One can also view the timesheets in a month and week.
All Timesheets
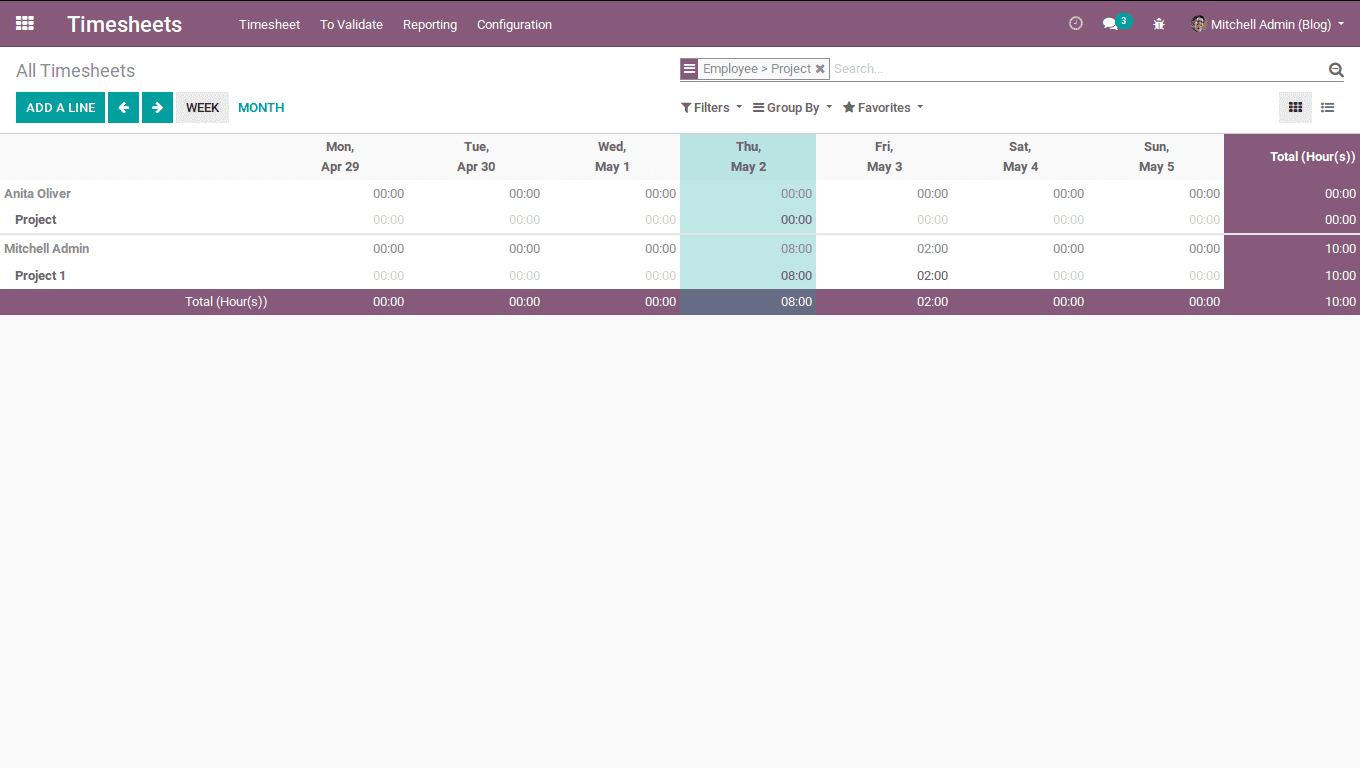
A manager will have access to all timesheets. He/She can add timesheets, view timesheets for a timeline say a week or month.
Timesheets -> All Timesheets
One can add/view all timesheets.
To add timesheet: Click Add a Line.
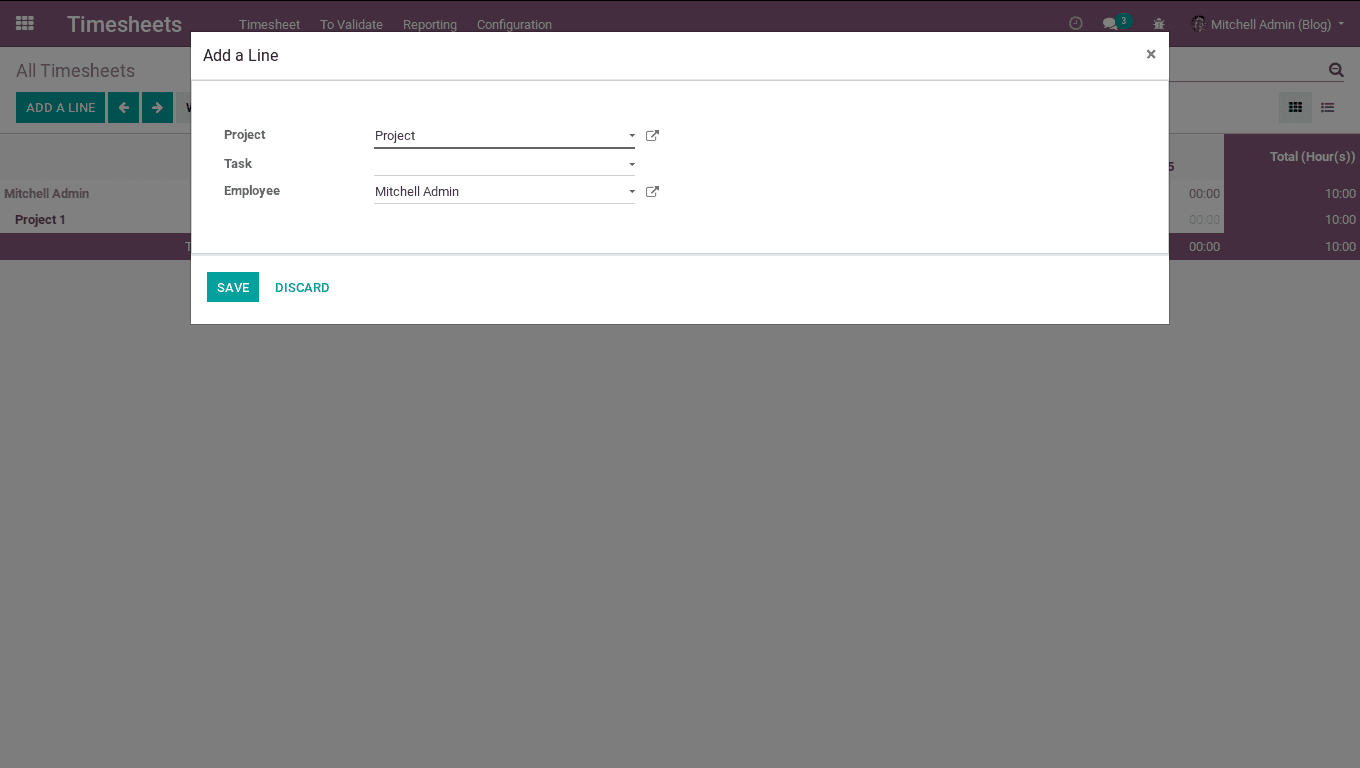
One can choose the project, task and add the timesheets to the corresponding employees.
One can view the timesheets for a month or week.
TimeSheet App
Odoo provides a timesheet app, where one can seamlessly manage their timesheets using the application.
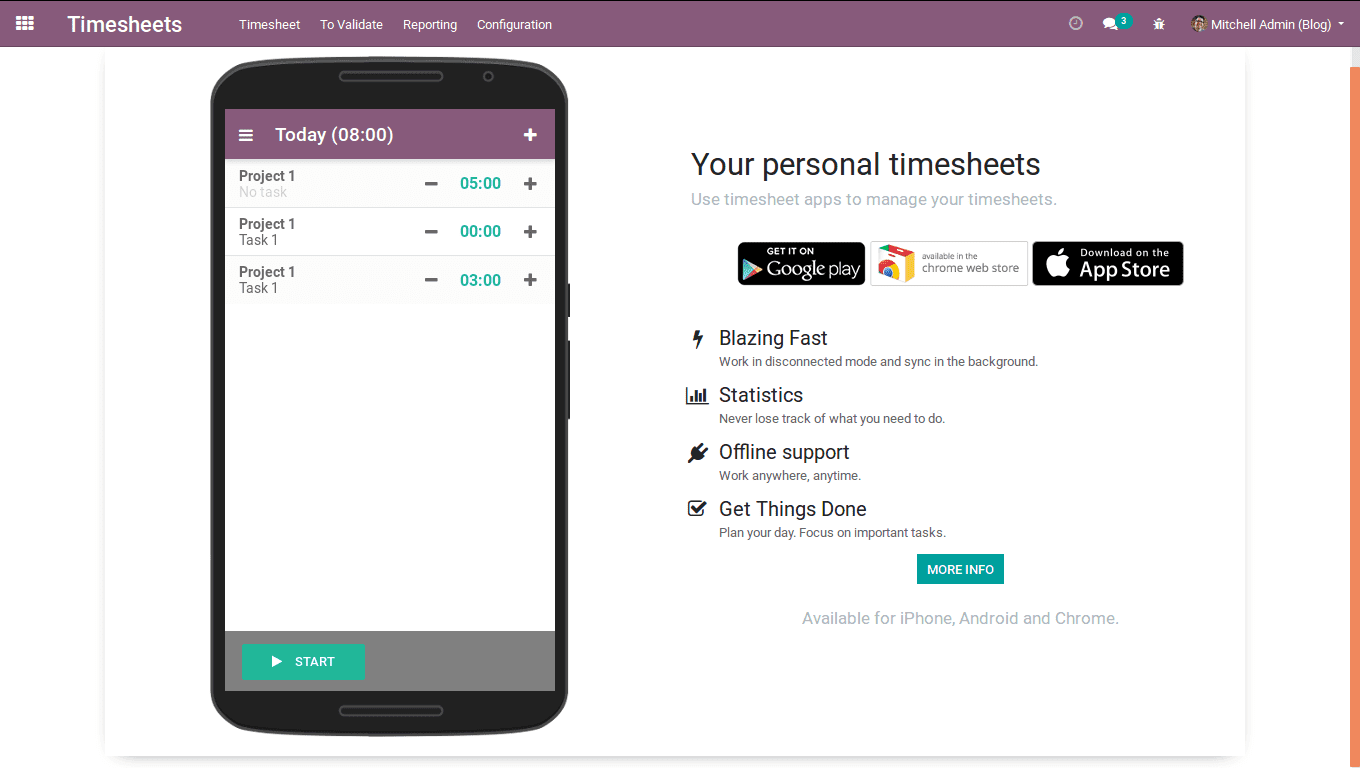
One can start the application while you start the work and close it upon finishing the task/work. The application provisions to add project, task, summary and also save the timesheets. The corresponding timesheet will be added to My Timesheets.
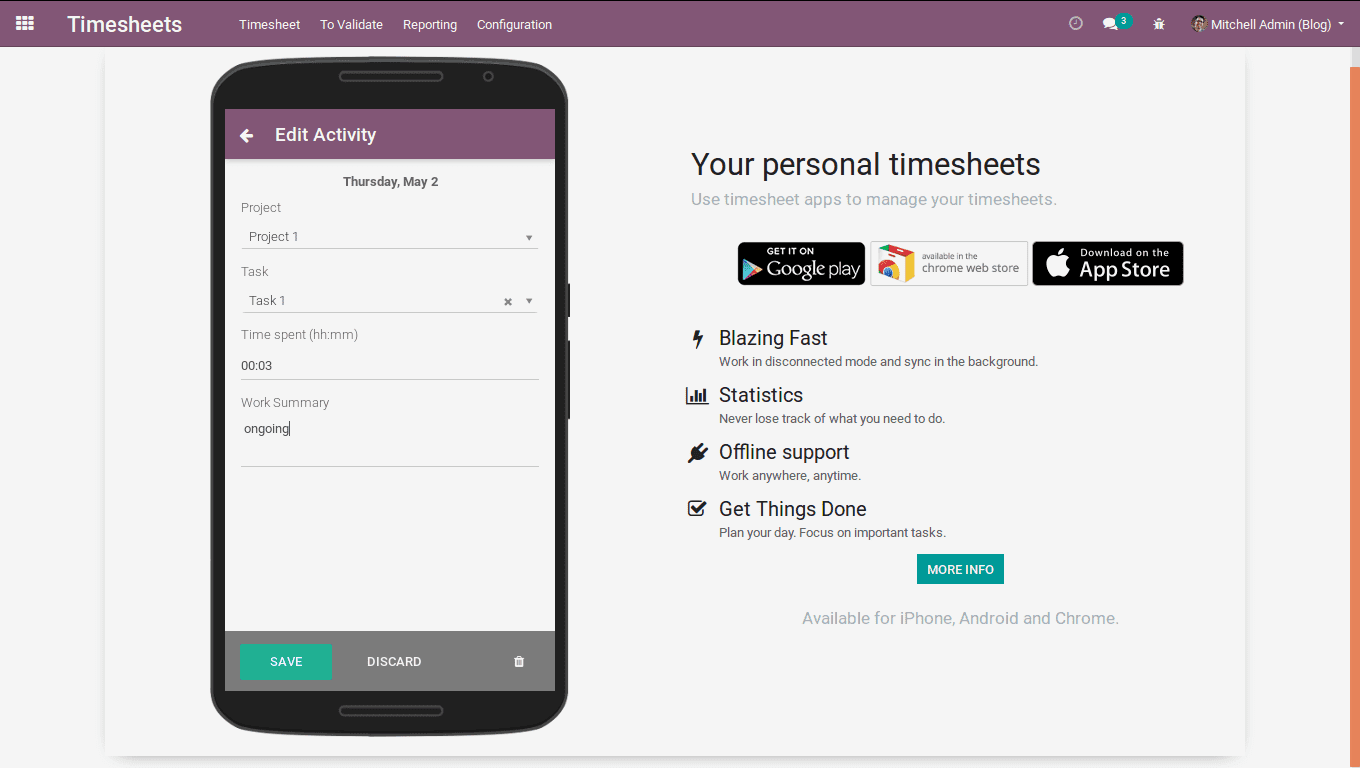
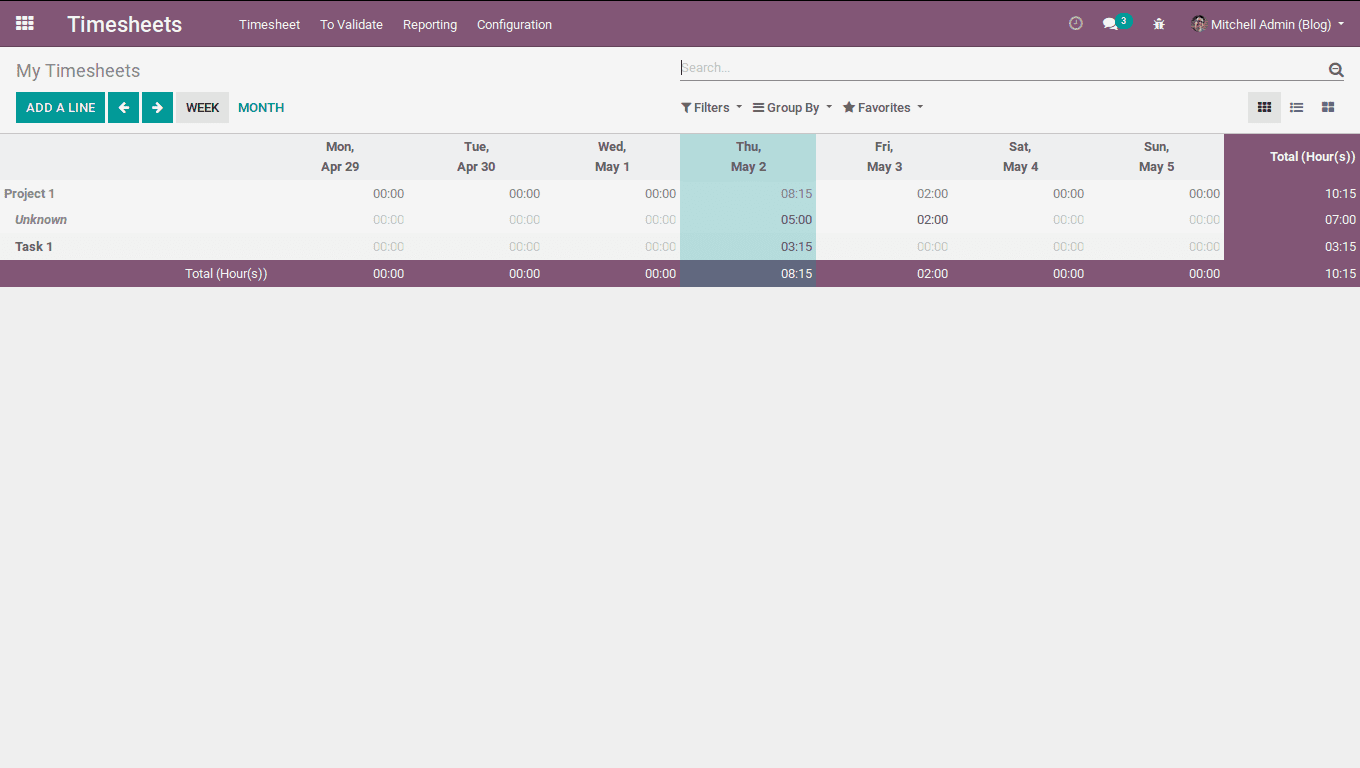
Using the Timesheet application, one can add/view the timesheets daily or weekly.
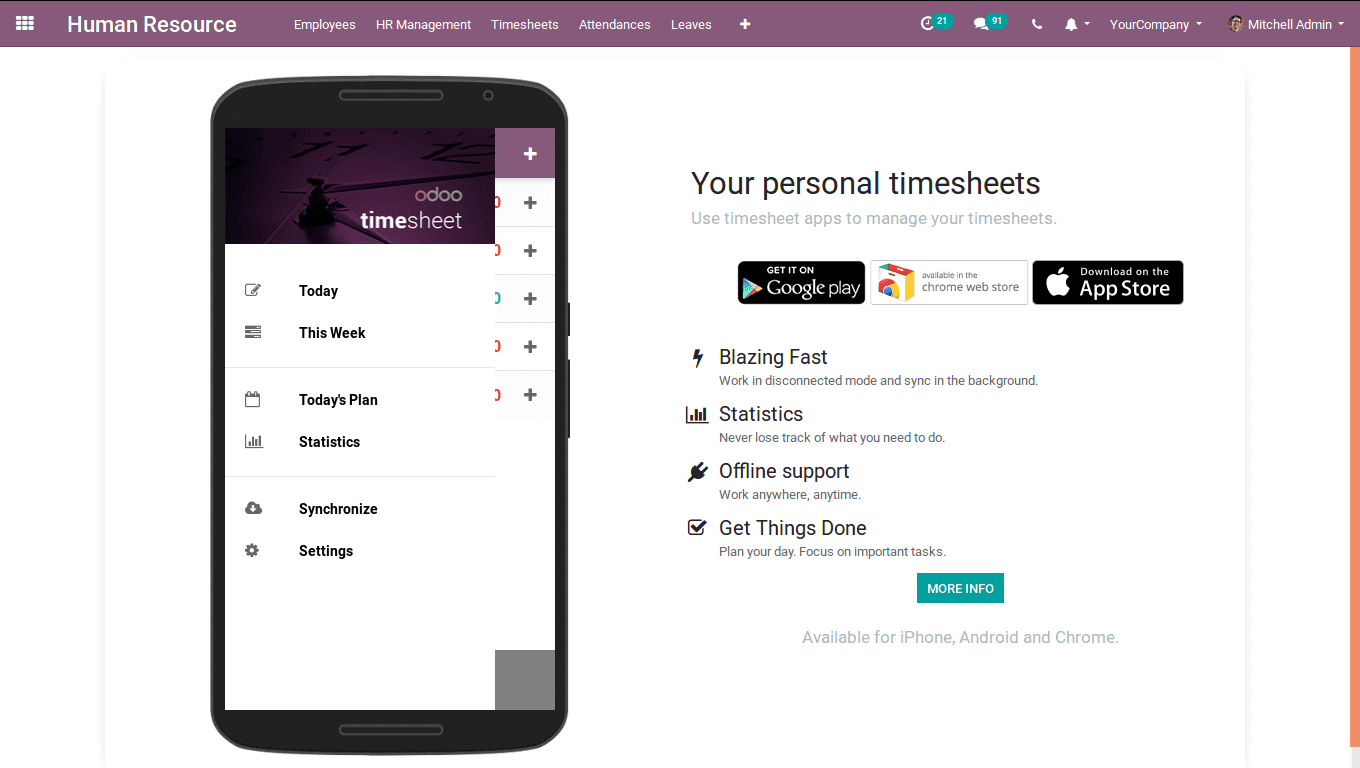
Timesheet app provides with today’s plan, where one can see the plans for the day. One can also see the statistics of the timesheet.
TimeSheet Validation
A manager can validate and view the validated timesheets. While creating an employee, one can set a timesheet responsible. Timesheet responsible is a person who can validate the time sheets. Timesheets can be validated for selected employees or for all employees.
Go to To Validate -> Last Week -For Last Week Validation.
Go to To Validate -> Last Month – For Last Month Validation.
To validate, Click on Validate. One can choose the date, uncheck validation if validating for a specific employee. Click Validate.
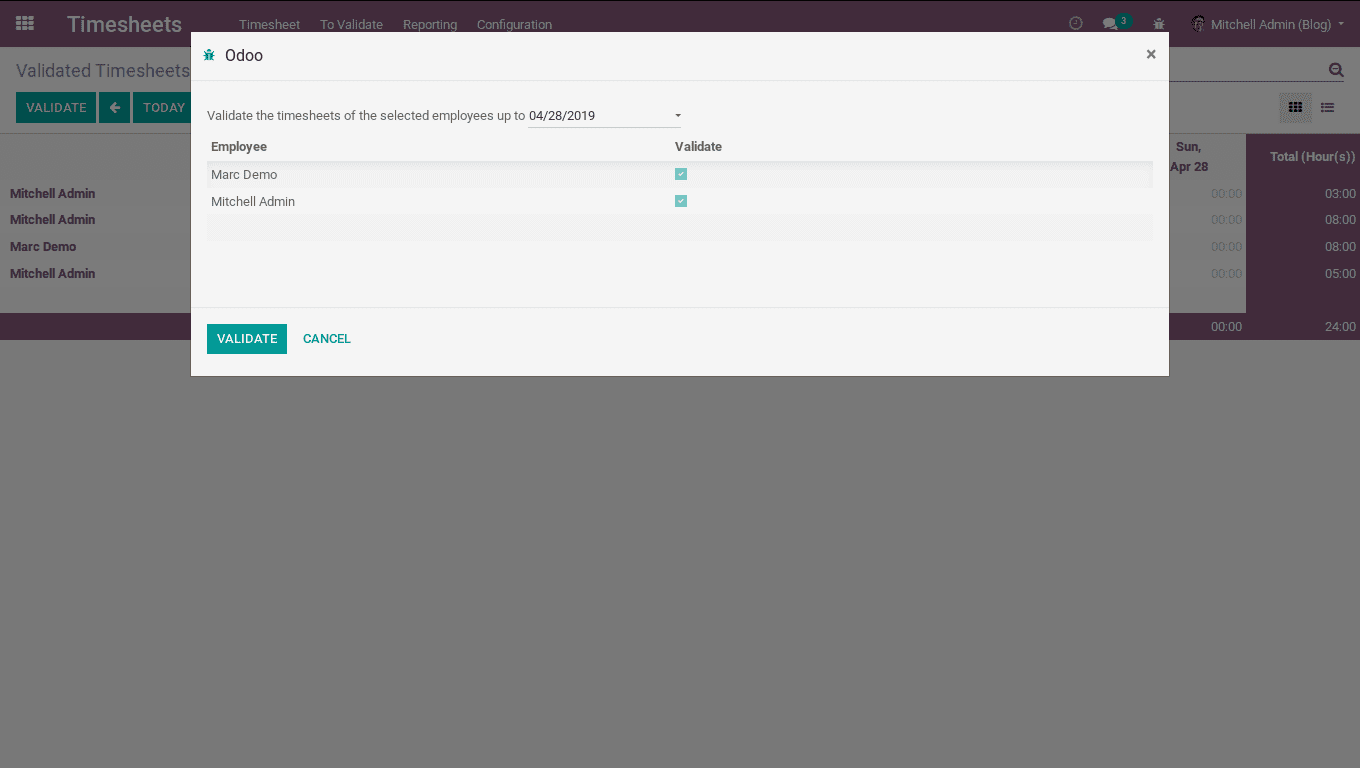
Timesheets are validated.
TimeSheet Reports
You will get timesheet reports based on employee, task, project and billing rate.
By employee:
Reporting -> By Employee
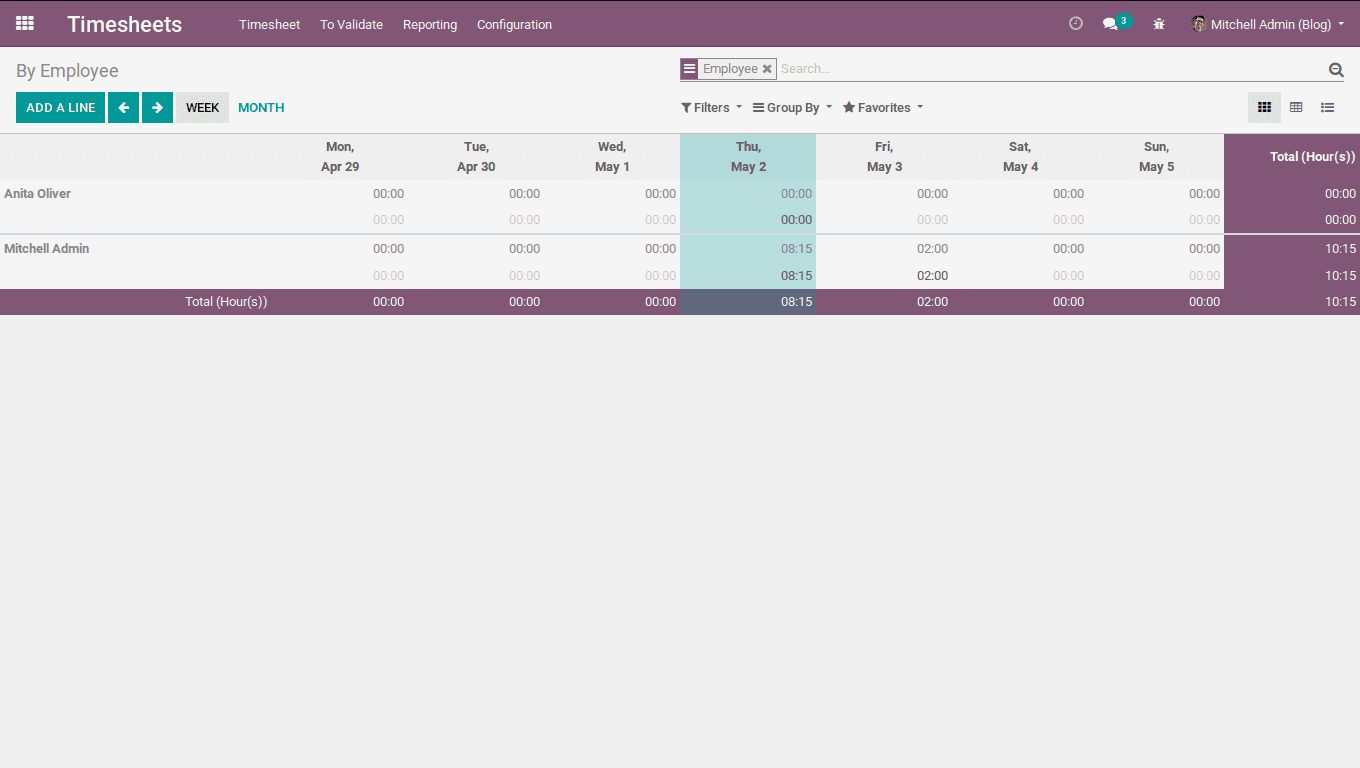
Here, one can get the employee wise timesheet report on a weekly or monthly basis. The end user can filter billable hours, my time-sheets, etc from this report.
By Project:
Reporting-> By Project
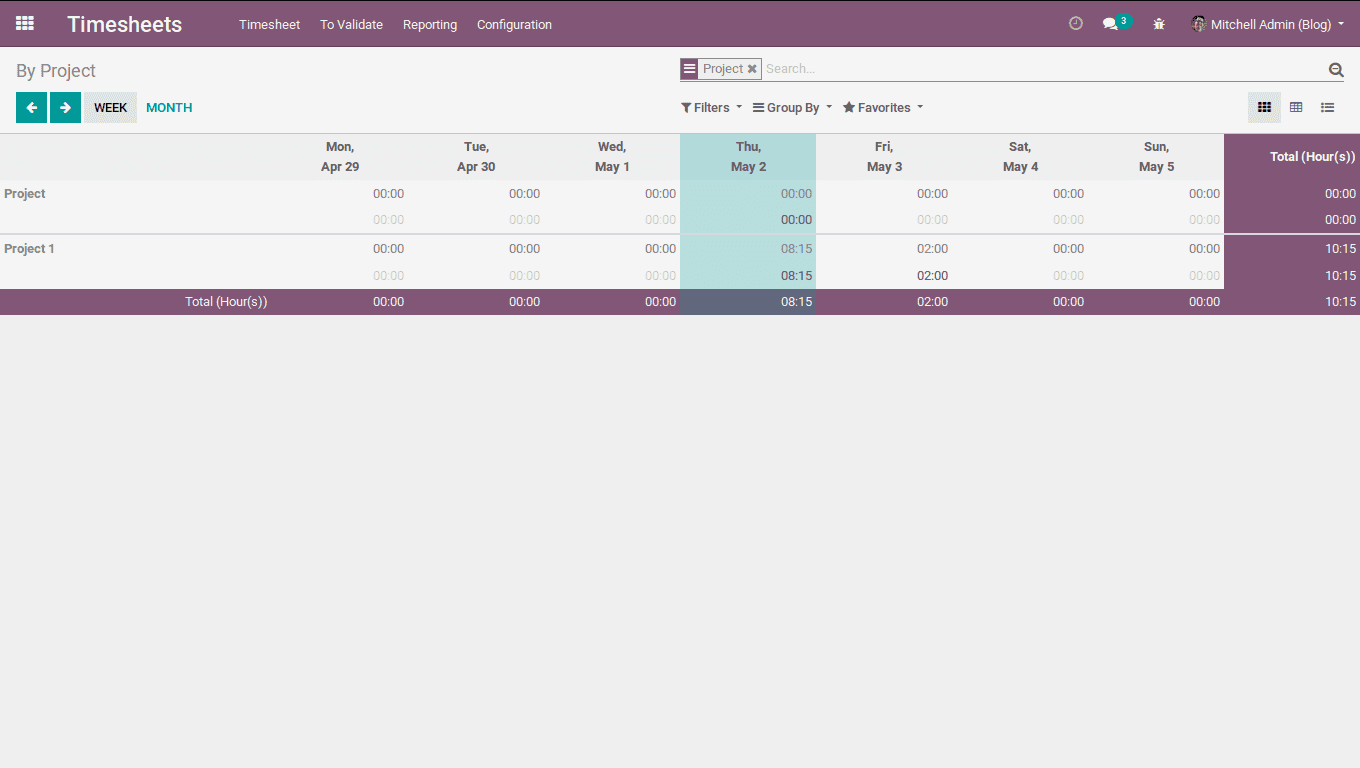
Here, one can get the Project wise timesheet report. One can filter the billable hours, my time-sheets, etc from this report.
By Task:
Reporting -> By Task
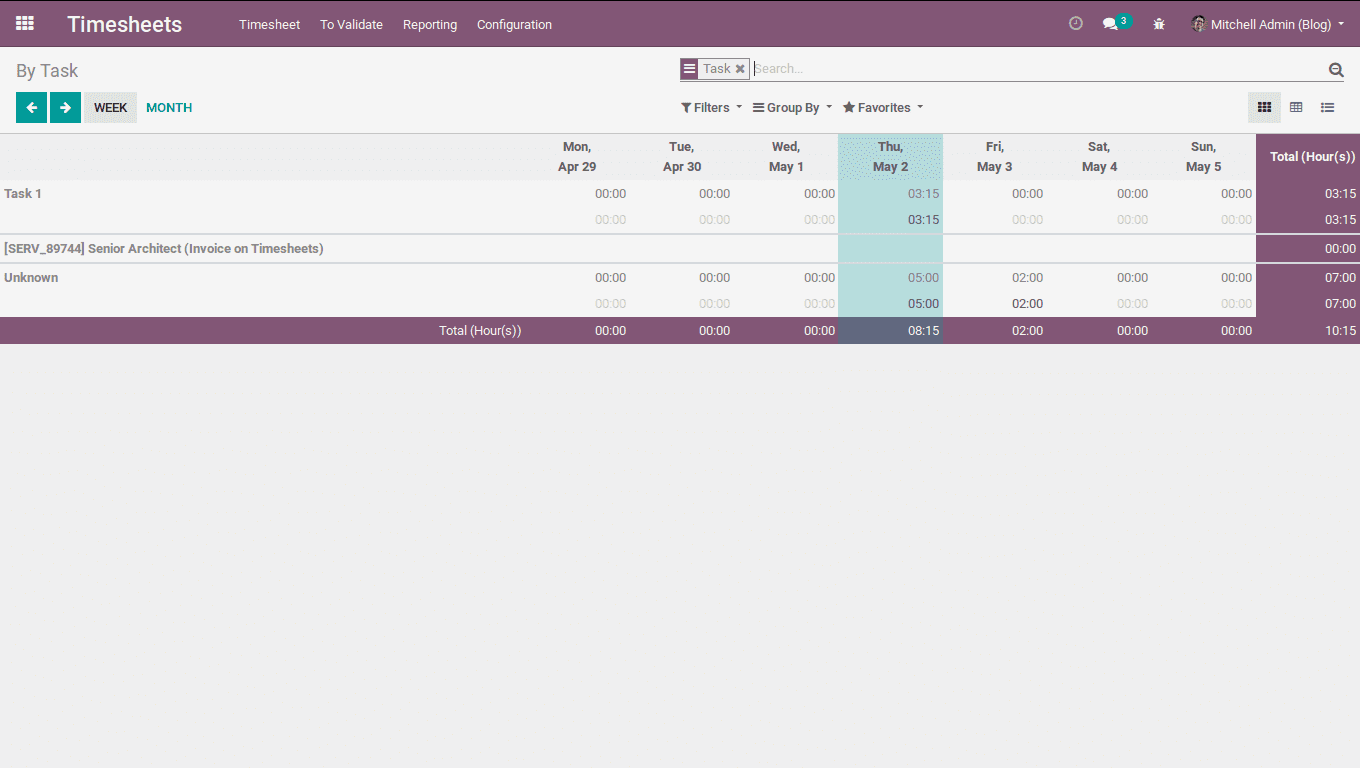
Here, one can get the Task wise timesheet report. One can filter the billable hours, my time-sheets, etc from this report.
By Billing Rate:
Reporting -> By Billing Rate
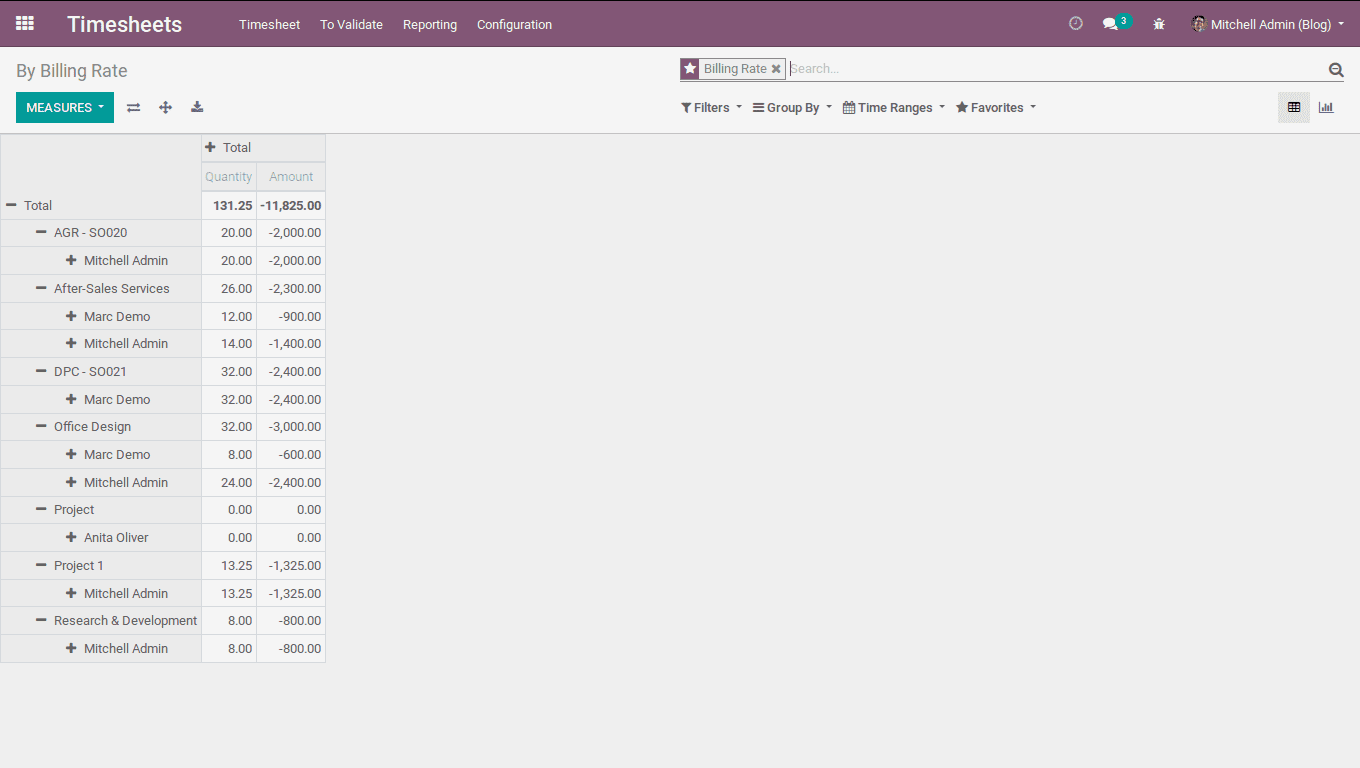
Here, one can get the billing rate based timesheet report. The end user can filter the billable hours, my time-sheets, etc from this report.
Timesheet Cost:
Timesheet cost is calculated as the service cost of an employee. One can set the timesheet cost, timesheet responsible for each employee. For that, Install Employee module.
Go to -> Employee module.
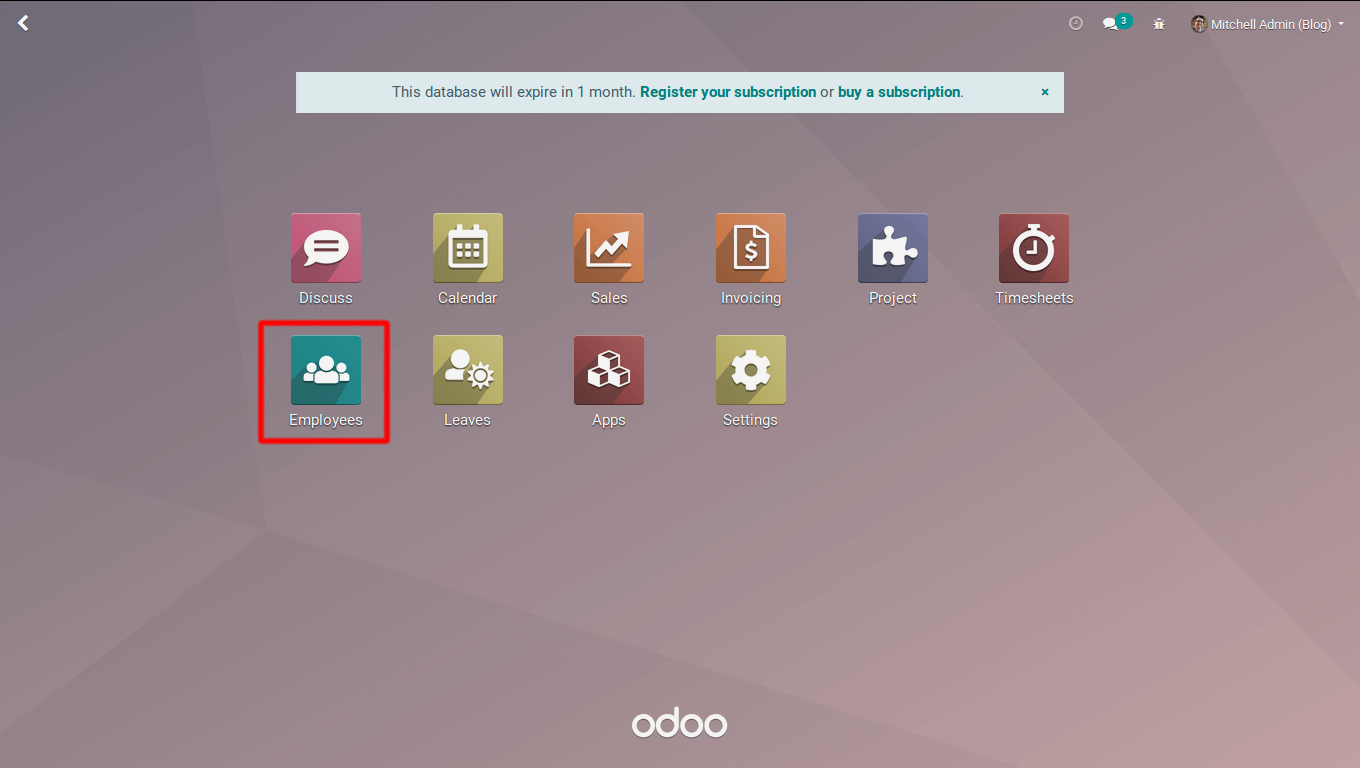
Select an employee, under the tab HR settings.
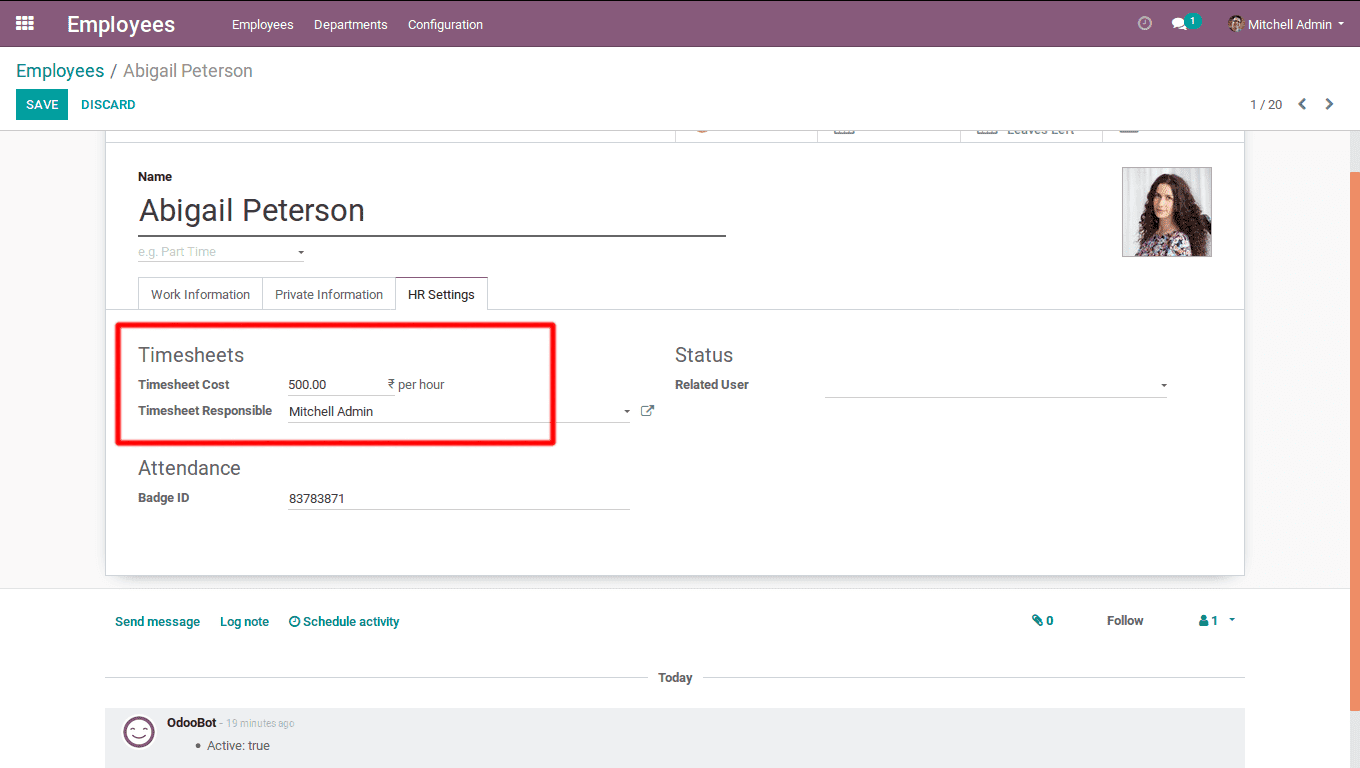
TimeSheet Cost: Time-Sheet Cost per hour for an employee.
TimeSheet Responsible: User responsible for timesheet validation.
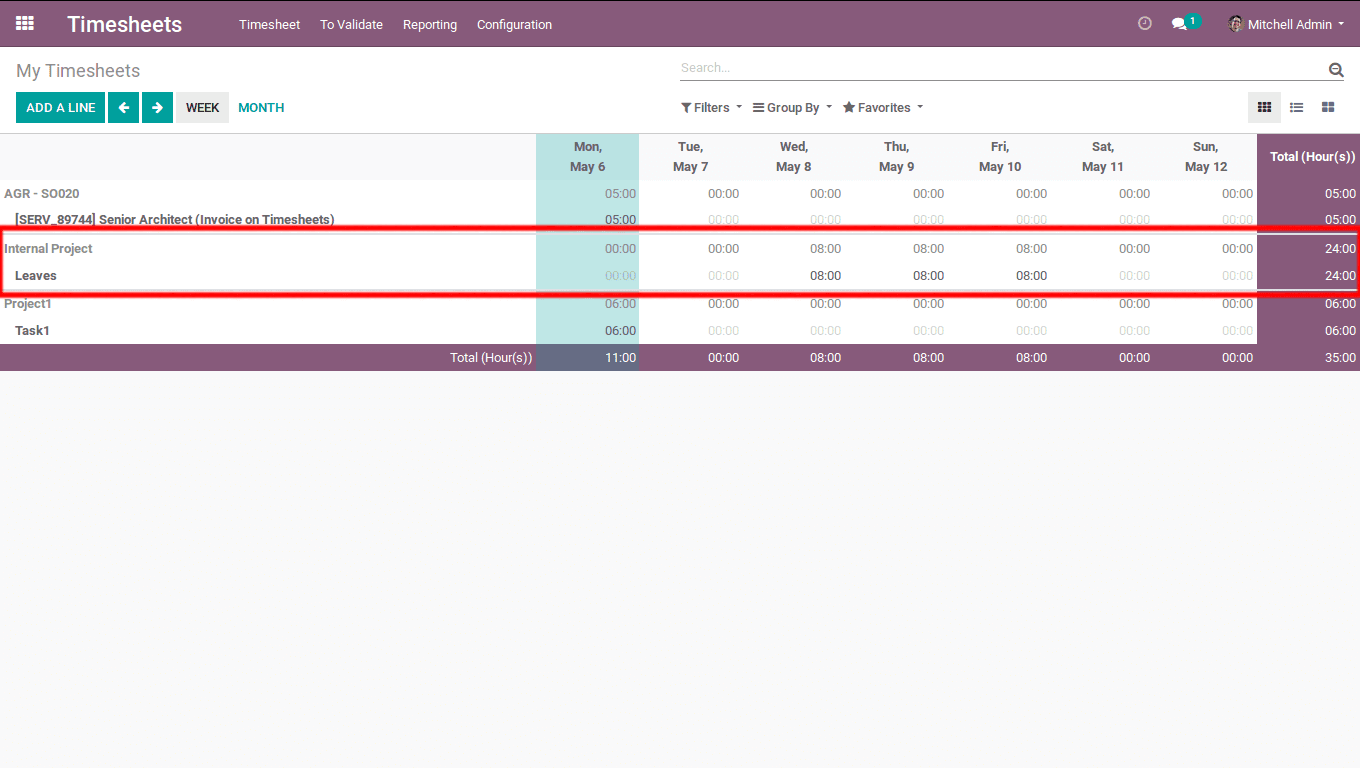
When one needs to track the expenses of an employee, it is necessary to add timesheets for an employee in case of paid leaves. Only then, one can bill the timesheets for the leaves. Odoo provides an option to add timesheets for the validated leaves.
To auto-create timesheet for the validated leaves, Install Leaves Module.
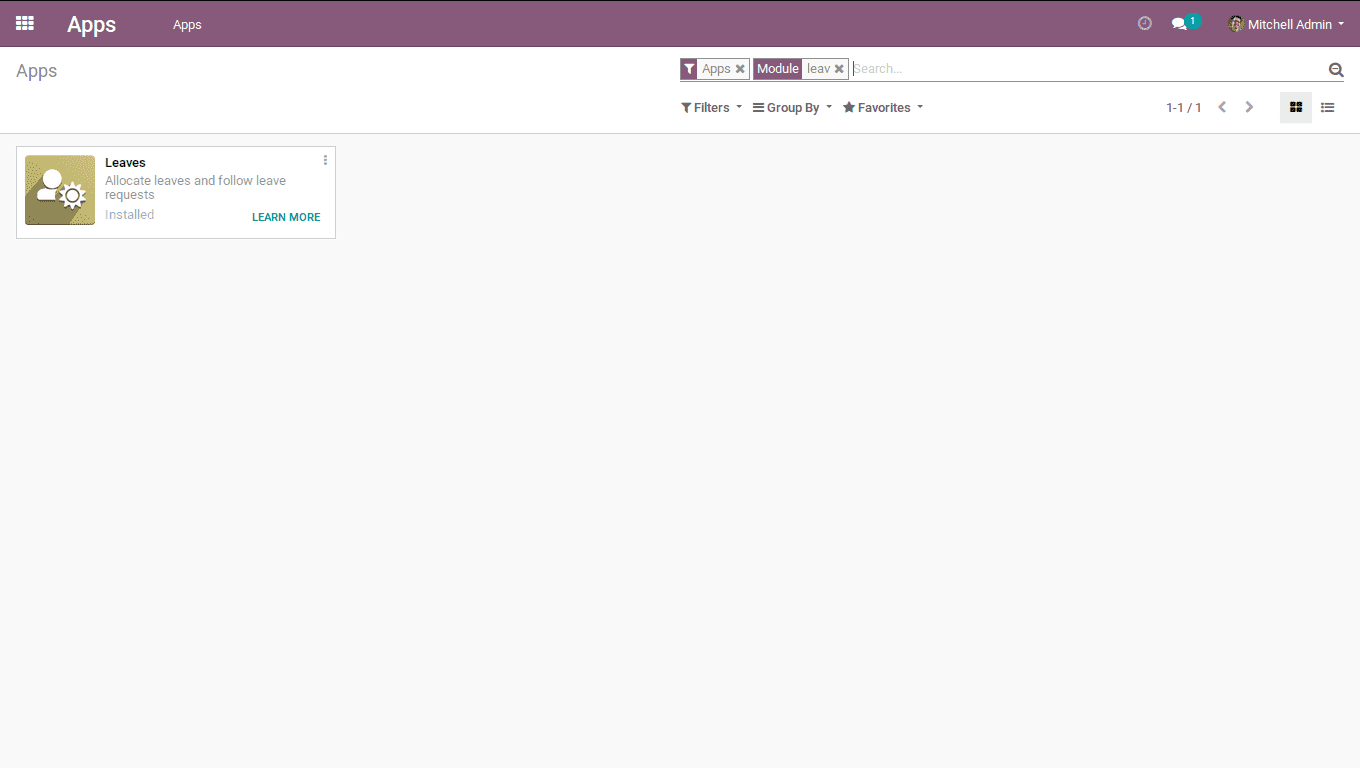
Go to -> TimeSheets -> Configuration -> Settings
Check Leaves.
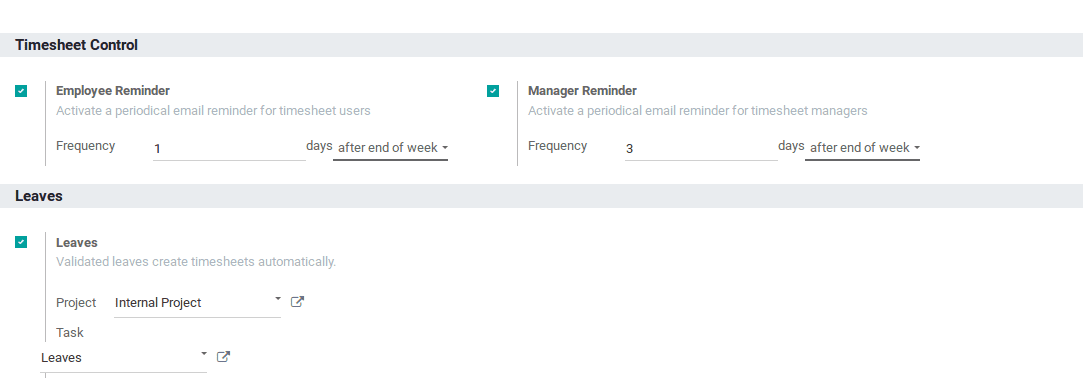
One can choose a project and task, under which the timesheet must be added. Upon the action, the timesheet will be added based on approved leaves.
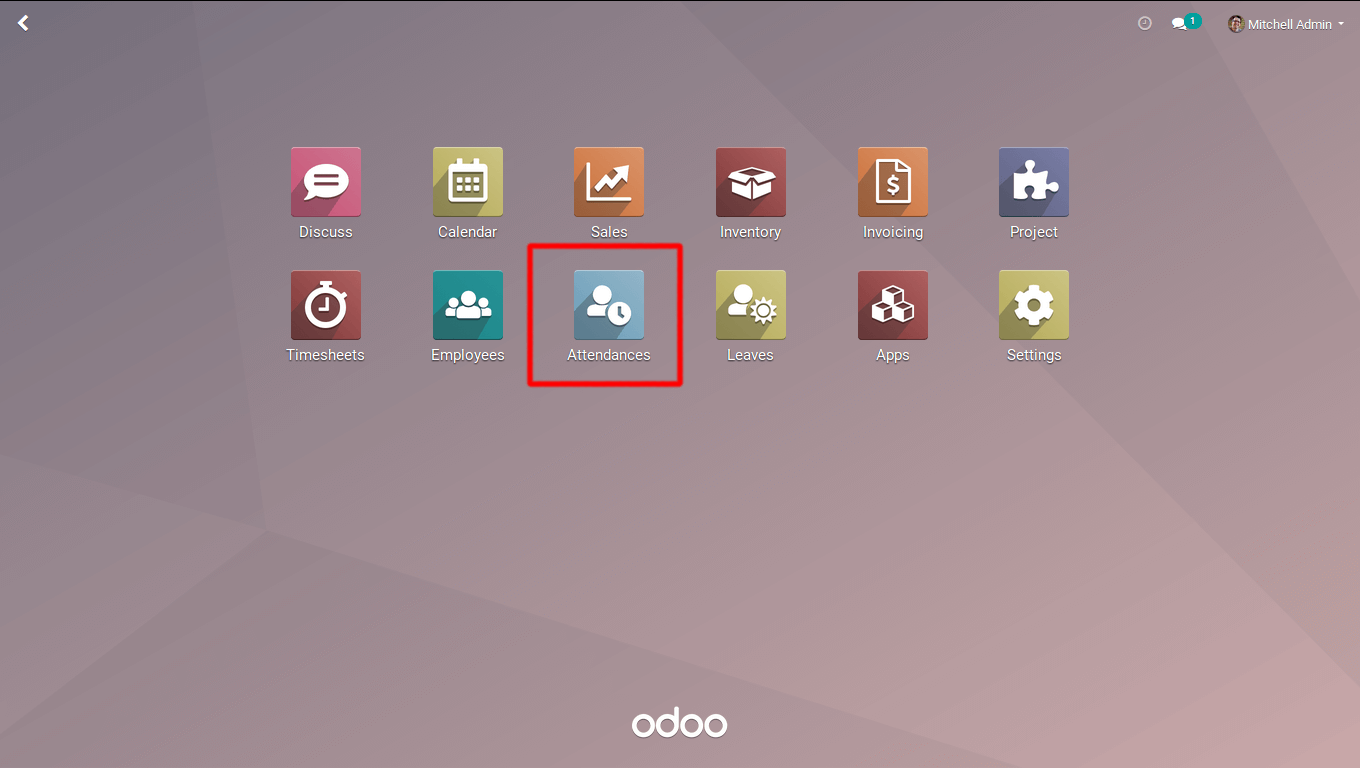
To evaluate the working hours of employees, Odoo provides with the report, which is based on Attendance/Timesheet. For that Install Attendance Module,
Go to -> Timesheets -> Reporting -> TimeSheets/Attendance.
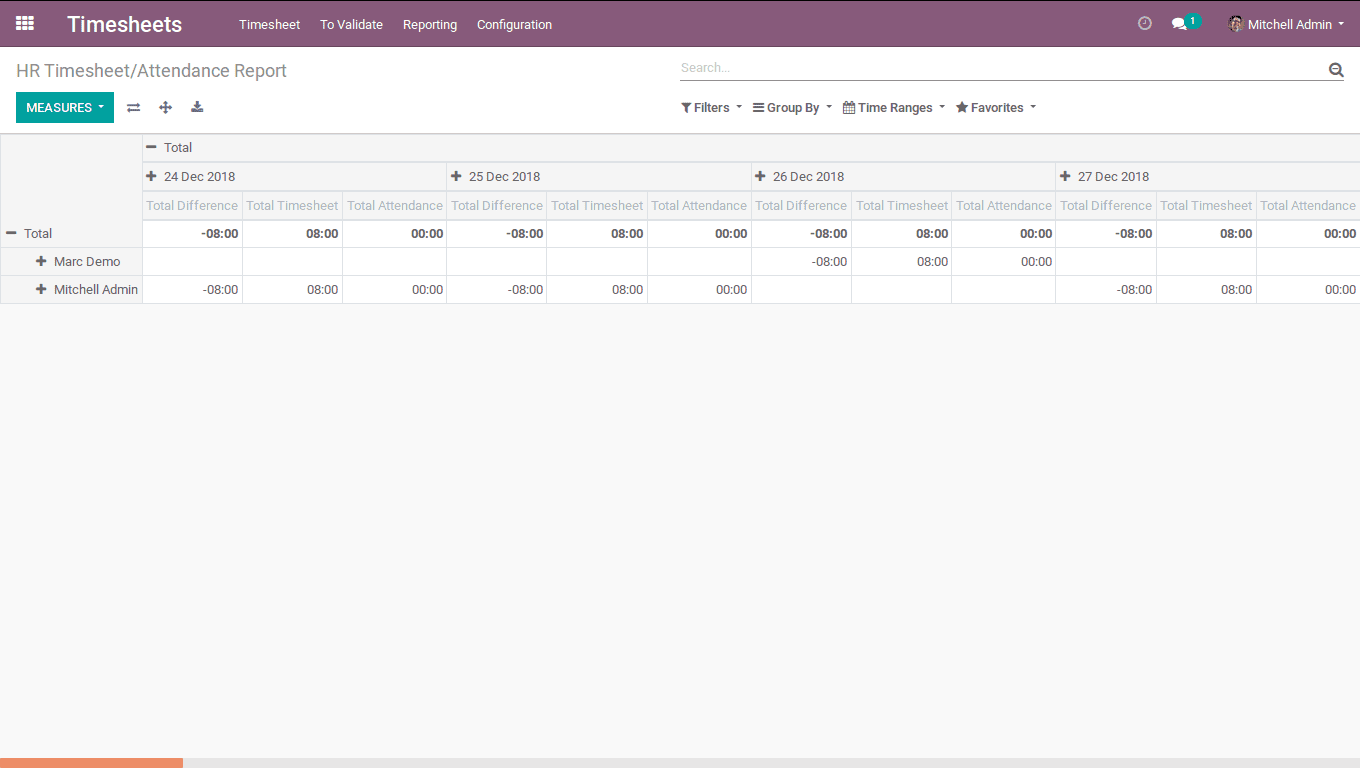
Here you get a report worth running the details like total timesheets, total attendance and the time difference among them. Eventually, the manager can evaluate the working hours of his/her employee in the organization.
This is all about the TimeSheets in Odoo V12.


