Everyone stores the contact details in books or phones most of the time. The ERP system of Odoo 15 gives a Contacts module for individuals to secure the contact information inside a company or personal relations. We Purchase and Sale many materials for our daily routines, and it is easy to save these details through the Odoo 15 Contacts module. You can access the Payment terms and methods of purchase/sales using the Odoo 15 Contacts module. It is easy to create information about a new contact using the Odoo 15 Contacts module.
This blog assists to know the use of the Sales and Purchases Tab with the Odoo 15 Contacts module.
Users can view sub-menus after developing a new contact inside the Contacts window. Here, we can see the Sales and Purchases menu at the top of the Contacts window. In addition, you can see the Sales and Purchase tab at the end of the Contacts window. Let’s look at the detailed analysis of the Sales and Purchases tab with the Odoo 15 Contacts module.
Sales
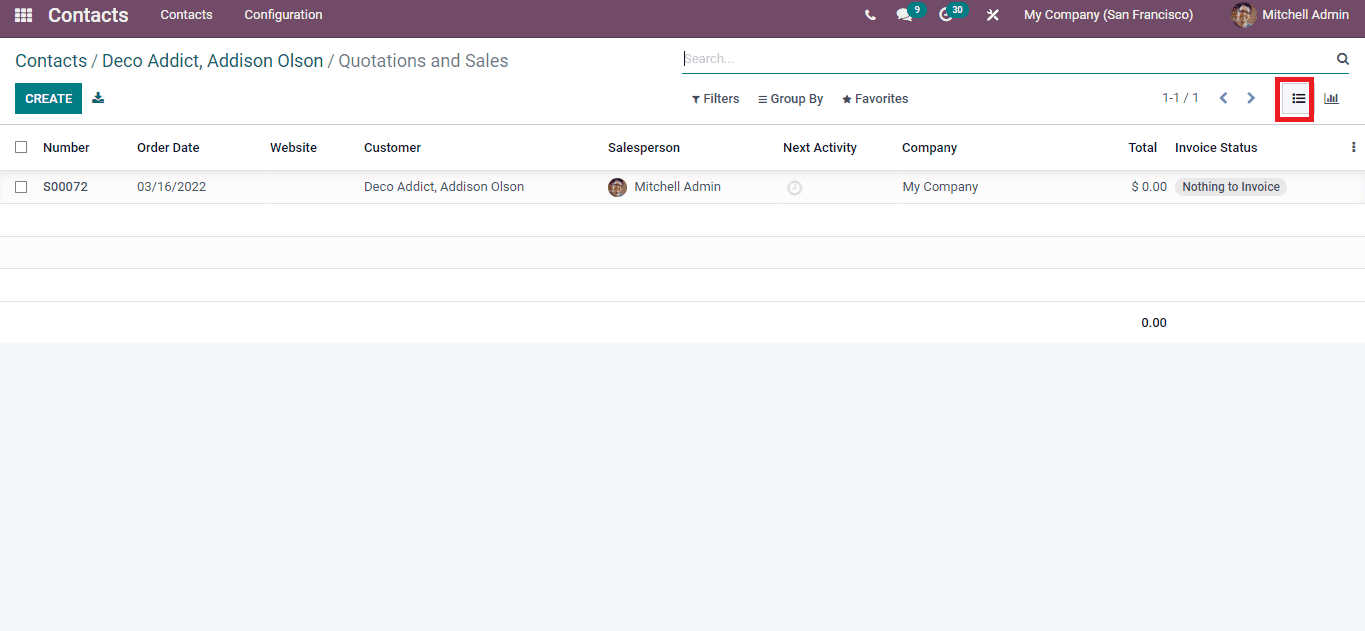
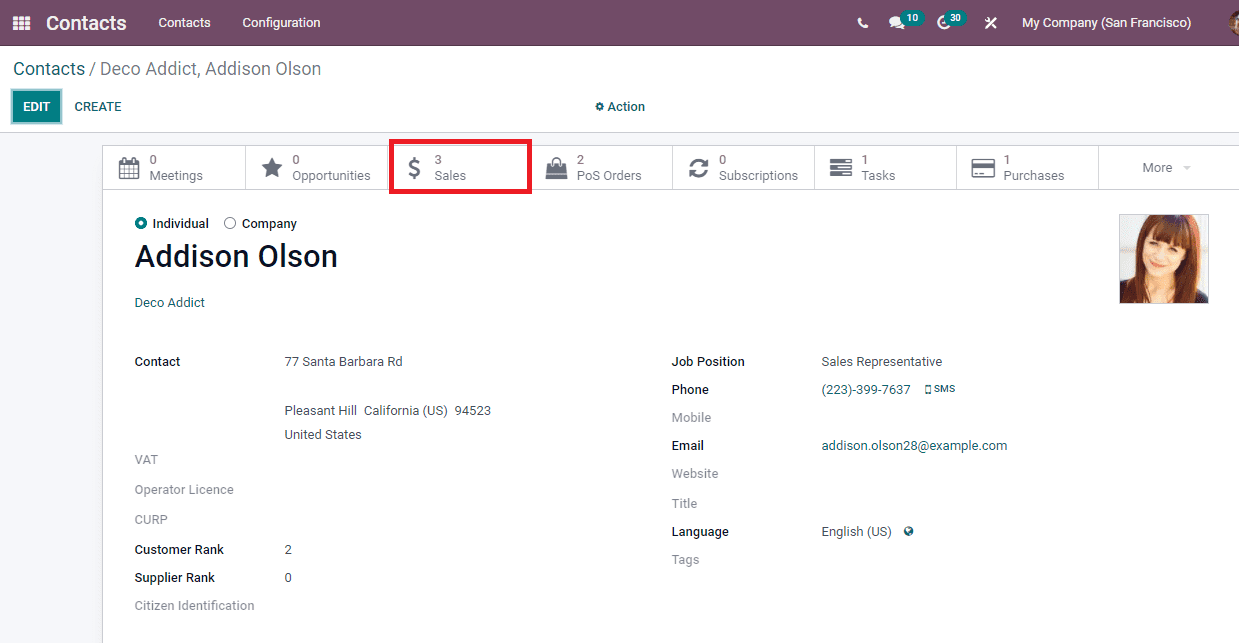
Choose one of your contacts from the Contacts tab, and we can see the Sales submenu in the Contacts window. A new Quotation and Sales window opens when the user clicks on the Sales icon. Here, you can see the details such as Number, Customer, Company, Order date, Salesperson, Website, Invoice Status and more aspects as depicted in the screenshot below.
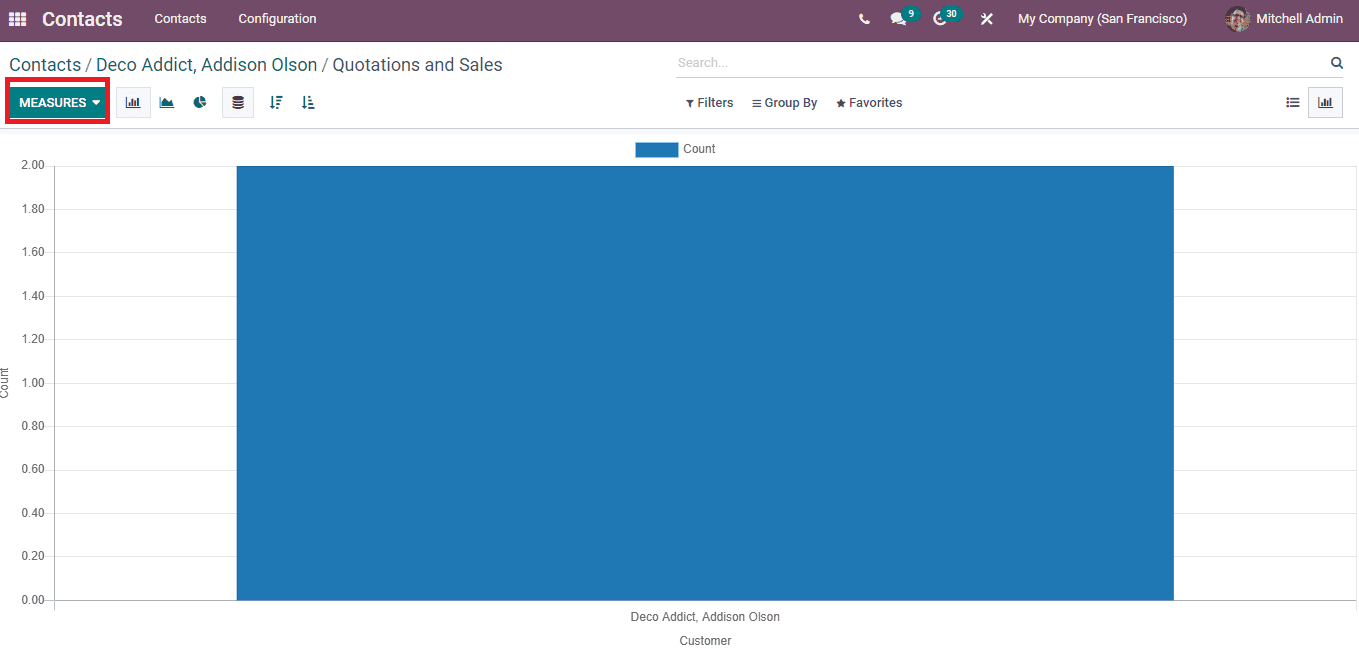
In the Graph view, you can view the Customer details on X-axis and Count on Y-axis. The Measures icon enables you to add several measures to the graph, including Taxes, Margin, Total and more.
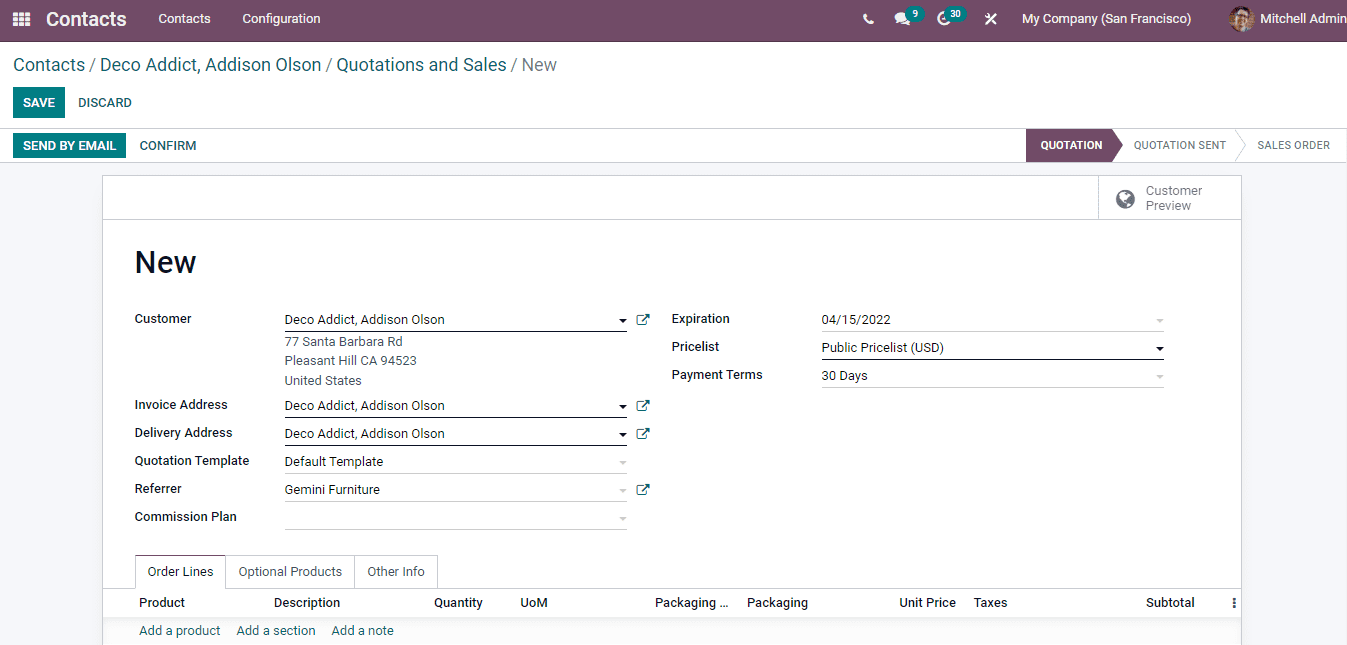
We can develop new sales orders inside a contact using the Create icon. Add Customer, Delivery, and Invoice Address details in the new window. Choose the Referrer, Quotation Template and Commission Plan takes precedence over the Referrers. After that, select the Expiration date and Payment Terms. You can add the Pricelist, and newly added lines will be affected when you change the Pricelist as displayed in the screenshot below.
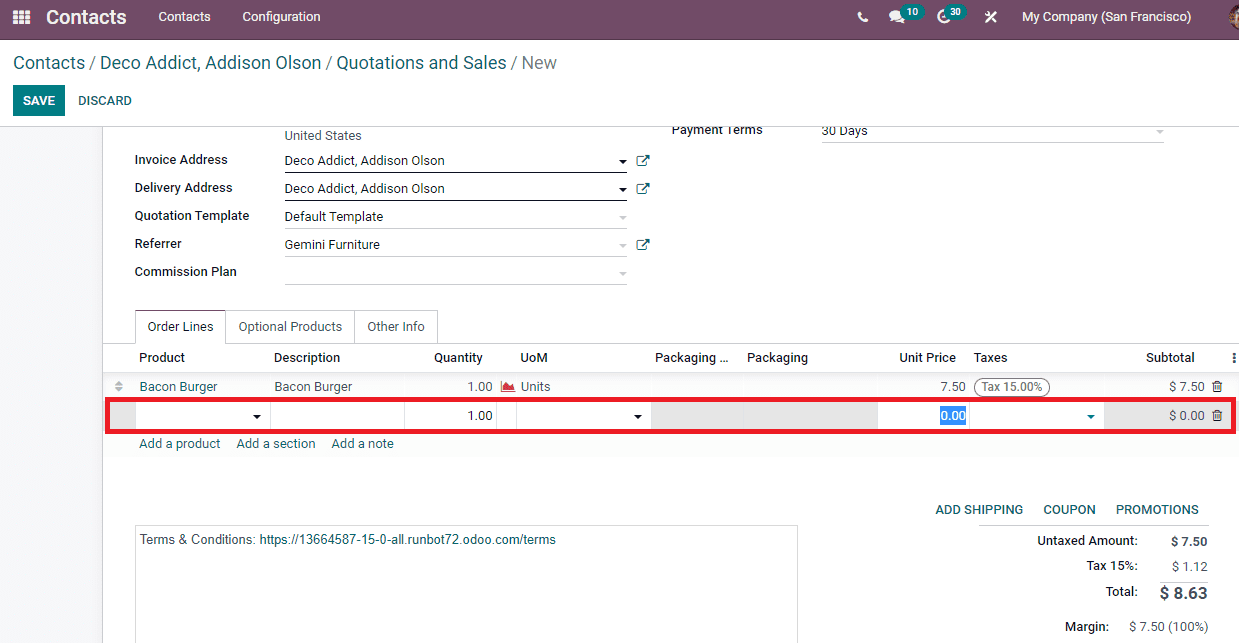
Inside the Order Lines tab, you can apply product details by clicking on Add a Product option. A new space opens below the titles in the Order Line tab and adds the Product name, Quantity, Taxes, Description, UoM/Unit Price as displayed in the screenshot below.
You can apply a product description by clicking on Add a note. An open bar is visible when selecting the Add a note option. Here, use the information about the product as illustrated in the screenshot below.
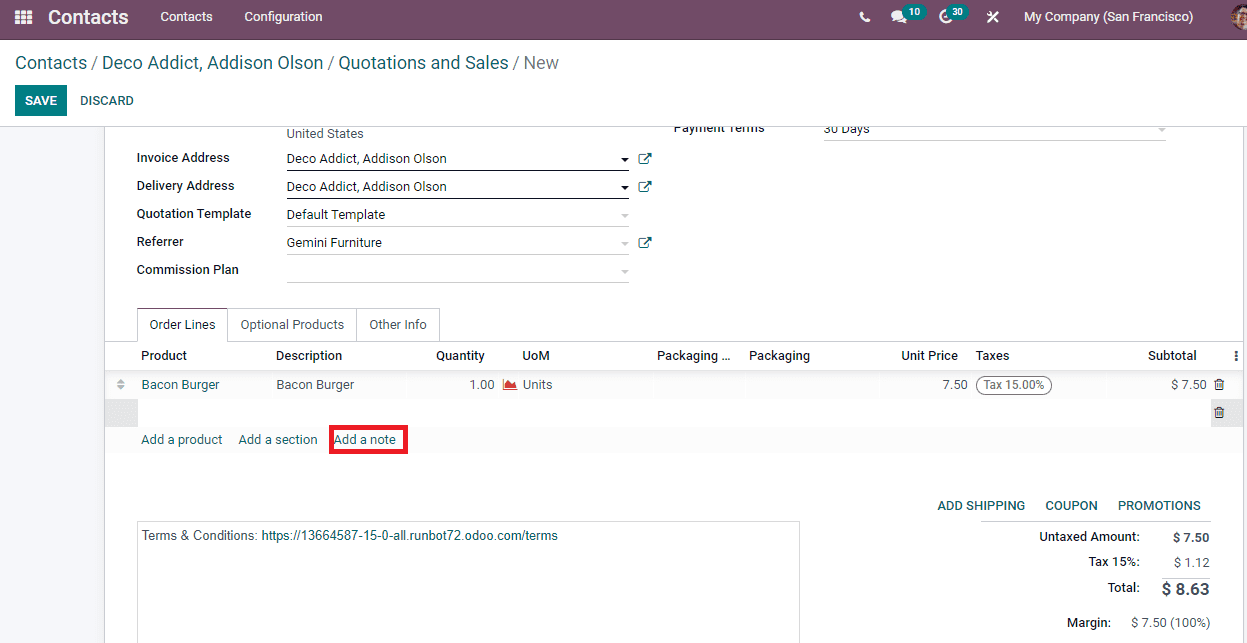
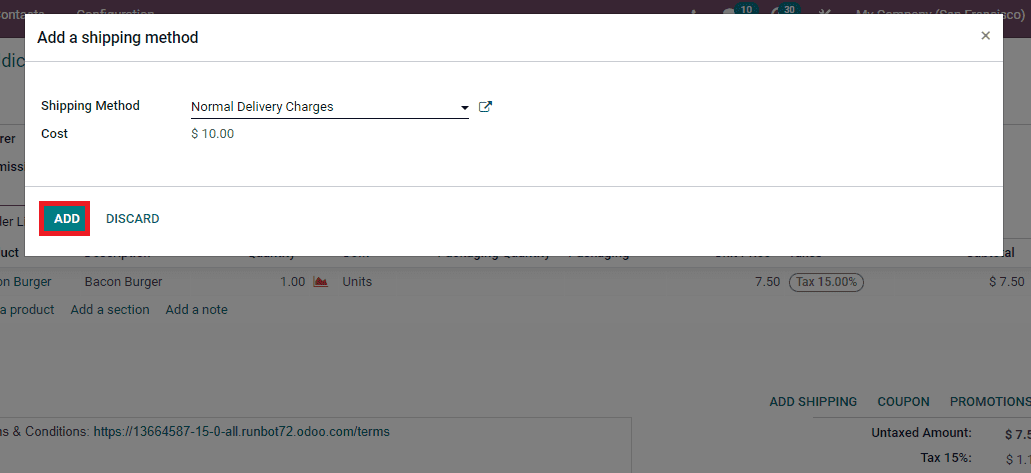
Users can add the shipping procedure by clicking on the Add Shipping icon at the bottom of the Order Lines tab. In the Add a Shipping Method window, choose the method for goods delivery using the Shipping Method field, and the Cost is automatically visible for you. Later, click the Add button, as portrayed in the screenshot below.
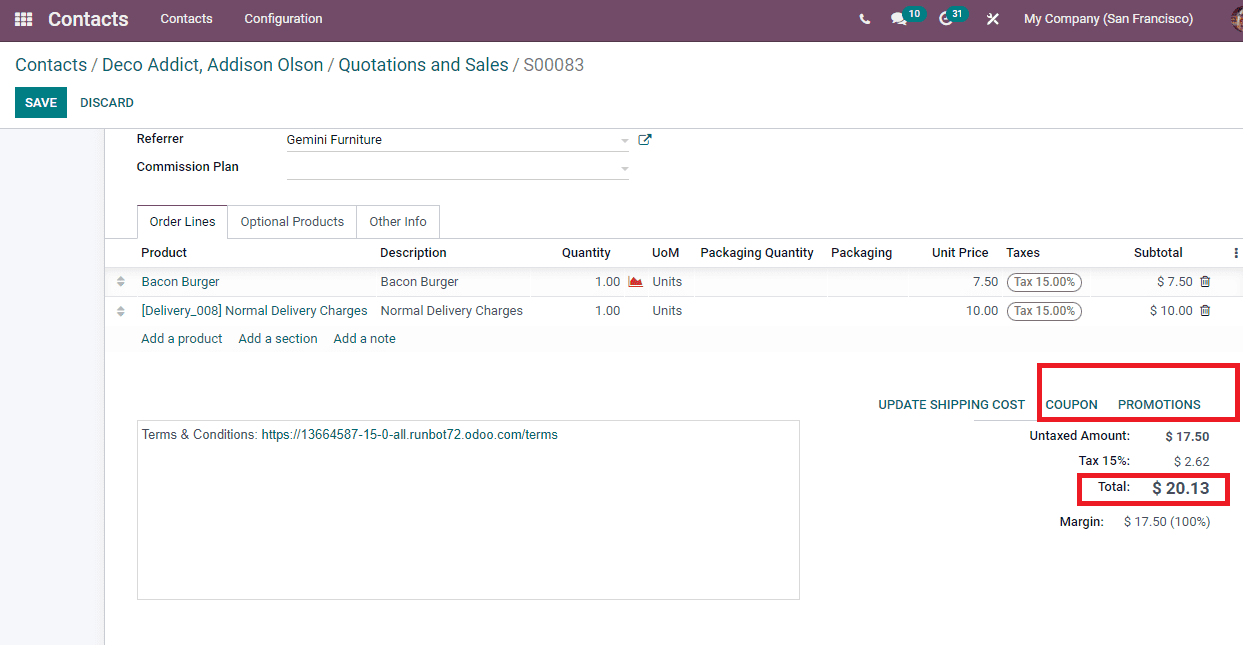
You can generate coupons for the order by clicking on the Coupon icon inside the Order Lines tab. In the Coupon Code window, enter the code and click on the Apply button. The order contents apply for necessary promotion programs after clicking on the Promotion icon. You can view the Total amount of placed orders at the bottom, as displayed in the screenshot below.
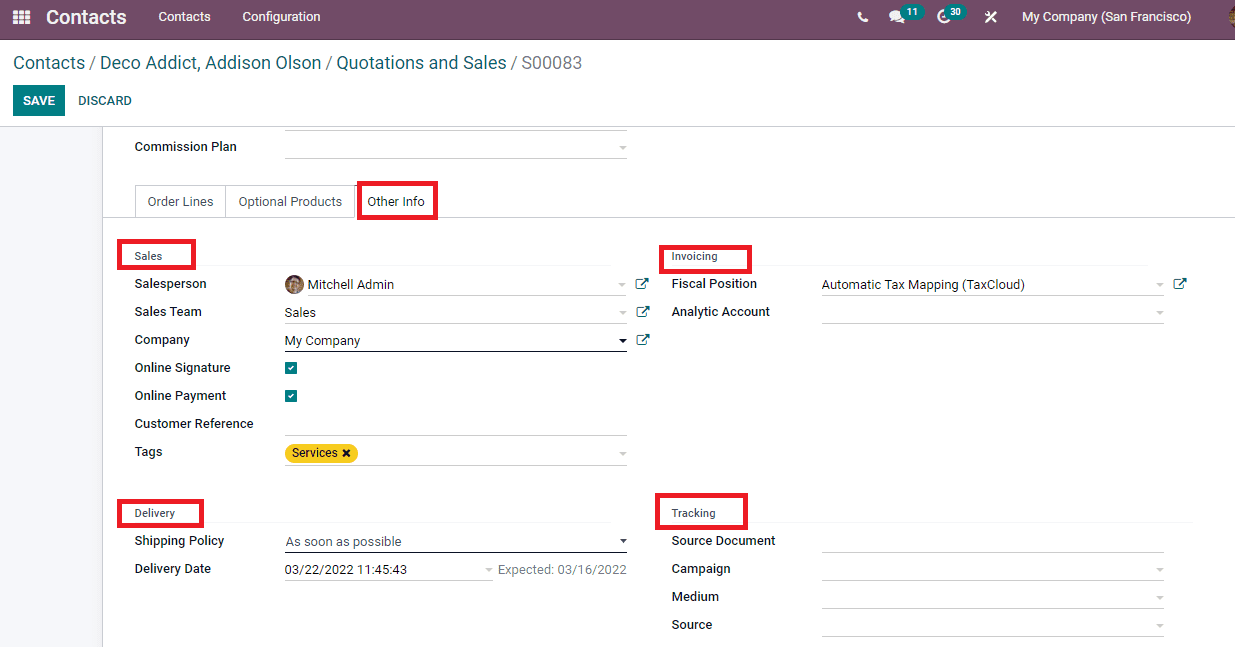
Click on the Other Info tab, and you can manage the Sales, Tracking, Invoicing and Delivery details of the product. Enter the Sales Team, Customer reference, Tags, Salesperson and Company details in the Sales section. After enabling the Online Signature request, the customer confirms the order with an online signature, and the payment request confirms automatically by activating the Online payment field.
Users can adapt accounts for sales orders with Fiscal position and choose Analytic Account for a sales order from the Invoicing section. Add the Delivery date and Shipping policy based on the order below the Delivery title. Enter the document’s reference in the Source document field and name to track the Campaign option. Later, choose the delivery method in the Medium option and Source below the Tracking section.
After entering the details, click on the Save icon, and it is possible to confirm the order by clicking on Confirm button. In the Contacts window, you can view the number of sales inside the Sales sub-menu as displayed in the screenshot below.
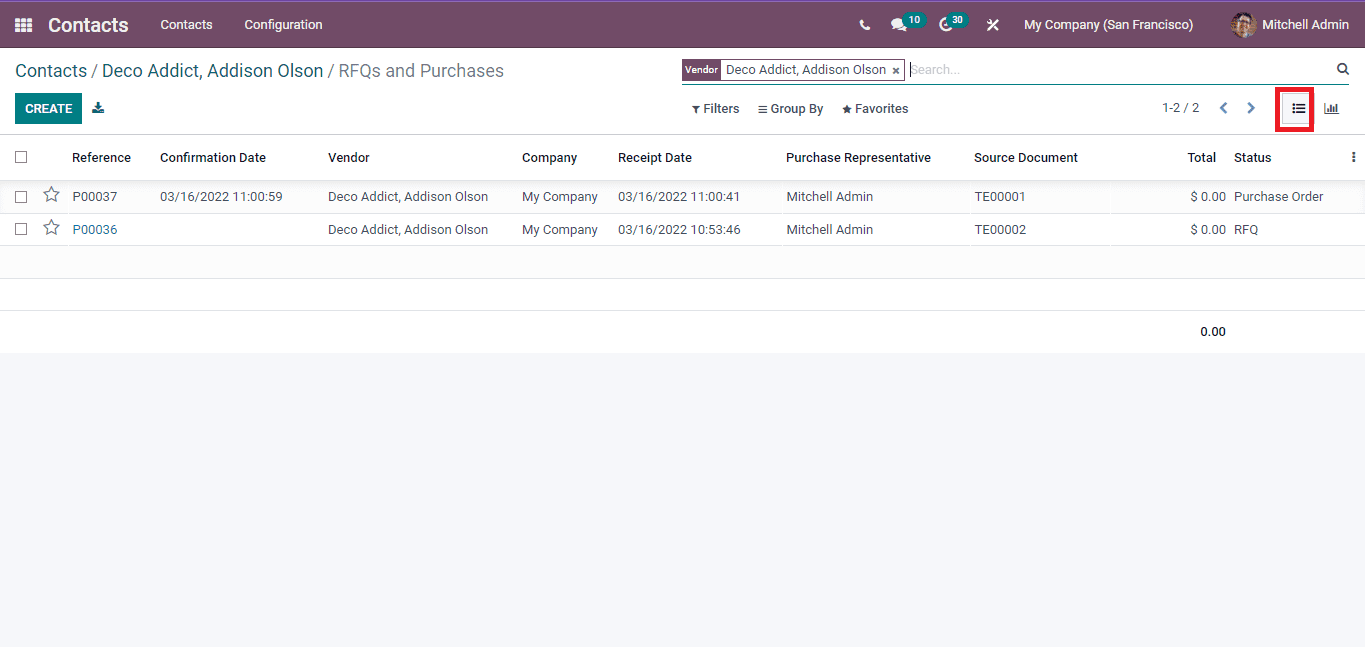
Inside the Purchase sub-menu of the Contacts window, you can see the list of purchases done by a specific individual. You can generate a new purchase order using the Create icon. Here, we can see the details, including Reference, Vendor, Receipt Date, Source document, Confirmation Date, Status, Company, Purchase Representative and Total in the List view as portrayed below.
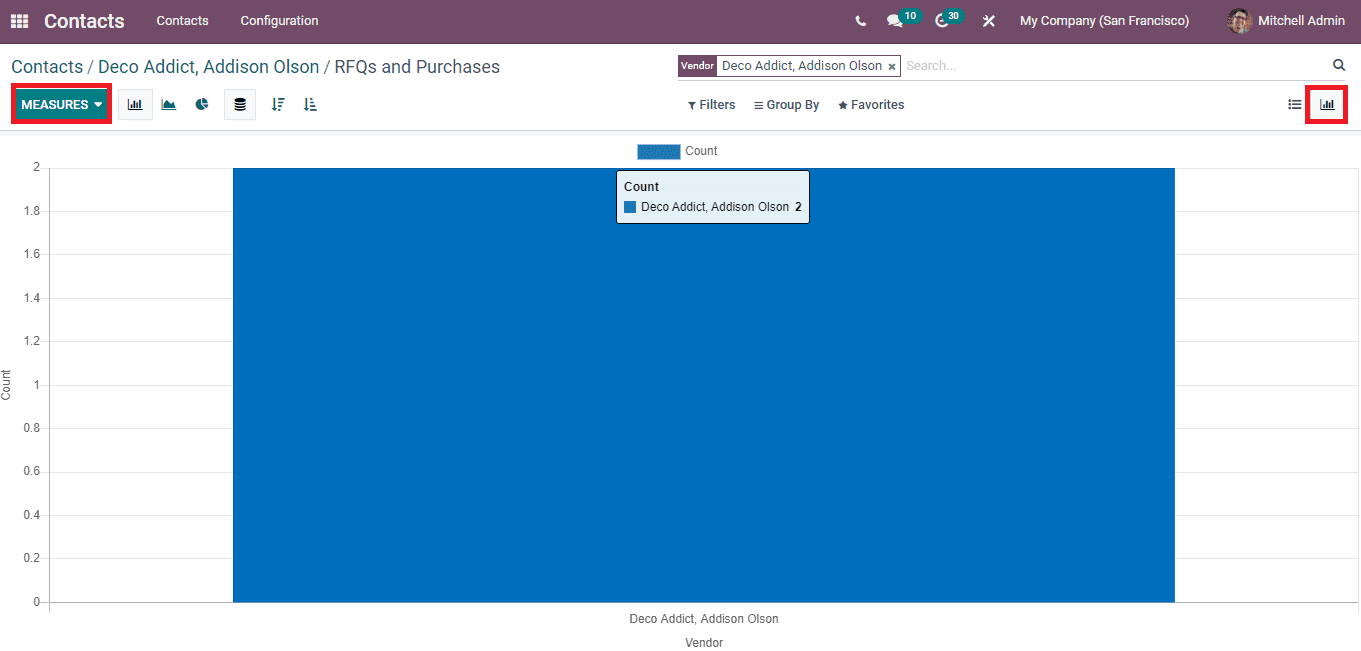
The Graph view depicts the Vendor details on X-axis and Count rate on Y-axis. You can add measures including Bill Count, Untaxed Amount and more aspects using the Measure icon.
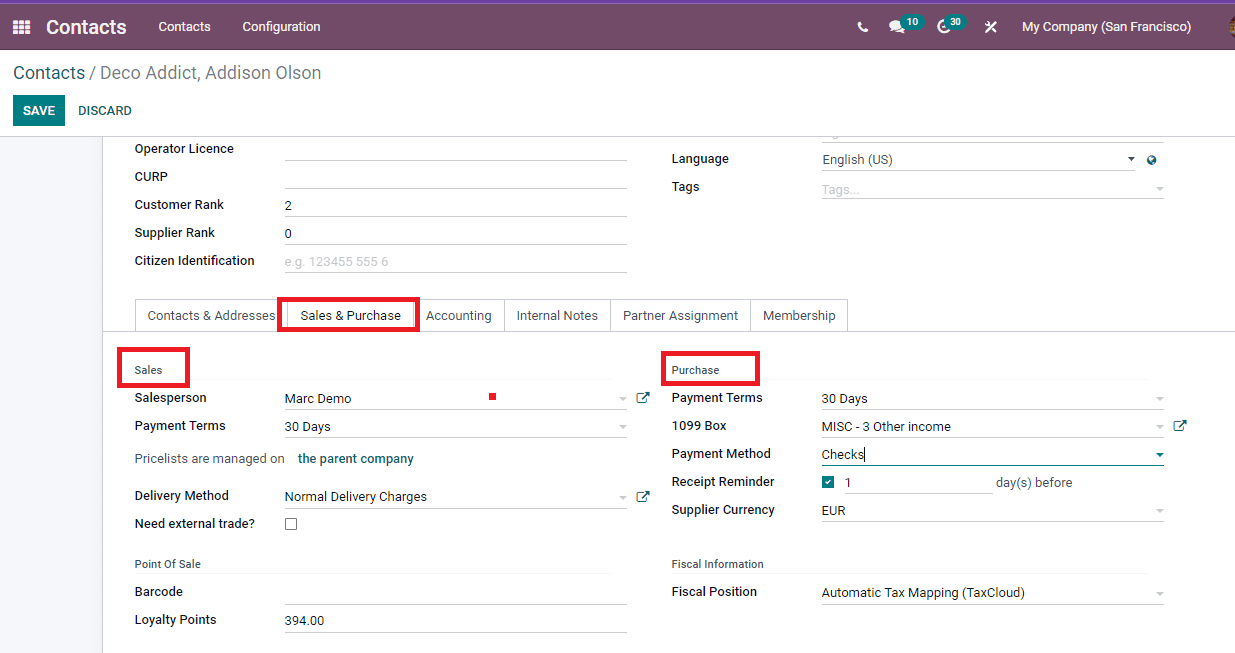
We can look at the Sales and Purchase tab at the end of the Contacts window. Inside the Sales section, add the name of the Salesperson and Payment Terms used for sales orders and customer invoices. Choose the Delivery Method for your sales order. Select the days for purchase order/vendor bills in the Purchase section and the Payment Terms. Choose the 1099 Box to sum up the journal items of a vendor and set the payment method as Checks/credit Transfer/Manual from the Payment Method field. Apply the Receipt reminder to send a confirmation email for the vendor and select the currency for purchase inside the Supplier Currency field.
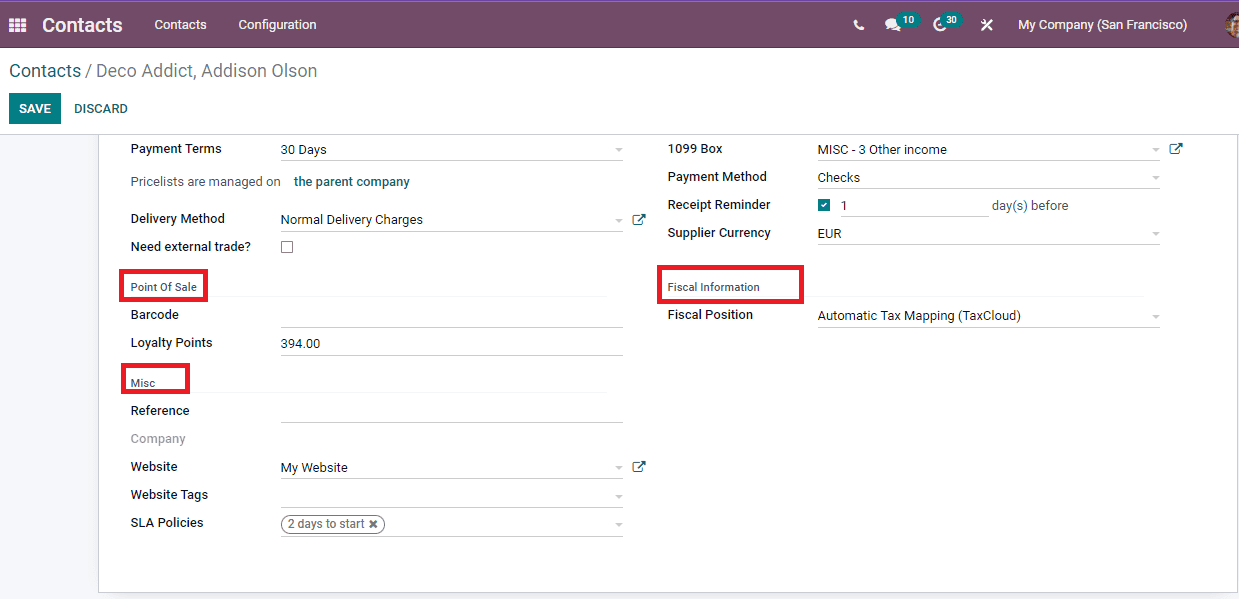
Apply the Barcode to identify your contact and set the Loyalty Points as a part of a Loyalty program inside the Point of Sale section. You can determine taxes used for a contact using the Fiscal Position field in the Fiscal Information section. At last, enter the SLA Policies, Website, Reference and Website Tags inside the Misc section as displayed in the screenshot below.
After entering the sales and purchases information in the Contacts window, click on the Save icon.
We discuss using the Sales and Purchases Tab in the Odoo 15 Contacts module. Users quickly access the details of sales and purchase orders done by a particular individual. Odoo 15 Contacts module manages the contacts, Localization, and Configuration features.


