In general accounting, a Credit Note is a document that a seller issues to a buyer to inform them that credit has been credited to their account. A seller can provide a credit note when a customer needs to cancel all or a portion of an invoice for several reasons, including After an invoice has been issued, changes to an order can be made. A debit note often called a debit memo, is a commercial document that a buyer sends to a seller. It is a request for a refund of payments from a buyer to their seller owing to defective or damaged goods, transaction cancellation, or other specified reasons. A debit note is identical to a credit note, except that the buyer issues it. A debit note or credit note is sent when a customer returns merchandise to the supplier or seller of those goods. A debit note is issued to the items’ supplier or seller, while a credit note is issued to the goods’ consumer or buyer.
In Odoo what we will follow is that returns are managed by credit note and extra bills or invoice for extra goods are managed by debit notes.
However, while using debit notes in Odoo 15, there is a difference. A credit note is used in the same way mentioned previously during the return of products. However, with Odoo 15, a debit note is utilized to pay for any additional products that have been delivered. When a firm orders a certain number of products, the vendor provides more; when a company pays for an order’s quantity before it is given, the extra quantity must be paid for. Debit Note is used in Odoo 15 in such instances. Let’s check the implementation and use of both Credit Note and Debit Note in Odoo 15.
– Use of Credit Note
A firm that deals with sales and selling products go through various stages to complete a sale. The company sold things in specified quantities to customers. After that, the consumer is responsible for paying for the delivery. The customer has the option of paying before or after delivery. The transaction is then completed.
That’s not always the case, though. If a customer is unhappy with a product that has been delivered, they can return it. Customers sometimes return the entire quantity of sold merchandise, while others return partial quantity amounts that may occur due to product damage or other reasons. In such circumstances, if the consumer paid the company for delivery, the company is responsible for reimbursing the customer for the return. Credit Note is the name given to such a reverse invoice in Odoo15.
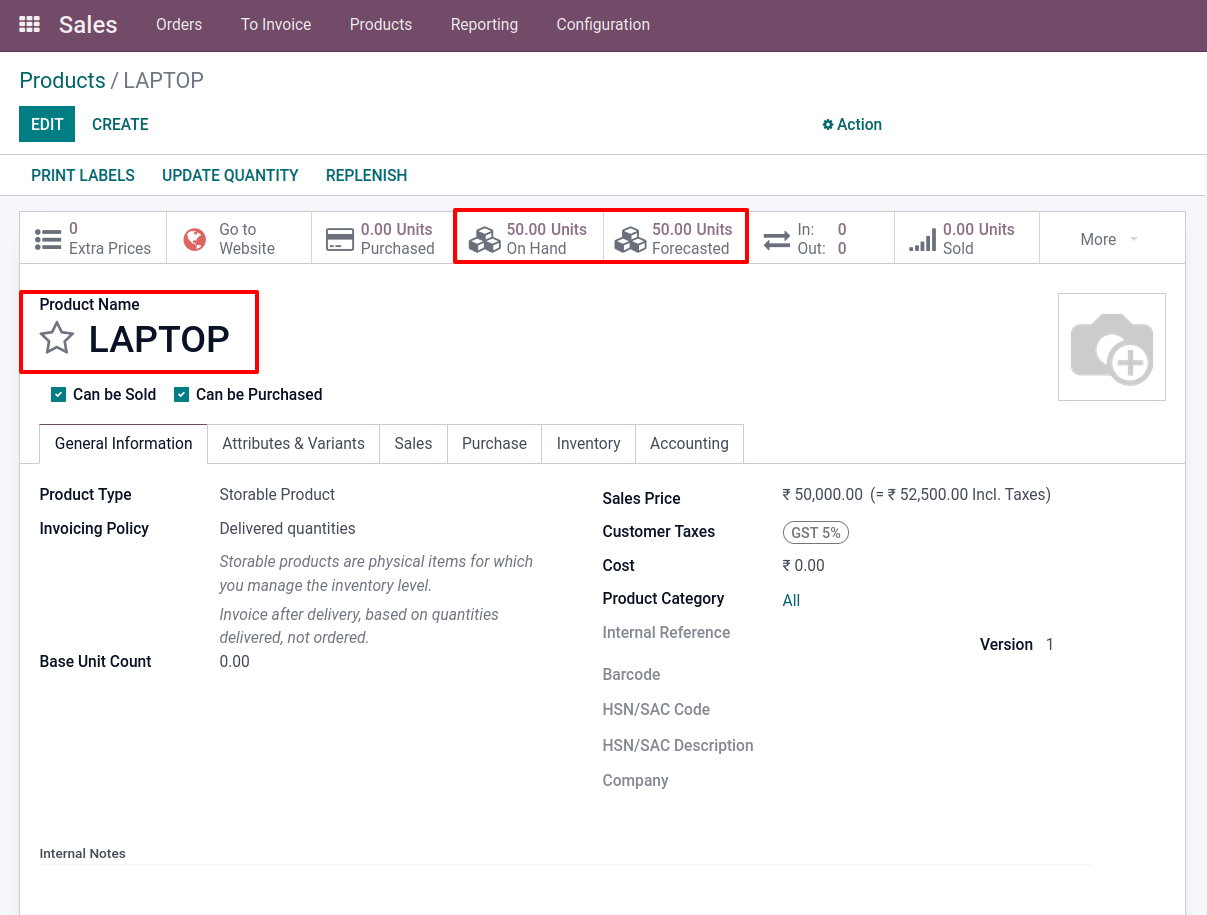
There is a product called LAPTOP. This is a storable product with an On Hand Quantity of 50 Units. The Predicted Quantity is 50 in this case. When a salesperson sells a product, the Onhand Quantity and Forecasted Quantity are updated automatically
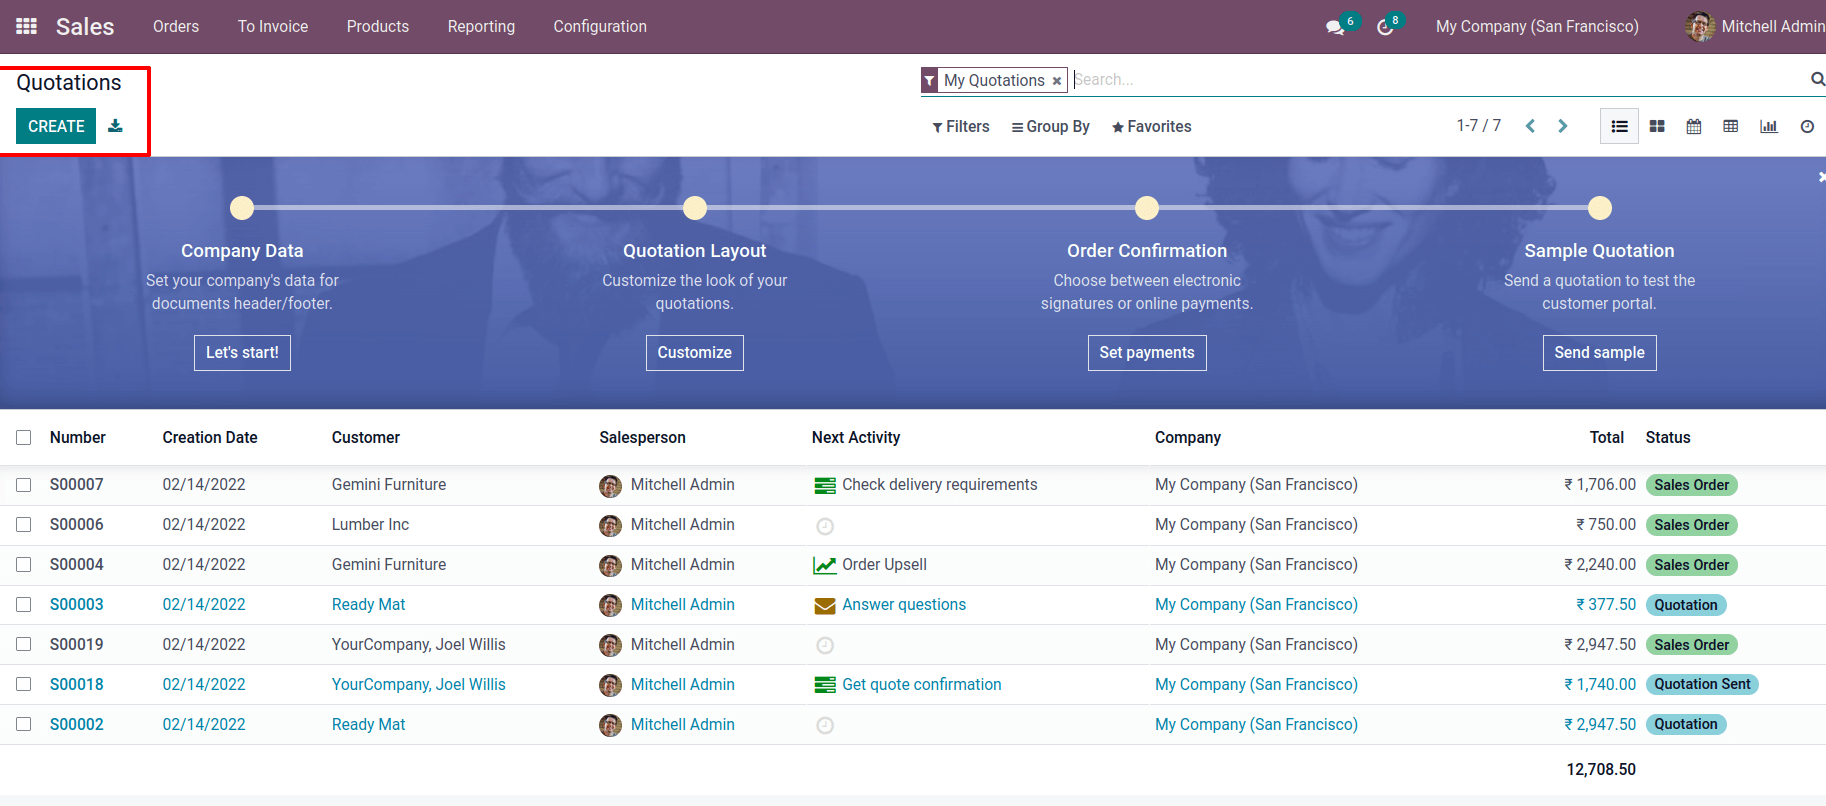
Let’s build a quote for the products. Go to overview for more information. There is a list of all the Quotations that have been created. Click the Create button to begin a fresh one.
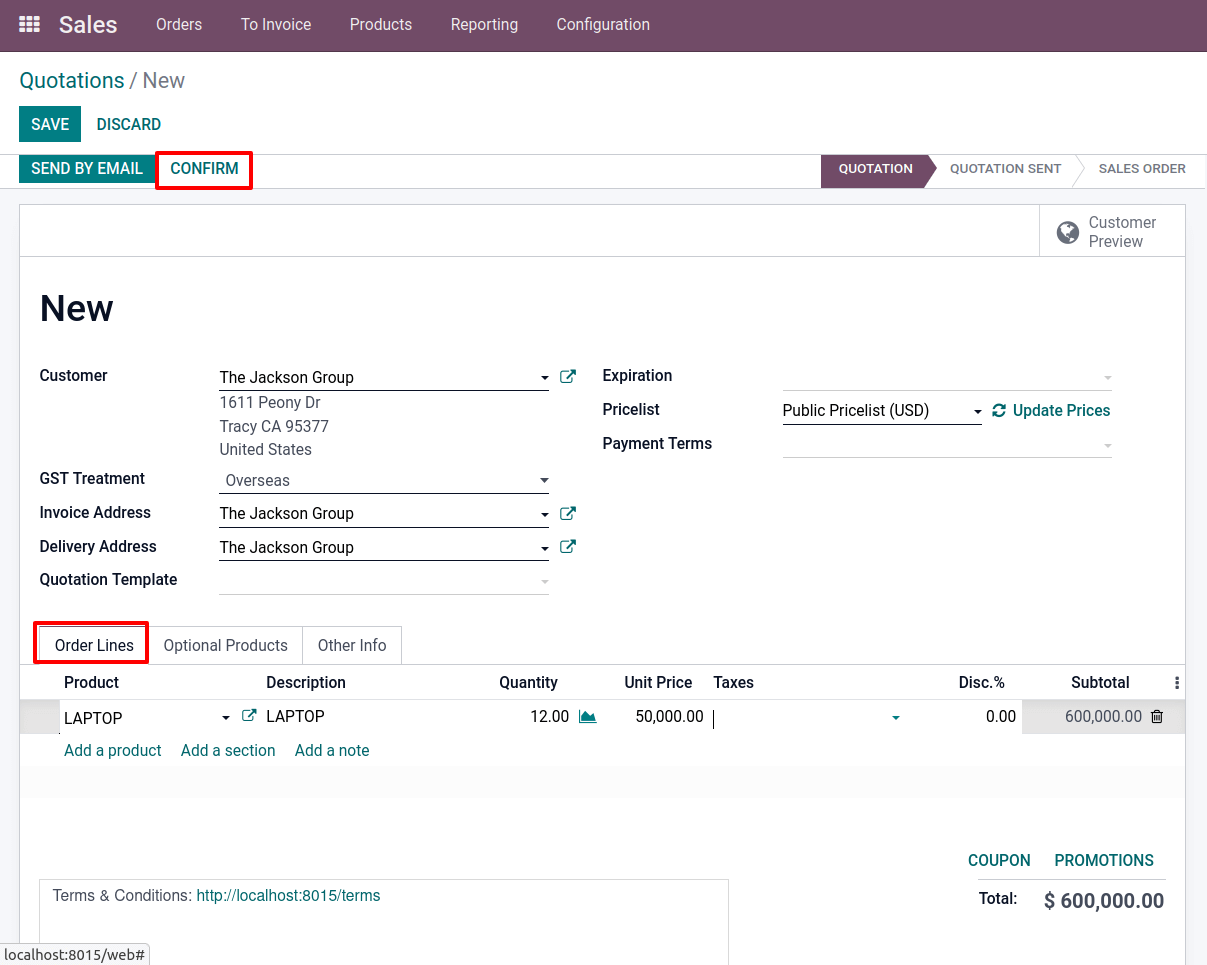
For the customer, The Jackson Group here generated a quotation. In the Order line, provide the quantity and unit pricing for the product. LAPTOP has been added with a quantity of 12. The unit price is $50,000 in this case. Now it’s a quotation, but it’ll transform into a Sale Order if you click the Confirm button.
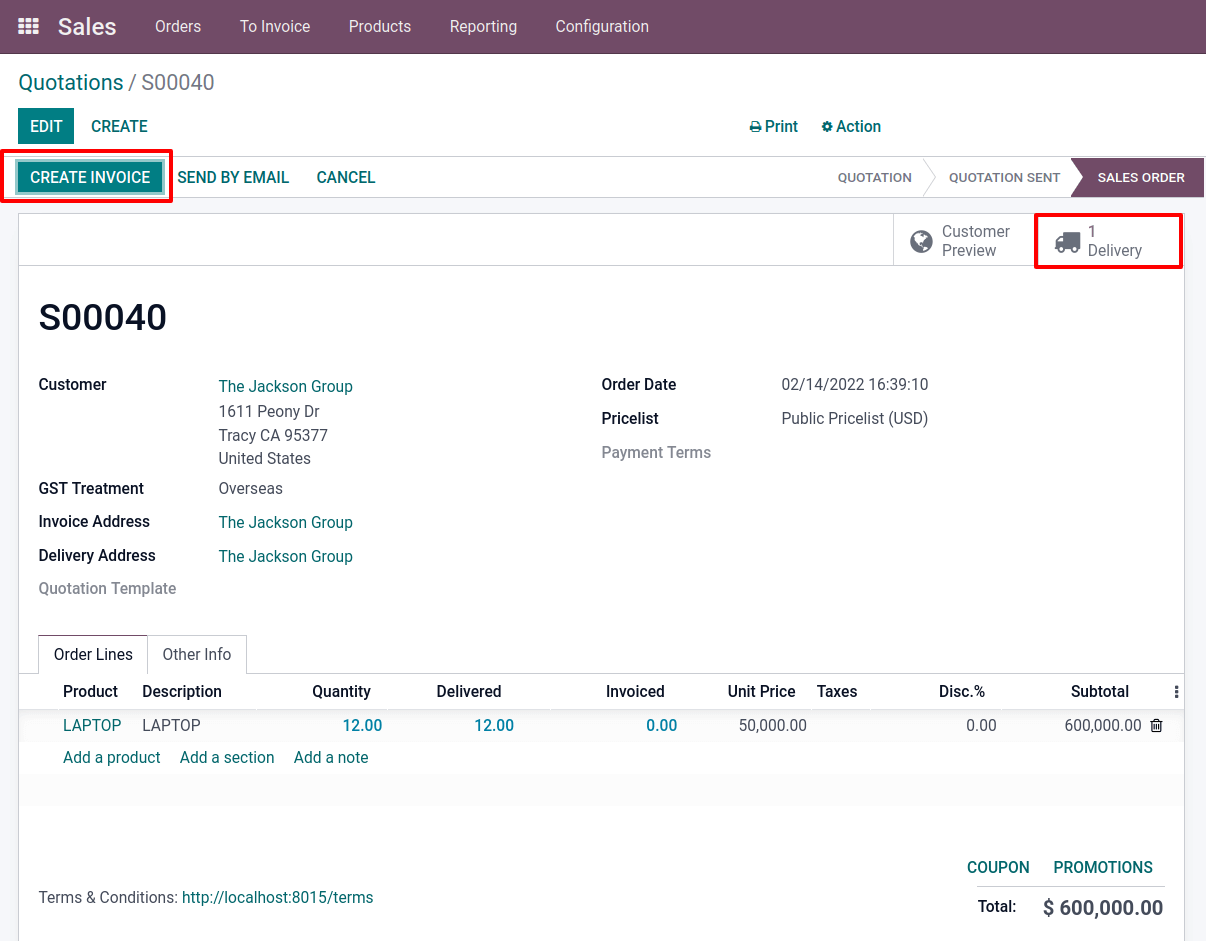
After that, a smart tab called Delivery was established. The delivery was finished after it was validated. Create an invoice from the Sale order after that
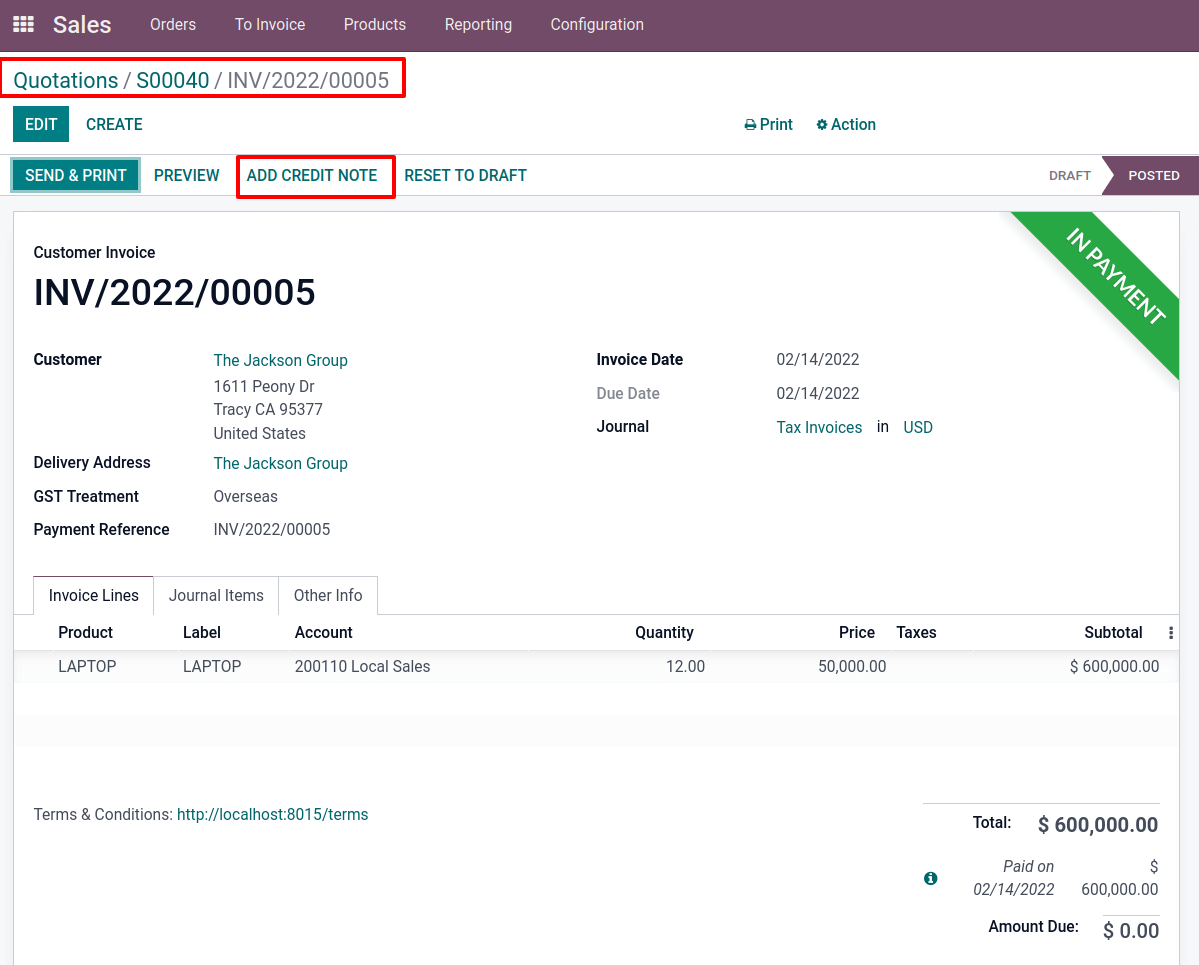
Make a Regular Invoice. Then, for the order, register payment. Then an IN PAYMENT ribbon appears on it. There is an ADD CREDIT NOTE button that can be used to create a credit note right away. However, credit notes are usually used in the commercial world after things have been returned. So, while the consumer returns the things that were delivered, let’s move on to
the case.
Go to the sale order page again. Two smart tabs were generated, as shown. Delivery will be the first, and Invoice seems to be the second.
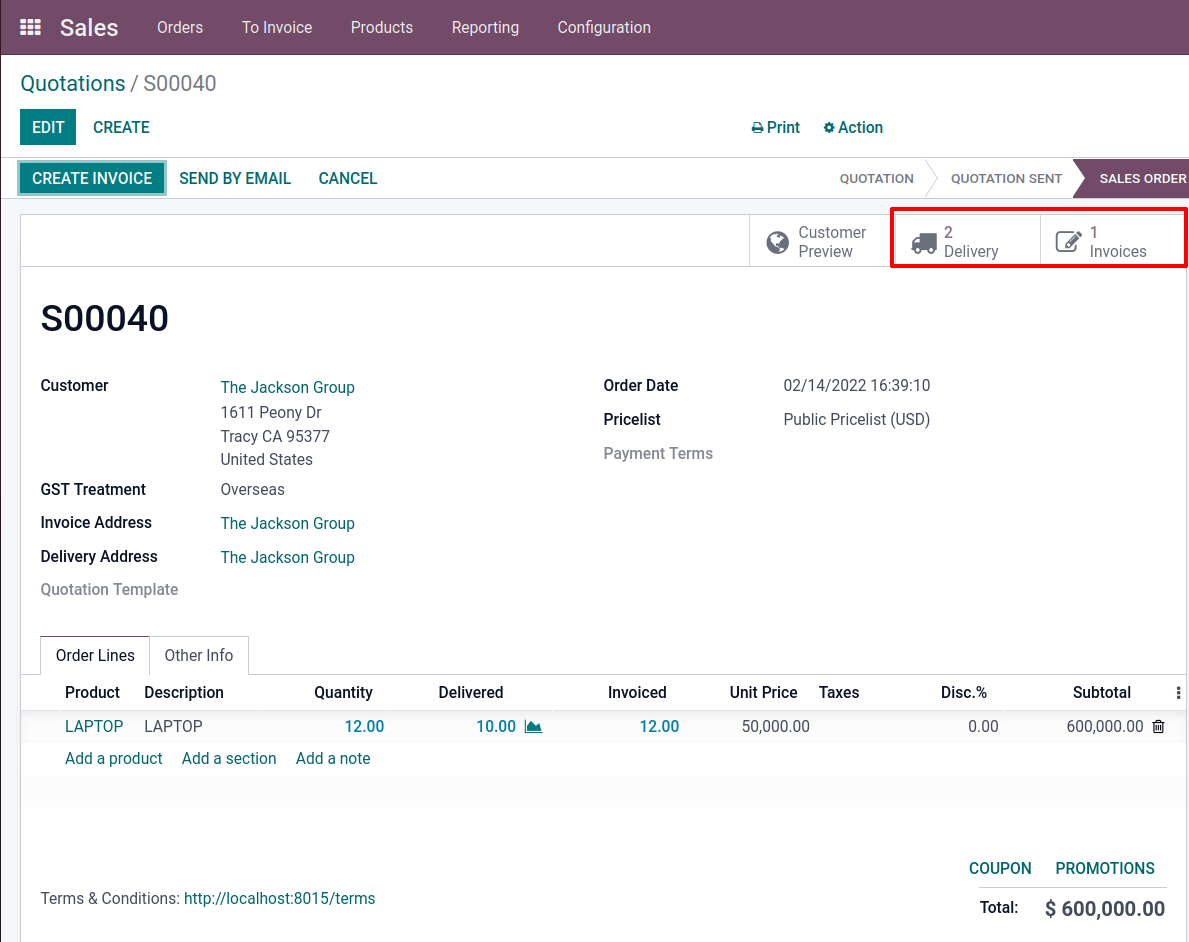
There is a Delivery smart tab in the sale order; open the new tab. There are delivery details such as Delivery Address, Scheduled Date, Effective Date, Source Document, and so on display.
The product is displayed in the Operational tab and its quantity and unit pricing.
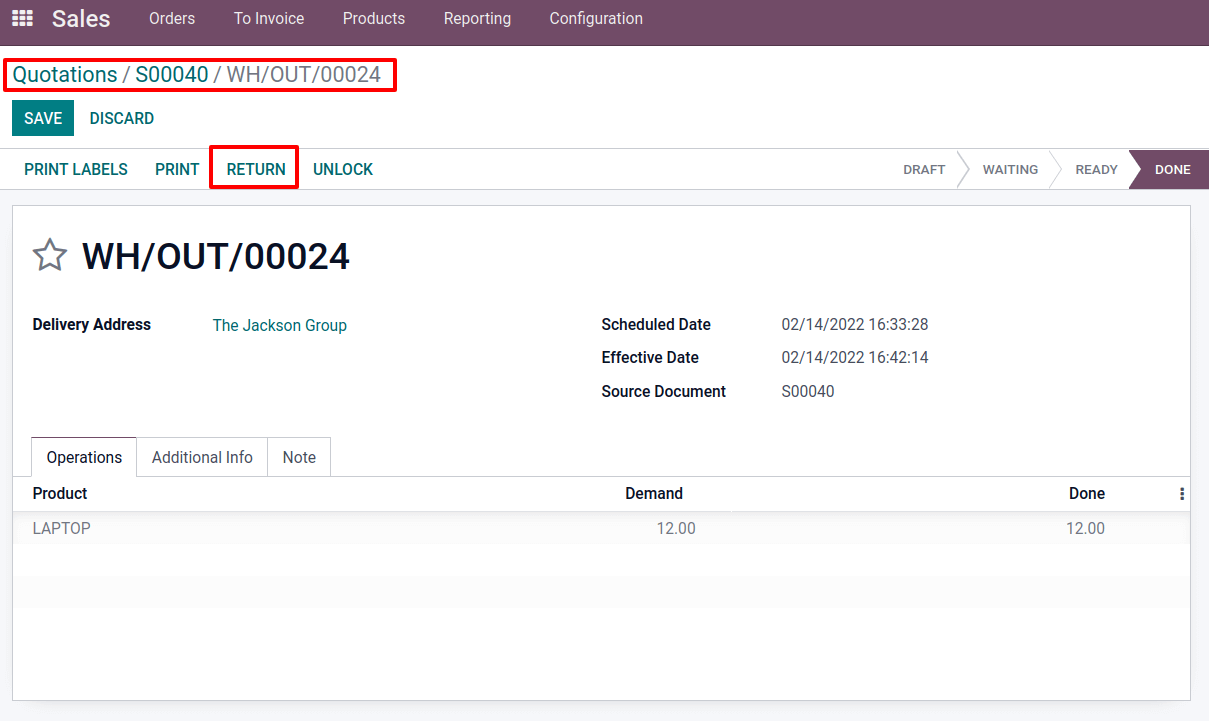
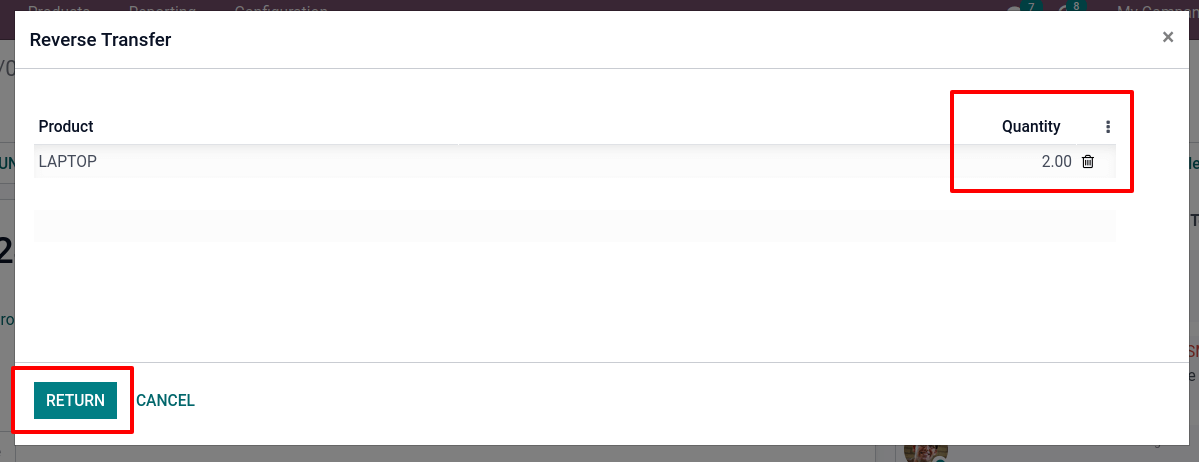
A RETURN button is visible. Customers’ product returns can be managed using this mechanism. When one clicks the button that takes to another page, you can enter the quantity of returned products. Initially, there is a complete quantity displayed. However, the count can be updated. The Jackson Group, the customer, wishes to return two units. As a result, change the field Quantity to two. Then press the RETURN option.
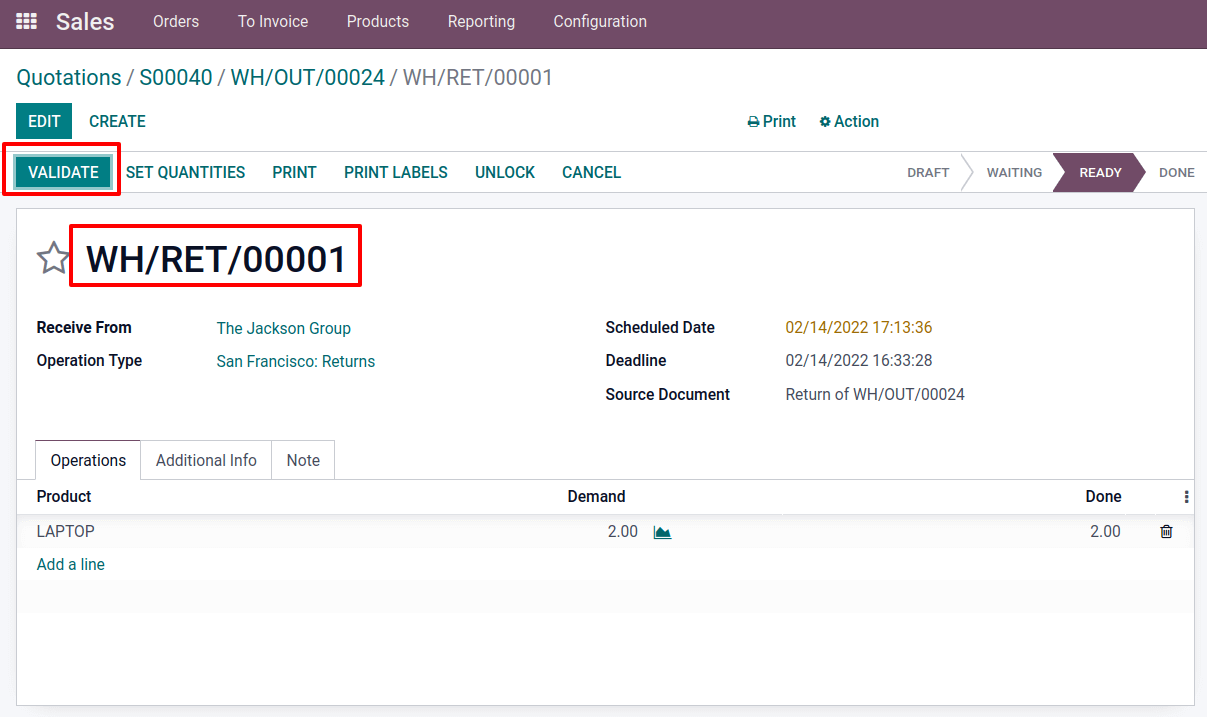
Then the appropriate Delivery is created automatically. The reference WH/RET/00001 denotes that this is a return. Details such as Receive From Whom, Operation Type, Scheduled Date, Deadline, Source Document, and so on are displayed. The returned product details are placed in the Operation tab. Then select VALIDATE menu.
Select the second smart tab Invoice in the sales order to create a reverse invoice, also known as a credit note. There is a button ADD CREDIT NOTE when the Invoice tab is opened. Click on it.
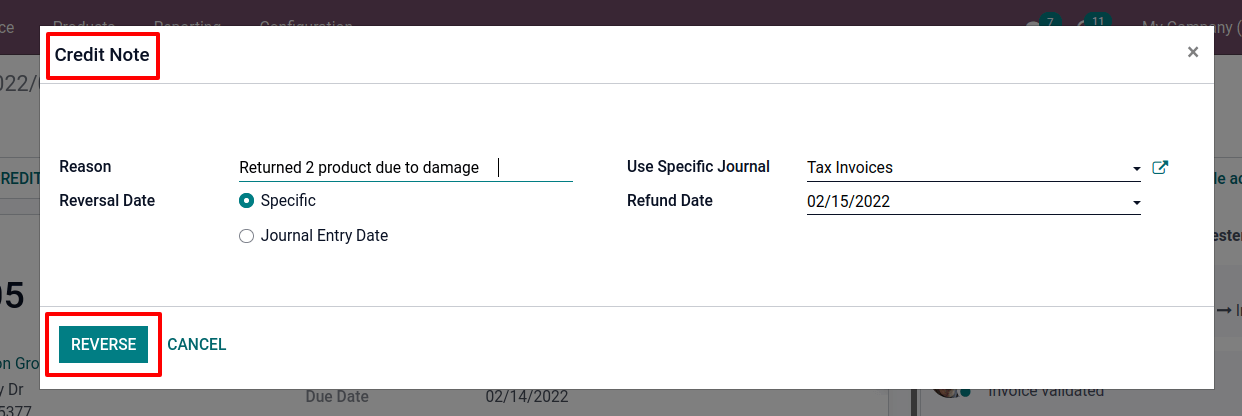
A new page is displayed on the screen. There is a discussion of the reason for producing a credit note. One can also offer details like the Refund Date, Journal Date, and Reversal Date. Click the REVERSAL button once completed.
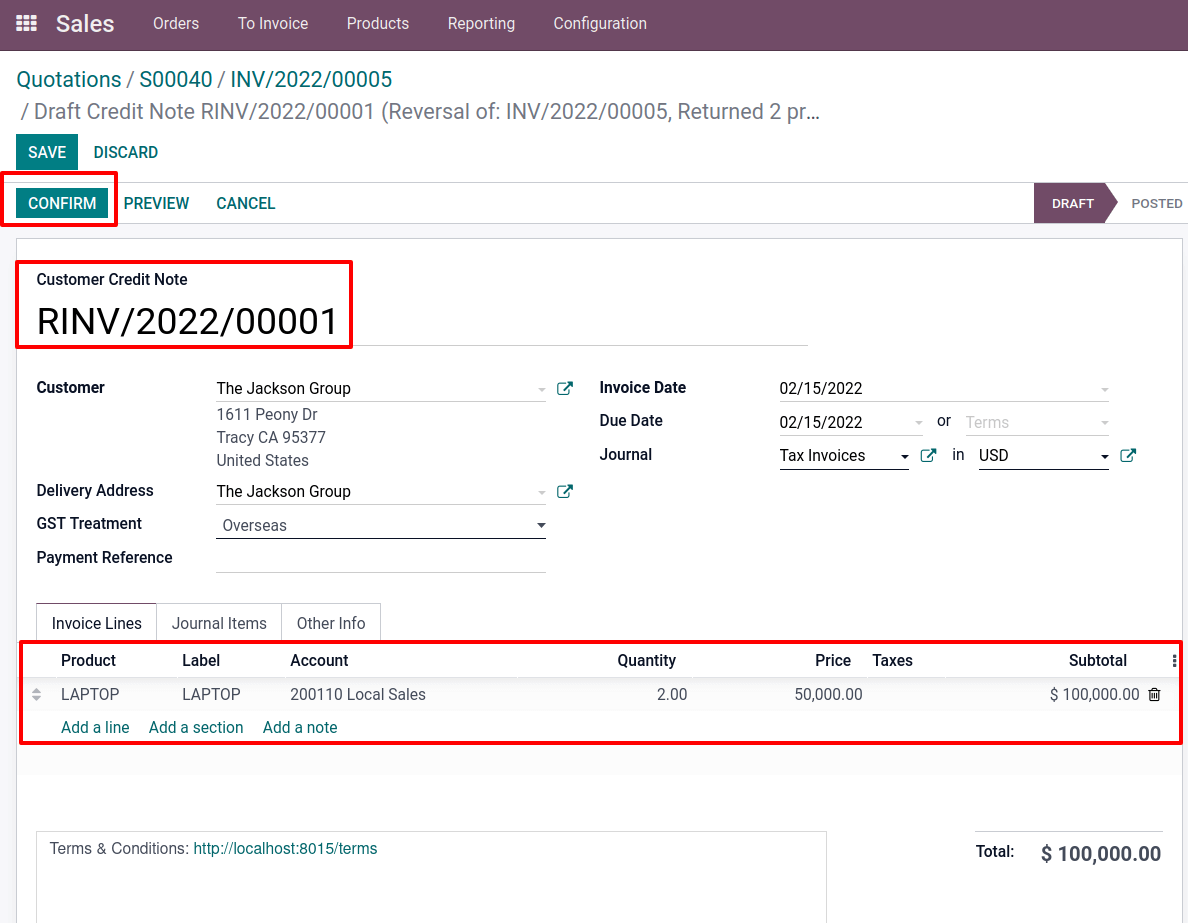
The customer’s data, delivery address, invoice date, and so on are subsequently entered into a Customer Credit Note. When looking at the Invoice line, the product with the entire quantity added there. From there, one can change the quantity. The client returned only two products in this case. So, reduce the quantity to two. As a result, the overall value immediately decreased in proportion to the quantity. Then click on the Confirm button.
After that, create a payment by registering it. At this point, one can include details like Journal, Recipient Bank Account, Amount, Payment Date, and a Memo. Then CREATE PAYMENT from there.

Now the credit note has been created, and the payment has been confirmed. As a result, it’s labeled IN PAYMENT
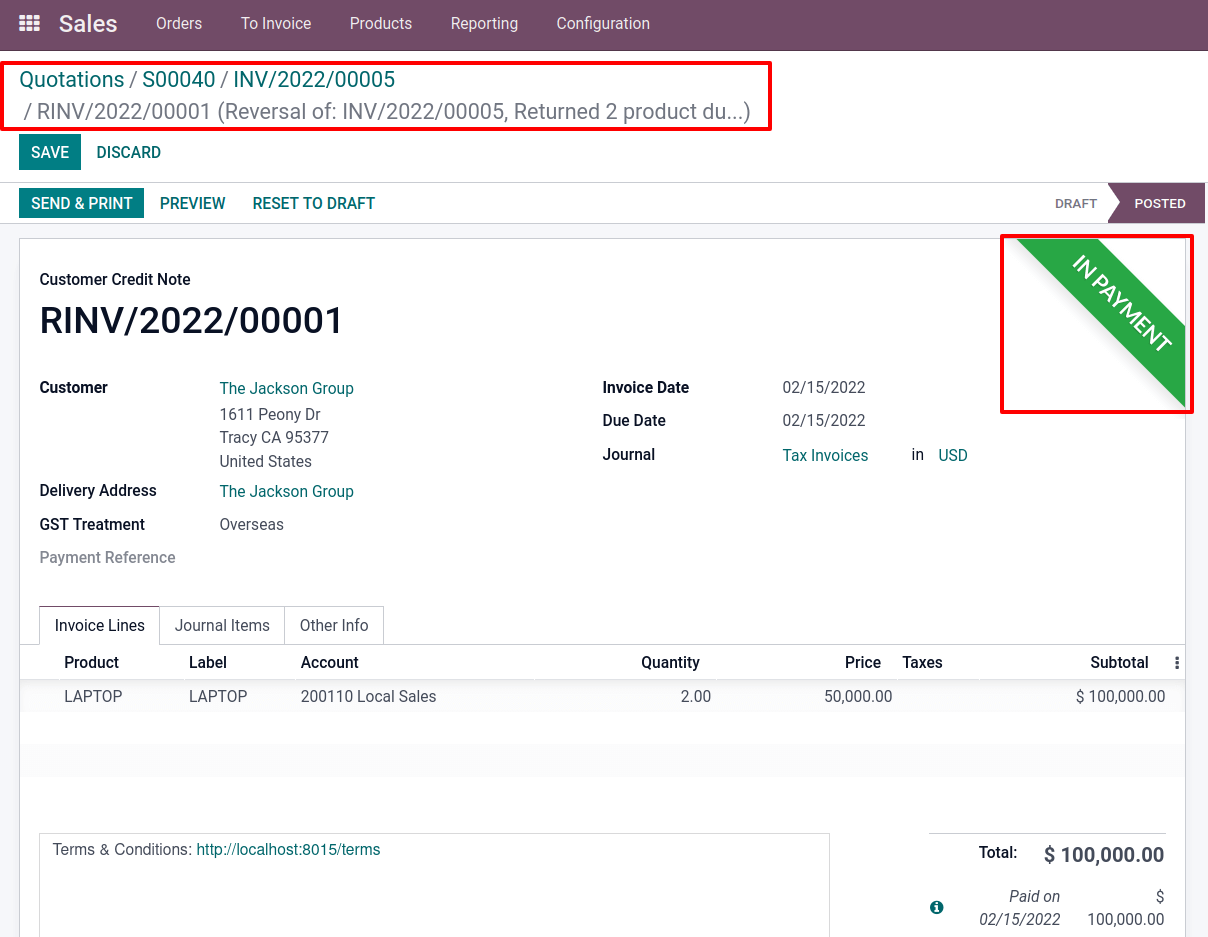
Now, the consumer has returned two things, and the firm has reversed a payment to the customer for those two products. This was handled by using the Credit Note option.
– Use of Debit Note
One of the most significant parts of a business is its purchasing. Because a business keeps goods on hand, either through purchase or production, when purchasing a product from a vendor, submit a Request for Quotation after confirming the order. The vendor then delivers the product and bills to the company, which the company pays. But there are two types of vendor billing policies. That company has the option of paying before for the quantity ordered or the quantity received. It pays for the quantity demanded, and the firm pays for what it ordered.
Consider the scenario of a company that placed an order for a certain quantity of products and the bill created for what they ordered. If the vendor, on the other hand, if the vendor delivers more goods than was ordered. This can happen by accident or because the vendor has a policy of only selling a certain number of items. The extra added products will need the creation of a new bill. In such circumstances, a debit note is used.
So, let’s have a look at how Debit Note is used. From the Purchase module, create a new Request for Quotation. From Purchase, it is simple to create an RFQ. A list of previously created RFQs is provided in the overview. To enter a new one, click the Create button.

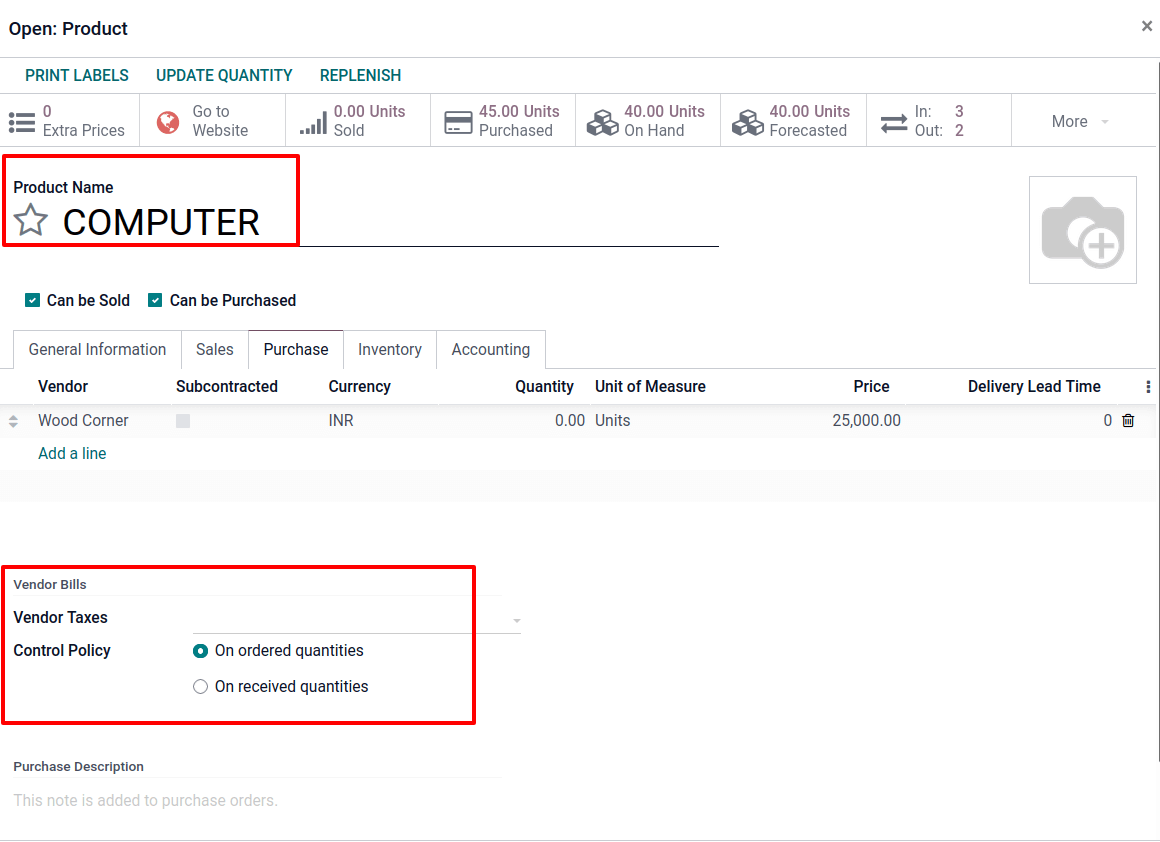
In this scenario, a COMPUTER was bought. The product COMPUTER is a storable item, and the Vendor Bill Control Policy is set only to allow on-order quantities from its Purchase tab.
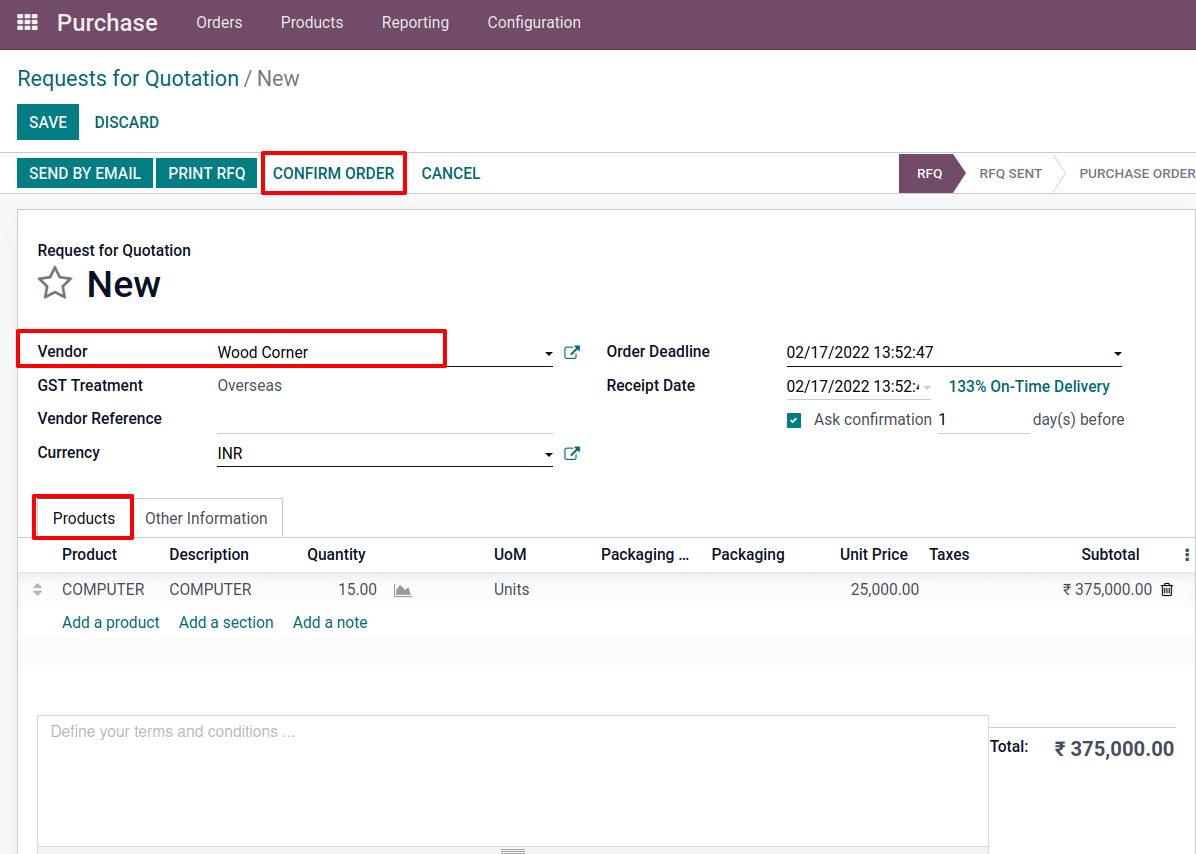
As a result, one issued a request for a quote (RFQ) to the vendor Wood Corner for a quantity of 15 units. Vendor, Vendor Reference, Currency, Order Deadline, and so on should all be included. Add the product to the order Deadline, the amount and unit price, and Confirm the order.
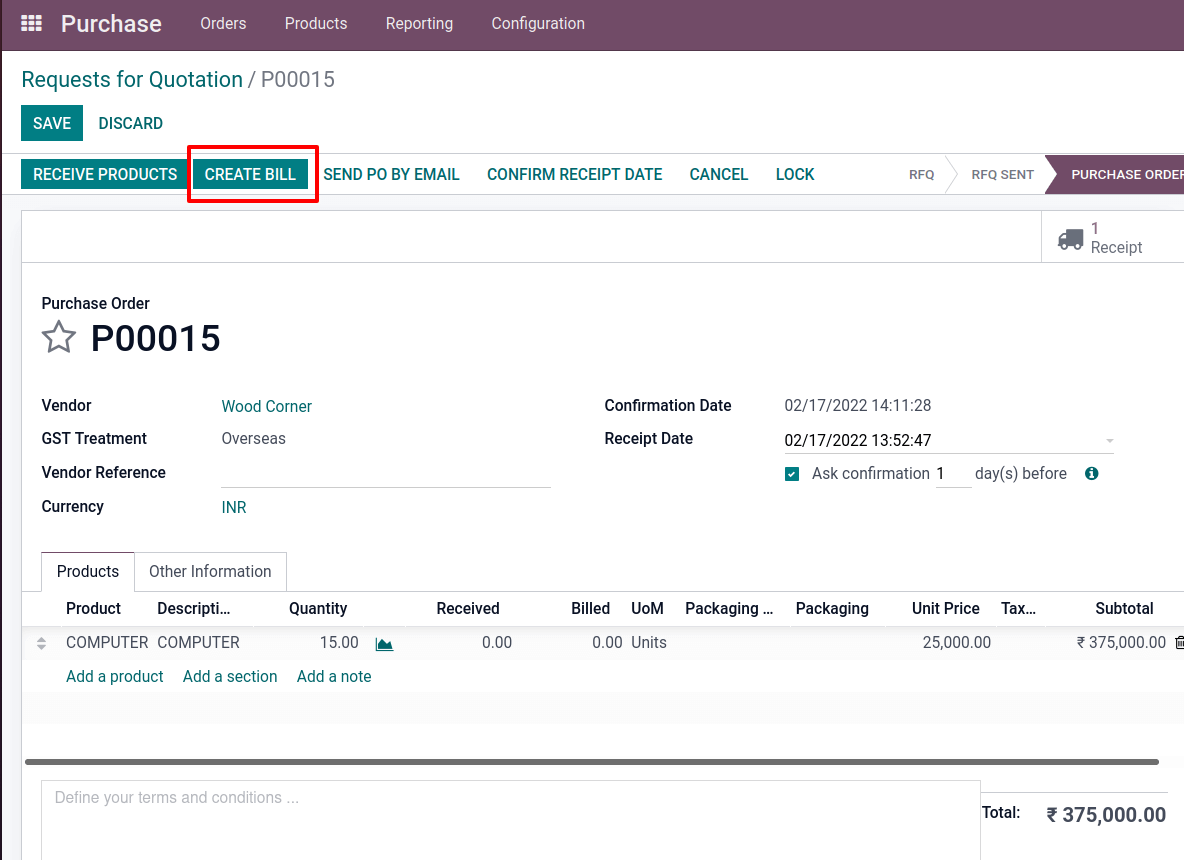
There is an option to produce a Vendor Bill before receiving products, which is the CREATE BILL option. Please click on it after Confirming the RFQ.
In Draft mode, a vendor bill is generated for the ordered quantity. Vendor, Accounting Date, Due Date, and Journal are all listed on the bill. It is essential to provide the bill’s date. After that, the bill will be confirmed and sent to the posted state.
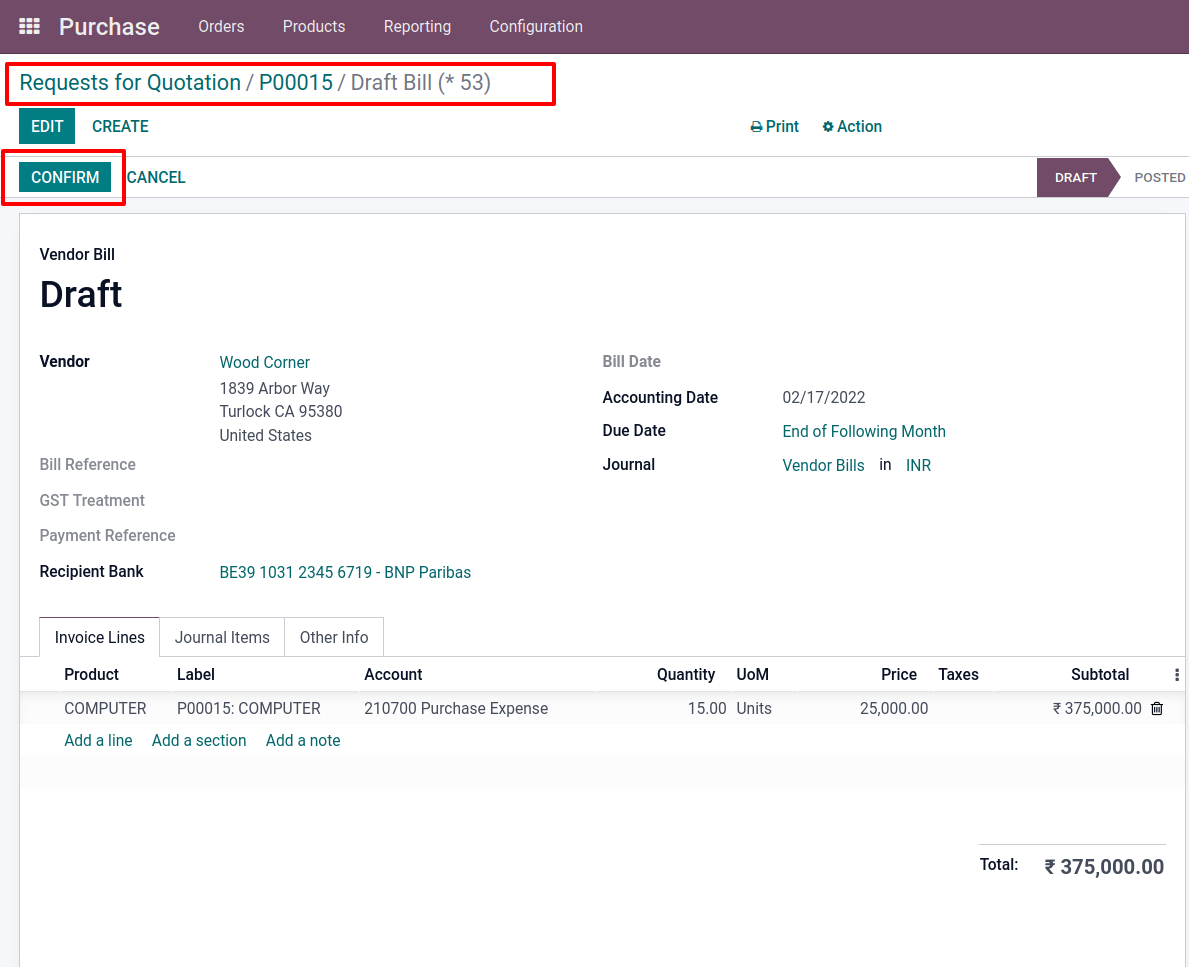
The Vendor bill has now been generated, and the Bill has been moved to the Posted stage.
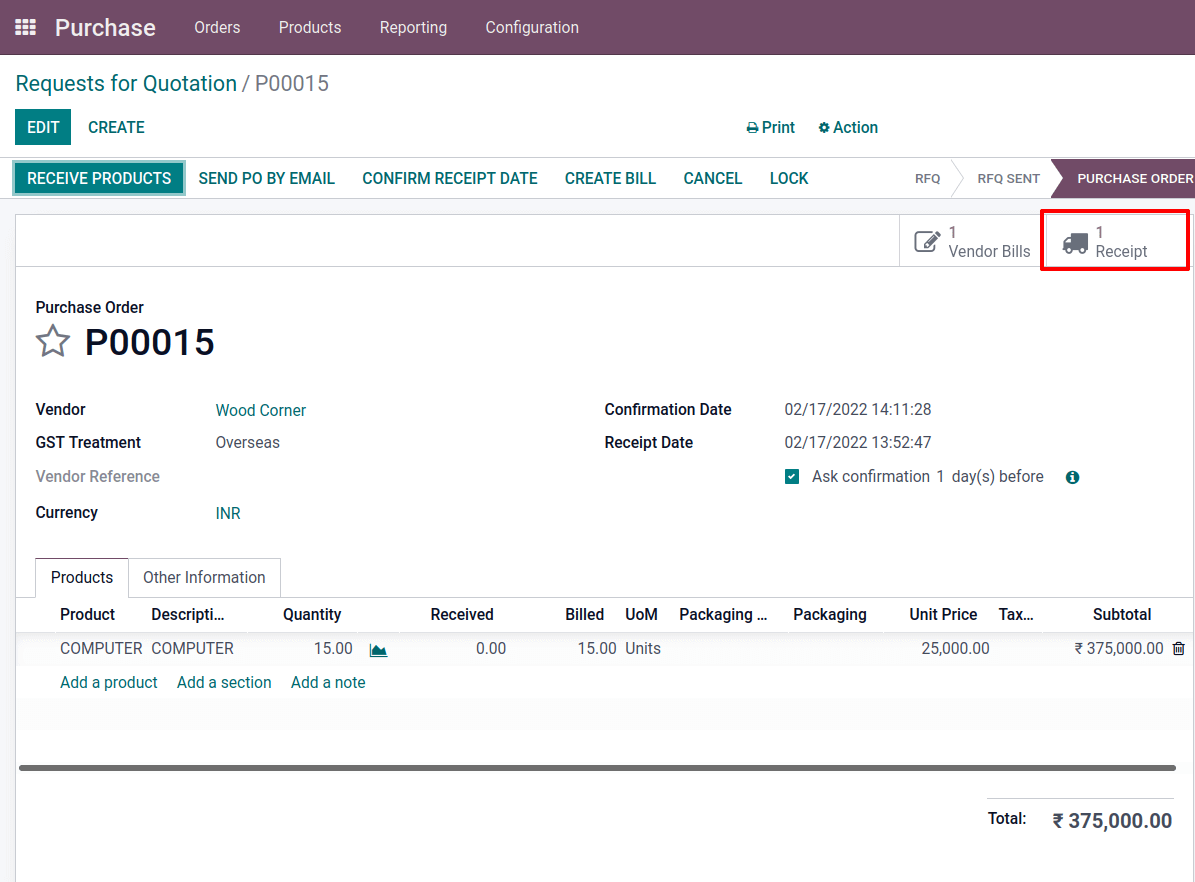
Returning to the Purchase Order and receiving goods. There is a smart tab called Receipt that should open. A Receipt for the purchase appears from there.
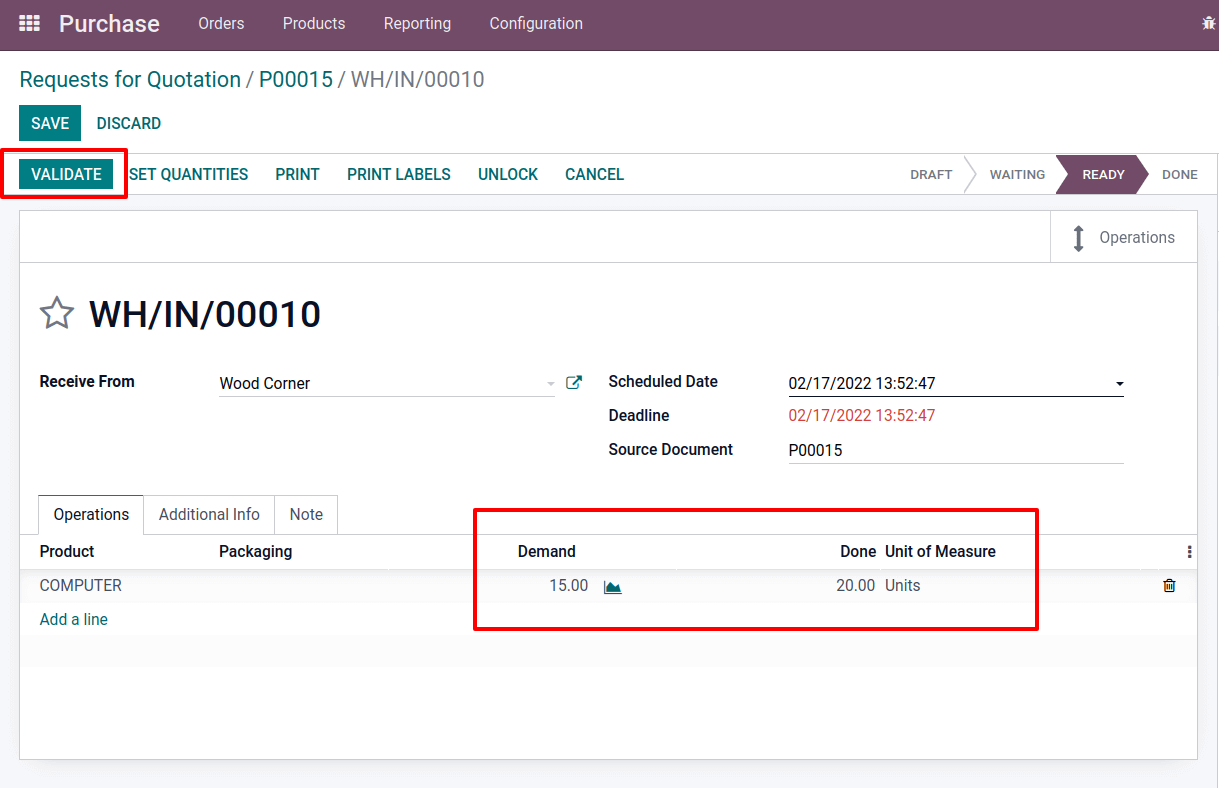
The vendor from whom the item was obtained, the scheduled date, the deadline, and the source document are all displayed on the receipt. Validate it to complete the order. But, before validating, consider the scenario mentioned above, in which the vendor delivers more goods than were purchased. So, from the Receipt, change the product’s Done quantity. The company placed a 15-item order here. However, the vendor delivers 20 units. So here, the Demand is 15, and the Done is 20. Validate it after updating the quantity.
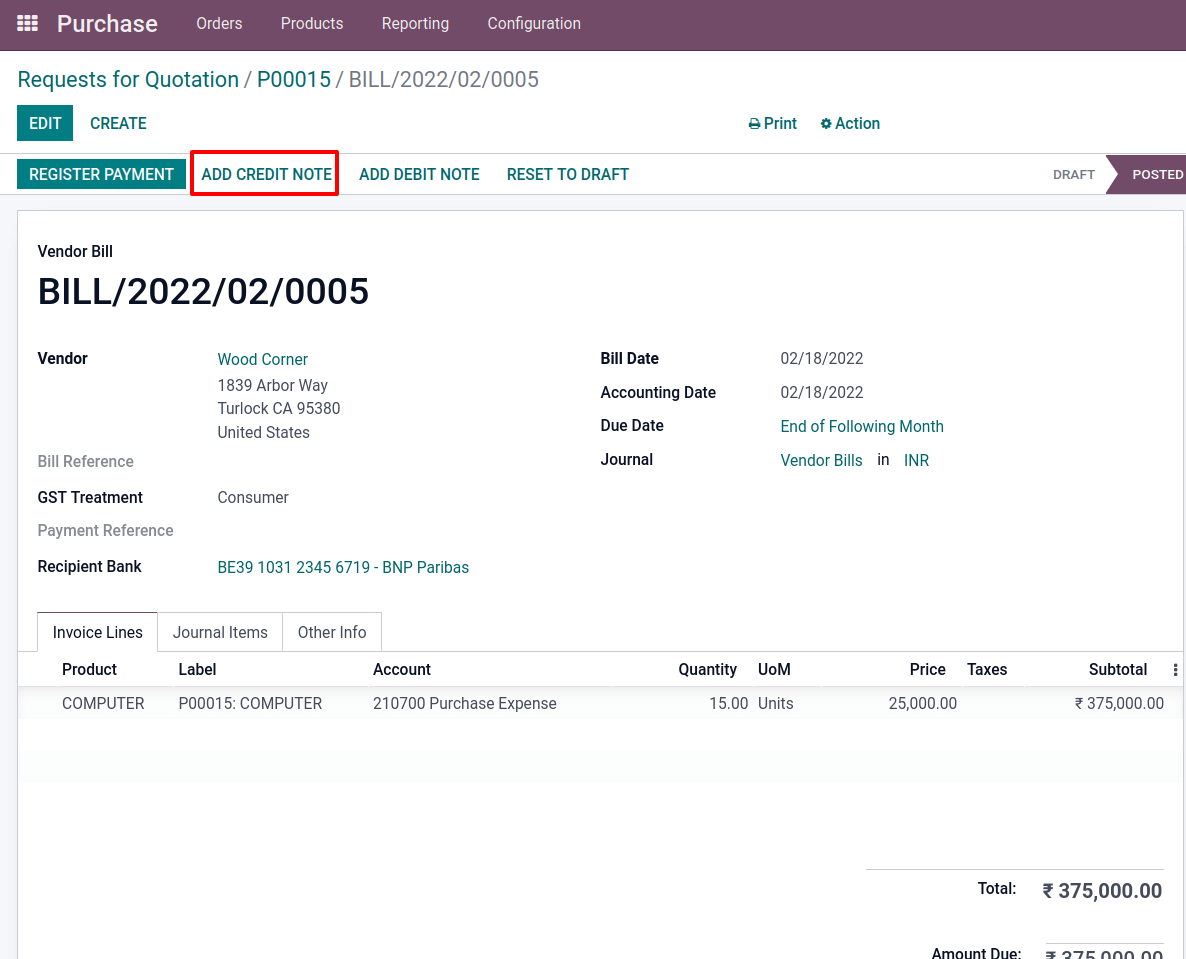
The vendor sent more stuff than was ordered in this case. However, the corporation just creates a bill for the quantity ordered in this case. As a result, a bill for the additional quantity is required. In such situations, use the Debit Note in Odoo 15. Go to the sale order and click the Invoice smart tab. There is the option to generate a Debit Note.
There is information about the cause for the Debit Note, the date of the debit note, and the journal, among other things. Enable the checkbox near Copy Lines to copy the lines to the debit note. Then select the CREATE DEBIT NOTE menu.

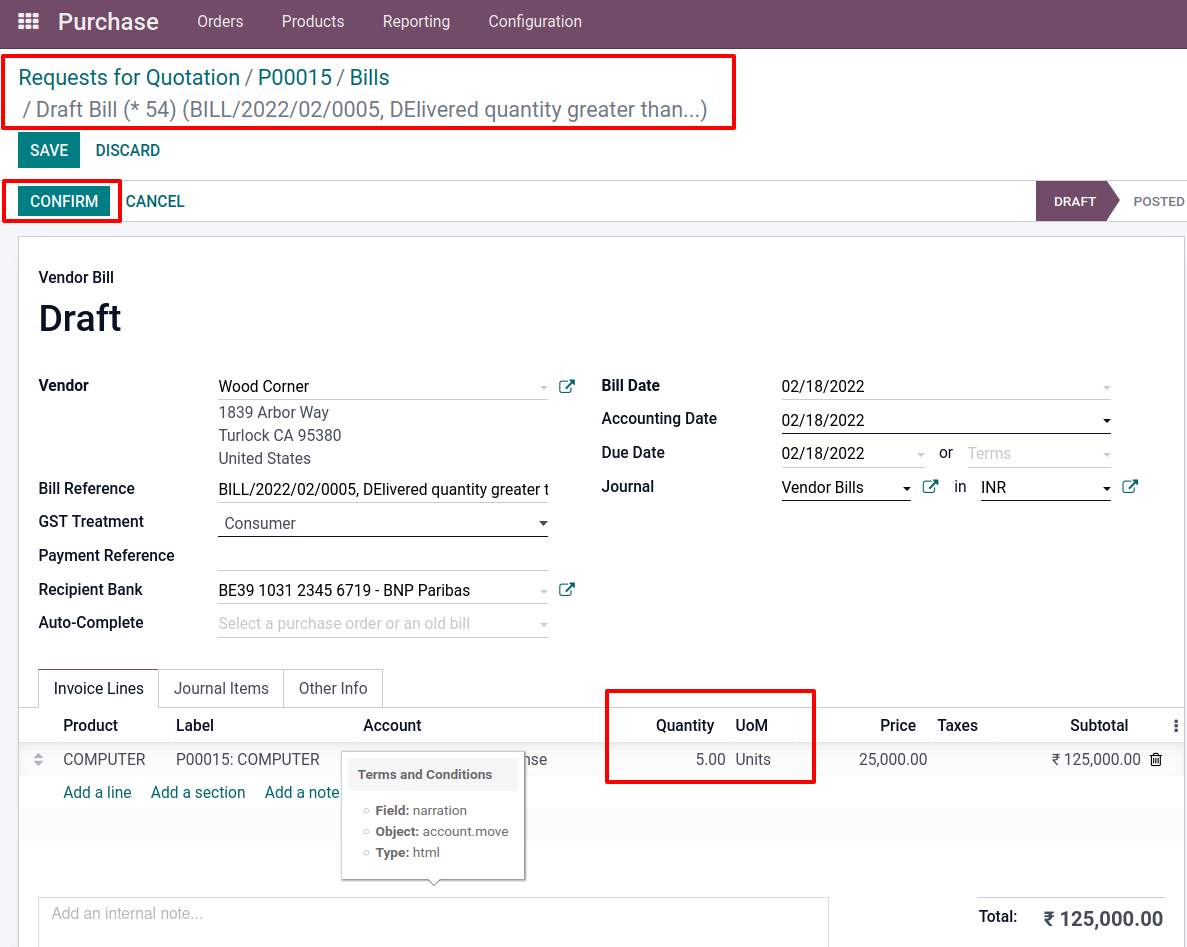
Another Draft bill with the entire quantity is created, as stated in the credit note. From there, one can change the quantity. As a result, only five products are extra sent, so change the quantity to 5. The matching price was then modified. When one clicks the Confirm button, the bill’s status changes from Draft to Posted.
There are two smart tabs in a purchase order. One is a receipt, while the other one is Vendor bills. The first is a pair of vendor bills. As a result, that tab displays the vendor bill for purchase and the extra product delivered, which is a debit note.

Both bills have not yet been paid. Payments for both bills can be registered. Once make a payment for the Vendor Bill. The bill was ribboned as IN PAYMENT when the payment was created. The purchase is then completed.


