A business thrives through better communication with customers, leading to good marketing. You can create a unique Website with Live Chat Channels with Odoo 15 platform. The website develops pop-up chats that consist of customers’ queries after developing a Website Live Chat Channel. Odoo 15 Live Chat dashboard contains the tabs such as Visitors and Configuration. These features assist in contacting visitors through SMS, Email, and developing Canned Responses in Live Chat. A sustainable relationship between customers and your business boosts through the Odoo 15 Live Chat platform.
This blog helps you understand Visitors and Configuration features in the Odoo 15 Live Chat module.
Odoo Live Chat module ensures developing various channels on multiple websites and chatting with your websites. One of the essential tabs in the Live Chat dashboard is Visitors and Configuration features. It creates responses at the Live Chat dialogue box and analyses the visitors visiting the Website Live Chat Channel.
Visitors
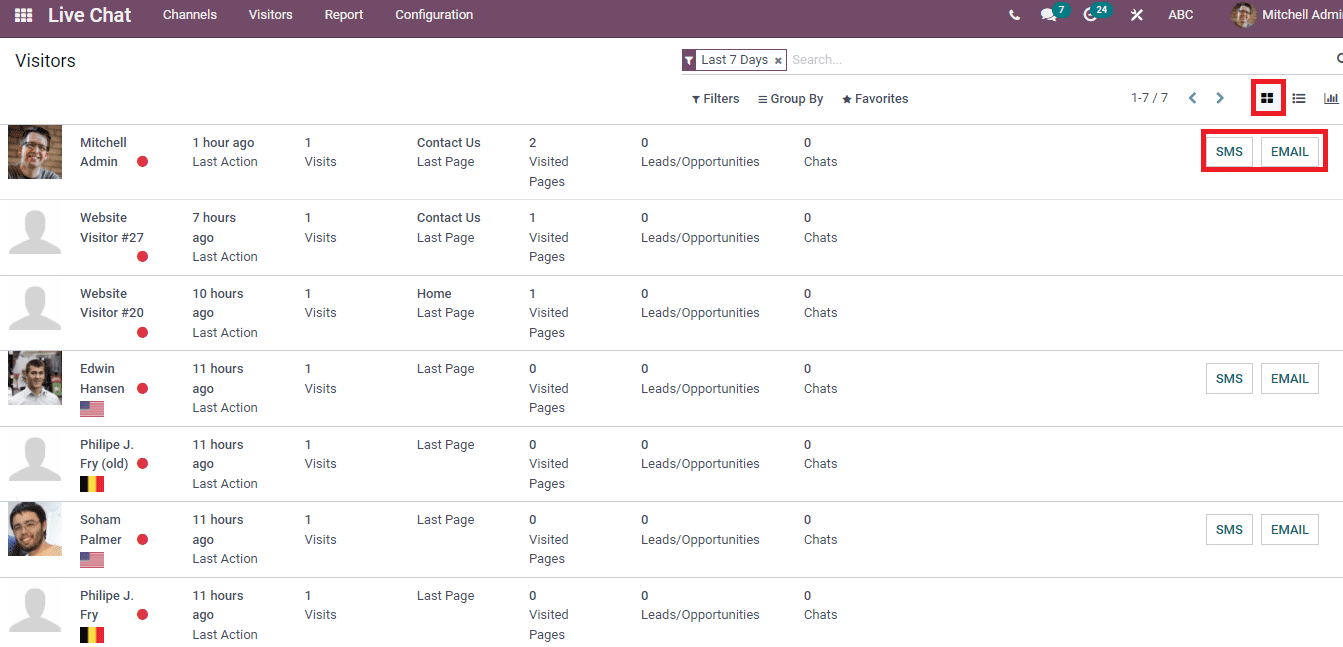
The information regarding the Visitors is displayed in the Visitors’ window. For accessing it, click on the Visitors tab in the Odoo Live Chat dashboard. The details of website visitors to your channel are shown in the window. In the Kanban view, you can view the number of visits, chats, leads/opportunities, last action, and whether the Visitor is online/offline.
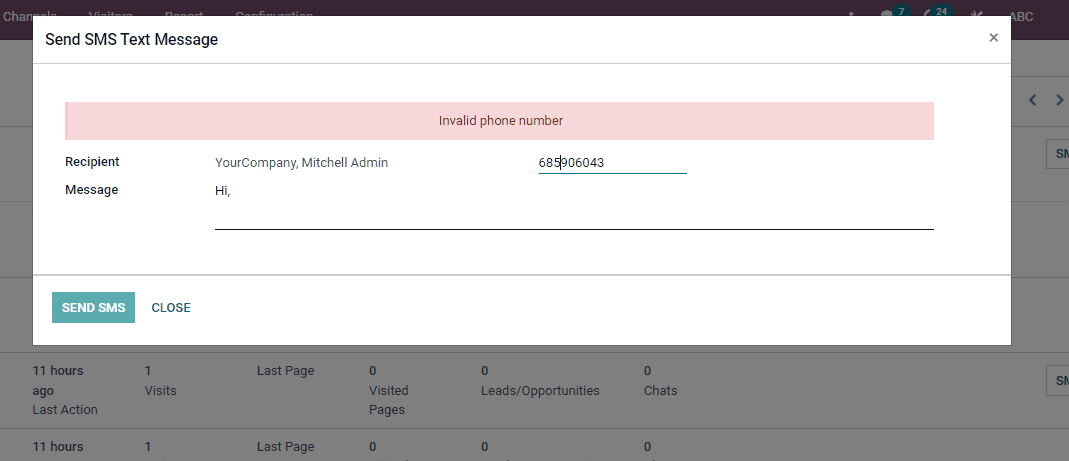
Users can chat with visitors by Email and SMS. Here, click on the SMS icon, and a new box opens before you. Add the name and phone number of the Recipient in the new window. After that, type your text for Visitor inside the Message option. Later, click on the SEND SMS icon portraits in the screenshot below.
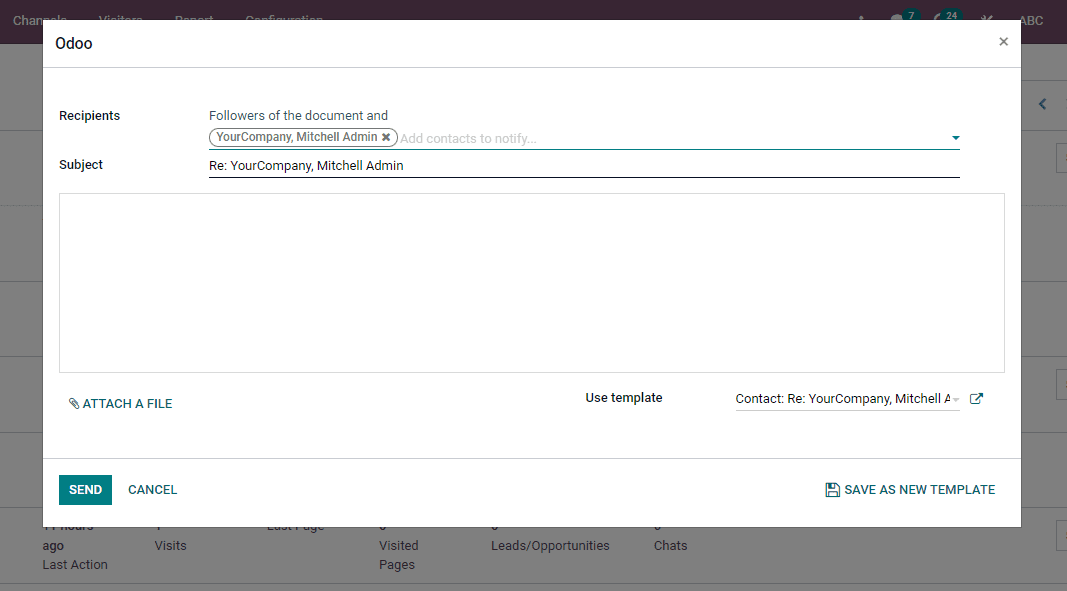
By clicking on the Email button, a new window of Contact Visitor opens in front of the user. Here, you can add the email id of the Recipients, Subject, and enter the message inside the box. It is possible to choose a template from the dropdown menu of User Template and can attach any file relating to the statement. Later, click on the Send button, and you can also Save it as New Template as shown in the screenshot below.
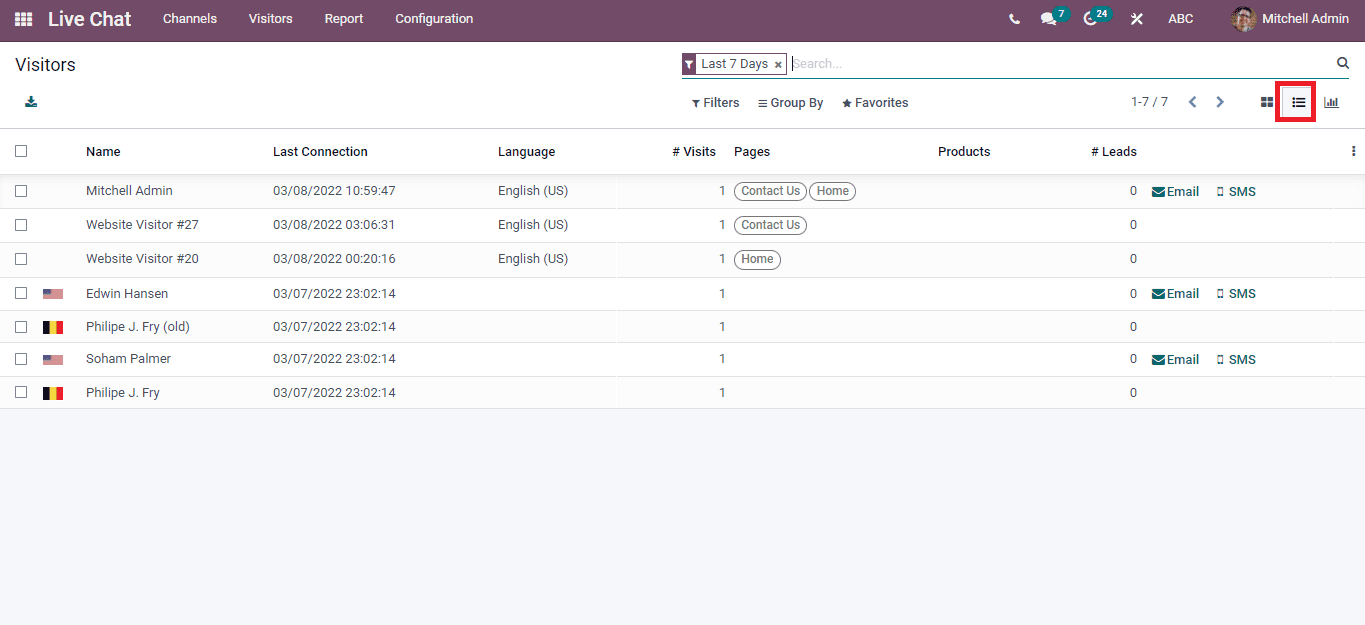
The List view of the window shows the Name, Language, Last Connection, Pages, Leads, Visits, and Products as shown in the screenshot below.
You can access the data of a specific visitor by clicking on the particular name. In the new window, we can see the details and visits of the Visitor, as shown in the screenshot below.
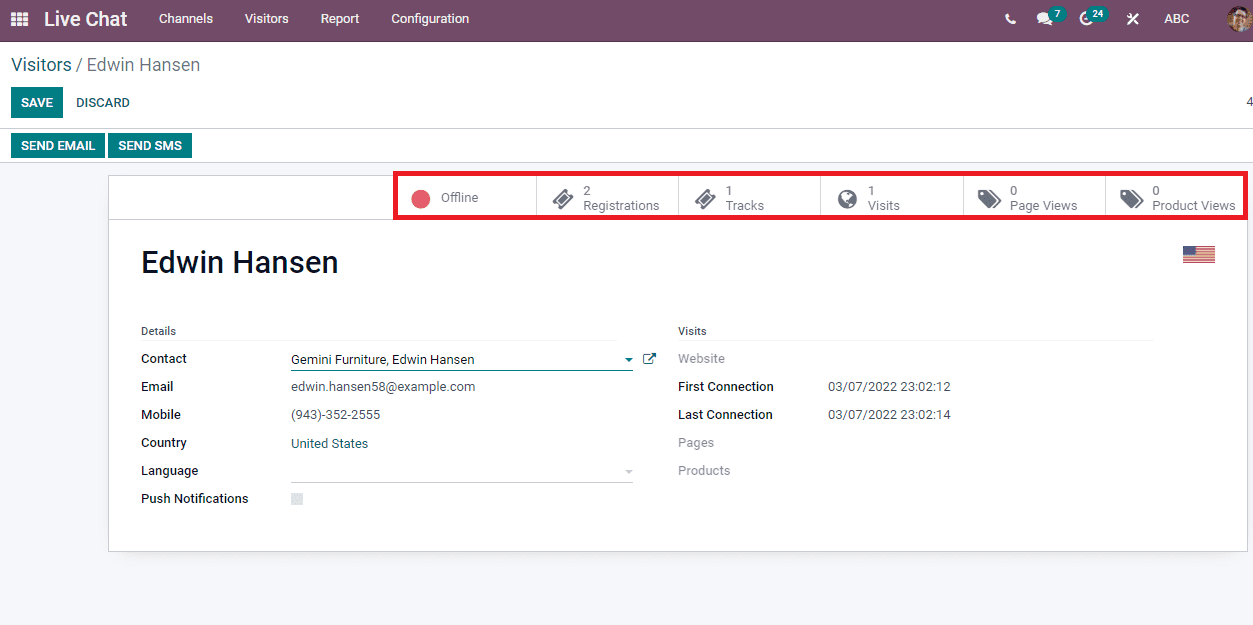
Here, the information regarding ‘Edwin Hasen’ depicts in the window. You can access the Email address, Country, Mobile Number, Contact, and First and last connection of this person. The image of the County flag of the respective Visitor is shown on the left side. Apart from these, the number of Registrations, Visits, Product Views, Tracks, Page Views, and Offline/Online depicts at the top end of the window. A user can change this person’s information by clicking on the Edit icon and choosing the Save button later.
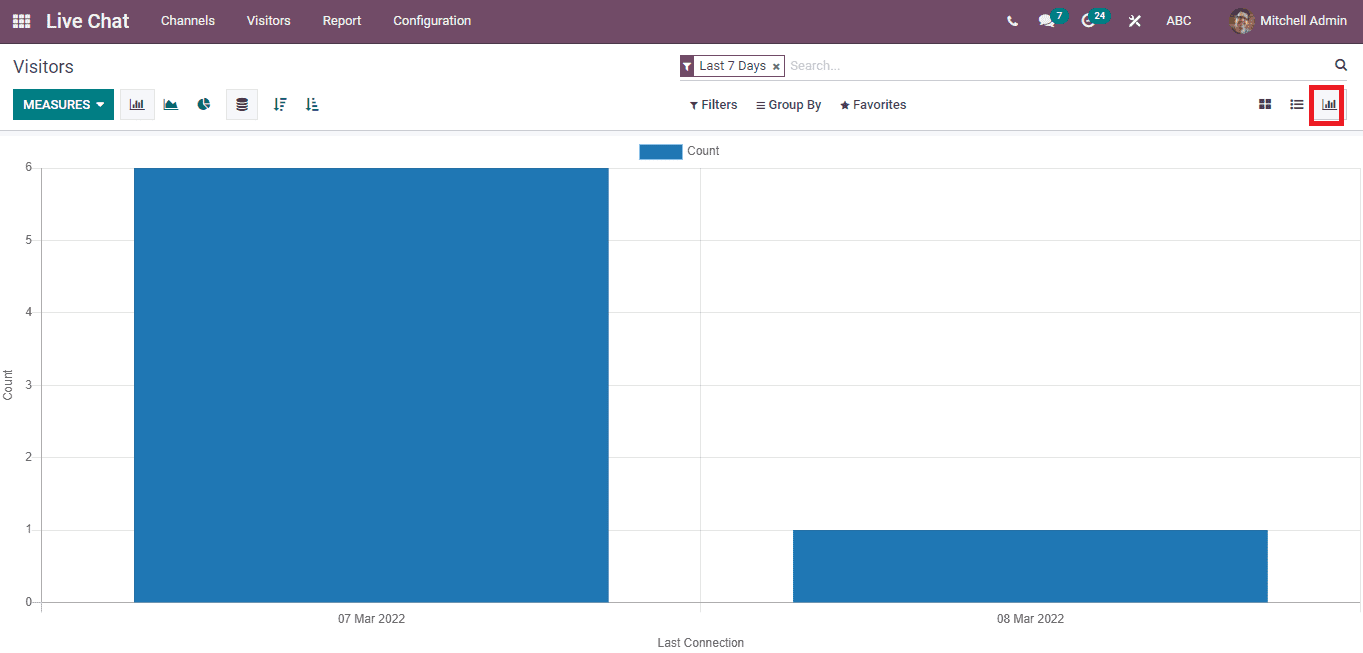
The Graph view of the Visitors window denotes the Last Connection on specific dates on the X-axis, and Y-axis shows the Count in a graphical representation. You can apply measures like Visits to this graph using the Measure icon. The Group By option ensures adding Custom Group into the graph based on Language, Country, Name, and many more aspects. We can add customized and default Filter options into the graph visible on the specific graphical chart.
Configuration
The operator saves time by composing short messages instead of long ones. Operators answer the queries of customers through these Cannes Responses. The Configuration feature in the Live chat dashboard allows you to develop Canned Responses when chatting with customers on your website. Click on the Canned Responses menu in the Configuration tab, and we can see the list of created Canned Responses in the window as shown in the screenshot below.
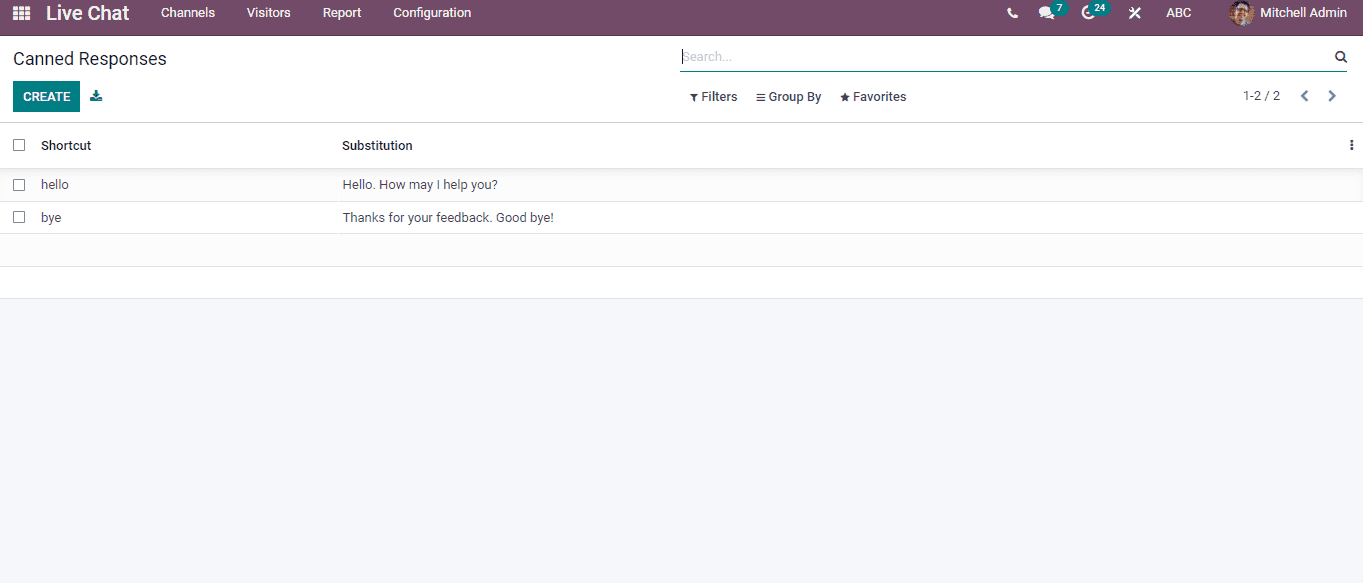
You can view the Shortcut and Substitution in the Canned Responses window. Automating responses like ‘hi’, ‘hello’, and more for common conversations in a Live Chatbox is possible.
How to Create New Canned Responses?
Click on the Create icon in the Canned Responses window to generate a new response. A new space is visible at the bottom of the Canned Responses window after clicking on the Create button, as depicted in the screenshot below.
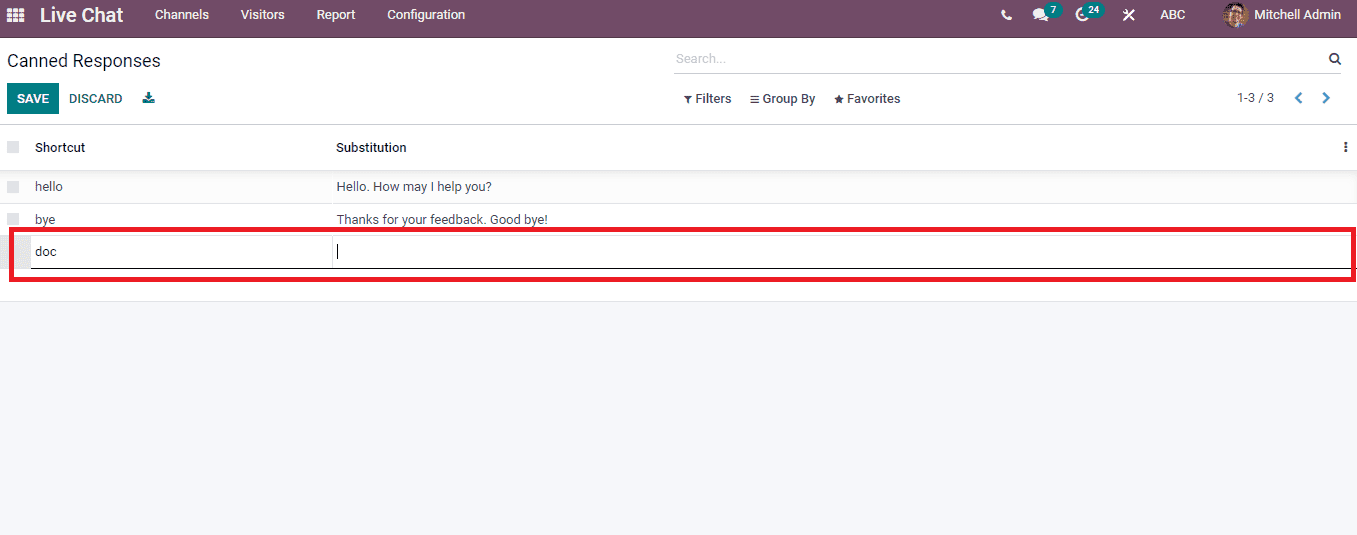
Enter the new Shortcut and Substitution on the new space and select the Save icon. Your created response is viewable along with existing ones. Users can generate responses as much as they need for Live chat conversations with clients. It is beneficial to save effort and time during a live chat session. Let’s look at a situation to use this application with your customer.
Choose your Website Channel from the Live Chat dashboard and open the dialogue box. Suppose you received a message from a visitor on your website such as ‘Hi’ in the dialogue box. After typing the ‘: ‘, you can use the created Canned Response ‘hello’. Here, after typing the colon symbol, the respective Canned Response visible before you shows in the screenshot below.
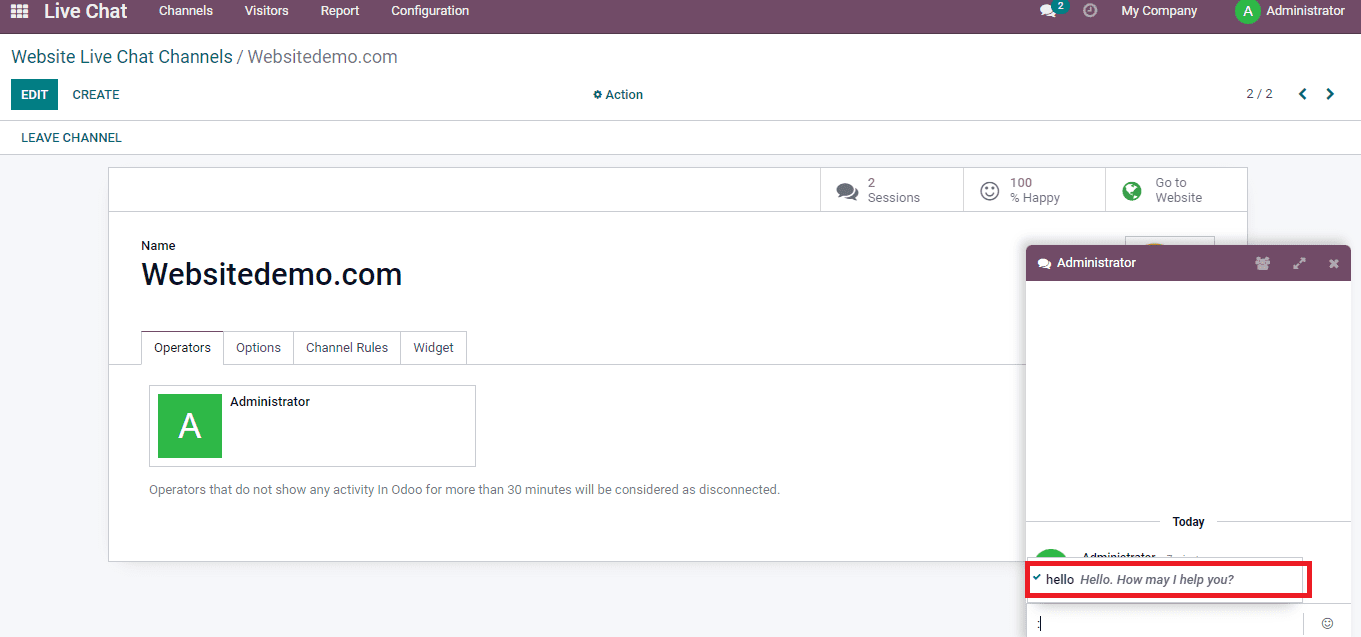
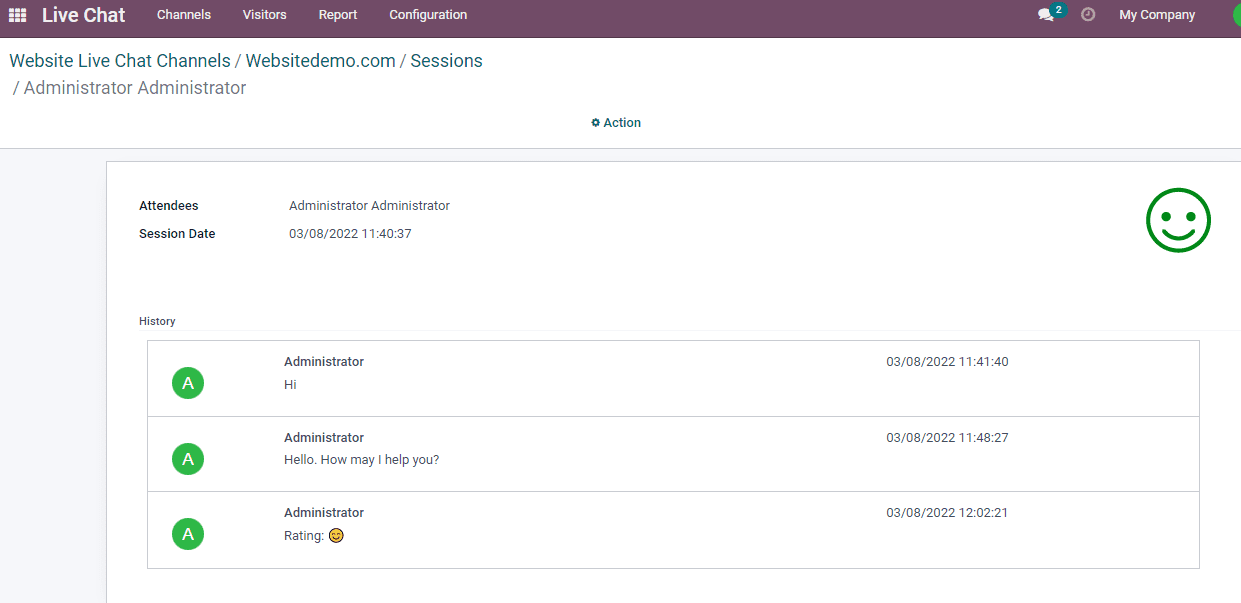
Select the respective response, and it will direct to the Visitor in your Live Chat. In this way, you can continue the conversation using shortcuts in Canned Responses. It did not take much time, and it quickly reaches the person on the opposite side of your chat. The chat conversation with visitors is viewable in the Sessions option inside your Website Live Chat Channel depicted in the screenshot below.
We discuss the Configuration and Visitors tab in the Odoo 15 Live Chat module. The Canned Responses in Configuration feature allows placing a full text when entering a shortcut word, and it is beneficial during a conversation. Users can know about the data of visitors looking into your website channel and easily track their time, address, place, and whether the individual is online/offline. You can configure the chats easily through advanced features of the Odoo 15 Live Chat module.


