Contact management is crucial for small and large industries, and it increases based on business growth. Odoo 15 Contacts module manages the contacts in your organization and stores the information about individuals/companies. You can view the scheduled meetings, vendor bills, purchases, sales orders and more aspects. The configuration feature of the Odoo Contacts dashboard allows you to create Contact Titles, Tags and Website Tags. It is easily configured as per the user’s requirement and possible to manage bank account details. A deep insight of contact opens before you with all these pieces of information inside the Odoo 15 Contacts module.
This blog provides you with an overview of Website Tags, Contact Titles, and Tags in the Odoo 15 Contacts window.
One of the most outstanding features of the Contacts module is Configuration. Users can configure the details such as Bank accounts, Industries, Website Tags, Localization and more aspects. You get access to various settings after selecting the Configuration tab. Let’s look at the menus such as Website Tags, Course Title and Tags in Odoo 15 Contacts module.
Contact Tags
We can group various contacts in a similar label using the Contact Tags. The list of created tags is visible on the screen after selecting the Contact Tags menu from the Configuration tab. You can apply default and customize filters to view specific tabs. The Contact Tags window depicts the Display Name and Color, as shown in the screenshot below.
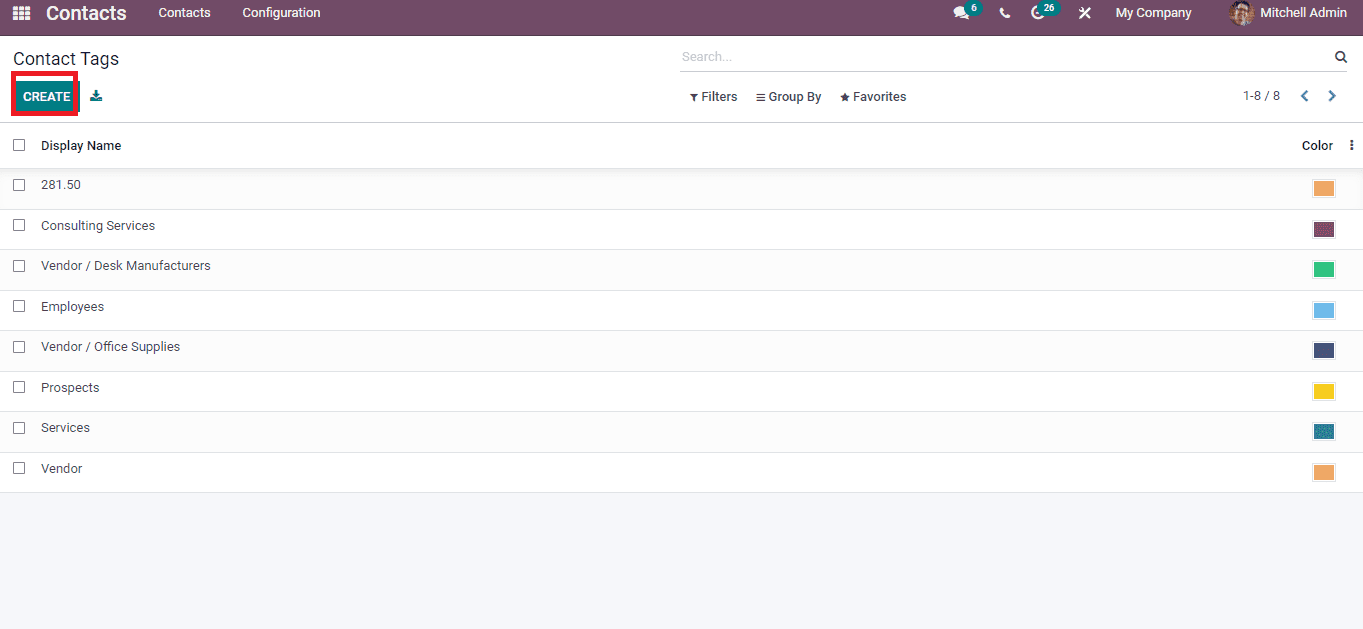
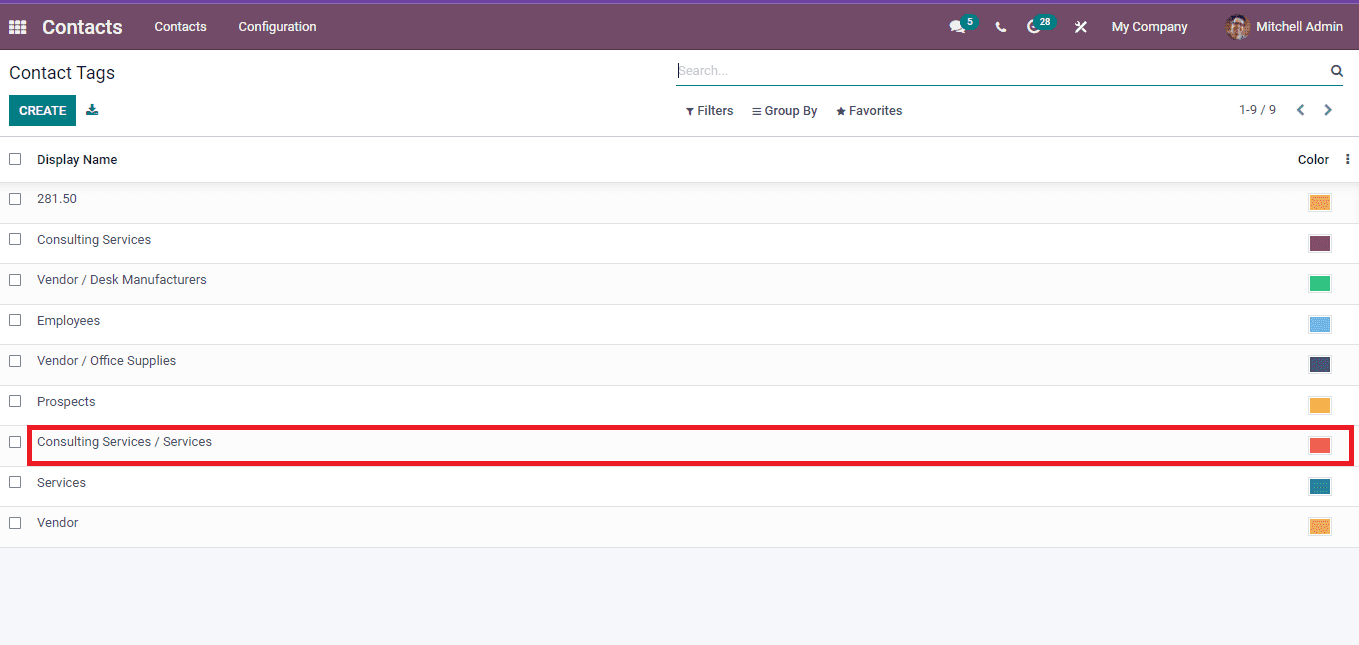
The details of a specific tab are visible by clicking on a particular title-Tag. You can develop a new tag using the Create icon, and a new window opens before you. Here, add the Tag Name and Parent Category. For example, you can add ‘Services’ as Tag Name inside the Parent Category’ Consulting Services’. Later, select the colour, and the Active field assists to hide the category without removing it. Select the Save button to create a new Contact Tag. The created tag is visible inside the Contact Tags window, as depicted below.
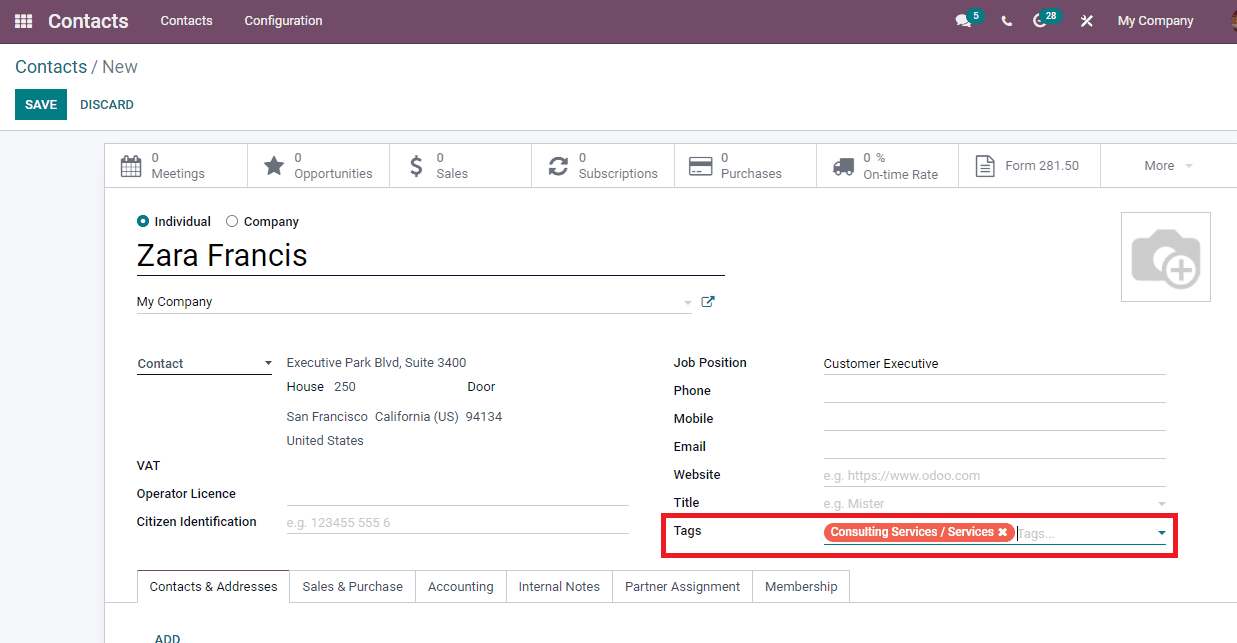
Let’s look at how to use the Contact Tag when developing a new Contact for a company. You can see a Tags option at the bottom in a new Contacts window. Here, you can choose the created Contact Tag inside the drop-down menu of Tags, as depicted in the screenshot below.
Website Tags
We use Website Tag as a tool to gather data from specific websites. It describes your site contains information regardless of any format. The Configuration feature of the Odoo 15 Contacts module manages the Website Tags. Select the Website Tags menu from the Configuration tab, and the user can develop a new Website Tag from here. You can see the list of Website Tags that consist of details such as Class, Is Published and Category Name as displayed in the screenshot below.
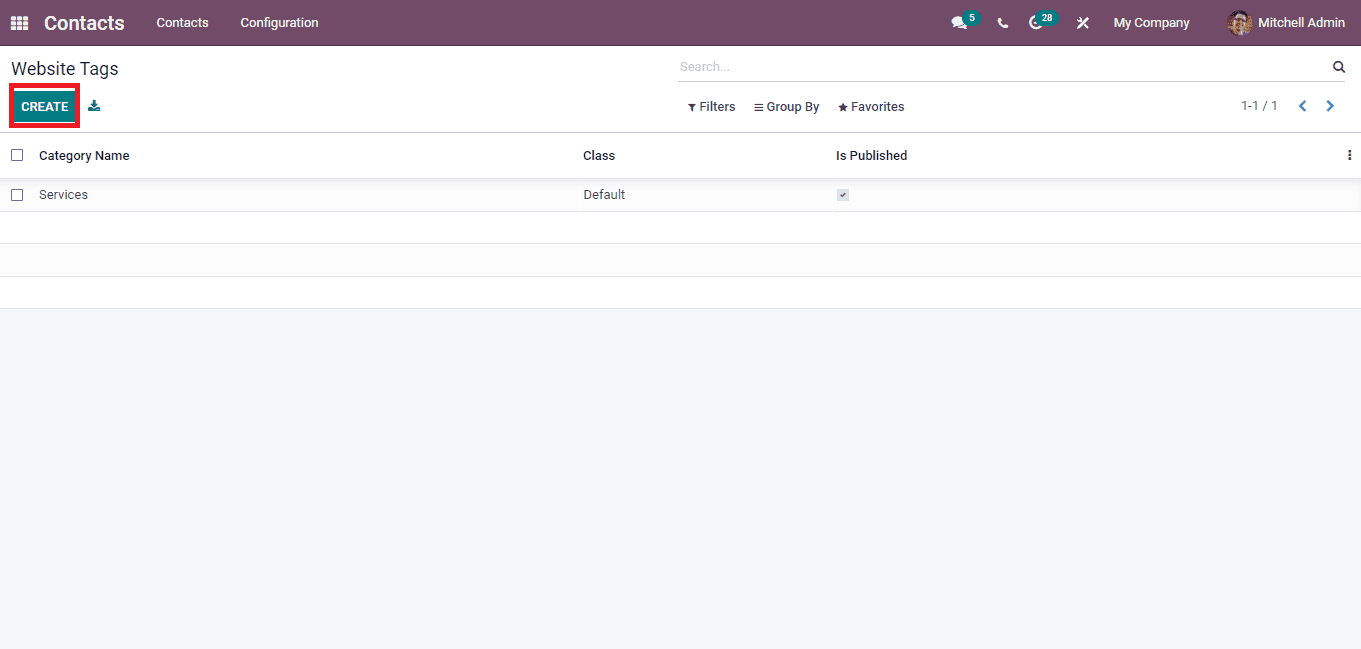
The Create icon in the Website Tags window ensures a generation of a new Website Tag for your Website. A new space opens at the end of the Website Tags window after clicking on Create icon. Here, add the Category Name, set the Class as primary, warning, default, success and danger. Later, mark it as published inside the Is a Published option, as depicted below.
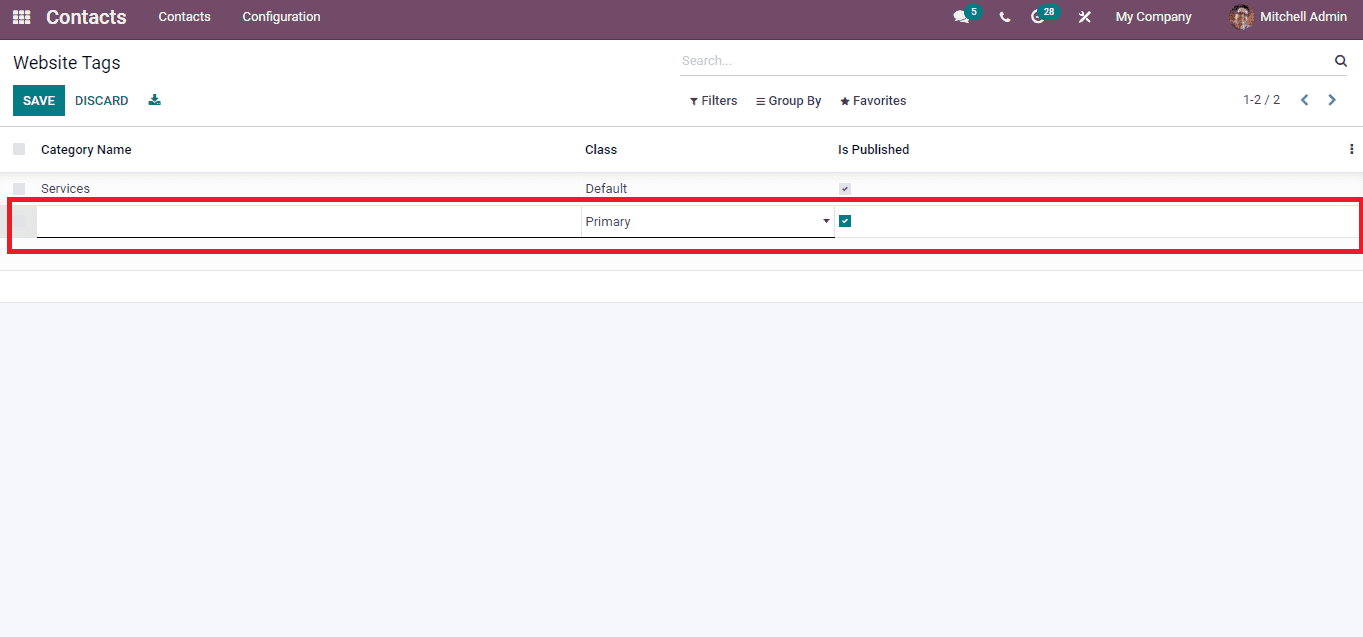
Choose the Save button after entering the information of Website Tags, and the generated Website Tag is viewable along with existing ones. You can export the details into a specific file by clicking on the Export All icon.
Contact Titles
It is necessary to give a Contact Title for a person when saving contacts. All these led to communicating with that individual efficiently and calling in any situation. Choose the Contact Titles menu from the Configuration tab, and you can configure the Contact Titles quickly. Here, you can view the created list of Titles with Abbreviations. By clicking on a specific title, we can edit it fastly. The Contact Titles window shows the respective Abbreviation for a particular title. For example, we can use the Abbreviation ‘Prof.’ for ‘Professor’ Title. This way, we can generate so many abbreviations according to your titles, as shown in the screenshot below.
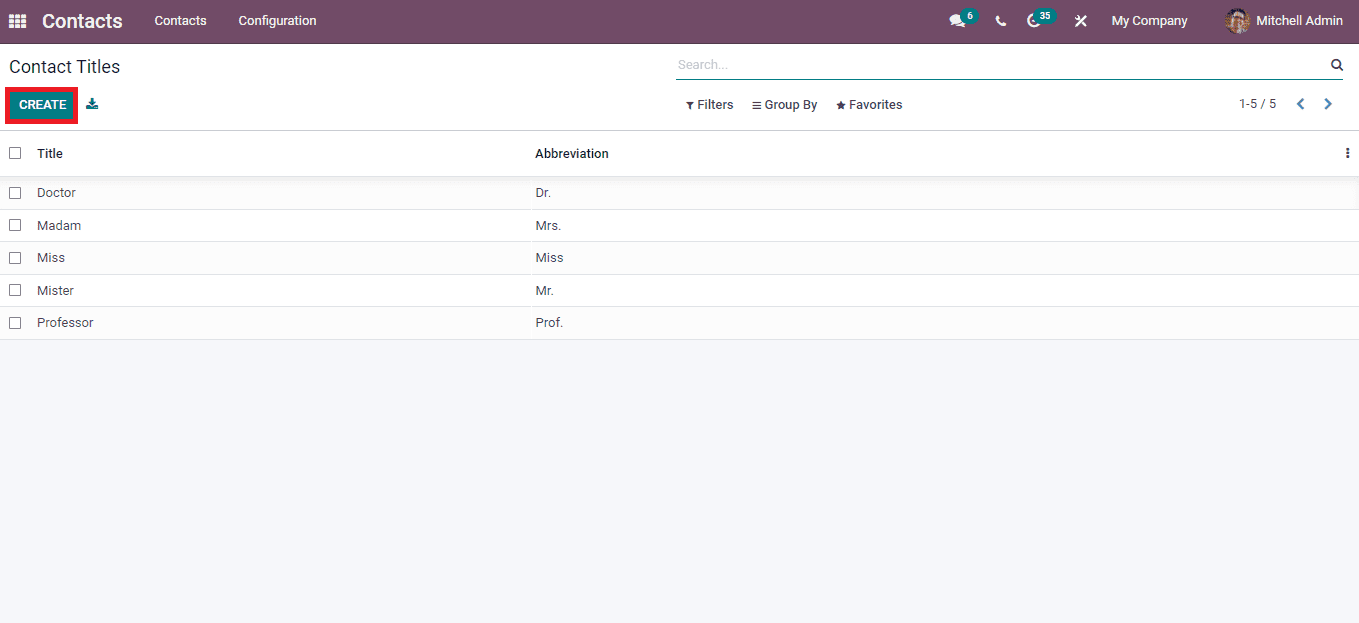
The Create icon in the Contact Titles window ensures developing a new Contact Title in your database. A new bar appears at the end of Titles after clicking on the Create icon. Here, you can enter the Title and respective Abbreviations. A translated version of the Title is visible by selecting the EN option, as depicted below.
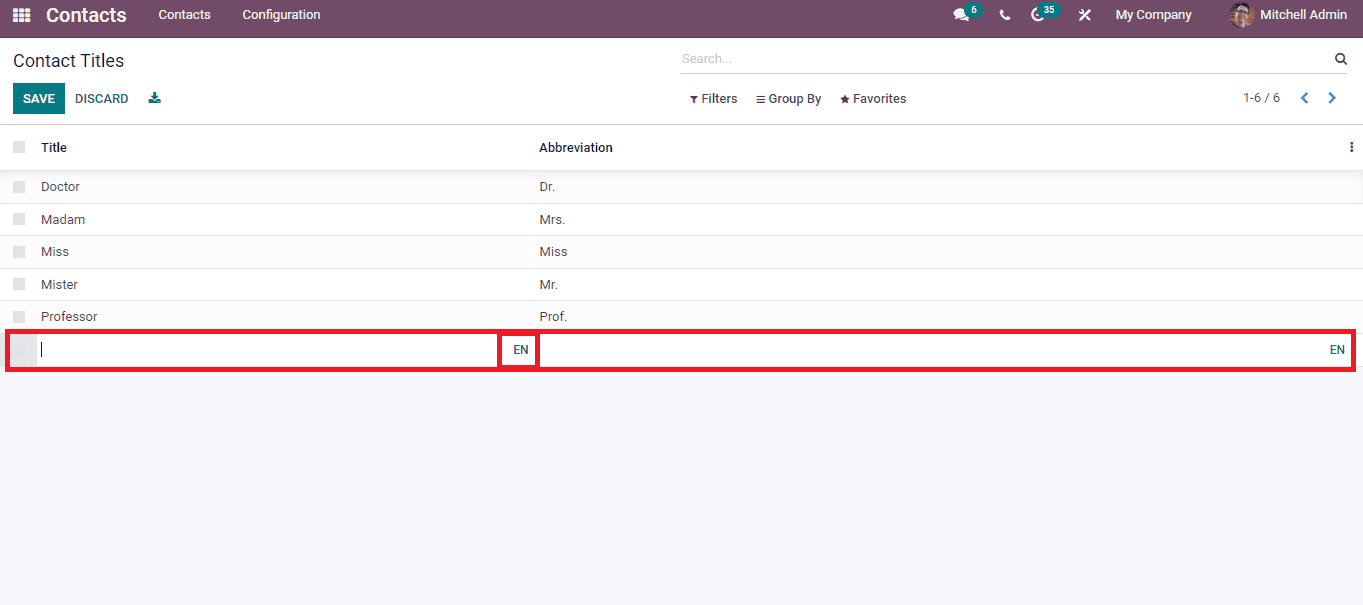
Click on the Save icon after entering the new Title and Abbreviation. We can add the Title when creating a new contact. Let’s look at an example in the Contacts window. Select one of your contacts in the dashboard, and we can see the details of a specific contact in the new window as depicted in the screenshot below.
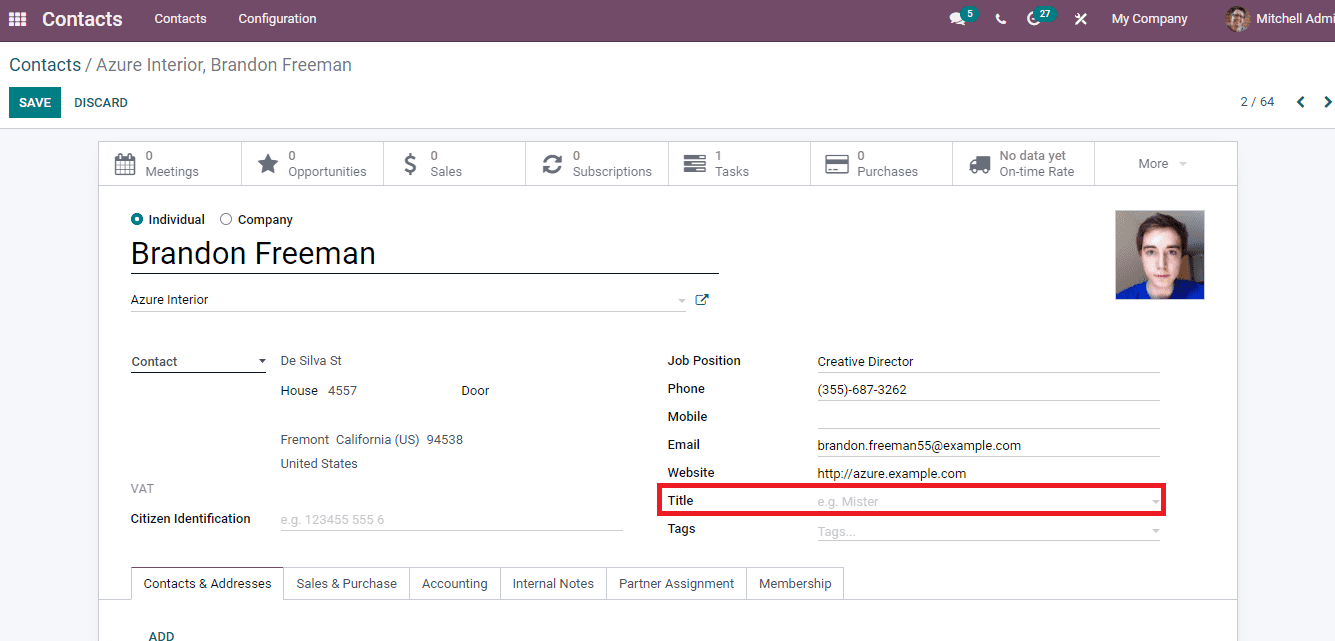
Here, you can add the Title as per your contact. After creating a Title from the Contacts Title window, you can select it from the Title option inside the Contacts page. Hence, the respective titles are helpful in the Contacts window of the Odoo 15 Contacts module.
Industries
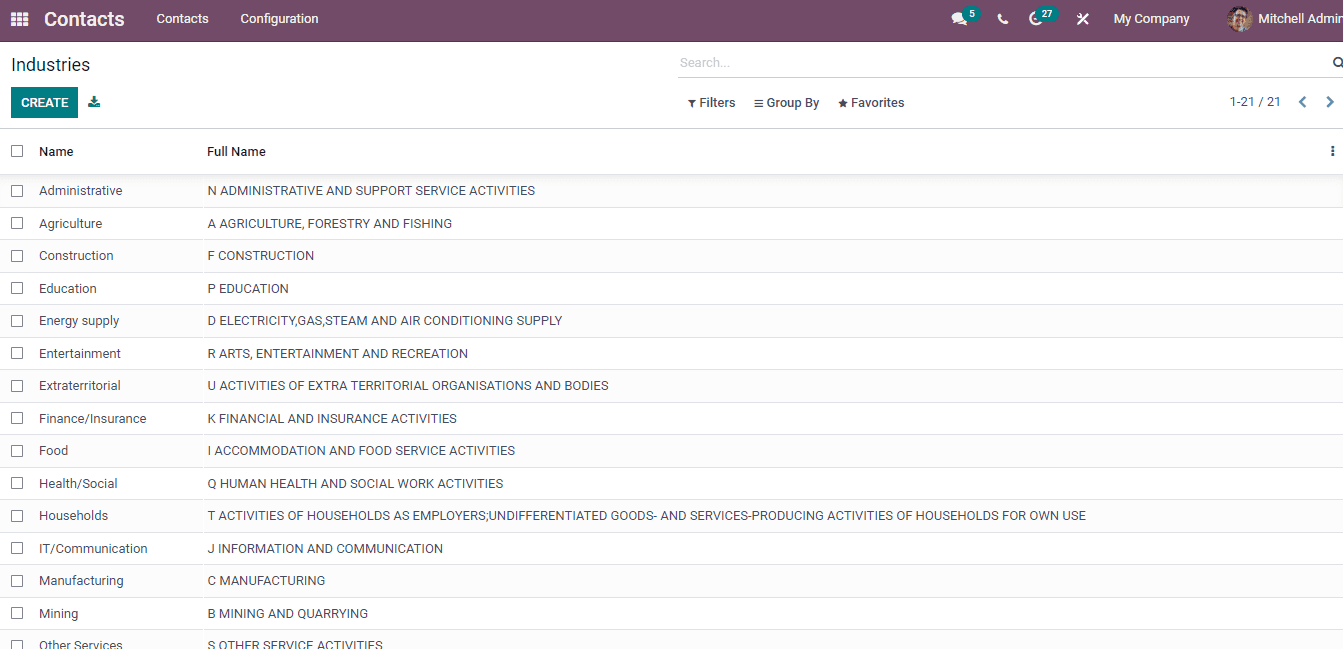
Select the Industries menu from the Configuration tab, and we can see the list of created industries. Here, you can configure the industries’ names and their full names, as depicted below.
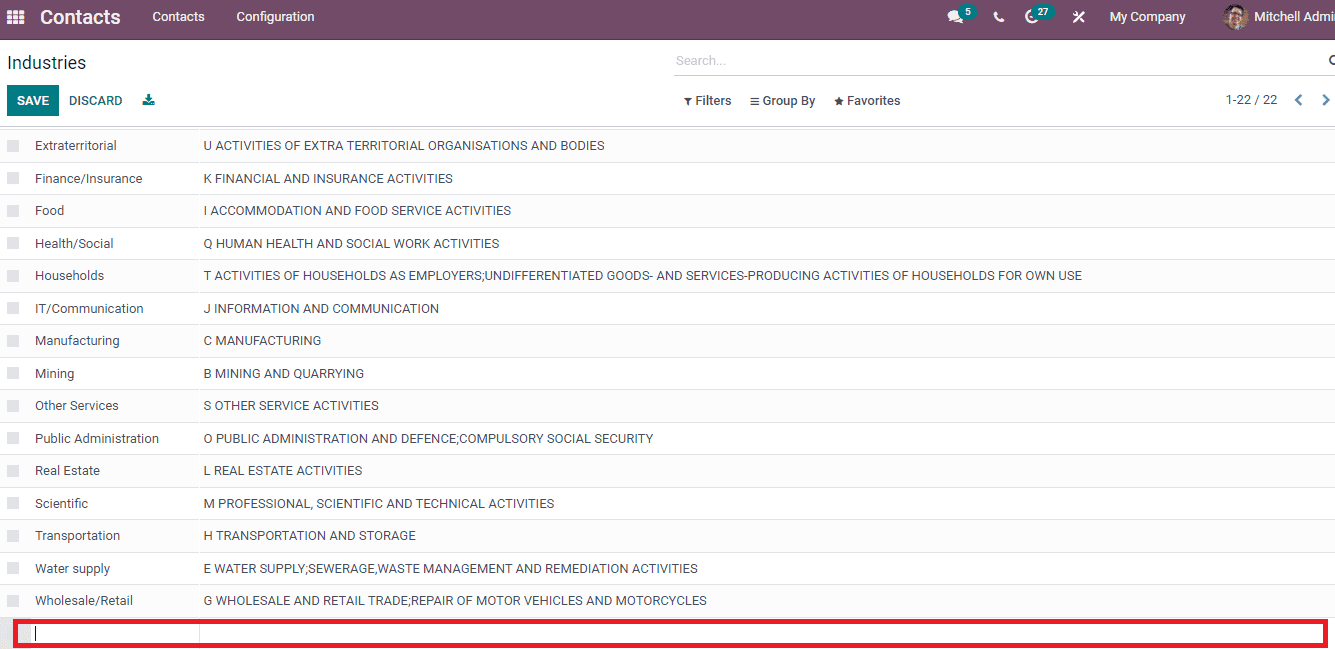
Click on Create icon to develop a new entry in industries, and a new space opens at the end to enter the details. Enter the Name and Full Name at that space as displayed in the screenshot below.
The Odoo 15 Contacts module allows you to configure Contact Tags, Industries, Website Tags and Contact Titles. All of your contacts are maintained easily with these configurations. The details of the contact track easily and exist as a record using the Configuration feature of the Odoo 15 Contacts module.


