The Inventory module of Odoo is well appreciated for its high efficiency and resourcefulness in conducting various inventory operations. May the business be of any scale, the inventory module can serve you with exceptional efficiency. Just like all the diverse modules in Odoo, the Inventory module also shares an integrated platform with applications like Purchase, Manufacturing, Sales, Accounting, etc. provides in-depth coordination between the functions of these applications.
This blog explains the purchase rules in Odoo 13.
Generally, there are various push and pull routes in Odoo that are integral for;
1. Product manufacturing chain management.
2. Assigning discrete locations for distinct products.
3. Managing and assigning warehouse locations for purposes like Quality Check
4. Triggering automated stock movement in the management of rented products.
These routes have an integral role to play in the movement of stock from the warehouse.
Procurement Rule
This rule reduces storage costs by triggering the movement of excess stock and thus cutting down inventory levels. This rule defines a particular measure of products/goods to be moved when stock amasses. This process is initiated with a customer order.
Push Rule
Push rule triggers the movement of a chosen amount of product from the source location to a destination location. They can be set as either automatic or manual.
The default routes in Odoo are;
Drop Shipping: The products/goods are directly shipped from the vendor to the customer without any intermediary storage by the company.
Buy: The product is purchased.
Make-to-Order: A purchase order is created for a product to be sold irrespective of the ‘stock in hand’ of the same product.
[wpcc-iframe loading=”lazy” width=”100%” height=”315″ src=”https://www.youtube.com/embed/SLZis3ukWqY” frameborder=”0″ allow=”accelerometer; autoplay; encrypted-media; gyroscope; picture-in-picture” allowfullscreen=””]
Pre-Configured Routes
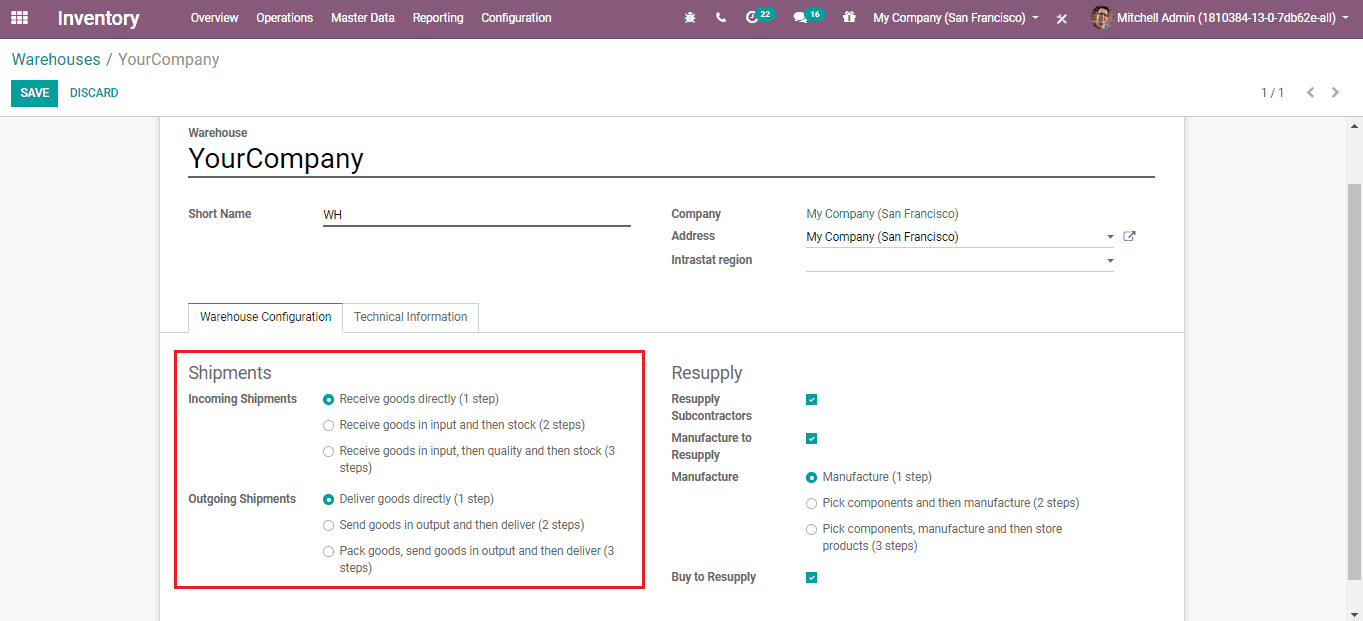
Odoo enables you to activate routes according to your need for Incoming Shipment and Outgoing Shipment in Warehouse configurations. For that;
Go to Configuration -> Warehouses
Custom Routes
For the creation of your own custom routes, Go to Inventory -> Configuration -> Routes and click ‘CREATE’.
Routes on Warehouse
The warehouses to which the route is applicable can be selected in this field. The route can be set with respect to the push and procurement rules.

Routes on Product and Product Categories
Tick mark the product to assign a route to a product whereas, tick mark the product category option to assign the route to a category.

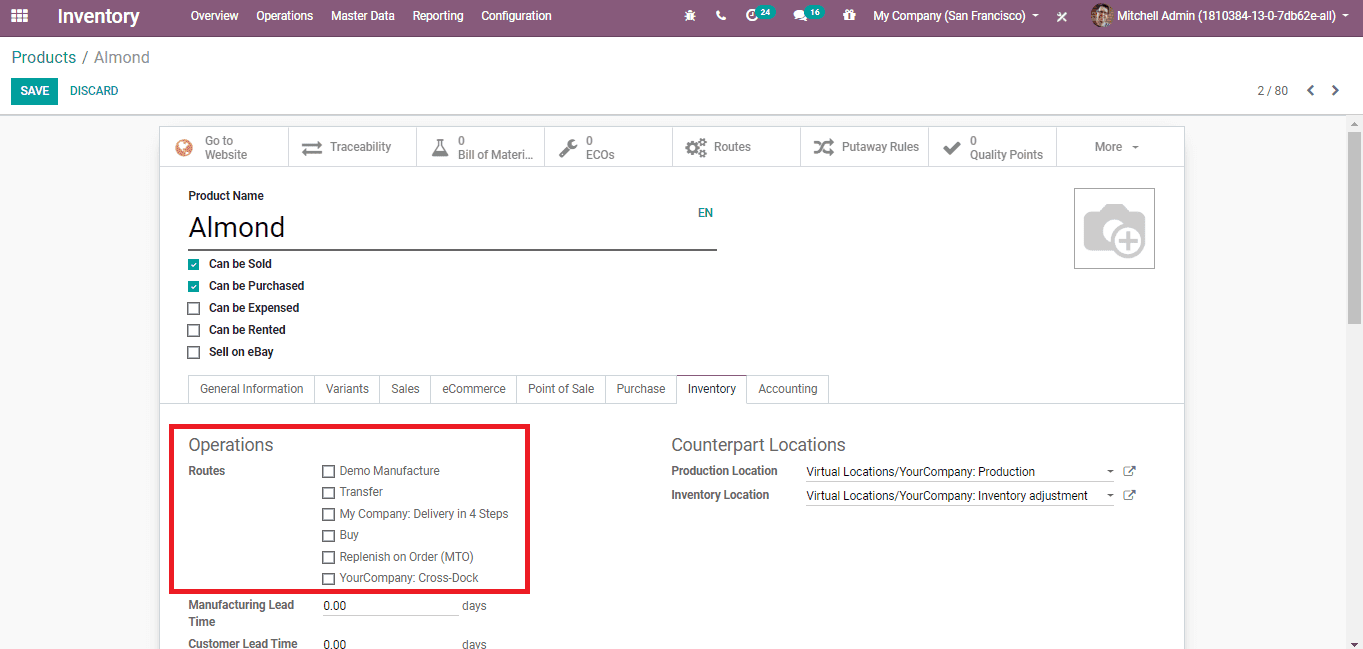
For setting the route for a product, go to Inventory -> Master Data -> Product
And under the Inventory tab, select the particular route.
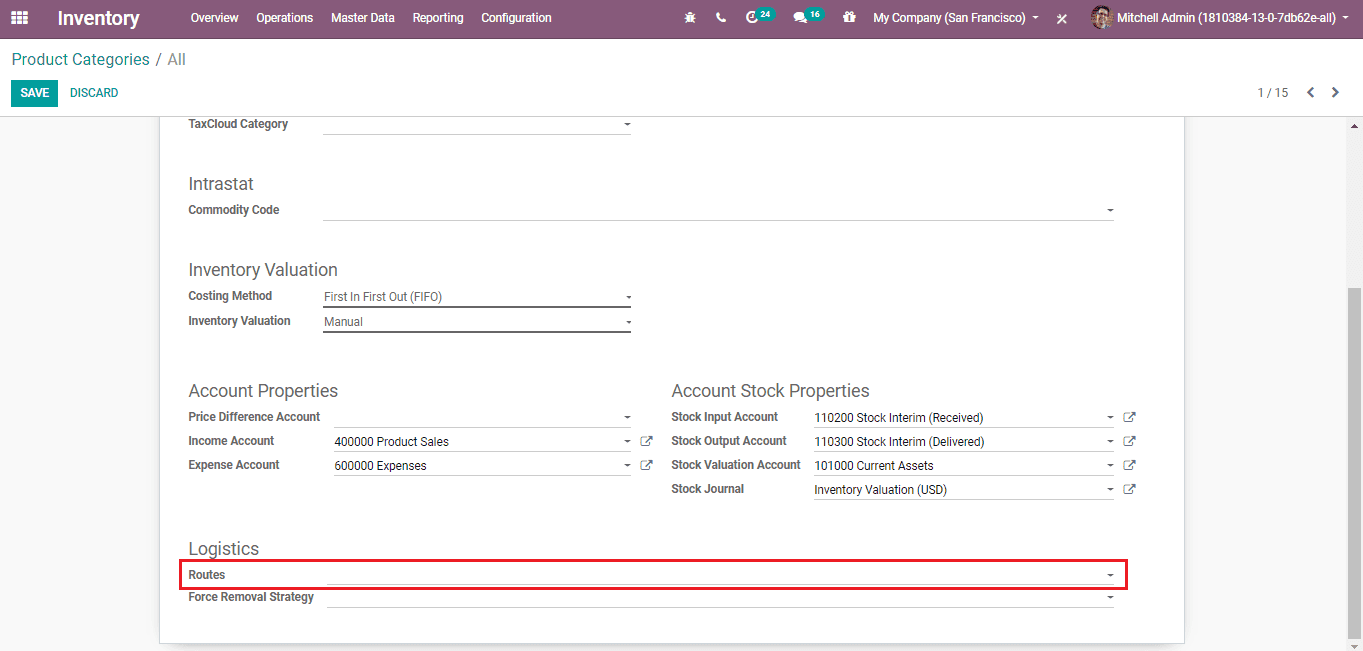
For setting the route for a product category, go to Inventory -> Configuration -> Product Category and select the particular category. Under the ‘Logistics’ tab, set the route in the corresponding field.
Routes on Sales Order Lines

Tick mark the sale order line option to set route each time you draft a sale order.
Routes contain ‘Rules’ which determine the course and nature of individual actions for the route. Let’s explain this with routes. In Odoo, there are three incoming shipment configuratio0n options available;
1. Receive goods directly(1-step)
2. Receive goods in input and then stock(2-steps)
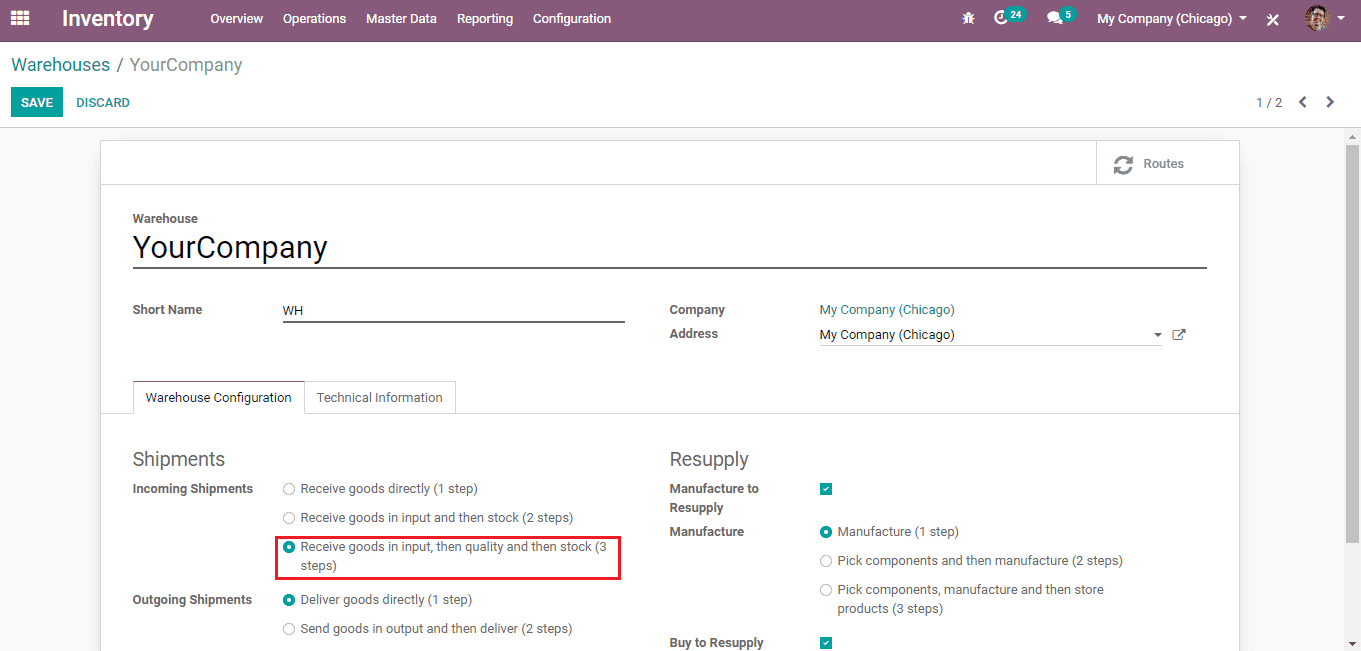
3. Receive goods in input, then quality and then stock(3-steps)
Receive goods directly(1-step)
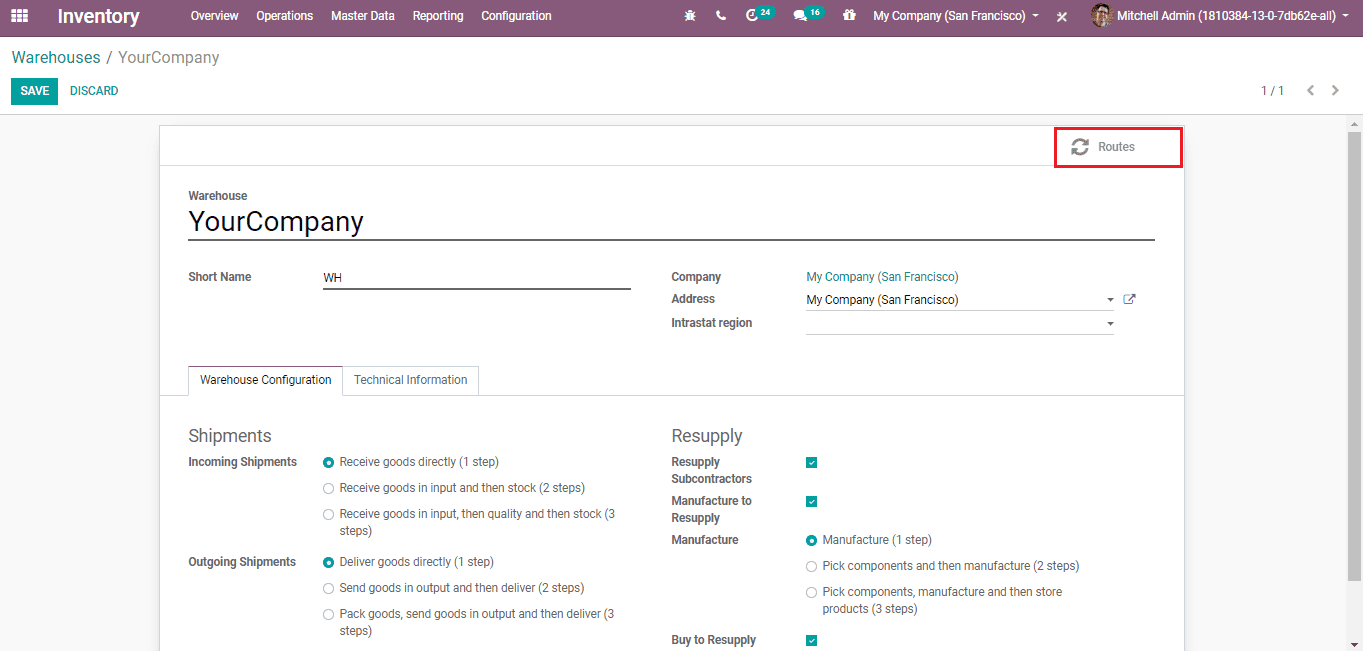
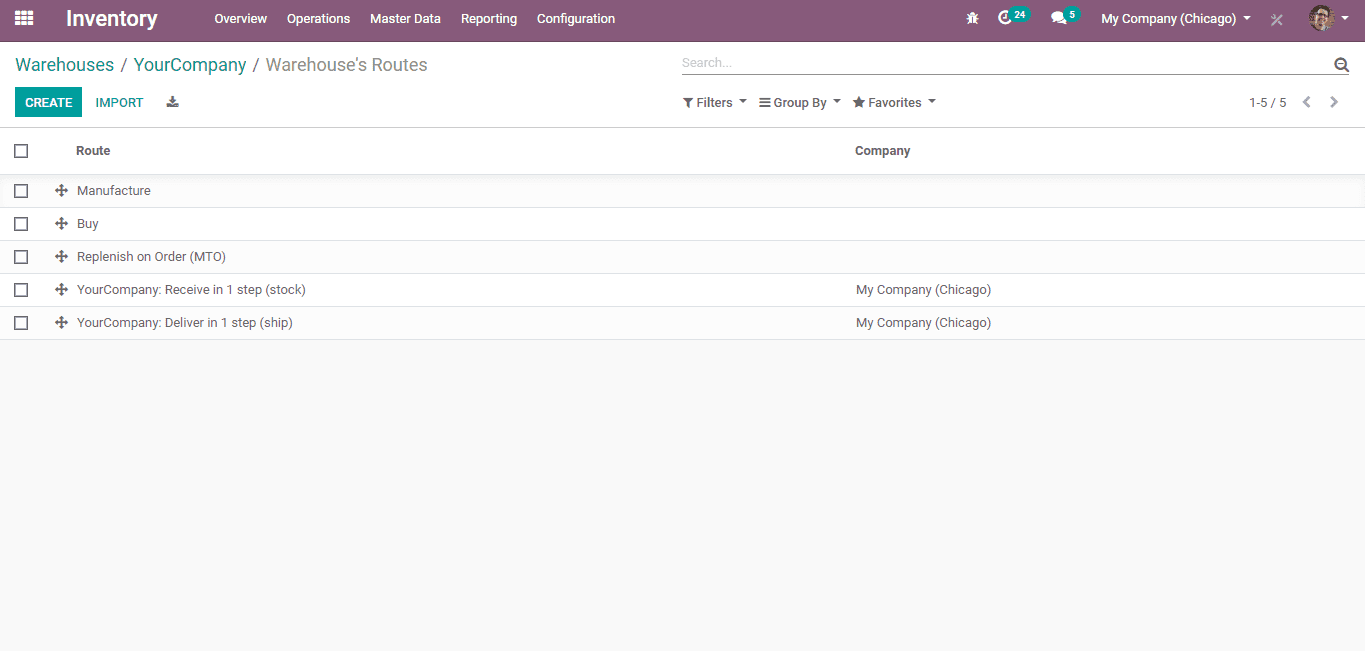
Click on the ‘Route’ button to see available routes.
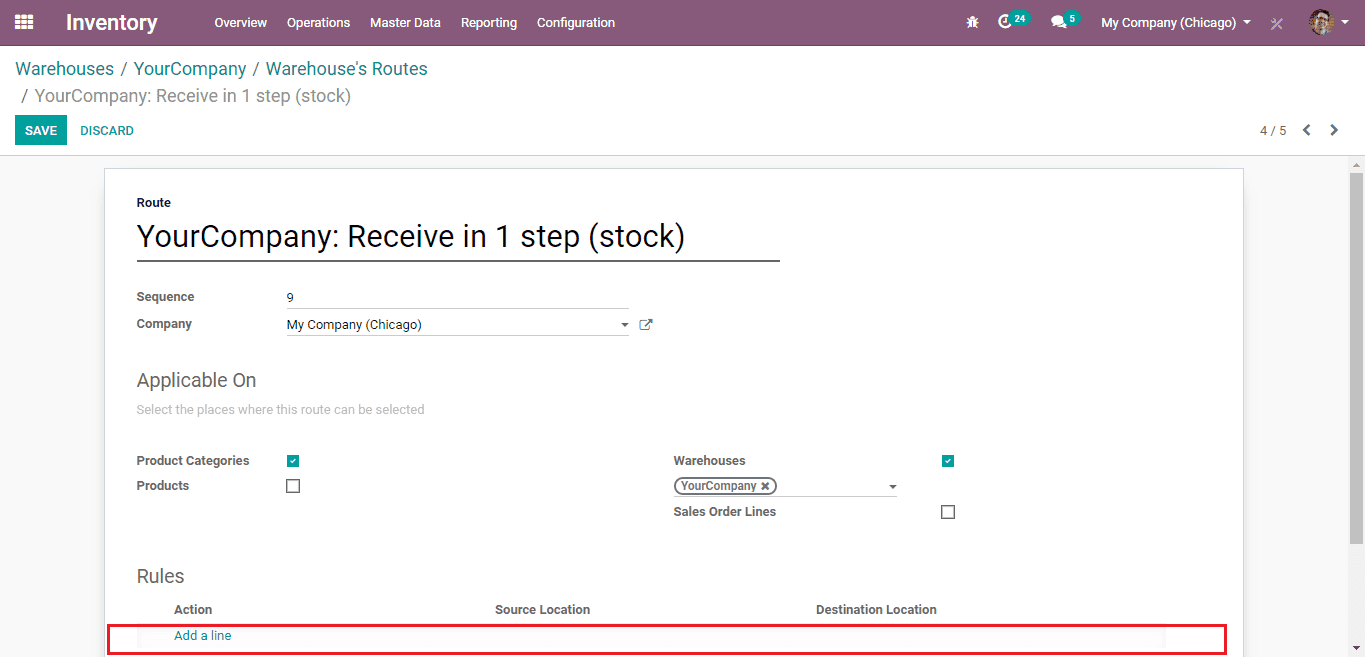
Rules can be added in the field allotted for it. As this is a ‘1 Step’ route, there is no need to set any rules.
Receive goods in input and then stock (2-steps)
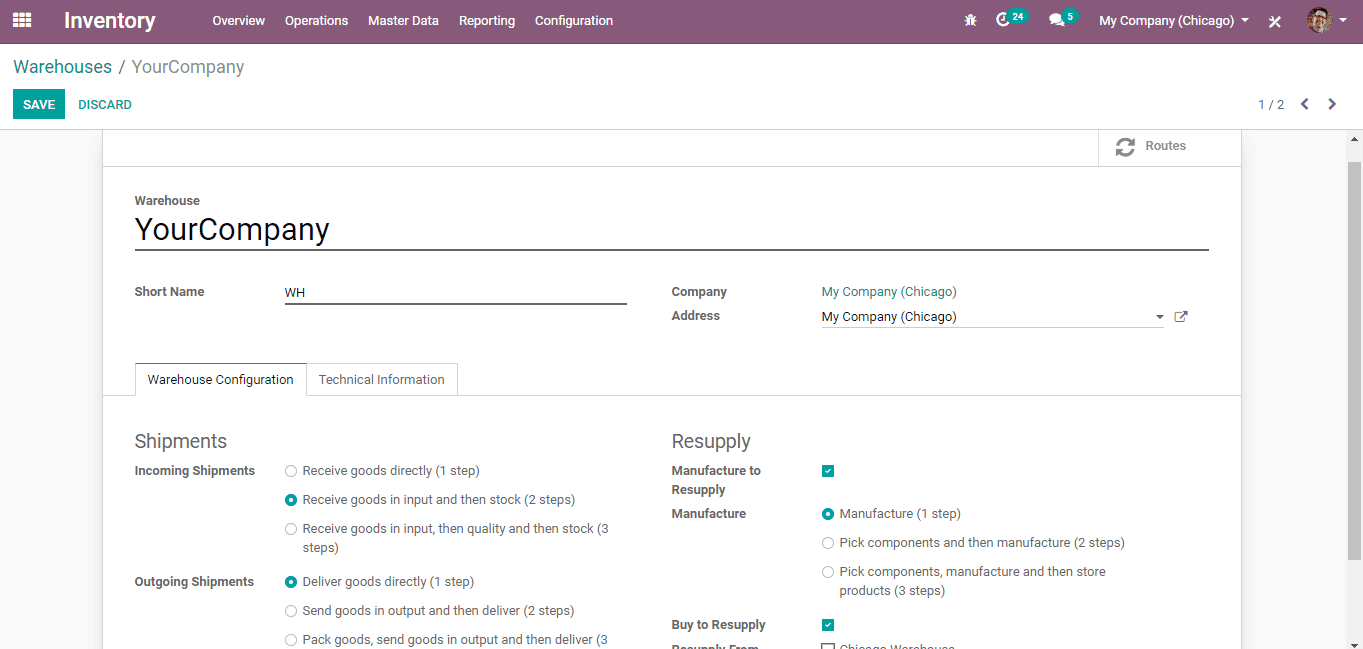
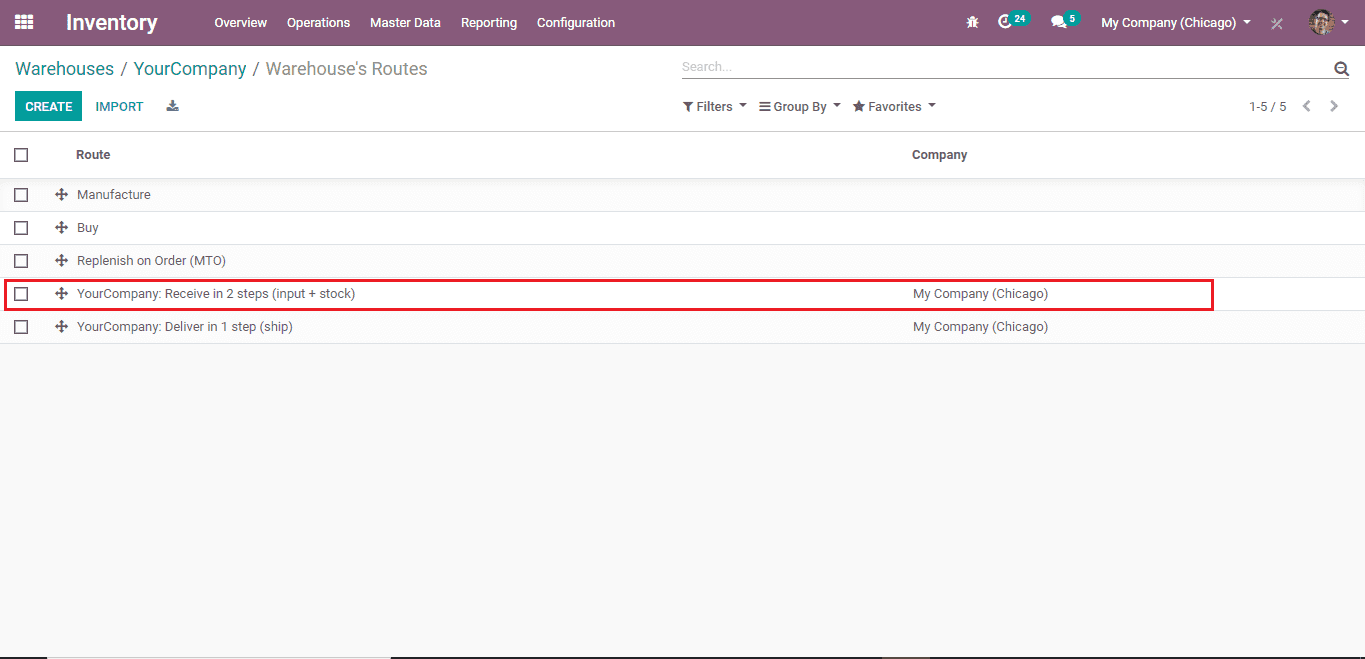
These are routes for 2 steps incoming shipment. Click on the marked route.
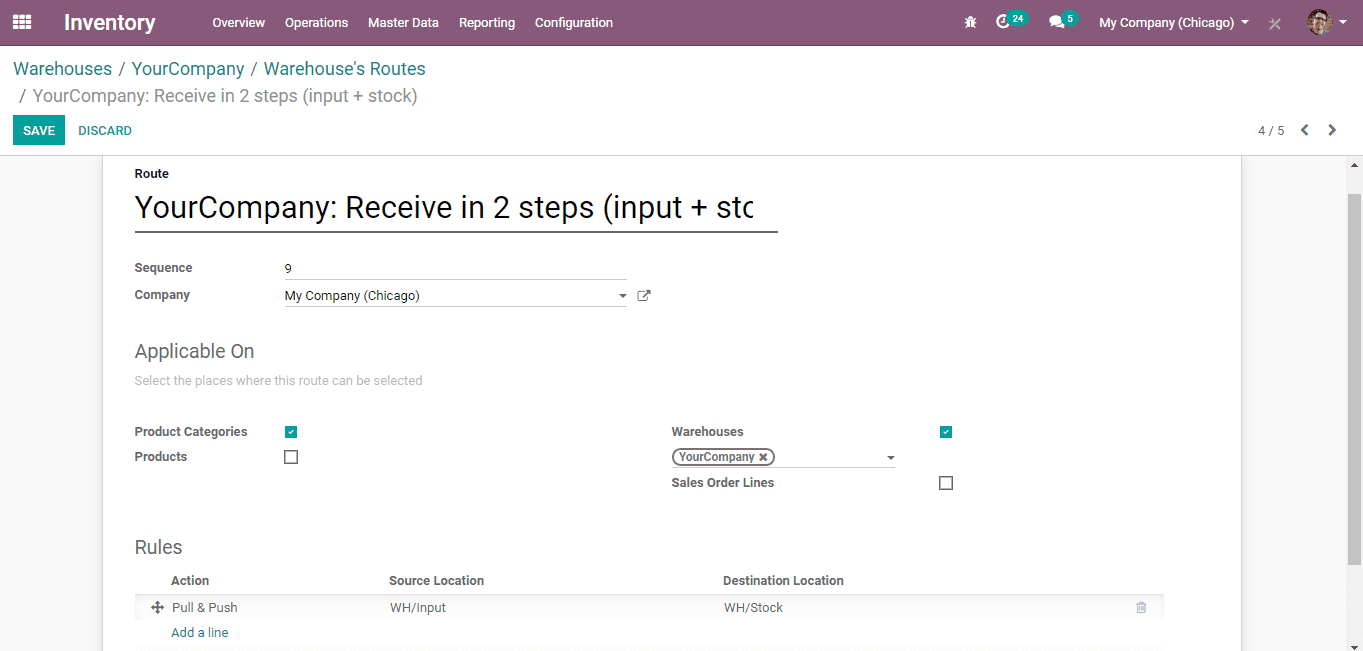
In the field for rules, click and enter rules according to your requirements.
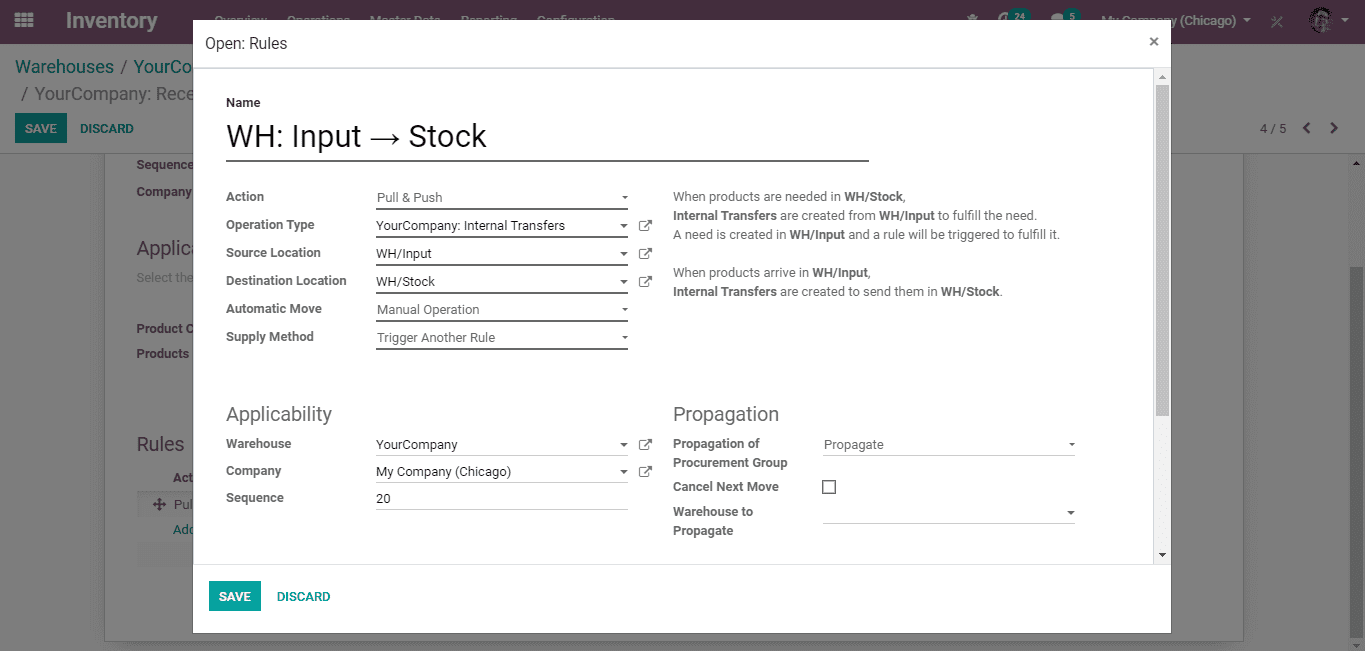
The fields to be filled in the rule creation form are;
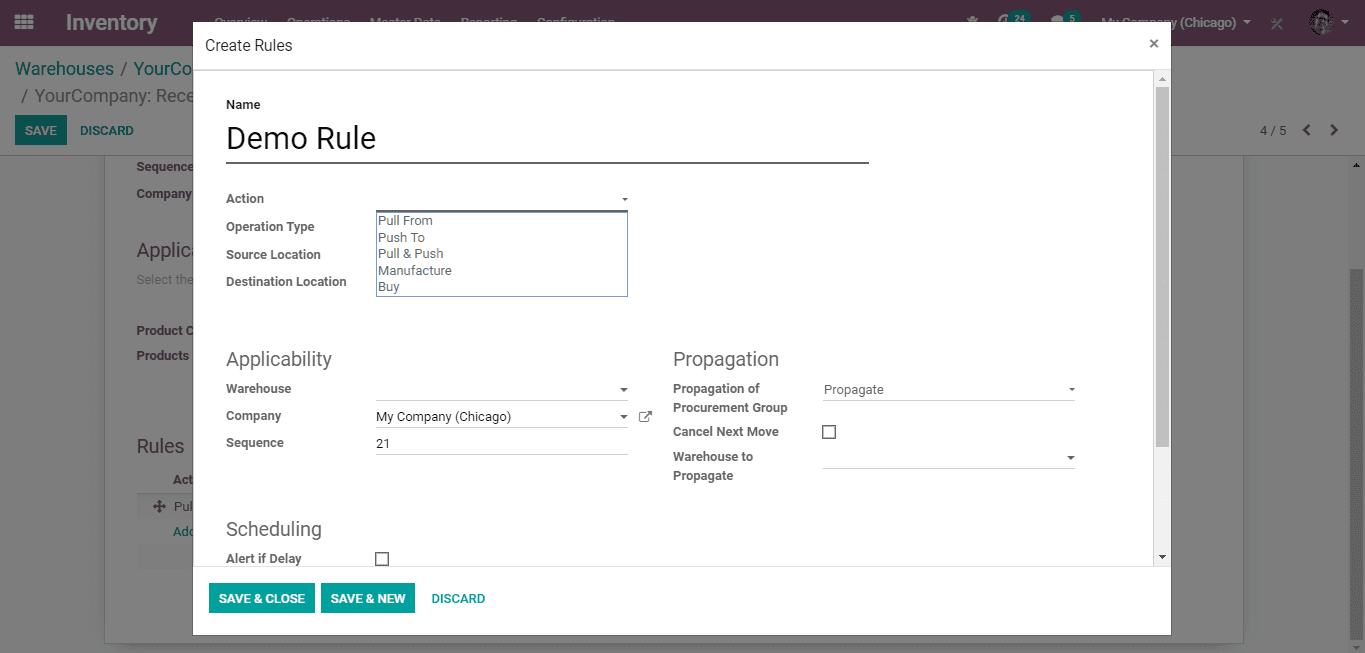
Action: They are the actions available
- Pull From
- Pull To
- Push & Pull
- Manufacture
- Buy
Operation type: This field determines the type of view of the picking in the views or reports.
One can also give the delay and partner address here. The newly created rules with push and procurement rules applied can be viewed under the inventory tab of the product view.
Source Location: The location where the products/goods are taken from.
Destination Location: The location to where the procured products/goods are headed to.
Company: The company to which the rules apply.
Warehouse: The particular warehouse to which the rules apply.
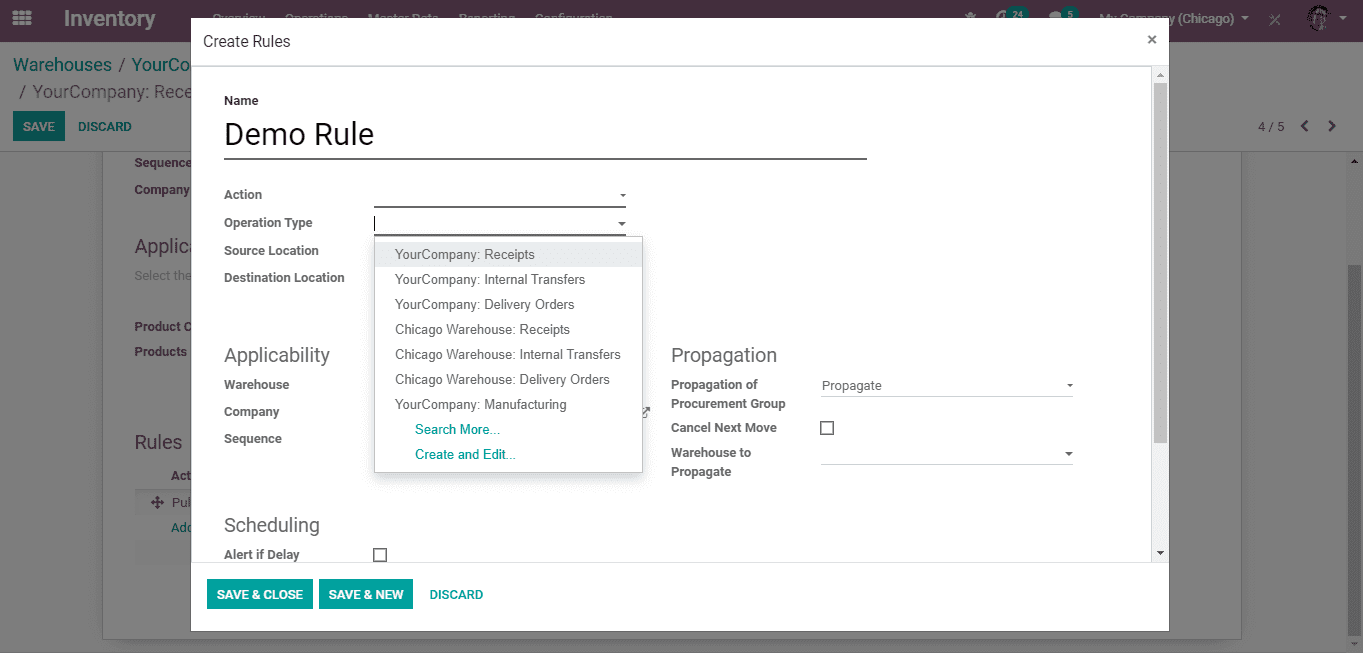
Since we’re dealing with the purchase rules, YourCompany: Receipts are the Operation Type to be selected. Click ‘SAVE & CLOSE’ to save the rule.
Receive goods in input, then quality and then stock (3-steps)
With the 3 Step method, you can receive products/goods that you’ve purchased in a manner most convenient to you.
Create numerous rules according to your need for receiving or internal transferring (Operation Type: Internal Transfer) products/goods in this route.
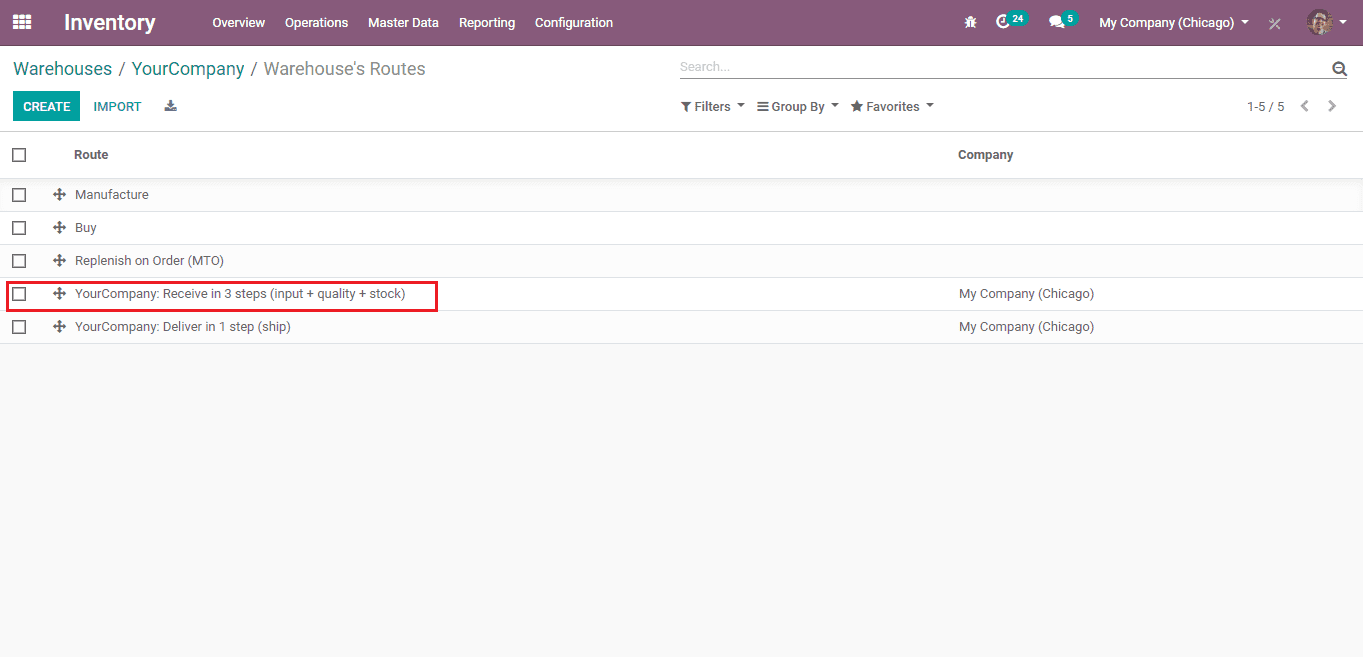
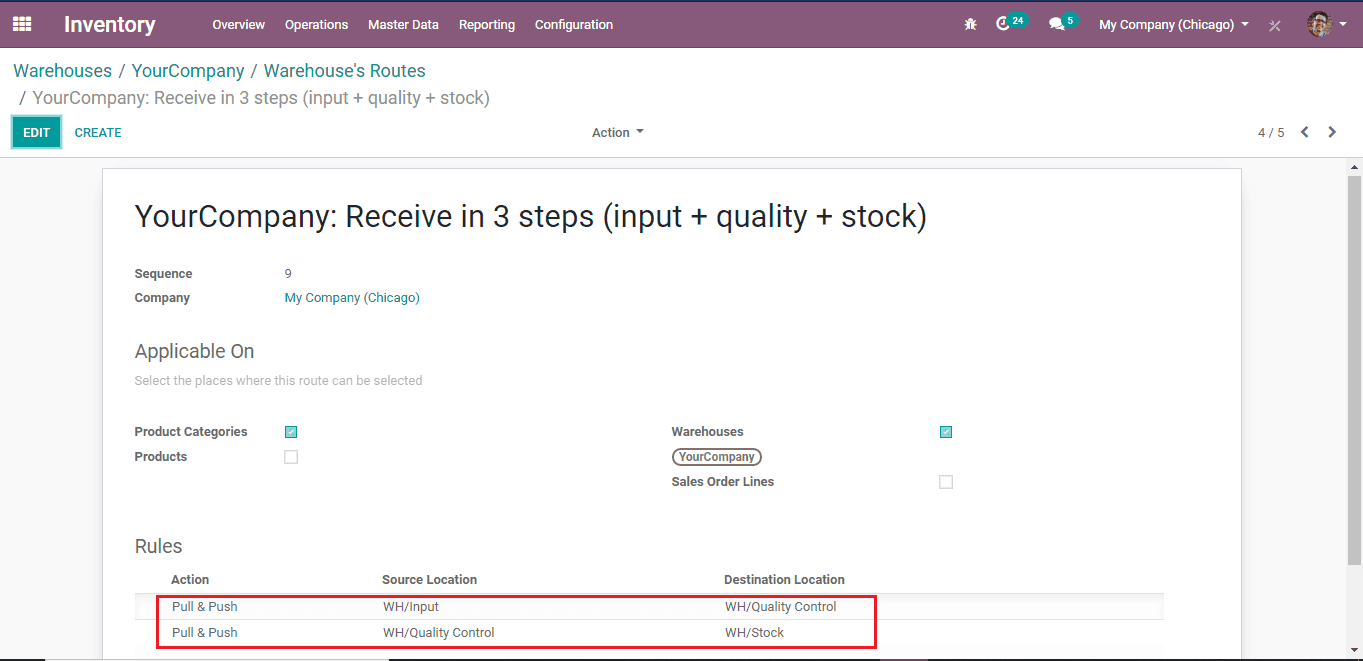
Many rules can be created here with respect to the routes assigned for the purchased products/goods’ movement.
Suppose, if we want to carry out a Quality Check for the purchased goods, a quality checkpoint must be created in the warehouse and corresponding routes with appropriate rules should be created.
Let’s see what are the functions of all the actions that are configured with the rules.
Pull From
Make-to-Order is an example of the pull inventory control method. With Make-to-Order, inventory can be kept at optimum levels by creating a purchase order when receiving an order from the customer, without referring to the stock in hand.
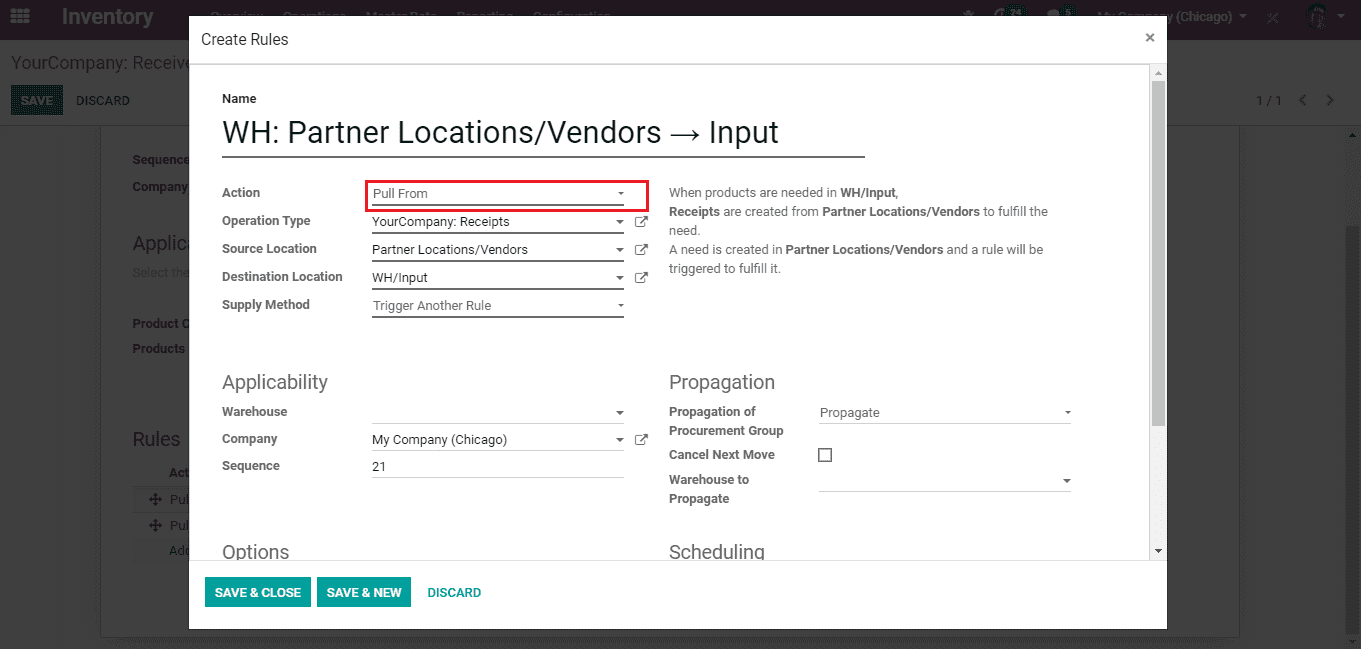
In the demonstration provided above, the operation type is set as ‘Receipt’ and the source location is ‘Partner Locations/Vendors’ as the operation is product purchasing.
When WH/Input is in demand of products, in order to serve this demand, Receipts are generated in Partner Locations/Vendors.
We are able to apply the move supply method when the action is set as ‘Pull from’.
There are two Move Supply method;
Take from Stock: Products/goods acquired from the source location’s stock.
Trigger another Rule: Another rule is triggered to take the products/goods from the source location without taking account of the stock available at the moment.
Push To
The ‘Push To’ function enables the locations to operate as a chain in product transfers. It facilitates the consecutive movement of products/goods from the source location with respects to already set conditions like delay, destination, journal and type of move. It can be manually activated or automatically activated.
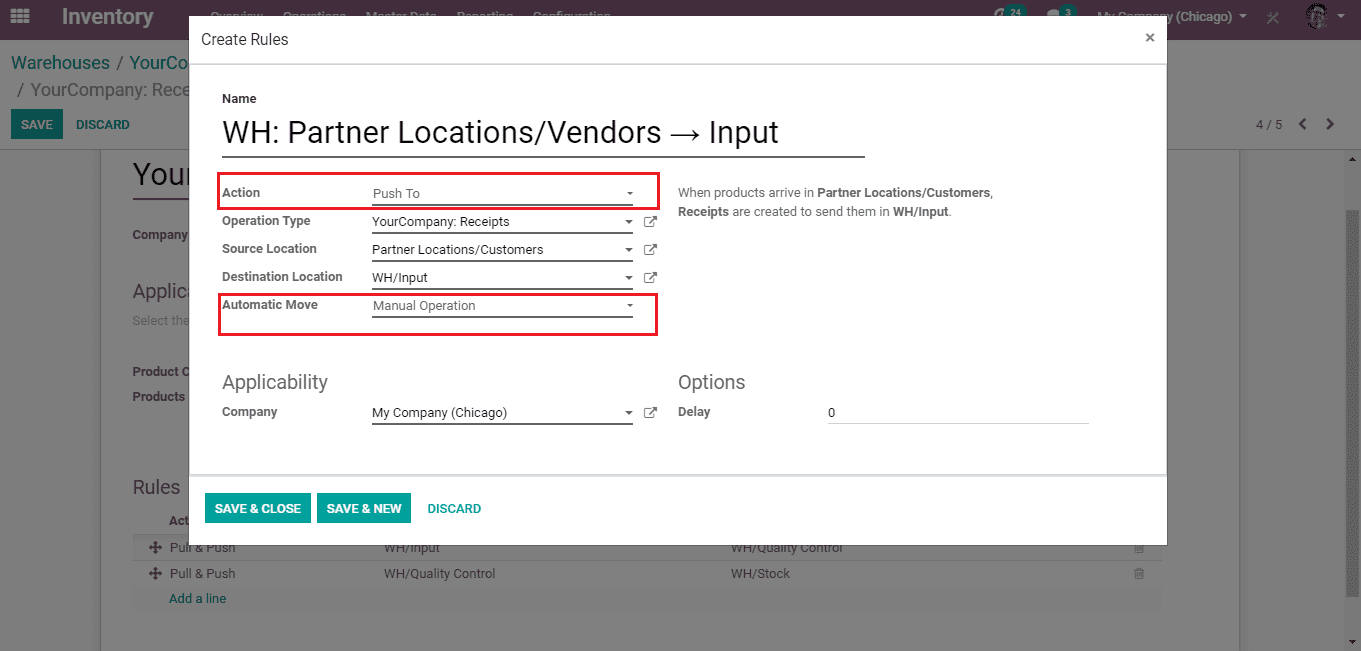
Receipts are generated to forward the products/goods to WH/Input when they are present at Partner Locations/Vendors.
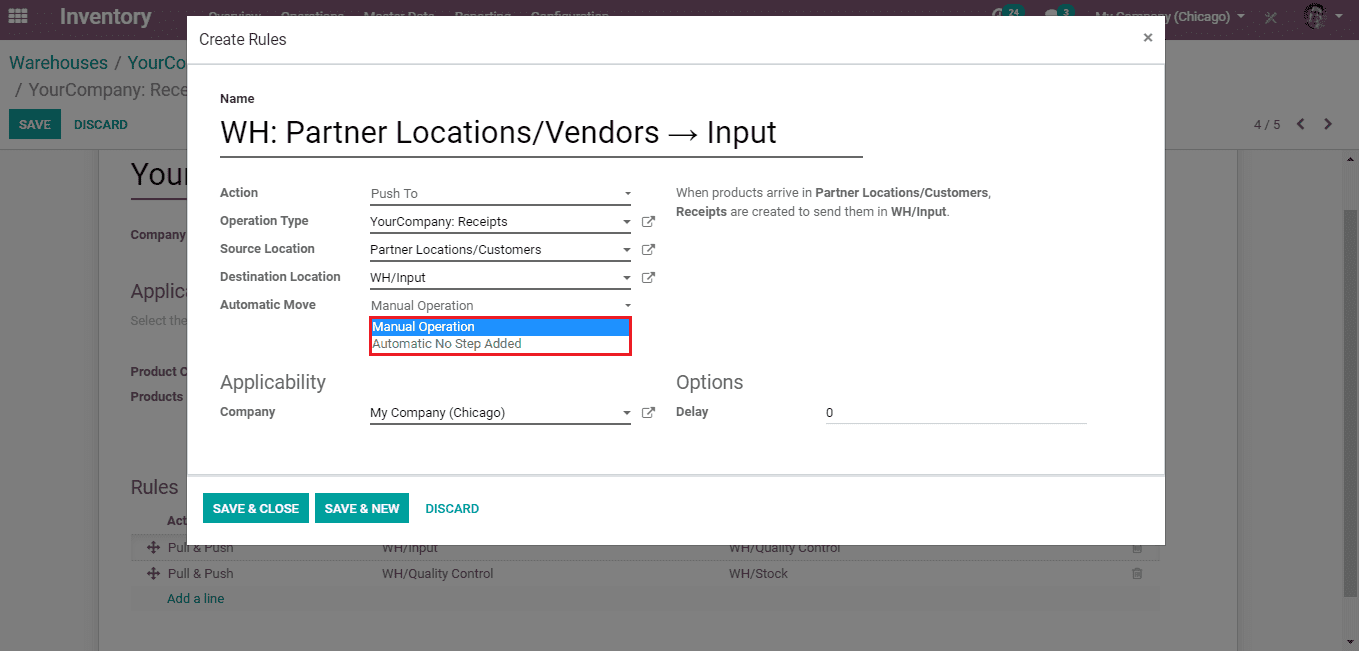
The Automatic Move is set when the action is set as ‘Push To’.
There are two options for Automatic Move;
The Manual Operation: A stock is created and the movement of the current one is commenced.
Automatic No step Added: Replacement of the location happens in the move originally done.
Pull and Push

When WH/Input is in demand of products/goods, in order to serve the demand Receipts are generated from Partner Locations/Vendors.
These actions are done with the help of some rules.
Receipts are generated in Partner Locations/Vendors when products/goods are ready to be moved to WH/Input.
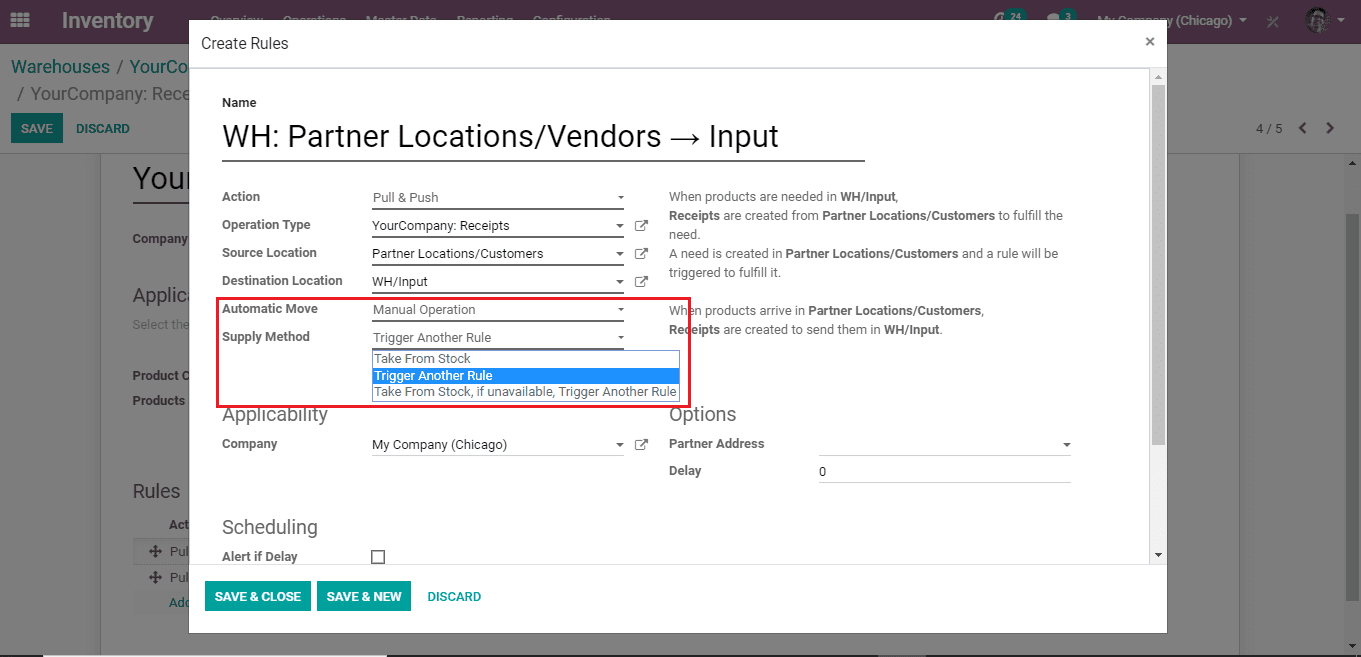
The Automatic Move and Move Supply Method options are selected when the action is set as Pull and Push action.
Manufacture
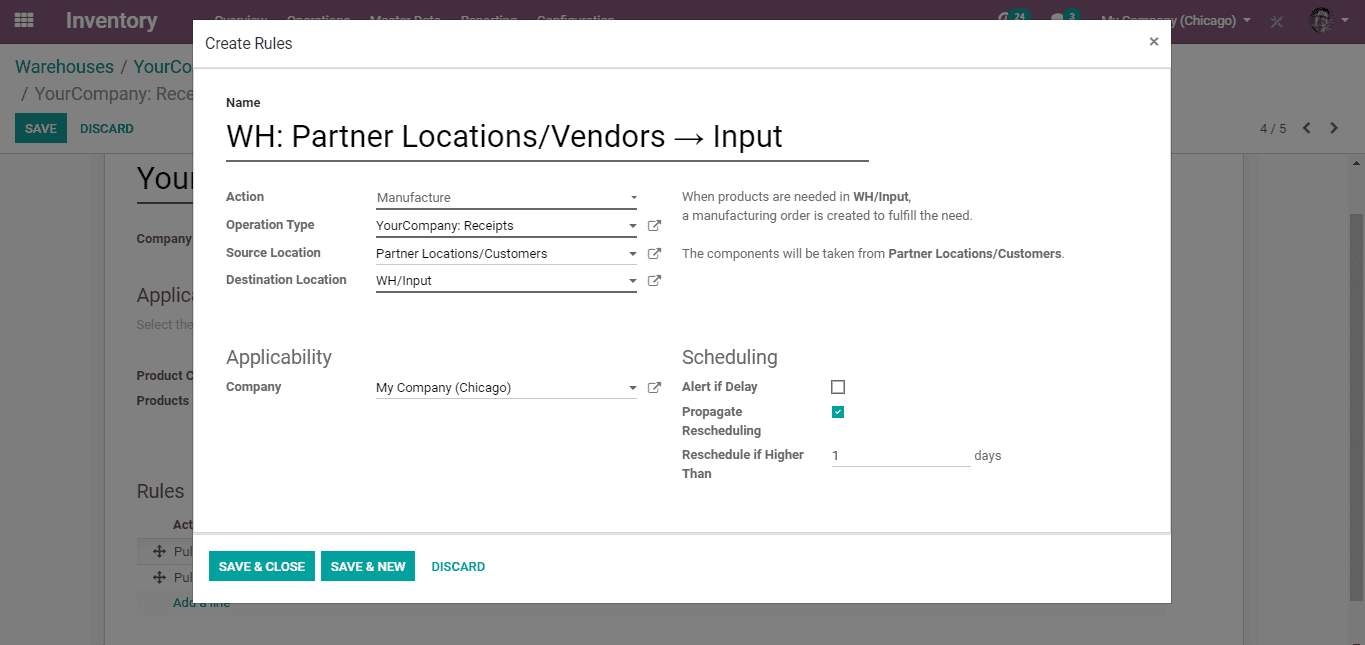
A Manufacturing Order is generated for catering to the requirements for products in WH/Input. The production apparatus is acquired from the Partner Locations/Vendor.
Buy
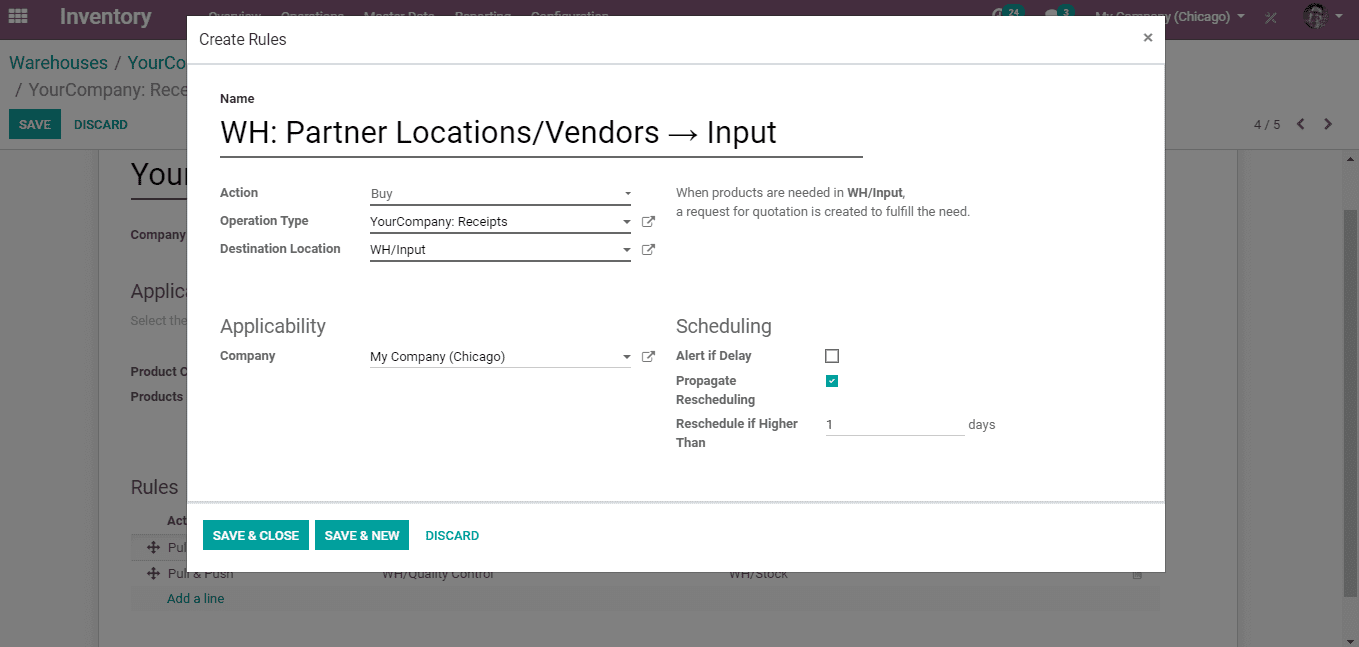
A Request for Quotation is generated to cater to the requirement for products/goods in WH/Input.
Let’s look at an example.
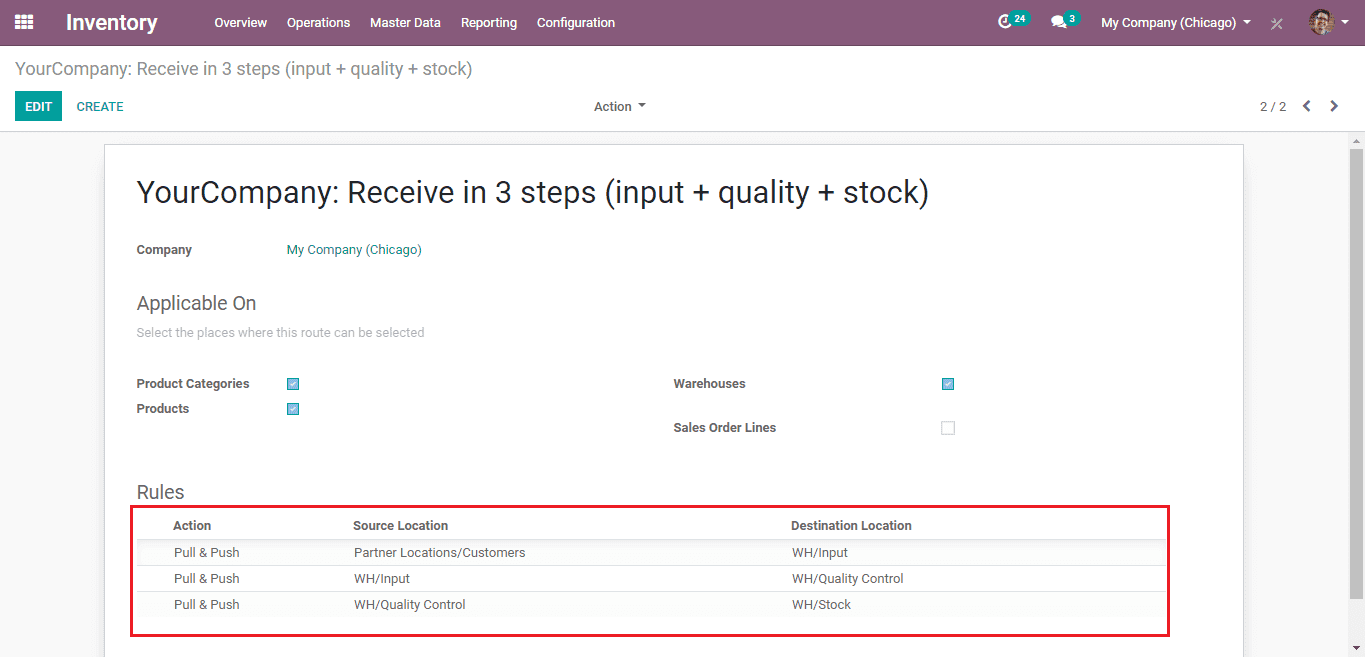
A total of three rules for three-step incoming shipment is provided in the route applied on product category and products.
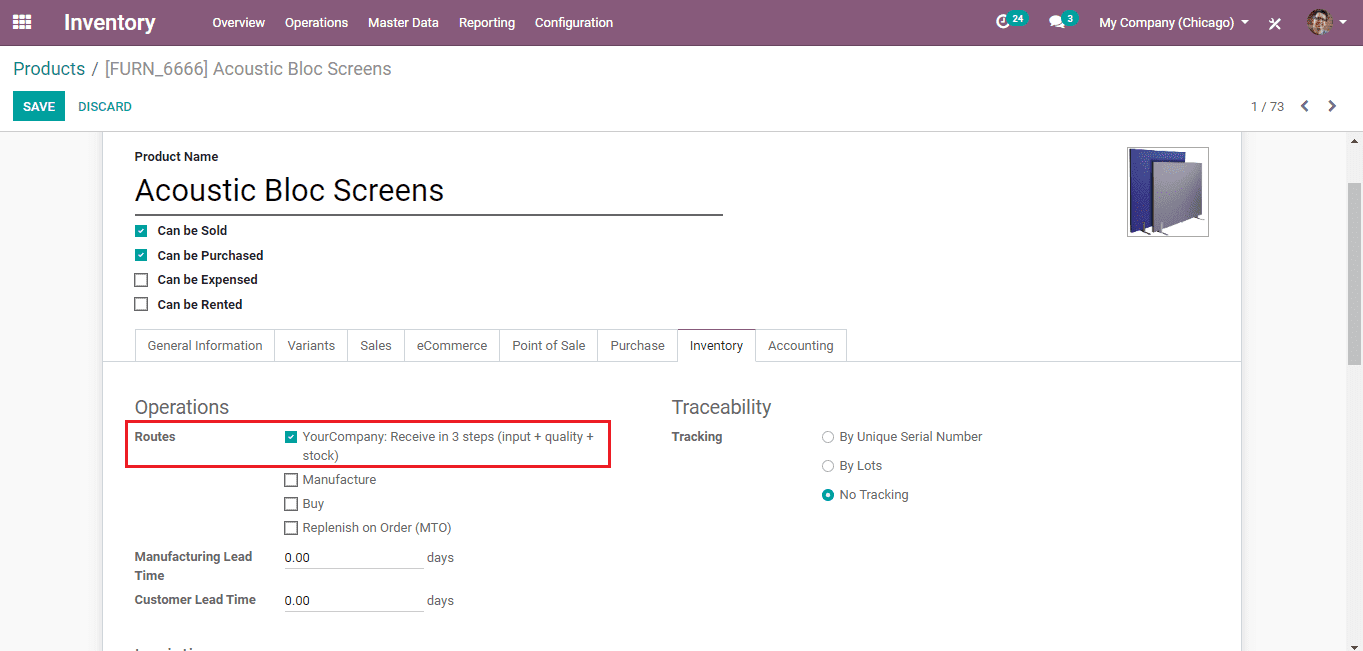
Go to the inventory tab of the particular product to be purchased and tickmark the route.
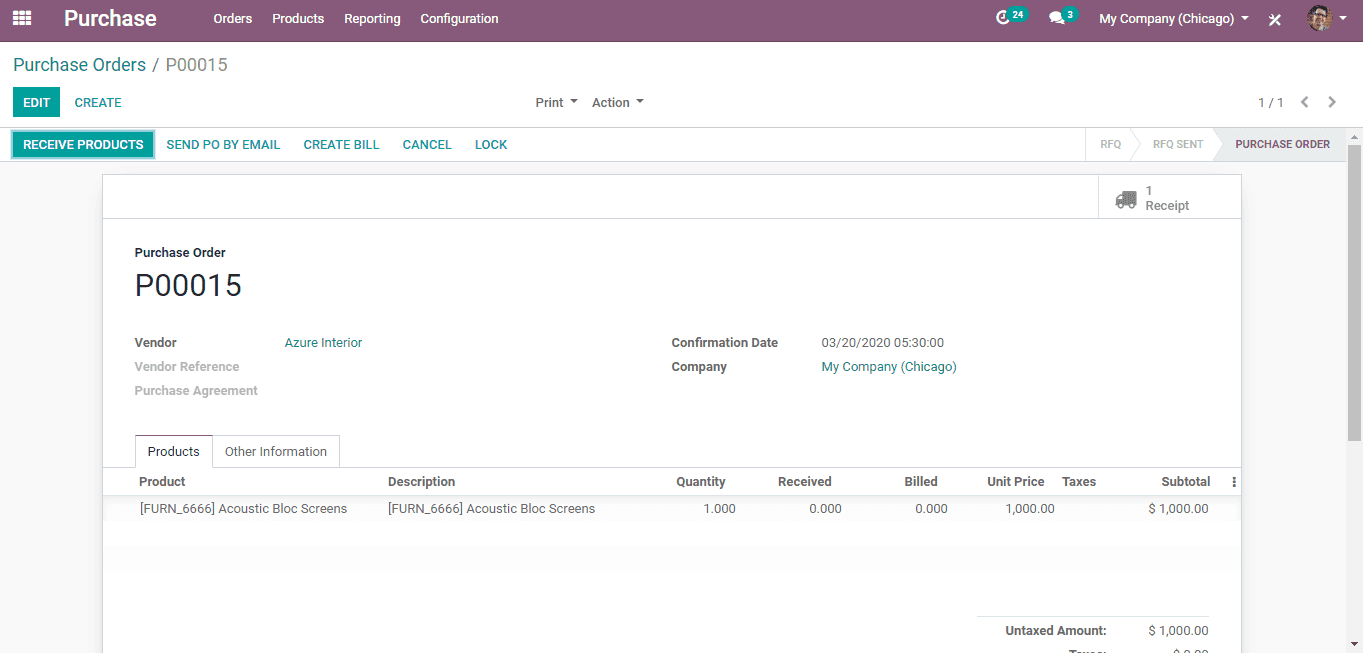
Now, a purchase order should be generated for this product.
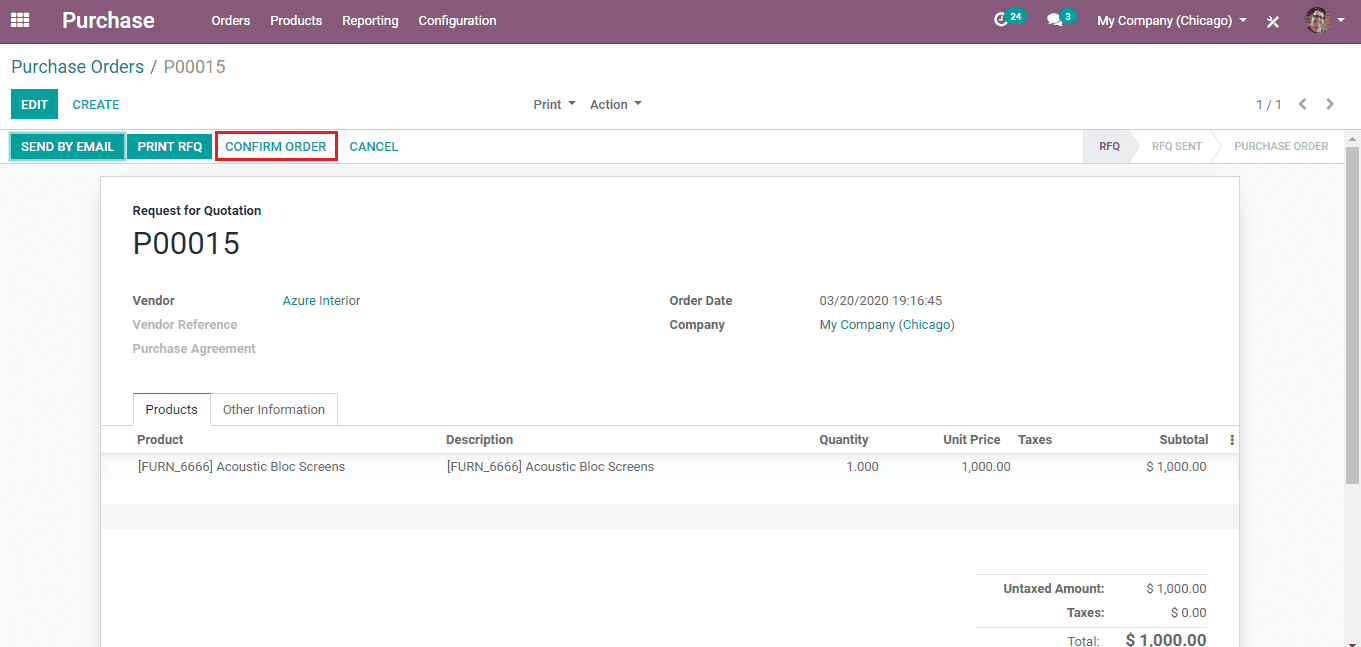
Confirm the order and validate it by going to the inventory.
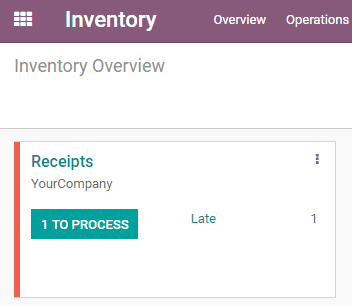
From the inventory module, click the ‘Process’ button seen on the receipt for validation of the purchase.
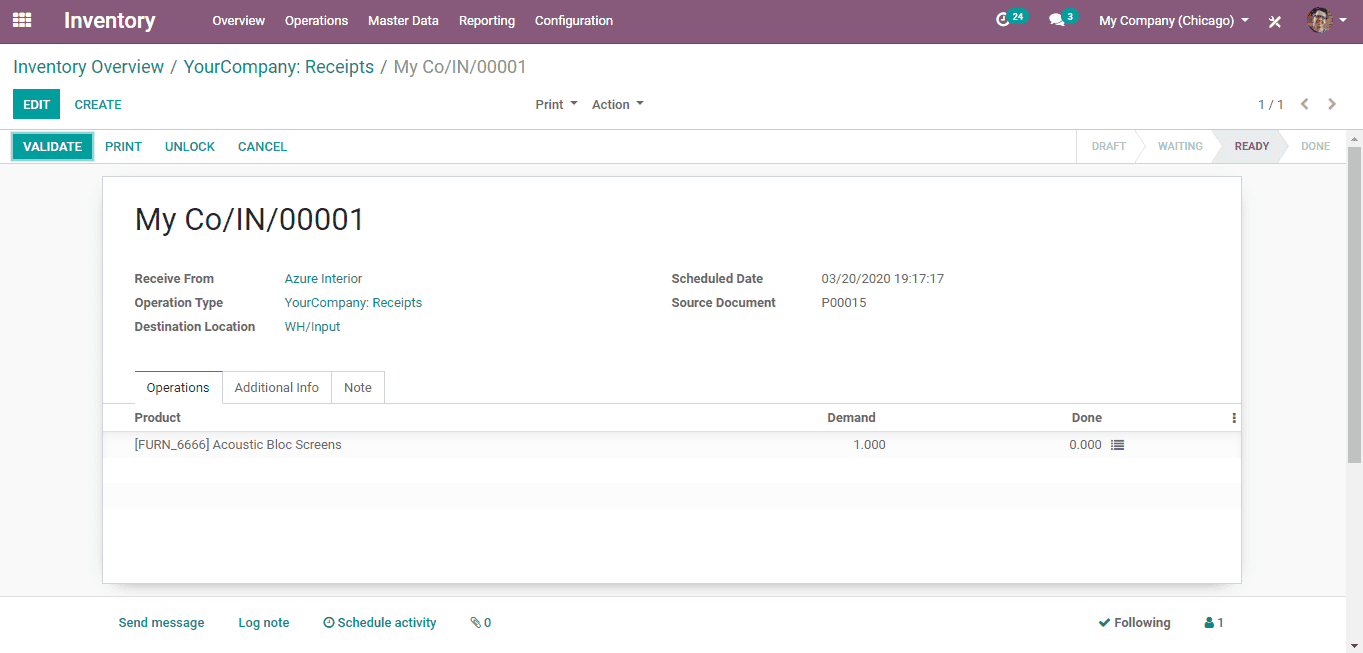
Validate and go to the input location.
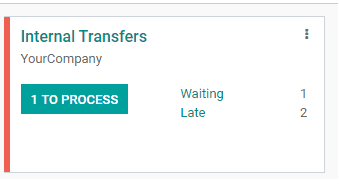
Now, the product will be carried to a different internal location such as quality control. Validation of this can be done at the internal transfer.
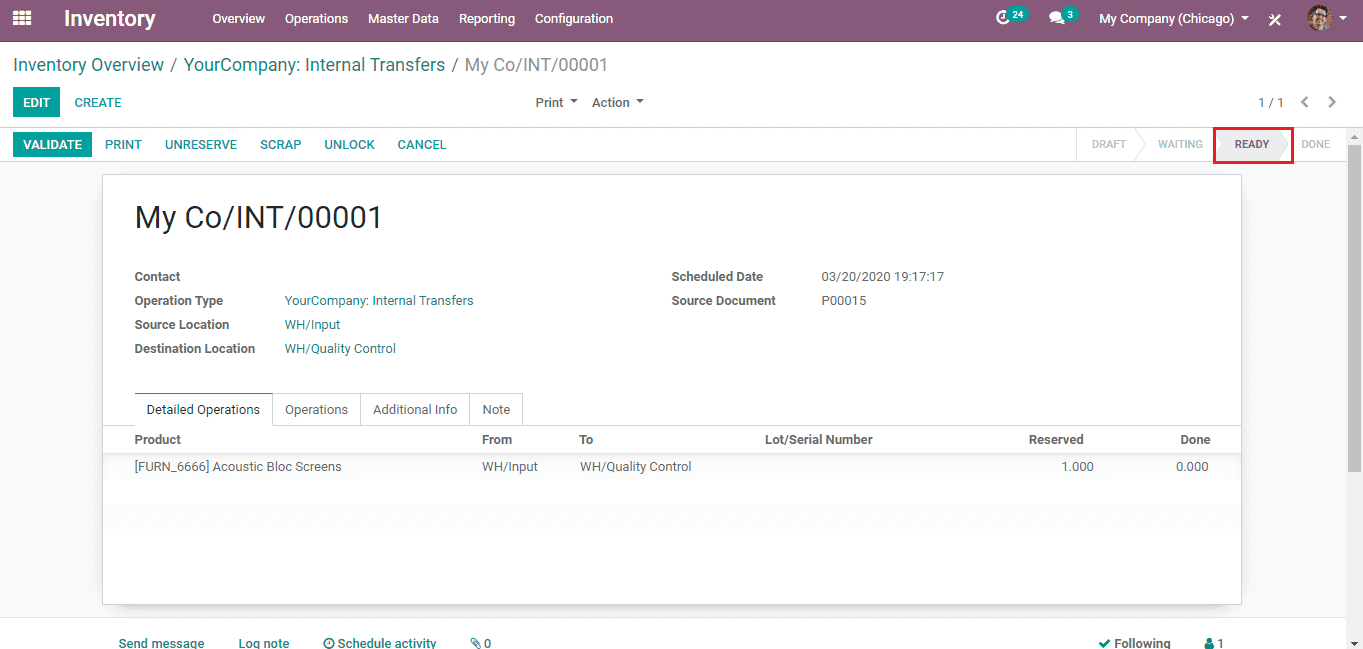
When validated the ready state will be changed to ‘Done’ and the purchase becomes complete.
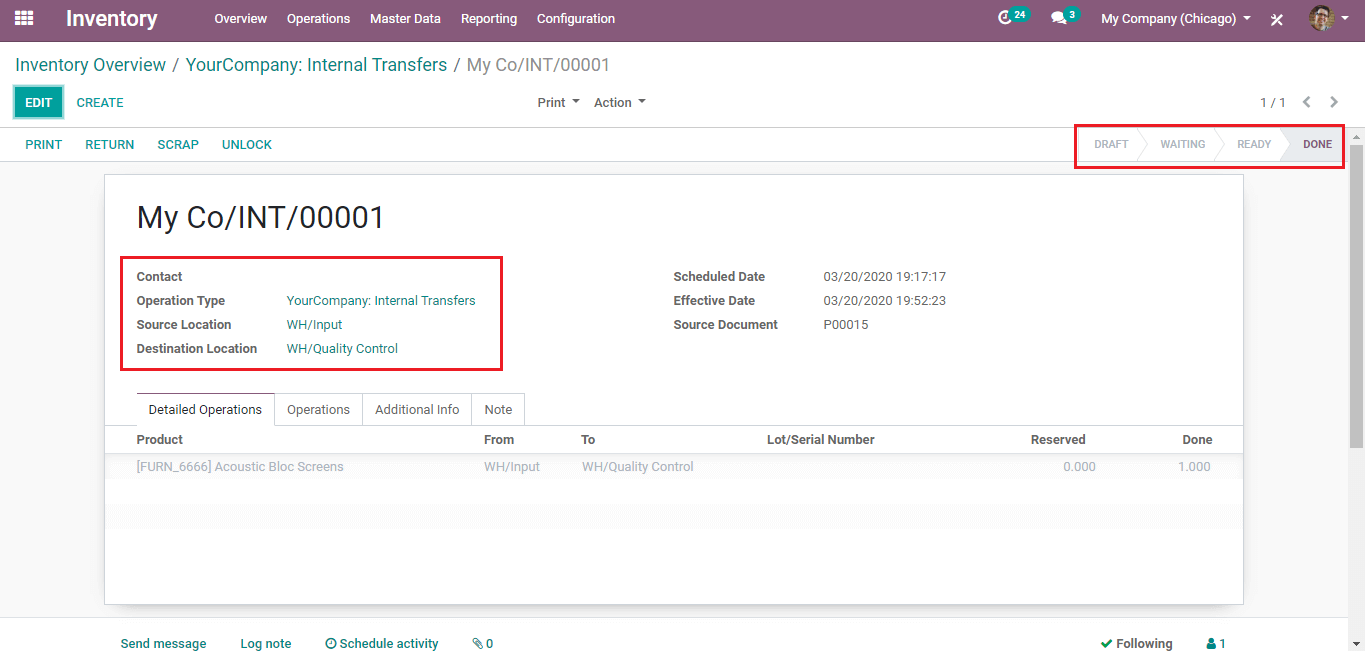
The products will be carried to the stock location, right after the validation of the products/goods from Quality Control and the purchase is complete.
That is how purchasing rules work in odoo.


