The time recording feature available in the Odoo Field Service module is beneficial for the authorities to get accurate information about the timesheets of each employee on each task. This feature extends the functionalities of the field service management system to determine the cost of the service based on the time taken to complete each step in field service. Time tracking serves several advantages, major among them are the invoicing of the service based on timesheets and payroll of the fieldworkers. It is possible to record the time worked on field services from the Field Service module itself. Odoo will automatically create timesheets of the assigned employees according to the recorded time. The employees can also record their timesheets manually on the task and modify them.
The timesheets will be automatically added to the customer invoice and bill if you want to generate invoices based on the timesheet. In such cases, it is very important to keep a track of the timesheets on each step in field service operations. The time tracking and recording capabilities of the Field Service module can be utilized to analyze the performance of your employees and enhance productivity by taking adequate actions.
The company will get visibility to the hours worked by each fieldworker by the integration of the timesheet in the Field Service module. This will also simplify the payroll actions in a company. The time recording system in the Field Service module ensures automatic and manual recording of timesheets. The automatic tracking system eliminates manual errors and reduces the complexities in the recording of time. This will also be useful to save the time of both authorities and field workers.
In this blog, we will discuss how to record timesheets on the tasks field services in Odoo.
The Field Service module can be found in the home dashboard of your database, or else you can install the module from AppStore
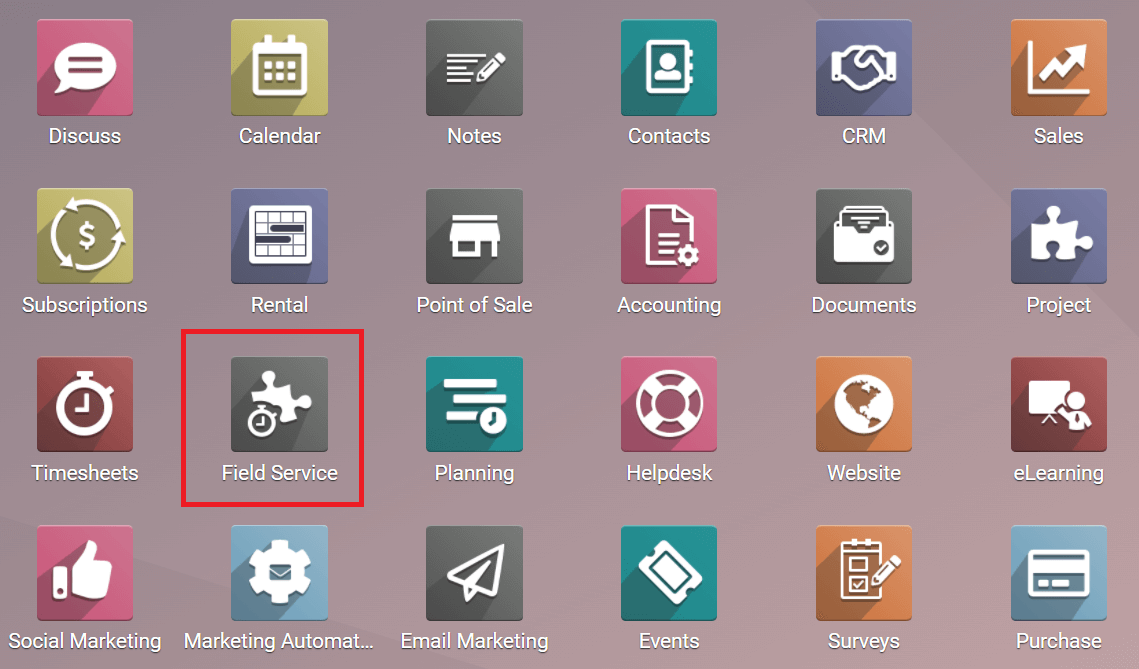
To get the option to record the time taken to complete a task, you need to activate the Time and Material option from the Settings menu. When you open the Field Service module, you will land on the Task window of the module.

You will get access to the Settings menu from the Configuration menu given in the main menu bar of the module as marked in the screenshot above. In the Settings menu, you will get the Time and Material option to activate.
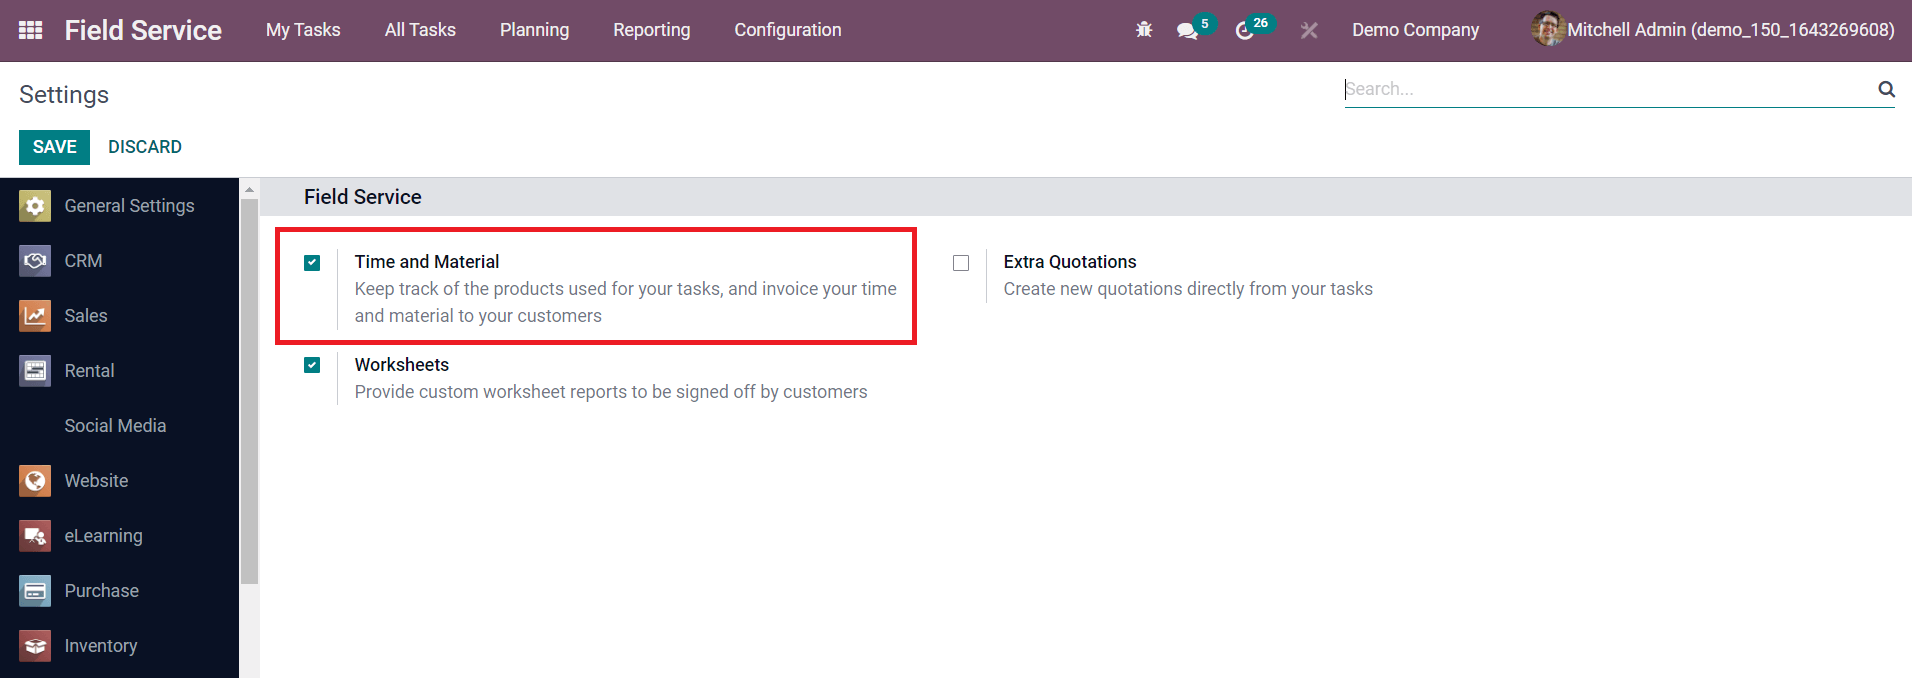
By enabling this option, you will get corresponding features in the task creation window to record the time and invoice the recorded time to the respective customer. To know more about how this feature works in the Field Service module, let’s create a new task for a new field service operation.

You can click on the Create button from the Task dashboard of the module.
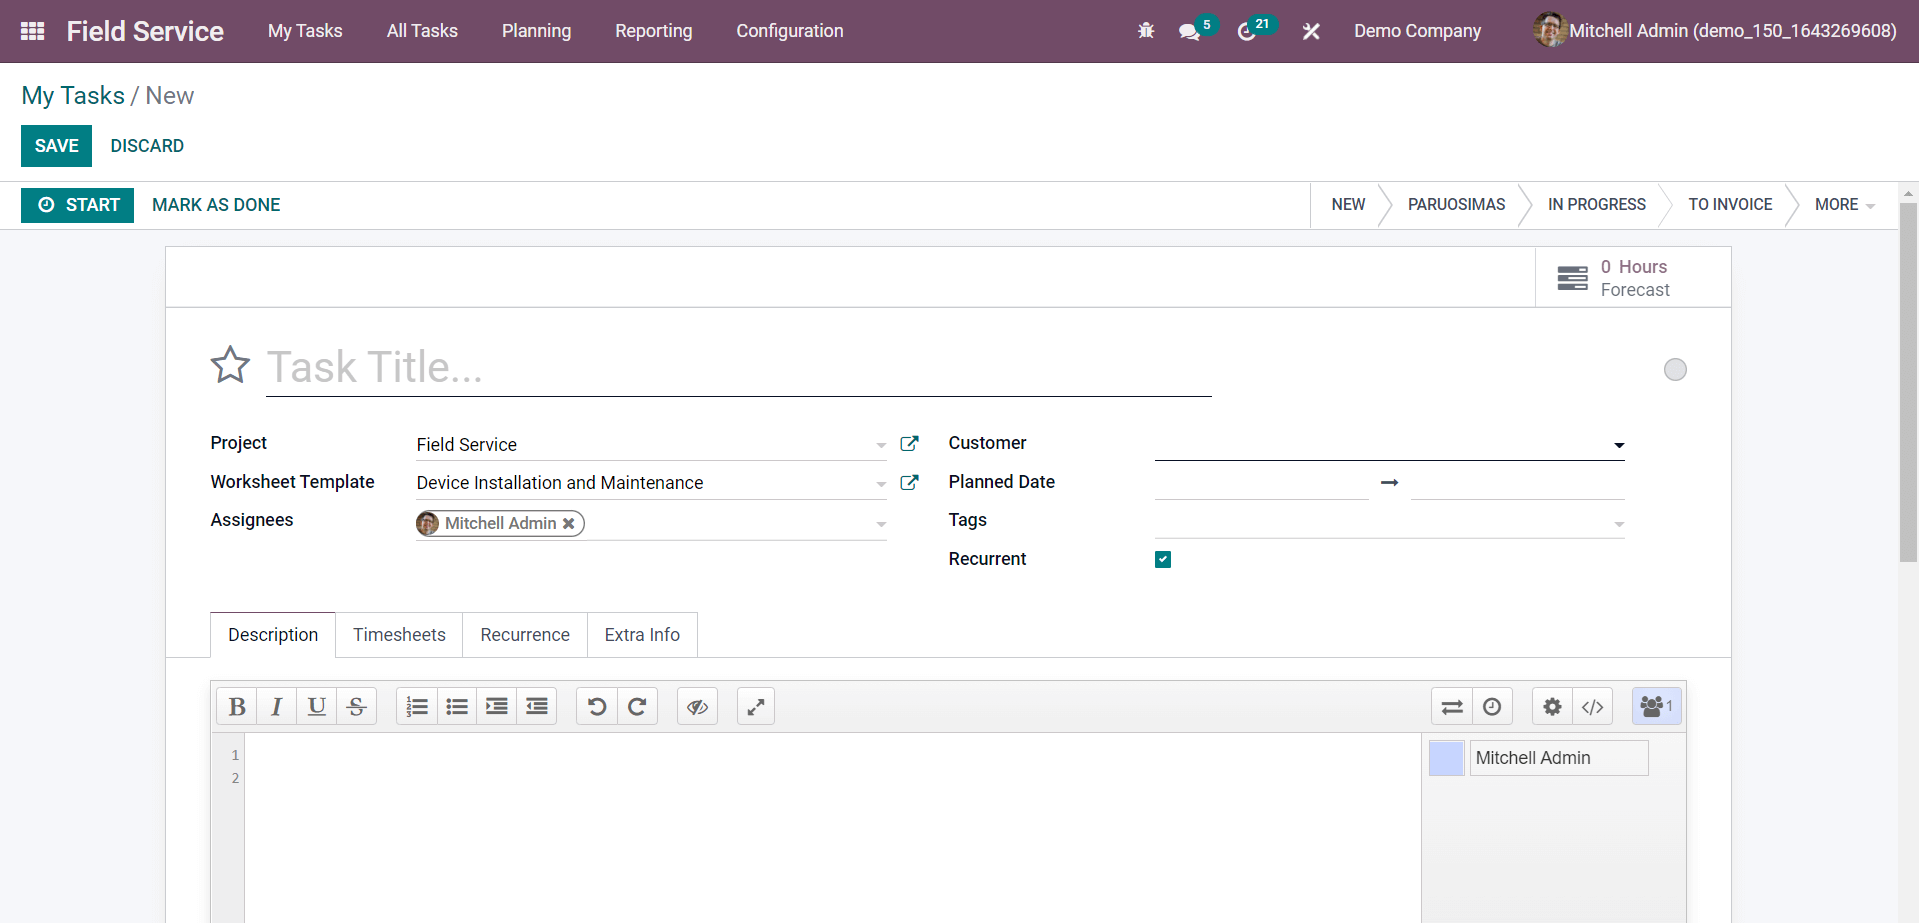
As you can see in the screenshot above, a new task creation window will appear to add details regarding the task. Mention the title of the task in the corresponding field. The Project field can be used to specify the name of the project under which this task will be added. By clicking the external icon given next to the title of the project, you will get a pop-up window to edit the details of the project.
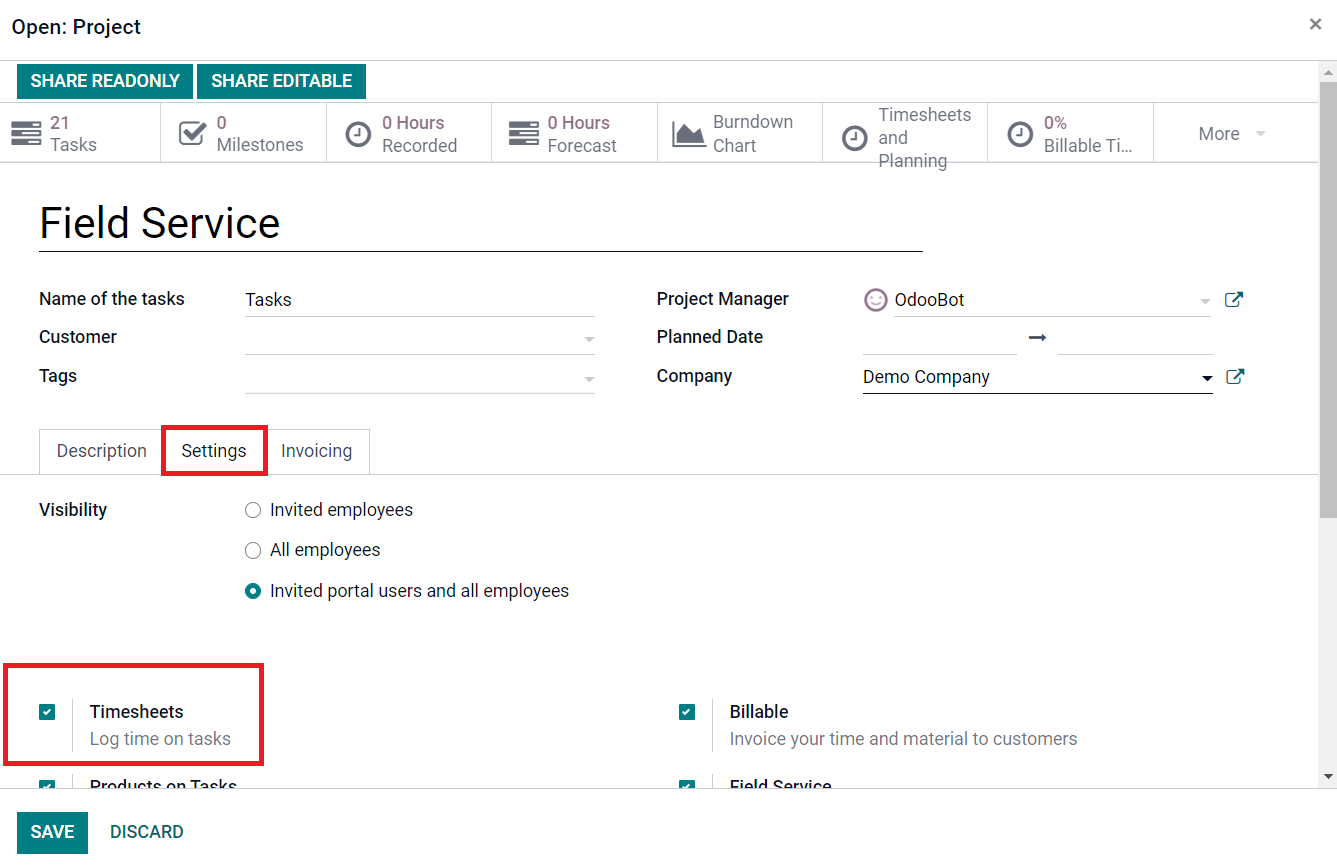
Under the Settings tab, you can find the Timesheets option to activate. This option will allow the recording of timesheets on each task included in this particular project. Now, return to the task creation window. You can specify the Worksheet Template for the task, Assignees, and Customer in the corresponding fields.
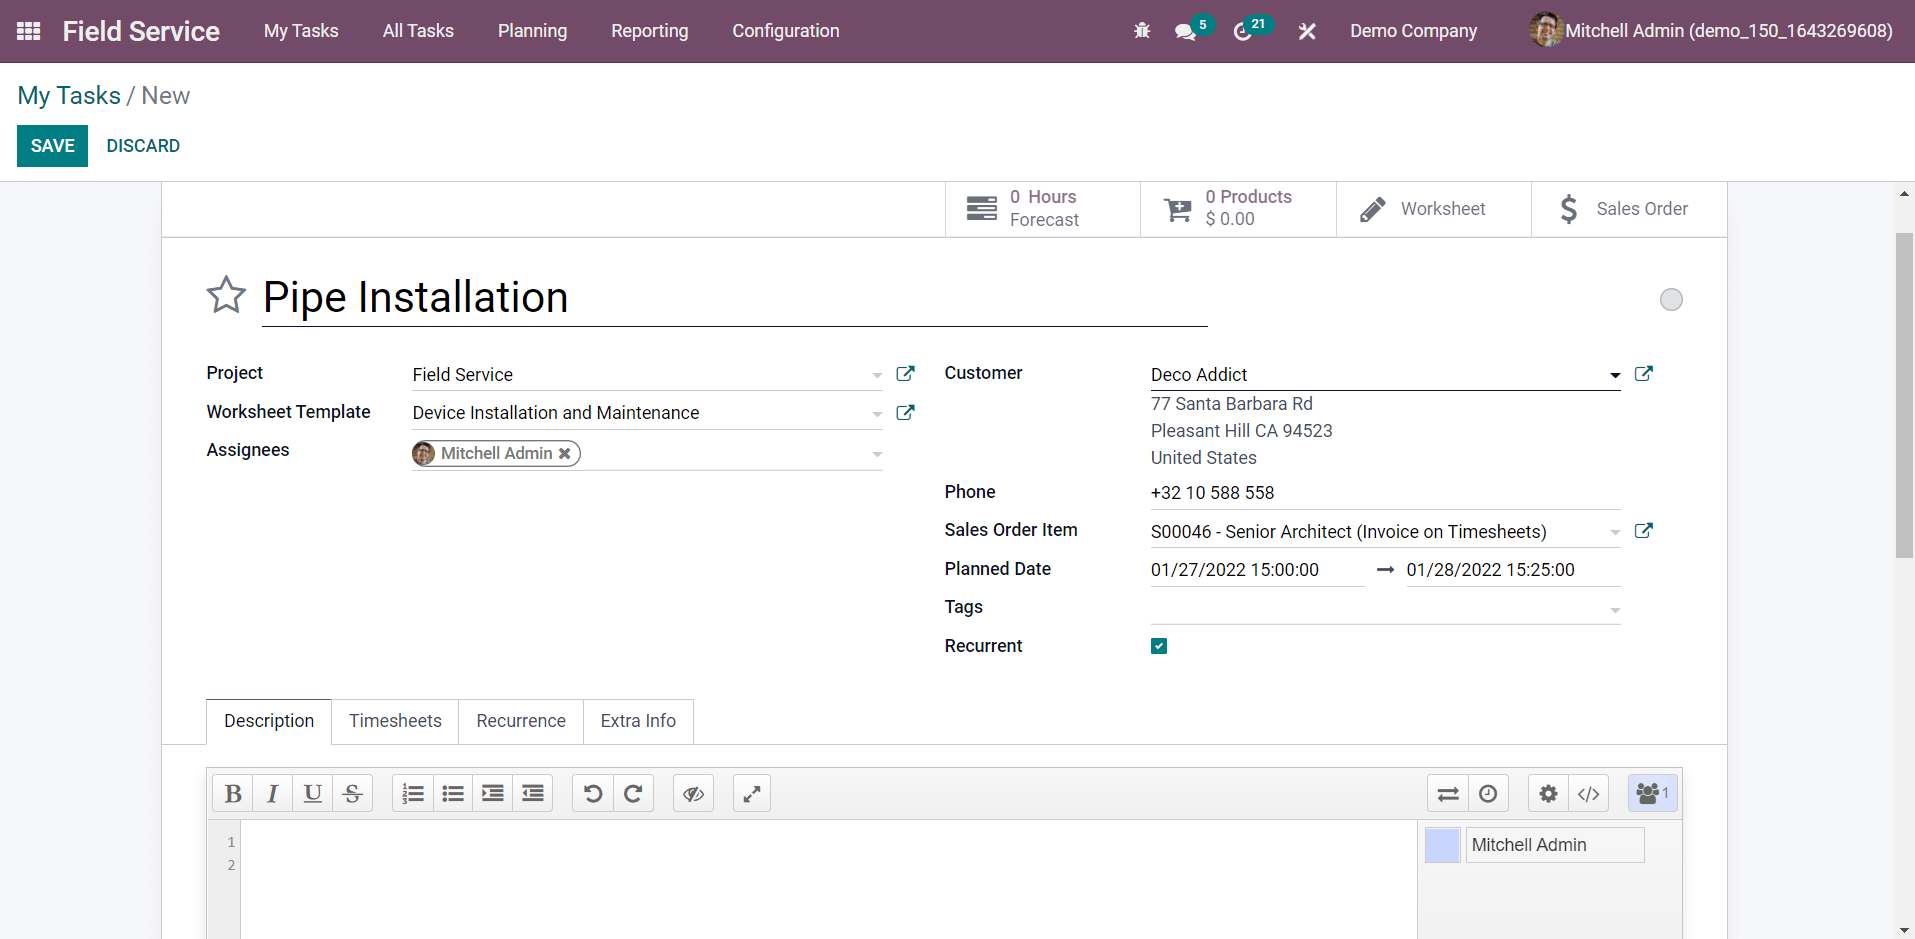
When you mention the name of the Customer, you will get the Sales Order Item field to specify the sales order of this service. This sales order will help you to invoice the time and material recorded for the task. Mention the Planned Date and Tags in the respective fields and activate the Recurrent field if you want to repeat the task at the customer’s request. You will get Description, Timesheets, Recurrence, and Extra Info tab to complete. In the Description tab, you will get a collaborative pad to communicate with your teammates.
The Timesheets tab is used to record the time spent by each employee for various activities in the task. Before starting the task, you can estimate the total hours required to complete the task within the planned date. These estimated hours will help you to analyze the progress of the task. If the task is out of track according to the recorded time and planned time, you can take necessary actions to improve the performance of both field workers and the task.

The estimated time required to complete the task before the end date can be mentioned in the Initially Planned Hours field. In the Field Service module, you will get two methods of tracking time. The first one is, you can record the time manually by clicking on the Add a Line button. Using this button, you can specify the Date, Employee, Description of the activity, and Hours Spent. The Progress field will show the progress of the task based on the planned hours and recorded hours. The second method is an automatic recording of time. For this, you will get a Start button as marked in the screenshot below.
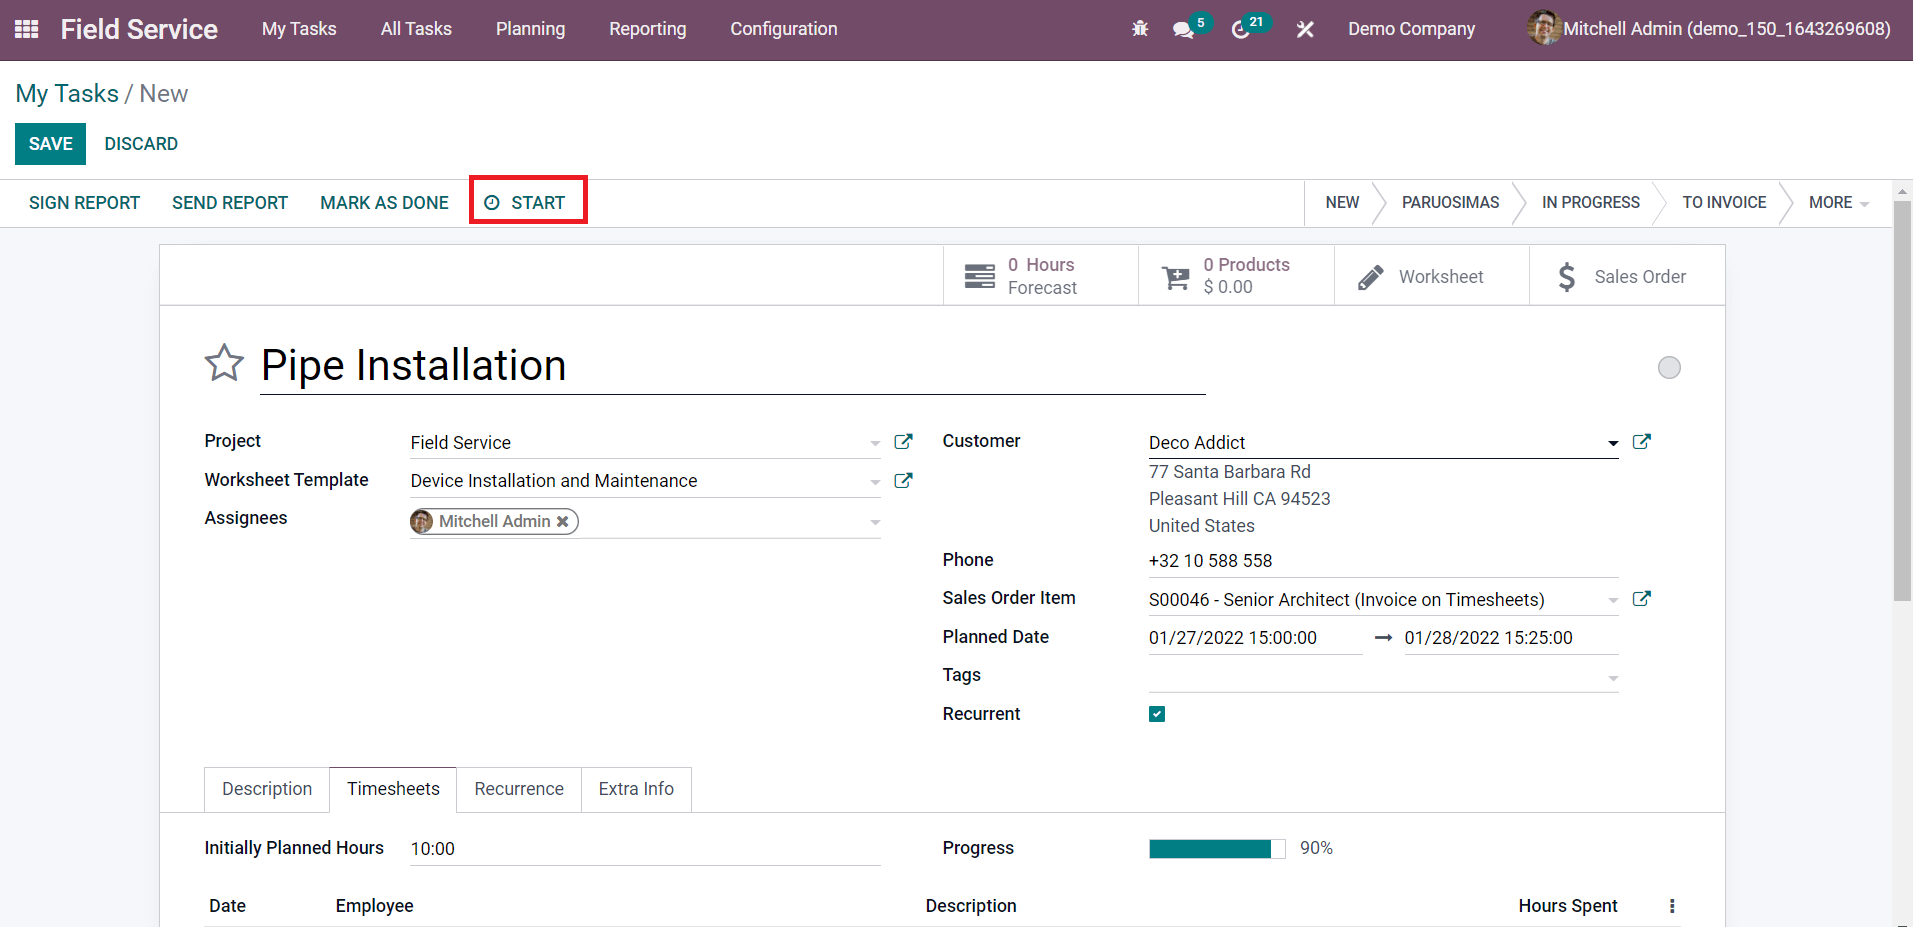
When you are about to start the task, you can click on this Start button and Odoo will start recording the time.
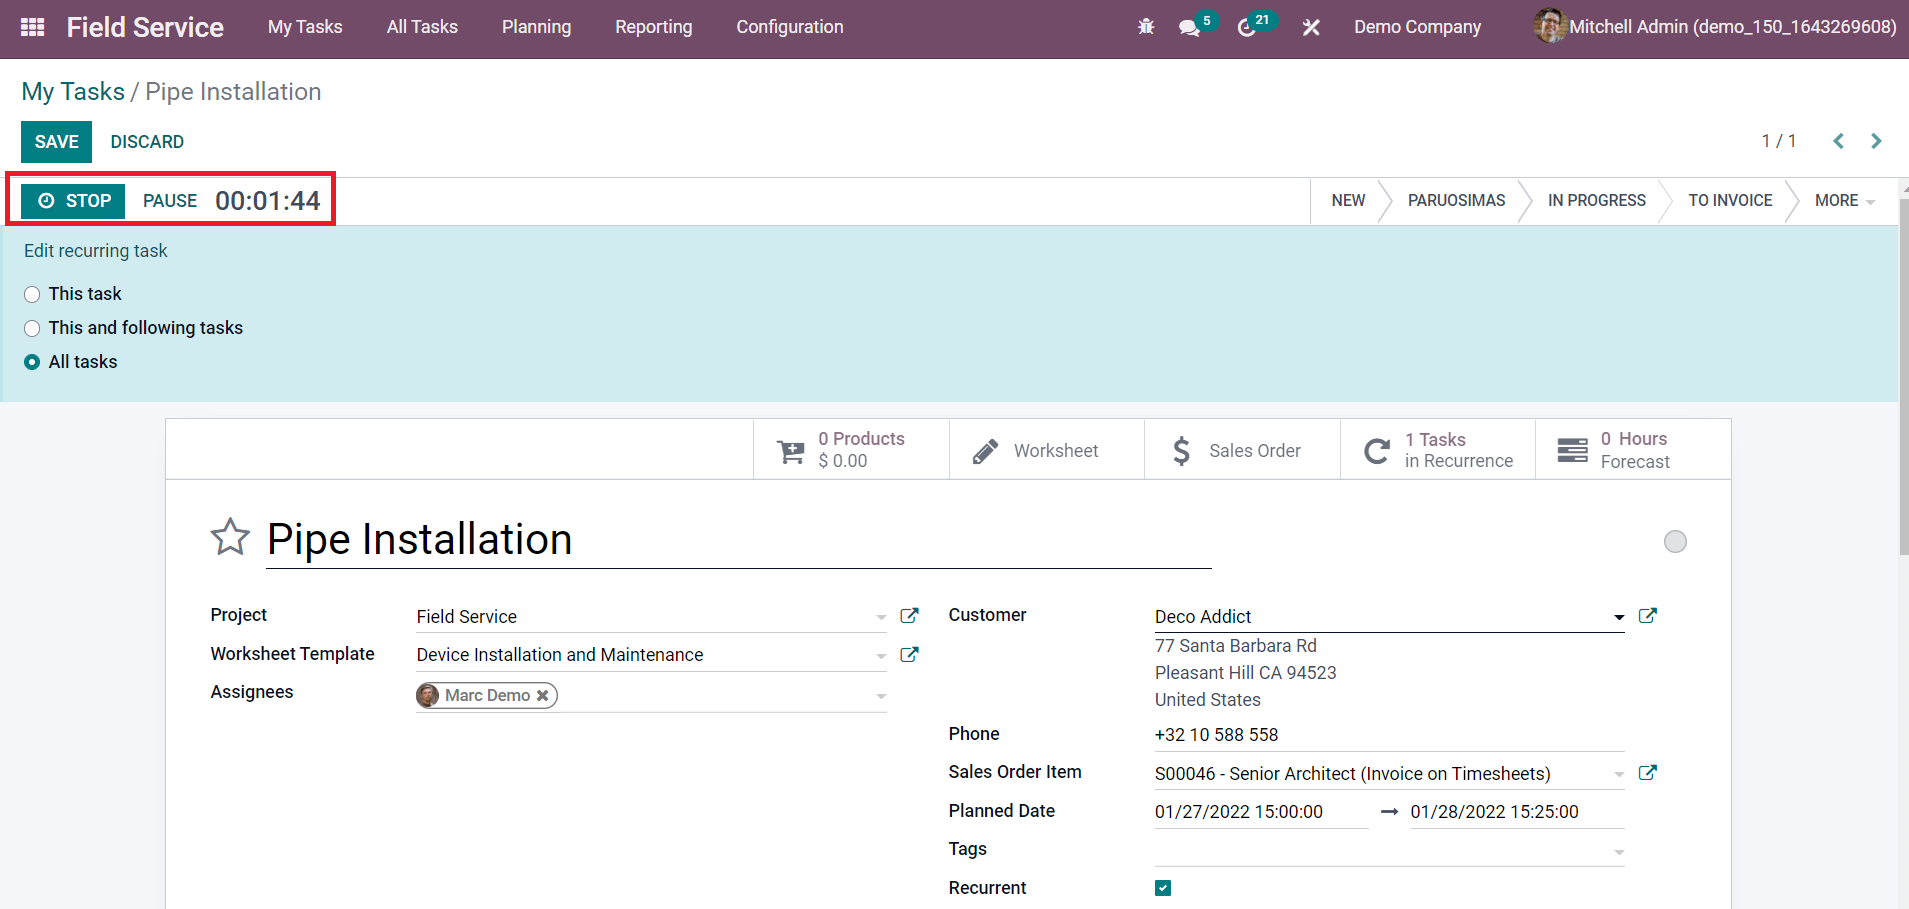
The Stop and Pause button can be seen next to the timer as shown in the screenshot. After finishing the task, you can use the Stop button. A confirmation window will appear to confirm the recorded time.

You can check the recorded time and click the Save button. Now, under the Timesheets tab, you will get the details about the newly recorded time.
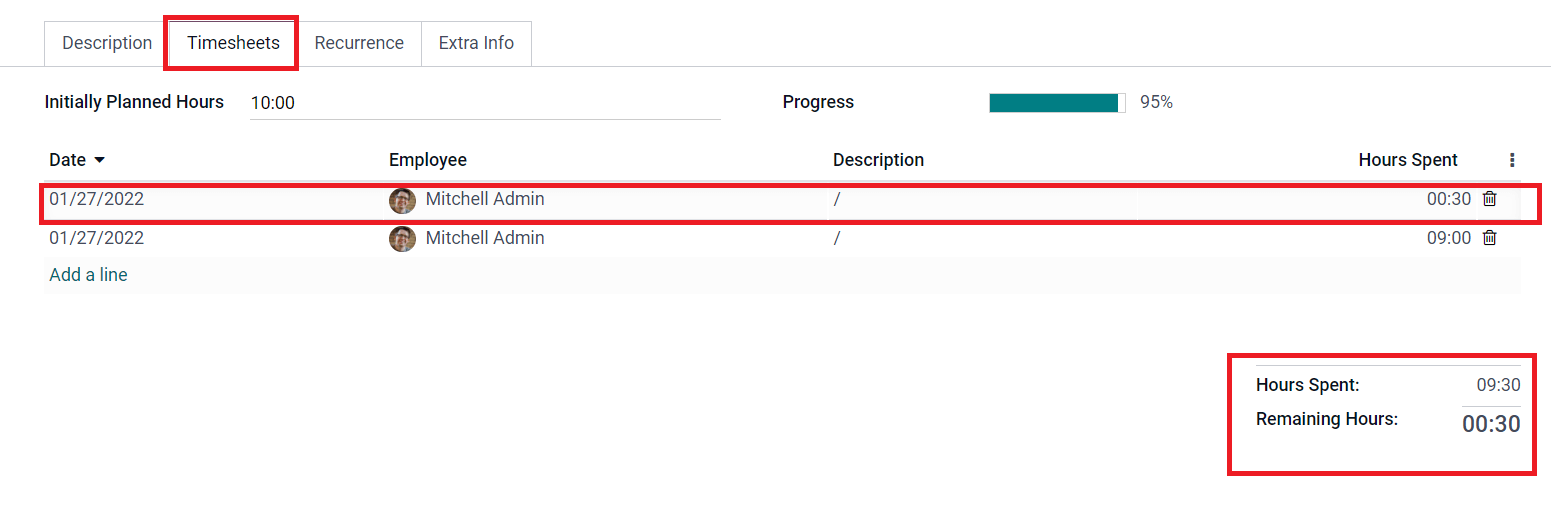
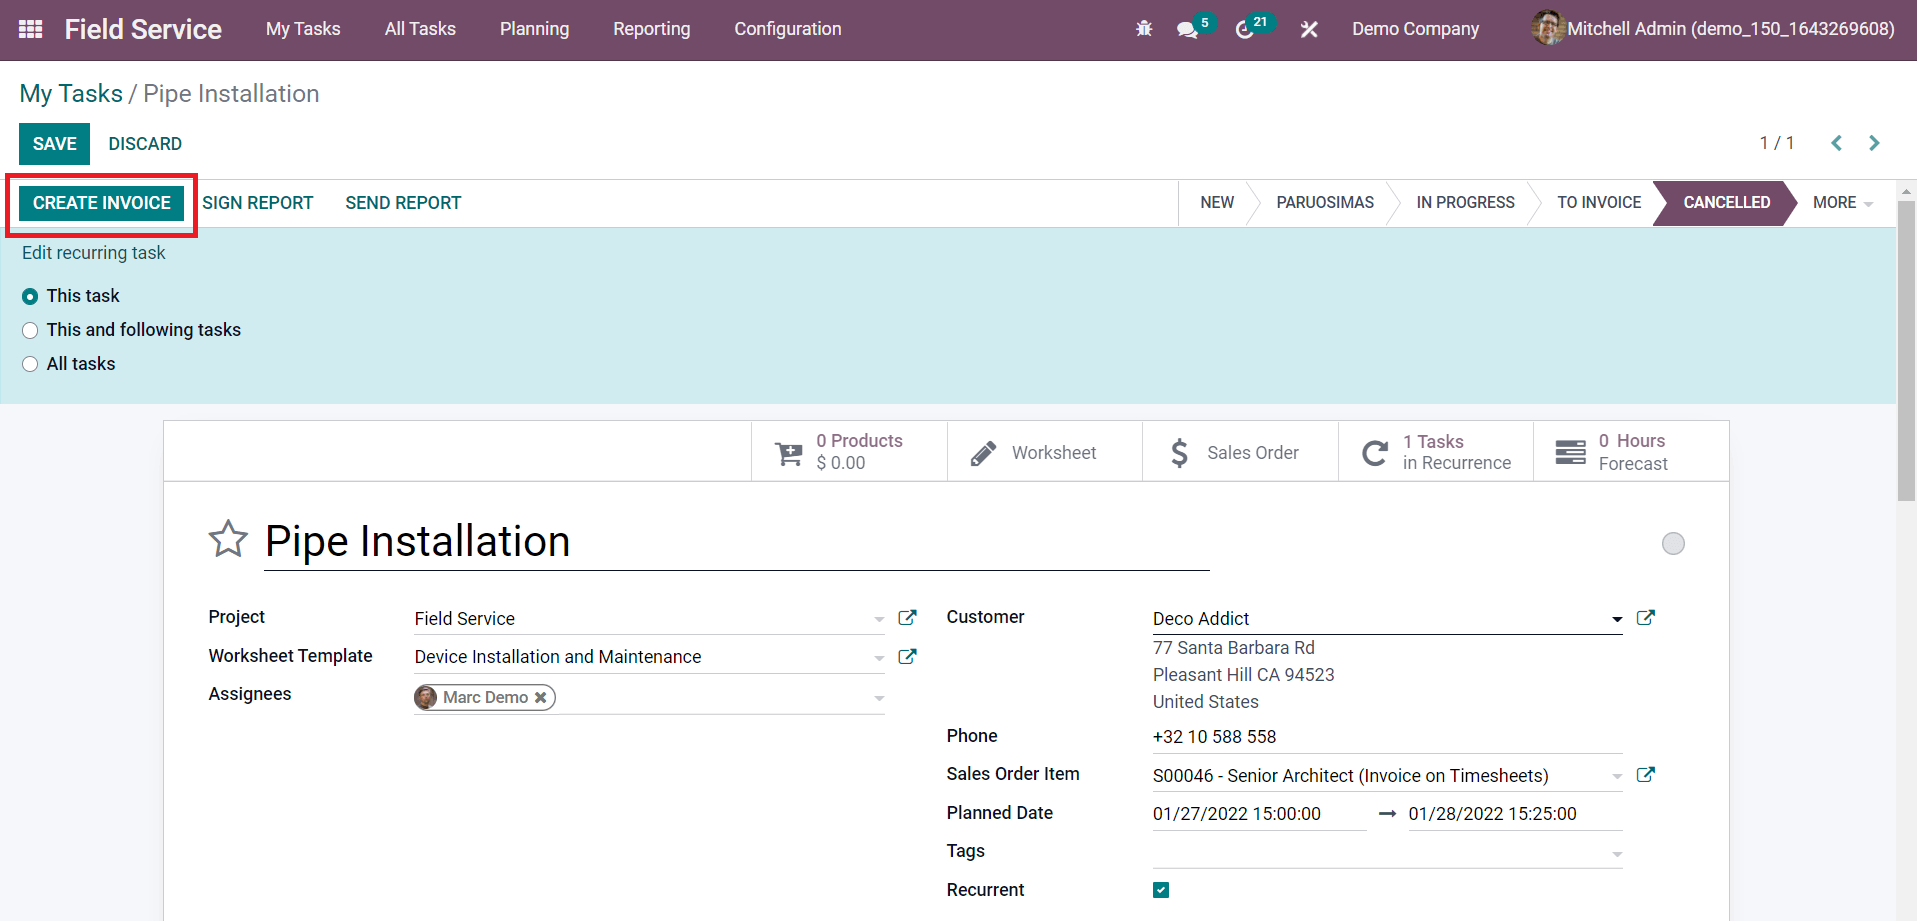
Under the timesheets, Odoo will display the total Hours Spent by the assigned employees and the Remaining Hours required to complete the task. This is how we record timesheets on the task in the Field Service module. After completing all activities in the task, you can use the Create Invoice button to invoice the time and material recorded on this particular task.
