The time between the beginning of a purchase order to the delivery of a product is a purchasing lead time. It includes order date, time consumed to reach the product for buyer and packing. We can easily access customer satisfaction with the lead time necessary for business success. Customers receive the product at the correct time, and it is easy to plan the manufacturing process by setting a purchase lead time. Odoo’s ERP system calculates the lead time and manages the efficiency of manufacturing a commodity.
This blog enables you to set up Purchase Lead Time with the help of the Odoo 15 Platform.
The purchase lead time is beneficial in various ways for an organisation. It maintains your inventory functioning, dropshipping, sales activities, and vendor details. Let’s look at how to set up a purchase lead time with the support of the Odoo database.
Importance of Purchase Lead Time Management
Most of the operations in a business manages efficiently with the help of purchase lead time. Individuals can plan product manufacture based on the purchase/sales of material by calculating the purchase order lead time. For example, users can set a lead time of 10 for the product Chair when we place the order on May 2. The same product reached our inventory on May 12. In this method, individuals can manage product delivery dates to customers and schedule the manufacturing efficiency. The customer location and the total number of delivery days for specific product access quickly by configuring a purchase lead time. If any fault occurs while setting a purchase lead time, it will directly affect the customer. It causes dissatisfaction for customers/clients and involves supply chain management.
To Set up a New Purchase Lead Time
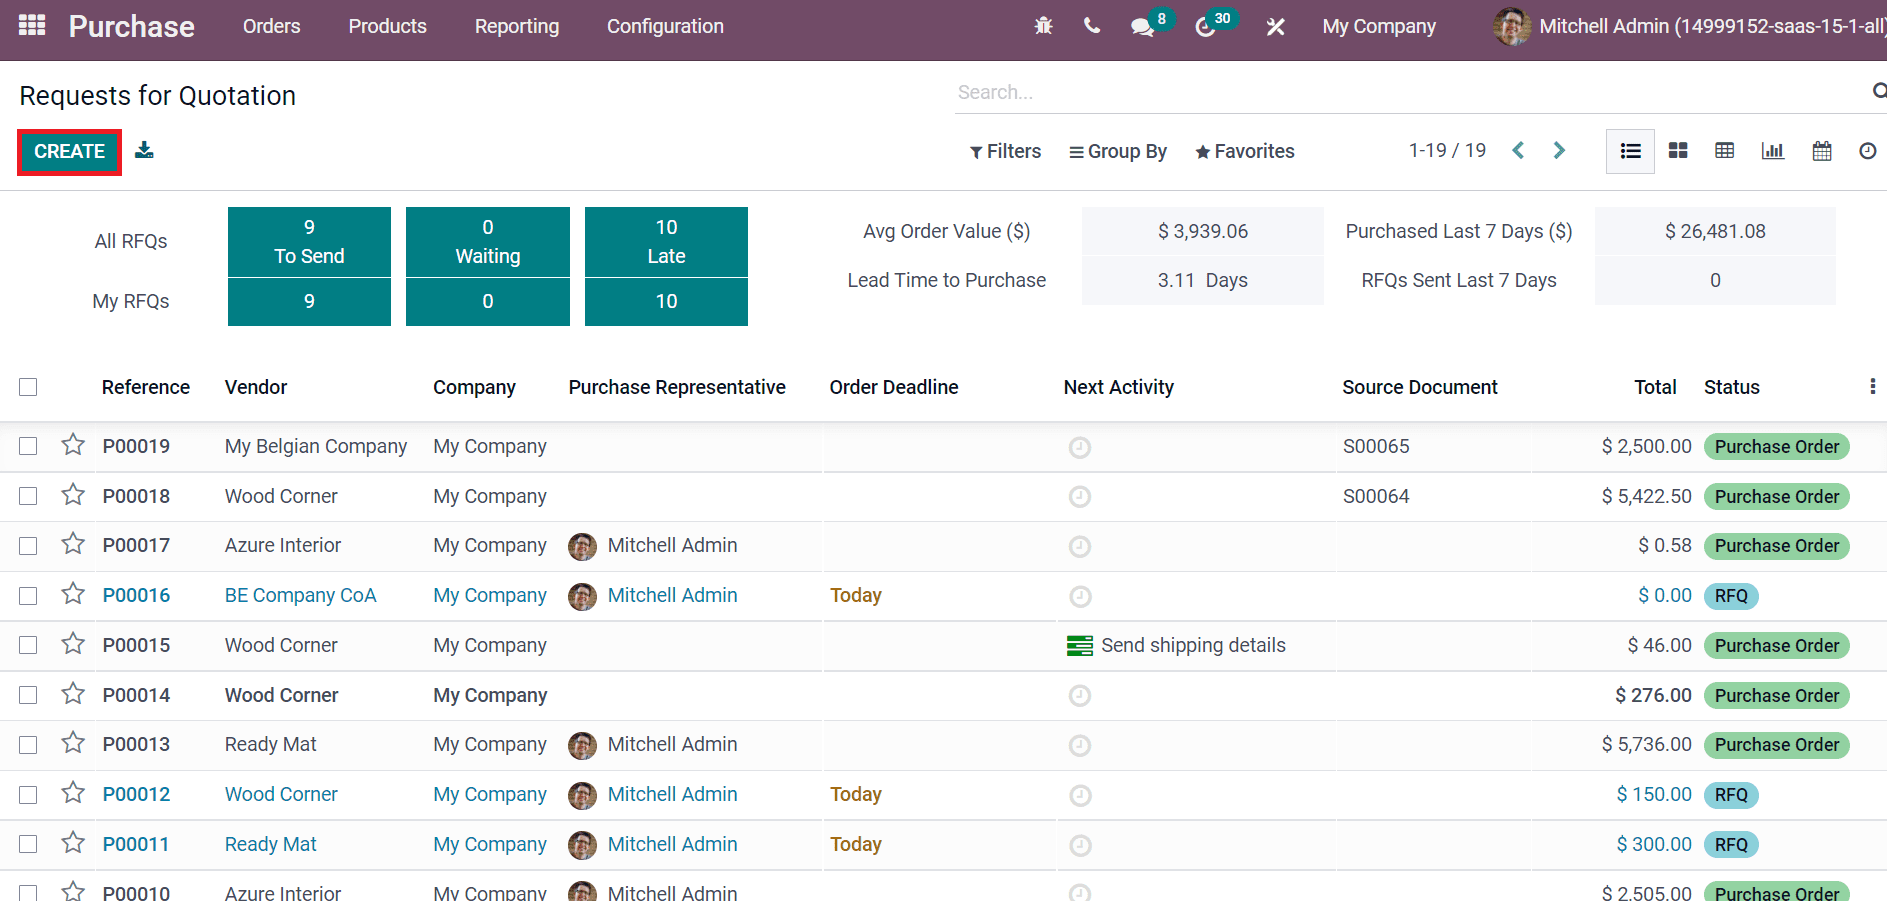
Odoo 15 Purchase module lets users develop Purchase orders, Vendors, Product Categories and Attributes. We can set up a purchase lead time in the Odoo 15 Purchase module. Now, let’s develop a new Quotation from the Purchase module. For this purpose, click on the Requests for Quotation menu in the Orders window. In the Requests for Quotation window, we can access details such as Vendor, Status, Company, Reference, Source Document, etc. After that, select the Create icon, as illustrated in the screenshot below.
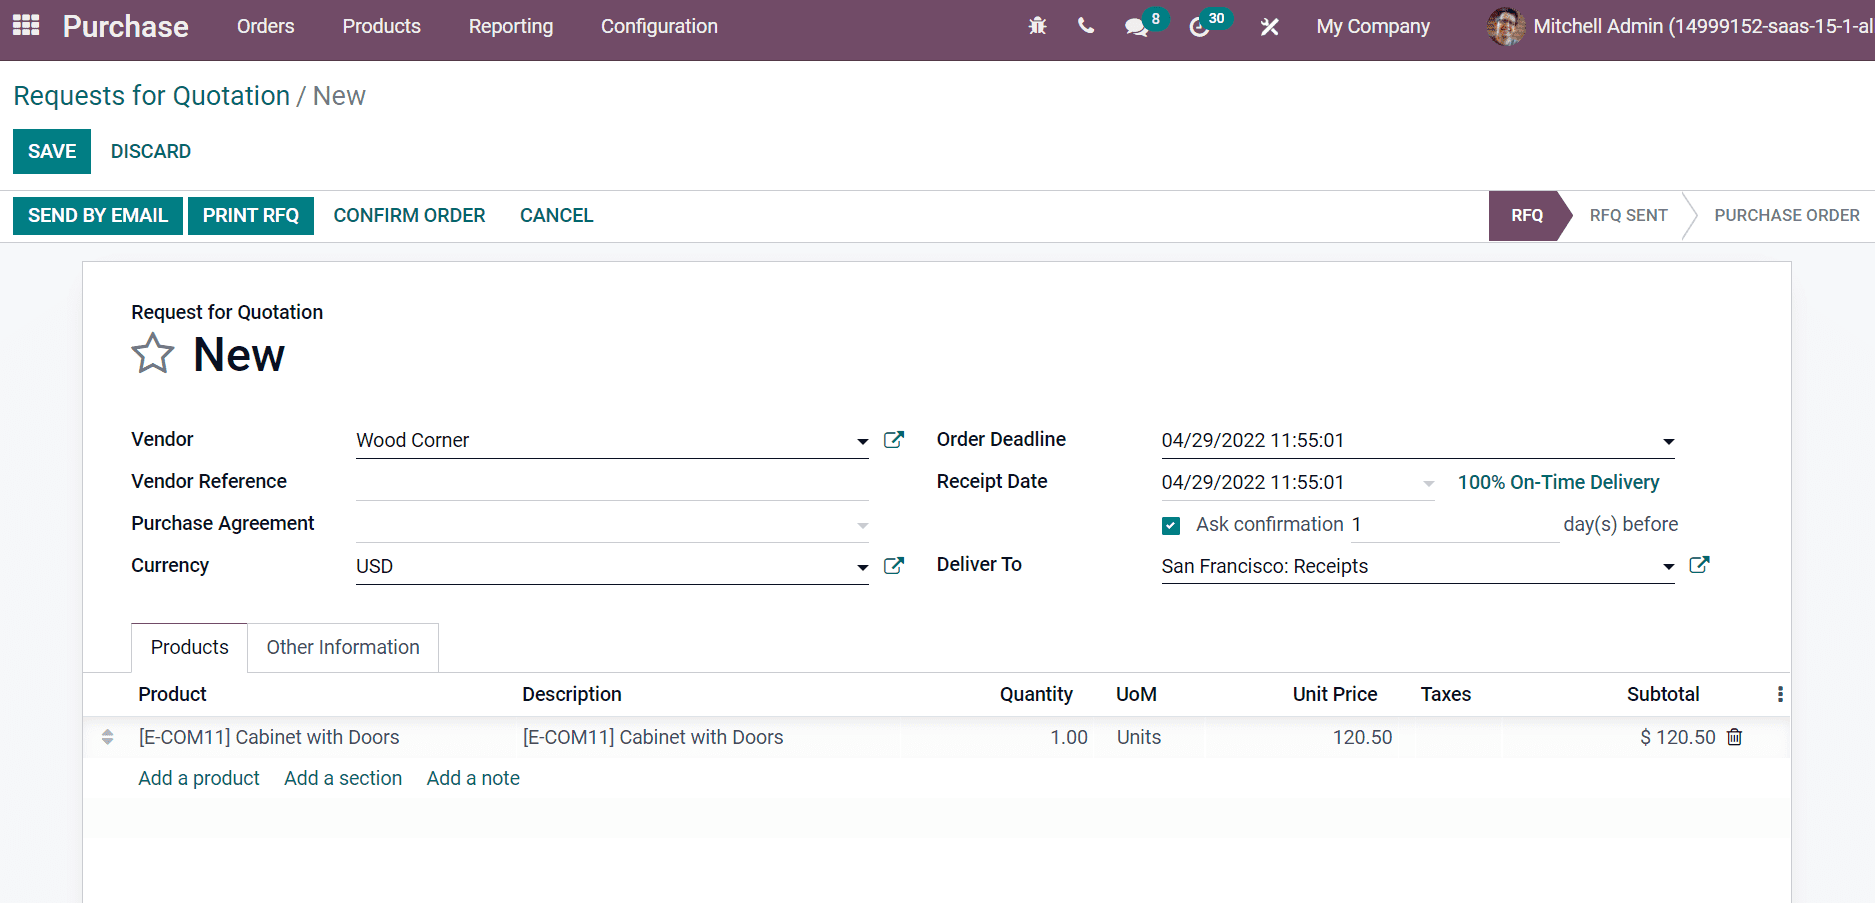
In the new window, choose your Vendor and Vendor Reference is displayed on the delivery order sent by your vendor. Moreover, users can select the currency and determine the operation type of shipment inside the delivery To field. Later, choose your product from the Products tab. Here, we selected the product Cabinet with doors by selecting the Add a Product option. You can also view the Receipt date means the expected arrival date promised by the vendor, as denoted in the screenshot below.
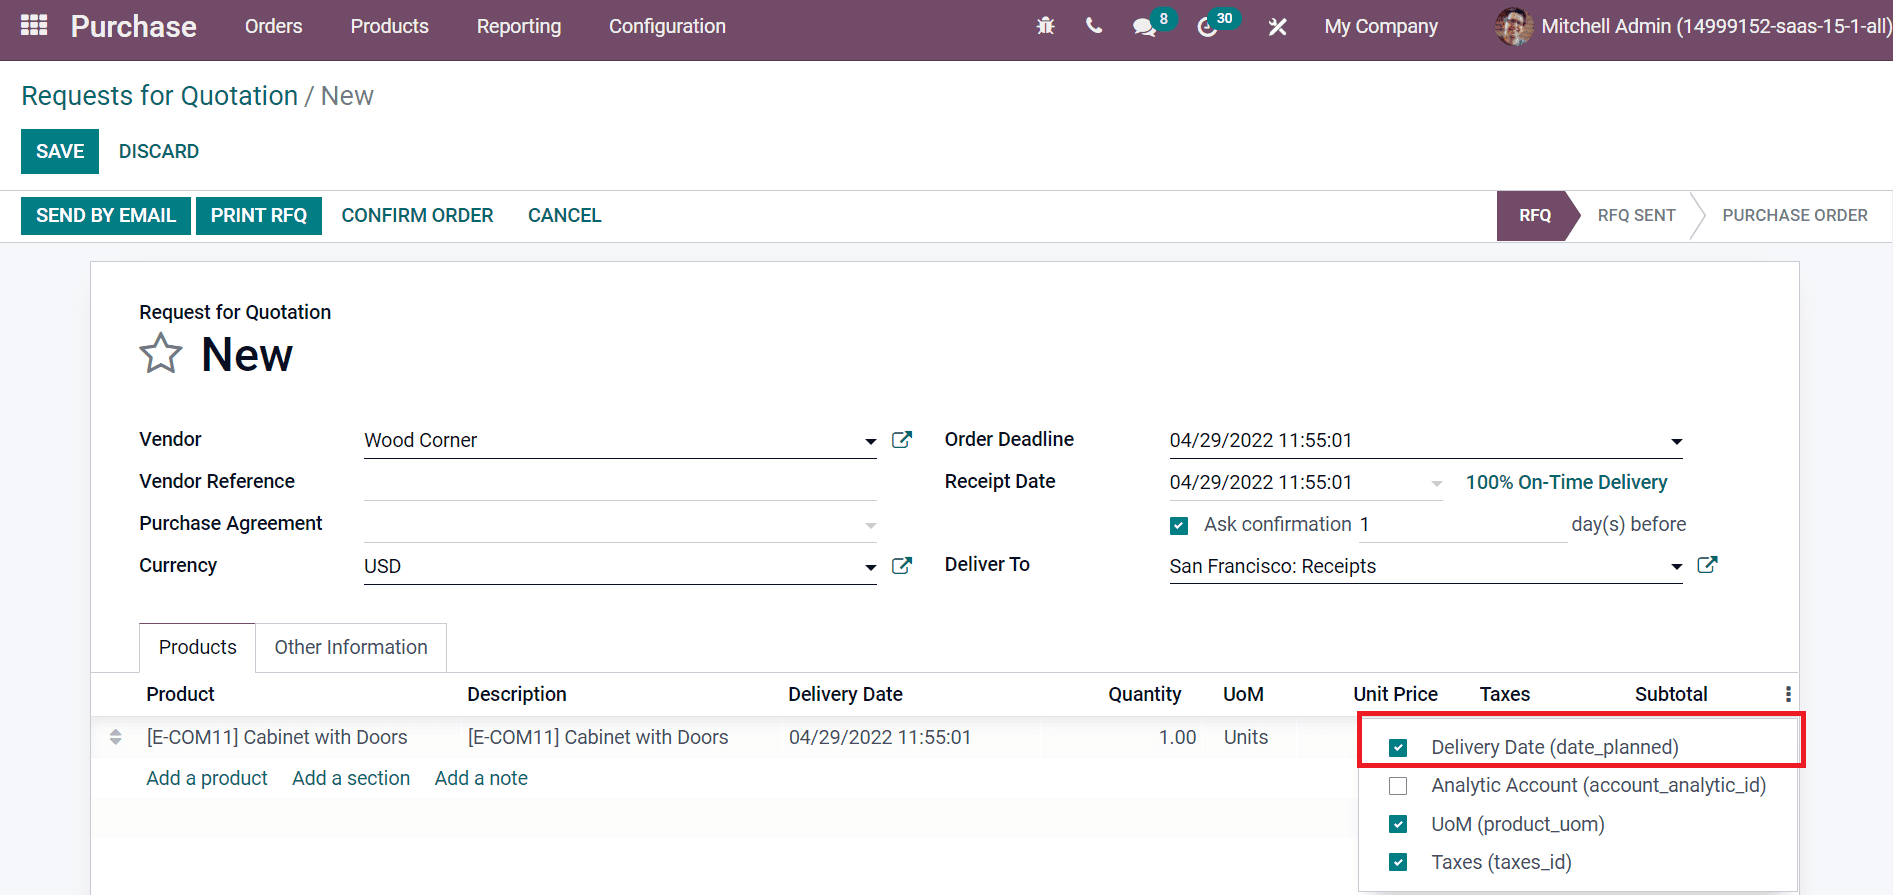
Below the Products tab, we can see the details of the product, including Description, Unit Price, Quantity and other features. Inside the Product details, we did not see the fields such as Analytic account and Delivery date. Users can enable these options by selecting the three-dot button at last. Select the Delivery date option form here, as in the screenshot below.
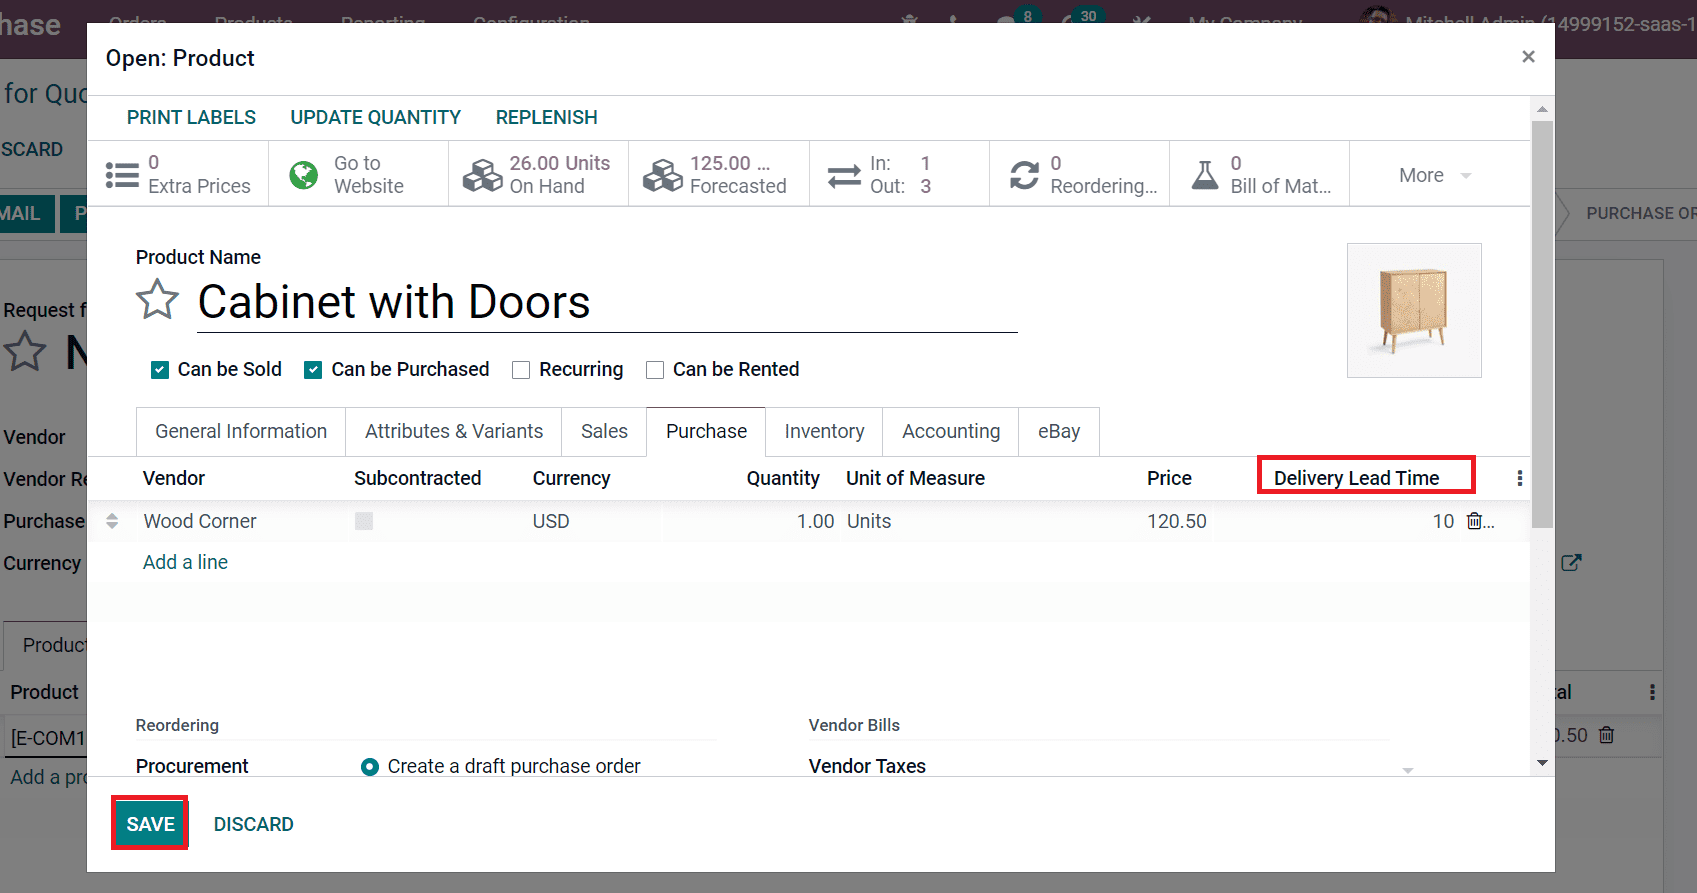
The Receipt and Delivery date are added automatically for your product. We did not view any lead times here. So, users need to change the product details to activate lead time. For that, choose the external link option near the product. The product window of Cabinet with Doors is visible before you, and different tabs are viewable here. Choose the Purchase tab, and we can view the information such as Vendor, Currency, Price and more. It is possible to add Delivery Lead Time for your product here inside the Purchase tab. Set your Delivery Lead Time as ten for your vendor and select the Save icon as displayed in the screenshot below.
The automatic update is not possible in the Quotation window. So, users need to delete the data of product Cabinet with Doors from the Products tab and enter the Cabinet with Doors details again, as portrayed in the screenshot below.
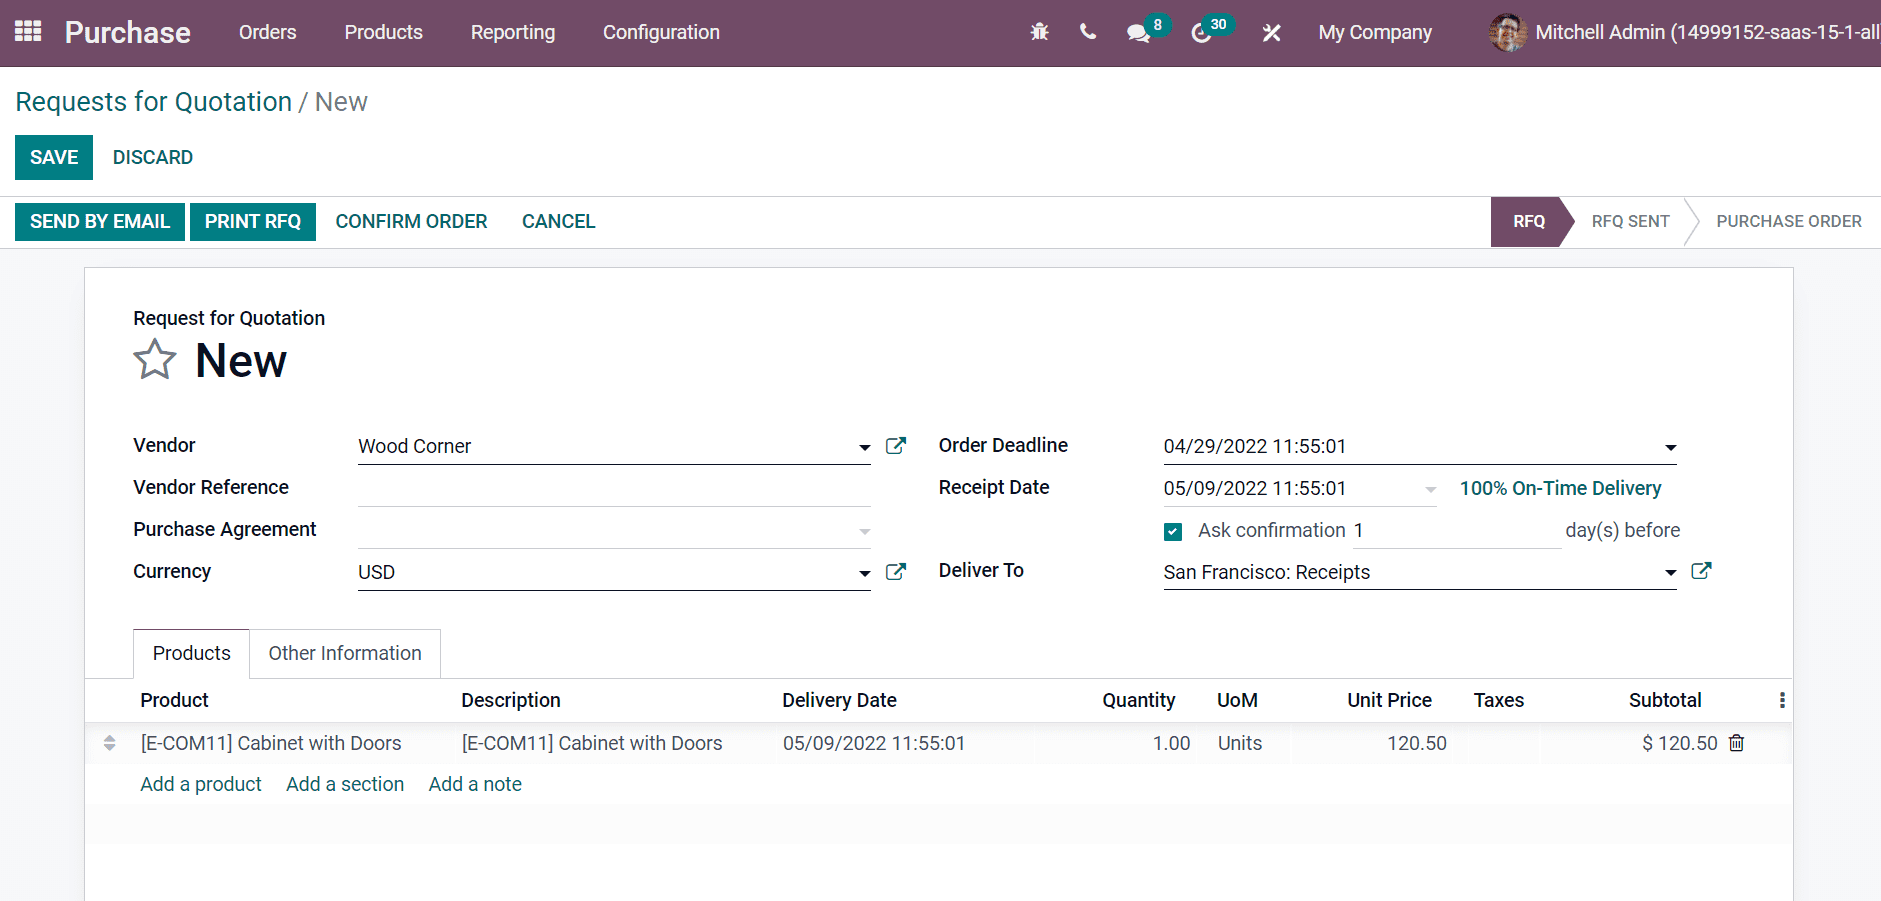
Here, we can see that the Order Deadline and Receipt Date are updated, as shown above. The Receipt Date is scheduled according to the lead time we set(10). Moreover, users can set confirmation mail to vendors before the awaited delivery date by activating the Ask Confirmation option. Here, you can add the number of days for a confirmation email. Choose the Confirm Order icon after saving your details. After confirming the order, the stage is changed from RFQ Sent to Purchase Order, and one Receipt is generated, as illustrated in the screenshot below.
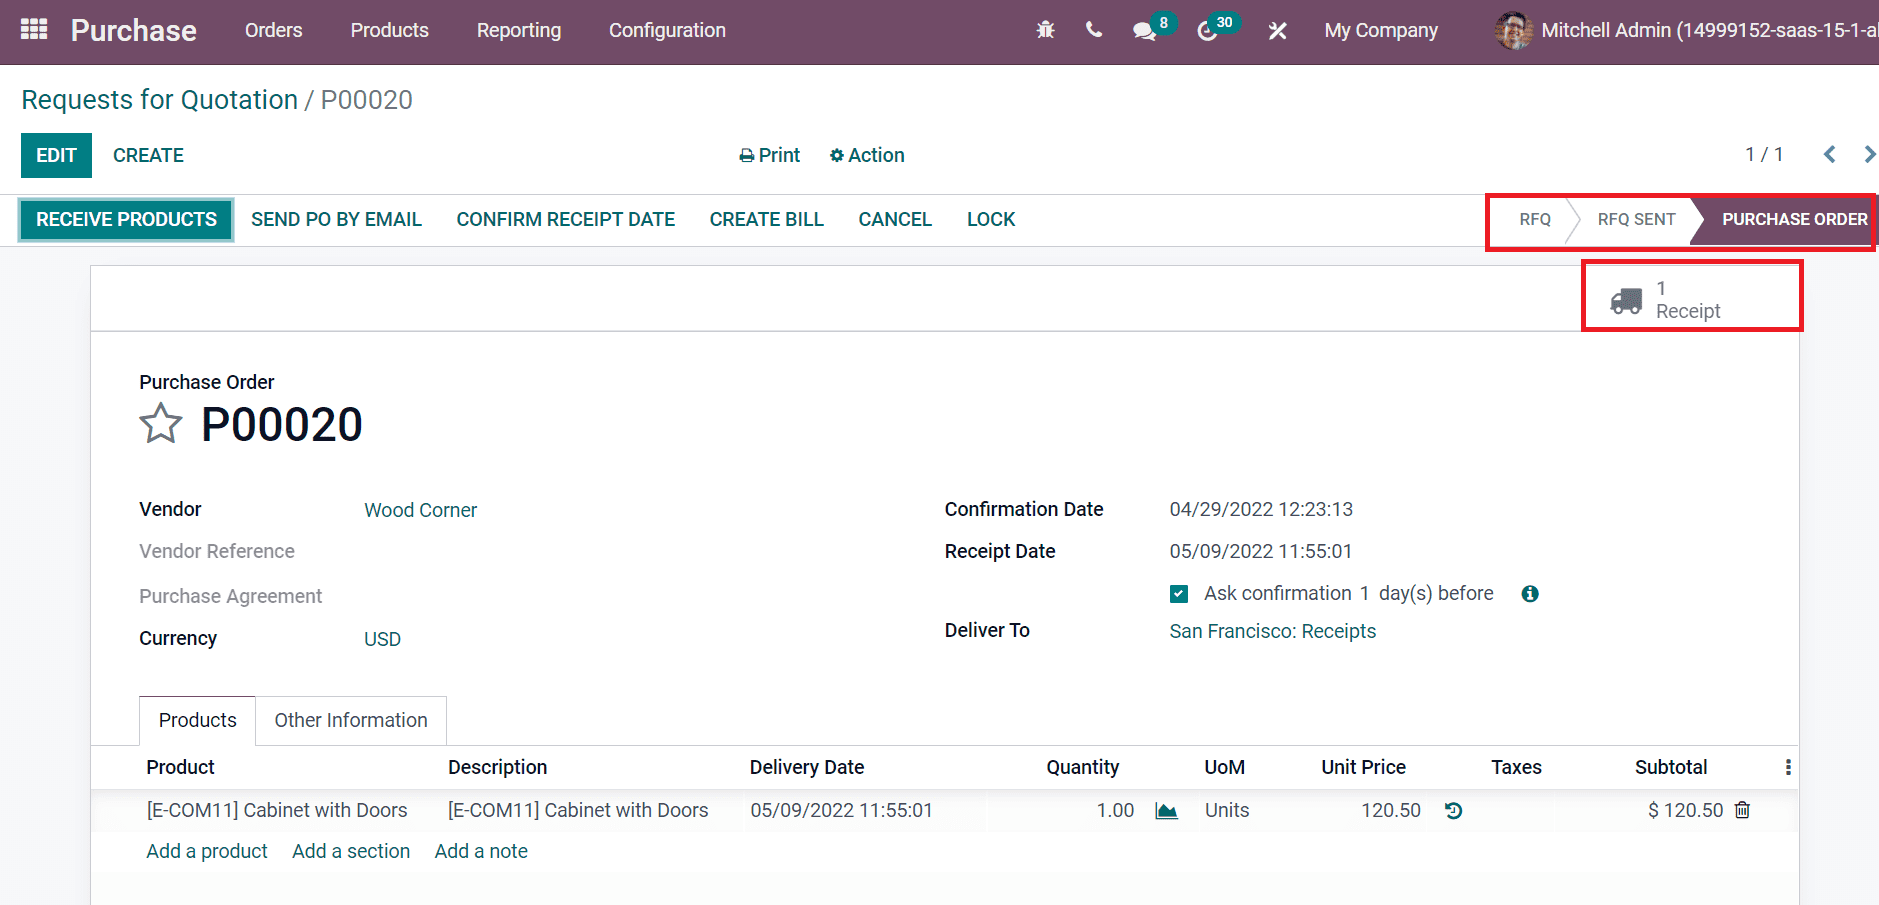
The incoming shipments are visible in the Receipts sub-menu. Click on the Receipts smart tab, and you can view details of operations in the new window, as shown in the screenshot below.
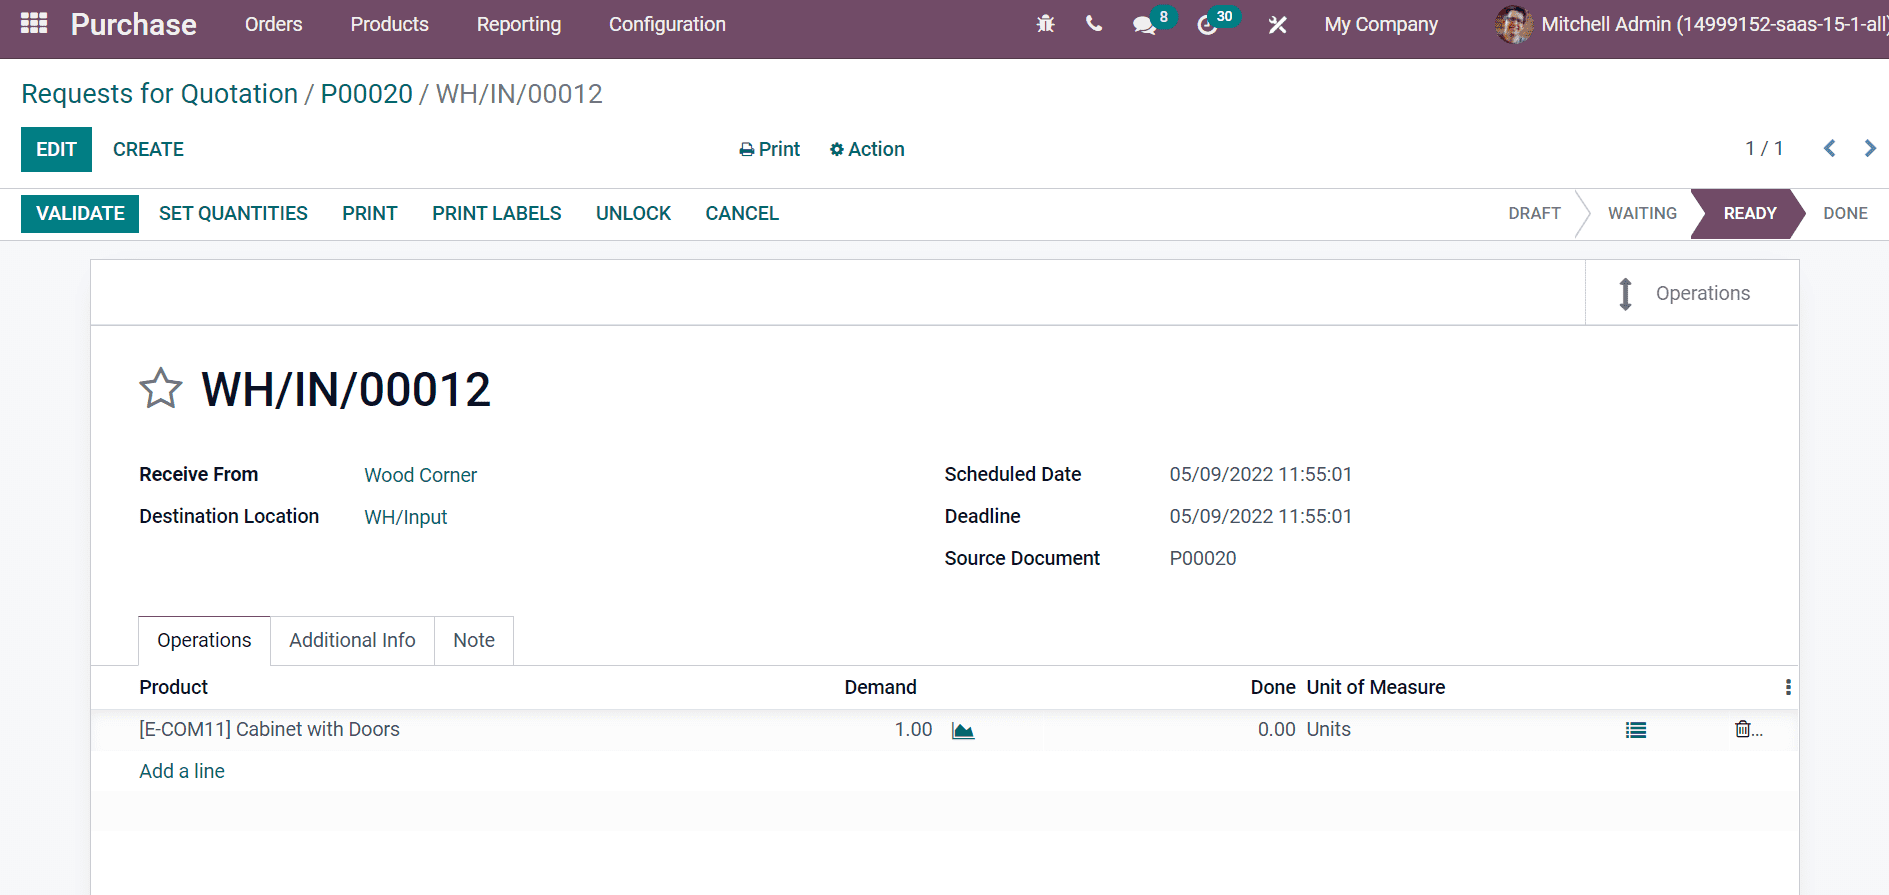
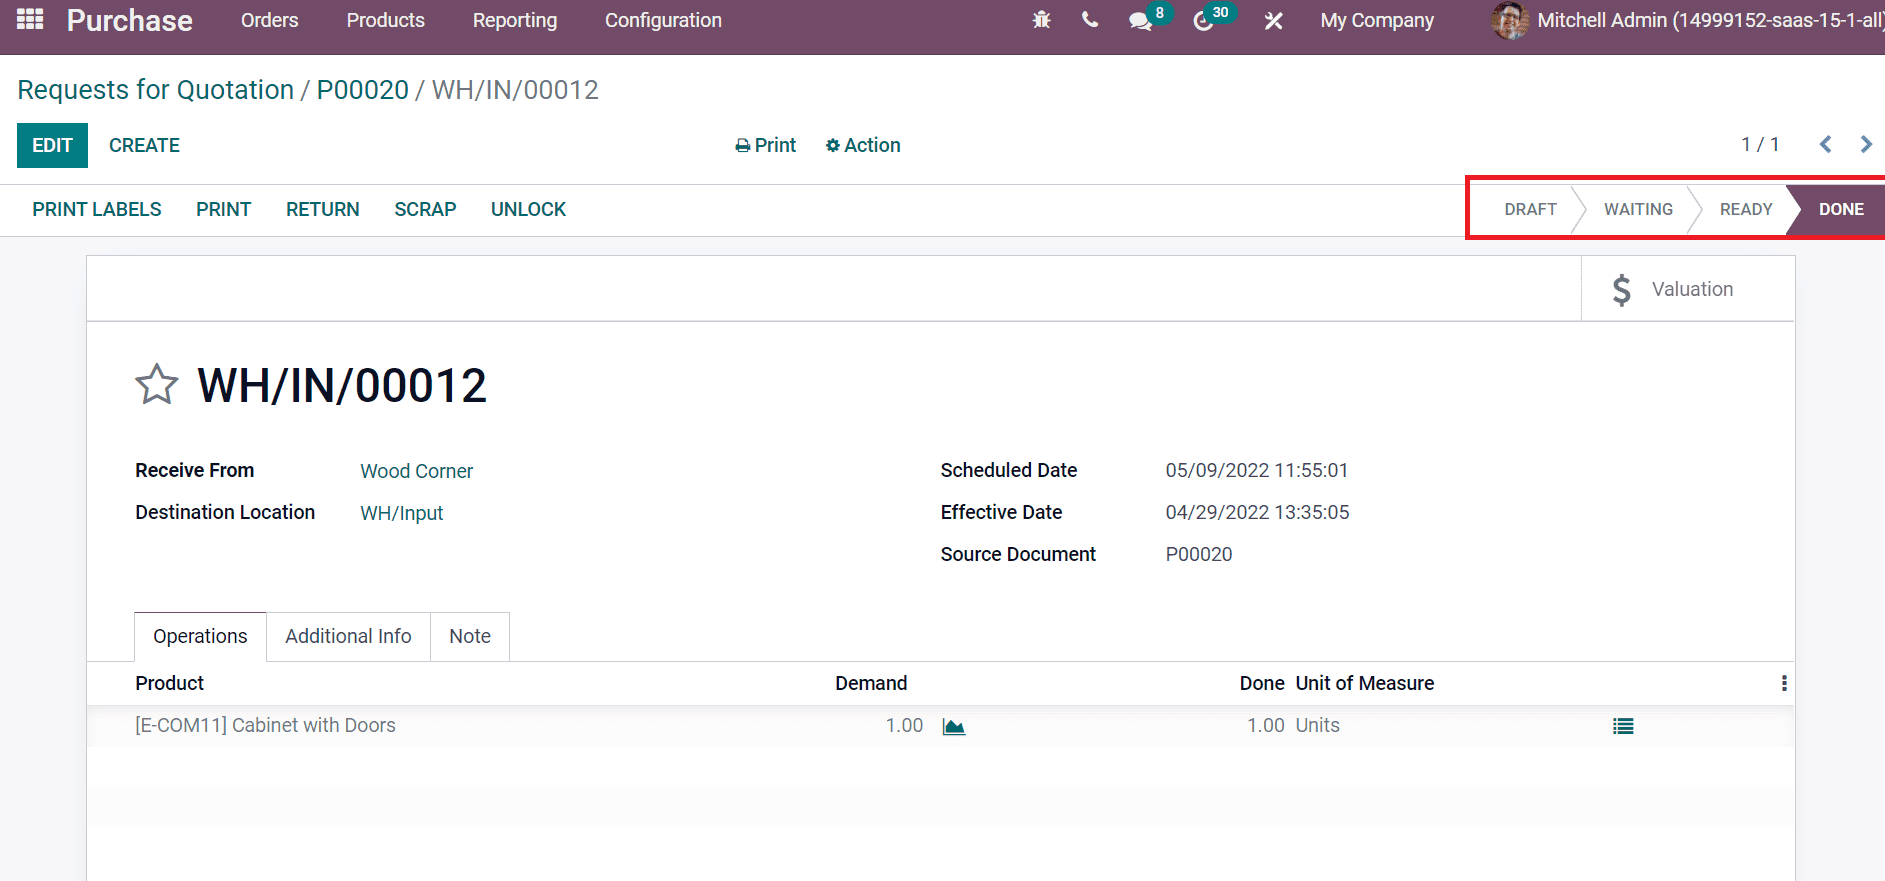
Here, we can see the information such as Destination Location, Contact person, Scheduled Date, Source Document and Deadline. The product transfer takes place by choosing the Validate icon in the window. Hence, the stage is changed from Ready to Done, as illustrated in the screenshot below.
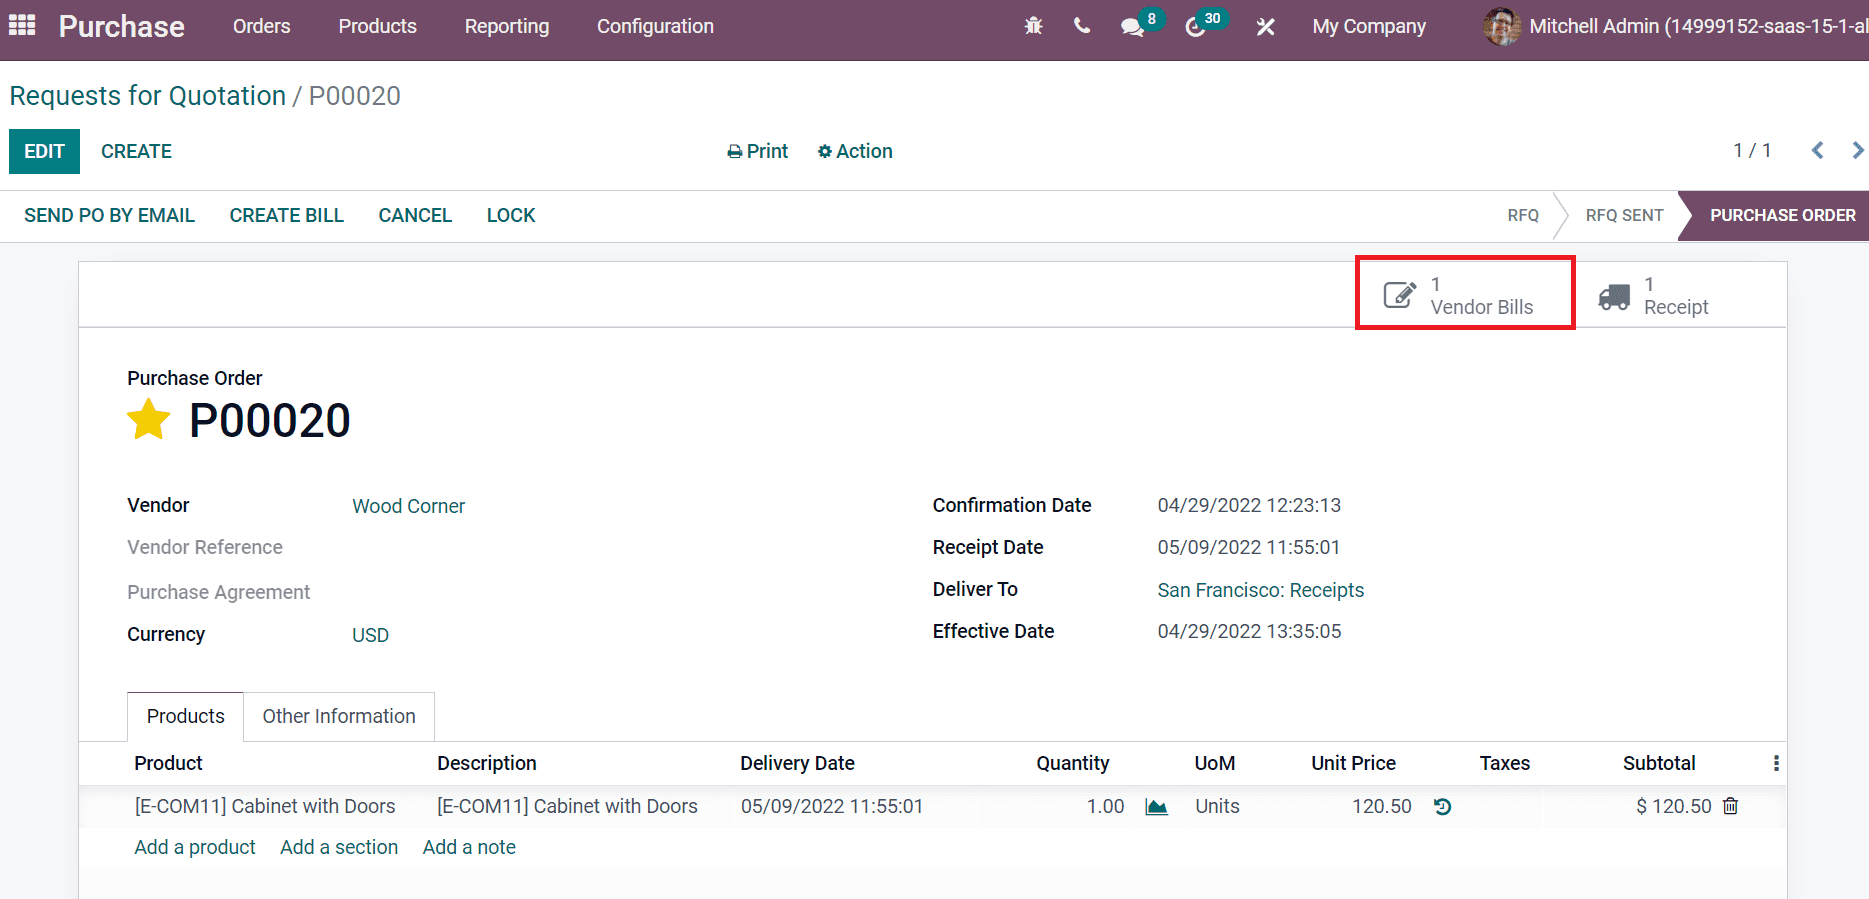
We can create a bill after purchasing an order from the customer by selecting Create a Bill icon. Users can view one Vendor Bill inside the Vendor Bill smart tab, as shown in the screenshot below.
In the Draft Bill window, we can view the Vendor details, Accounting Date, Invoice/Bill date and payment terms inside the Due date filed as in the screenshot.
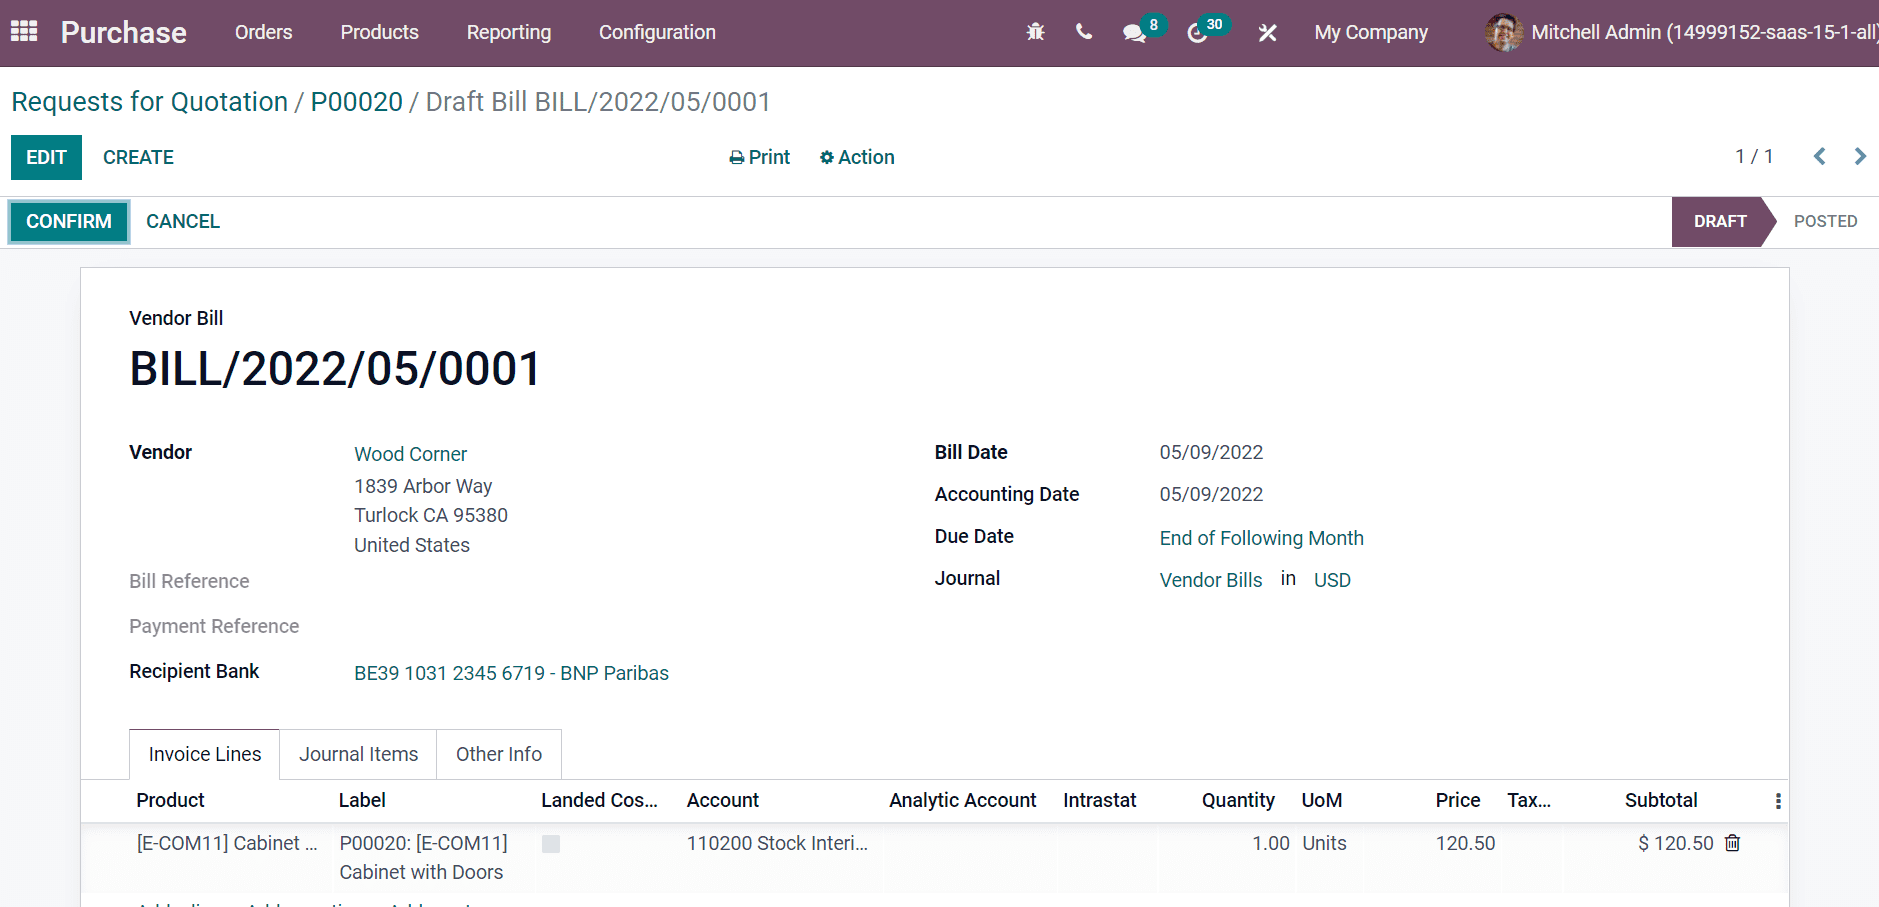
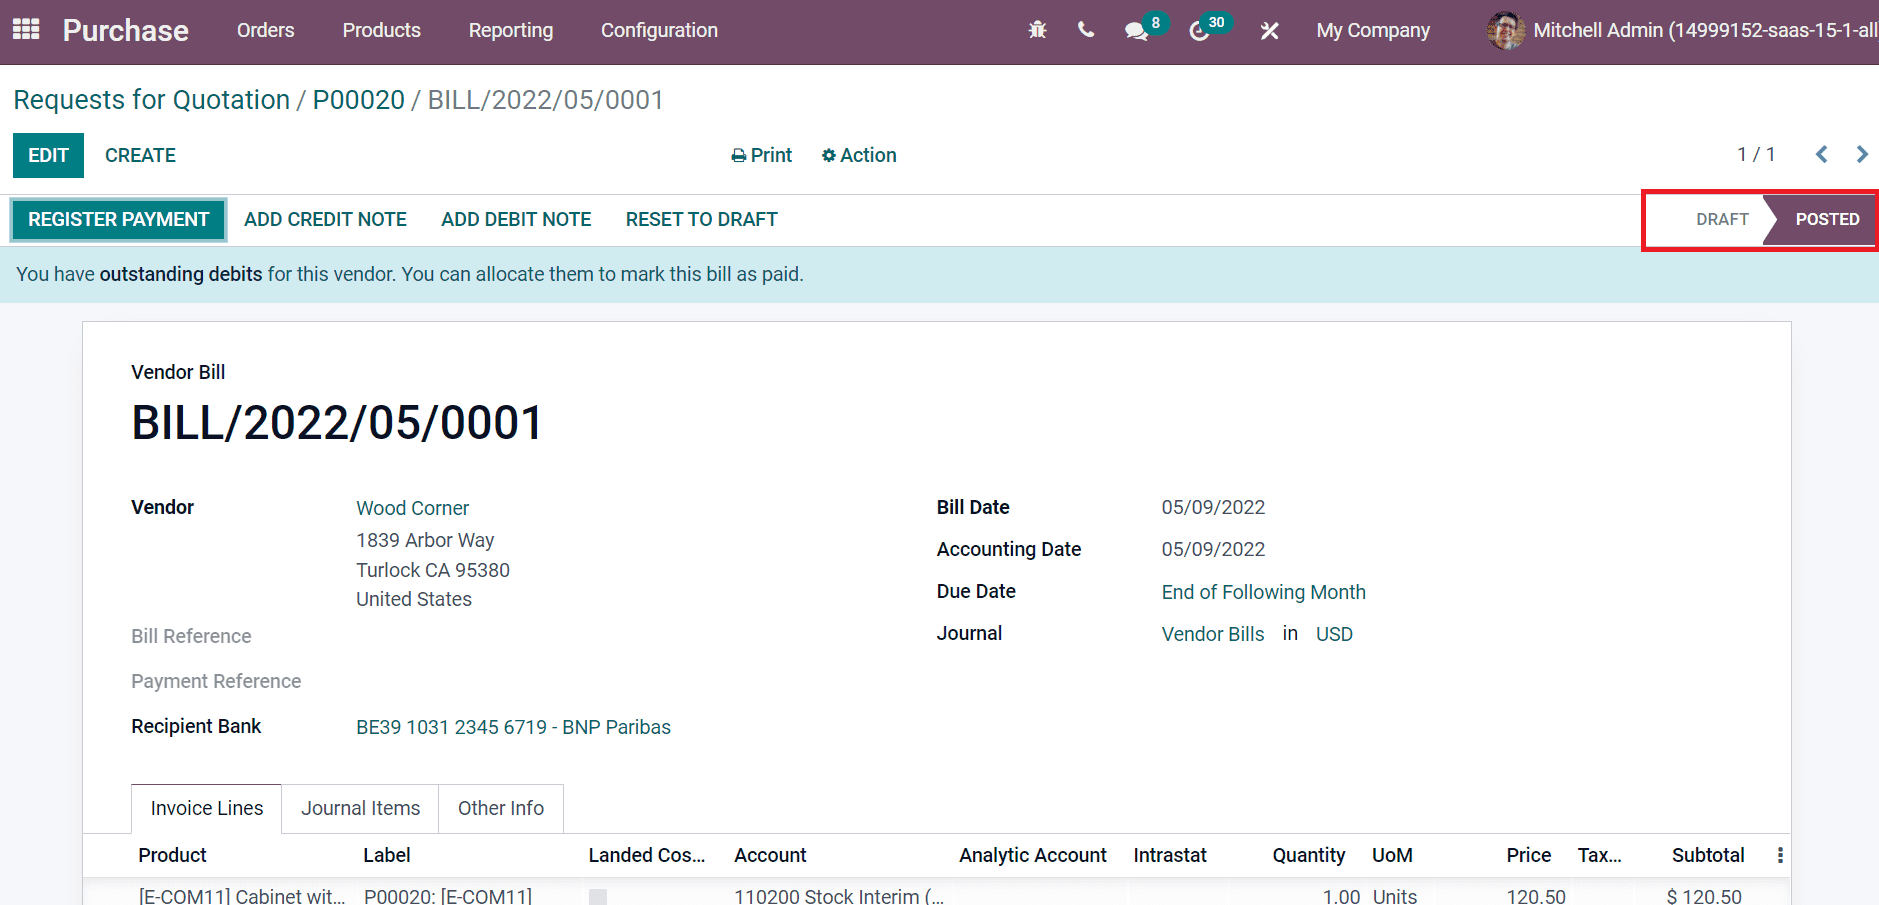
The bank account to which the invoice is paid shows in the Recipient Bank field, and product information is visible inside Invoice Lines. By clicking on the Confirm button, the draft of the Bill will be posted. Thus, the stage is changed from Draft to Posted, as portrayed in the screenshot.
A purchase lead time is set up quickly with the support of Odoo ERP. Users can get a customer lead time after formulating a purchase lead time in Odoo 15 Purchase module. We can access customer satisfaction in a business by setting a purchase lead time for commodities.


