In the latest iteration of the renowned open-source business management software, Odoo 17 has ushered in significant improvements to the employee expenditure management features within its accounting module. This update is designed to enhance efficiency and accuracy for businesses of all sizes, offering a seamless and automated approach to recording and managing employee costs. A standout feature in Odoo 17 is the heightened integration between the accounting and employee spending processes. This enhancement ensures a smooth synchronization of expense data, allowing for precise and automatic reflection in the accounting books. By reducing the likelihood of errors, businesses can maintain accurate and up-to-date financial records.
Employee Expenses in Odoo Accounting
Like the previous Odoo ERP version, the Odoo 17 Accounting module has improved expense classification and reporting options. With the ability to customize expense categories and subcategories, the process of categorizing and analyzing various charges has become more straightforward. Furthermore, the reporting options have been refined, providing businesses with access to analytical expense reports and visualizations that effectively showcase spending trends. This empowers organizations to make informed decisions on cost control and resource allocation. The enhancements in Odoo 17’s accounting module for employee expenditure management encompass improved integration, simplified procedures, and enhanced reporting tools. These upgrades enable businesses to efficiently monitor and track staff spending, ultimately leading to accurate financial records and more informed resource allocation and decision-making.
Managing Employee Expenses in Odoo 17: A Step-by-Step Guide
Initiating Expense Recording
Employees can easily record expenses incurred on behalf of the company using the Odoo Accounting module. Navigate to the Vendors menu and select Employee Expenses. You will see the dashboard of all the employee expenses stored inside your Accounting database from this window, as shown below.
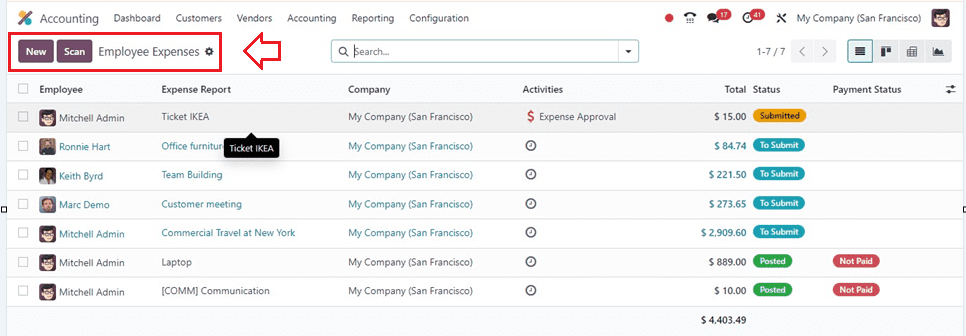
In the list view of employee expenses, crucial details such as employee, expense report, company, activities, total amount, status, and payment status are visible. After scanning expense reports using the Scan option, reports can be posted, and new reports can be created using the ‘New’ button.
Creating Expense Reports
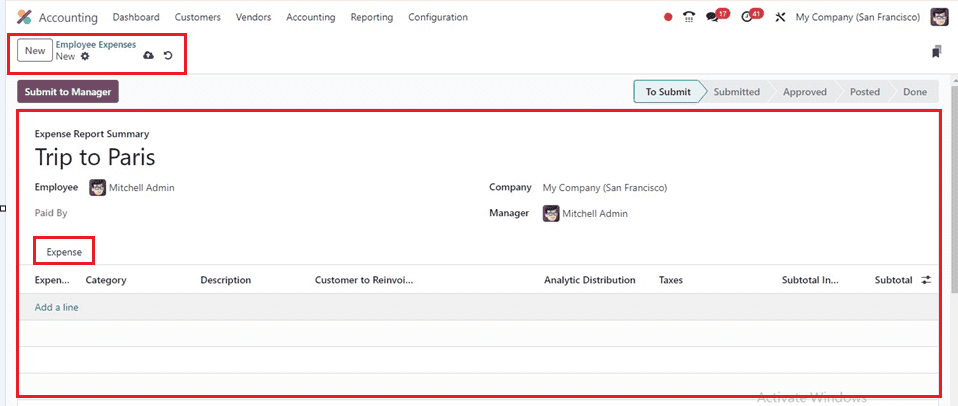
When creating a new report, users can add a title in the ‘Expense Report Summary’ field, and the Employee name will automatically populate. Details about the Paid-By account, required Manager approval, and Company information can be specified.
Adding Expense Lines
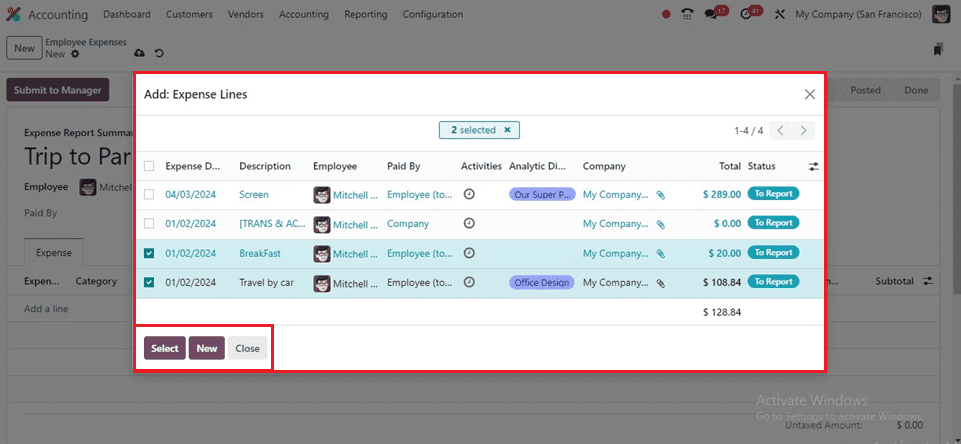
Expenses can be added one at a time under the Expense tab by using the “Add a Line” button. Users can include details such as description, category, total cost, employee information, payment account, and more from the displayed pop-up window, as illustrated in the below screenshot.
Submission and Approval
Clicking the “Submit To Manager” button inside the expense configuration form sends the expense lines for approval. Managers can review and either accept, return to the draft, or refuse the report. Accepted expenses can be included in the subsequent payslip.
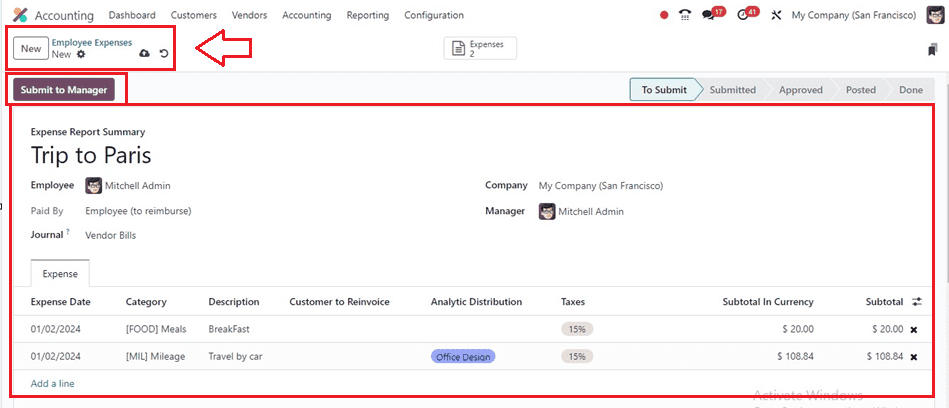
After sending the expense request to the manager, the manager can approve the expense using the ‘Approve’ button or refuse it using the ‘Refuse’ button.

The ‘Expenses’ smart button will provide the details of the expenses that the employee has added to this employee expense request. After approving the expense request, the user can post this information as a journal entry to their accounting database using the ‘Post Journal Entries’ button.
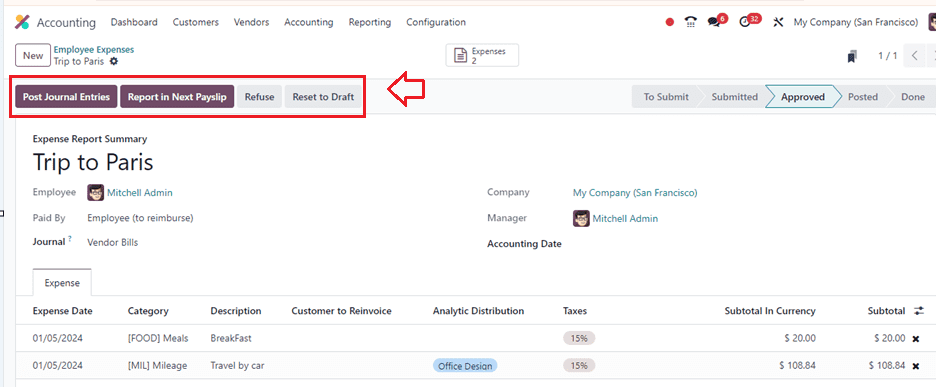
Selecting the “Report in Next Payslip” button allows the addition of the payment to the following payslip, ensuring a seamless integration of employee expenses with payroll.
By following this step-by-step guide, businesses can effectively leverage Odoo 17’s enhanced employee expenditure management features, promoting accurate financial records and streamlined processes within the Odoo ERP software.


