The module or application within the Odoo ERP (Enterprise Resource Planning) system that is meant to manage and streamline field service activities is referred to as “Field Service” in Odoo 16. Companies offering services or maintenance at their clients’ premises, such as equipment installation, repairs, maintenance, inspections, and more, will find this module especially helpful. Field service procedures may be optimized, customer happiness can be raised, and field technicians’ productivity can be increased with the help of features and functions offered by the Field Service module in Odoo 16.
During the field service task, the employees spent their time, and sometimes they used some materials to complete the task. So it is necessary to invoice them to the customer. So the field service task needs to connect the materials, timesheet, etc., which is so easy by using the Odoo 16 Field Service module.
Let’s go through the Field Service module. It is possible to add some configurations inside the Field Service module. So to add these changes, go to the Configuration tab and click on Settings.
: Configuration > Settings
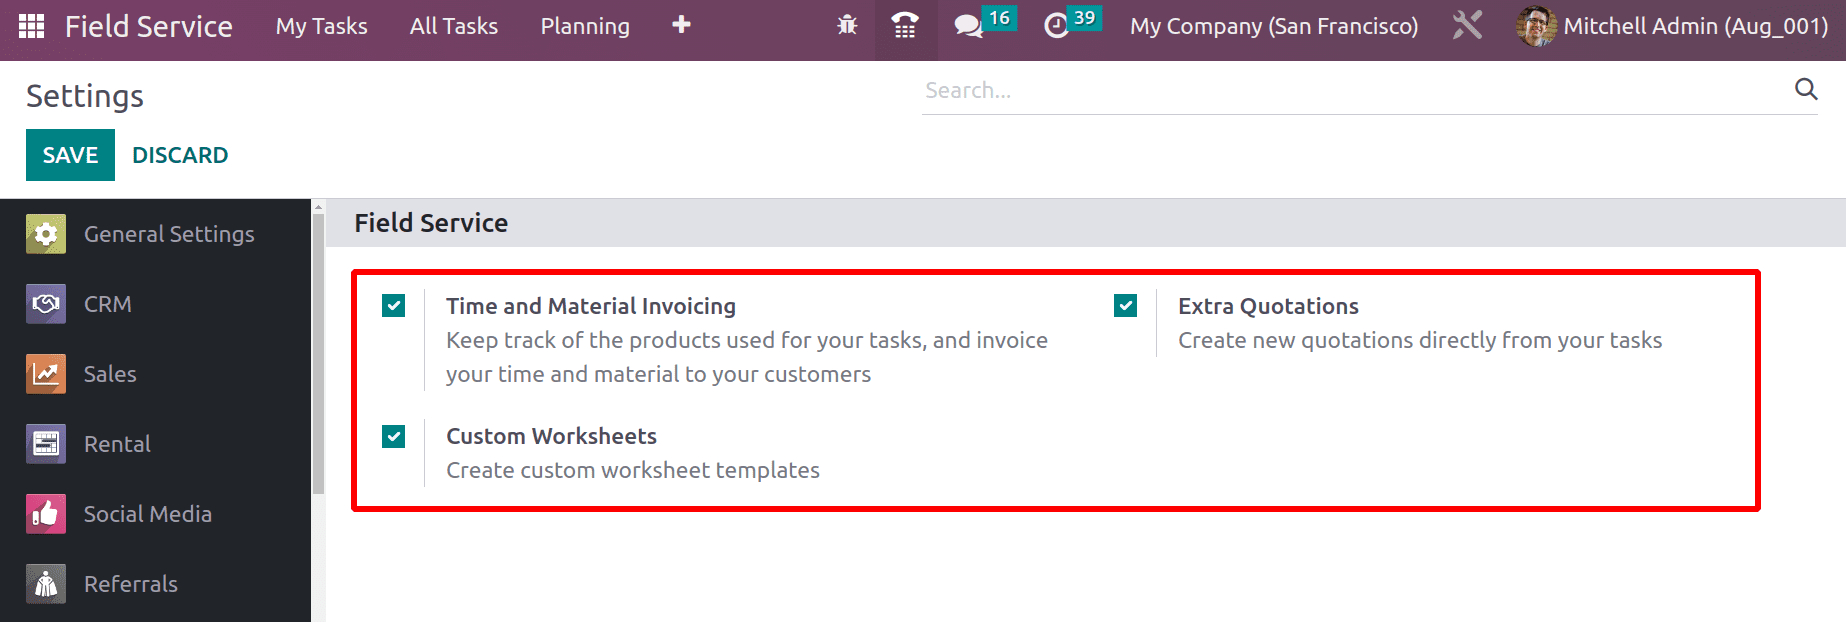
There are three settings available.
1.Time and Material Invoicing
By enabling this option, the user can Keep track of the products used for completing the tasks, and invoice the time and material to the customers.
2.Extra Quotations
By enabling this option, users can create new quotations directly from the task.
3.Custom Worksheets
After completing the task, users can add a worksheet on the basis of the completed task. To add a custom worksheet enable the Custom Worksheets option.
After enabling these three options, save the new configurations.
A new field service project can be created from the field service module. For that, go to the Configuration tab and choose the Projects option from there.
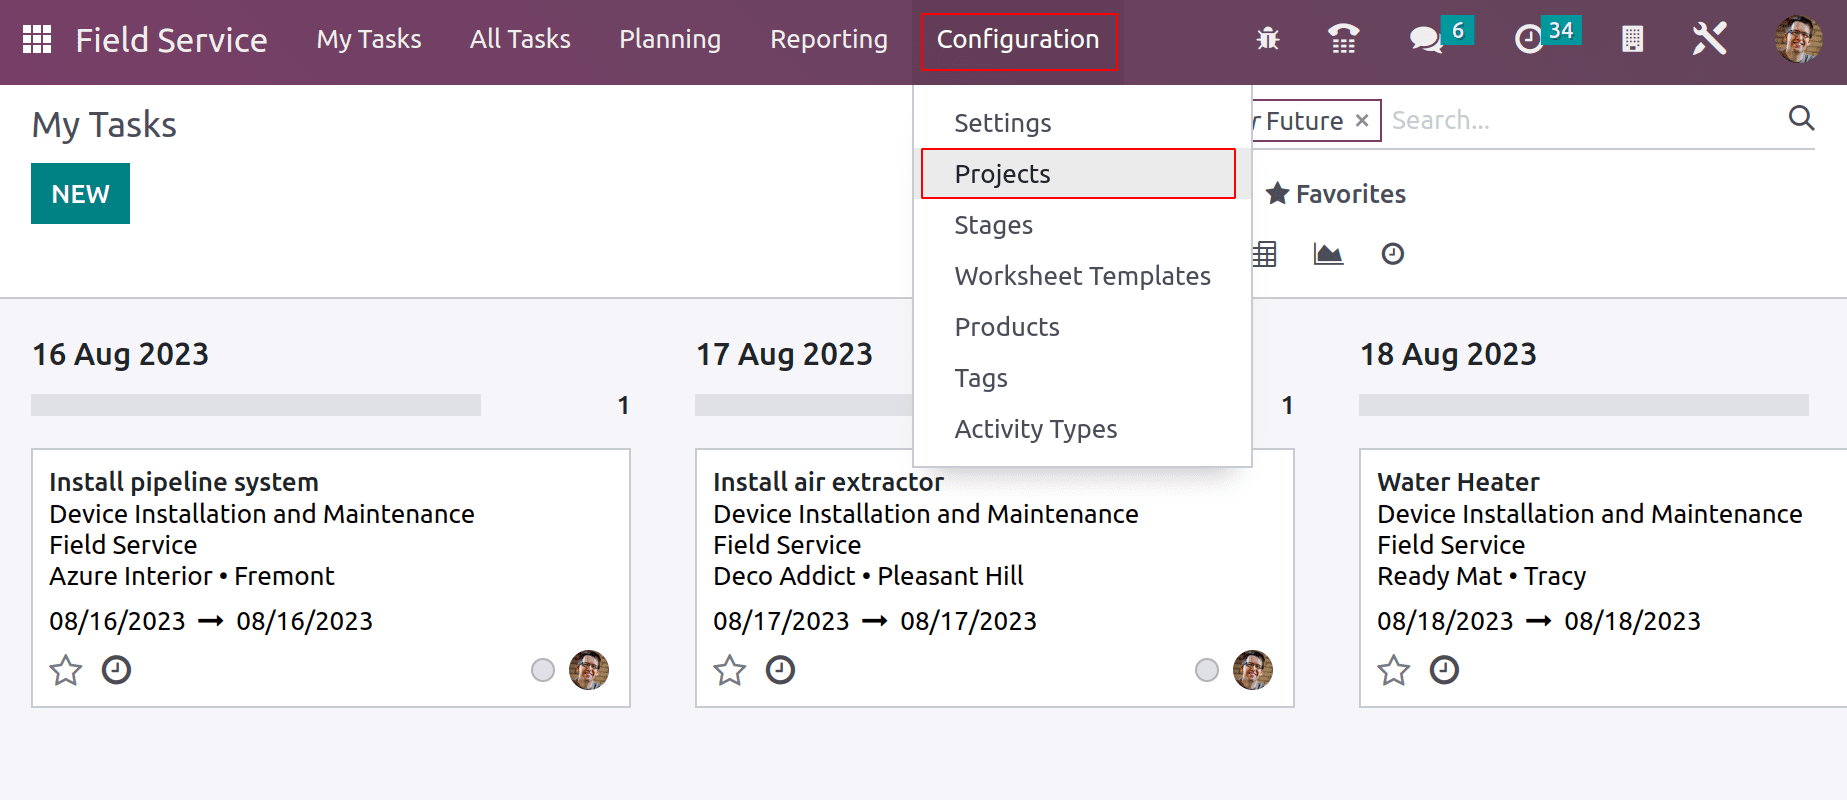
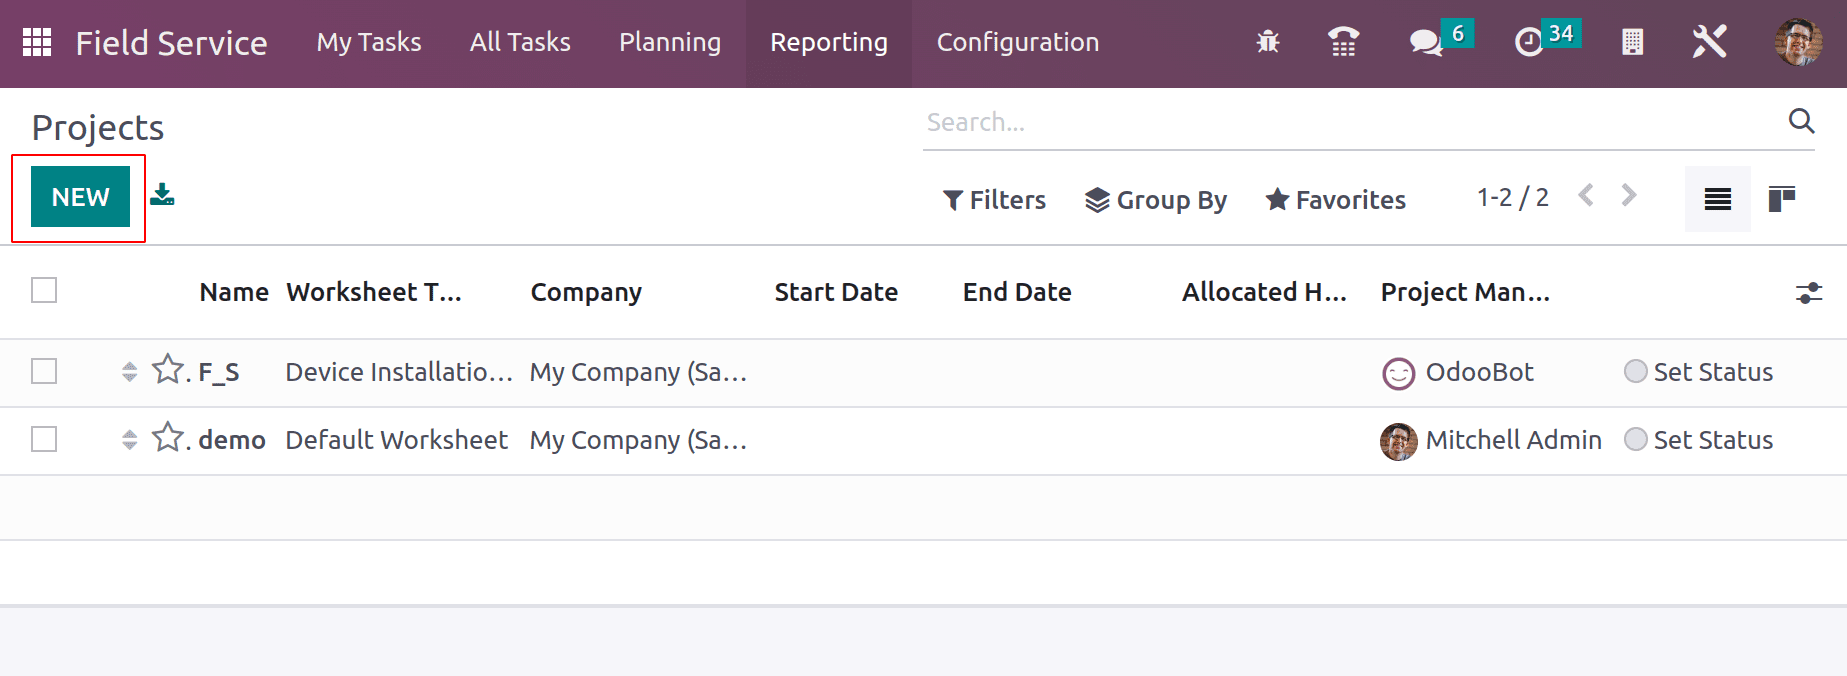
The NEW button can be used for creating new projects.
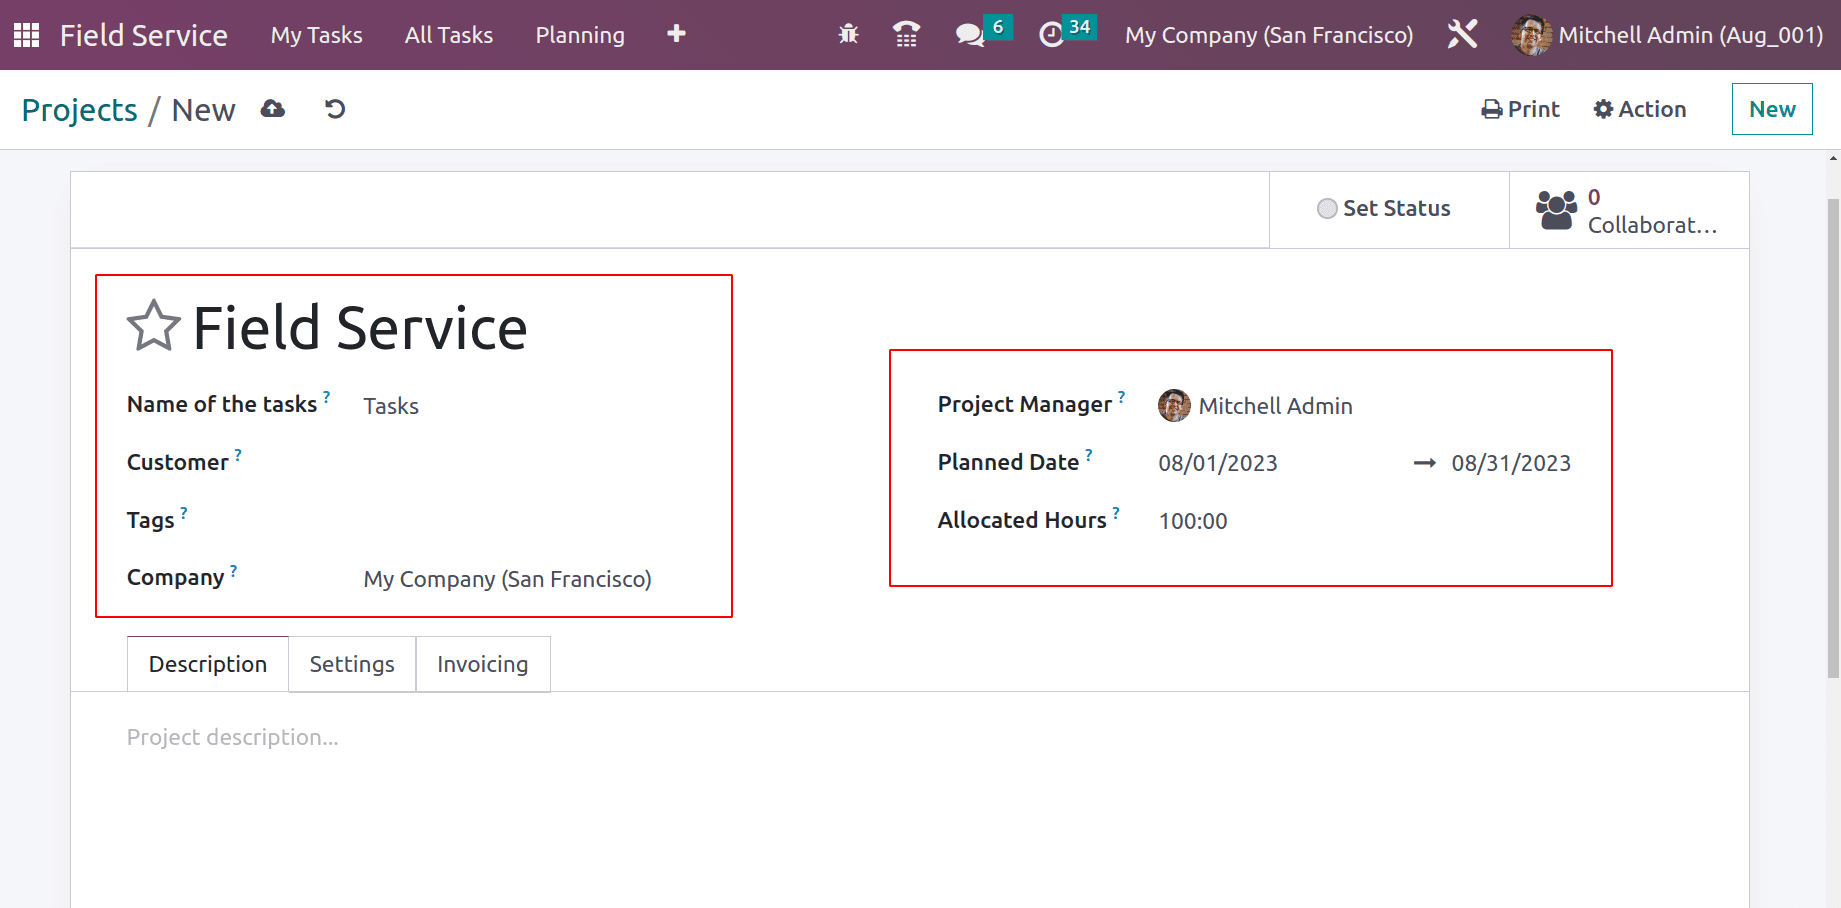
The project name was added as Field Service. Inside the Name of Task field, the user can mention the name of this particular task. Add the project manager’s name and company. The days planned for the project can be mentioned there. Any description of the project can be added to the Description tab.
The settings tab can be used for configuring different features for the project. The analytic account to which the project, its tasks, and the timesheets are linked can be mentioned in the Analytic Account section. To whom the project and its tasks are visible can be set in the visibility. There are three options, one is for Invited internal users, All internal users, and for Invited portal users and all internal users.
Inside the Task Management section, the user can configure Milestones, and inside the Time Management section, the user can enable the check box named Timesheet by enabling the employees to add Timesheets to tasks.
The SALES & INVOICING section has three options named Billable, Products on Tasks, and Extra Quotations.
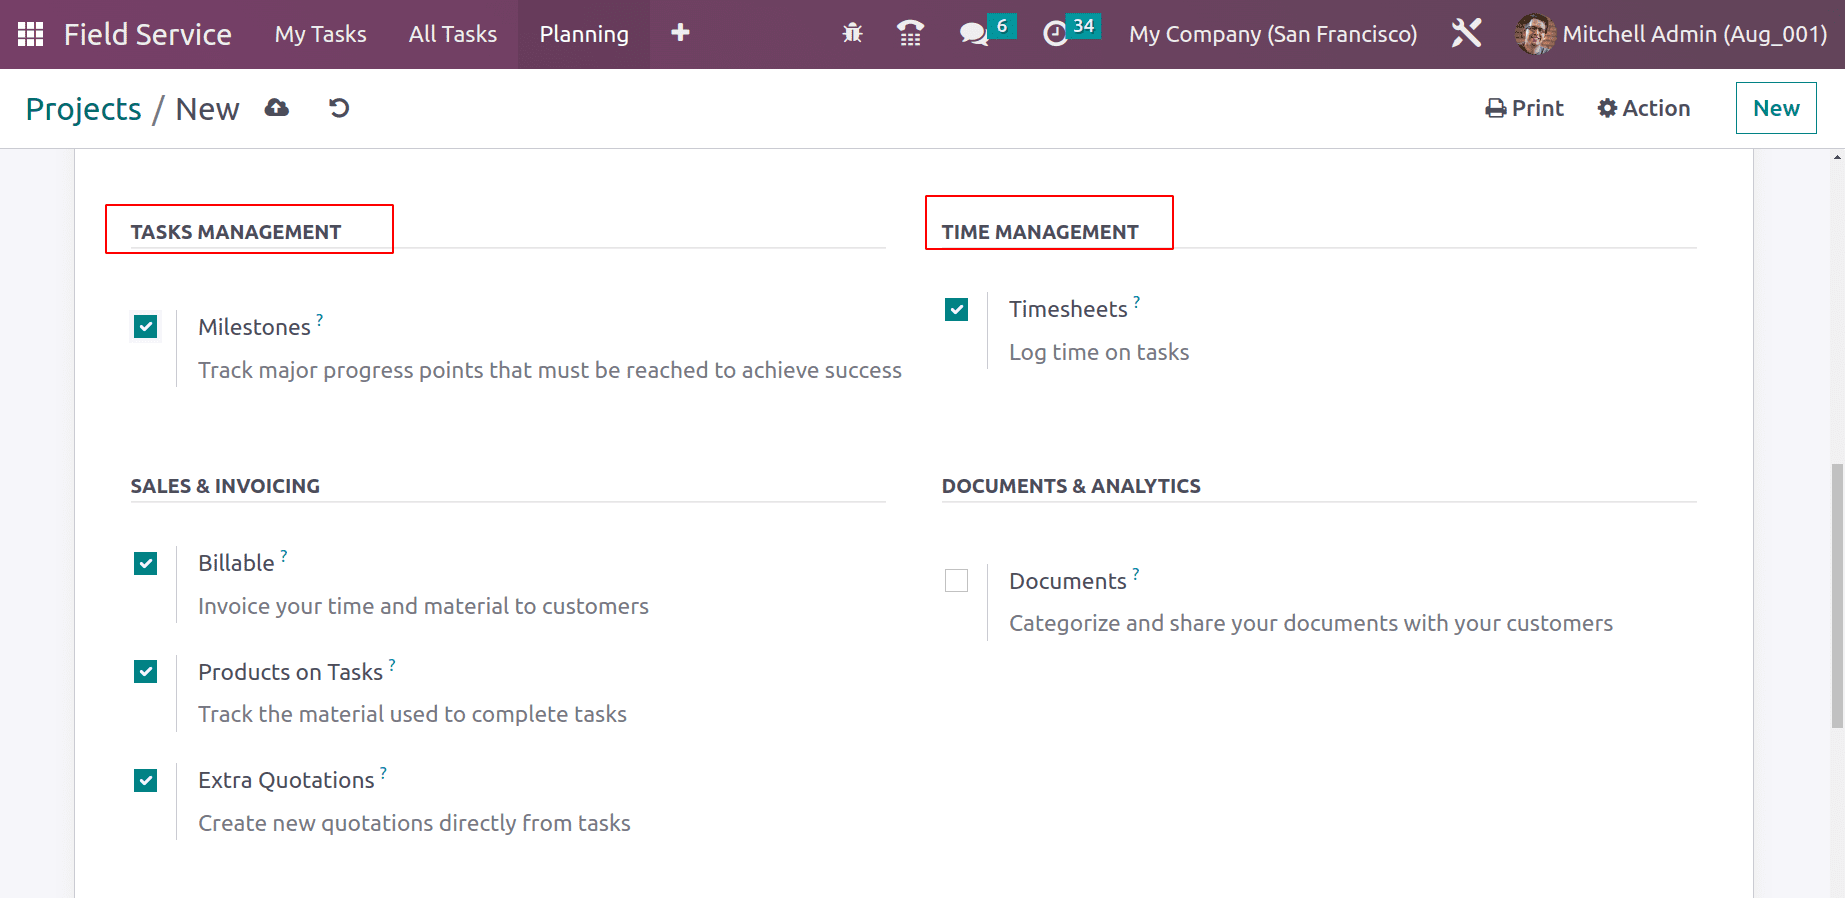
If the timesheets and material need to be invoiced to the customer, enable the Billable option. To track products consumed during the task, enable the Products on Tasks option. Then, if the user needs to add an extra quotation, then enable the Extra Quotations.
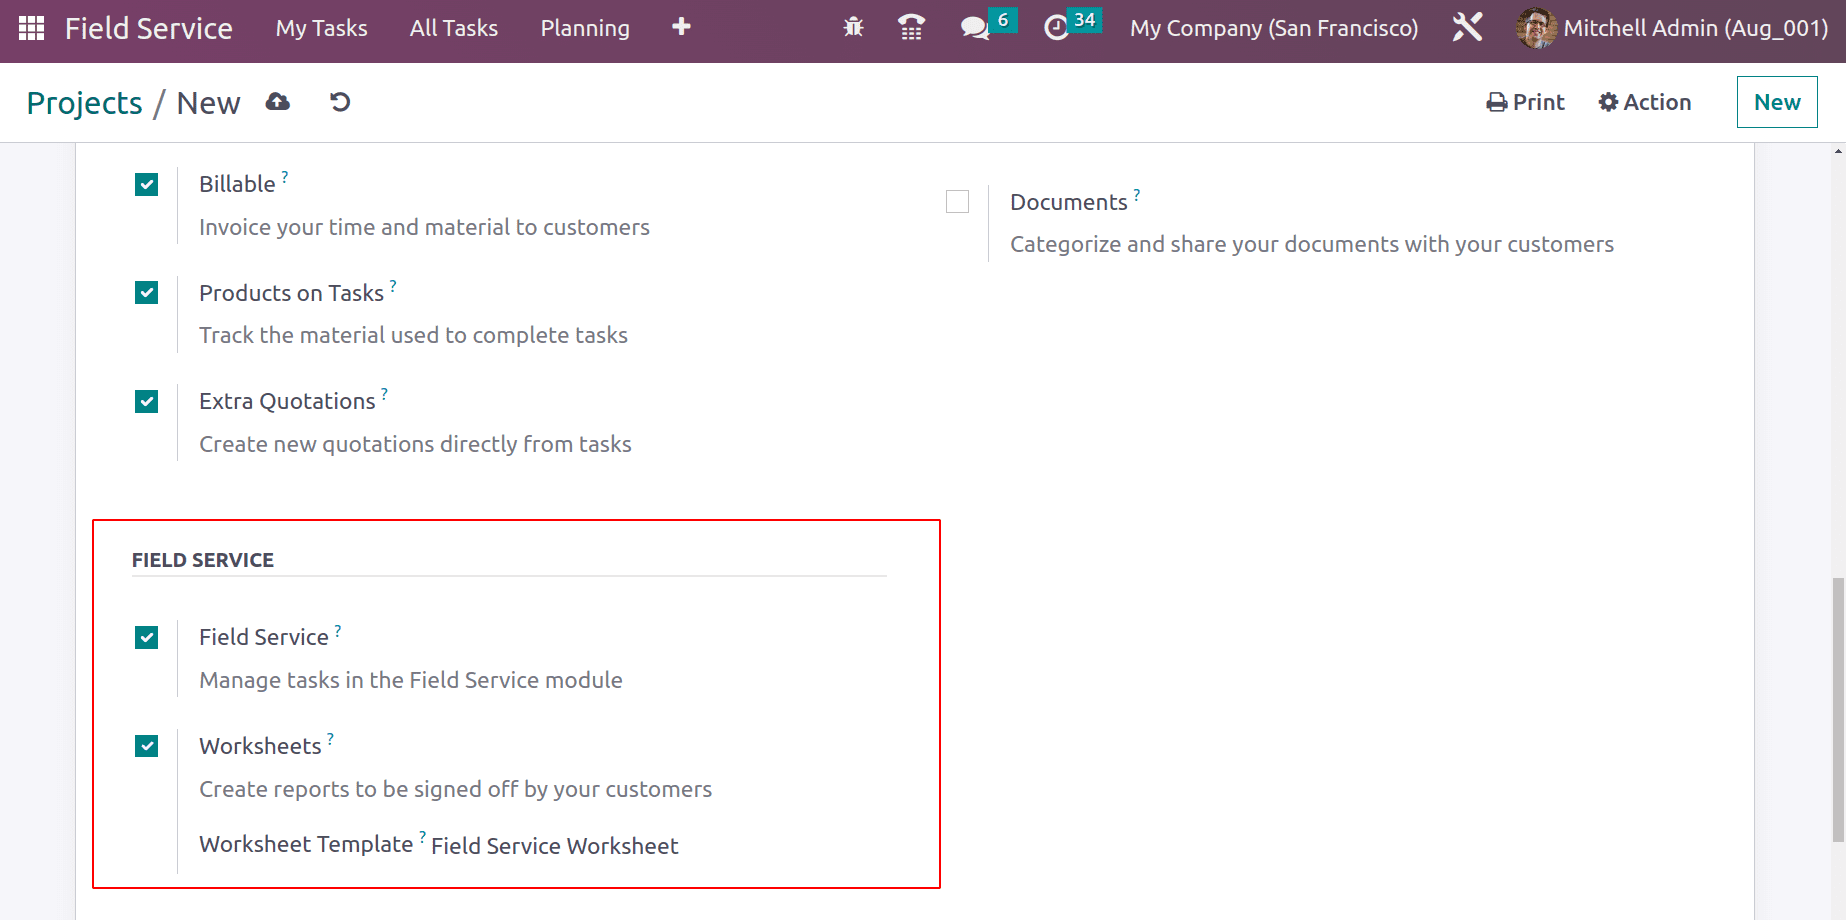
The Field Service section contains two options: Field Service and Worksheets. If the user needs to handle the task from the Field Service module, enable the checkbox Field Service.
To add a Worksheet, enable the Worksheets option and add the Worksheet. Worksheets in the Odoo 16 Field Service module make it easier to organize and track field service tasks by giving the employees a systematic checklist to complete while on-site.
Then save the project.
It’s possible to design a new worksheet for this particular project. For that, move to the Configuration tab again.
Configuring Worksheet Template
Worksheets are used to construct structured task lists for field service operations in the Odoo 16 Field Service module. These Worksheets help the employees to create step-by-step processes, gather pertinent information, and efficiently monitor the completion of on-site service operations. The customer may readily recognize every detail of his project or task by receiving the worksheet, which can be sent to them. If the consumer is satisfied and the task is done by the employee, he or she may even put his or her signature on it.
Inside the Configuration tab, there is an option, Worksheet Template. Pick it to design a new Worksheet.
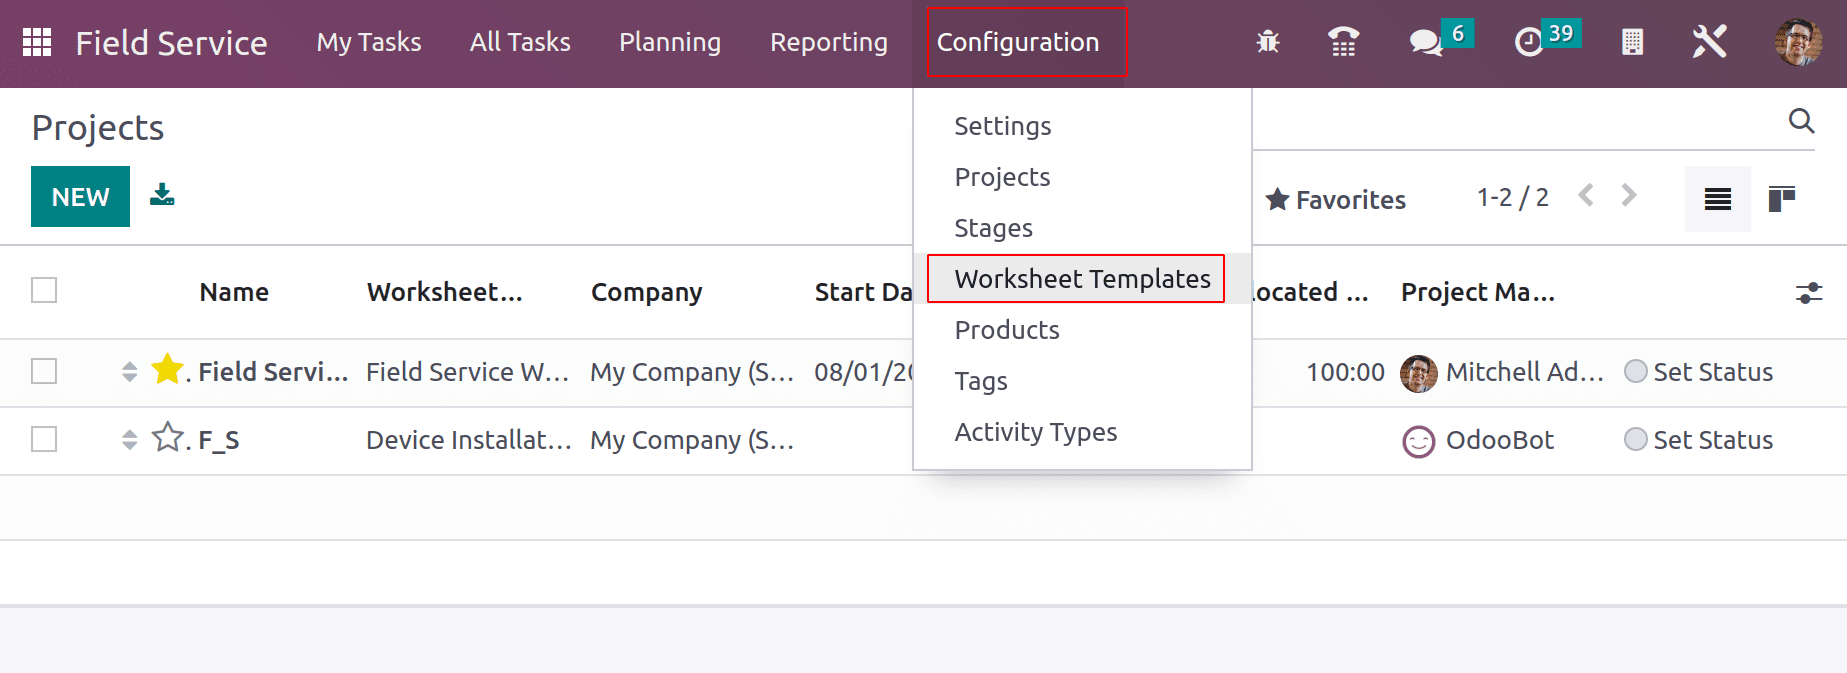
The opened window shows all the templates that are previously created. The worksheet which was added inside the create project was Field Service Worksheet, which is also available there.

Currently, there is no created Worksheet in that template. So it’s possible to design the template from there. For that, first, open the template Field Service Worksheet.
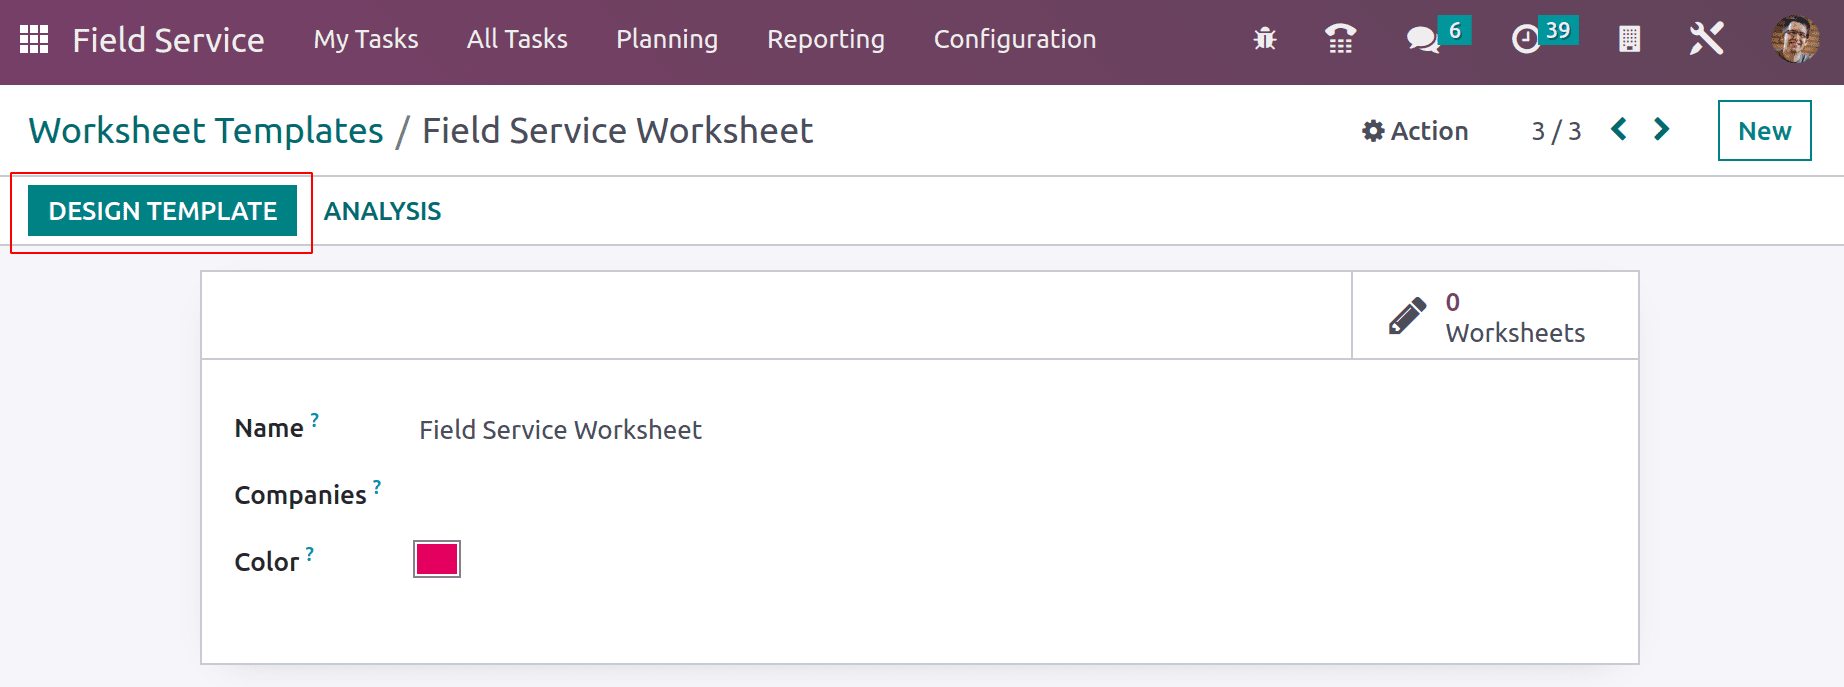
To design a new template, the user needs to install Studio in Odoo 16. This worksheet design is possible only if the Studio module is installed.
Users can simply modify and expand different system components, such as fields, views, and actions, using the Studio module in Odoo 16 to adapt the software to their own business processes without having to write a lot of code. So install the Studio module from the App store first.
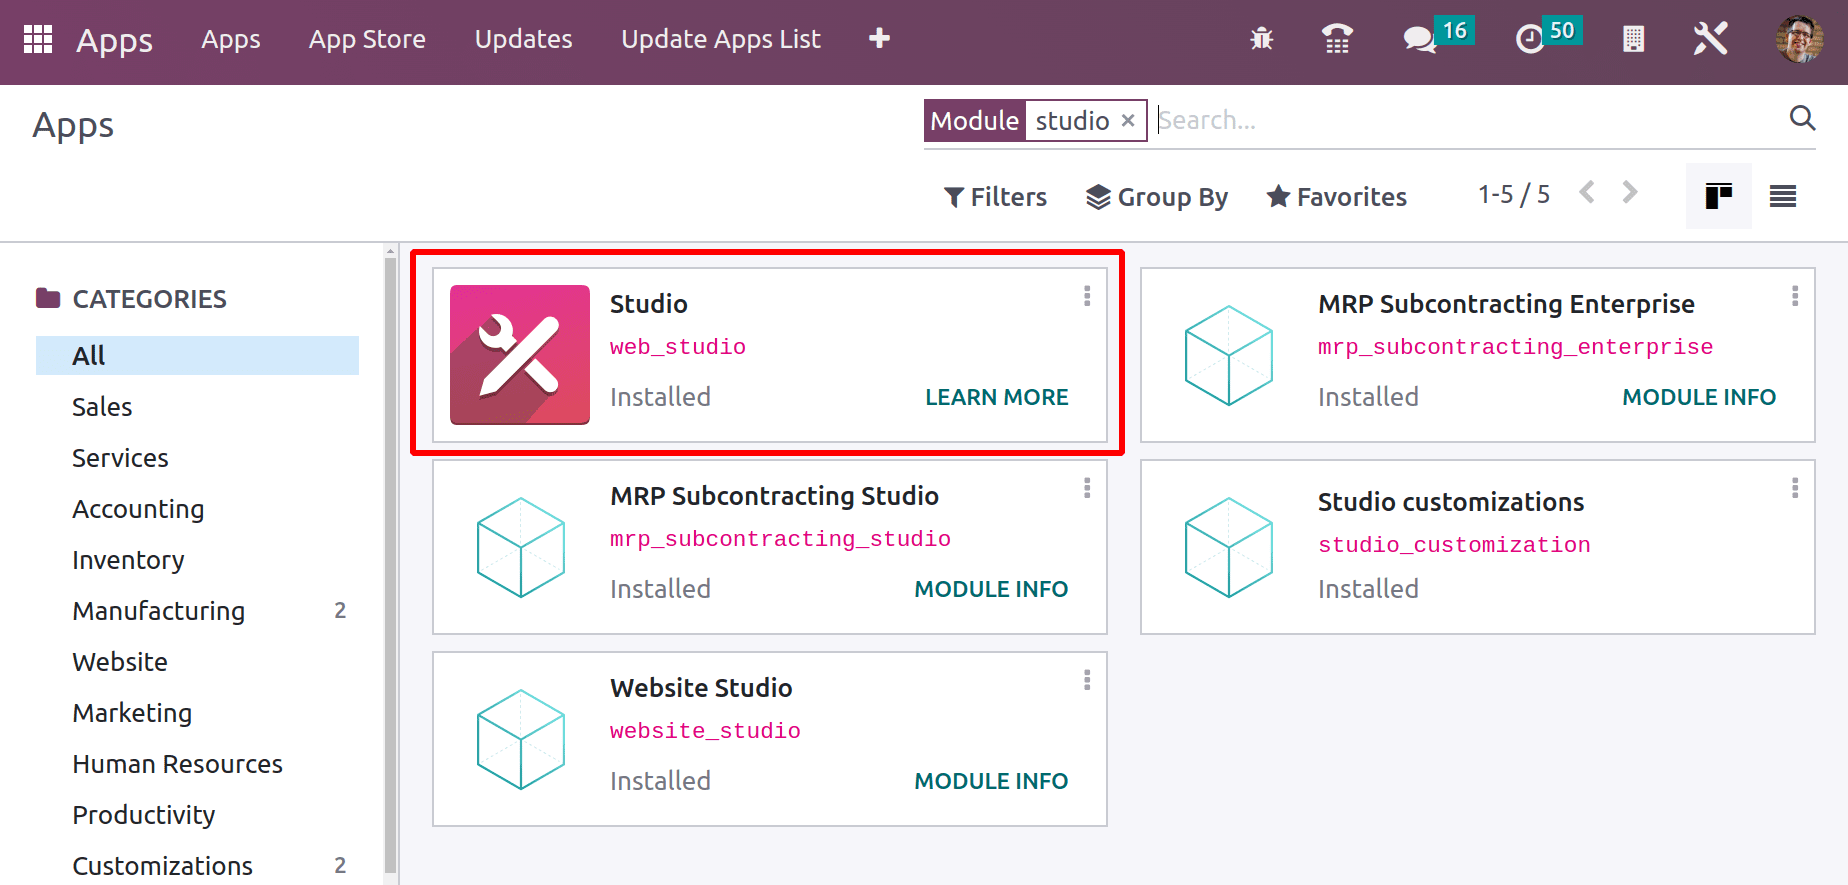
Then click on the DESIGN TEMPLATE button to design a new template. The button leads us to another platform. The left side of the opened window contains many fields like Text, Multiline Text, Date & Time, etc. It’s possible to add these fields by simply dragging and dropping.
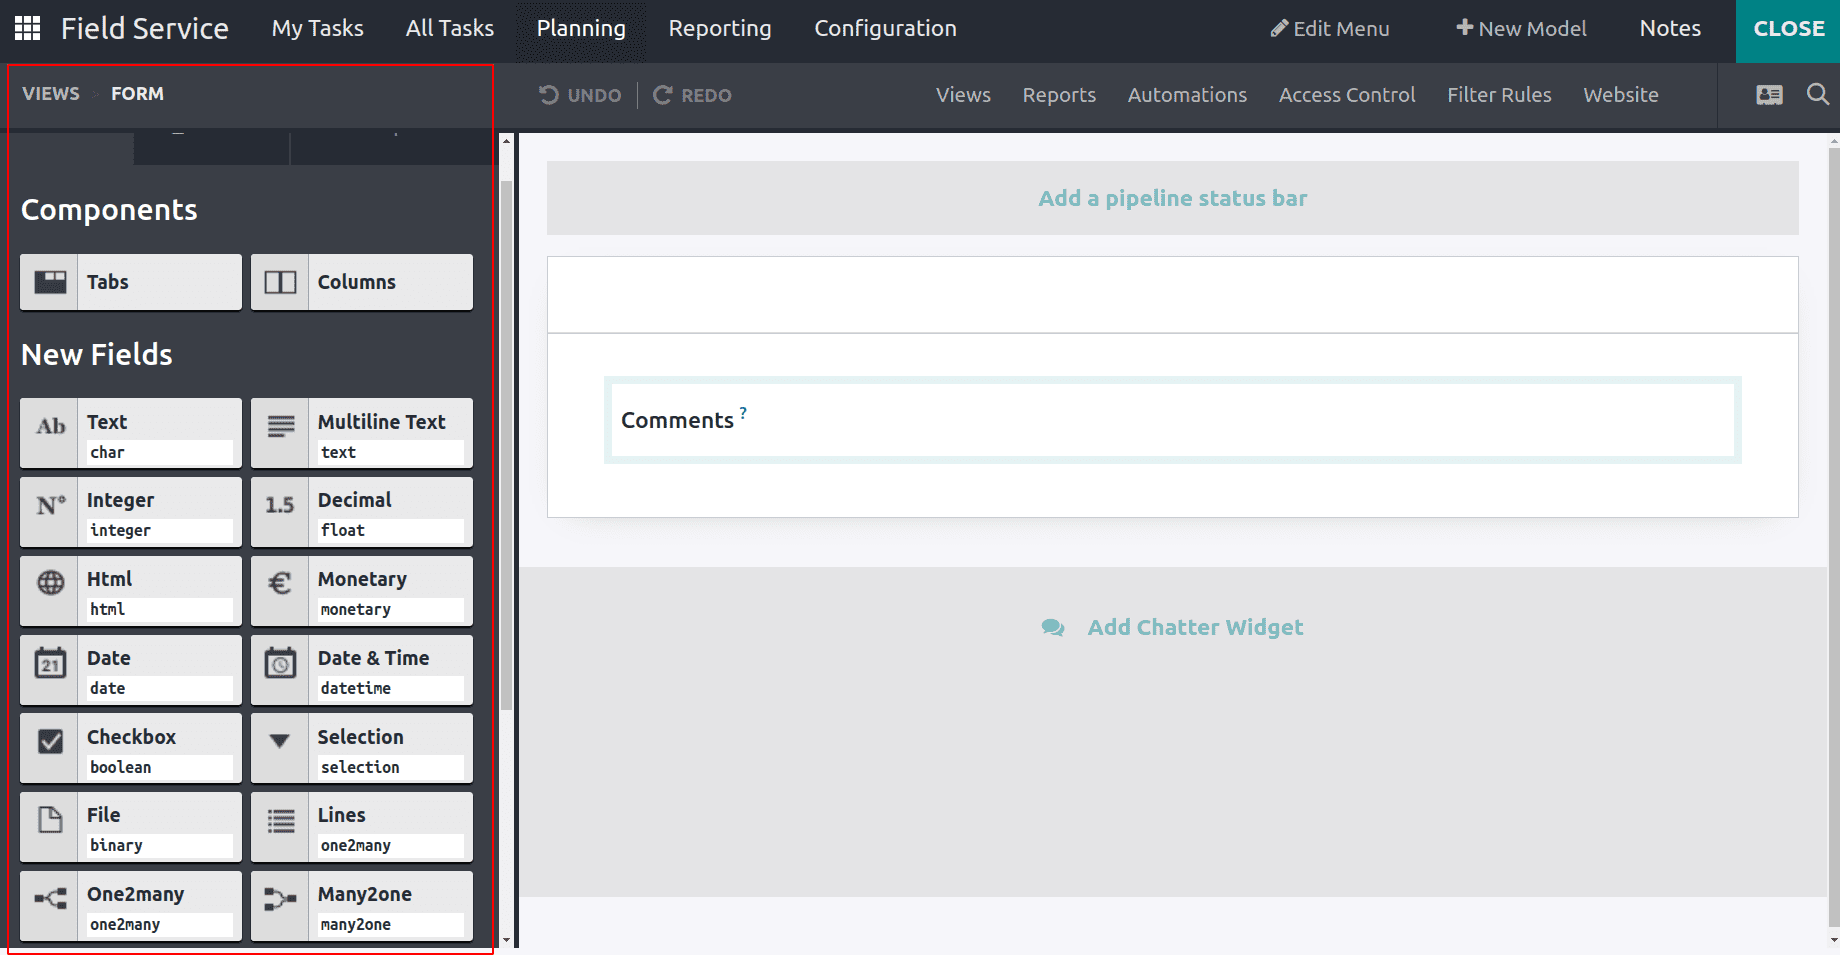
The necessary fields can be simply dragged from the left side, and then dropped on the right side. It’s possible to arrange them for our needs.
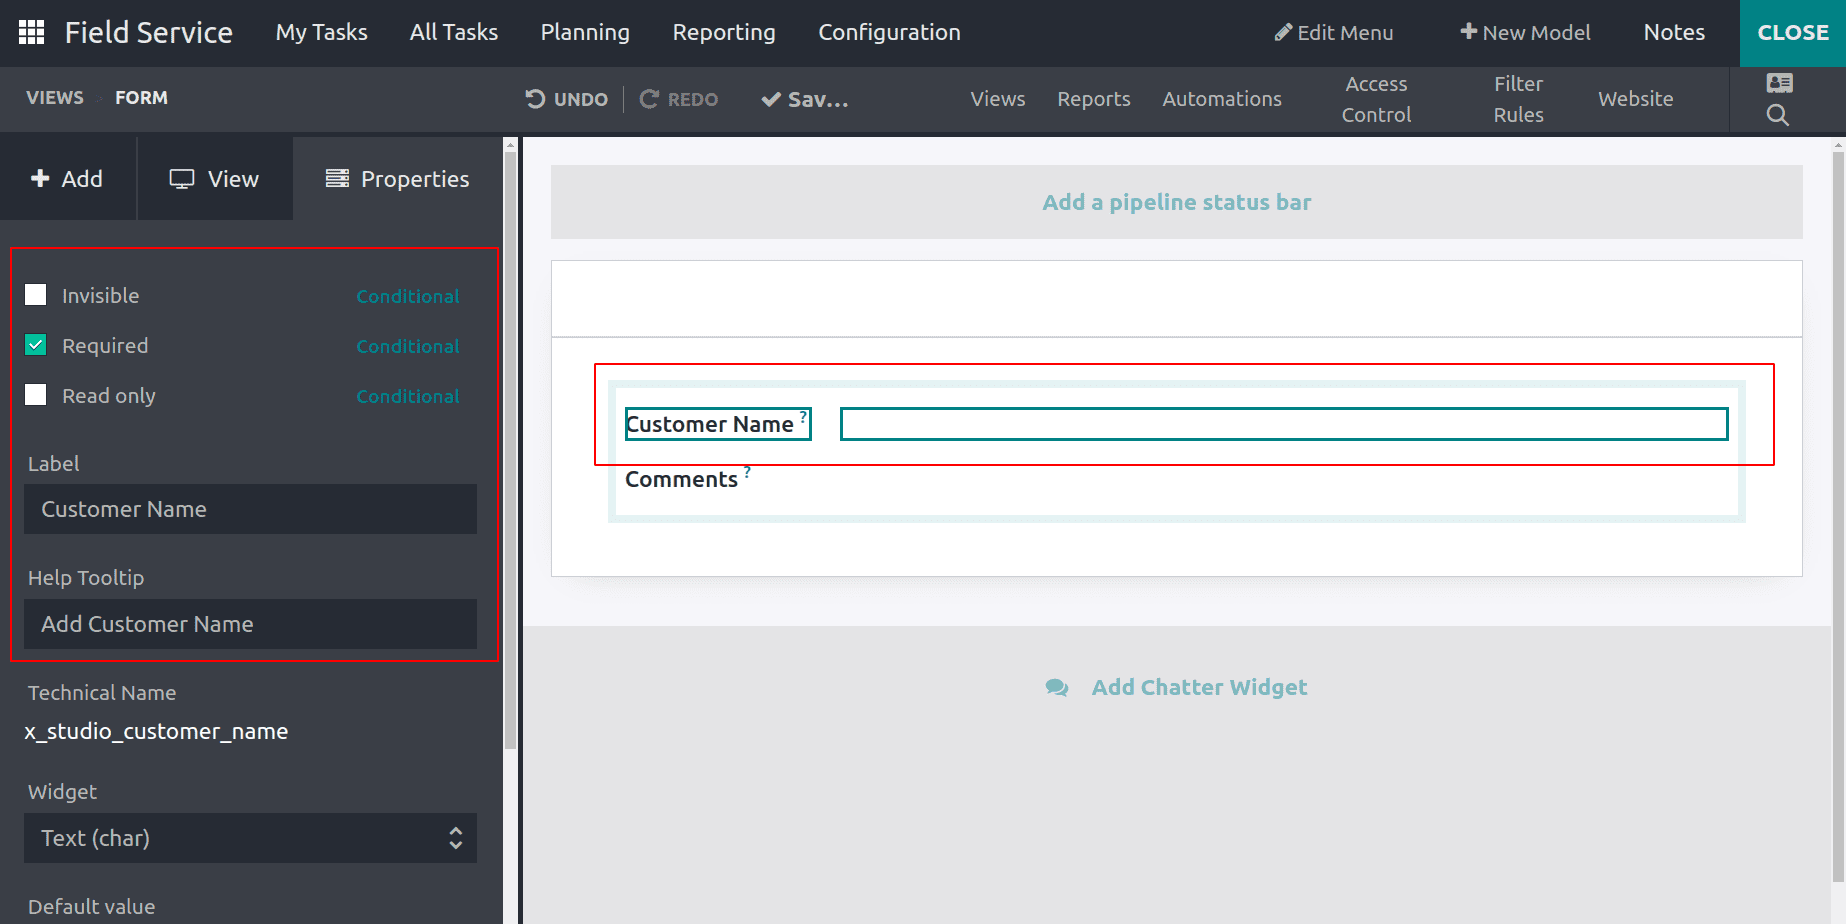
A simple Text field is chosen here to add the Customer name. After dropping the field, the left side window allows the user to add settings on the field. Add the label, which is shown on the field, and it’s possible to set it as a mandatory, read-only or invisible field. Also, possible to add a helping tool.
After choosing the necessary fields, click on the CLOSE button placed on the upper right side.
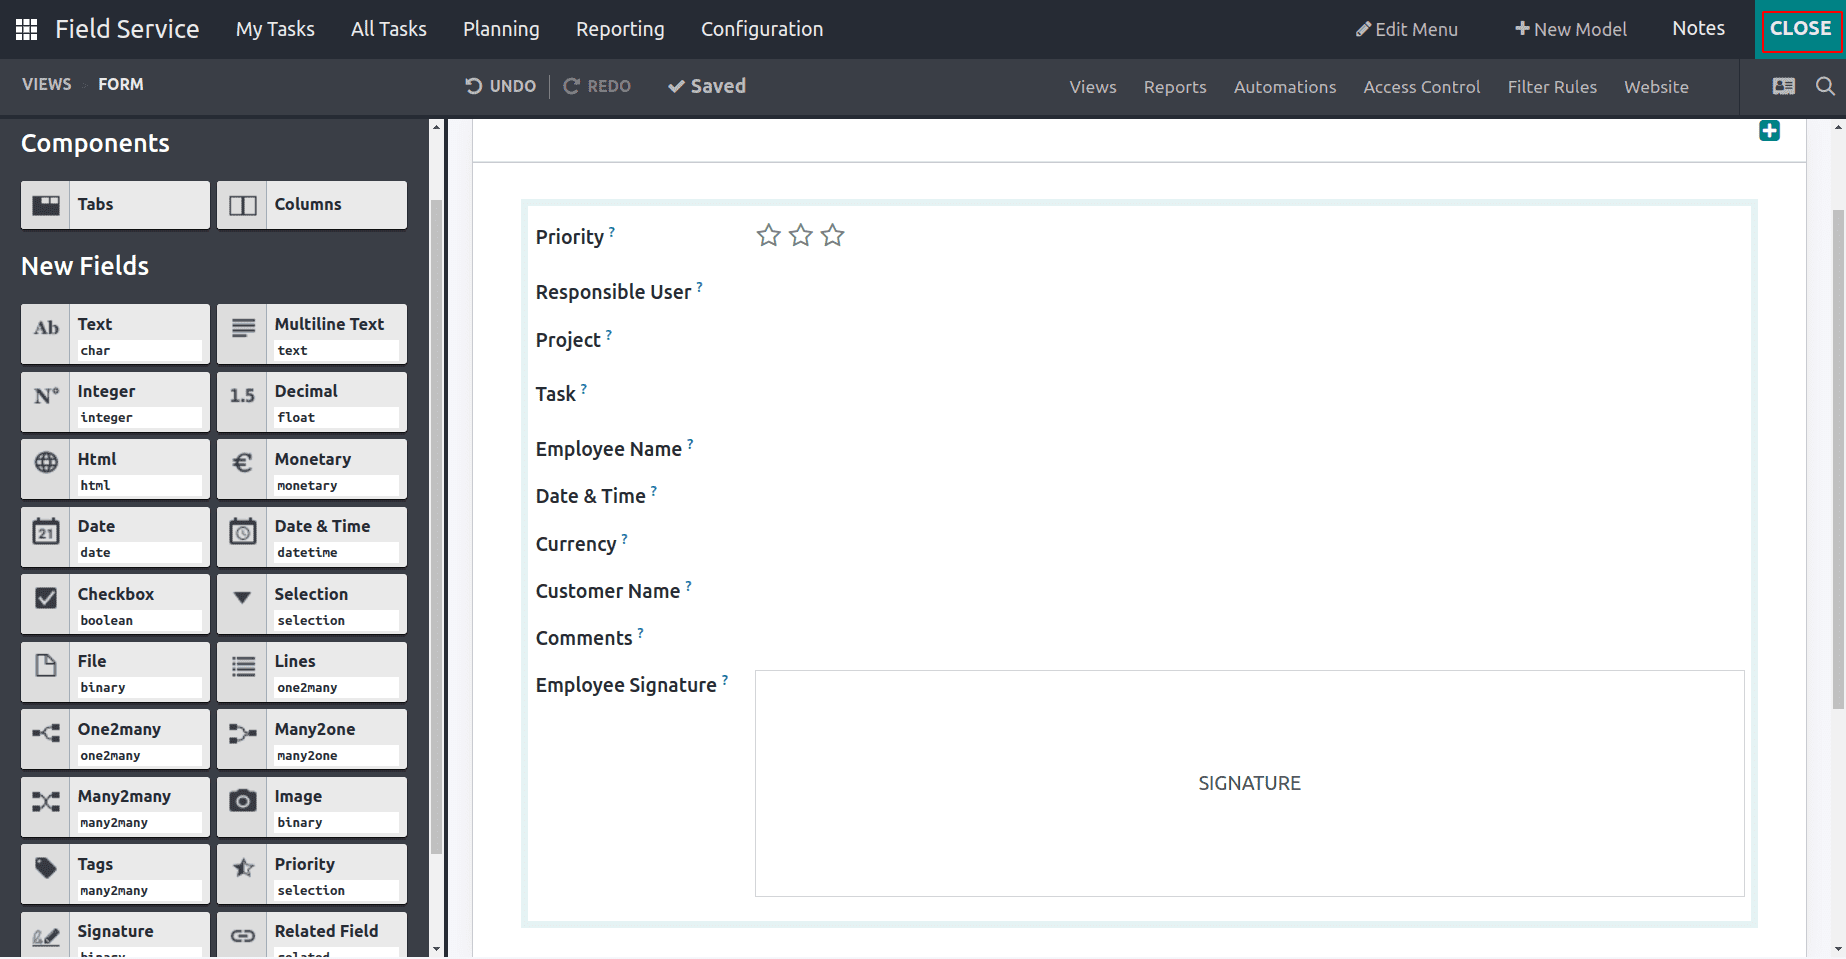
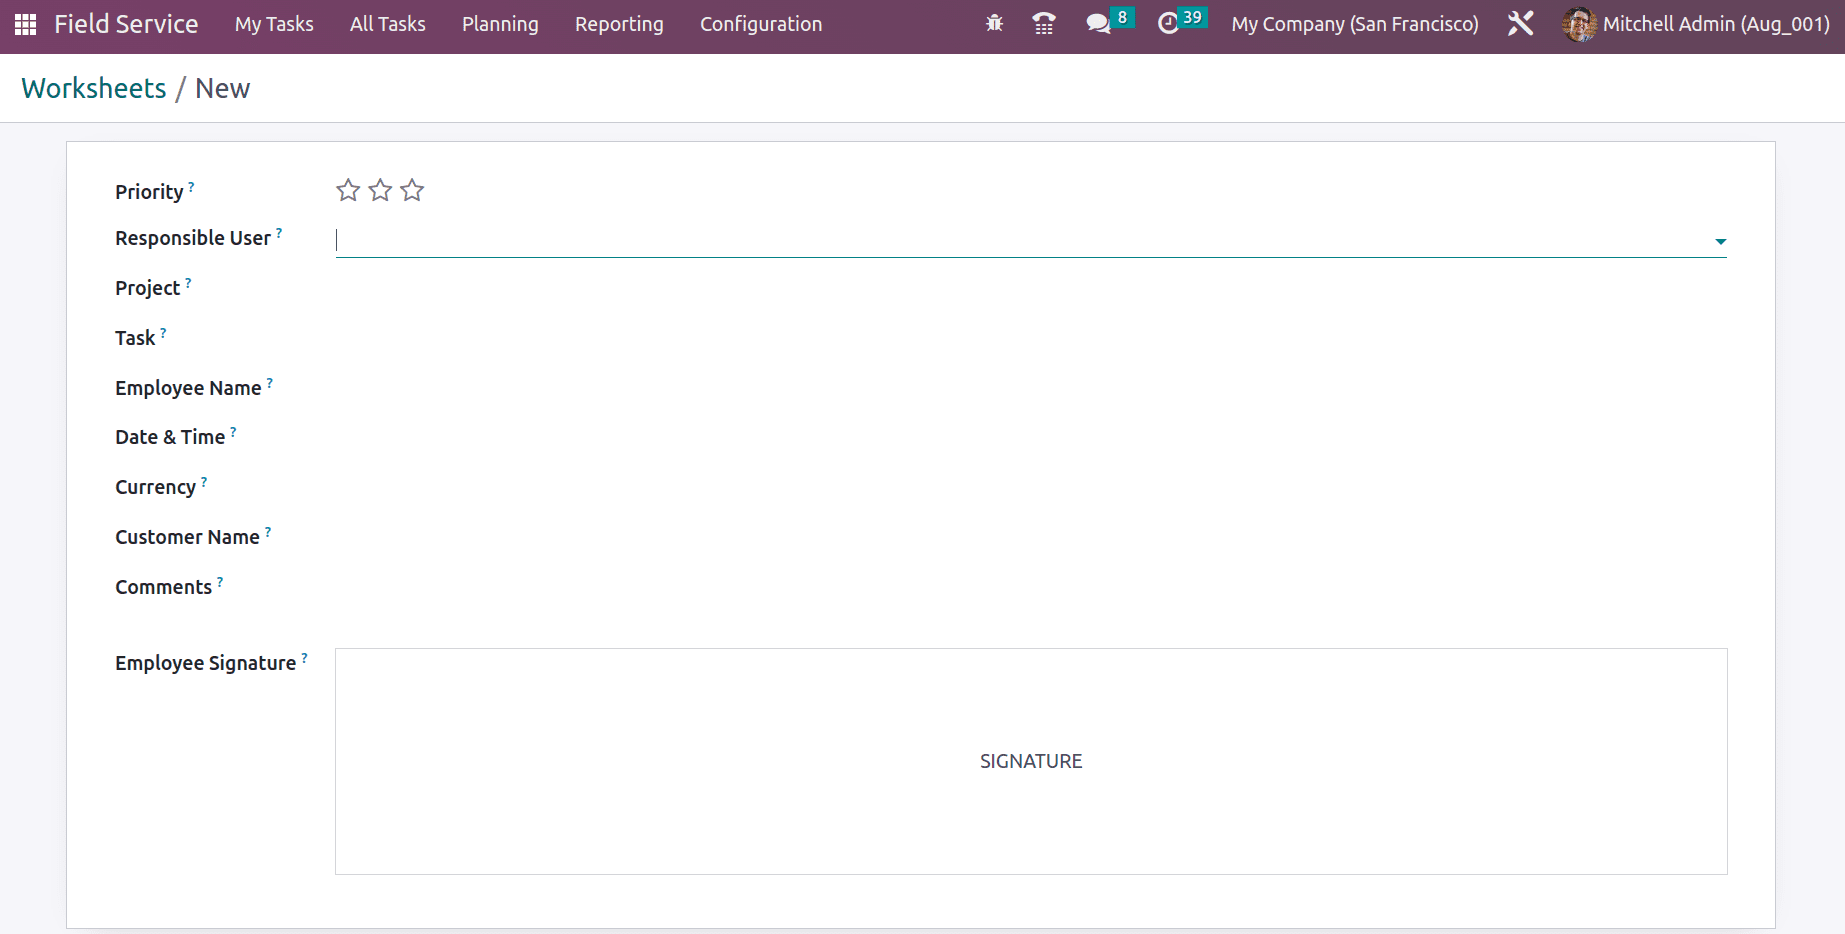
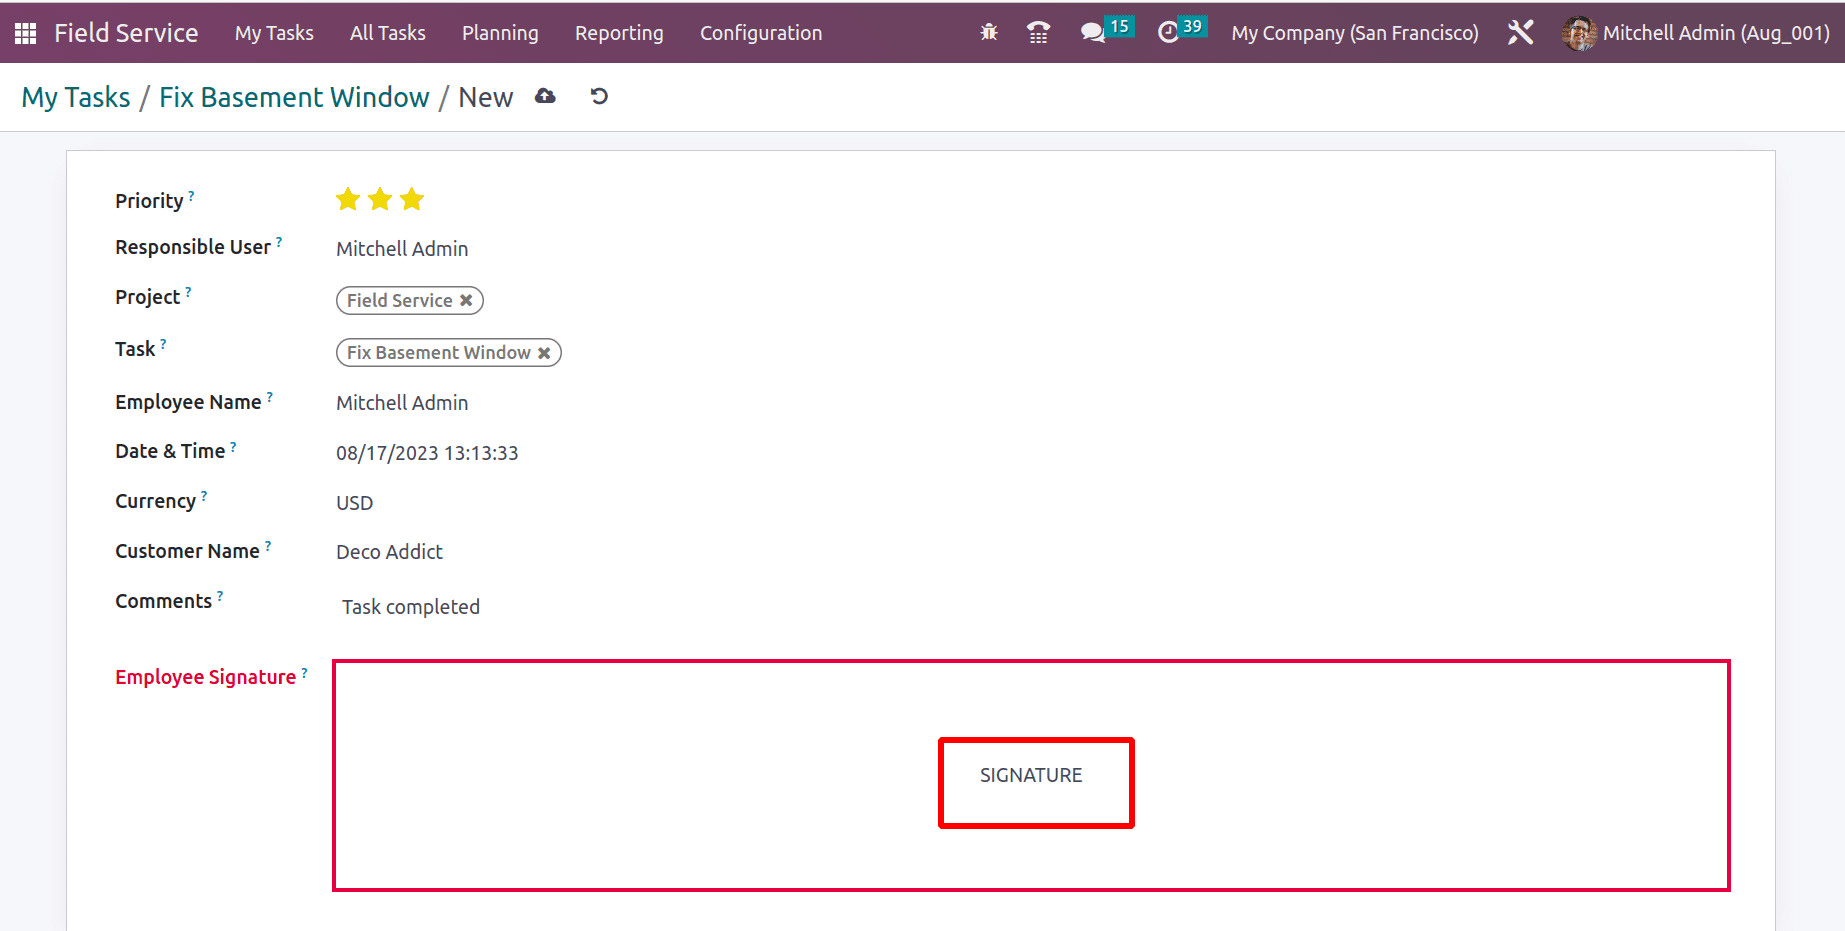
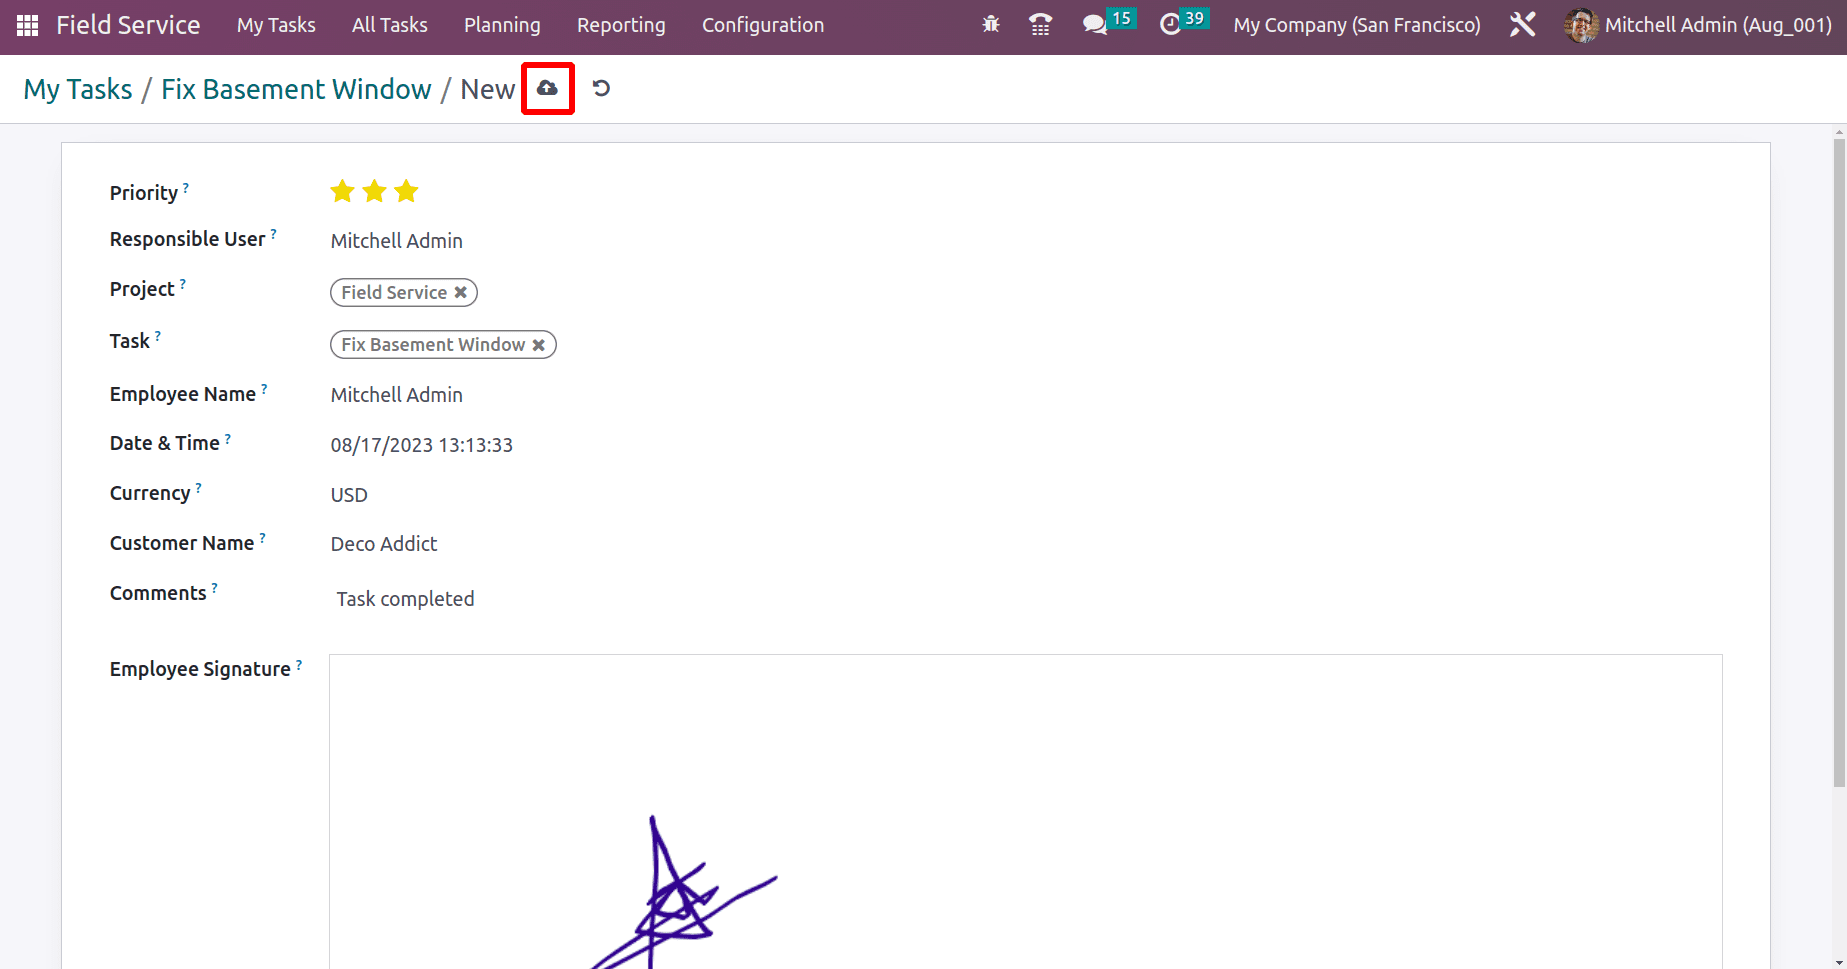
After closing, the created worksheet will display there. Priority, Responsible Person, Project, Task, Employee Name, Date & Time, Currency, Customer Name, Comments, and Employee Signature are the fields added in this Field Service Worksheet.
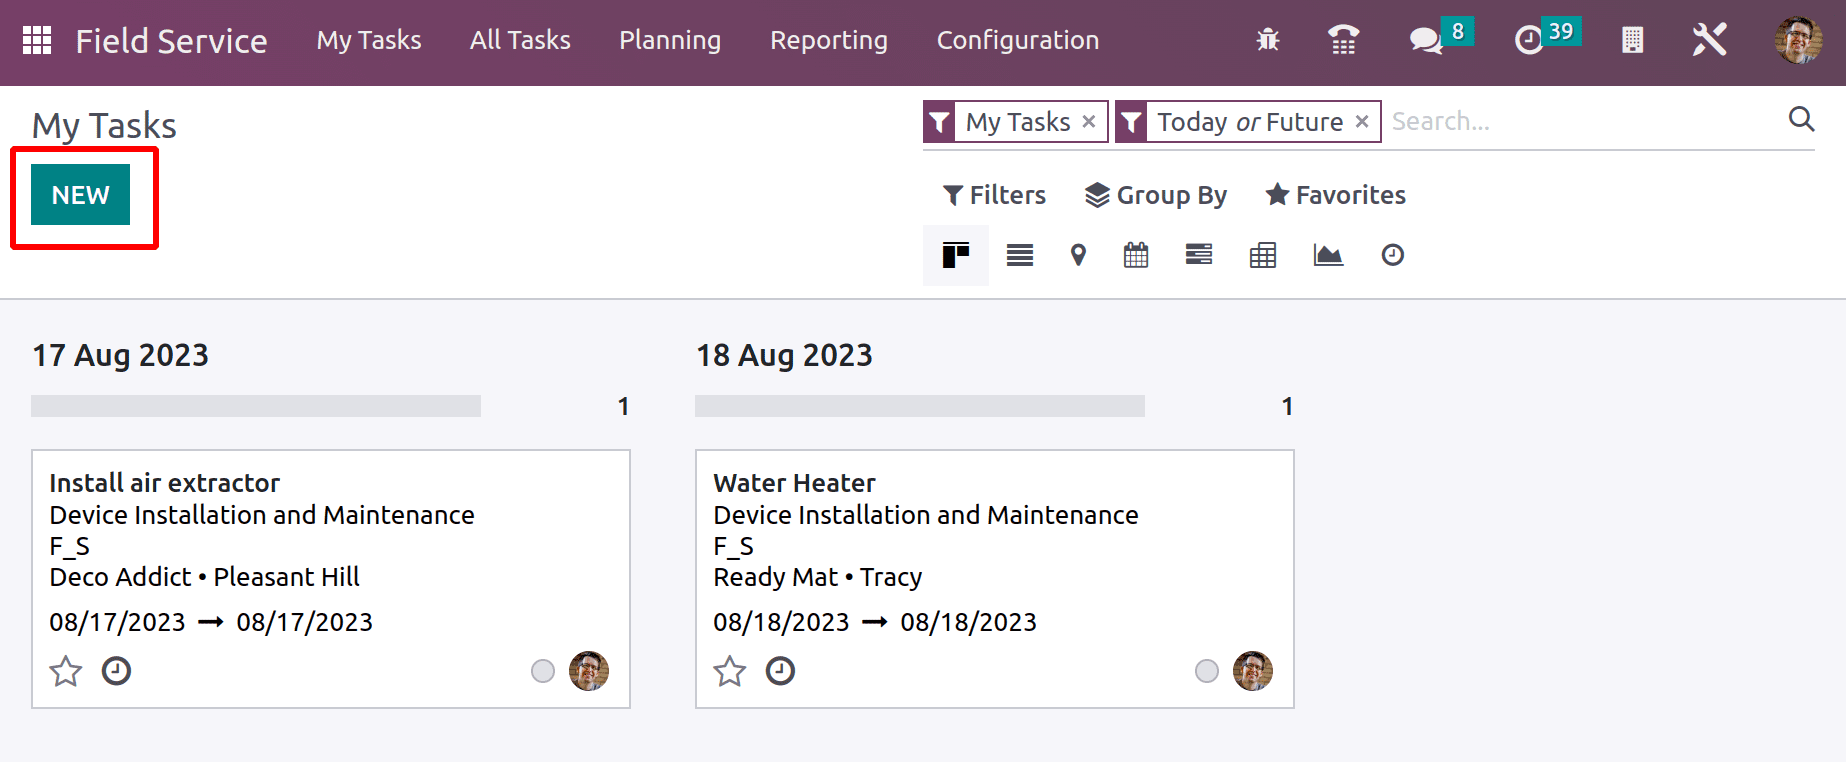
Let’s move to create a new Task. A new task can be created from MY TASK window, simply by clicking the NEW button.
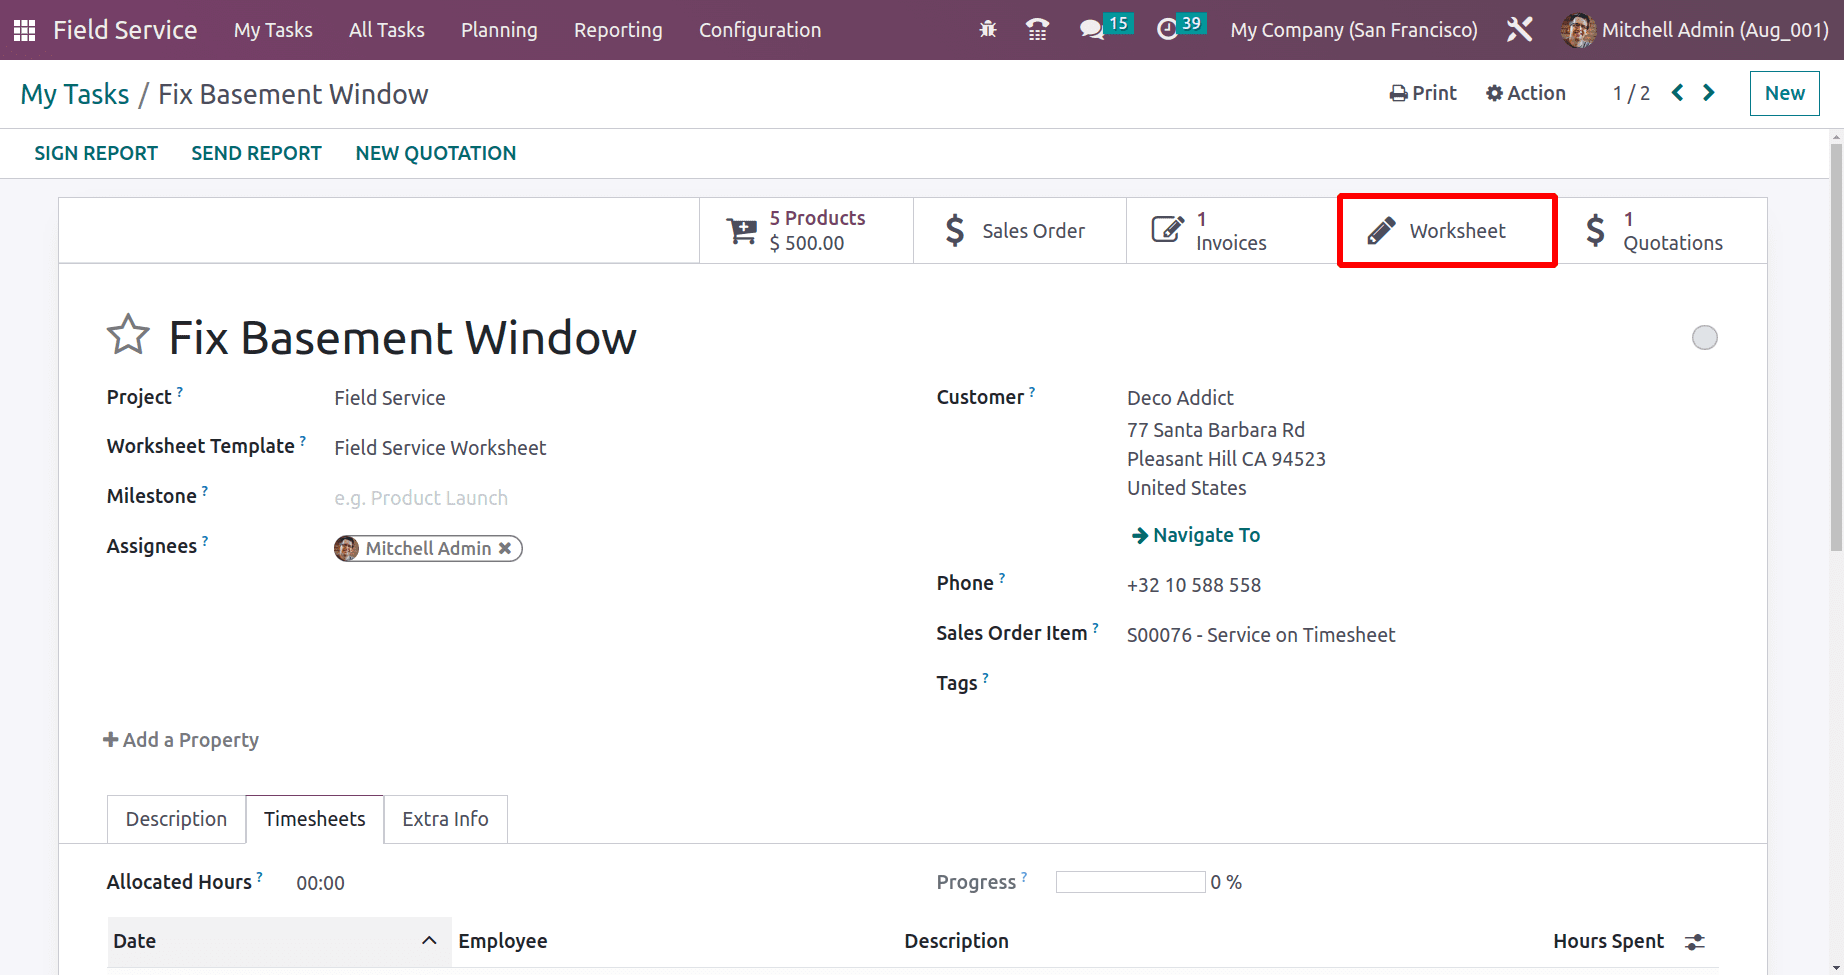
The created task is for Fixing the basement window, which is a field service task. The task details like task name, project name, worksheet template, customer name, etc can be added there.
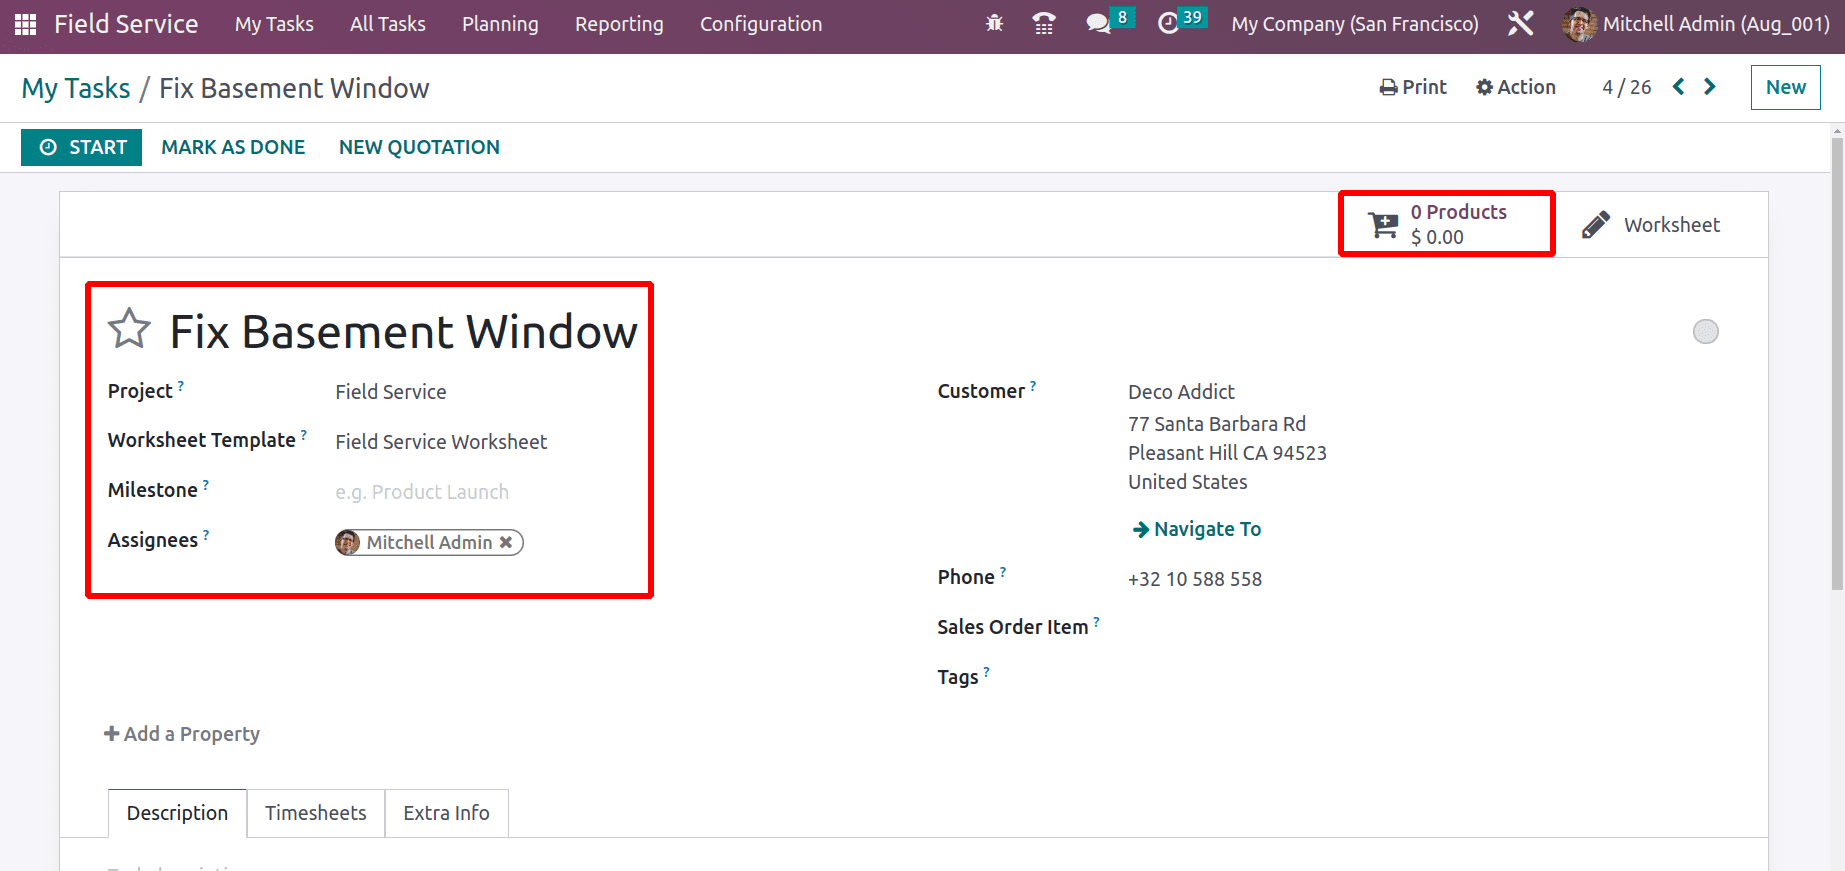
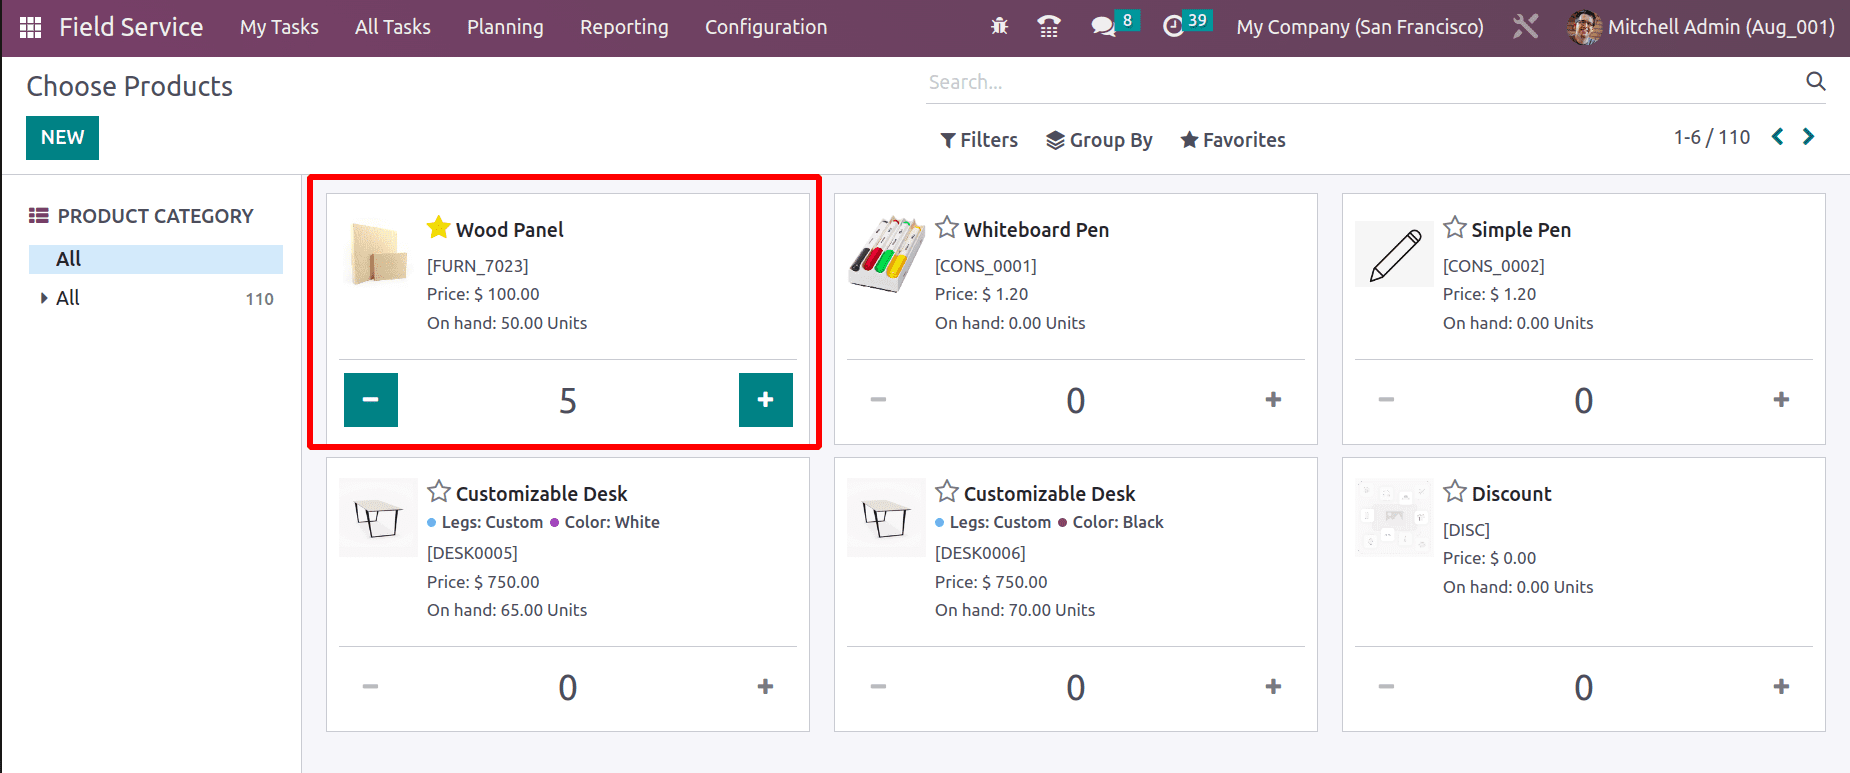
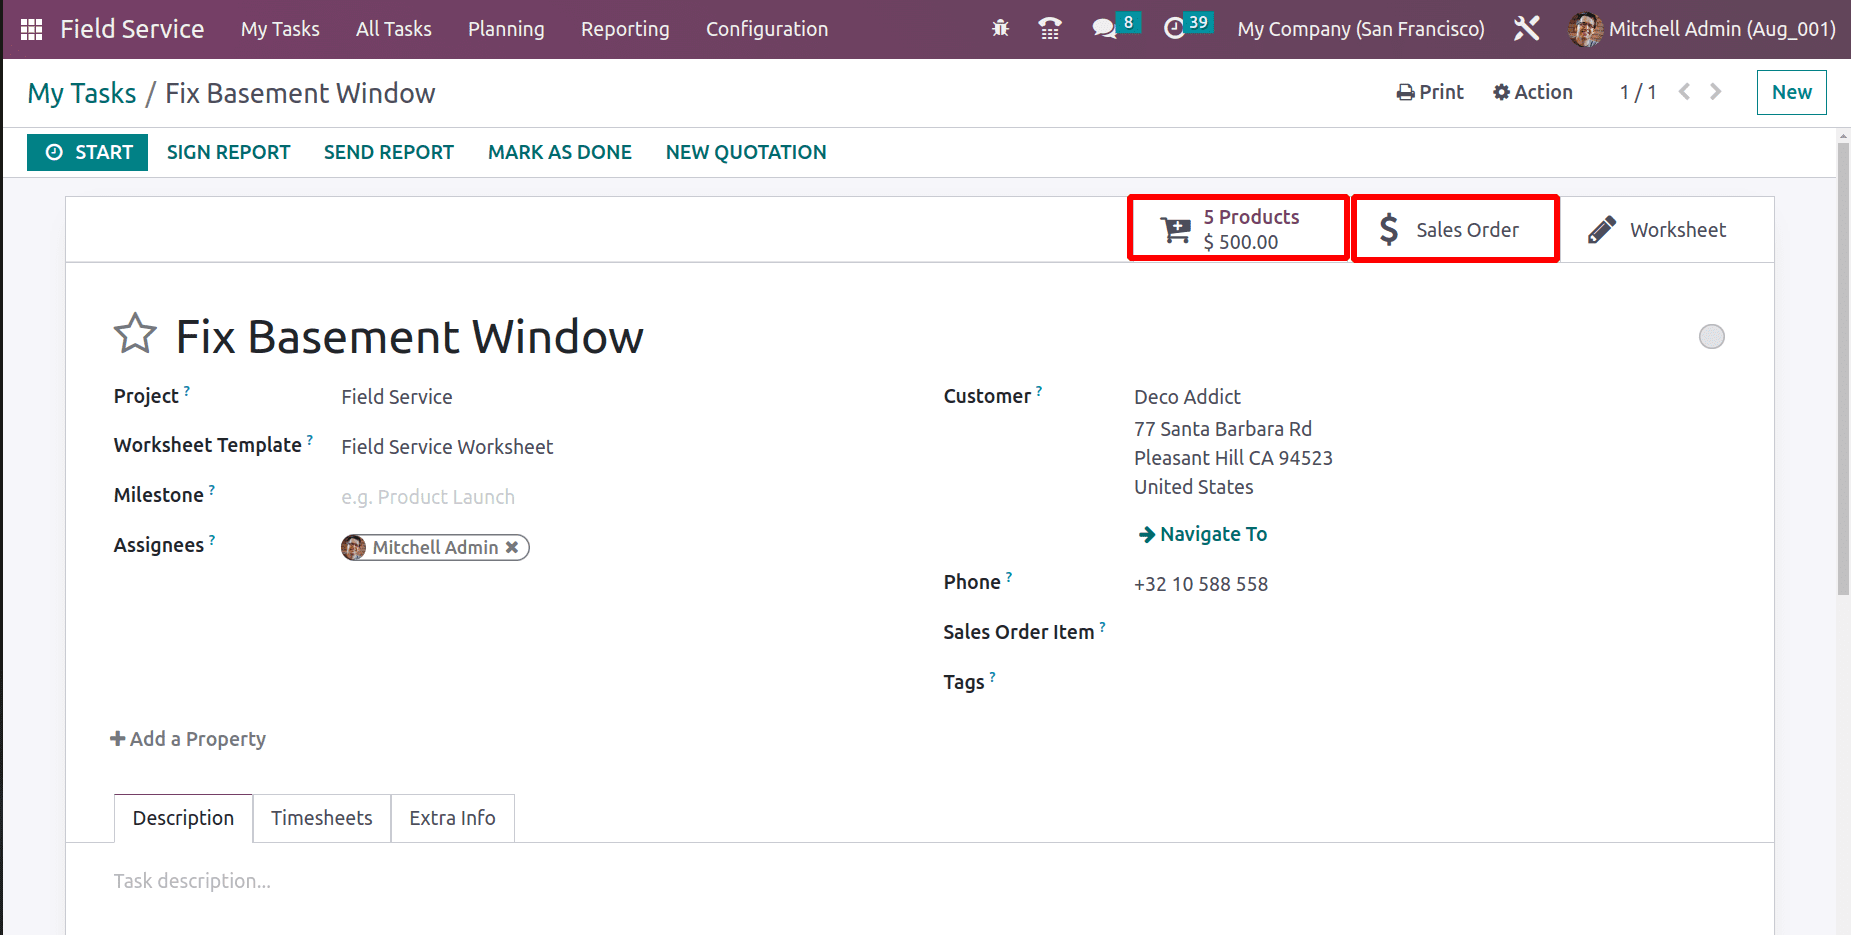
If the employee used some material to complete the task, it can be invoiced to the customer. So click on the smart tab Products. Here 5 quantities of Wood Panels with a unit price of 100$ are selected.
Then the added material with 5 quantities is added. An extra smart tab Sale order is updated.
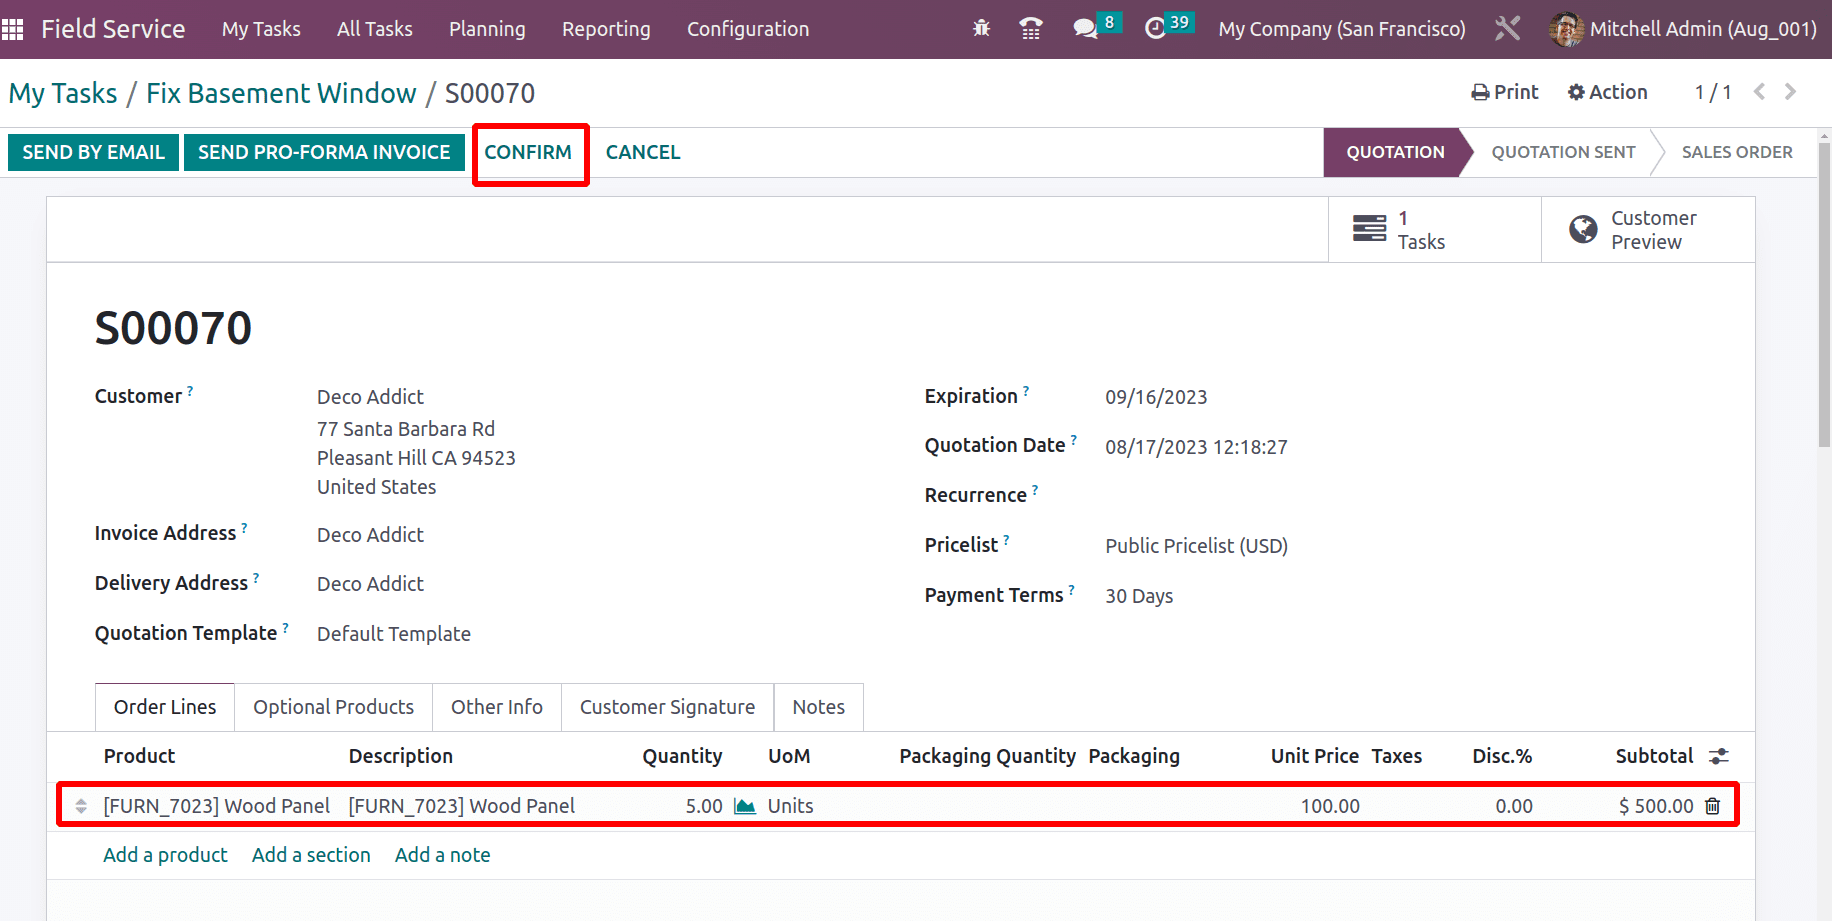
Open the sales order, and the material used will automatically be added to the order line. Confirm the order.
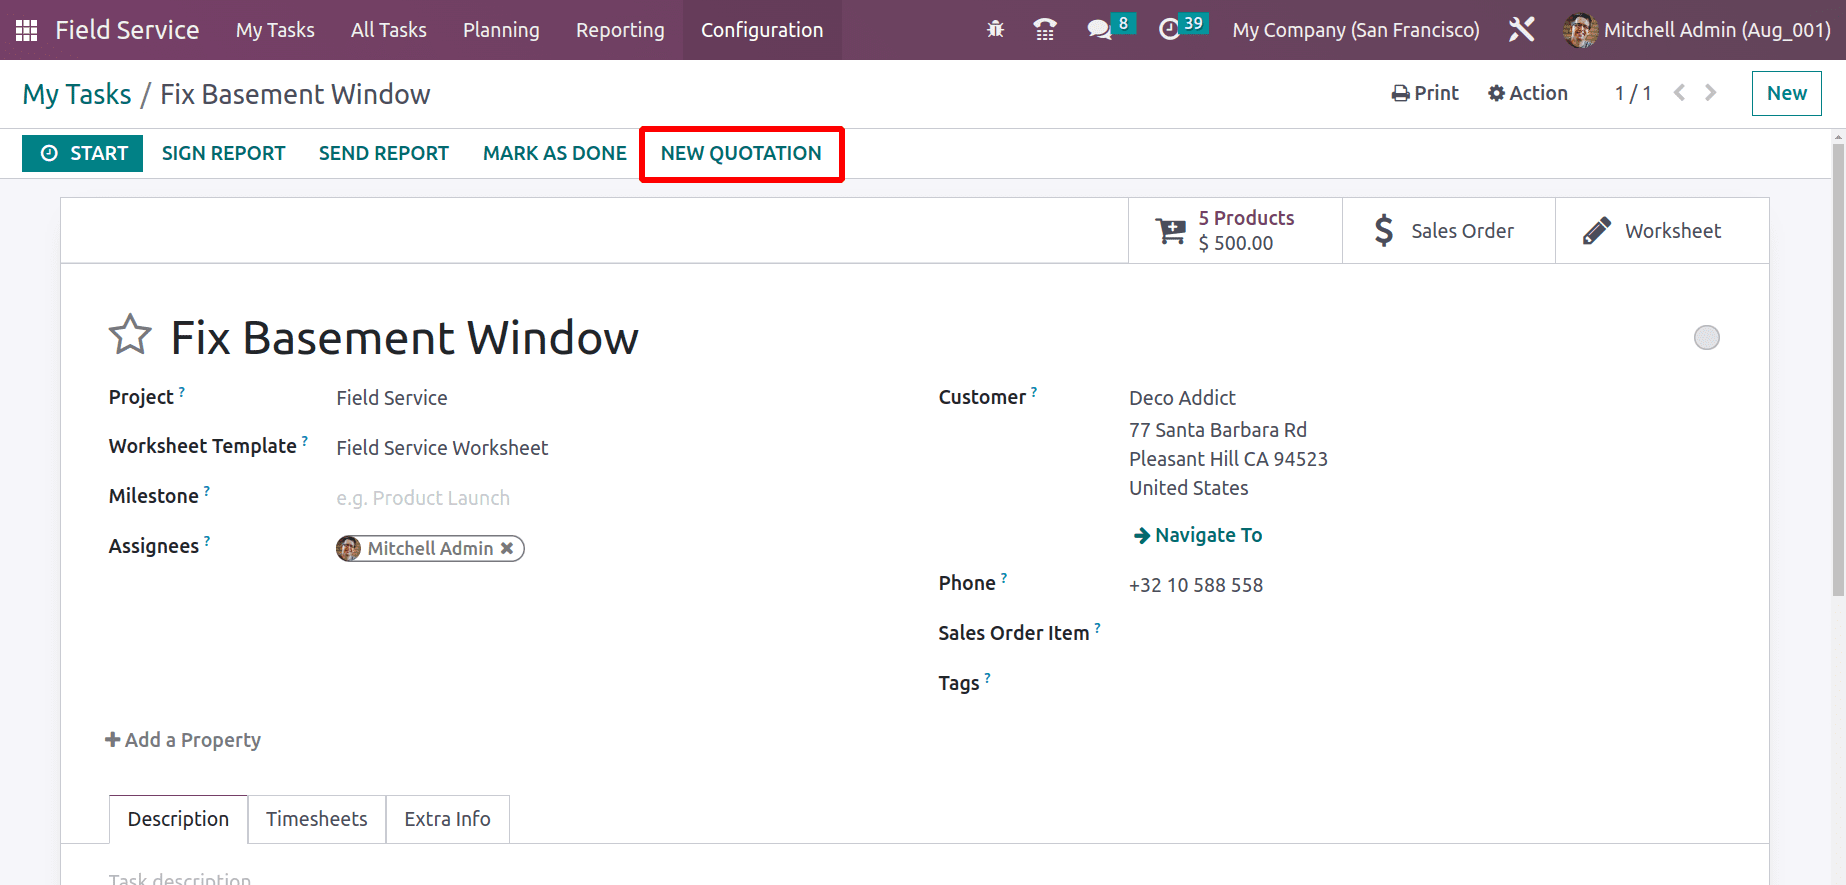
If the user needs to add an extra quotation. In Odoo16 it’s possible to add extra quotations from the task itself. For that, click on the NEW QUOTATION button.
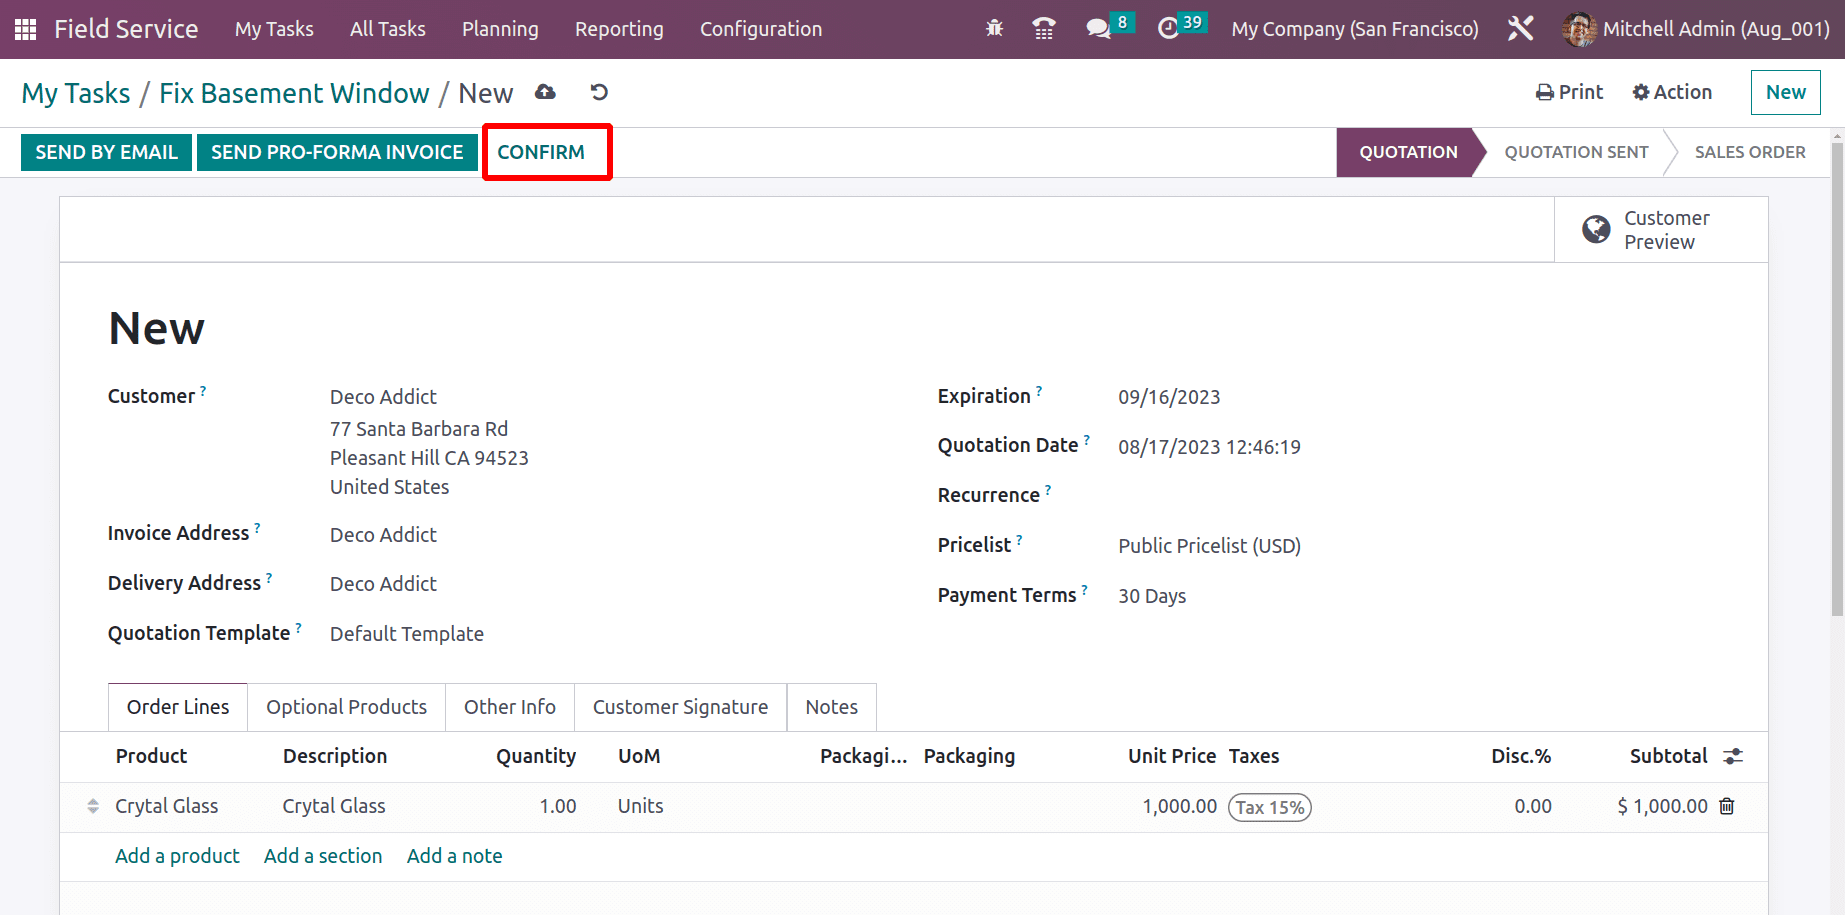
So another sales order is created. And the employee used another material, Crystal Glass. Confirm the order.
Now an additional smart tab Quotation appeared in the task.
The employee spends his working time completing the task. So the employee’s work time needs to be invoiced. The employee timesheet can be added inside the Timesheet tab. It is possible to add a timesheet either by clicking the Add a line or by clicking the Start button. Here are 2 hours added by the employee Mitchell Admin.
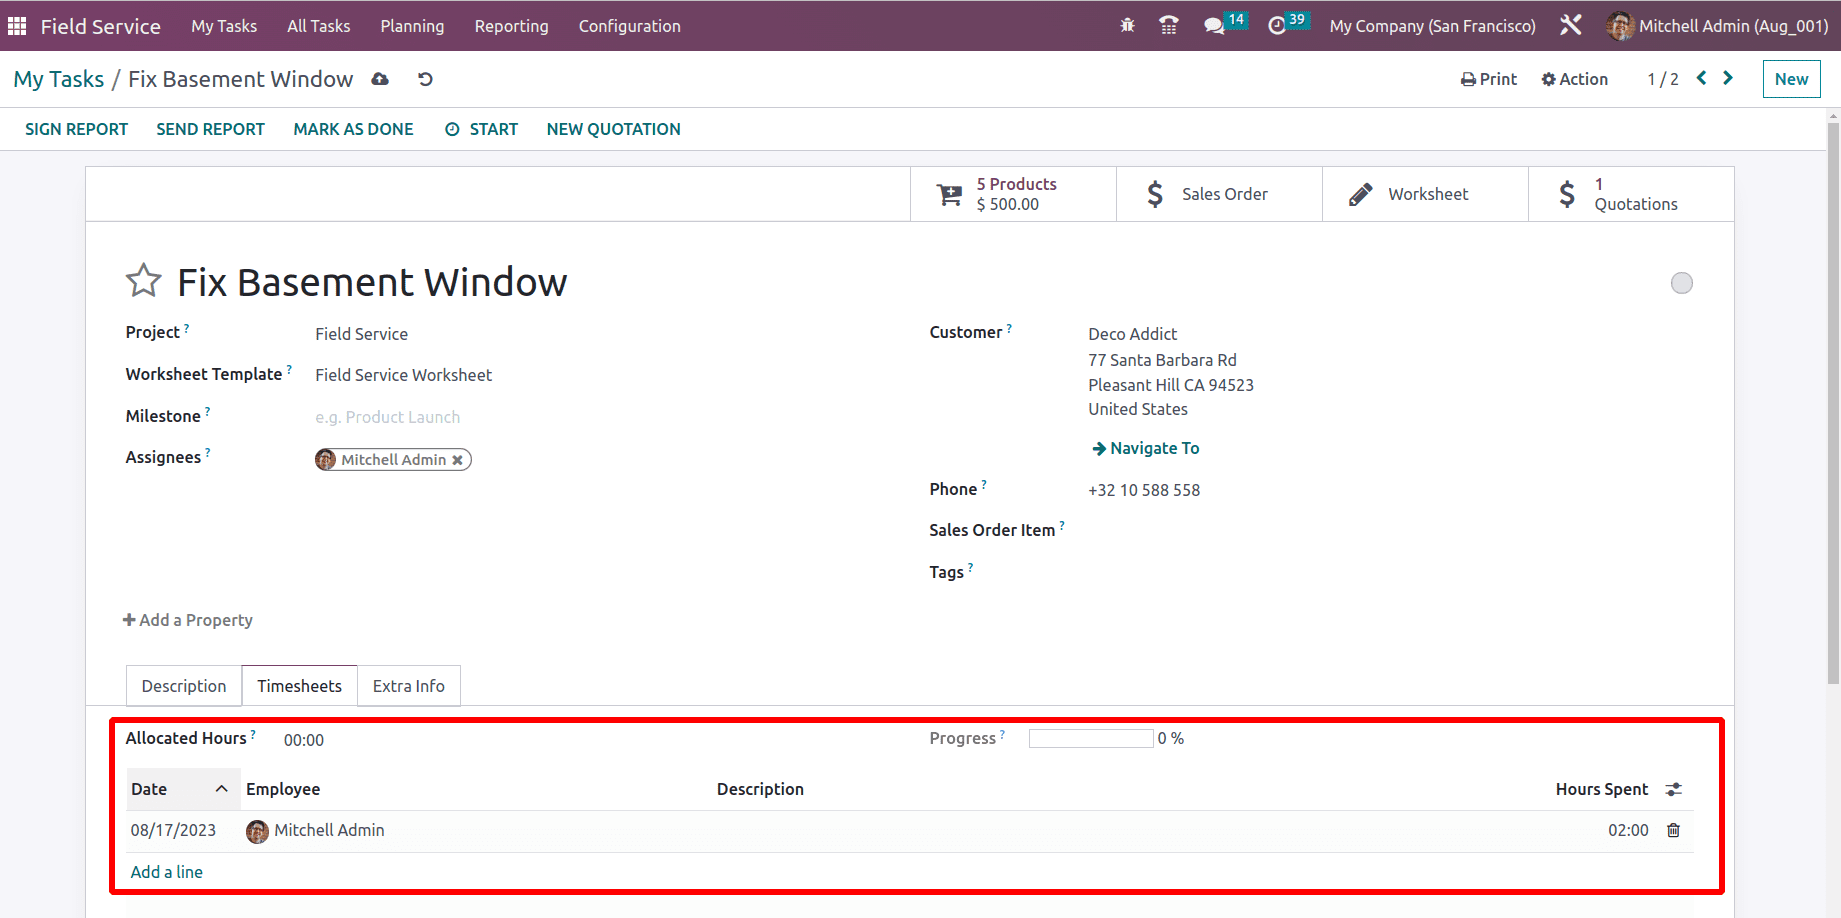
To complete the task, click on MARK AS DONE.
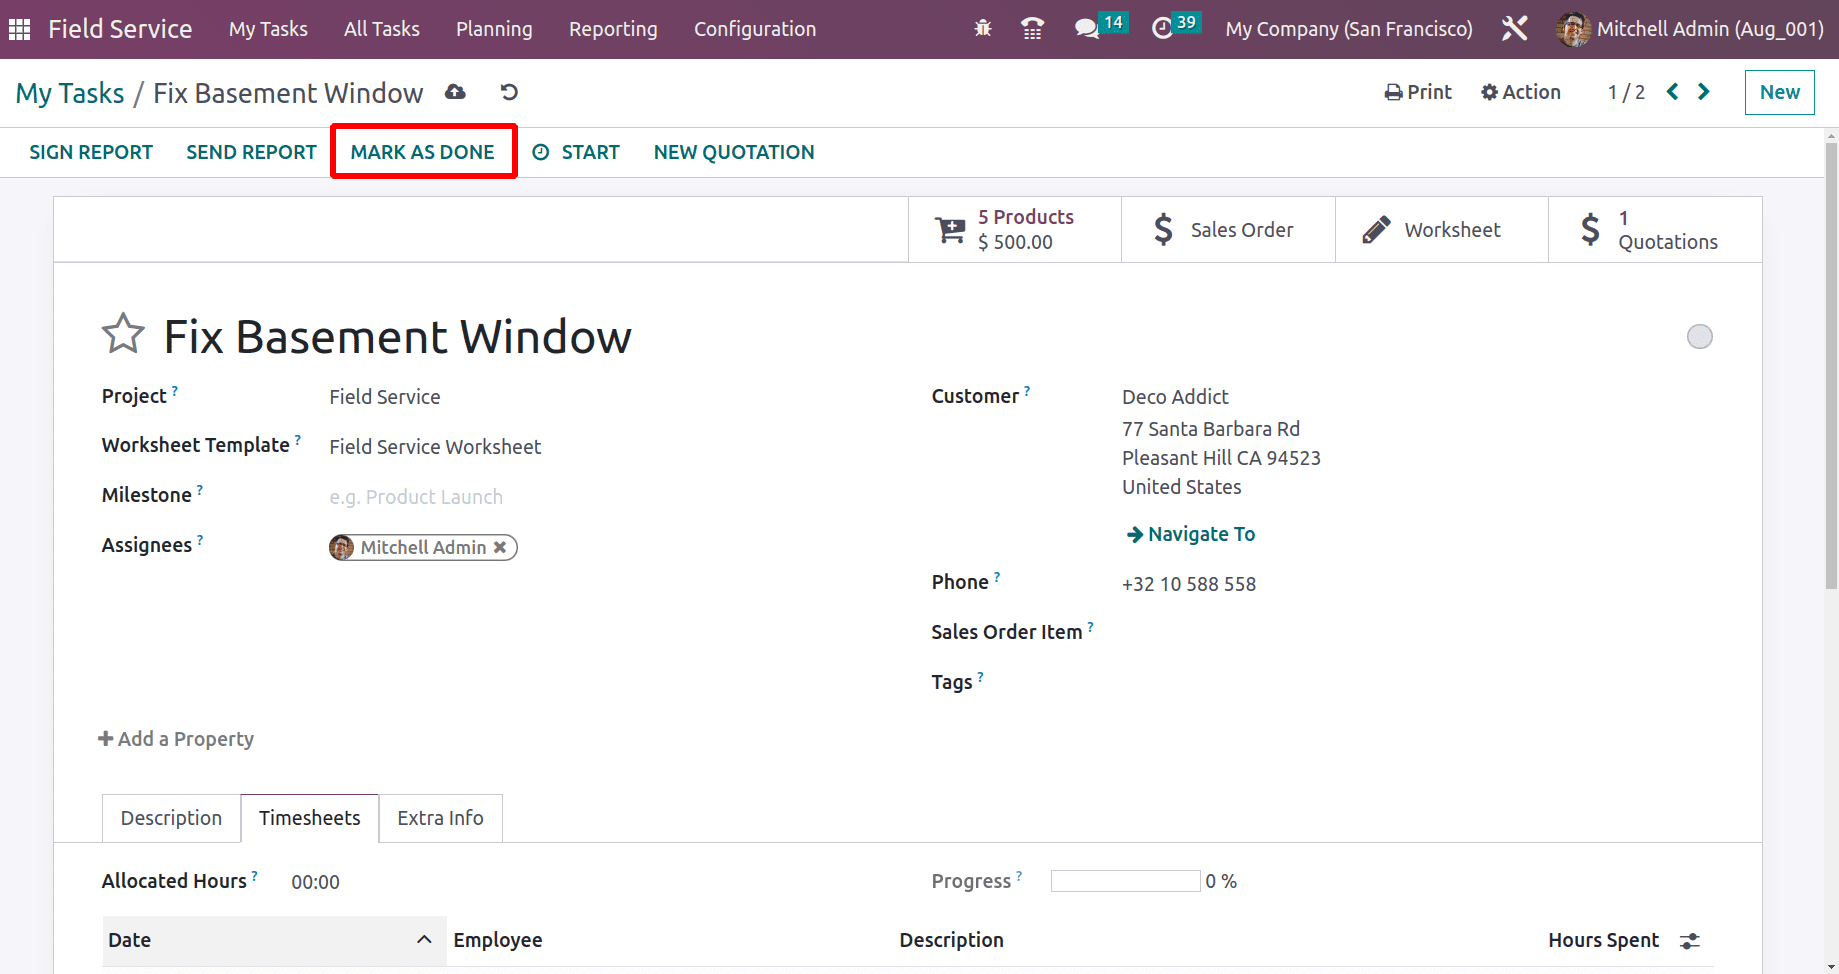
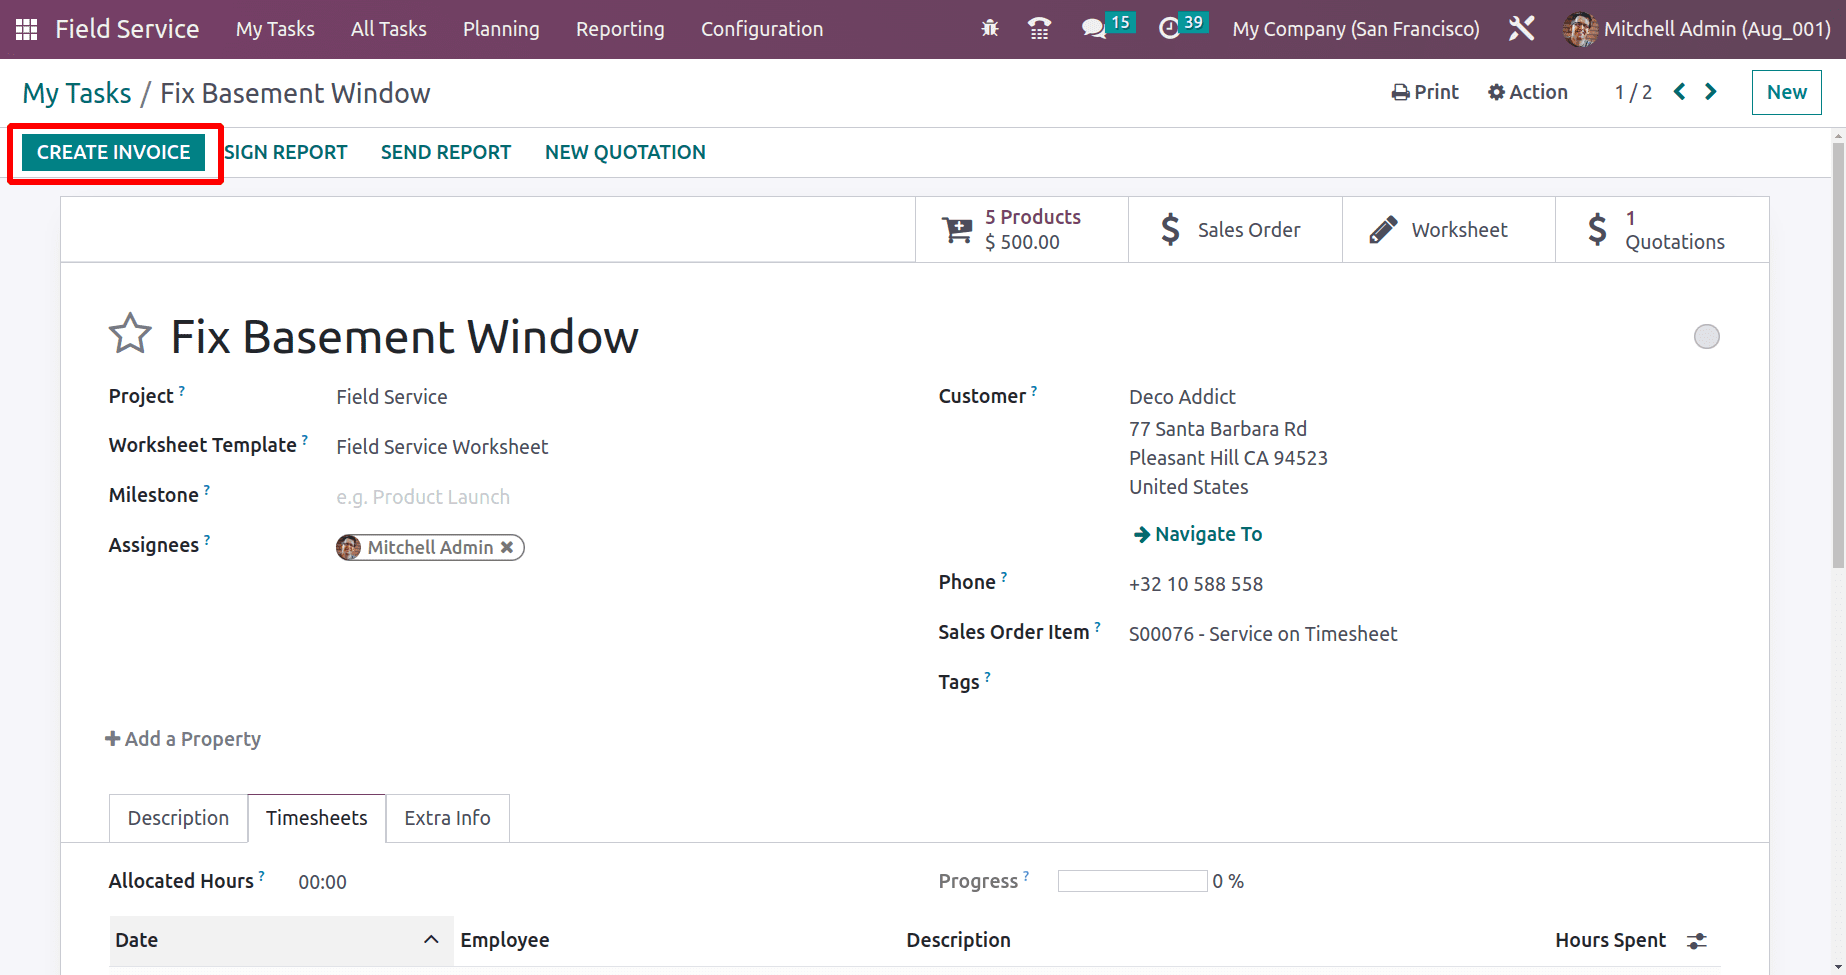
Now the task is completed here. The employee Timesheet and some materials used are needed to invoice the customer. For that, click on the CREATE INVOICE button.
A regular invoice is created. The used material and added timesheet are updated on the order line. CONFIRM the regular invoice. The invoice is created for the customer Deco Addict.
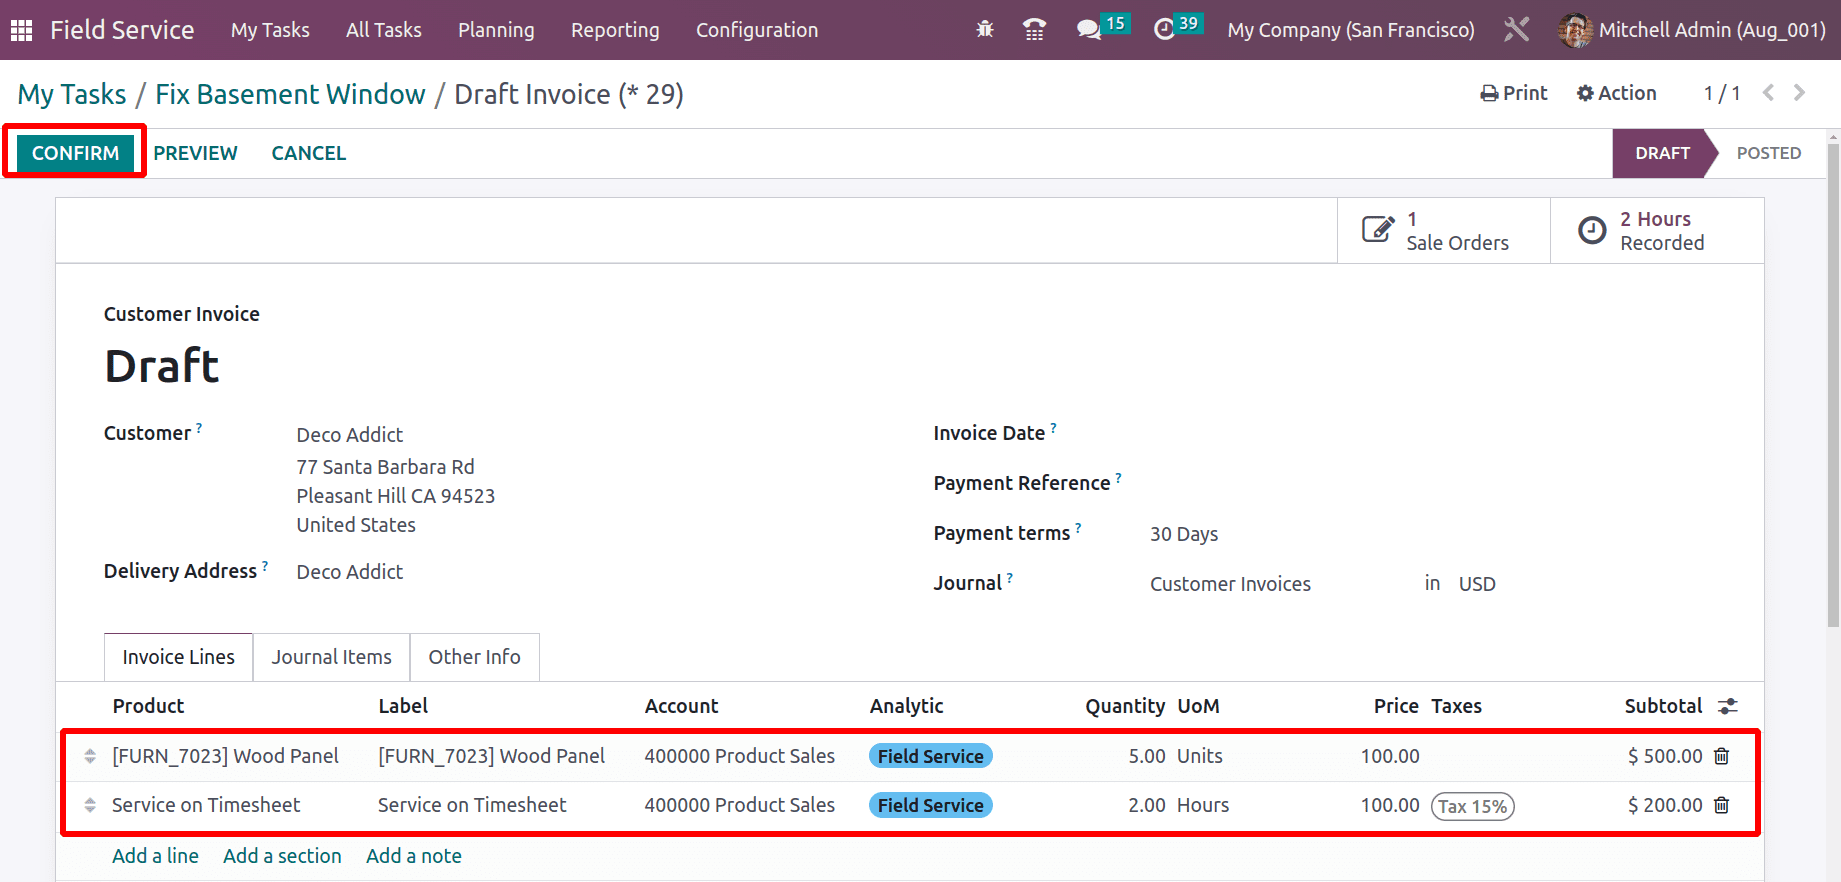
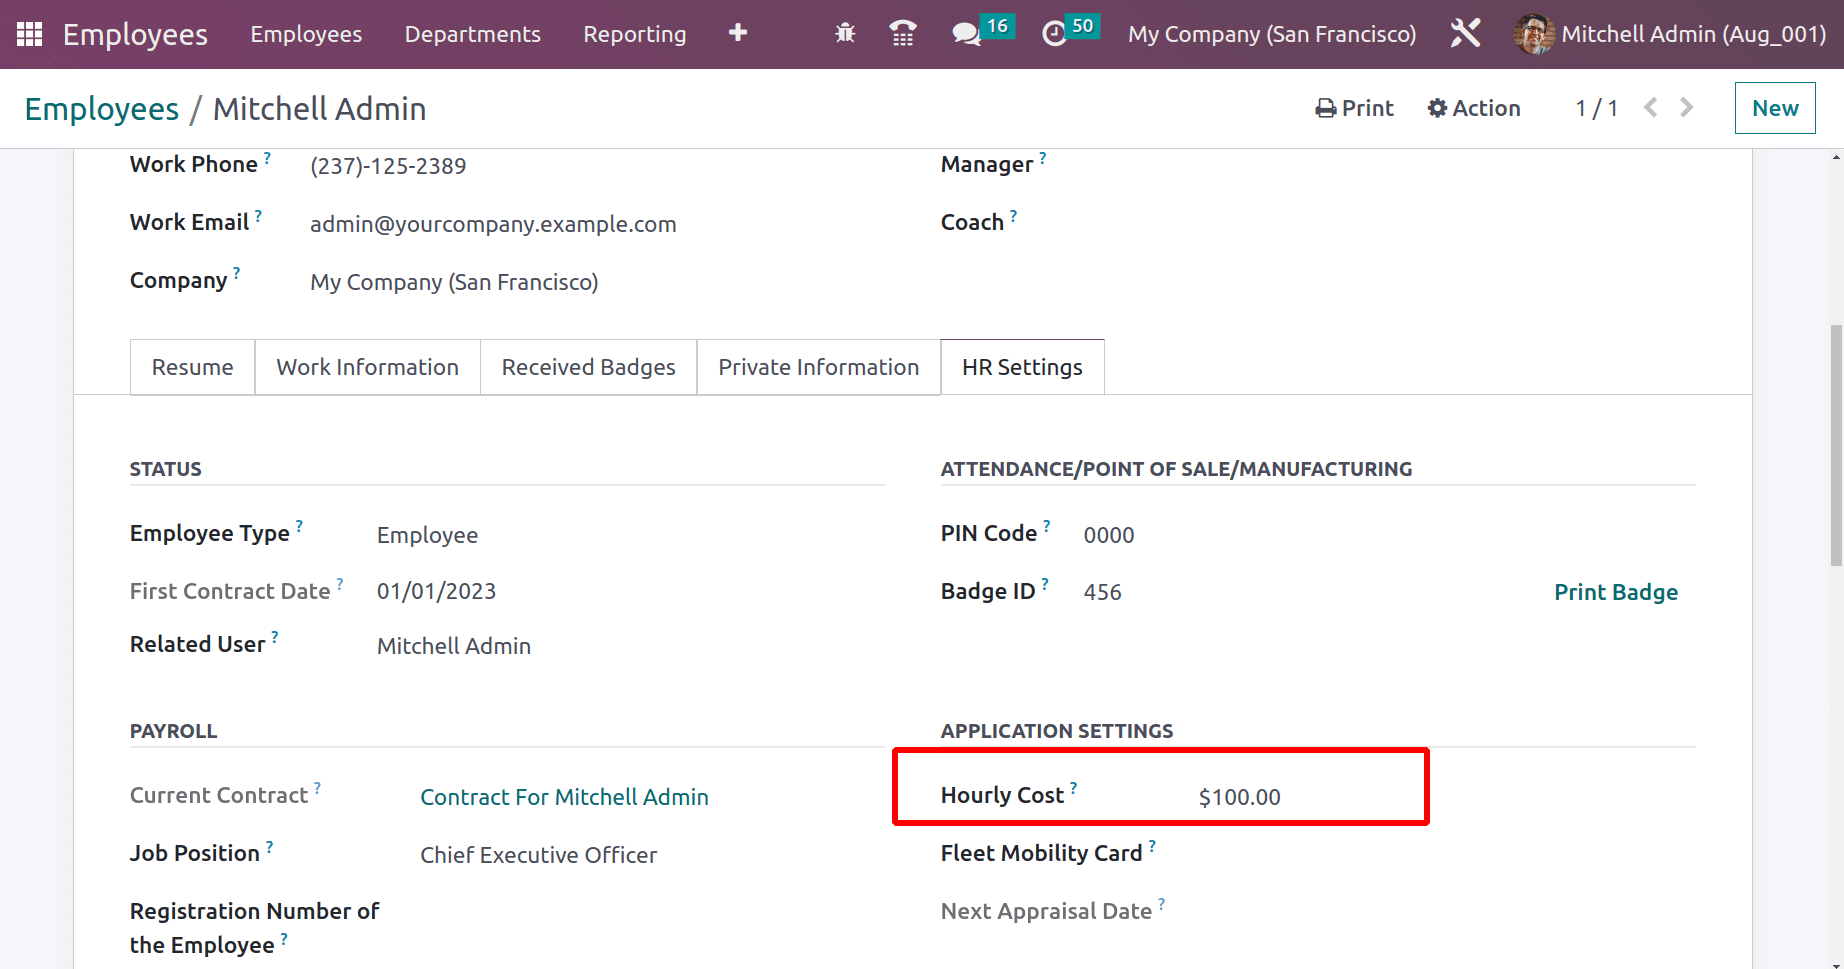
Here the price is 100$, which is actually the employee cost. The hourly cost of the employee can be set inside the employee module. So go to the employee module and open the particular employee. Here, the employee is Mitchell Admin. So inside the HR Settings tab, a field named Hourly Cost. There we can mention the hourly cost of Mitchell Admin.
Complete the payment and go back to the Task. After completing the task, the employee wants to complete the Worksheet. So click on the smart button Worksheet.
Complete the worksheet by adding proper details. Then to add the employee signature, click on the signature box.
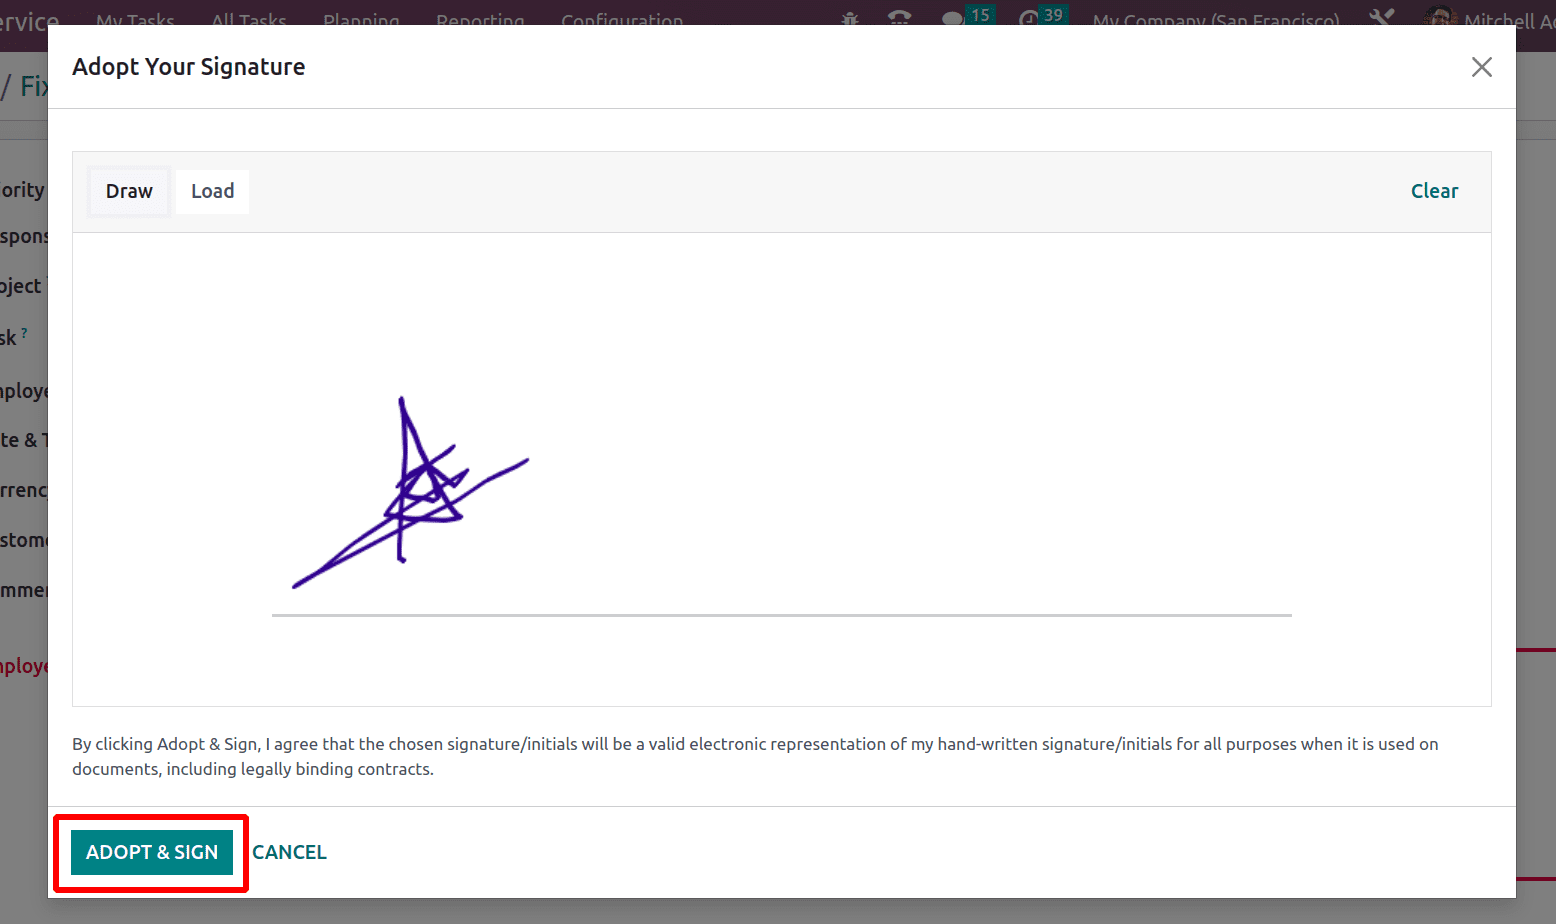
Either upload the signature or draw the signature to complete the worksheet. Then after adding the signature, click on the ADOPT & SIGN button.
Click on the save button after completing the worksheet. And go back to the task.
Now the smart tab shows that the worksheet is completed. By using the SEND REPORT button, the report can be sent to the customer.
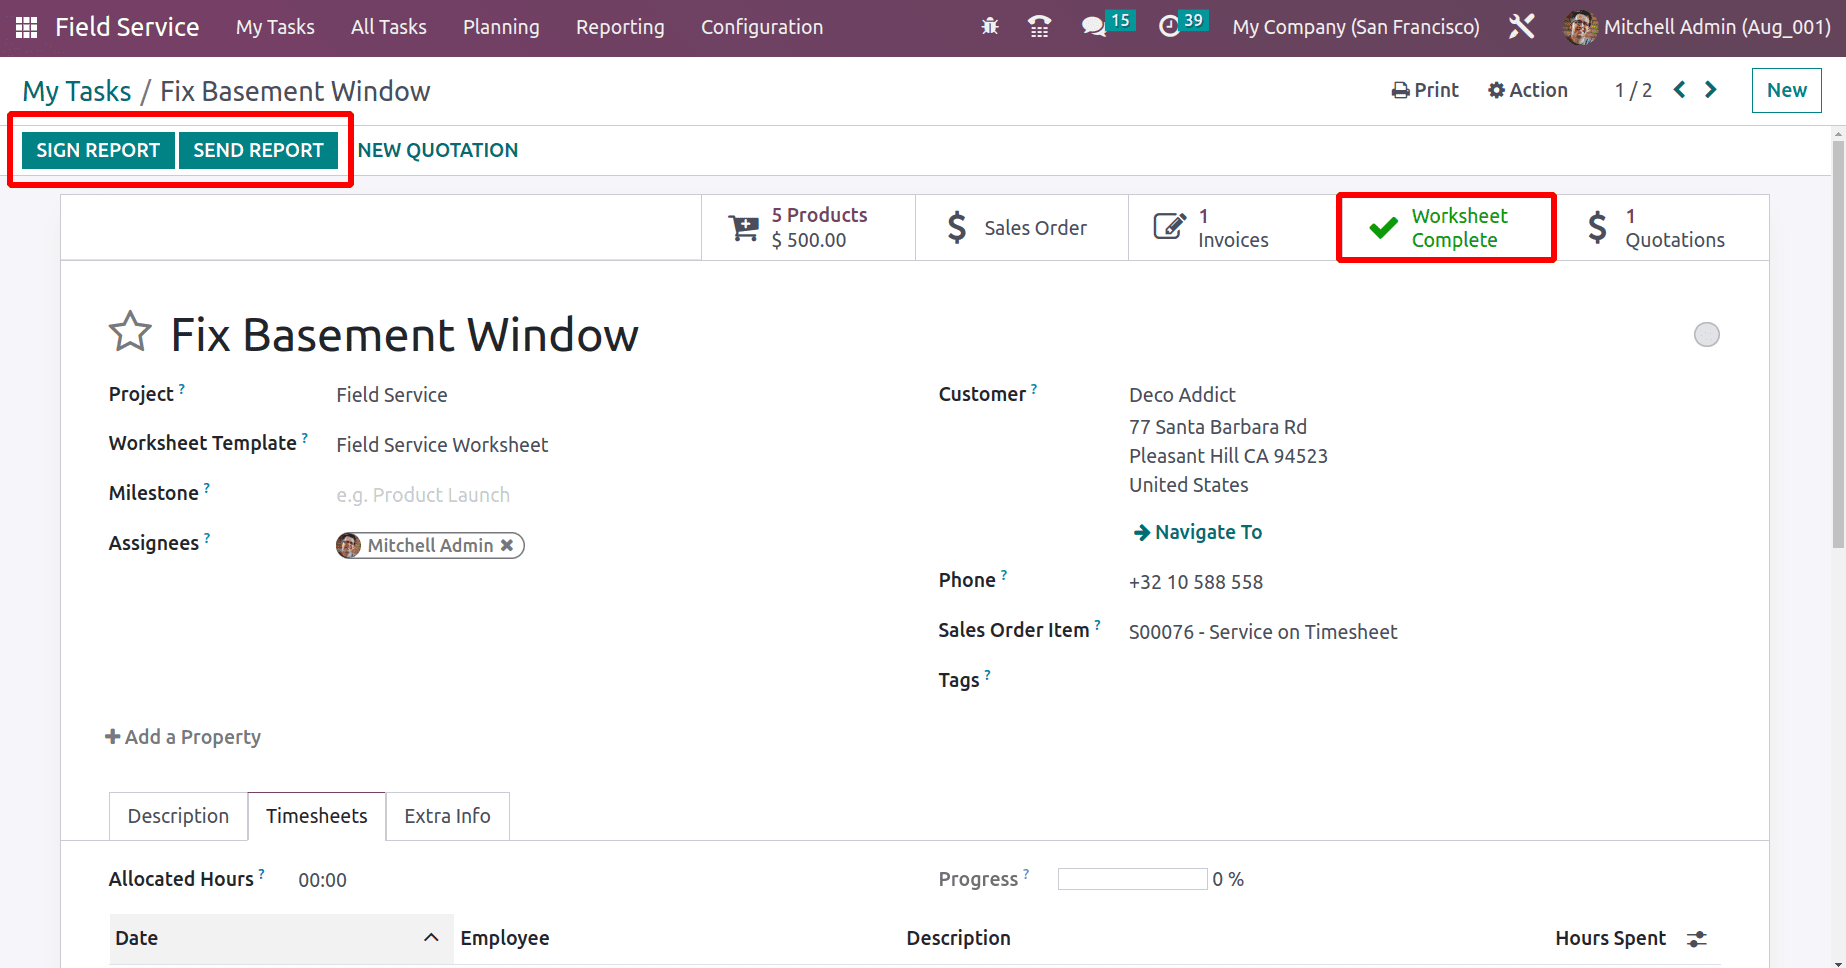
The customer can sign the report from their portal. So click on the SIGN REPORT Button.
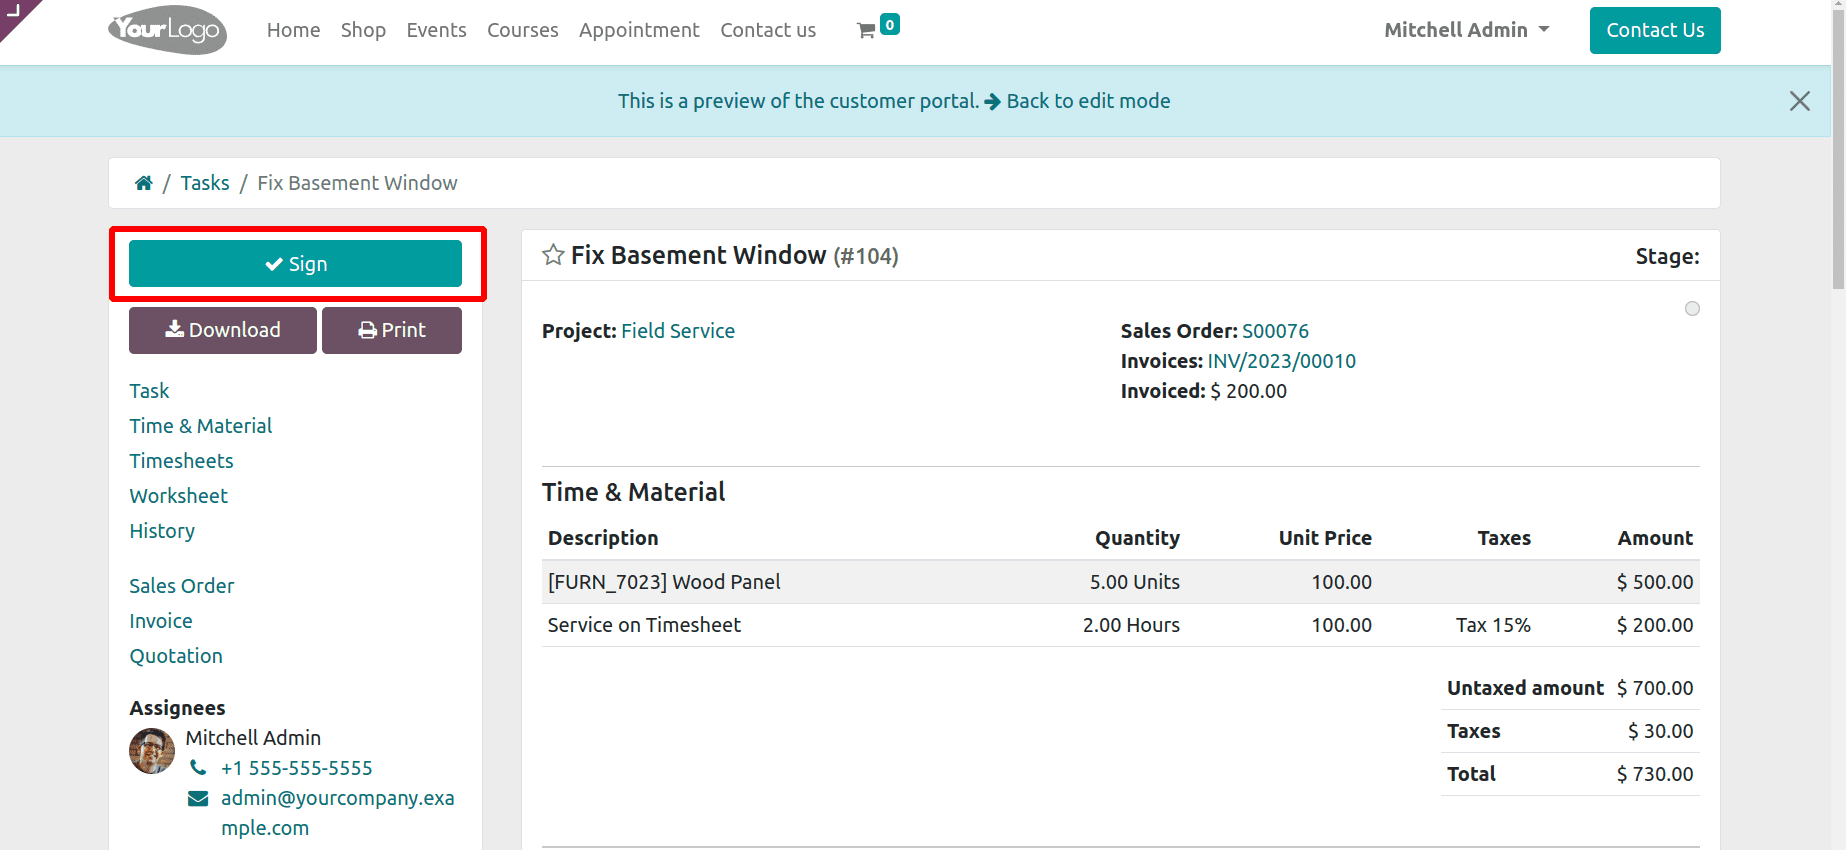
From the portal view, customers can click on the Sign button to add a signature.
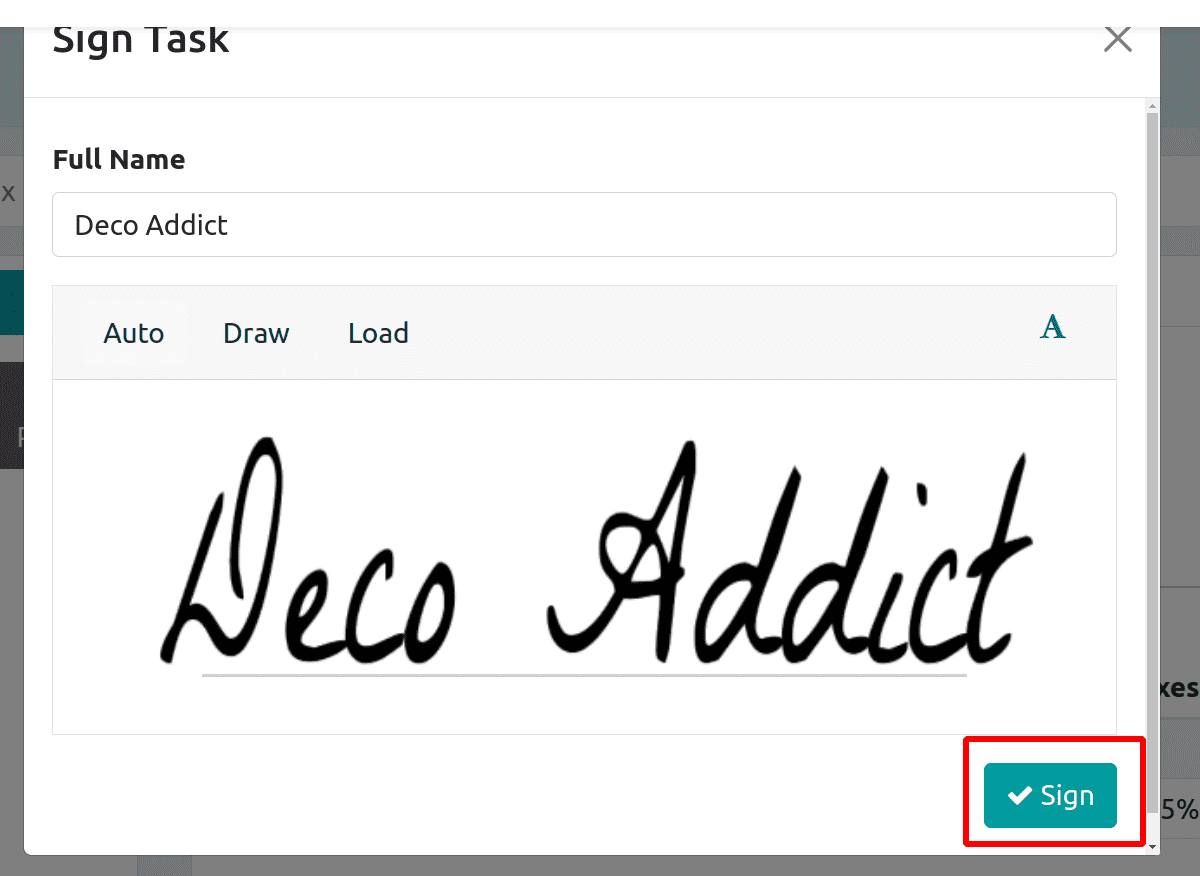
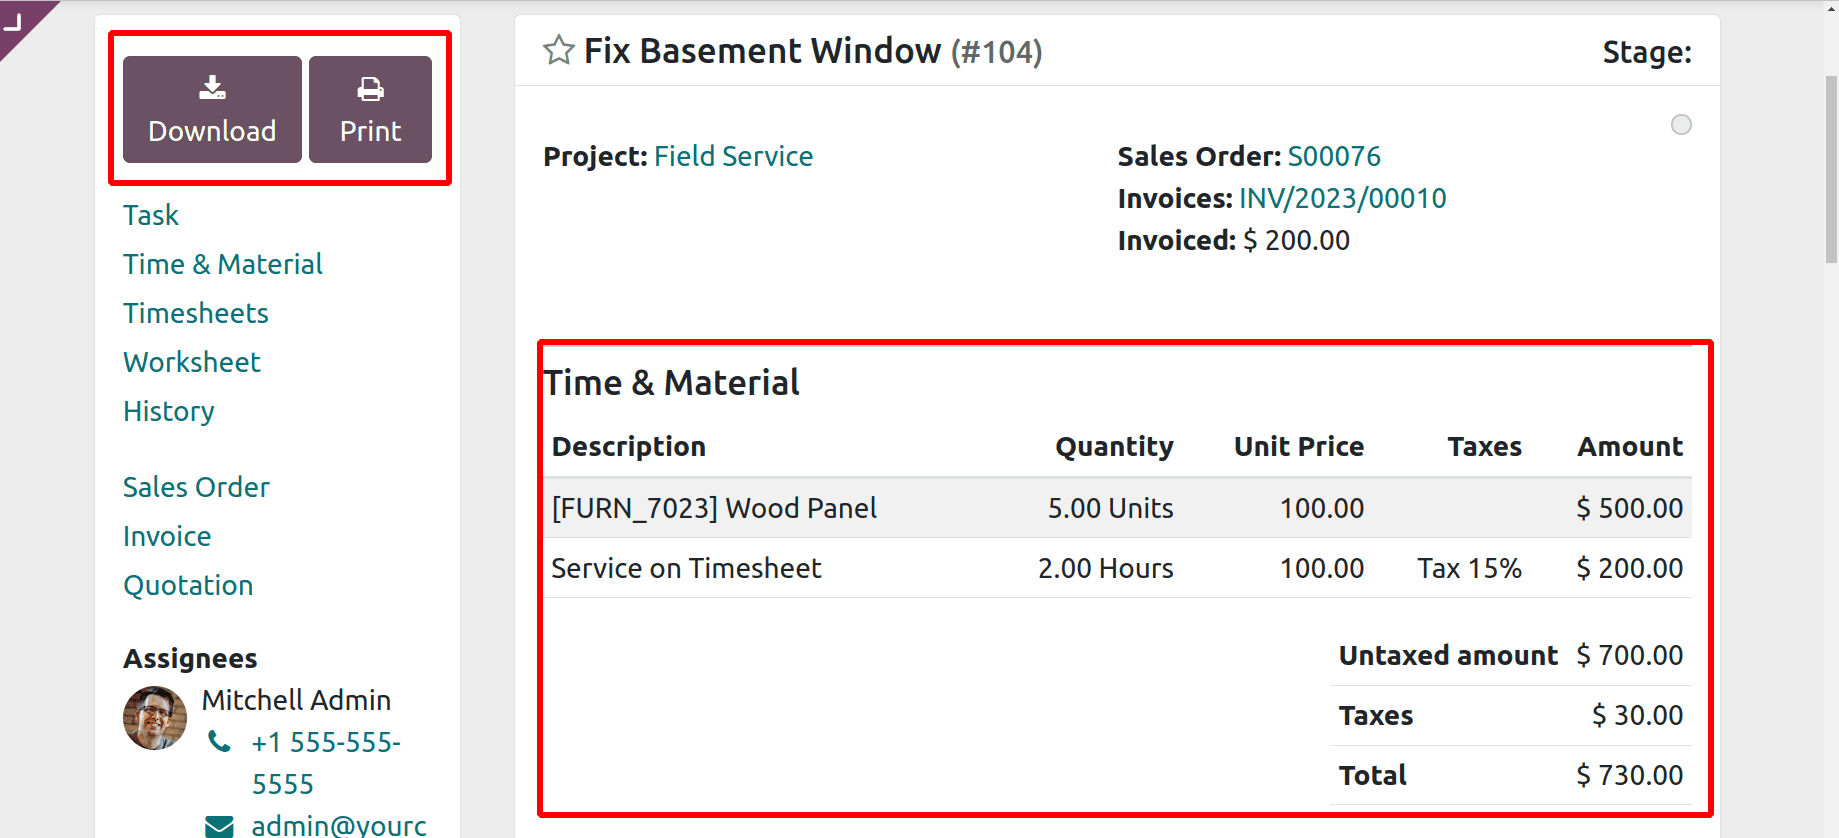
Add the signature, then complete it by clicking on the Sign button. From the portal, customers can download and print the slip. The portal view contains details like invoiced Time and materials.
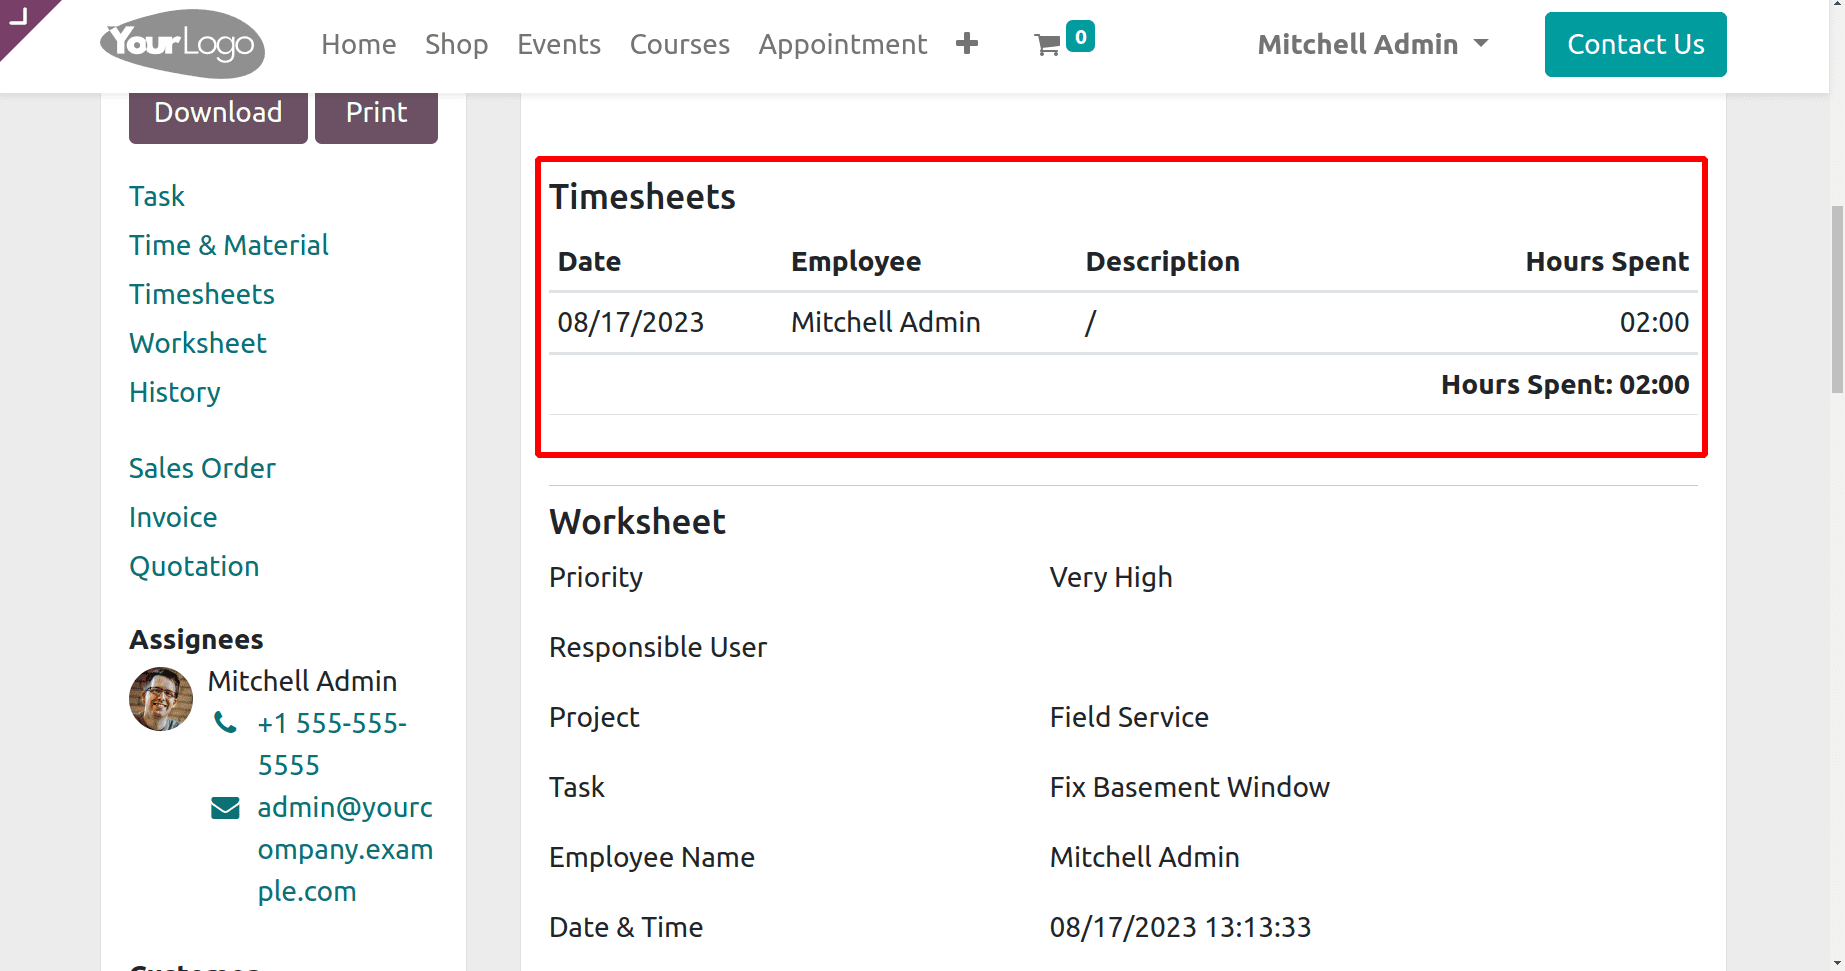
The employee timesheet was also visible there.
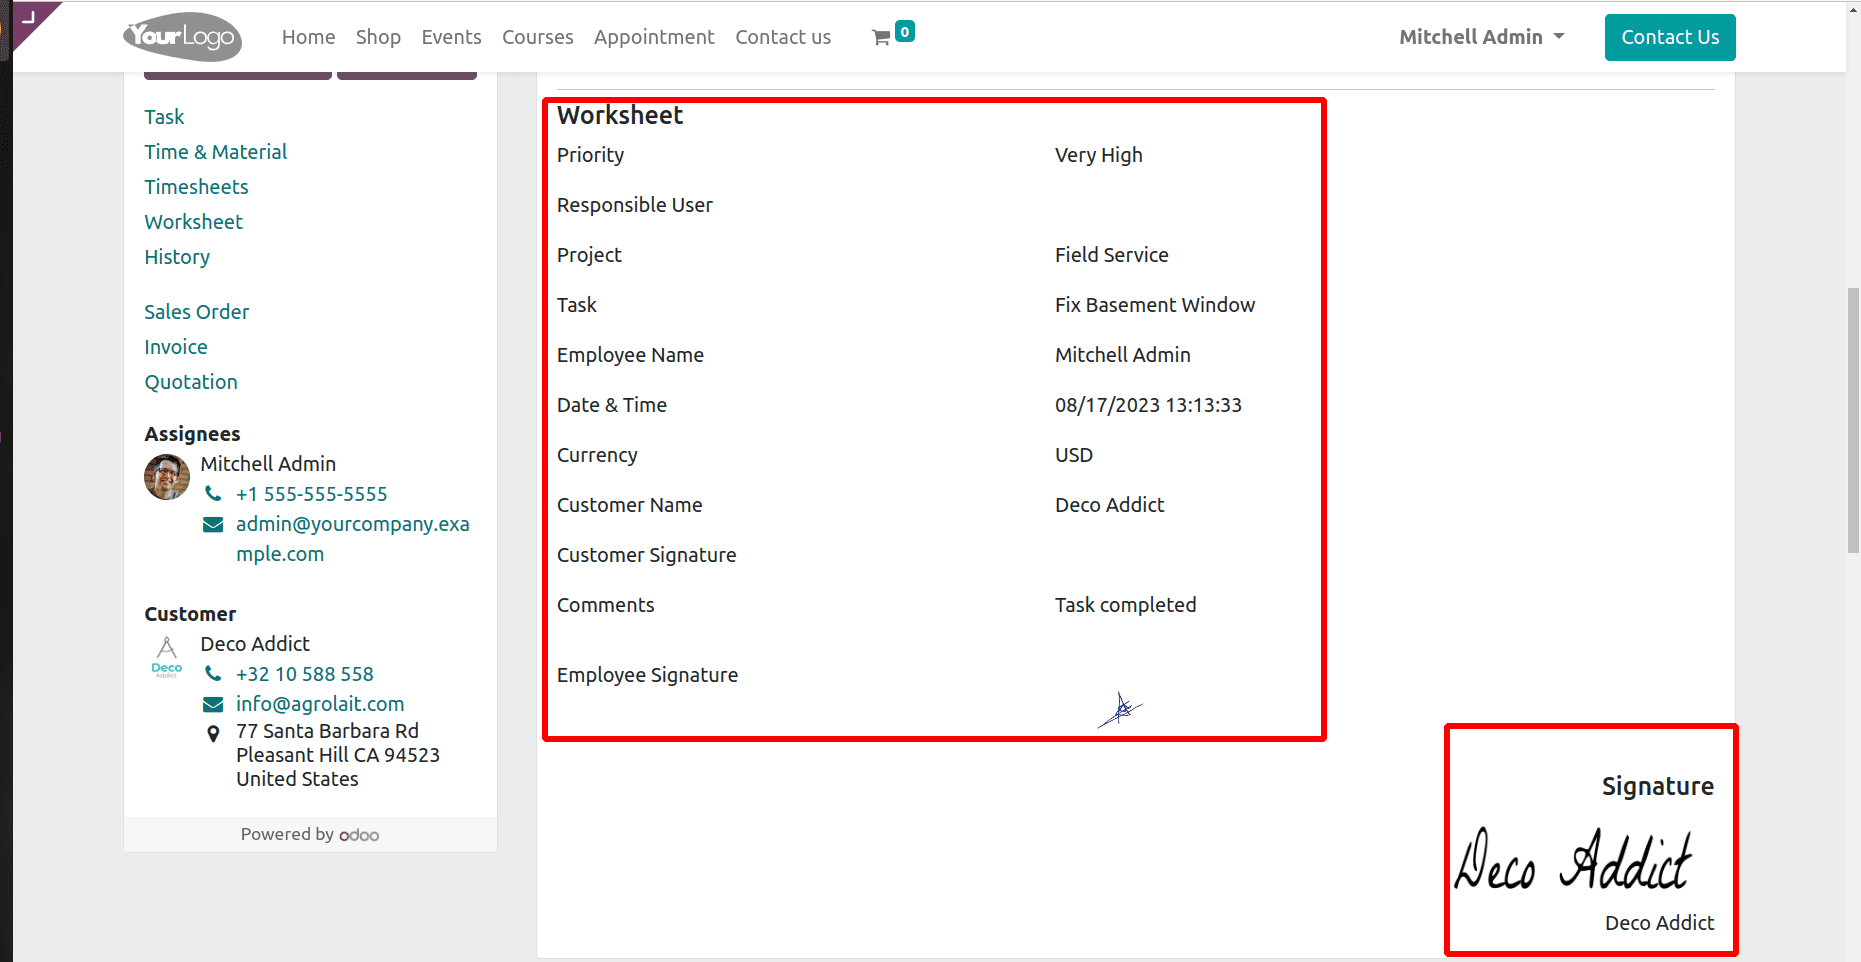
And finally, the worksheet was added, and the customer signature can be displayed inside the customer portal as well.
In conclusion, it’s very simple to manage field service tasks in Odoo 16. The complexity of handling materials and timesheets and adding worksheets will be reduced by using the Odoo 16 Field Service module.


