One of the vital parts of a manufacturing business is planning and managing Production. The organization of work centers, departments, and other activities came under the production section. It is easy to track the raw materials inside a manufacturing unit to ensure performance. The production process assists a business in working efficiently. Odoo 15 Manufacturing module is the best solution to maintain your production management. We can quickly understand the operation styles of various manufacturing industries using the Odoo 15 database.
This blog enables you to grasp managing production with the assistance of the Odoo 15 Manufacturing module.
Users can manage work orders, bills of materials, manufacturing orders, work centers, and tasks using the Odoo 15 Manufacturing module. You need to plan a work center and work order by ensuring a systematic production. Now, let’s view how to manage Production using Odoo 15 Manufacturing module.
To Manage Production with Odoo 15
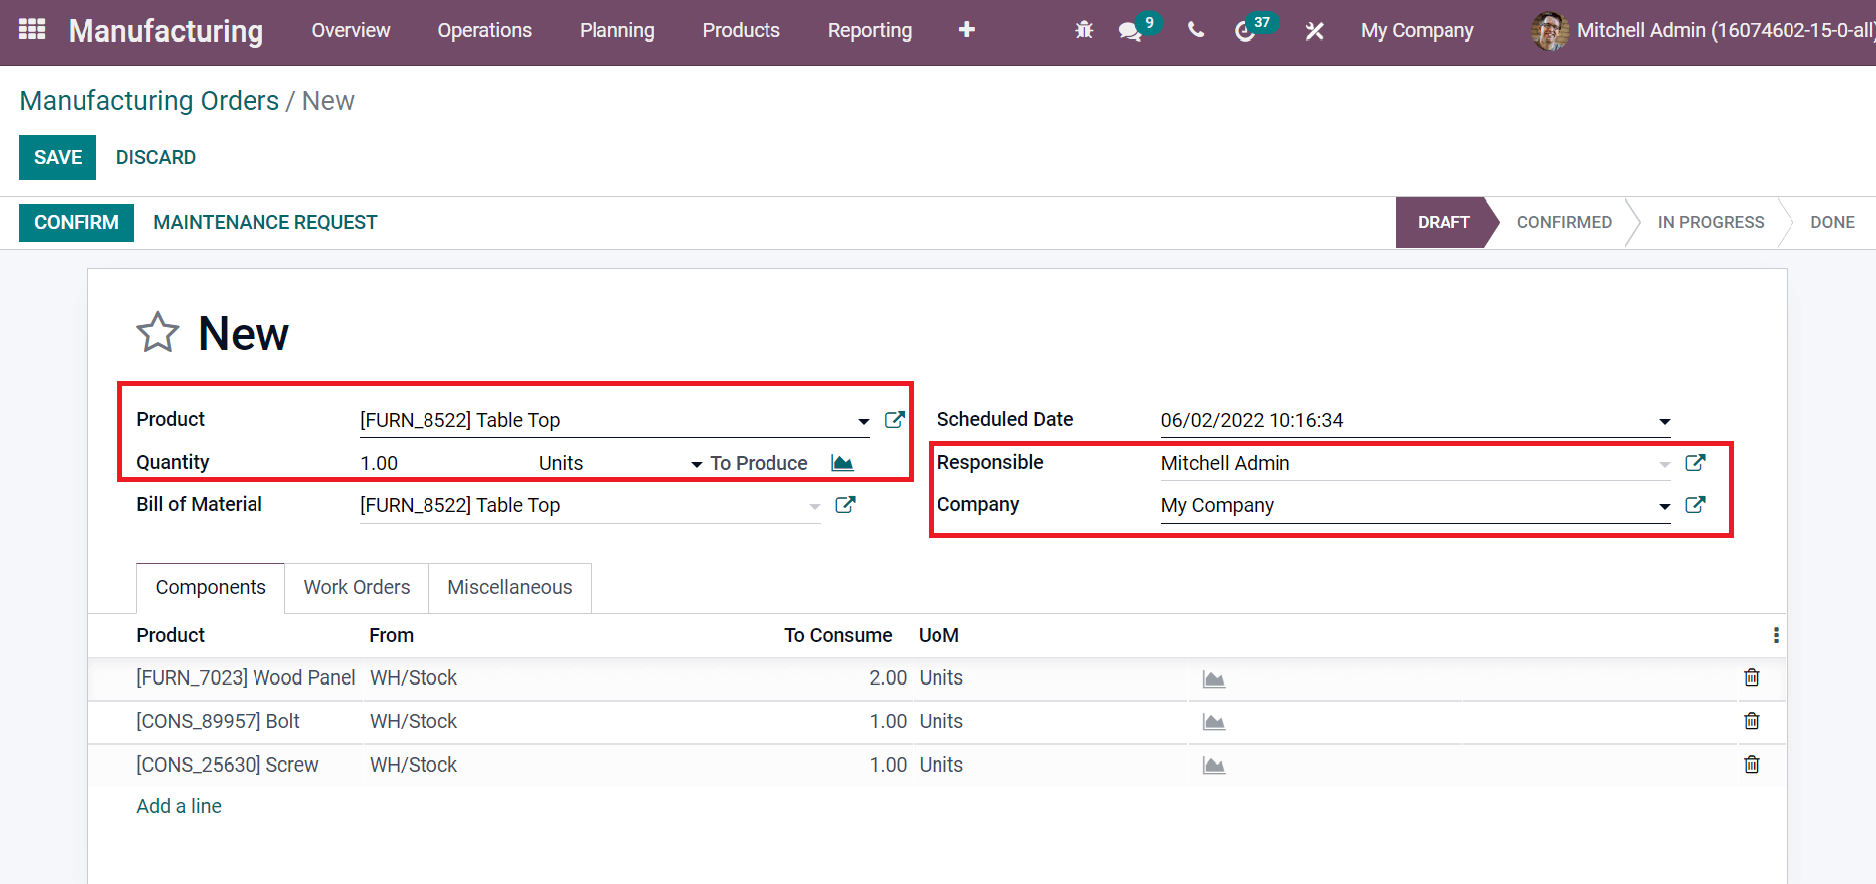
The production procedures in a manufacturing industry occur after completing a manufacturing order. So, first, we need to develop a manufacturing order for a product. Select the Manufacturing Orders menu in the Operation tab. Next, we can set a manufacturing order for a Table Top. Click on the CREATE icon in the Manufacturing Orders window to generate a new order. Enter Table Top in the Product field and Quantity in Units in the new window. Later, you can pick up the Responsible person and Company as depicted in the screenshot below.
Below the Components tab, the user can apply the products needed to manufacture the Table Top by selecting the Add a line option. We added the components such as Wood Panel, Screw, and Bolt to manufacture the Table Top, as denoted in the screenshot below.
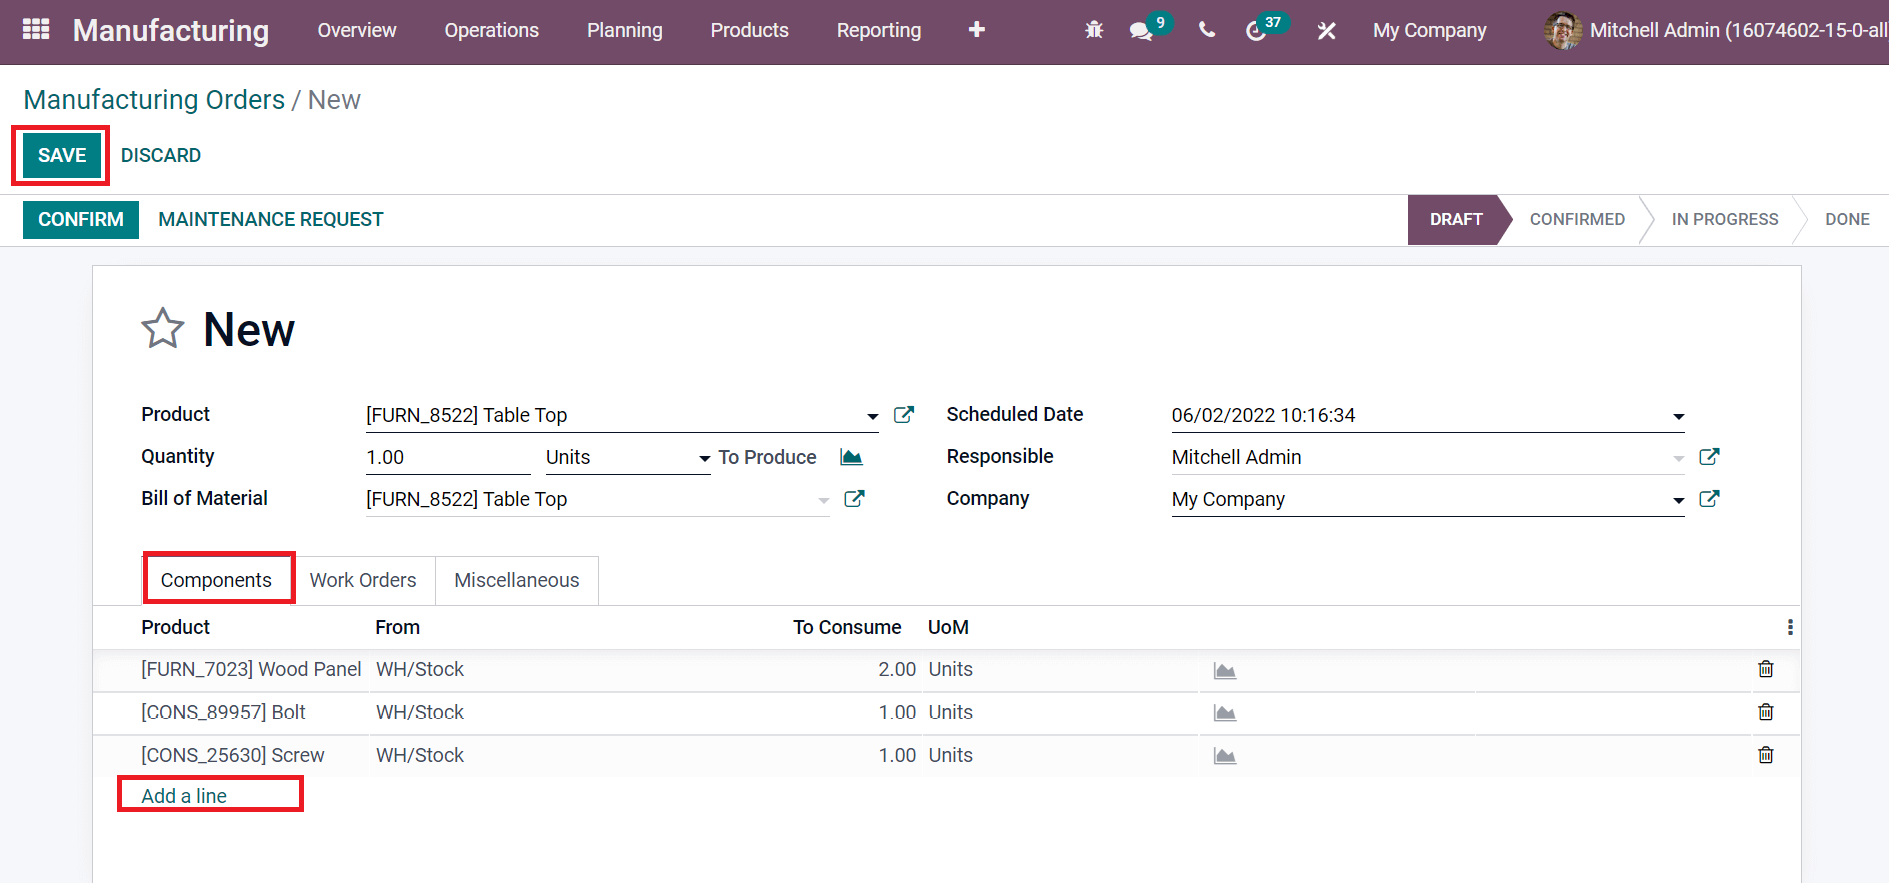
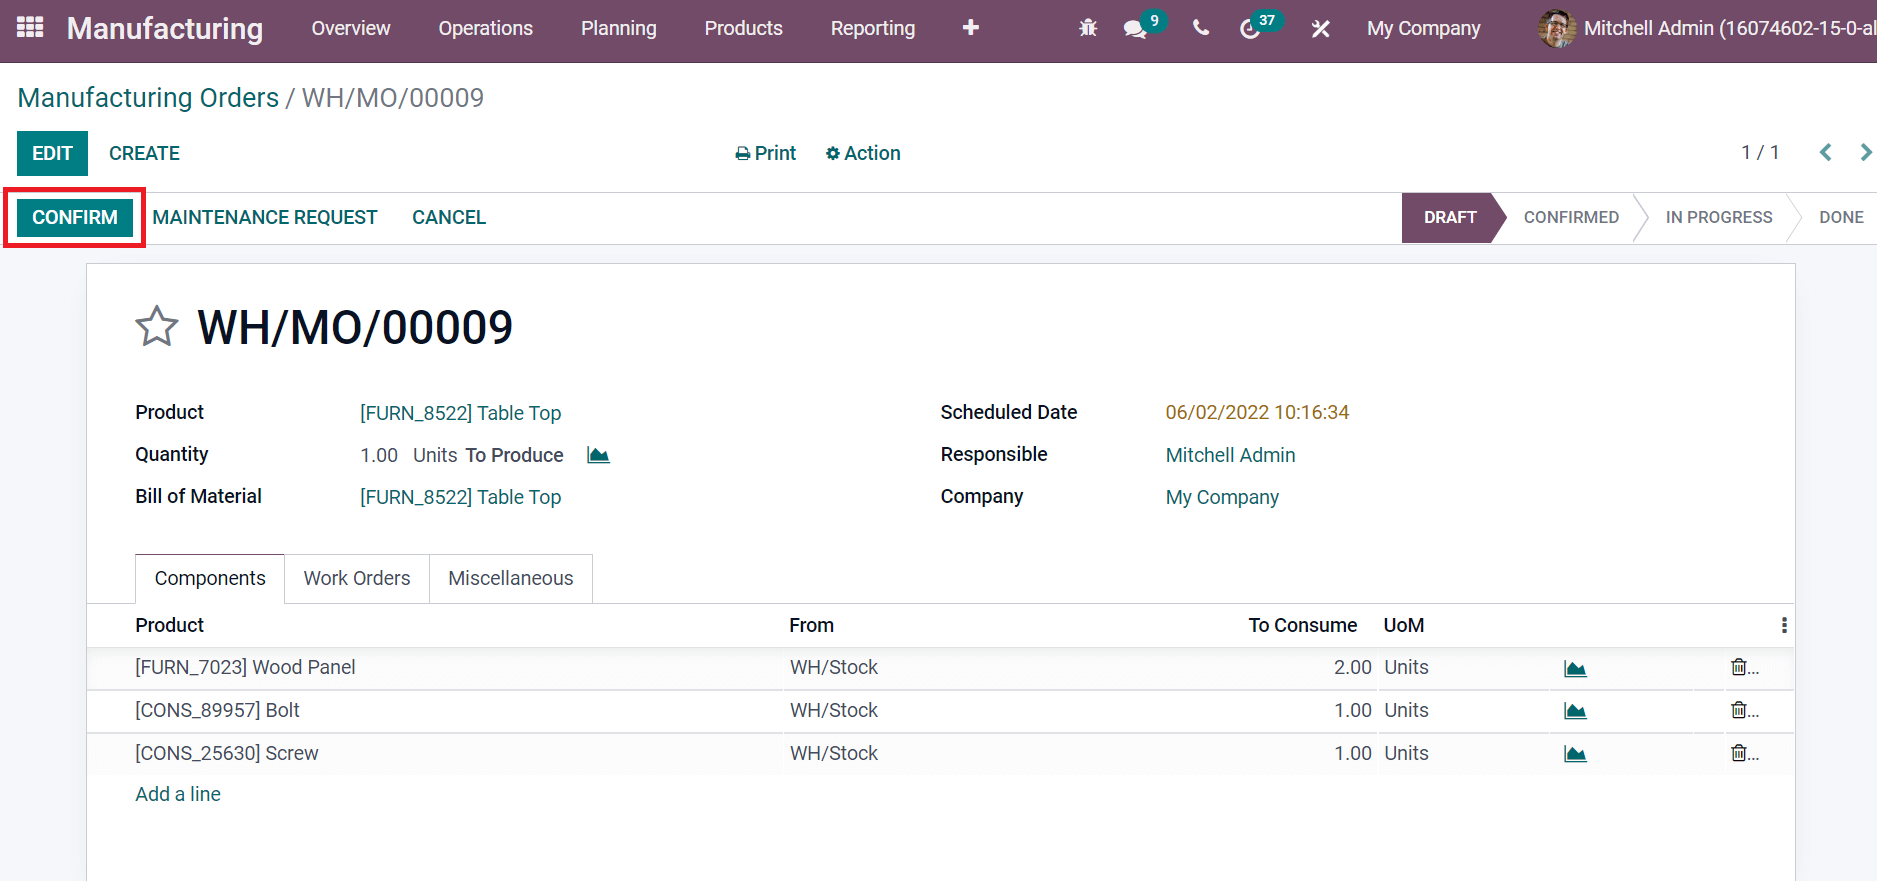
Choose the SAVE button after entering all data regarding Table Top. We can approve the order by clicking on CONFIRM icon as mentioned in the screenshot below.
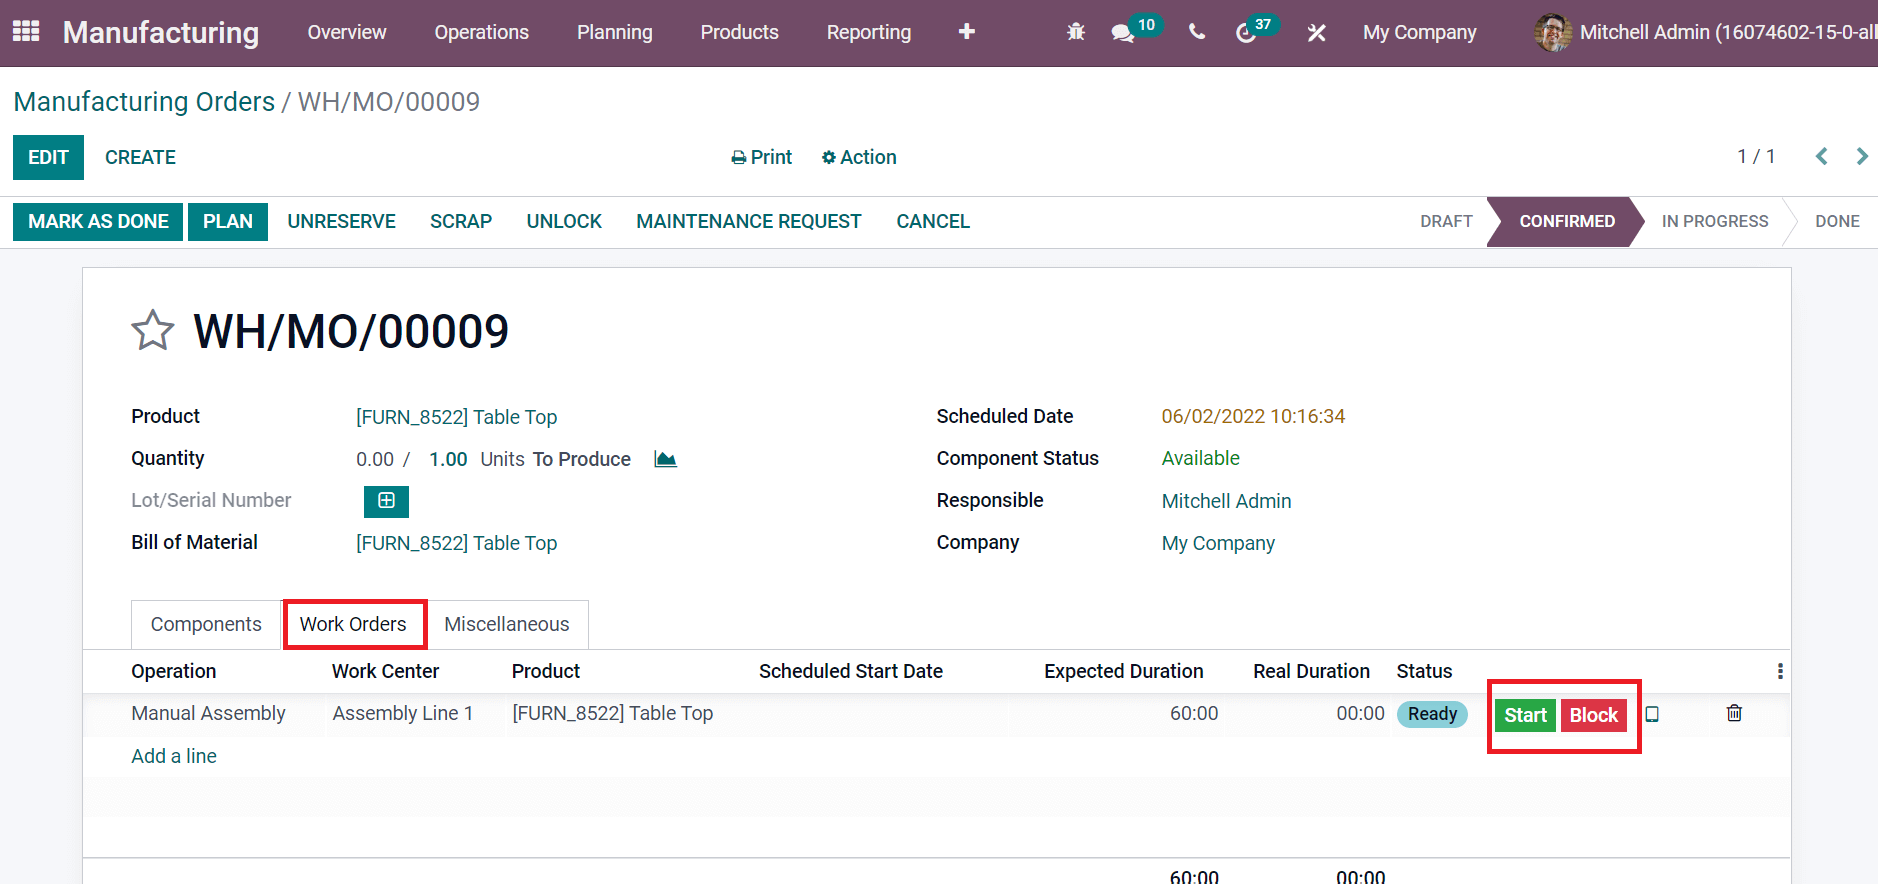
Inside the Work Orders tab, you can view your work center details for manufacturing the Table Top. The Start and Block buttons assist in managing the Production of your commodity, as specified in the screenshot below.
We can see a change in status after clicking on the Start button and it changes from confirmed to In progress stage. In addition, you can click a Pause icon to pause the production steps, as represented in the screenshot below.
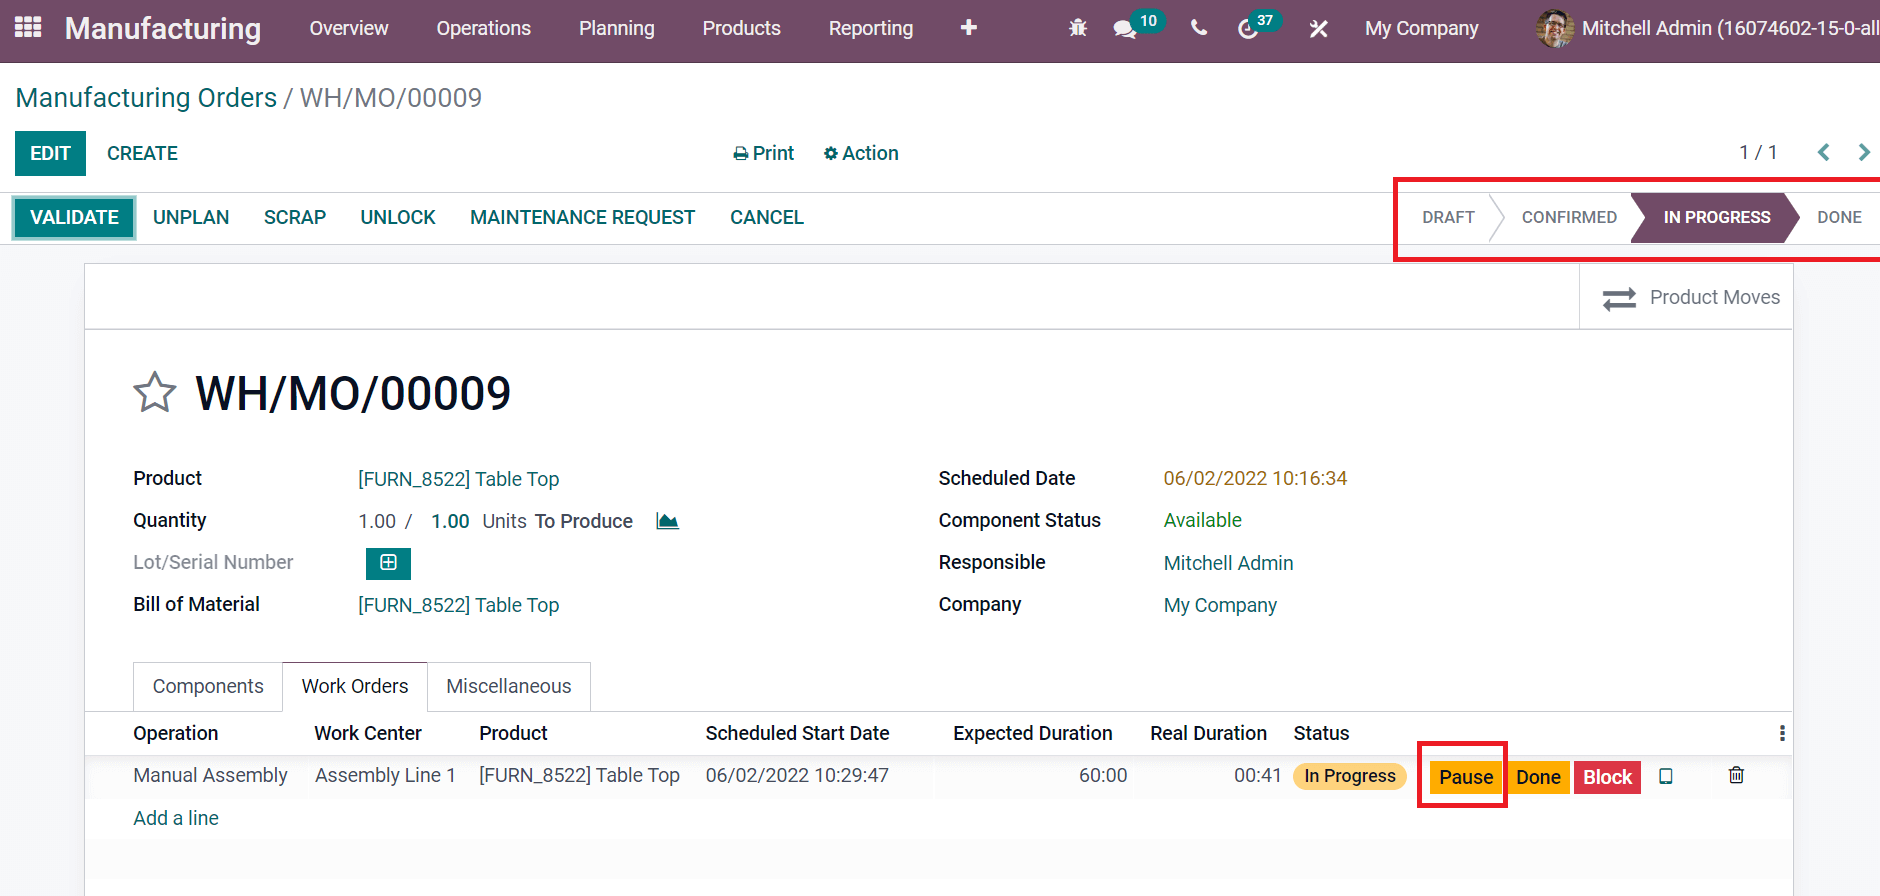
After completing the Production, you can click on Done and stop the Production using the Block icon. The done icon is shown in yellow color, and the Block button depicts in red color before the users. We can find all data related to the production item by choosing the tablet icon near the Block button, as portrayed in the screenshot below.
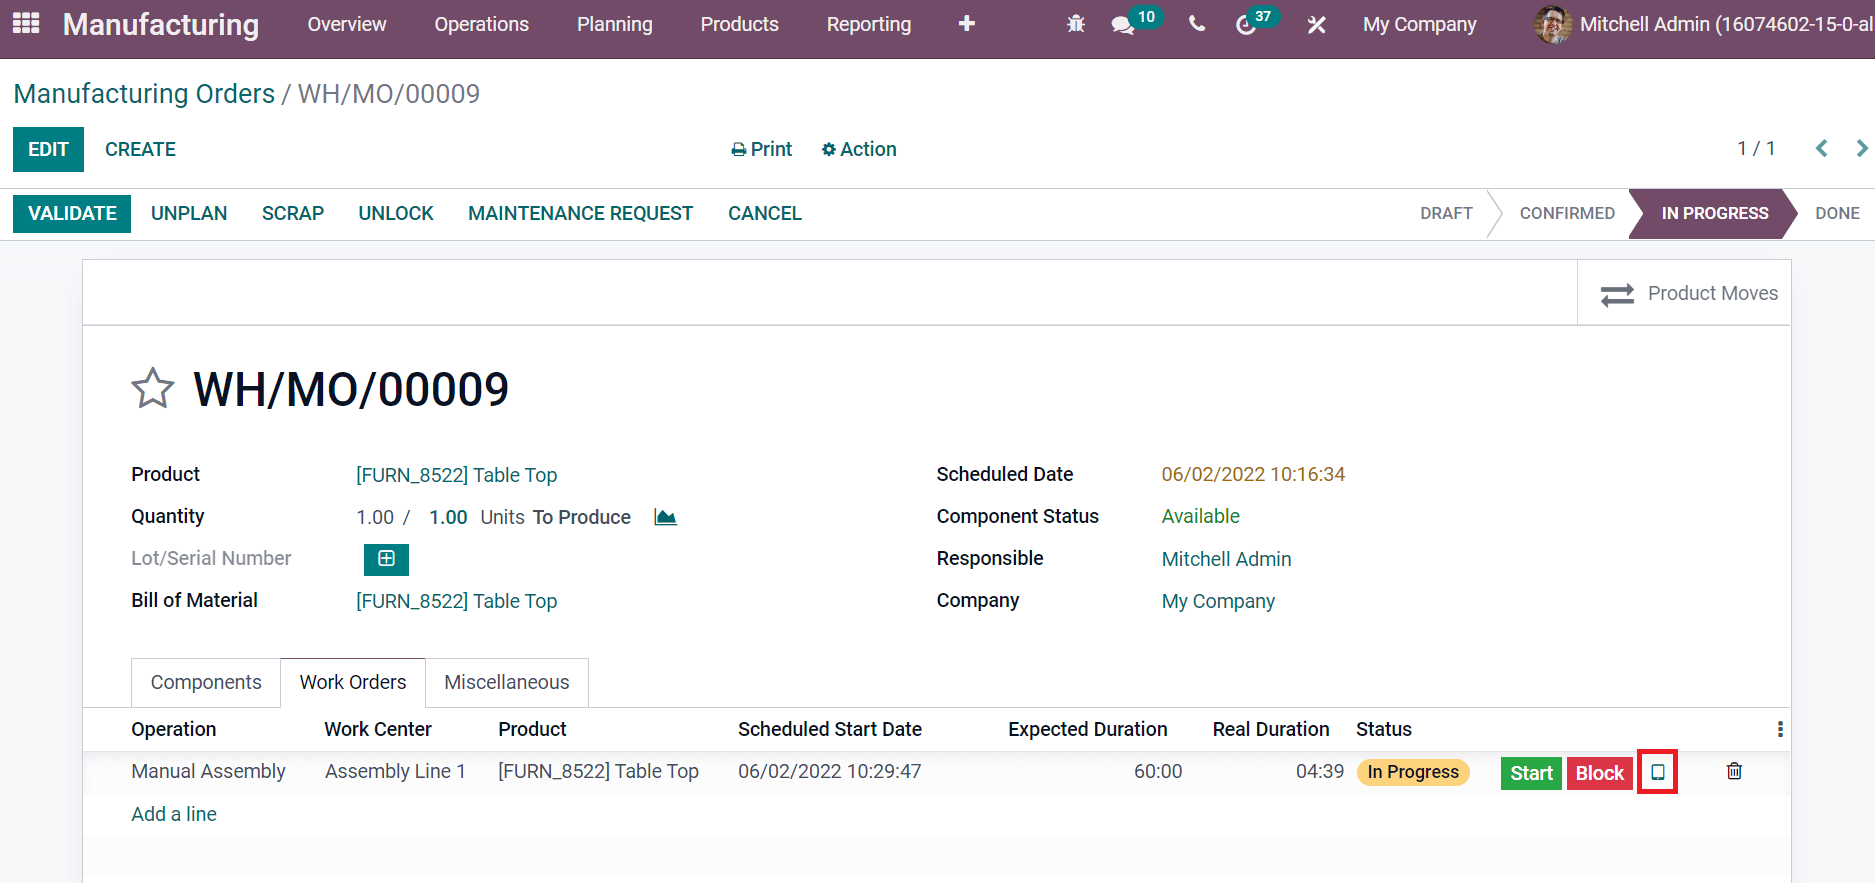
On the new page, users can see the worksheet on a Table Top and click on the drop-down menu at the left end, as depicted in the screenshot below.
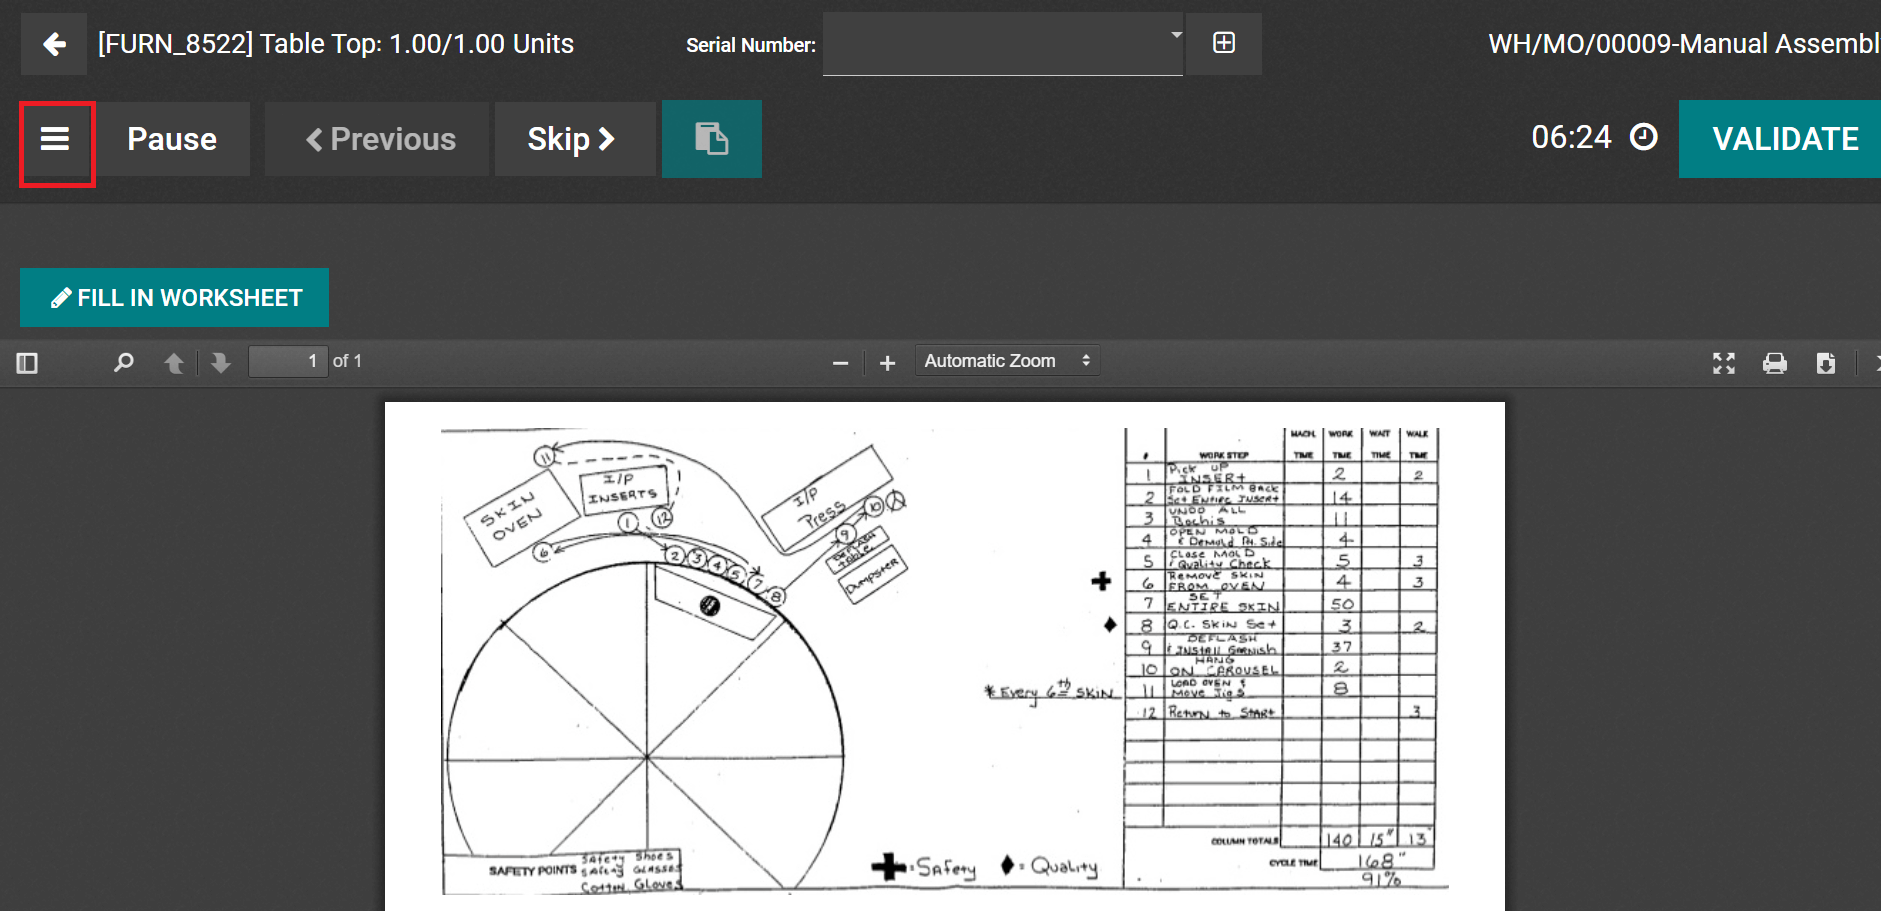
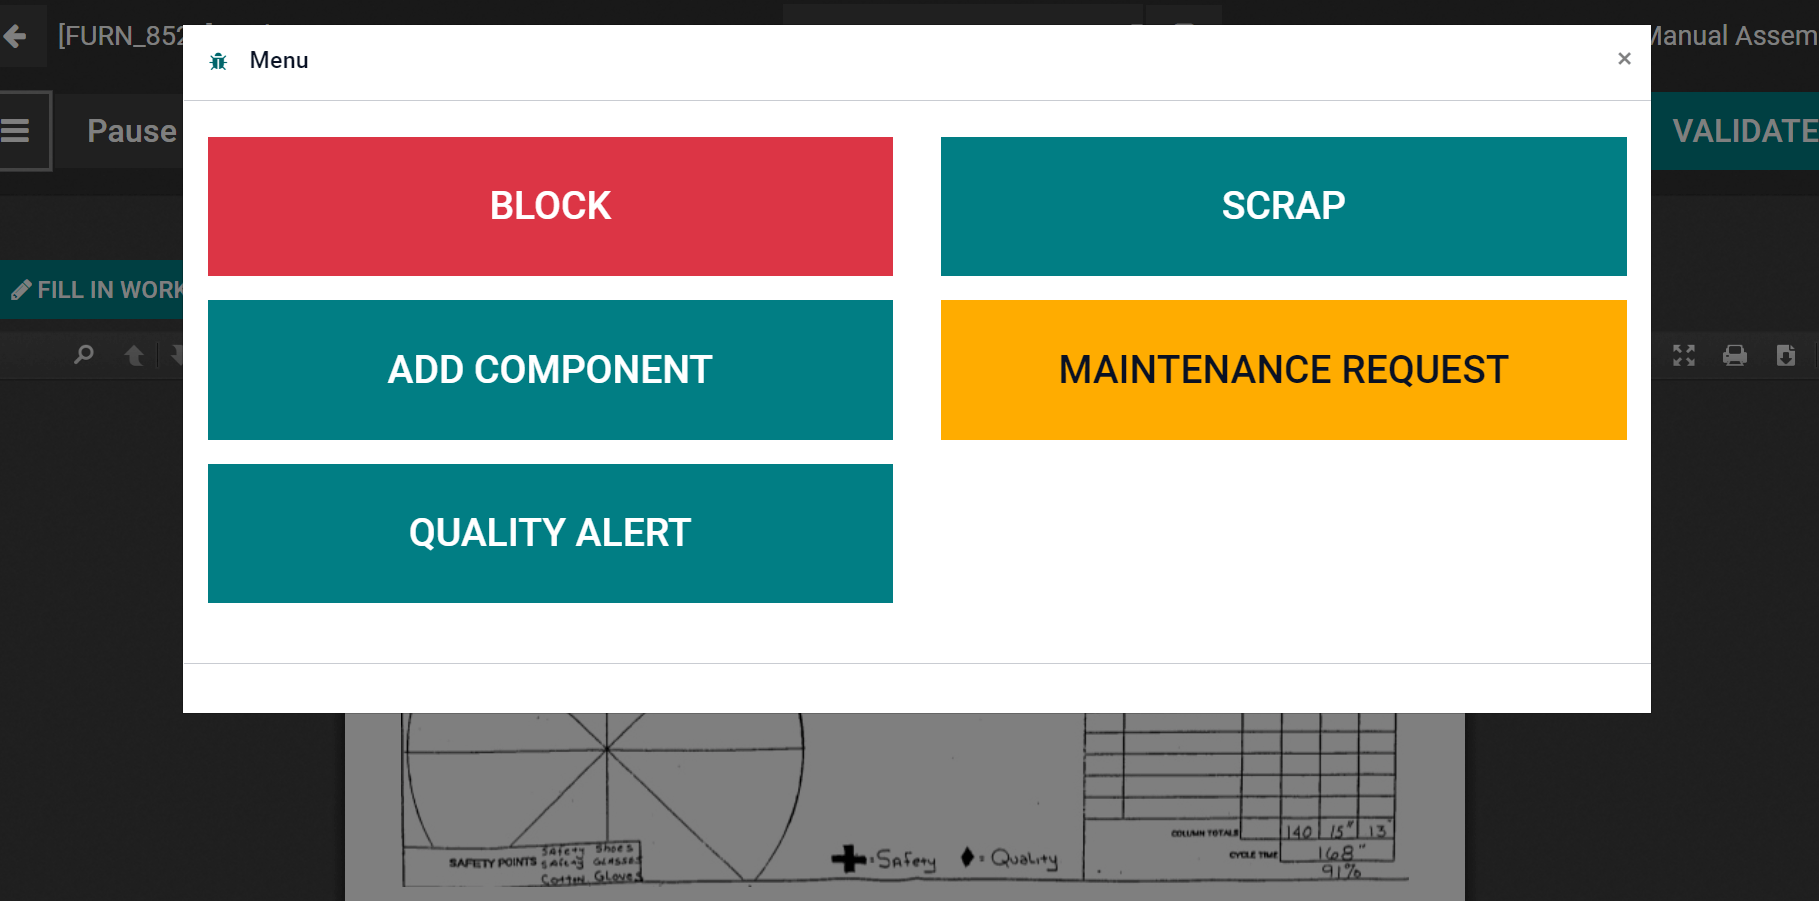
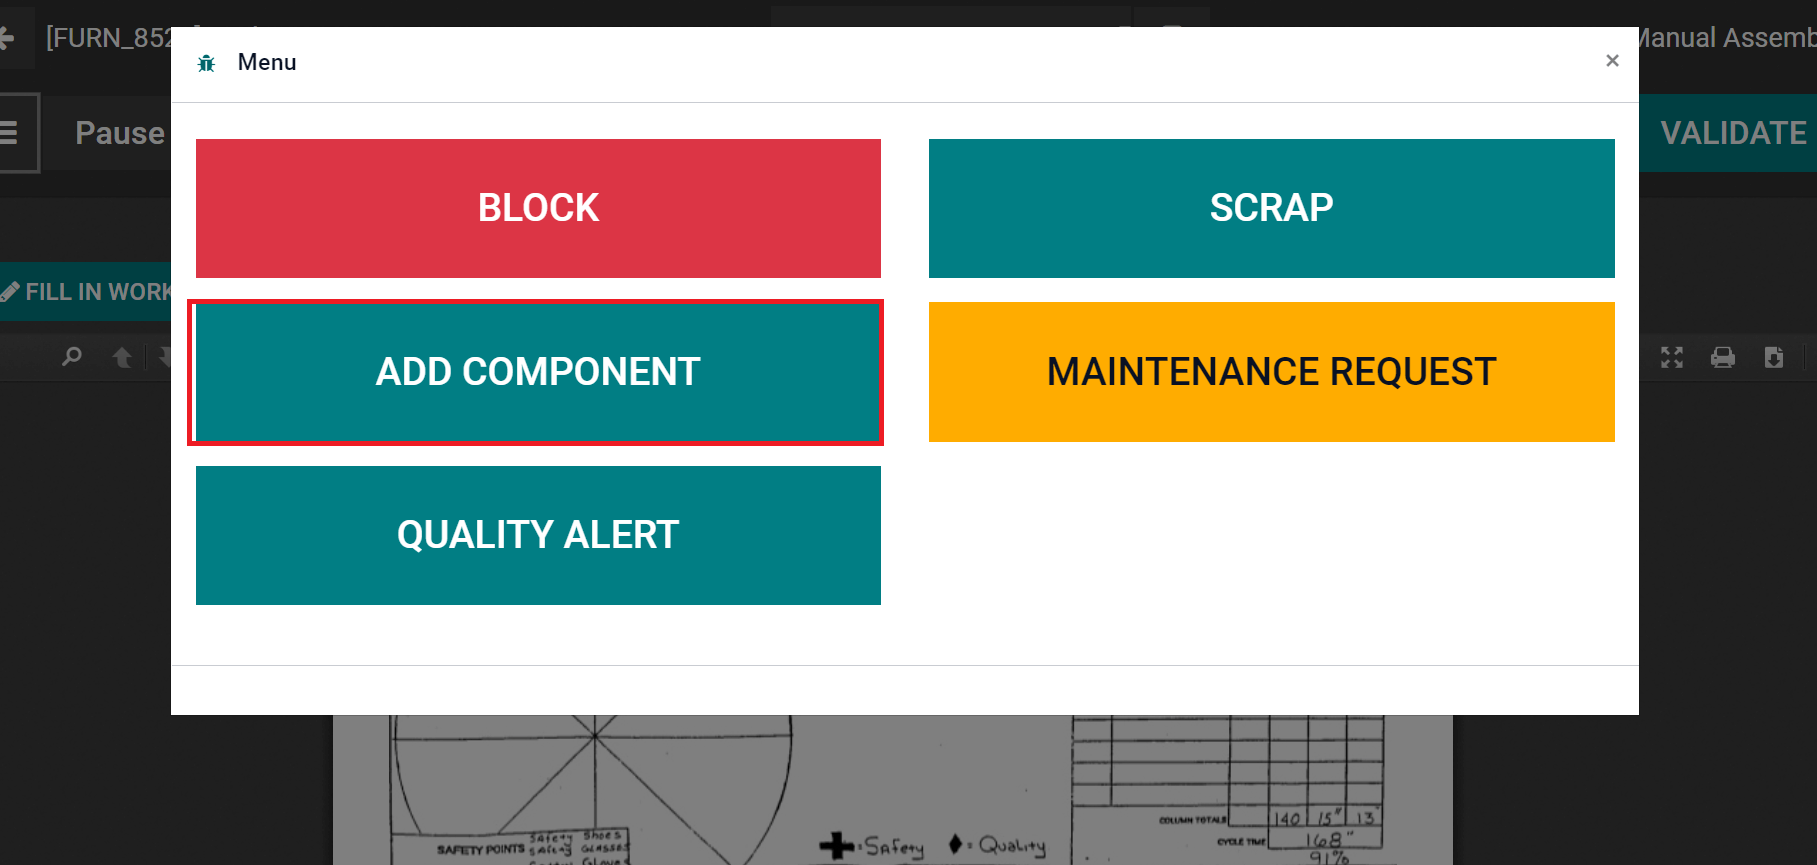
By clicking on the three vertical lines, you can view various options such as BLOCK, QUALITY ALERT, SCRAP, ADD COMPONENT, and MAINTENANCE REQUEST to manage the material’s Production shown in the screenshot below.
Select the QUALITY ALERT icon to set a new alert for your product. A new page opens before you by clicking on a QUALITY ALERT icon. You can add the Title as Table Top Alert. Other details include Team, Product, Responsible person, and Product Variant automatically visible in the window, as mentioned in the screenshot below.
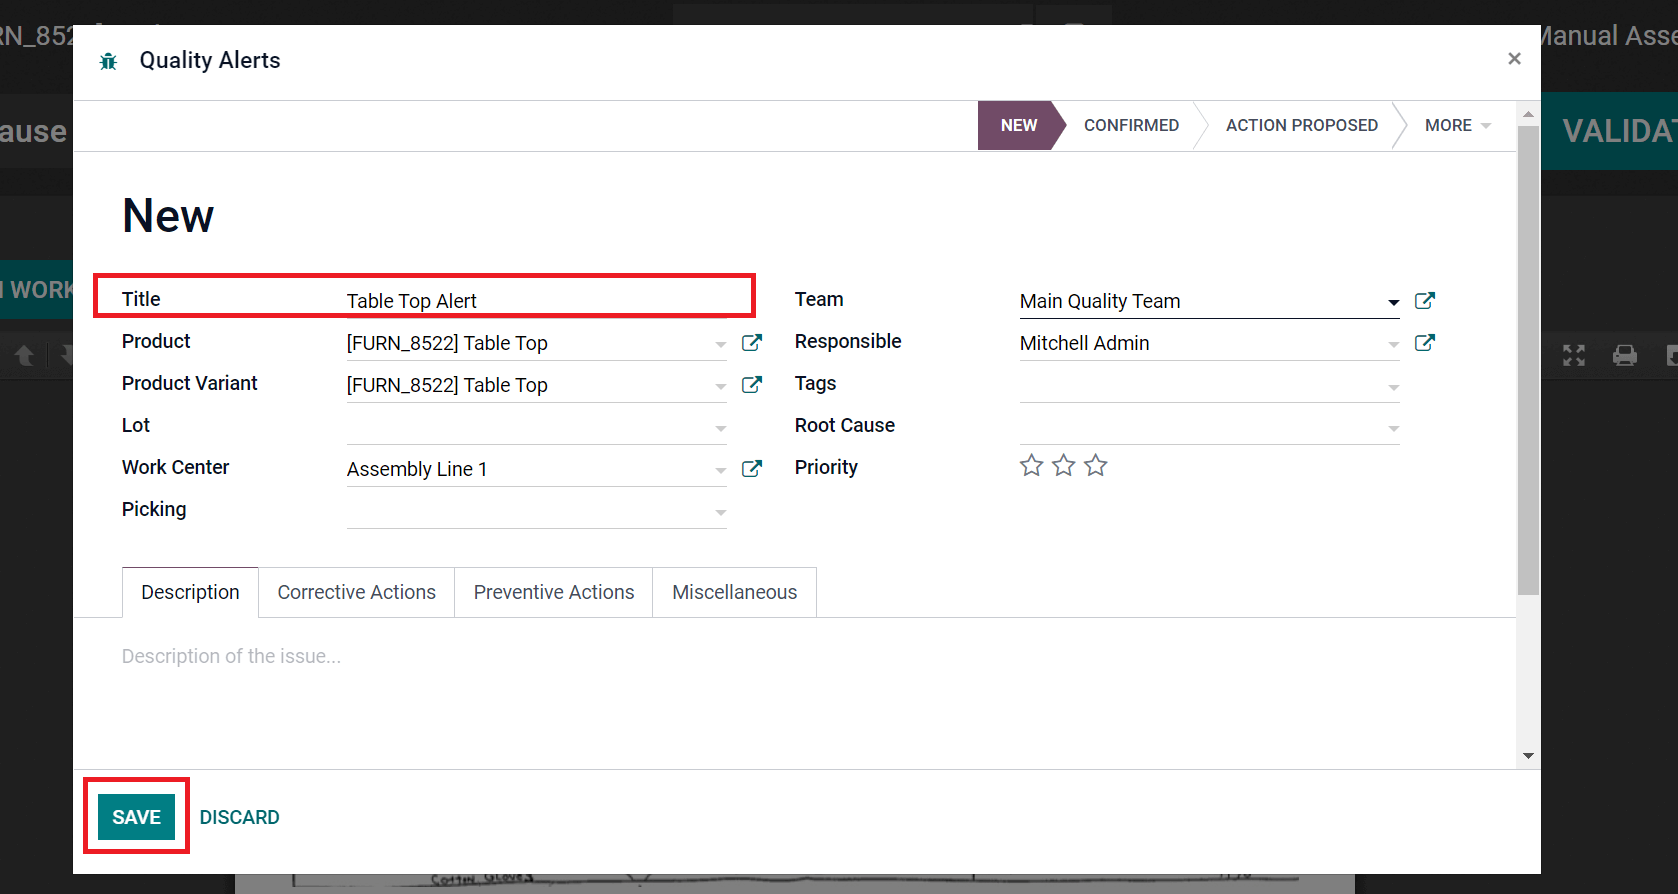
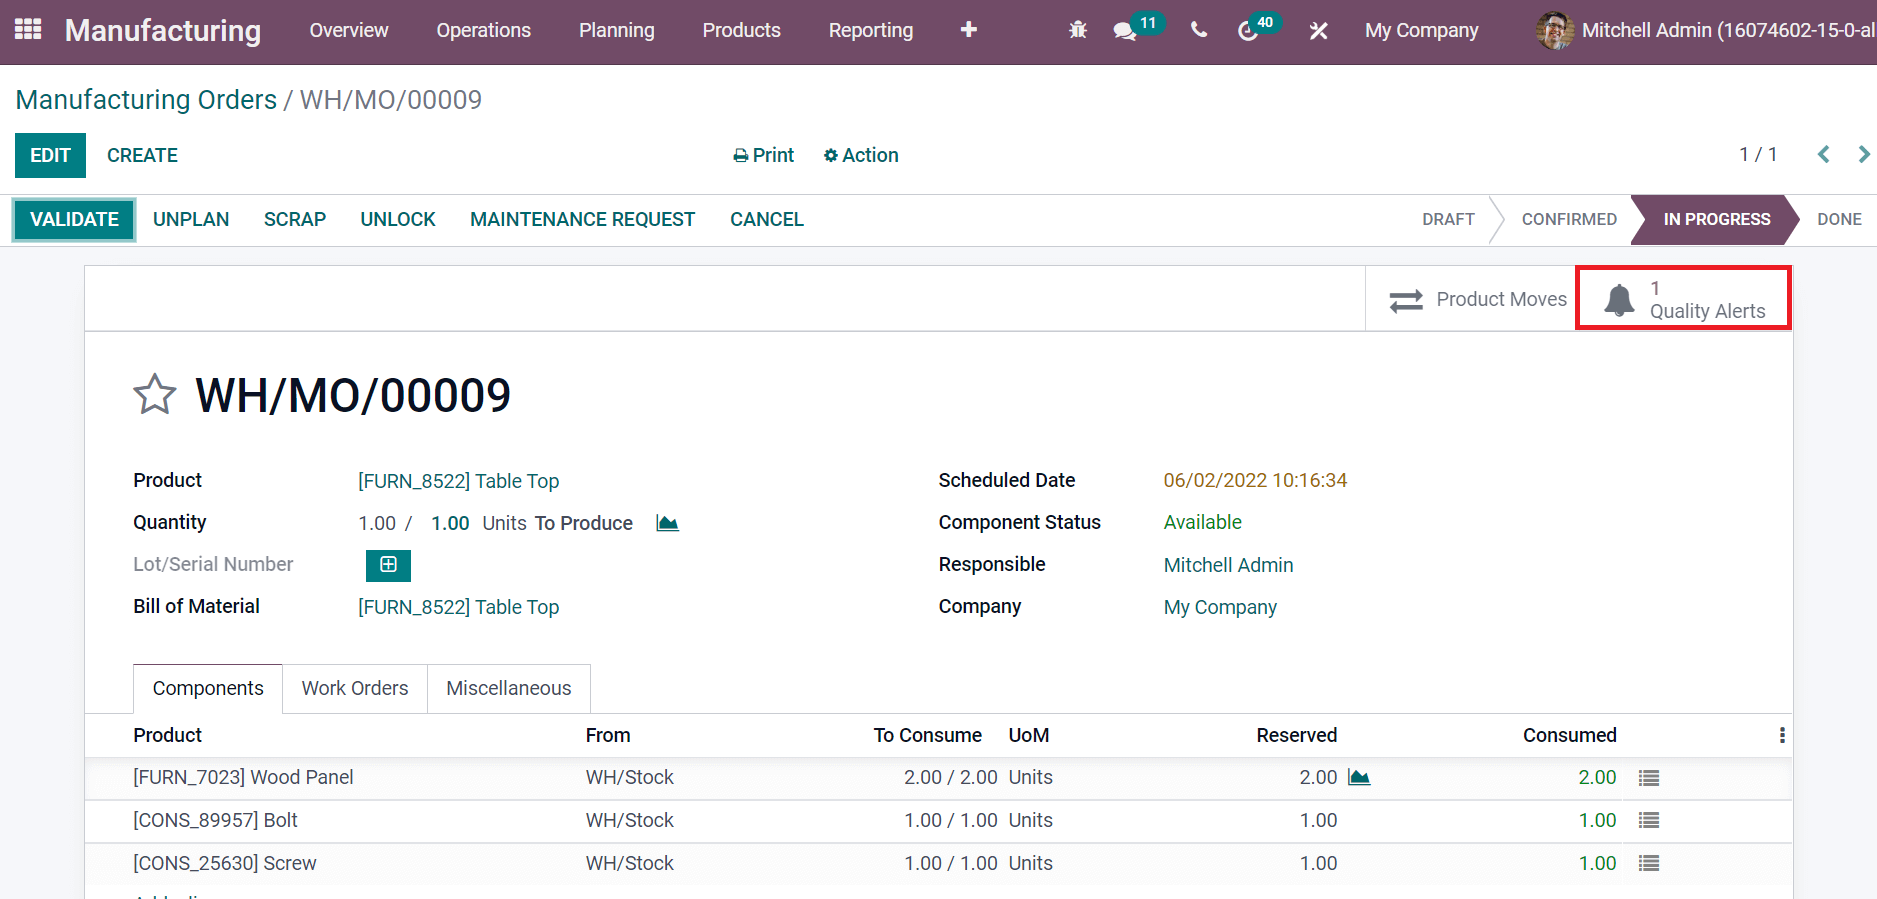
By clicking on the SAVE icon, a quality alert is generated for a product. In the Manufacturing window, you can see one alert is constituted inside the Quality Alerts smart button.
You can add a new component to a product by choosing the ADD COMPONENT icon, as illustrated in the screenshot below.
A new window opens before you after choosing the ADD COMPONENT icon. Here, you can select the Product and Quantity in Units as specified in the screenshot below.
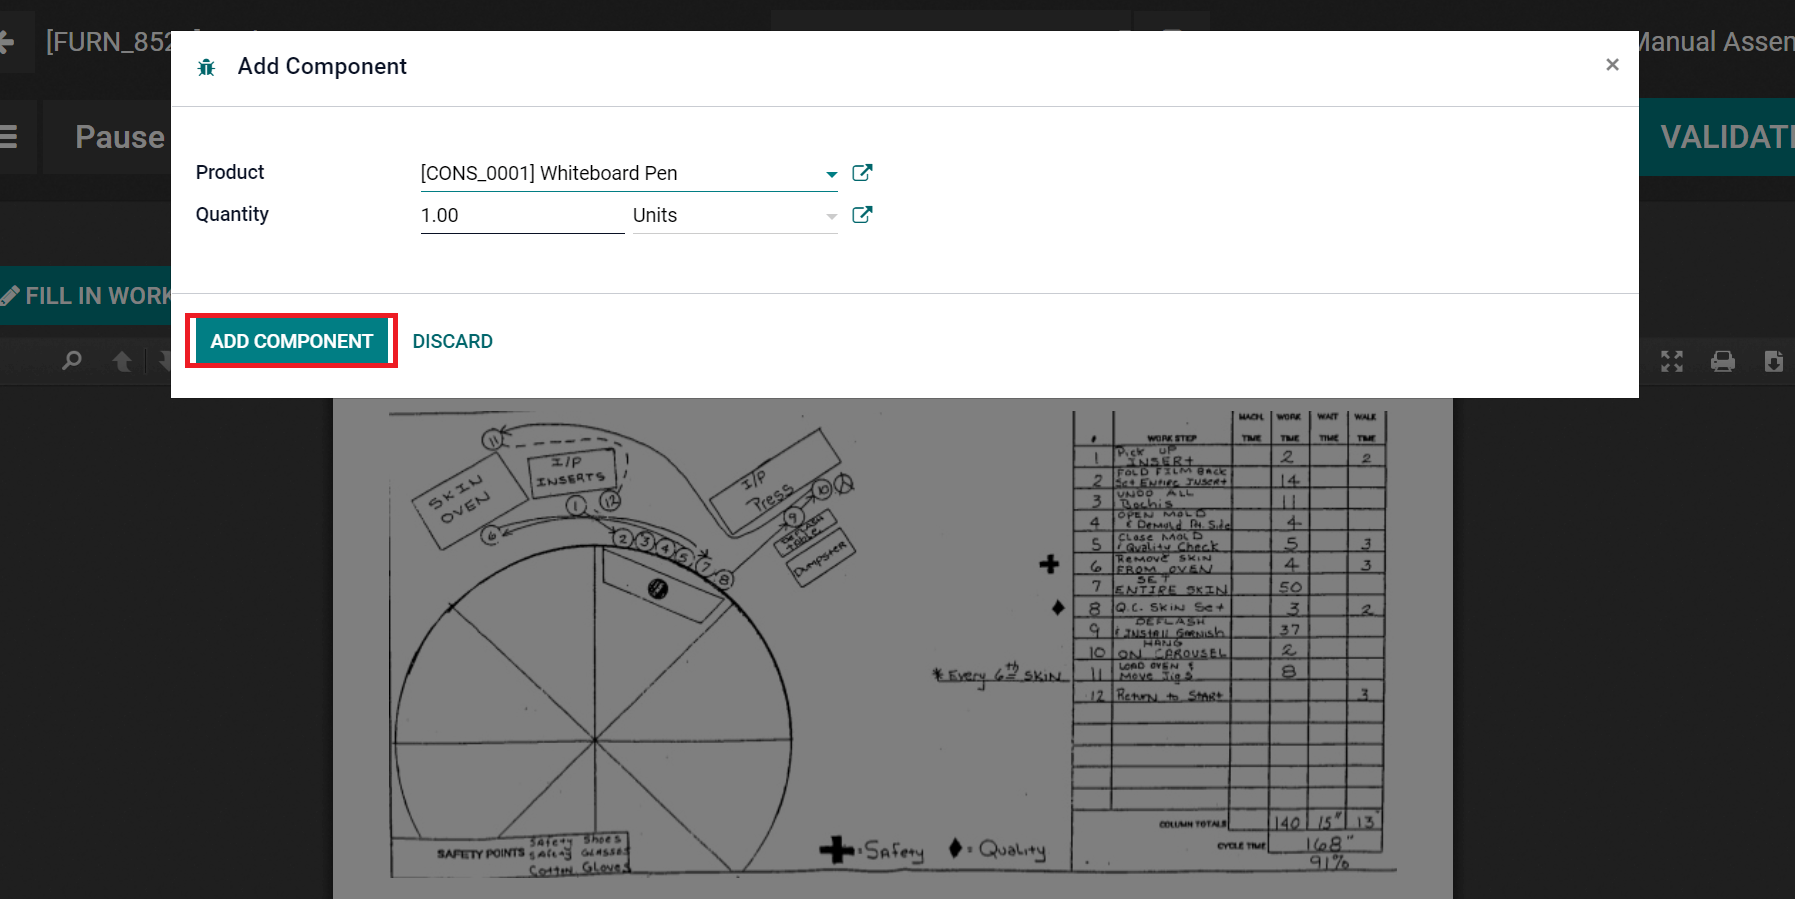
After adding all information, click on ADD COMPONENT icon to generate a new component for a commodity. Let’s move to the Work Orders menu inside the Operations tab and click on the DONE icon to complete the Production as specified in the screenshot below.
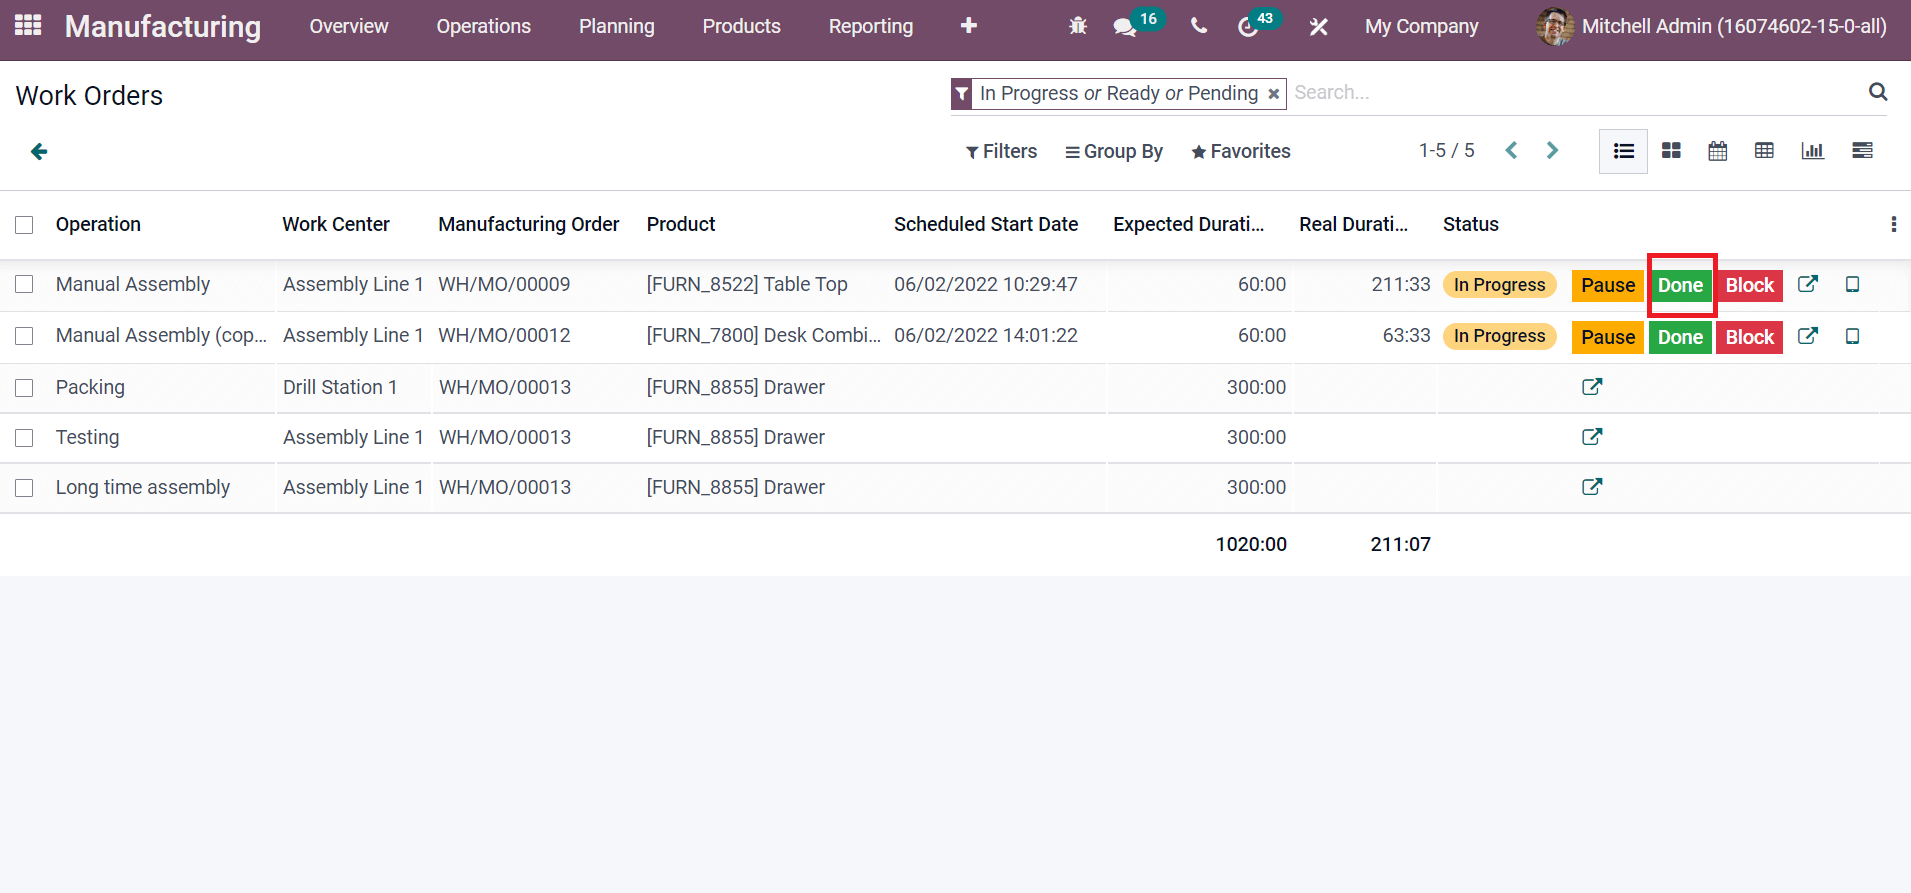
After that, we can go to the Manufacturing Orders window, and the user can see the status as finished inside the Work Orders tab, as in the screenshot below.
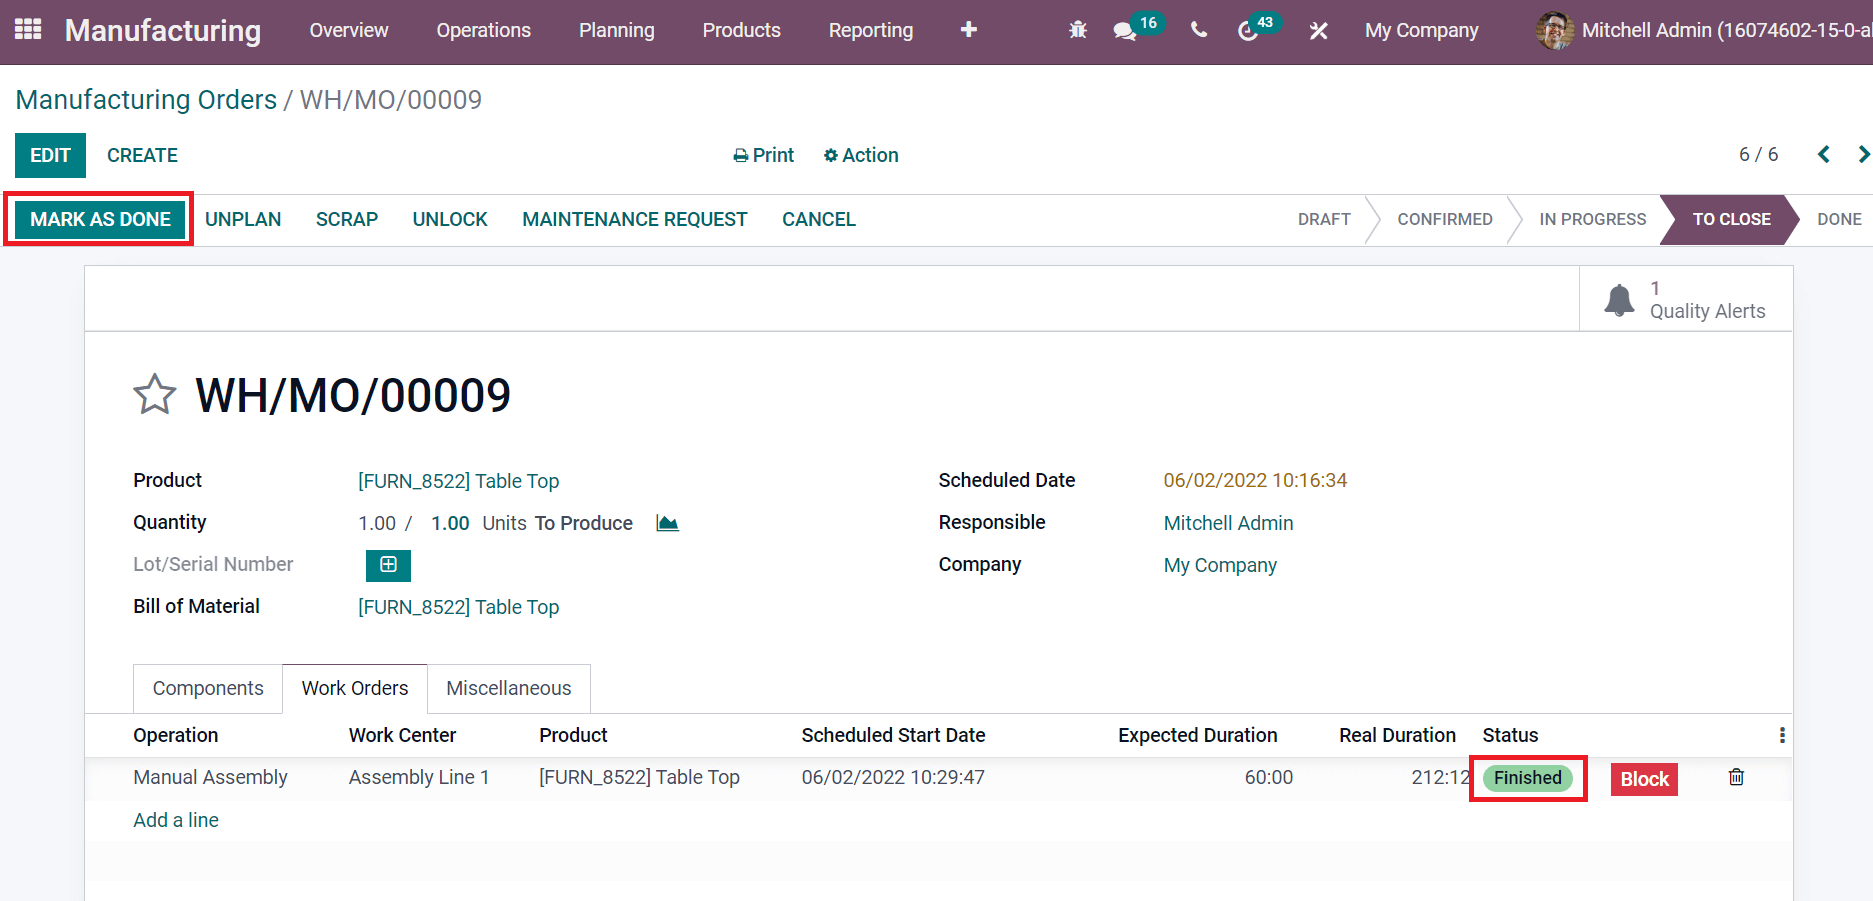
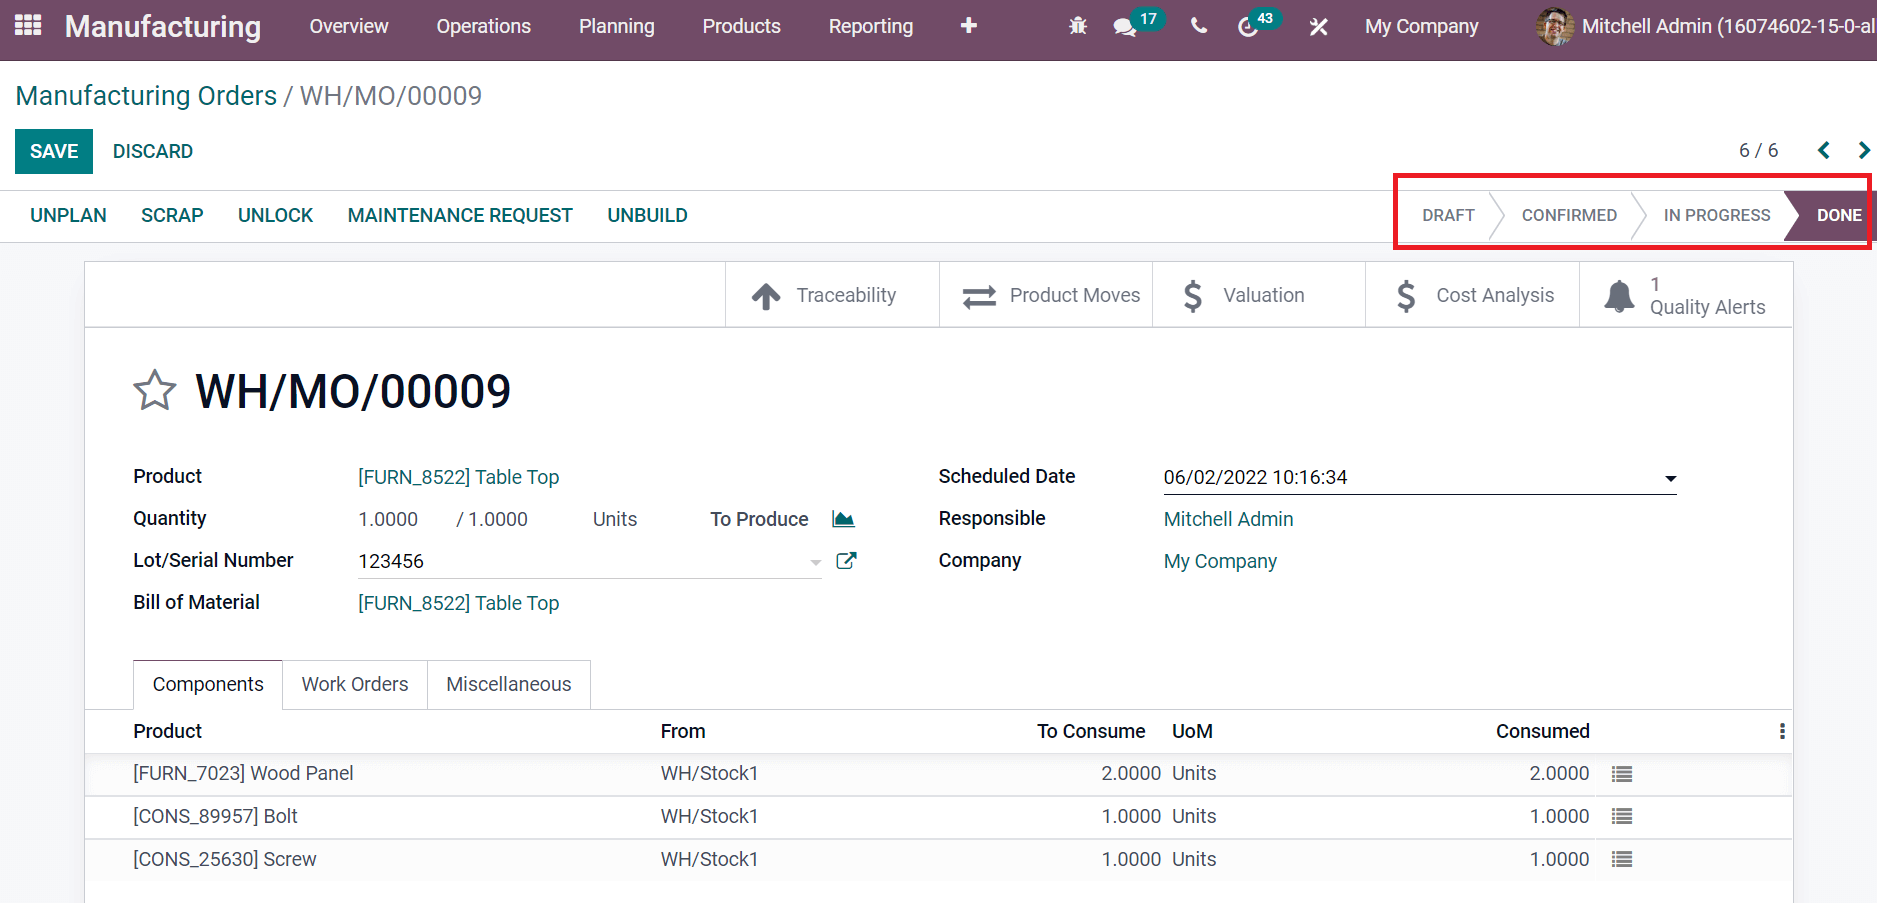
Choose the MARK AS DONE icon to generate your manufacturing order. After confirming the order, the stage changes from To Close to Done, as specified in the screenshot below.
To Create a Maintenance Request for your Product
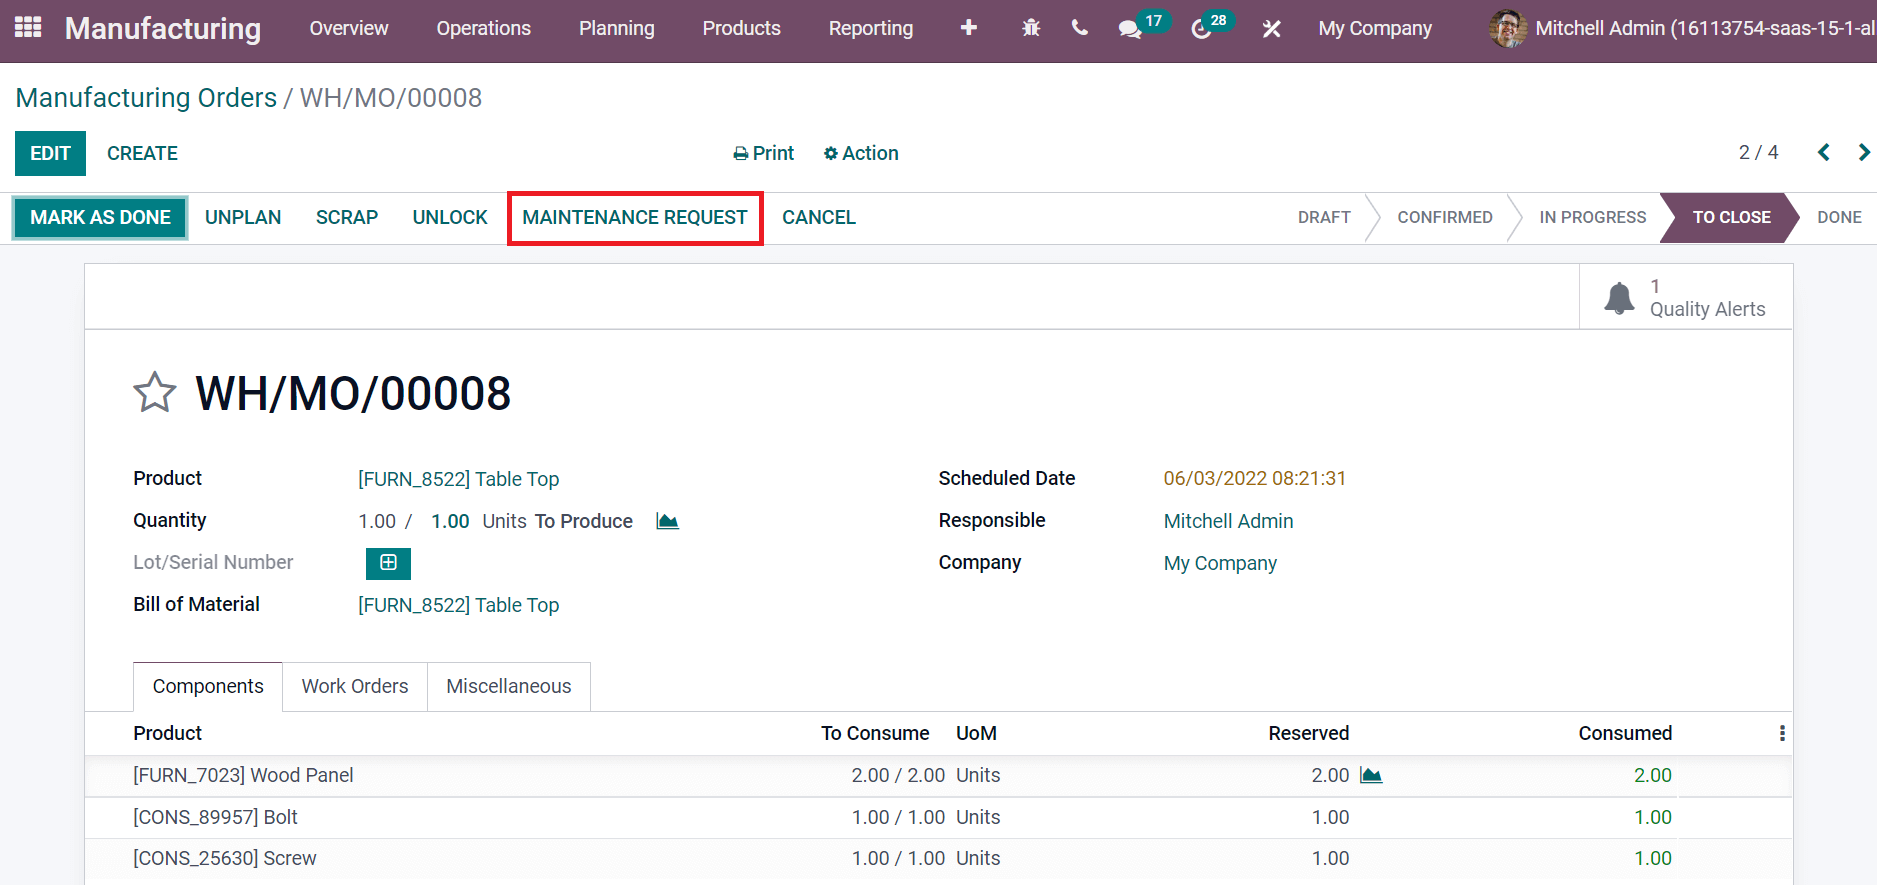
Users can formulate a maintenance request for a product by clicking on the MAINTENANCE REQUEST icon, as mentioned in the screenshot below.
After clicking on the MAINTENANCE REQUEST icon, a new request window displays before you. Add the Request name as ‘Table Maintenance and select the created person in Created by field. The Maintenance Type is divided into two Preventive and Corrective. Choose your maintenance type for the created request as specified in the screenshot below.
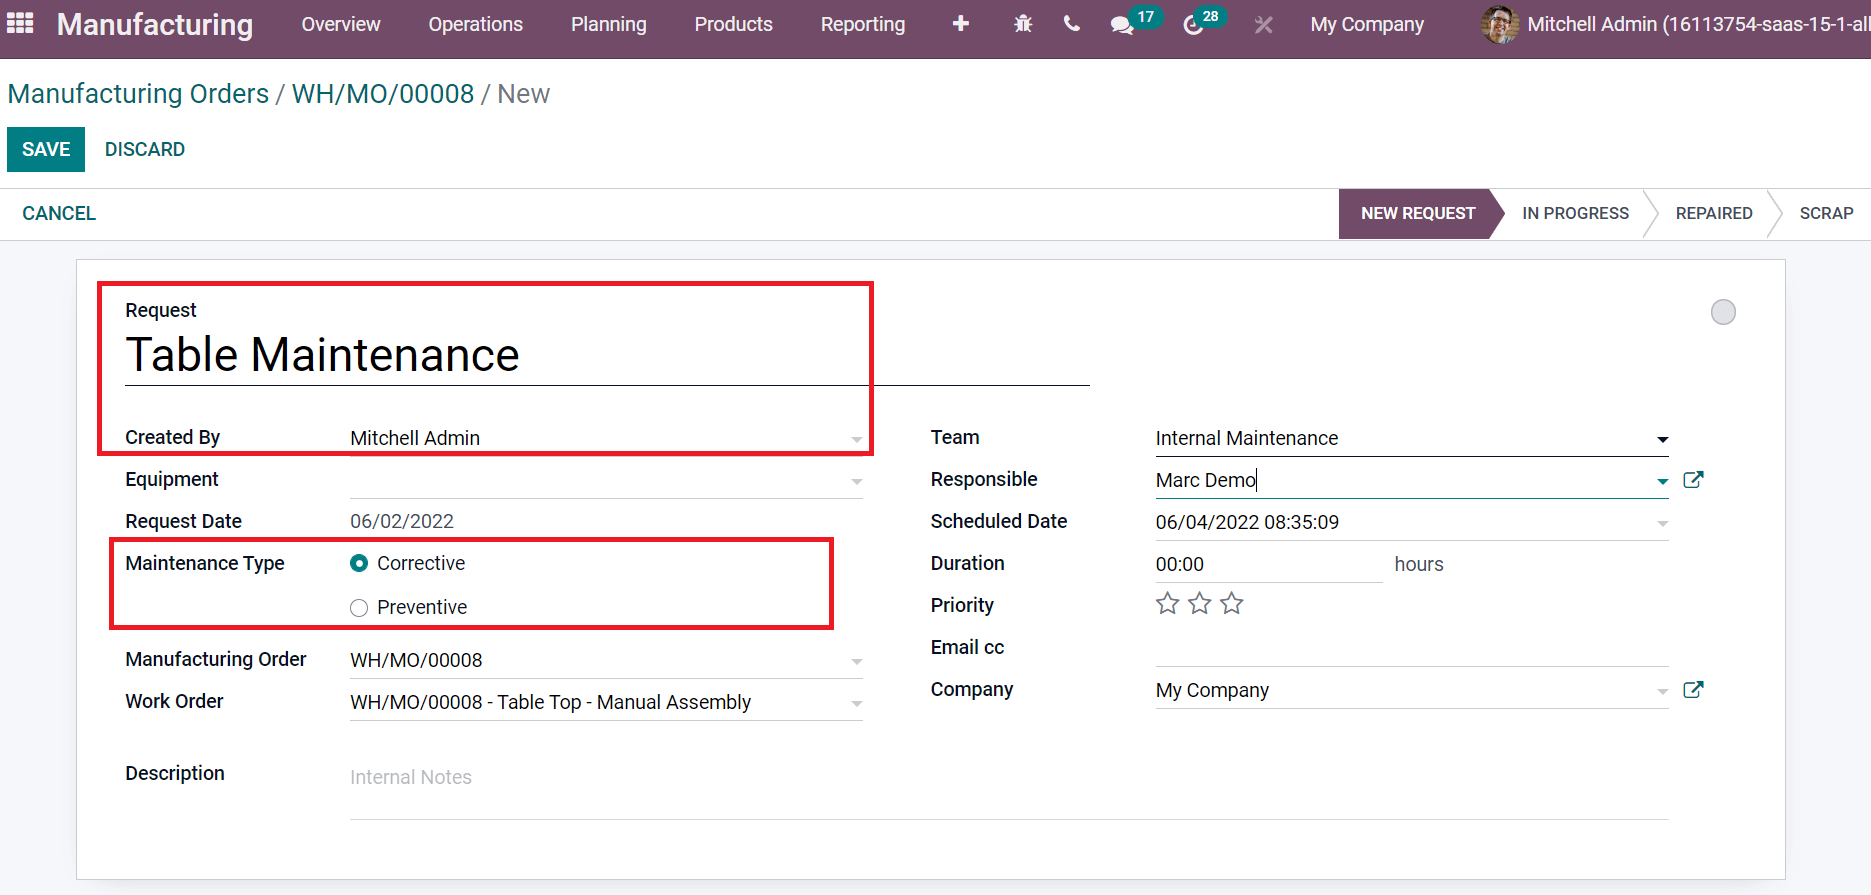
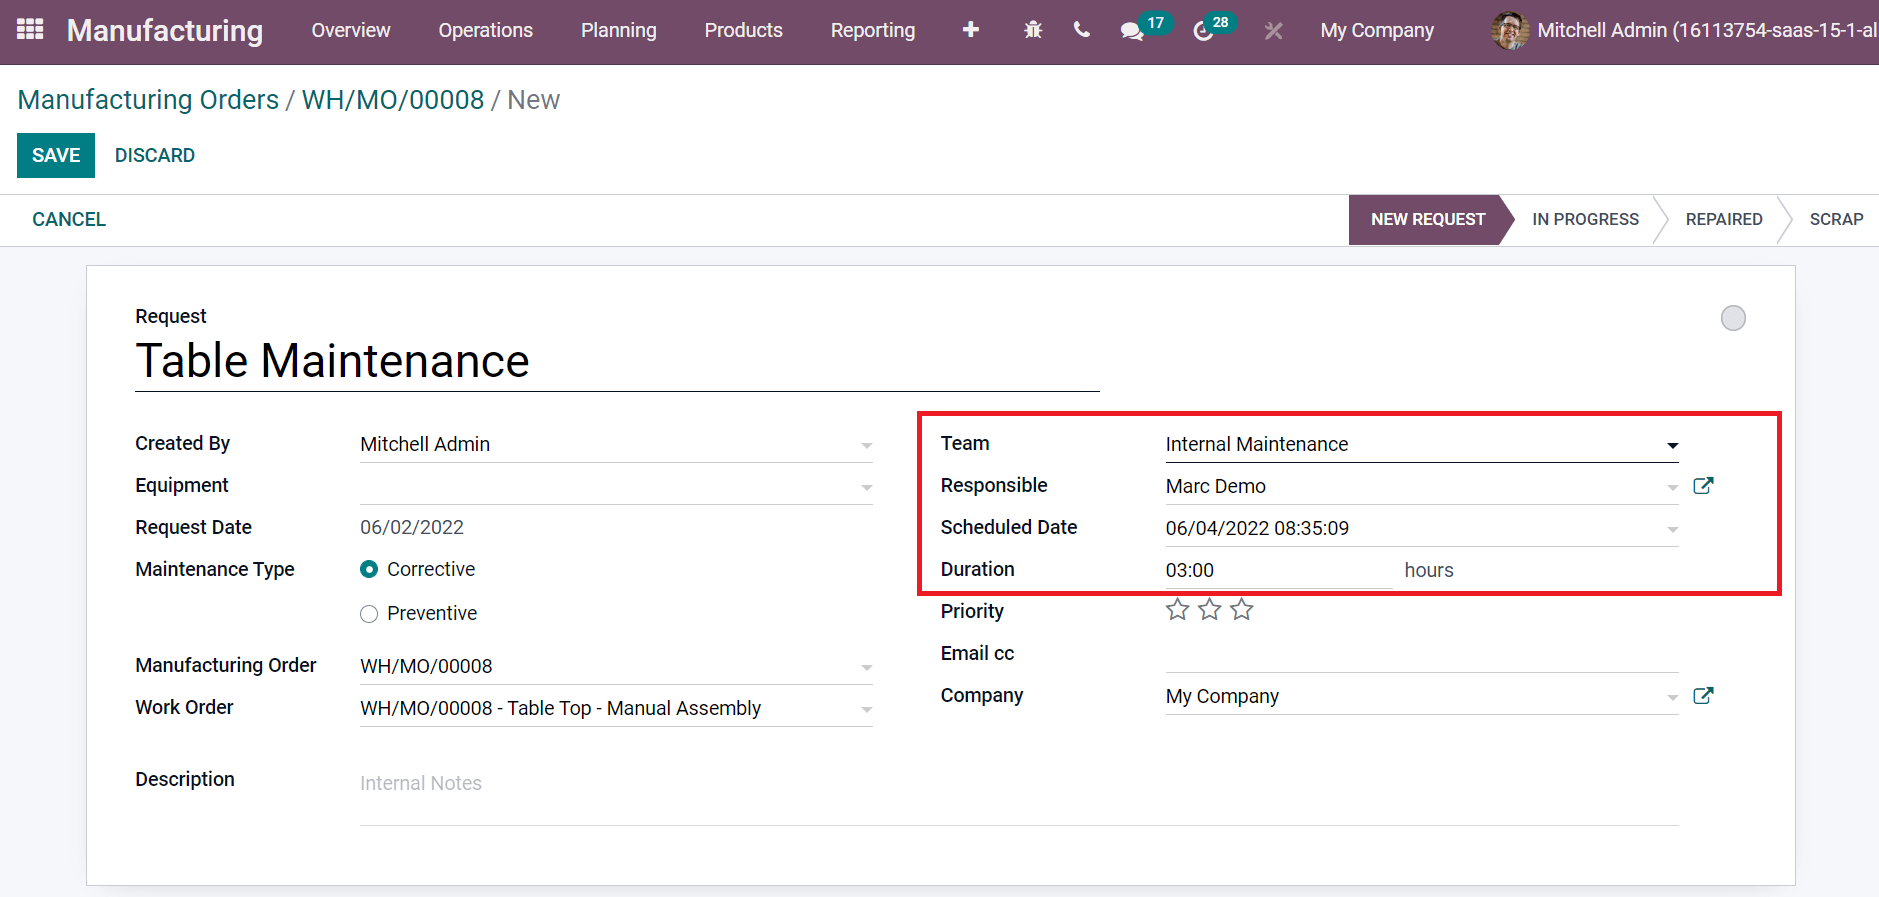
We can also select the Work Order and enter the Description regarding the maintenance request of your product. Later, pick your Team, Responsible person, Scheduled Date, and Duration as portrayed in the screenshot below.
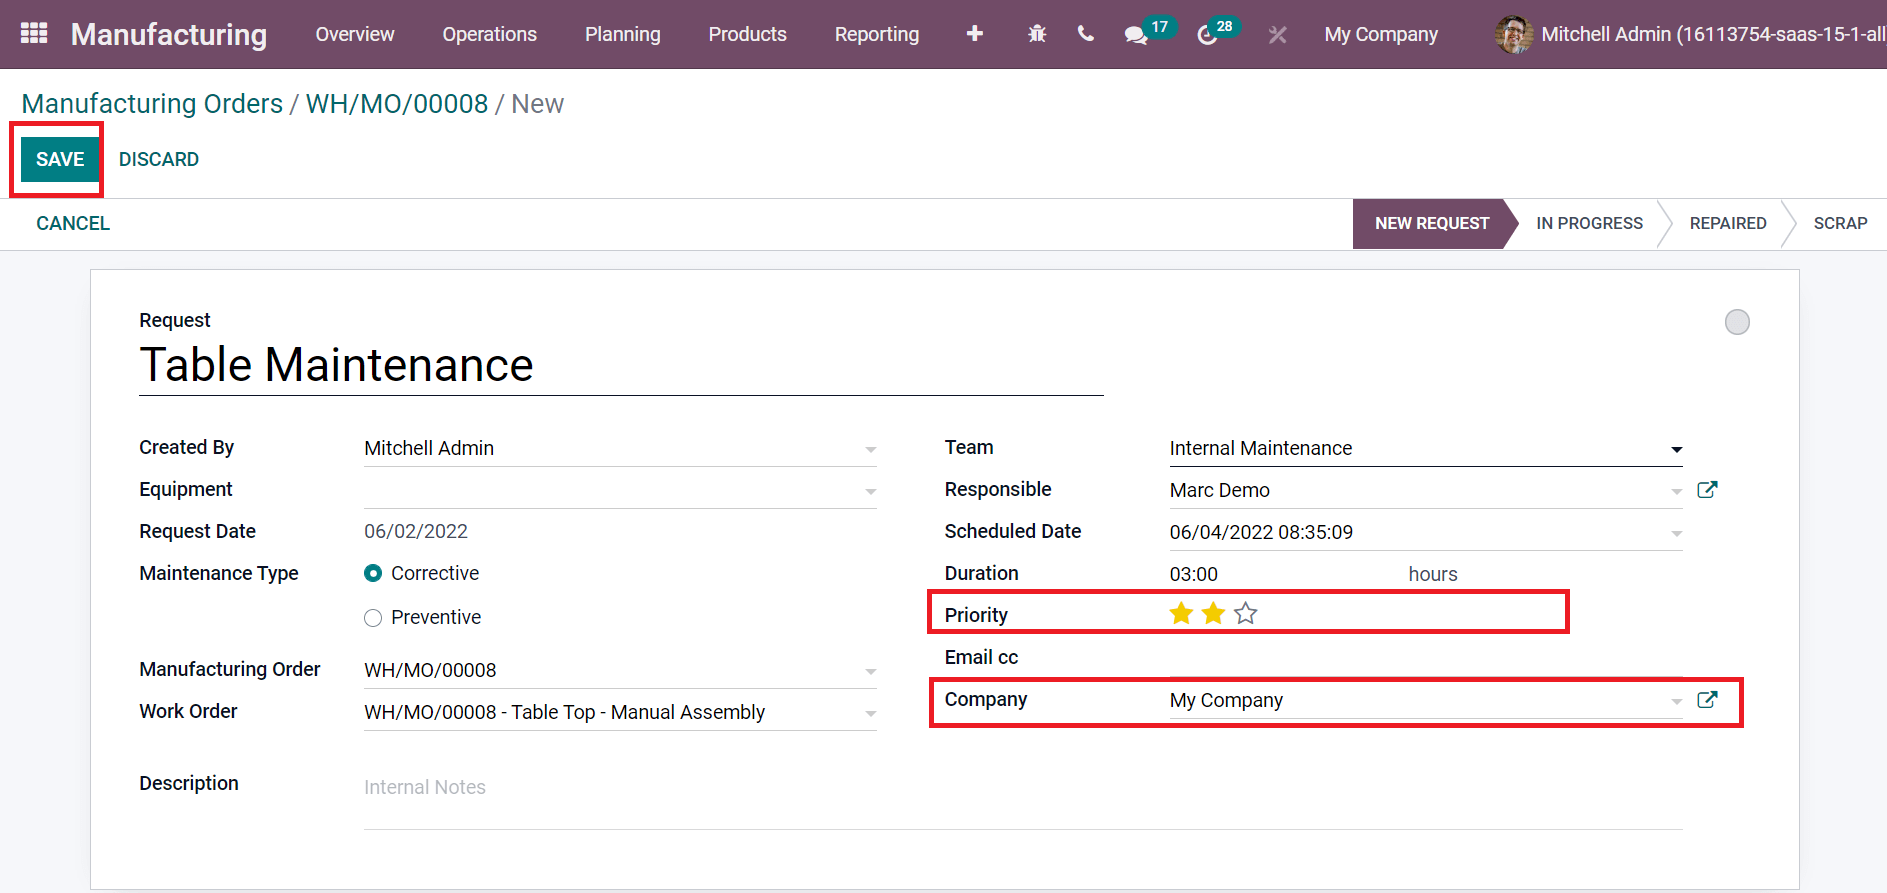
Users can also mark priority for the created request by selecting the Star icon in the Priority field and choosing your Company. After that, select the SAVE icon to generate your maintenance request for Table Top, as represented in the screenshot below.
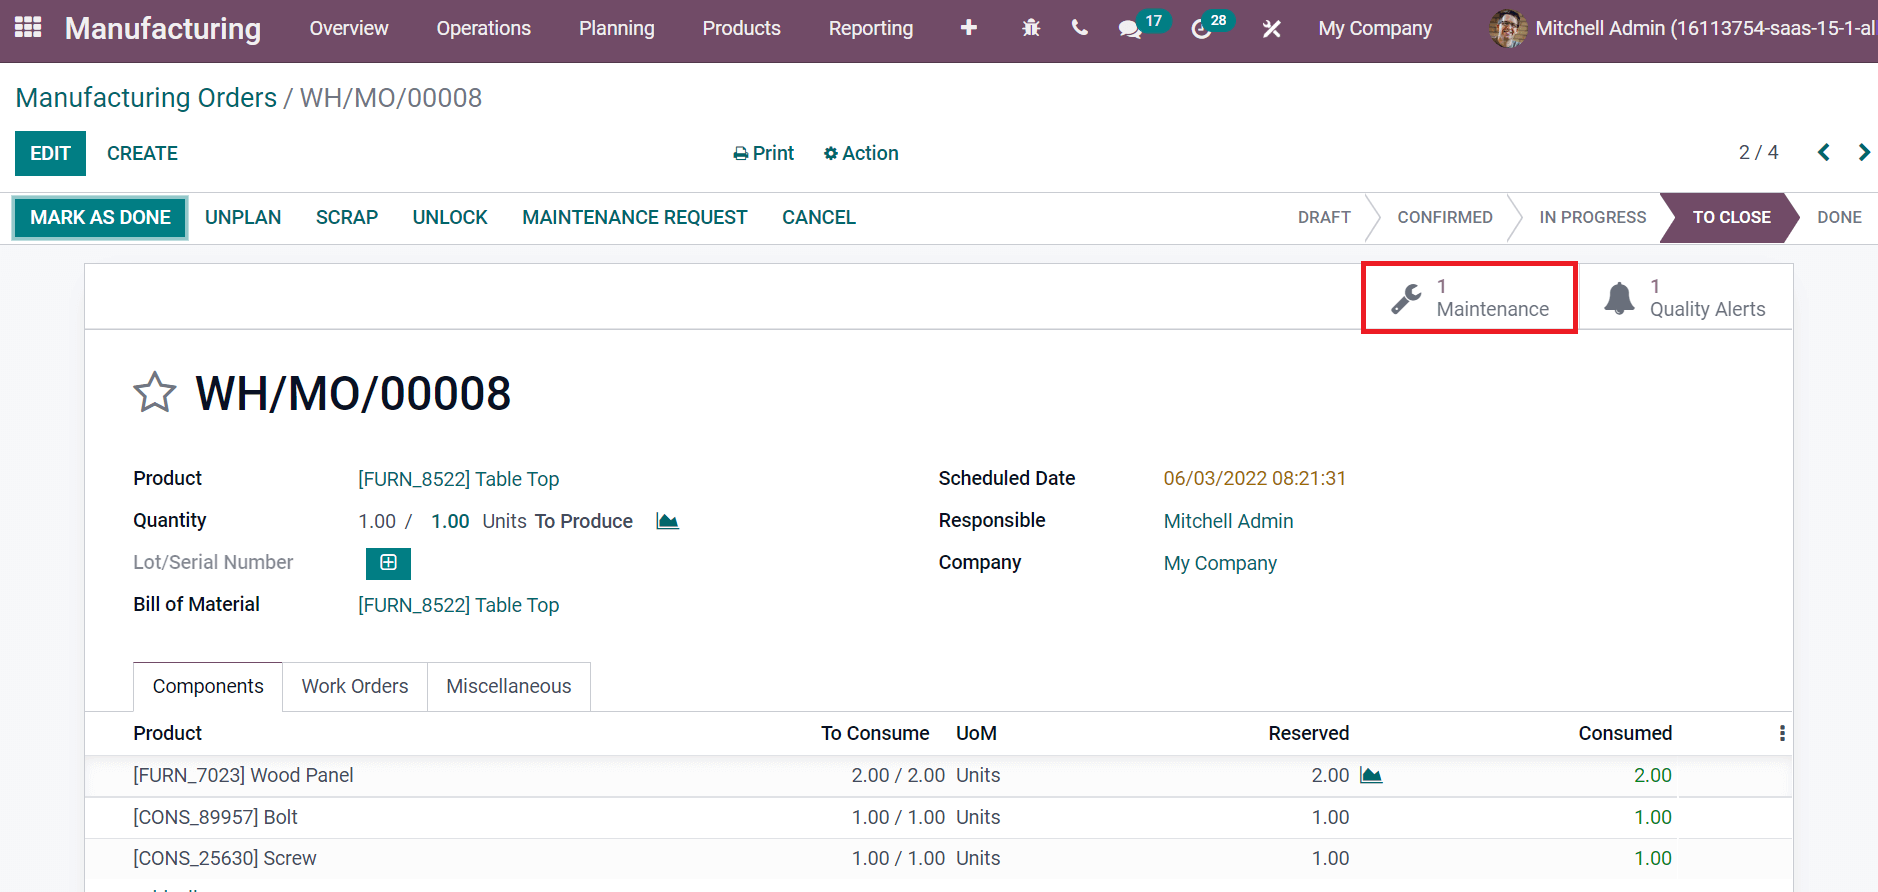
Inside the Maintenance smart button in Manufacturing Orders, you can view one request, as illustrated in the screenshot below.
The manufacturing process of a product is managed quickly with Odoo 15. Production management in Odoo 15 Manufacturing module connects all work centers in your industry and finishes the work accurately. We can plan the work orders within a sufficient time using ERP software, and Odoo 15 is the best solution. Look at the given blog to identify more about Odoo 15 Manufacturing Module


