The maintenance of product quality or services is vital for a business. To ensure production, quality control plays a significant role in entrepreneurship. Better customer satisfaction enables through accurate quality control. At various stages of production, quality testing assist in finding out the exact problem and taking corrective action. Most manufacturers did not think of removing quality control from the manufacturing process. The removal of quality controls leads to a firm raising defective products and needing to scrap/rework. Odoo 15 Quality module helps improve the company’s quality control processes of products.
This blog enables you to manage quality controls with Odoo 15.
Odoo 15 Quality module lets users maintain quality checks, alerts, and control points for a product. It is beneficial to analyze your material’s quality checks and alerts and enhance the production level. Now, let’s see managing quality control using the Odoo 15 database.
Quality Control Points
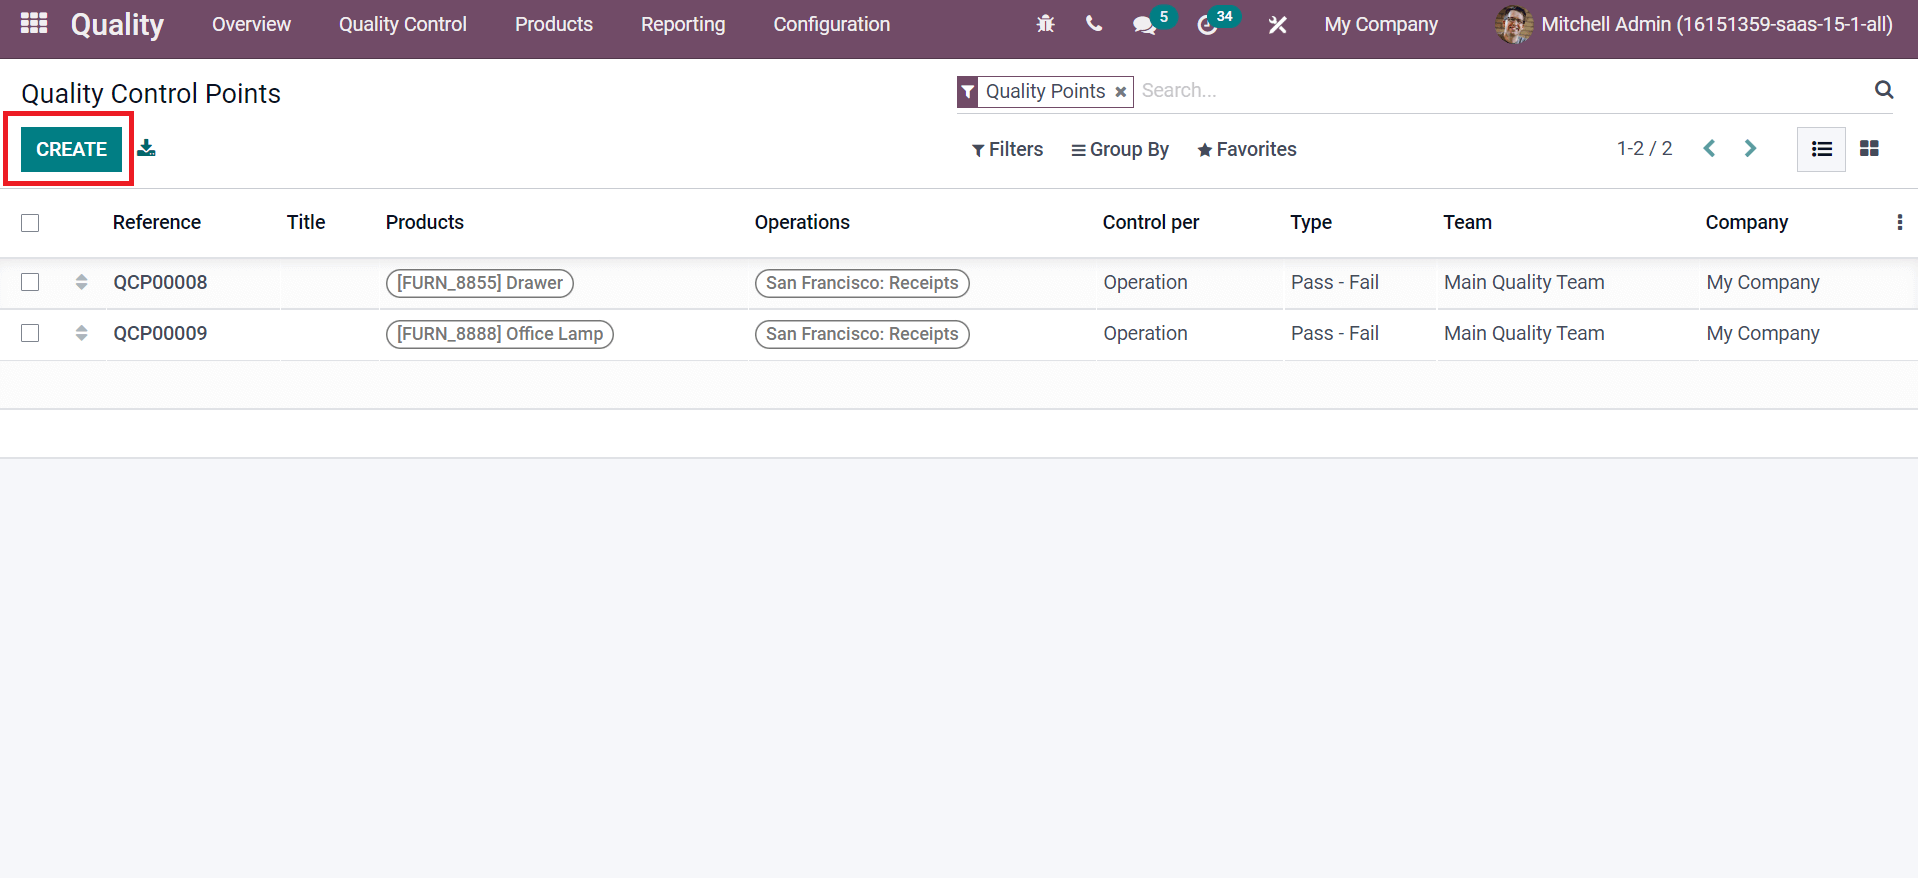
We can define the stages of evaluating a product using Quality Control Points. It is easy to check product quality using quality control points. Select the Control Points menu in the Quality Control tab to generate a new Quality Control Point for a product. Select the CREATE icon in Quality Control Points window as depicted in the screenshot below.
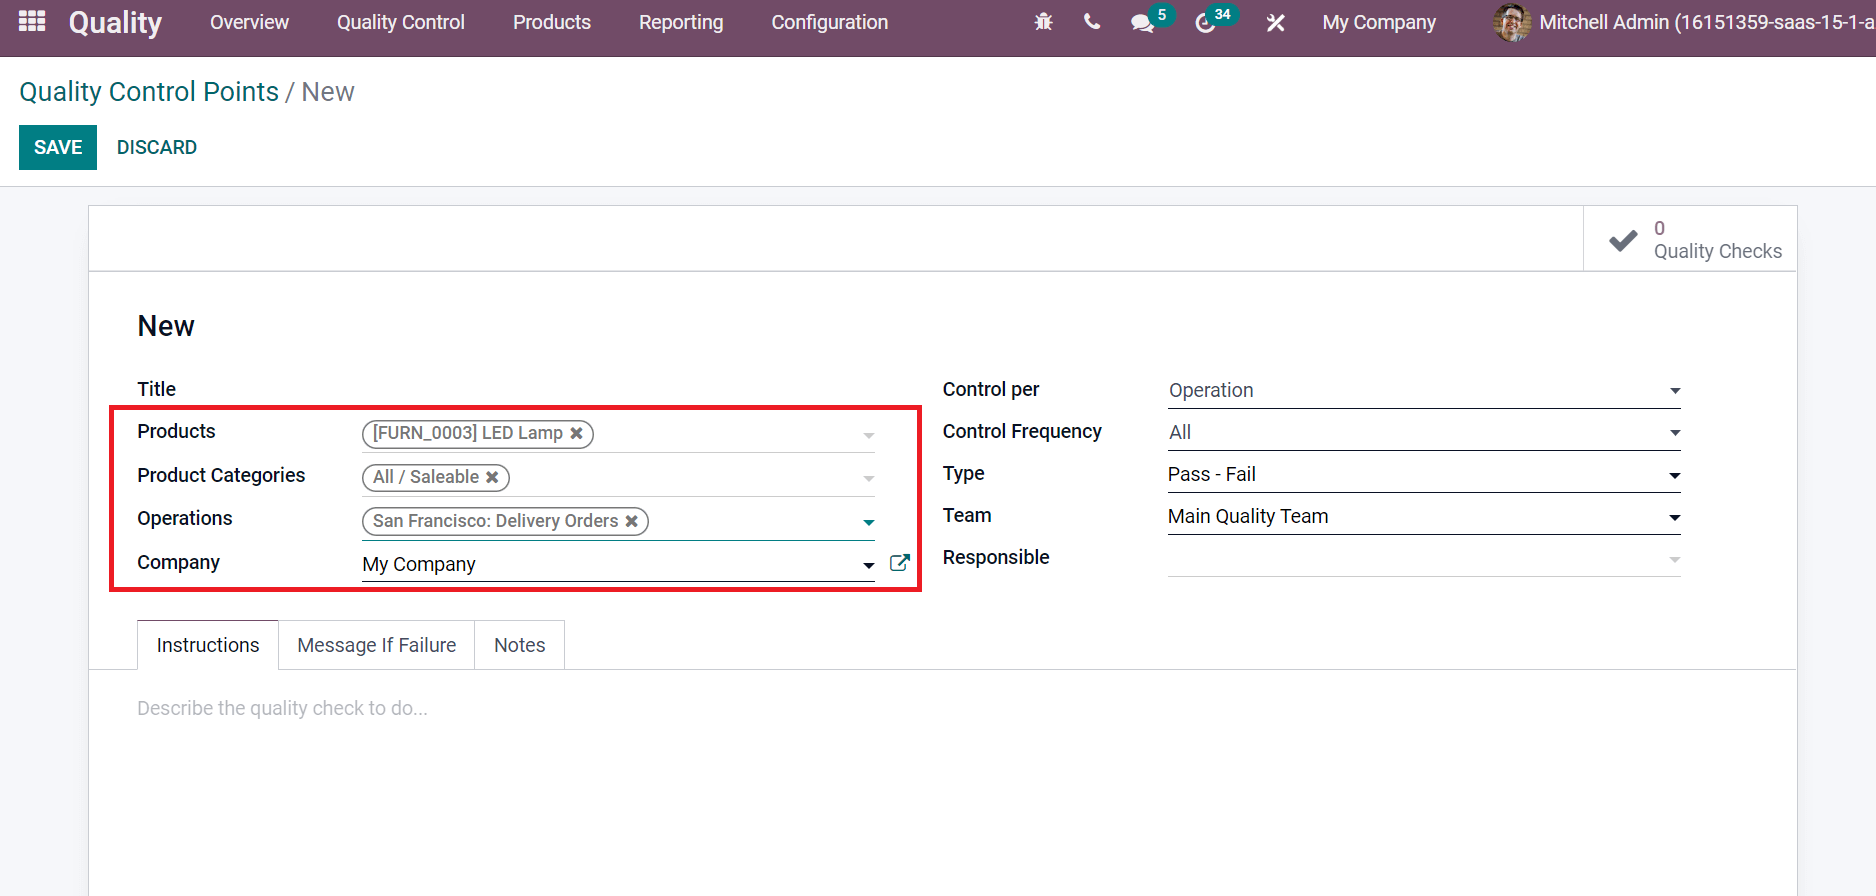
Let’s develop quality control points for a LED lamp. Add LED Lamp inside the Products field once you enter in Quality Control Points window. Also, select the Product Categories in which the quality control point is applied to all products in specific categories. Later, choose your Company and Operations as displayed in the screenshot below.
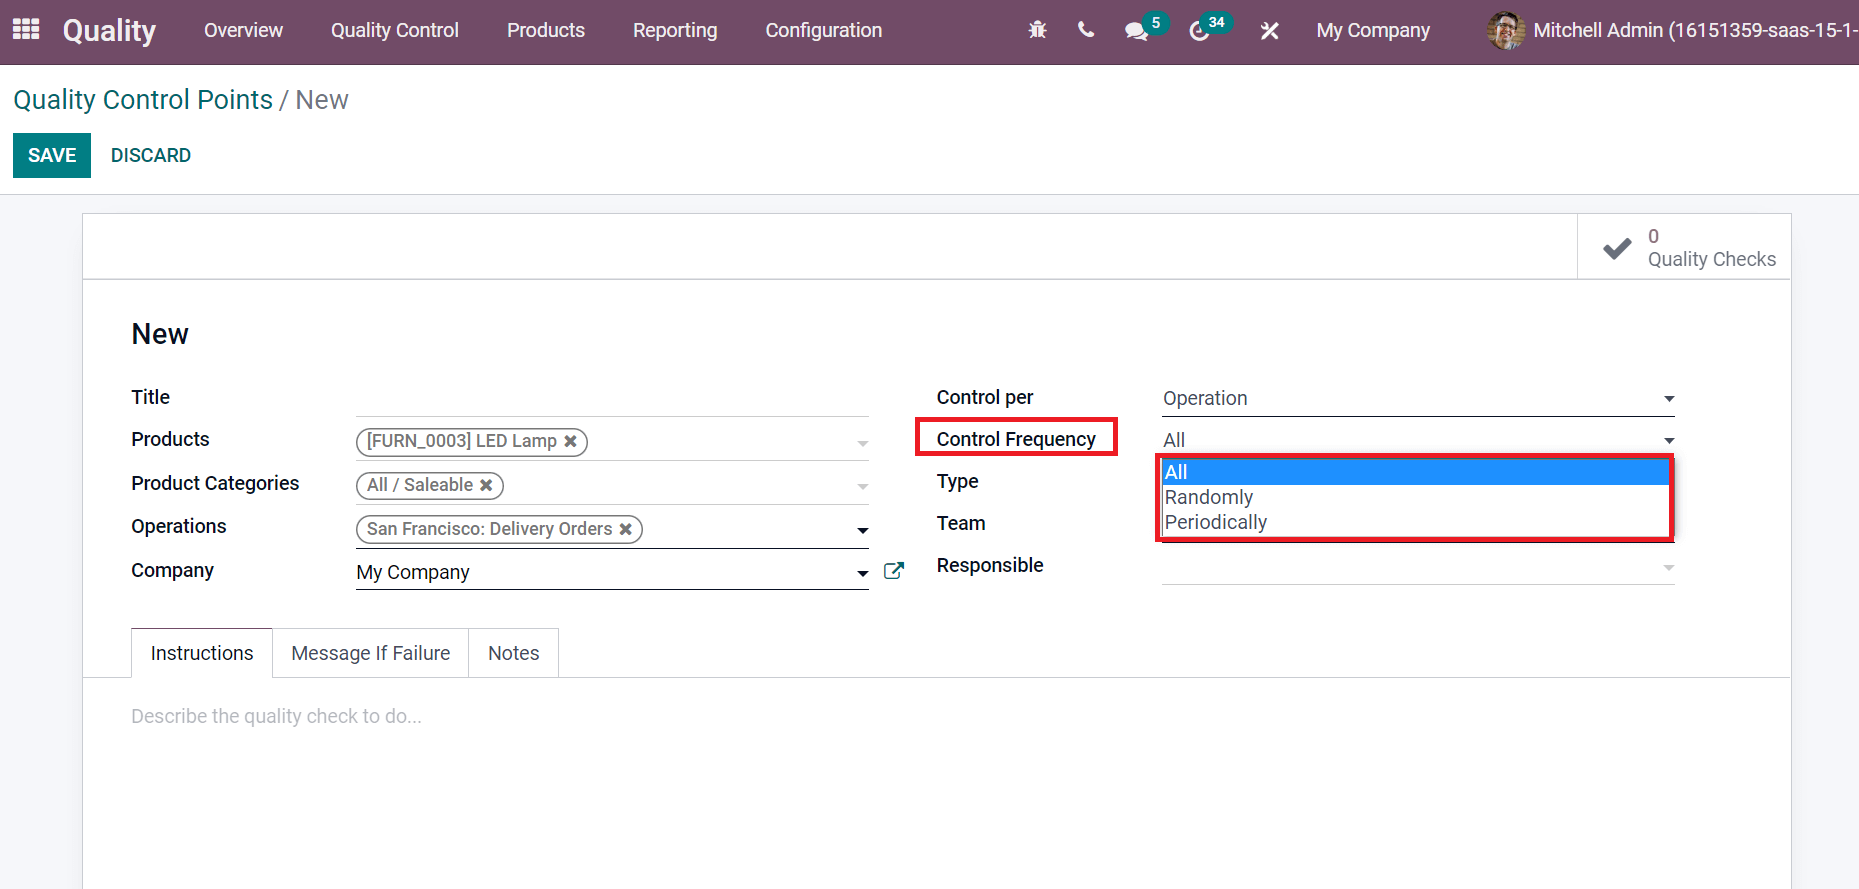
You can select Control as Operation or Product. The frequency takes place for quality checks defined in the Control Frequency field. Control Frequency is classified into three types: All, Periodically, and Randomly, as specified in the screenshot below.
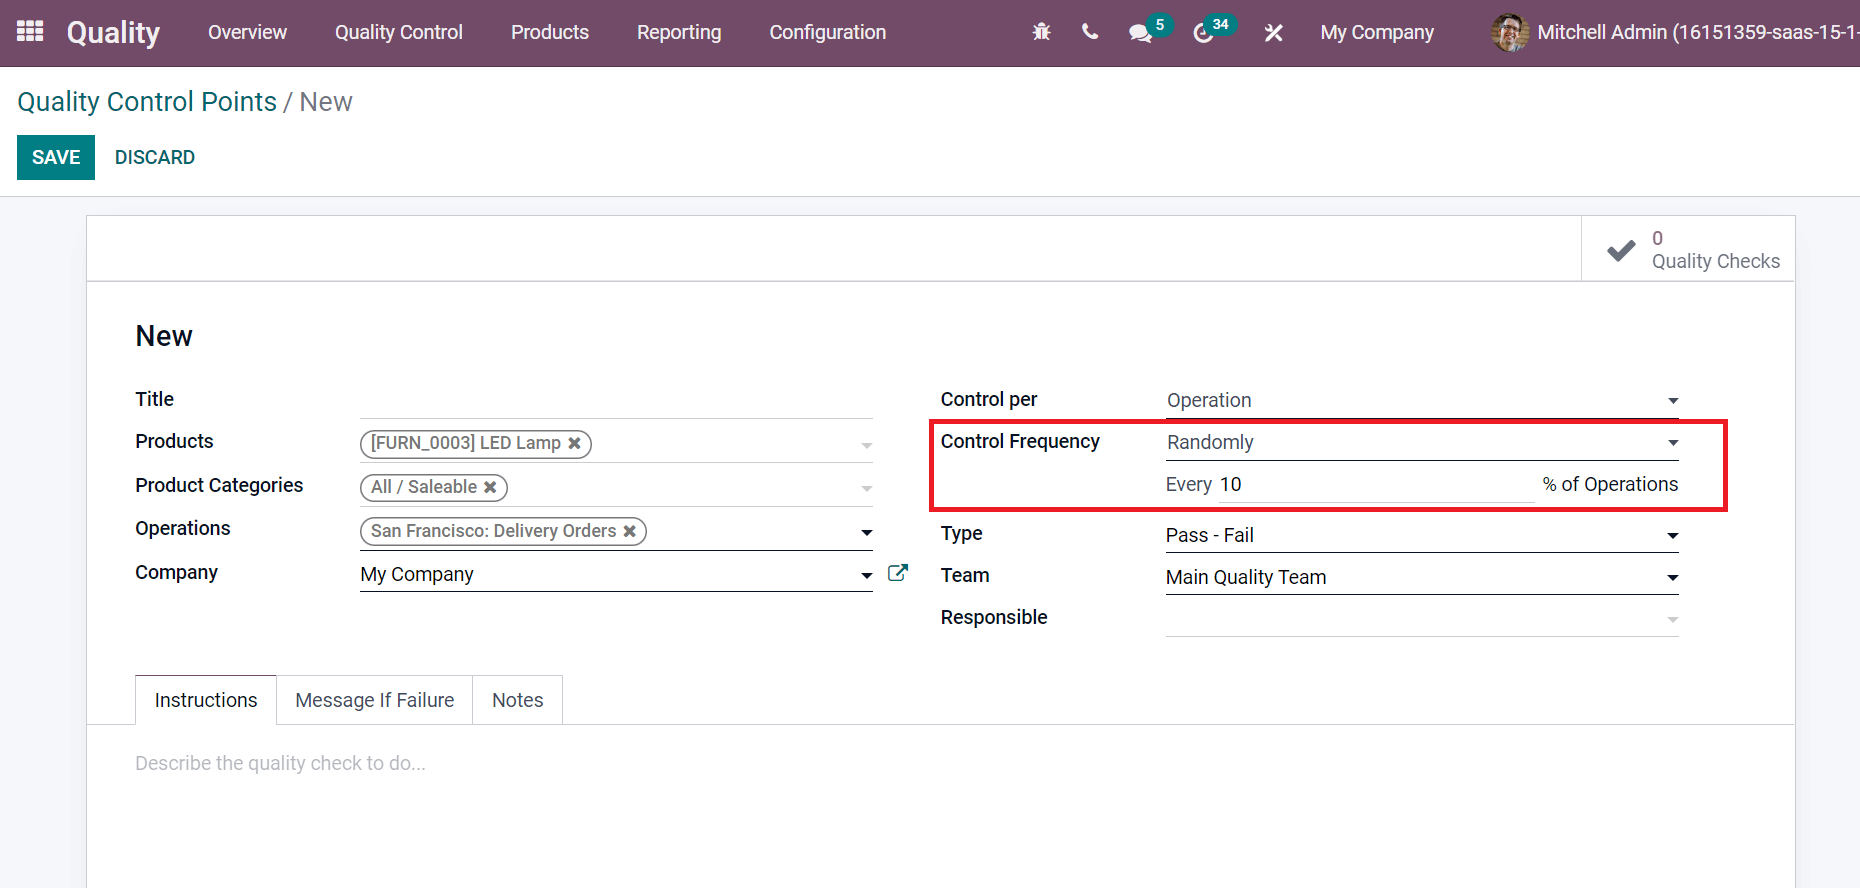
The quality checks perform automatically for all operations by selecting the All option. By choosing Randomly, quality checks are based on a particular percentage. Users can add the percentage rate in open space below the Control Frequency field, as denoted in the screenshot below.
Quality checks are based on specific periods by choosing the Periodically option. You can specify frequency numbers based on day, year, or month as portrayed in the screenshot below.
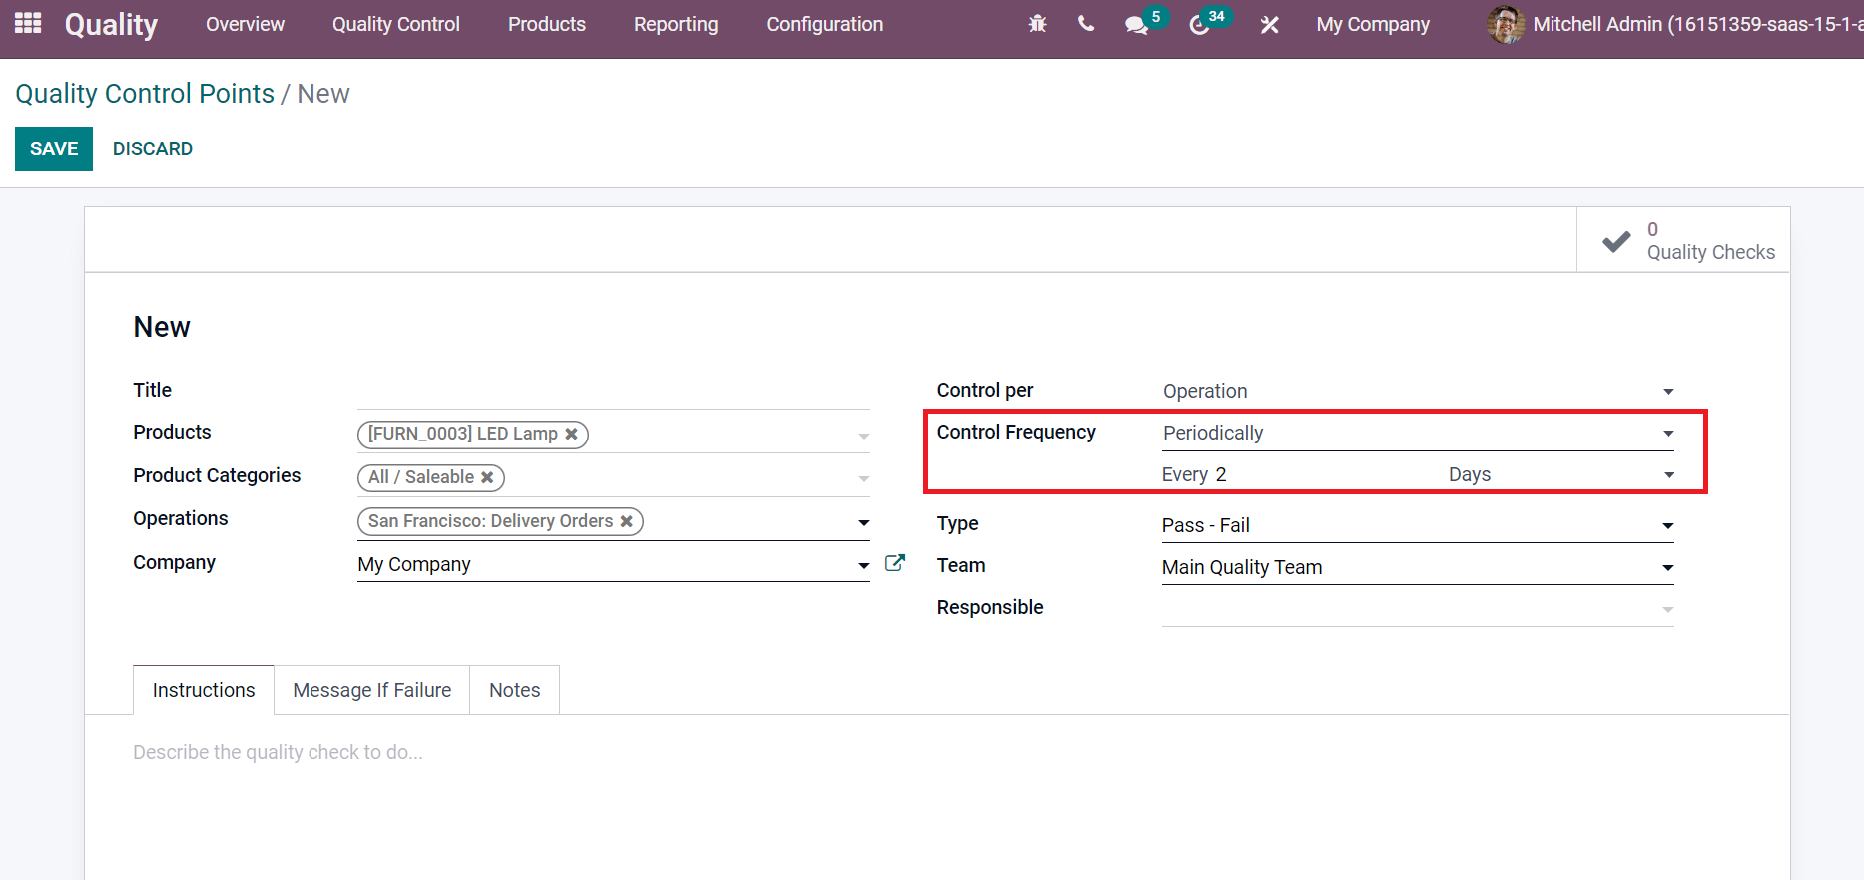
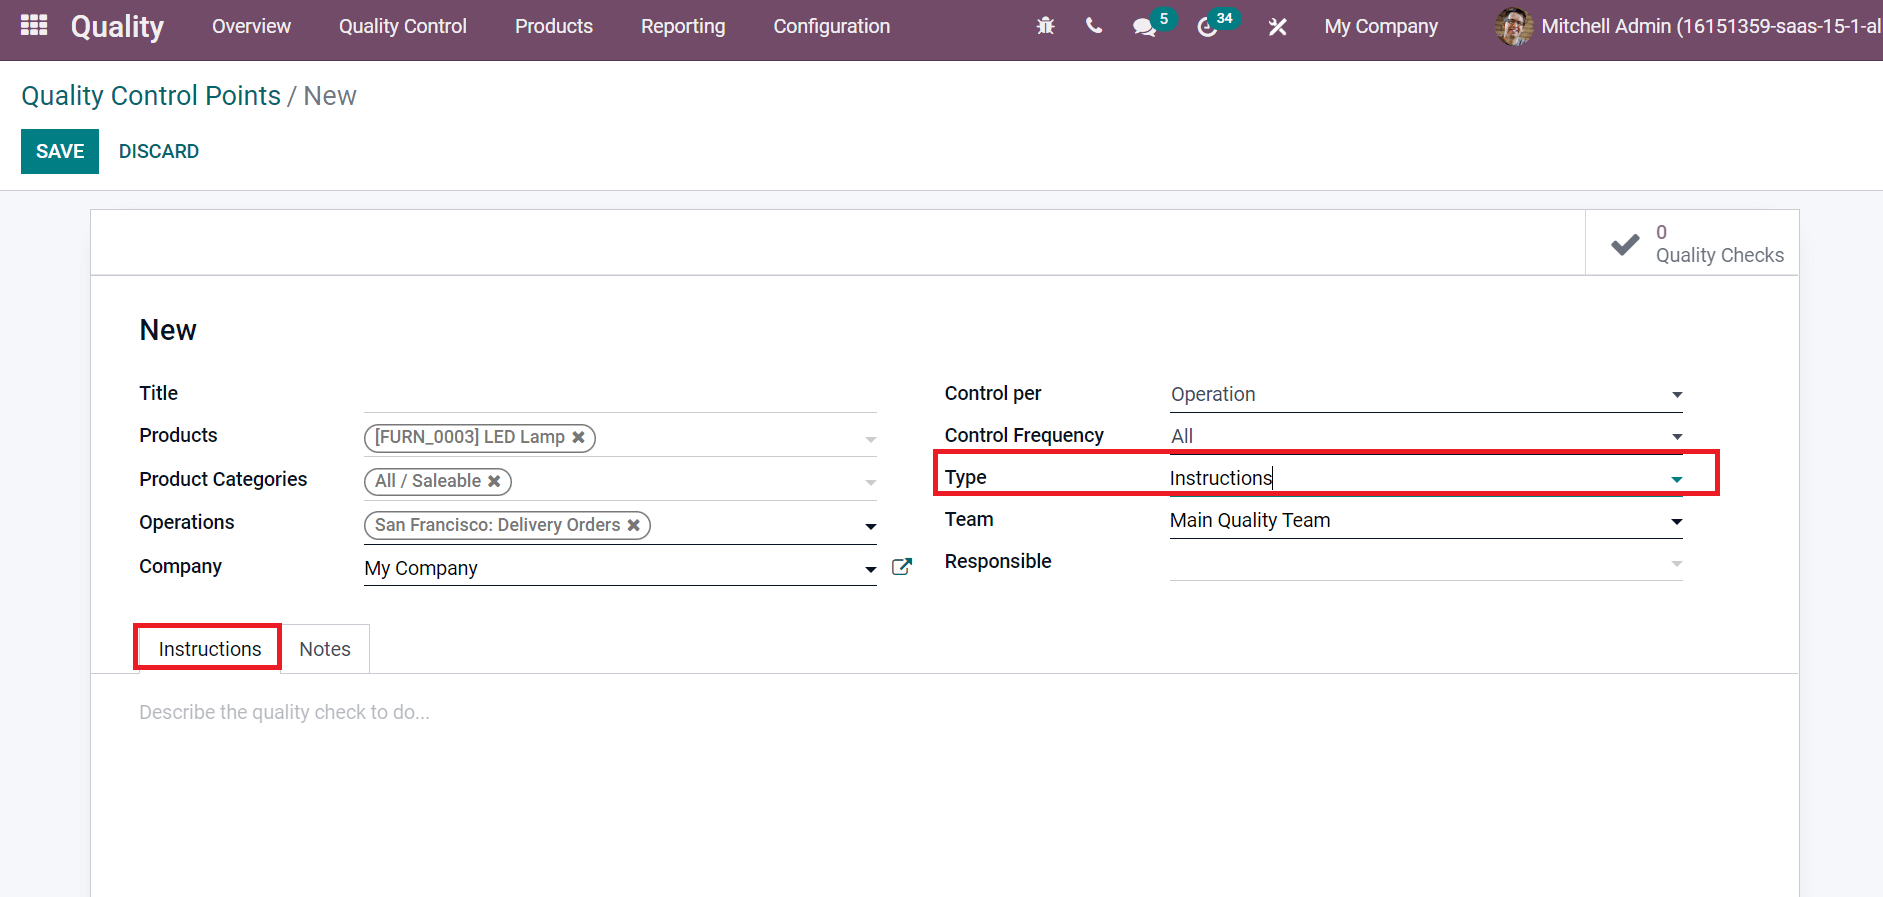
We are setting the Control Frequency as All inside Quality Control Points window. Quality control points type is classified into Instructions, Pass-Fail, Take a picture, Worksheet, and Measure. By selecting Instructions, workers get instructions during the manufacturing process. You can enter the details of quality checks to do for workers inside the Instructions tab in Quality Control Points, as mentioned in the screenshot below.
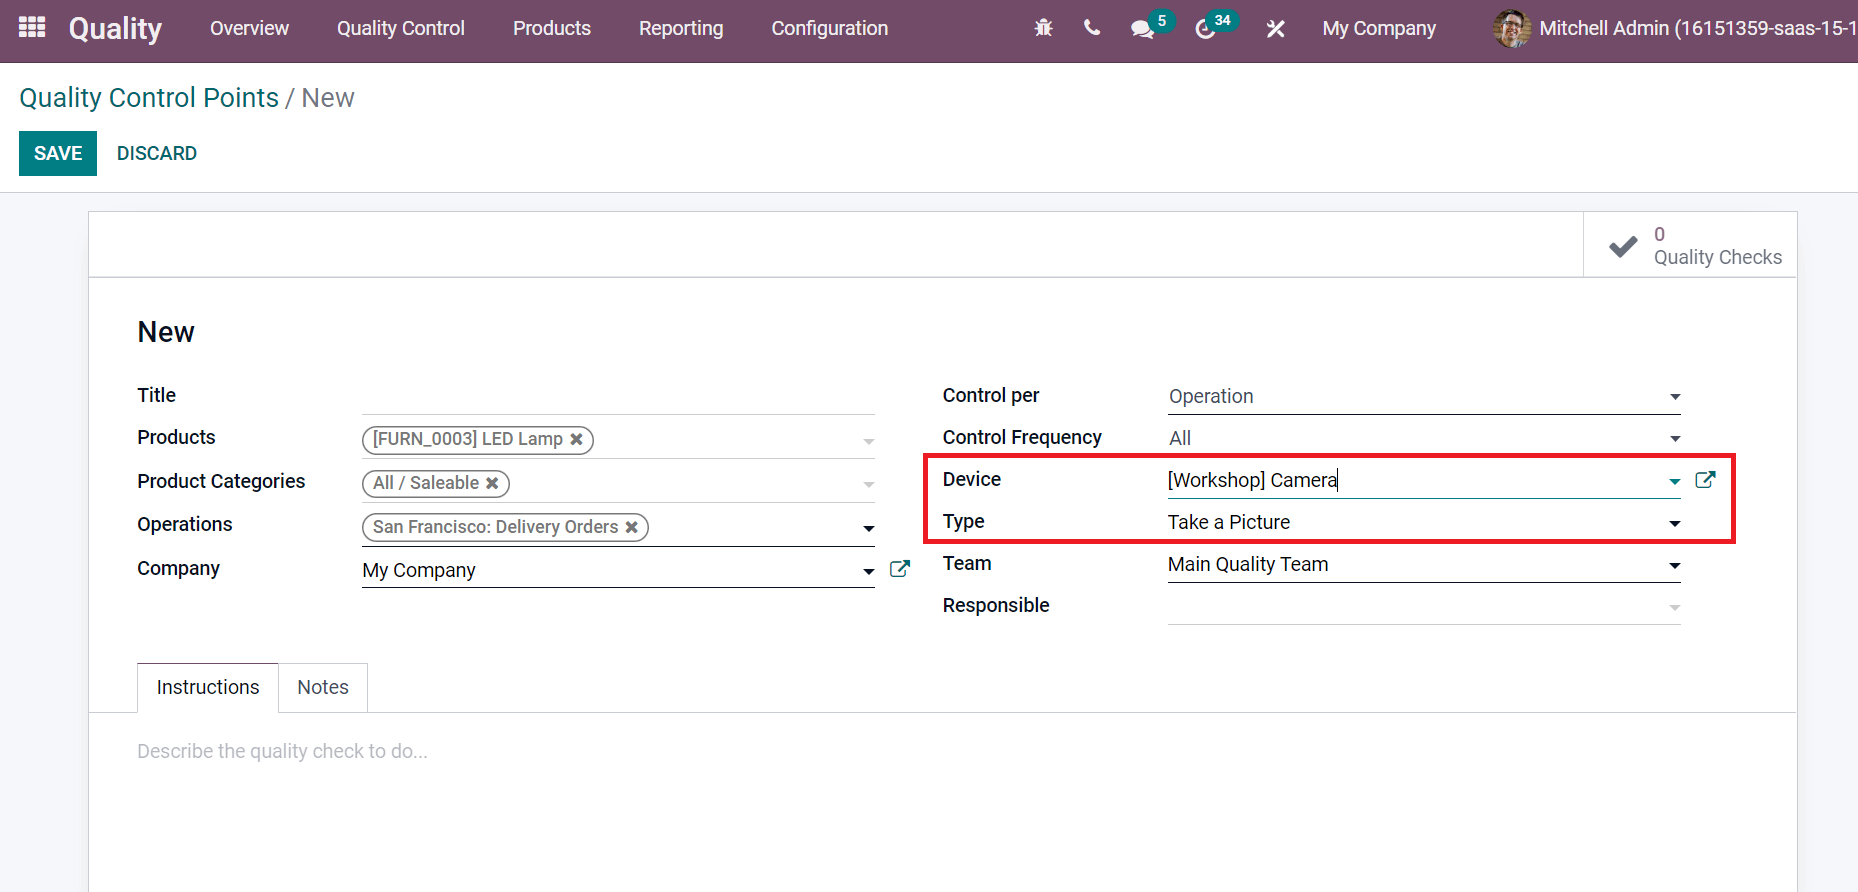
After choosing to Take a Picture option as Type, it takes a picture of an applied product in a transfer. A Device field is open after selecting this option and picking up your device, as represented in the screenshot below.
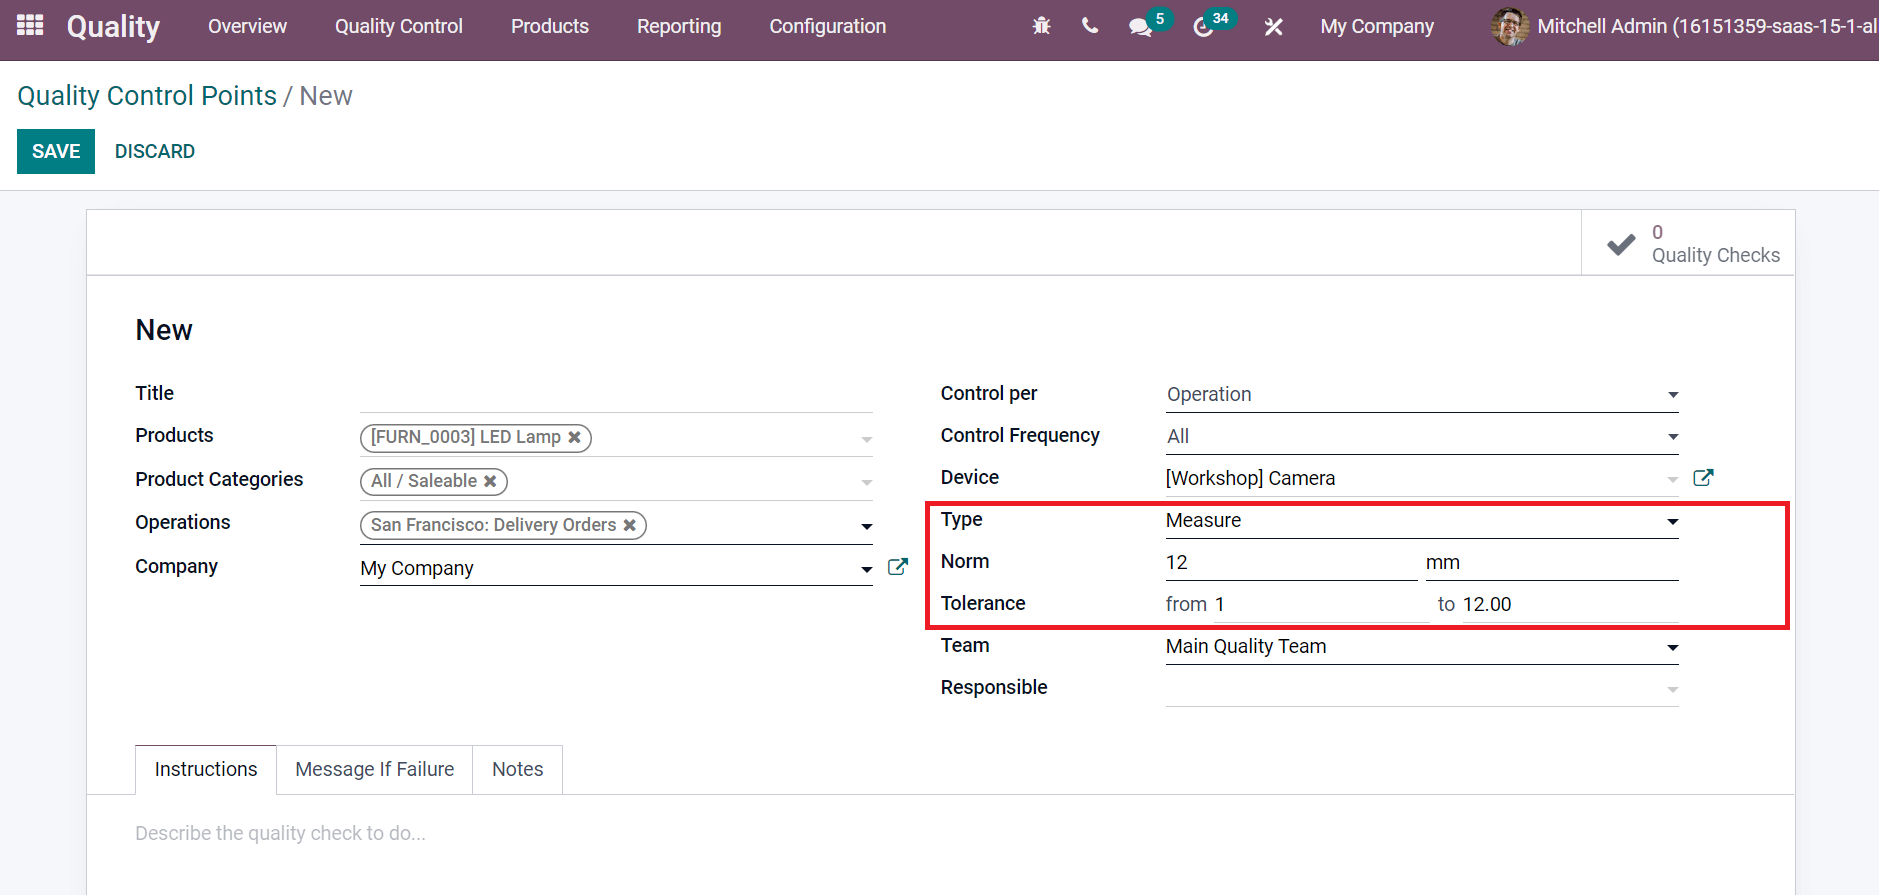
The Pass-Fail option ensures the pass or fails criteria of a specific product. In addition, it is applicable for both manufacturing orders and transfers. A product measurement specifies after selecting the Measure option as Type. You can add the Norm and Tolerance of the product by choosing the Type as Measure, as shown in the screenshot below.
The Template field is viewable before choosing the Worksheet option in the Type field, as illustrated in the screenshot below.
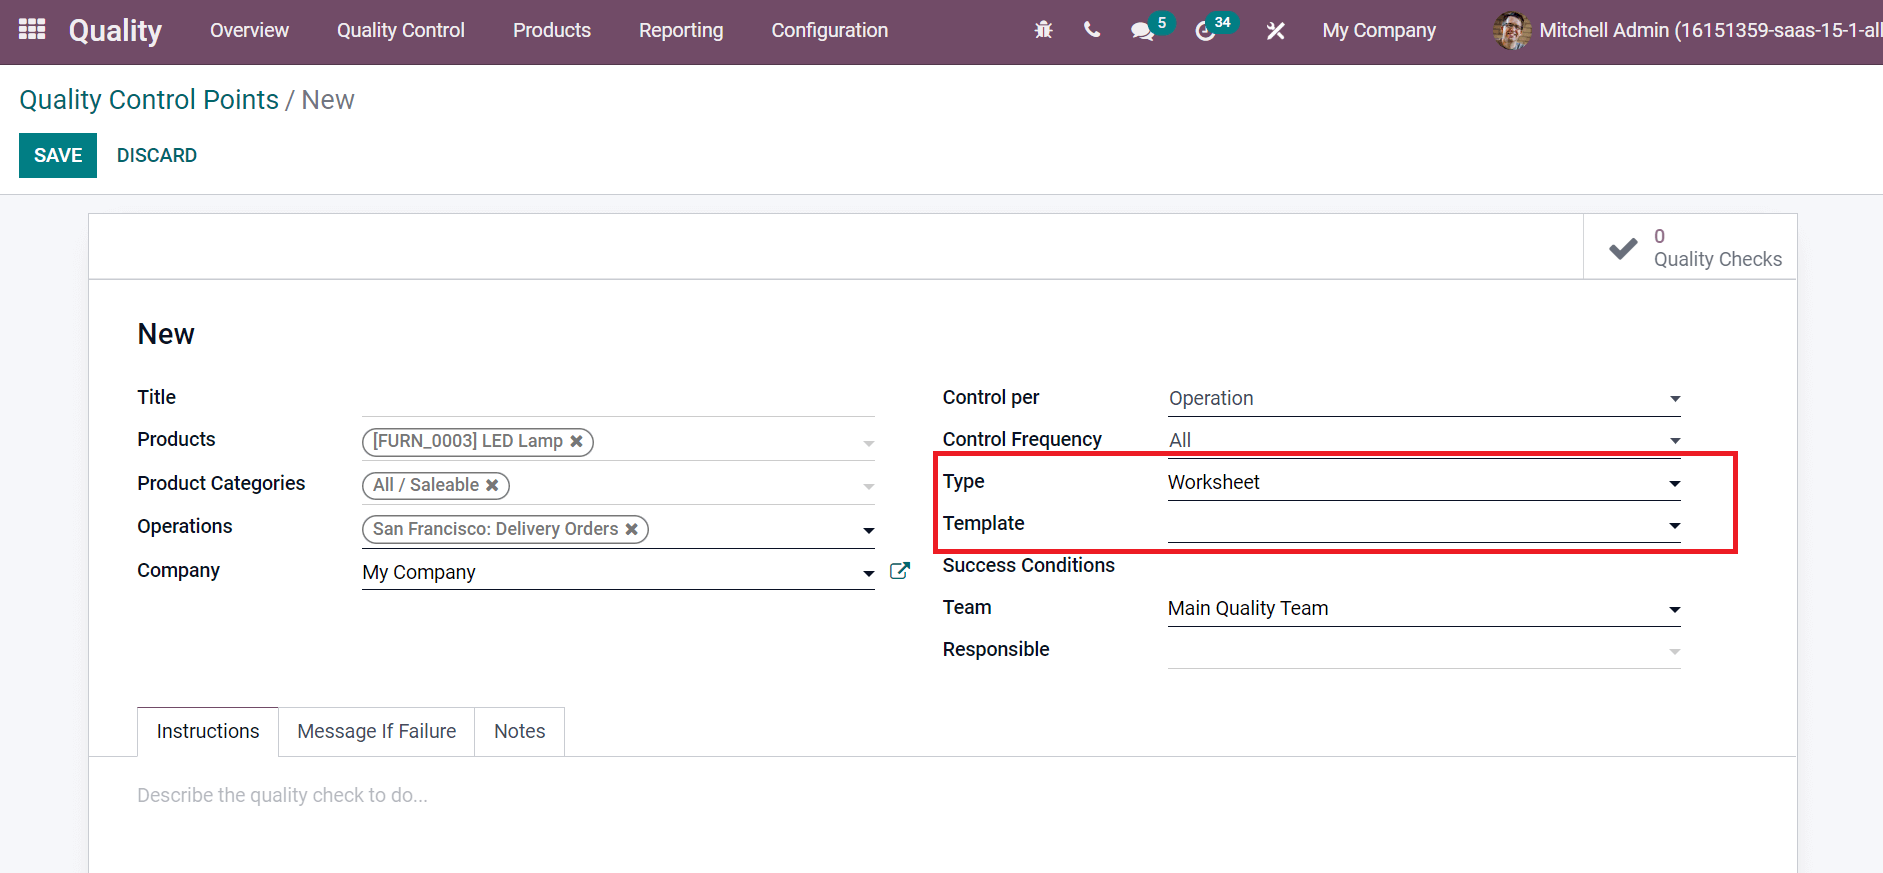
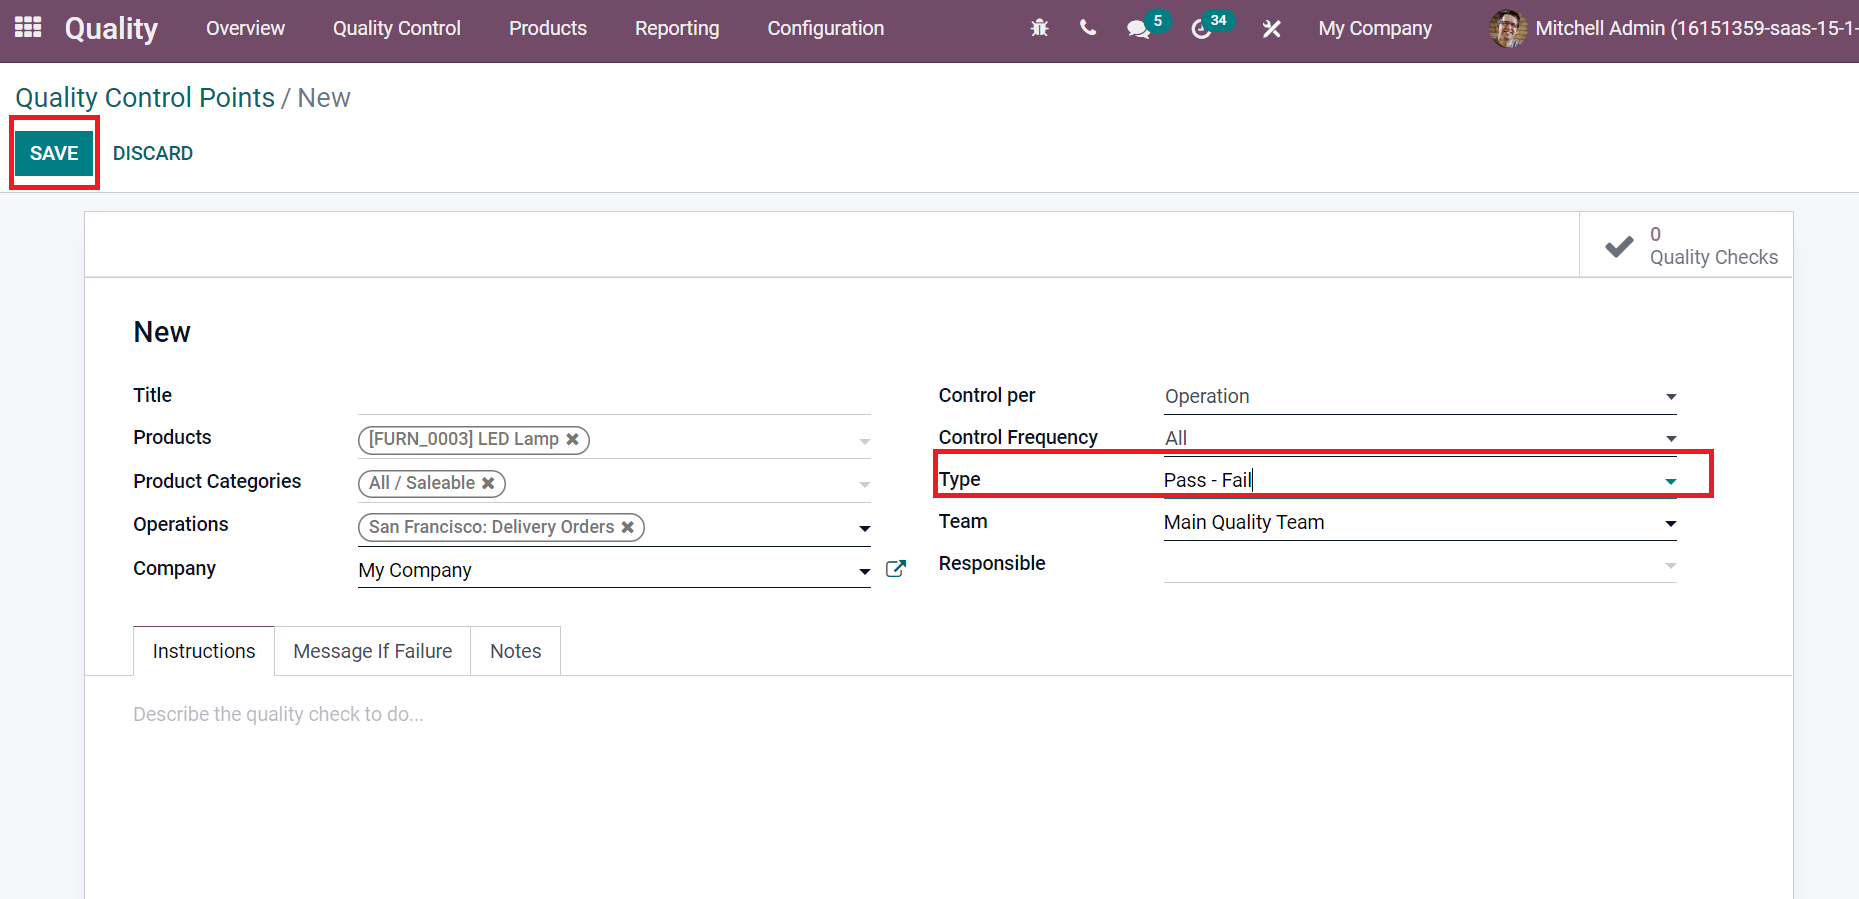
We selected the Type as Pass-Fail and clicked on the SAVE icon to process your quality control point for a product.
Quality Checks
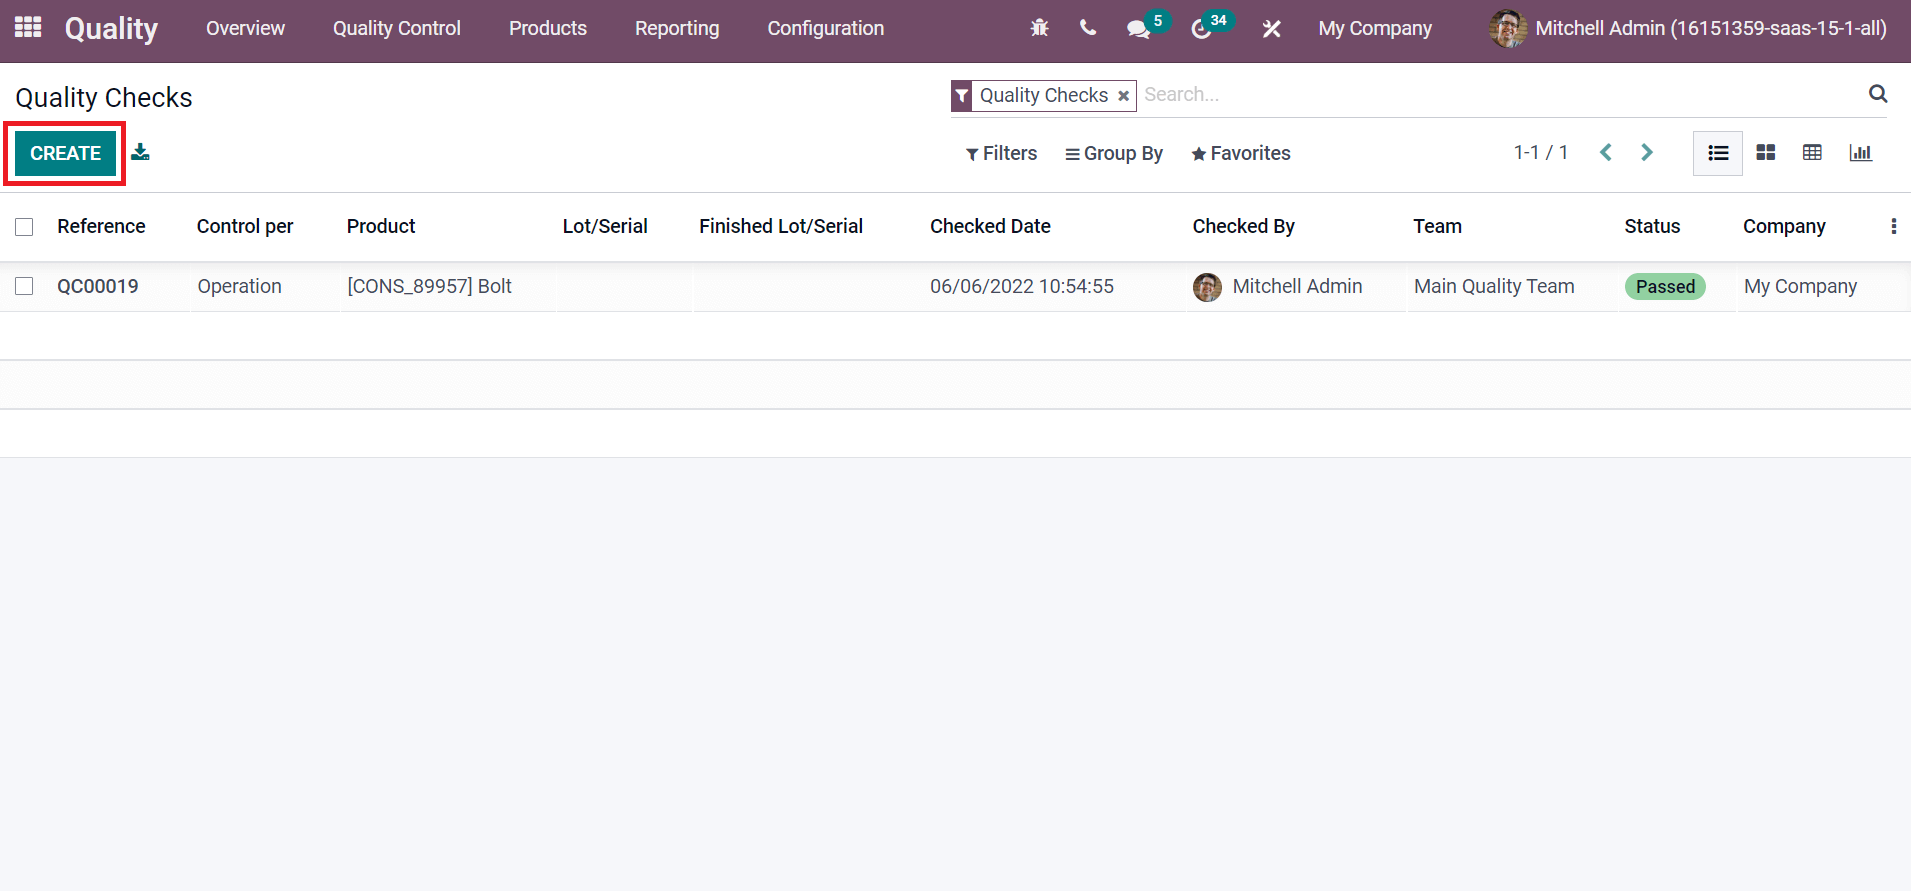
Users can check out the status of a product using Quality Checks. Choose the Quality Checks menu in the Quality Control tab, and you can view the list of generated quality checks for products. Click on CREATE button to process a new quality check for a product as specified in the screenshot below.
In the new window, add Product as Drawer and your Picking location. Later, select the Company and Team for your product quality check, as denoted in the screenshot below.
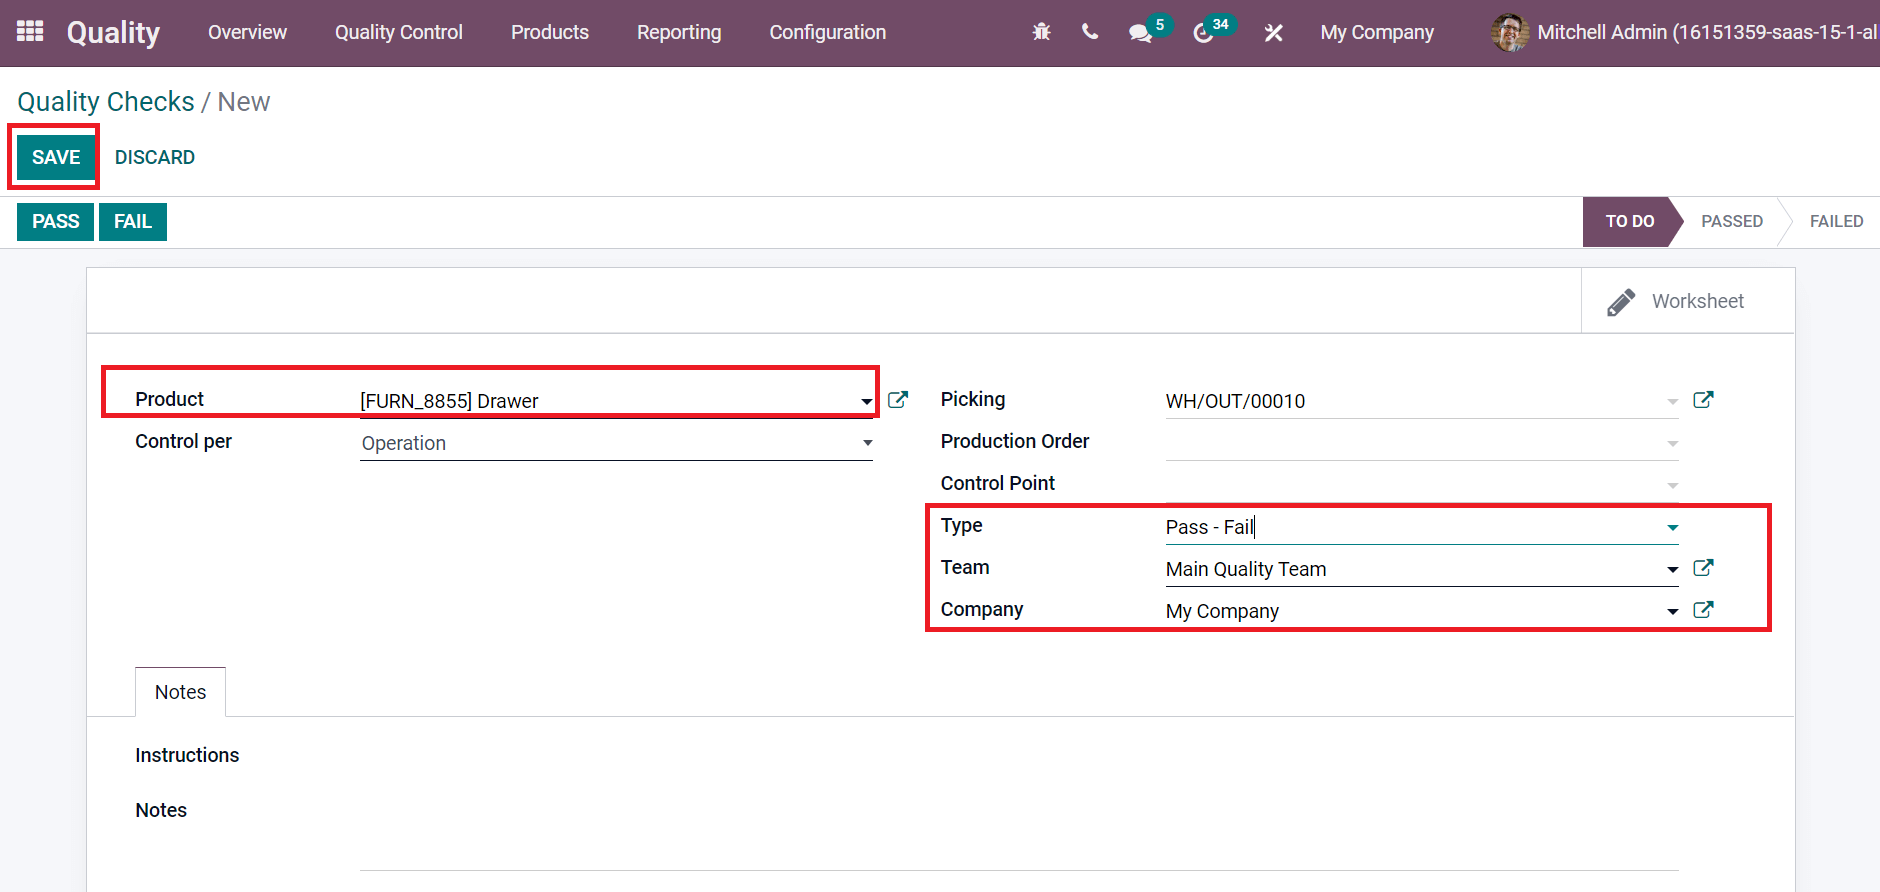
Click on the SAVE icon to constitute your product quality check, as in the above screenshot. After processing the quality checks, you can mark them as PASS or FAIL in the Quality Checks window.
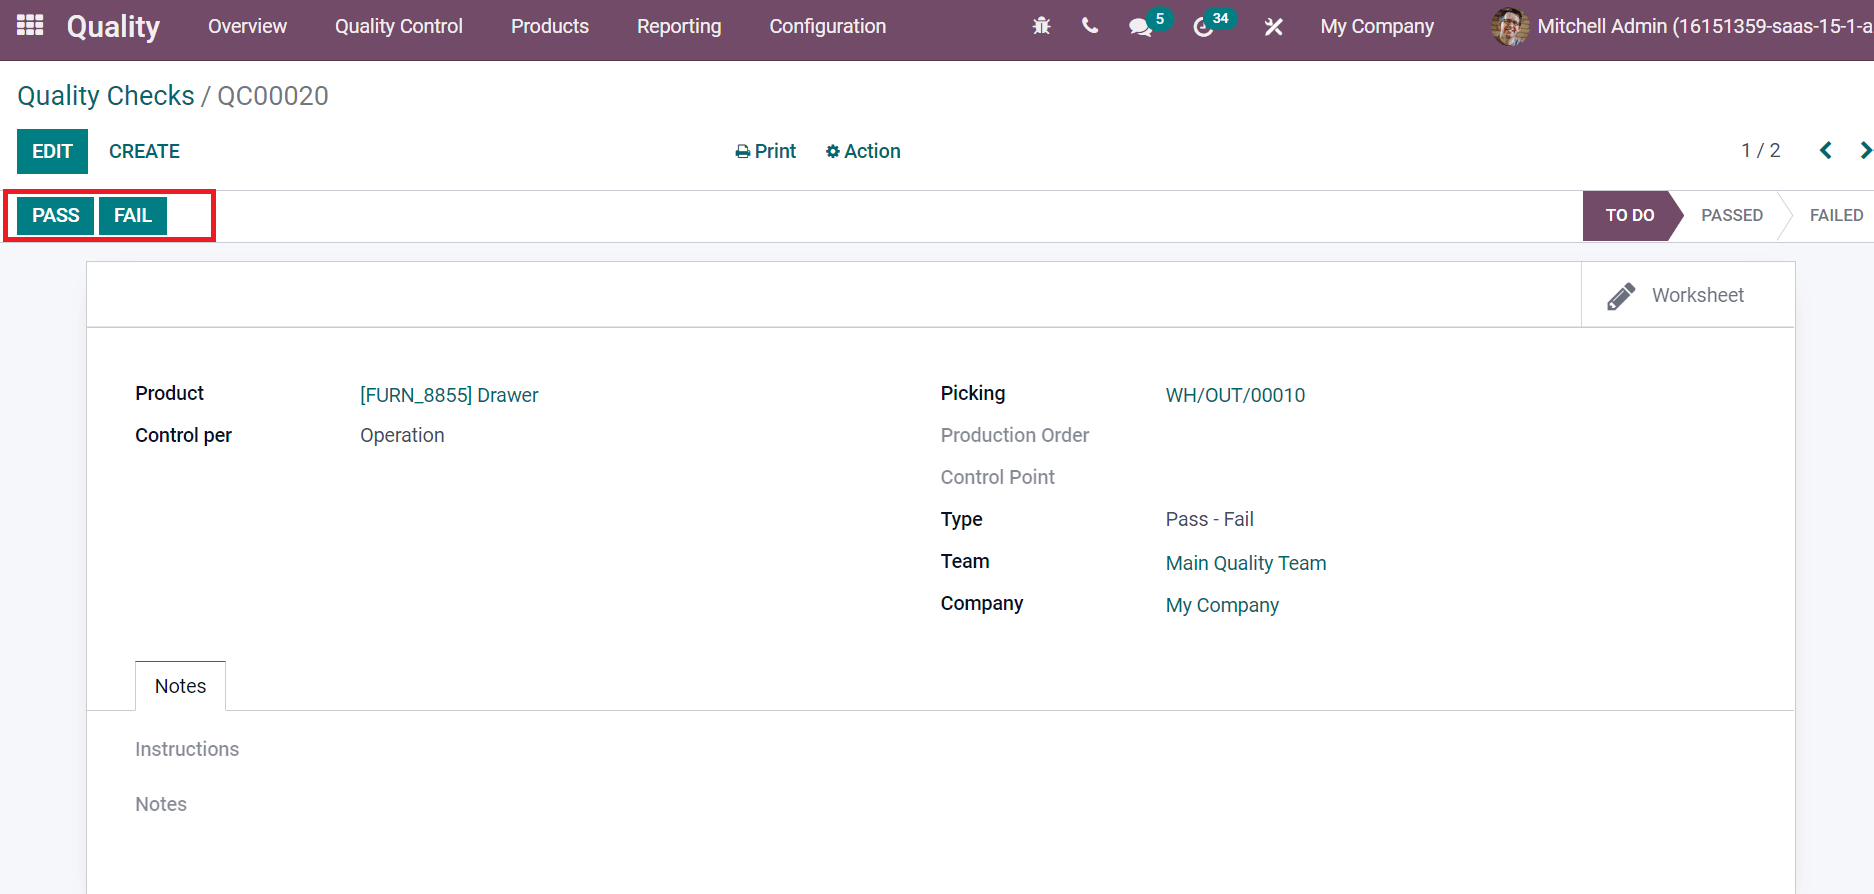
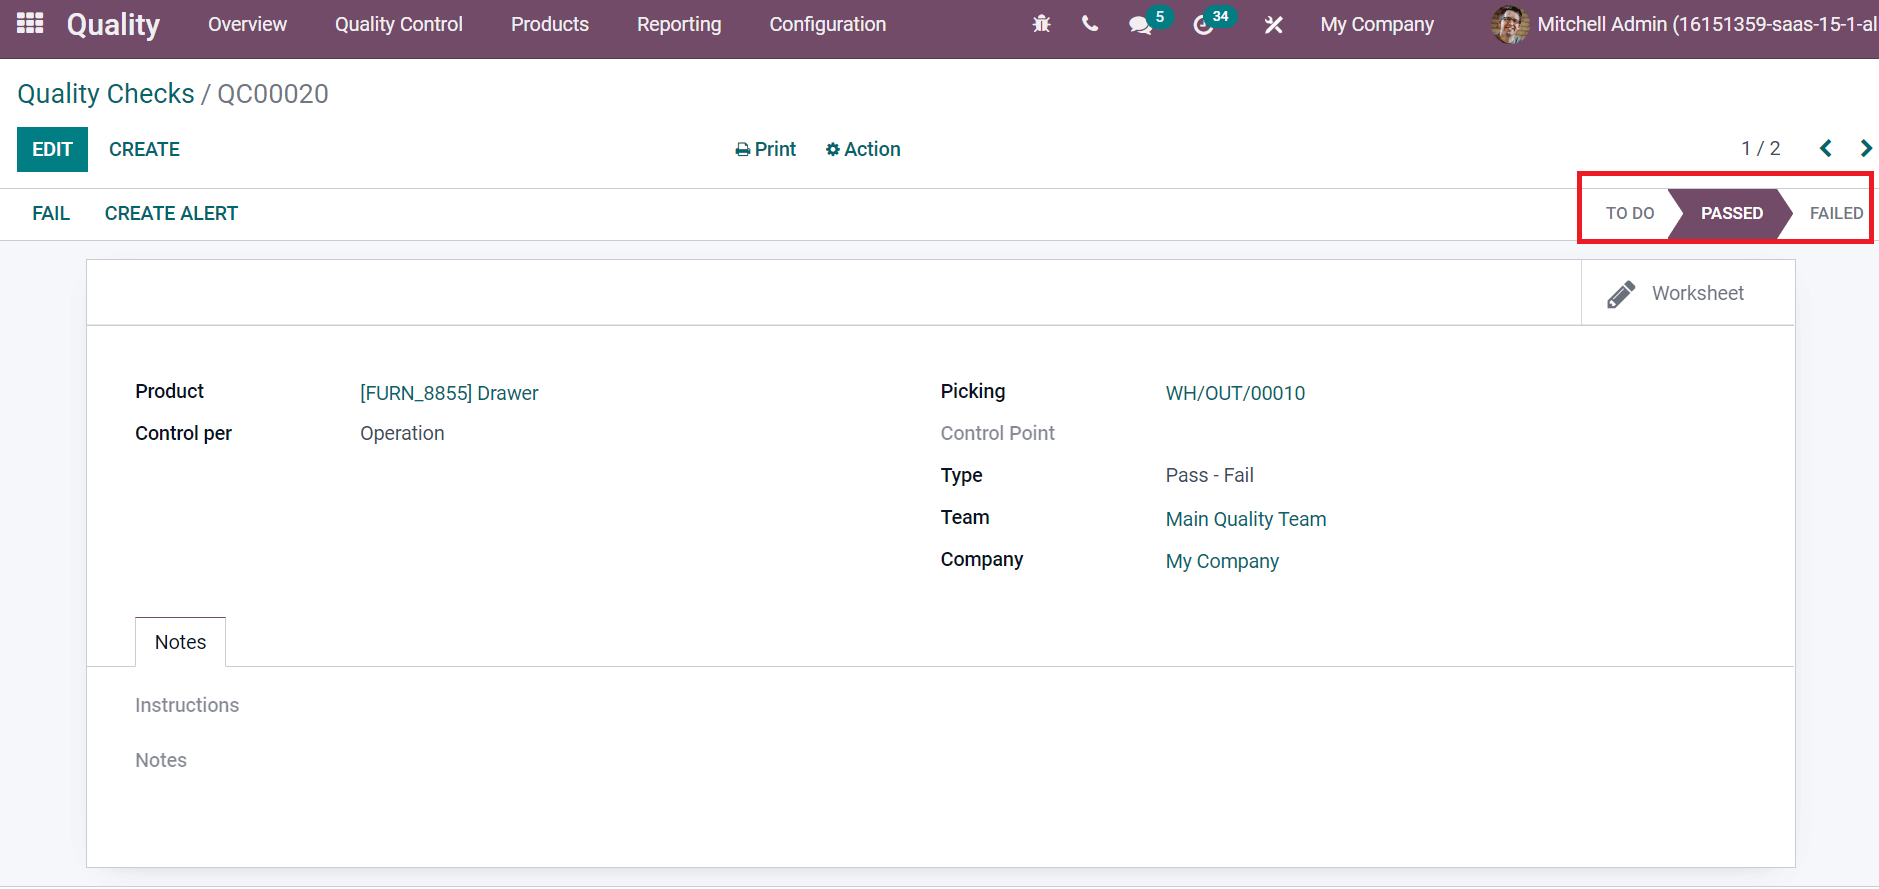
The production stage is changed from To Do to PASSED by clicking on the PASS icon, as displayed in the screenshot below.
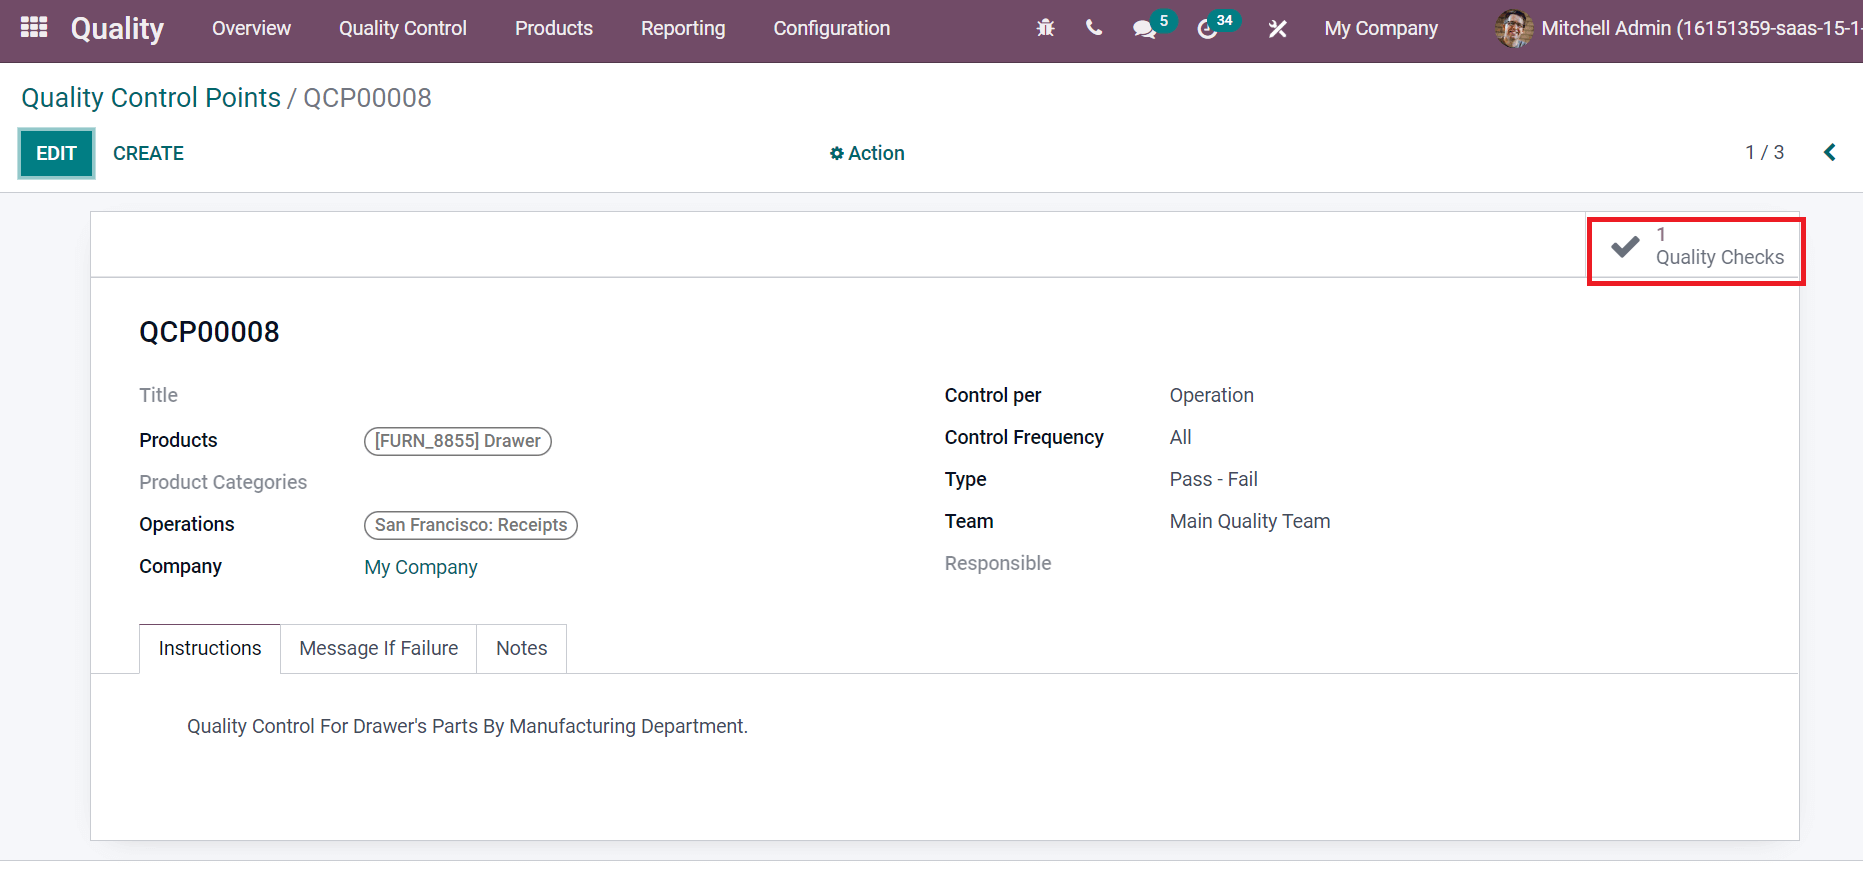
After that, let’s move to Quality Control Points window and choose the product Drawer. One quality check is generated inside the Quality Checks smart button in the new window, as portrayed in the screenshot below.
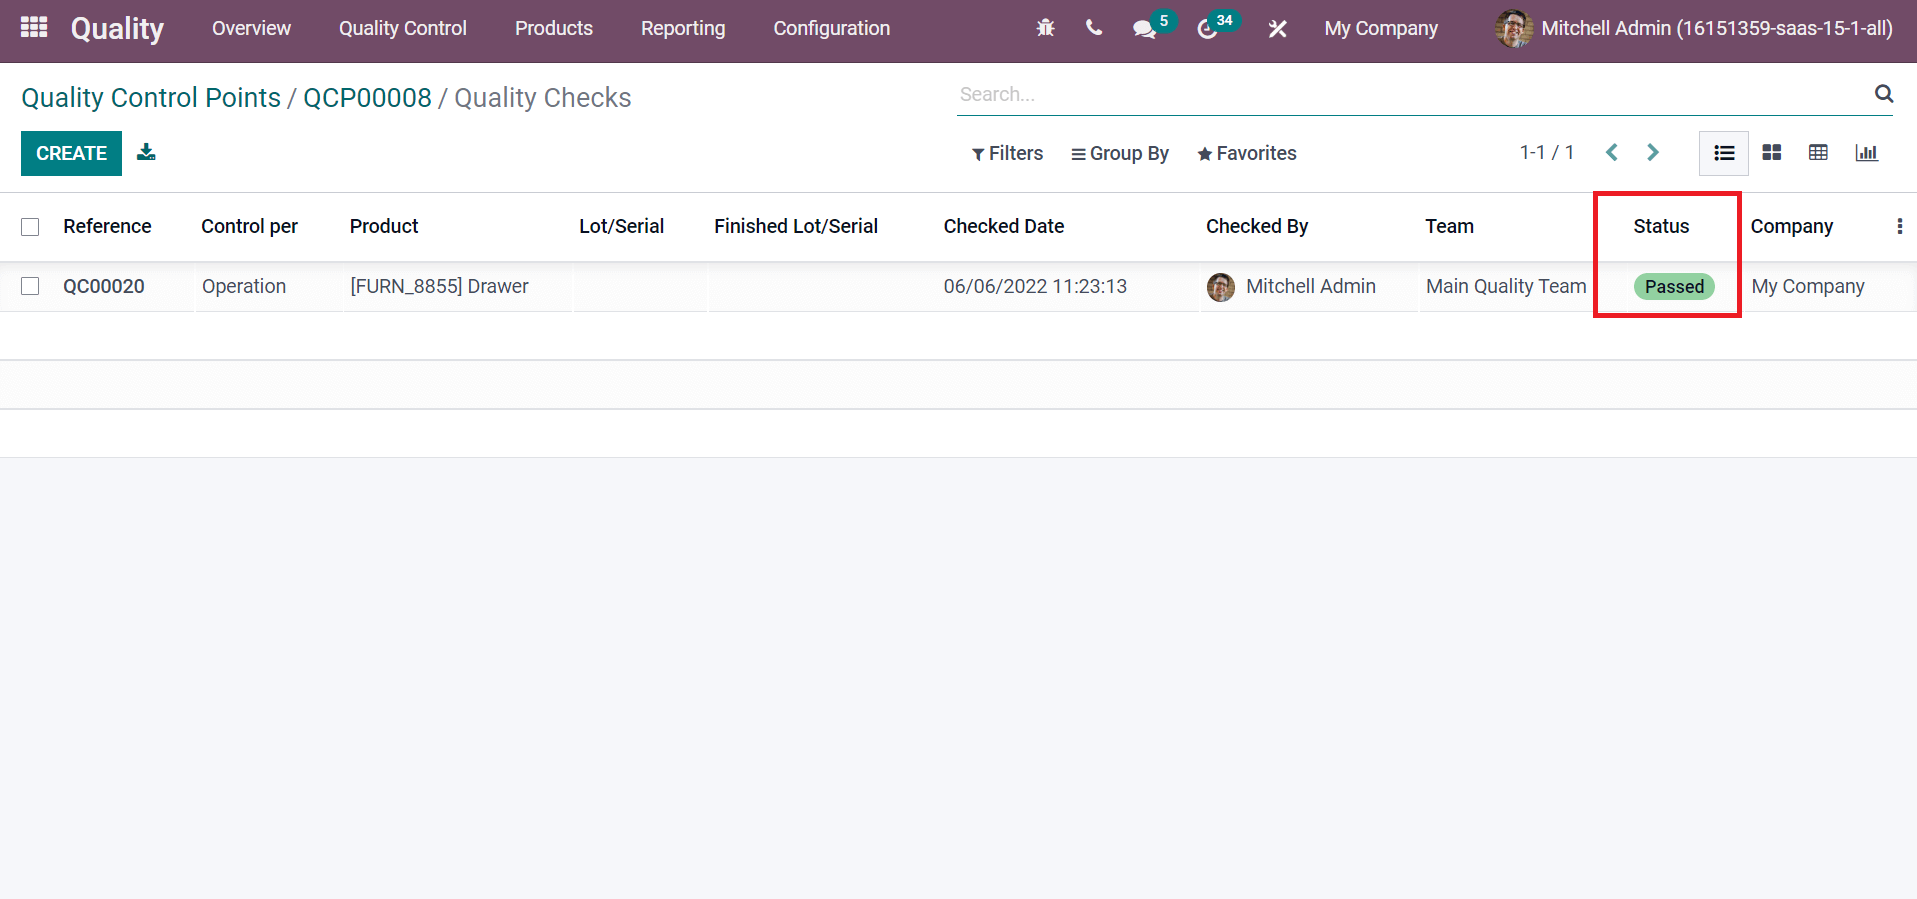
Now, the Status of the Quality Check of the Drawer is Passed, as mentioned in the screenshot below.
Quality Alerts
We can set quality alerts for products, services, and manufacturing orders. Users can remind employees about product quality checks or services in a company. In the List view of a Quality Alerts window, you can view the list of quality alerts of products. It includes details such as Name, Work center, Responsible, Company, Team, and other data as mentioned in the screenshot below.
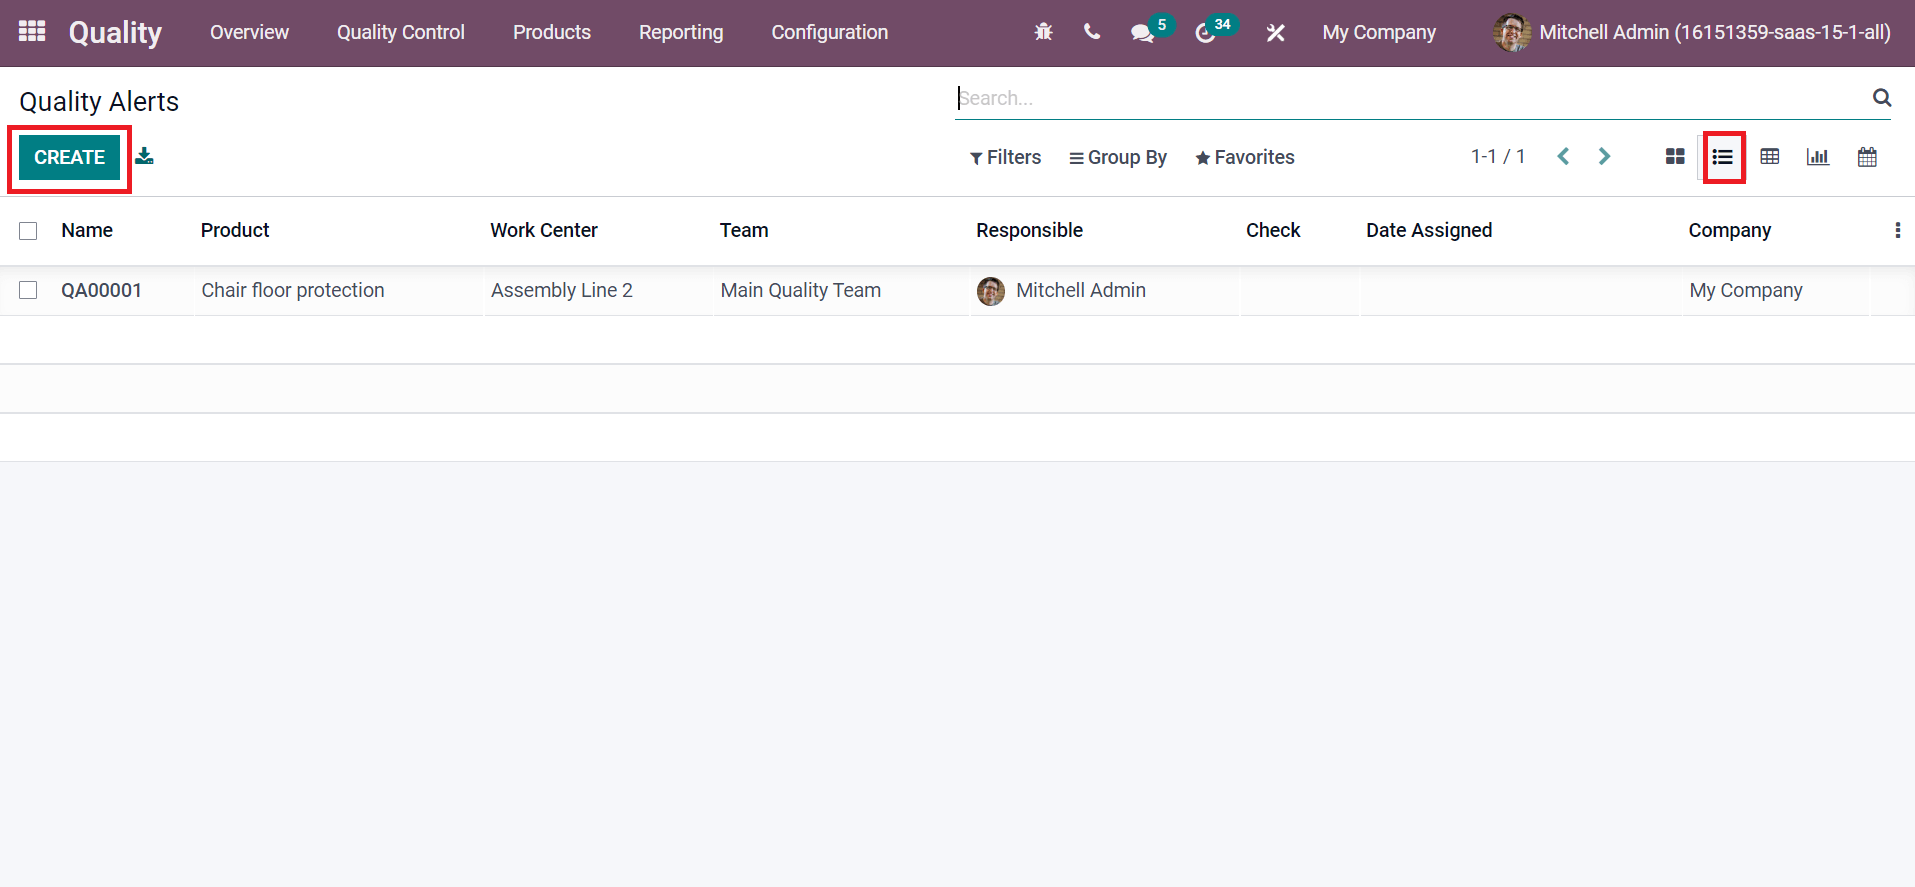
By clicking on CREATE icon, you can set a new quality alert for a product. In the new window, add Product as Drawer, and select Work Center or Picking location as portrayed in the screenshot below.
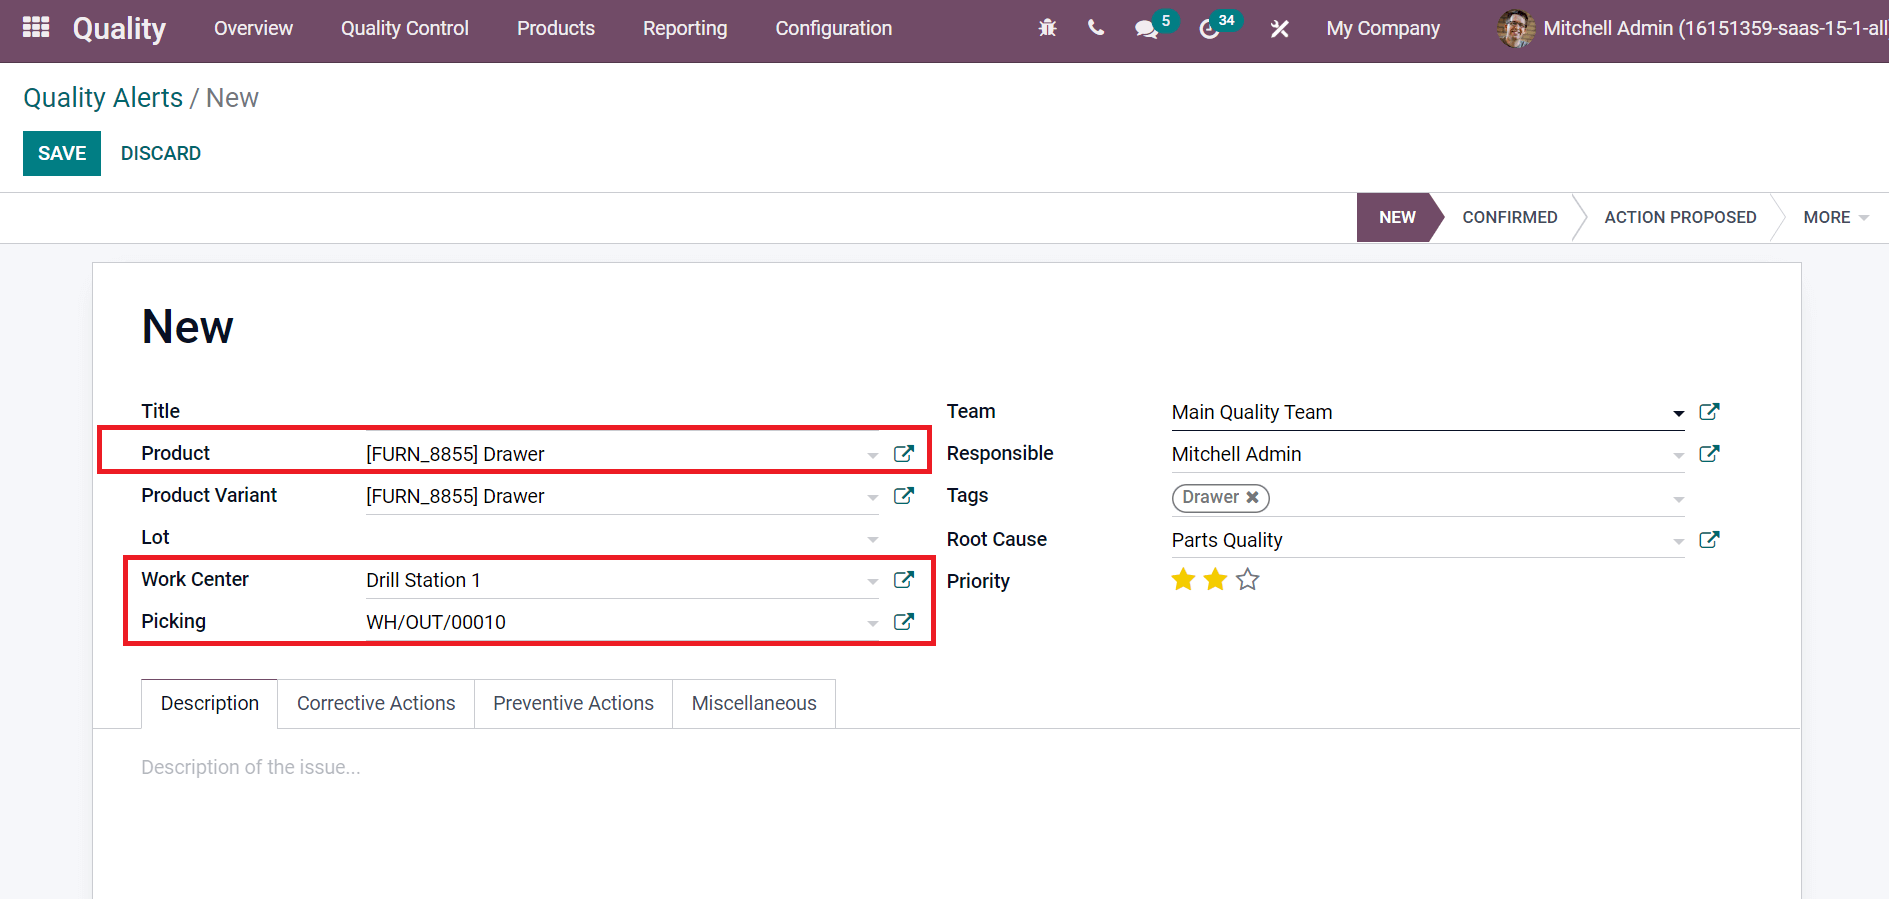
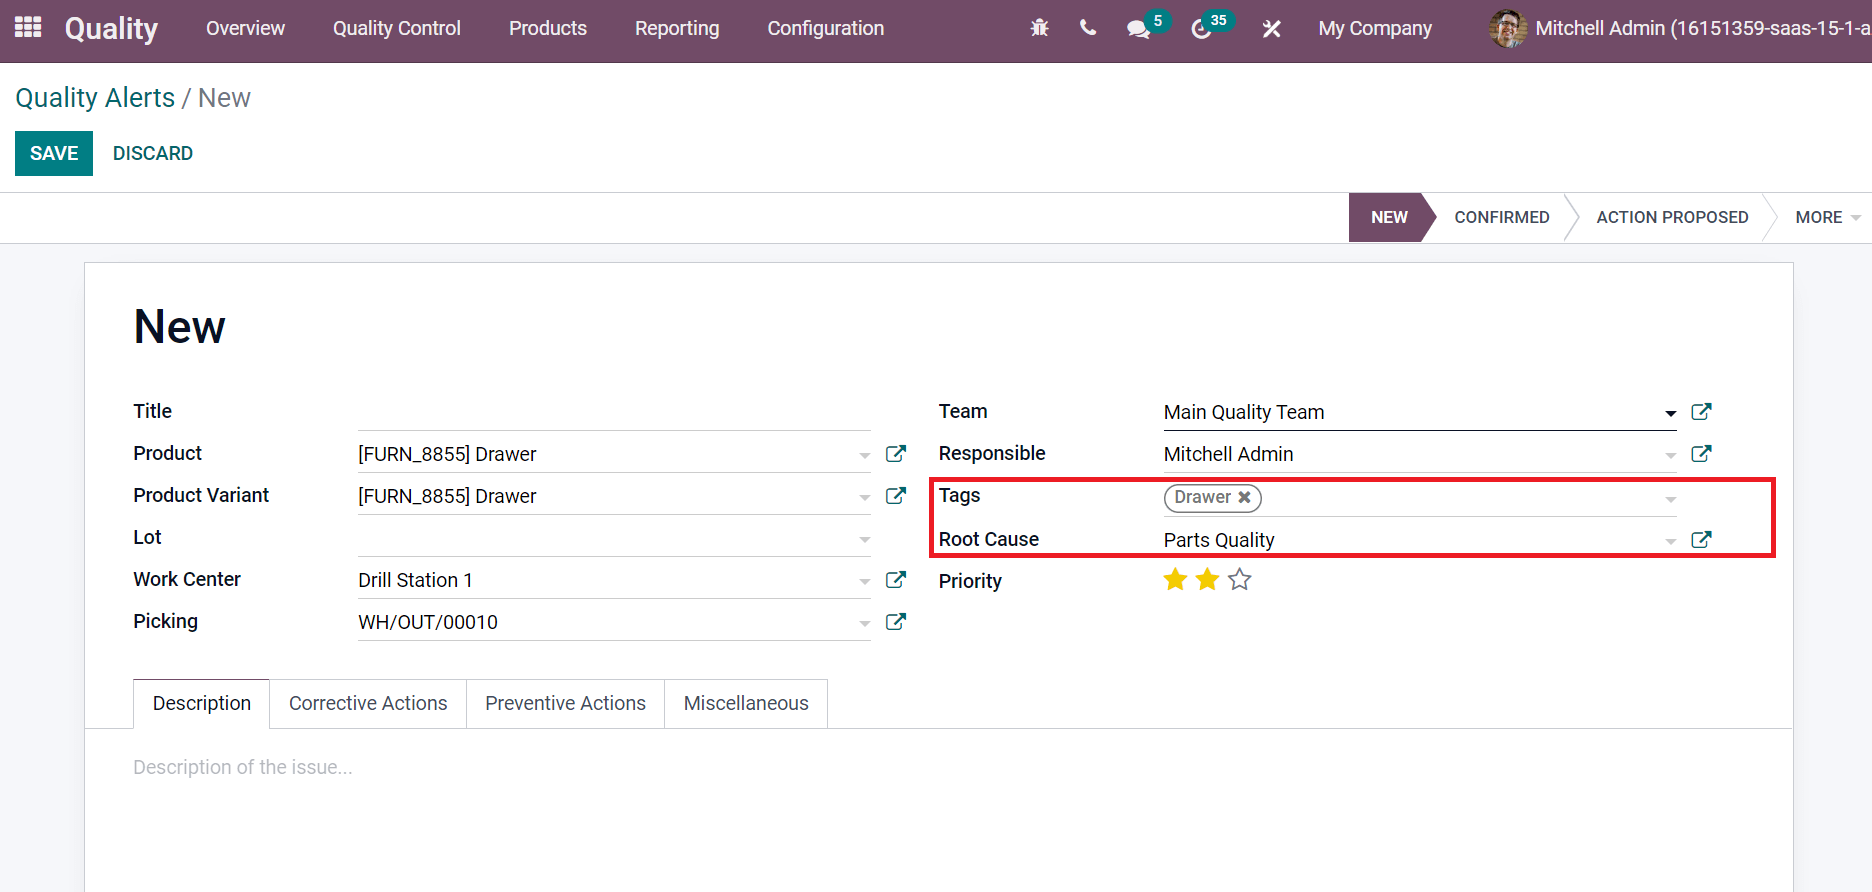
You can also assign a Team for your product quality check. Later, add Tags and Root Cause for the quality check as specified in the screenshot below.
Users can prioritize the quality alert by clicking on stars inside the Priority field. We can add details about the product issue in the Description field, as depicted in the screenshot below.
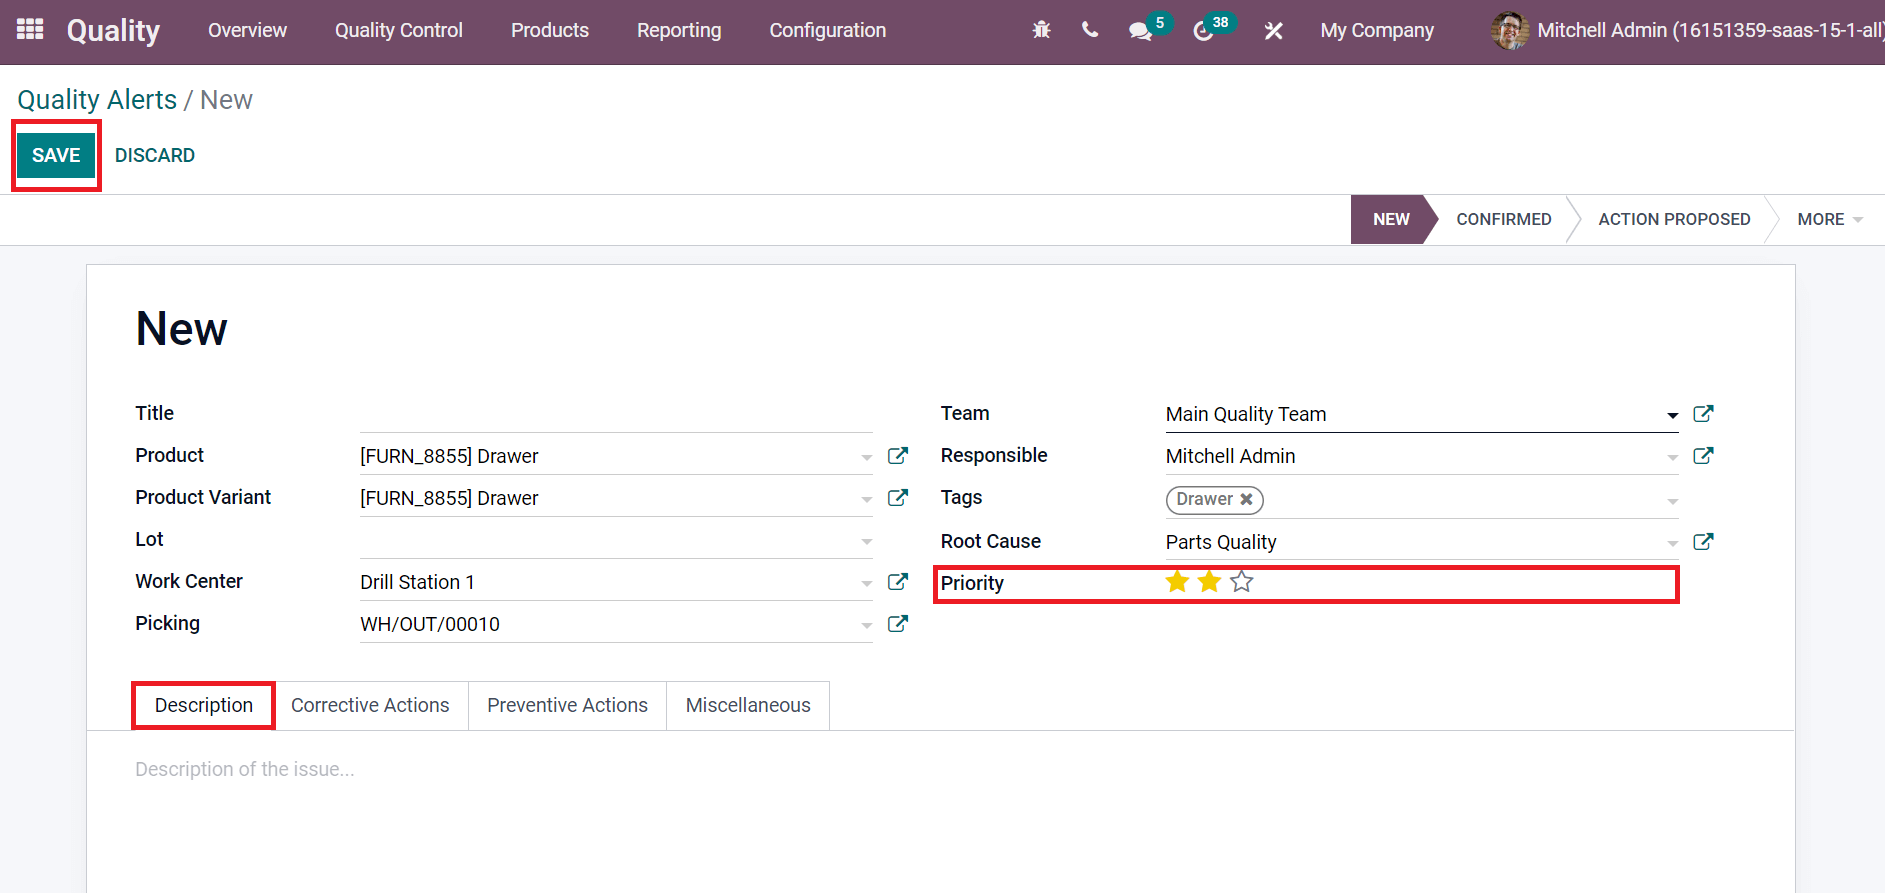
Click on the SAVE icon to formulate the quality alert of your product.
We can control the quality-related actions of products using the support of the Odoo 15 Quality module. It is easy to manage quality checks, alerts, and control points of products and services in a company. Refer to the following blog to learn about Control Points and Alerts in Odoo 15.


