Employee salary management is an essential element in employee salary management. Having a reliable system for employee management is critical for maintaining efficiency in employee payroll management. The Payroll module of Odoo is a highly advanced employee salary management system equipped with the most advanced features and tools to ensure maximum efficiency in the process.
This blog will give you a detailed note on how to manage salary structures with Odoo 15.
The payroll module of Odoo is explicitly designed for employee salary management. The module is highly integrated with the Employee module of Odoo to let the user have full access to all of the employee profiles. With the payroll module of Odoo, you can manage multiple salary structures for your employees based on their pay grades and other related factors.
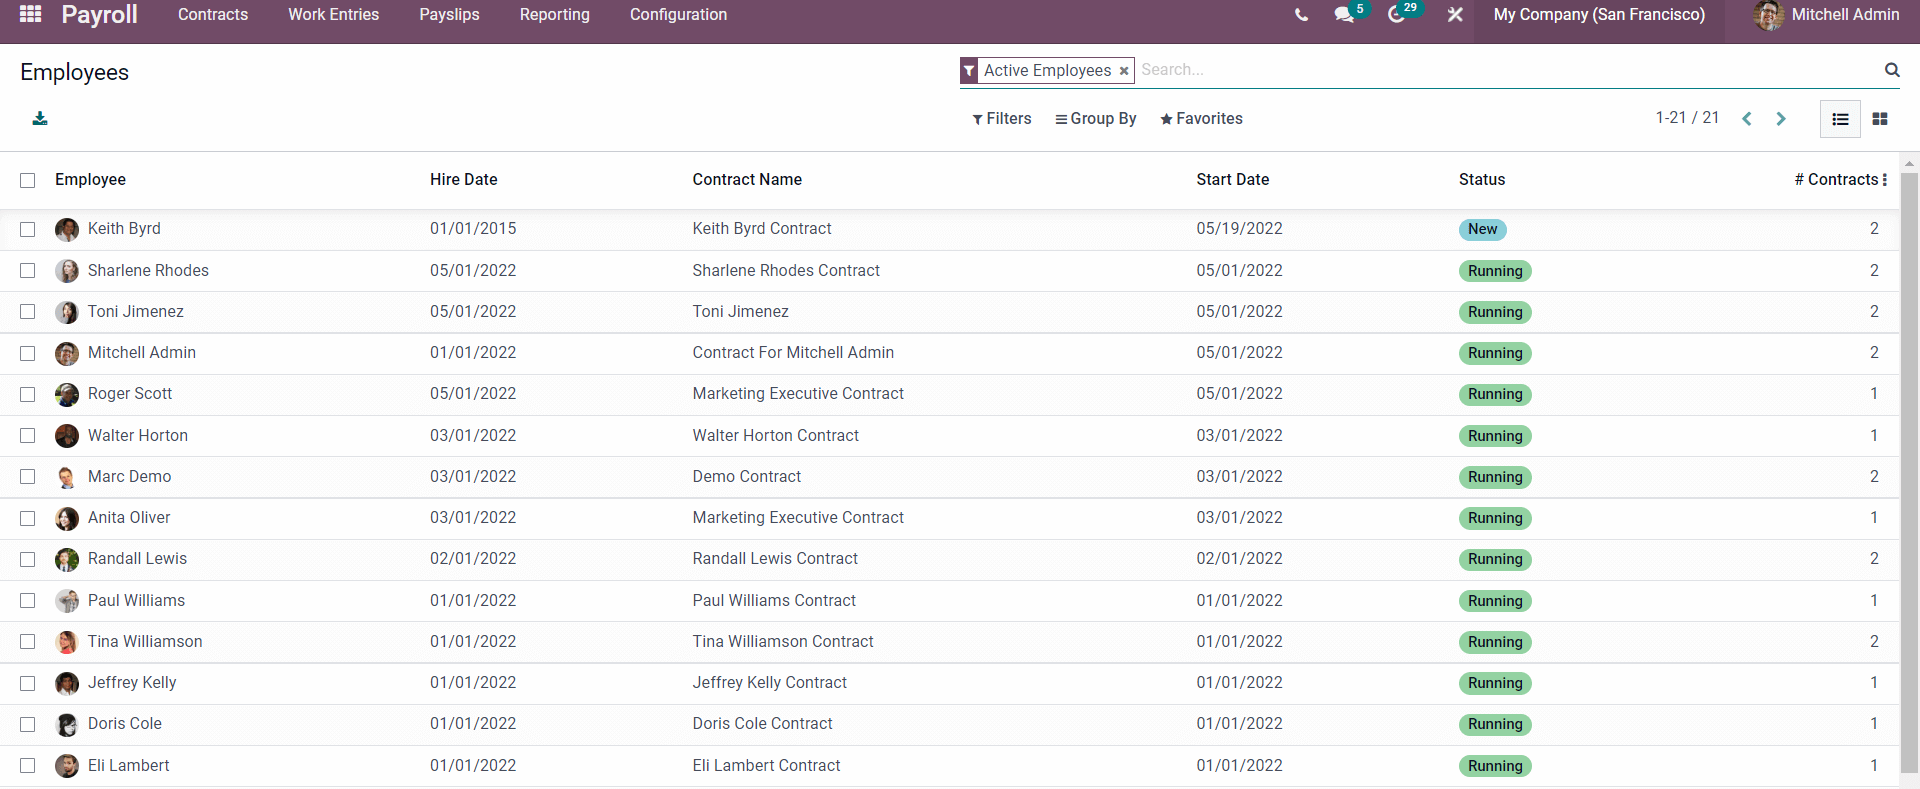
The image given above represents the dashboard of the Payroll module. All employees with their live status on the Payroll will be displayed. Follow the link provided below to learn more about the dashboard and the Employee salary management procedures with the Odoo Payroll Module.
The initial step to creating a salary structure is to create a new structure type. Creating salary structure types can help you manage and overview all of the salary structures effortlessly. To create a new salary structure type, click on Structure types under the configurations tab of the module.

The existing structure types will be listed on this page. The CREATE button will let you create a new Structure type which can be later included in the salary structure.

Enter a name to the Structure type. Choose the country and the Wage type from the respective fields. You can choose the payment schedule from the Default Schedule pay field and the working time from the Default working hours field.
You can also choose the regular pay structure, and the default works entry types from the respective fields. Note that you create and manage Work entry types and Working times from the Payroll Module
Post configurations; click on the SAVE button to include or integrate the structure type into Odoo.
Salary Structure
With the Payroll module of Odoo, you can create and manage multiple salary structures effortlessly. Salary structures can be built and managed from the configuration tab of the Payroll module. The Configuration tab will have a Salary section with all of the configuration options on the Salary. Click on Structure from the drop-down menu under the configuration tab.
The page on the Salary structure will open up as shown below.

All of the Salary structures will be listed on this page. Press the CREATE button to create a new salary structure.
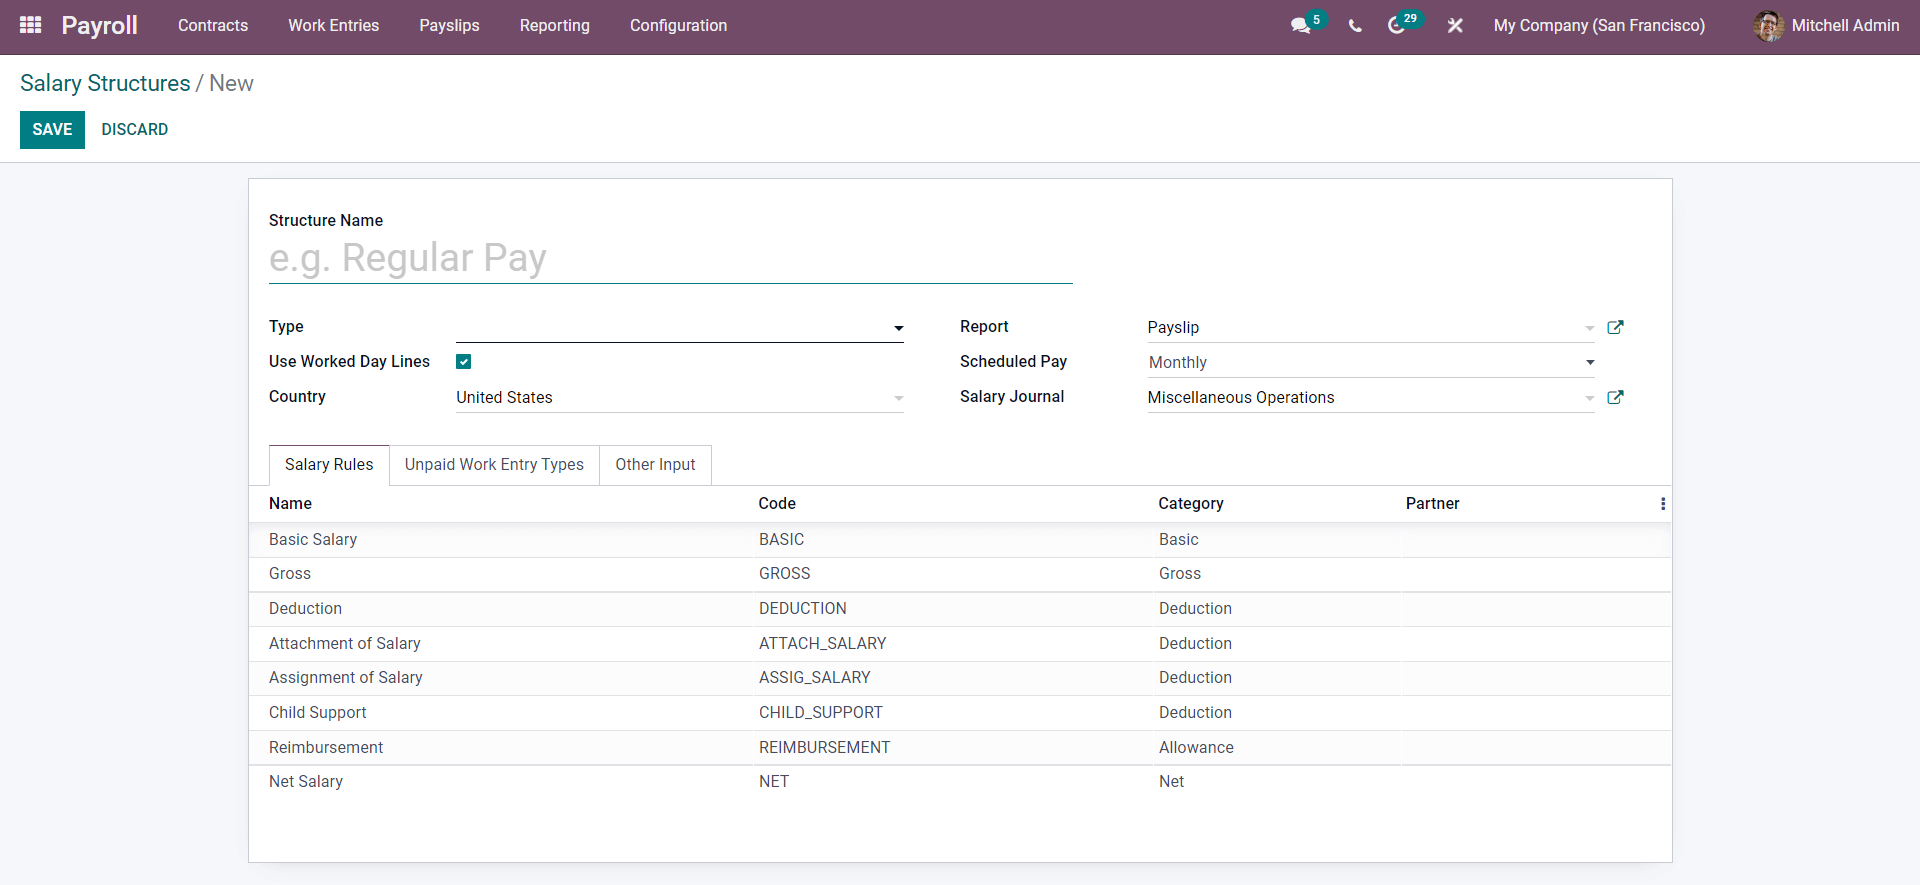
Salary structures can be configured from this page. You can give a name for the structure for easy identification and management. You can choose a structure type from the Type field to categorize the new salary structure. If you have created a new salary structure type, it will be displayed as you press on the Type field. You can select the report type from the Report field; as it is a salary structure, you can give Payslip as the Report.
The Schedule pay field will let you change the scheduled payment time of the salary. The default pay is monthly, and you can change it based on the salary structure or job. Odoo has given you the option to include the salary in the journal from the Salary Journal field and will allow you to maintain and manage the salary records effortlessly according to your company policies and strategies.
In the lower section of the configuration page, you can find the Salary Rules tab below.
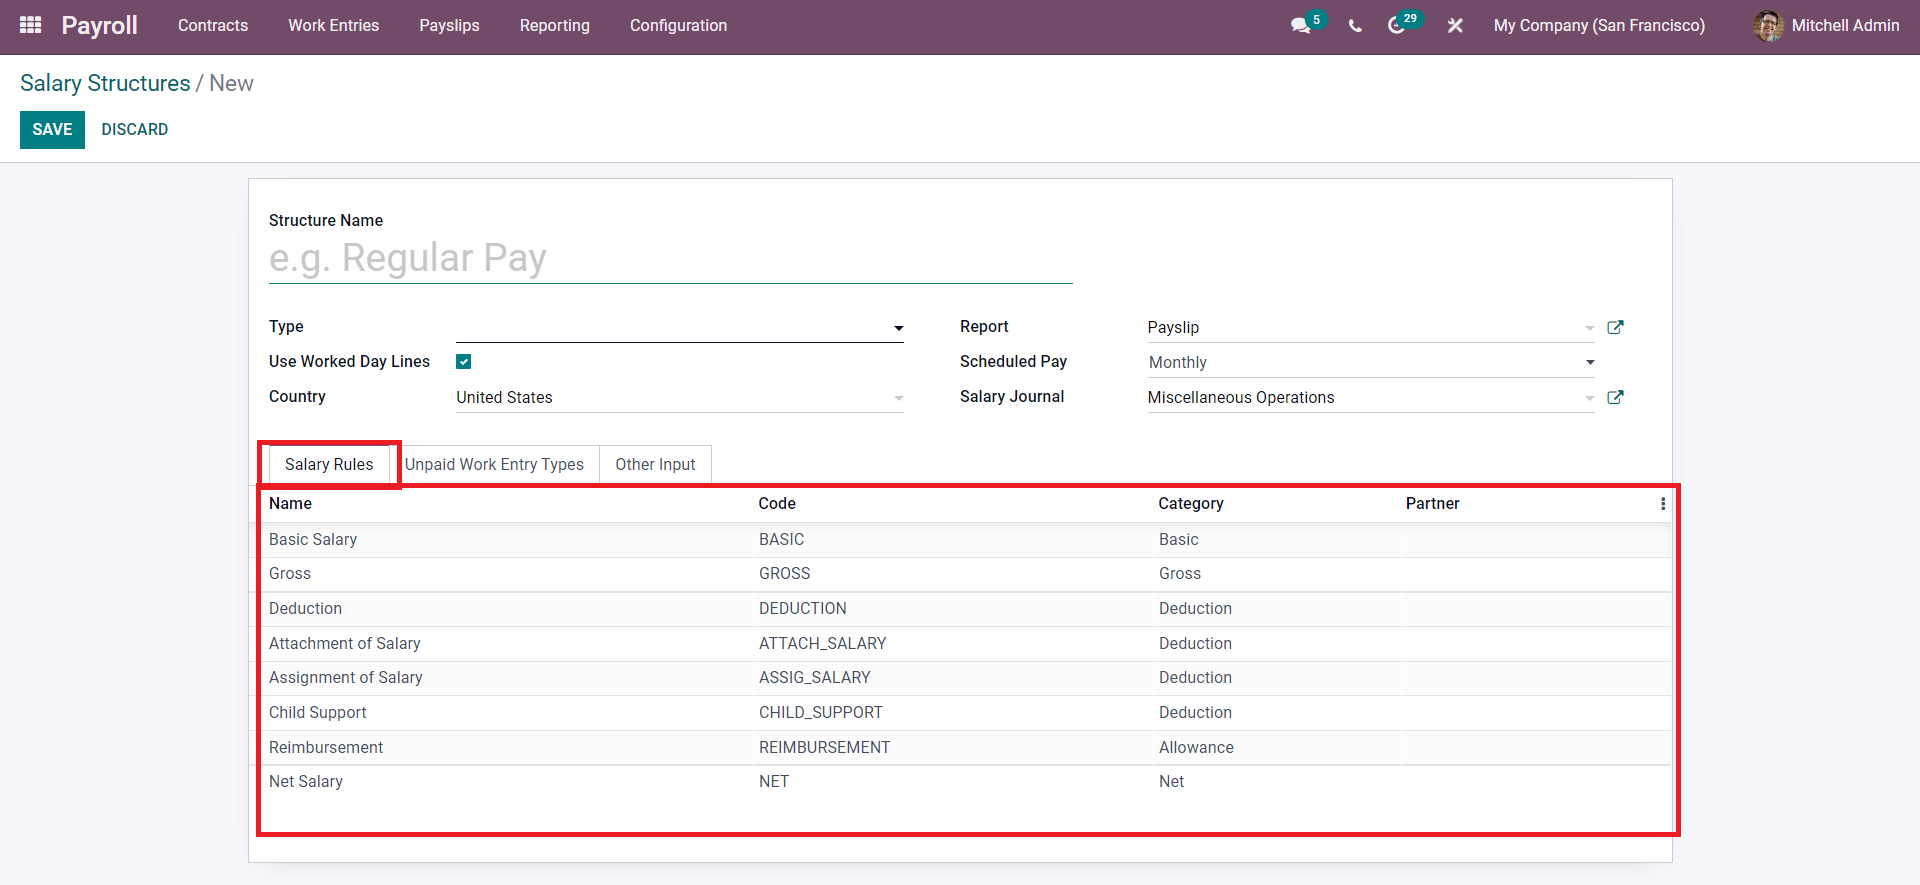
The rules relating to the Salary will be detailed on the Salary rules tab. You can instantly create and manage salary rules using the payroll module of odoo, which will be explained later in this blog. You can click o any of the rules from the list to manage and overview them.
The Unpaid Work Entry types tab of the configuration page will let you include the unpaid work entry types, as shown below.
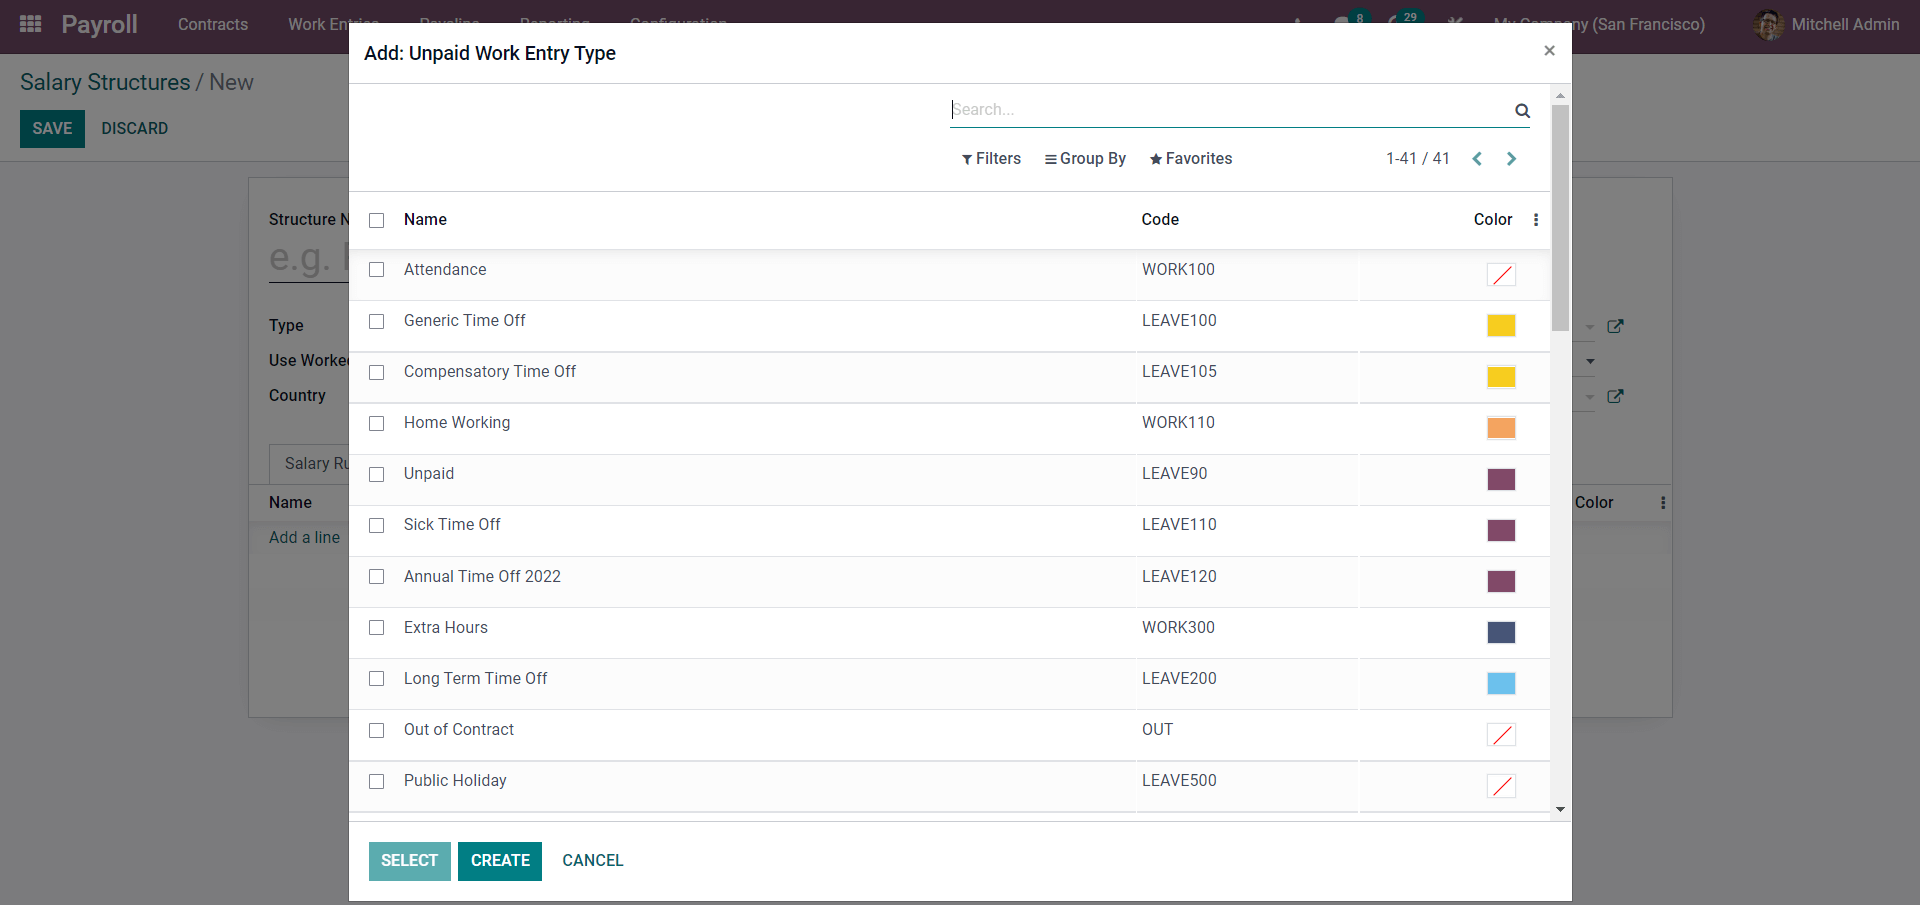
You can apply the unpaid entry type based on your salary management structure. After including the work entry type, you can add a description to the Salary structure by going to the Other Input button, detailing the various info relating to the salary structure.
Rules
With the Odoo 15 Payroll module, you can include rules to the salary structures for easy employee salary management. Salary Rules can be accessed from the Configurations tab of the Payroll module.
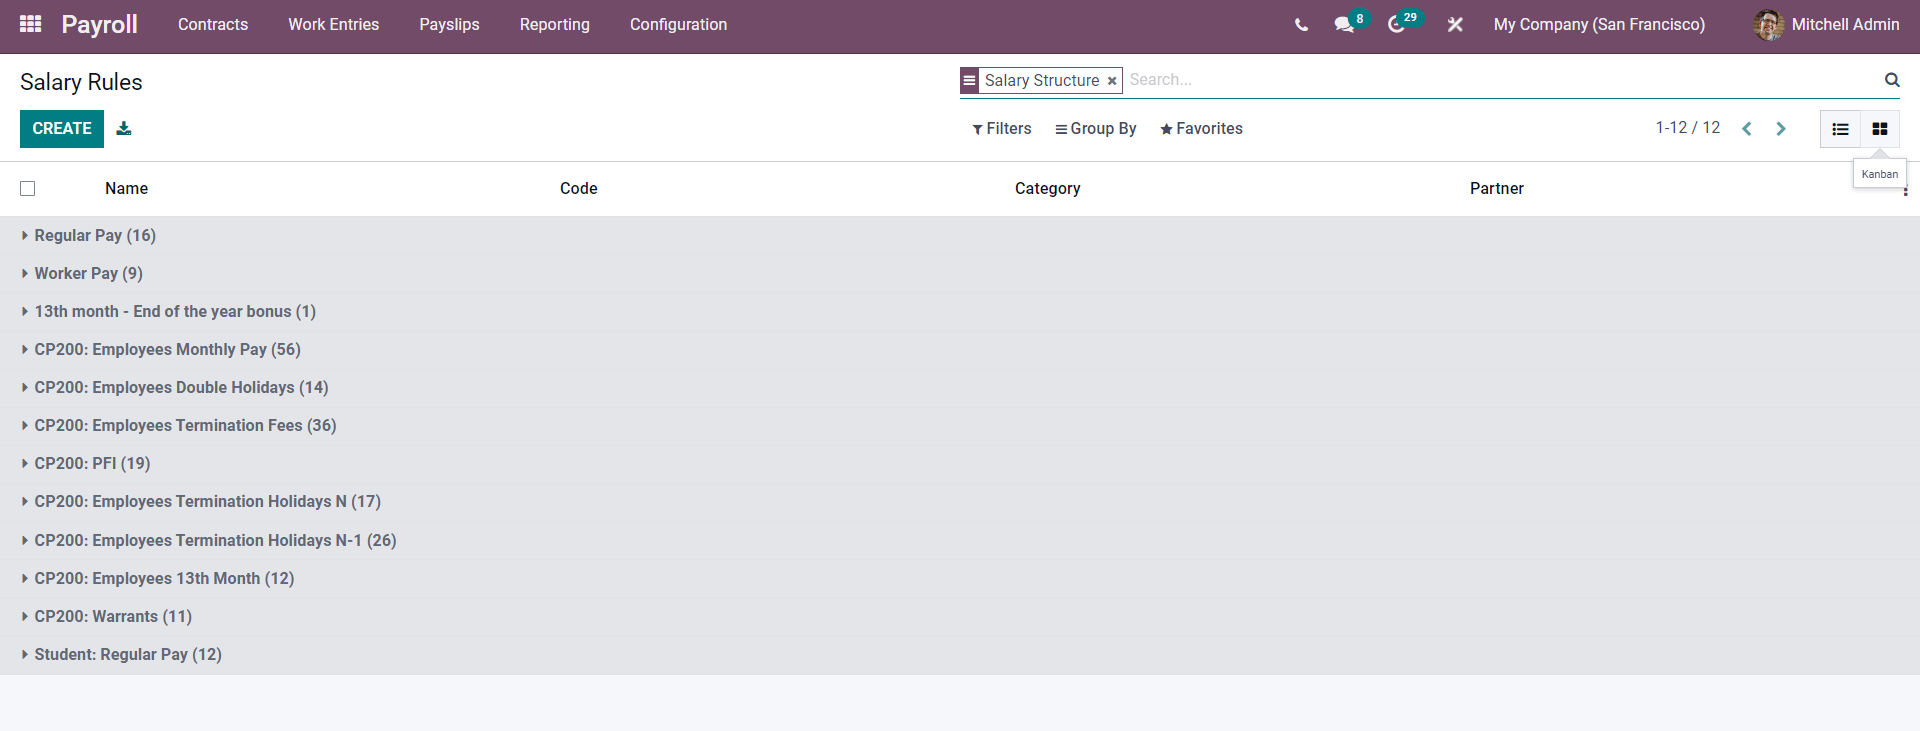
All of the existing salary rules will be listed on this page. The Filter tab will let you filter out the salary rules for easy accessibility. Press on CREATE for the new salary rule.
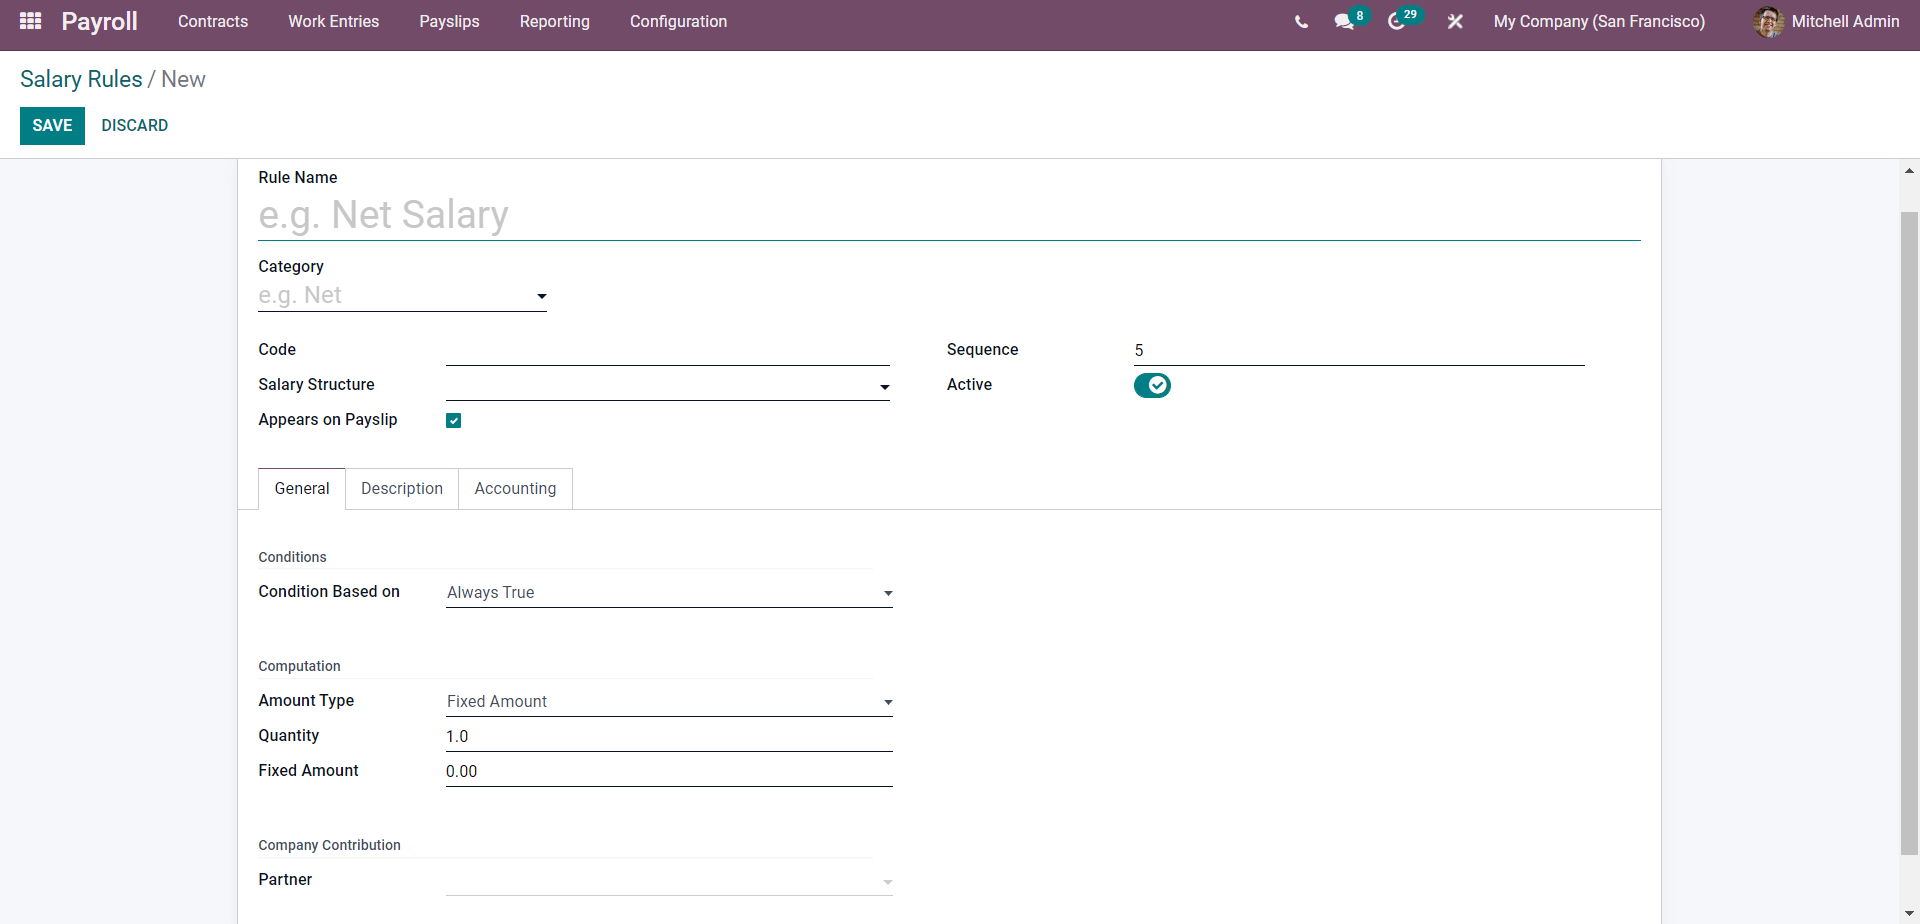
To begin the configuration, type in a new name for the salary rule and choose the category to specify its usage, as shown below.
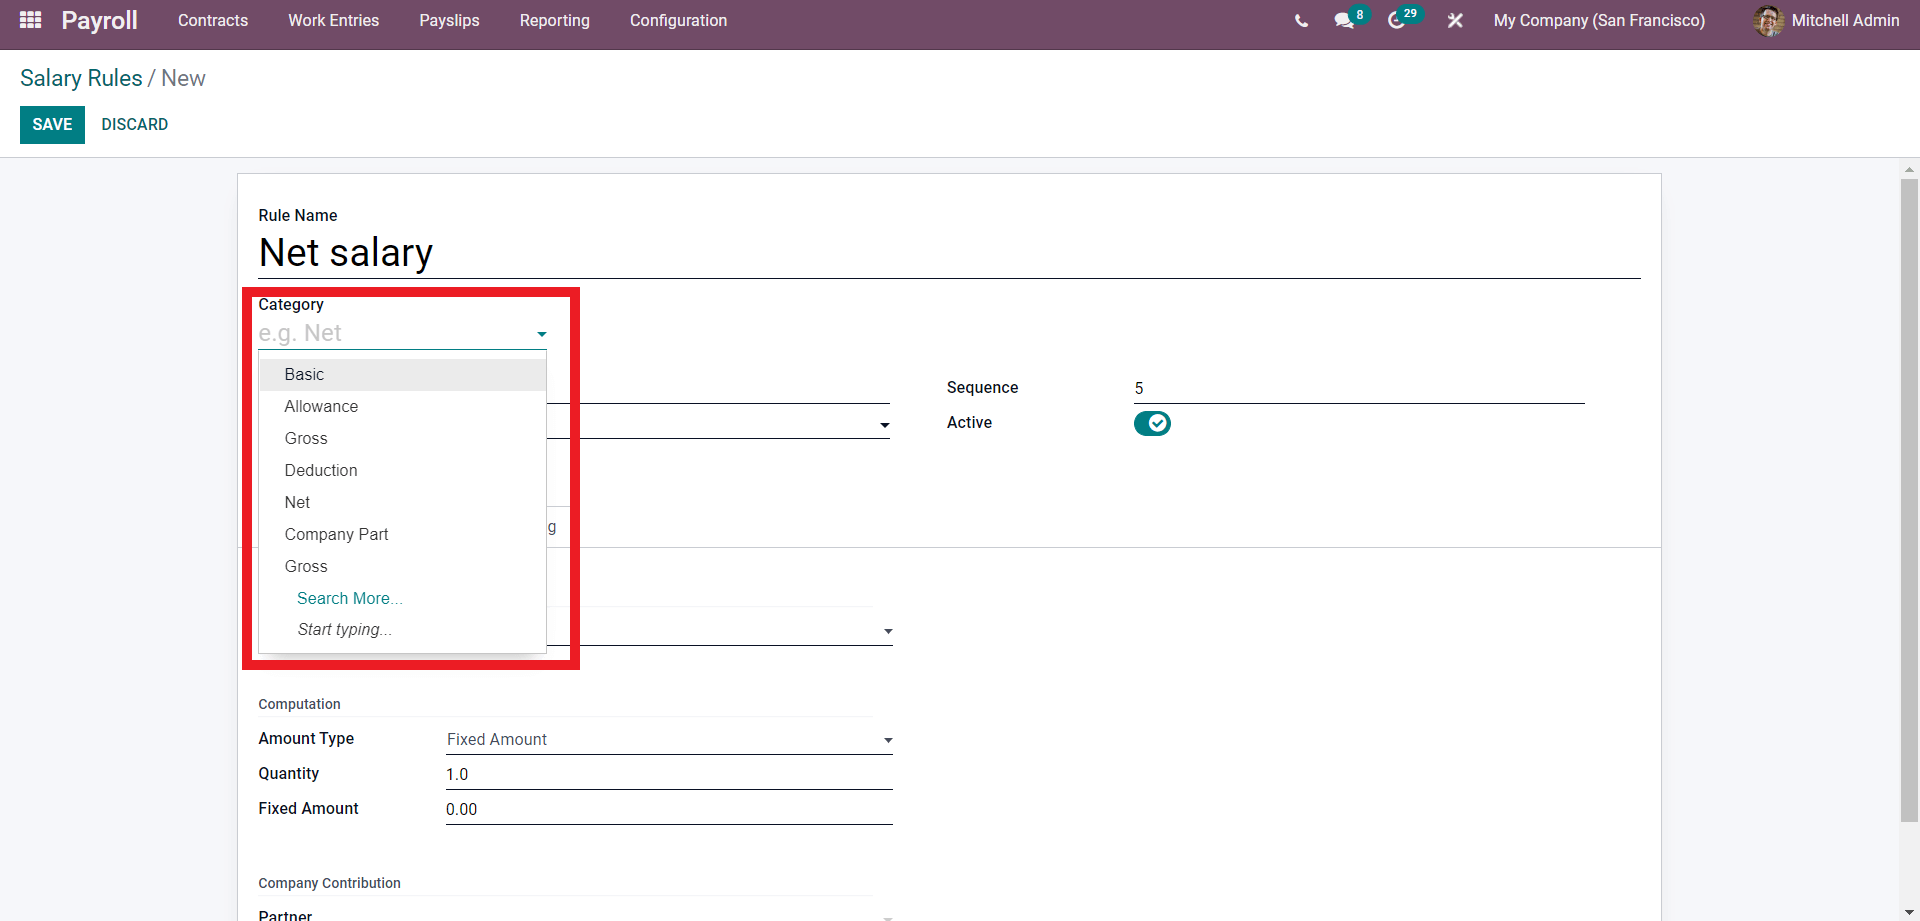
Categories are fundamental salary division that adds up to the total salary. Applying the category will inform Odoo of the salary rules and how to manage them. You can type in a unique Code for the salary rule and select the salary structure from the Salary structure field.
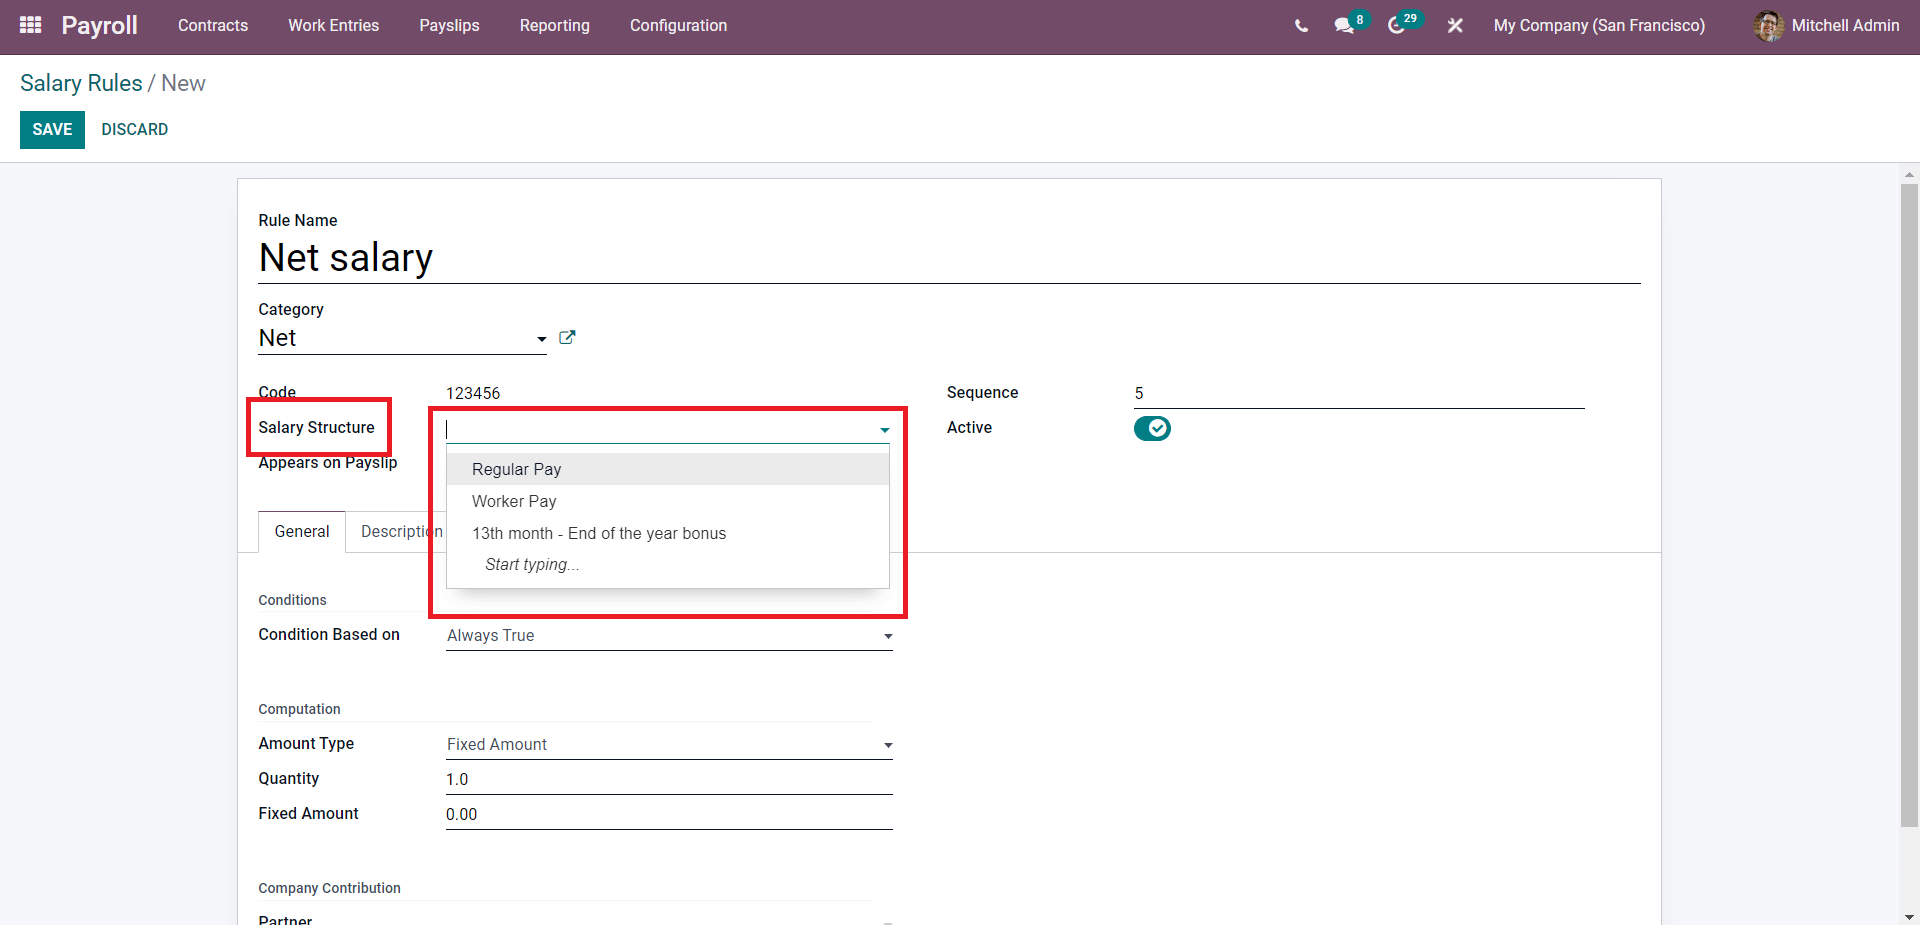
If you choose the salary structure, then Odoo will integrate the Salary rule in the Salary structure to give you more flexibility in salary management. The Active button can be used to activate the salary rule. You can choose whether to include the salary rules on the payment slip or not by clicking on the Appears on the pay slip check box.
In the General tab of the configuration page, you can configure the Conditions and the Computation details of the new salary rule, as shown below.
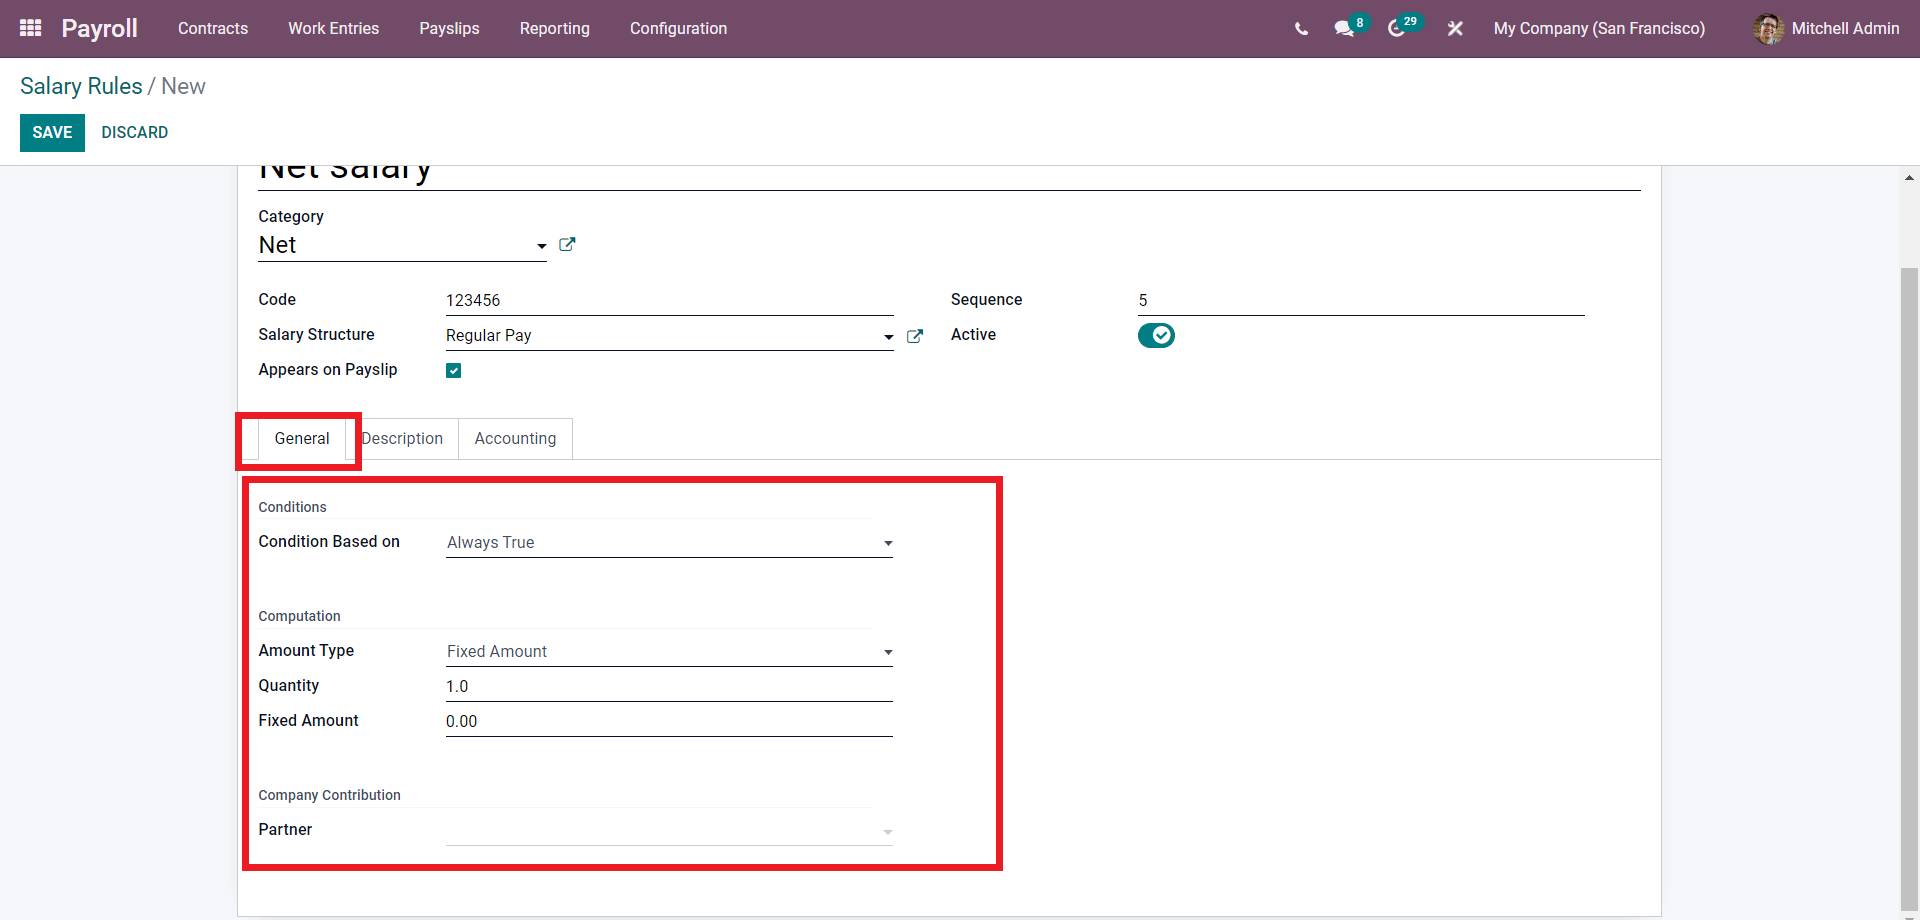
You can include the conditions from the drop-down menu in the Conditions section shown below.
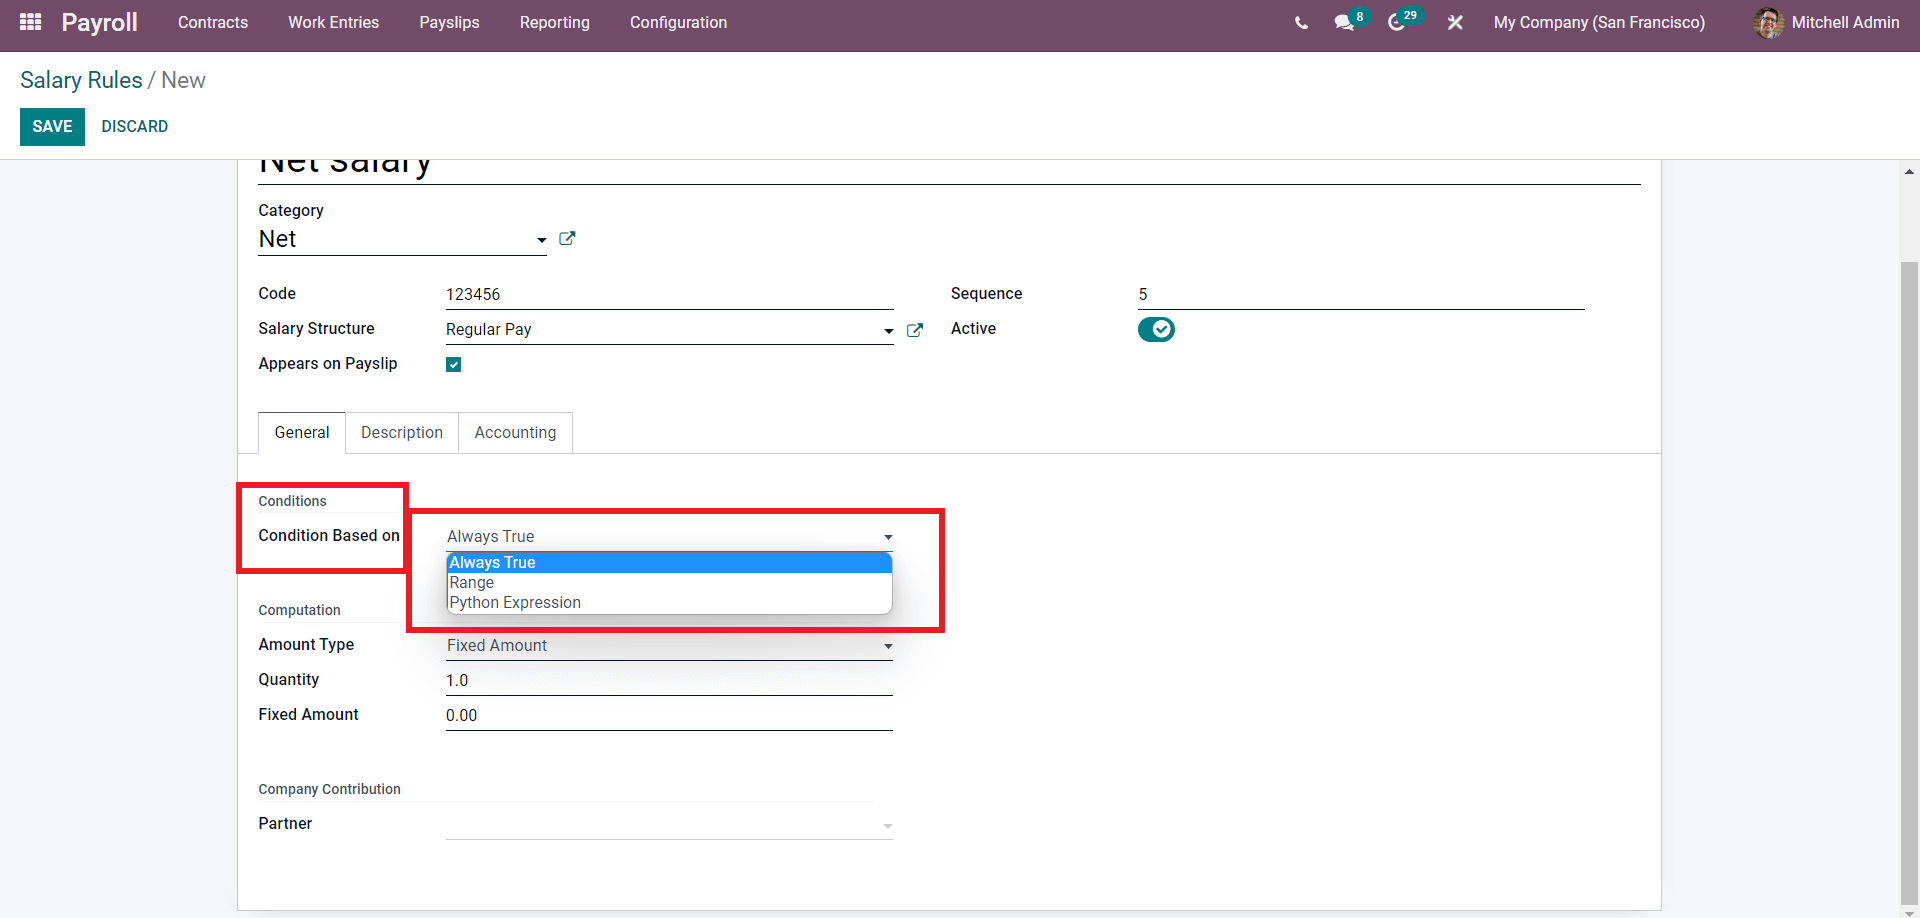
There are three options under the field as highlighted in the image given above, Always true, Range, and Python Expression. The configuration page will change according to the condition you have opted for. The above-given image shows the configuration options for the Always True option. If you have chosen Range, the configurations will be as shown below.
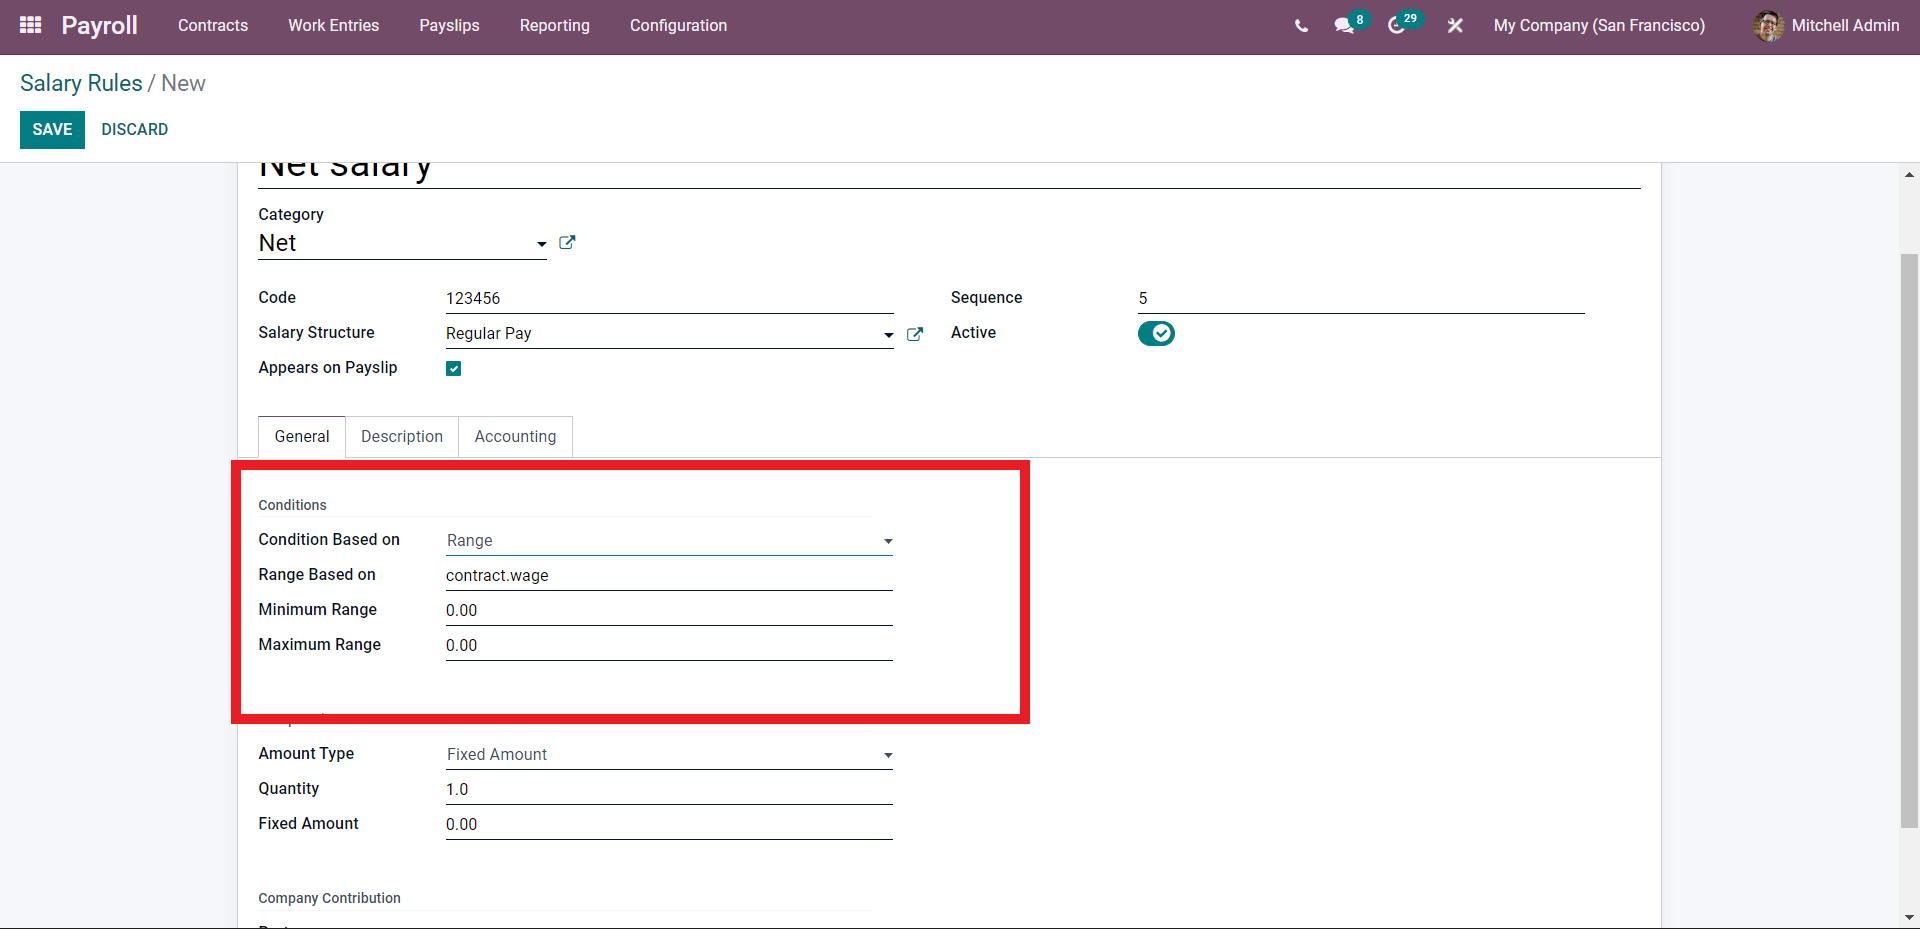
You can configure the condition you have chosen; in here you can configure the Minimum and maximum Range as the conditions. If you have opted for Python Expression, you will be provided with access to the Python expression as highlighted in the image below.
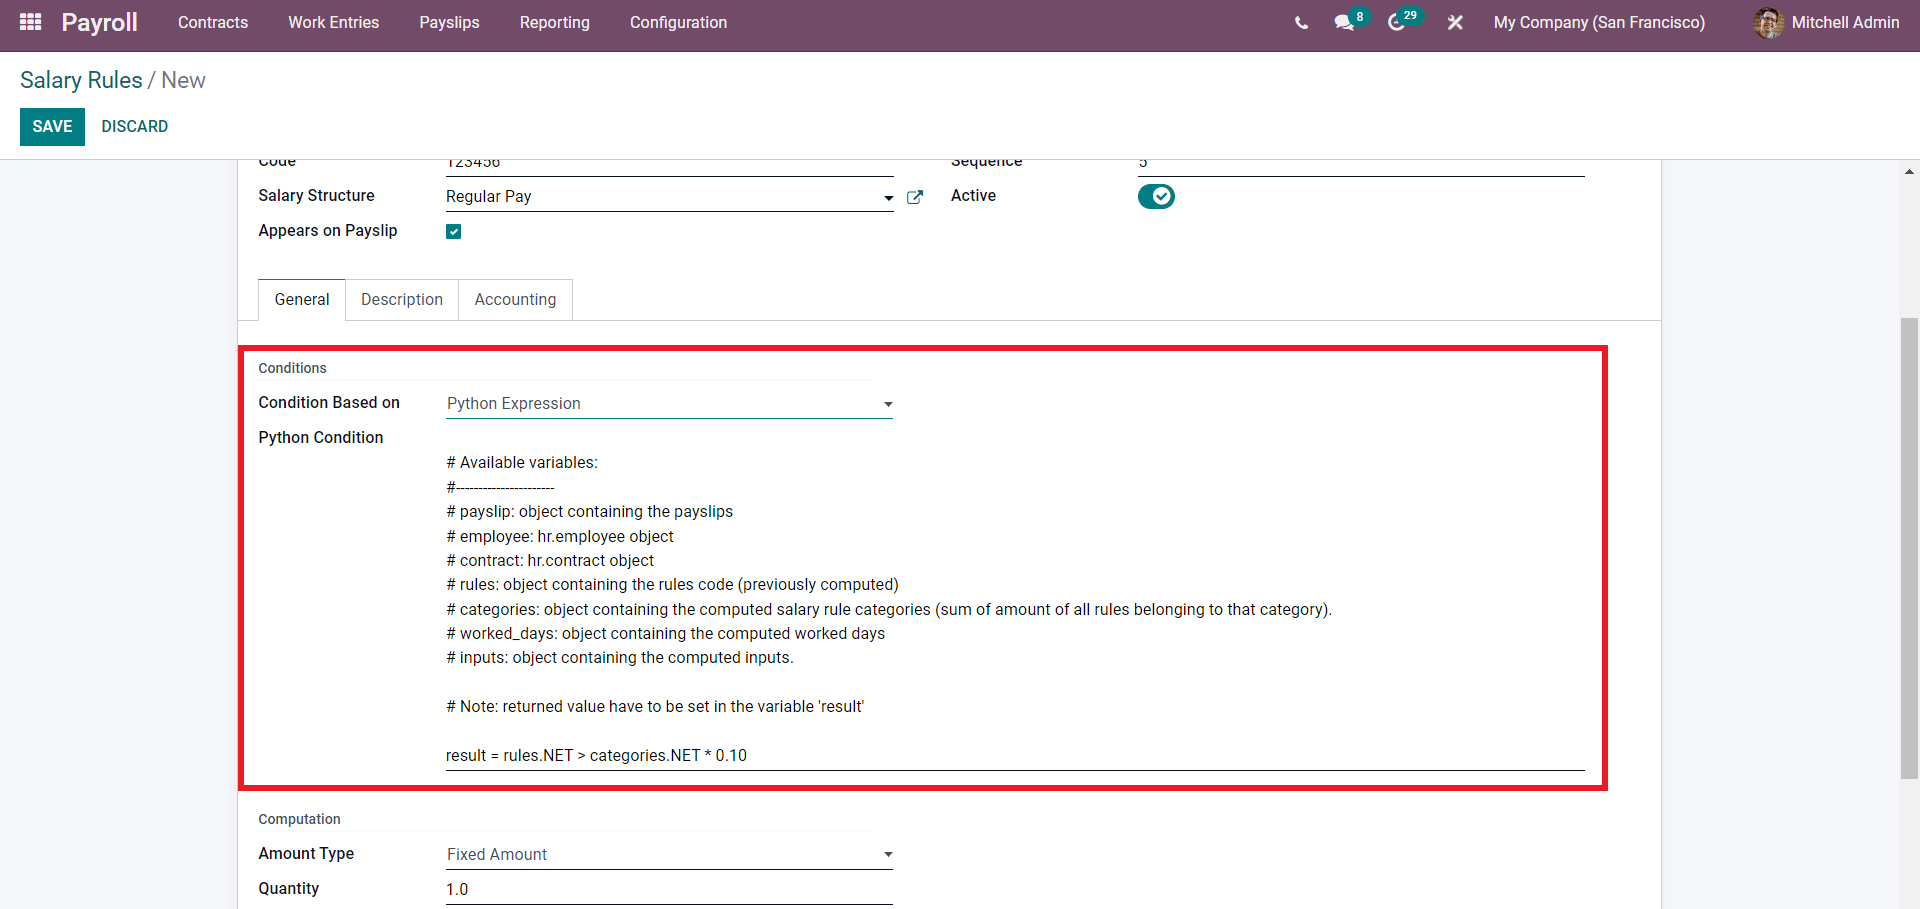
You can edit or overview the python code under the Python Condition field to configure the condition.
In the Computation section of the configurations page, you can select the amount type to decide the Salary rule’s nature further.
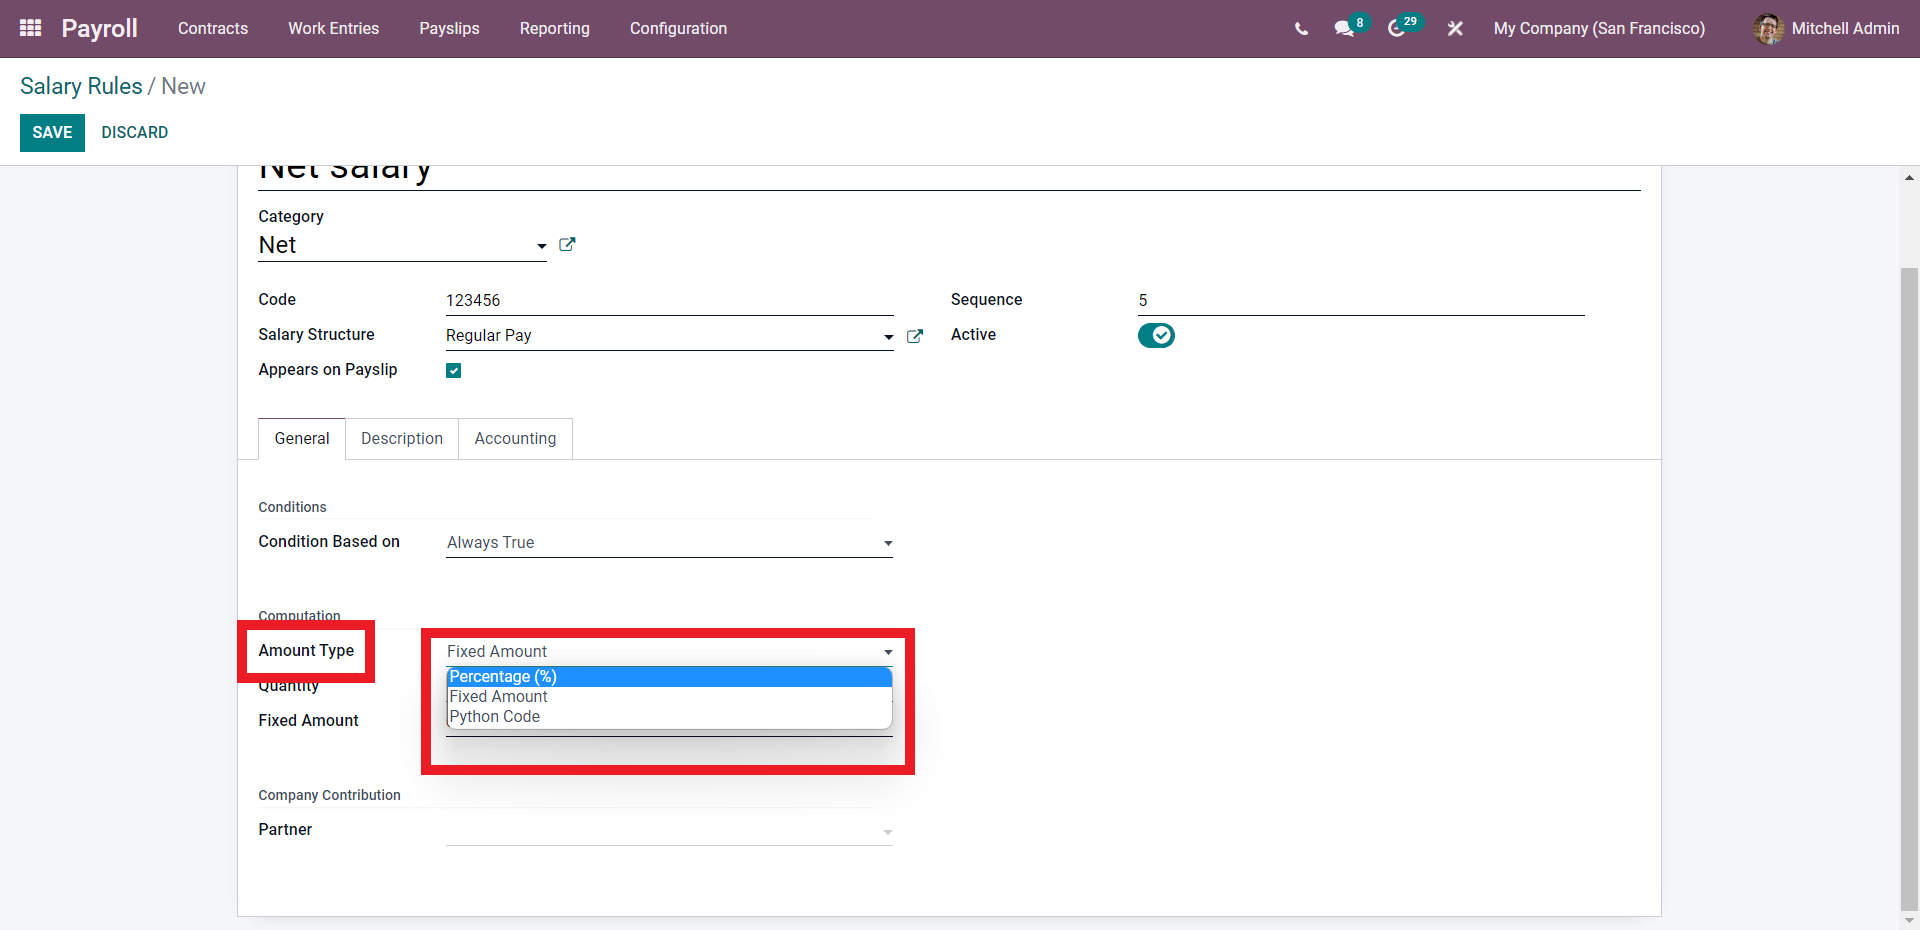
You can choose from the Amount type field to include it in the Salary rule. The options include Fixed Amount, Percentage (%), Fixed amount, and Python code. If you have selected the Percentage (%) option, the configuration options will change to configure the percentage.
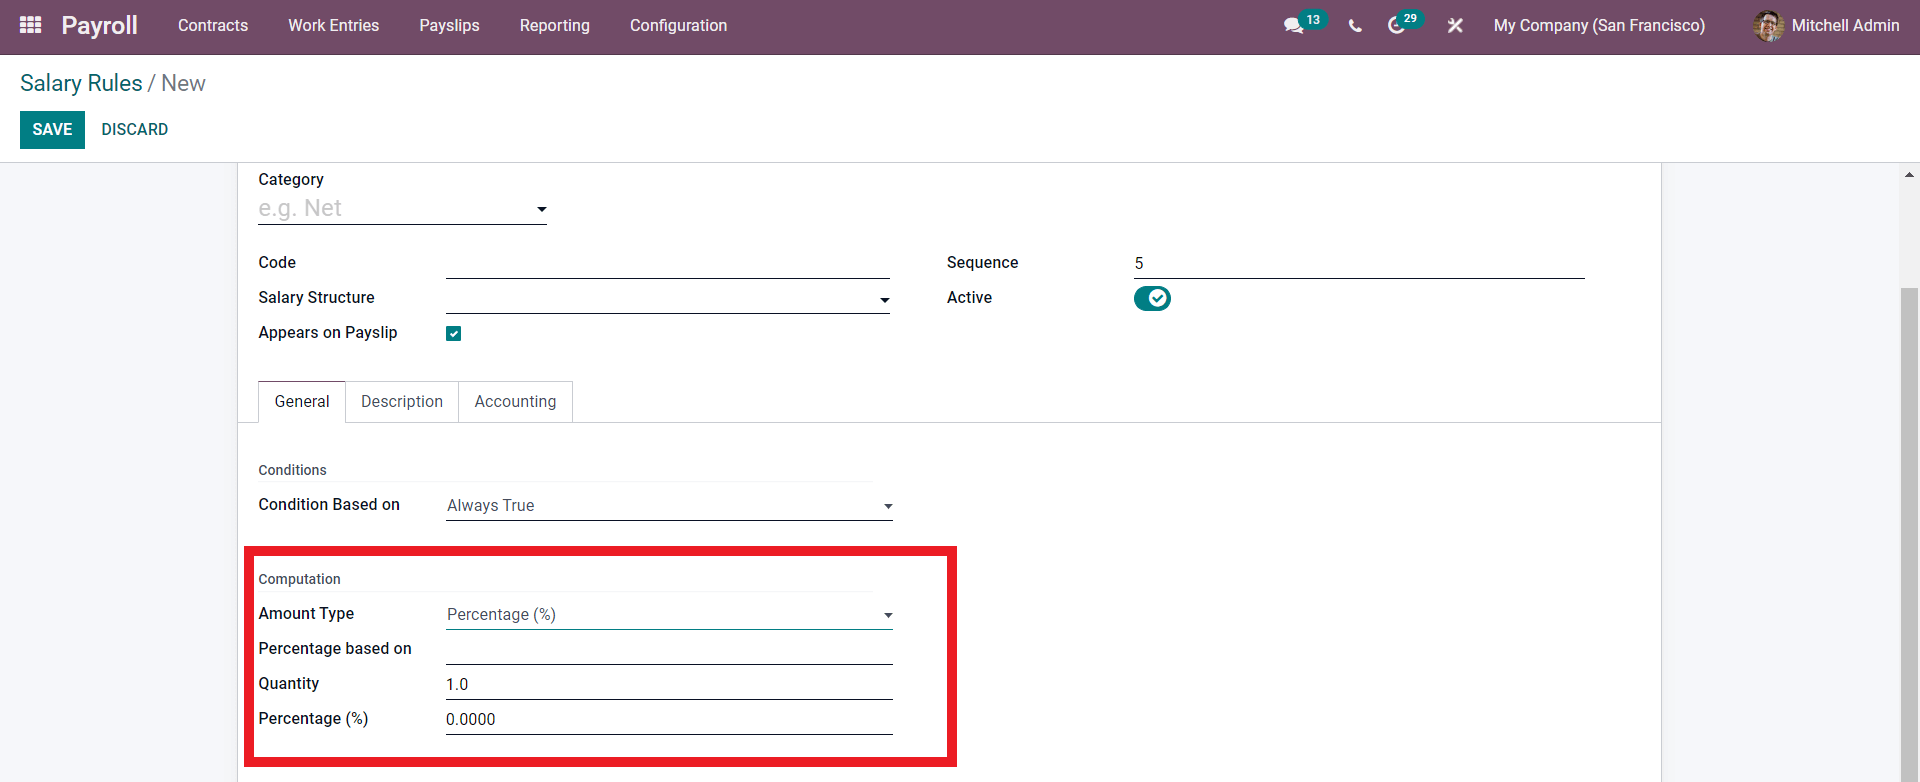
In the percentage section, you will have the option to configure the Quantity and Percentage from the fields named the same. If you have opted for a Fixed amount, the configurations will change, as shown below.
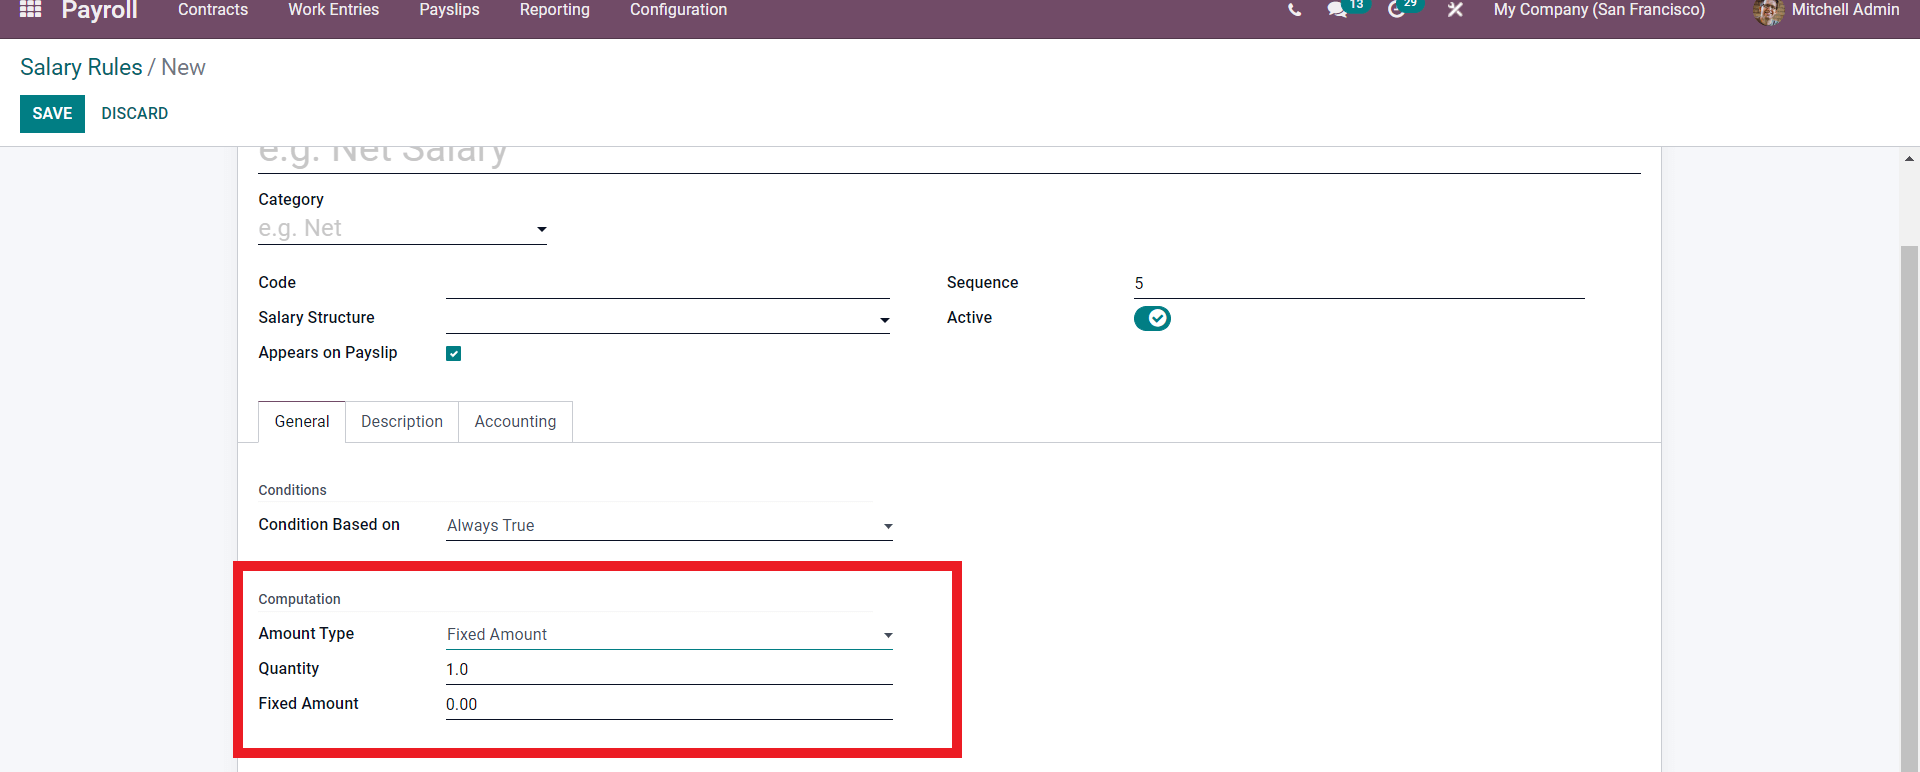
You can configure the Quantity and fixed amount for easy management of the fixed amount and configure the section based on your business policies.
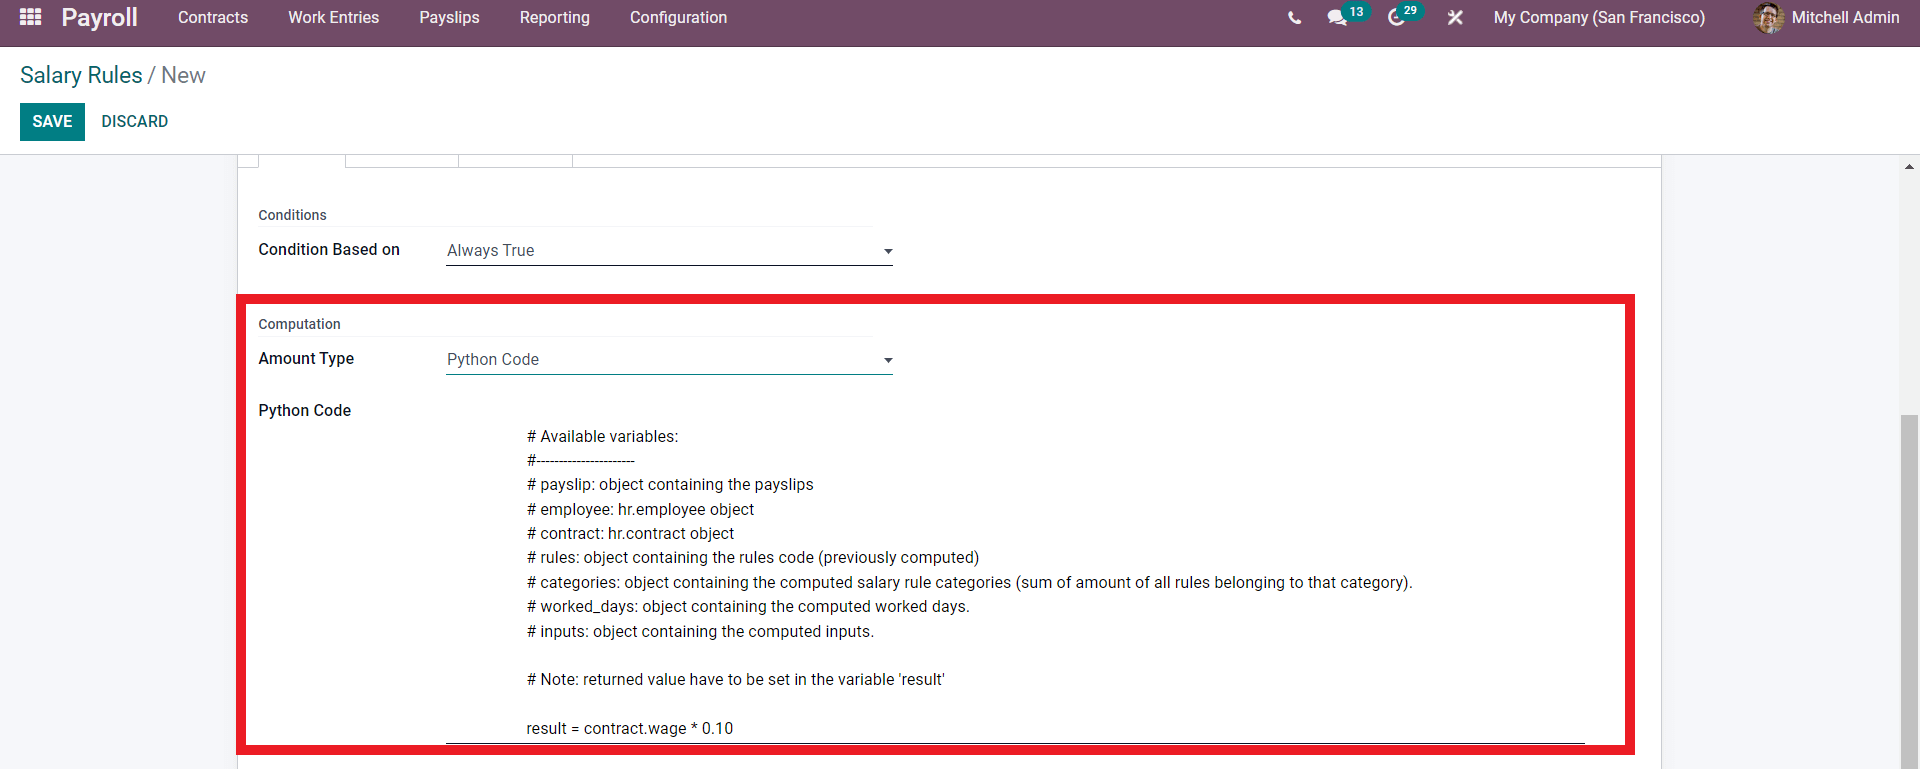
Similar to the Conditions section, you can edit the python code to suit your business requirements. After the configurations, you can add a partner from the Partner field under the Compony contribution section. Post the configurations, click on the SAVE button to save the rule, and it will be available to apply to the payroll.
The salary structure and rules can be configured and sequential according to the country’s laws within which your company is working or the company’s policies on employee salary or payroll management. Use the link for more on the payroll module.
Managing and overviewing your salary structures with the payroll module is effortless. Type in Payroll on our blogs page to learn more about the Payroll module.


