Most individuals’ private and professional lives deal with various projects for various purposes. Several types of projects are working by companies to gain success, and considerable parts of projects include delivery in time with quality or within budget. Maintenance of company work is challenging, and we can organize all the work within a project. Better project management is beneficial for both an organization and its clients. You can remove your worries regarding work by imparting Odoo 15 projects module. It is easy to develop tasks from sales orders and allocate different projects for employees using Odoo ERP.
This blog ensures users organize projects effectively within Odoo 15 database.
We can set up tasks and keep track of projects in the Odoo 15 Projects module. Users can involve and communicate with stakeholders in a project. It is easy to set task stages, tag, and analyze your project’s tasks. Let’s view how to organize projects perfectly within Odoo 15.
To Create a Project in Odoo 15
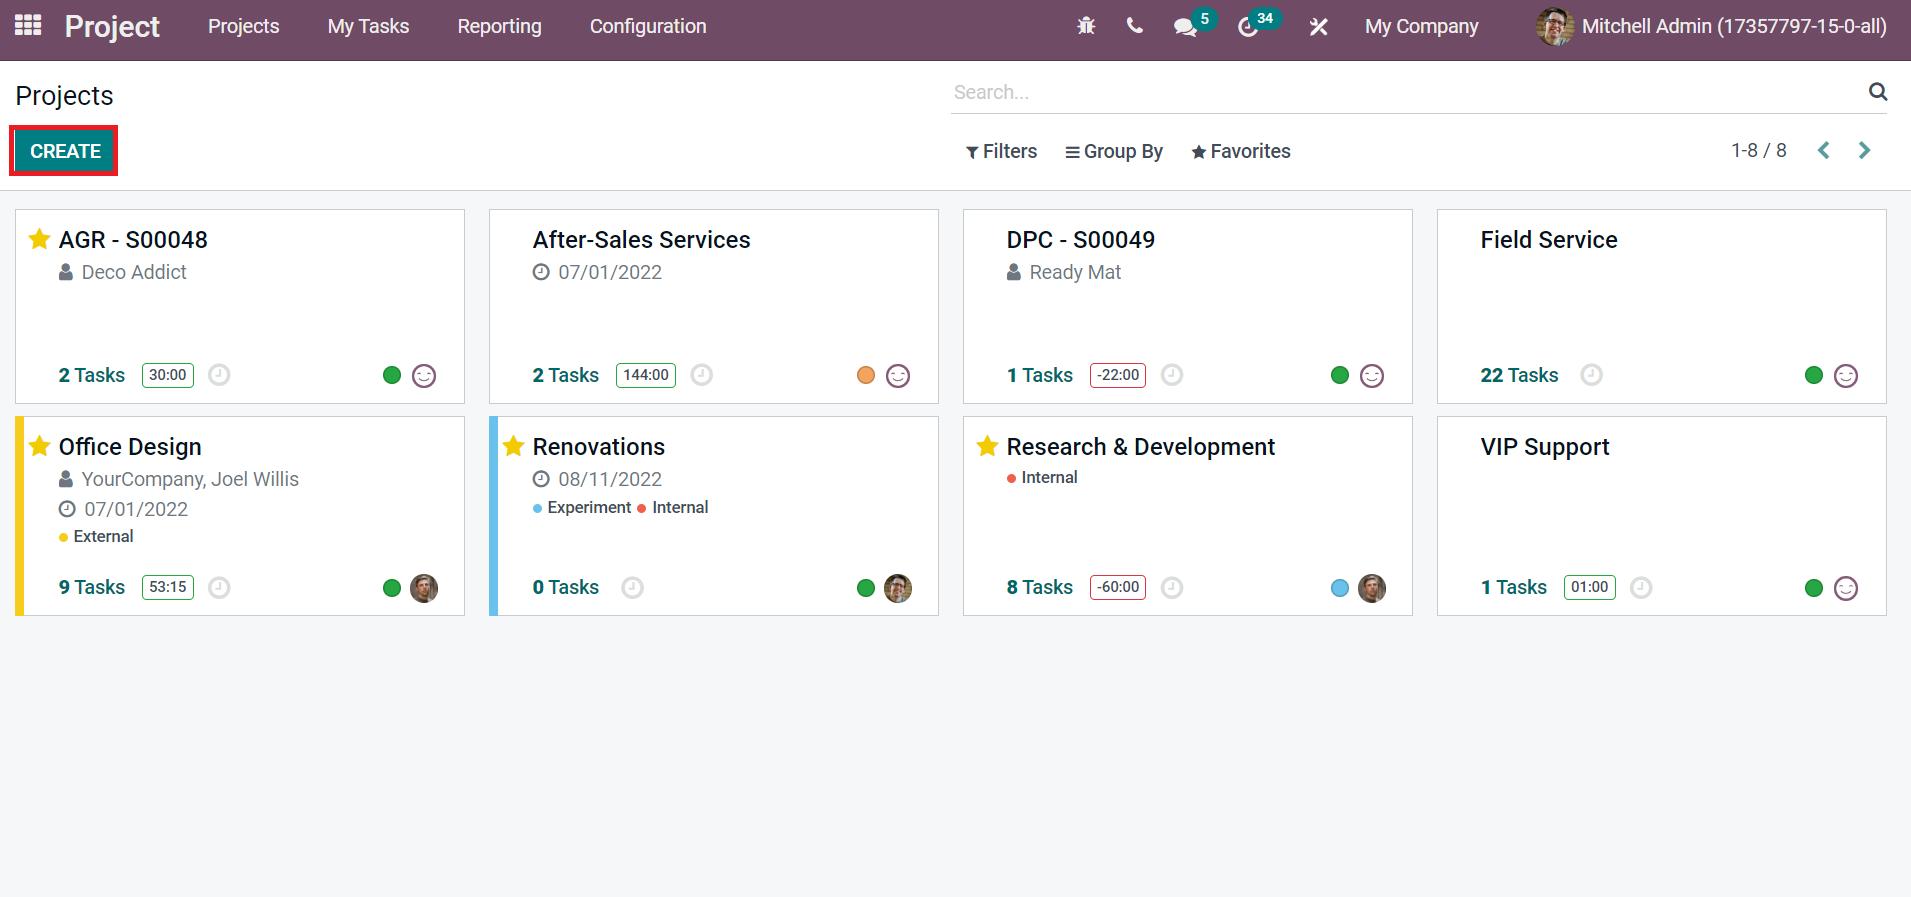
All created projects in your company are visible in the Projects dashboard. Users can view the project name, the number of tasks, the assigned person, and the duration for each project separately. A new project is created quickly by choosing the CREATE icon as stated in the screenshot below
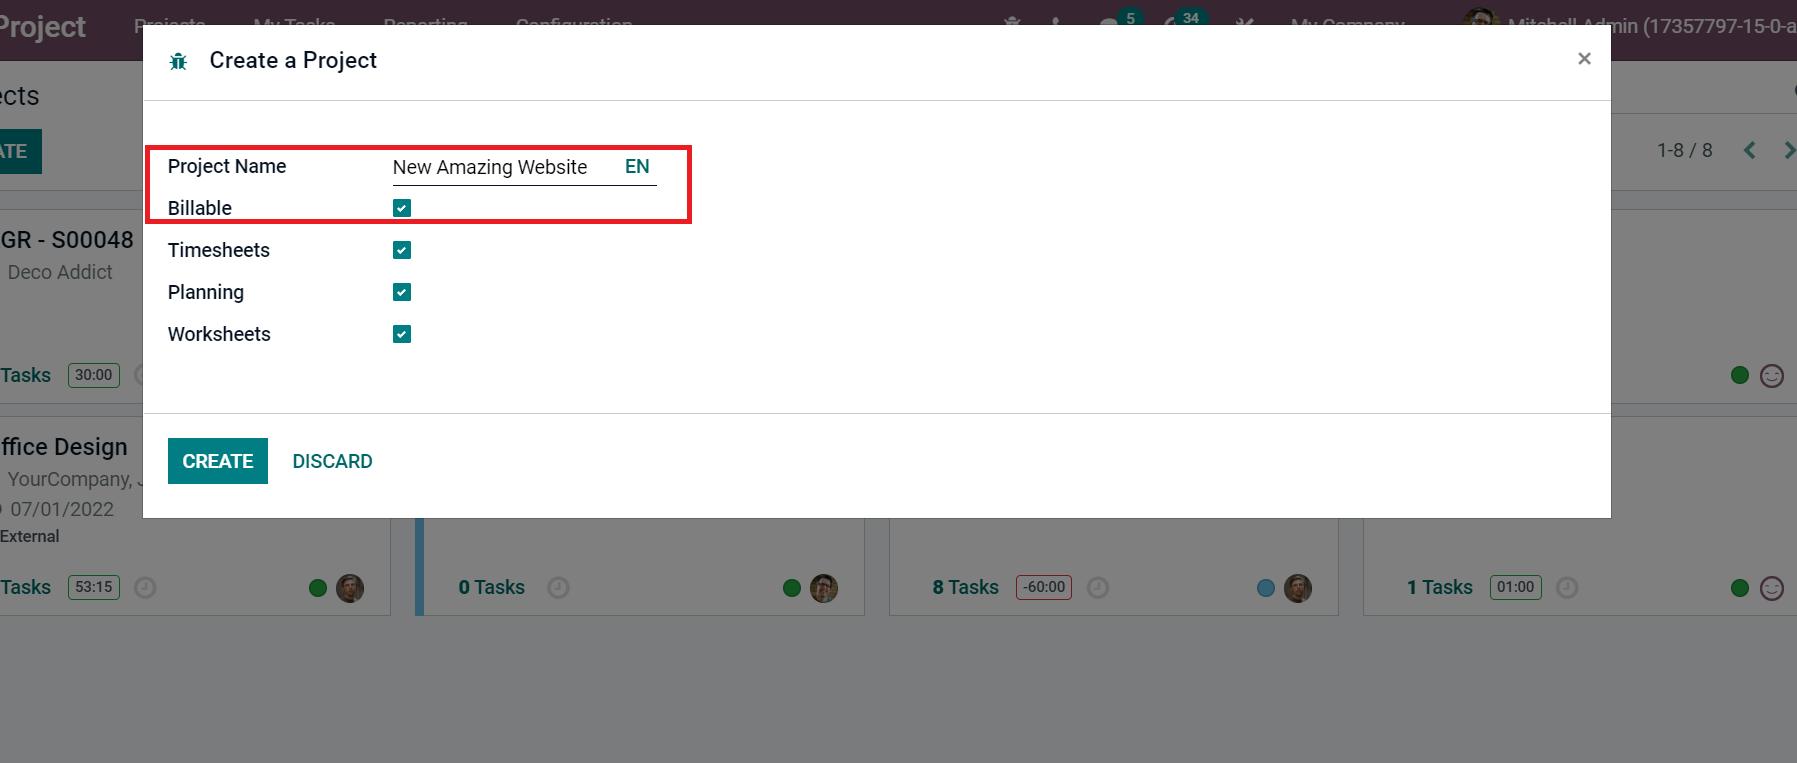
By choosing the CREATE icon, a new box appears before you. Add your project name as New Amazing Website and enable the Billable field to invoice your material and time of tasks.
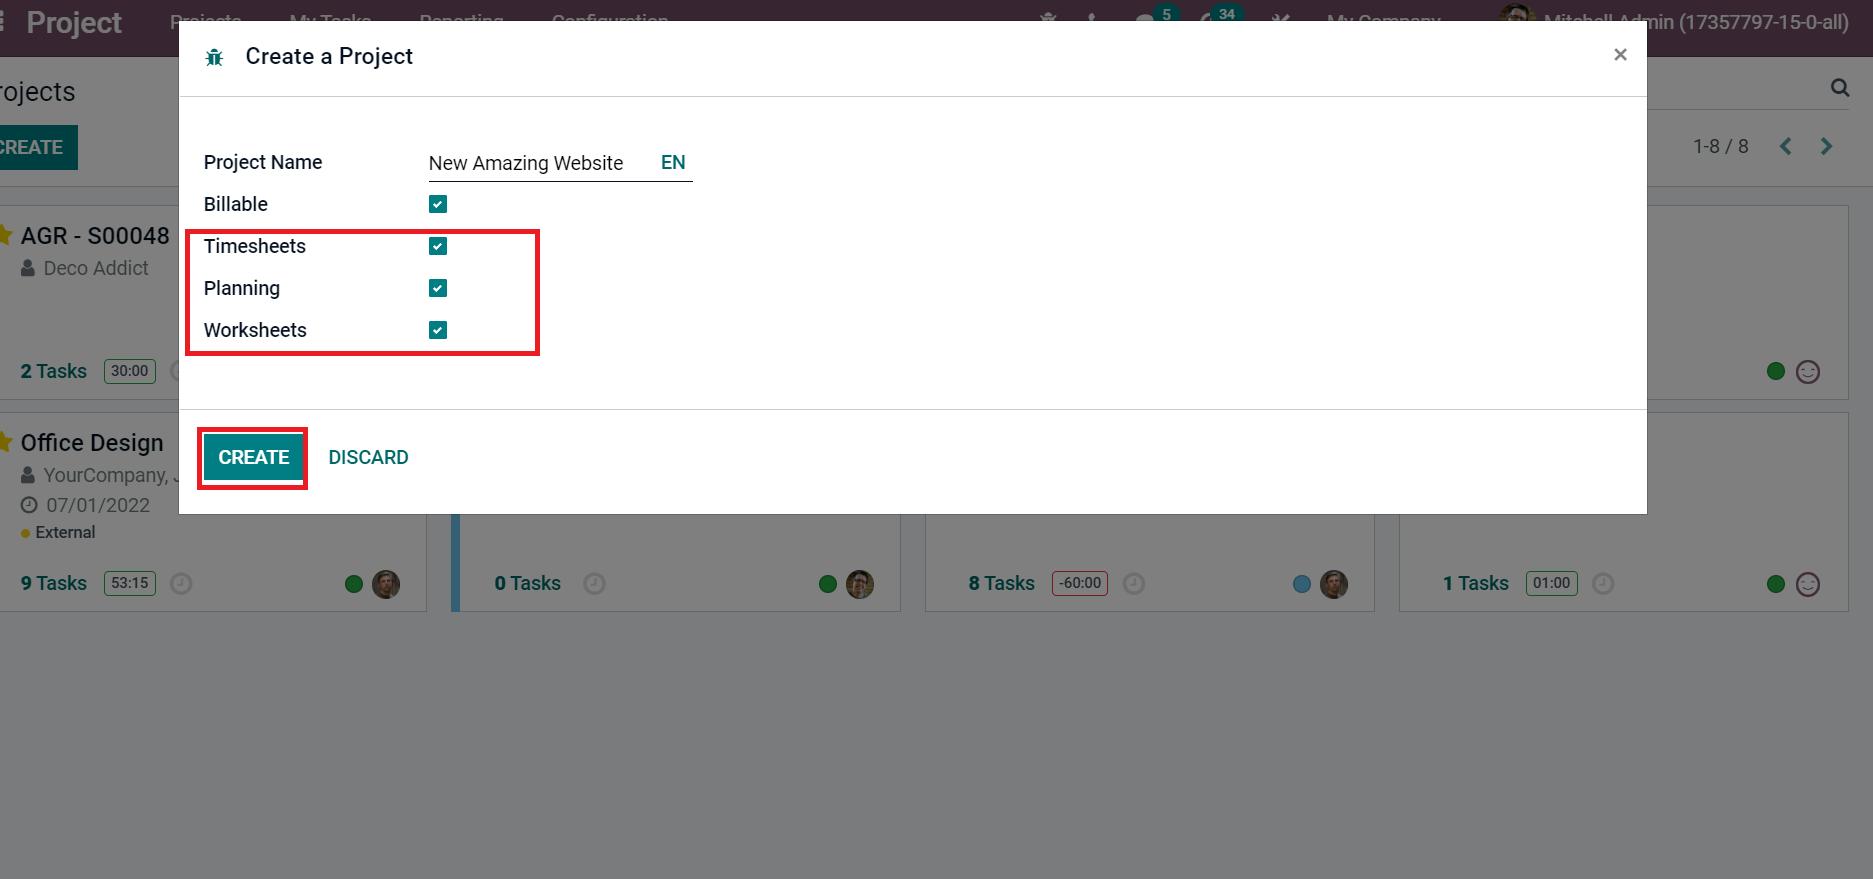
Users can activate timesheets for projects by activating the Timesheets field. It is possible to enable planning tasks on projects using the Planning field and customize worksheets on functions within the Worksheets field. After allowing the necessary fields for your project, select the CREATE button as described in the screenshot below.
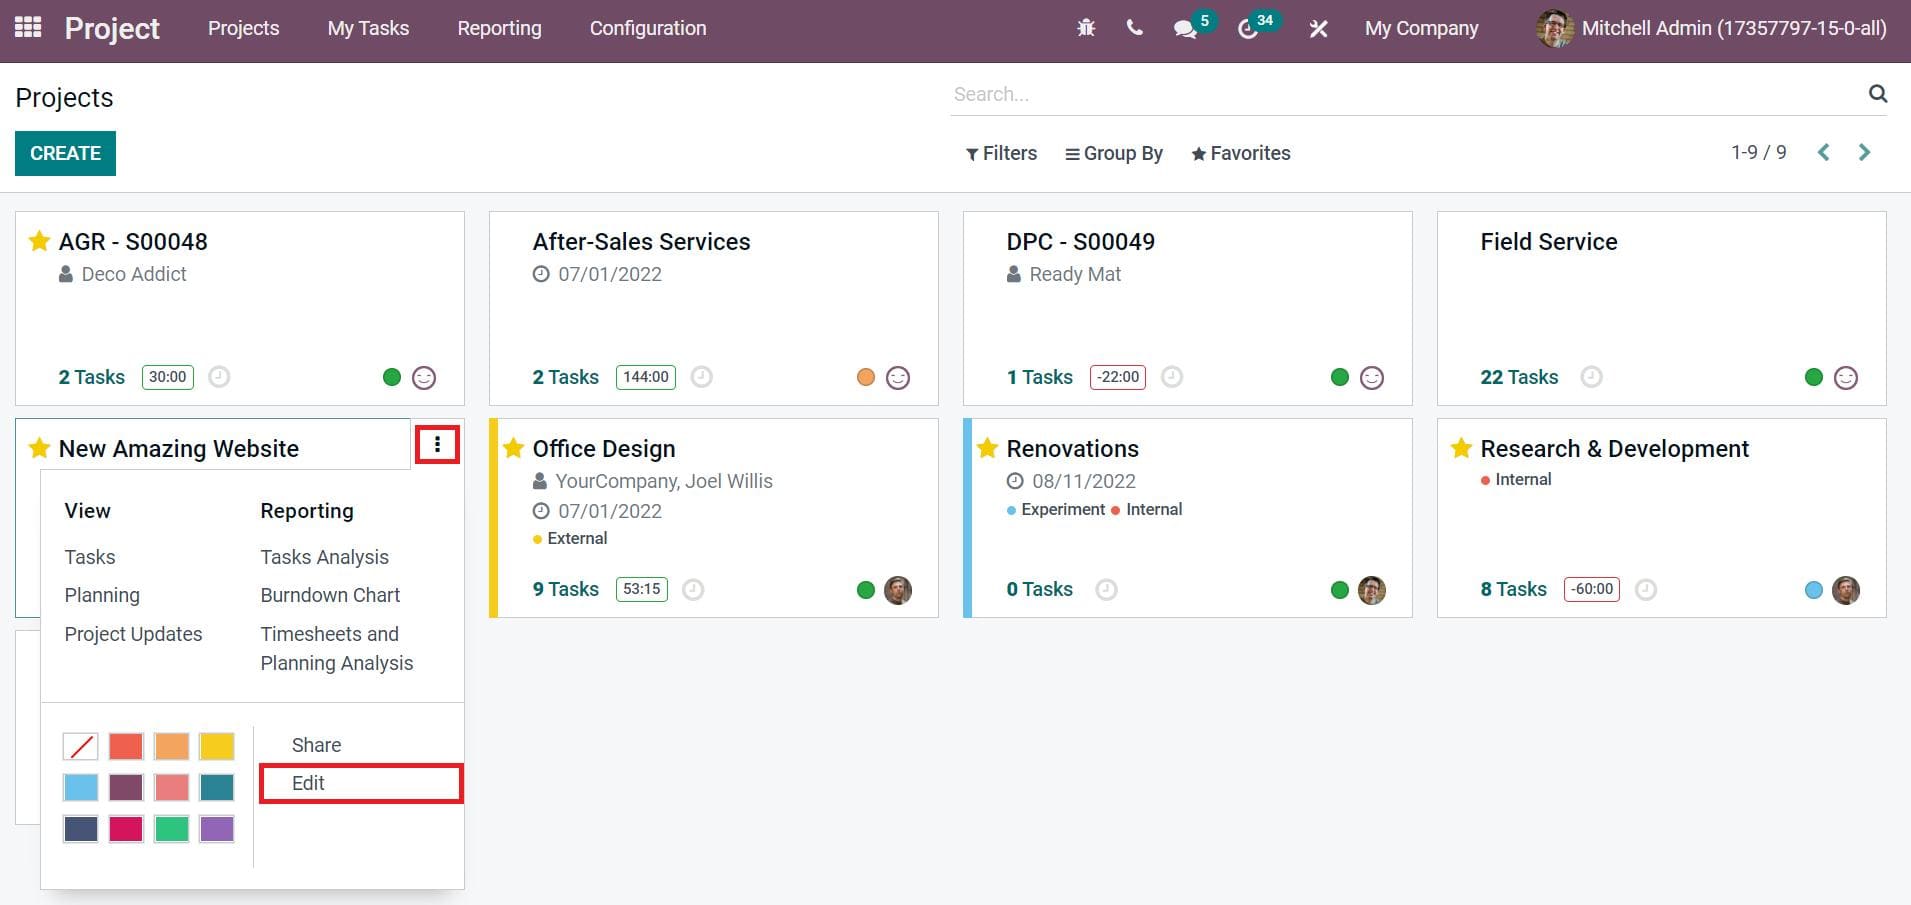
We can access the created project, New Amazing Website, from the projects window. Choose the three-dot button for your project and click on the Edit icon as mentioned in the screenshot below.
You can select the Customer and Tags for your project in the new window. Later, schedule the time to finish the project inside the Planned Date section as denoted in the screenshot below.
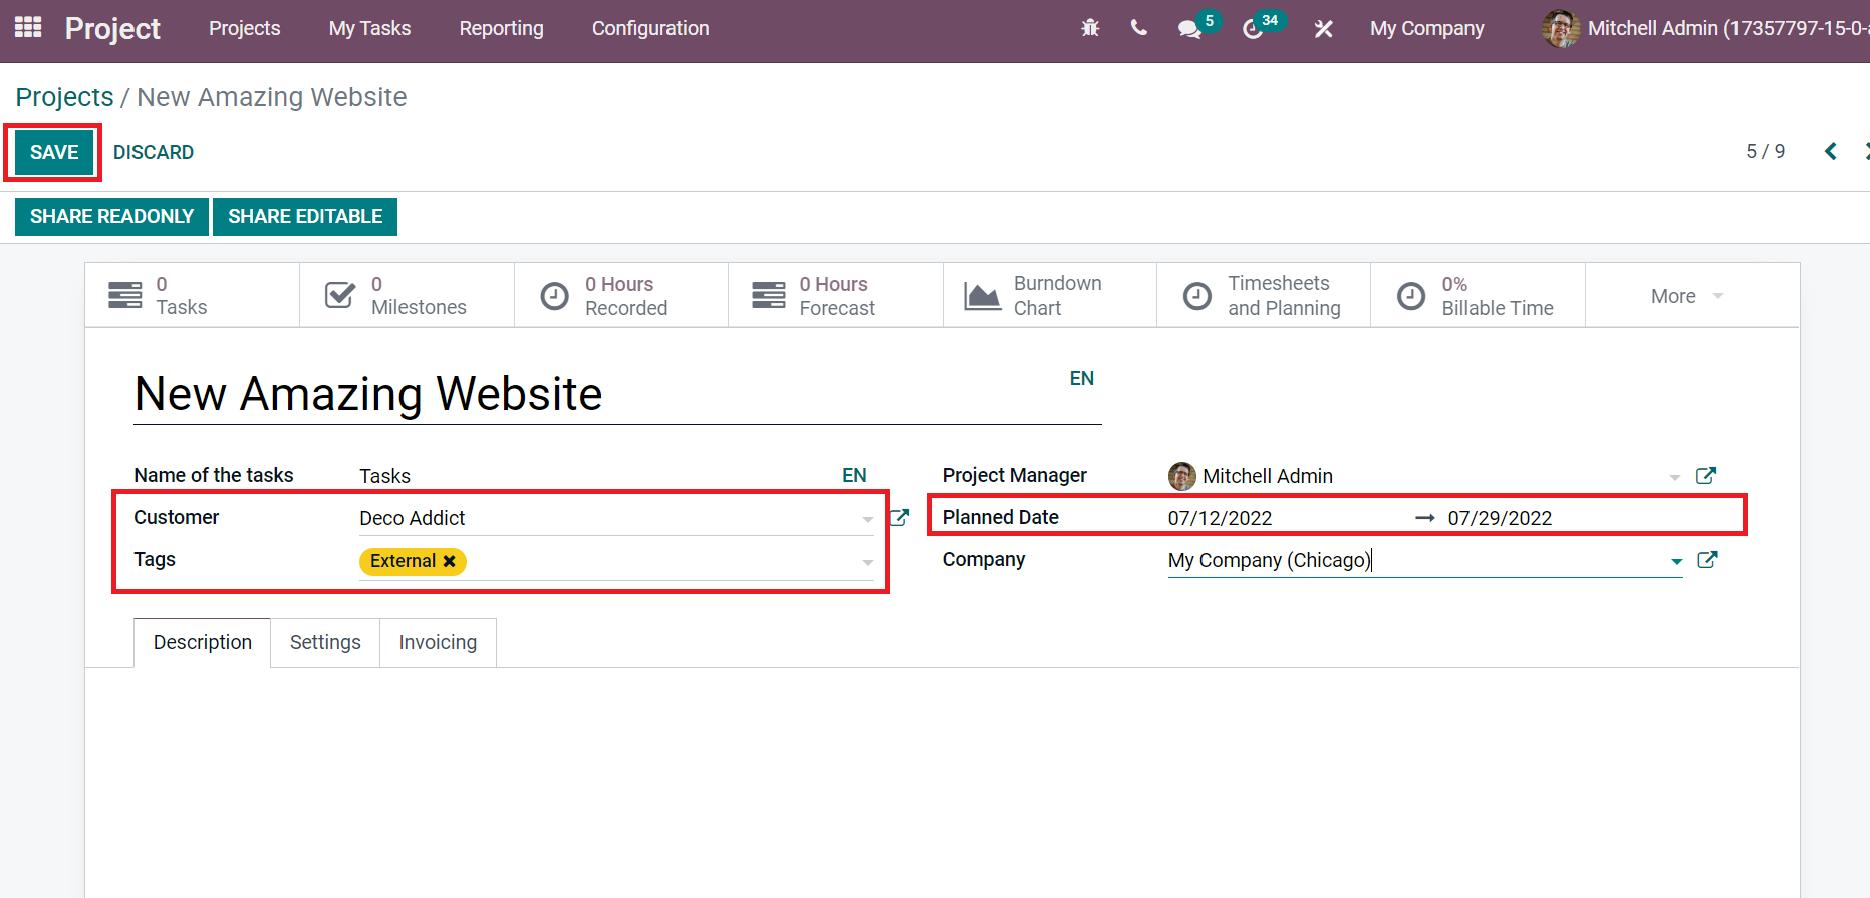
After entering the details, select the SAVE icon in the projects window, as shown in the above screenshot. Check the below link to learn about Project Creation in Odoo 15
Build Task Stages for Your Project Tasks
We can arrange various tasks into different stages using the Odoo 15 Projects module. You get an idea about project tasks through task stages. Let’s generate a few tasks stages for the tasks in your project. Choose the Task Stages menu inside the Configuration tab, and all created task stages for different products are accessible to you.
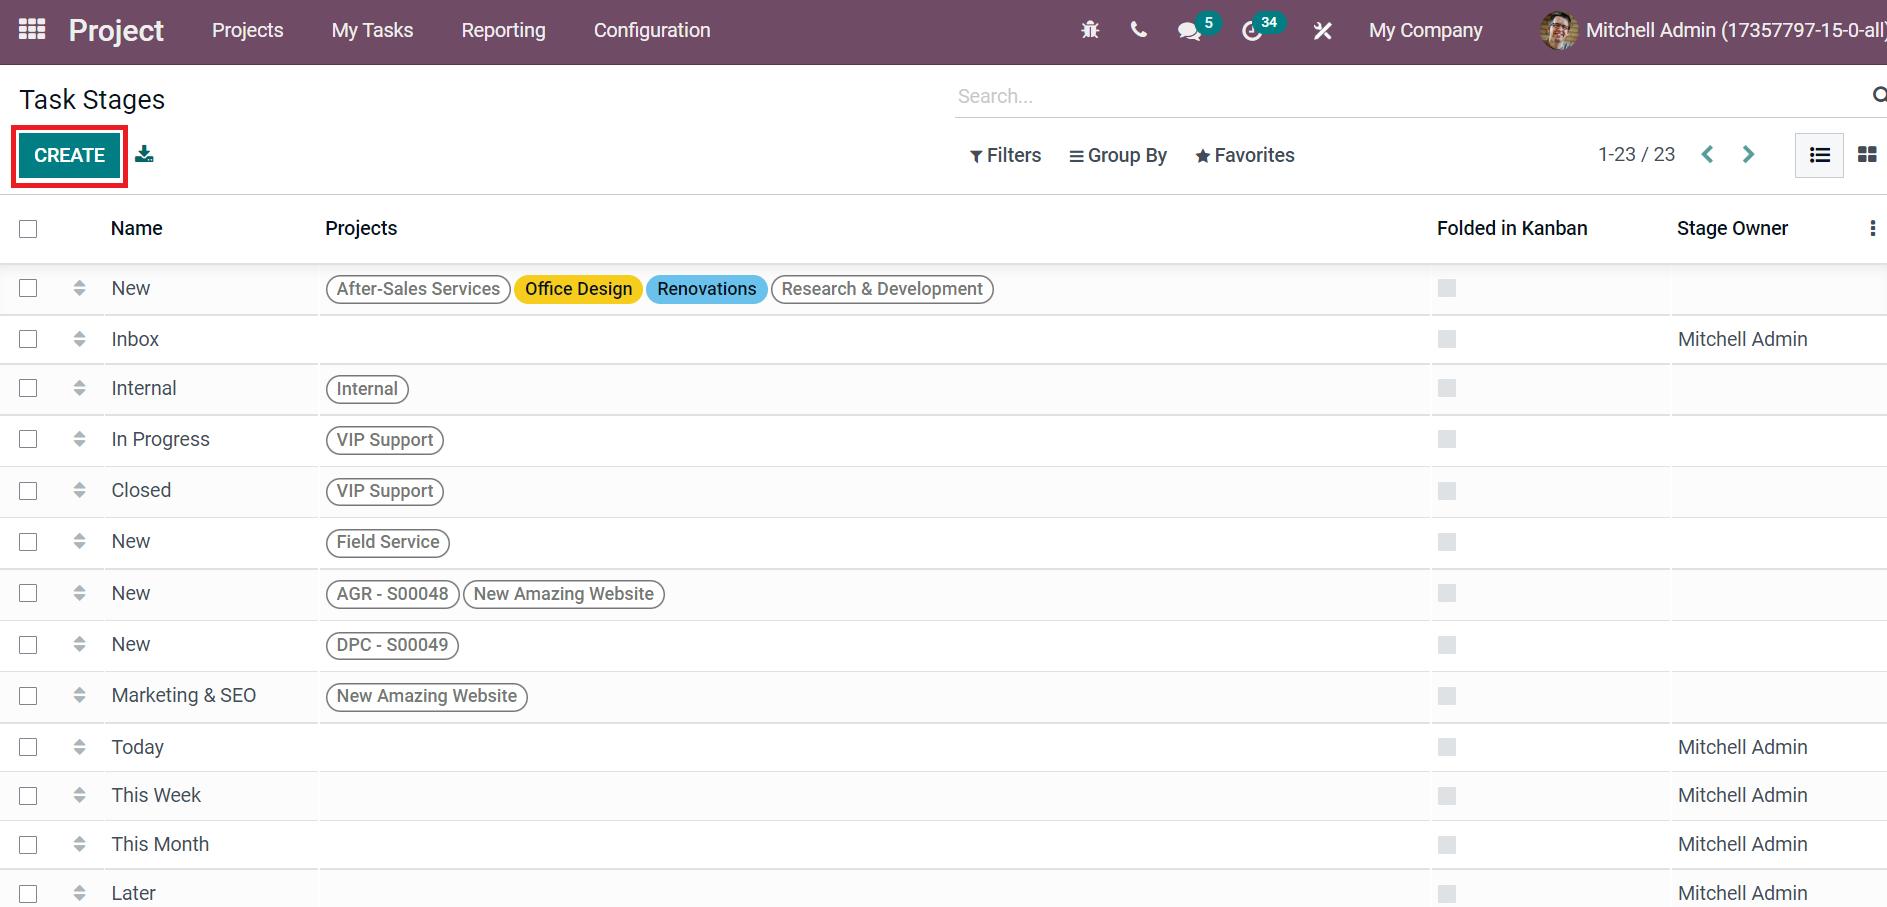
Using the CREATE button, we can apply various stages to your project. Now, let’s apply stages for the New Amazing Website in Odoo. First, we formulate a New Stage by adding the New in Name field and selecting your project New Amazing Website in the Projects field, as marked in the screenshot below.
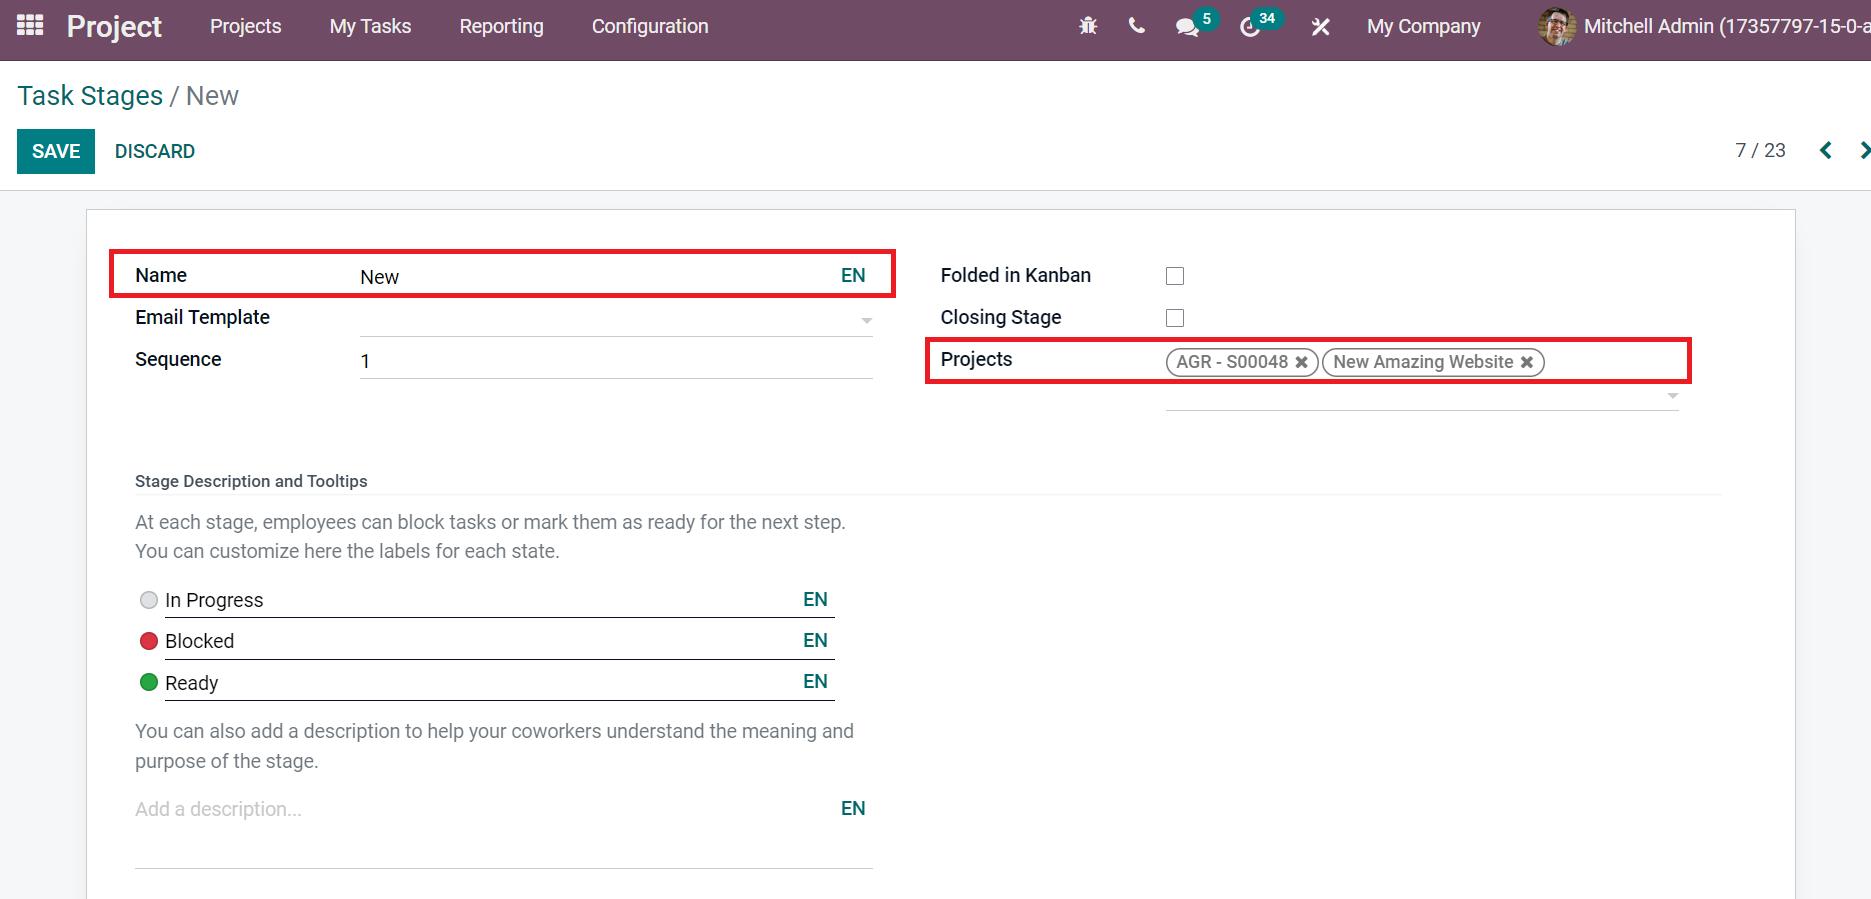
In the same way, we created some other stages such as In Progress, Done, and Cancelled. All these stages are viewable when developing tasks for your project.
How to Set up Tasks in your New Project?
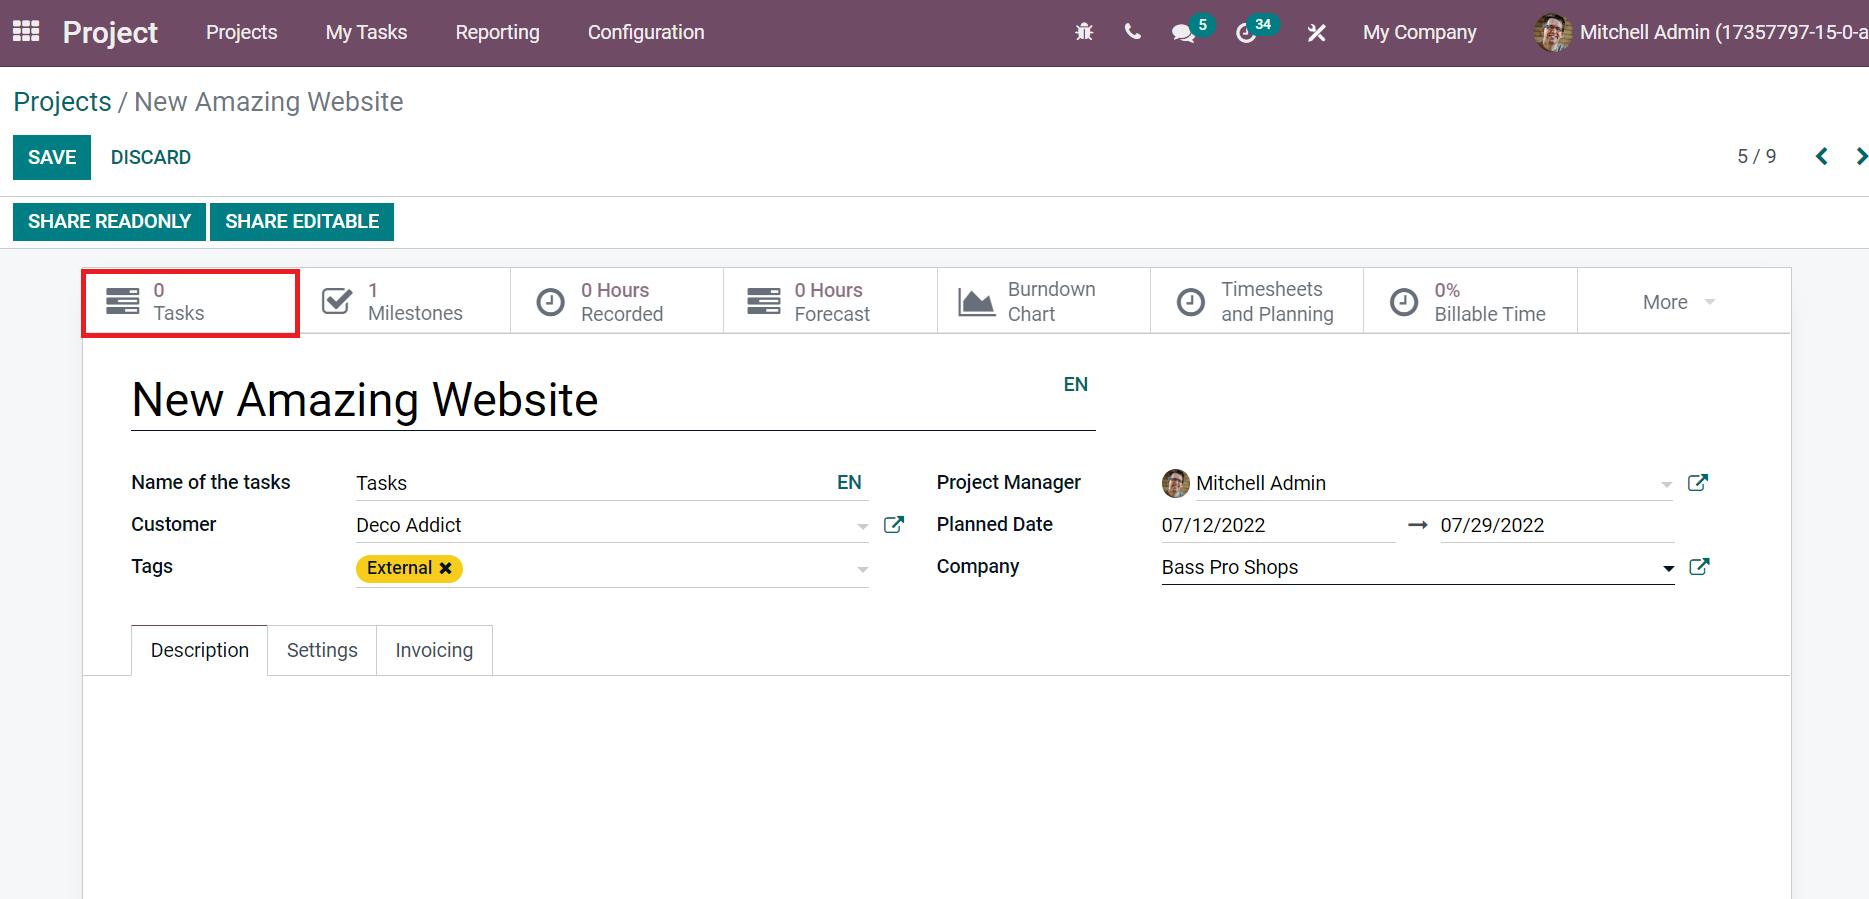
The tasks in a project consist of duties or responsibilities fulfilled by the assigned person. We can develop tasks in two steps from the Odoo 15 Projects module. The first one is to create a task from your project. For that, you can choose your project and click the Tasks smart button as portrayed in the screenshot below.
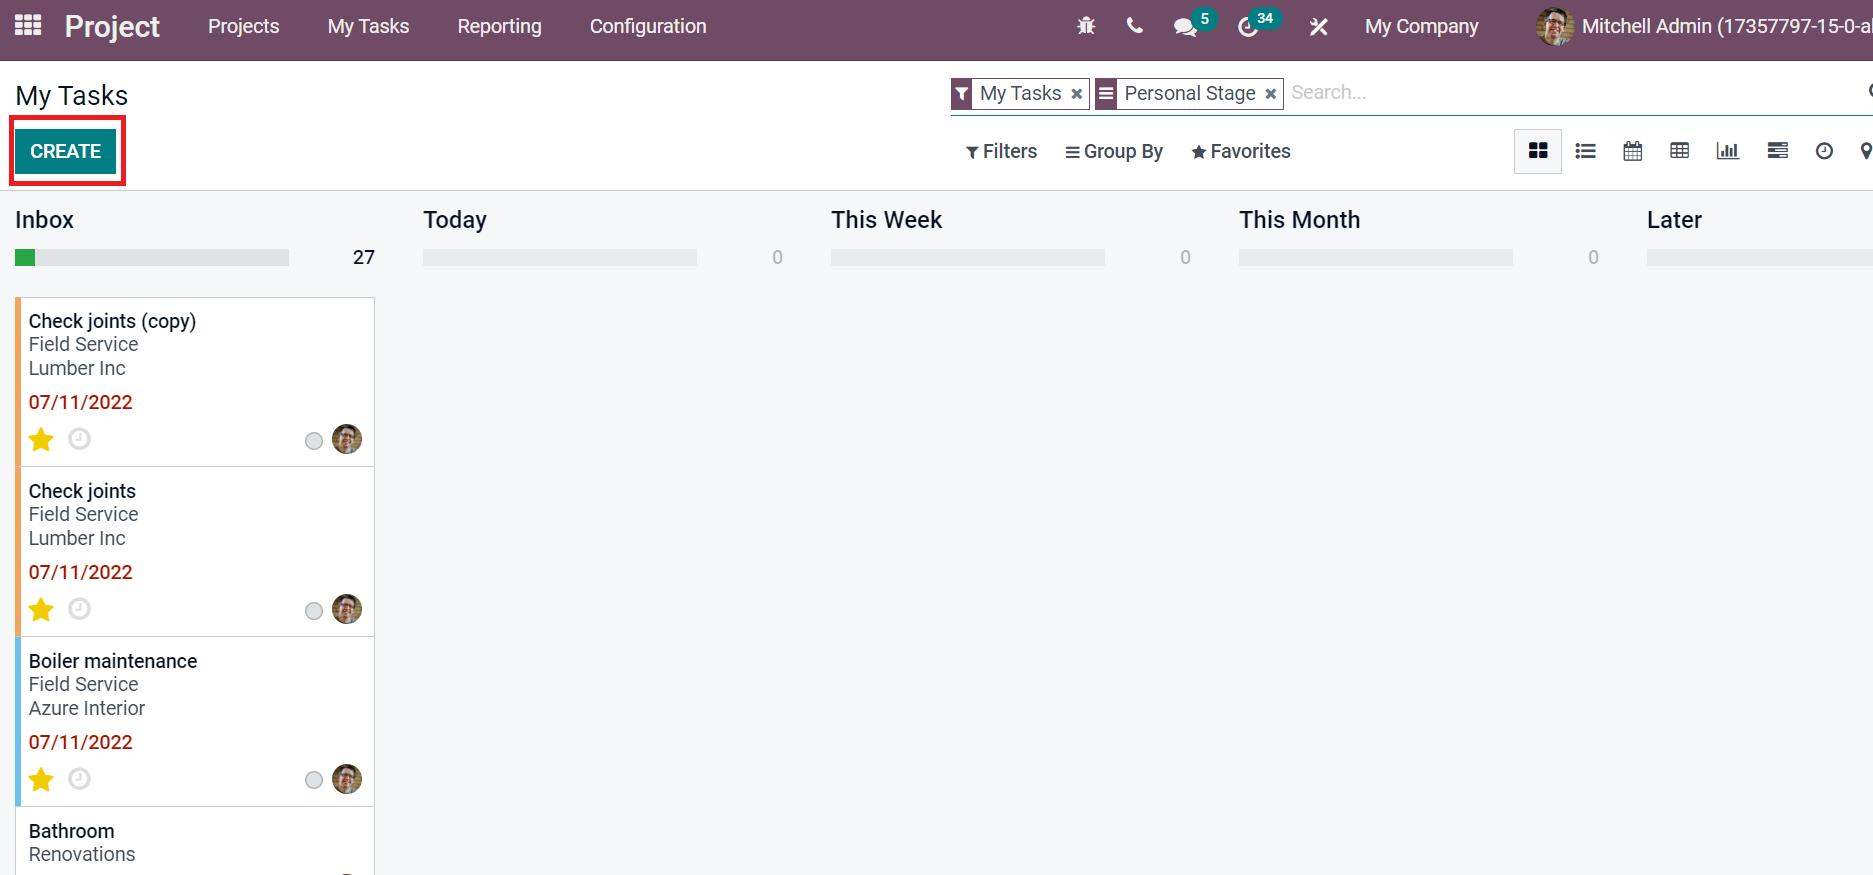
Another method is to generate tasks from the My Tasks tab. You can select the CREATE icon in the My Tasks tab to process a new task for a project, as indicated in the screenshot below.
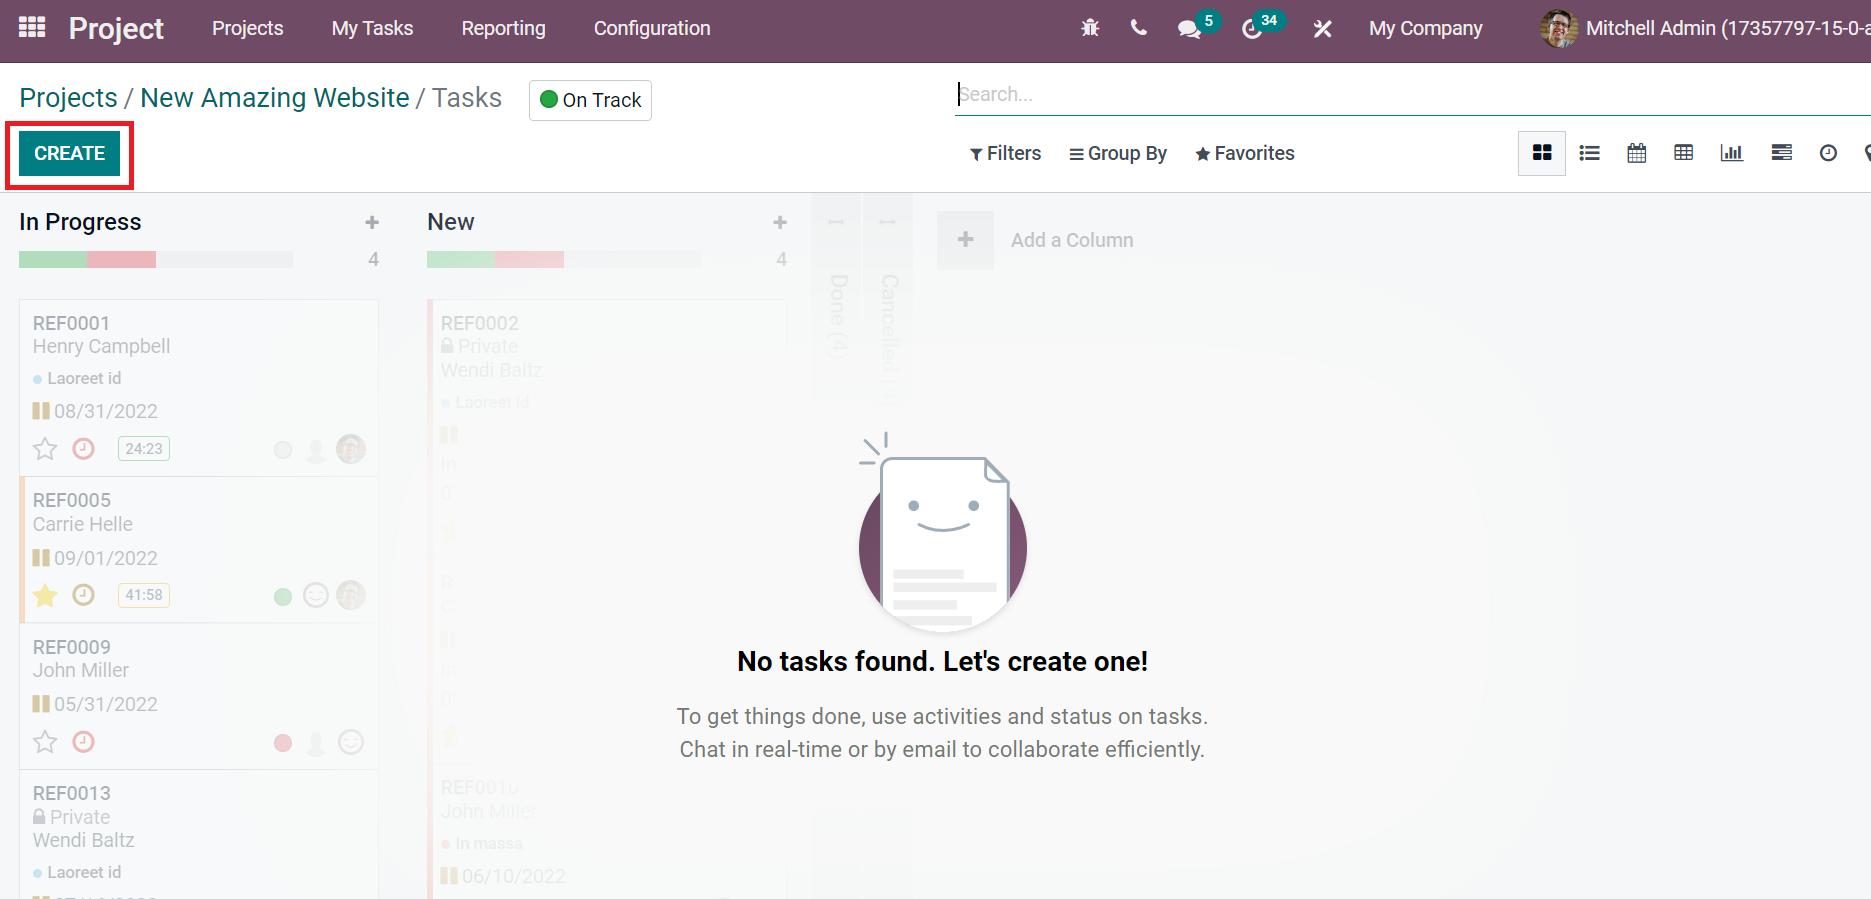
Let’s follow the first method to create tasks for the New Amazing Website project. Choose the CREATE icon inside the Tasks window of your project, as depicted in the screenshot below.
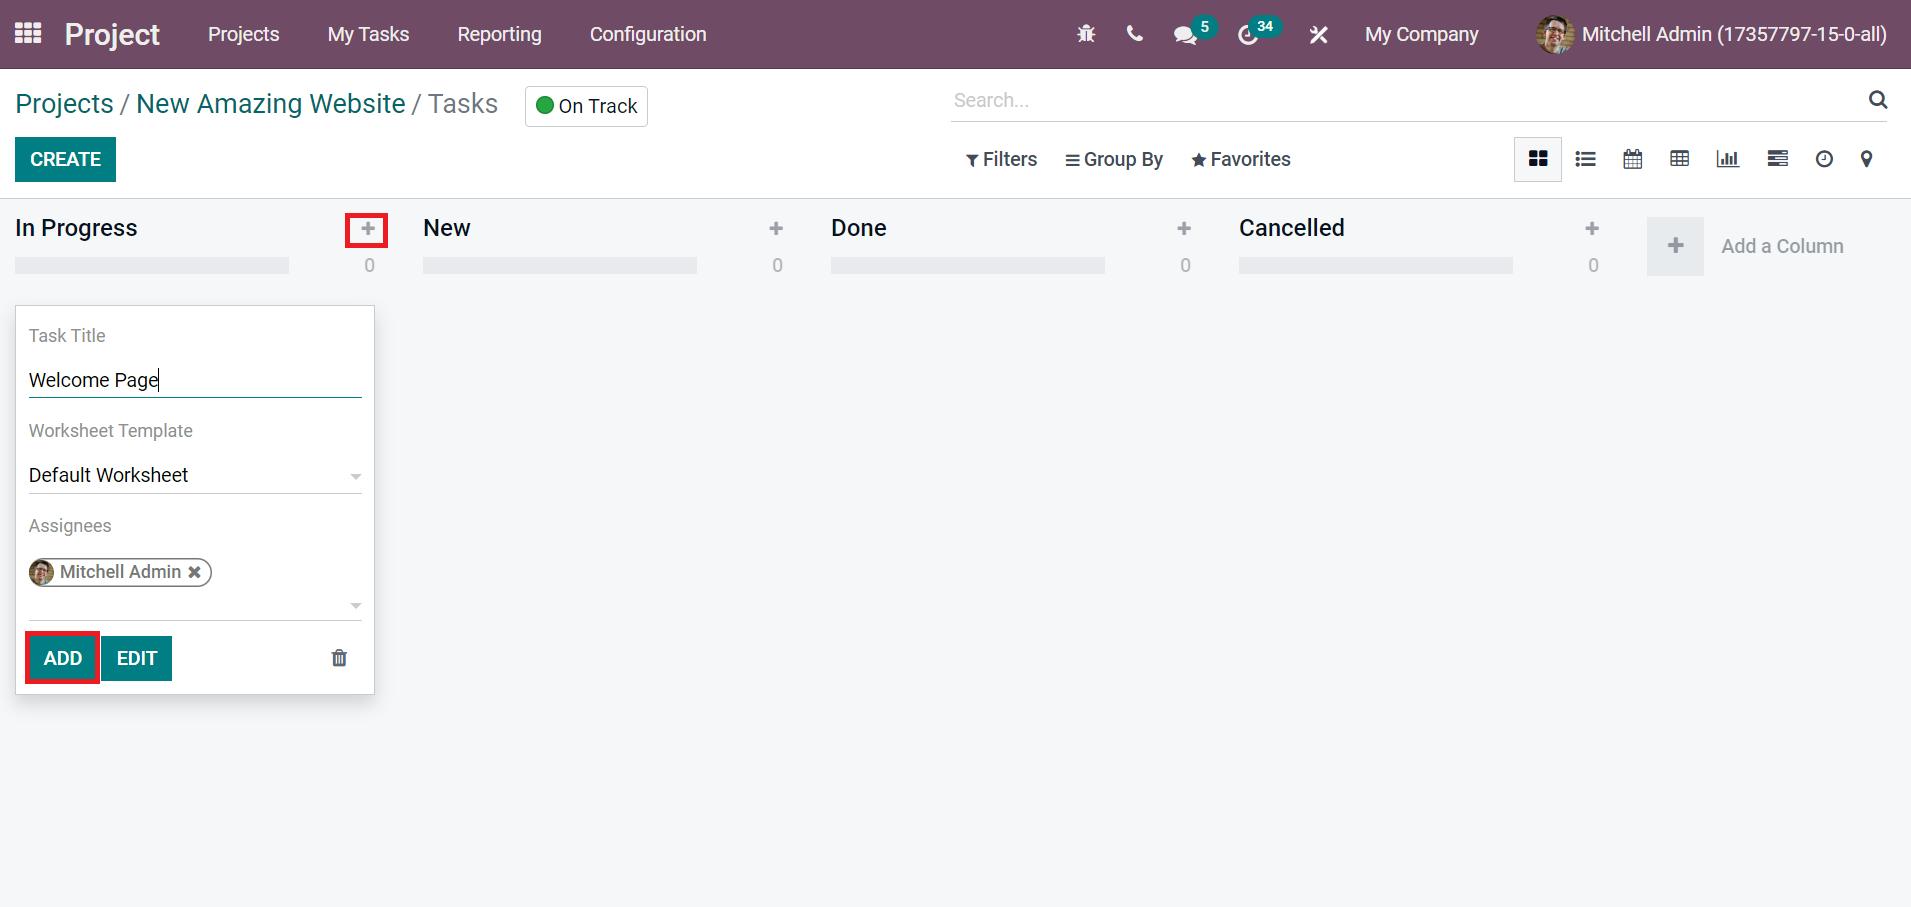
After clicking on CREATE button, you can access all created task stages created before. By selecting +icon near to In Progress stage, a pop-up box opens before you. Add your Task Title, Worksheet Template, or Assignees, and select the ADD button as represented in the screenshot below.
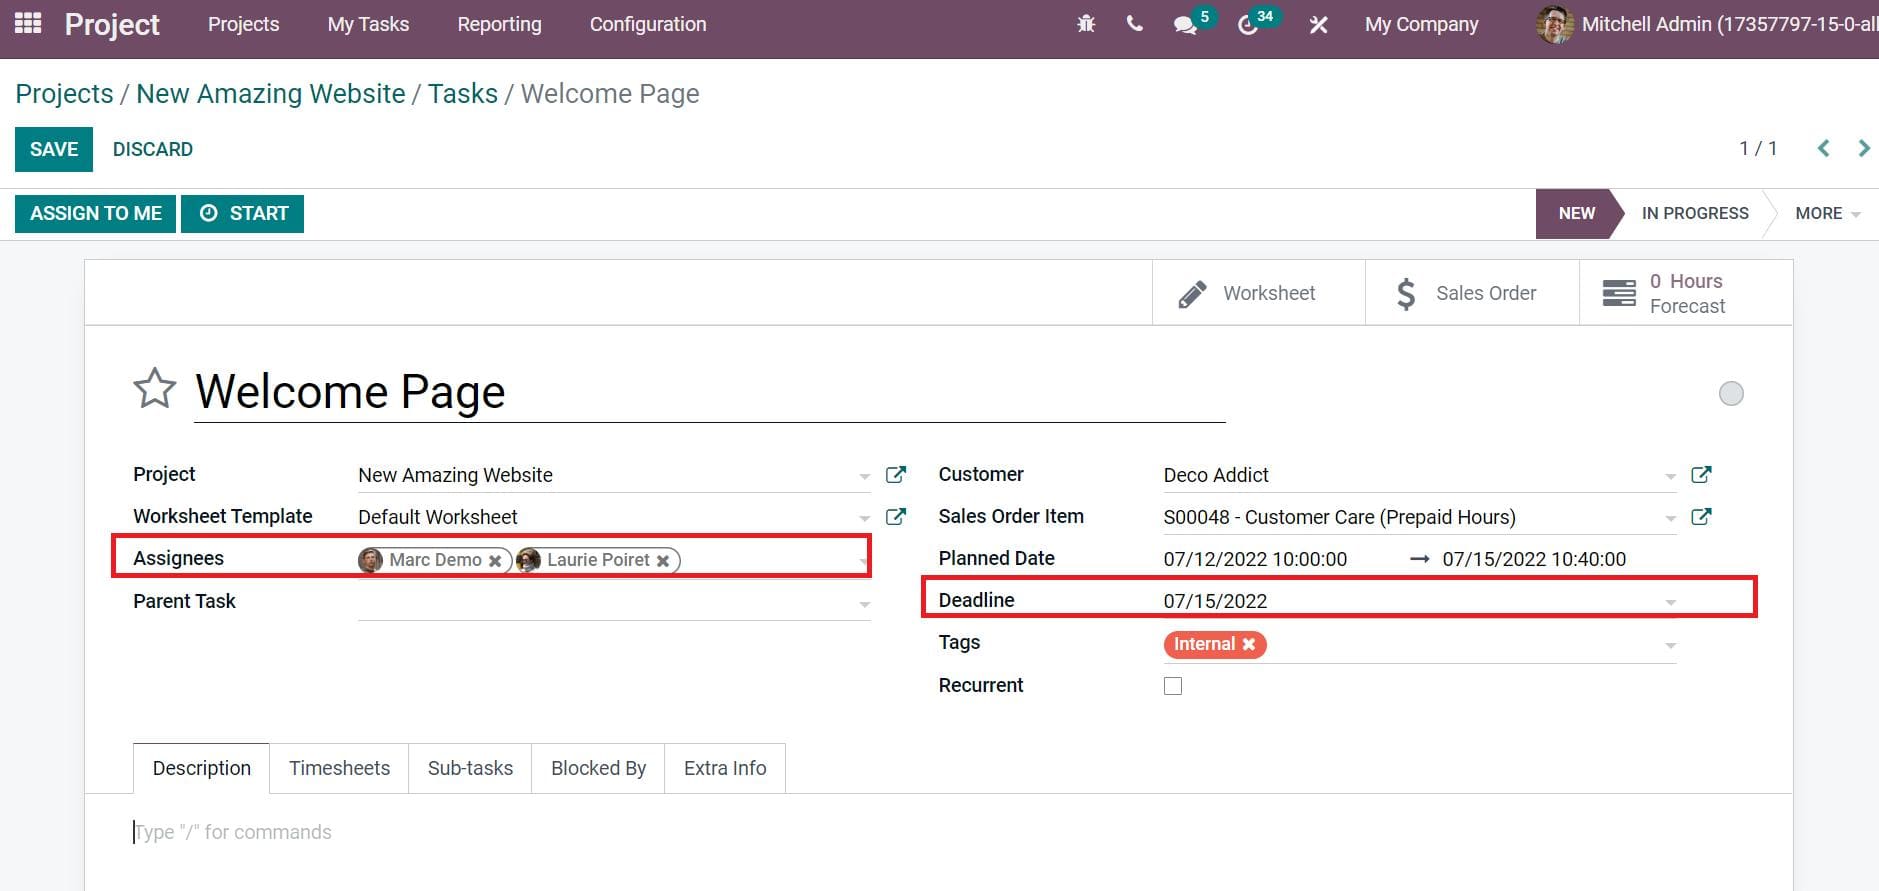
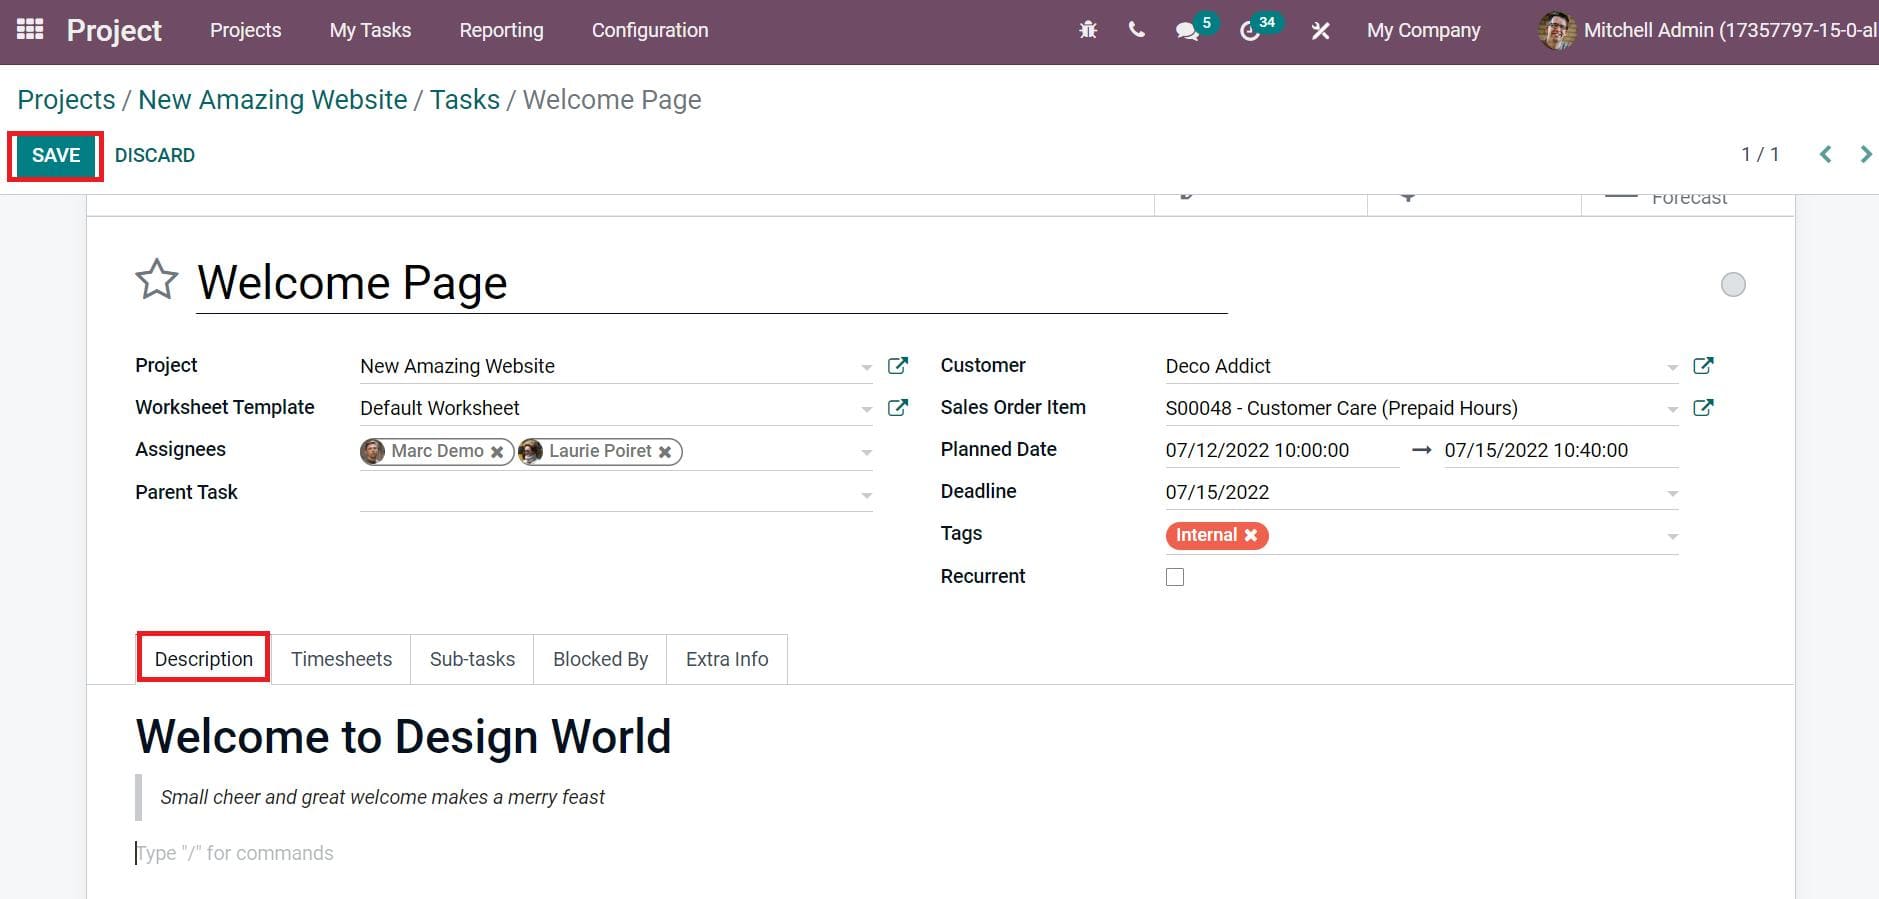
Click the Edit button from the created task, and the Task page is visible before you. On the Tasks page, you can add people to handle the task inside the Assignees field and a target date to finish the project in the Deadline field.
Users can enter the welcome message visible to customers on the welcome page below the Description tab, as illustrated in the screenshot below.
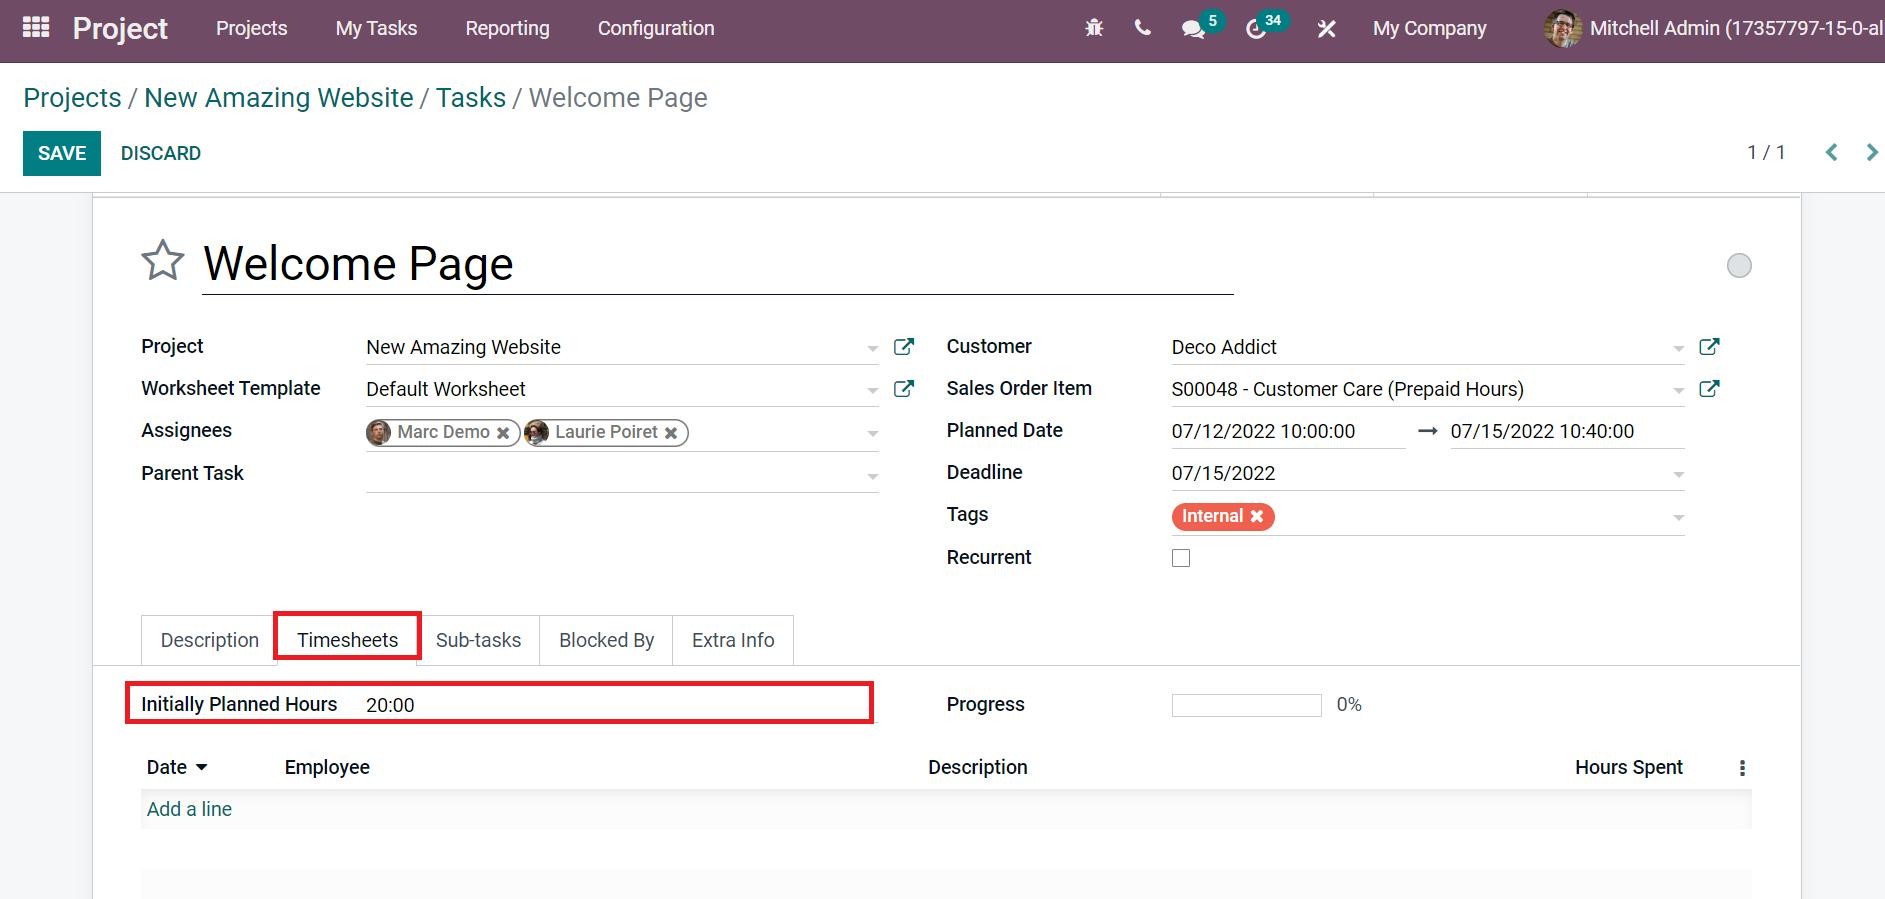
Next, we can set the time to complete the project inside the Initially Planned Hours field below the Timesheets tab.
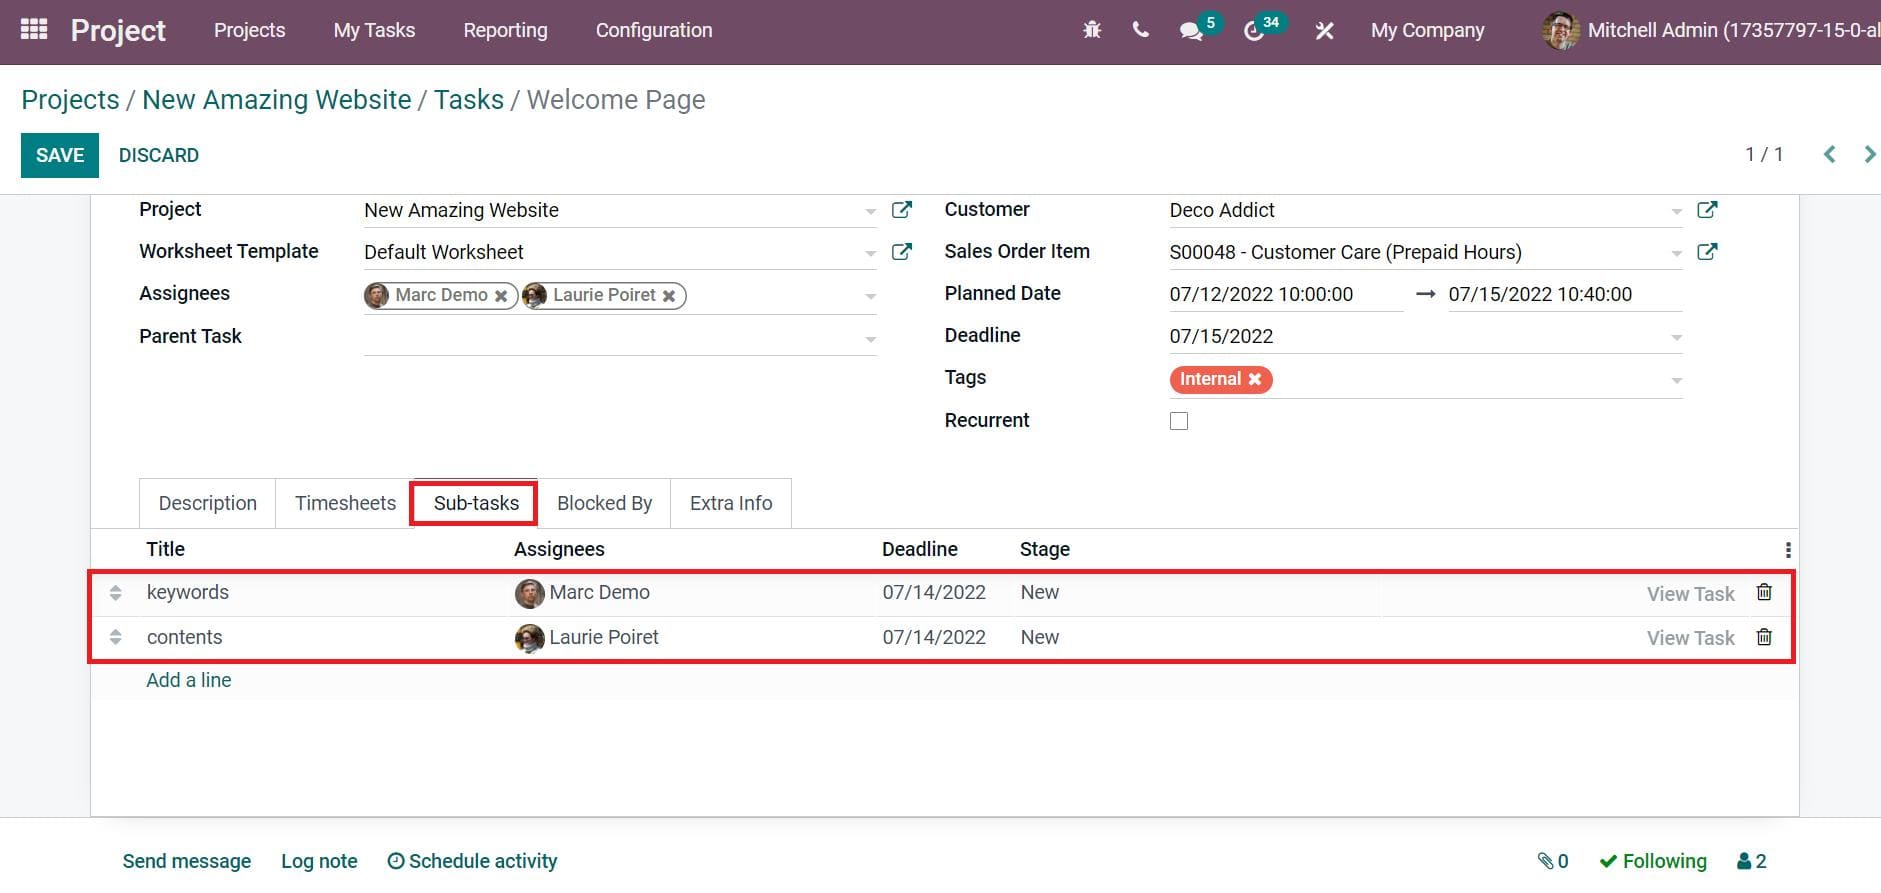
Now, we can assign sub-tasks for assignees inside the Sub-tasks tab by choosing the Add a line option. We assign each task separately for assignees below the Sub-tasks tab, as presented in the screenshot below.
After applying the details, save your changes, and you can view that two tasks are generated in your project.
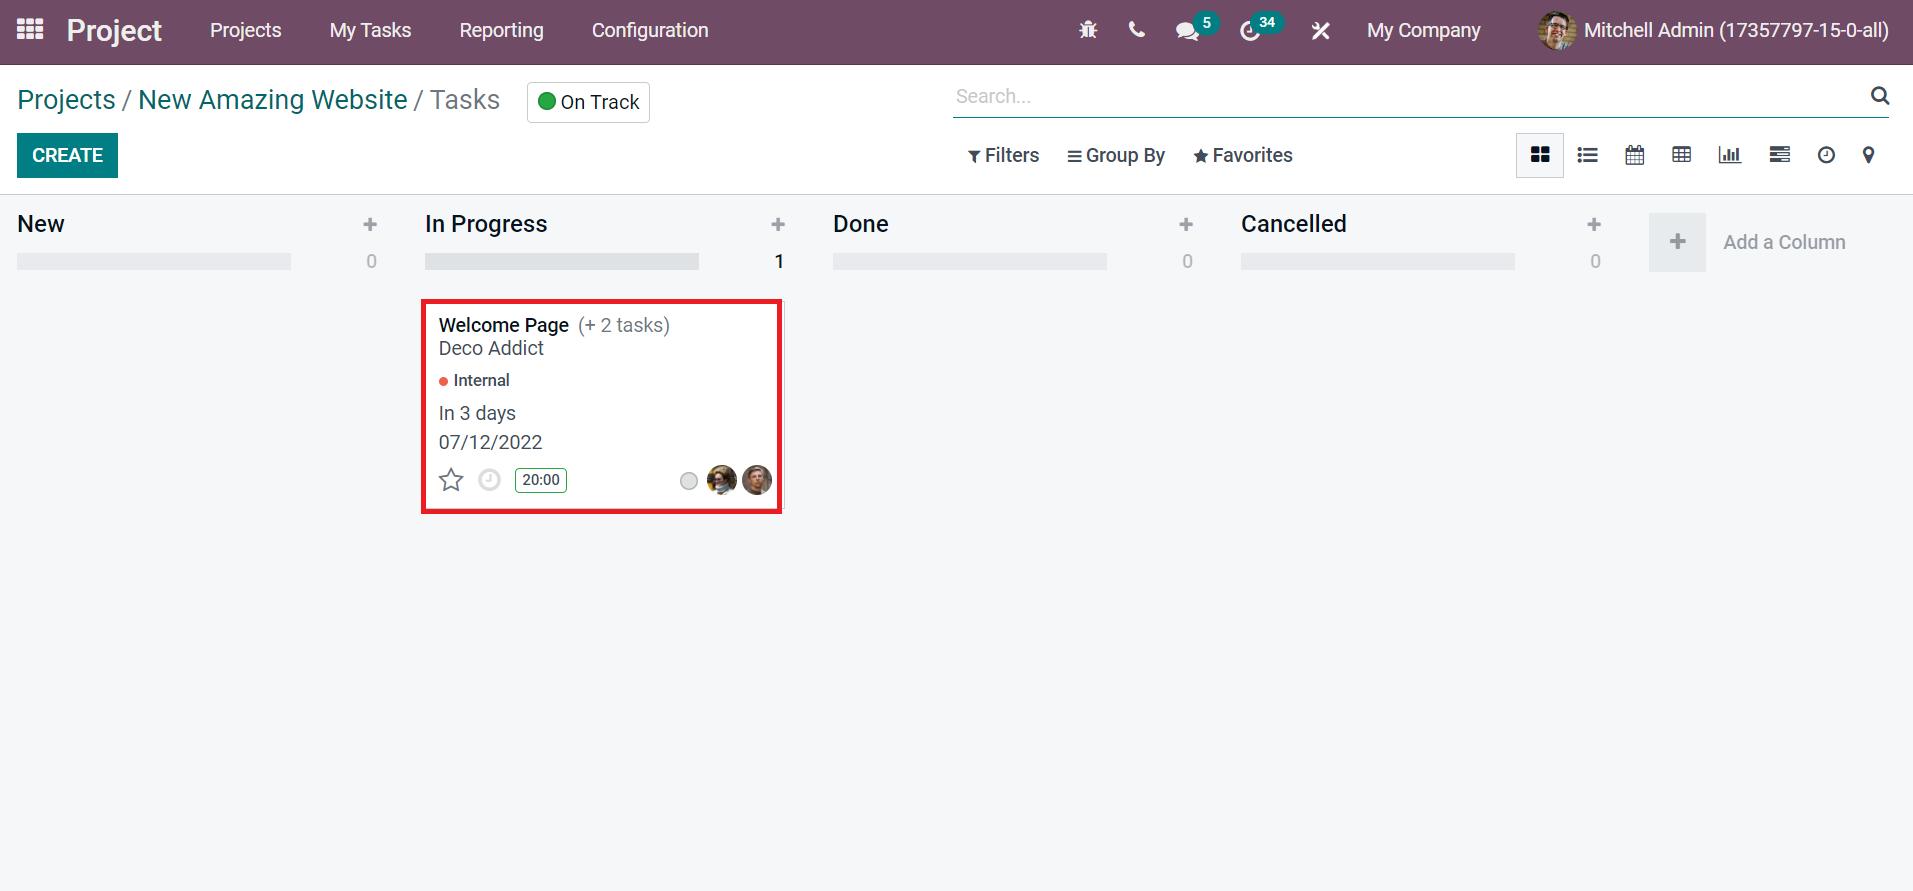
In the Graph view of the Tasks window, you can access the scheduled task details and the calendar deadline.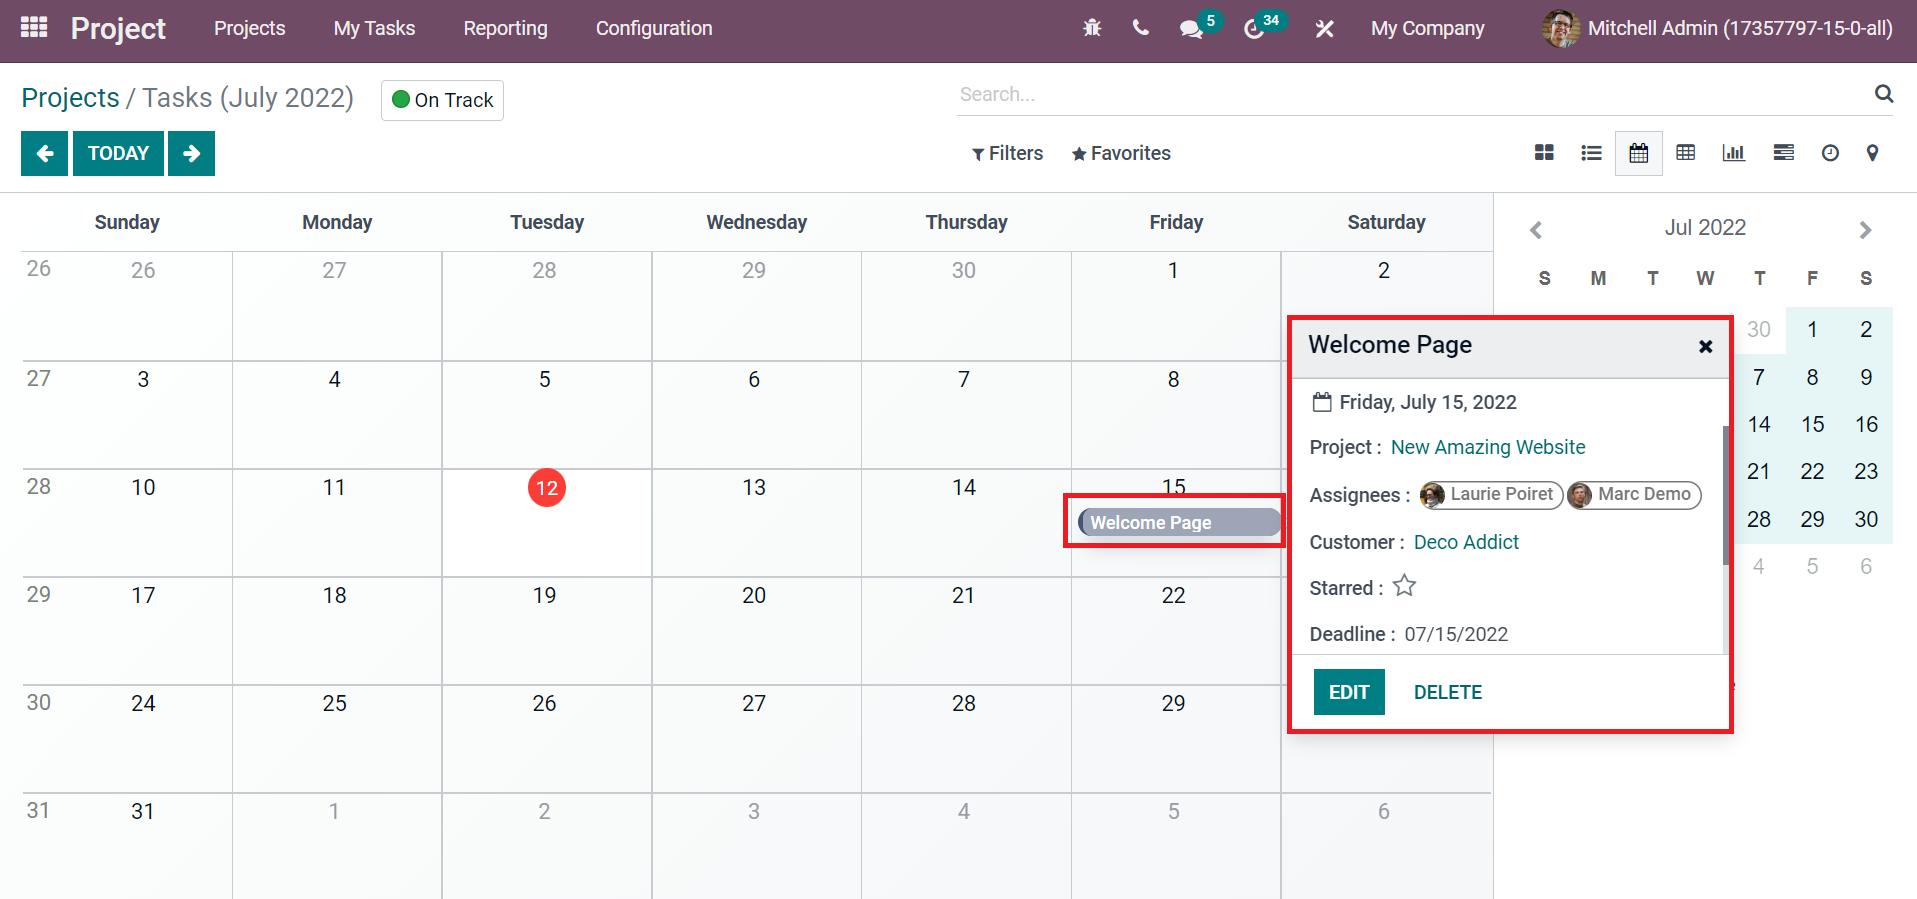
Hence, we can quickly manage tasks for projects within Odoo 15.
Task Analysis of Projects in Odoo 15
We can evaluate projects in the company using the Reporting feature of the Odoo 15 Projects module. Users can analyze tasks of projects by clicking on the Task Analysis menu in the Reporting tab. Choose the Task Analysis menu in Reporting tab, and a graphical representation is viewable before you, as visible in the screenshot below.
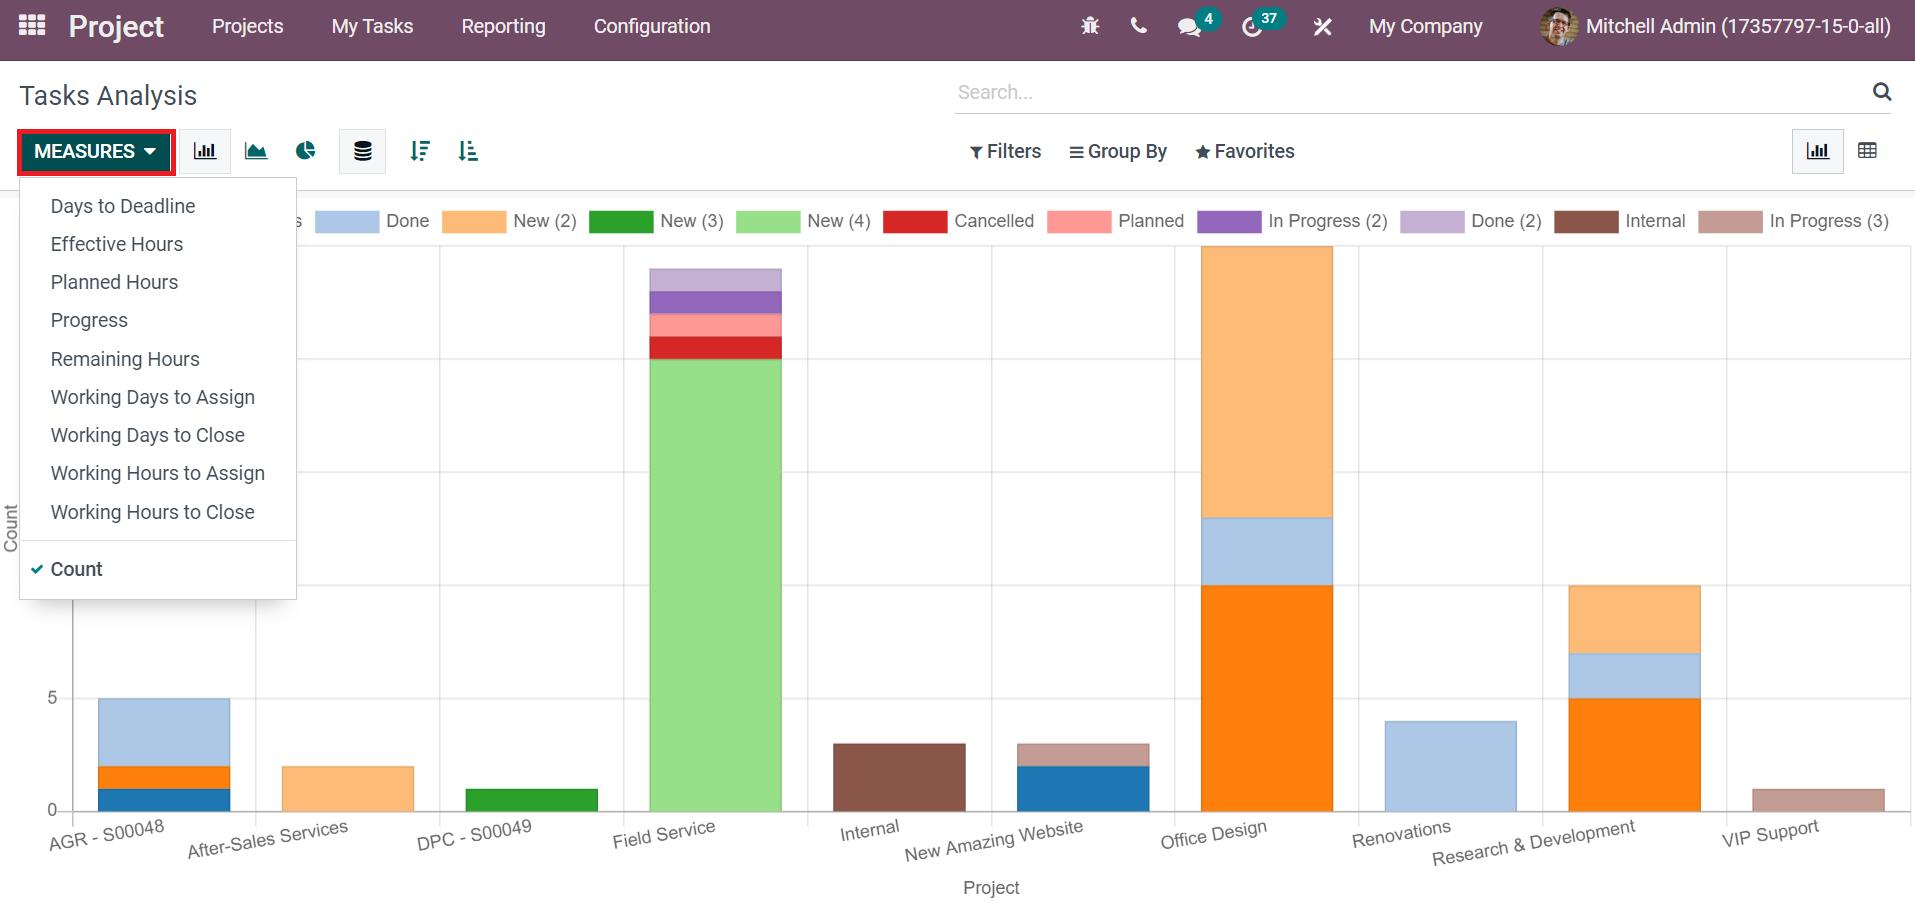
You can add various measures such as progress, remaining hours, planned hours, and more to the graph by clicking on the MEASURE icon. The graphical representation shows Project details on X-axis, and Y-axis depicts Count data, as shown in the above screenshot. Users can analyze the count of each task in your project from the graph. Each task is marked in different colors on the graph, and you can identify it quickly by the stage data given at the graph top.
Users can organize projects accurately by creating tasks and stage tasks in the Odoo 15 project module. We can manage different projects for your company within the Project application of Odoo ERP. Check out the below link to learn about Advanced Features in Odoo 15 Projects Module.


