Accounting management monitoring in a company assists in controlling cash flow smoothly. Most firms manage payable and receivable accounts for customers in separate accounts. The financial operations of an organization rely upon Accounts Payable and Receivables. A payable account is a good purchased by a firm based on credit that needs to be paid back within a short time. It is considered a liability for an individual or company and comes under the current liabilities. On the other hand, the debt by a customer regarding company goods already used or delivered is an account receivable. It consists of a current asset and changes into cash within a year. Management of these accounts in an organization becomes simple by installing an Odoo ERP.
This blog points out the setting of payable and receivable accounts using the Odoo 15 Accounting module.
We can manage payments, products, vendors, journals, and balance sheets with the Accounting module Odoo 15. The accounting management of Odoo integrated with other modules is beneficial for the smooth workflow of a company. Now, let’s discuss establishing receivable and payable accounts in a US company with the help of Odoo 15 Accounting.
To Set up Receivable Accounts for Customer in Odoo 15
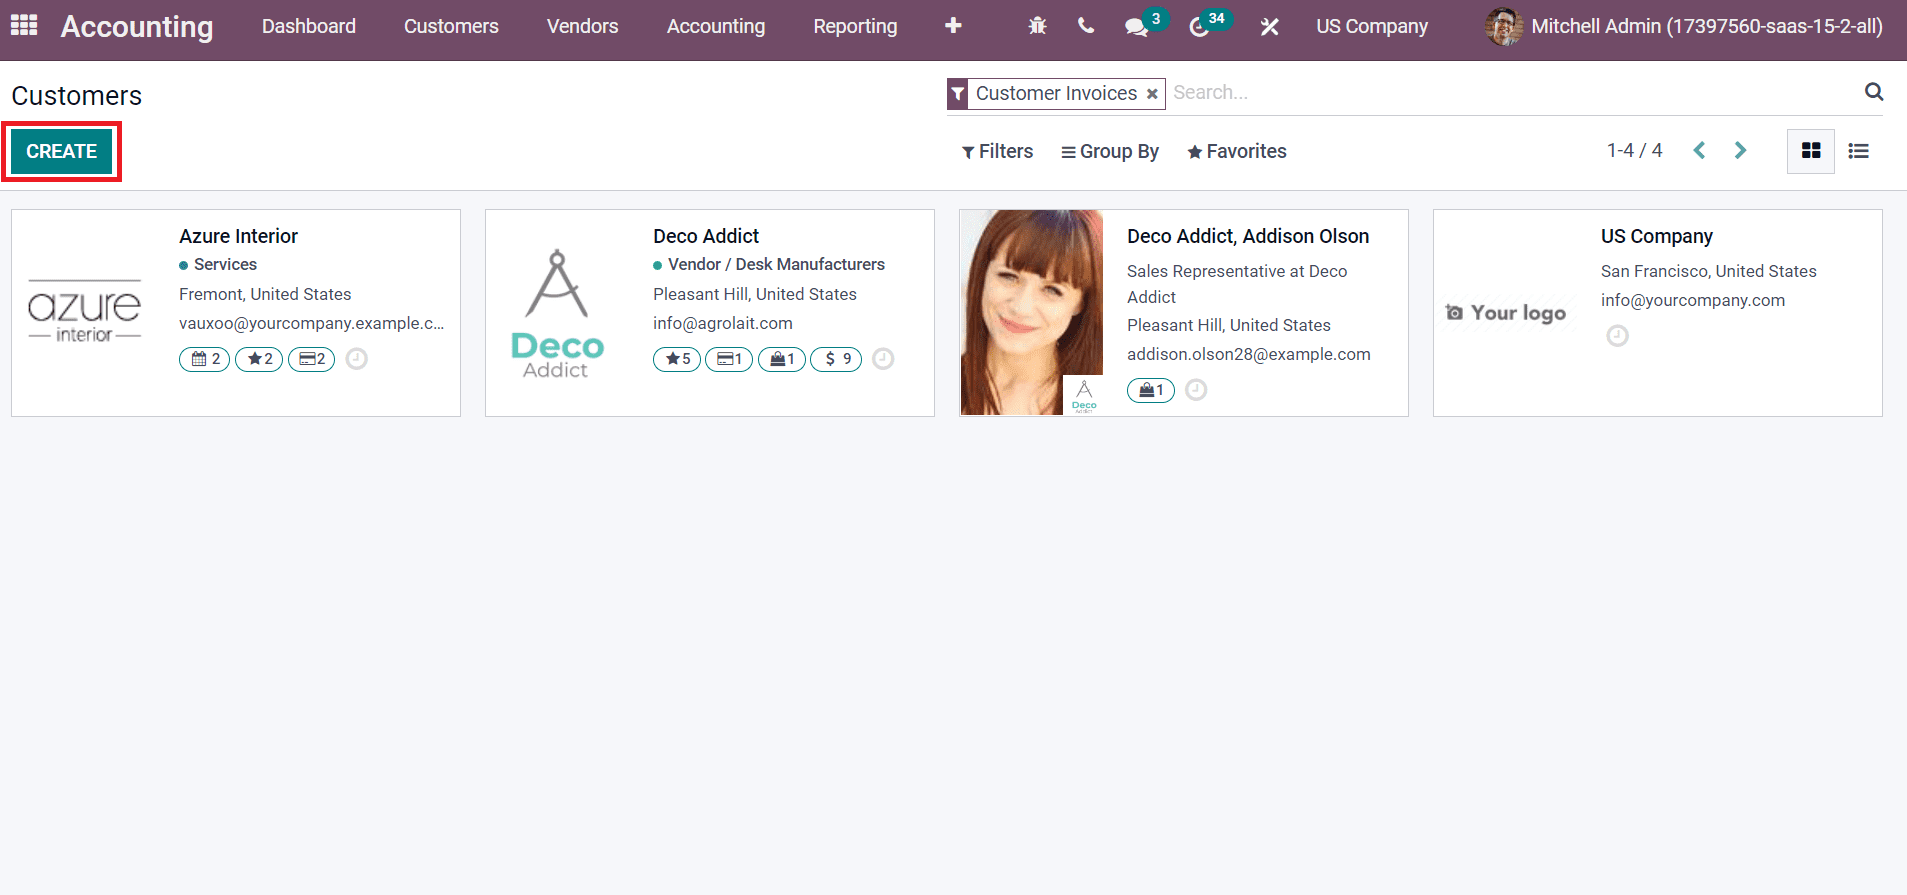
The canceled accounts for customer purchases are specified in the receivable accounts of a firm. To define a receivable account, we need to create a customer and give the details. For that, select the Customers menu in the Accounting module, and a list of all customers in your firm will be visible before you. Press the CREATE button to generate new customer information to add a receivable account, as mentioned in the screenshot below.
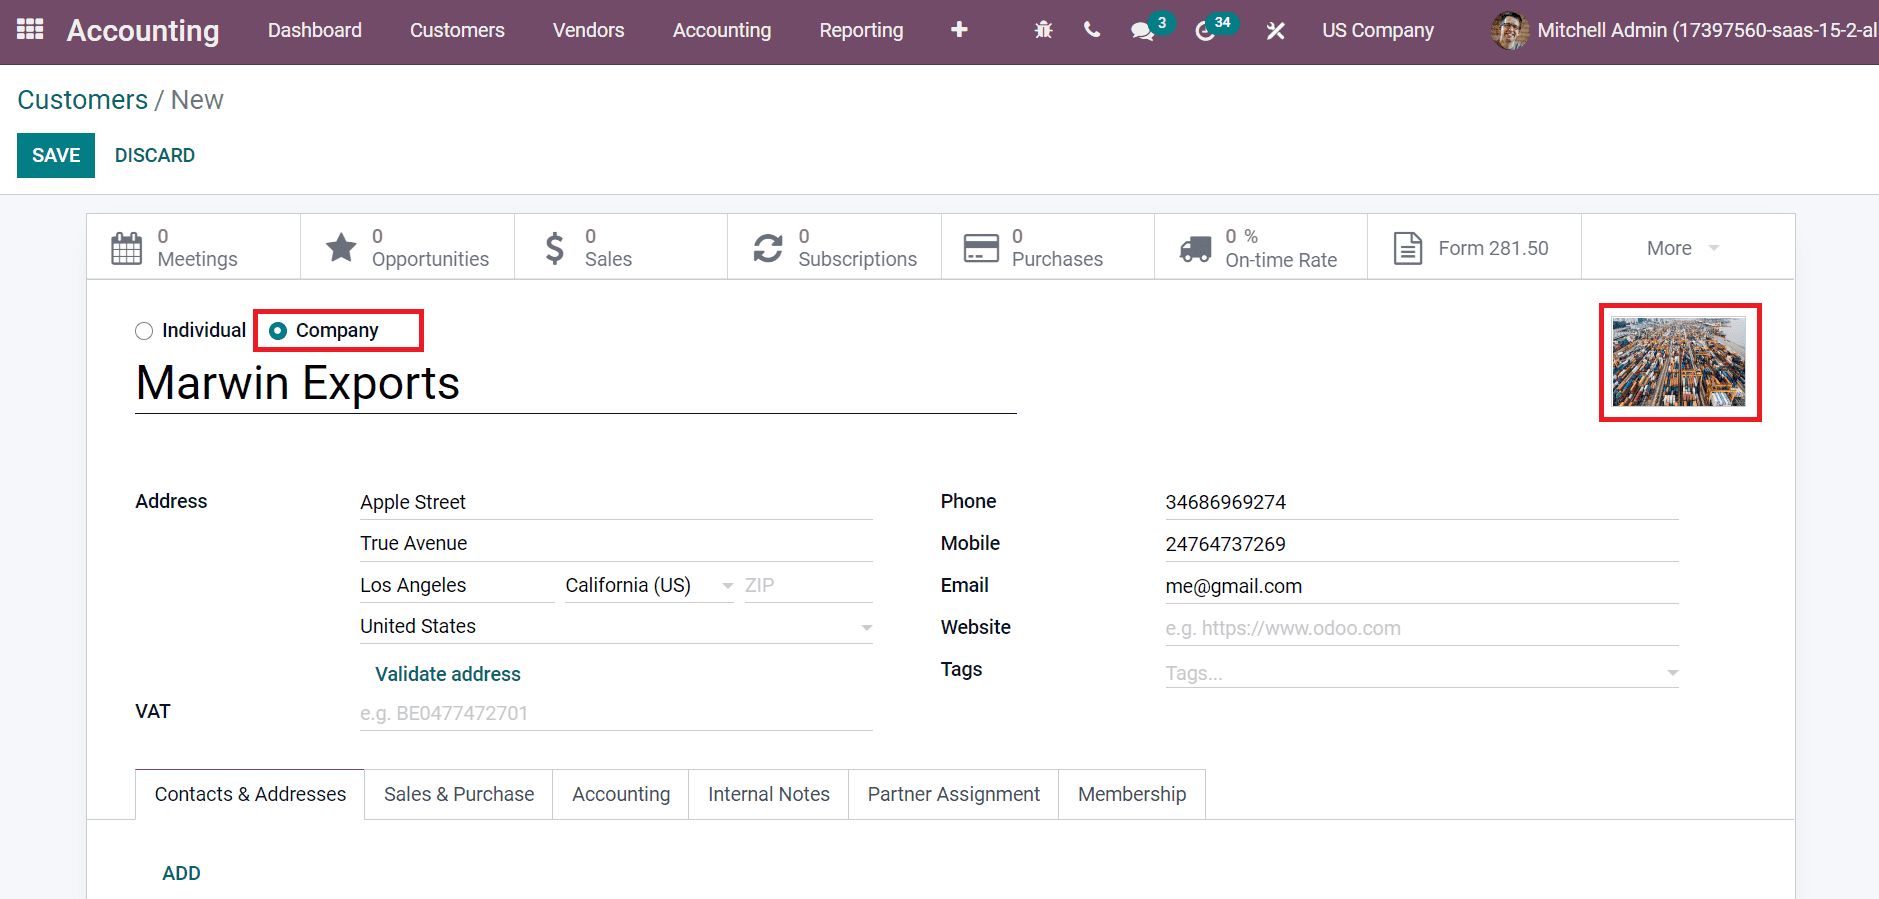
In the new Customers window, you can select the customer as Company and Individual. We picked the company option and added the company name Marwin Exports, as described in the screenshot below.
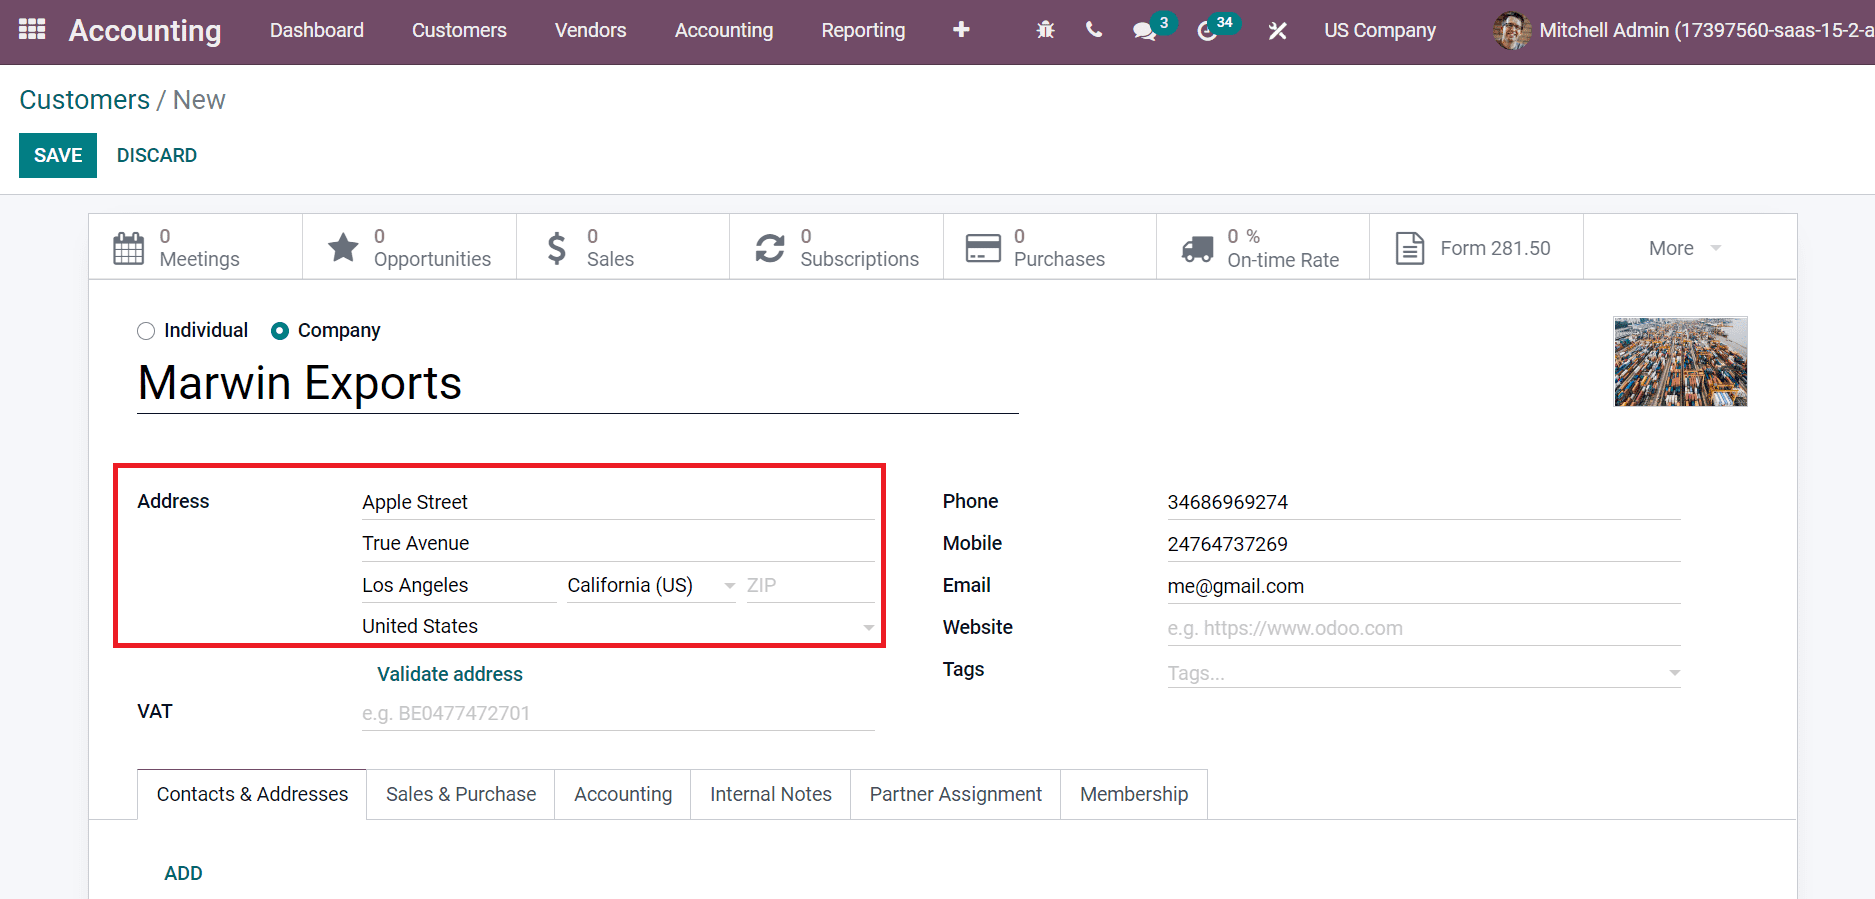
You can also upload an image of the company on the right side, as shown in the above screenshot. Later, enter your company address inside the Address field, and we applied the address of a US company here as marked in the screenshot below.
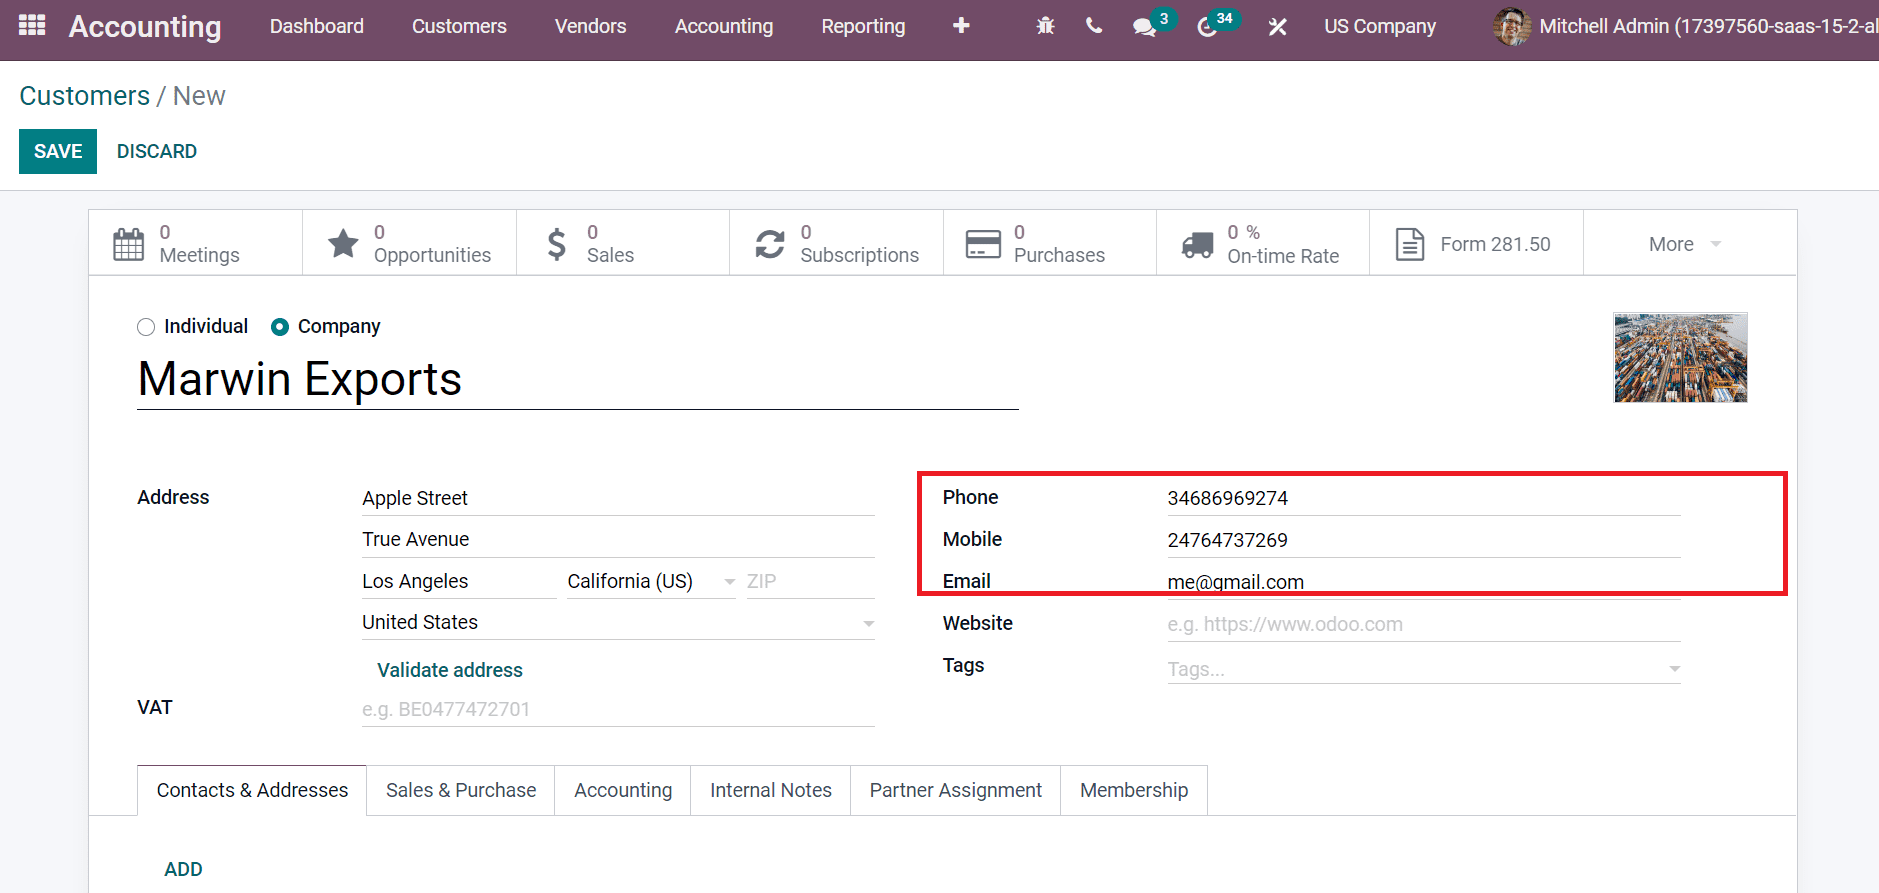
Next, set the Phone, Mobile, and Email id of your company as in the screenshot below.
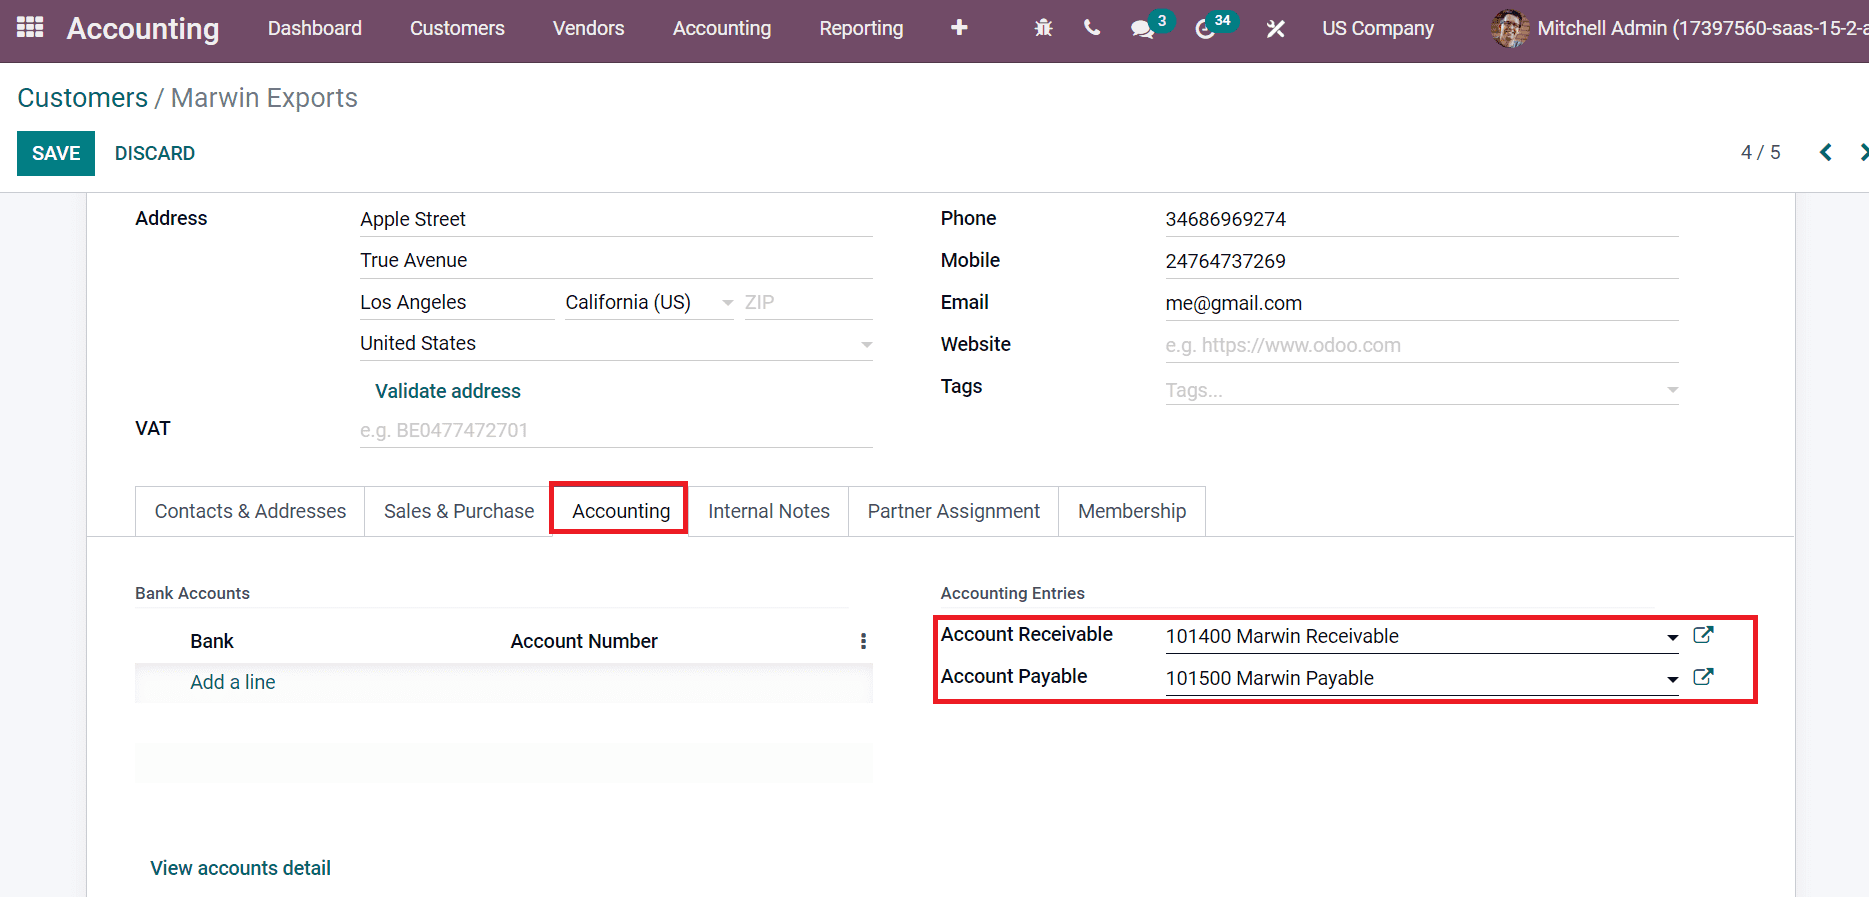
Below the Accounting tab, you can see the default payable and receivable accounts set inside the Accounting Entries section, as depicted in the screenshot below.
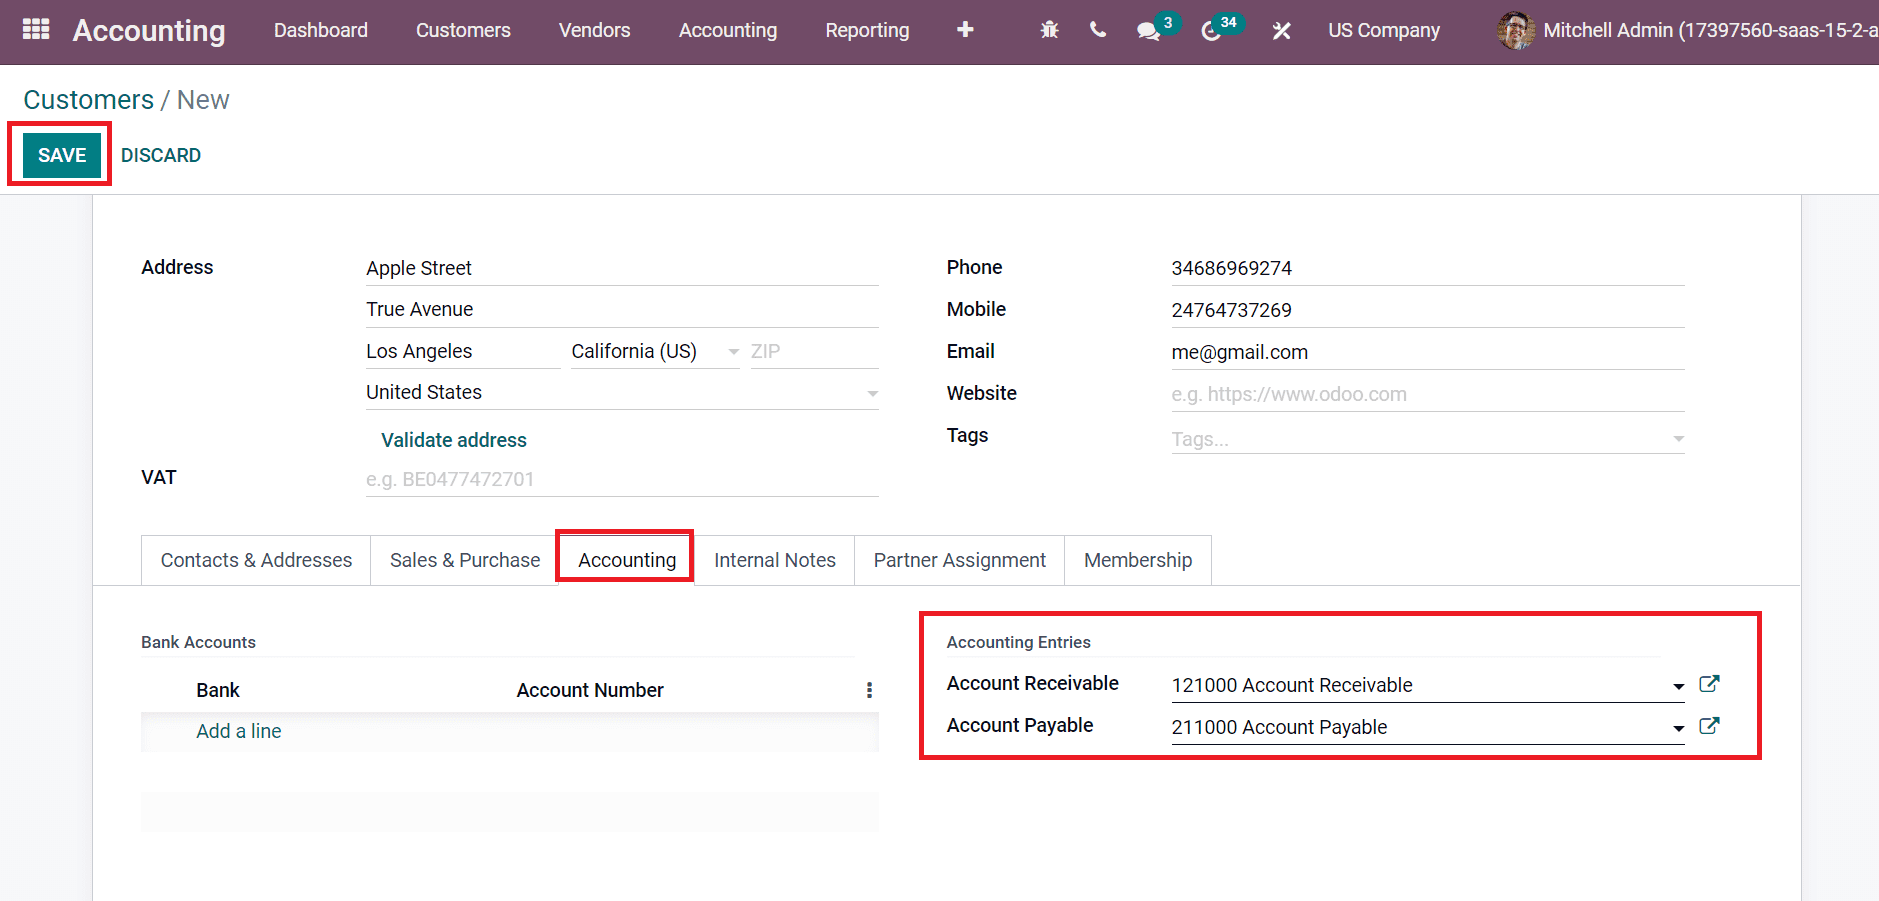
Click the SAVE icon after adding the data of your customer. Now, we need to create a chart of accounts for specific customers. Choose the Chart of Accounts option below the Accounting section of the Configuration tab. The list of all accounts is viewable before the user, as portrayed in the screenshot below.
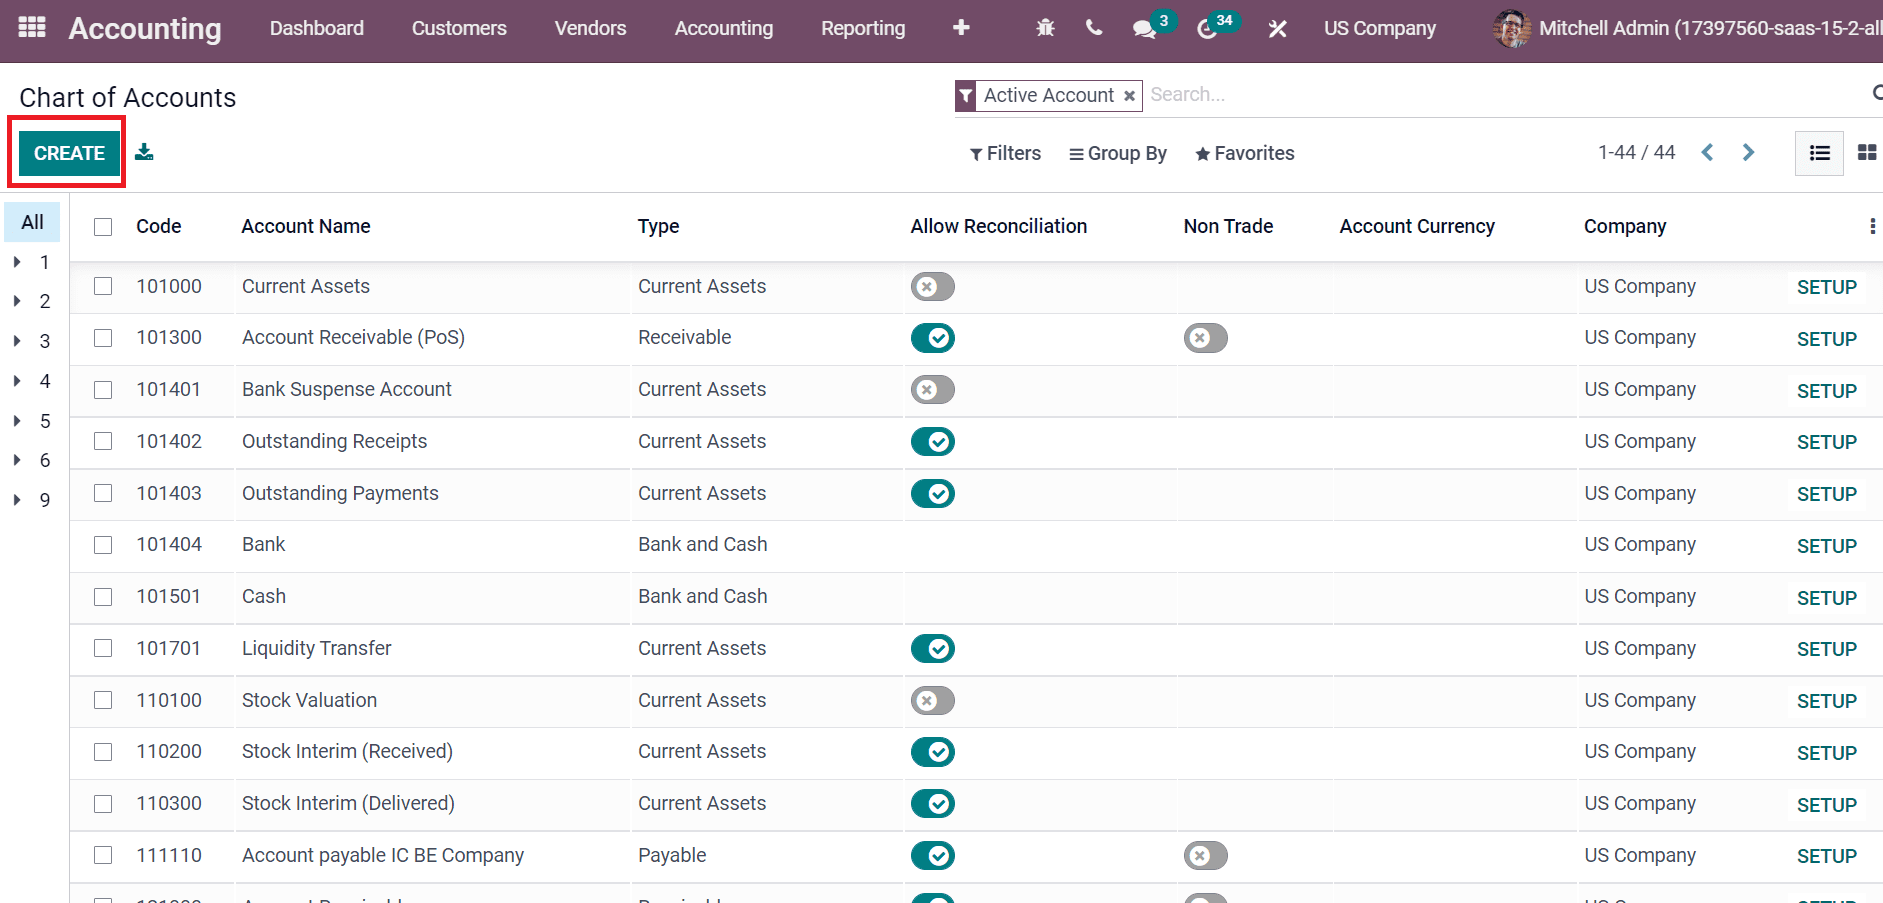
We can see the details of each account, such as Code, type, Company, Account Name, and more, in the Chart of Accounts field. Click the CREATE icon to develop a new chart of accounts for your customer, as shown in the above screenshot. We can generate payable and receivable accounts for the company Marwin Exports. By clicking on CREATE icon, a new space appears before you. Add code, Account Name as Marwin Receivable, Type as Receivable and choose your US Company as represented in the screenshot below.
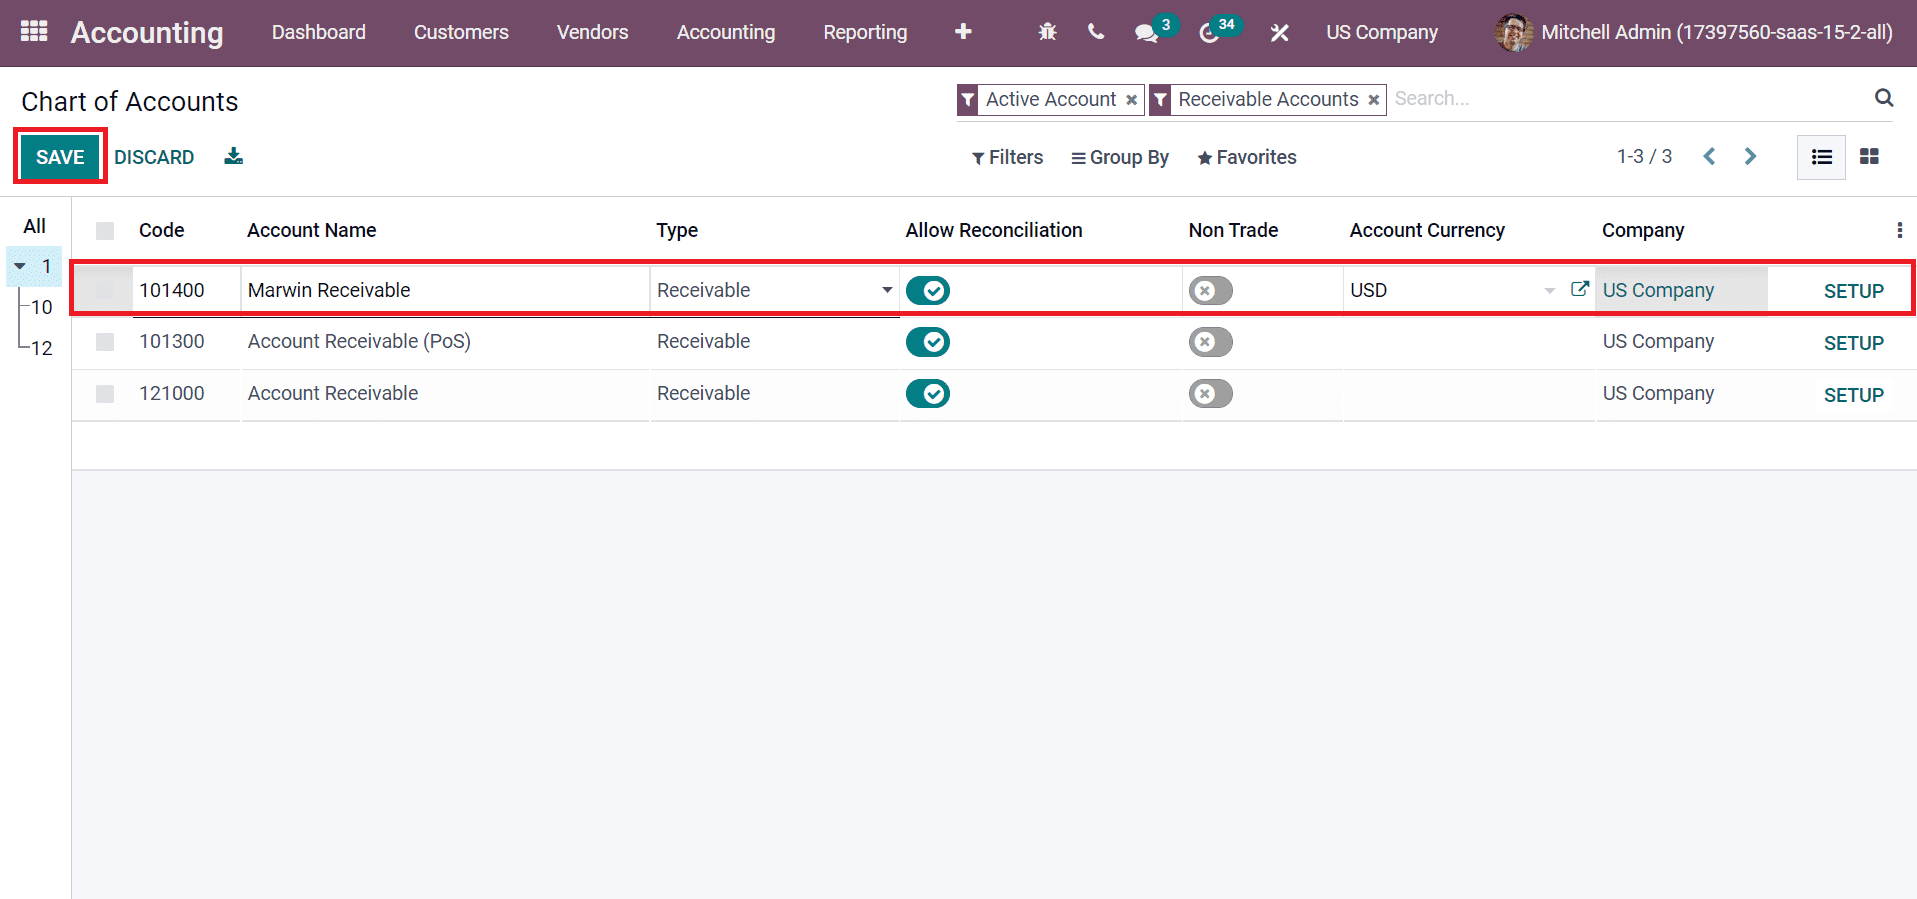
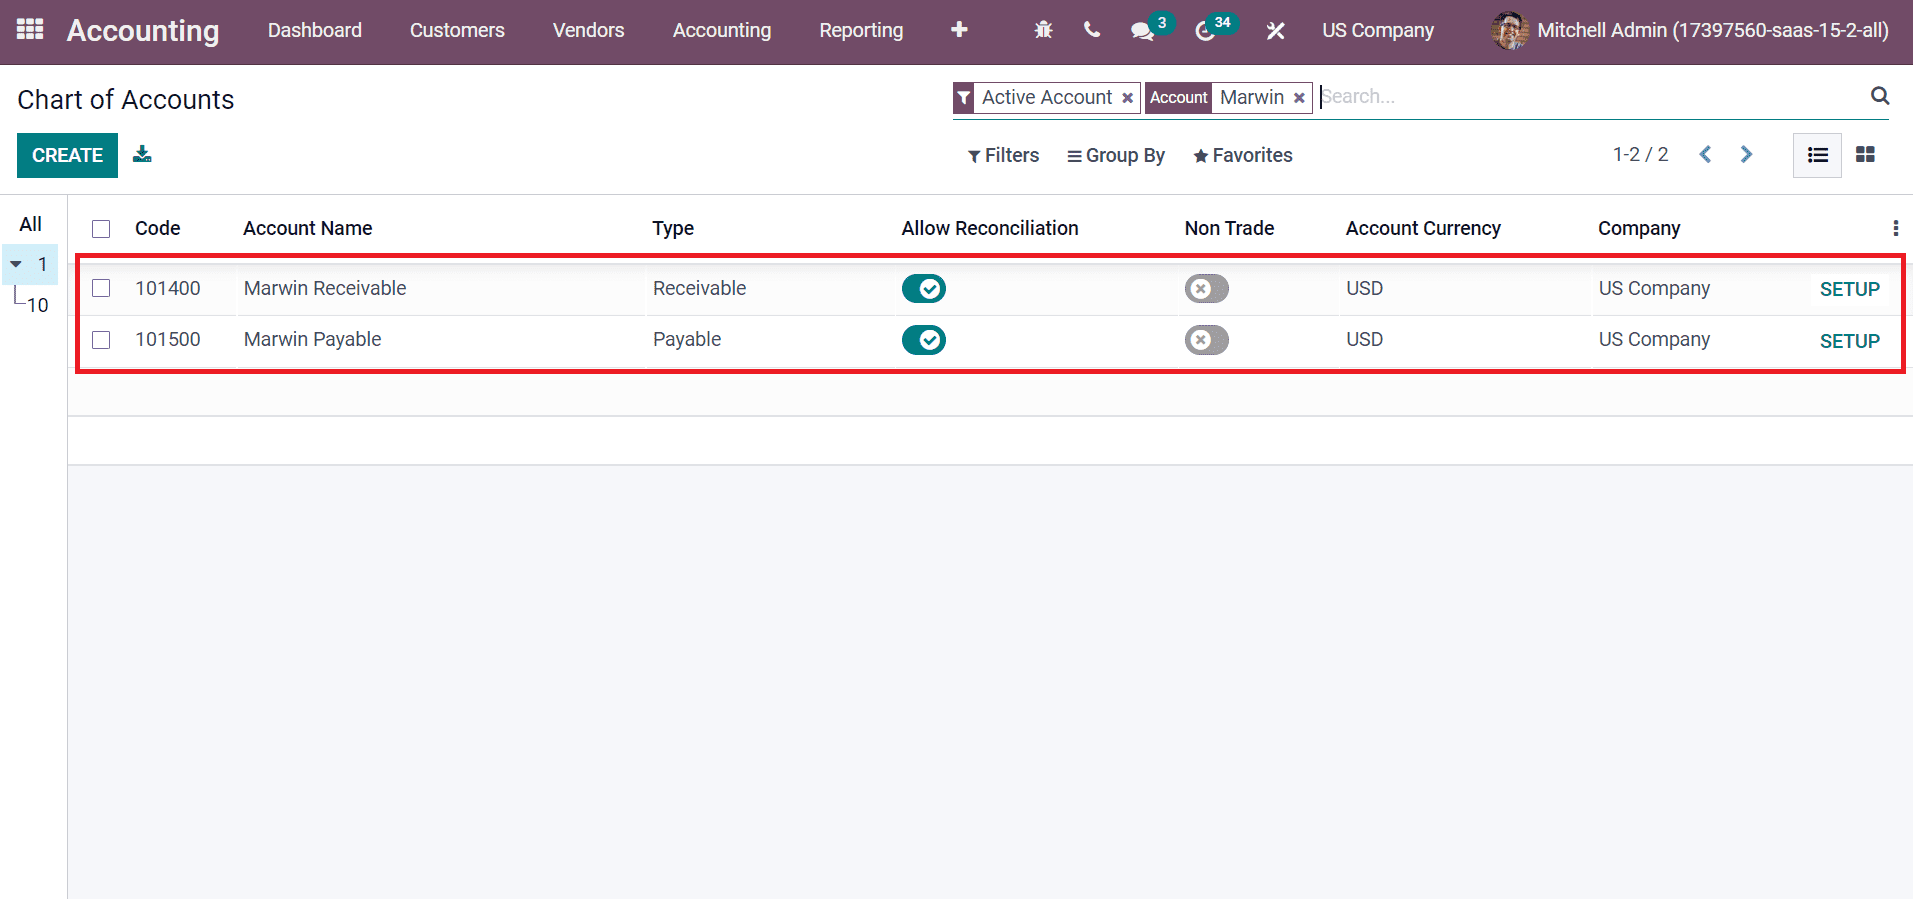
Select the SAVE icon after entering all details, as shown in the screenshot above. In the same way, you can formulate a payable account for the company from the Chart of Accounts window. We can see the created chart of accounts for the company Marwin Exports on the Chart of Accounts page after applying filters as specified in the screenshot below.
Now, we can assign these accounts to the customer Marwin Exports company. Pick your customer and click on the Accounting tab. Afterward, select Marwin Receivable account from the Account Receivable field and Marwin Payable inside the account Payable field, as illustrated in the screenshot below.
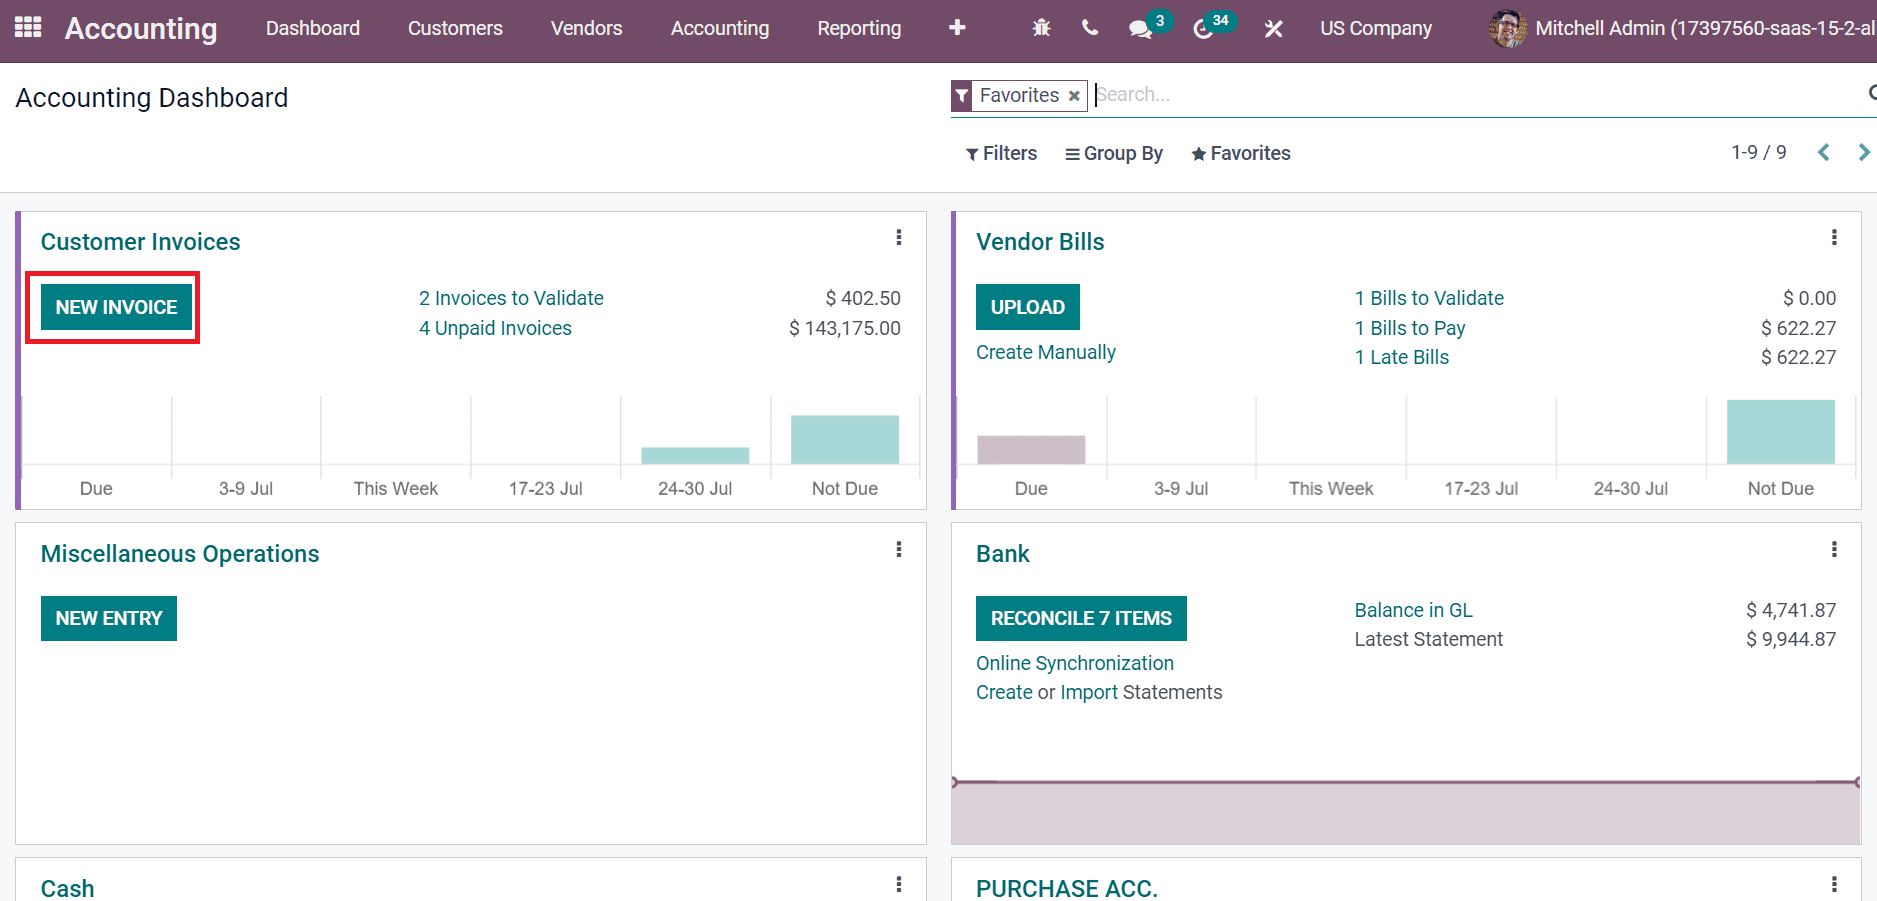
Next, we can produce a customer invoice to evaluate accounting operations from the Odoo 15 Accounting module. You can access the Customer Invoices option from the Dashboard and click on the NEW INVOICE button as presented in the screenshot below.
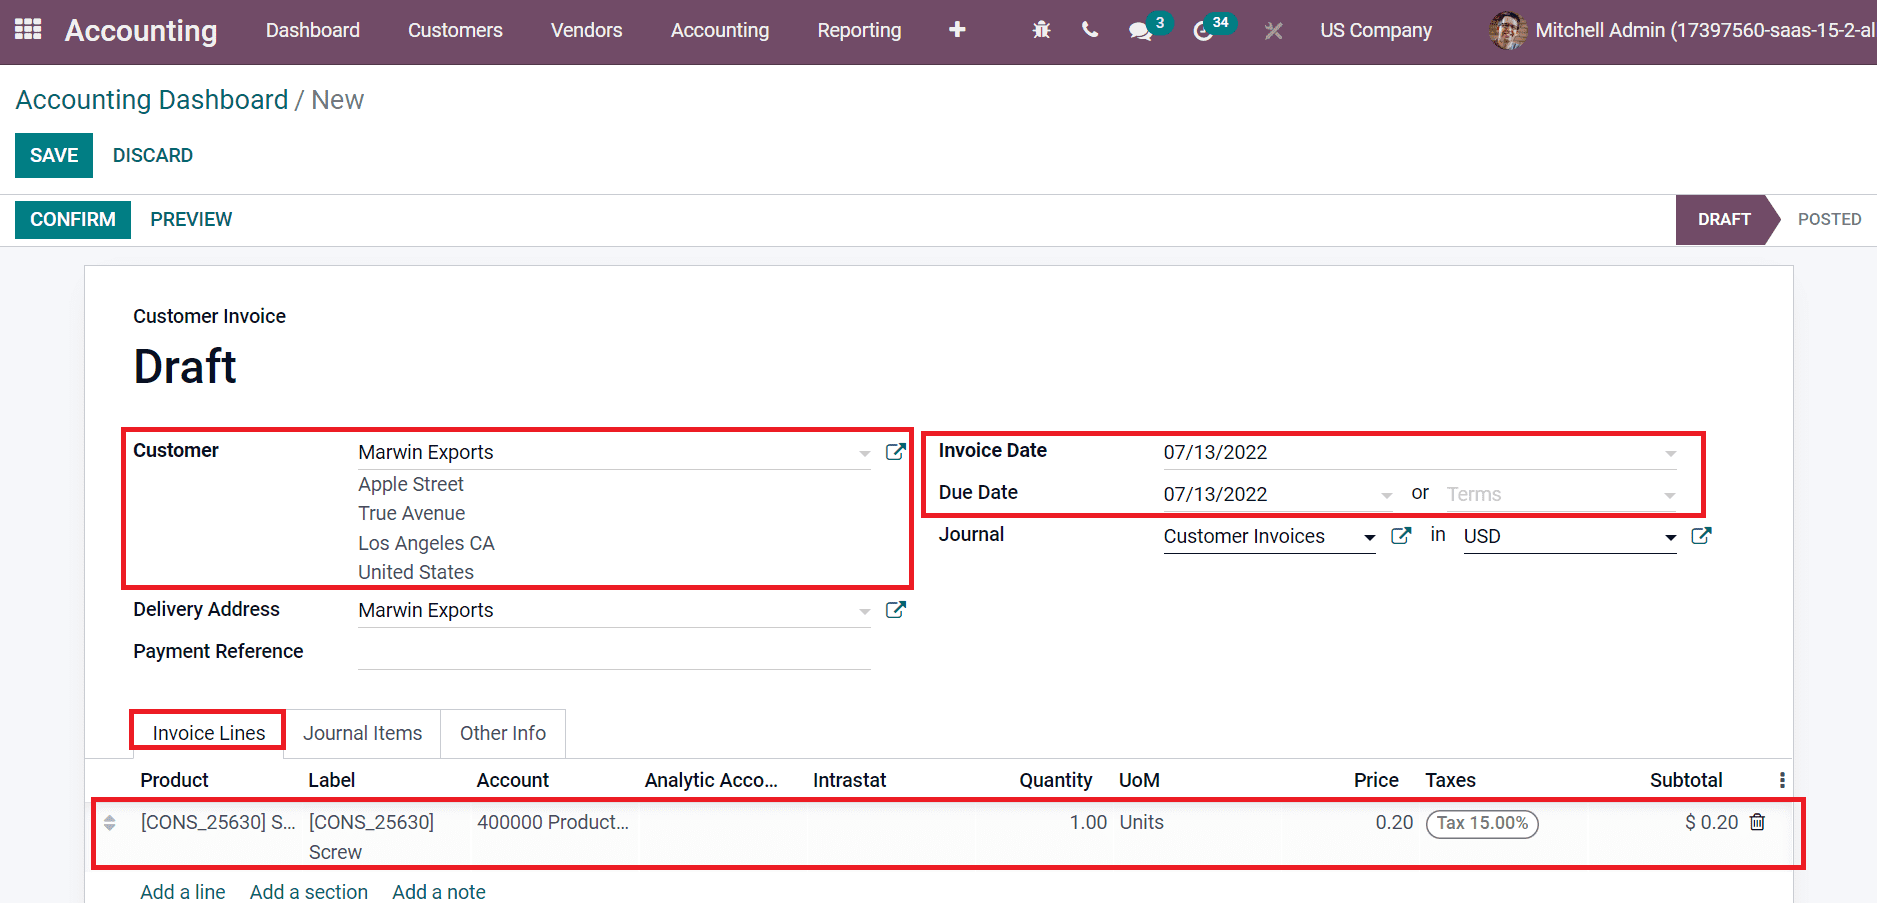
In the new window, pick your customer as Marwin Exports, and select the Bill or Due Date. Users can choose a product for invoicing below the Invoice Lines tab as specified in the screenshot below.
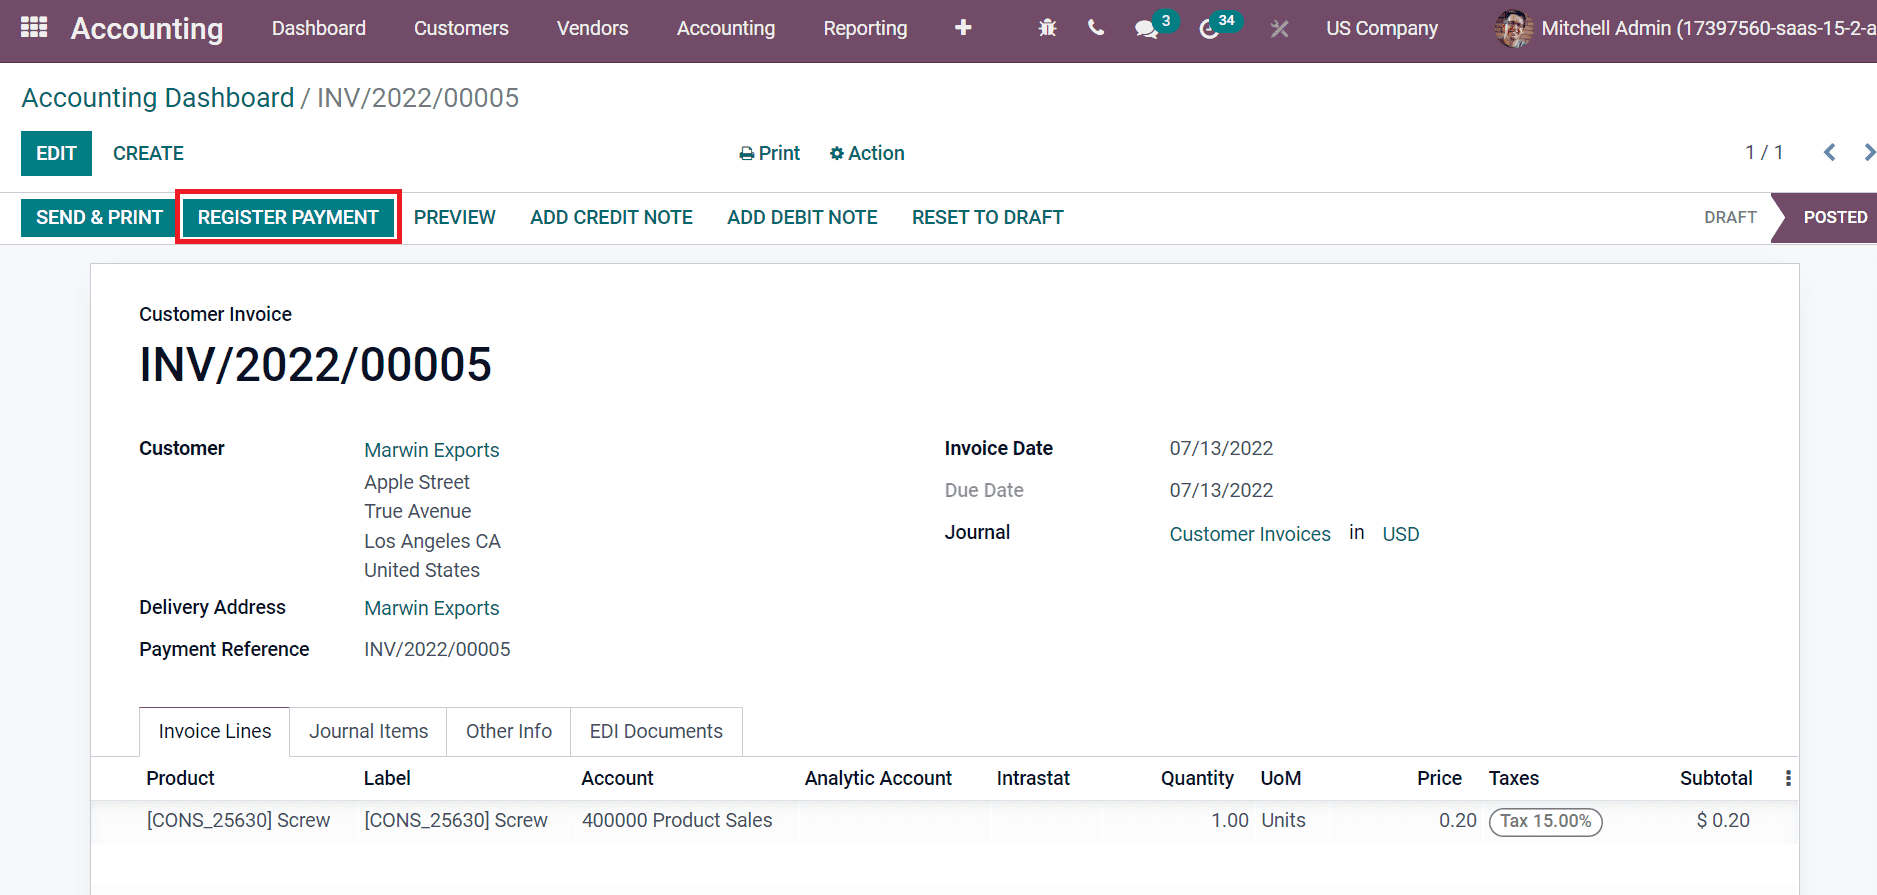
You can confirm the invoice after saving the data. Set your payment after confirmation by clicking on the REGISTER PAYMENT icon.
The operation status changed to paid after registering customer invoice payment.
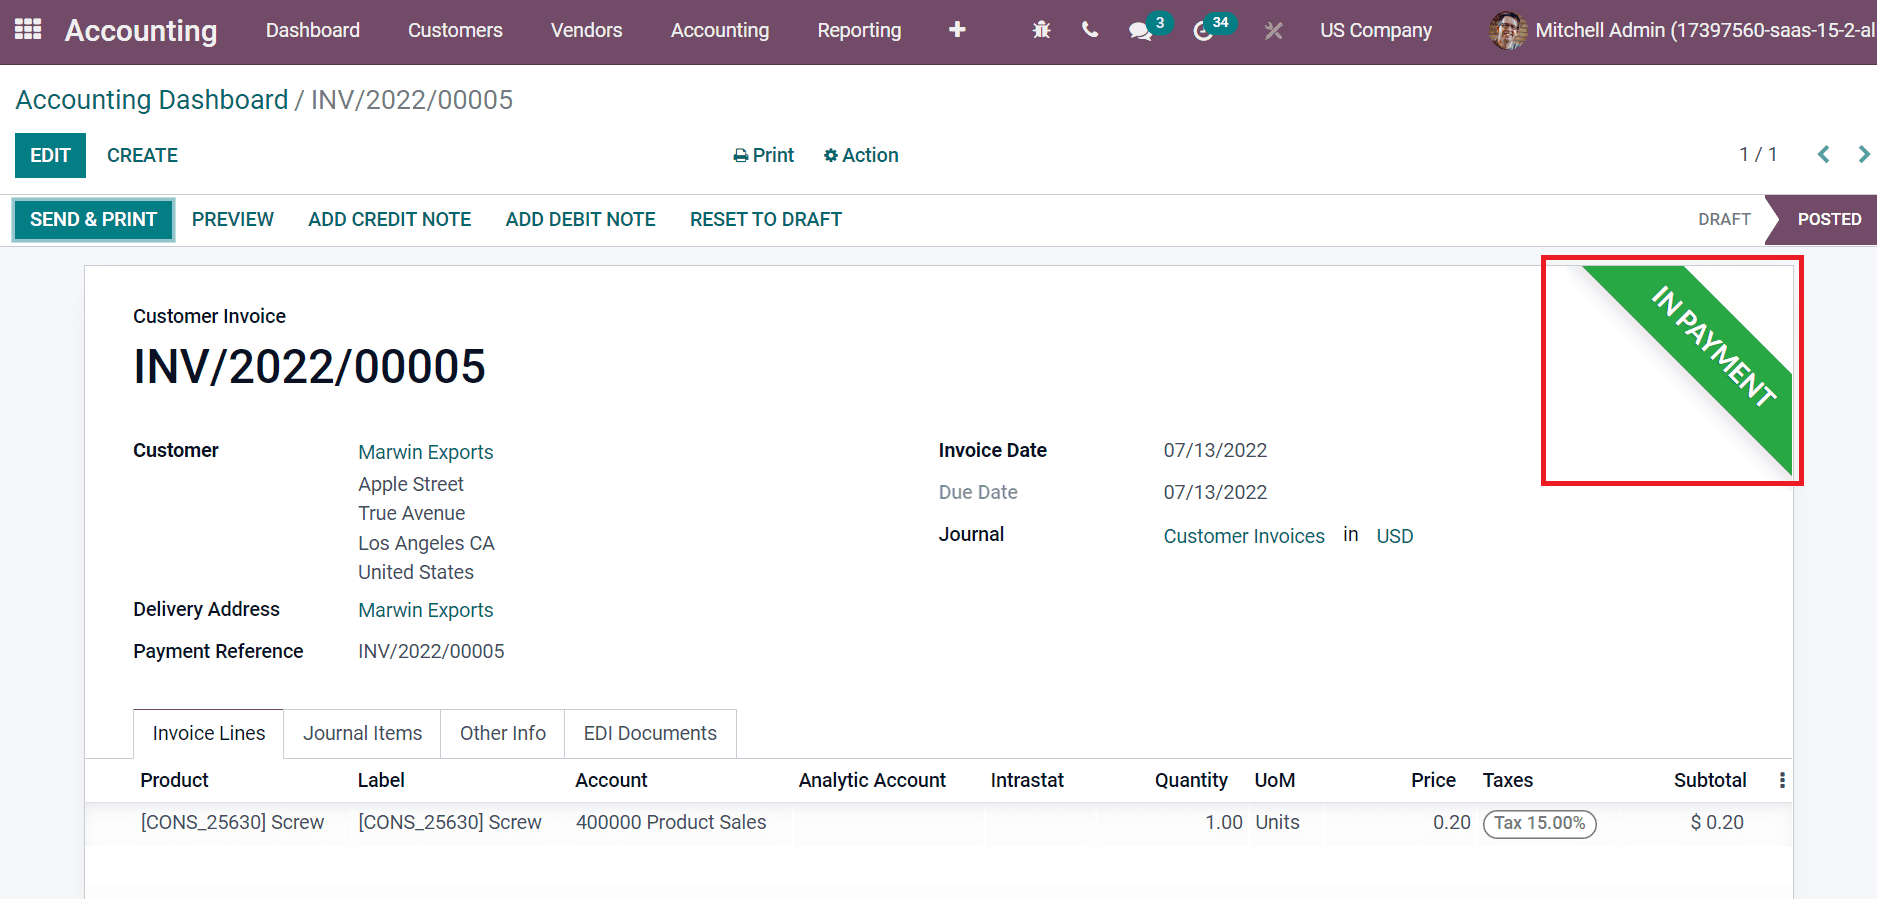
Later, select the General Ledger menu below the Ledgers section of the Accounting tab, and you can access the ledger of Marwin Receivable. By clicking on the ledger, we can see a customer’s created invoice and payment details.
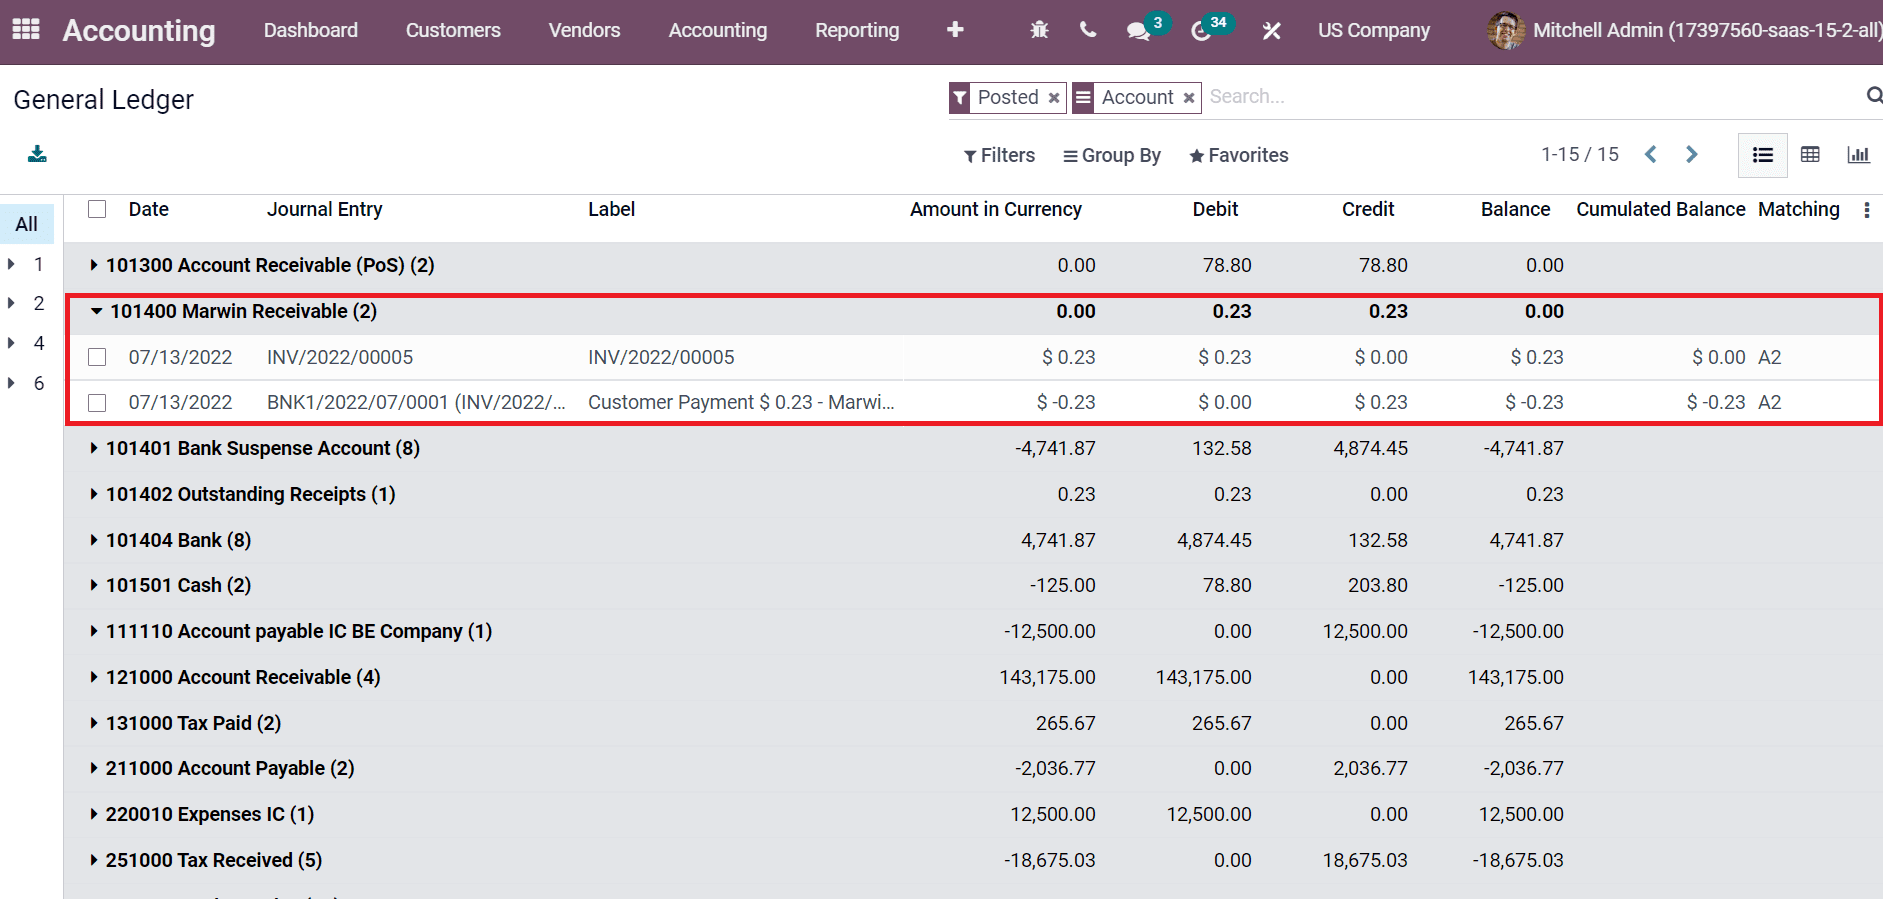
Hence, it is easy to manage receivables account for a customer based on invoices and payments.
To Develop Accounts Payable for Vendors
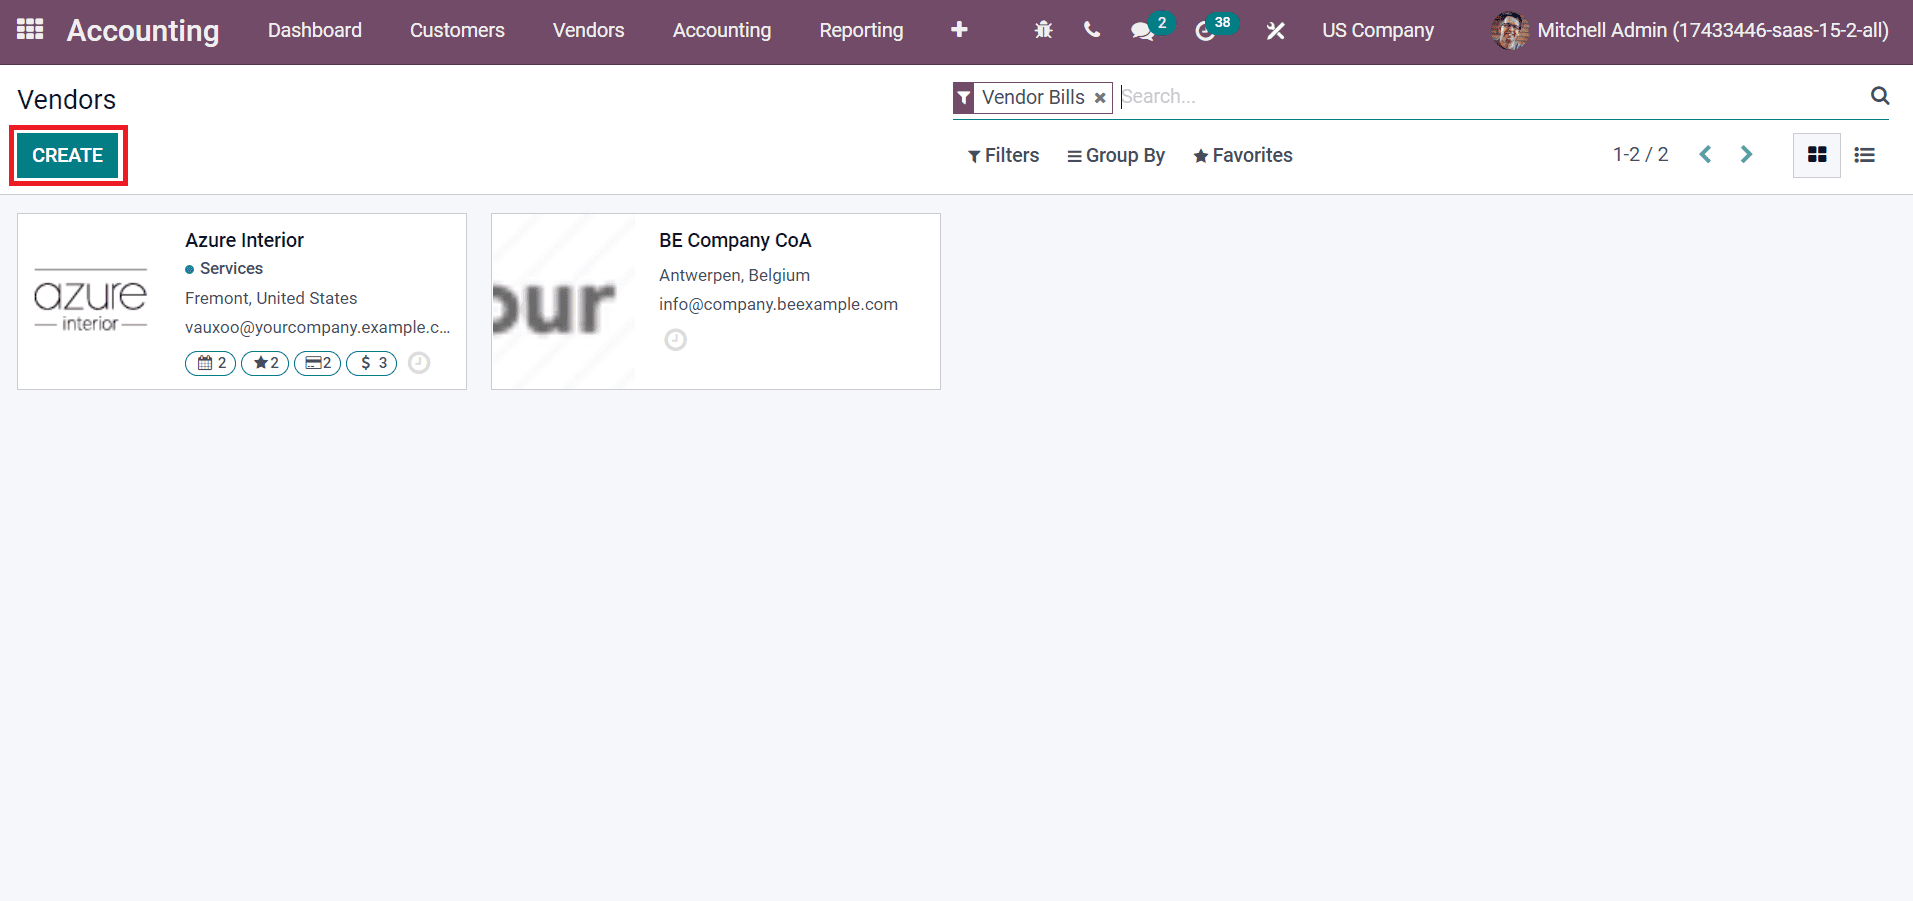
A company needs to pay liability if a vendor purchases products or services, and the financial statements of these amounts depict in a firm’s accounts payable. First, we must develop vendor details from the Odoo 15 Accounting module. Choose the Vendors menu and click the CREATE icon.
Add the company name as Sack Company in the new Vendors window and enter an address. You can see the default data of Accounting Entries below the Accounting tab.
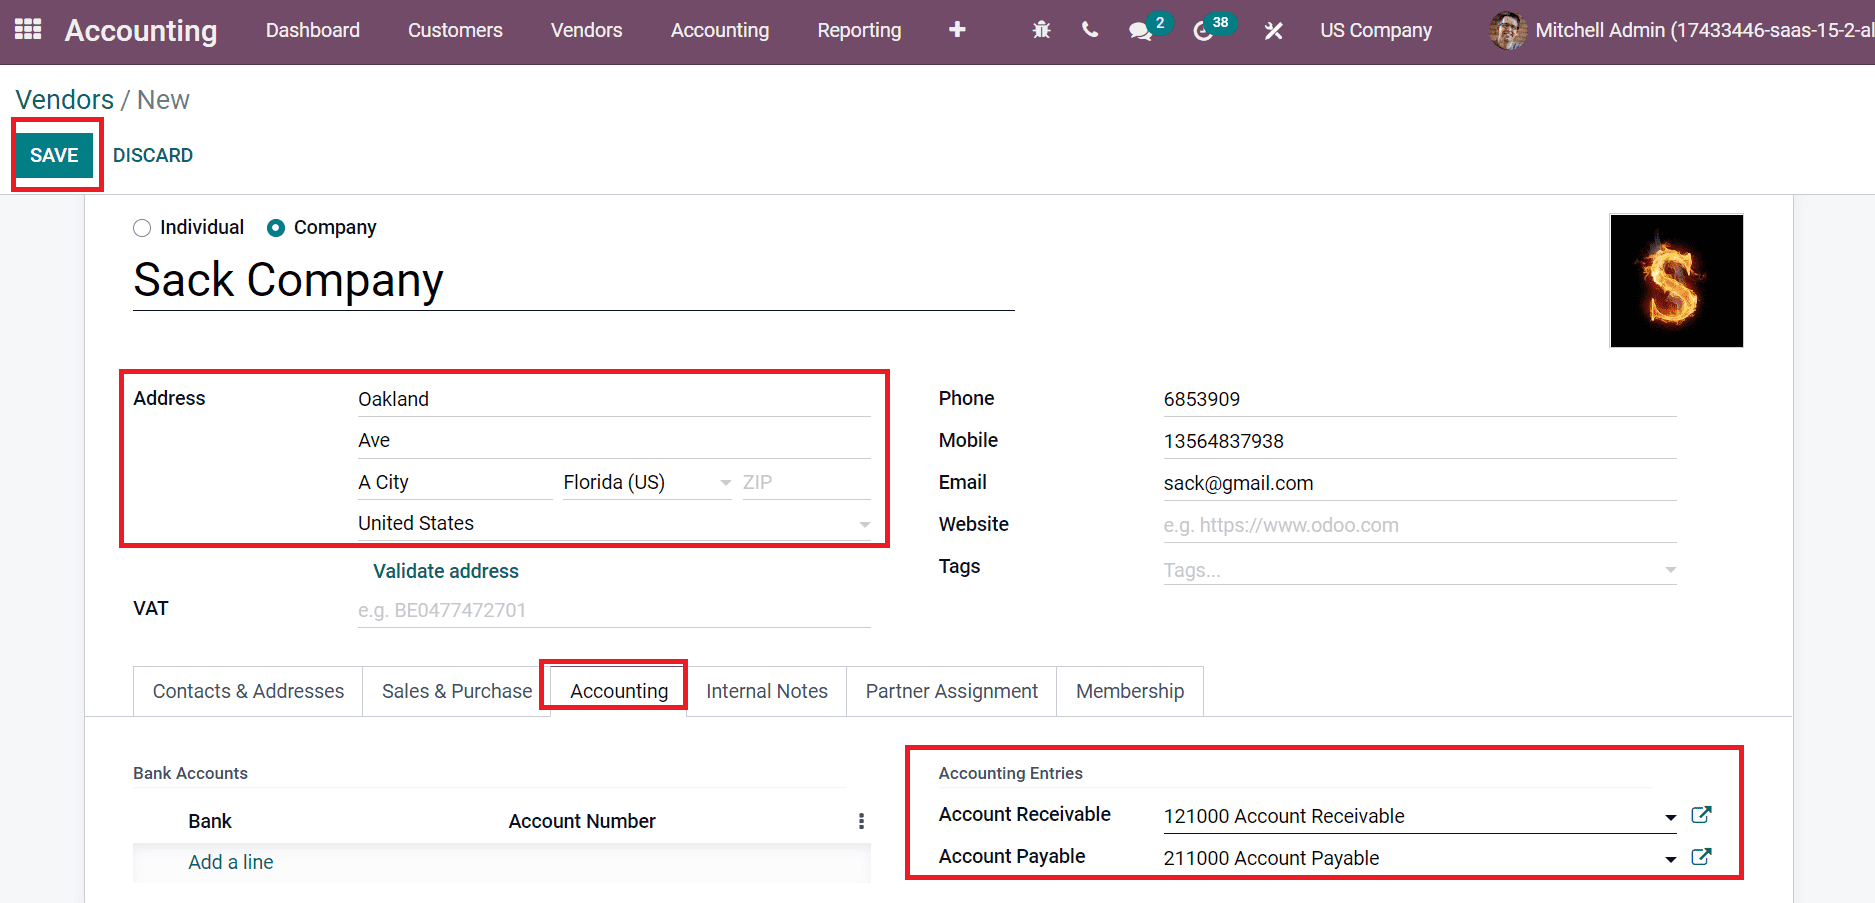
After applying the details, click the SAVE icon shown in the screenshot above. Next, we can develop a chart of accounts for the vendor. Click the Chart of Accounts menu and select the CREATE button.
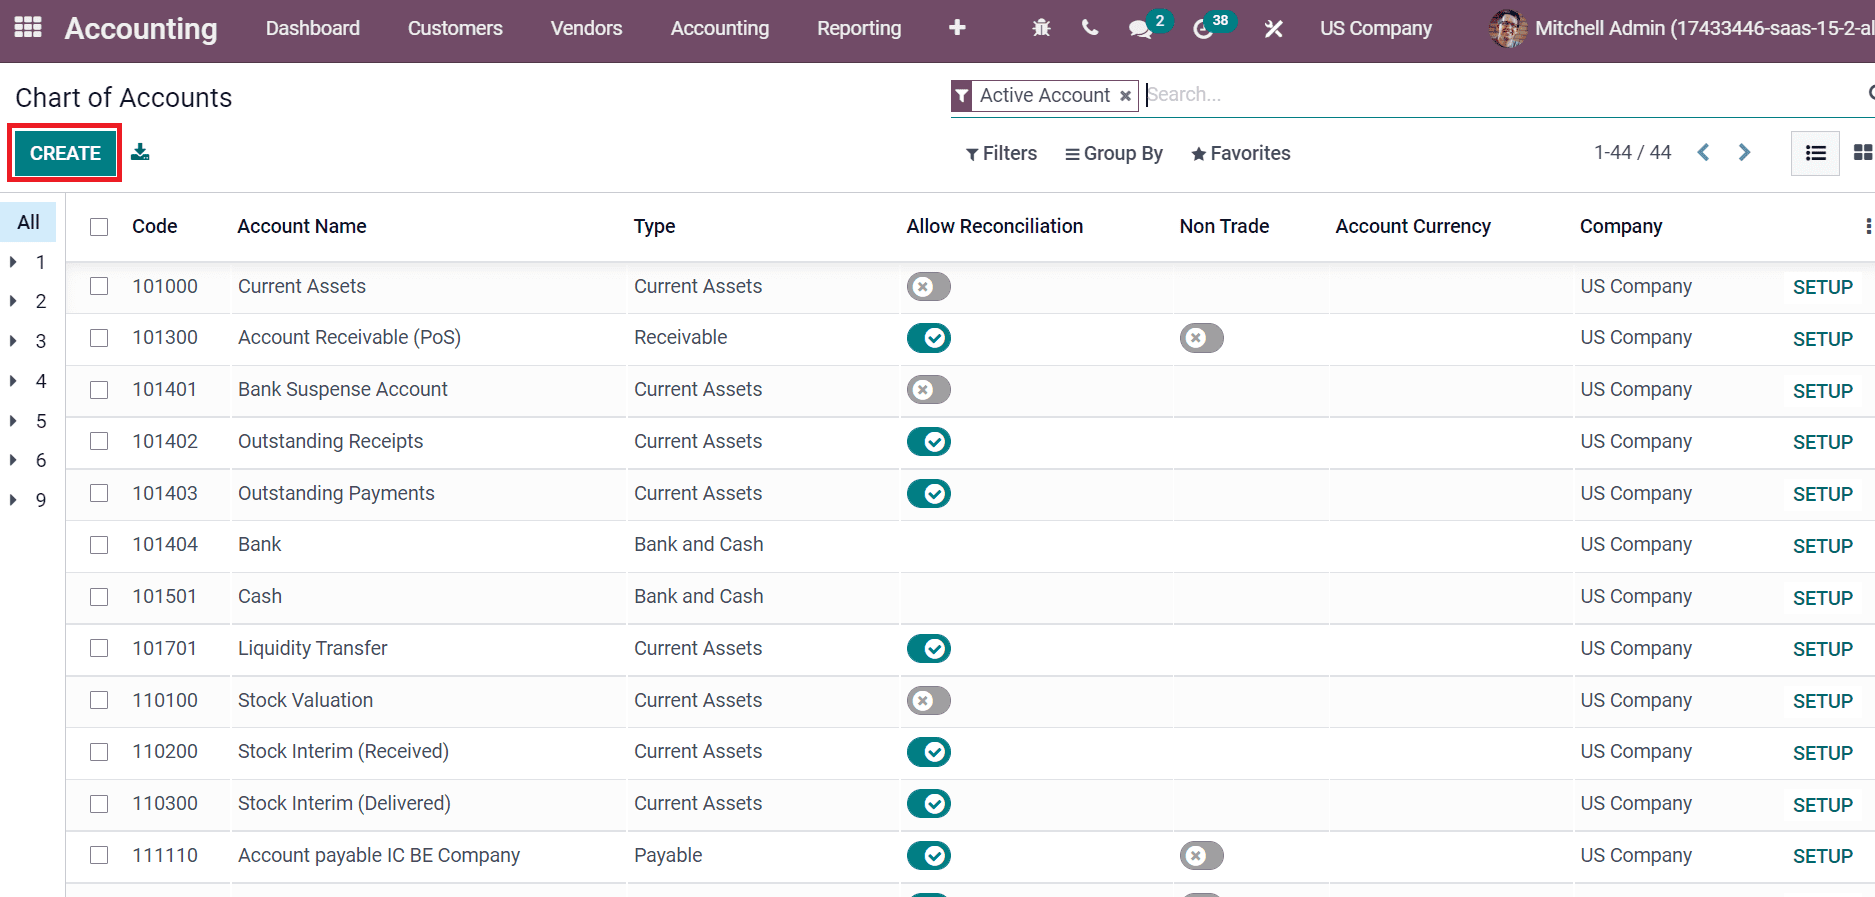
We are creating Sack Receivable and Sack Payable accounts in the new box that appear after choosing the CREATE button.
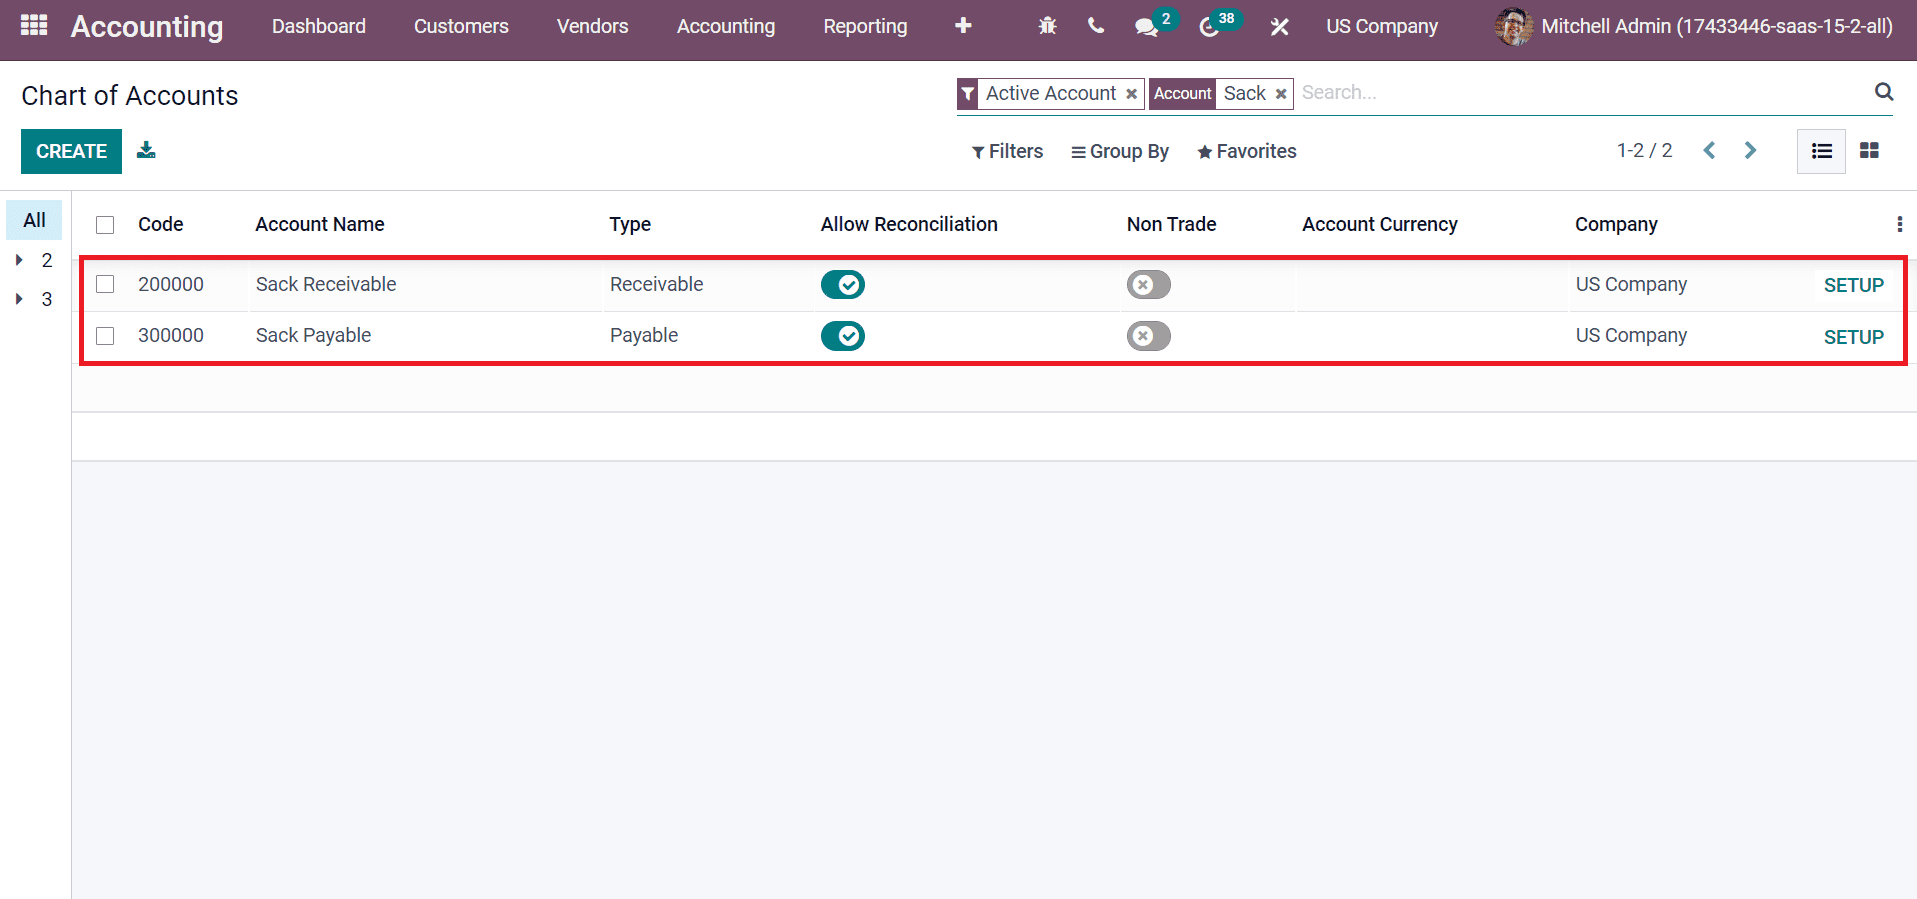
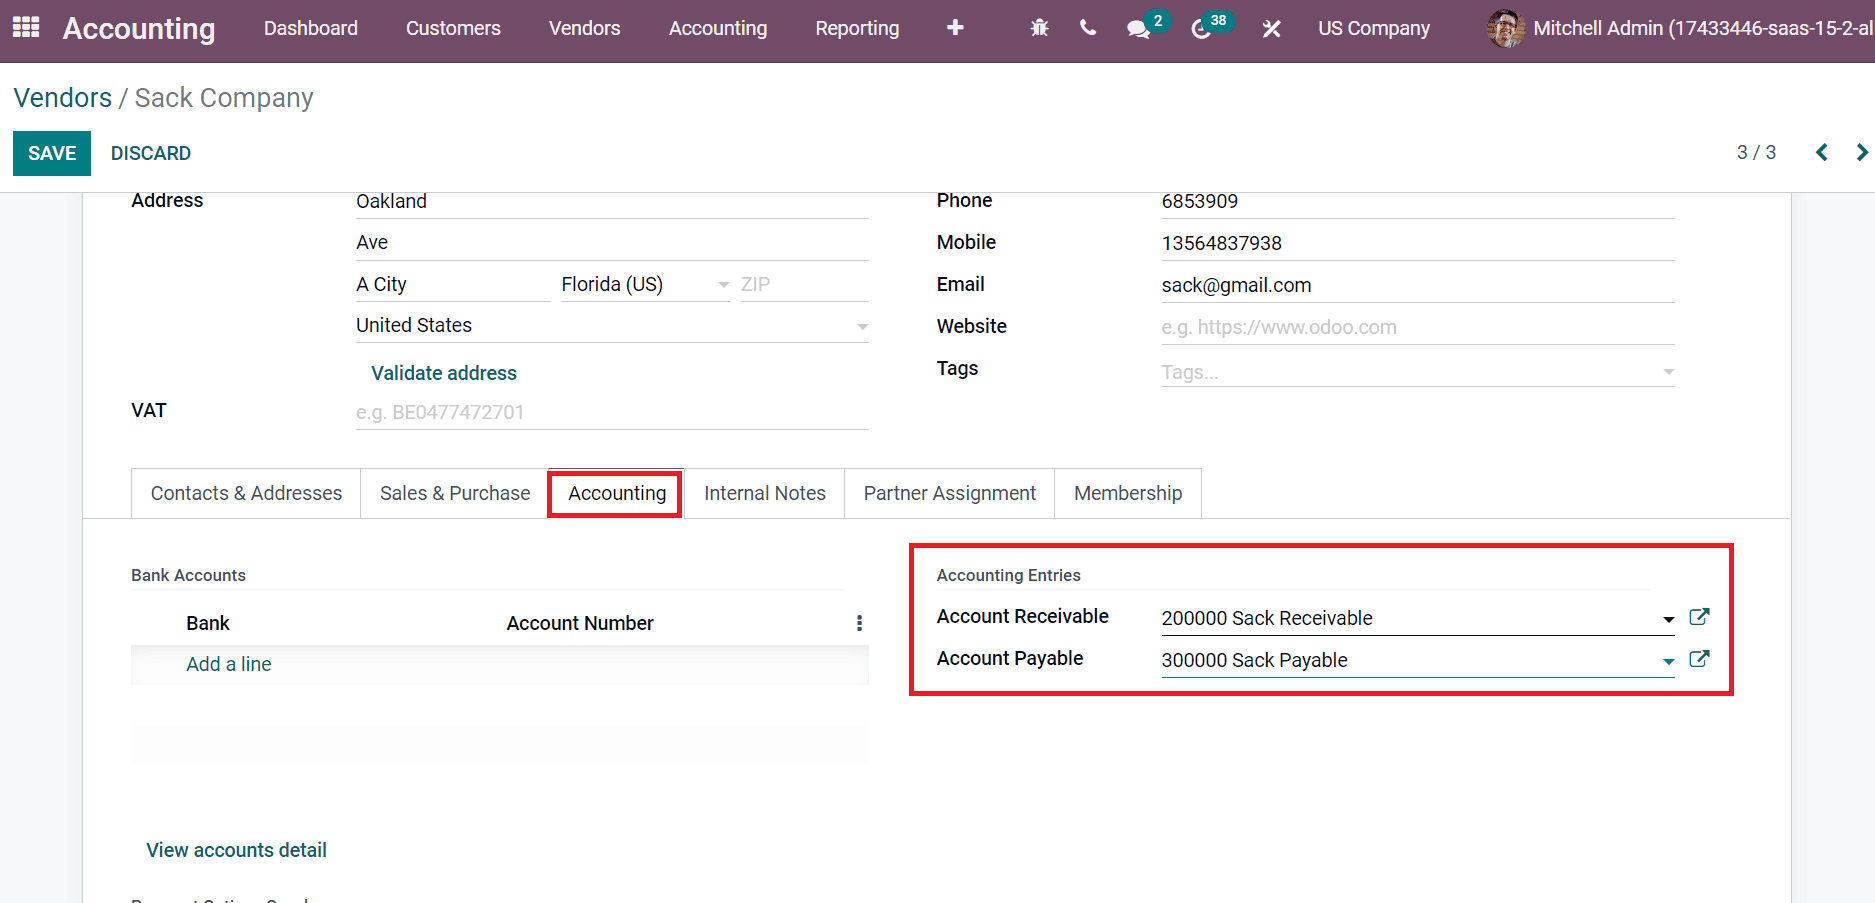
Here, we set the Account name, Company, Type, Code, and more details when developing a chart of accounts. Now, we need to allocate these accounts for the vendor Sack company. Select the Sack Receivable option inside the Account Receivable field and Sack Payable in the Account Payable field below the Accounting tab.
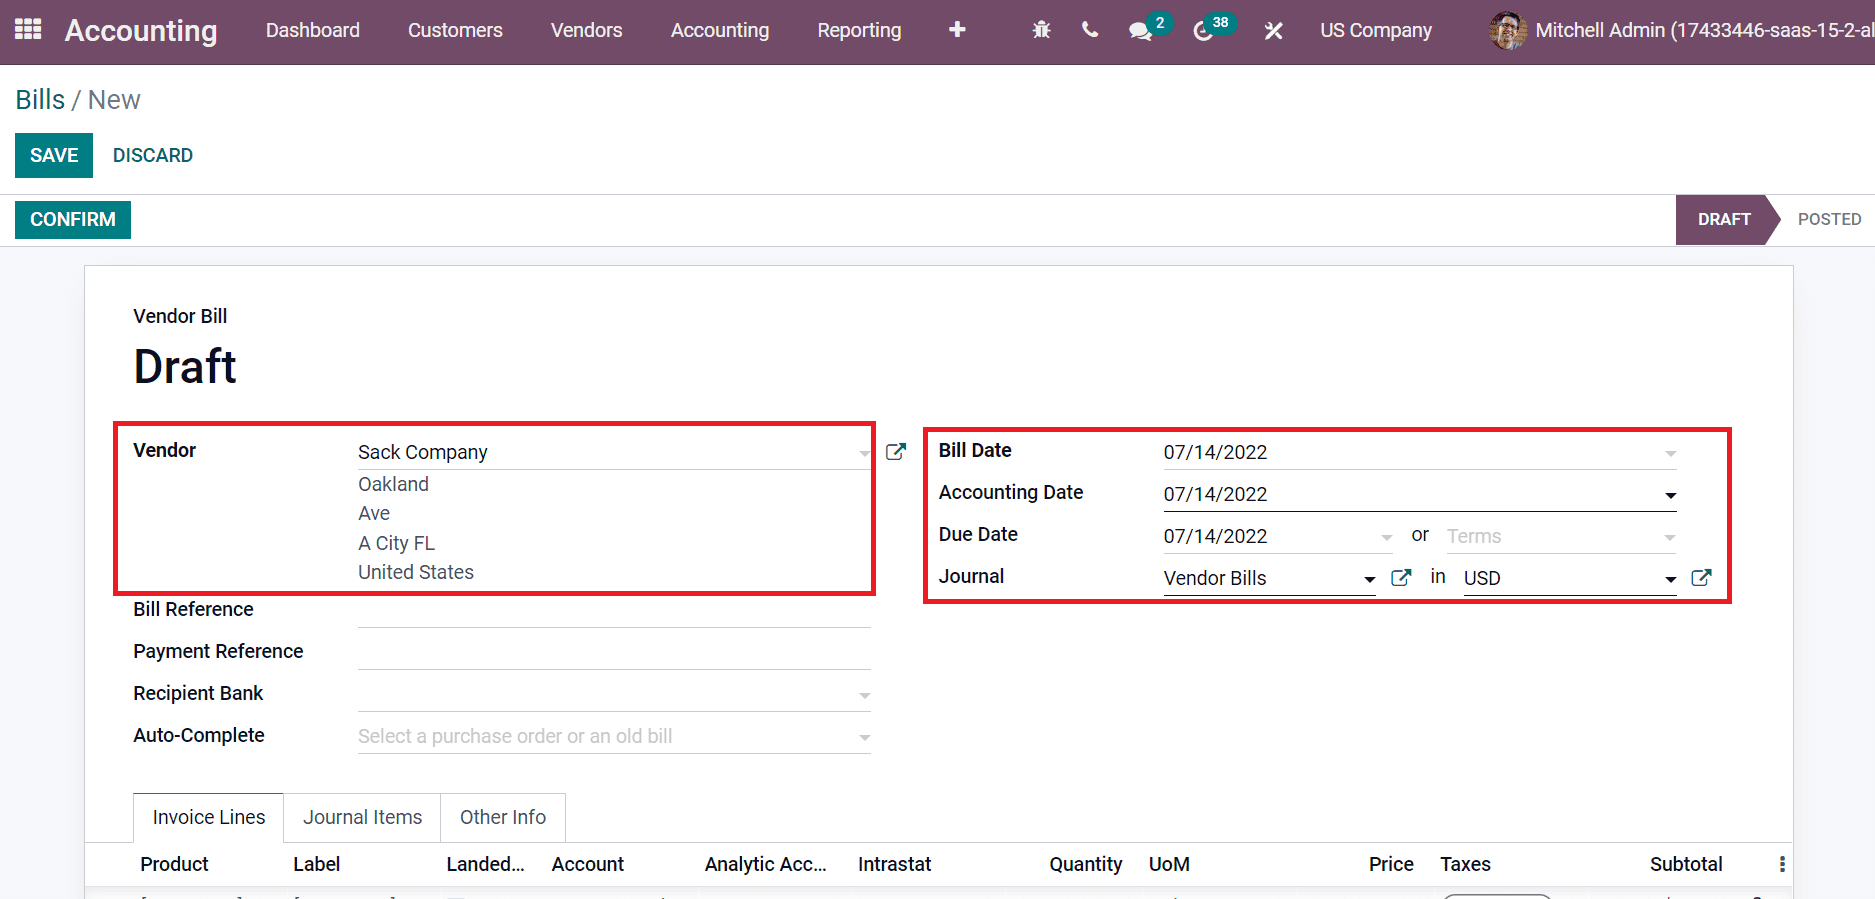
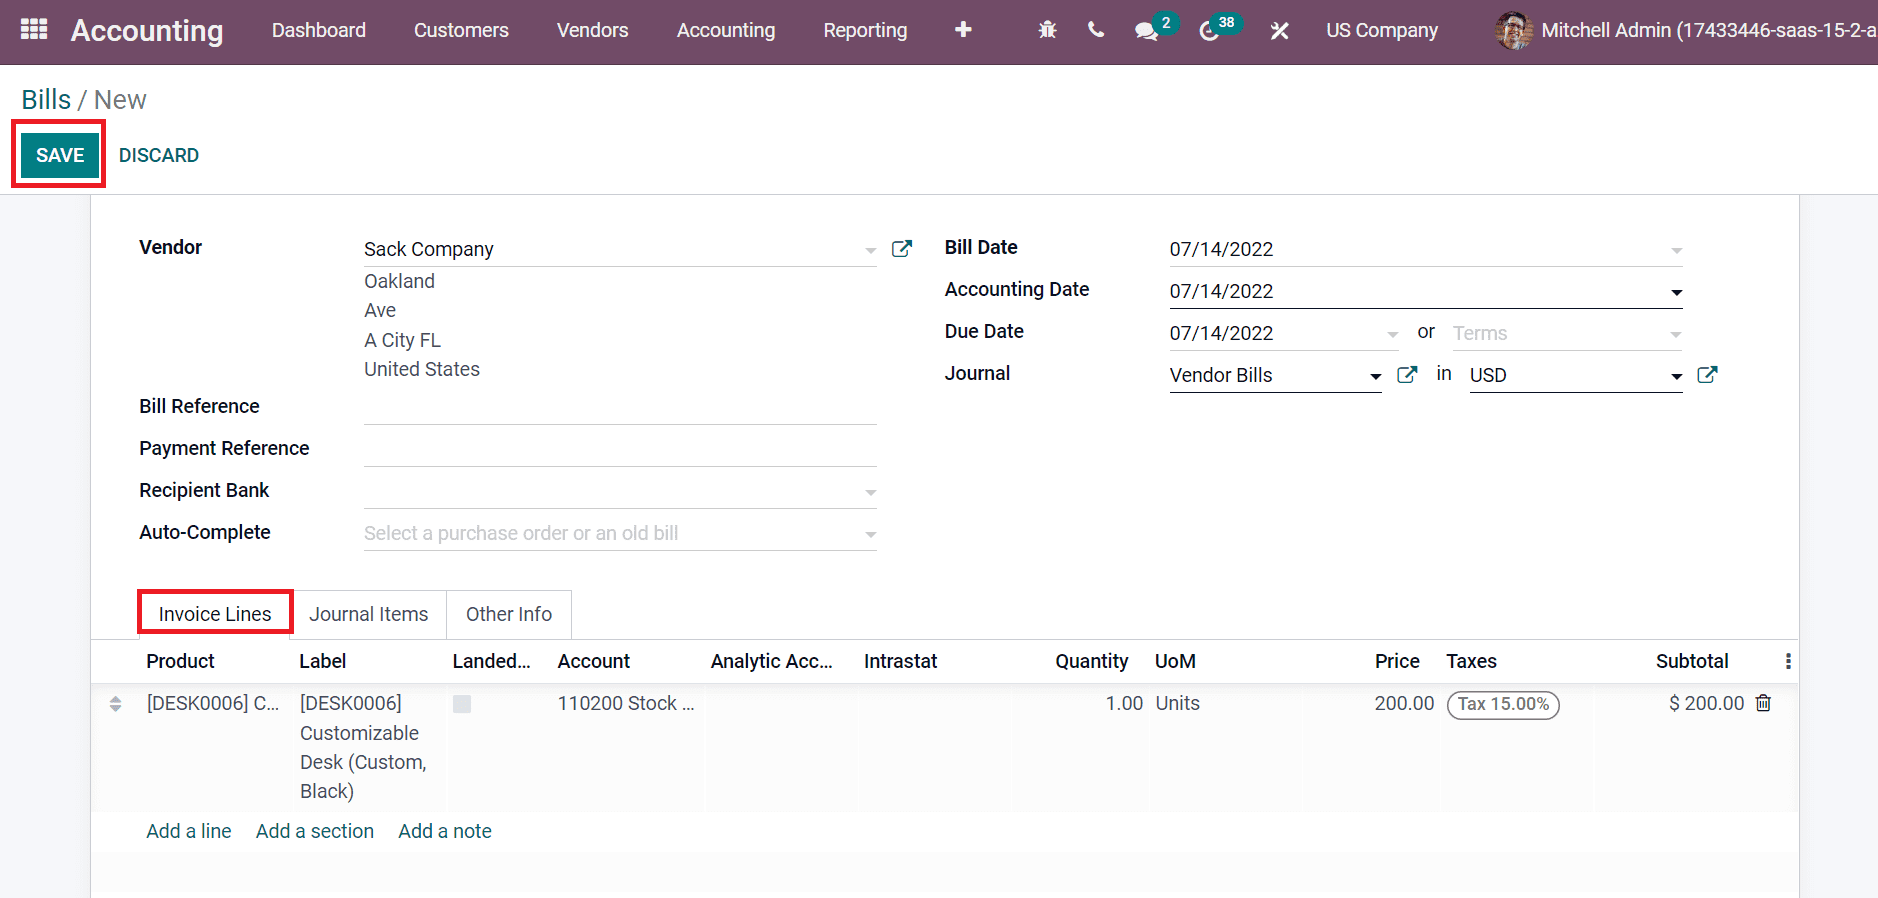
Next, we can formulate a bill by selecting the Bills menu from the vendor tab and clicking the CREATE icon. In the new window, choose your vendor Sack Company, add Bill Date, Due date, Accounting Date, and Journal as mentioned in the screenshot below.
Choose a product for the vendor inside the Invoice Lines tab and click the SAVE icon.
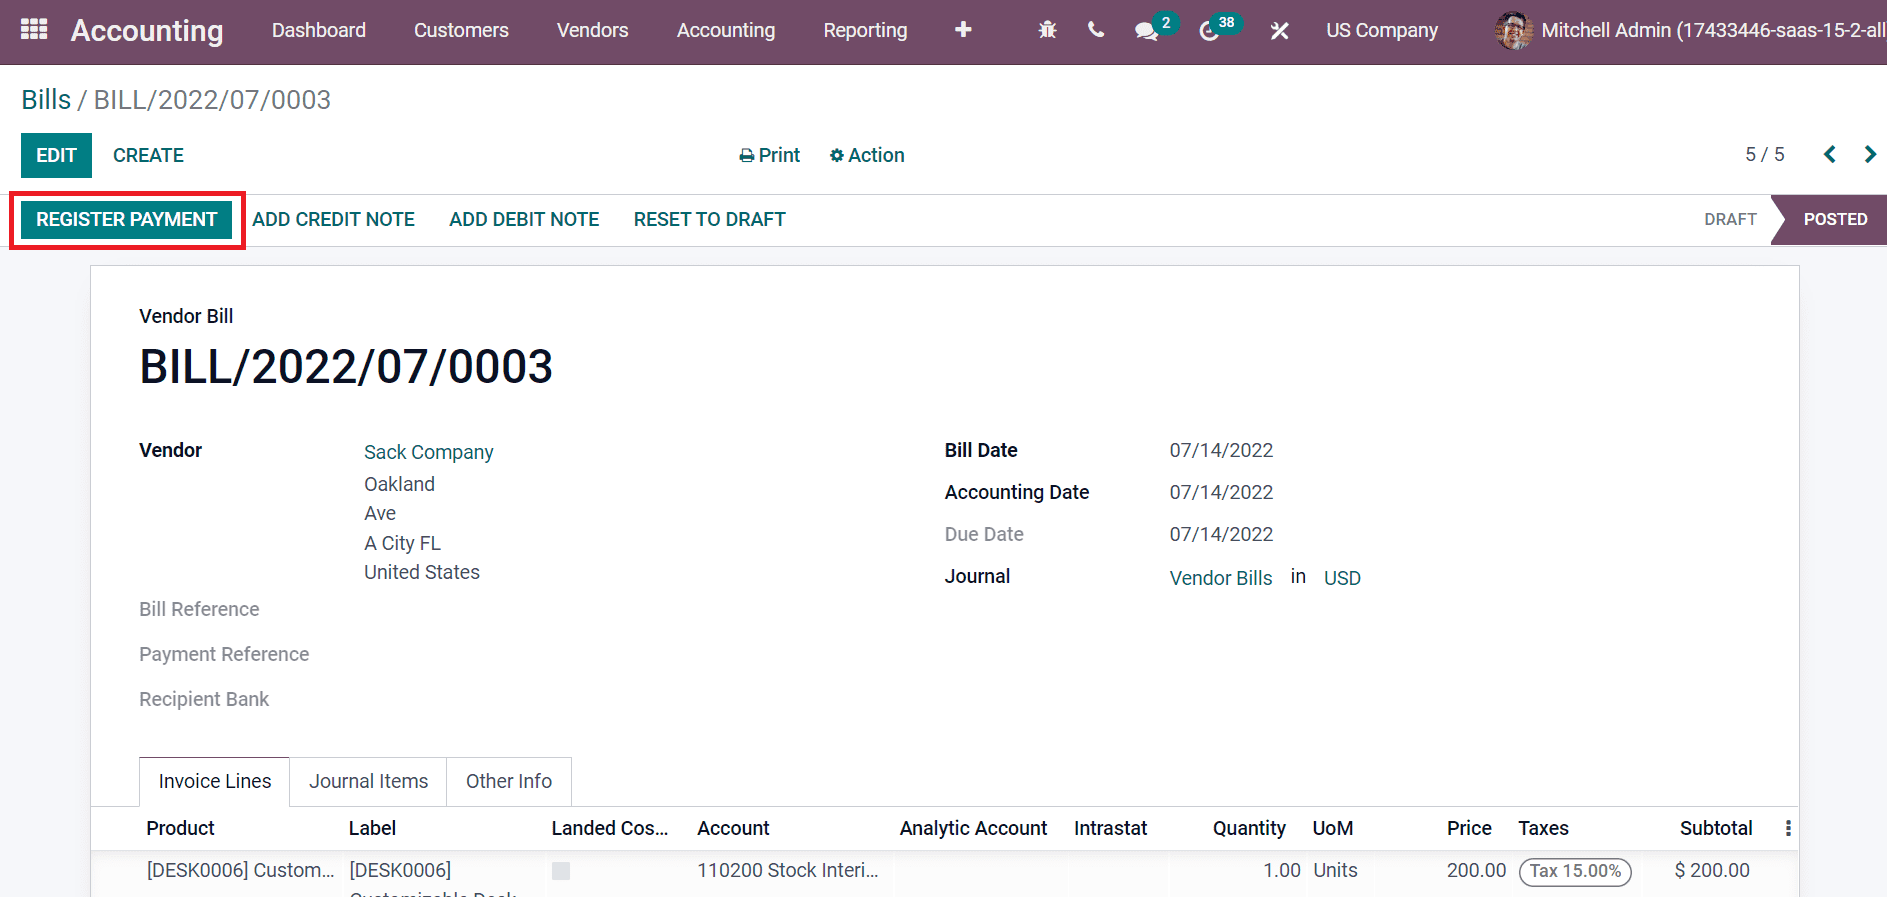
After the confirmation, you can make payment for the bill after choosing the REGISTER PAYMENT button.
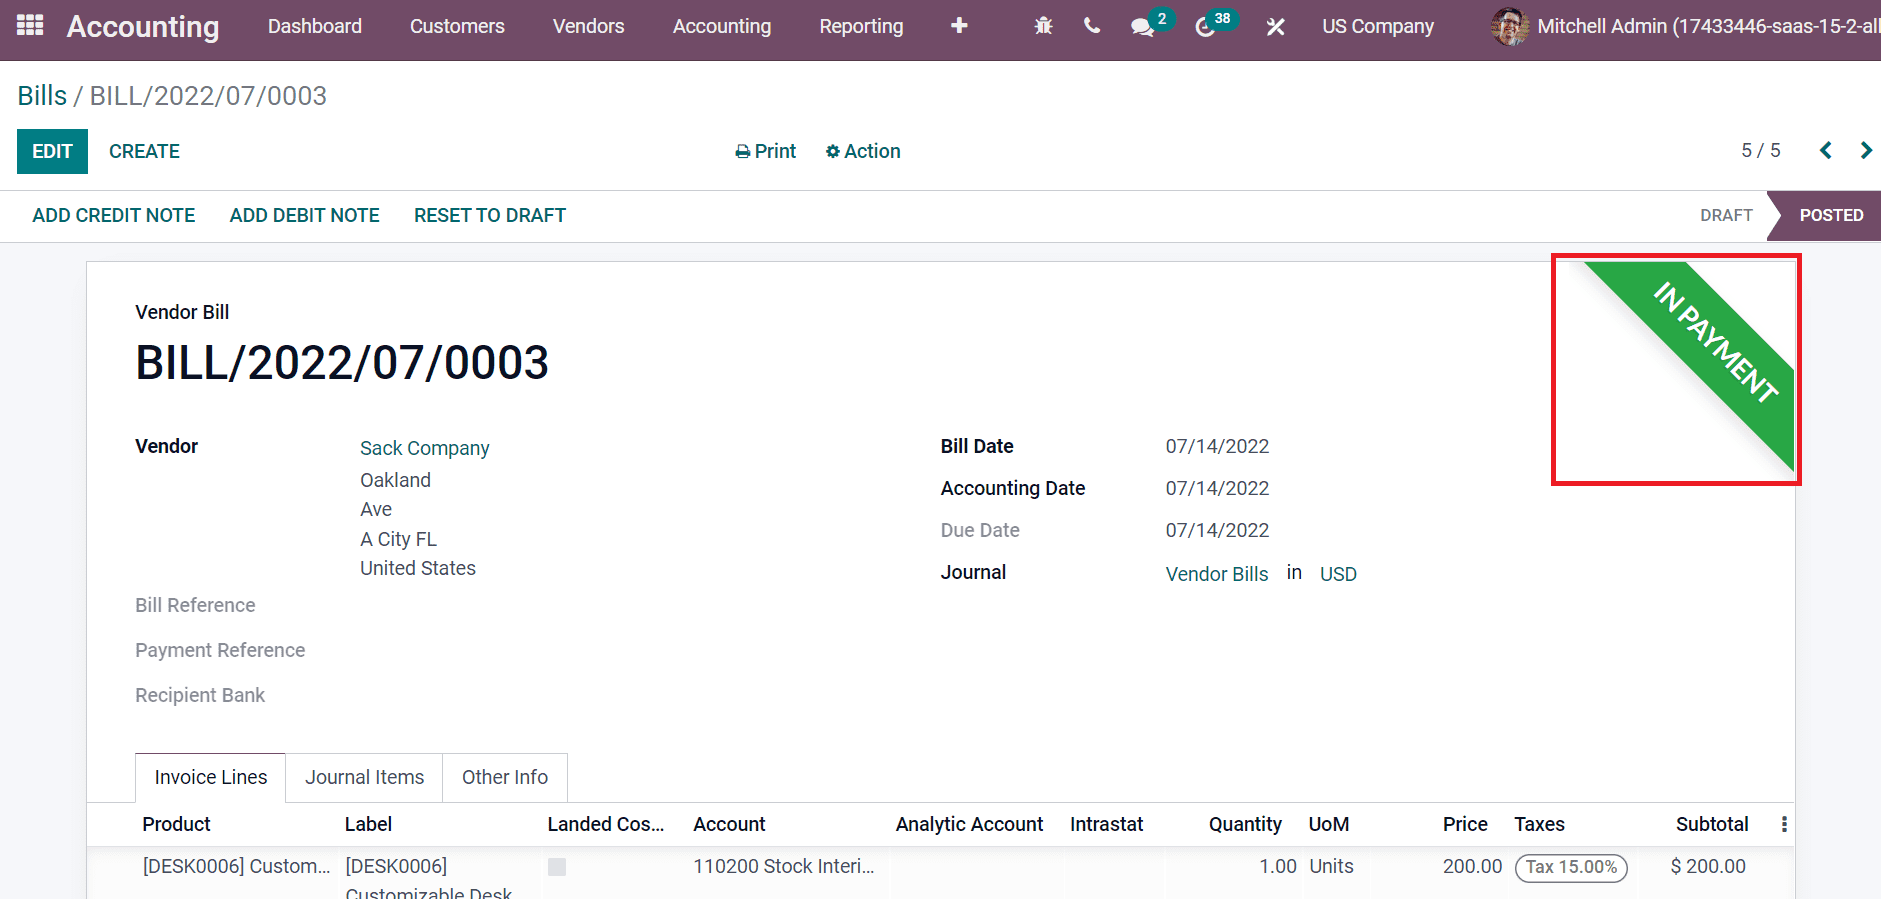
IN PAYMENT mark is visible on the bill if the payment is successful.
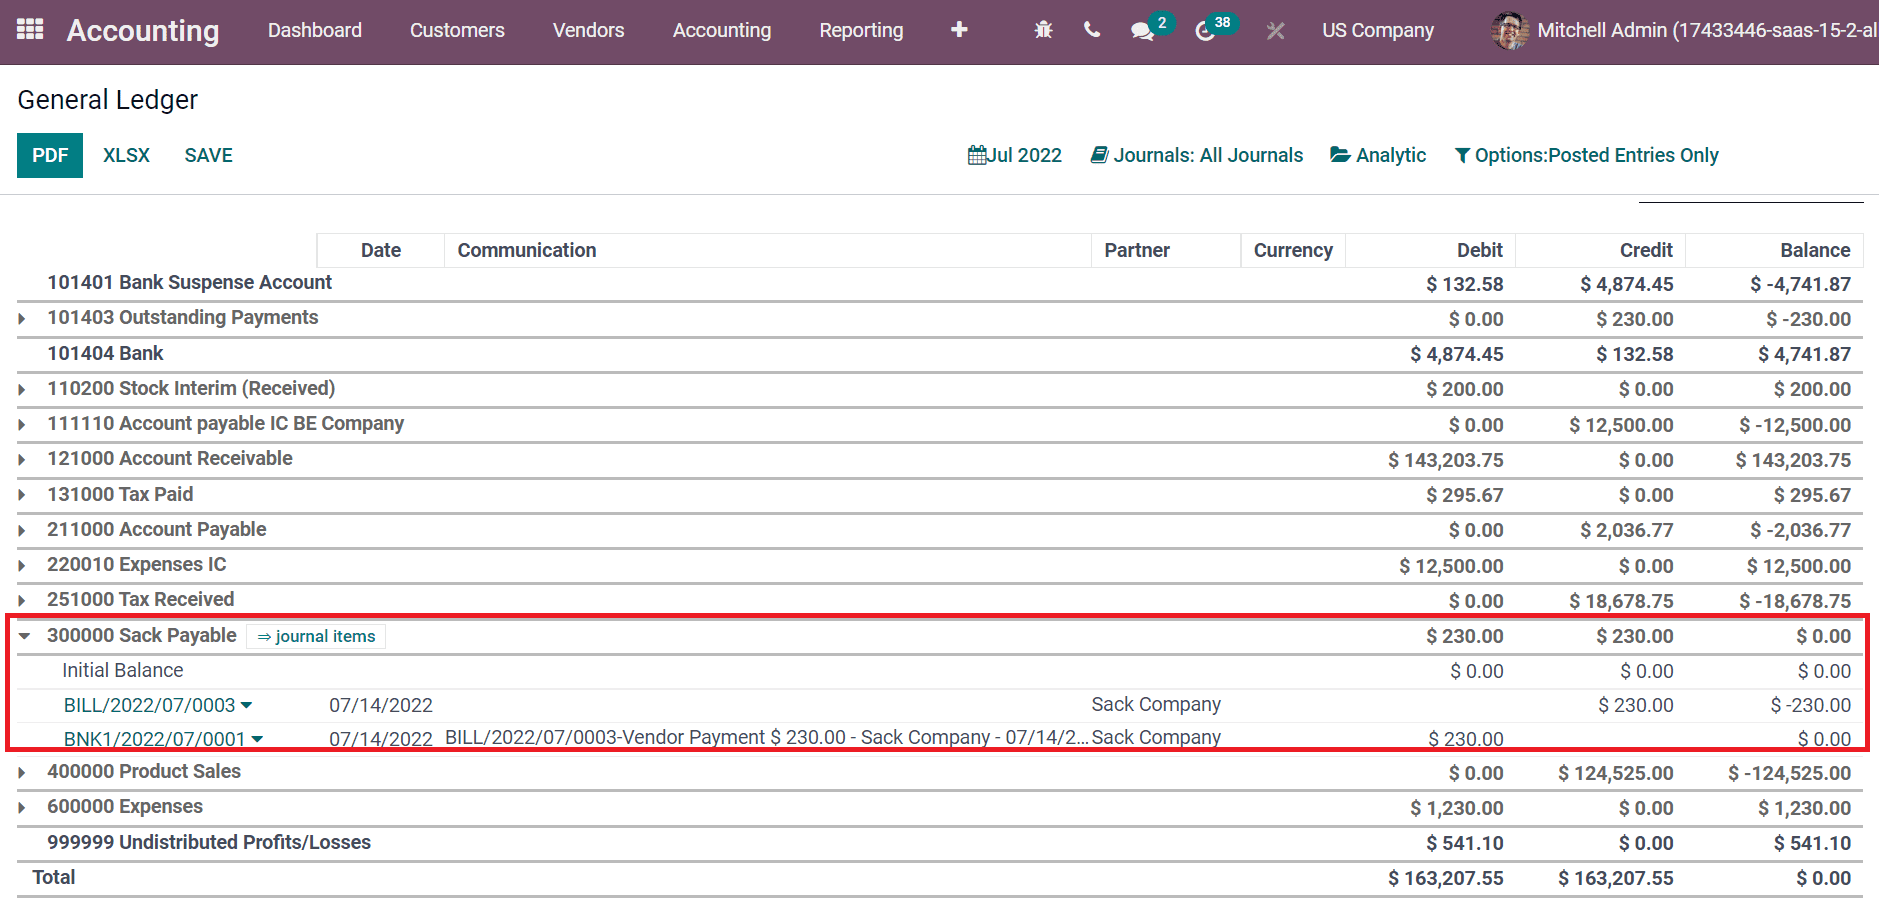
Users can check the payment data from the company ledger. Choose the General Ledger menu inside the Audit Reports of Reporting feature, and you can see the created list of ledgers. Users can visible the bank statement and invoice data when selecting the Sack Payable Ledger within the General Ledger window.
We can access the trial balance report on the chart of accounts by selecting the Trial Balance menu from Reporting feature. You can get the trial balance regarding the Sack payable account in the Trial Balance window.
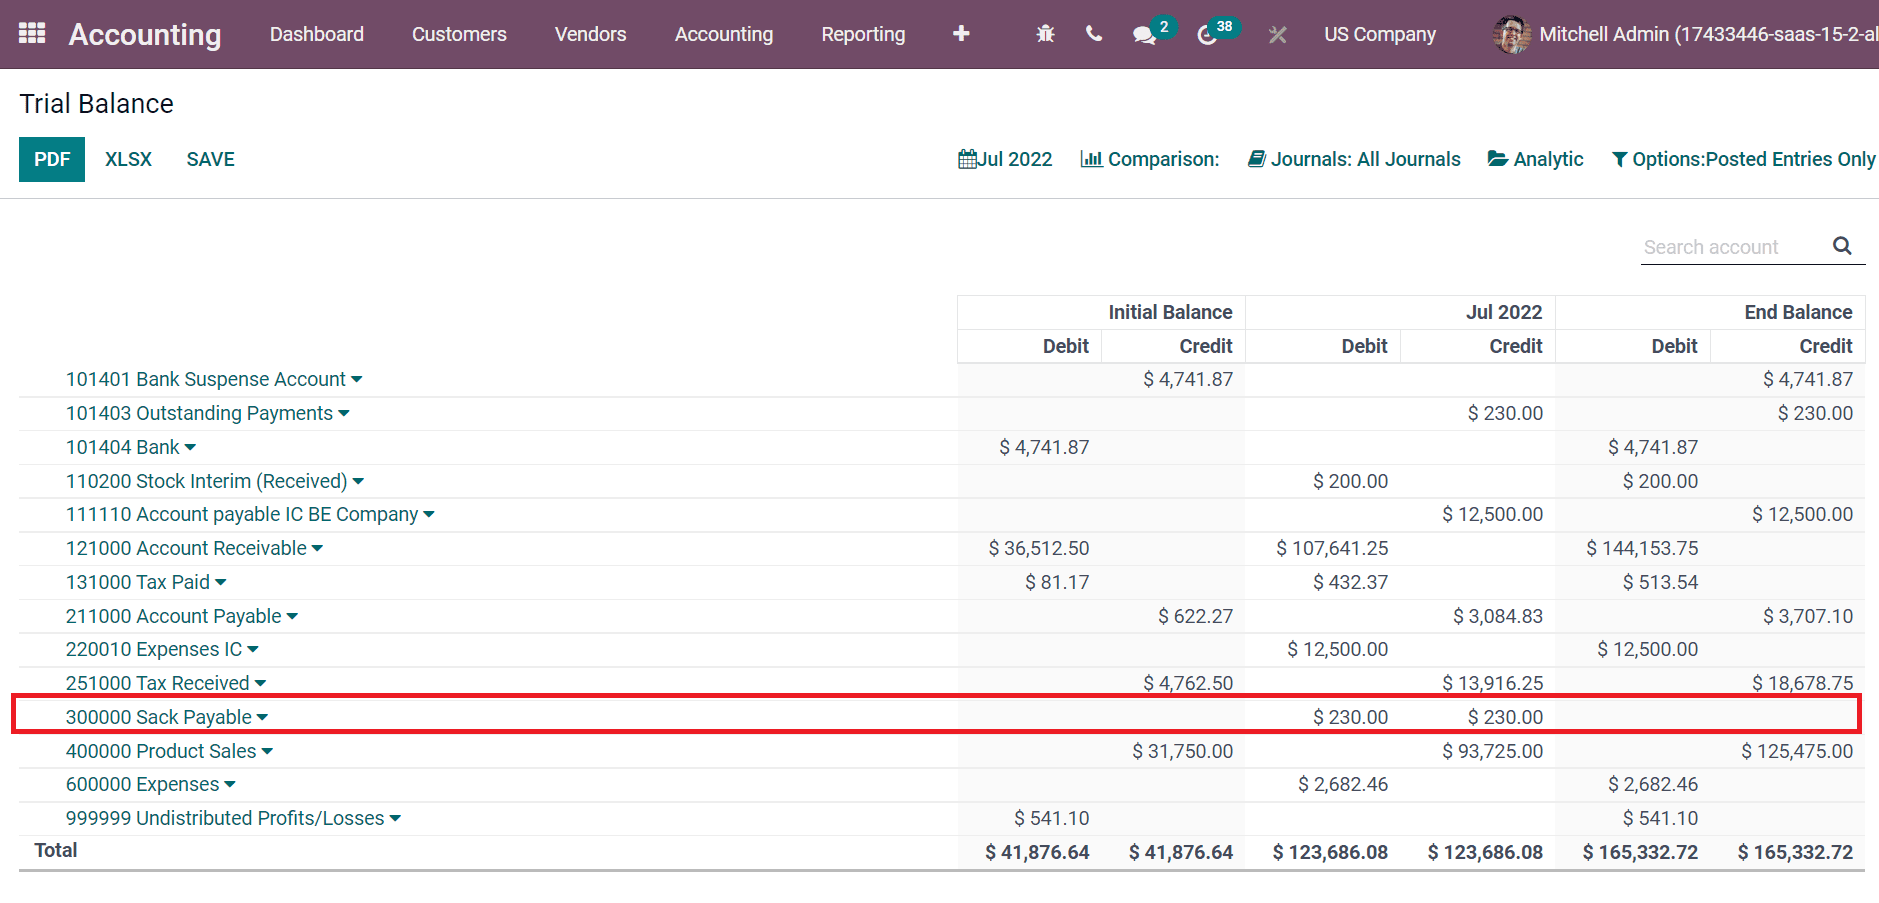
Henceforth, it is easy to evaluate payable accounts after paying a bill by the vendor. Odoo 15 Accounting module assists users in setting receivable and payable accounts accurately. To learn more about the features of the Accounting module, refer to our blog An Insight into Invoicing with Odoo 15 Accounting Module


