The process of configuring invoice process for a customer is known as Automatic Invoice. Customer invoicing is a crucial part of most business processes when selling a product or service. A customer gets notified about product details such as price, quantity, and more from an invoice. It is easy to know the total cost of a purchased item within an invoice for a customer. Most buyers sometimes place an order through online shops and pay for the commodity. We can formulate an automatic invoice from the company in these situations. ERP software allows you to manage invoice policies for various clients or customers.
This blog enables users to develop automatic invoices within the Odoo 16 Sales module.
Odoo 16 added the automatic invoice feature after confirming an online payment. Moreover, invoicing policies are managed in a Sales Order using the Odoo 16 Sales order. We can quickly keep track of all invoices generated for customers with Odoo ERP support. Let’s the procedure to enable an automatic invoice after making a payment by a customer in Odoo 16.
Enable the Automatic Invoice in the Odoo 16 Sales
For developing an invoice automatically, a user must activate the Automatic Invoice feature in the Settings window. You can view the Automatic Invoice option inside the Invoicing section and activate it, as depicted in the screenshot below.
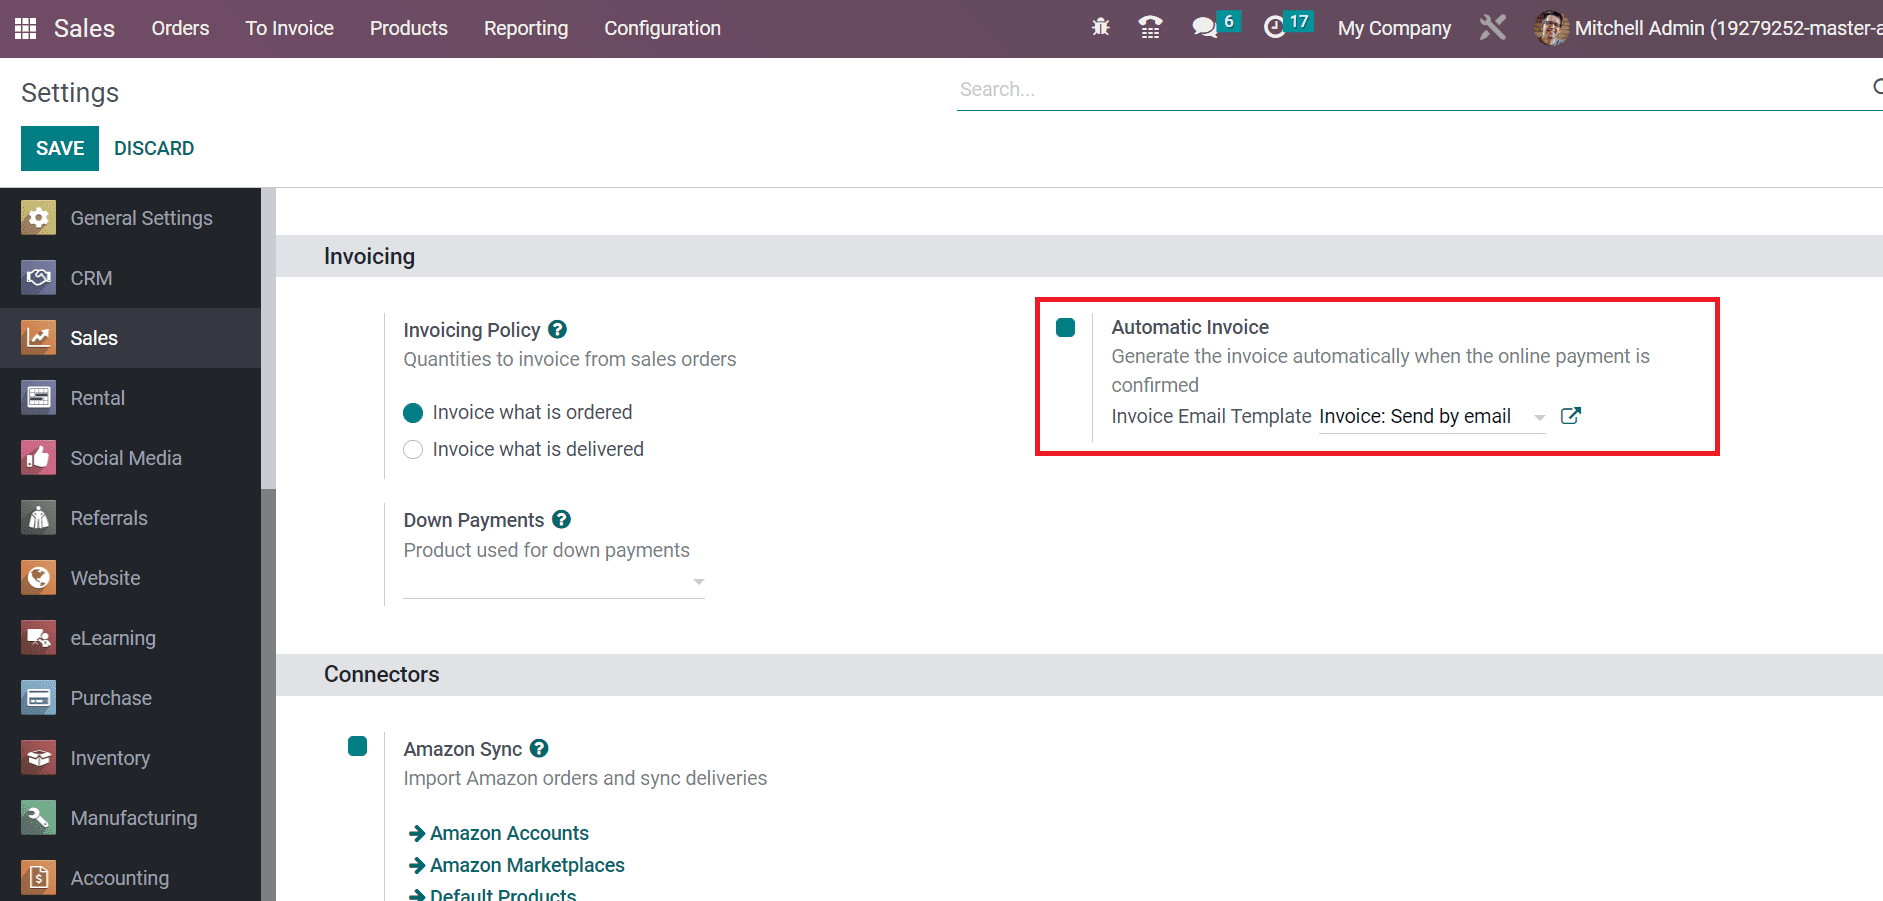
By enabling the Automatic Invoice option, an invoice is created automatically after confirming the online payment by the customer. Additionally, you must activate the Invoice what is Ordered option below the Invoice Policy section. After enabling the necessary features, select the SAVE button in the Settings window.
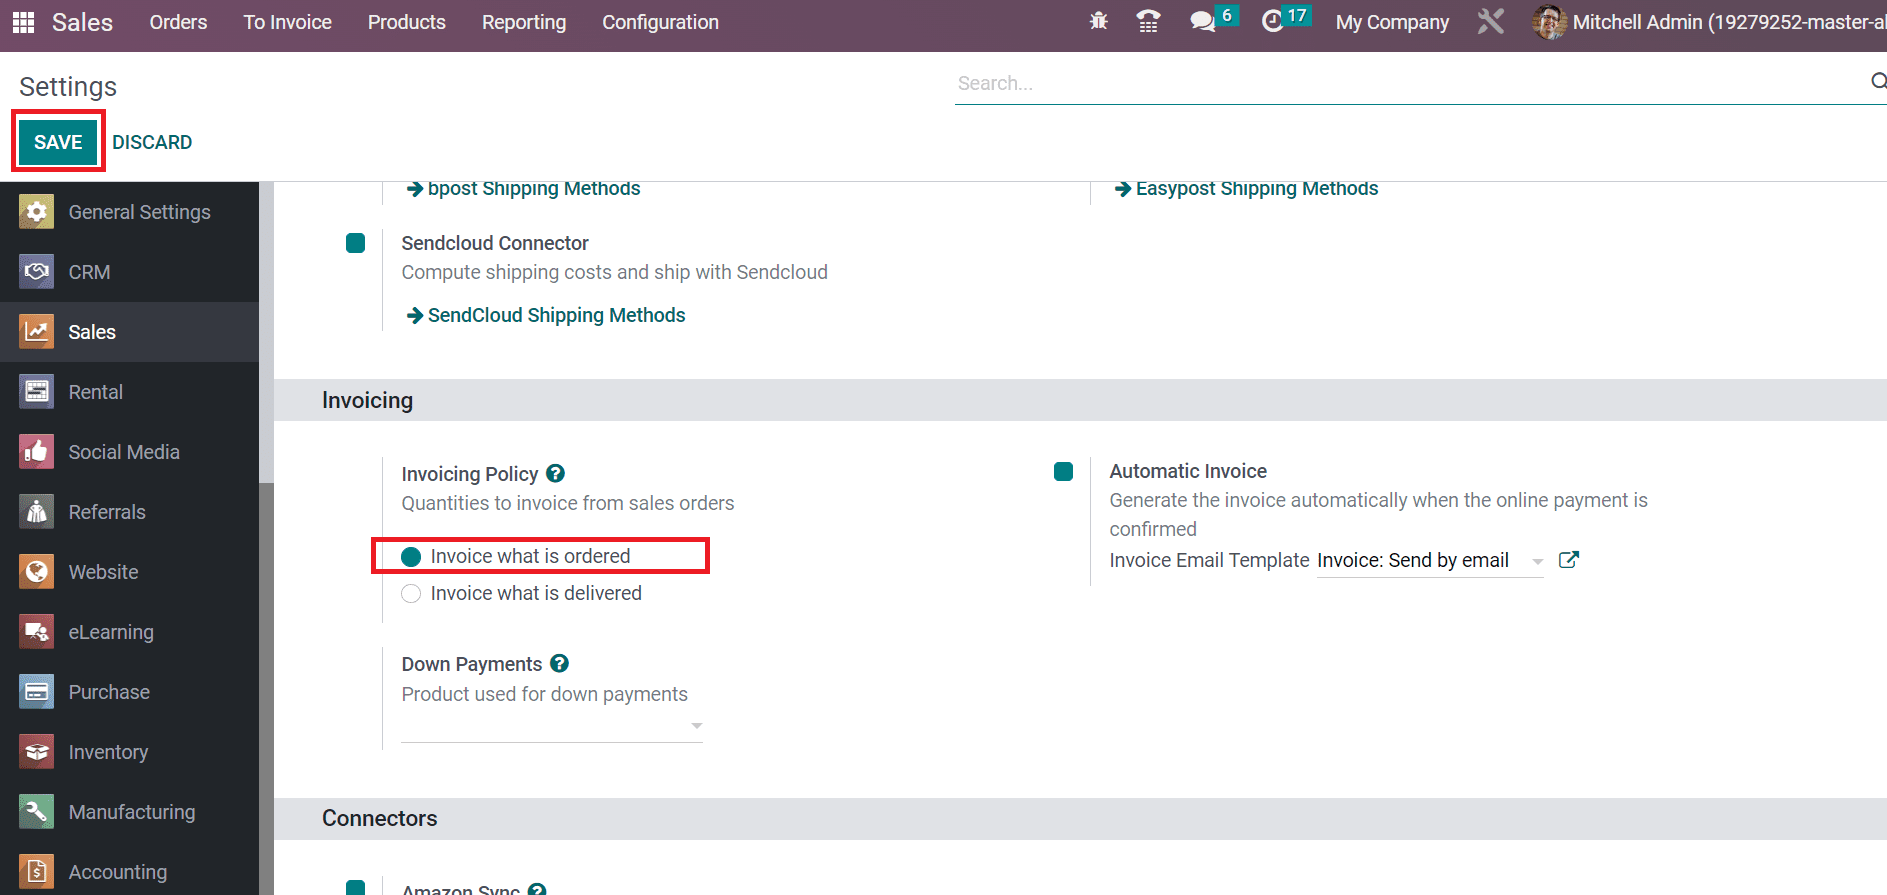
Let’s set an invoice policy with ordered quantities for a product and view the automatic invoice creation.
How to Develop Automatic Invoice for a Sales Order in Odoo 16?
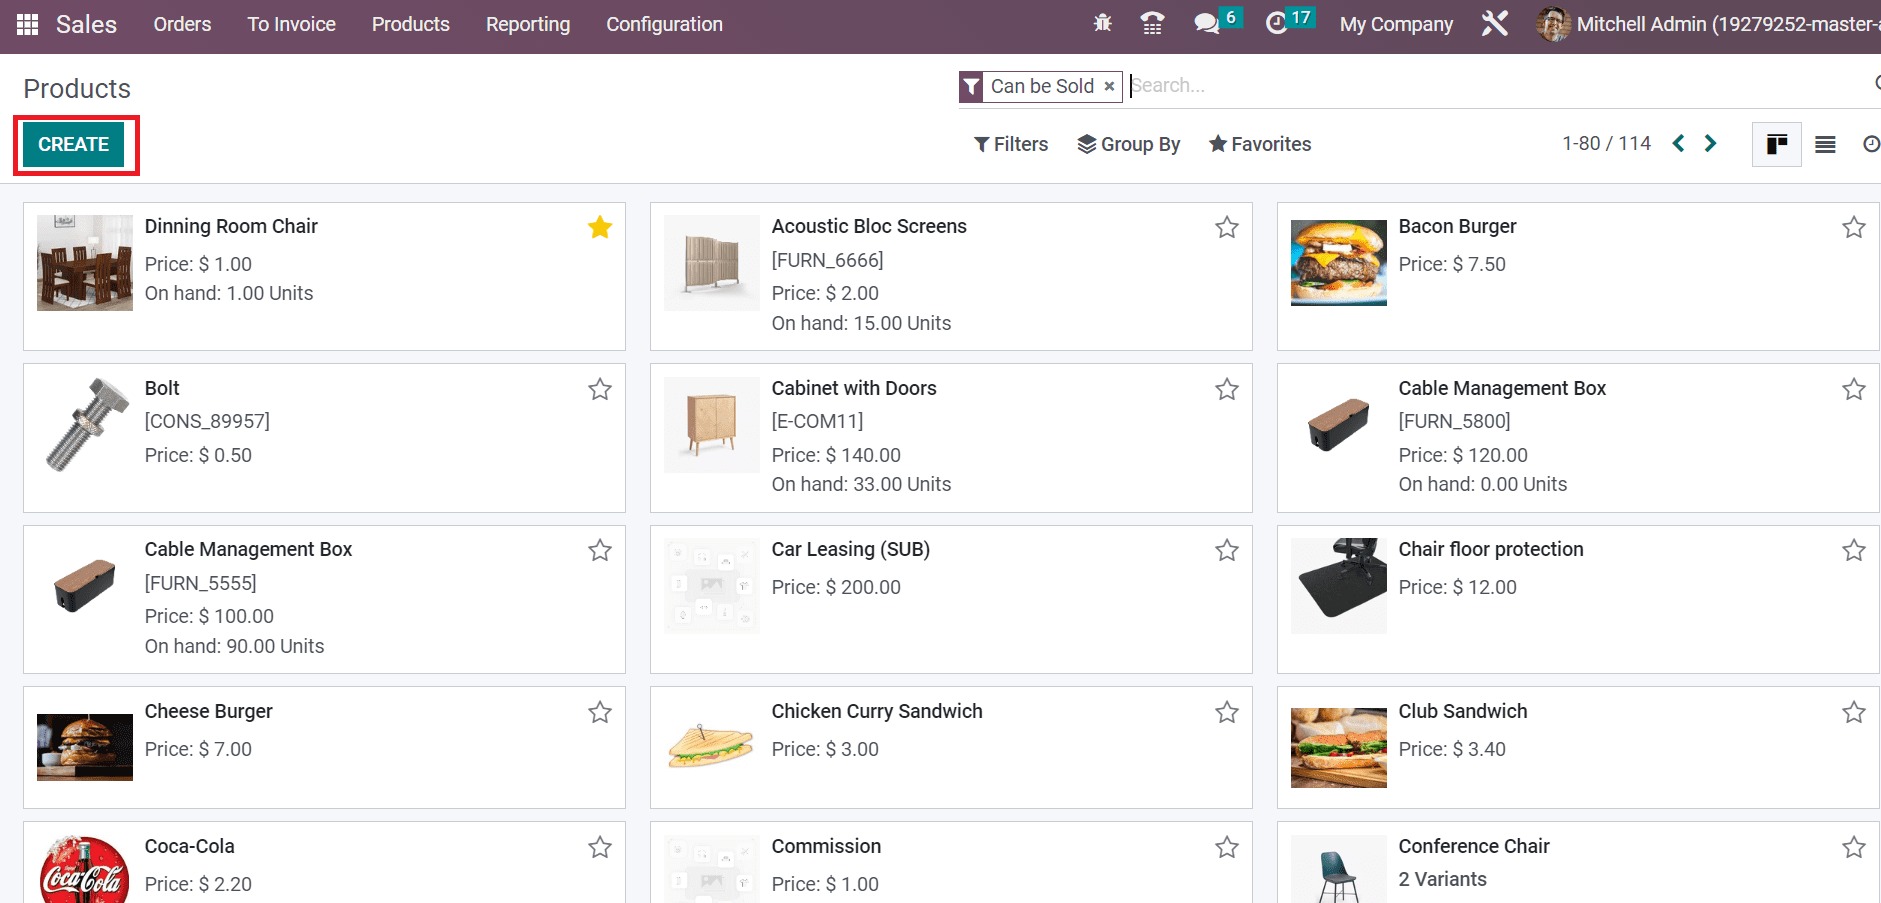
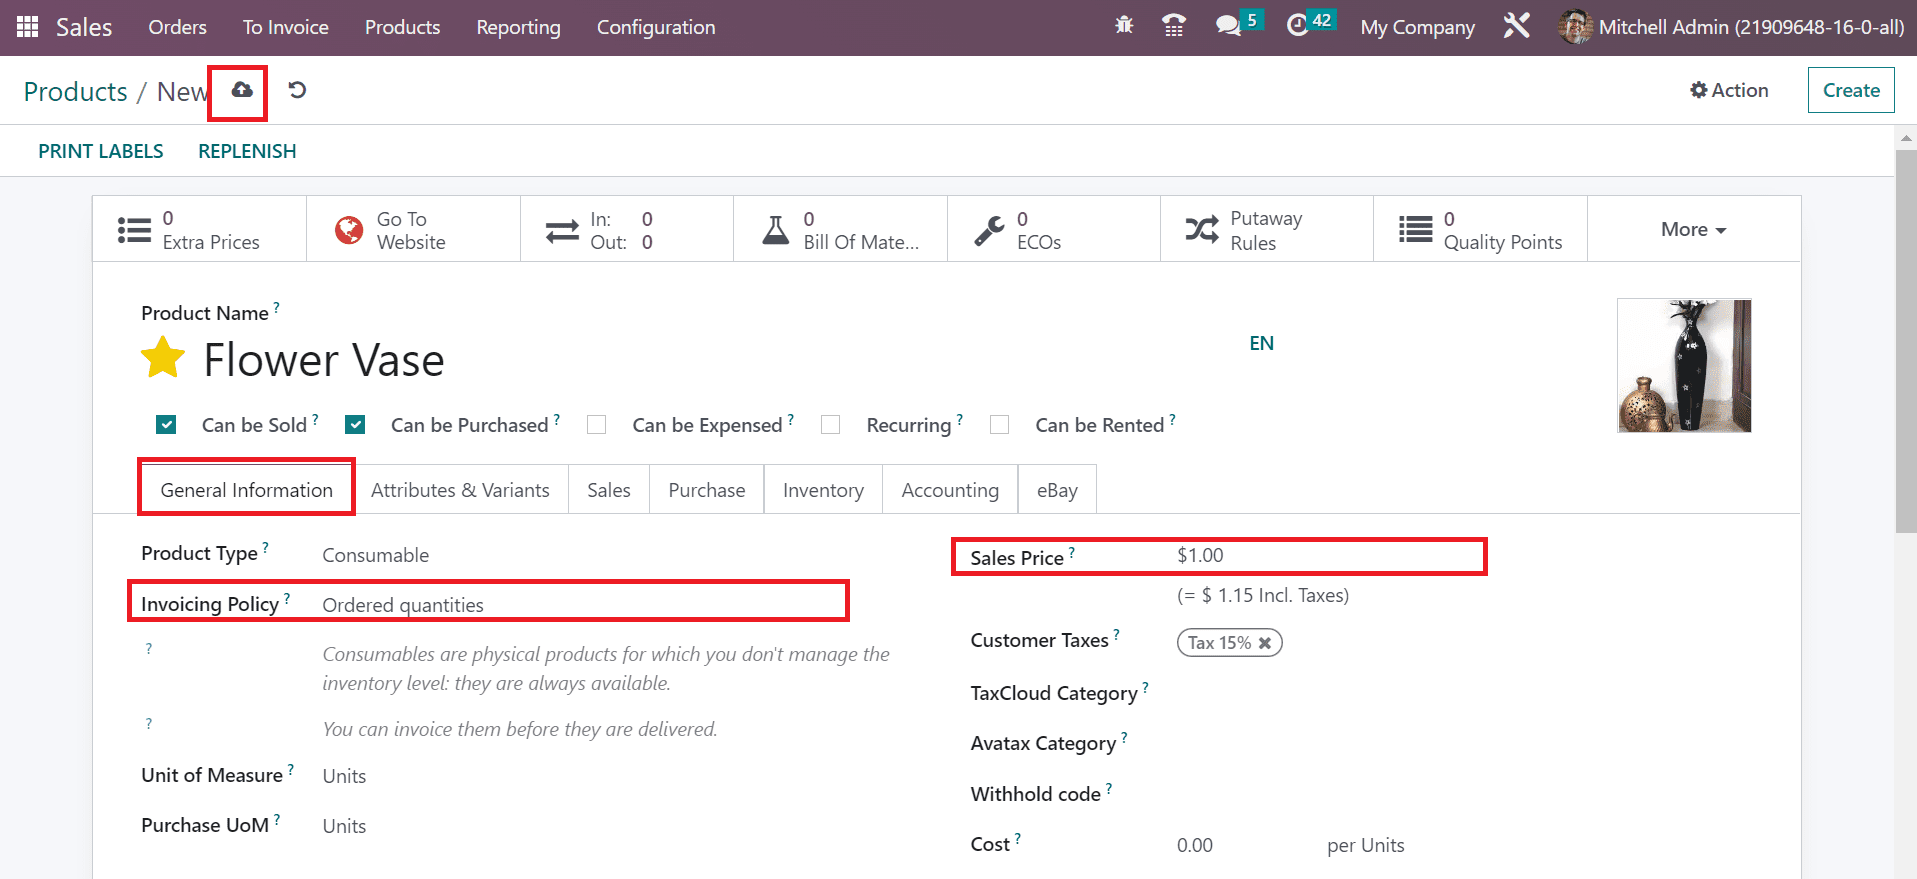
Primarily, we need to develop a product with an invoice policy of ordered quantities. Choose the products menu, and the user can obtain all created items’ information in the Products window. In the Kanban view, we can see each item’s price and on-hand units individually. Select the CREATE icon in the Products window to proceed with a new commodity, as pointed out in the screenshot below.
In the new screen, add Flower Vase in the Products Name and post the image on the right end. Users can mark the product as necessary by selecting the star icon near Products Name.
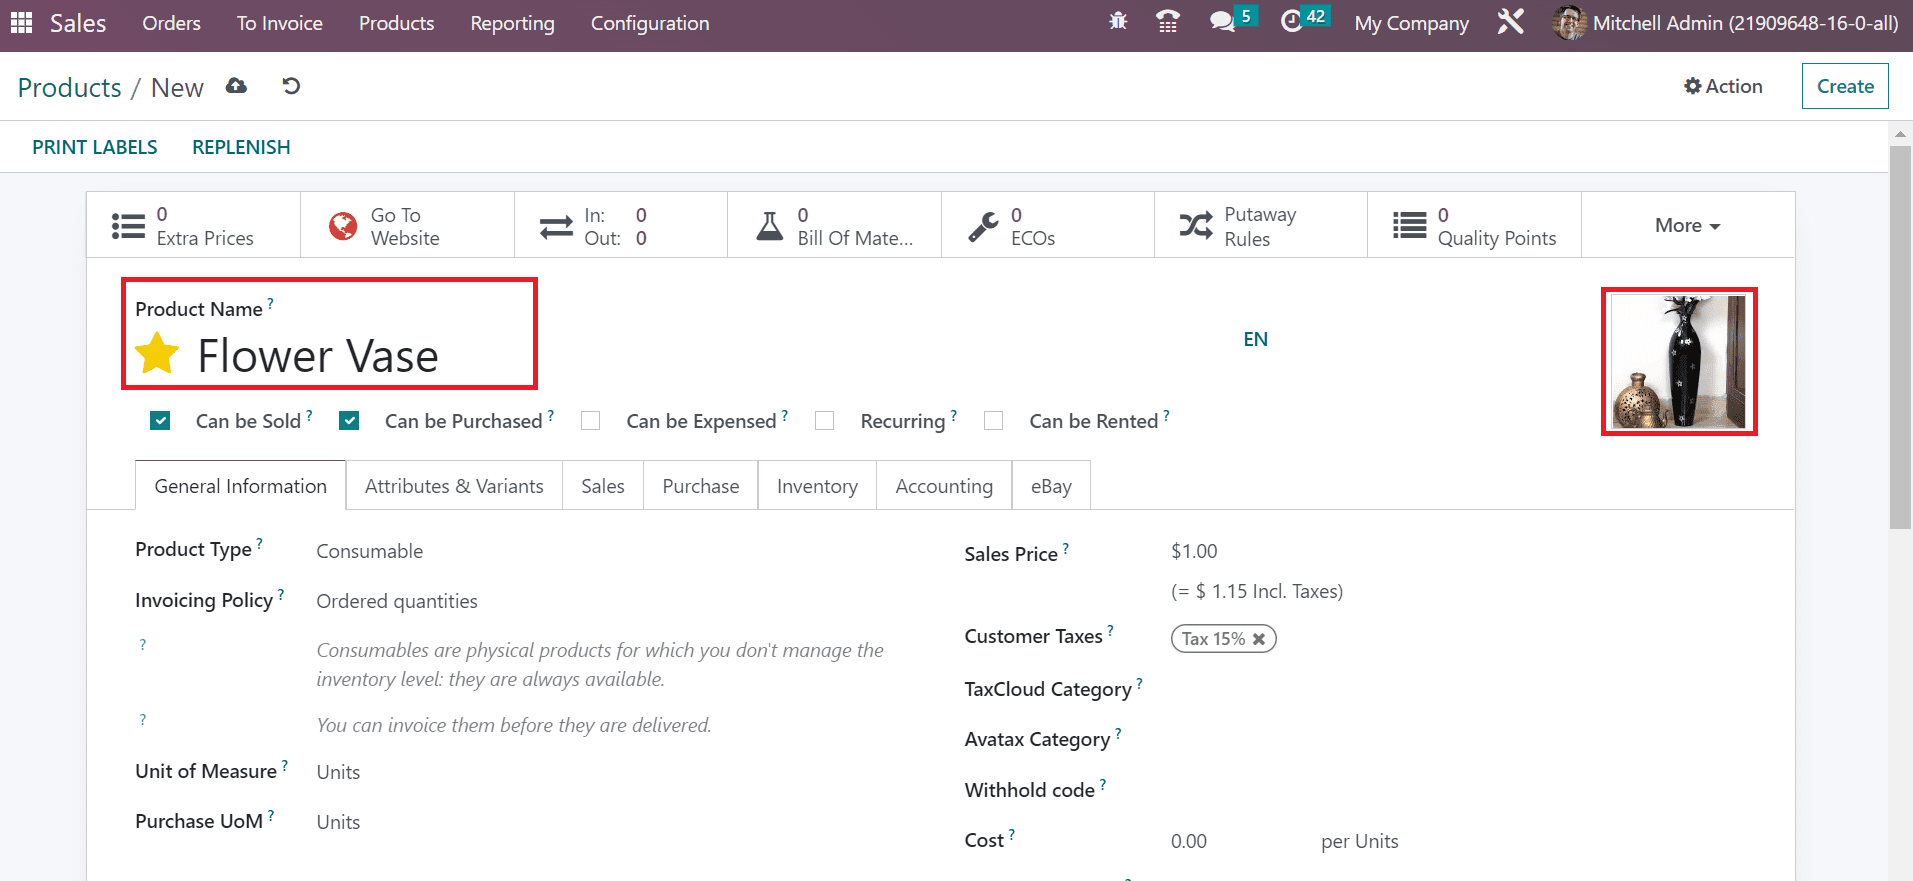
Below the General Information tab, choose Ordered Quantities in the Invoicing Policy option. Click the save manually button after entering essential details about the product as specified in the screenshot below.
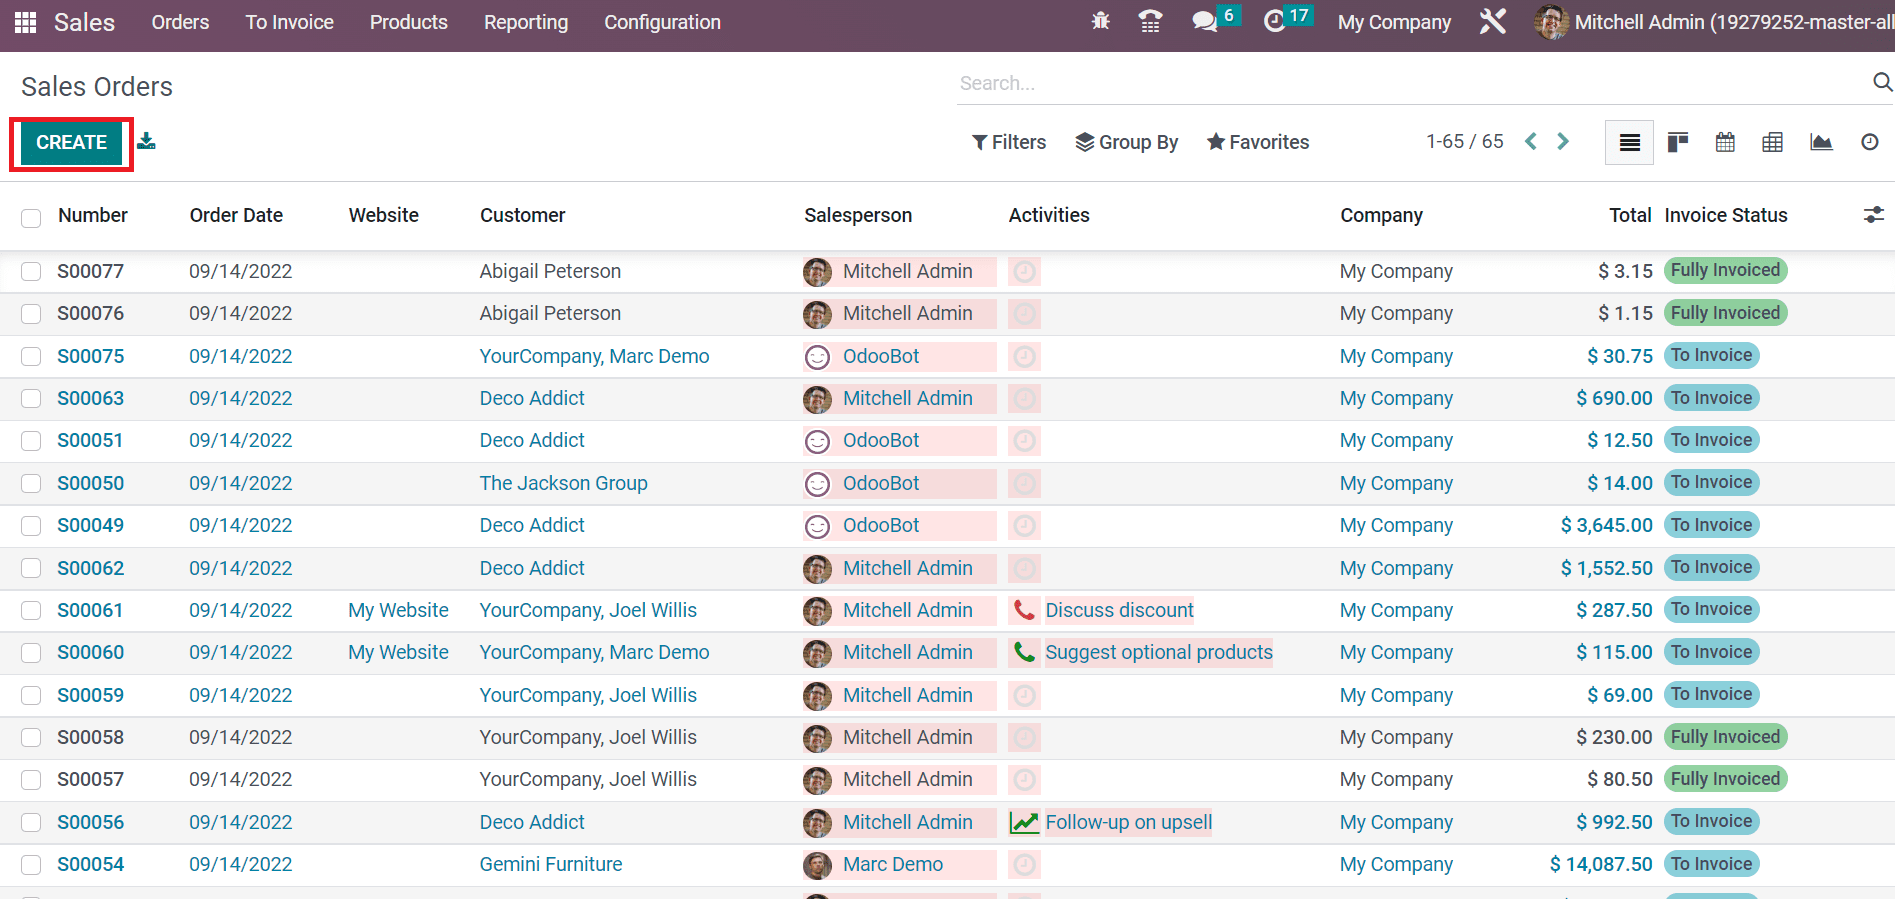
Next, let’s create a Sales order for the specific product. Click the CREATE icon in the Sales Orders window to formulate a new order, as demonstrated in the screenshot below.
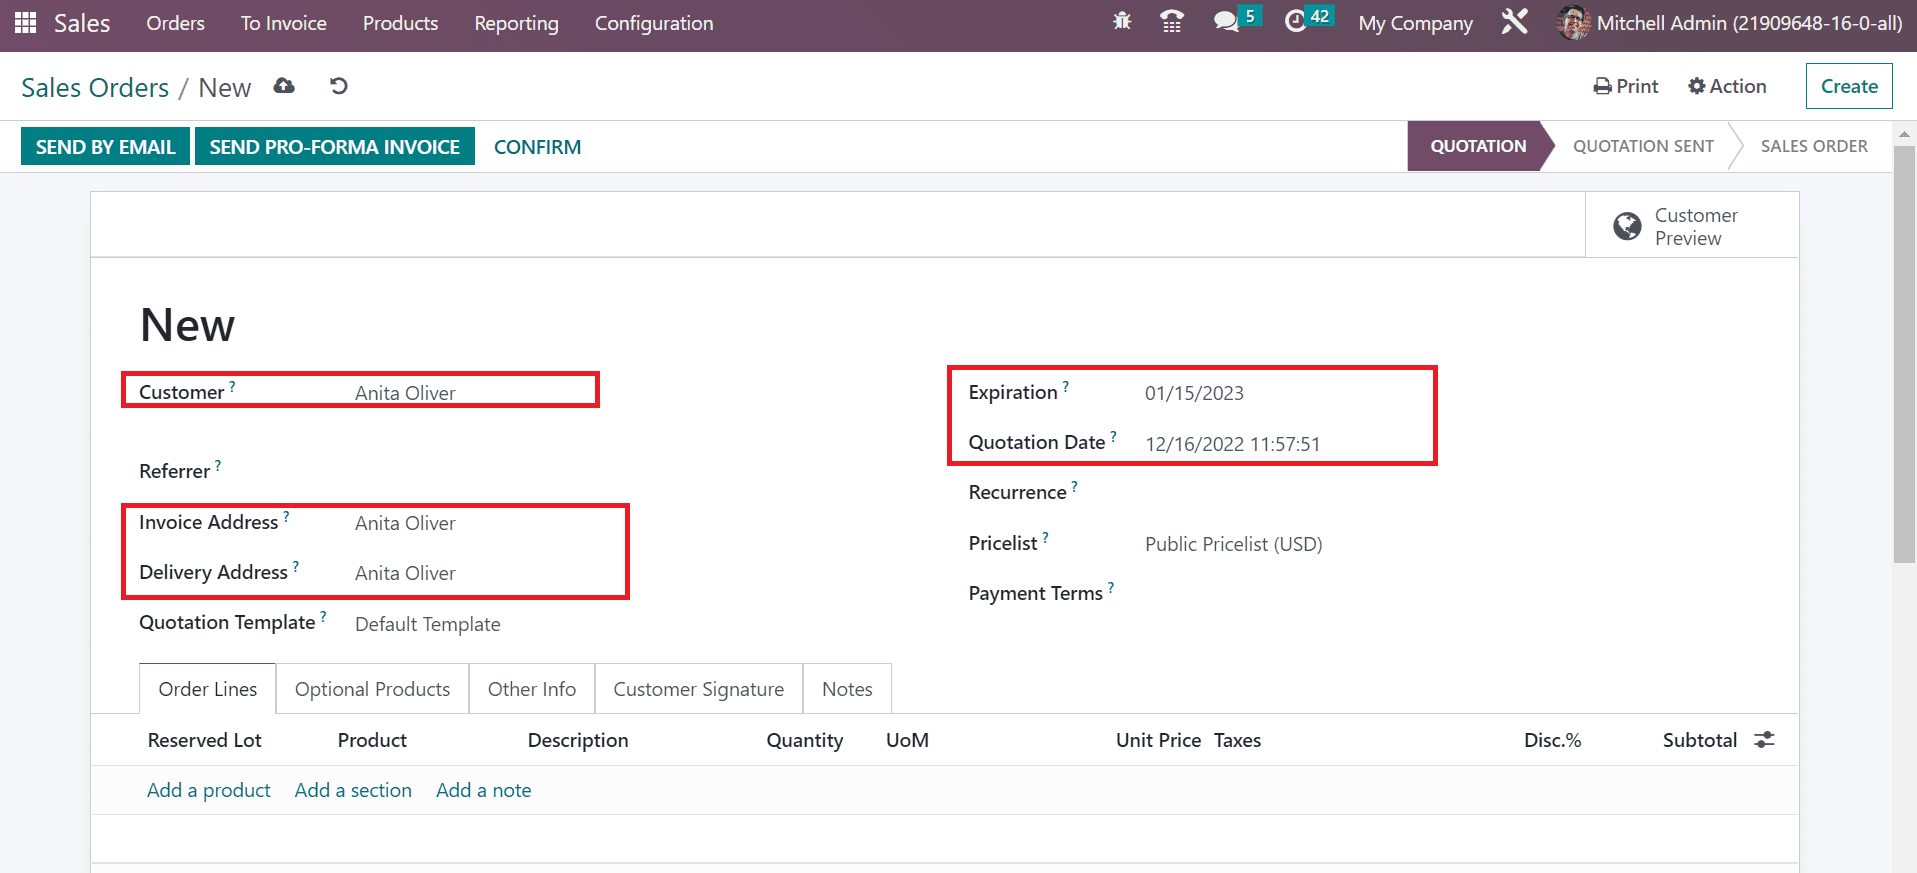
In the new window, choose your Customer, Invoice Address, and Delivery Address concerning the selected customer. Later, specify the order’s confirmation date within the Quotation Date field and add an Expiration date, as mentioned in the screenshot below.
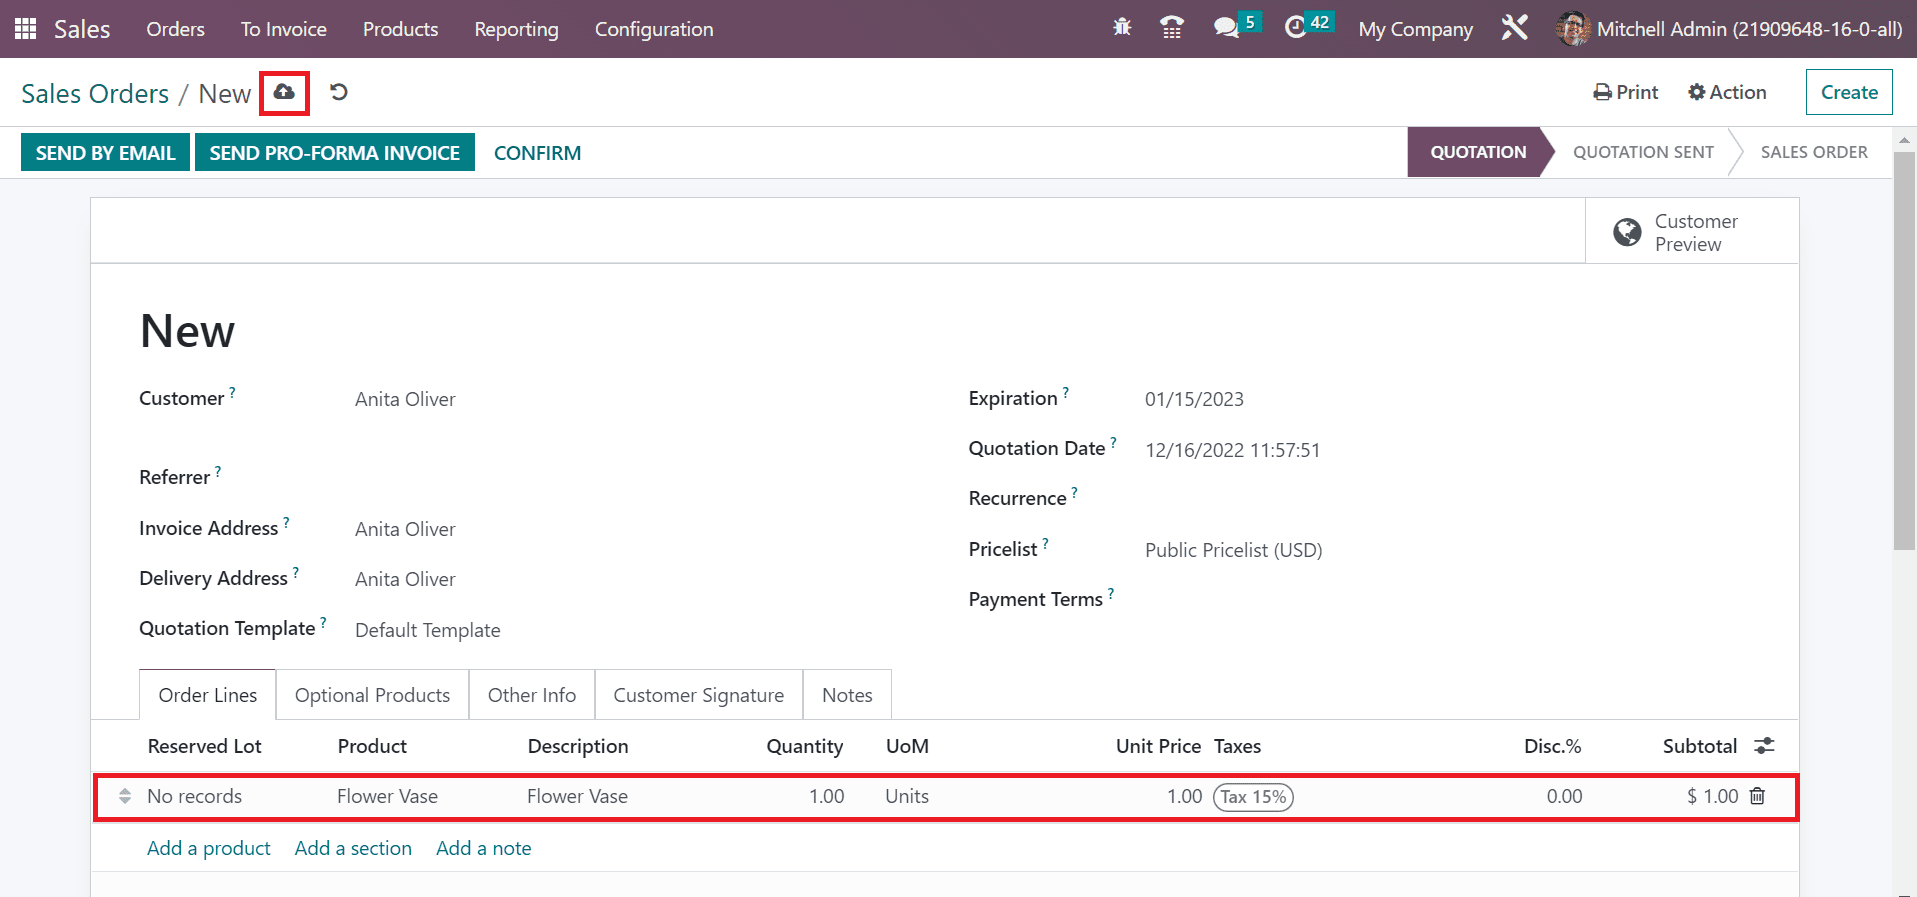
Pick your created product, Flower Vase, below the Order Lines tab after selecting the Add a Product option. After entering the needed count of products, click the save manually option in the Sales Orders window.
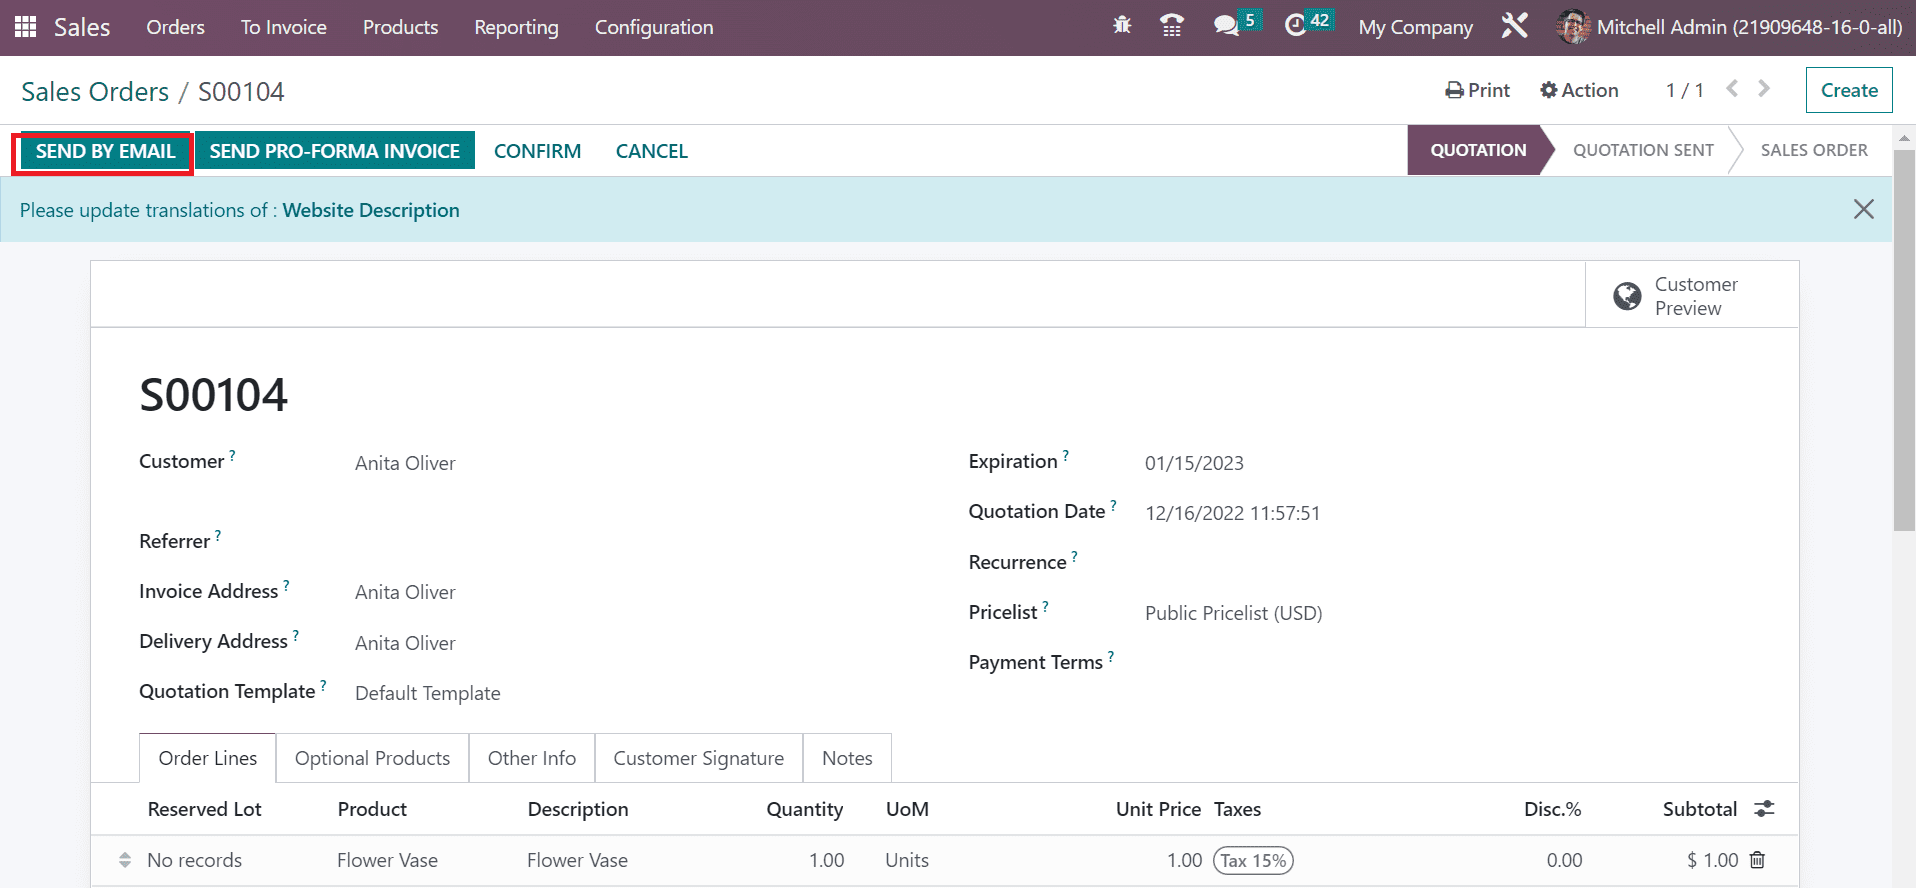
It is possible to send the order data to the customer from the Sales Order window. For that purpose, click the SEND BY EMAIL icon, as cited in the screenshot below.
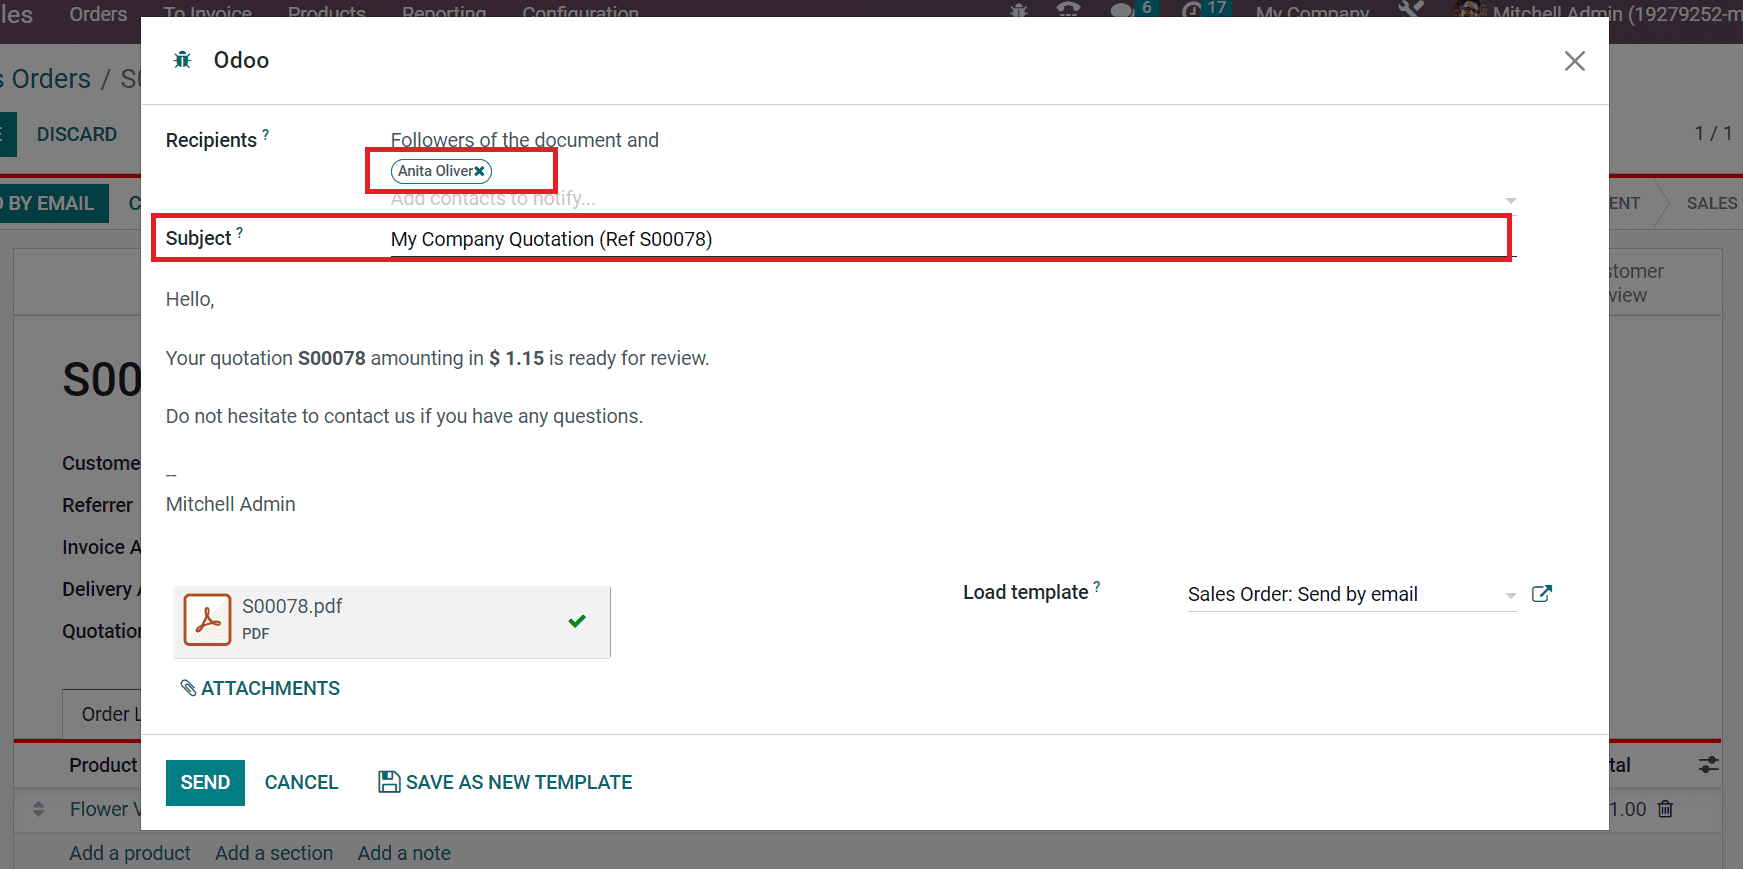
A new window opens for you, and we can access the customer detail in the Recipients field. Furthermore, users can access the Subject and Email text as described in the screenshot below.
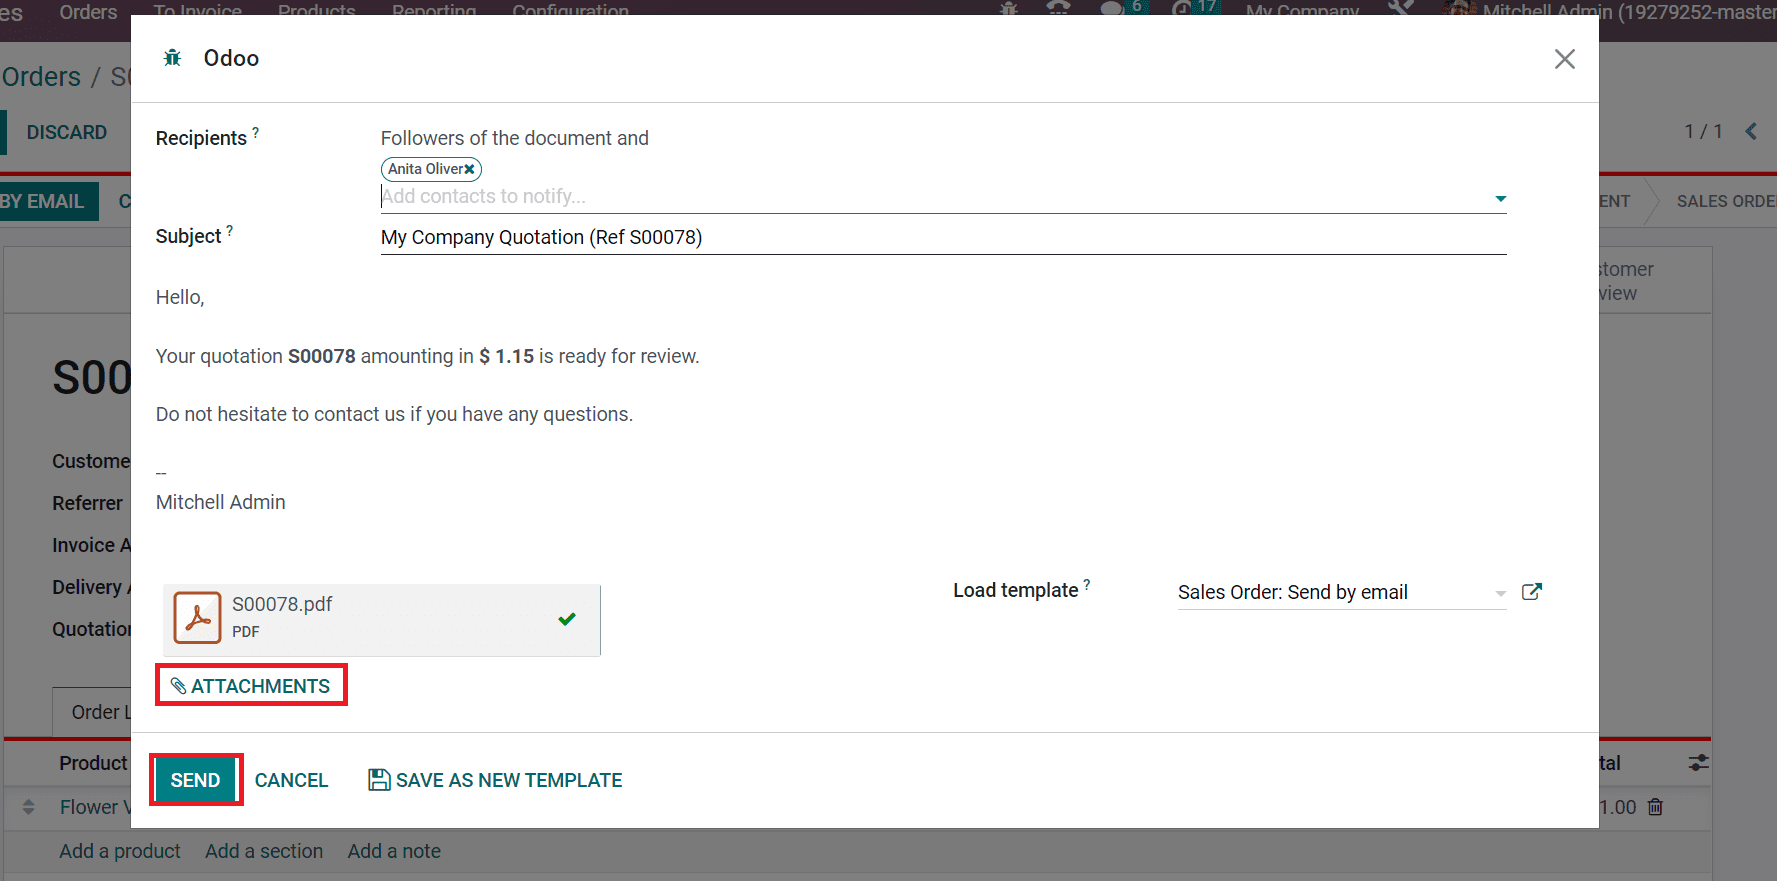
It is possible to upload additional documents by clicking on the ATTACHMENTS option in the Odoo window. After adding essential data, click the SEND button, as signified in the screenshot below.
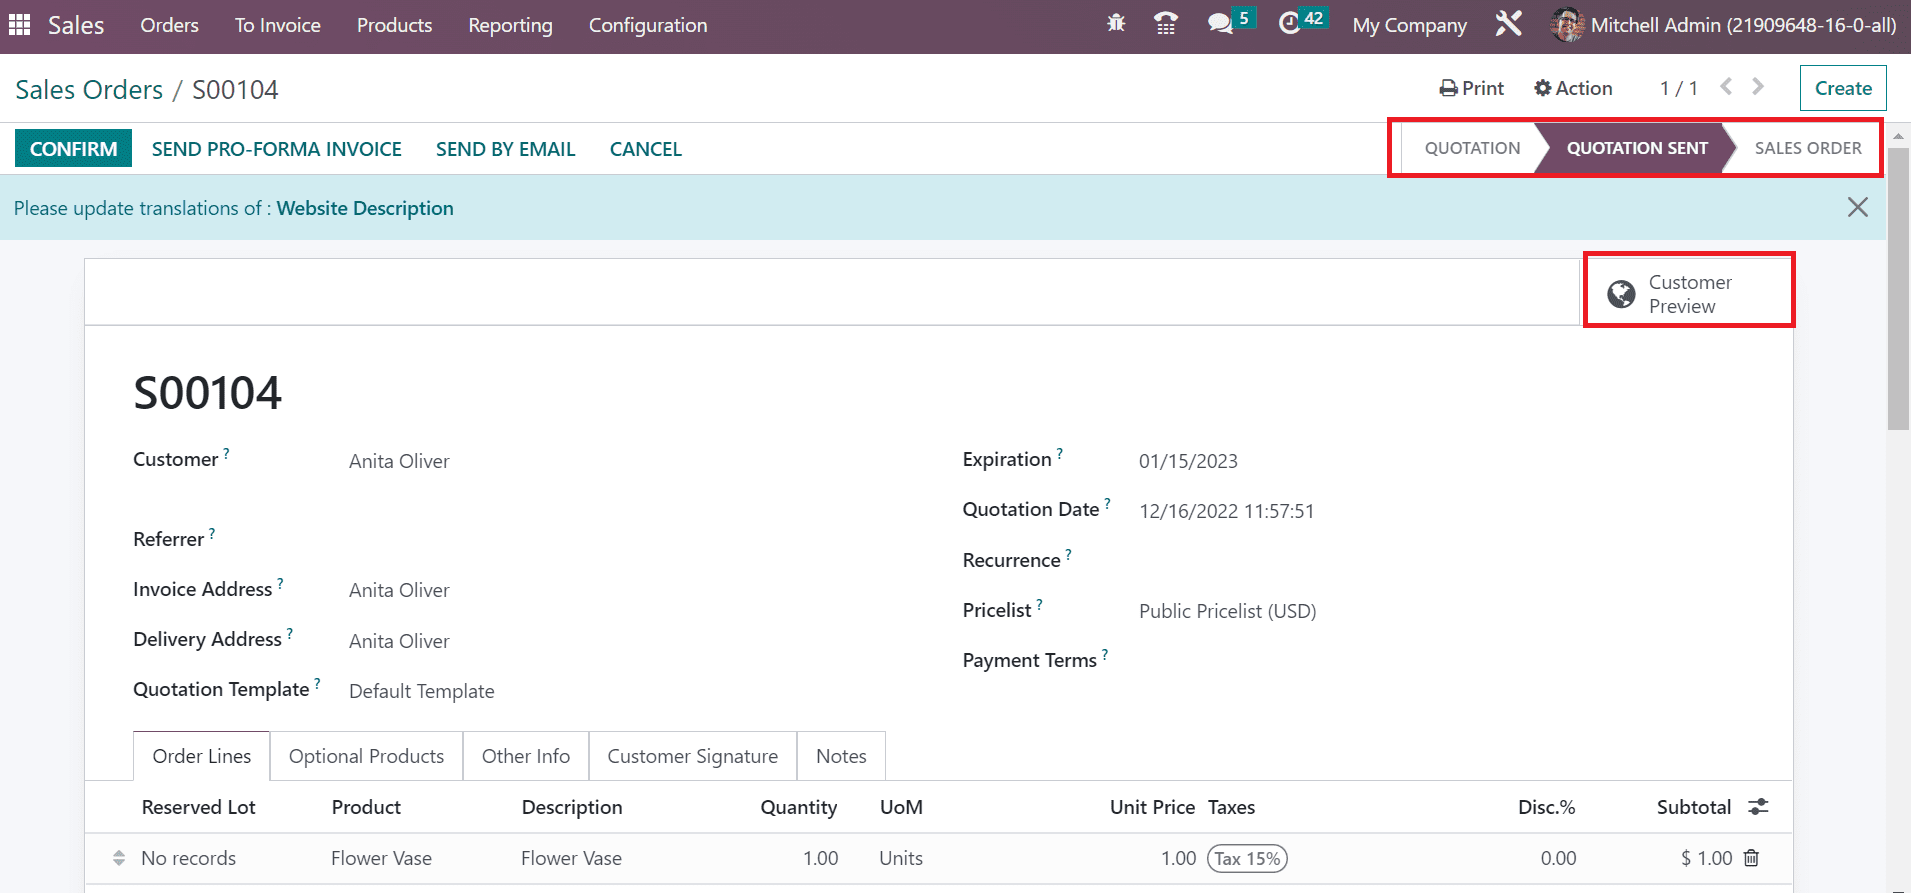
The stage changes from QUOTATION to QUOTATION SENT after sending the email. You can acquire the customer portal by clicking the Customer Preview smart tab in the Sales Orders window.
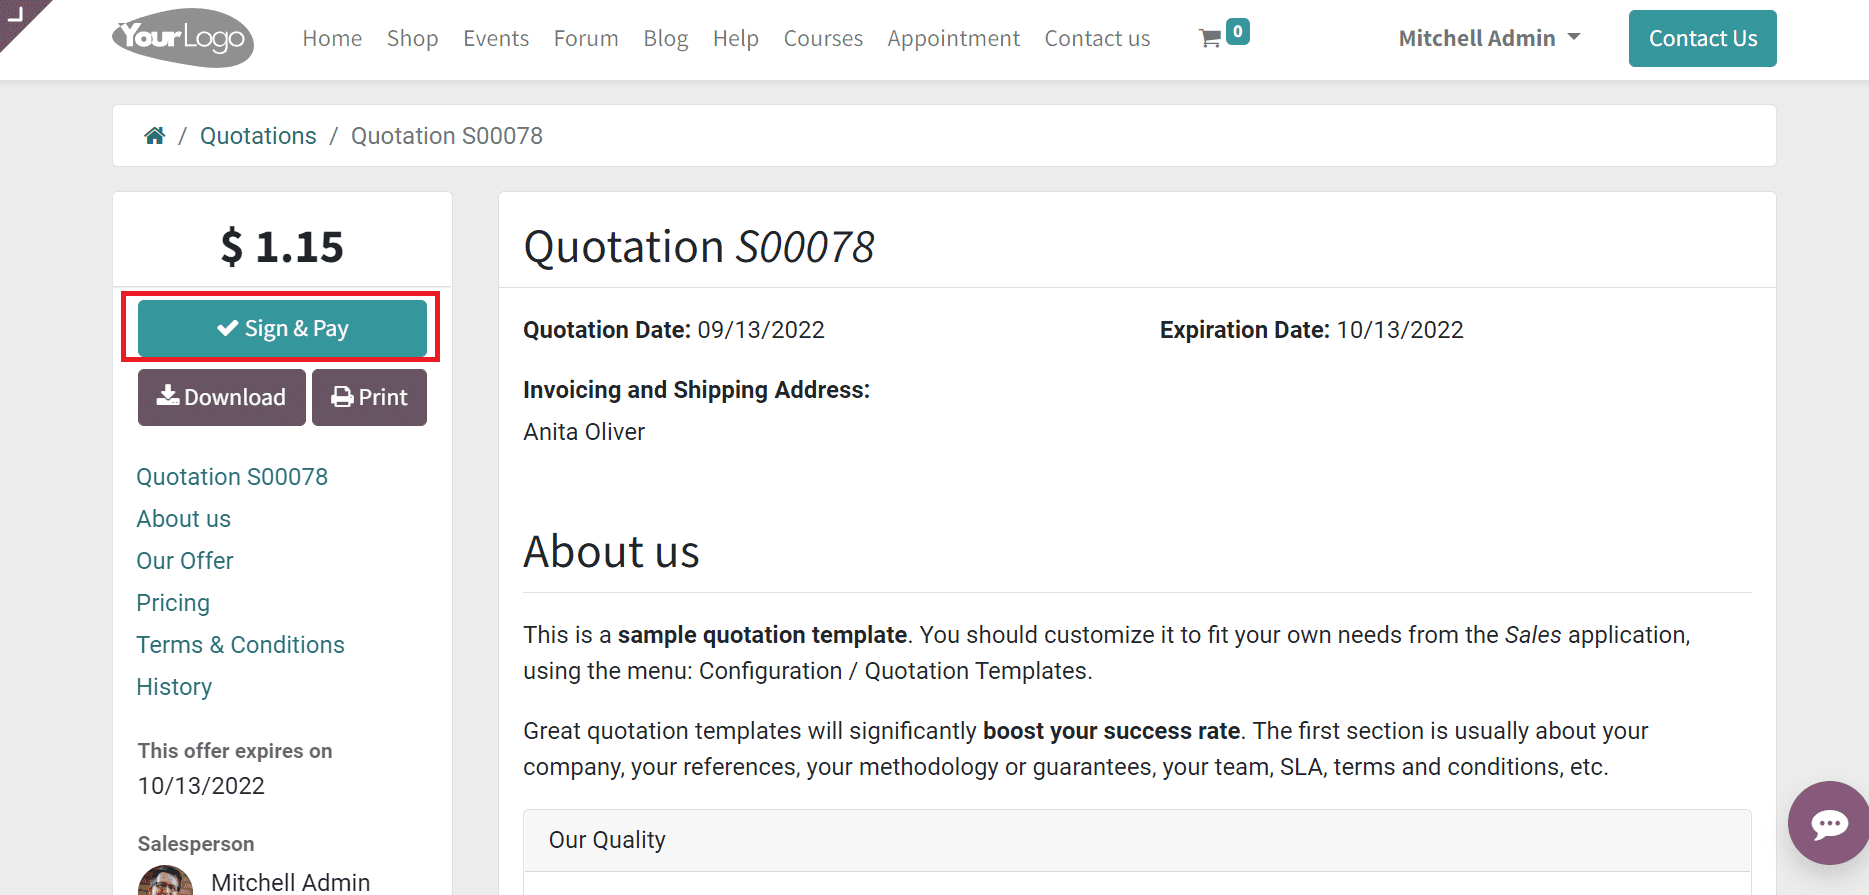
It is easy to make payments by a customer from the customer portal after signing a quotation. The Customer Preview portal can access the quotation details, including the Expiration Date, Quotation Date, Invoicing, and Shipping Address. Customers can pay for the item by clicking the Sign & Pay button.
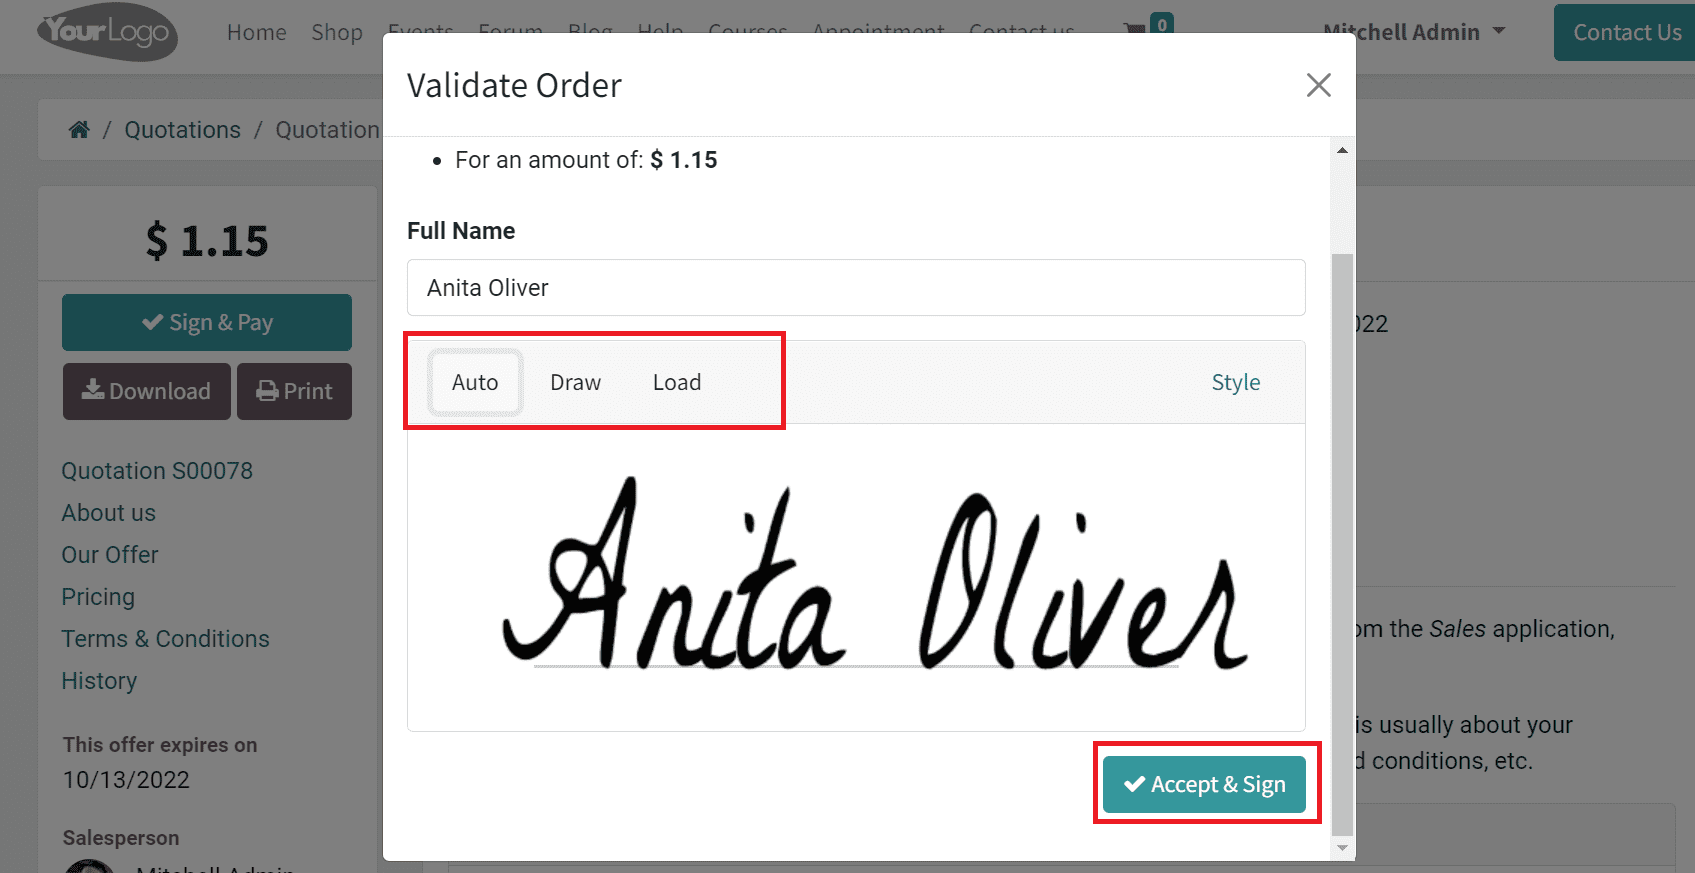
A Validate Order window appears to a customer and needs to sign it. You can sign the quotation based on Auto, Draw or load options as marked in the screenshot below.
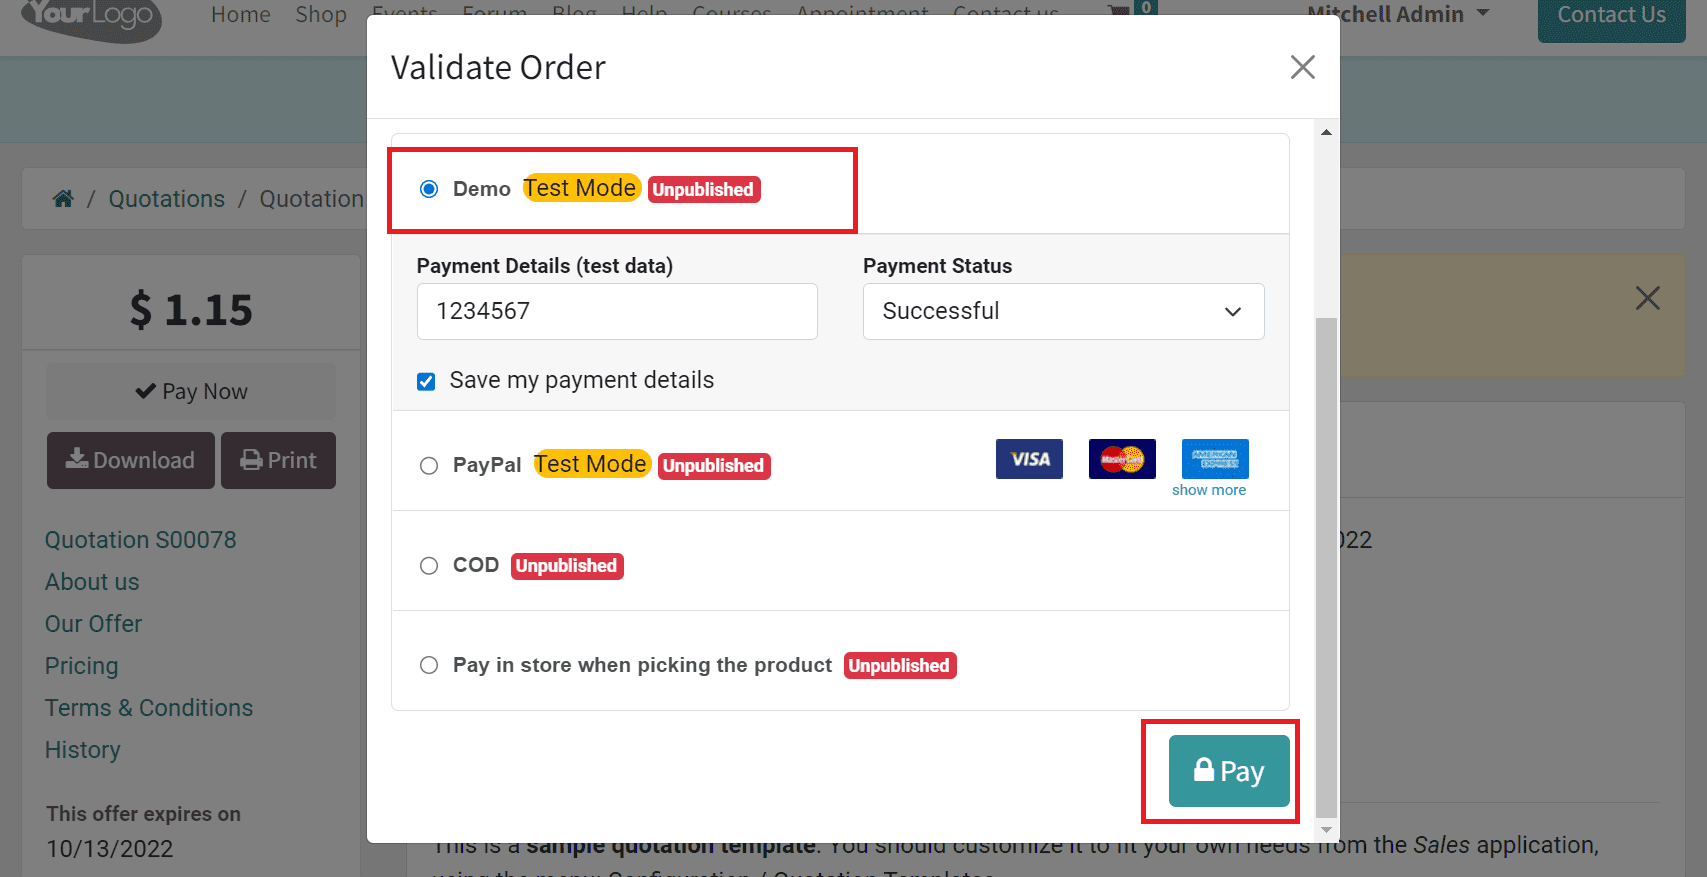
Here, we select the Auto option and click the Accept & Sign button, as shown in the above screenshot. Next, we must apply the payment steps for the quotation. After choosing the necessary payment method, click the PAY icon in the Validate Order window.
We can see a message in the Customer Portal that the payment is successful.
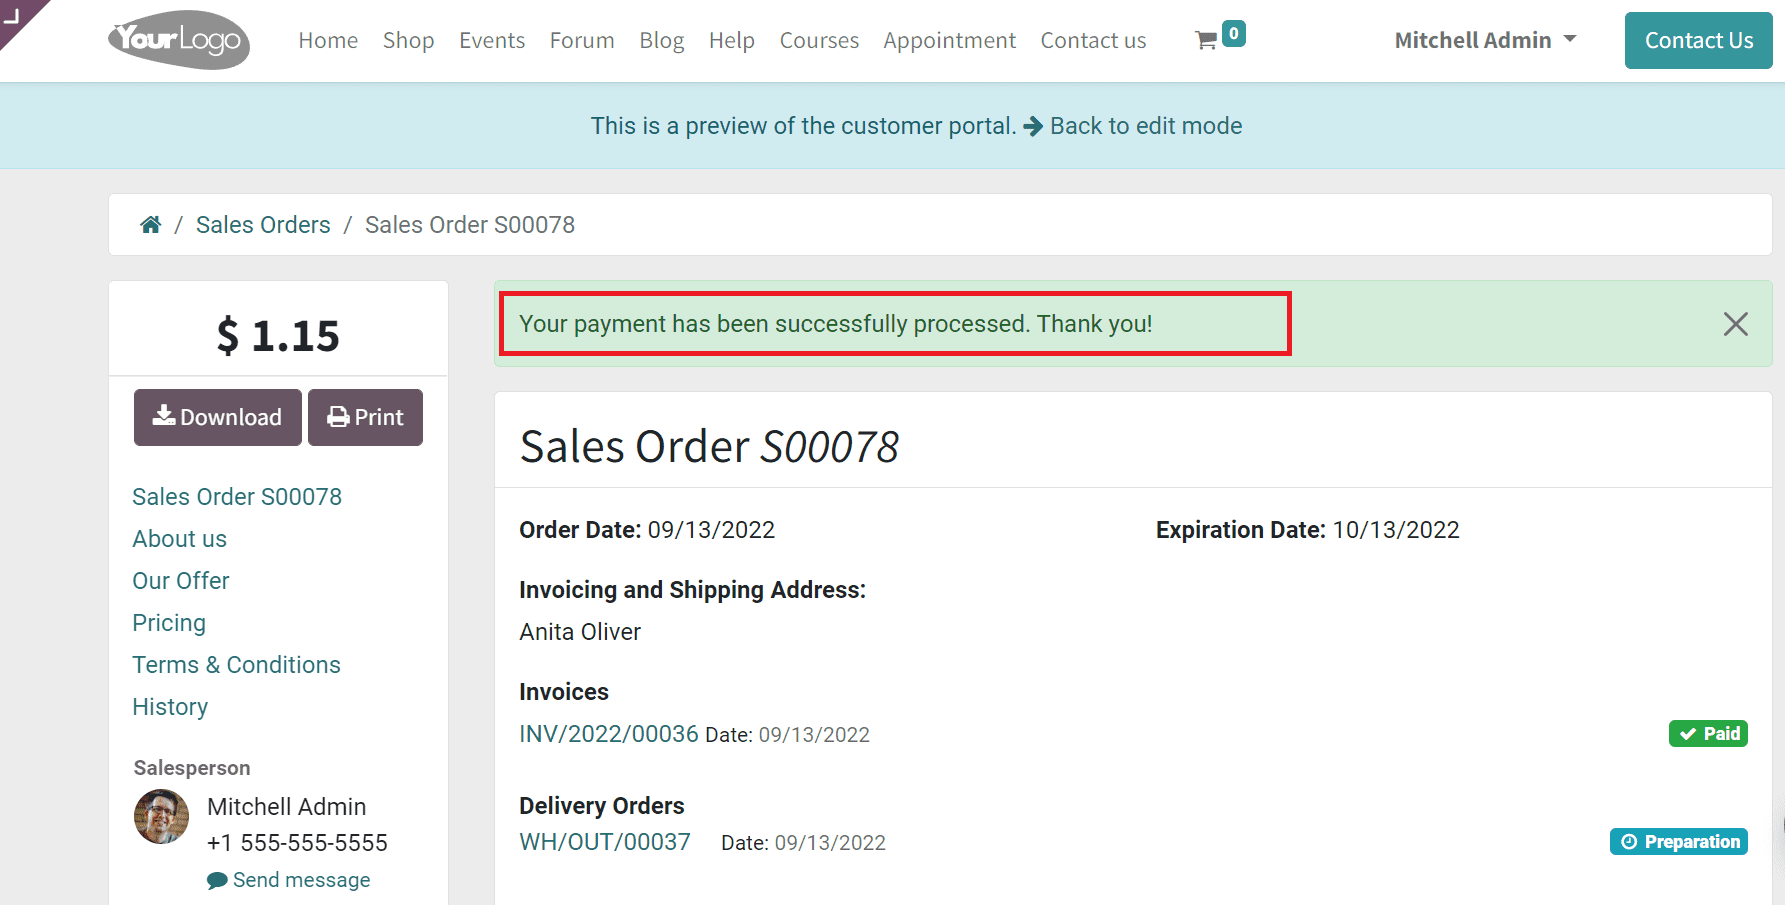
Return to the Sales Order window and stage changes into SALES ORDER. You can also obtain two new smart tabs such as Delivery and Invoice.
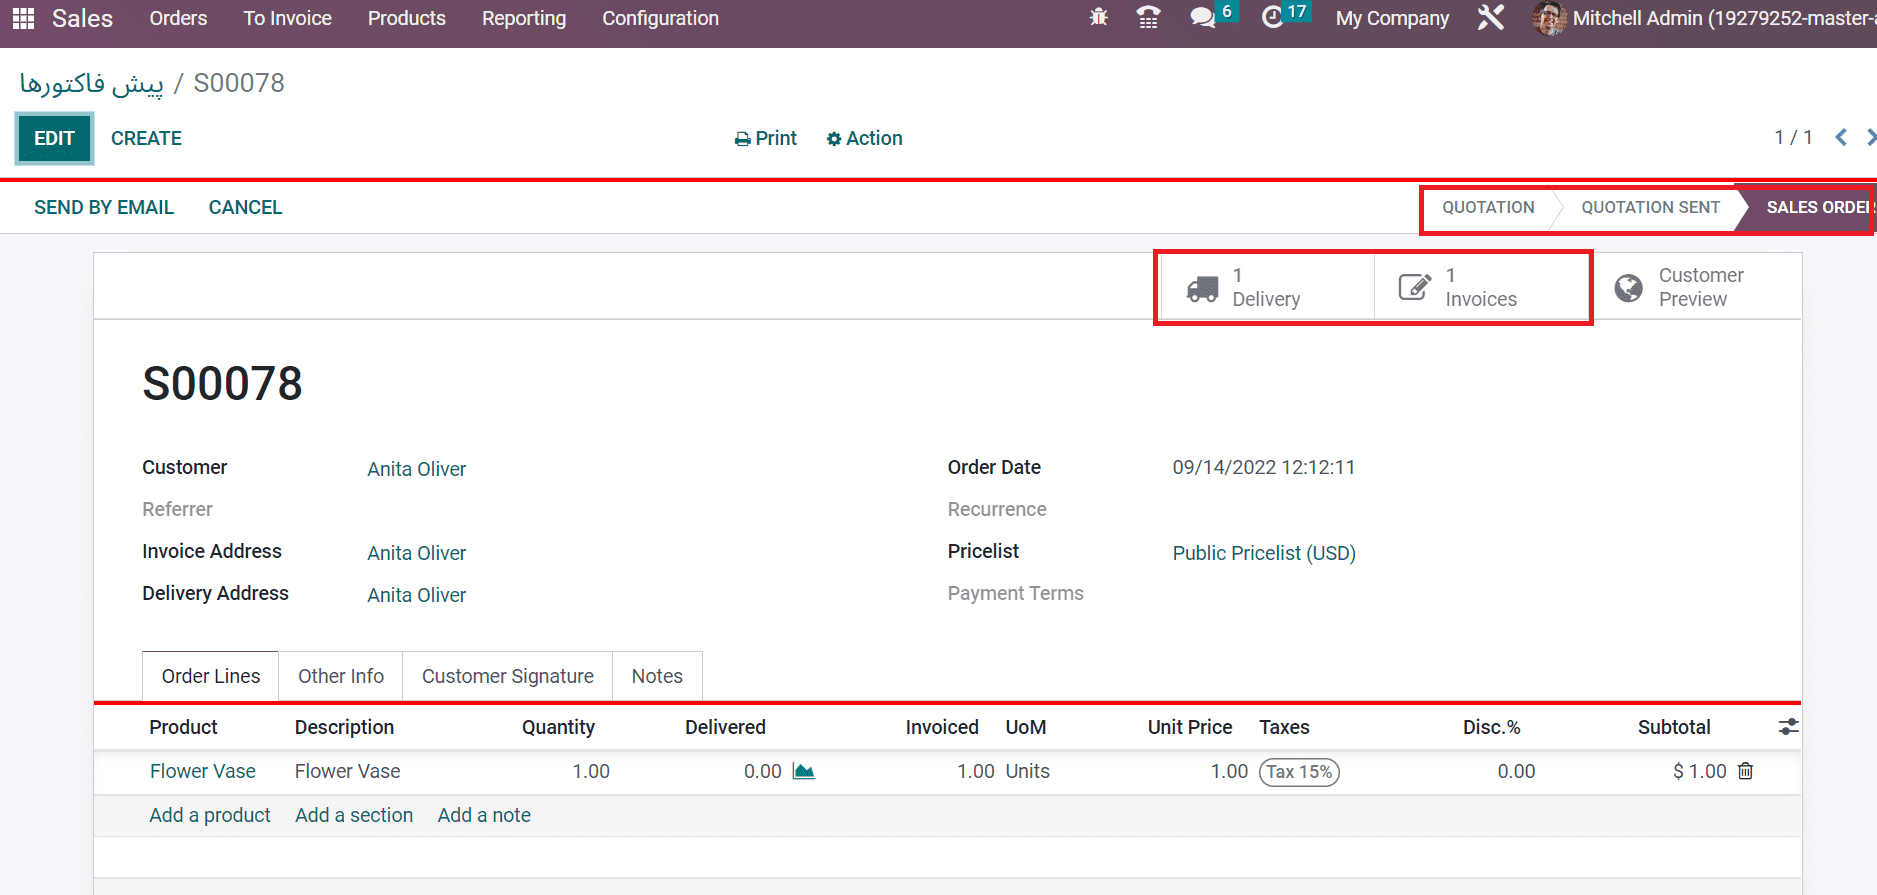
Here, the Invoice is formulated automatically after completed the payment by the customer. After opening the Invoice tab, the user can see the created invoice details. The Invoice exists IN the PAYMENT stage, as illustrated in the screenshot below.
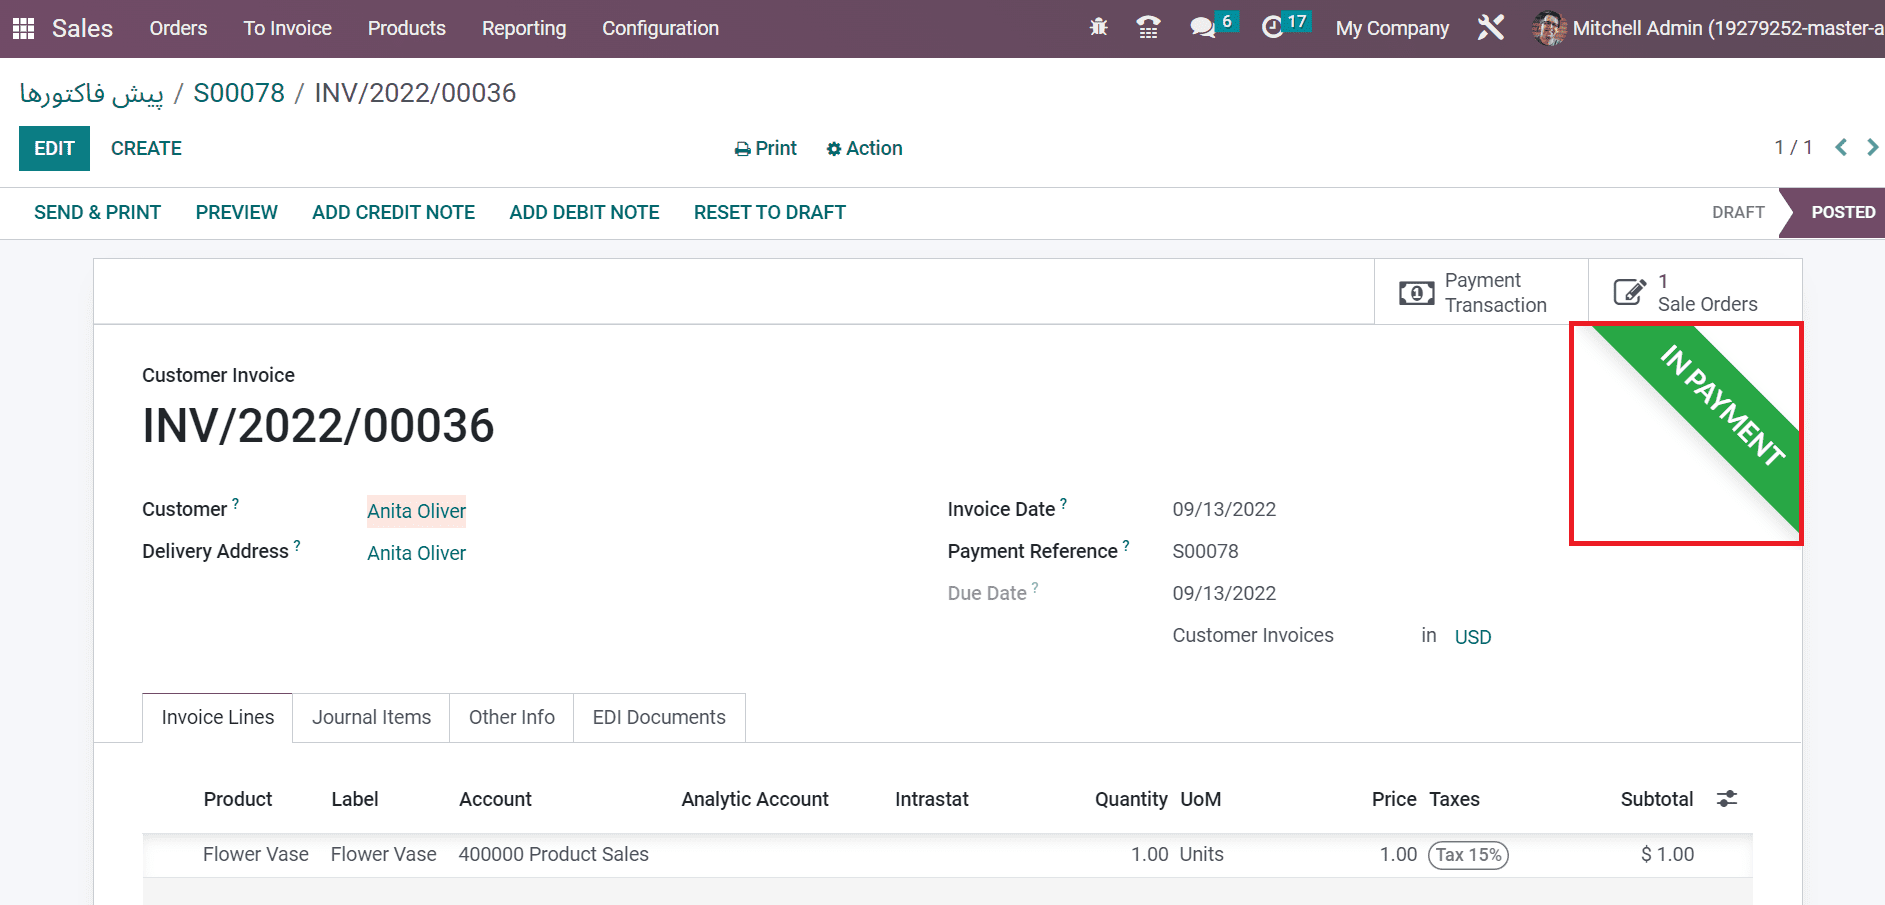
Here, you can access data regarding the Customer Invoice, such as Customer, Invoice Data, Payment Reference, and Delivery Address. Inside the Invoice Lines tab, we can see product details concerning the Invoice.
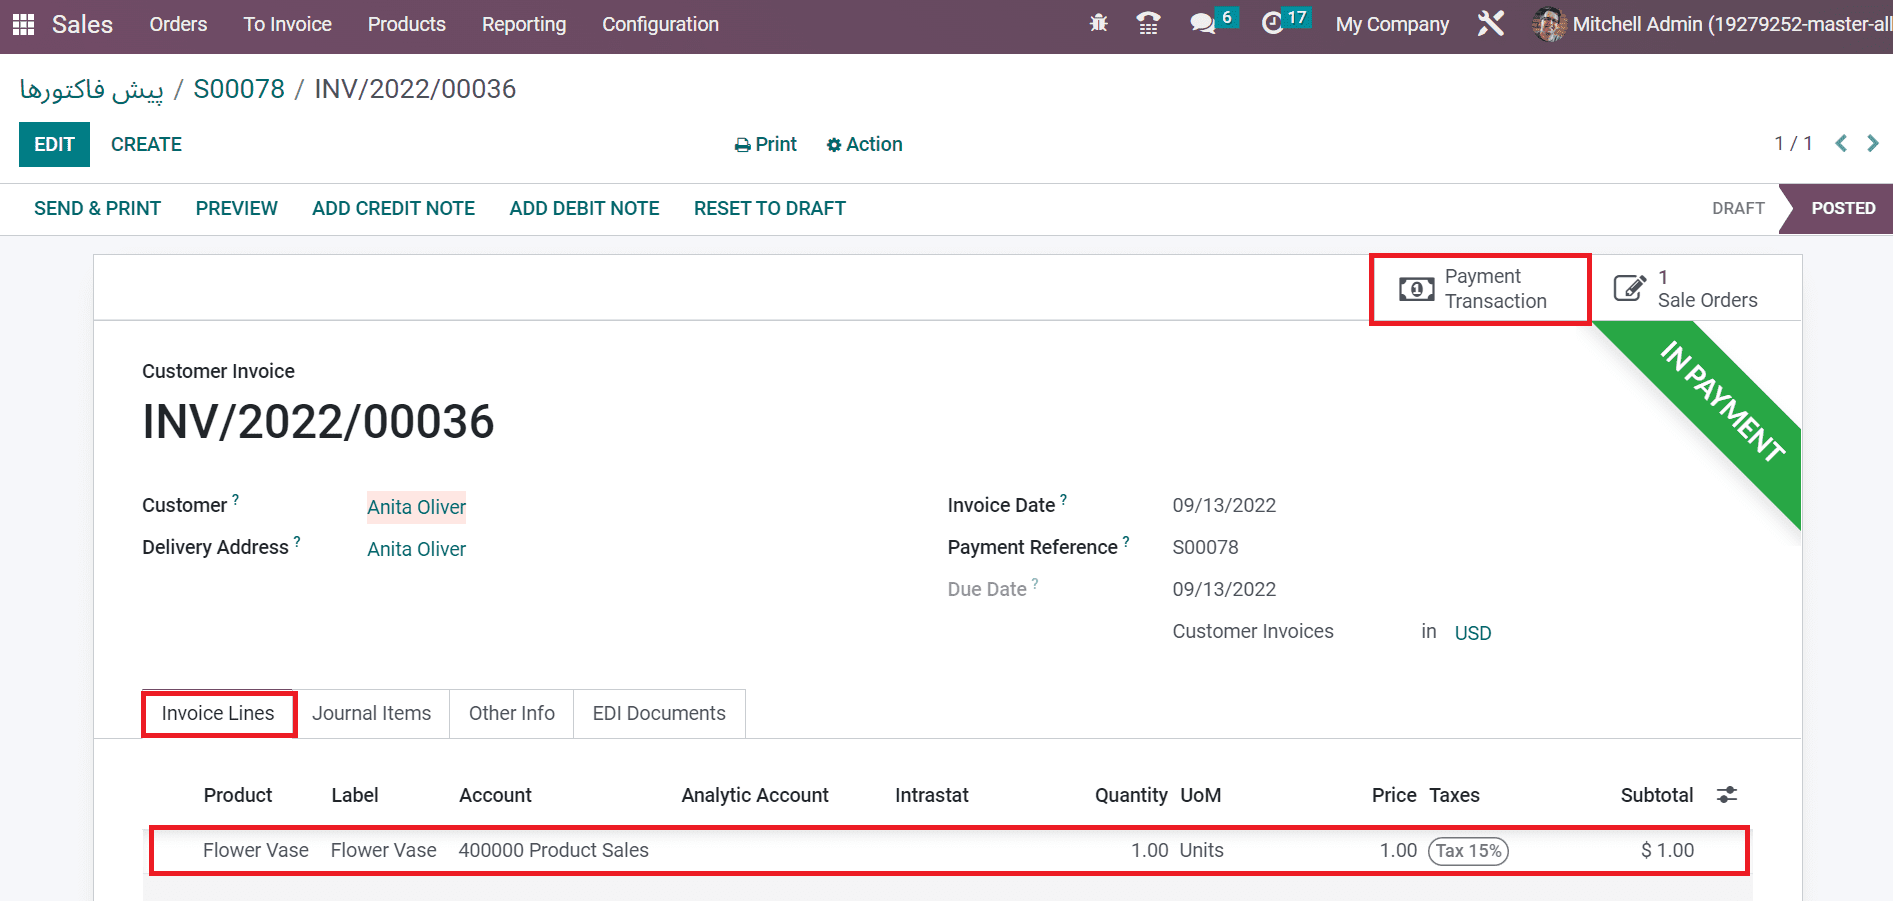
You can get the transaction information once choosing the Payment Transaction icon. It contains information such as Provider, Amount, Company, Created date, Partner Name, etc., as described in the screenshot below.
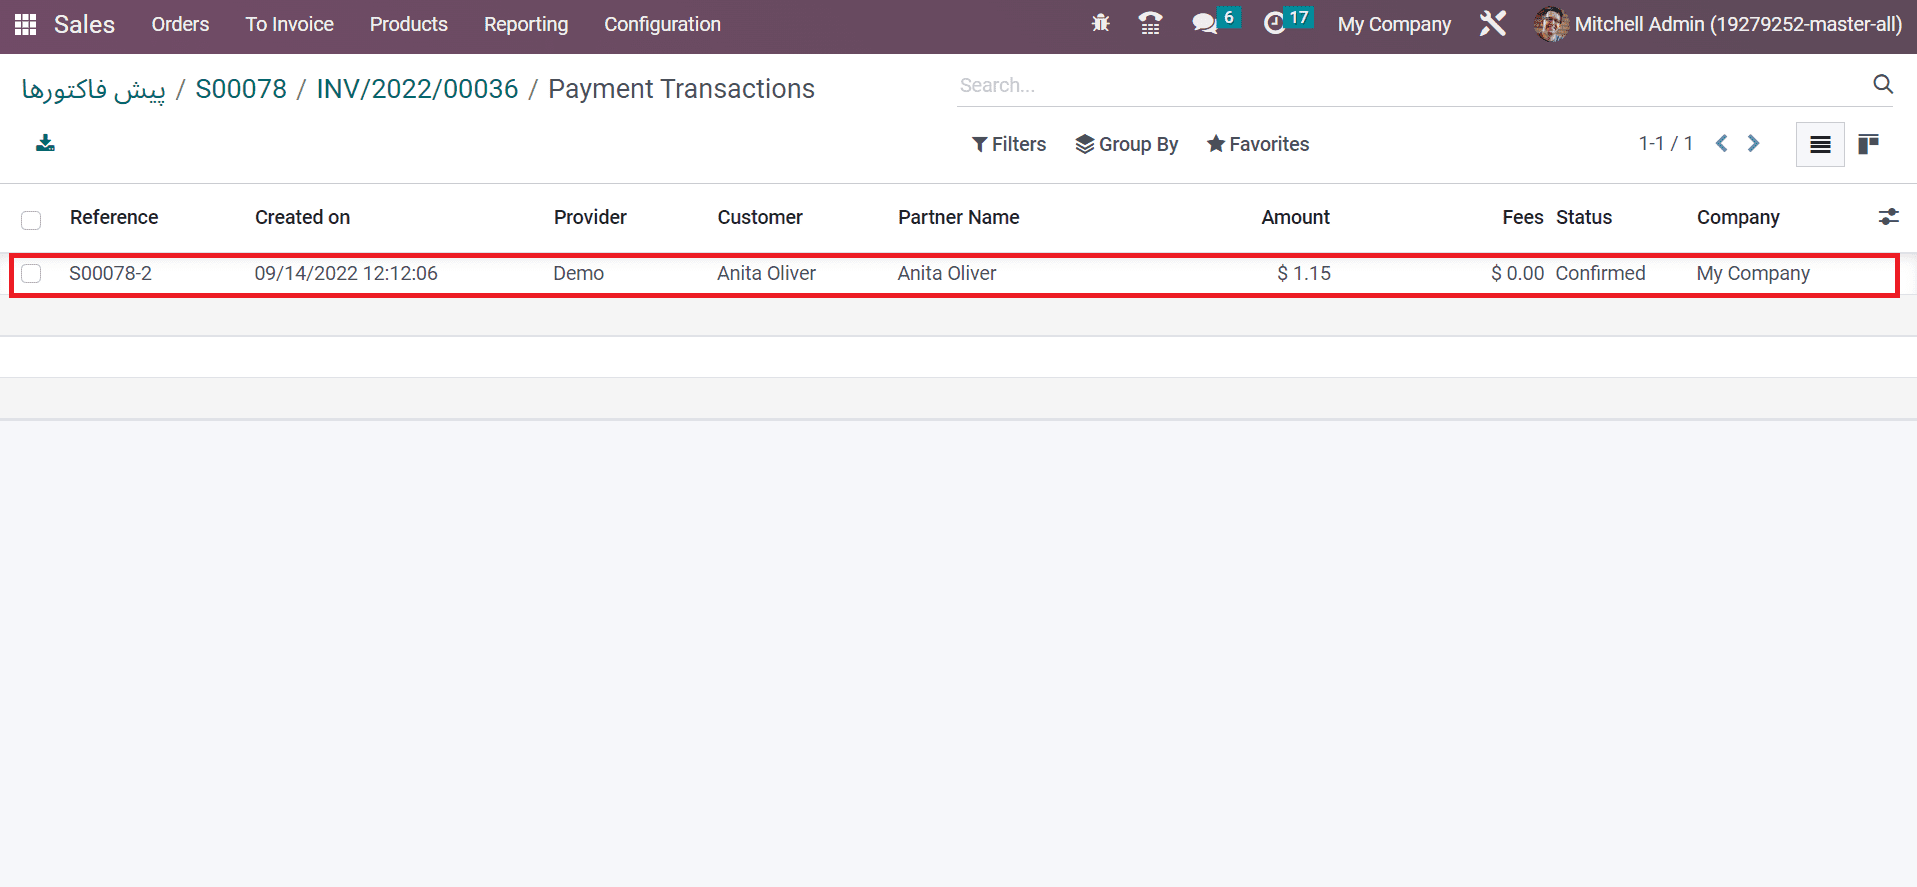
Hence, making an invoice automatically after a payment transaction is easy.
A company automatically improvises the invoice procedures using the Odoo 16 Sales module. You can efficiently process online payments for a product and develop invoices with the help of ERP software. Business Sales growth paves the way through invoice management in a company.


