The Project module in Odoo is suitable to manage all types of projects and project-related activities in a smooth manner. It is easy to create new projects, track their progression, split them into subtasks, assign them to employees, and many more operations using the efficient tools in this module. This module will be a smart solution for the management of projects in your company.
You will get a complete overview of all ongoing projects on this module and it will help you to attain every minute information about the configured projects.
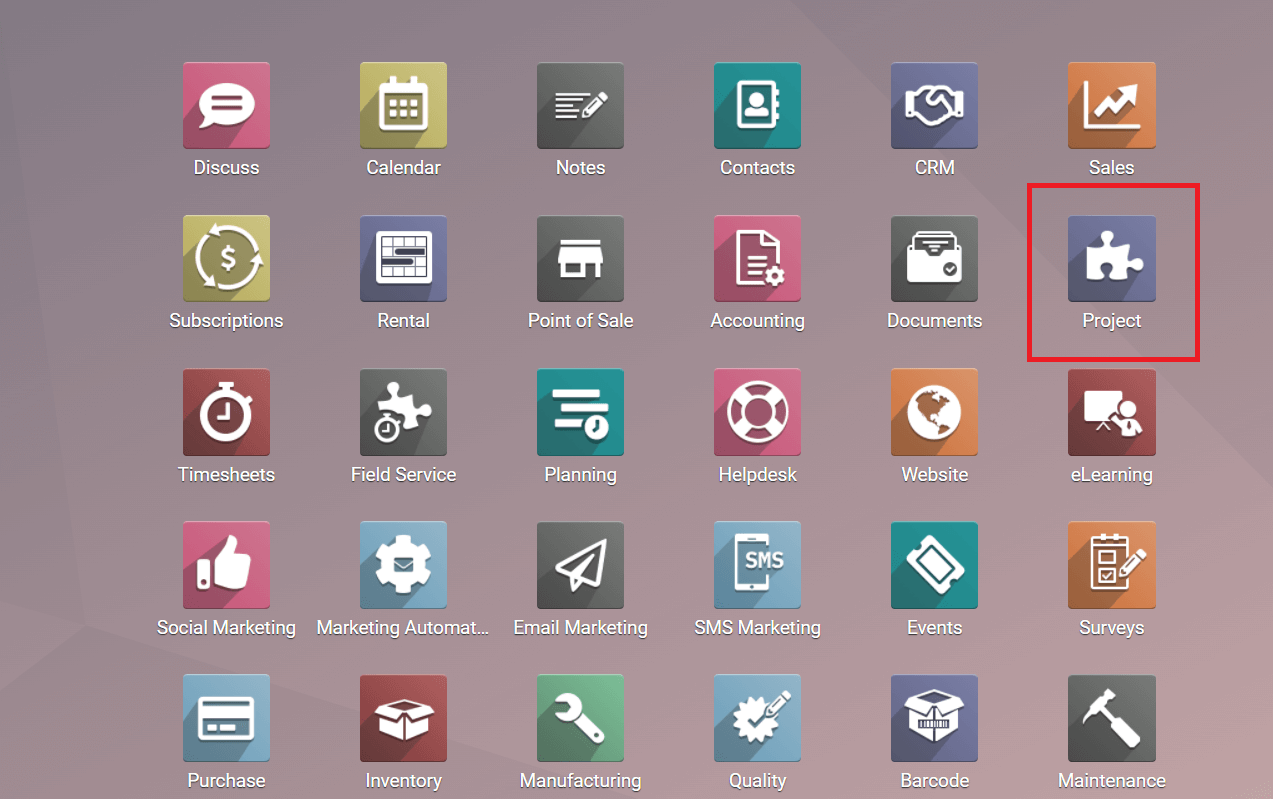
You can select the Project module from the home dashboard of Odoo. By doing so, Odoo will direct you to the main dashboard of the module.
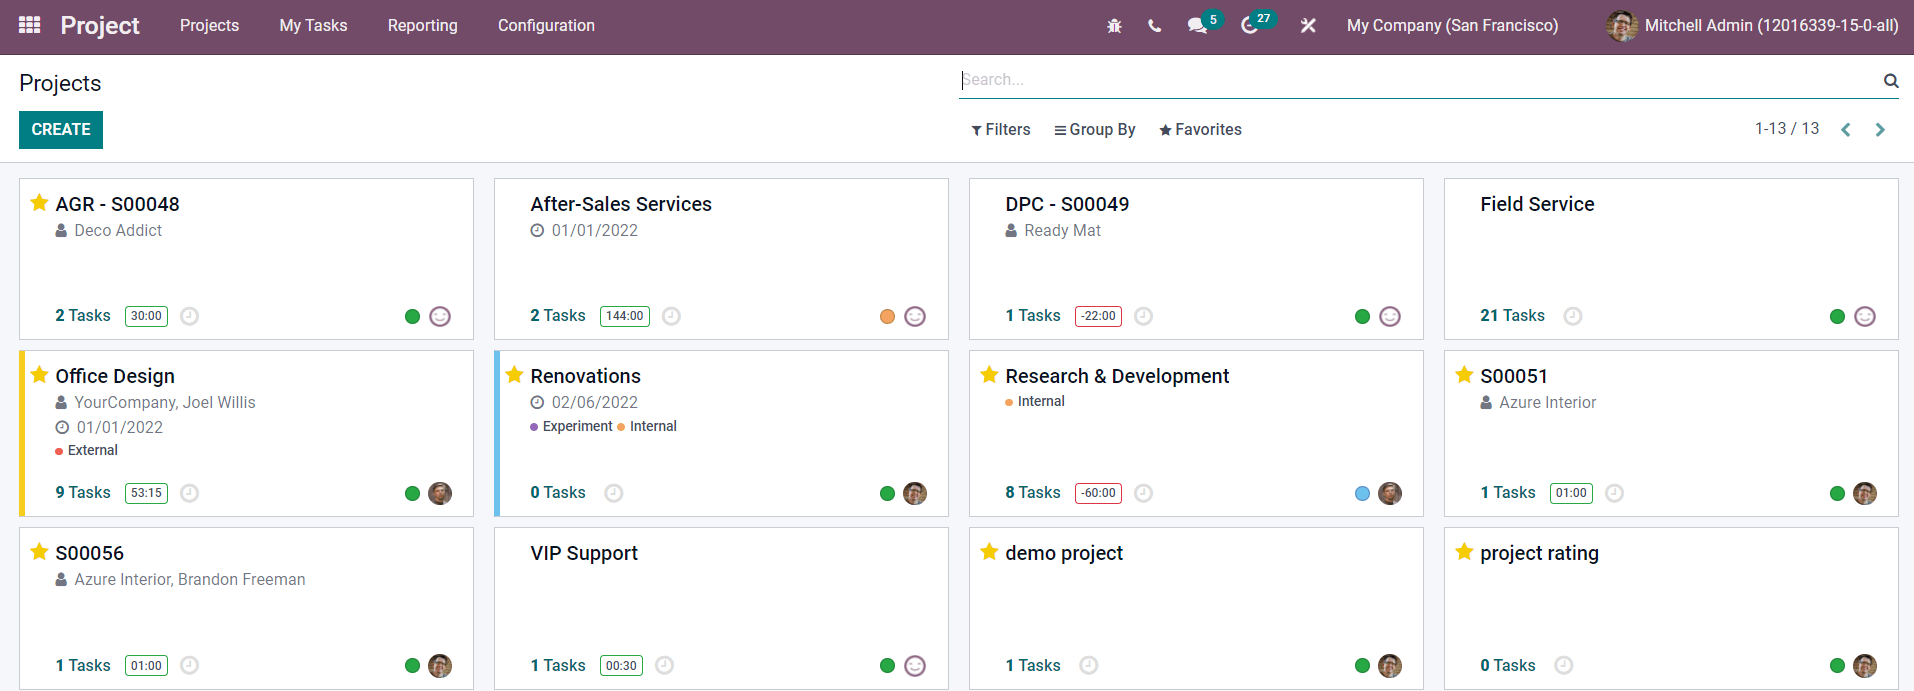
The dashboard displays all projects created in this module. You can use the Filters and Group By options to categorize these projects using the default as well as customizable options. Projects on this platform are arranged in separate tabs along with the details of the name of the project and customer. The number of tasks assigned in each project can be seen on these tabs. It will also show the remaining hours allocated to complete the project.
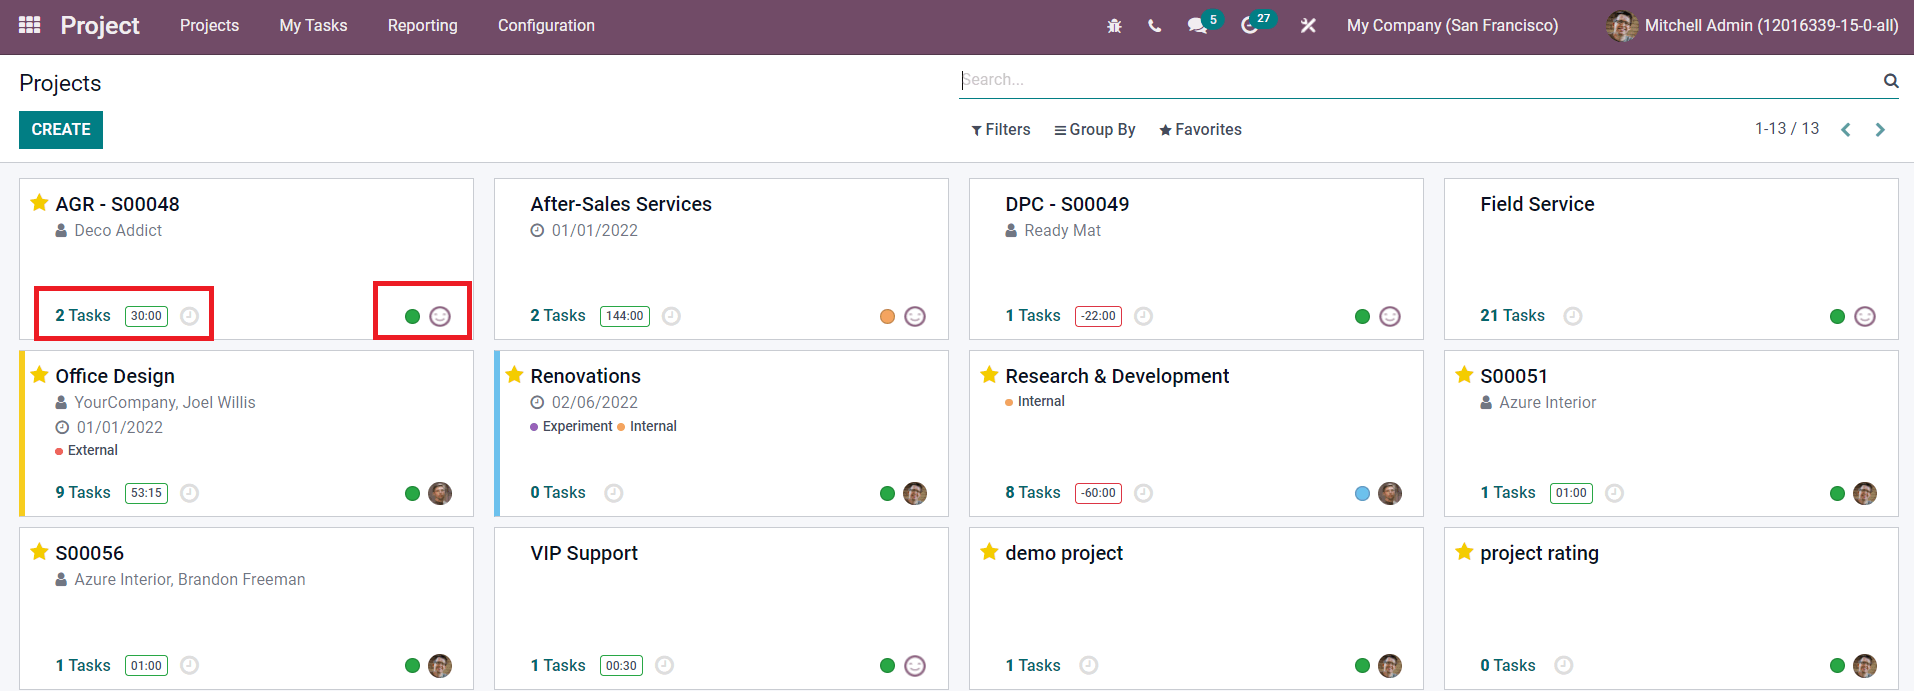
You can see small dots on each project in various colors as shown in the image above. These colored dots are used to define whether the project is on track, off track, blocked, or at risk. To schedule activities concerning the project, you can use the small clock icon available on each project tab.
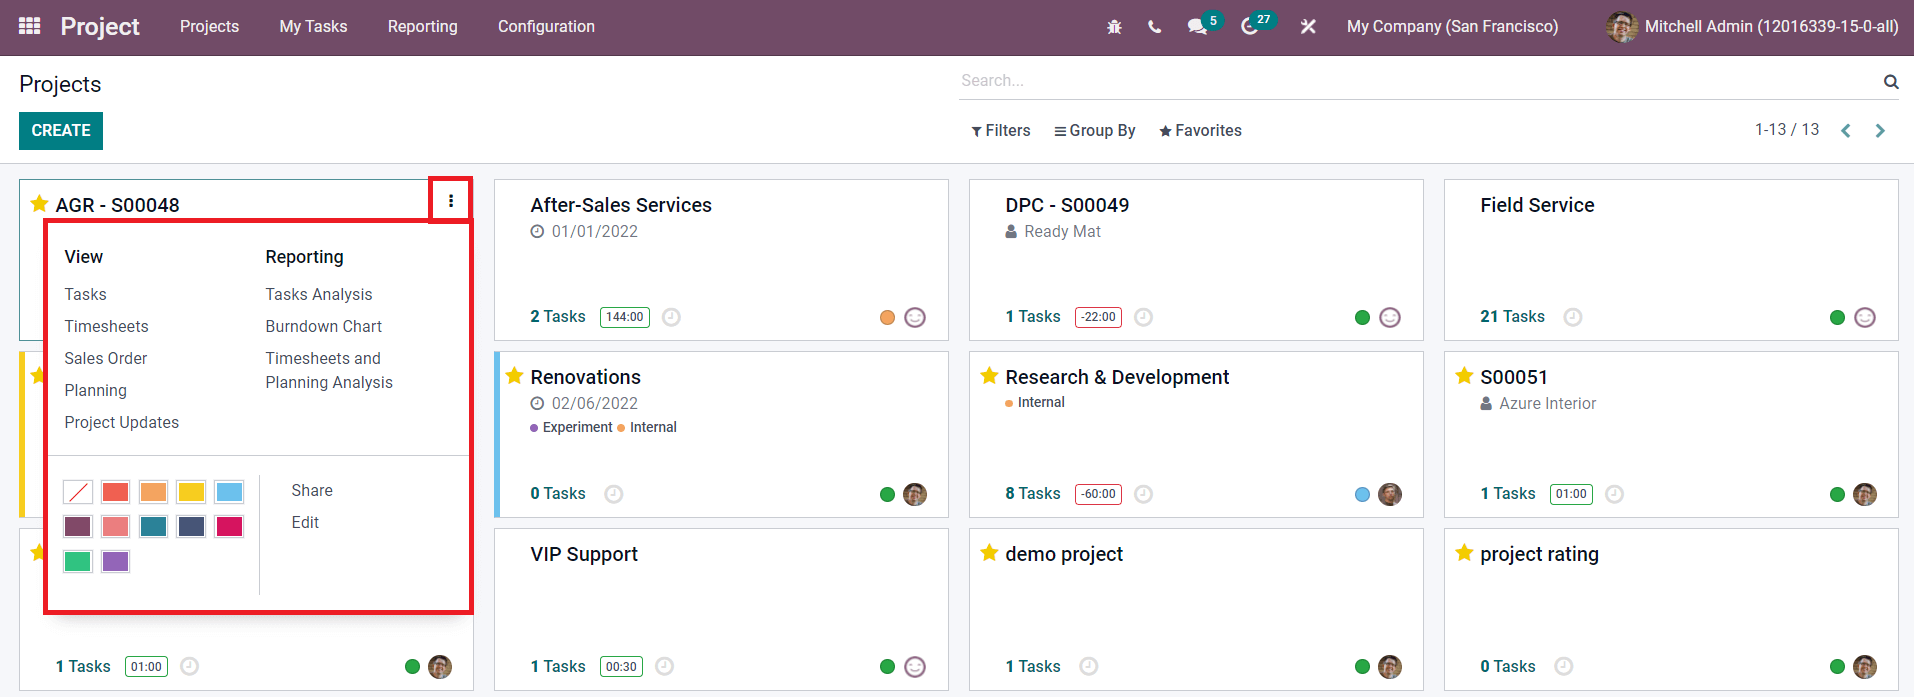
Click on the three vertical dots given on the top right corner of each project to get the options to view Tasks, Timesheets, Sales Order, Planning, and Project Update. You will also get Reporting options in this menu which will help you to generate reports about Tasks Analysis, Burndown Chart, Timesheets, and Planning Analysis. You can use the Share and Edit options in this menu to share and edit the corresponding project.
Now, we will look at how to create a new project in this module.
You can use the Create button from the project dashboard to create a new project. After clicking this option, a pop-up window will appear as shown below.
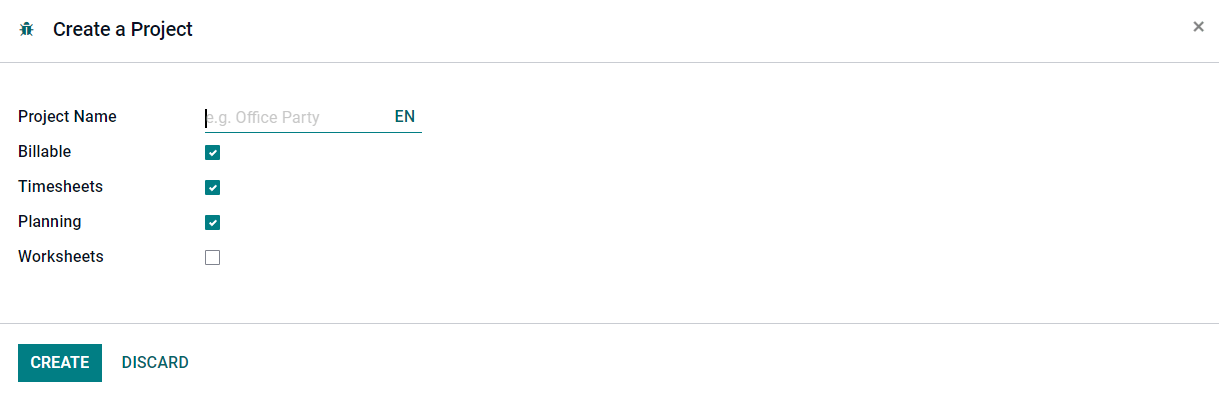
The name of the project can be mentioned in the Project Name field. Then, you will get Billable, Timesheets, Planning, and Worksheets options to activate. The Billable option will help you to invoice your time spent on this project and material from tasks. To keep a track of the time spent on the project, you can enable the Timesheets option. The Planning option can be used to enable planning tasks on the project. You can easily configure worksheets on each task of the project by activating the Worksheets option. After this, click on the Create Button. You will be directed to a new window where you can create new tasks for the project.
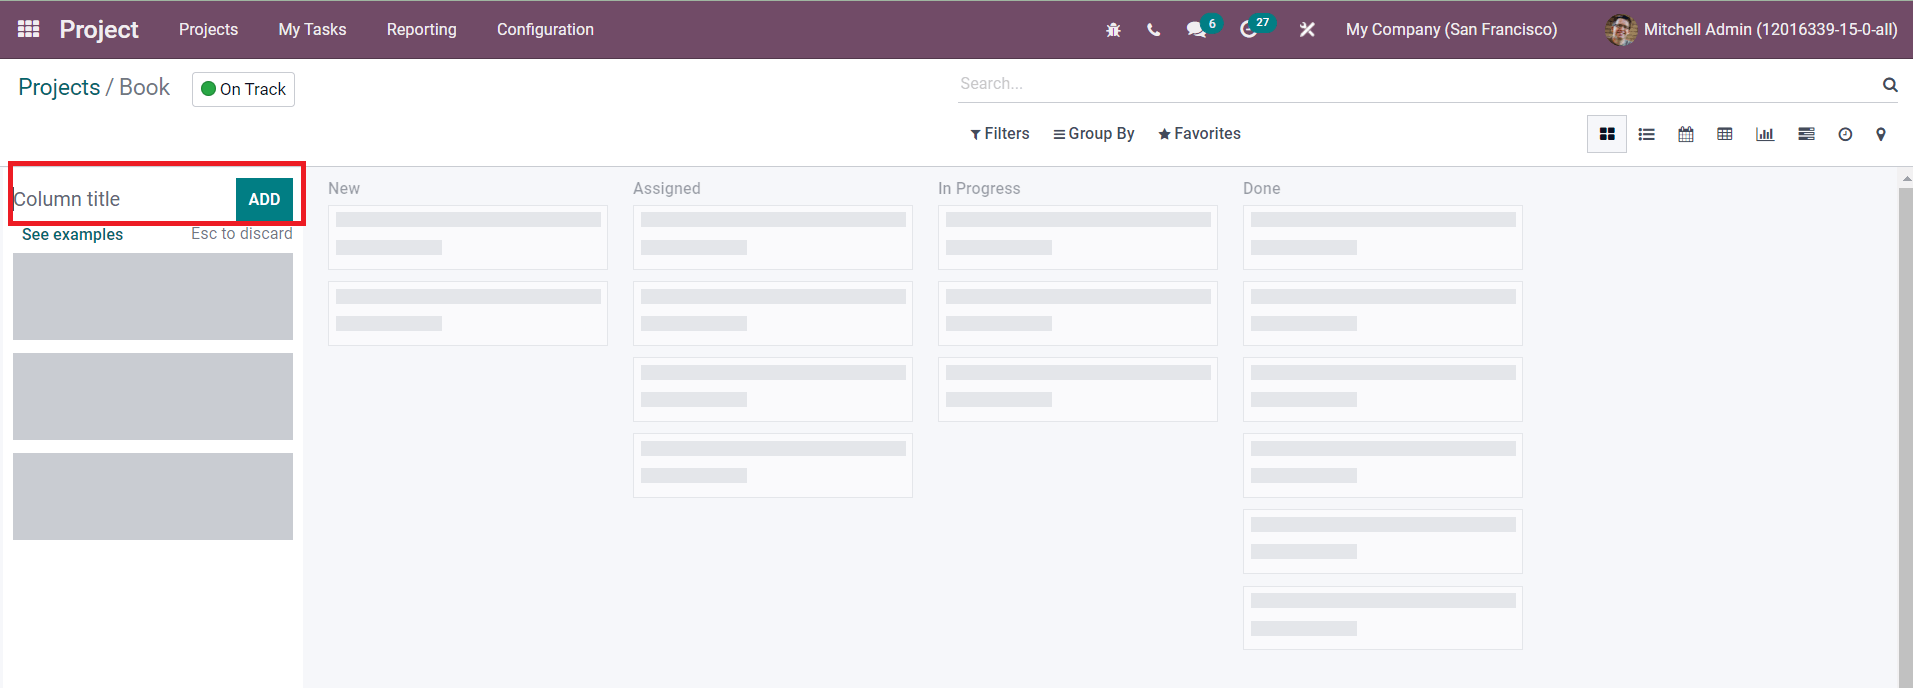
On this platform, you can assign different stages for the tasks which will help you to understand the progression of the project. This is how we create new projects from the main dashboard of the Project module. You can also create new projects by selecting the Projects option from the Configuration menu.
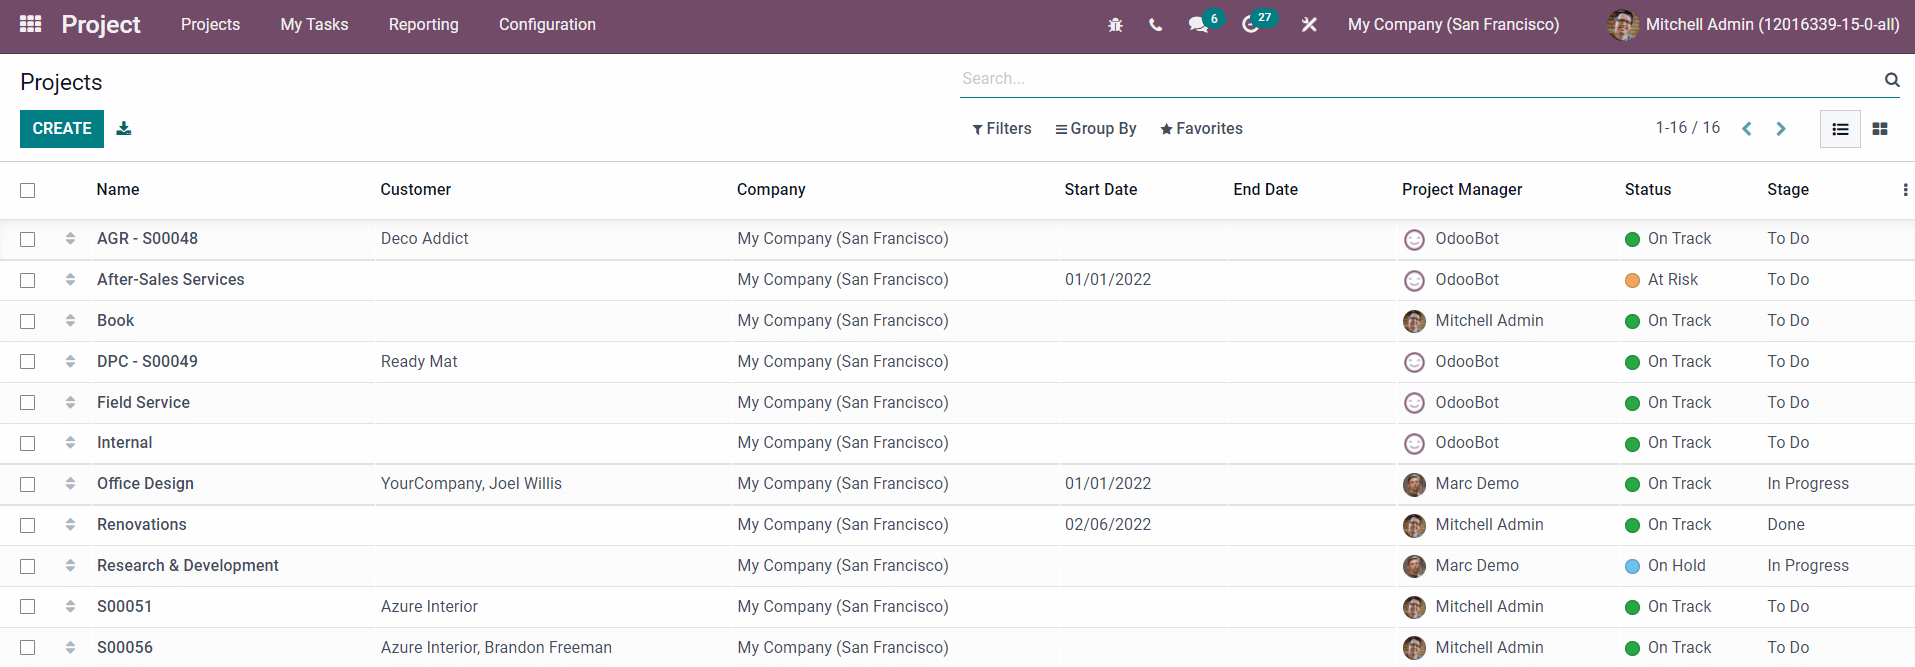
The List view of this platform will show the list of all configured projects just like we observed in the project dashboard. The preview of the list includes the name, Customer, Company, Start Date, End Date, Project Manager, Status, and Stage of each project. To create a new project, you can use the Create button.
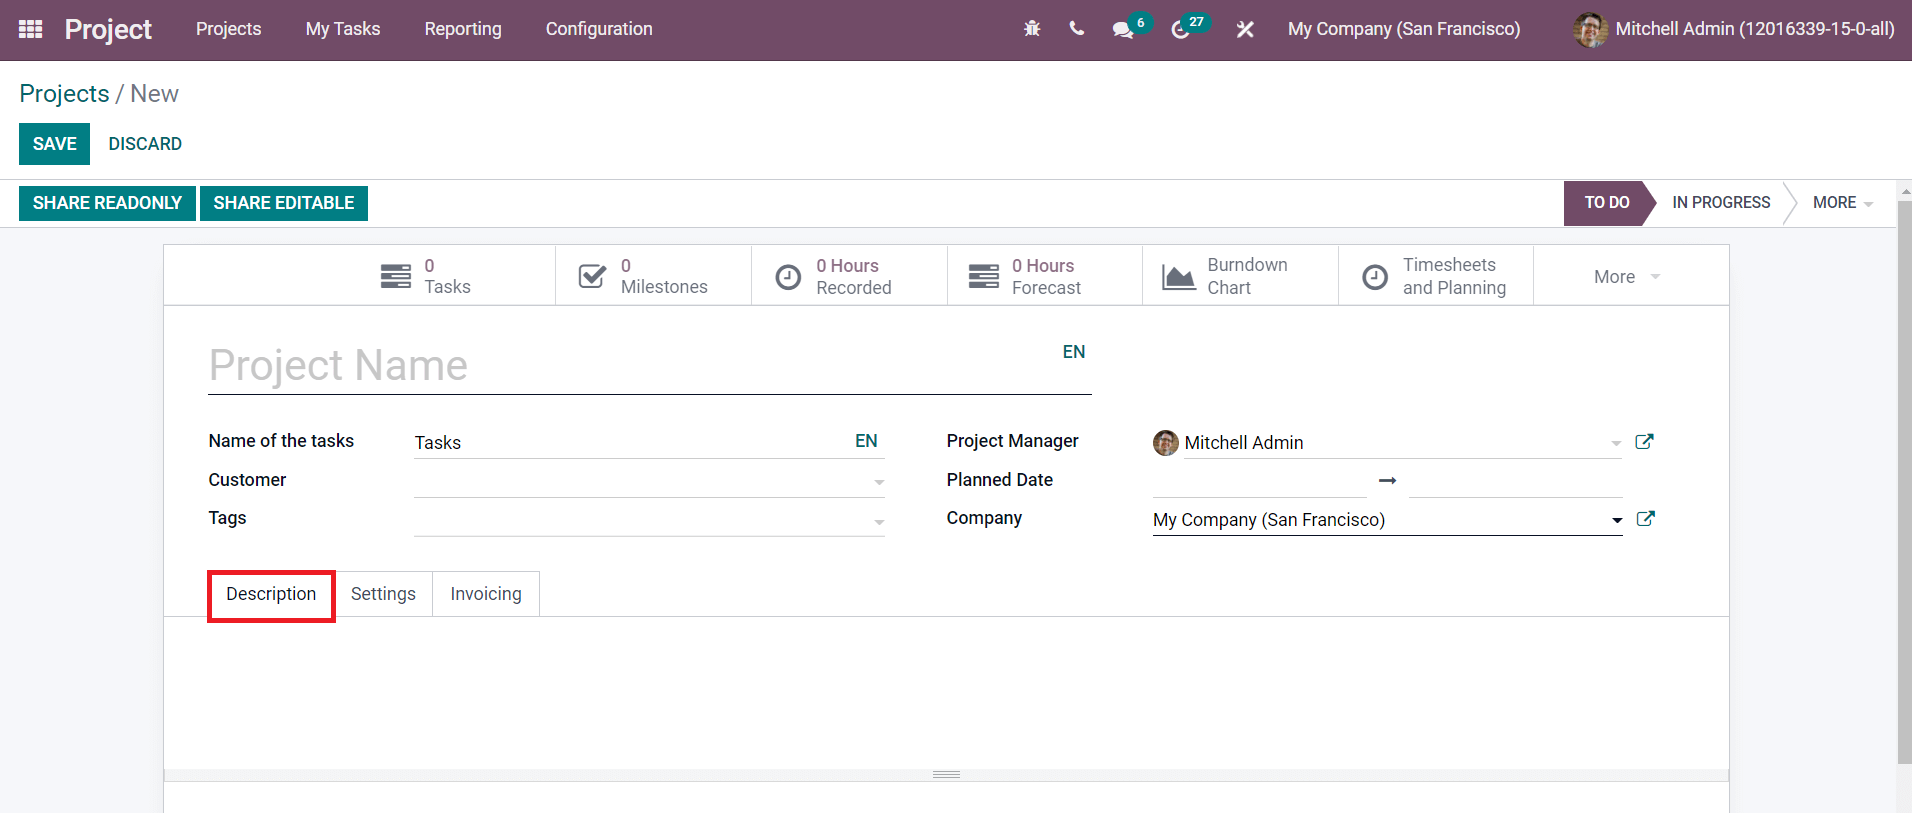
You can add details about the new project in this window. Mention the name of the project, Name of the Tasks, Customer, Tags, Project Manager, Planned Date, and Company in the corresponding fields. Under the Description tab, you can add additional information regarding the project. The Settings tab includes various options to configure to ensure the advanced performance of the project.
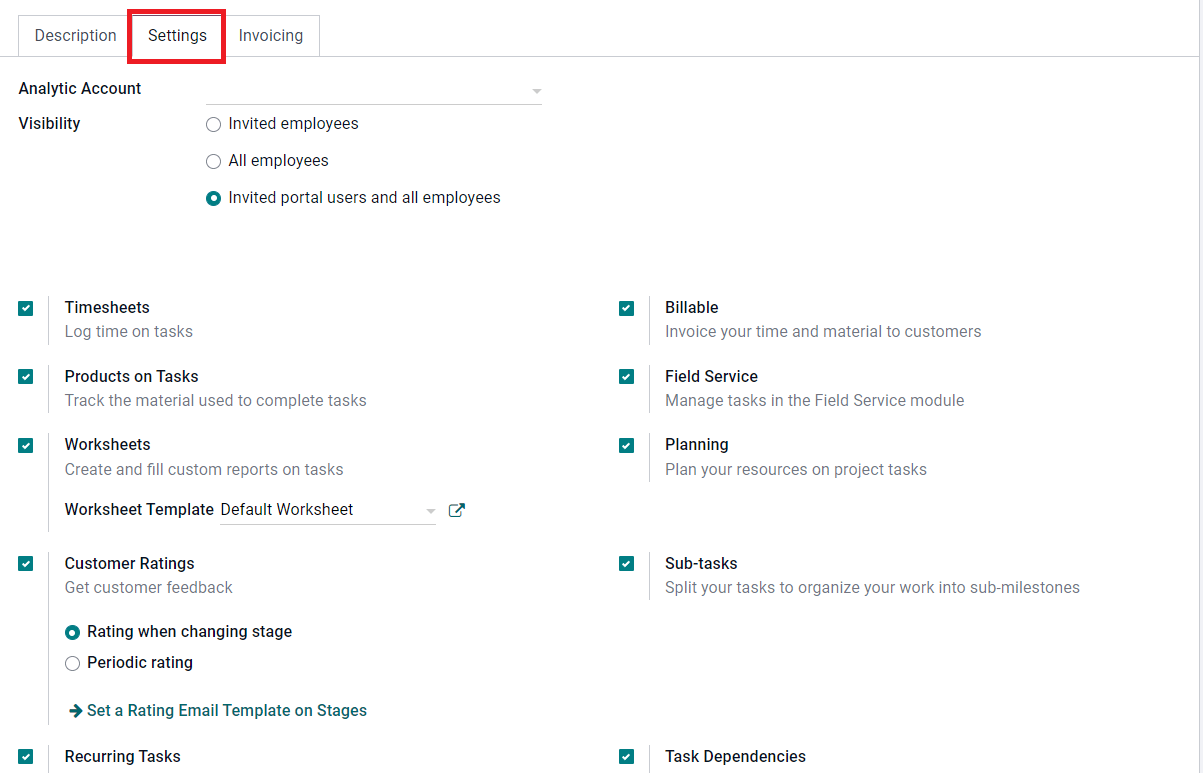
To record the cost and revenue of your project, it is important to link an analytic account to your project. In the Analytic Account field, you can mention the account for financial management. You can set the Visibility of the tasks of this project as Invited Employees, All Employees, or Invited Portal Users and All Employees. To record the exact time spent on this project by assigned employees, you can activate the Timesheets option. The Products on Tasks option will help you to keep a track of the products and materials used to complete this project. You can enable the Worksheets option to configure worksheets for this project. It is also possible to add a Worksheet Template in the corresponding field which can be changed later individually on each task in this project. In order to get feedback from customers, you can activate the Customer Rating Option. You can set this option as Rating when changing stage or Periodic rating. You can set a Rating Email Template on stages for which you want to get customer feedback.
For regular activities, you can repeat the task in a specified interval of time by activating the Recurring Tasks option. The Billable option will help you to generate invoices on the time and material used to complete each task in a project. To manage tasks in the Field Service module, you can activate the Field Service option. Similarly, for enabling planning tasks on the project, activate the Planning option. It is possible to split each task into subtasks by activating the Sub-tasks. The Task Dependencies option will help you to determine the order to perform tasks.
After Activating the Billable option, you will get an additional tab called Invoicing in the project creation window where you can mention a sales order item to which this project is linked.

You can add Sales Order Items of assigned employees in this tab to which their timesheet entry will be added. This will help you to define the rate at which an employee’s time on the project is billed. After completing adding details in the project creation window, click on the Save button.
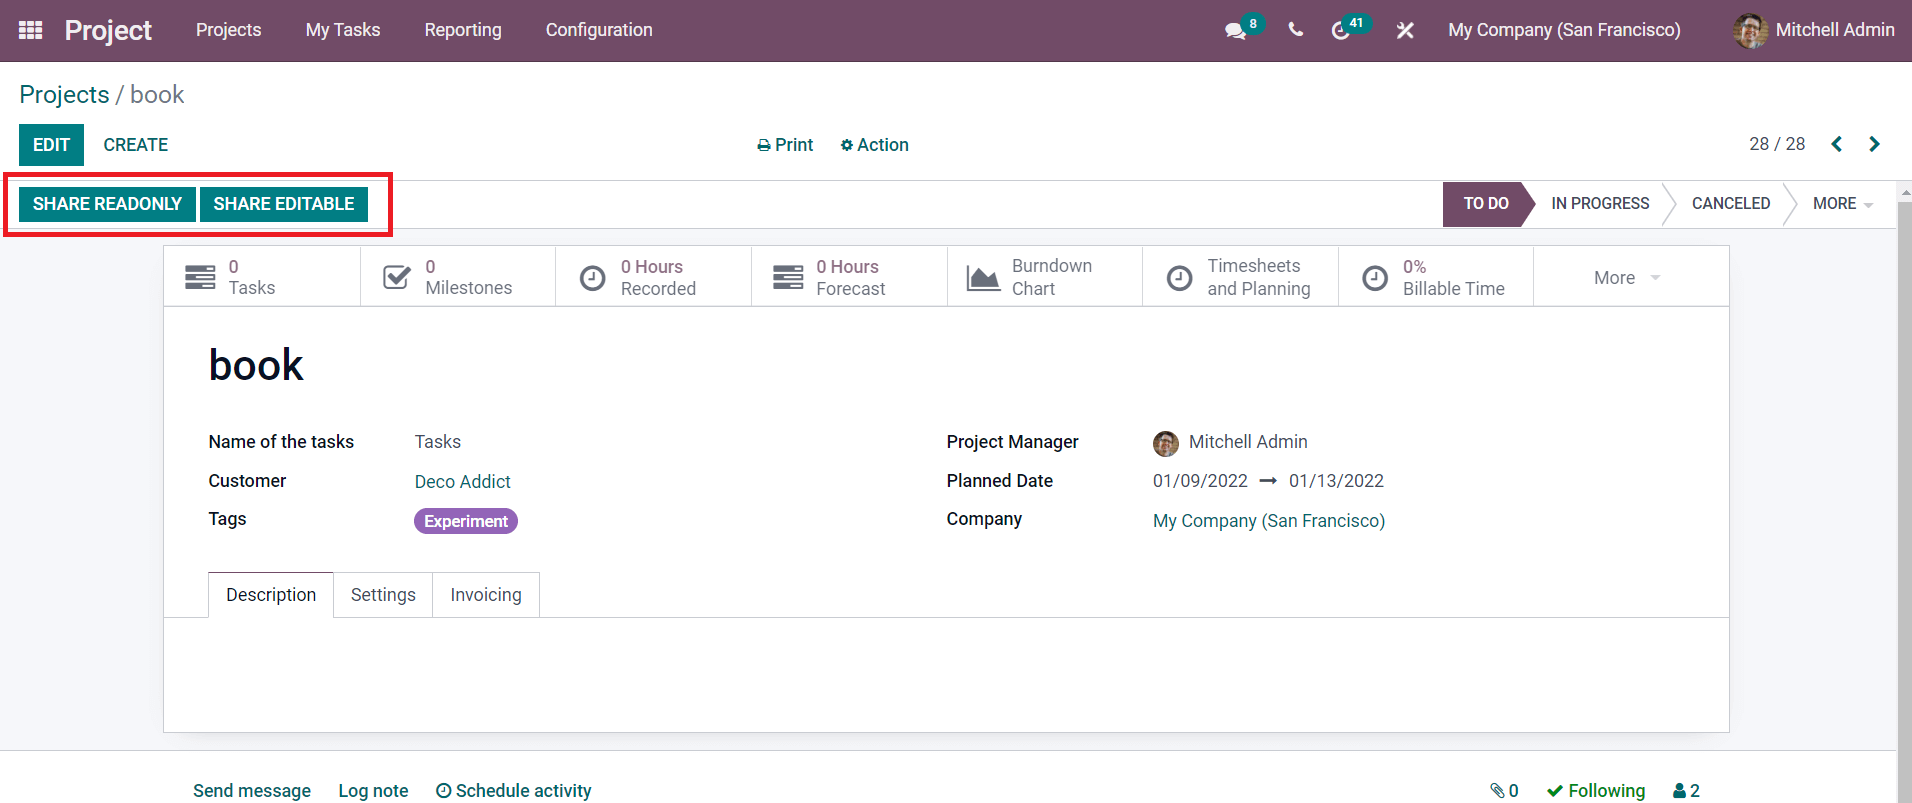
Using the Share Read Only button, you can share the project with customers and co-workers. This option only provides reading access to the recipients. To provide editing access, you can share this project using the Share Editable button.
We discussed two methods of creating projects in the Project module in Odoo 15. You can effortlessly create and manage new projects and split them into various tasks and sub-tasks in this module in an organized manner.


