Finance management is one of the most significant and challenging tasks in any company. If a business deals with sales, purchases, or both, it may need to deal with various payment methods. Because when a client needs to pay a certain amount to our organization, they can select a convenient method for them. As a result, the company must adapt to that payment option to preserve a positive client connection.
This implies that the business must handle any transaction involving various payment methods. Odoo, as everyone knows, helps manage all forms of payment methods such as cash, bank, payment terminals, client accounts, and so on.
However, another payment option is Cheque, which is very similar to the first.
Customer payments are sometimes made on checks and other times via post-dated reviews.
When a customer writes a check to a company for a future date, the check is known as a Post Dated Check (PDC). The check can be cashed or deposited on the check date.
If a consumer pays with a post-dated check, the payment is completed but not shown until the funds are credited to the company’s bank account. So, while accounting can be hard, Odoo can help companies deal with the Post Dated Check approach using the Accounting module.
Let’s look at how PDC can be managed with introductory features in Odoo V14.
We can create a new Journal for post-dated check transactions. To do so, go to the Accounting module and select Configuration. When one clicks on it, a list menu appears. To view journals, select the Journal option from the drop-down menu.
: Configuration > Journal
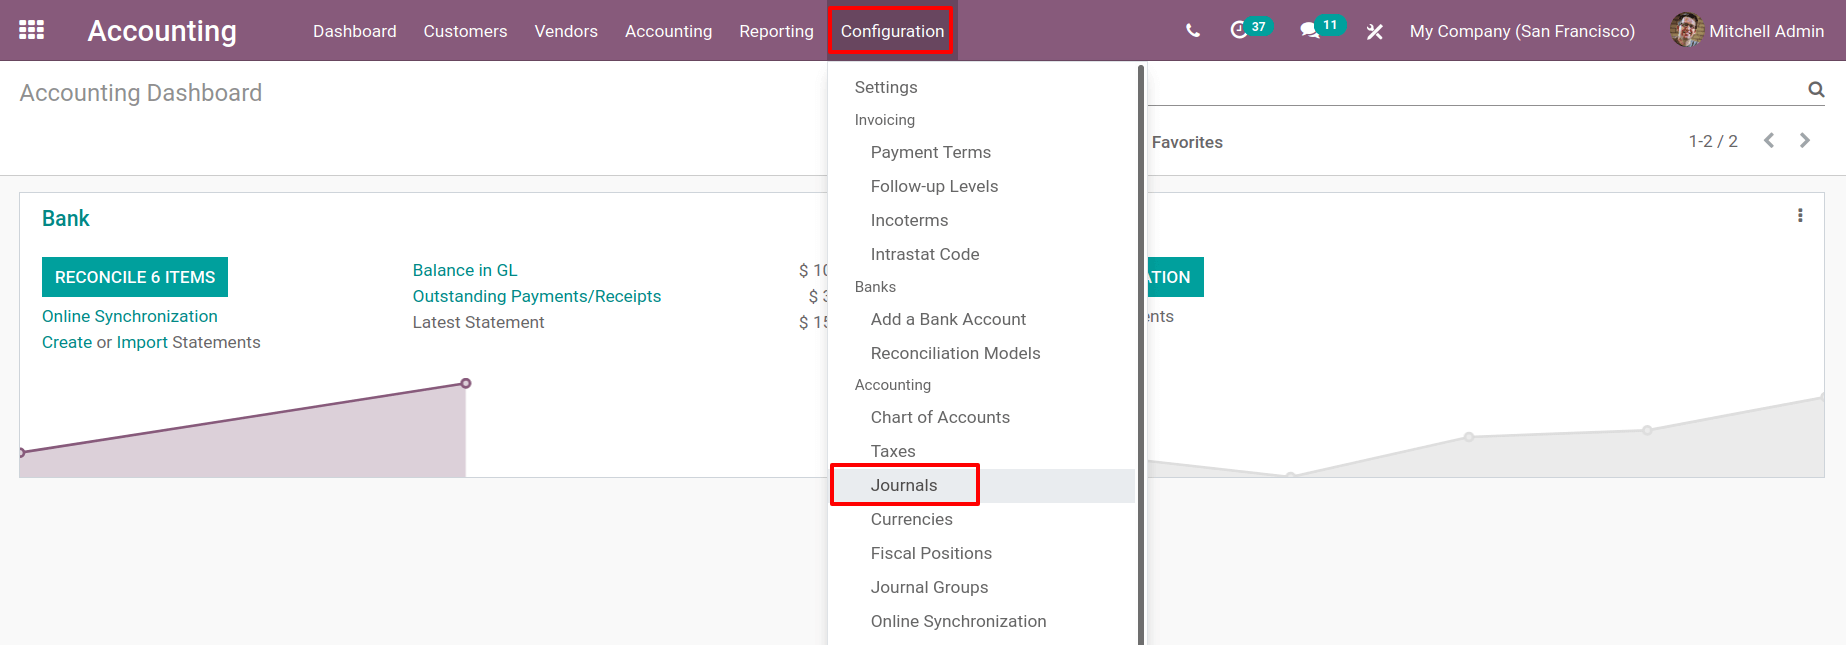
So far, many types of journals have been created, such as Sales Journal, Purchase Journal, Bank Journal, Cash Journal, etc.
To begin a new journal, click on the Create button that is available.

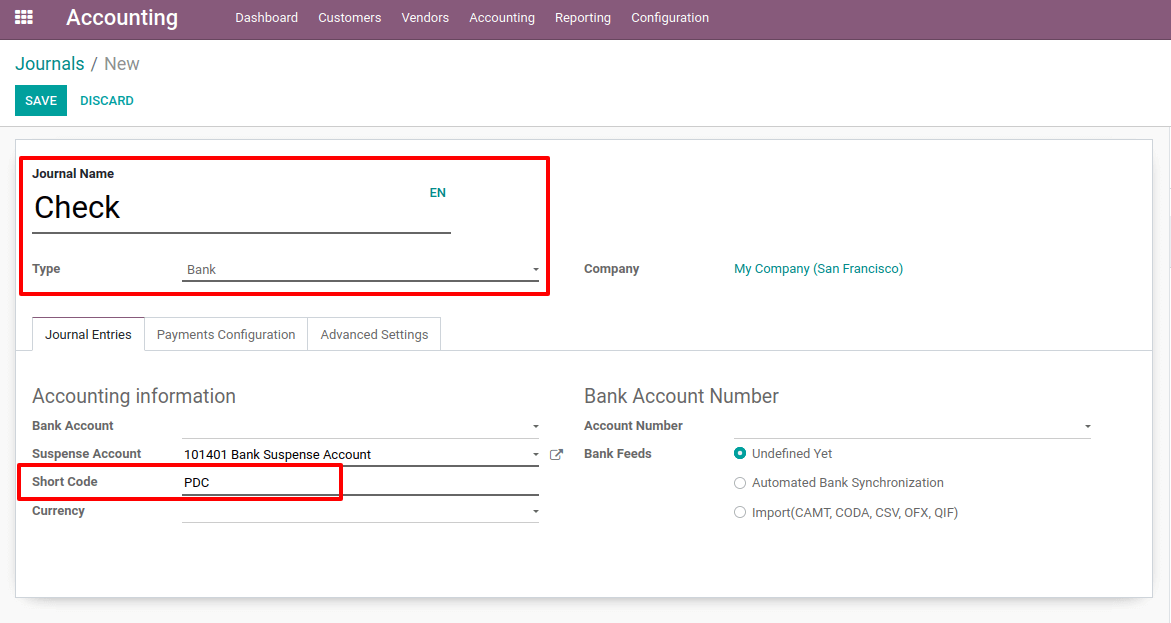
To create a new journal, in the creation window fill up the Name, Type, Company, Shortcode, and Account information such as Account Number and define the Bank Feeds information.
A short code is simply a name for a display. By default, this short code is used as a prefix for all journal entries in this journal.
The journal’s name is Check, and the short code is PDC.
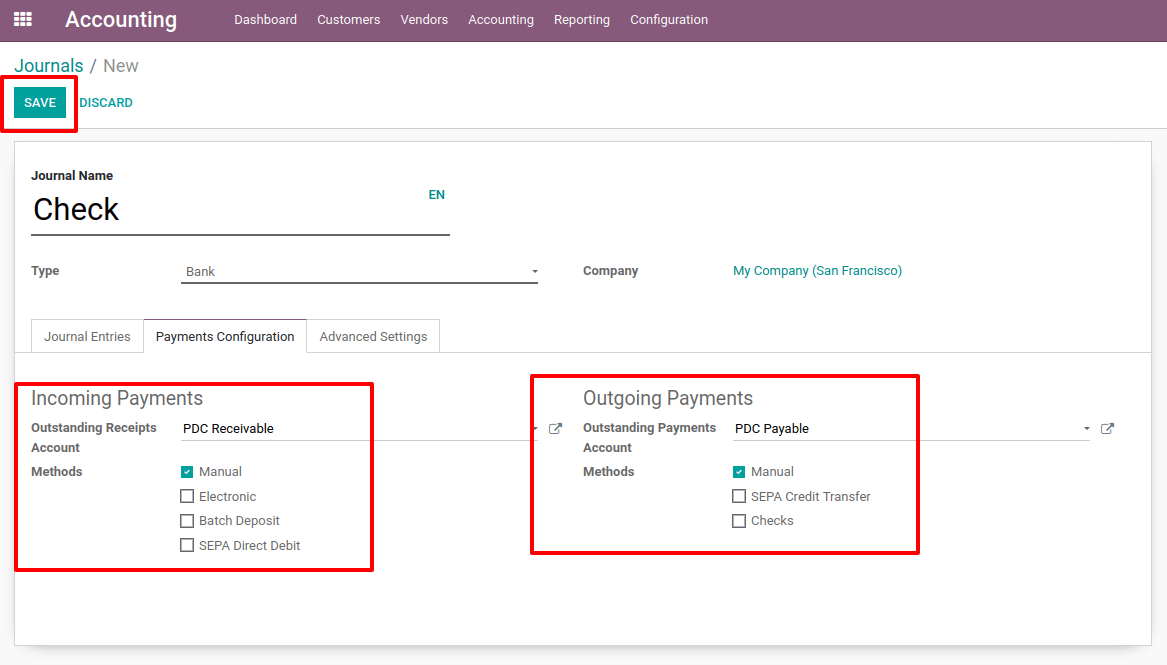
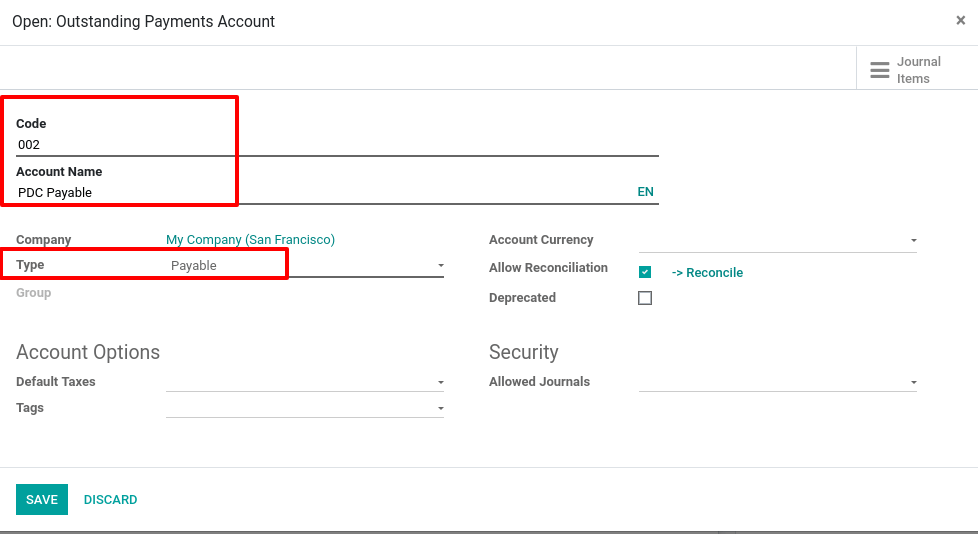
A Payment Configuration tab is available. From there, one can add details for incoming and outgoing payments. Mention the Outstanding Receipts account as ‘PDC Receivable’ under Incoming Payments and the Outstanding Payments Account as ‘PDC Payable’ under Outgoing Payments.
Select payment options as well. The checkbox displays several payment methods such as manual, electronic, batch deposit, SEPA Direct Debit, etc. The way to choose them was checked.
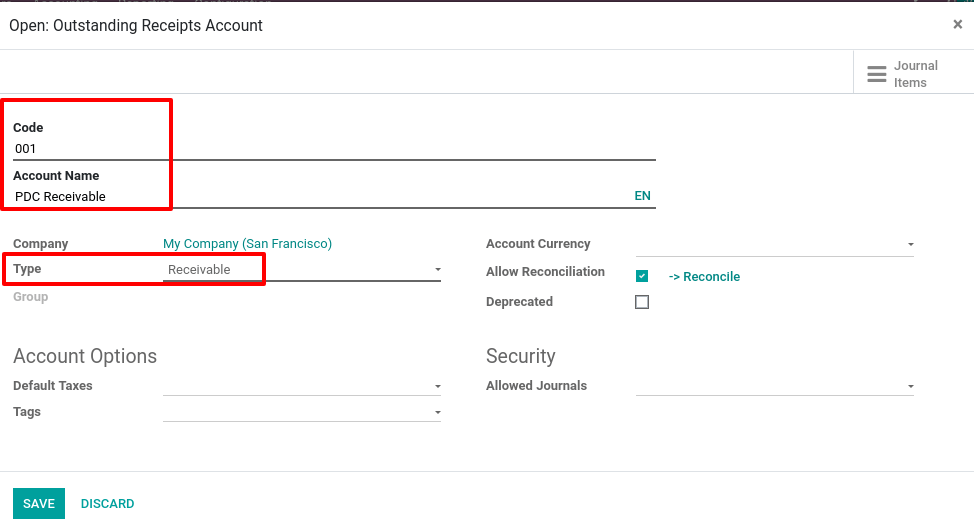
Outstanding Receipt Account: Incoming payment entries caused by invoices and refunds will be posted to the Outstanding Receipt Account and shown in the bank reconciliation widget as blue lines. The concerned transaction will be reconciled with entries on the Outstanding Receipt Account during the reconciliation operation rather than the Receivable Account.
The Outstanding Receipts account should be a Receivable account.
Outstanding Payment Account: Outgoing payment entries generated by Bills and Credit Notes will be posted to the Outstanding Payment Account and appear as blue lines in the bank reconciliation widget. The related transaction will be reconciled with entries on the Outstanding Payment Account rather than the Payable Account during the reconciliation process.
An outstanding Payments account should be a Payable account.
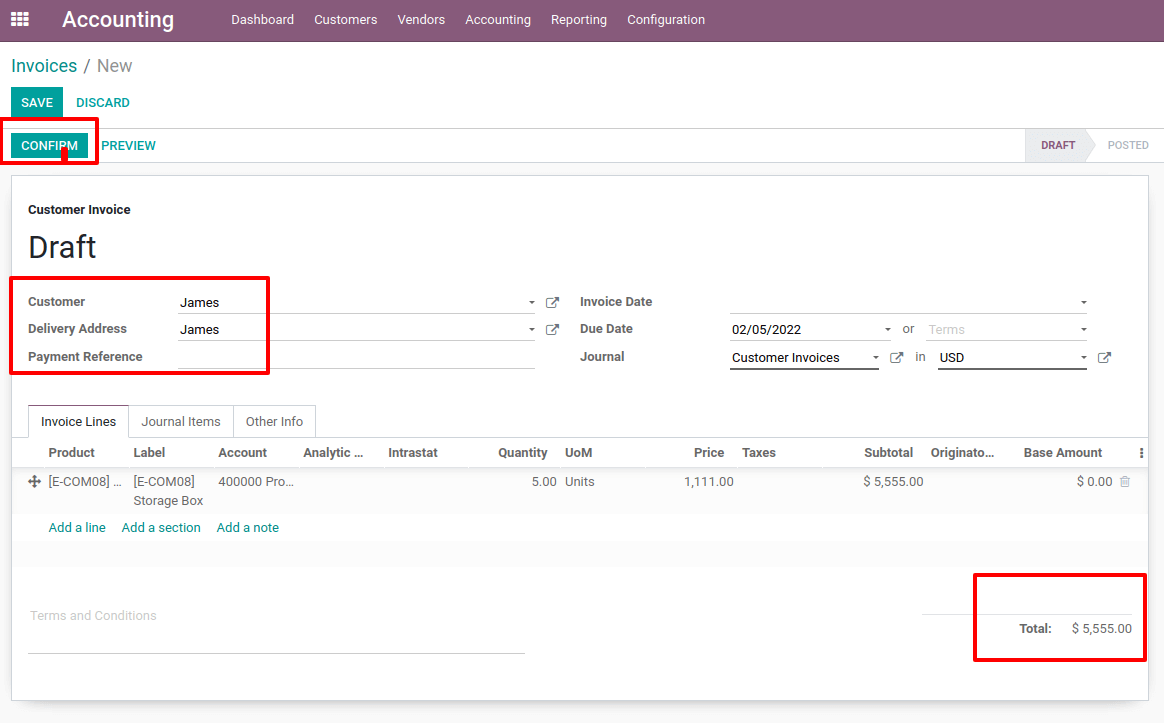
Let’s make an invoice for a consumer. James, the customer, creates an invoice for $5555.
The payment deadline has been established for two days following the invoicing date.
Add a product with the required quantity and unit price to the invoicing line. The invoice should then be confirmed.
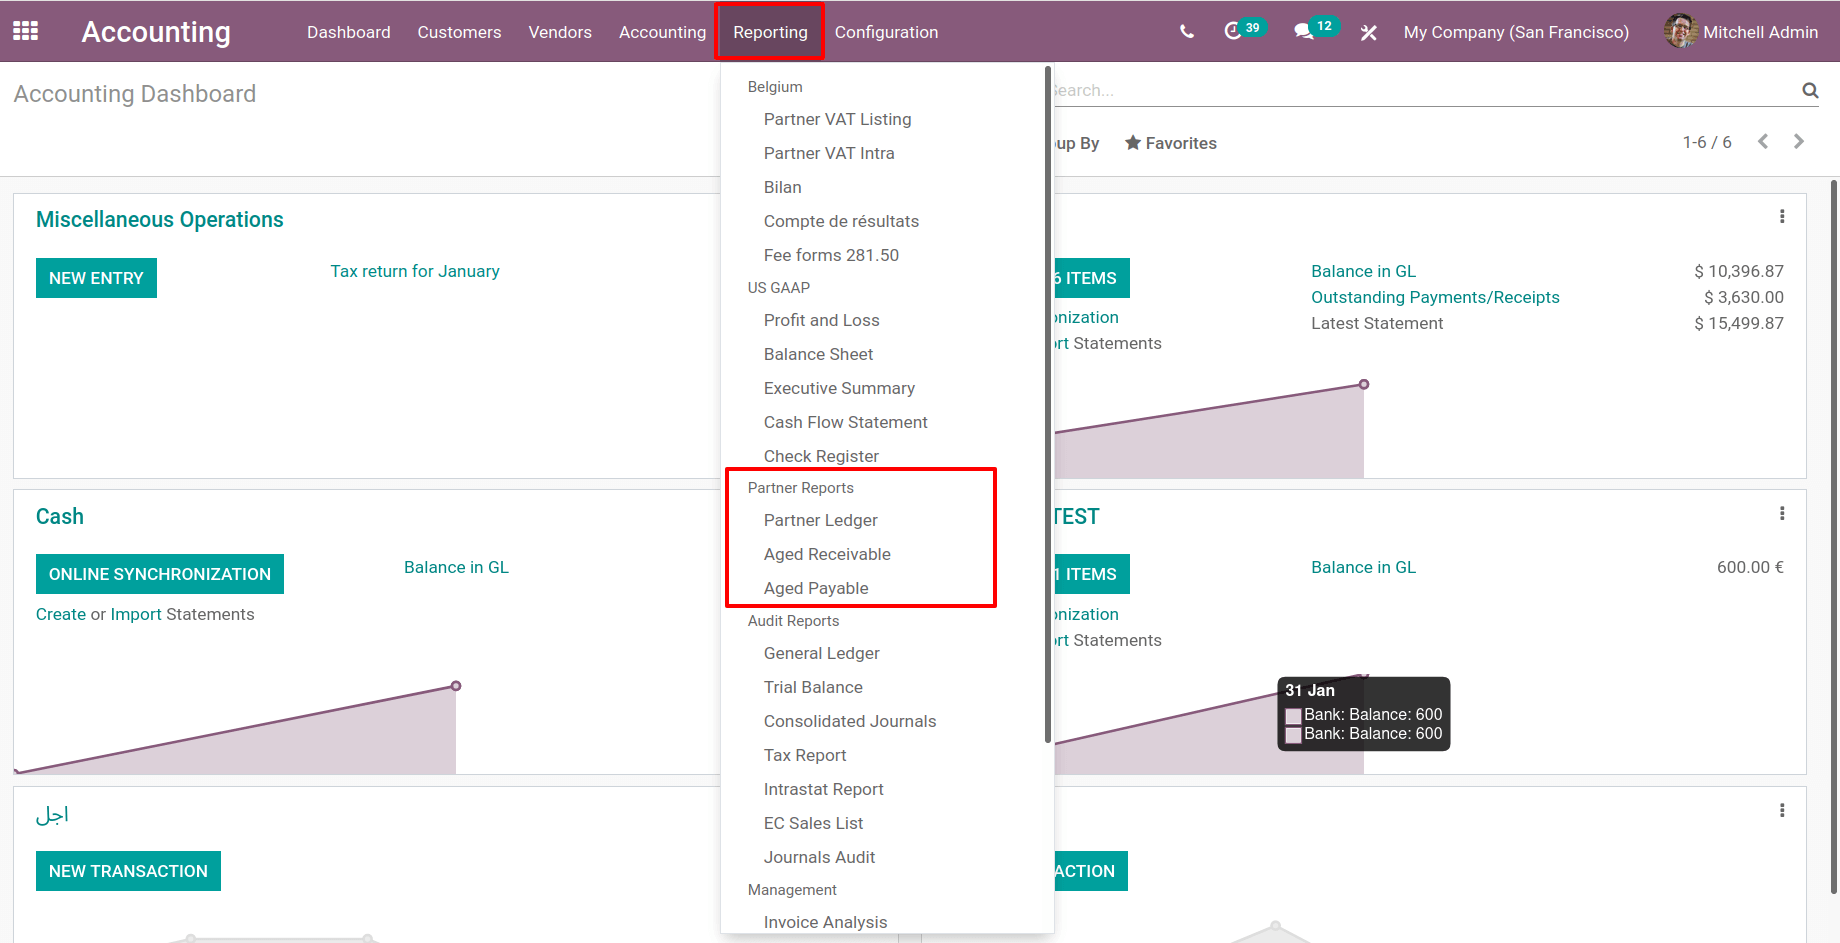
The Reporting tab displays many forms of accounting reporting, such as Audit Reports, Ledgers, and so on, and a Partner Reports option.
The Partner Ledger, Aged Receivable, and Aged Payable are included in Partner Reports.
Check the partner ledger of James. The initial balance in the partner ledger is zero.
On the invoice, $5555 is debited, and there isn’t any money credited to the account because the customer did not pay the invoice.
The customer’s balance is now $5555. As a result, the consumer will be required to pay $5555.

As a result, the customer must make payment to the company. So, let’s get down to business.
Now the customer is making payment. Select Payments from the Customer menu to make a new payment. There will be a list of all previously created payments, with the option to make a new one by clicking the Create button.

James, a new customer, makes a payment here. When establishing a recent payment, one wants to include payment type, Customer / Vendor name, Destination Account, Journal, Amount, Date, and Memo, among other things. There are two payment types: one is used while the company receives payment, and another is used when the company pays an amount to vendors.
The customer pays the company in this case. As a result, select Receive as the payment type.
As a result, the customer paid $5555. Since the customer is making a check payment, choose the journal ‘ Check,’ which we have created to record the check payments. Because this is a Post Dated Check, the check date is set to two days after the payment.
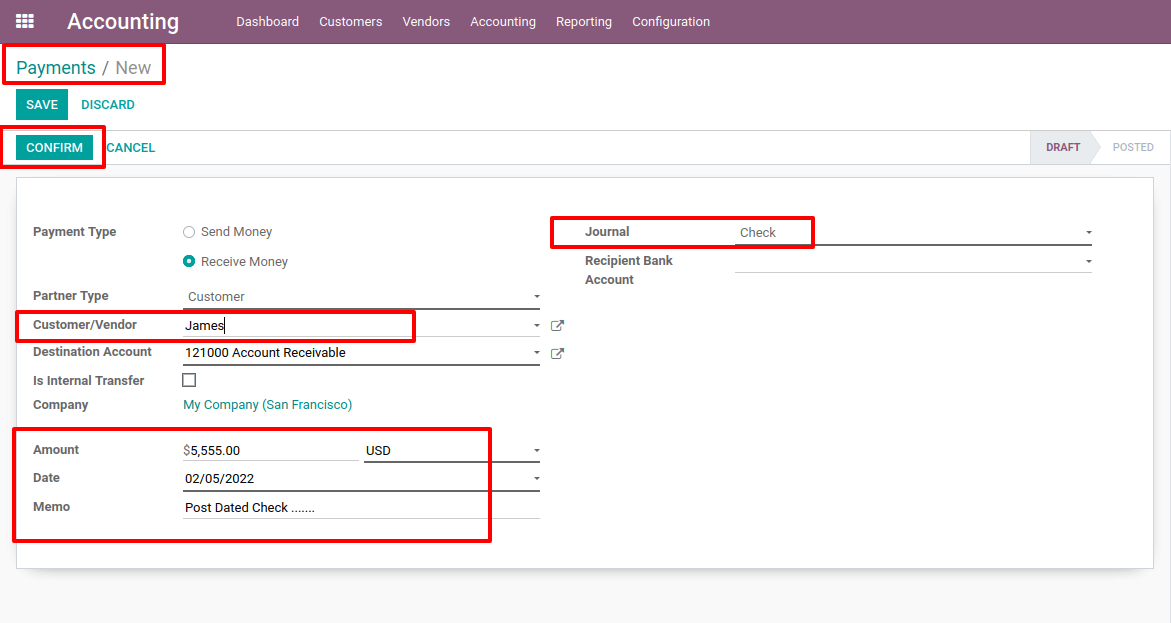
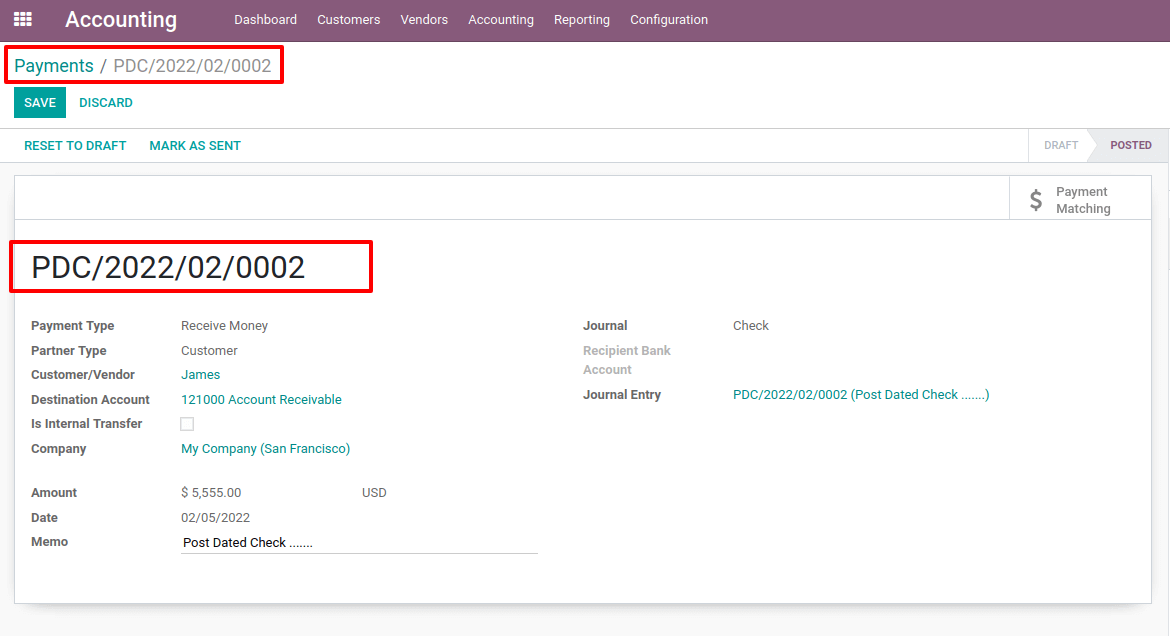
Then click on the Confirm button. Then the payment PDC/2022/02/0002 is created. Payment Posted.
From the Reporting tab, select the Aged Receivables Report. There is an entry for the customer. The customer has already paid. However, the invoice amount is in Aged Receivable. It’s because the customer paid with a check, which was written on a future date.

Check the ledger of the partner one more time. Following the payment, two additional entries were added. While comparing the two entries, one is $555, and the other is $-5555.
As a result, the overall effect is nothing. Because the buyer pays with a post-dated check, this is the case. As a result, the money is not credited to the bank account.

To produce a bank statement, go to Dashboard and select Create Bank Statement from there.

Add a reference number and the date to a bank statement. A transaction tab has been added.
There should be a date and a label, and fill in the partner’s information and the amount.
Then, with the computed value, update the ending balance.
Finally, save and post the bank statement that was generated.
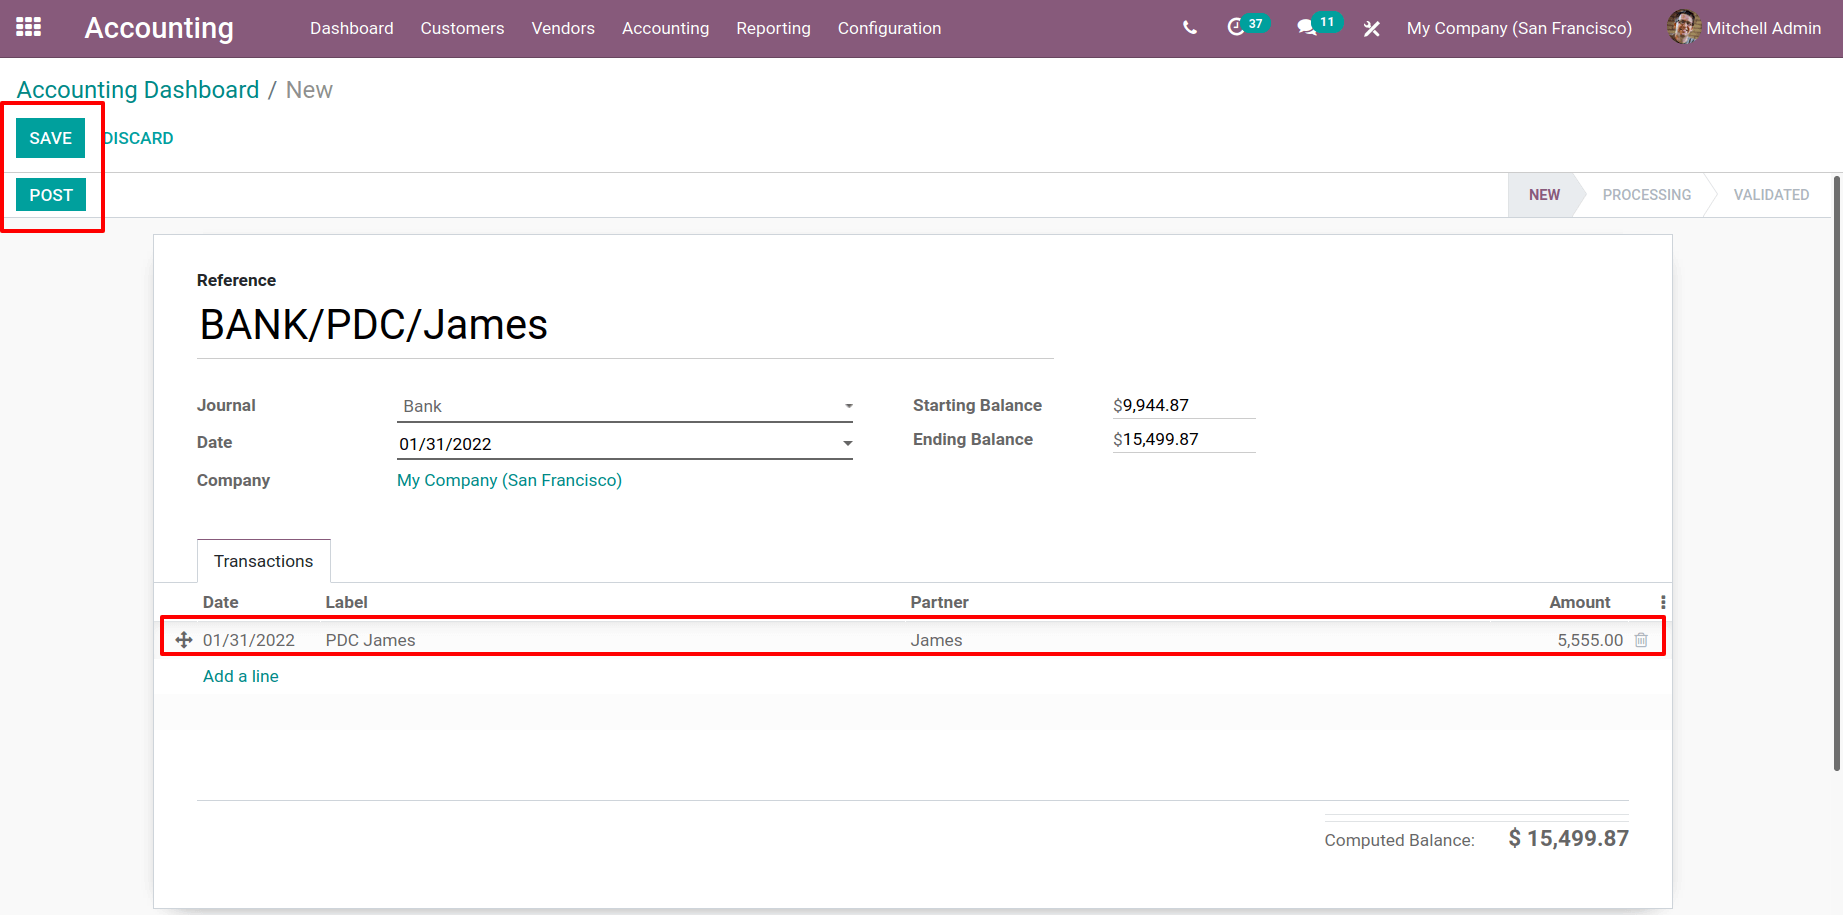
After submitting the bank statement, it will immediately change its state from New to Processing.
Then there’s a button that says Reconcile. To reconcile the bank statement, simply click on it.
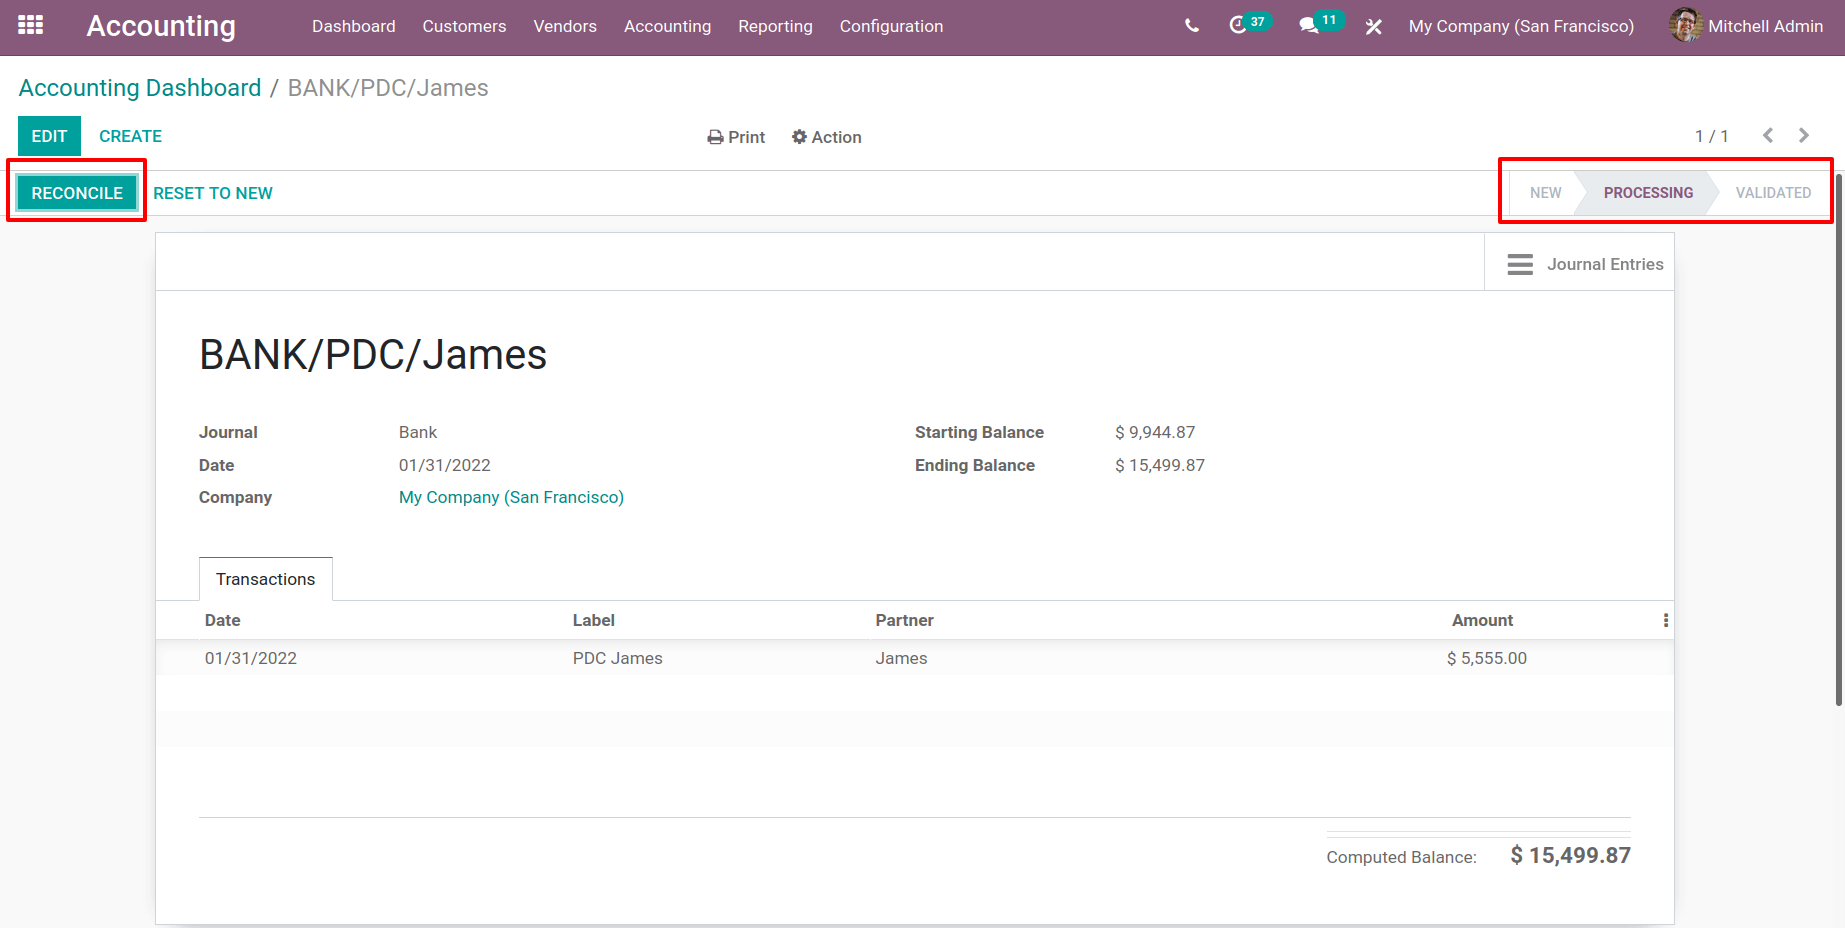
They showed the created invoice and payment. It is feasible to bring them together from here.
To do so, press the Validate button.

Re-evaluate the Aged Receivables Report. There are now two entries for the customer. The money has been deposited into the bank account. As a result, the total seems to be zero.

Re-evaluate the partner ledger. There is another entry because there’s a bank entry there, too.
The balance is now zero. As a result, the payments are credited to the company’s bank account.

Let’s return to the invoice now. The previously created invoices are displayed there. From there, choose the invoice prepared for James, the customer.
The invoice status has now changed to PAID, and the invoice is now POSTED.
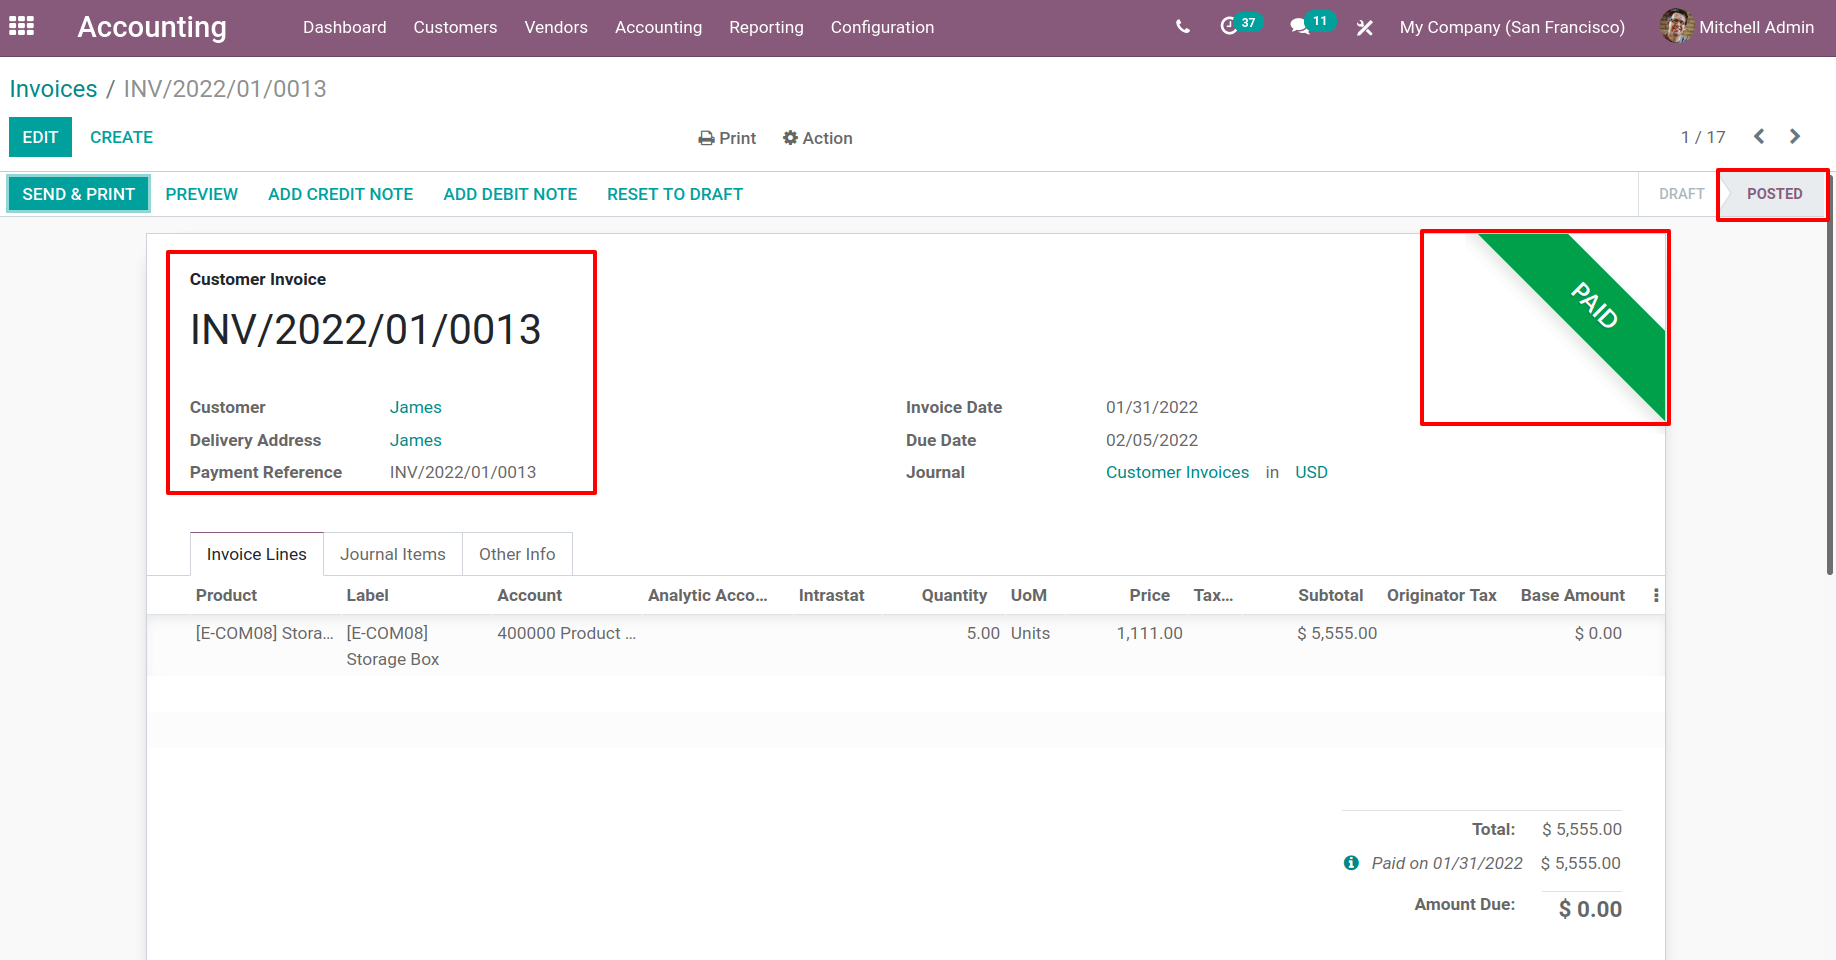
A customer can choose from a variety of payment options. One of them is a check. If the consumer paid using a post-dated check, the payment is processed after the check is received. However, it will have no impact on the accounting because the money isn’t put in a bank account. As a result, the ledger balance is displayed. So, the balance was only recognized after the payment was credited to the company’s account and the reconciliation was completed.


