Known for being the versatile pattern, Odoo ERP can be personalized to any degree, making it absolutely suited to the business needs you want. Odoo’s Membership Management is among such features, which can be personalized to the end user’s needs. Any process of membership management, however big or small they may be, can be easily personalized. One of the key elements of this module being that it embraces different types of members-whether it is a free member, associate member, paid member, or a special member.
Additionally, sales and accounting modules combine Odoo membership management systems. Integration with the above modules enables automated invoicing and request submission for membership renewal in the process.
Features
- * Creation of membership items and their configuration
- * Creation of members
- * Free admission.
- * Invoicing and Membership Fee.
- * The choice to add attachments in products for memberships.
Install the Application of Members
First of all, we shall install the module of “Members” from the Odoo Apps.

Membership products configuration
In order to create a membership product go to, Members > Configuration > Create
Click on the “Create” button, and we will get the form to create the ‘Membership Product’.
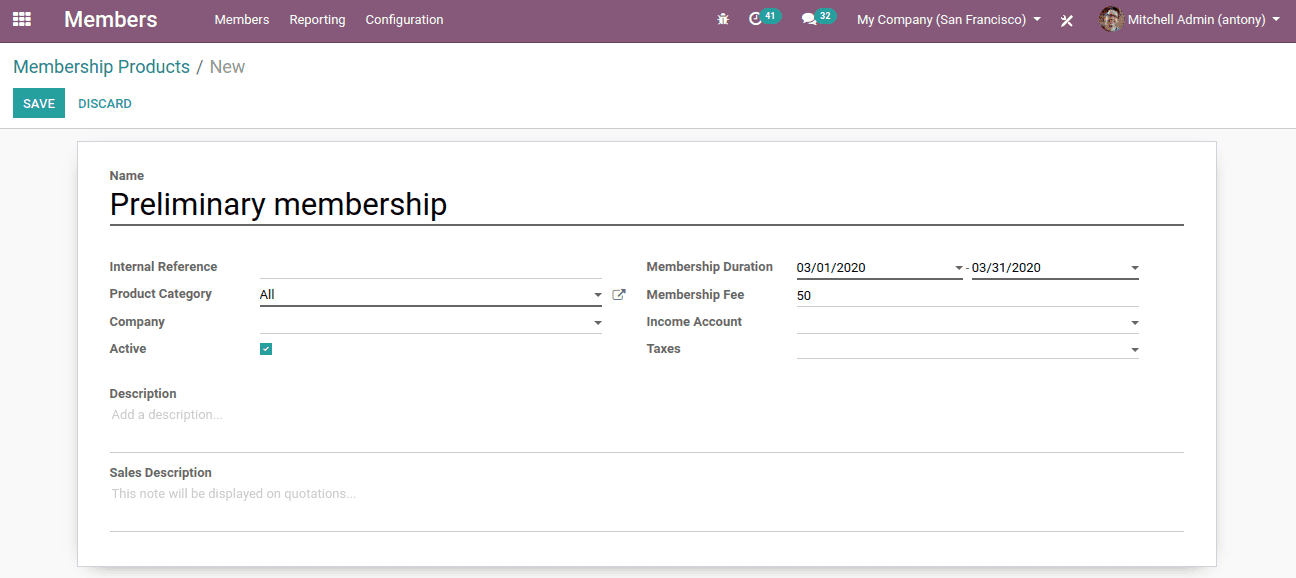
Here we shall mention the Name of the membership product.
We shall also mention the duration of the membership.
If there is a membership fee we shall also mention it there.
If we need to keep it active we shall tick the active button.
We shall also mention the product category.
Member configuration
To create members go to, Members > Create.
You can configure a new member by clicking on the “Members” tab and then clicking on “Create”. Here you can fill in the member’s basic information and contact details that you are making. The members can be either a person or company.
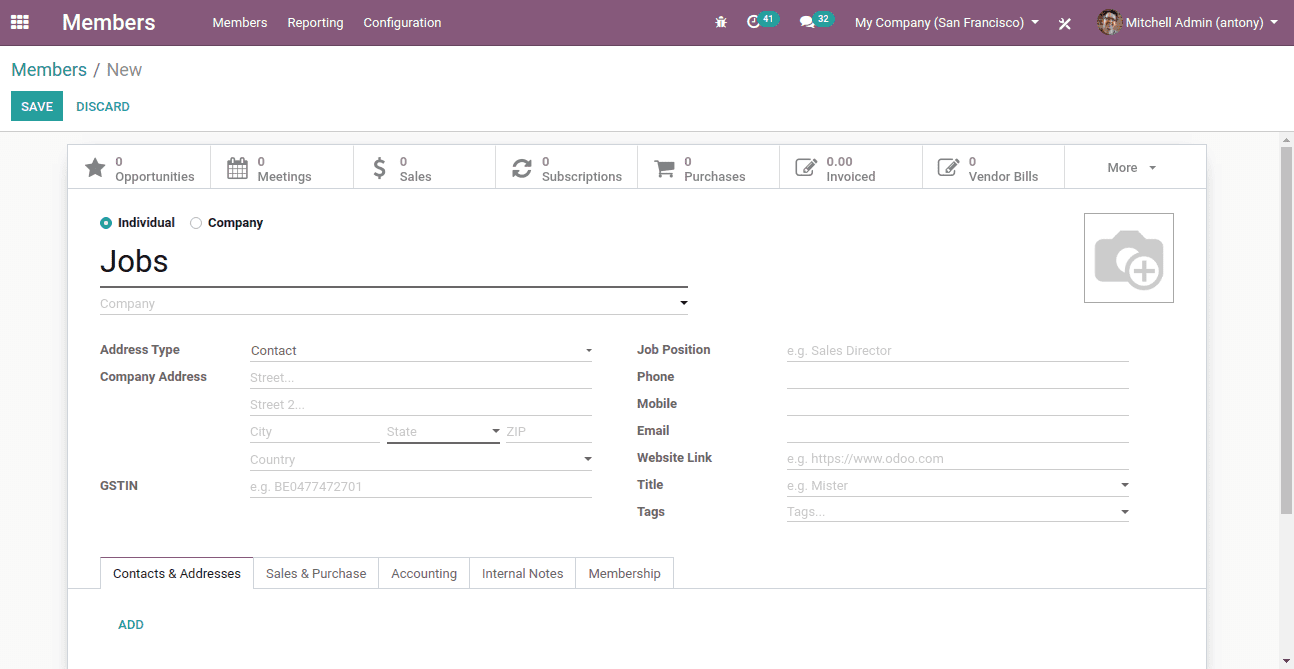
Configuring Free Membership
While we create members we have the option of creating free membership, an option to buy the membership. There is an option of mentioning membership status.
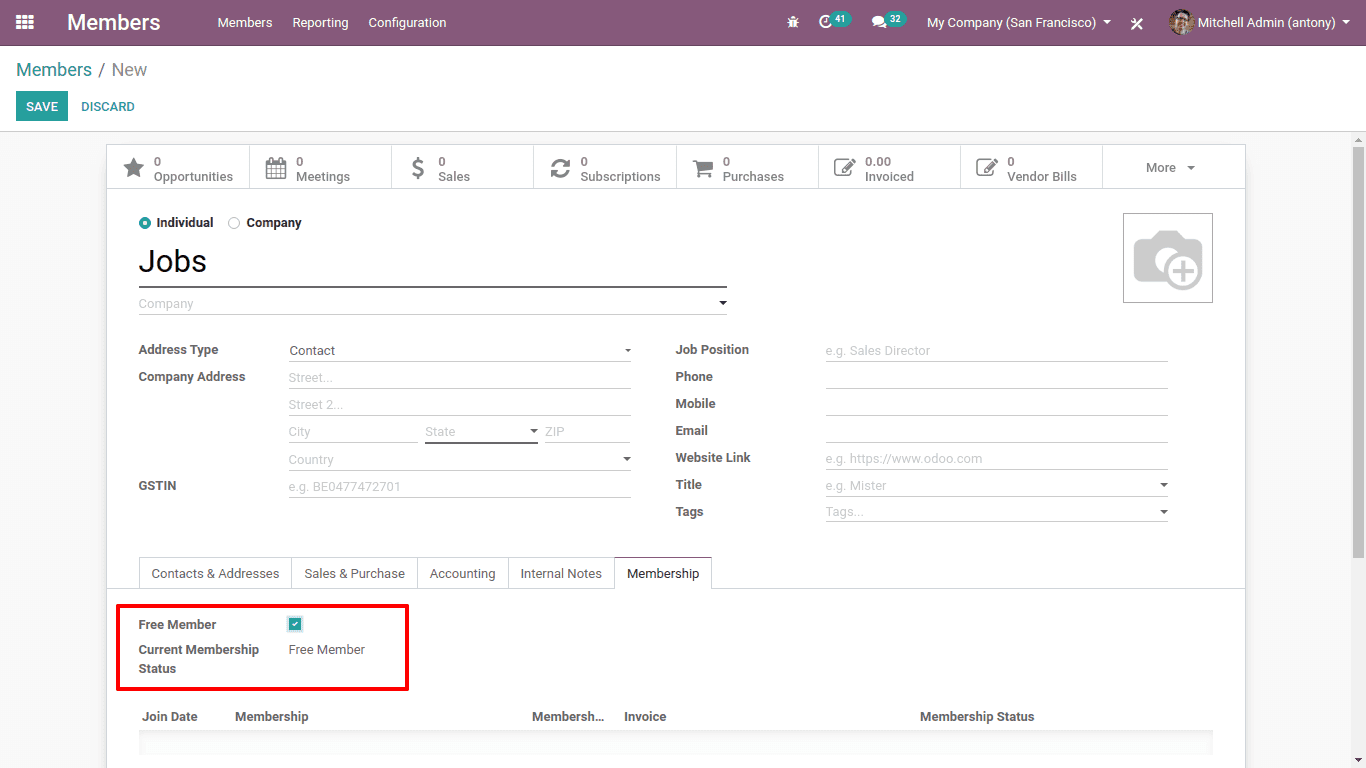
Here, under the tab of ‘Membership’, we have the option of “Free Members”. If we tick the option the member will get a free membership. ‘Free member’ will be the current Membership status.
Buy Membership
And if we don’t want to make the members into free members, we shall uncheck the option of ‘Free member’. Then the current membership status will be ‘Non-member’, the person has to buy the membership.
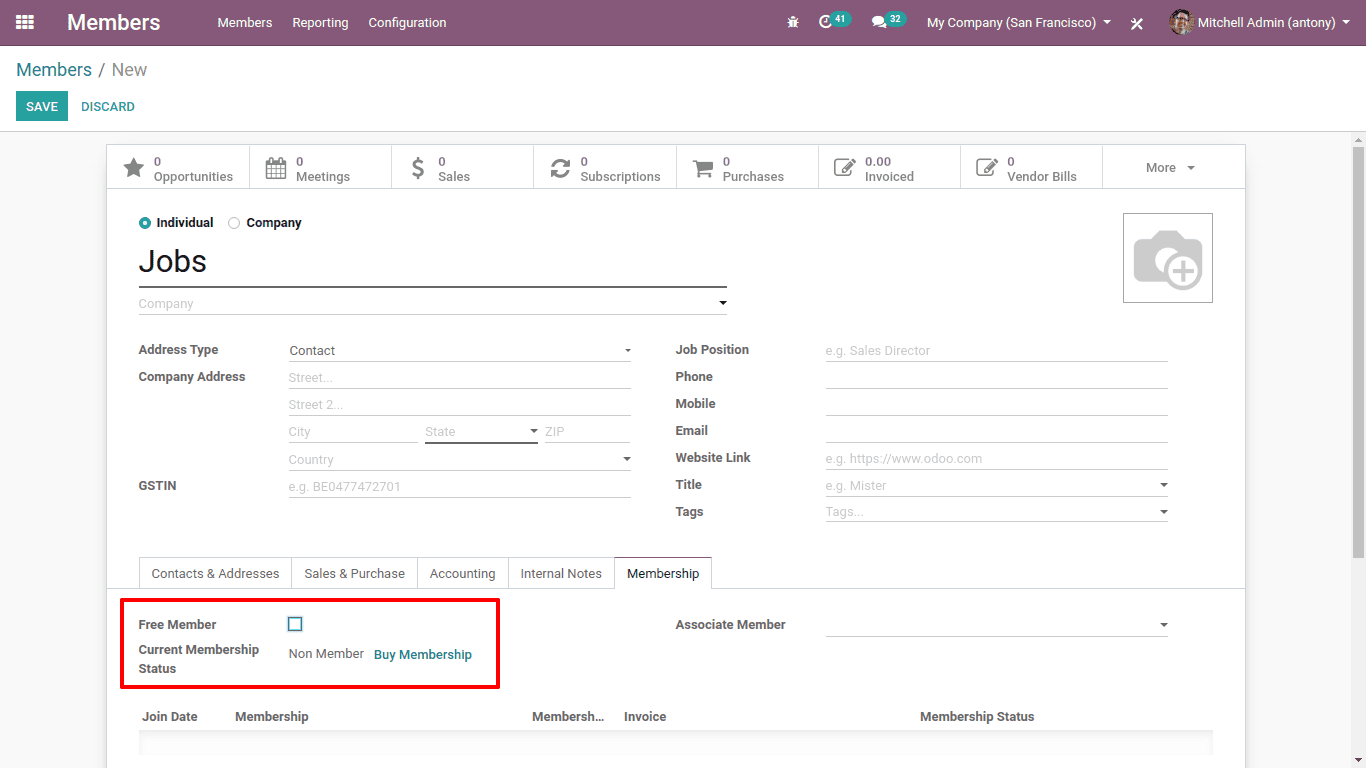
If we mention the “Associate Member” the new member will have the membership during the period of membership of the associate member.
Invoice membership
Now if the member is ready to purchase the membership, click on the ‘Buy membership’ then a new wizard will appear and there he or she can mention the membership and its cost will be updated automatically. Thereafter the membership can be invoiced by clicking on the “Invoice membership”.

Post the Invoice
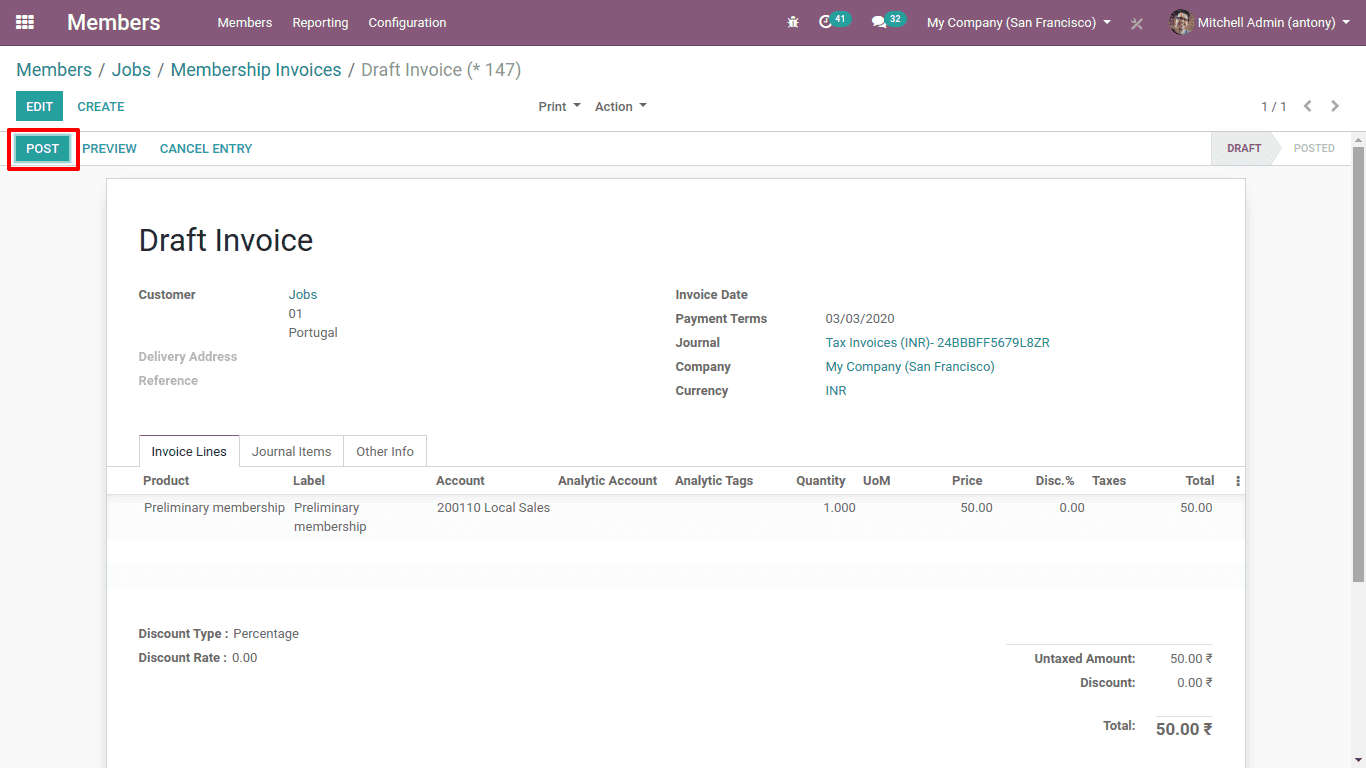
After creating the invoice we shall post the invoice by clicking on the “Post” button there in the invoice.
Do the payment
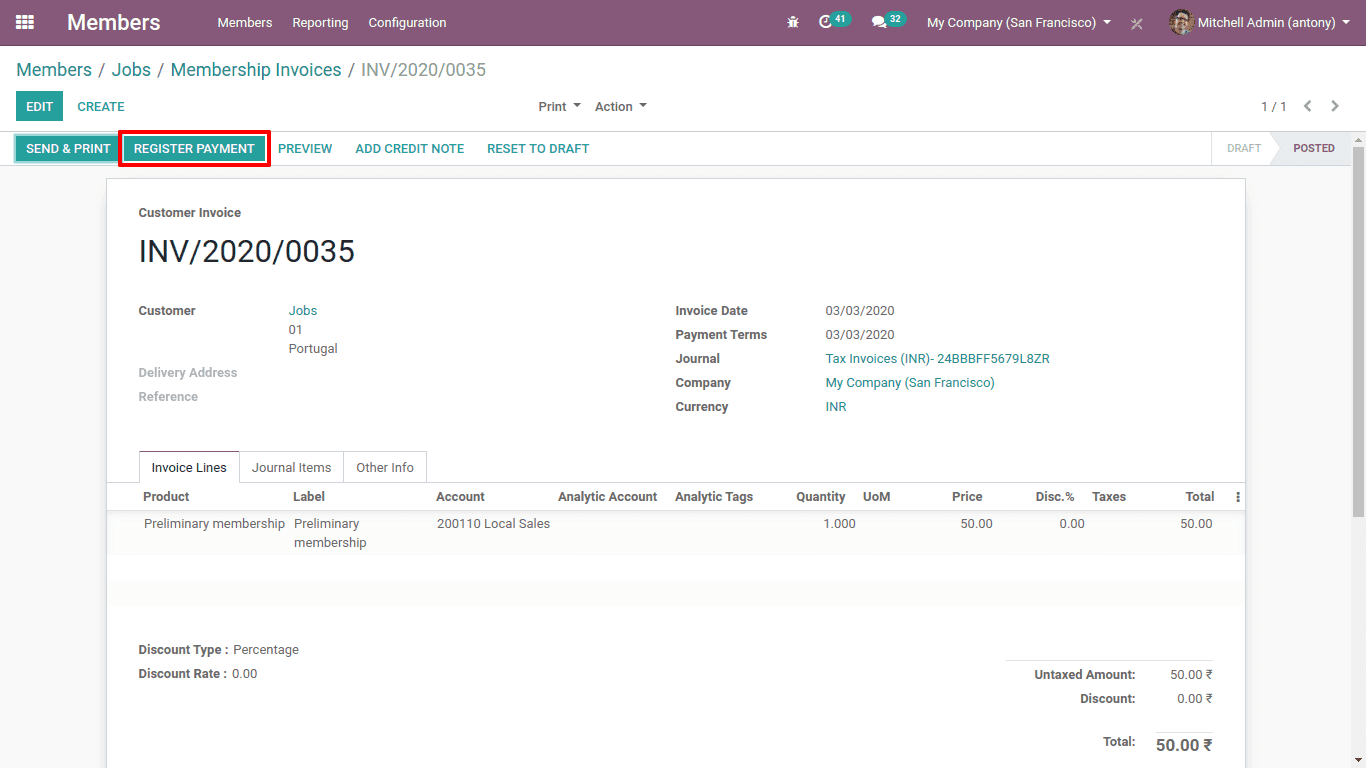
After posting and validating the invoice we shall make the payment of the membership.
For that click on the “Register Payment”.

Invoiced lines
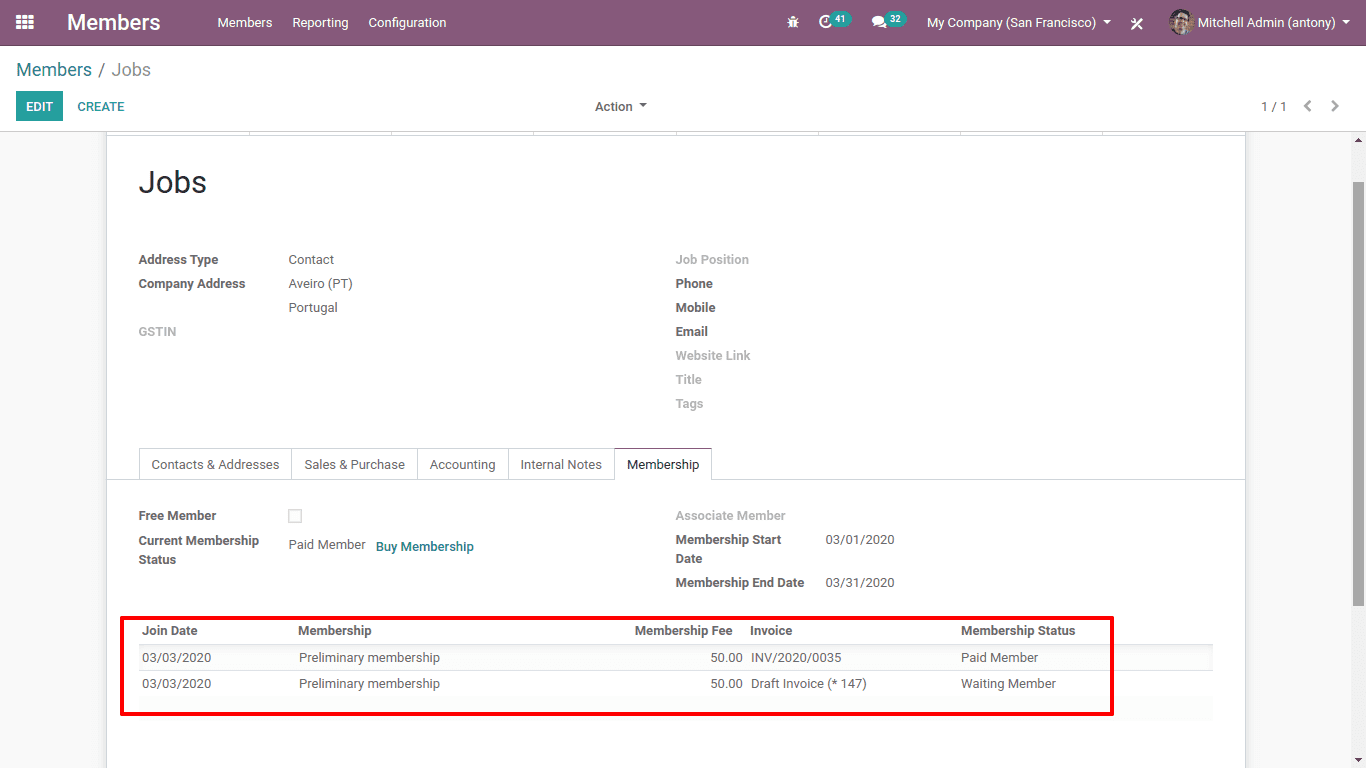
Here, under the profile of the member, we are able to see his invoice data.
So this is all about the ‘Membership Management in Odoo 13’.


