Every single lead is critical to a company’s success. Because a healthy lead is transformed into a deal. As a result, the company maintains sales personnel to oversee the transaction. Every sales team is made up of salespeople. Every single person, as we all know, is unique. As a result, a company may require the services of a single salesperson in many teams at times. It is not allowed to add a member to several teams until Odoo14. So, there’s a risk of some discomfort. As a result, Odoo 15 introduced a new feature to address this issue, which is the Multi Teams option.
This blog will provide you an insight into the Multi Teams option implemented in the Odoo 15 CRM
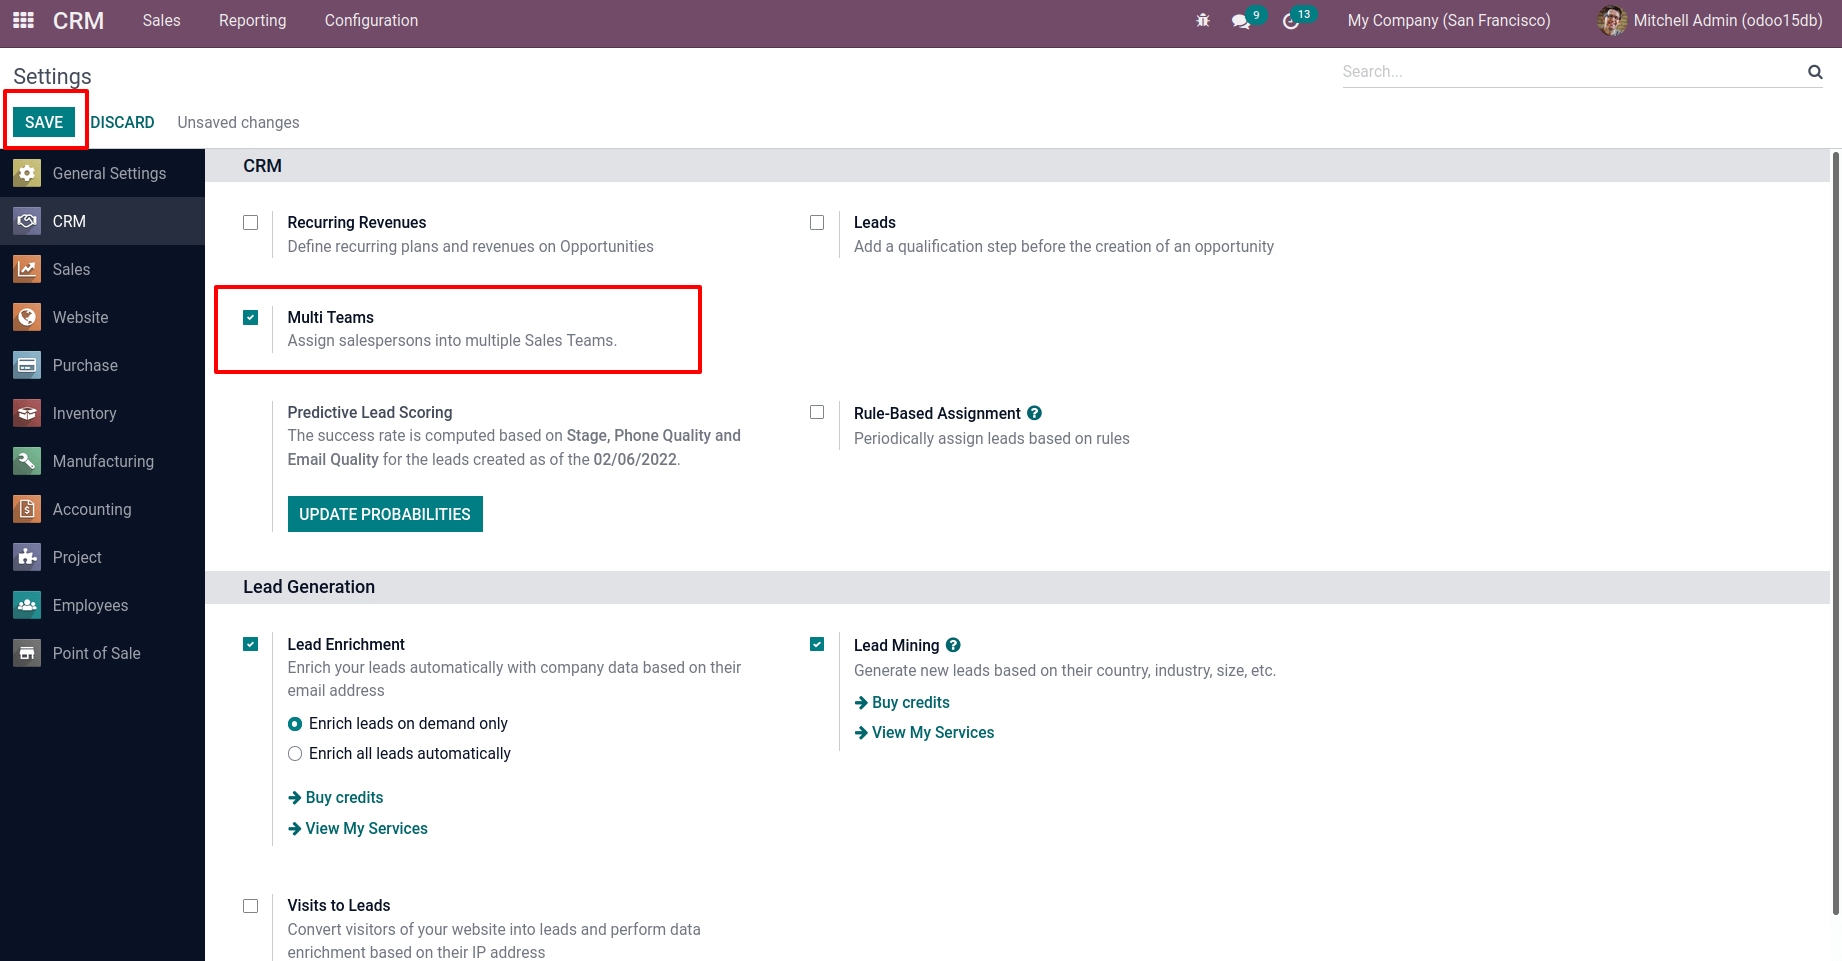
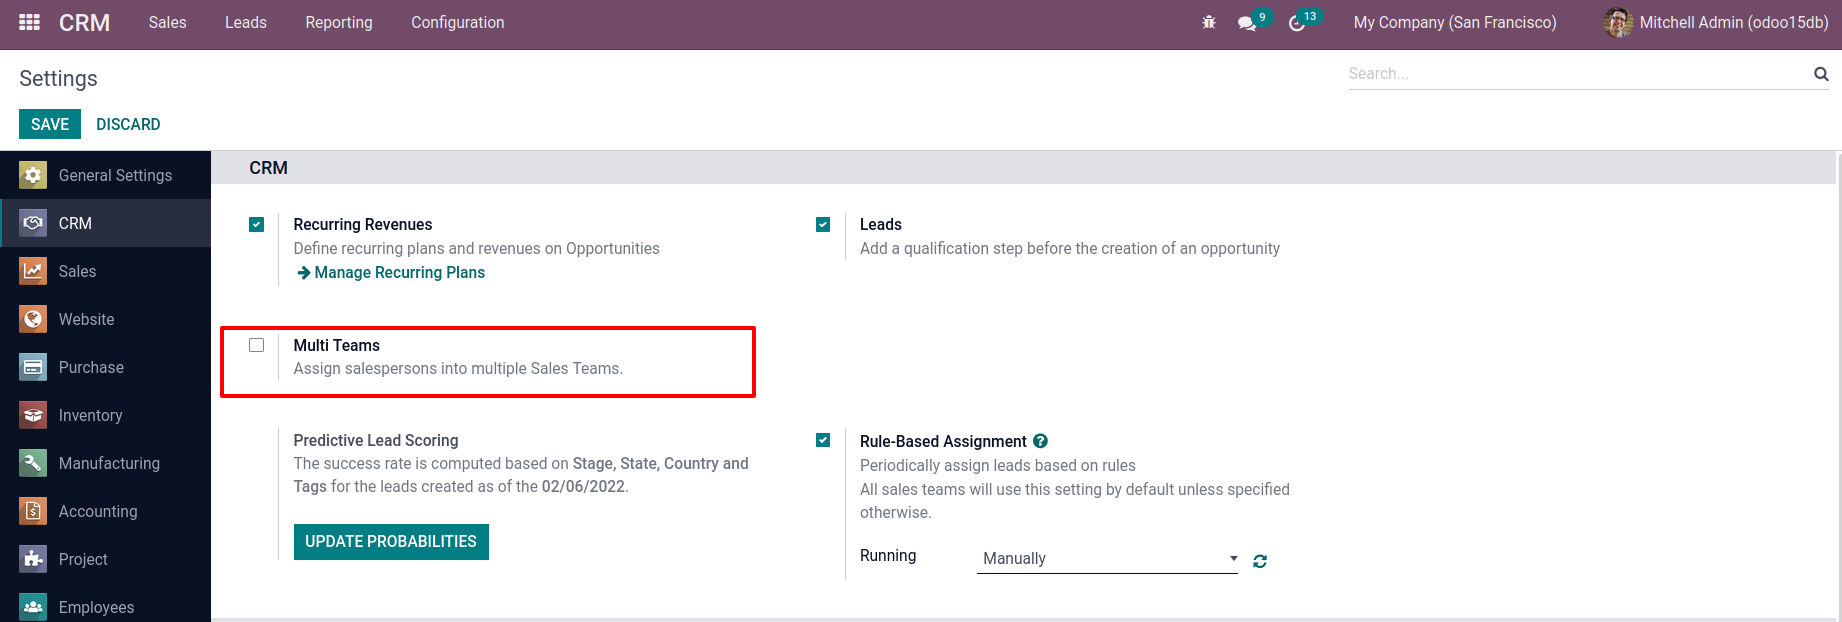
So, to assign a single individual to many teams, go to Configuration settings of CRM modules. Then there’s the option Multi Teams in the CRM area. It is possible to allocate a salesperson to different teams by enabling this option and then saving the settings.
: Configuration > Settings > Multi Teams > Save
There are mainly three types of users in Odoo.
– Internal User
– Portal User
– Public User
An Internal User is someone who works for the company. It is feasible to give such personnel access permissions. They can access modules in Odoo using those access rights. Customers and vendors are the most common Portal Users. It is feasible to grant them portal access. The third category of user is Public Users, who are those visitors to the website. So, in Odoo, it is able to create users. To create a user, go to the Settings app first.

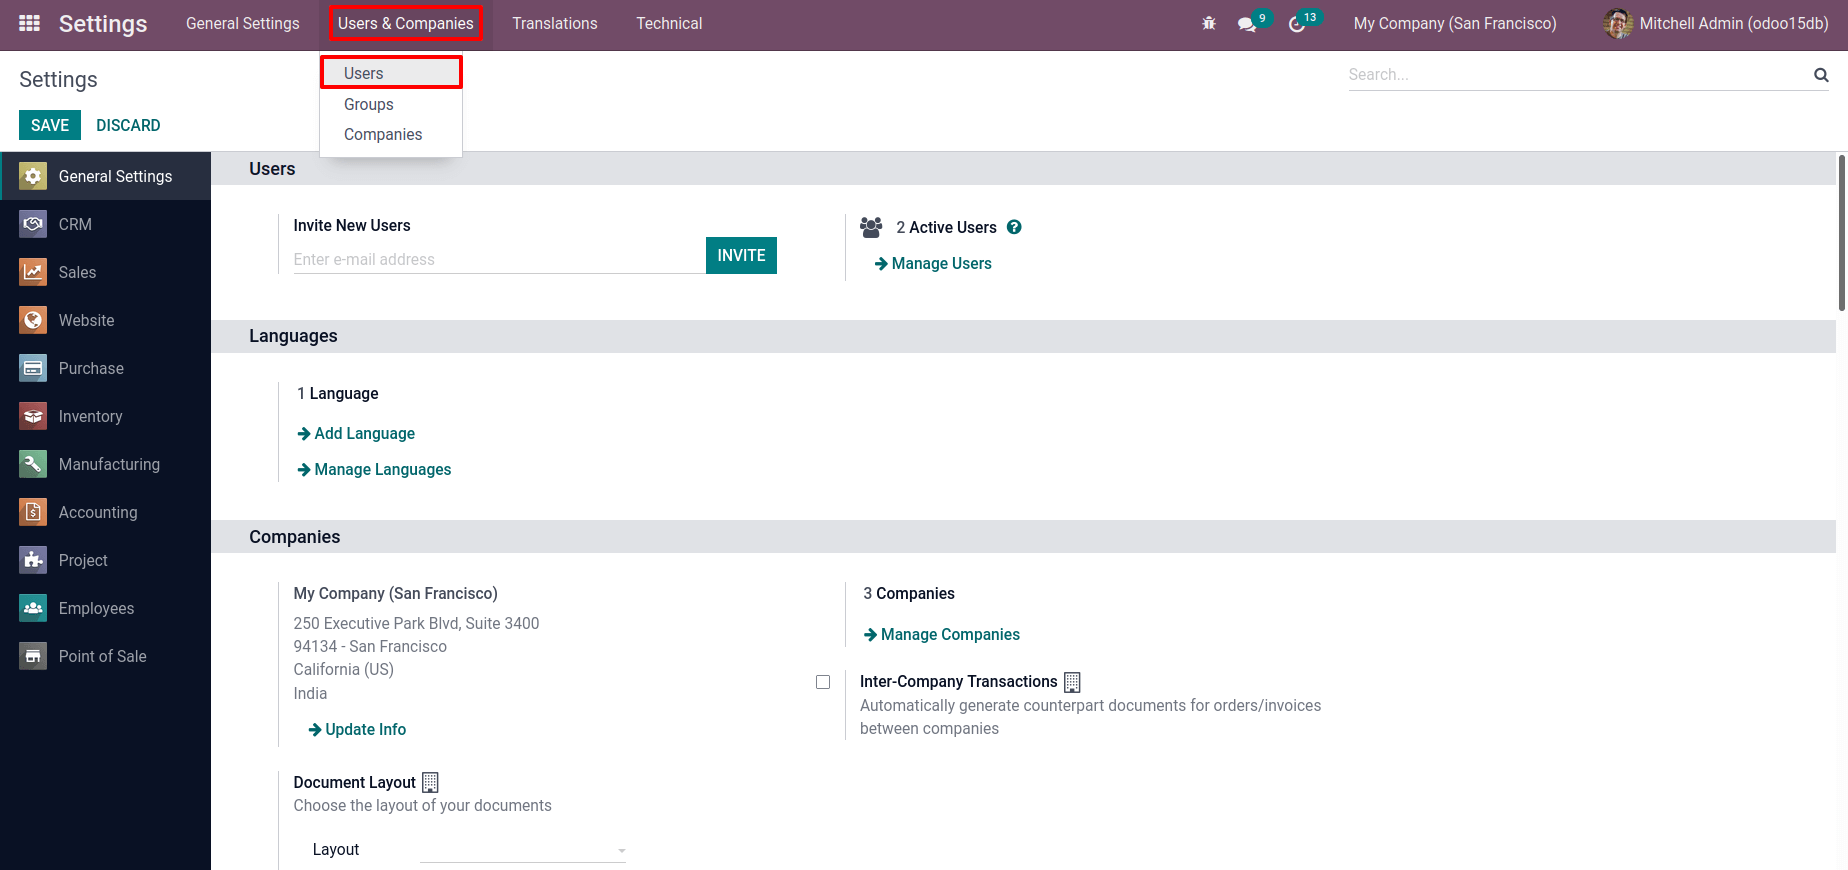
There are tabs such as General Settings, Users & Companies, Translations, and Technical when you access the Settings. So, let’s go to the Users & Companies tab. There is a User option under that tab. Choose that option.
It is now possible to see all of the users from this place. Filter, Group By, and Favorites options are all accessible. Click the Create button to create a new user.

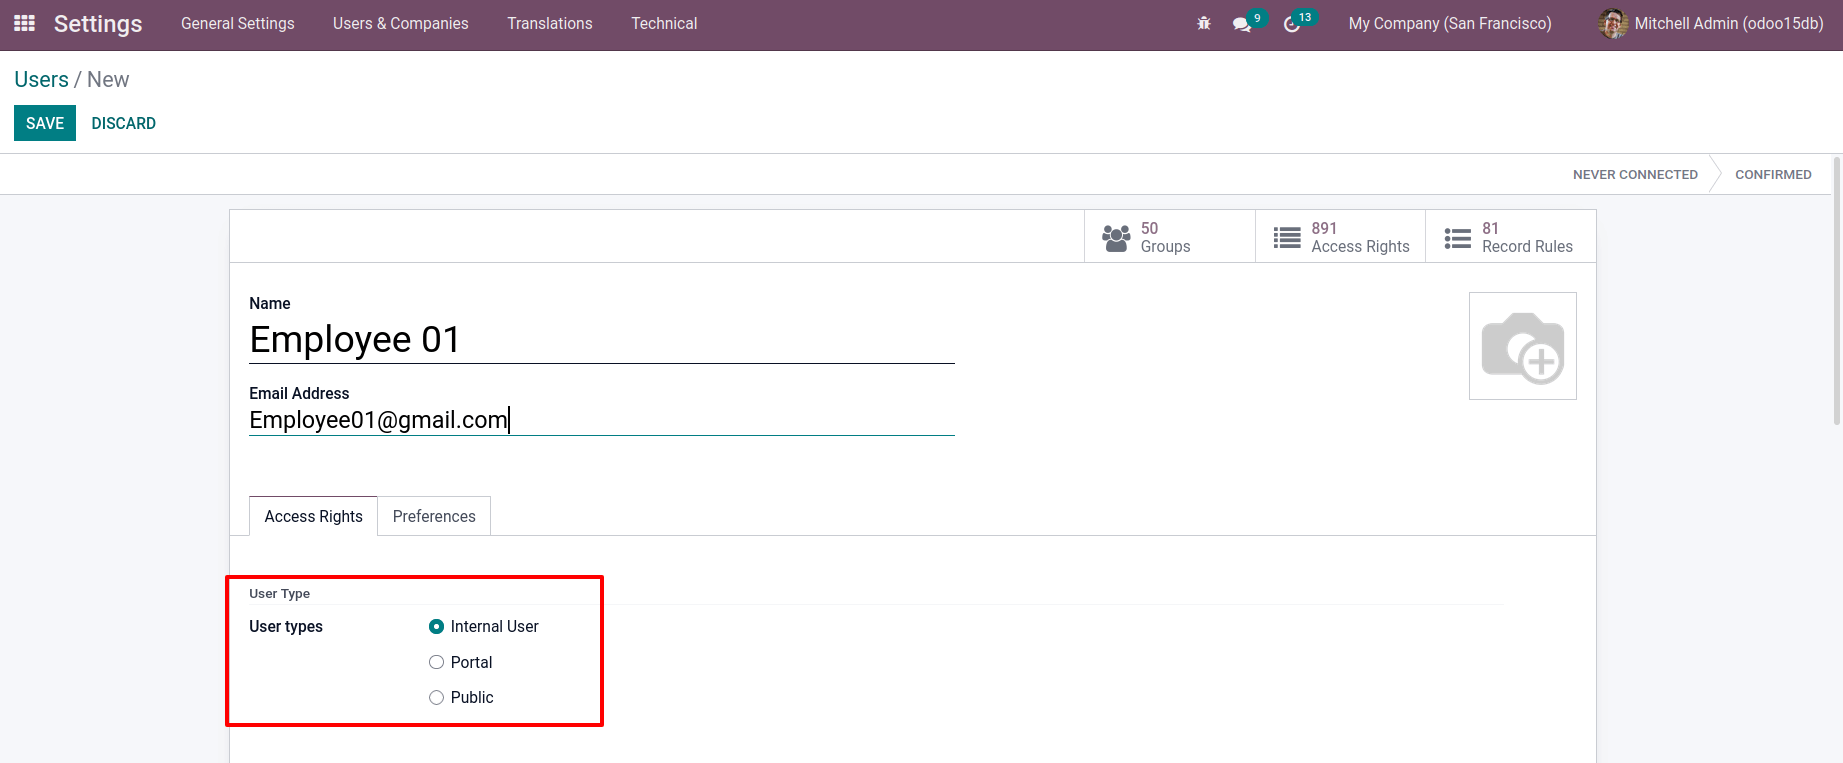
When one clicks the Create button, it is sent to another window where one may give the new User a name, an Email address, Access rights, and Preferences. After entering the user’s name and email address, select the user type for the newly formed user. User types are only available if the developer mode is activated. The above-mentioned three user types are depicted. Internal User Employee 01 is created here.
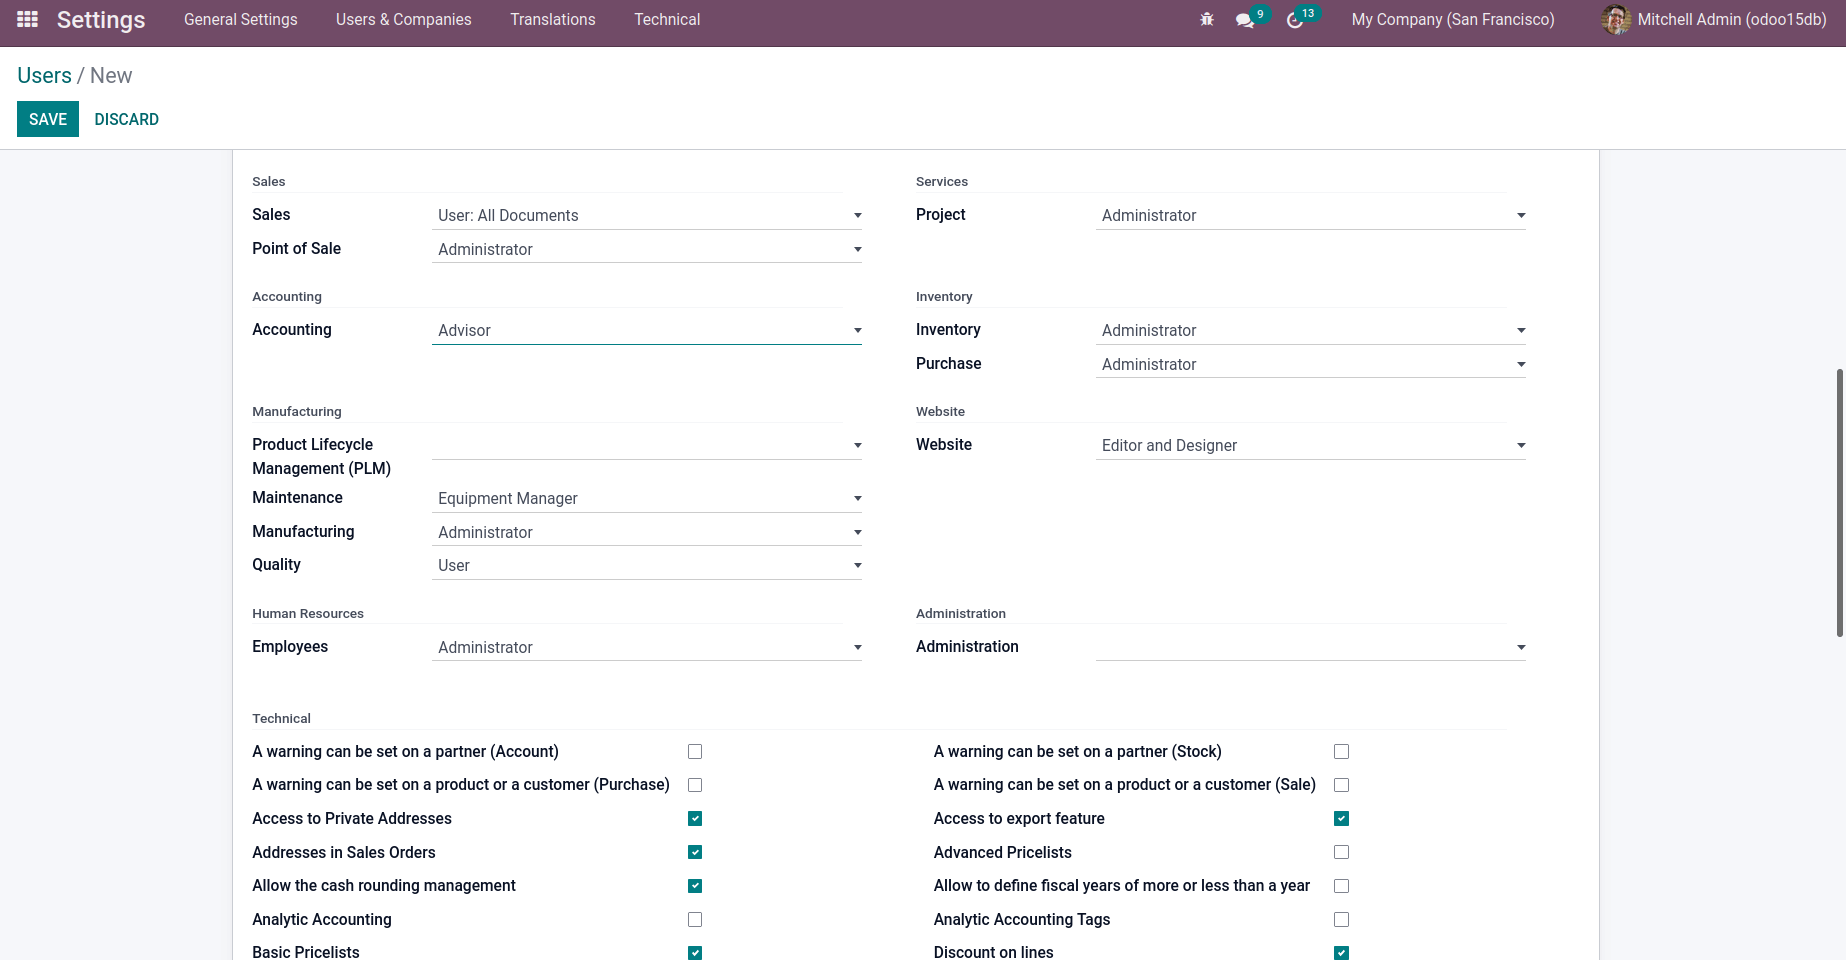
It is possible to grant the module access permissions from the Access Right tab. This page can be used to set such access rights for each module separately. When scroll down to the bottom of the page, you can provide the users Technical Rights and various Extra Rights. These options are only displayed if the user type is Internal.
The user’s Localization and Menu Customization can be set on the Preference tab. Language, Timezone, and other settings can be set via Localization. Once finished filling out the form, click the Save button. After that, a new internal user is formed.
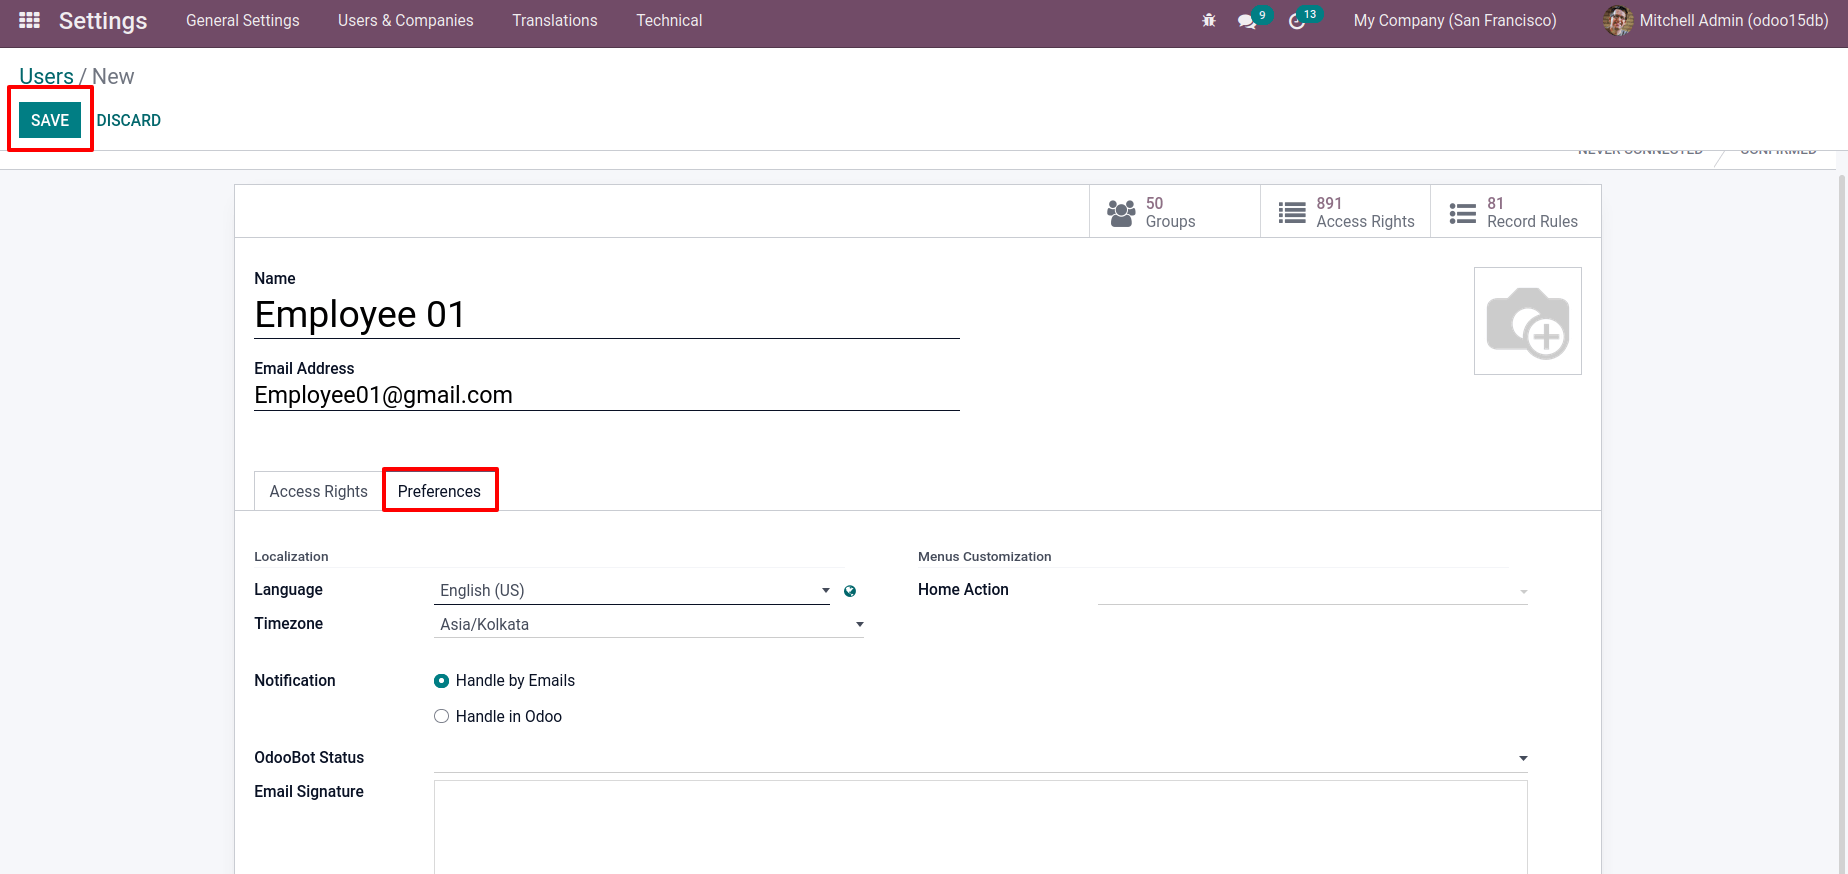
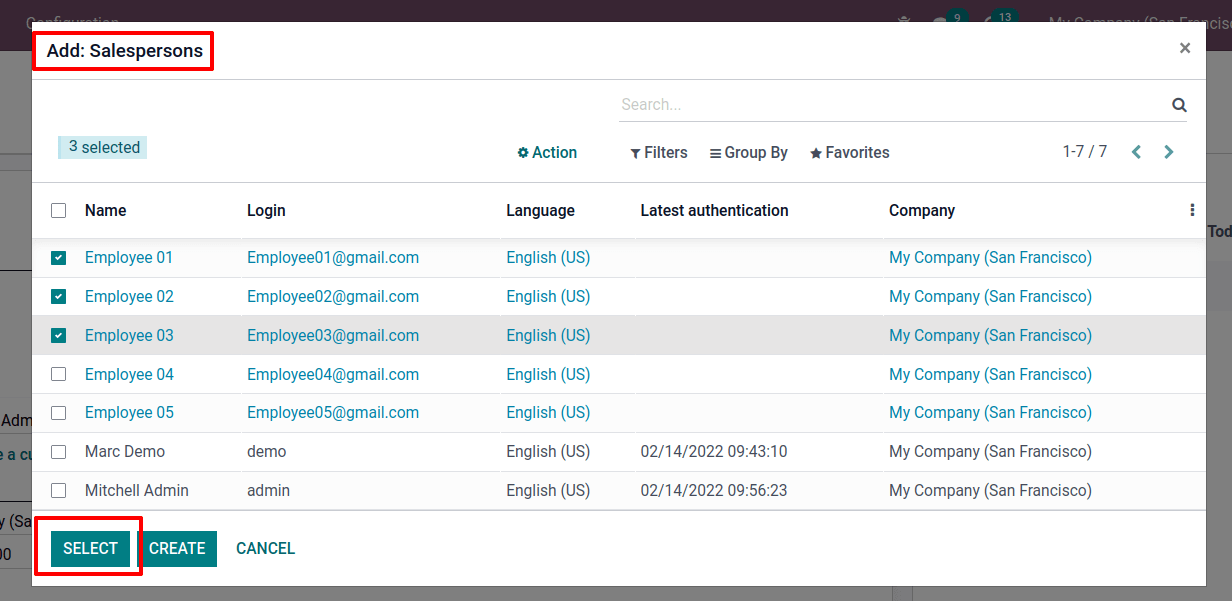
There are 7 internal users. Five of them are currently created.

Let’s move on to the CRM module, where one forms a new sales team. So, when entering the CRM module, notice a tab called Configuration. Select Sales Teams from the list.

Now opens a new wizard, a list of previously formed sales teams appears. By clicking the Create button, a new team can be created.

Mention the new team’s name and appoint a team leader. While creating a new team, one can set an Invoicing Target for the team. In the provided field, type an email alias. One can specify who can send emails to the team. Accept Emails From is a policy that allows you to publish a message to a document via mail gateway. There is an ADD button that can be used to add more members to this team.
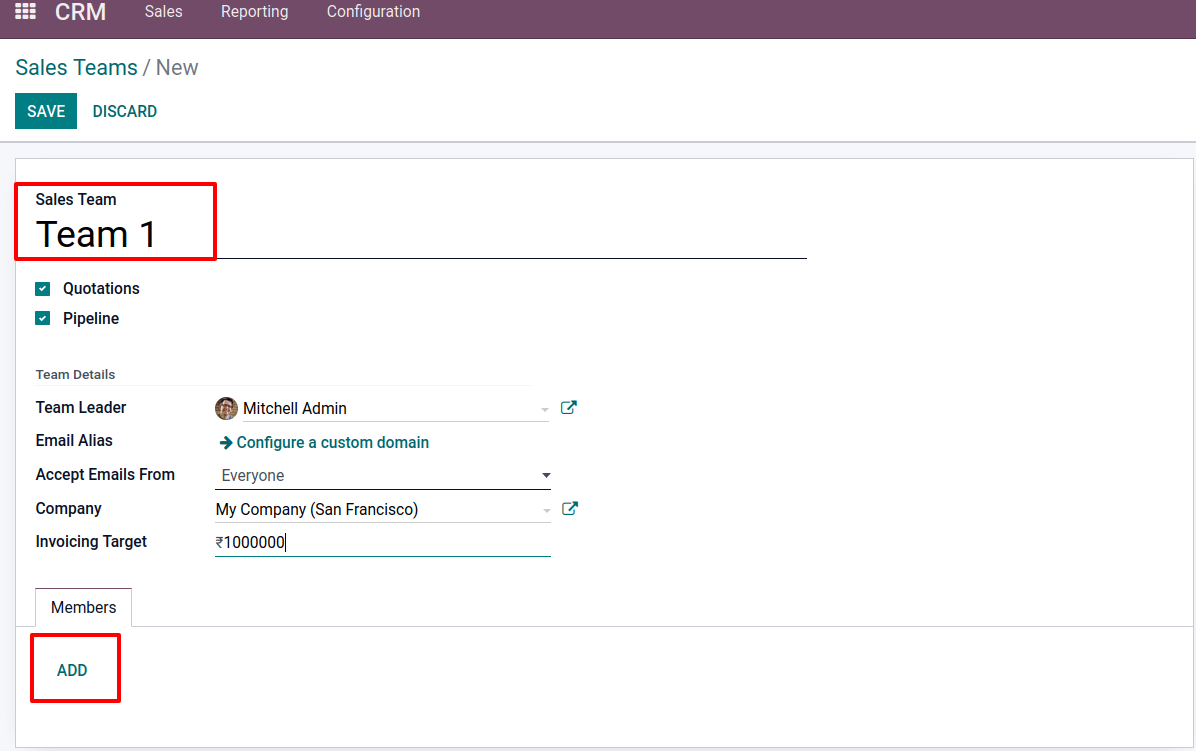
While pressing the ADD button, a list of internal users appears. Select required users from the list and click the SELECT option. By selecting the CREATE option from this page, you can create a new user.
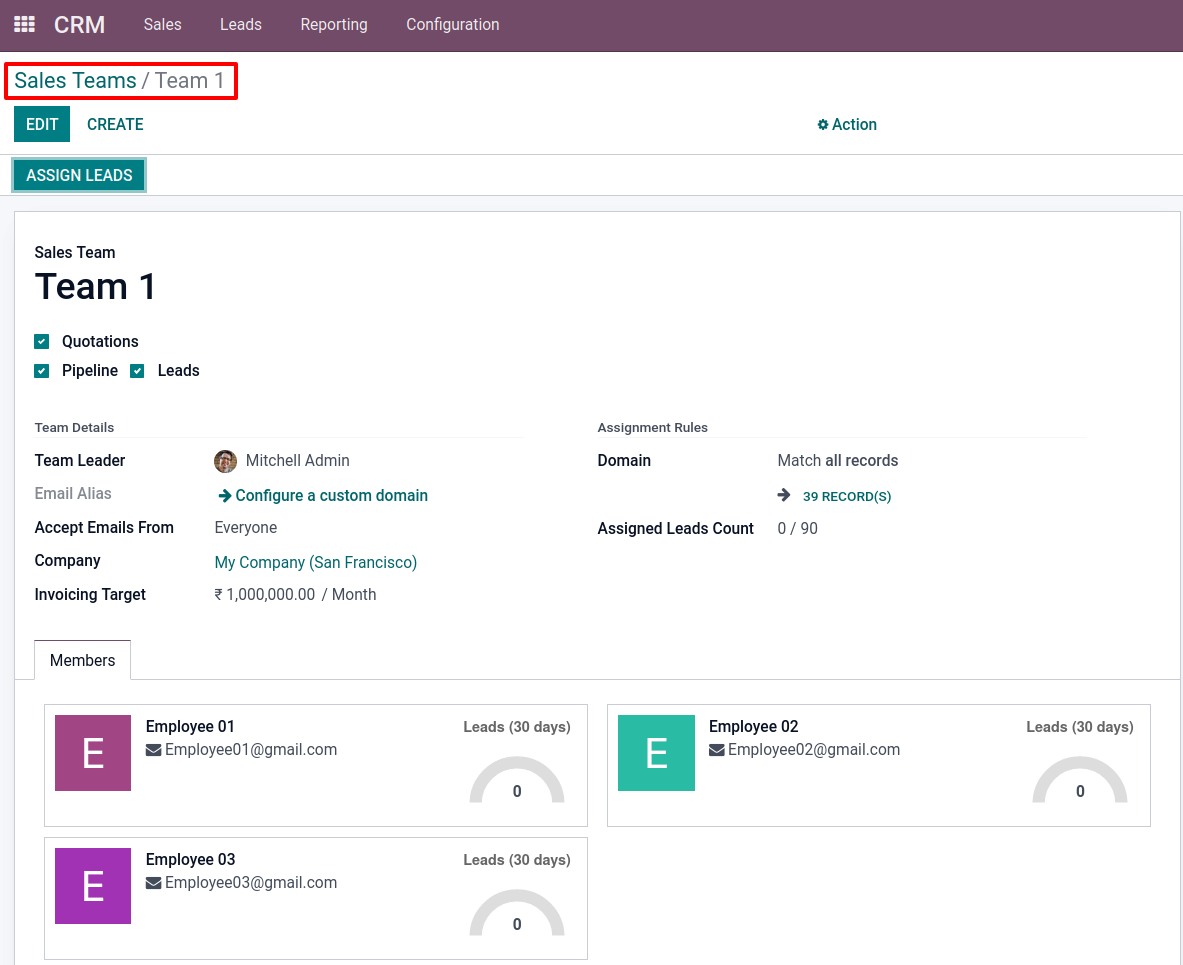
Team 1 is currently made up of three members: Employee 01, Employee 02, and Employee 03, with Mitchell Admin as the Team Leader. Set a $1,000,000.00 Invoicing Target. So, everything has to do now is save the team.
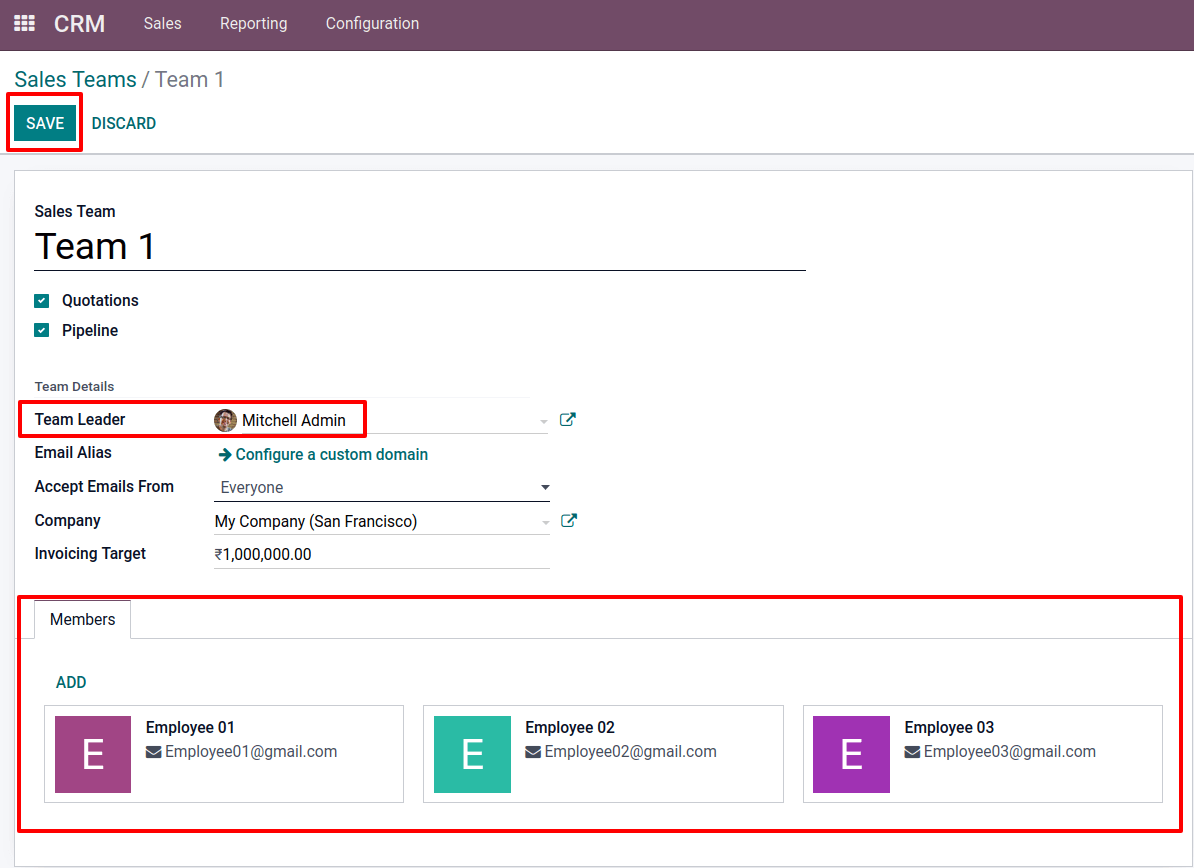
As a result, Team 1 is formed. Let’s make a new team, Team 2. To do so, click the Create button once more. Team 2 should be included. Take on the role of Marc Demo as the team’s leader. By clicking the ADD button, one can add members to the team.
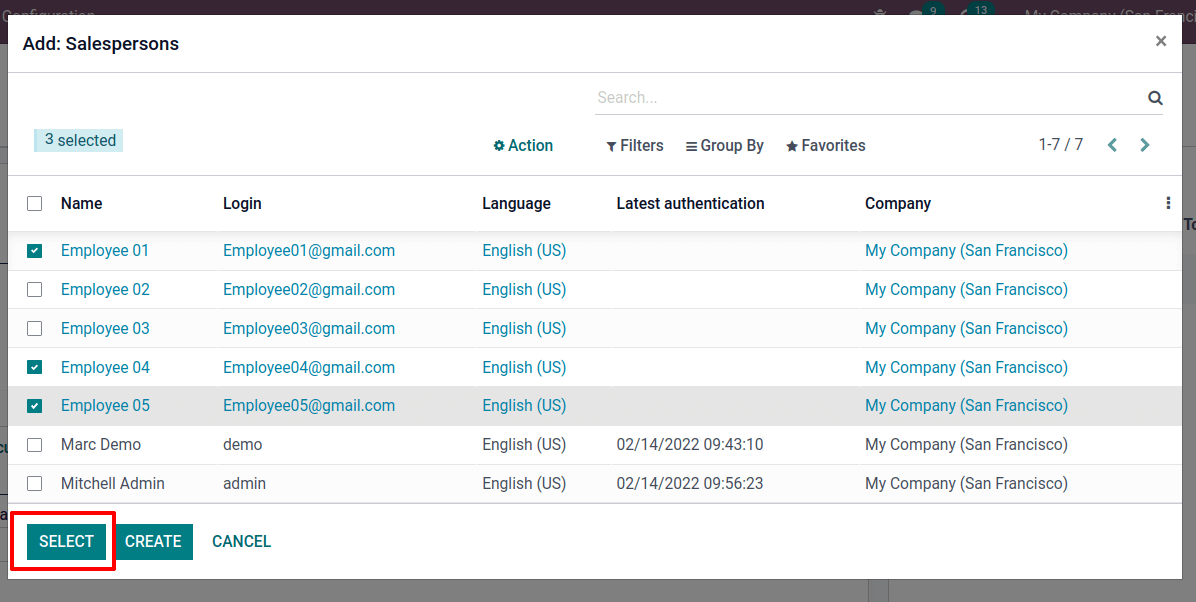
Let’s take a look at Team 2’s members. Team 2 consists of Employee 01, Employee 04, and Employee 05. Employee 01, as previously stated, is also a member of Team 1. Save the team after inputting the information.
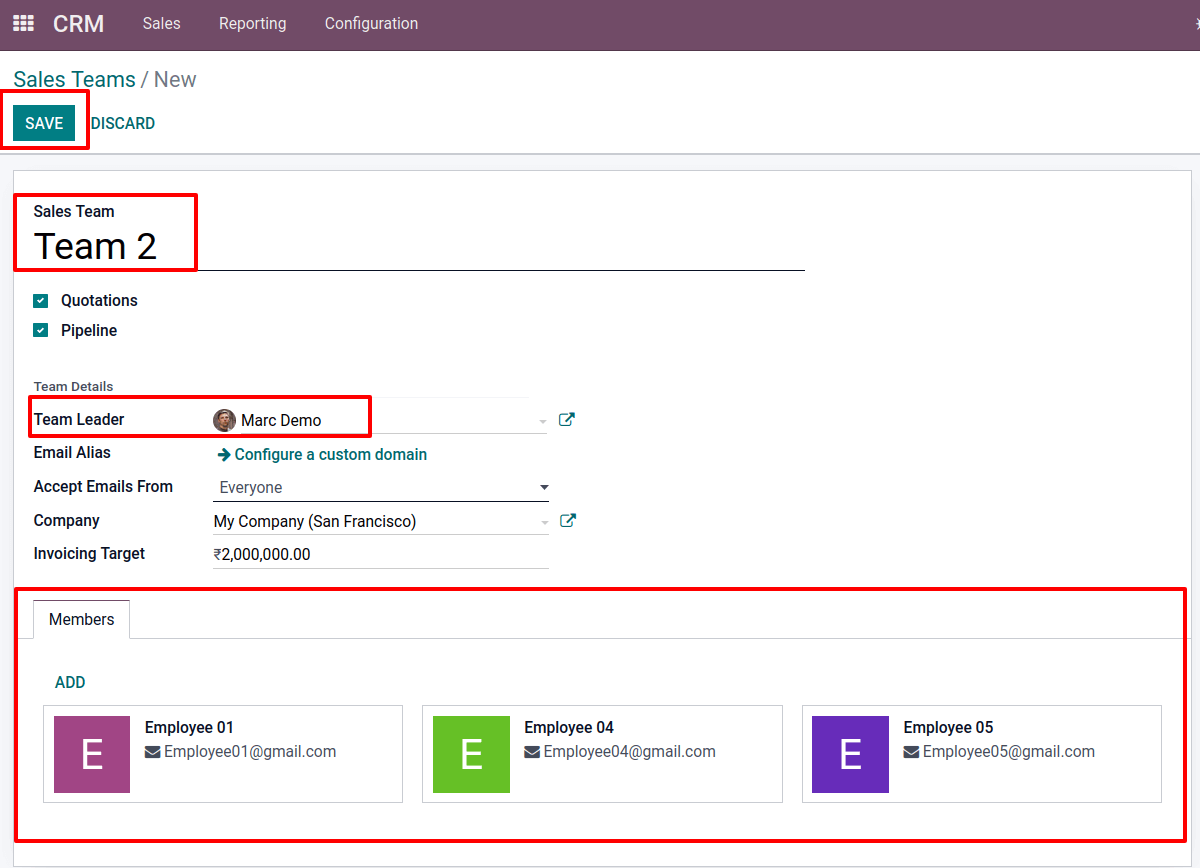
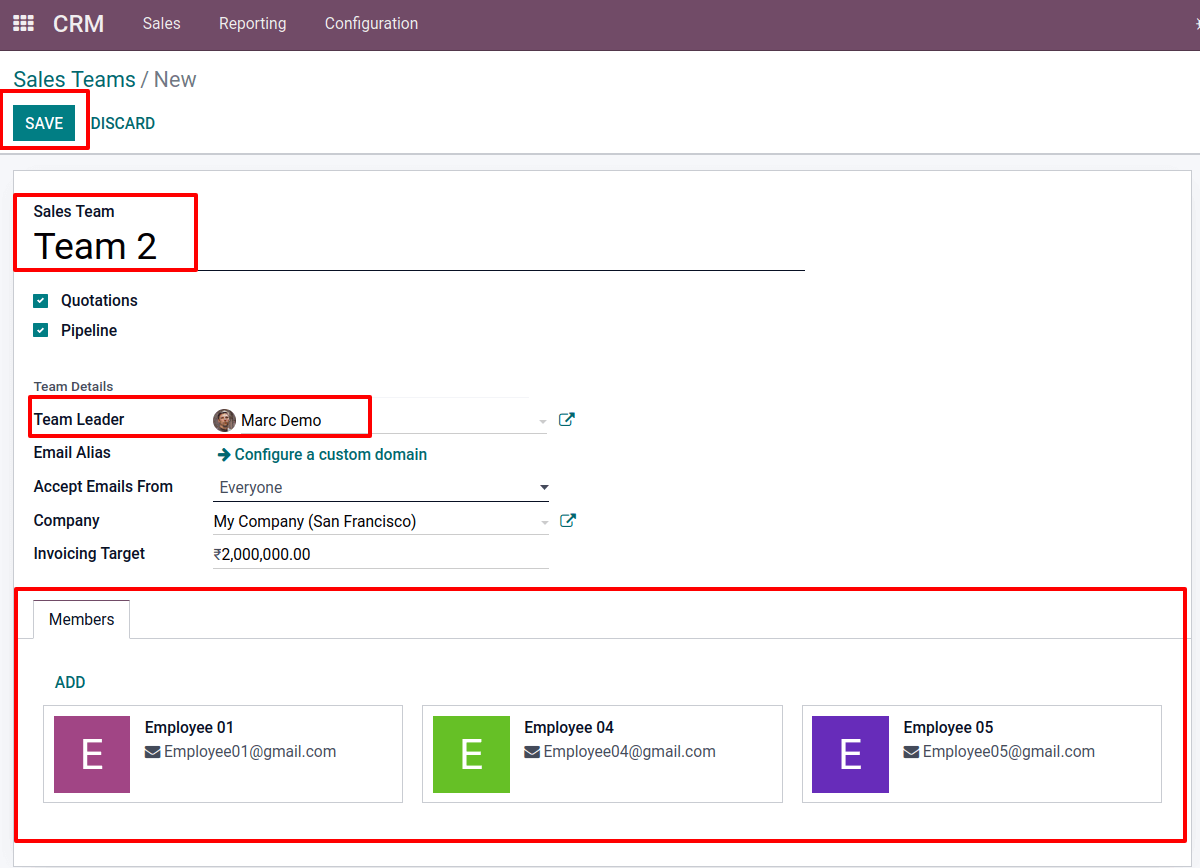
Employee 01 is a member of both Team 1 and Team 2. This means that a salesperson may manage all aspects of both sales teams. This is only possible after enabling the Multi Teams option in the settings.
Let’s see what happens when a salesperson is added to numerous sales teams when the Multi Teams option is disabled. Go to the Configuration tab and choose Settings. Disable Multi Teams option and Save it.
Team1 and Team2 are the two sales teams now. Mitchell Admin is the Team Leader for Team 1, which consists of Employee 01, Employee 02, and Employee 03.
Team 2 is the second sales team. Employee 04 and Employee 05 are members of this team, which is led by Marc Demo.
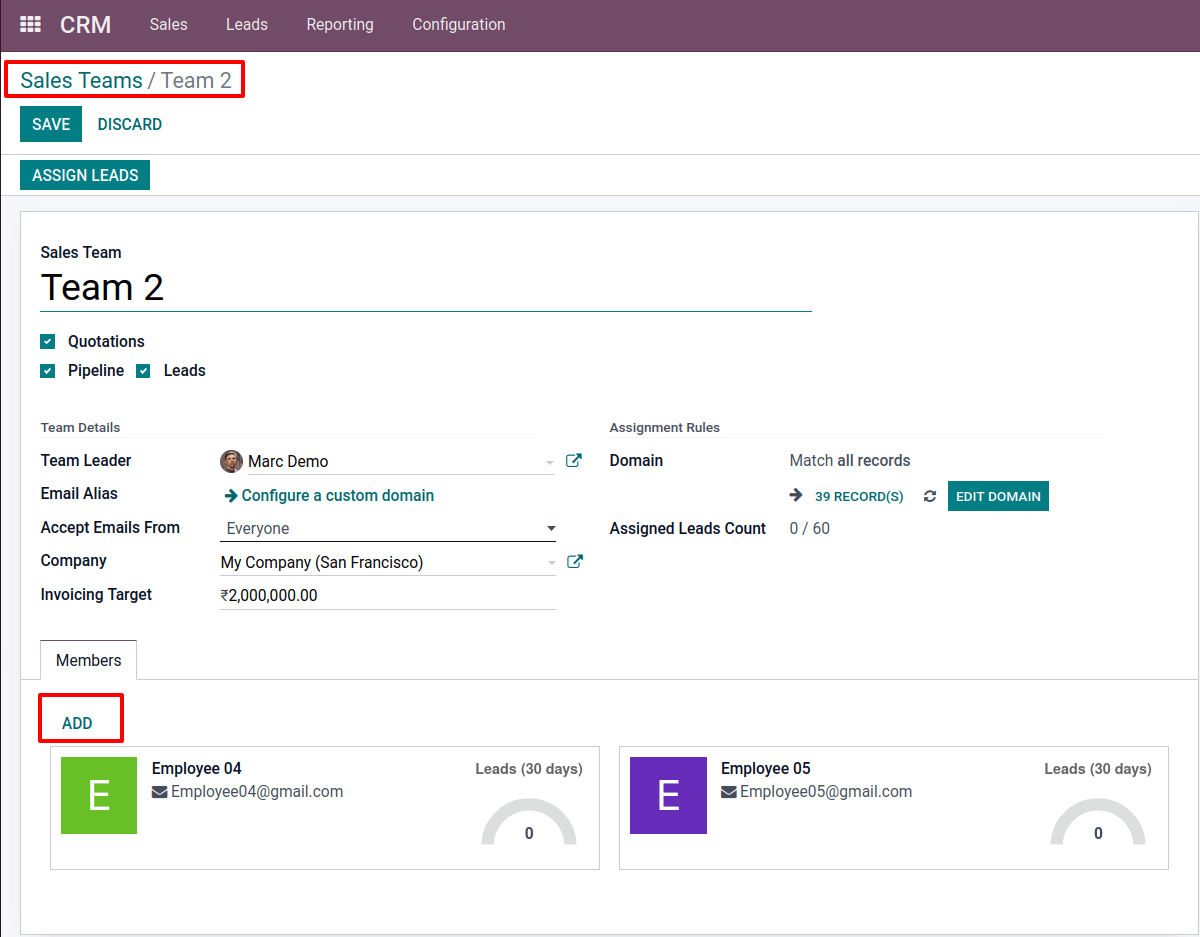
When you click the Edit button, an ADD button appears on the Member tab. This allows you to add a new team member. Employee 1 is already a member of Team 1 and is trying to add here.
A new page appears after clicking ADD. It is possible to add Salespersons. However, the drop-down list only includes people who are not members of any Sales Team.
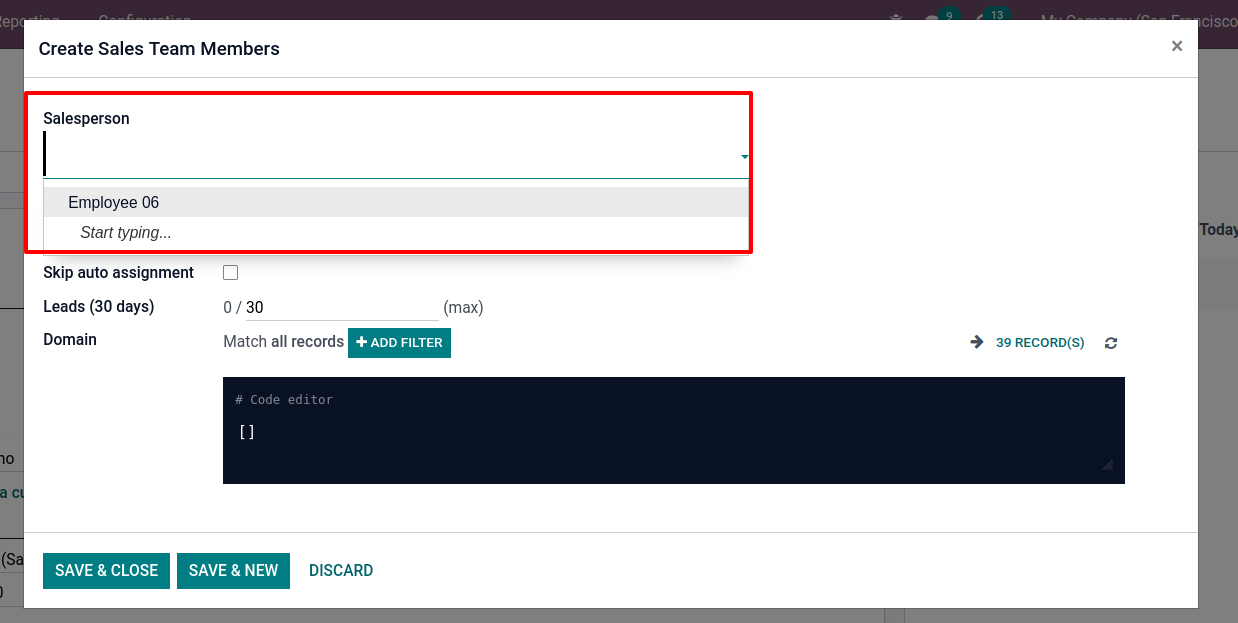
Alternatively, you can create a new salesperson from there, but you won’t be able to add a single salesperson to several sales groups.
Odoo15 has a new feature that allows you to add a salesperson to numerous sales teams.
As a result, this blog discusses the implementation and execution of Multi Teams.


