Managing human resources efficiently is crucial for the success of any organization. To achieve this, companies rely on robust HR systems and databases that store and manage vital information about employees, contracts, departments, job positions, time-off types, allocations, leaves, salary structures, and rules. Odoo, an open-source ERP system, provides a comprehensive solution for HR management. Setting up master data in Odoo is a fundamental step to streamlining HR processes. Each category of data, from user details to salary structures and rules, plays a vital role in HR management. Proper configuration not only ensures compliance with legal and organizational requirements but also enables HR professionals to make informed decisions that contribute to the overall success of the company. A well-structured HR database is the backbone of an efficient and productive workforce.
In this blog, we will outline the steps to set up master data in Odoo for managing the HR department of a company.
1. User Details:
User details are the foundation of any HR database. They typically include personal information such as name, contact details, identification numbers, and access credentials for the HR system. This data is crucial for tracking employee records and ensuring secure access to sensitive HR information. In Odoo, you can configure user details by creating and maintaining user accounts. Assigning proper access rights and roles ensures that employees can access relevant HR data securely.
To configure new user details, go to the General Settings of Odoo and select the Users option. As shown below, you will get the list of existing users of the database.

The New button can be used to create a new user. This will open a new form view as shown below.
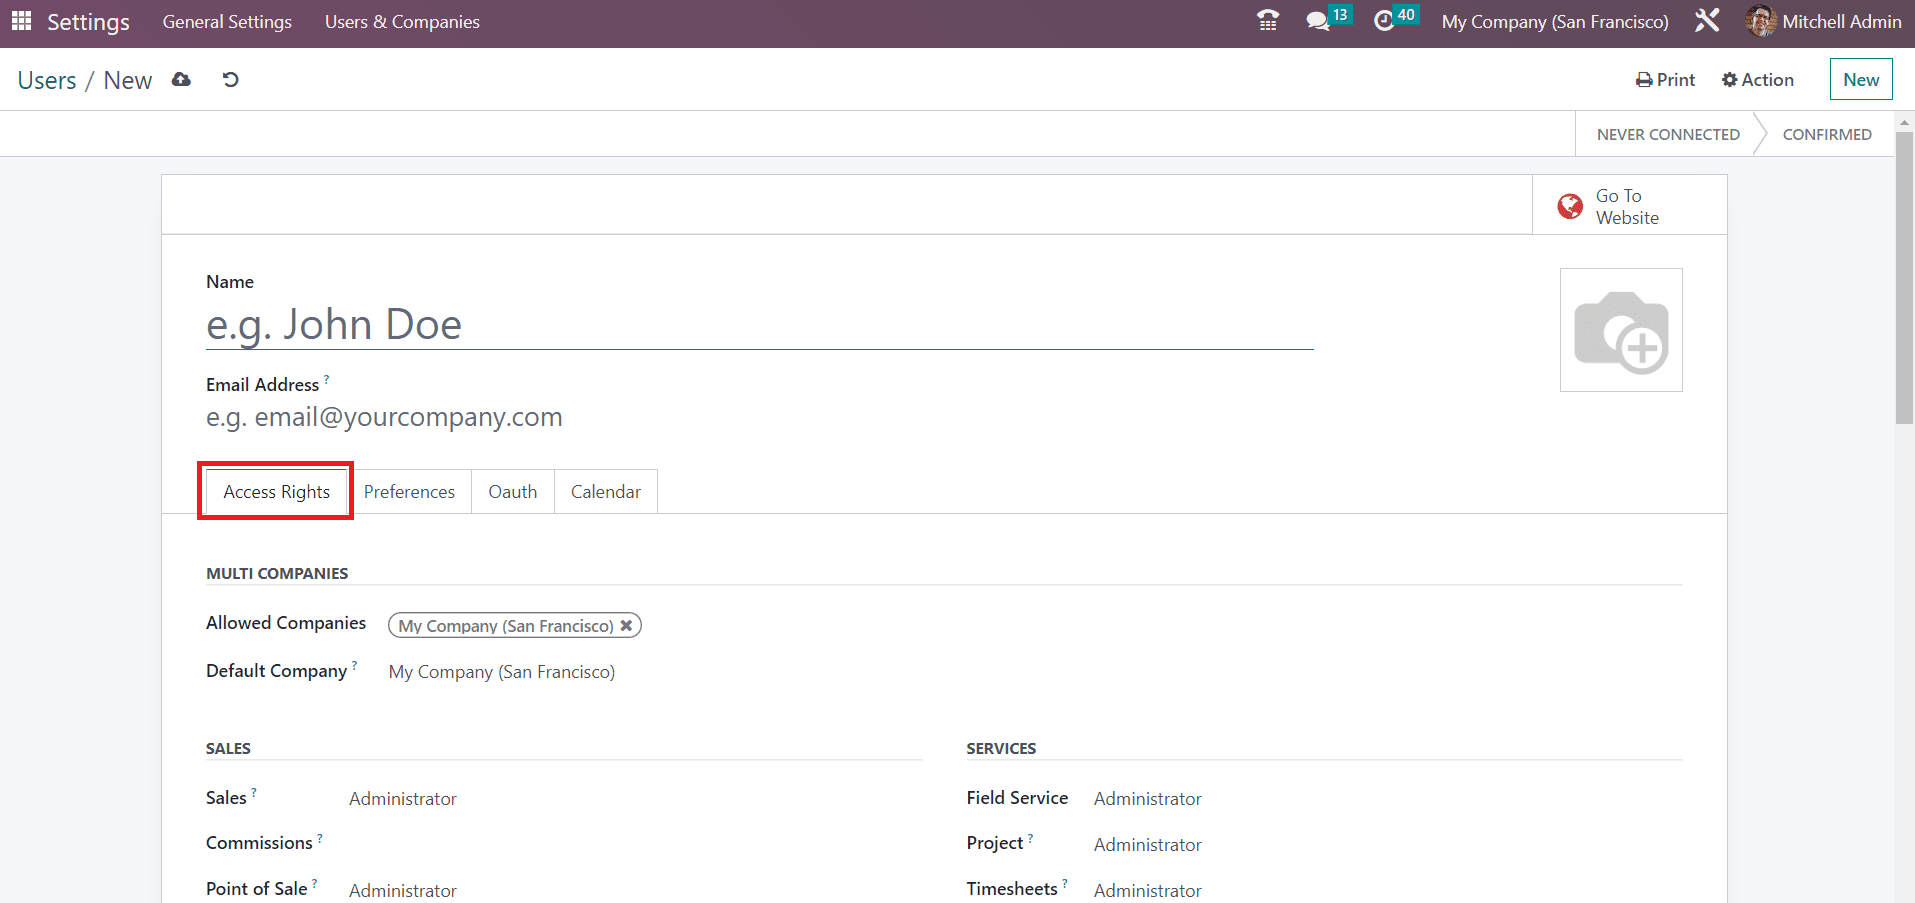
You can mention the Name and Email Address of the new user in the specified fields. Under the Access Rights tab, you can set access rights for the new user.
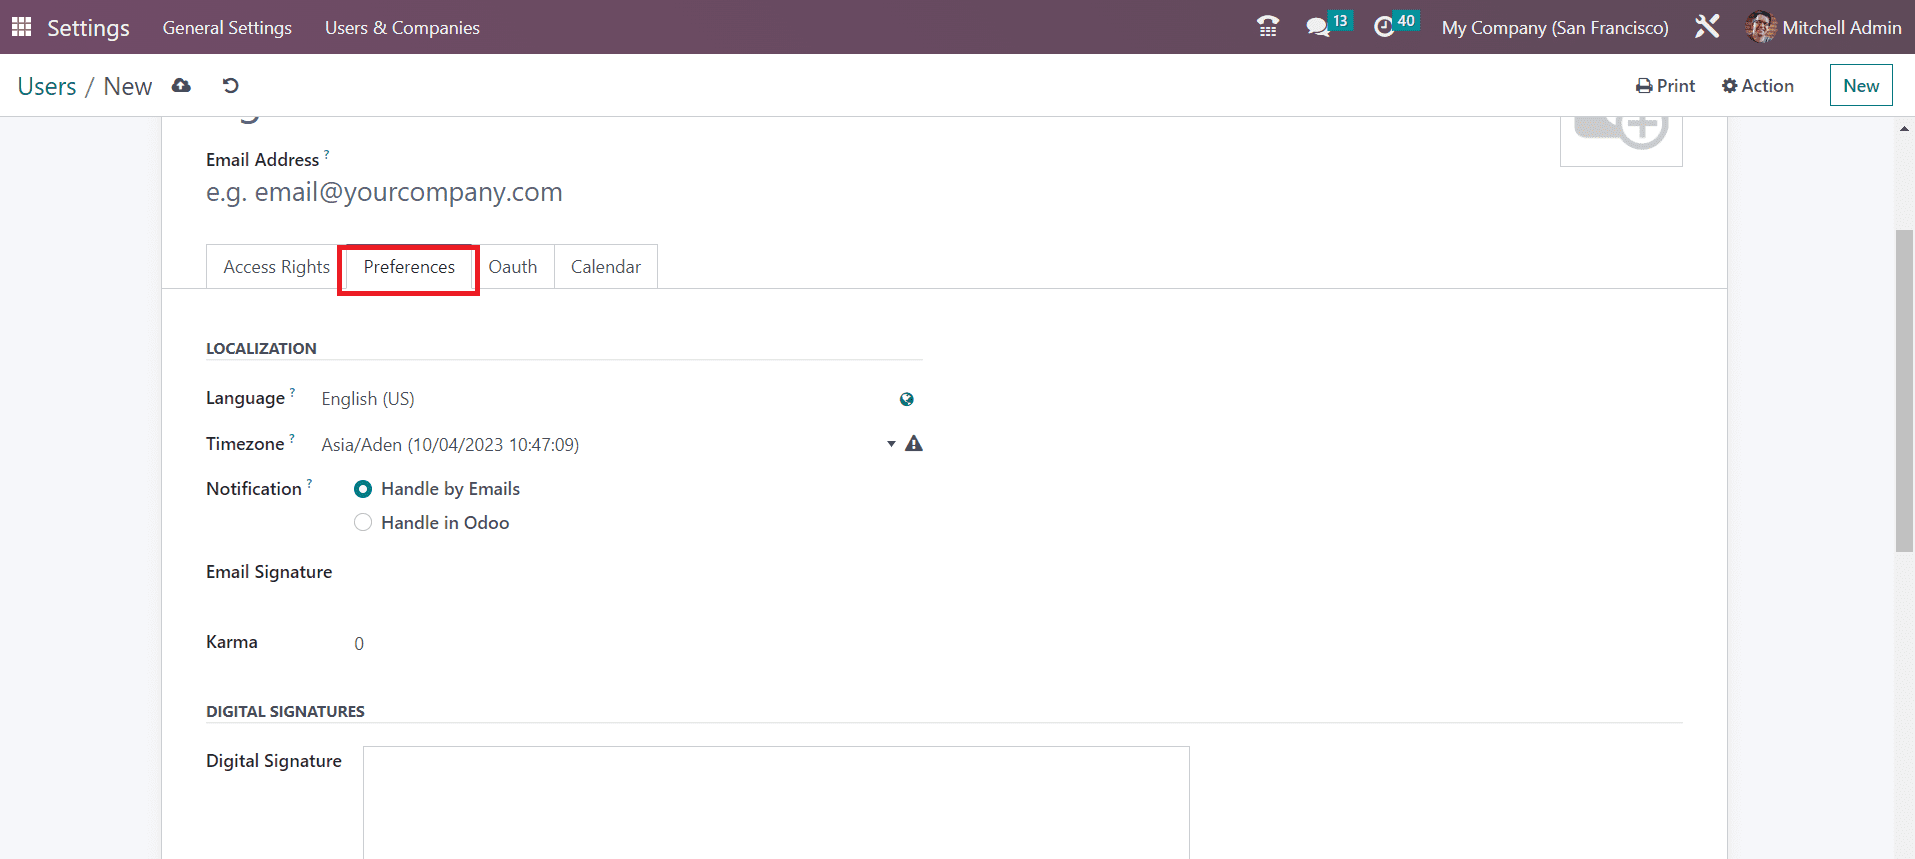
Localization and Signature details can be mentioned under the Preference tab.

In the Settings menu, you will get a dedicated field where you can mention the mail address of the new user. By clicking on the Invite button, an invitation mail will be generated automatically and sent to the respective mail id. The user can accept the invitation and create new login credentials using the link provided in the invitation mail.
2. Departments:
Departments help in organizing your workforce. You can configure department records in Odoo to categorize employees based on their roles or teams. HR departments must maintain a clear organizational structure, including information about different departments and job positions. Configuring this data helps in managing reporting structures, defining roles and responsibilities, and facilitating efficient communication within the organization.
Create department records to categorize employees and streamline reporting using the Department option available under the Configuration menu of the Employees module.

Specify the department’s name, manager, and parent department if applicable. After mentioning the needed information, the department details will be added to your database.
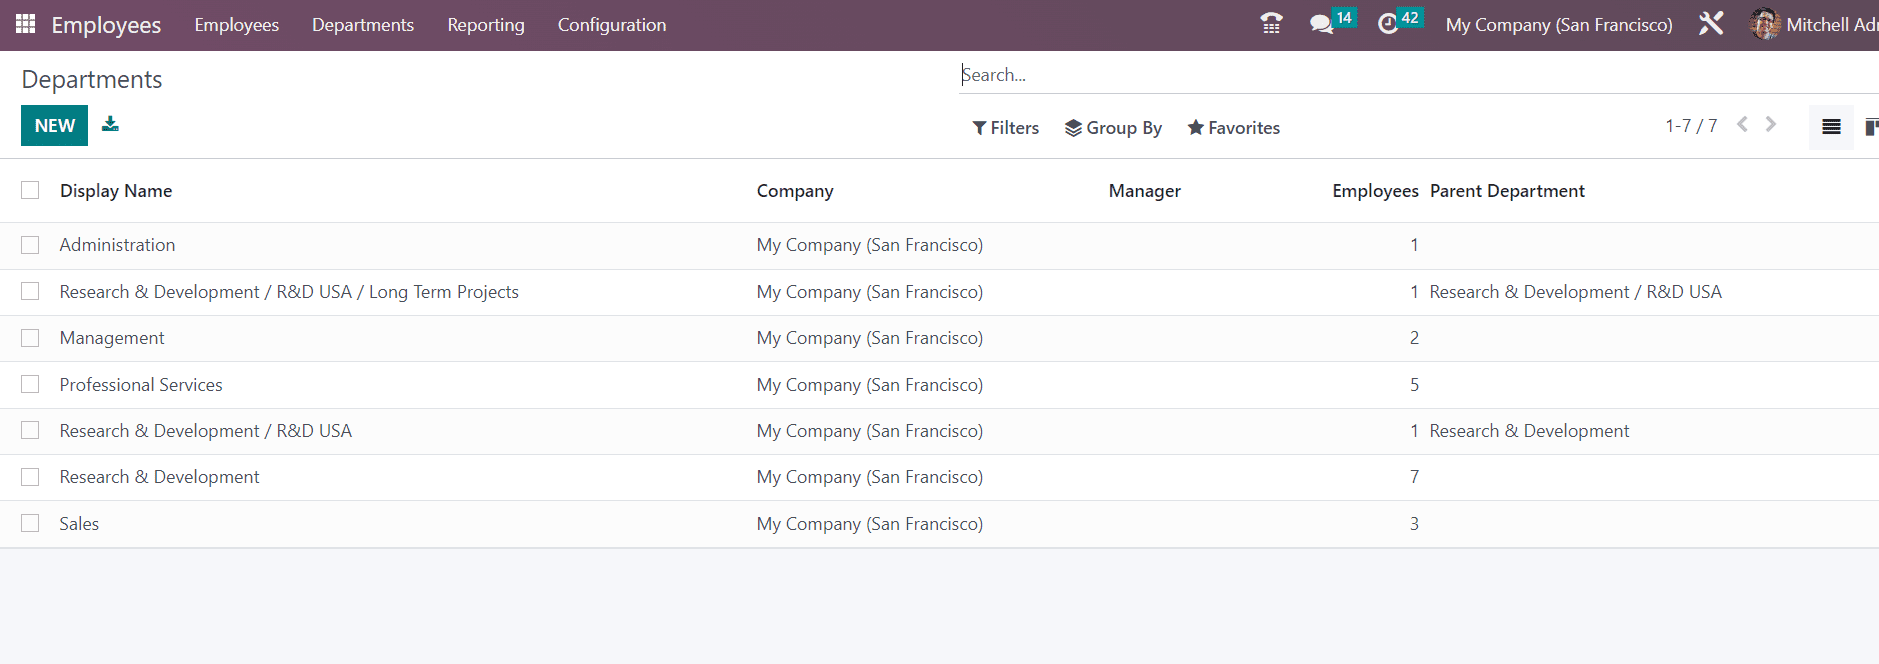
This way, you can configure all departments in your company to your Odoo database.
3. Job Positions:
Defining job positions in Odoo allows you to categorize and manage job roles within the company. This helps in recruitment, performance assessment, and ensuring each position has clearly defined responsibilities. You can define job positions within the Employee module. Each job position should include details such as the job title, department, and job description.
The option to configure job position details can be found under the Configuration menu of the Employee module.
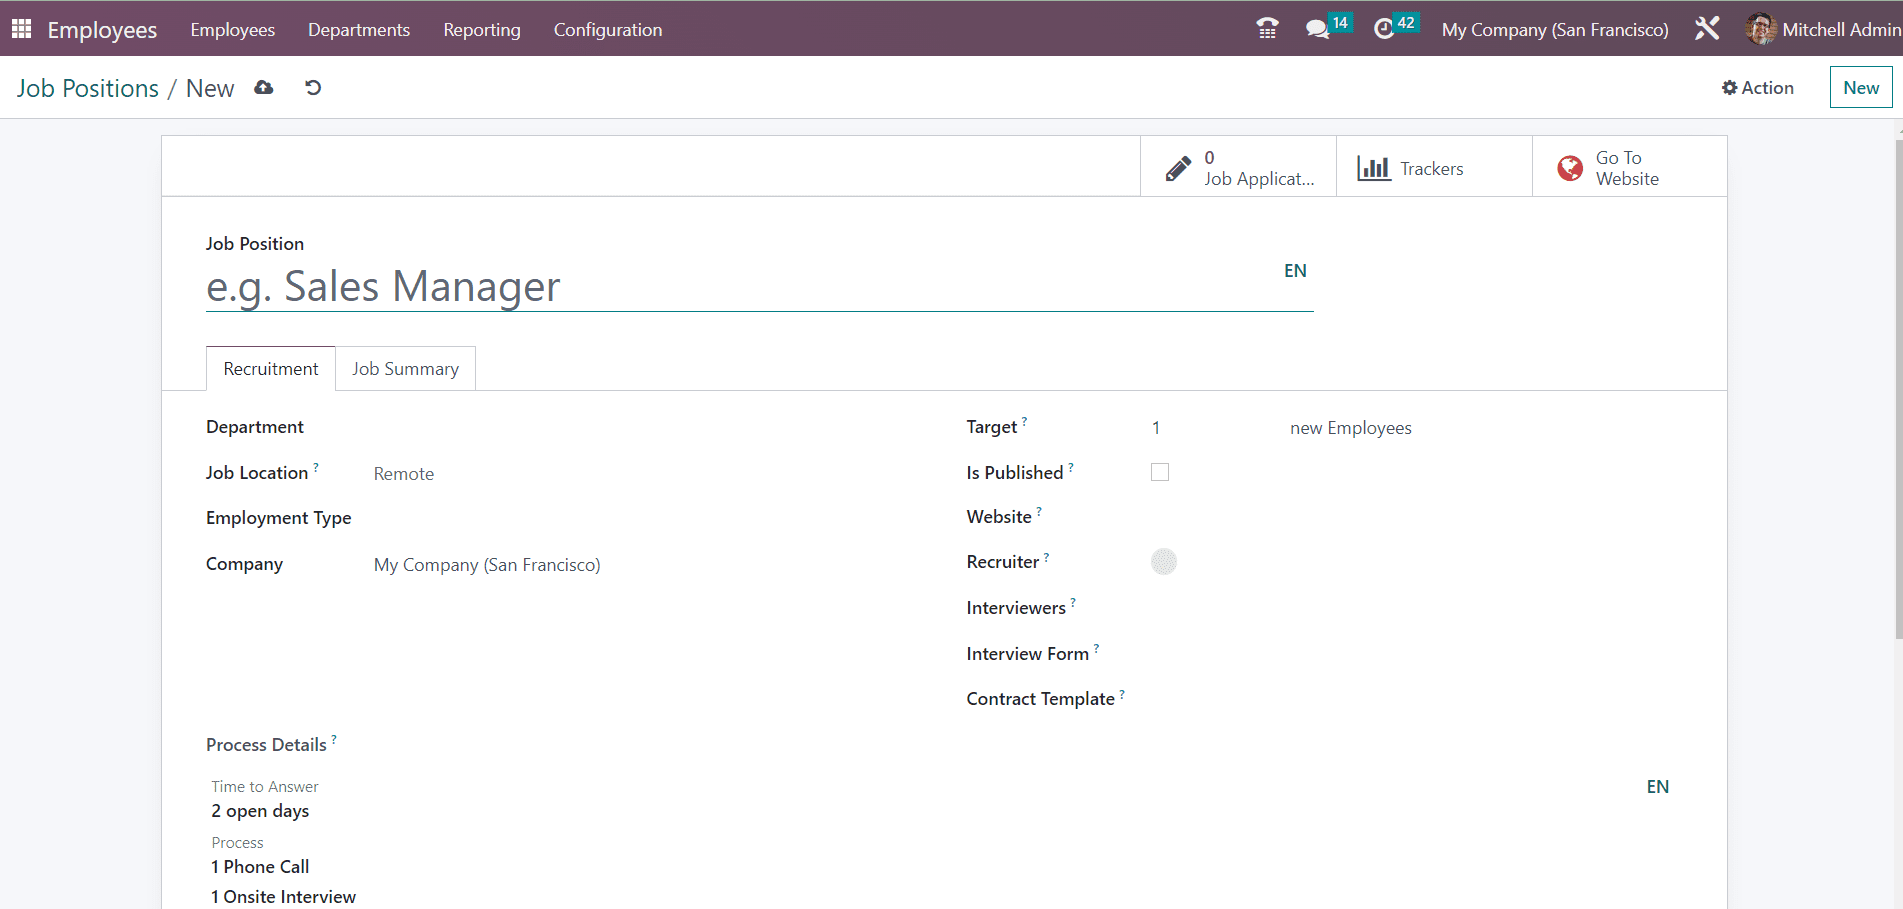
The screenshot shown above is the form view of the new job position creation window. You can specify Job Position, Department, Job Location, Employment Type, Company, Process Details, Recruitment Details, and Job Summary in the corresponding fields.
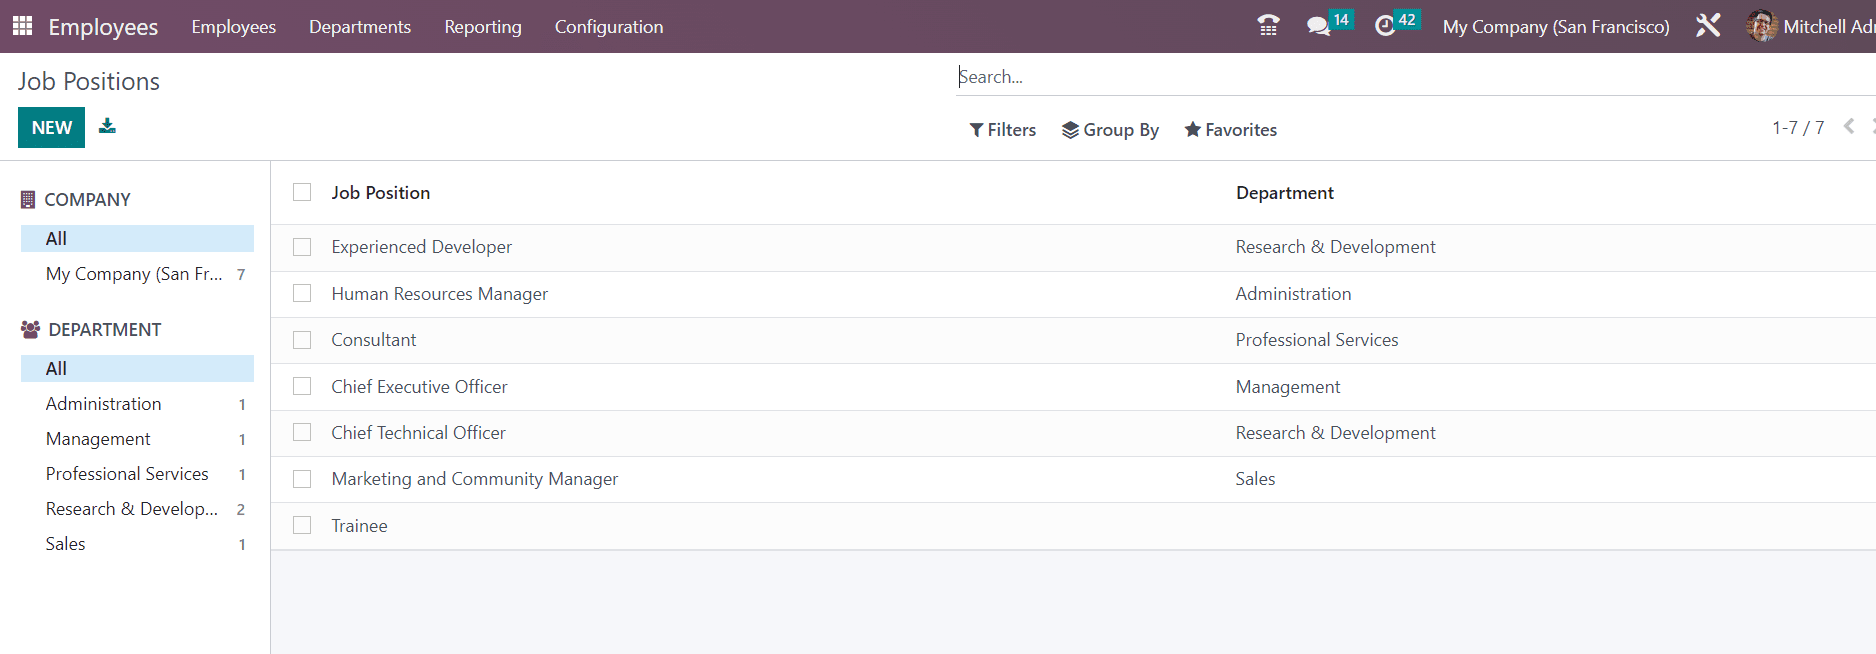
You can create a list of all available job positions in your company on this platform.
4. Employee Information:
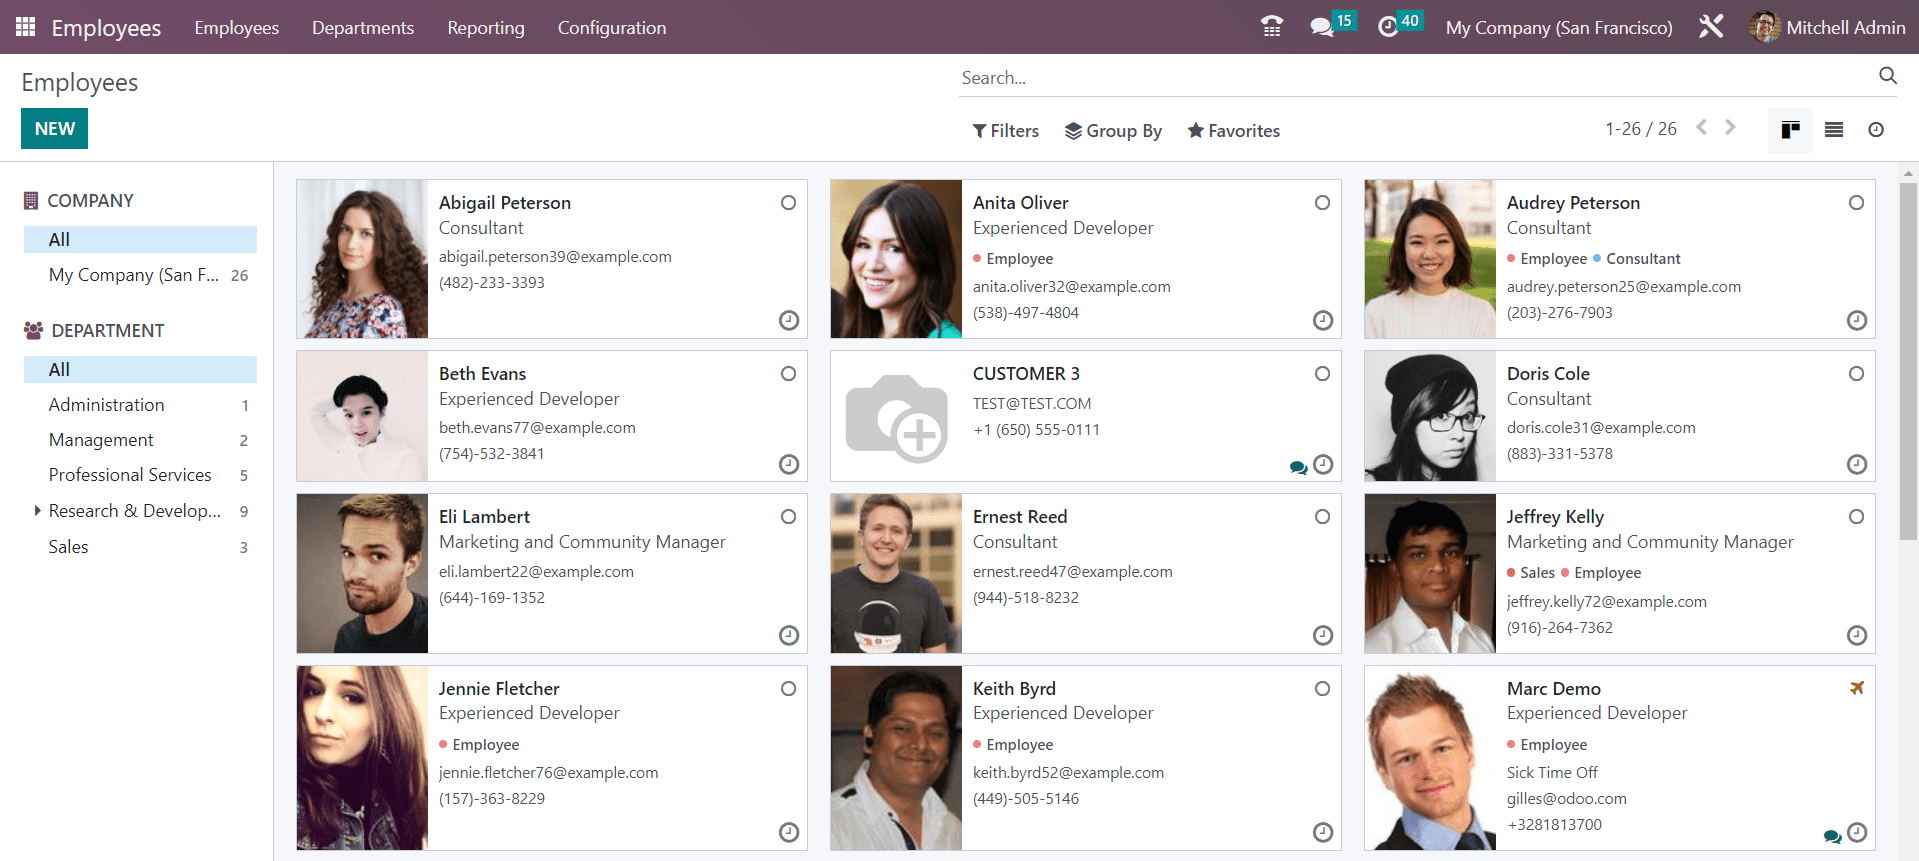
To manage employee data in Odoo, you can create Employee Records. Employee information encompasses comprehensive details about each individual within the organization. Each record contains essential information such as name, contact details, employment history, and personal details. You can also link these records to user accounts for seamless access. Configuring this data allows HR departments to efficiently manage personnel and make informed decisions about hiring, promotion, and training.
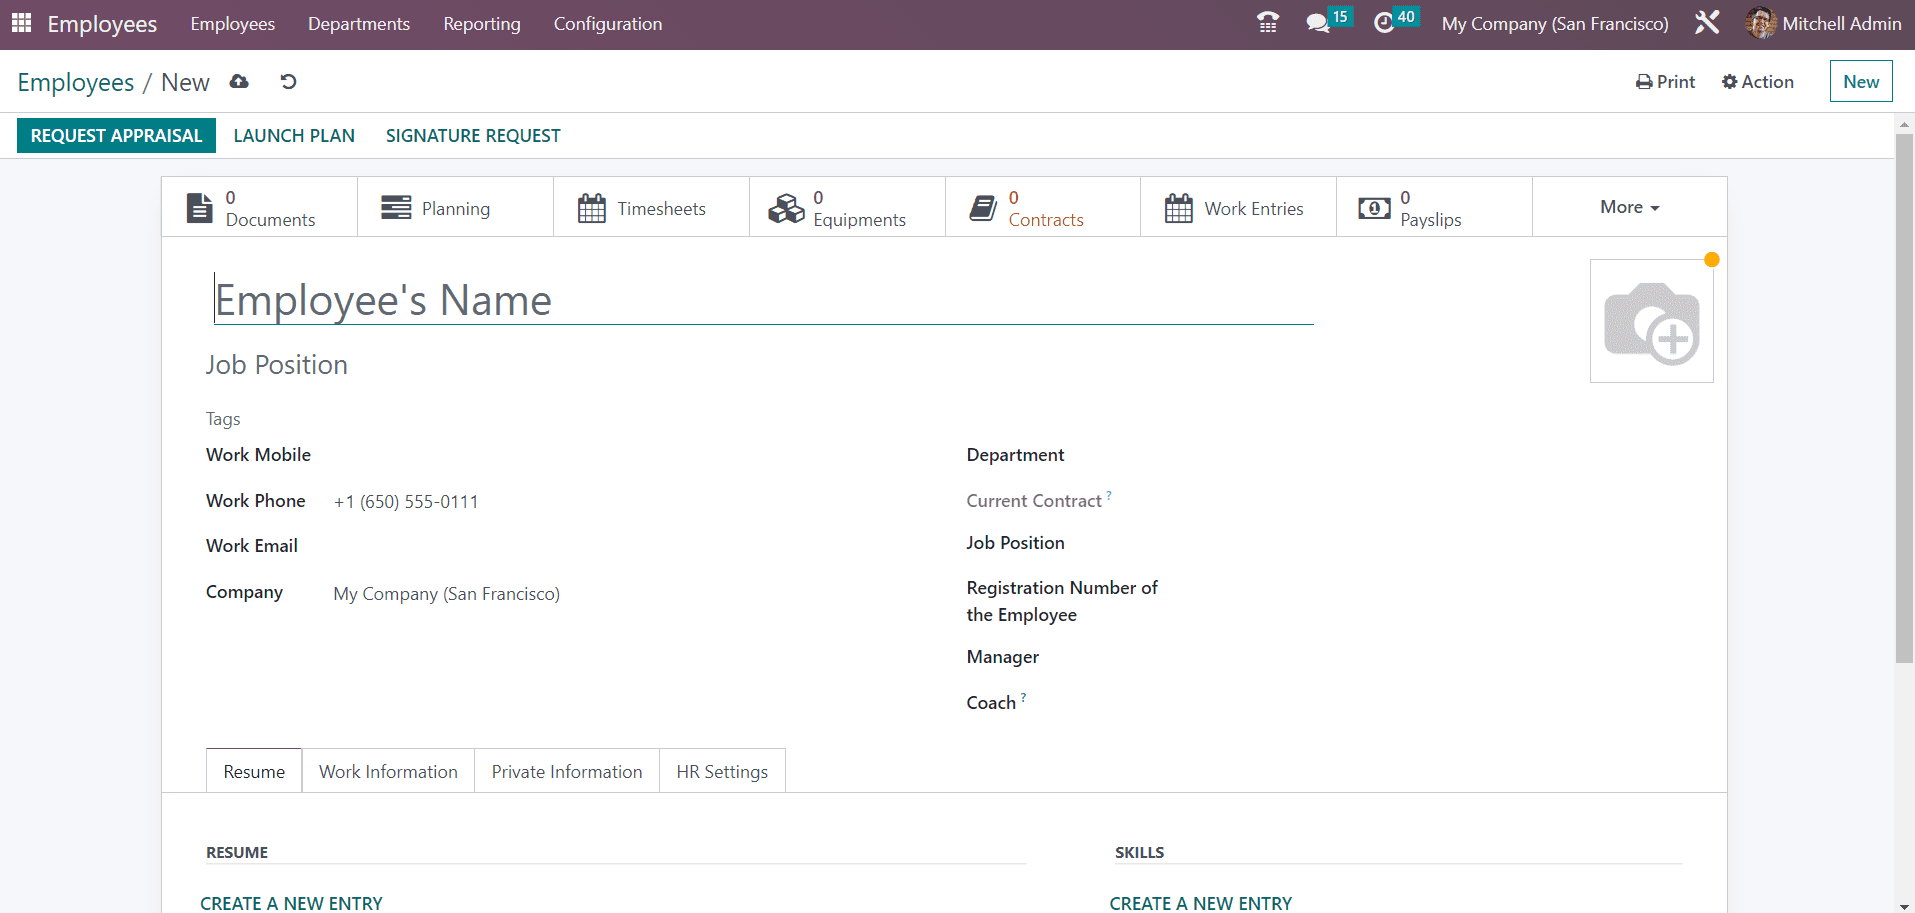
An employee should have a unique employee ID, personal information, contact details, and job-related information such as job title, department, and manager. Attach relevant documents, like resumes, contracts, timesheet, and certifications, to individual employee profiles for easy access.
5. Contracts:
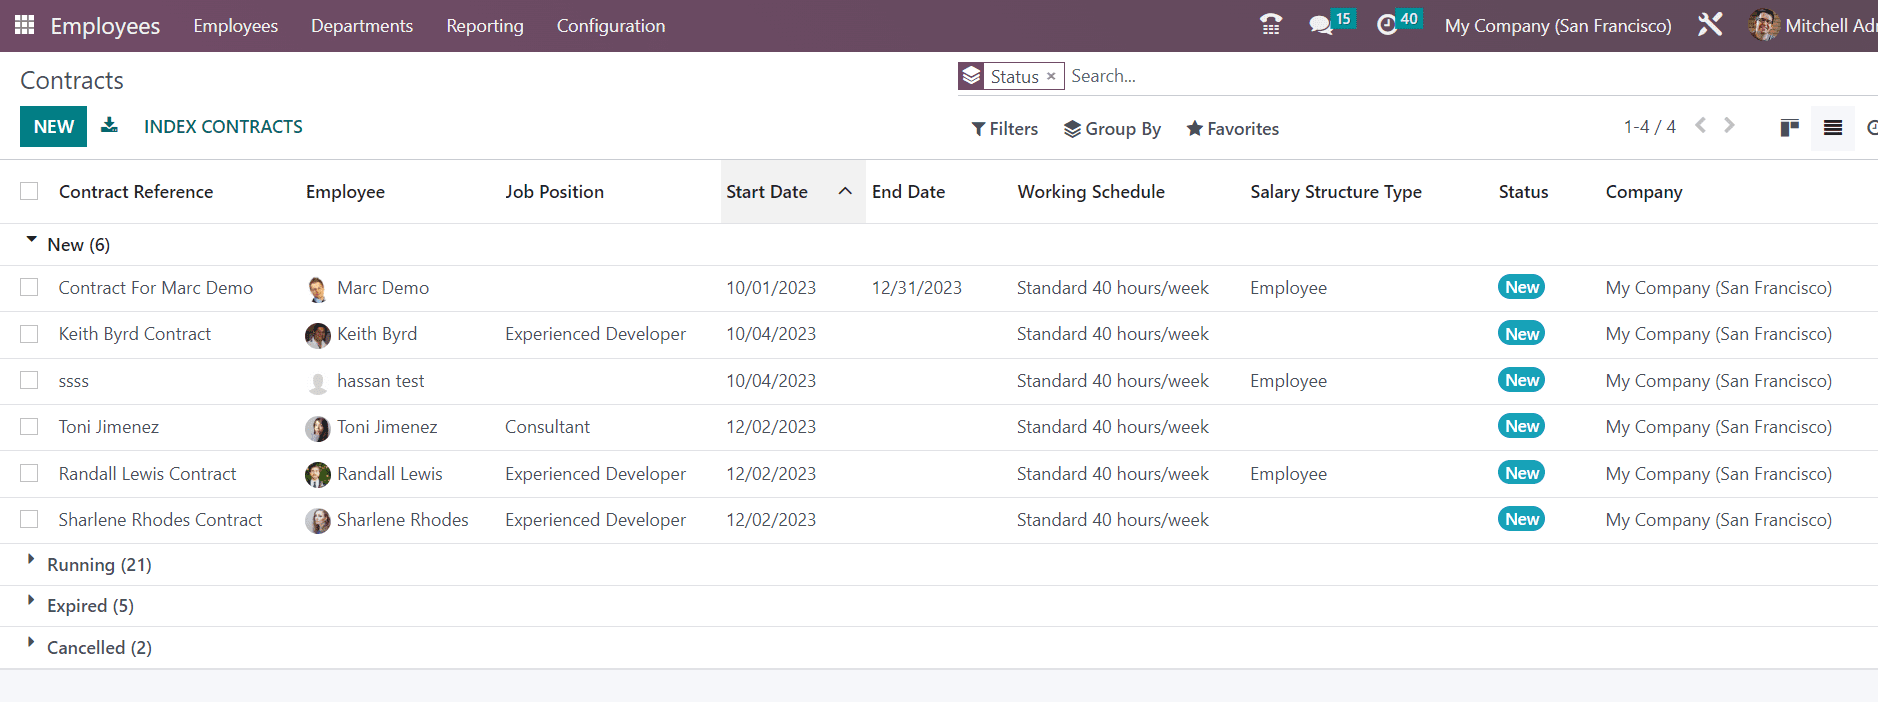
Contracts are vital to establish the terms of employment. Odoo allows you to define various contract types, specifying conditions, working hours, salary components, and more. Linking contracts to employee records ensures accurate payroll processing. Contracts are the legal foundation of the employer-employee relationship. This data is essential for compliance, payroll, and ensuring that employment agreements are upheld.
After creating a new employee profile, you can configure a new contract for that particular employee from the Employee module itself.
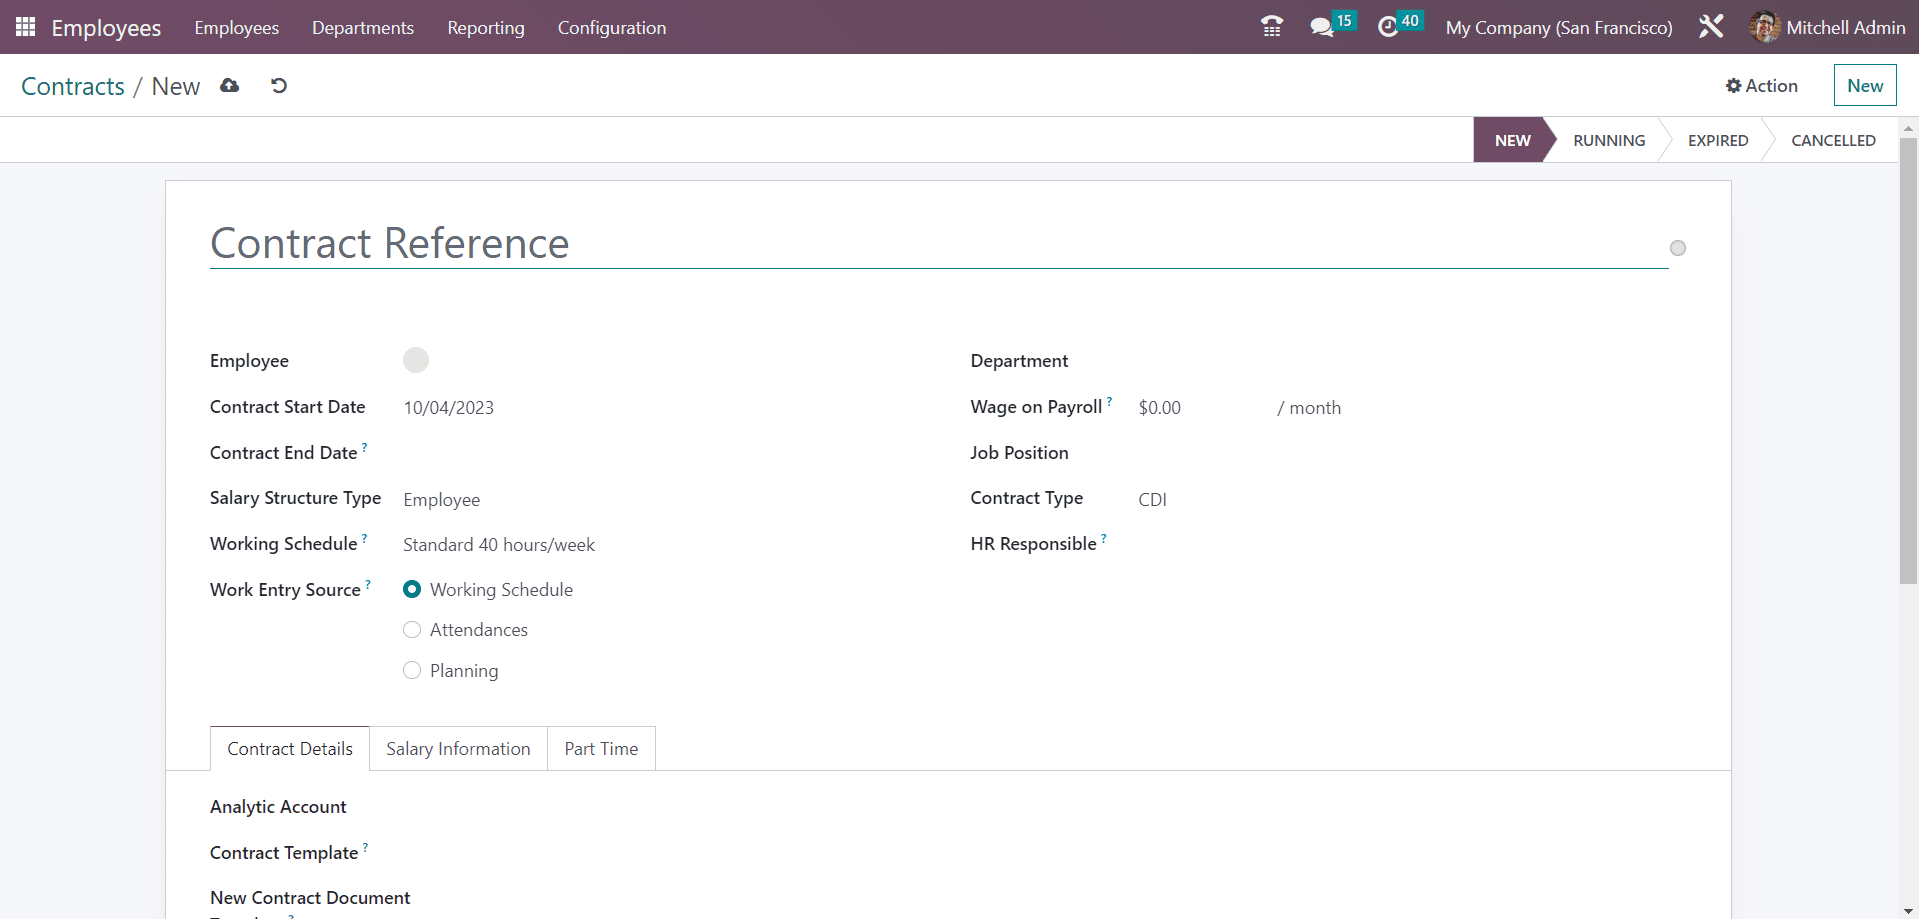
Configuring contract data involves recording terms and conditions, start and end dates, compensation details, and any special clauses. You can mention salary structure, working schedule, wage on payroll, contract type, and salary information in the new contract creation window.
6. Time Off Types:
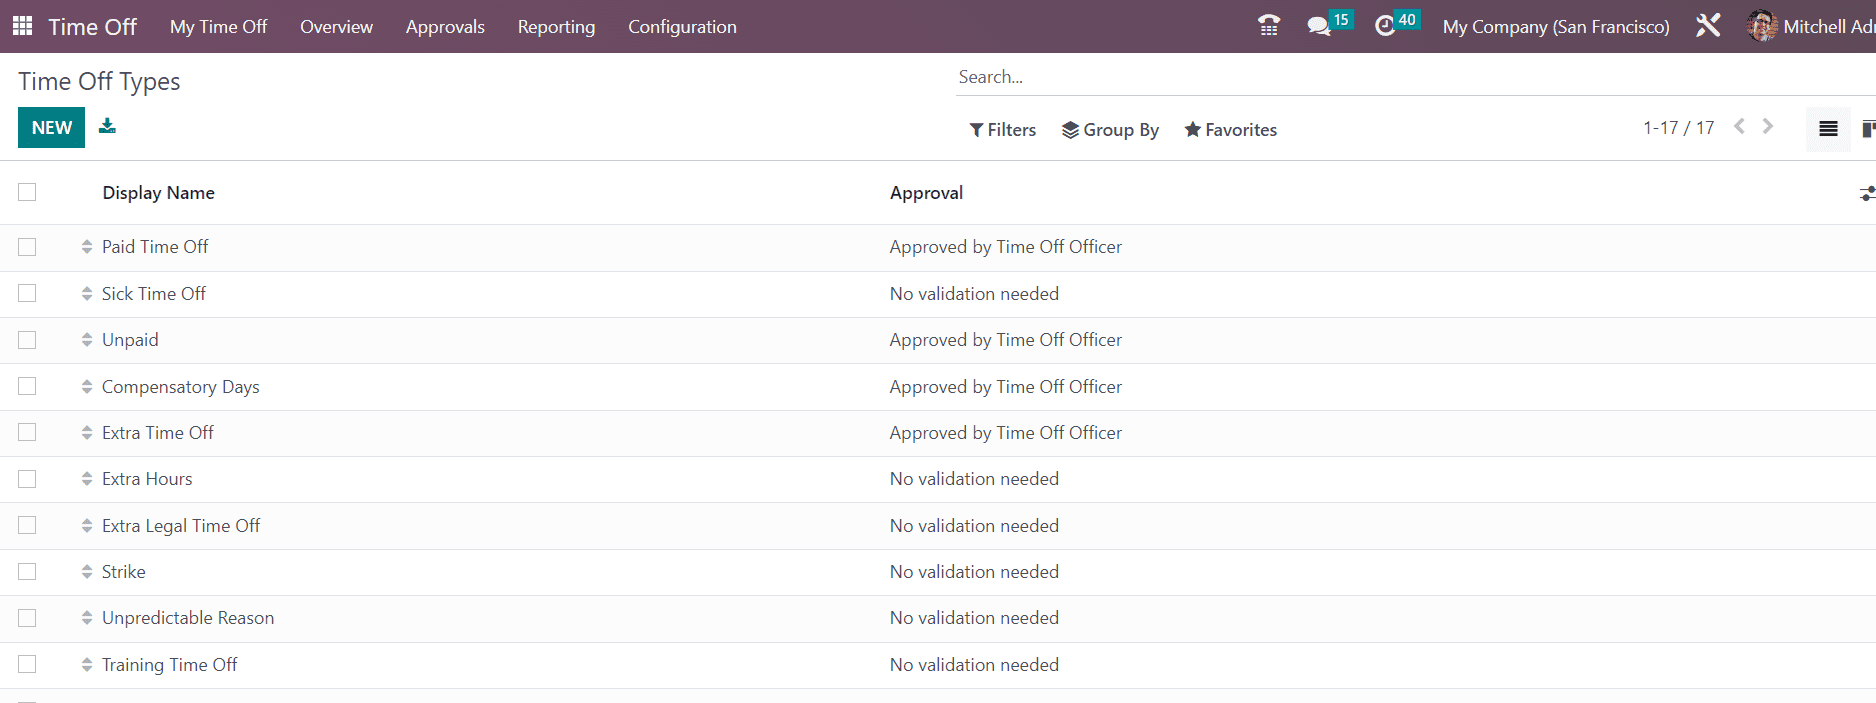
Time off types include various leave categories such as vacation, sick leave, and maternity leave. Odoo lets you customize these types, set accrual rules, and define approval workflows to manage employee time off effectively. Configuring time-off types allows HR to track and manage these requests, ensuring that employees are granted the appropriate time off while maintaining productivity. You can create such time-off types from the Configuration menu of the Time Off module.
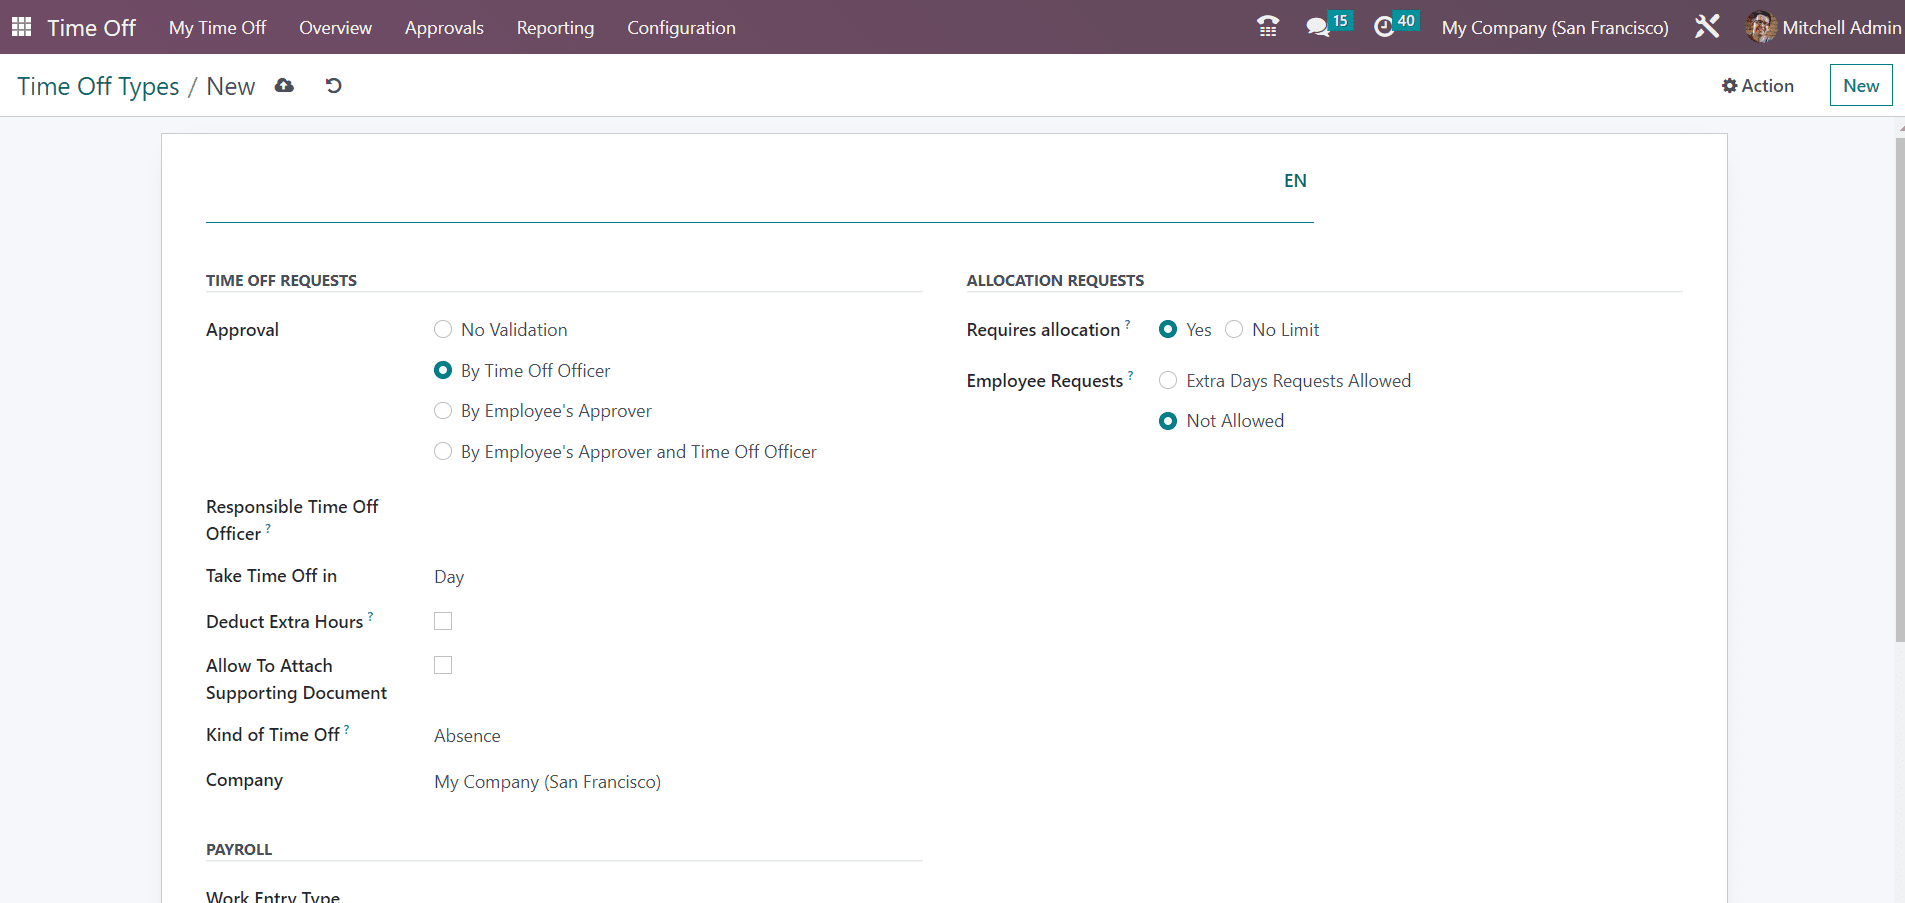
Odoo allows you to configure and customize these time off types to match your company’s policies and requirements. You can set different accrual rates, approval workflows, and rules for each type of time off. Additionally, you can integrate time off management with the HR and payroll modules to ensure accurate tracking and compensation.
For each employee, go to their employee record and assign the relevant time off types and allocation rules.
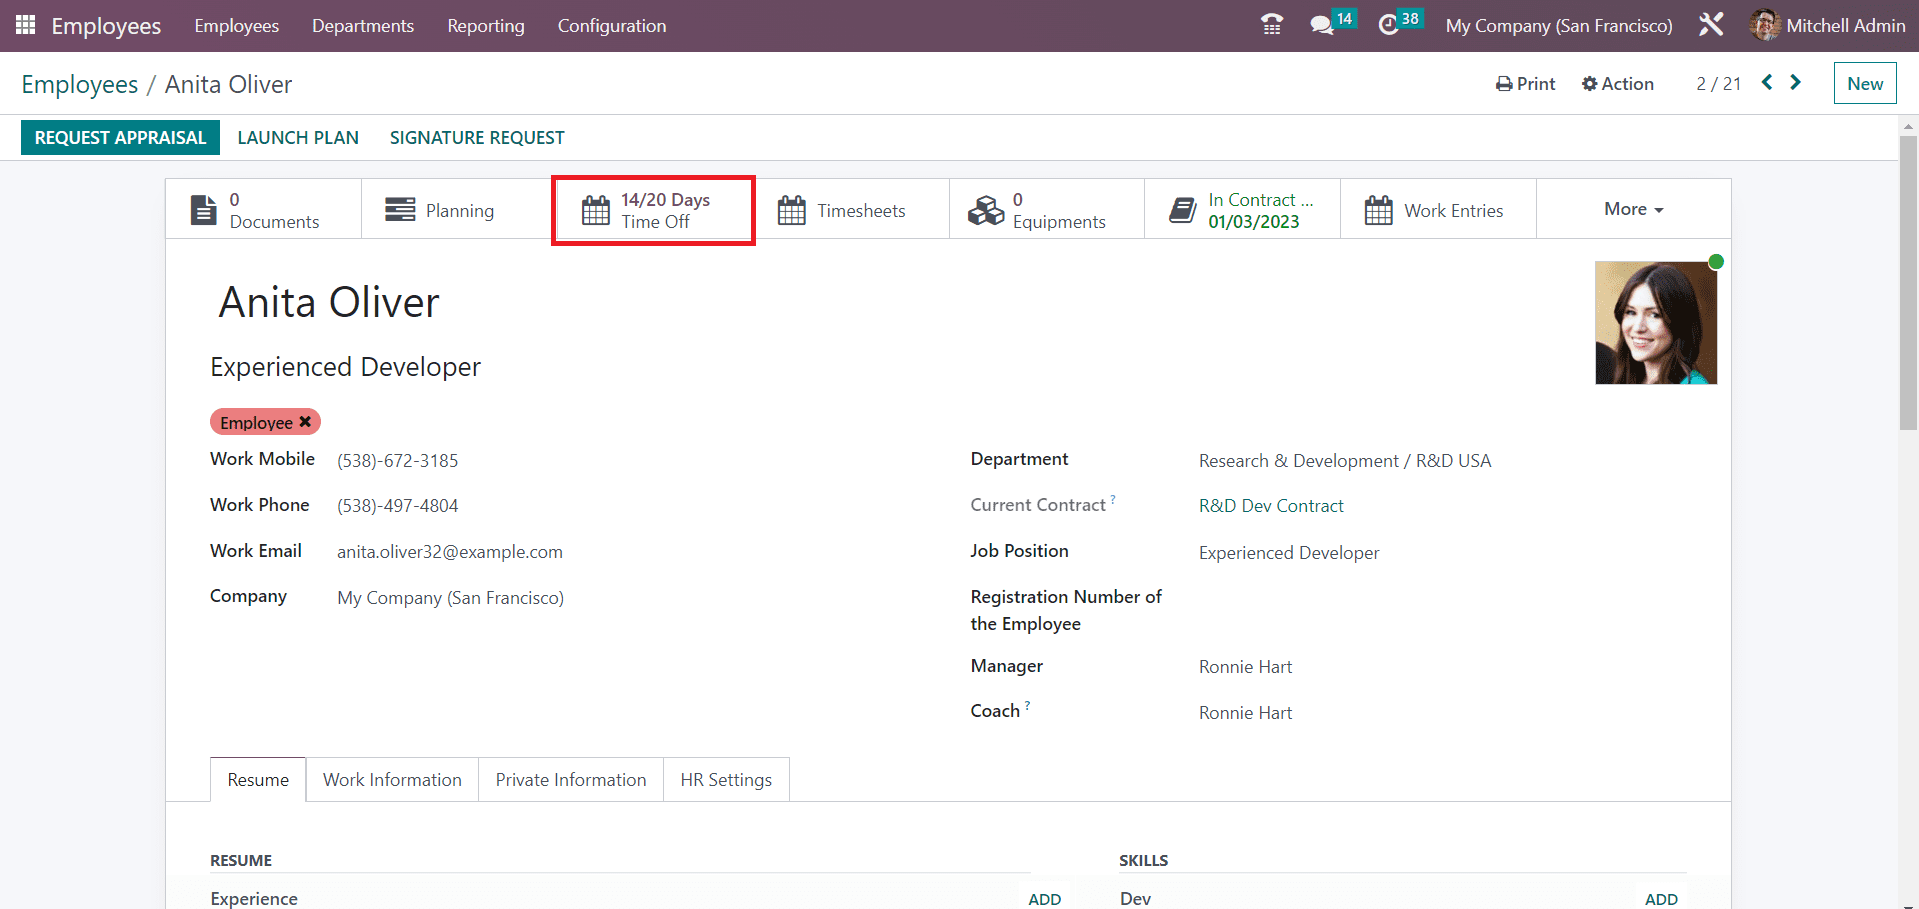
Employees can request time off through the Time Off module, and managers can approve or reject them.
7. Allocations:
In Odoo’s Time Off module, the Allocation option allows you to allocate a specific number of days or hours of leave to an employee. This can be useful for various purposes, such as granting an employee a specific amount of vacation days at the beginning of the year or providing them with a set number of sick leave days. Before you can allocate leave, you’ll need to set up Time Off Types which we mentioned earlier. Each type can represent different categories of leave, such as vacation, sick leave, or personal days. Configure the type, including the allocation method.
Select the Allocation option from the Approvals menu.
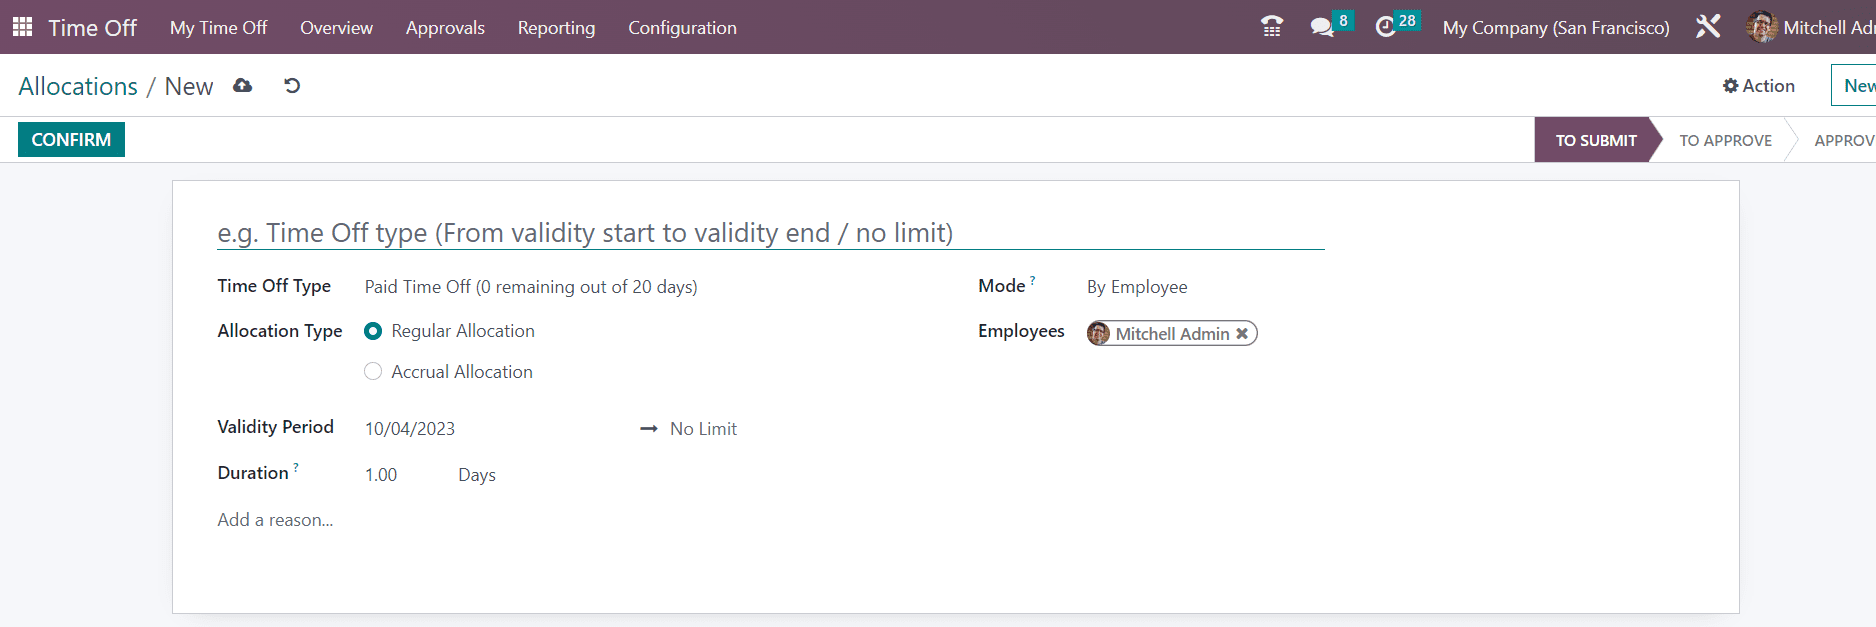
Mention the Time Off Type, Allocation Type, Validity Period, Duration, Mode, and Employee in the given spaces. Use the Confirm button. The allocated leave will now be available to the employee according to the allocation date or period you specified. The employee can request time off within the allocated limits.
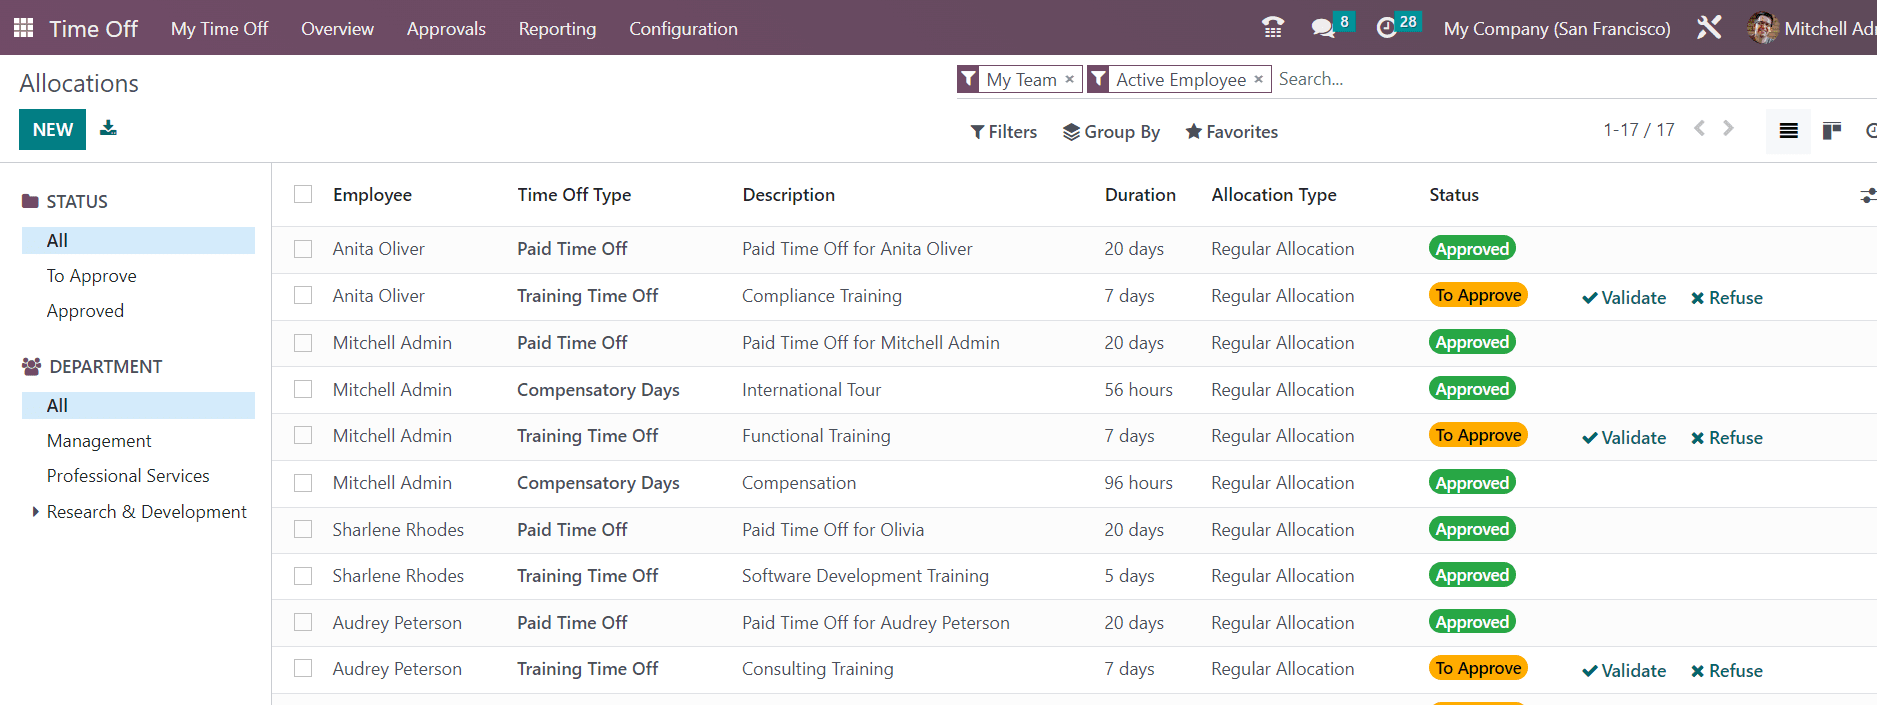
8. Leaves:
Managing leave requests and approvals is simplified in Odoo. Employees can submit leave requests, which can be routed to their supervisors for approval. This data is then integrated with the payroll system for accurate leave calculations. Leave management is crucial for maintaining workforce productivity. HR systems should allow employees to request leaves, track accrued time off, and provide managers with tools to approve or deny requests. Configuring leave data streamlines this process.
Using the Time Off option, an employee can easily create requests for leave. In the new time off creation window, mention the Time Off Type, Date, Description. Details like Mode, Employee name, Payslip State will be available in the window.

The HR Manager can Approve or Refuse the request using the corresponding buttons available in the form view.

9. Salary Structure and Rules:
Configuring salary structures in Odoo involves defining various salary components such as basic salary, allowances, deductions, and bonuses. You can also create rules to automate salary calculations, tax deductions, and other financial aspects. This data is central to payroll processing and ensures fair and consistent compensation practices.
Navigate to the Payroll module, where you can manage salary structures and related payroll functions. You’ll typically find an option to create or configure salary structures under the Configuration menu. Within the salary structure, define the various components that make up an employee’s compensation. These components may include:
* Basic Salary
* Allowances (e.g., housing allowance, transport allowance)
* Deductions (e.g., tax, social security)
* Benefits (e.g., health insurance, retirement contributions)
* Bonuses and Incentives
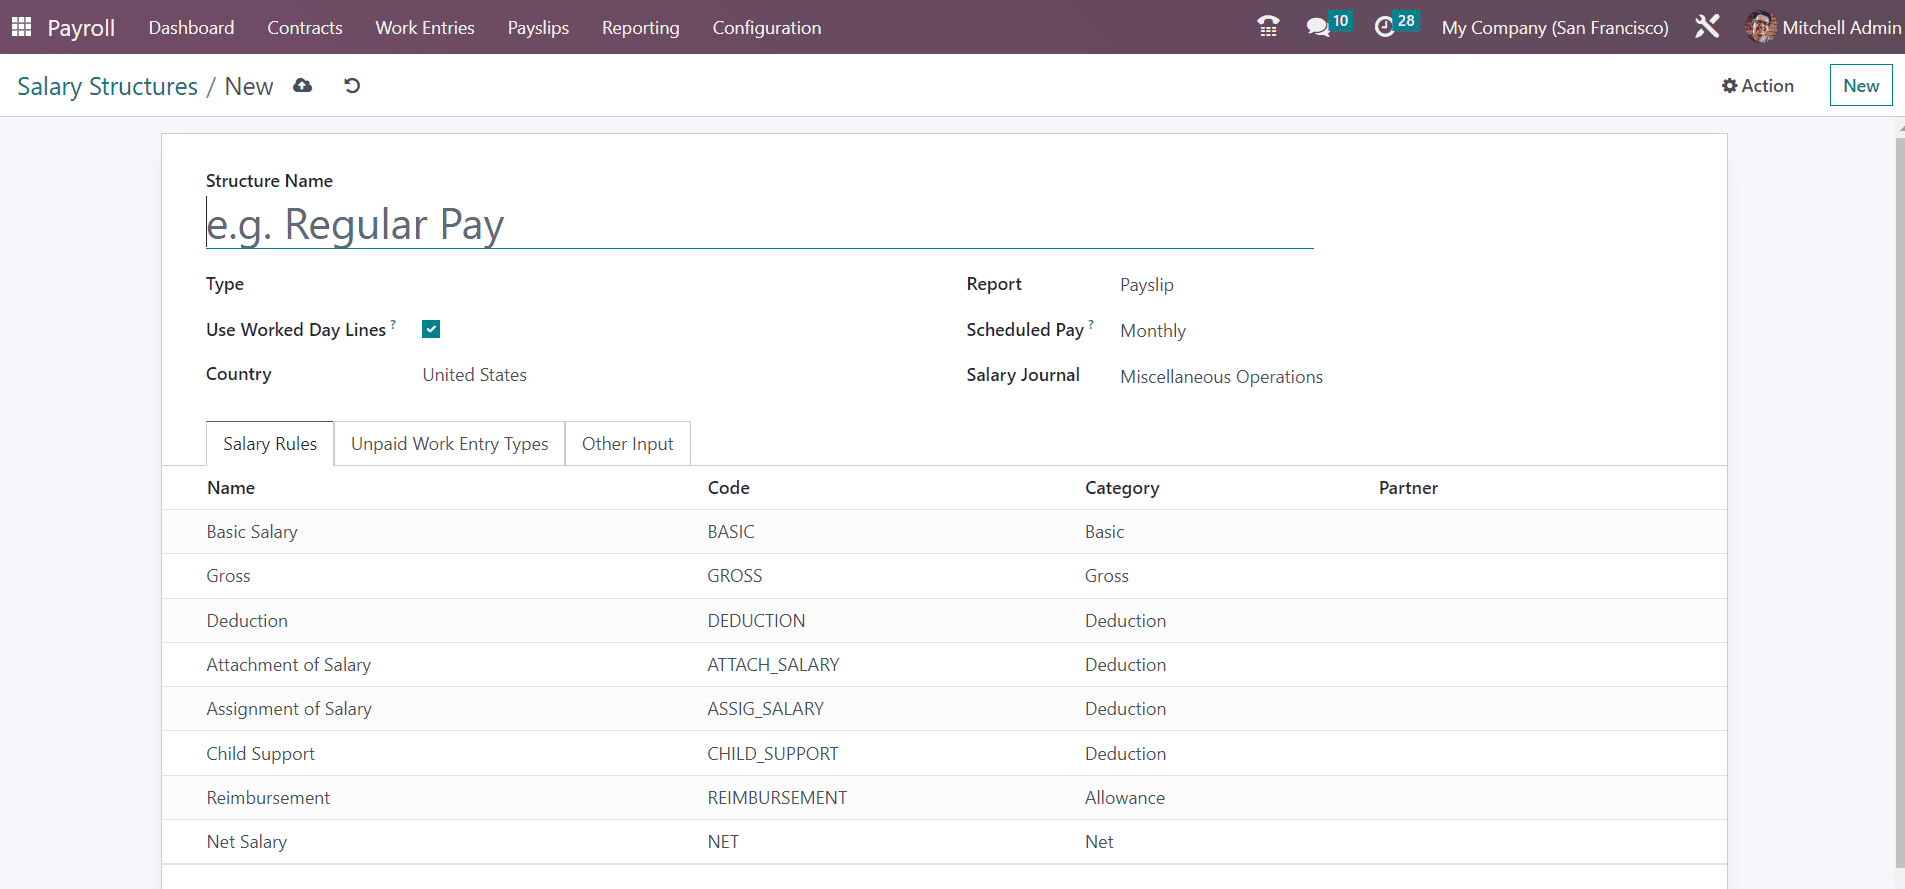
For each salary component, you’ll typically need to assign calculation rules. These rules specify how the amount for each component is calculated. Odoo often provides predefined rules, but you can also create custom rules. Rules can be based on fixed amounts, percentage of another component, formulas, or conditions.
You can customize Salary Rules from the Configuration menu of the Payroll module.
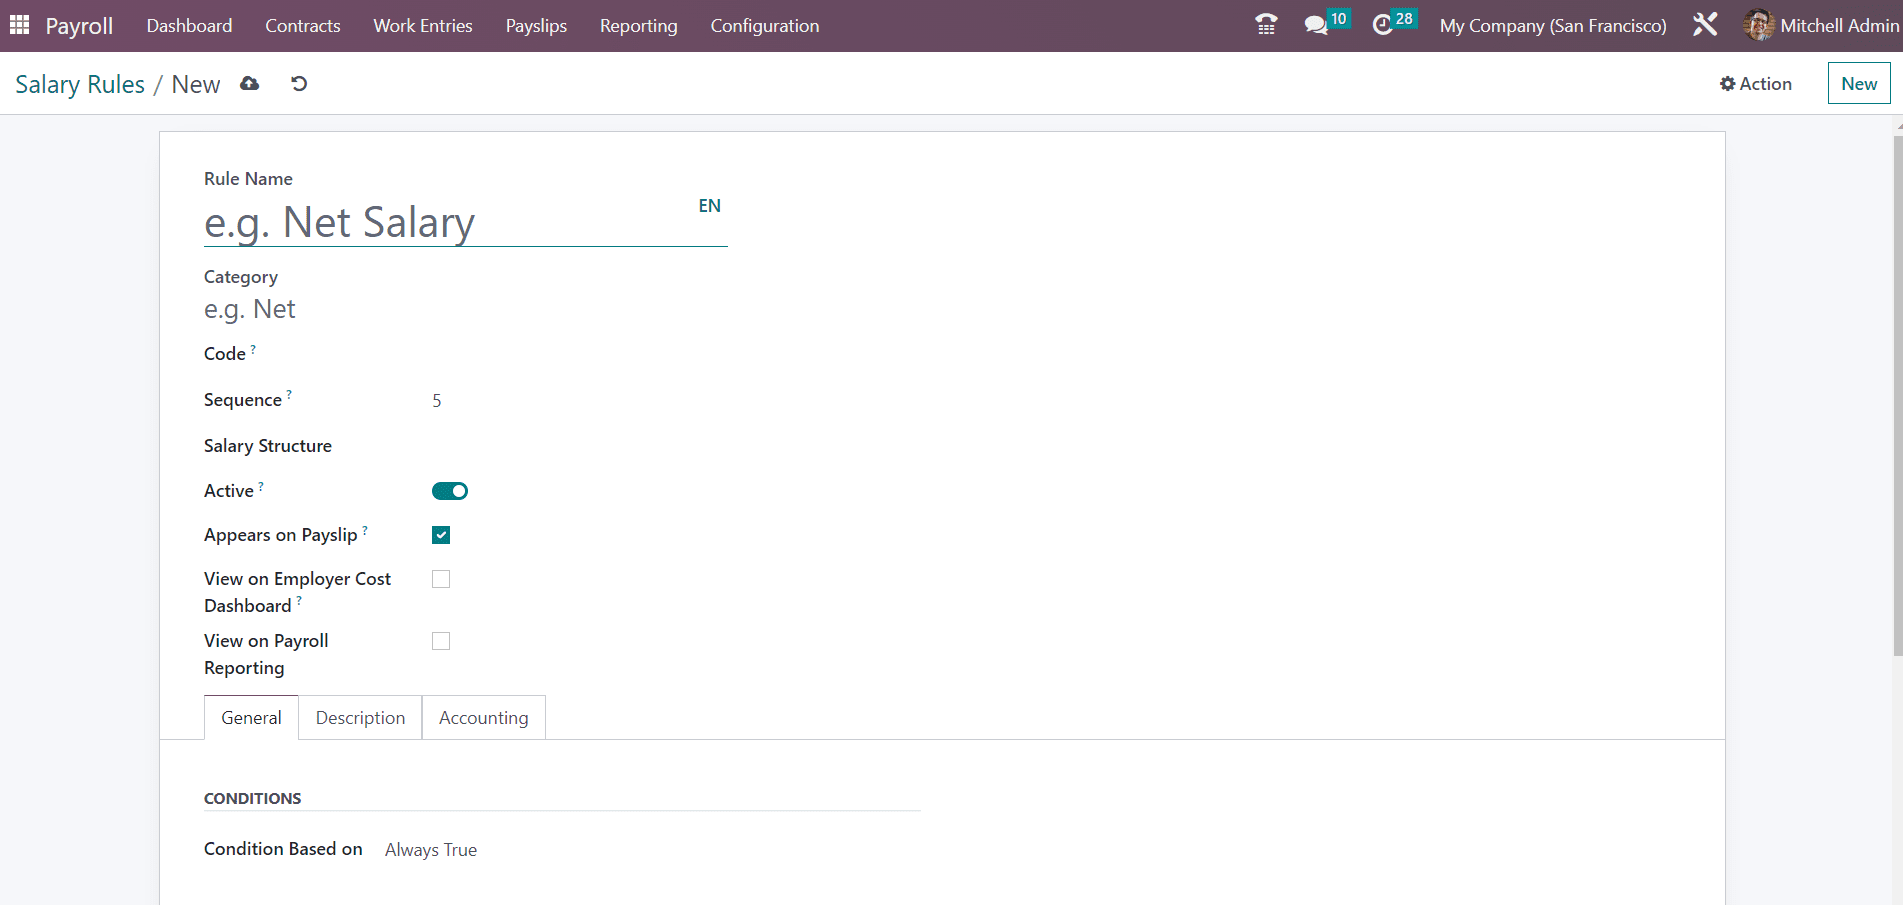
In the salary rule configuration form, you’ll need to define various details:
Name: Provide a descriptive name for the rule, such as “Basic Salary” or “Overtime Pay.”
Code: Assign a unique code to the rule for easy identification.
Category: Select the category that best represents the type of rule (e.g., Basic, Allowance, Deduction, Benefit).
Active: Enable this option to make the rule active and available for use.
Sequence: Specify the order in which the rule should be processed if you have multiple rules.
Condition: Define conditions that must be met for the rule to apply (optional).
Payslip Computations: Configure the formula or computation method for calculating the rule. Odoo provides a formula builder that allows you to create complex calculations based on different variables and components.
Based On: Indicate what the rule is based on, such as the employee’s basic salary, a percentage of another component, or a fixed amount.
To use the salary rules, you must associate them with a salary structure. Go to the salary structure configuration, select the appropriate structure, and add the relevant rules to it. Once salary rules are configured and associated with a salary structure, you can process payroll. Odoo will automatically calculate the employee’s salary based on the configured rules.
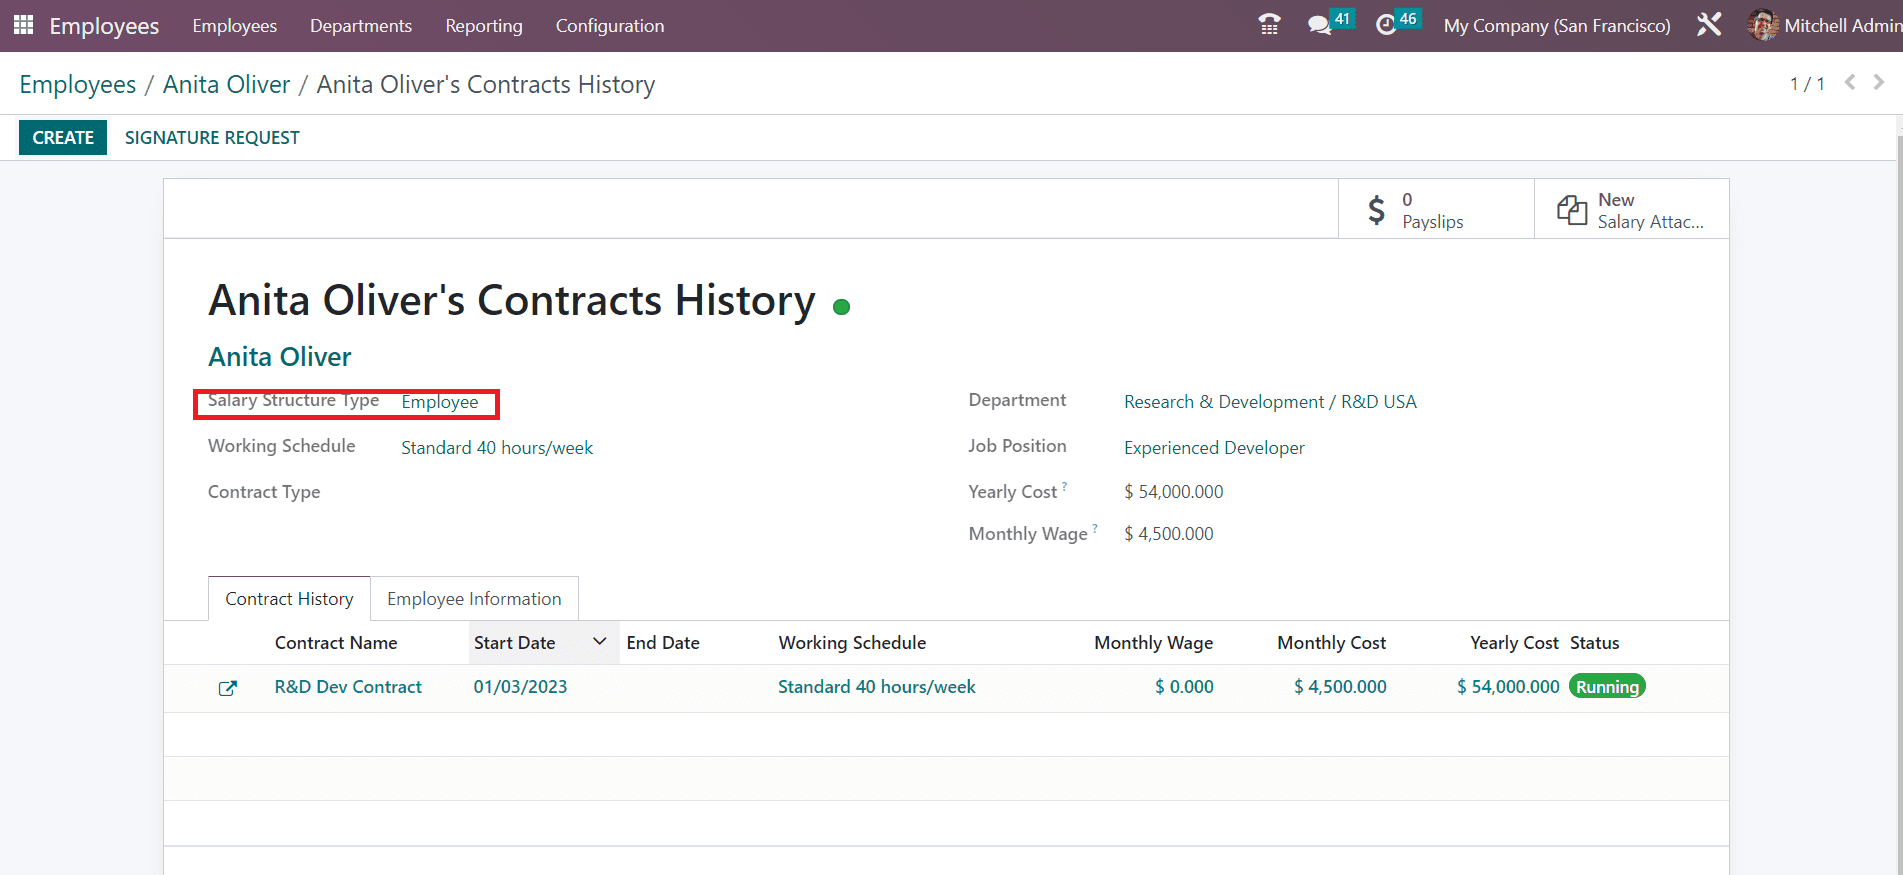
Associate each employee with a contract that specifies the salary structure they are subject to. In the employee’s contract, select the appropriate salary structure and configure any additional details specific to that employee, such as work schedule or probation period. With the salary structures and employee contracts in place, you can process payroll. Odoo often provides a feature to generate payslips for employees.
By following the steps outlined above, a company can effectively manage its workforce and ensure compliance with HR regulations. Properly configured HR master data in Odoo is the key to efficient workforce management and enhanced organizational performance. Odoo’s flexibility and customization options make it a powerful tool for HR professionals to optimize their department’s operations.


