The Odoo ERP system includes customizable business management modules in order to give assistance in your operations related to any kind of business. Regardless of the size and type of the business, you can successfully manage and monitor almost all business-related activities with this open ERP system. When it comes to a service provider company, field service is an essential task to be managed with utmost care and attention. In Odoo, the Field Service module can be used as an effective platform for the management of entire field service activities in a systematic manner. You can create new tasks for field services according to customer’s demands, assign employees to the task, monitor the progress of the tasks, generate instant invoices, and many more operations in this module without any confusion.
New tasks for the field service operations can be created easily by following a few steps in the Field Service module. You can control and manage these tasks from the main dashboard of the module.
In this blog, we will take a look into the steps to create new tasks for field services in Odoo 15.
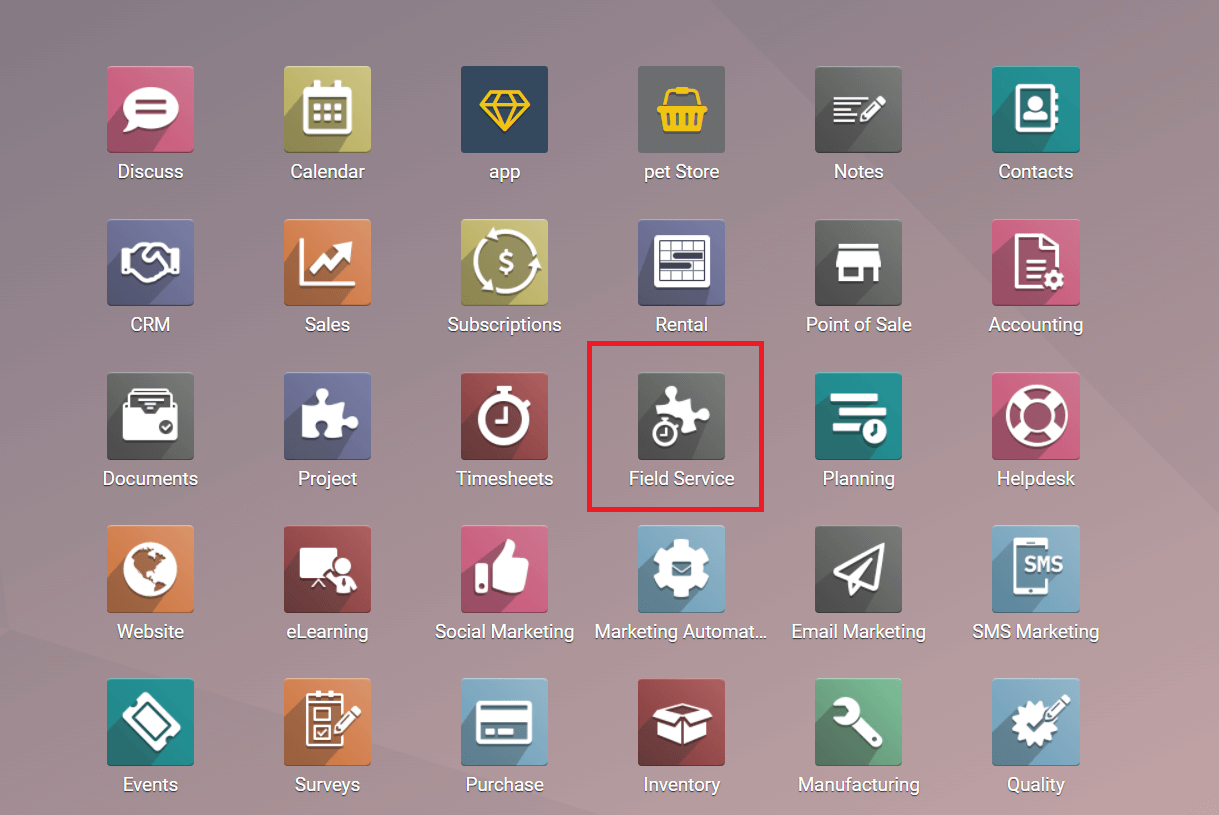
In order to create new tasks, first, you need to make sure that the Field Service module is installed into your database. The module’s icon can be seen in the main dashboard of your system as shown below.
By selecting the Field Service module, you will be directed to the My Tasks window of the module. You will get the details about all tasks created and assigned for you from this platform.

You can use Filter for the tasks based on your requirements using the default and customizable options. The tasks can be grouped based on the Responsible employee, Stage, Project, Company, Start Date, and Worksheet Template. If you want to add more Group By options, you can use the Add Custom Group button. Apart from the Kanban view, the tasks window can be viewed in Map, Calendar, List, Gantt, and Activity views.
In the Kanban view, you will get three vertical dots on the top right corner of each task as shown in the image below which includes the options to Set Cover Image, Share, and Edit the task.

The Star icon can be used to add the task to your favorite list and the small clock icon will help you to schedule new activities for the task.
Now, let’s discuss how to create new tasks in the Field Service module. For this, click the Create button from the task dashboard of the module.

You will get a new task creation window as shown below.
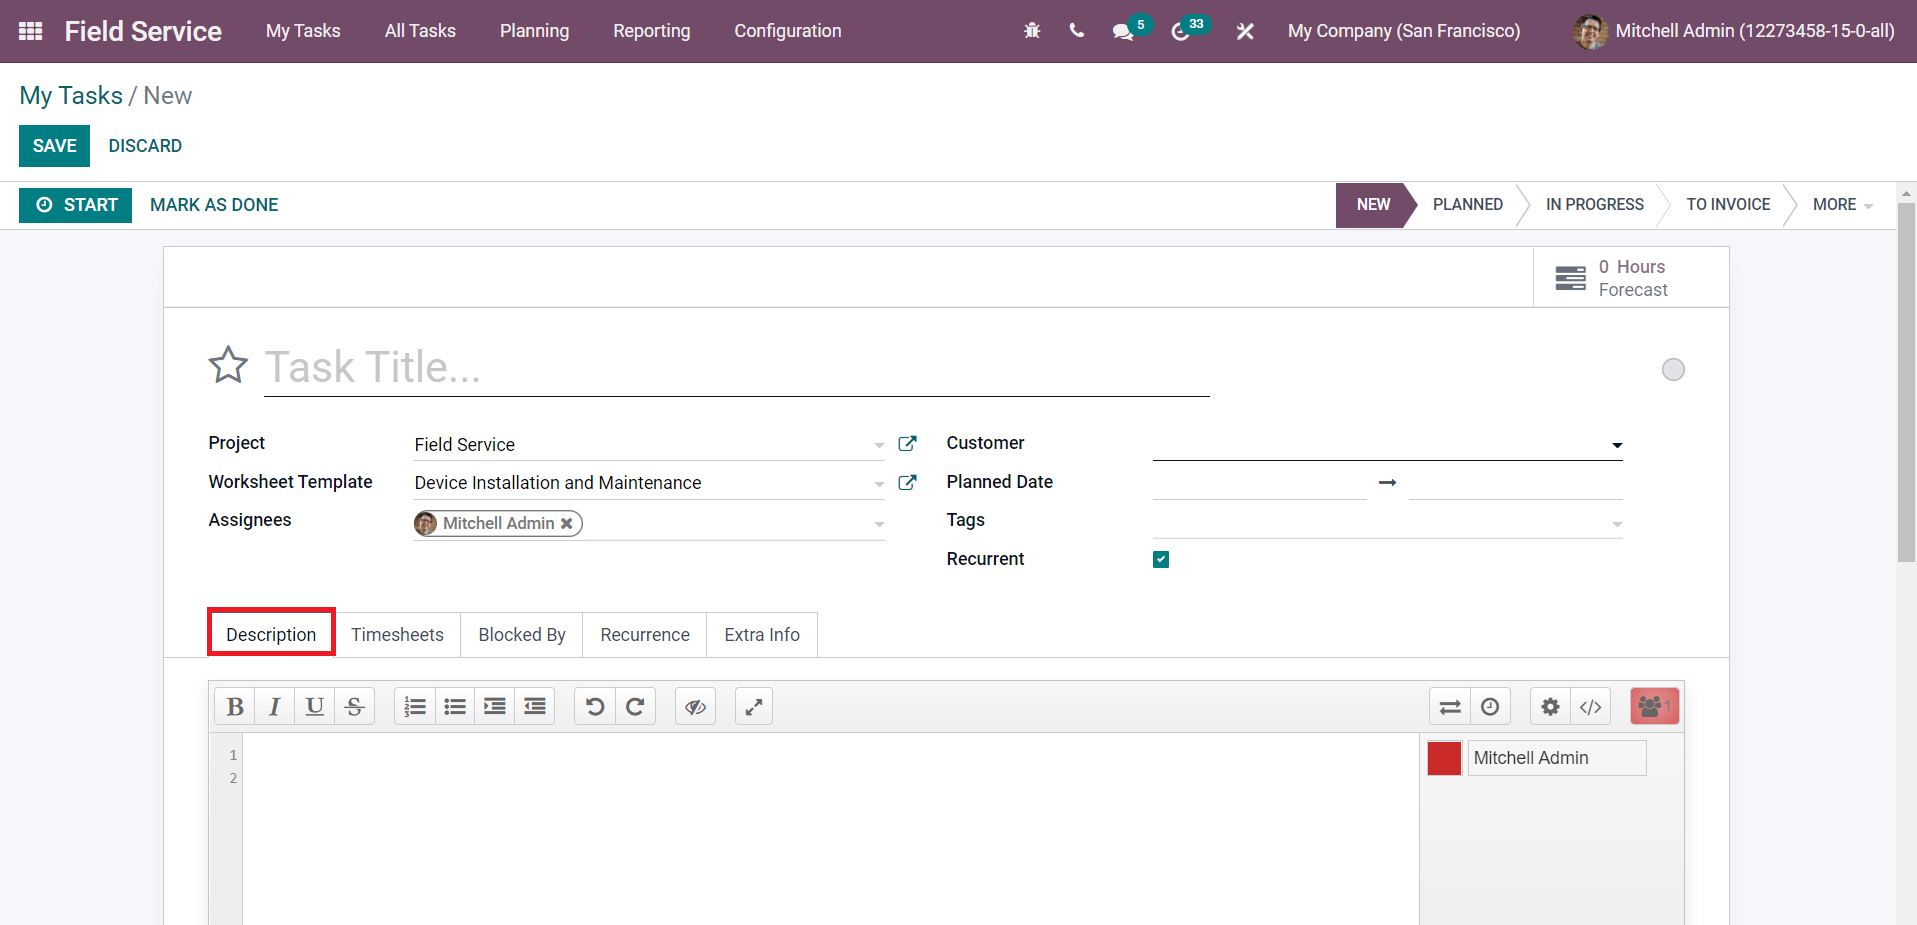
The name of the task can be added in the Task Title field. In the Project field, mention the project to which this task belongs. Configure a Worksheet Template and add Assignees to this task in the corresponding fields. Specify the Customer, Planned Date, and Tags for the task. You can activate the Recurrent field if you want to repeat the task at a regular interval.
In the Description tab, you will get a collaborative pad. This pad can be utilized to communicate with your teammates. You can chat with them in real-time using the corresponding feature in this tab. General instructions, rules, and demands from customers regarding the task can be specified in this collaborative tab so that your colleagues can follow them and work accordingly.
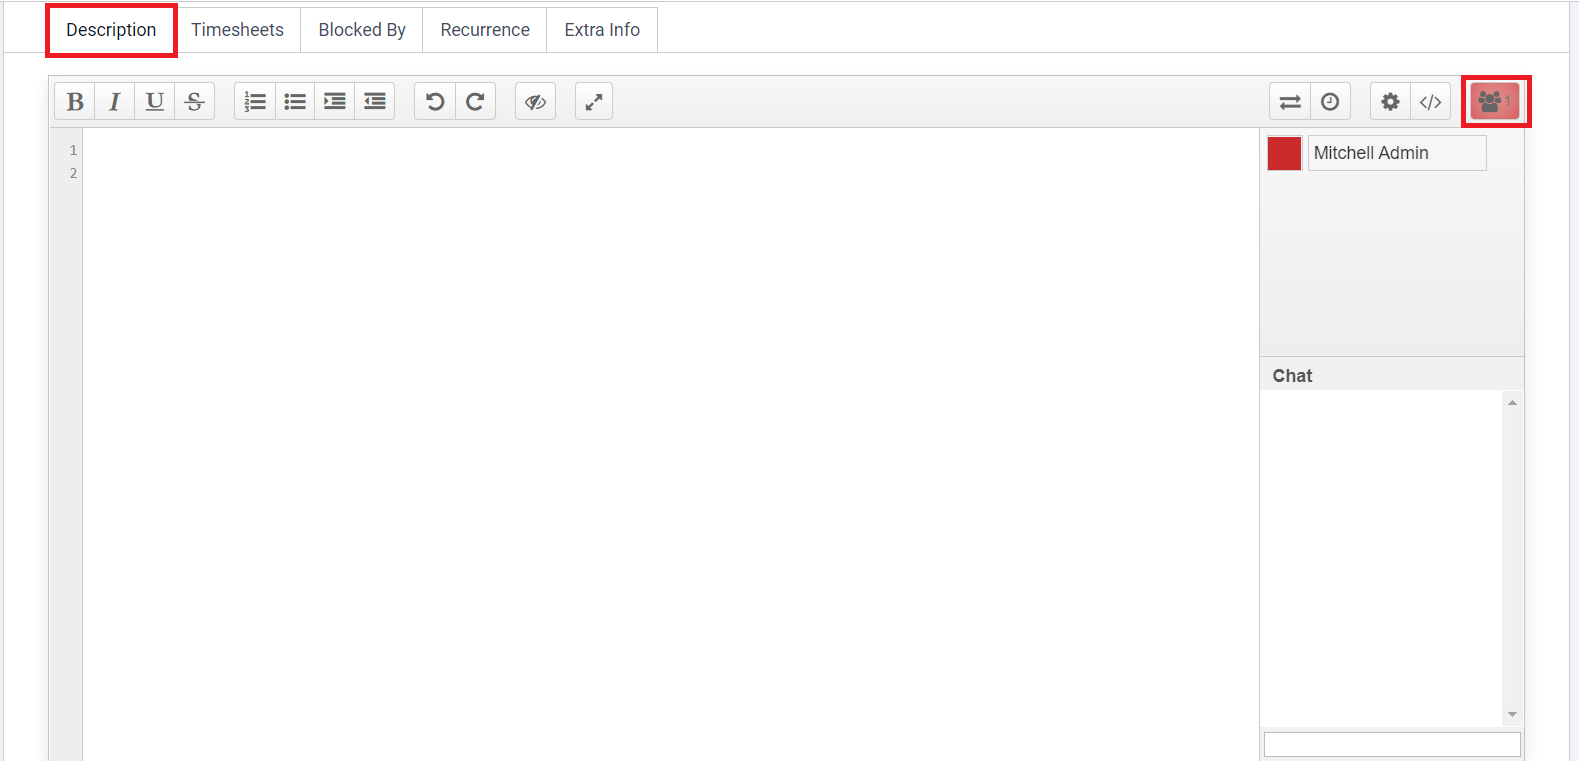
The number of users of this pad can be seen on the top right corner of the tab as marked in the screenshot. You can click on the colored box next to the name of the user to give separate colors for each user. The main body of the pad can be used to mention general instructions and details about the task. You can seek help from your teammates using the Chat option. This pad also includes the Share and Embed option that will help you to share this pad with other users. You can restrict the pad from any kind of editing by activating the ‘Read Only’ option while sharing the pad.
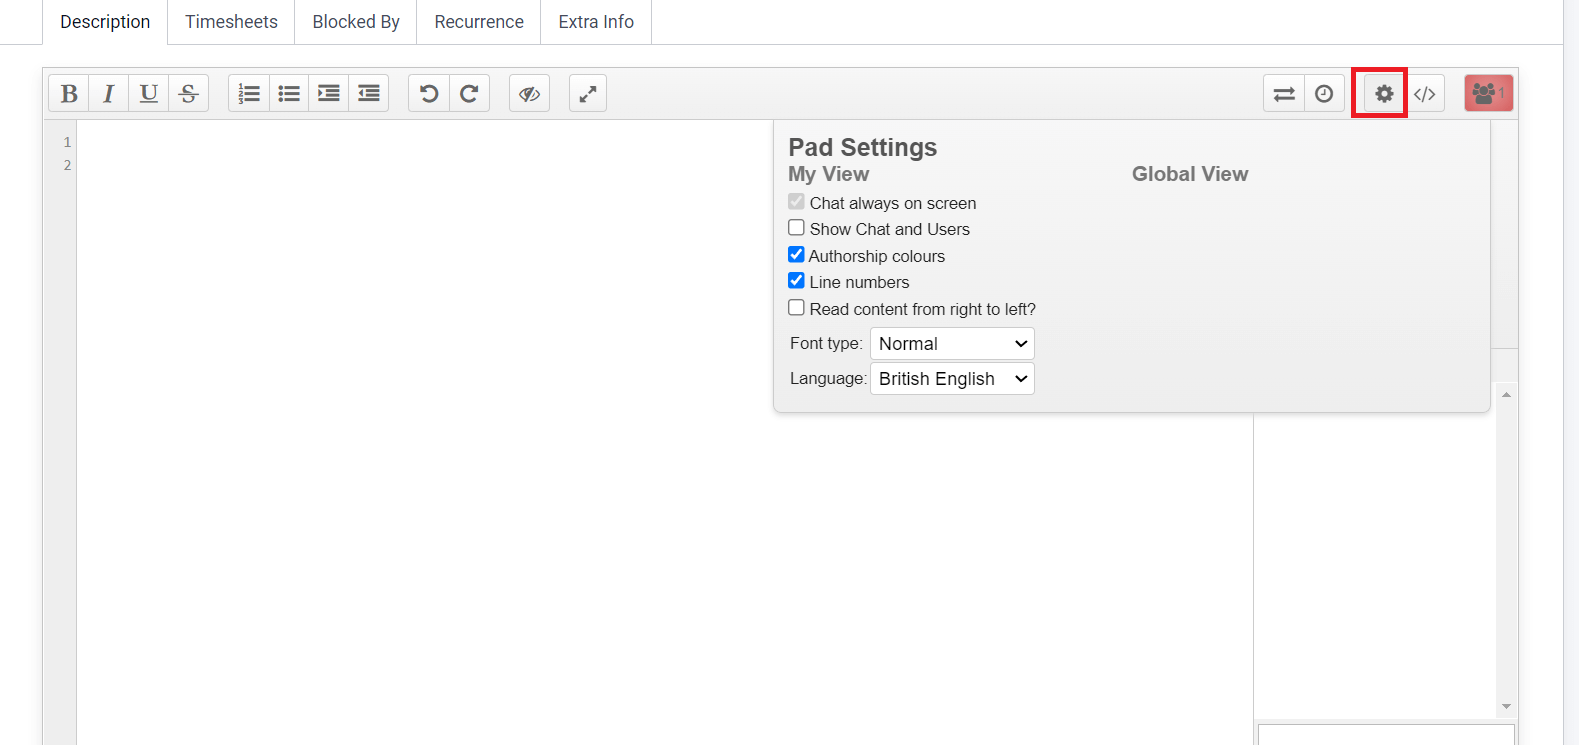
In the Settings menu, you will get options to set the chat always on the screen, show the details of the users and their chats, assign authorship colors for each user, line numbers for the texts in the main body of the pad, and select font type and language. Additionally, you will get Time Slider, Import/Export, Switch Pad, and Clear Authorship Colors options on this pad to improve the performance of the collaborative pad.
The Timesheets tab will be available under each task creation window to record the working time of each assigned employee. You can specify the Initially Planned Hours to complete the task in the respective field. By mentioning the estimated time, you can monitor the progress of the task and increase the speed of work if the task is out of track.

Using the Add a Line option, you can manually record the time spent on this task by an assigned employee. Here, you can specify the Date, Name of the Employee, Description, and Hours Spent in the corresponding fields. It is also possible to record the time using the Start button after creating the task. The Total Hours Spent on this task can be seen in this tab. Based on the planned hours and recorded hours, the Progress field will show the percentage of progress of the task.
A field service project demands the cooperation of various types of tasks. For the successful completion of the project, it is very important to perform each task in a specified order. While creating new tasks in the Field Service module, you can add the list of tasks that you want to block under the Blocked By tab. By doing so, Odoo will block the mentioned tasks and you can complete the current task before them.

Click the Add a Line button and a pop-up window will appear with the list of tasks created for various field service operations.
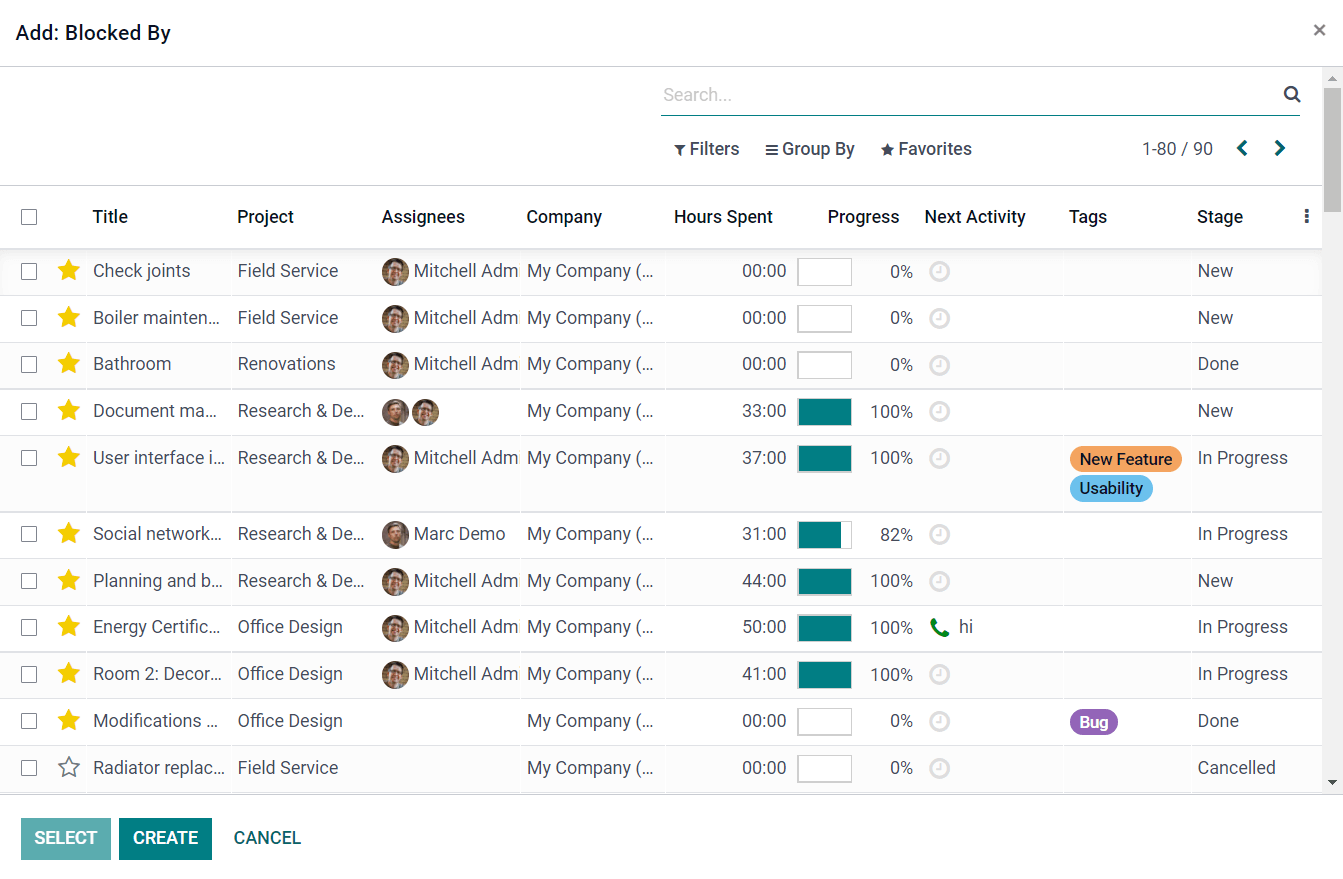
Select tasks from this list that you want to block and add to the Blocked By tab.
Some tasks in field services are meant to be repeated at a regular interval of time. For such tasks, you can activate the Recurrent option while creating them in the Odoo Field Service module.
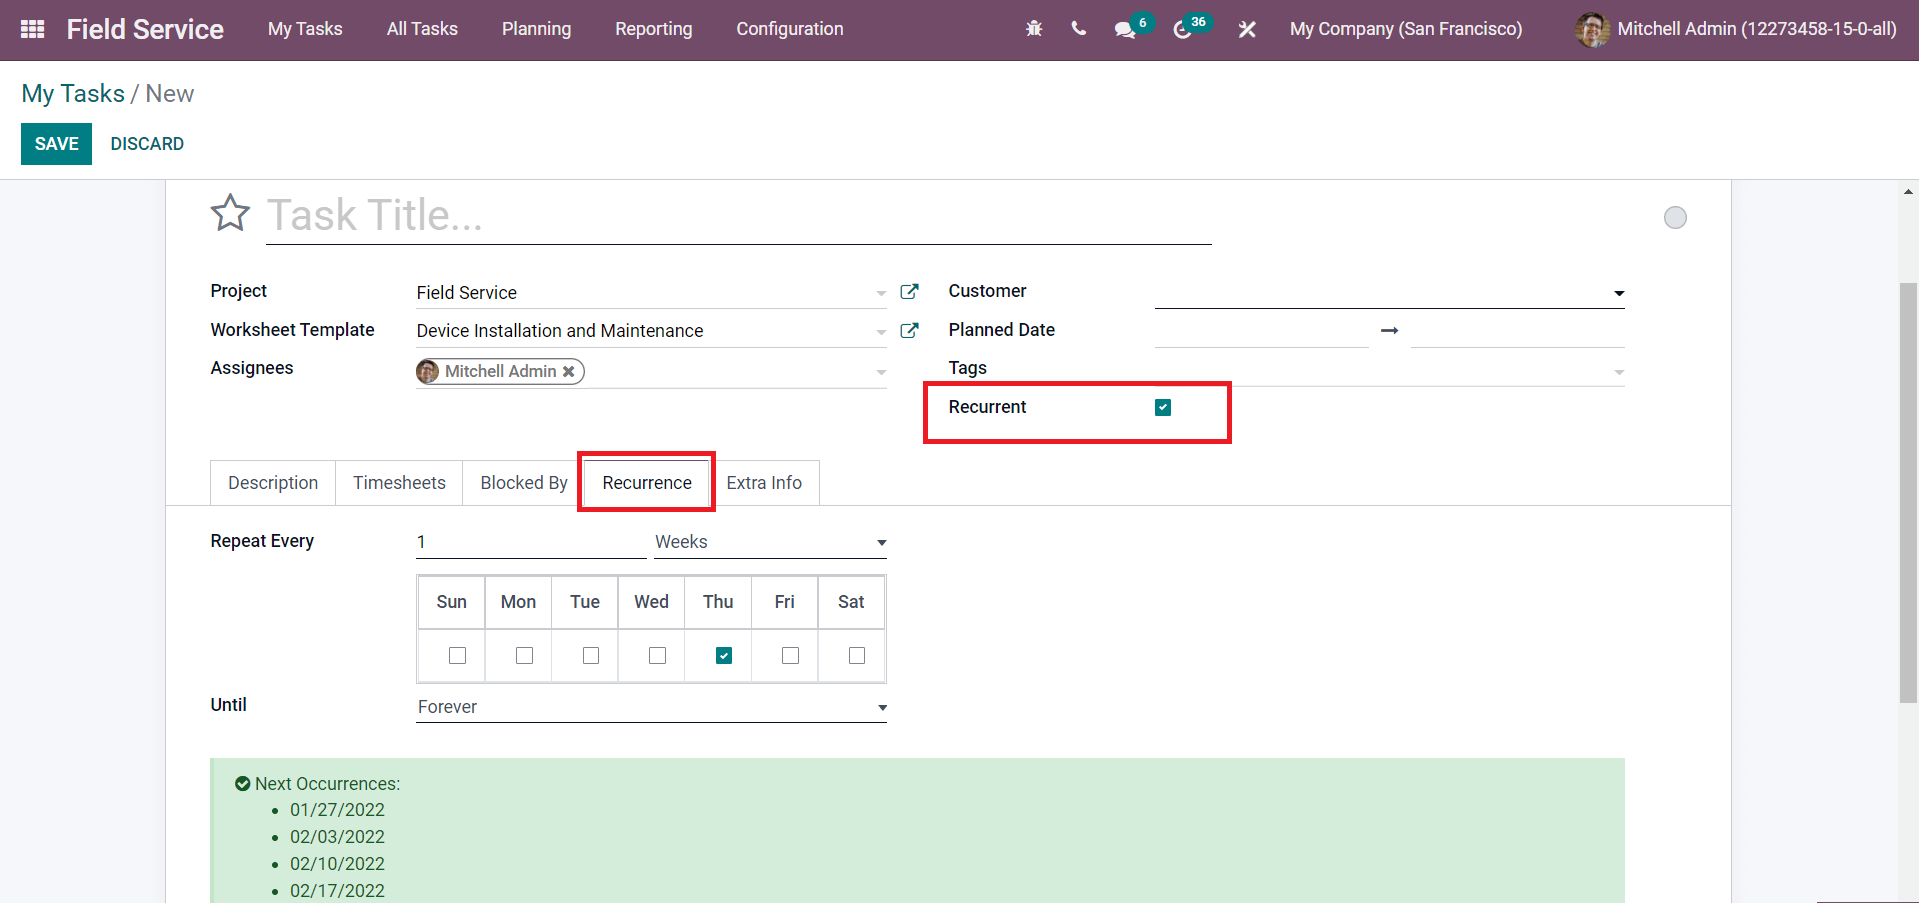
By activating the Recurrent field, you will get a new tab called Recurrence as marked in the screenshot above where you can specify the repetition time and the number of repetitions. The dates of the next occurrence also can be seen in this tab after specifying the repetition time.
Additional details regarding the current task can be configured under the Extra Info tab.

Linking an Analytic Account is very important to record the cost and revenue of the task. Specify Analytic Tag, Sequence, Email cc, Company, and add a Cover Image in the concerned fields. The Assigning Date and Last Stage Update will be displayed in this tab. After completing all fields, you can save the new task by clicking on the Save button.
In this blog, we detailed each step in the creation of new tasks in the Odoo Field Service module. By following these steps, you can effortlessly create new tasks and monitor their progress.


