From event planning to execution, Odoo Events is a complete platform for managing all facets of event management. To manage the various aspects of events from start to finish, this platform has a wide range of features and functions. Users can adjust or set up settings according to their needs using the configuration menu, which is an essential part of the events module.
Some of the features of Odoo events module are,
Organize events on a calendar basis
Using the calendar integration, events can be organized in a smooth and sleek way directly on the website, helping the website visitors quickly understand the schedules of your company and also sorting the events by date, location, tags, and speakers.
Online ticket sales
Users can sell their tickets through online using the Website integration feature of events platform
Attract sponsors to visit your website
With Odoo Events, managing new and existing sponsors is simple. Add sponsors to your events, and list them at the bottom of each page of the event in descending order of the level of sponsorship they purchased. Online sponsorship sales are possible with Odoo eCommerce
tools for overall promotion.
Integration with GA
Online shopping carts, checkout forms, call-to-actions, and other call-to-actions can all be tracked with the Google Analytics customer feedback tool. Each of the Odoo marketing tools is also integrated with Google Analytics to give you a complete picture of your company and its services.
SEO integration
Odoo has built-in SEO capabilities that enable you to carefully organize the contents and promote your events by basing keyword suggestions on the most popular Google searches. Therefore, no additional configuration settings are required to complete the process.
Through this configuration menu in the Events menu bar, as seen in the screenshot below, users can configure various settings necessary to carry out particular processes.
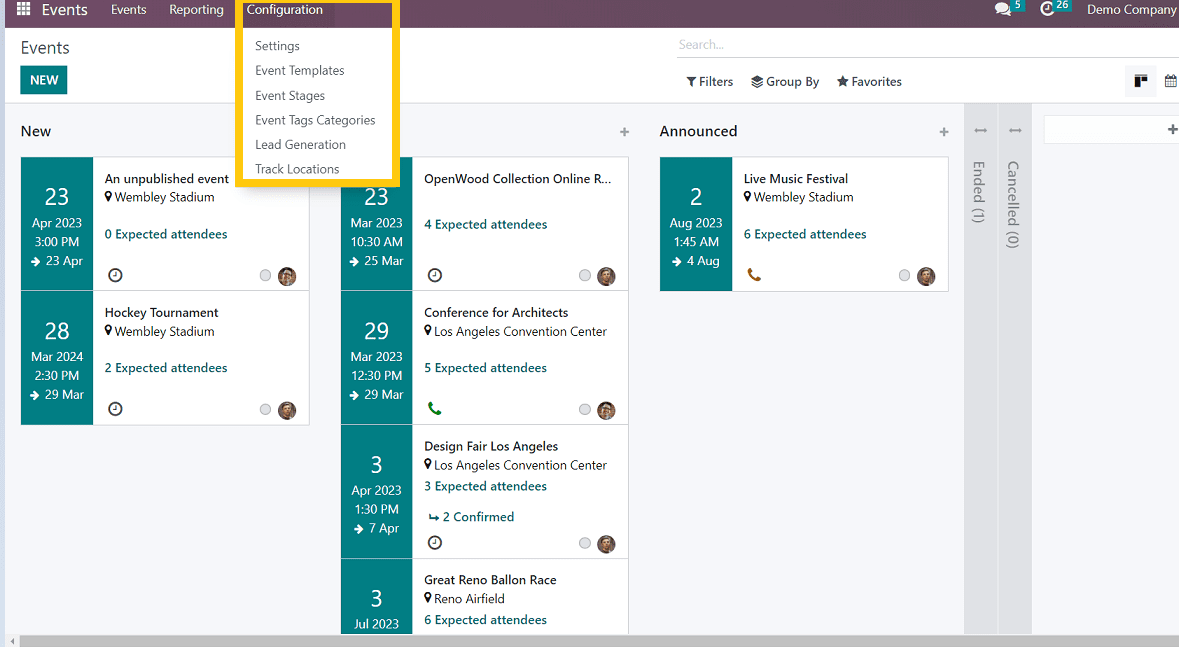
As can be seen, the configuration menu includes six different configuration types, including
1.Settings
2.Event Templates
3.Event Stages
4.Event Tags Categories
5.Lead generation
6.Track Locations
Let’s check the details of each settings
1. Settings
Events, registration, and attendance are the three sections of the setting.
In the Events Section we can setup the features as follows
* Schedule & Tracks : Users can manage and publish their schedules with tracks.
* Live Broadcast: Use a YouTube integration to broadcast your tracks online.
* Event Gamification : Once a track is completed, distribute a quiz to your attendees.
* Online exhibitors : Display Distributors and sponsors in the event webpages.
* Community Chat rooms : Users can provide virtual conference rooms to connect with attendees.
* Booth Management :Users can create and manage booth reservations for registrations
Next is the registration section.
* Tickets : Users can sell tickets and sales orders.
* Questions: Ask questions to attendees while registering online.
* Online -Ticketing: Users can sell tickets on their own websites
Attendance section.
* Barcode: Scan badges to confirm attendees while attending the event.
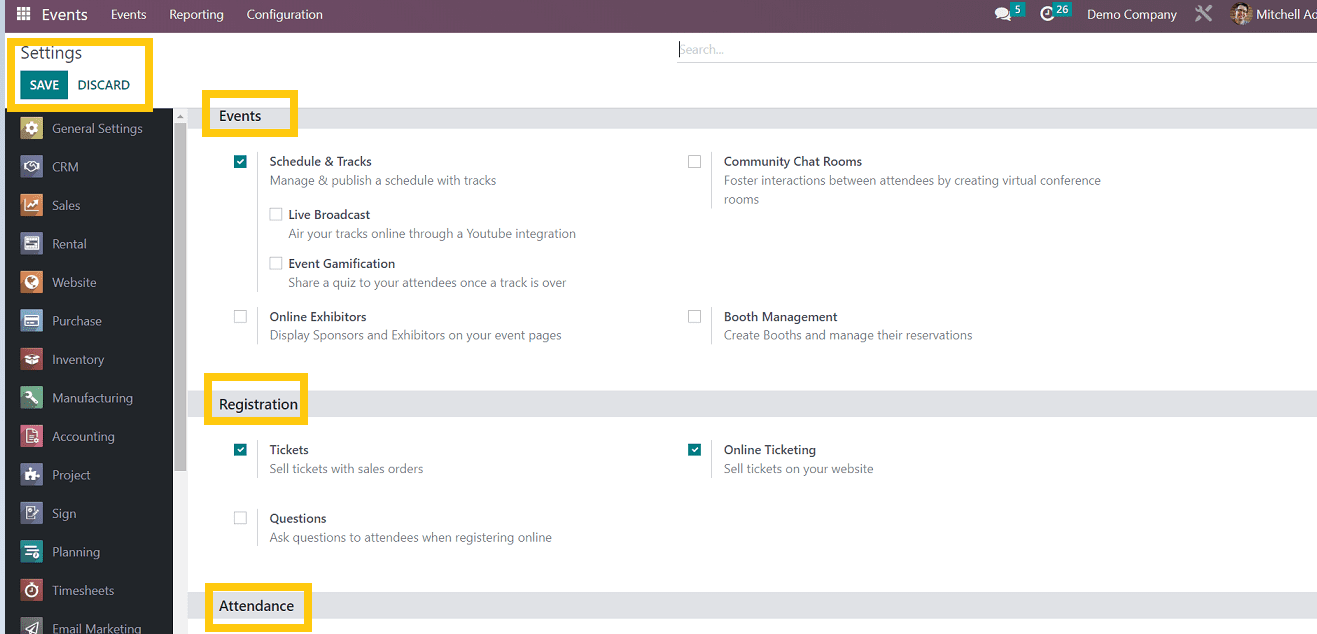
After changing the settings as per the user’s requirement, save the changes by clicking on the “SAVE” button from the upper left corner of the page, as shown in the above screenshot.
Moving on to the next configuration option,
2.Event Templates
Users can create a new template based on the event type in this configuration menu.
We can create a new event template or select from the pre-existing templates, as shown in the screenshot below.
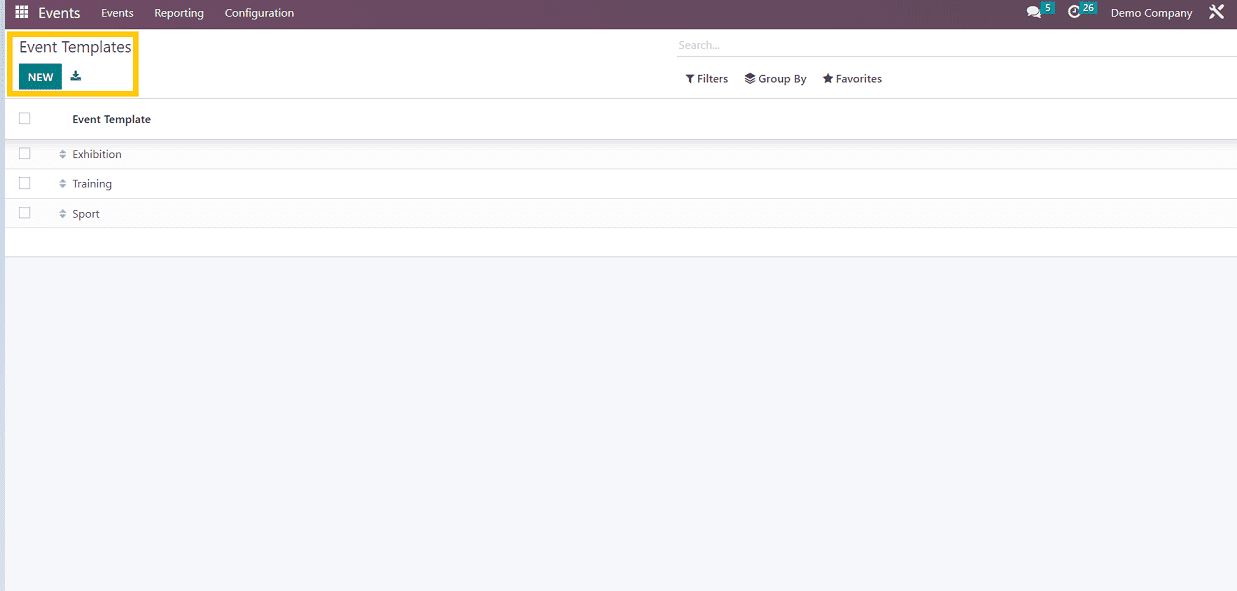
To create a new template, click on the “New” button. It will open a new form as shown in the screenshot below ,where you can fill in the details according to the event such as timezone, event template name, auto confirmation, etc., as with the “Create New Event” form from the event section.
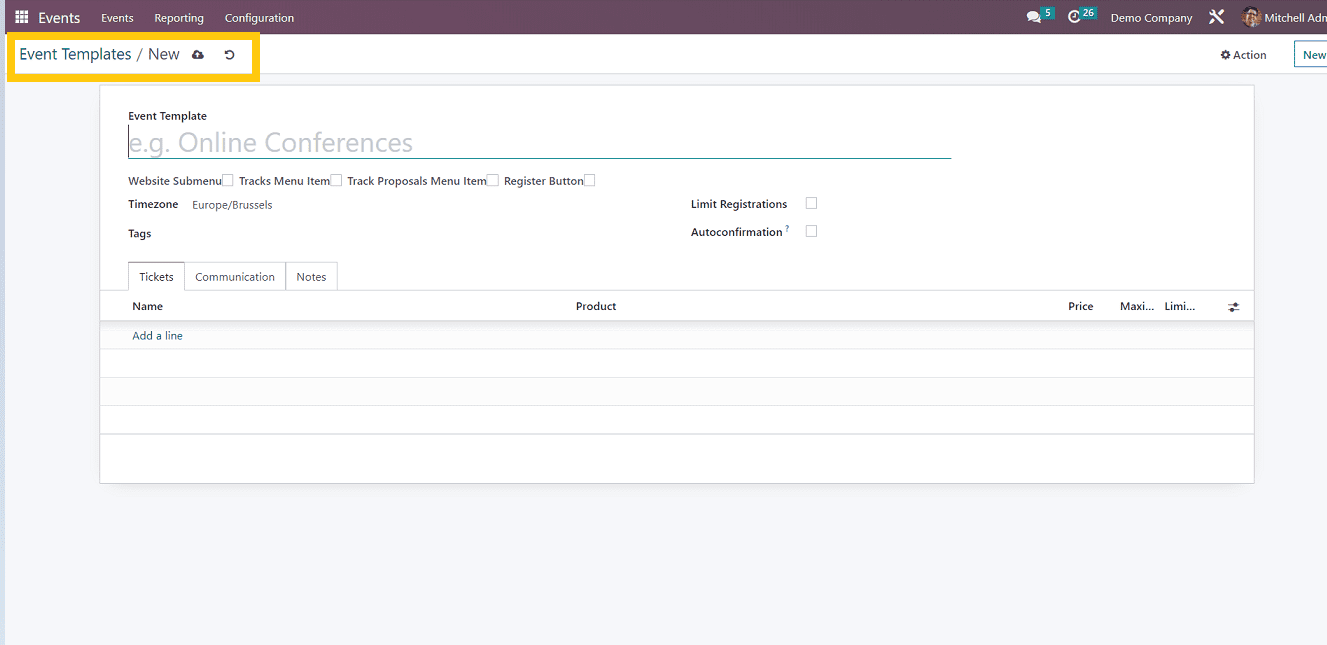
After filling in the required fields, save the details by using the save button. Then it will create a new event template.
3. Event Stages
Event Stages section helps to manage the stages according to each event.
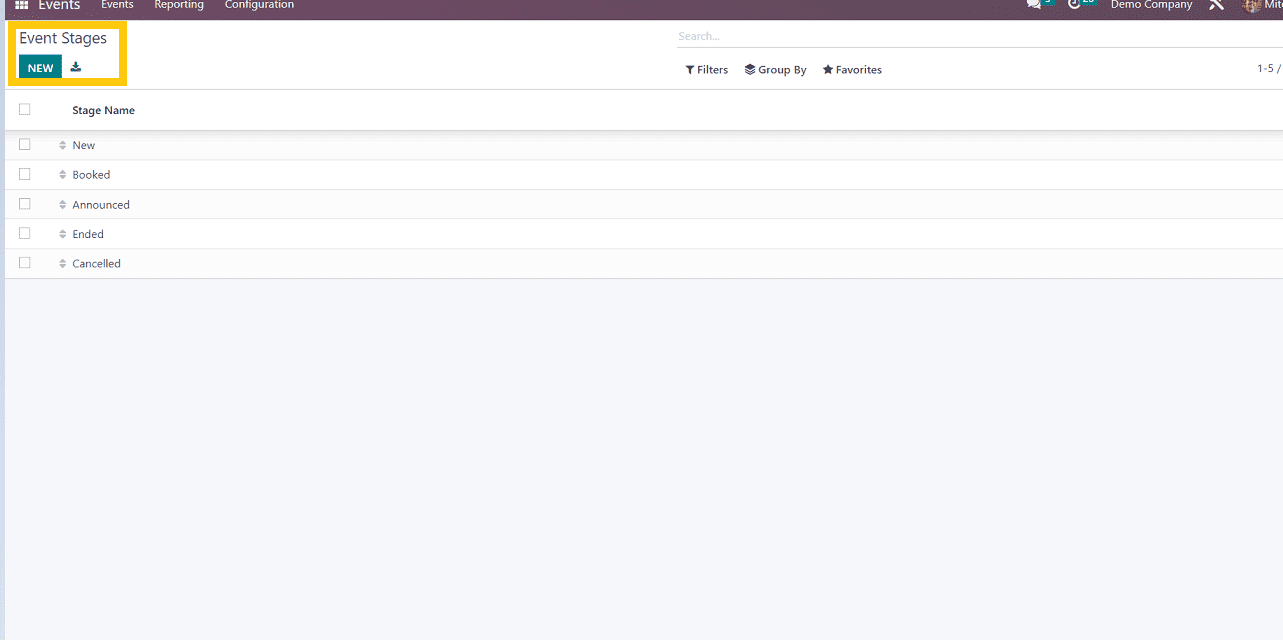
Here, we can create new venues and stages by using the “New” Event Stages button on the page, as shown in the above screenshot.
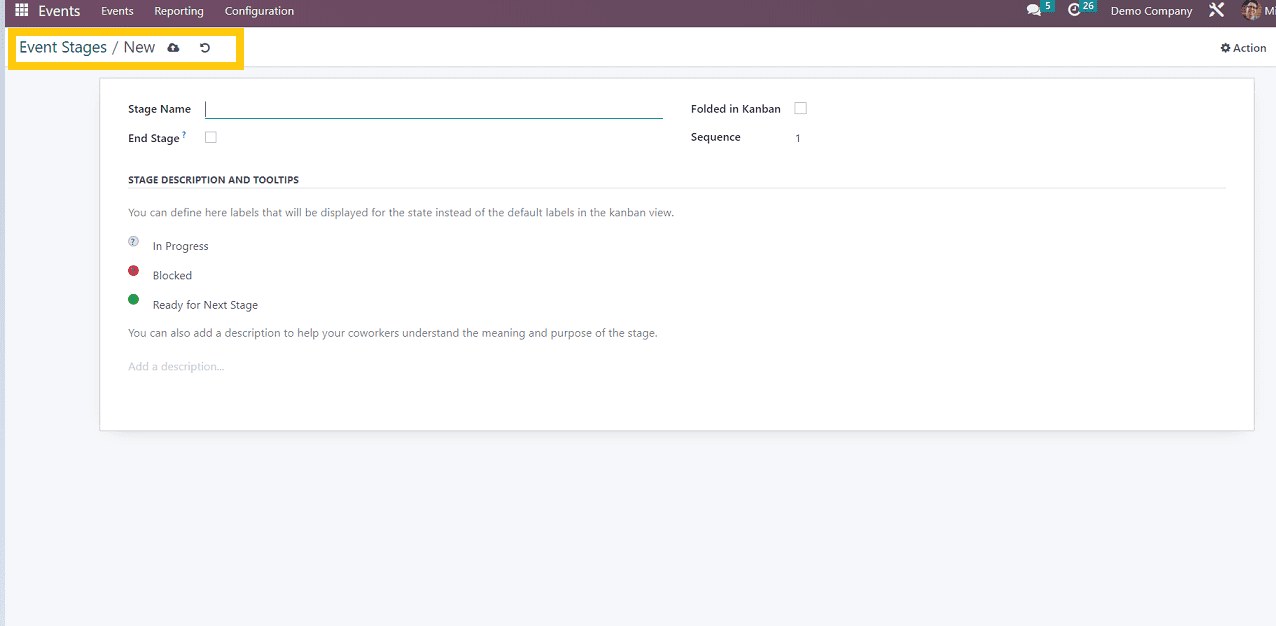
Users can enter the stage name, availability of the newly created stage, and stage description using this form. The stage you created will be visible in the section for event stages once you complete the details after saving the details.
4. Event Tags Categories
This option in the configuration menu allows users to add event tags. This enables attendees to understand the event category quickly. and users can manage their events by classifying them using tags like “cultural,” “art,” “conference,” “music,” etc.
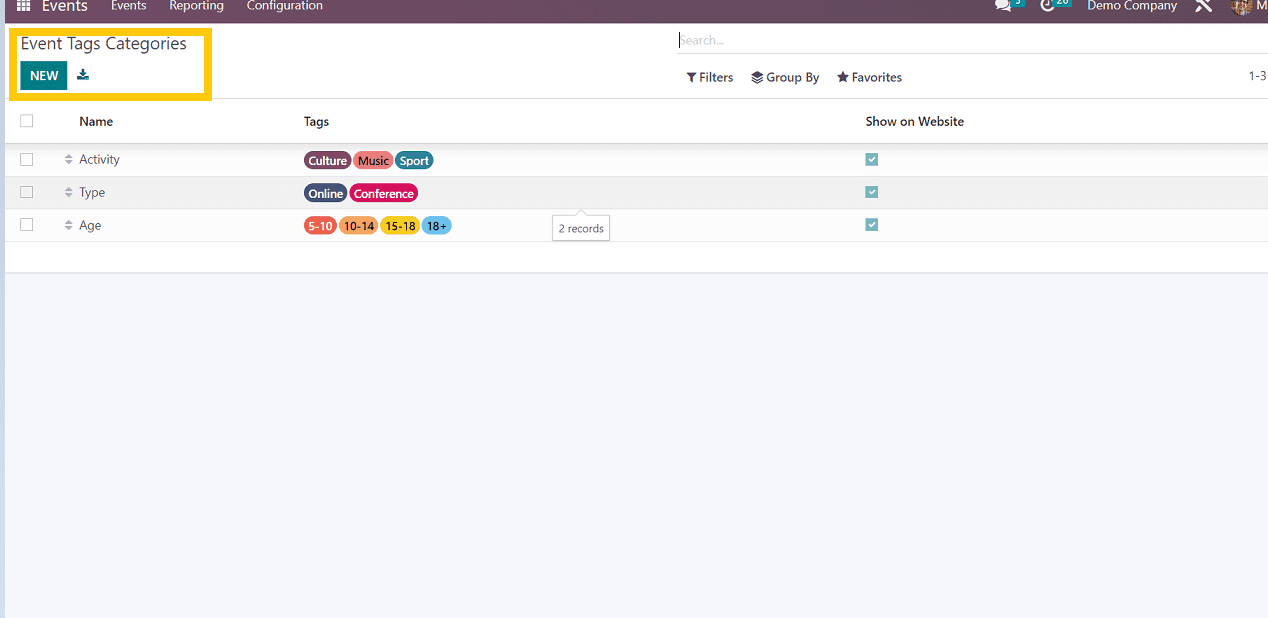
As seen in the screenshot above, by selecting the “New” event tag category option, we can add new event tags.
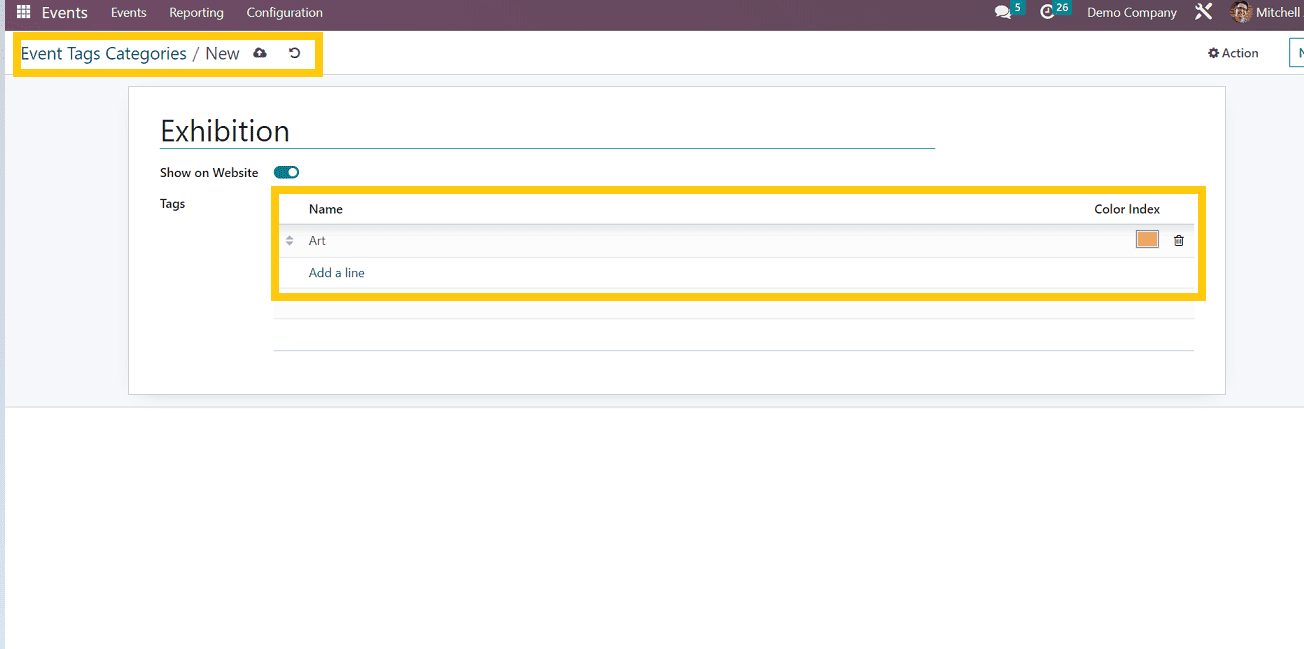
User have to add new tag category as per the event category and also an color index to represent the particular category
5.Lead generation Rule
In Odoo, you can quickly generate leads based on the information of participants who have registered for an event. You can use the Lead Generation option in the Configuration menu to define lead generation rules.
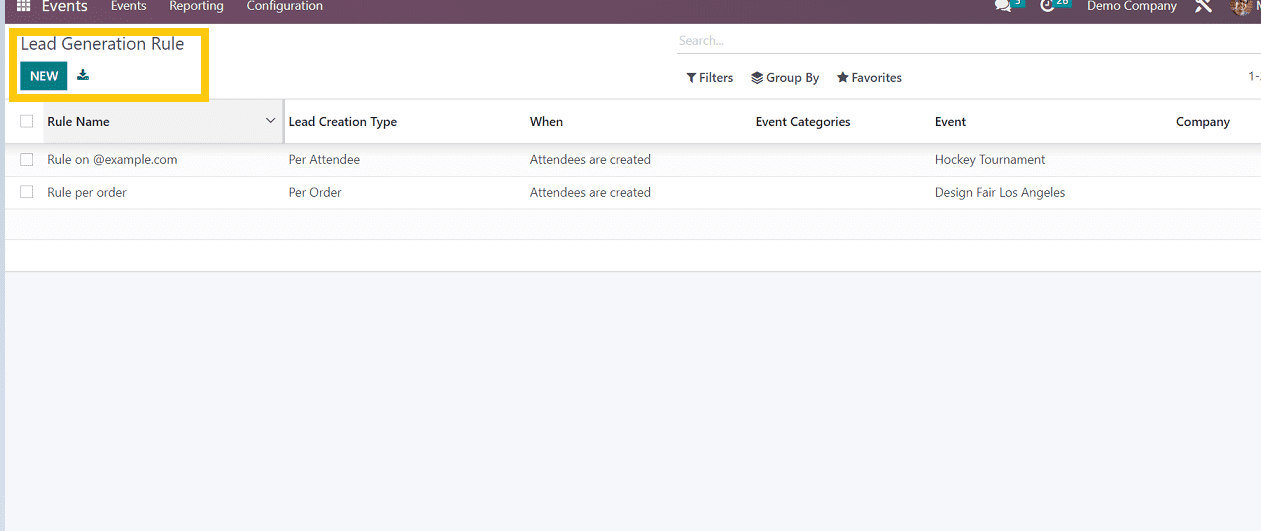
According to the needs of their events, users can add leads. The lead may be generated manually or automatically after the attendees have been created, confirmed, or attended.
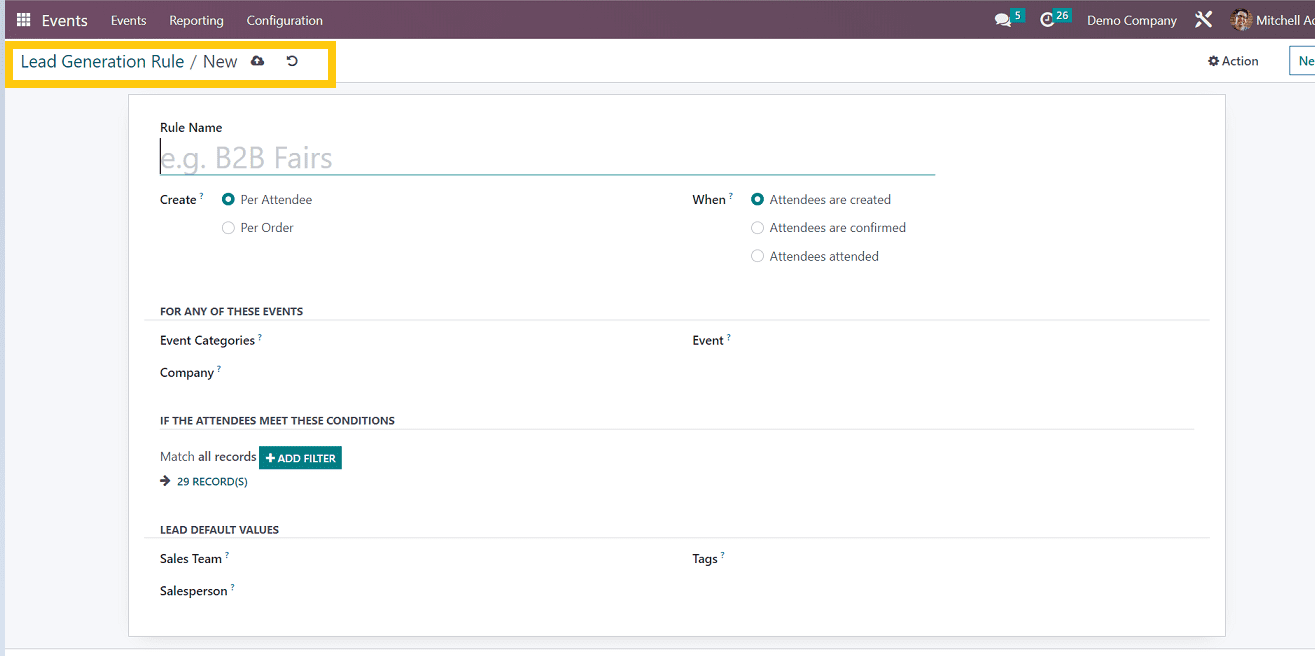
We can filter the attendees based on the created leads, such as,
Event categories- Event categories such as exhibition, conference, training etc.
Company- Based on the attendees who are attended the events of particular companies
leads that are based on events. This can be chosen from existing event lists or created from scratch.
Moreover, you may specify criteria to filter participants by using the Add Filter option.
Lead-by-default value- Newly created leads will be assigned to a particular sales team or salesperson. You can make note of them in the designated fields to assign the generated leads to a certain sales team and salesperson. and save the details to set up the new lead generation rule.
6.Track Locations
Users can create new events and track events. When adding a new event or event track, it is essential to mention the event’s location. Such configured locations can be seen under the Track Locations menu.
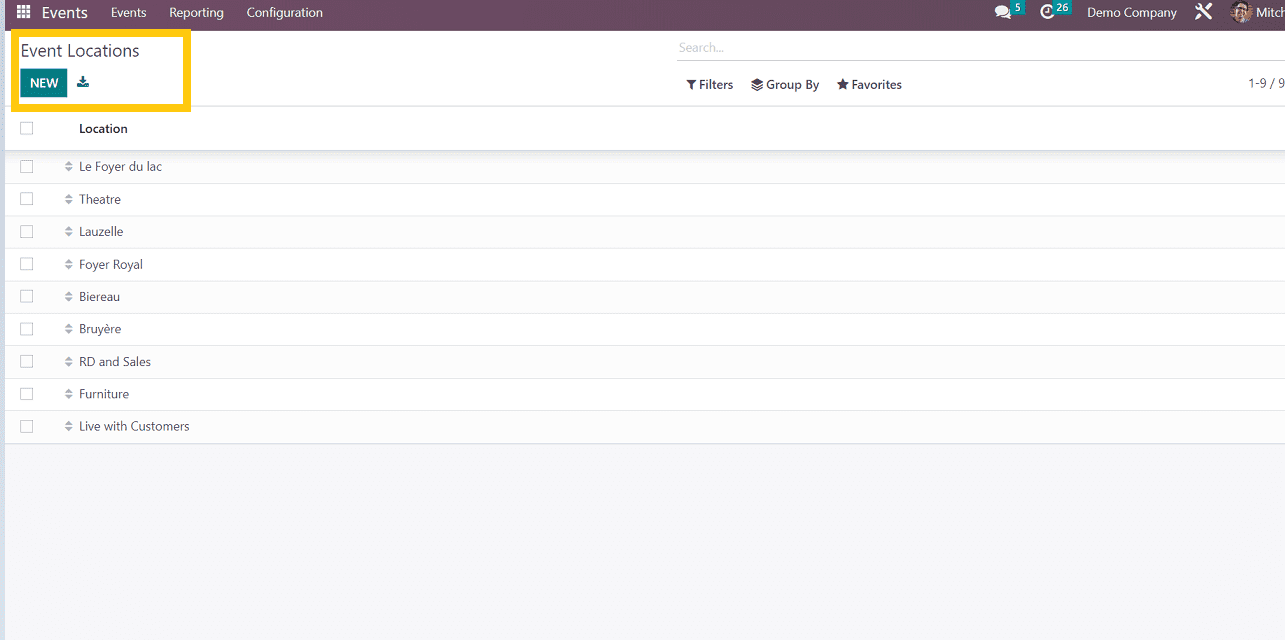
As you can see in the screenshot above, we can create new event locations and also select from the previously created locations and track them.
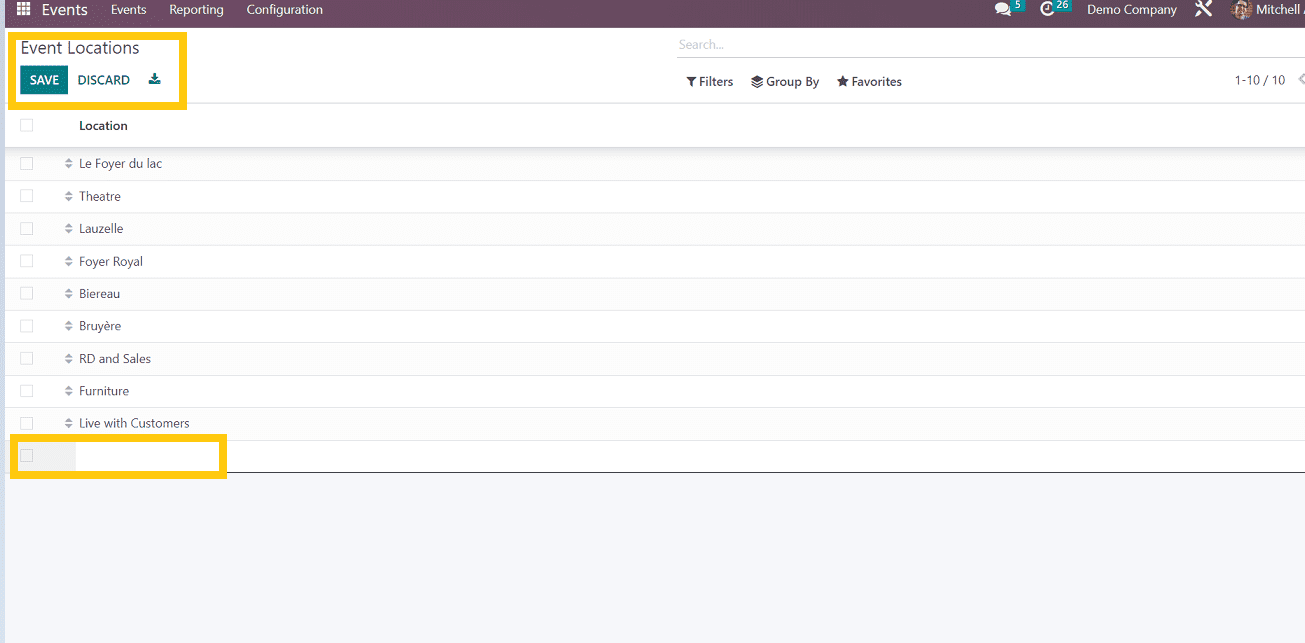
Using the “New” button, as seen in the screenshot above, we can add new event locations and save the information.
These are the options available in the Odoo 16 Events platform, which helps users manage each and every aspect of event management (creation, execution, etc.) in a very transparent way to improve both the customer experience and the business.


