The most important aspect of any firm is the management of inventory. To run the firm flawlessly, proper inventory management support is necessary. The choice of our inventory management software can determine how well or poorly our business does.
One of the greatest inventory management systems is Odoo, which can be used without spending a lot on integration, modification, or implementation and can ensure the business’s growth. The Odoo inventory module was created to be compatible with all company establishments and sectors. This tool can be used by corporate organizations of any size. Odoo Inventory, a configurable module that is crucial to managing all inventory-related tasks, can be the firm foundation for the company.
Odoo Inventory Management tackles all aspects of a company’s warehouse by utilizing particular well-designed operational instruments to meet the complete and realistic operational components. Furthermore, utilizing the Odoo platform, you will be able to manage many warehouse management operations for a company, which will be advantageous for worldwide organizations and establishments with multiple warehouses in the works. As a result, operational expertise for large-scale business management and inventory management tasks can be carried out efficiently.
Let’s see how to manage Inventory for a company with Odoo Inventory management.
The first step is to create a database and once it is done the next step is to install the necessary module from the apps since we are looking to set up the Inventory for the company, let’s install the Inventory module.
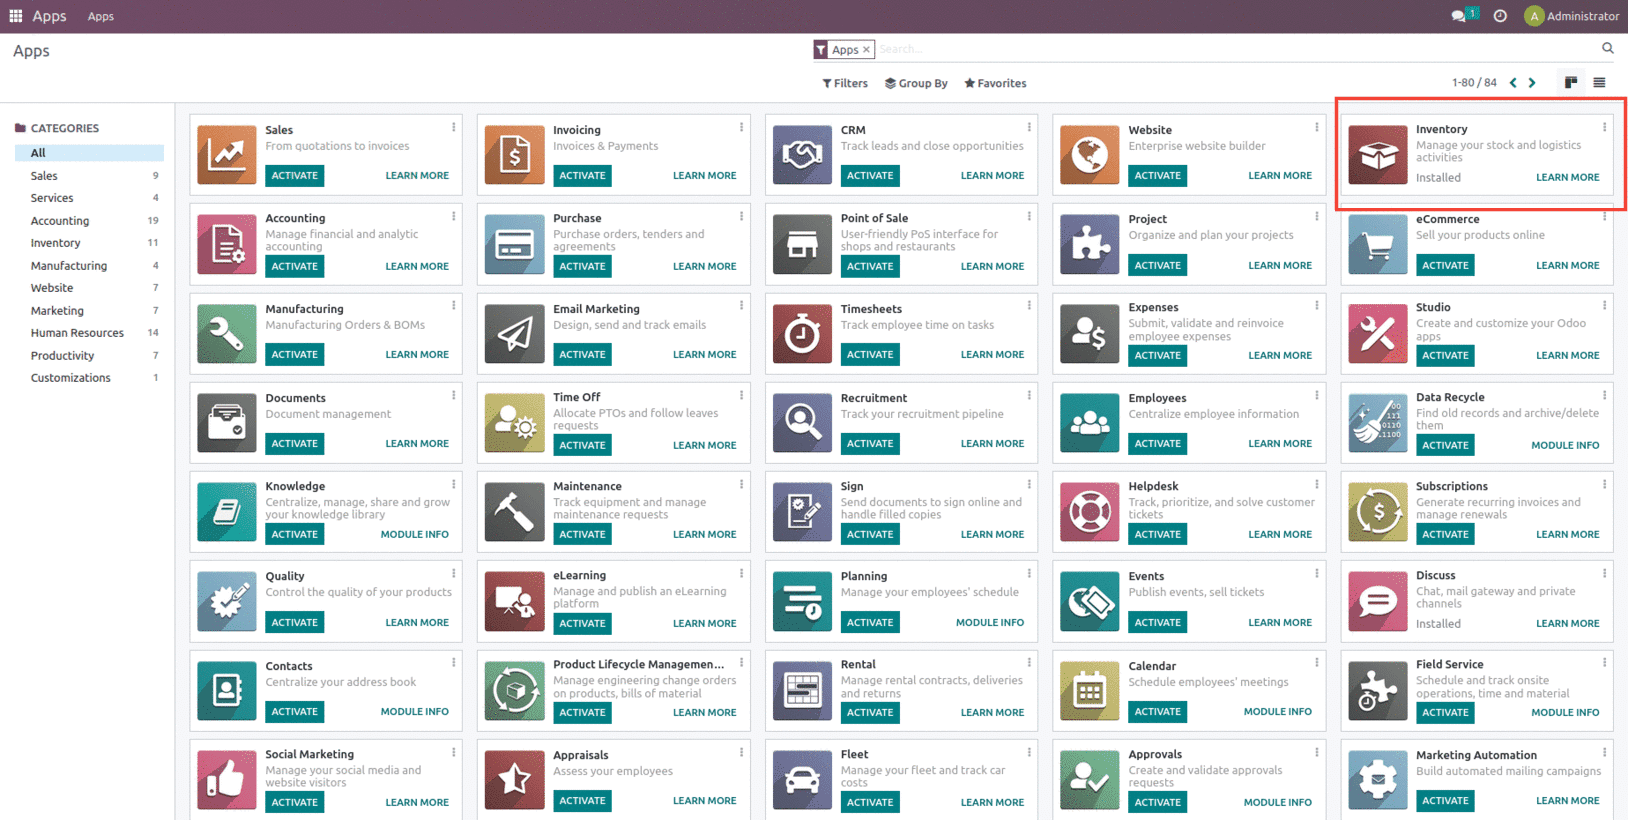
Once installed its dependent module will also be installed along with it as shown below.

After installing the necessary apps, the next step is to configure the Company data in Odoo’s settings.
Company Creation
To do so, navigate to Settings -> Users & Companies, where you may enter firm information such as Addresses, Email, Phone Numbers, Website, Tax ID, Company Id, and Currency.
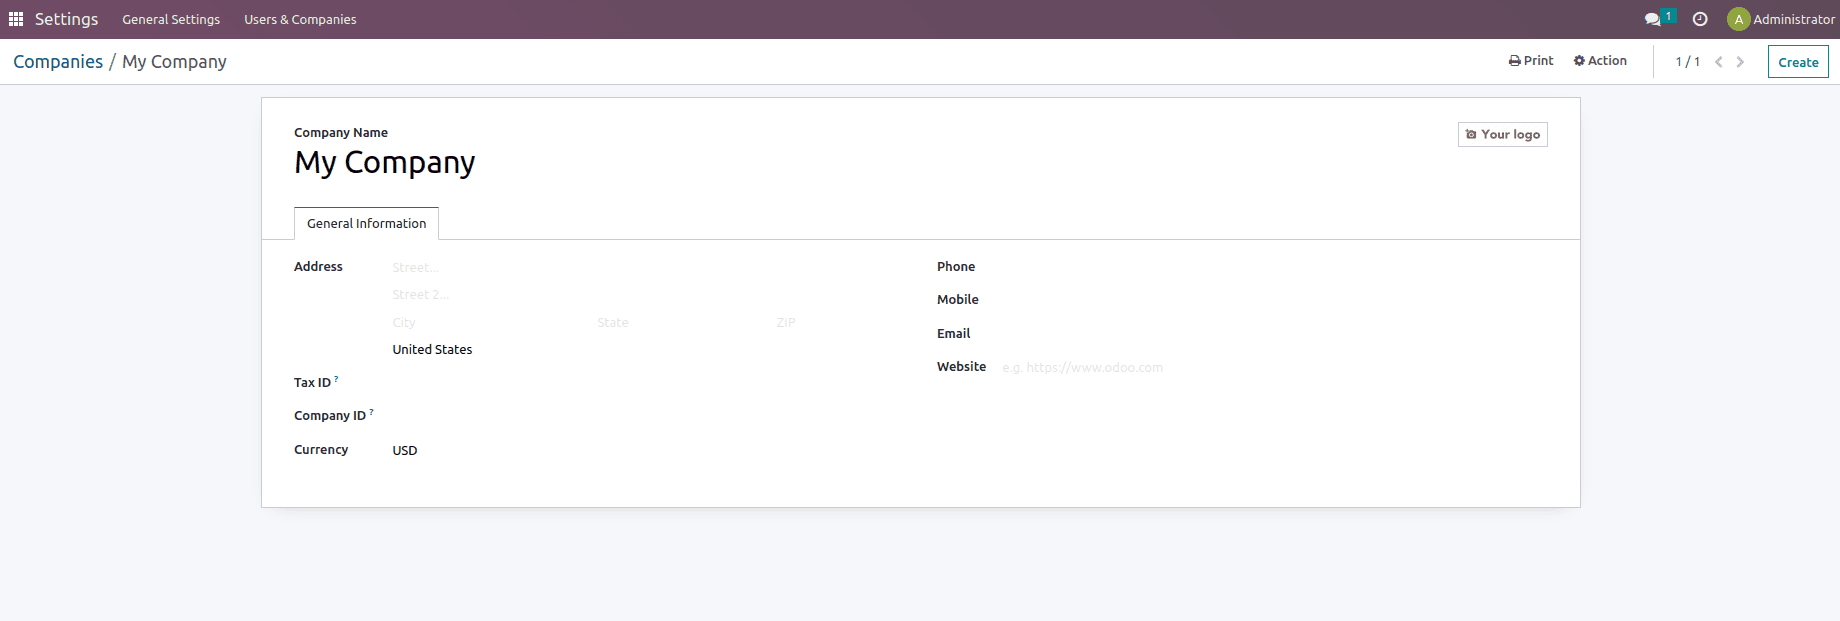
The Odoo Multi-Company option is also available, which allows for the centralized control of various companies under a parent company. Various companies with various warehouses, customers, and products may be involved.
User creation
Once the Company information has been submitted, the following step is to create Users from the Users & Companies menu. An Odoo user is someone who has access to the database and can use Odoo to complete their everyday responsibilities. We can add as many users as we need for business operations in Odoo. We can add, remove, and alter users and their access rights as needed.
You can manage your existing users and add new users from the user menu in the General Settings.
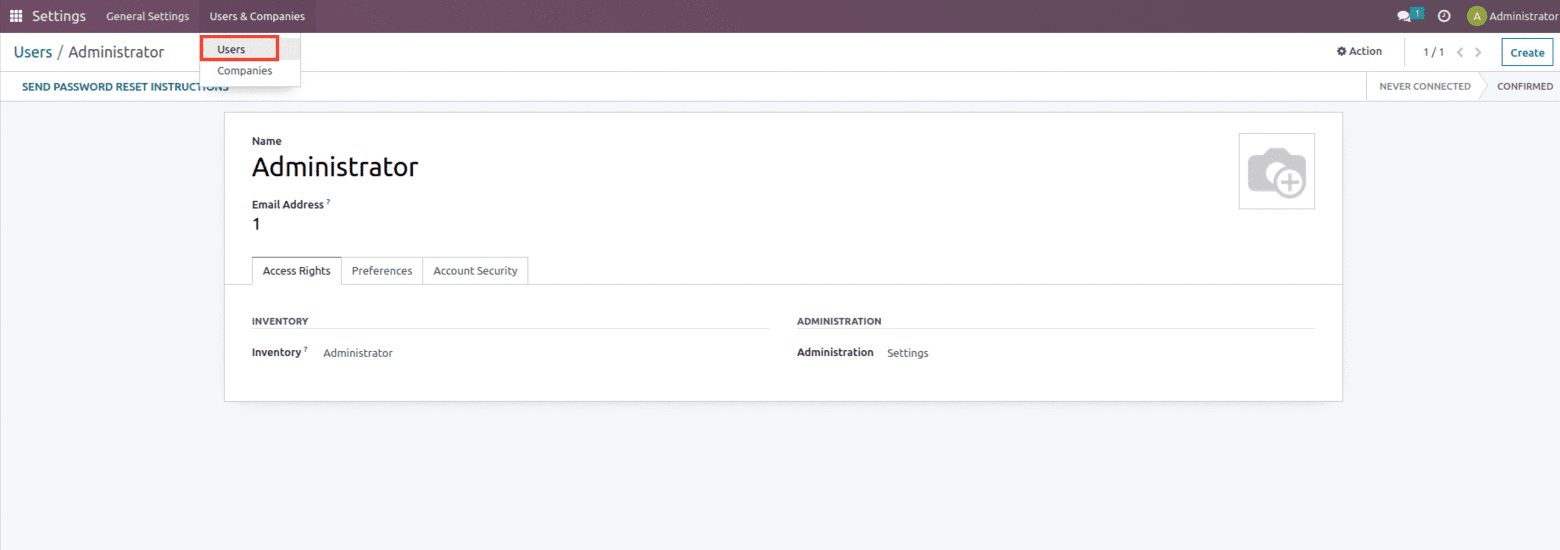
Access rights can be set for all module categories and apps installed in the database. This is accomplished by selecting the group defined with access rights. The user will receive an email invitation after the changes are saved. They can access the database by creating their own login.
With Odoo, you can add as many users as you need for your business, but keep in mind that subscription rates are based on the number of users. Access rights can be assigned to newly formed users, which are rules that specify who can do what in the Odoo database to ensure database security.
Warehouse Management
After all, let’s set up the Warehouse for the company, which can be created from the Inventory module under the configuration shown below.

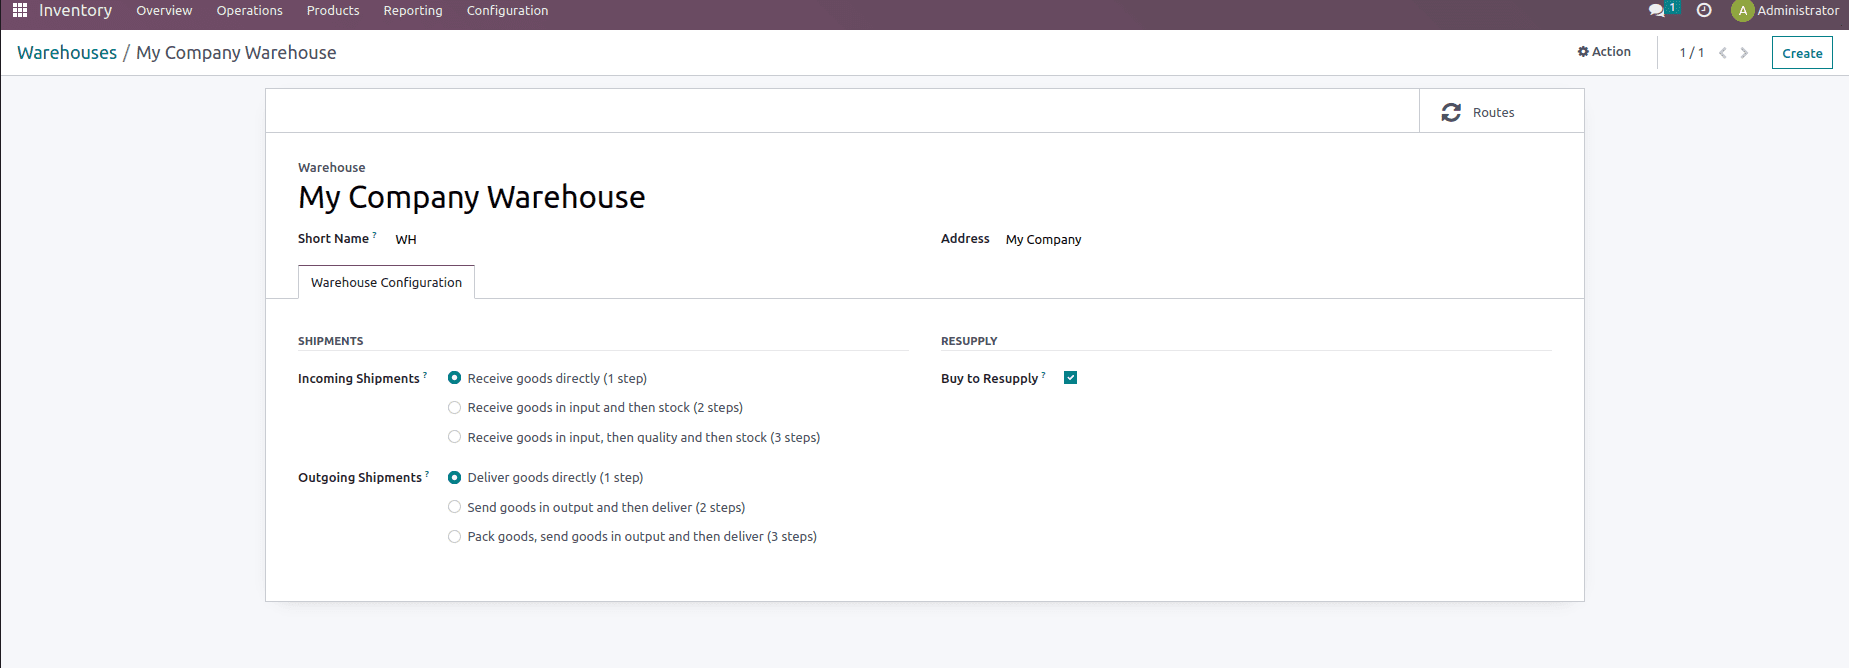
In Warehouse creation the user can add the name of the warehouse, can mention the shortcode for the warehouse, and can also mention the company to which the warehouse belongs. One can manually create the warehouse or also import the record.

And once the Storage location and Multi-Step routes features are enabled from the settings of the inventory module it will add on some additional features such as Incoming and Outgoing Shipment and Resupply options as shown below.
Incoming shipments can be divided into one, two, or three steps. The goods will be received directly in one step. Receiving products in inputs and then stocking are the two phases. In three steps, Receive items in inputs, followed by quality, and then stock. Outgoing shipments will follow the same processes ie. Deliver goods directly (1 step) then Send goods in output and then deliver (2 steps) and then Pack goods, send goods in output, and then deliver (3 steps).
Along with that you also have the option to resupply which can be used to resupply products from one warehouse to another warehouse if out of stock in any of them.
Setting up different Operation Types
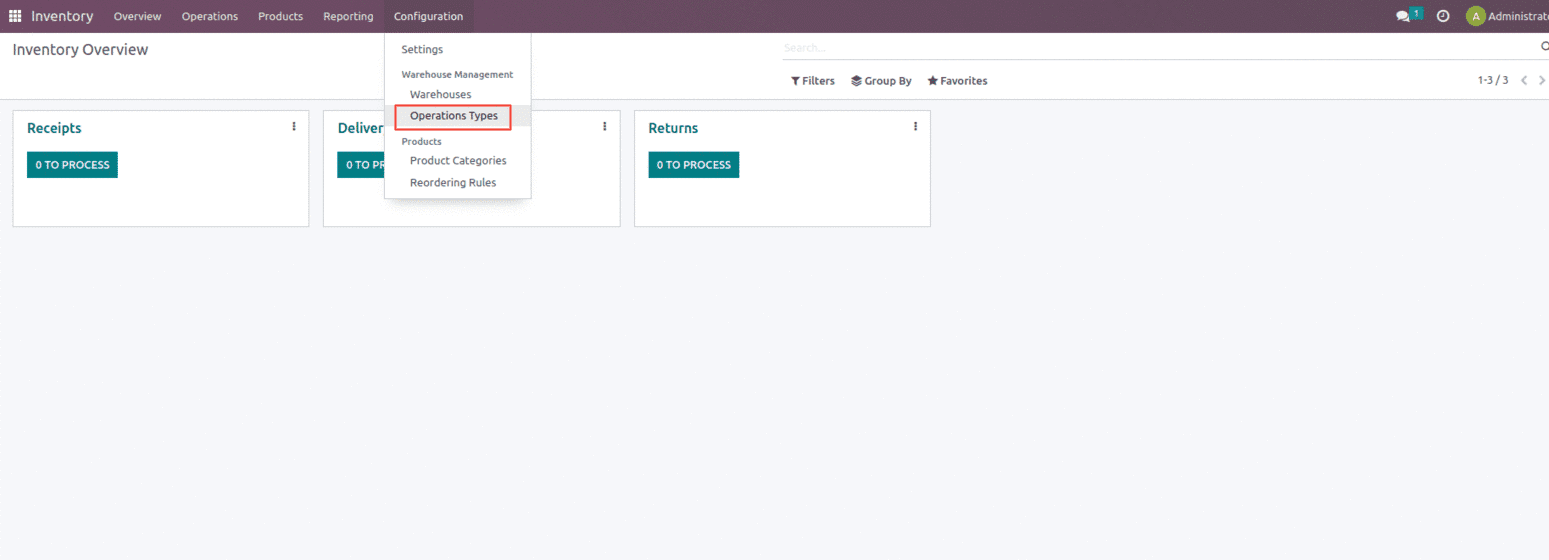
Once the warehouse is set for the company next we can set up the various operation types that need to run the company. Operation Types provide information on the various types of operations carried out within an organization, including Internal transfers – these operation types include transfers that happen within a warehouse with an Internal location, Delivery orders – these operation types include transfer that happens from stock to the customer, Receipts – these operation types include transfer that happens from the vendor to our stock, etc. It is listed in your Inventory Dashboard, and from the setup, you can build specific operations, as shown below.

Or the user can set up the operation types from the configuration of the inventory module as shown below.
One can create the Operation types from here which include the field for providing the name of the Operation types, Types of Operation such as a receipt, internal transfer, and delivery, Reservation Method which helps to reserve products while processing different operations, Create Backorder option which will generate backorders if the product is unavailable in the stock and if the customer demand is more than that and Show Detailed Operations option shows the detailed line of the operation.
Location Management
Once the Operation type is set the next step is to set up the location. A specific location within our warehouse or an external warehouse that we do not own can be referred to as a location. Furthermore, it resembles a warehouse sub-location, such as a shelf, a floor, an aisle, or any other type. A single warehouse can have as many locations as needed.
To manage location let’s enable it from the settings of the Inventory as shown below.
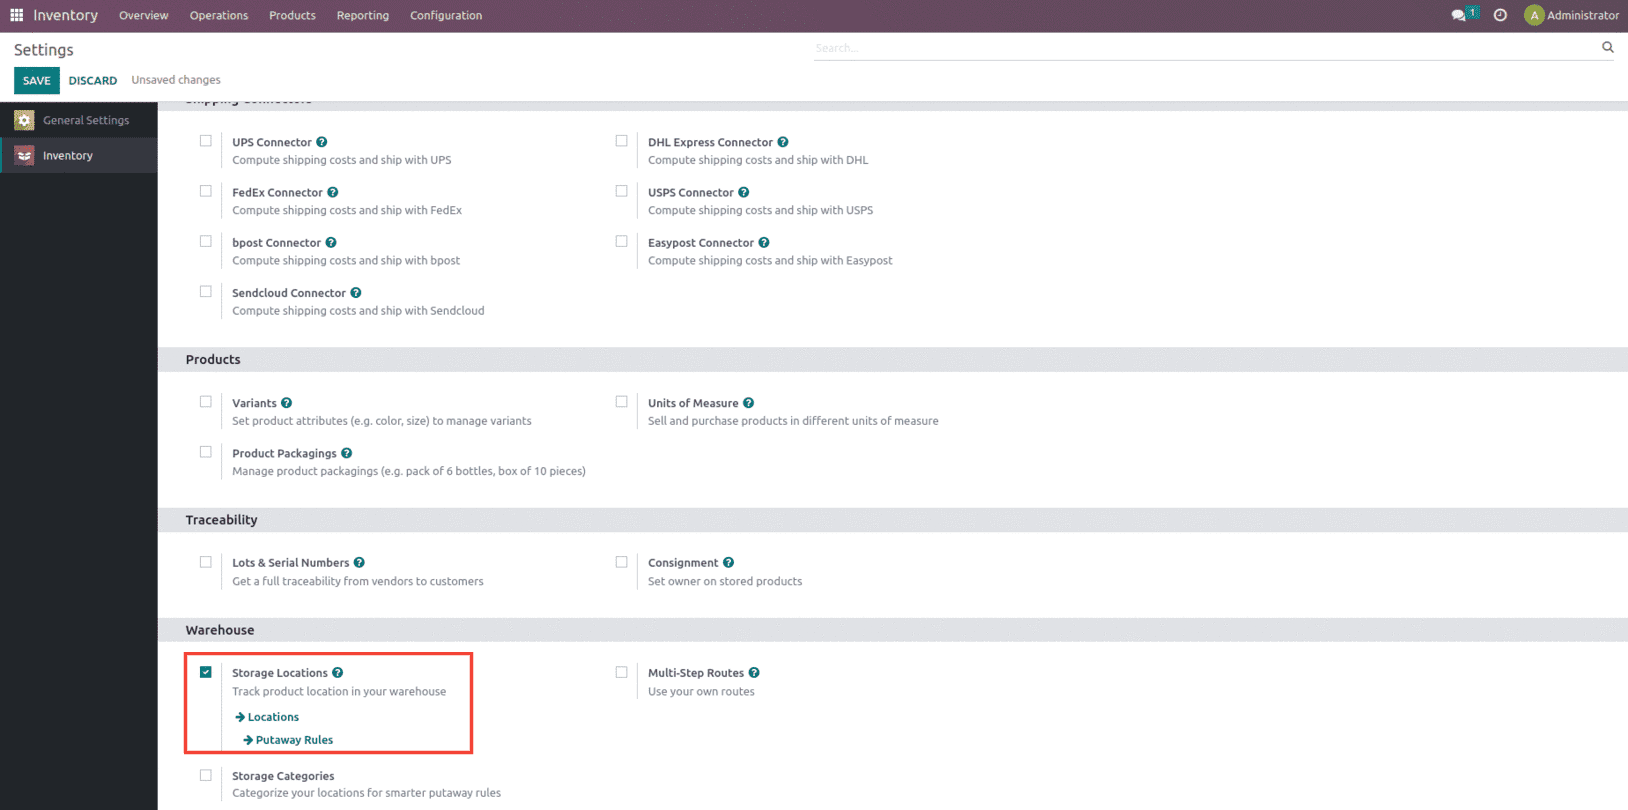
Once the location is enabled one can create new locations from the configuration of the Inventory as shown below.

Users can view multiple locations with different location types and one can easily filter them from the Filter option. To create a new location, use the create option as shown below.
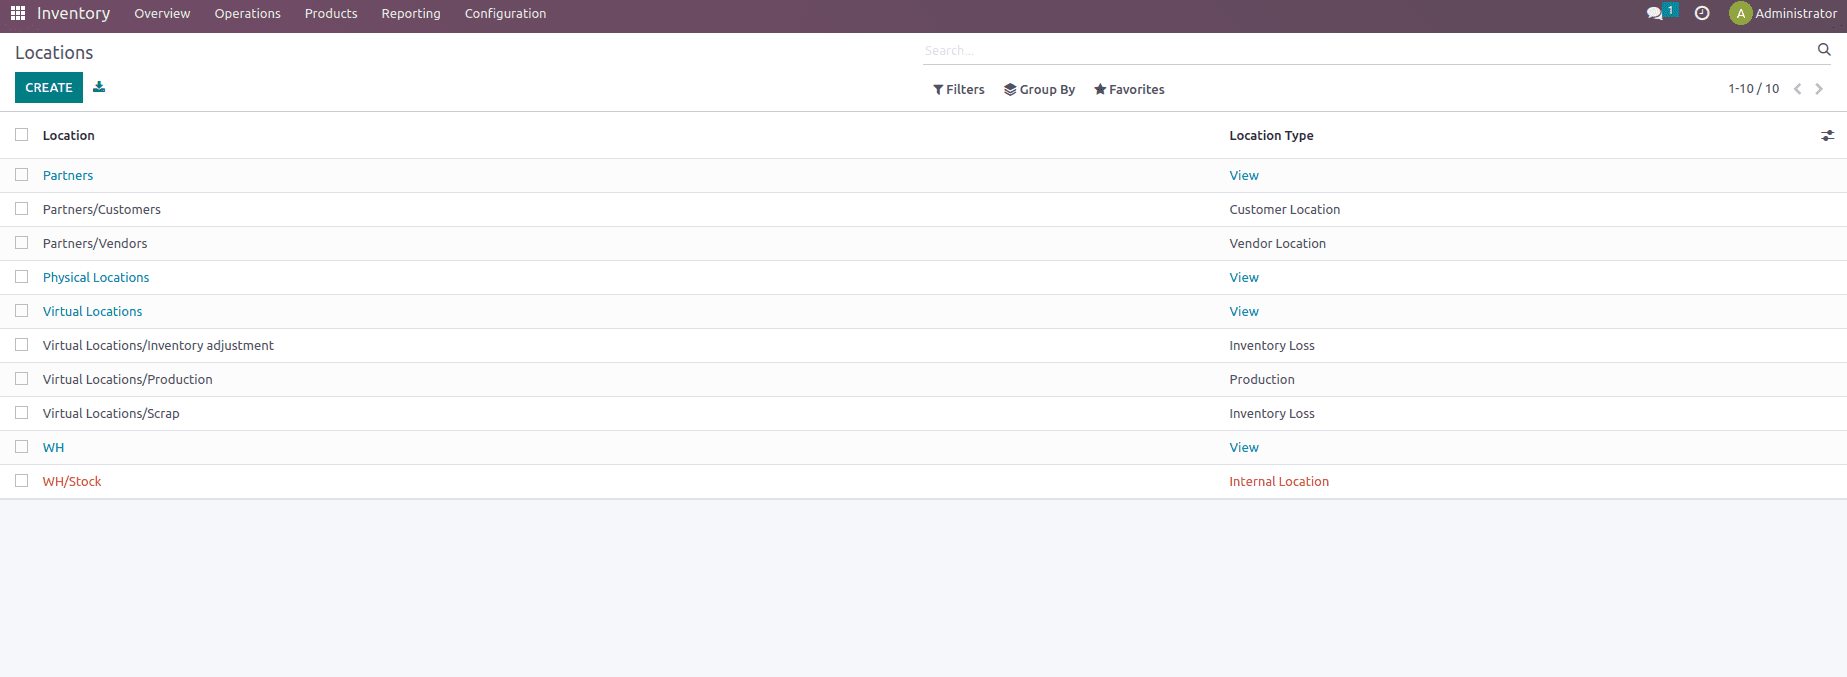
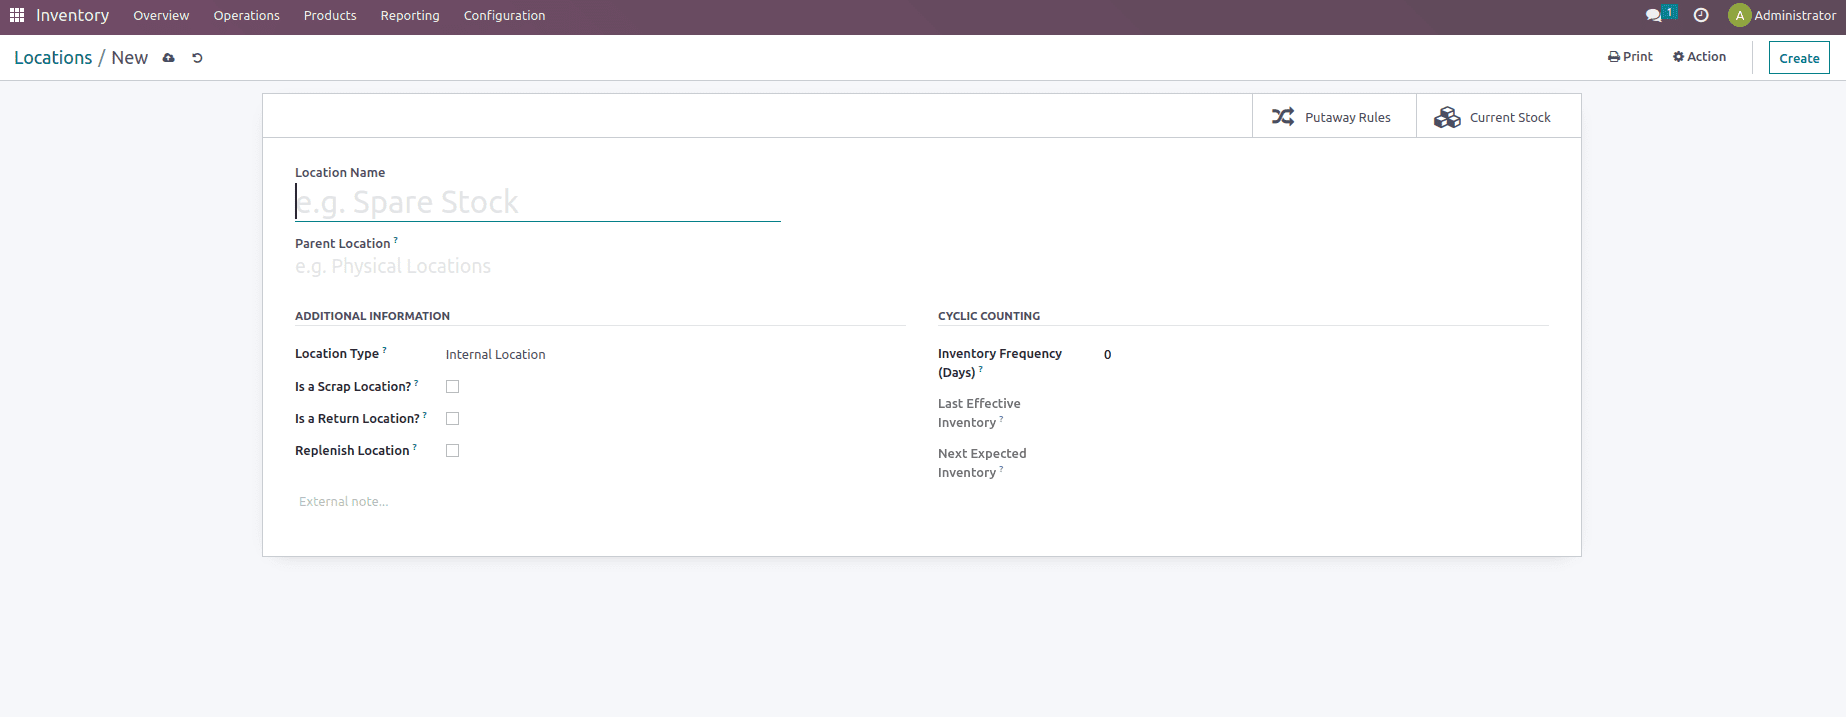
The Location feature includes certain fields such as location name, the option to mention the parent location if any, then some additional information such as location types which includes customer location, view, vendor location, internal location, virtual location, transit location, production location, and inventory loss.
The view is an imaginary location that contains no products. It serves as the warehouse’s base name. Our warehouse’s hierarchical structures are based on this point of view.
Vendor Location: This shows the location of the vendors’ products that we acquire. We do not maintain its inventory, hence it is a virtual location.
Customer location: This is a virtual place that depicts the final destination of products when they are sold to a customer.
Internal Location: These are physical places within our warehouse. We can store our products and keep track of the inventory at these sites.
Inventory Loss: These are virtual sites that are used to evaluate changes in stock levels at actual locations owing to a variety of factors.
Production is a virtual area within our organization that is used for manufacturing. These types of sites collect raw resources for consumption and ultimate product manufacturing.
Transit Locations: This is a virtual location used to depict stock movements between multiple warehouses or companies that we own.
Along with it the user also has the provision to mention whether that location is a Scrap location, Return location, or Replenish location when enabled any of these options work accordingly based on the location enabled, Location feature also includes certain cyclic counting option which helps to measure the effectiveness of the stock within the inventory.
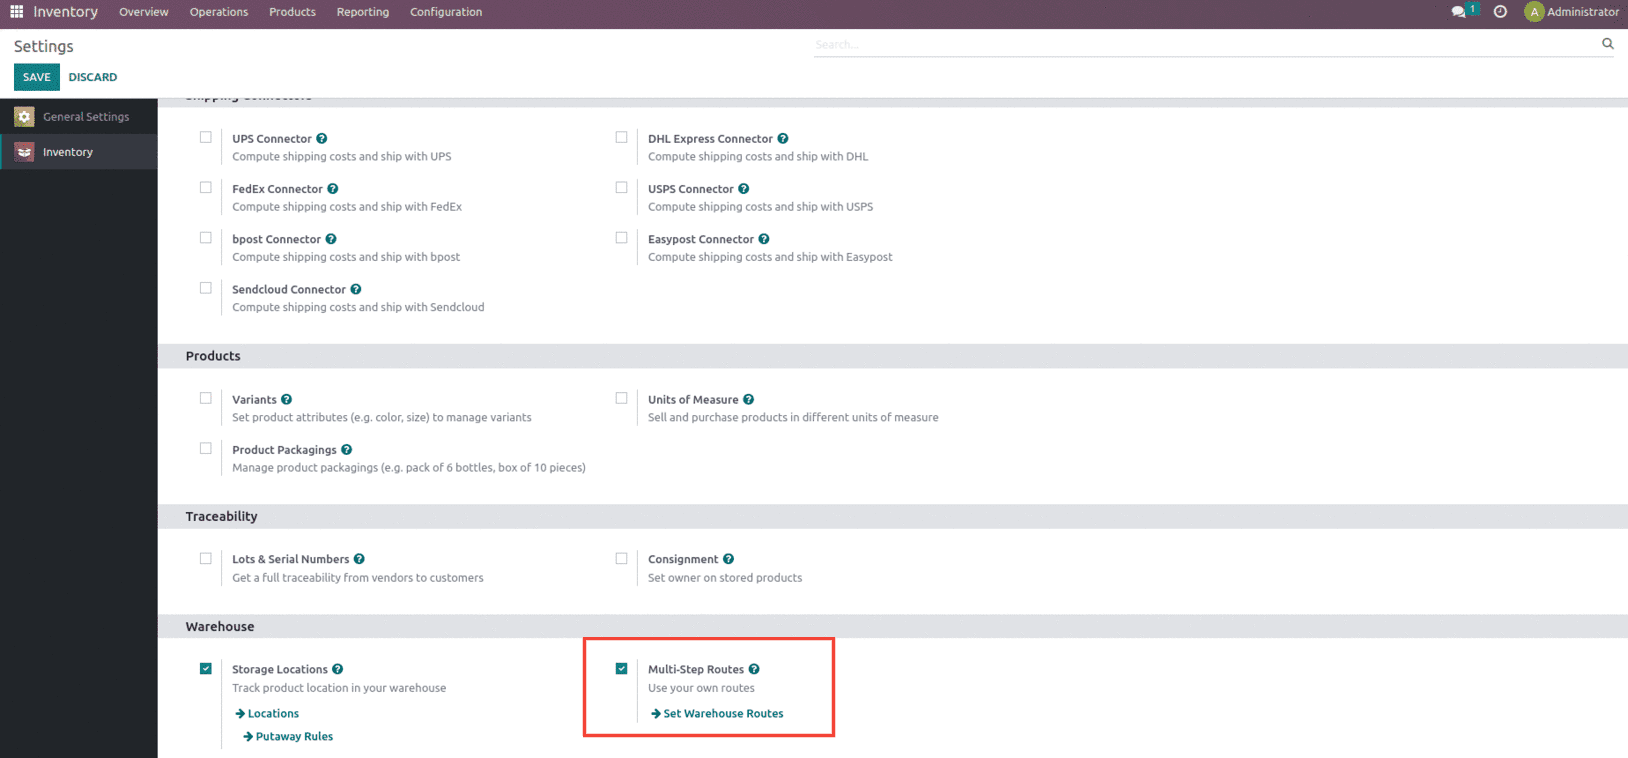
After creating and setting up the location the next procedure would be to manage the movement of the products within inventory if any. A Route is nothing but a collection of Rules. What happens is determined by the Rules. Some Routes contain a set of related rules, but they are linked by the Supply Method, not by the fact that they are on the same Route. These routes and rules are enabled from the settings of the Inventory module as shown below.
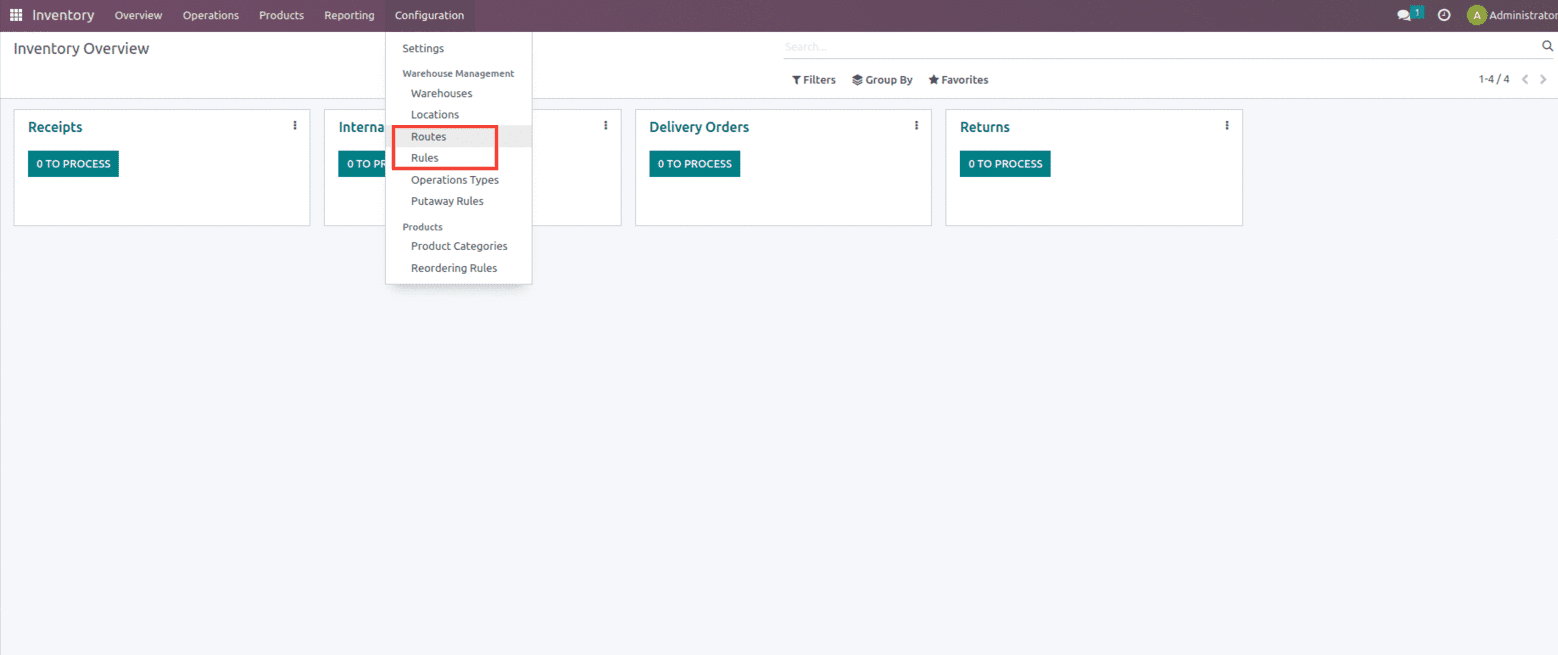
And these routes and rules can be created from the configuration of the inventory module.
Once these routes and rules and locations are enabled from the settings of the Inventory module it adds up some additional features within the warehouse such as the option for Shipments, ie Incoming and Outgoing shipments.
Product Import
The next step is to set up the Master data that is needed to run a company effectively.
So firstly we can add the Products to our database, which we can either do manually by creating products inside the Inventory module.
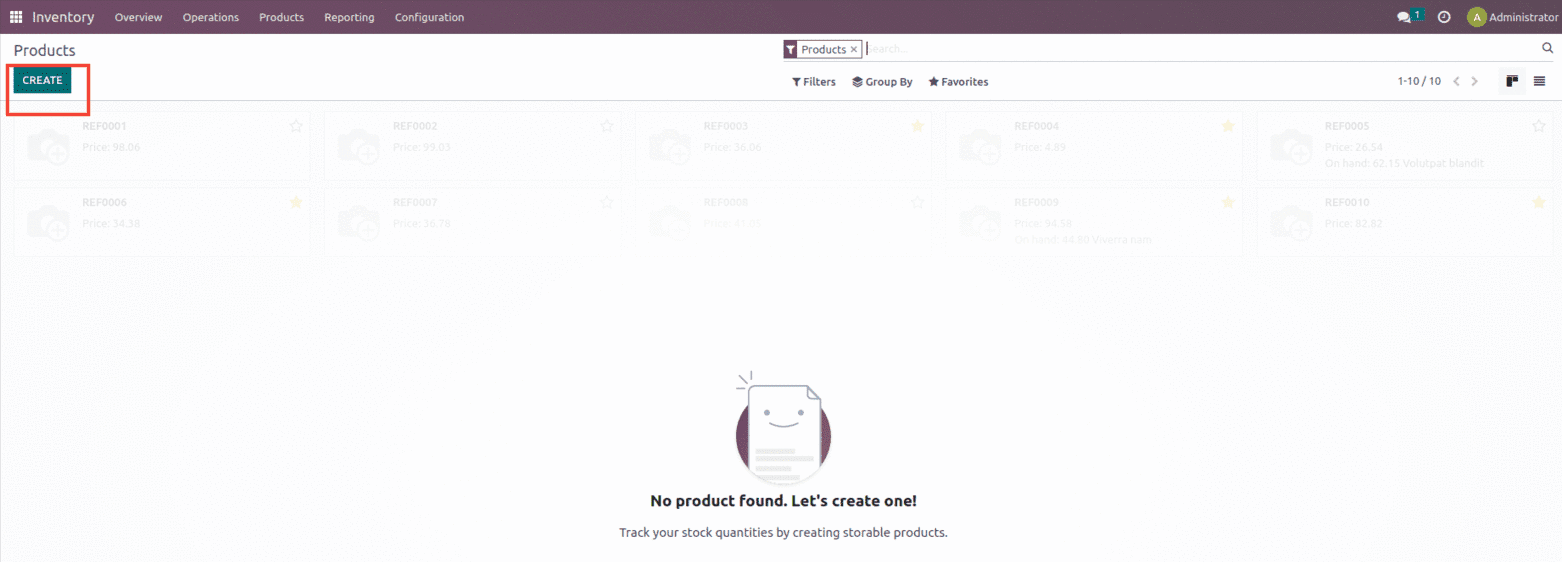
Or we can just import the file into the database odoo supports importing files in XLS and CSV format. While importing we must select the type of data file that we want to import. The file format must be CSV or Xlsx. When importing directly, there is often the possibility of errors. As a result, the import of the file model that needs to be imported must first be tested. The data template will send us the correct data fields to import the data. Connect information to the exported models’ fields and import data now.
To import the data, go to the product page’s Favorites section and select the “Import records” button.
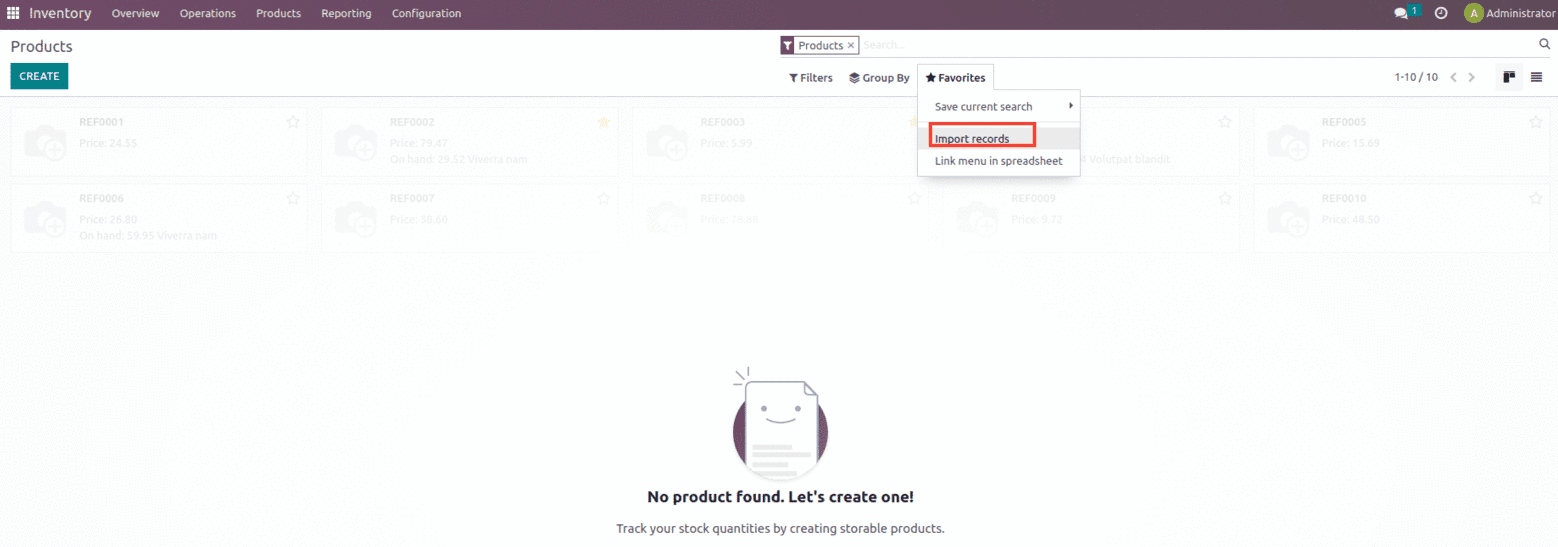
Suppose we need to import the product sheet which is shown below and choose the import option.

The applicable file will then be loaded, as shown below, and we can use the “Test” button to see if everything is correct. We can examine whether there are any mistakes by clicking on them. If it is error-free, we can observe the phrase “Everything appears valid.”
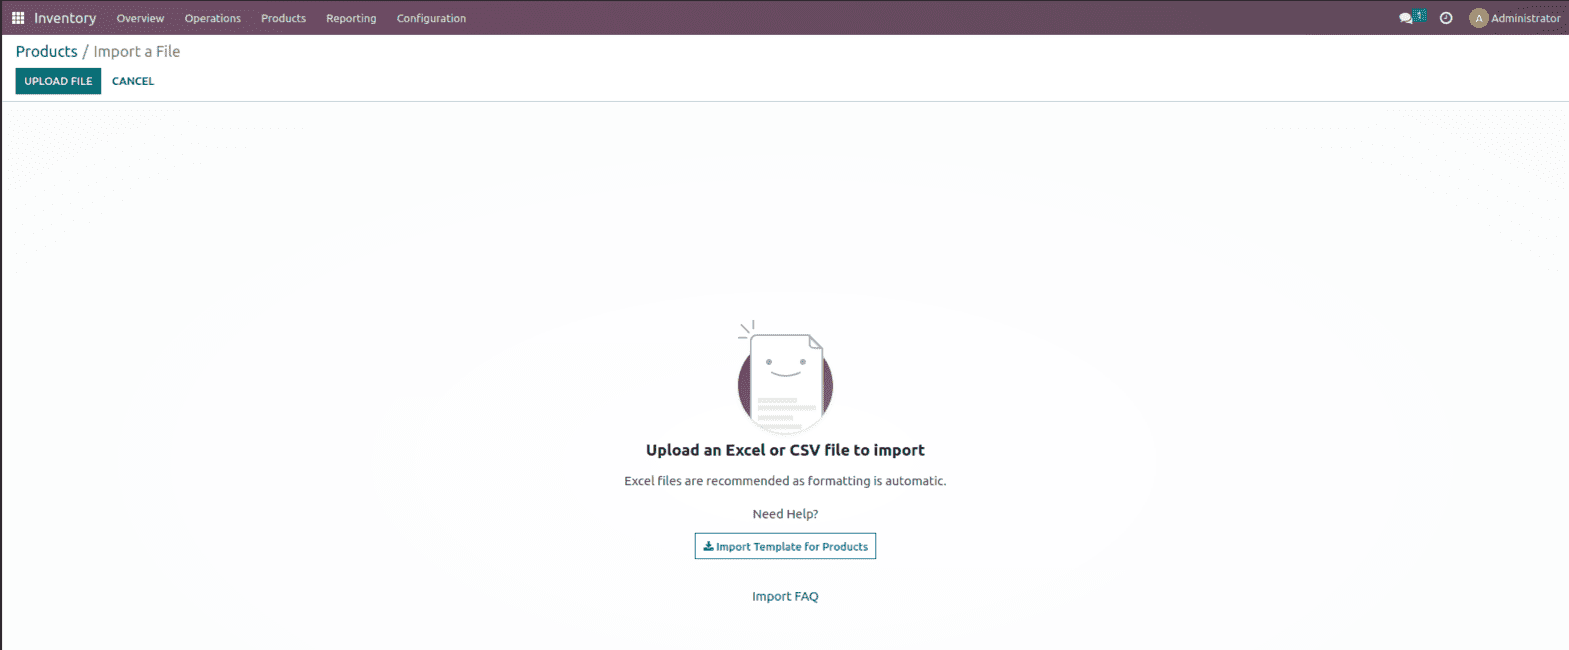
Upload the appropriate file and then use the Test button as shown below.
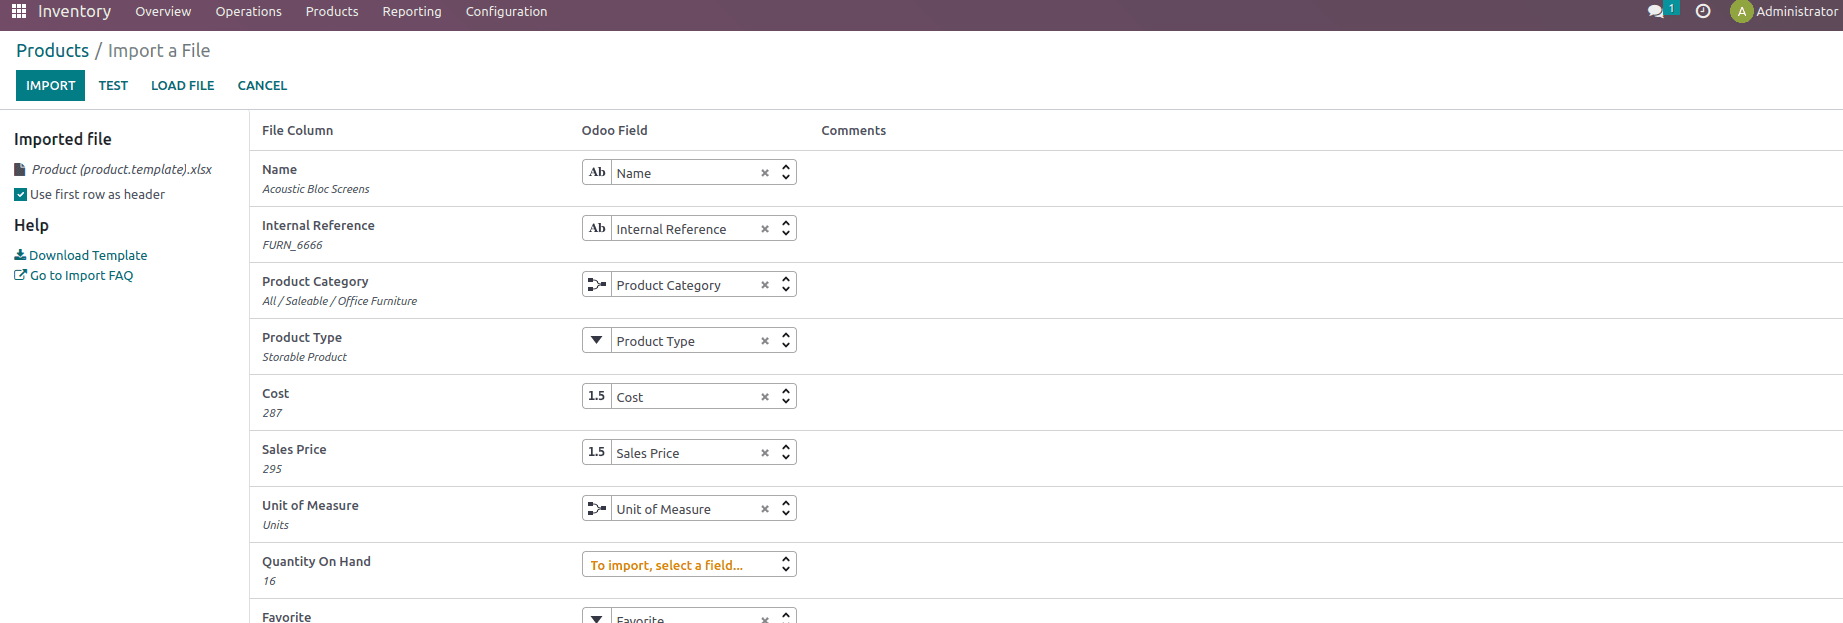
Once everything is valid, import the same into the database.
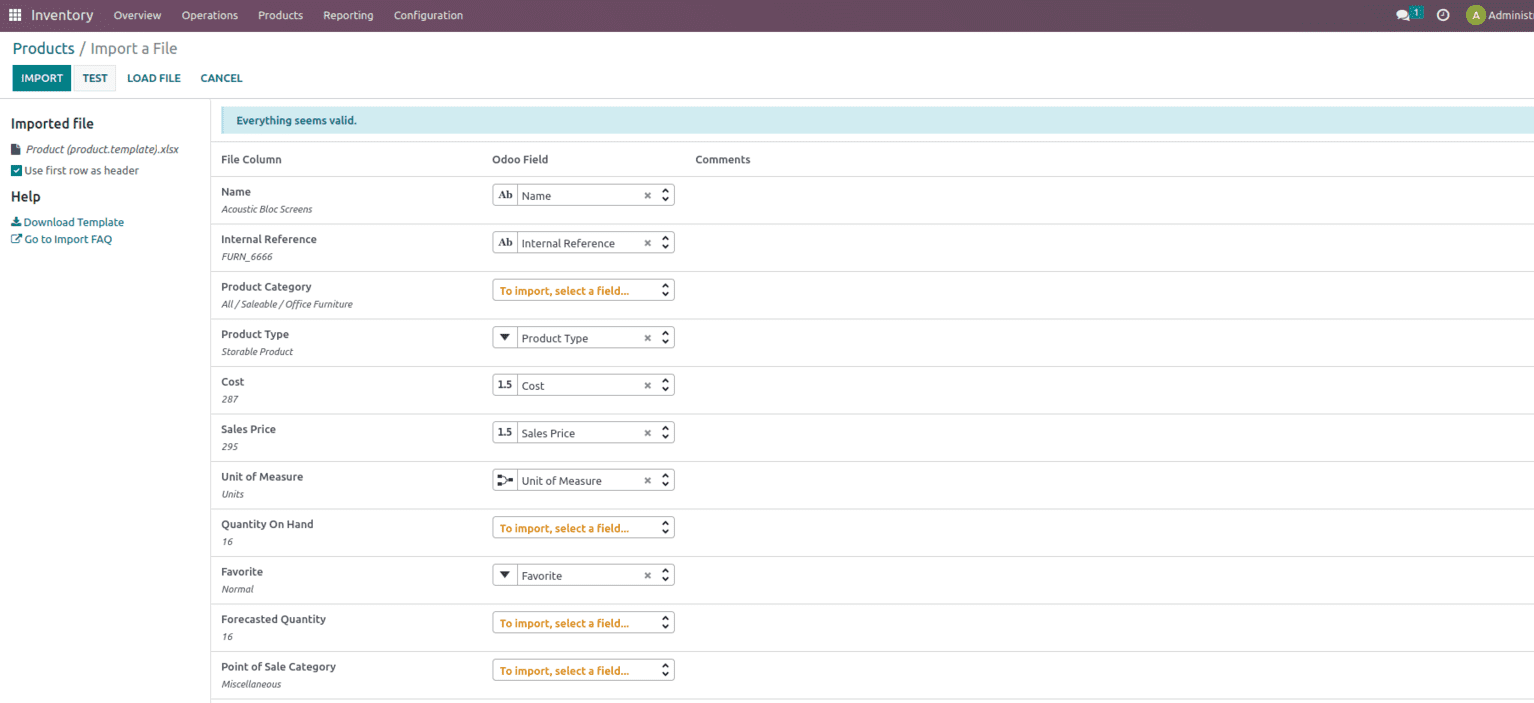
Once the products are imported we can see that the same thing will be imported to the product page also.

Once the product is imported we can see that the products are updated on the product page.
Along with the product importing, it’s important to import the Product Category if any, and to do so go to Inventory Configuration and choose the option where the product category is mentioned.
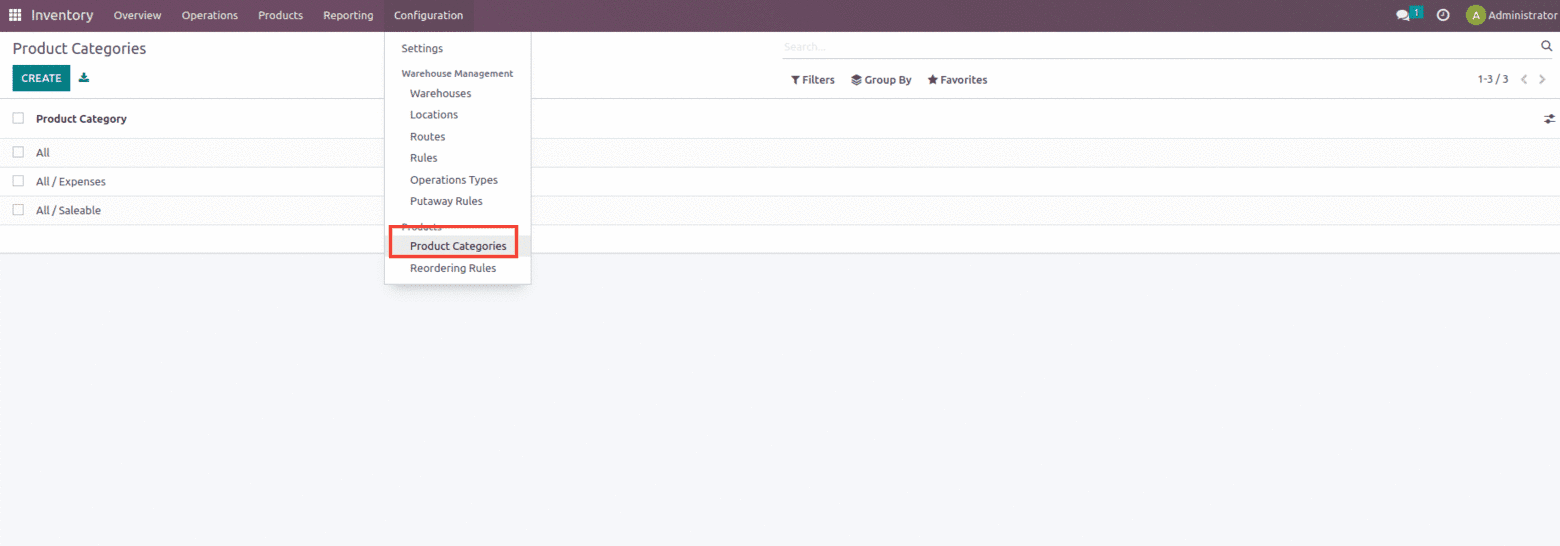
One can create a new category from here which includes Account Properties which include options such as Income account and Expense account, then we have the Logistics option which includes the option to mention the Route and Force Removal Strategy and then you also get the option called Inventory valuation.
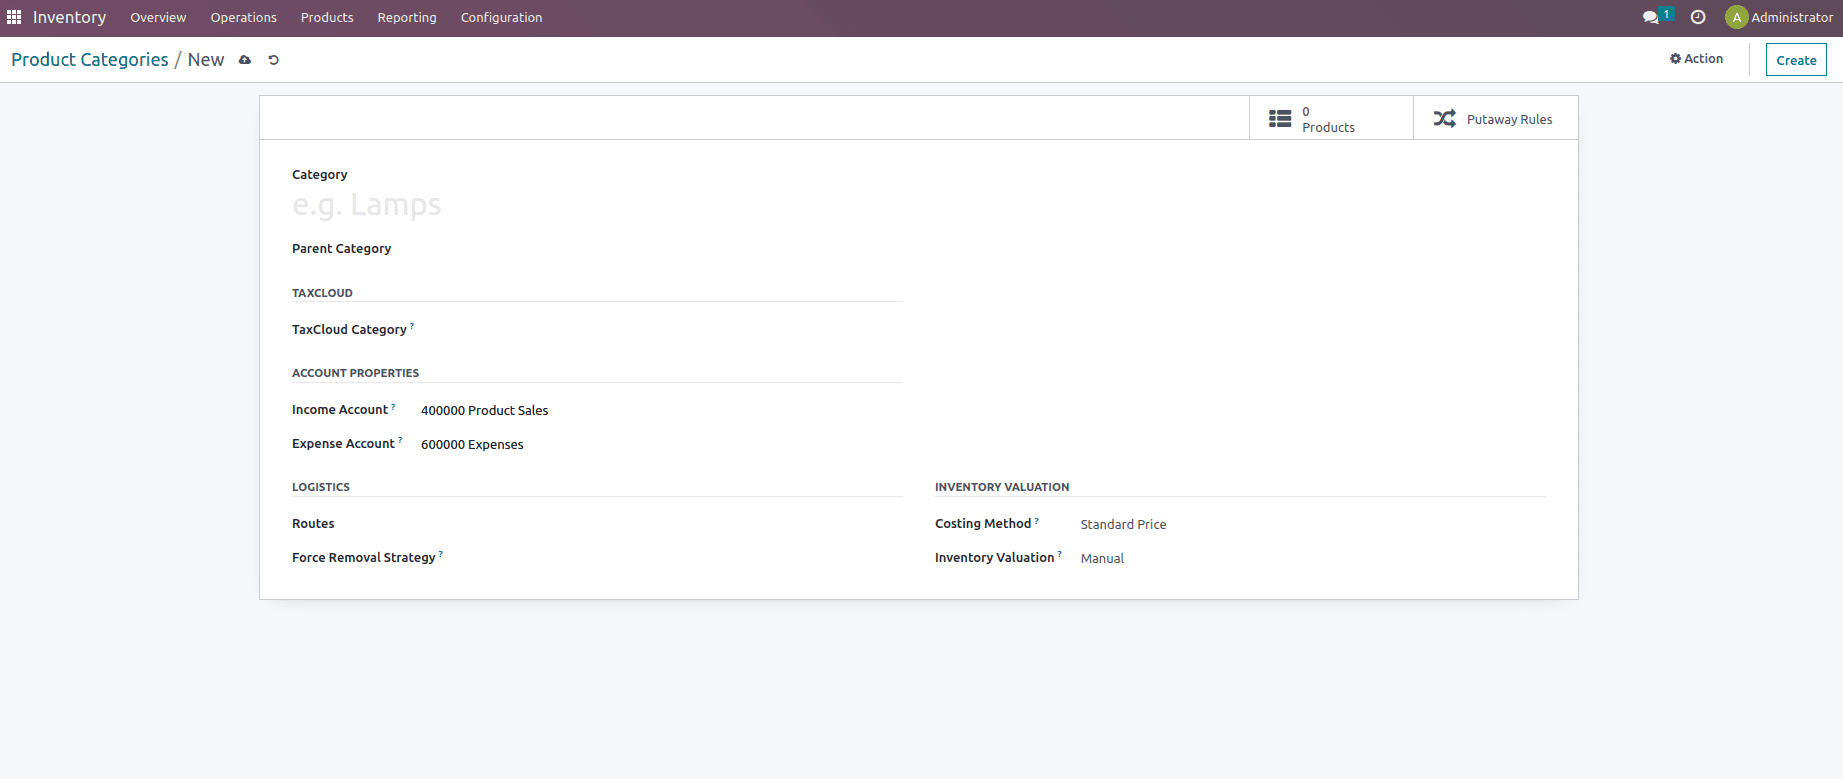
A company’s inventory valuation assists in determining the monetary value of products in its inventory.
Inventory valuation includes options like the Costing method, which specifies how things are priced. Costing methods are classified into three groups.
1. Standard Price: The products are appraised at their stated cost price. It will not change unless the user manually changes it.
2. Average Cost (AVGCO): The cost of the product is calculated at its average cost.
3. First in, first out (FIFO): The product cost is determined by the cost of the first product entered and removed from inventory.
Also, it includes an option called Inventory Valuation, which Determines whether inventory changes must be recorded. Inventory value is classified into two types.
1. Manual: When inventory is valued manually, accounting entries are not automatically recorded when a product enters or exits the inventory.
2. Automated: If the inventory valuation is automated, accounting entries are automatically recorded when a product enters or exits the inventory.
And when the valuation is set as Automated additional few filed are added such as Stock Input Account, Stock Output Account, and Stock Valuation Account.
Stock Valuation Account – This account is used to record the inventory’s current stock value.
Stock input account – This account is affected when the product is moved to the warehouse as part of purchase activity.
Stock output account – This account is impacted when the goods leave the warehouse on a selling operation.
Stock journal – The stock book keeps track of all stock movements.
And To import the Product category the process is the same as the product import but need to import it under the product category as shown below.

Suppose I have a product category to import as shown below.

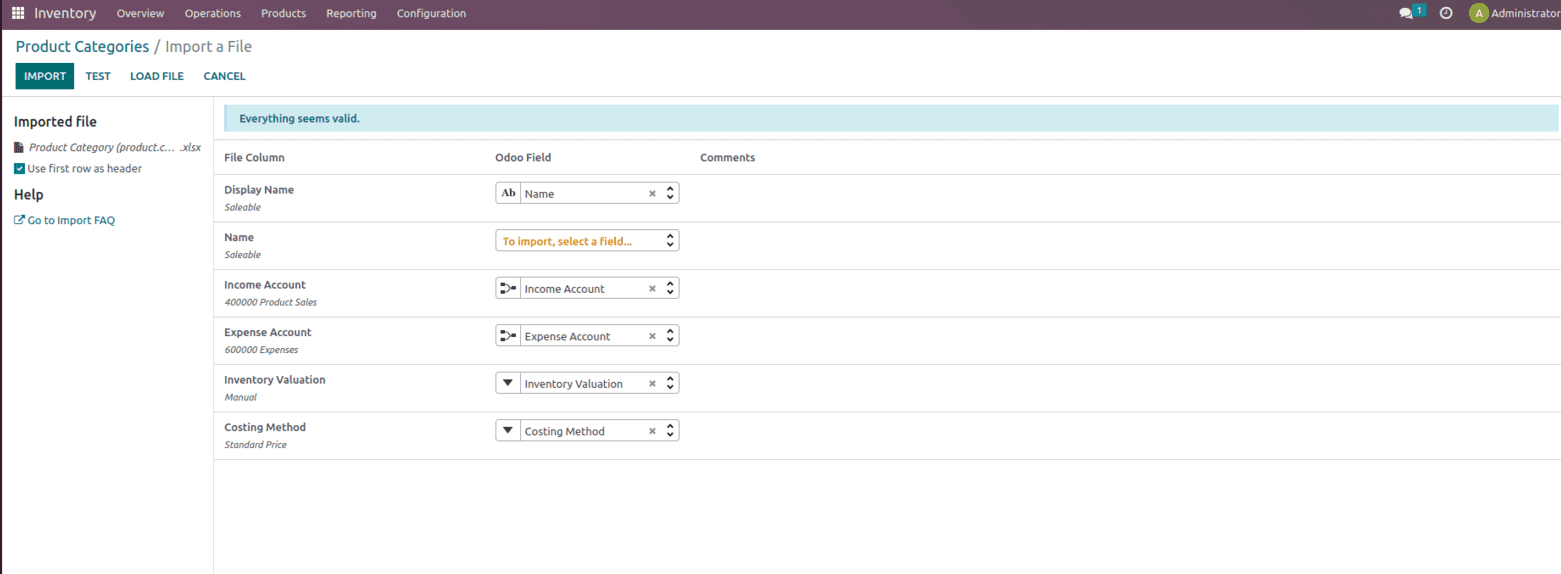
Upload the same onto the product category import option with a suitable field matching the same with the one in odoo.
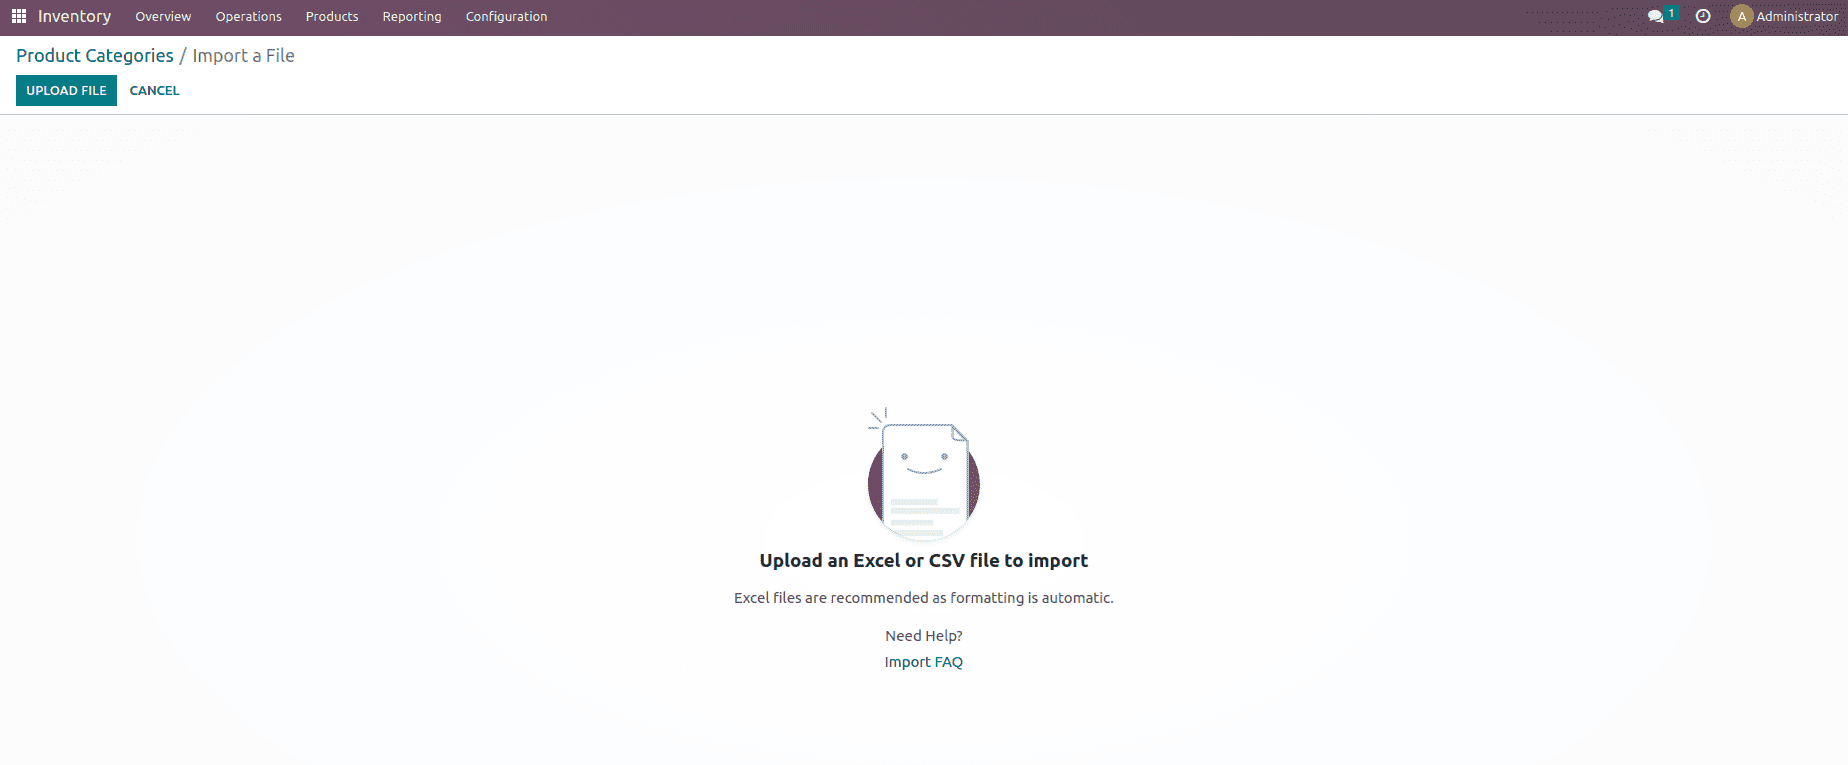

Test the following records being uploaded once everything seems valid then import the same into the database.

Once the data is imported and when we check the category we get the same info as in the sheet as shown below.
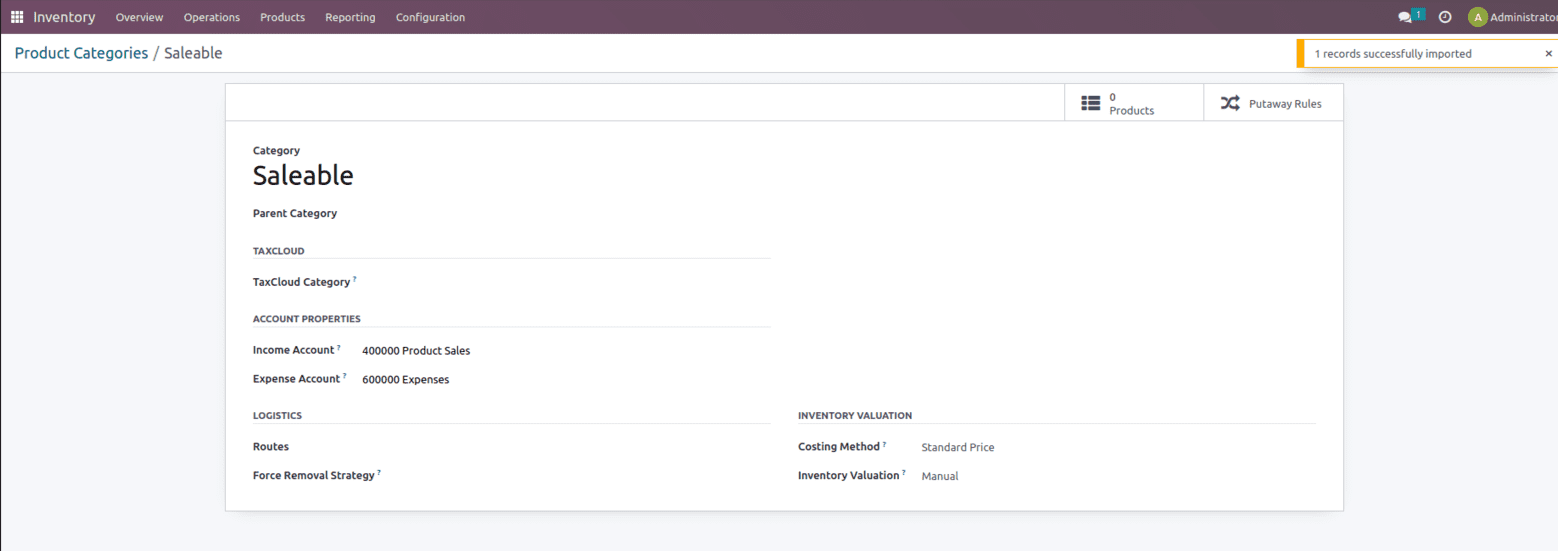
Note: It will be recommended to keep the inventory valuation ‘Manual’ initially, you can put any costing method based on your process. Change the inventory valuation to automated (if required) only after the opening stock is updated and the total stock value should be added as the opening balance.
Adding Opening Stock
Once the product is updated the next step is to manage the Opening Stock which can be achieved with the help of Inventory Adjustment. The recorded inventory counts in the database may not always match the actual inventory counts in the warehouse in any warehouse management system. The difference between the two tallies could be the result of theft, damage, human mistake, or other circumstances. As a result, inventory adjustments are required to reconcile the variances and guarantee that the recorded counts in the database correspond to the actual counts in the warehouse.
Inventory adjustments in Odoo may be accessible under the Inventory Operations menu as shown below.
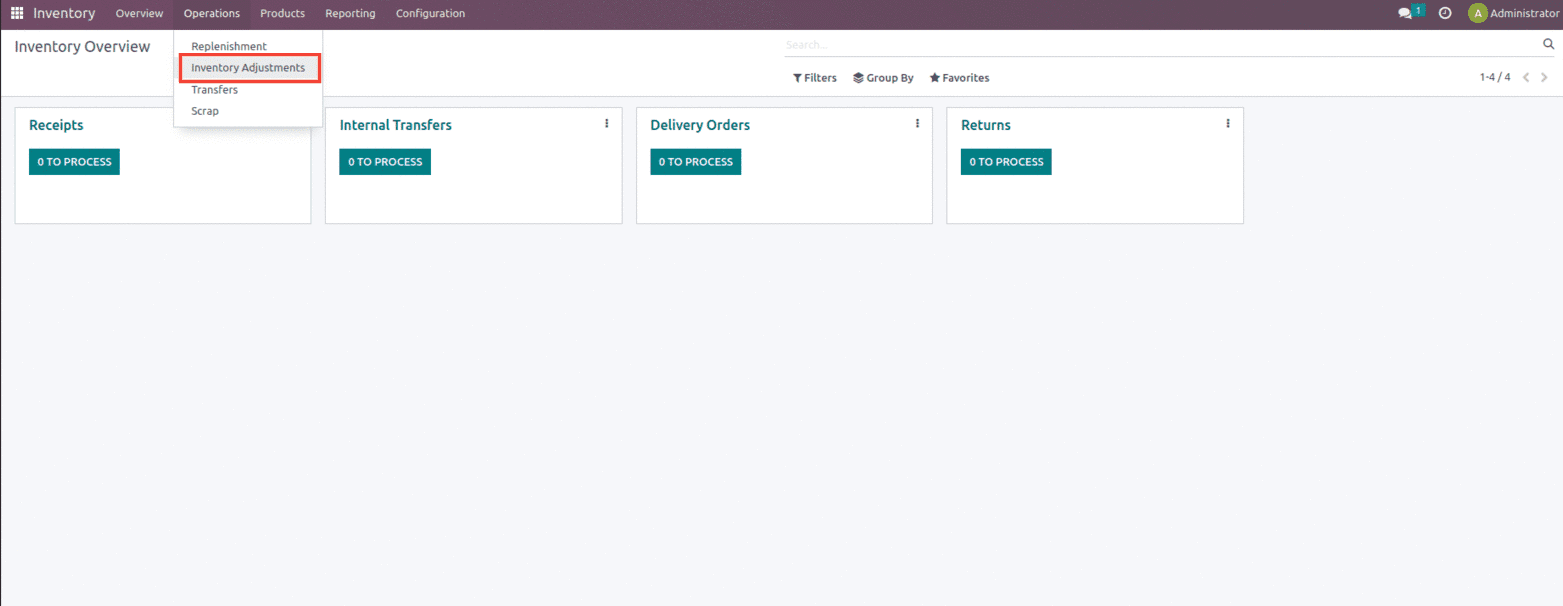
The Inventory Adjustment page includes options like Location, Product, On Hand quantity, Counted Quantity, Differences, and much more as shown below.

Opening stock also import, for that import options available under the favorites. Once counted quantity is updated click on apply. This will update the onhand quantity as counted quantity
One can create inventory adjustments or can set up the opening stock in this way which will be useful while performing annual inventory counts and will avoid any kind of discrepancies in stock levels. The Company can then explore the source of these discrepancies and modify inventory reports to maintain accurate corporate records.
So these are the few points that need to be kept in mind while setting up the Inventory for the new company.
Have a look at the following blog to explore more about Install Odoo16. Install Odoo16


