A planned series of individual emails sent over a defined period of time for a predetermined aim is an email marketing campaign. Examples of these specific objectives or calls-to-action (CTAs) include the following: Make a purchase, register for a webinar, or receive a white paper.
Odoo 16 Email marketing is a complete marketing solution based on the internet and email connections. There are numerous email marketing solutions available on the market today. However, Odoo offers both a paid enterprise edition for entrepreneurs and a free community version for small businesses. Without any IT knowledge or prior expertise, you can develop intriguing email campaigns that catch the attention of your potential customers.
Odoo provides user-friendly software that allows you complete control over the contents and presentation of your emails. The integration with CRM, Marketing Automation, Events, and Surveys gives the Odoo 16 Email marketing module platform an exclusive feature set.
The Odoo platform’s Email Marketing Module provides efficient and effective assistance in creating successful campaigns. It allows users to control email layouts, choose the ideal themes, and create their own email templates. These emails are easy to send to the necessary recipients.
The advanced ability to send emails to the individuals you mention can aid in boosting their email receiving, opening, and clickthrough rates. You can choose certain groups to send communications to, including leads, prospects, and other groups, based on location, time, or other factors. Now let’s see some of the features available in the Email Marketing Module.
* The Odoo 16 E-Mail Marketing module helps you to create, manage and customize your emails.
* Get a real-time preview of how your email will appear by adding text and graphics from within the customizable content of your building blocks.
* Import your contacts from your device, and upload contact from documents. Files etc.
* Segment your subscriber database by assigning subscribers to mailing lists and choosing recipients from Odoo CRM.
* Schedule your Emails and messages.
* To receive a preview before launching it to your entire mailing list, send a sample of your mailing to a few chosen email addresses.
* Display your emails on any screen,
* Track the undeliverable emails from the previous 24 hours and receive notifications when they bounce.
* Provides real-time analysis through the Odoo reporting facility.
* Archives the email history in the Odoo Database.
* Adding a tracking link to email campaigns to provide a comprehensive overview of campaign results.
* Analyze the Revenue generated through the email campaigns.
We have discussed the various features available in the Odoo 16 Email marketing platform. Now let’s discuss the process of creating and sending bulk emails for a campaign.
To start with the module functions, you can install the updated version of the Odoo 16 Email Marketing Module from the Enterprise Edition.
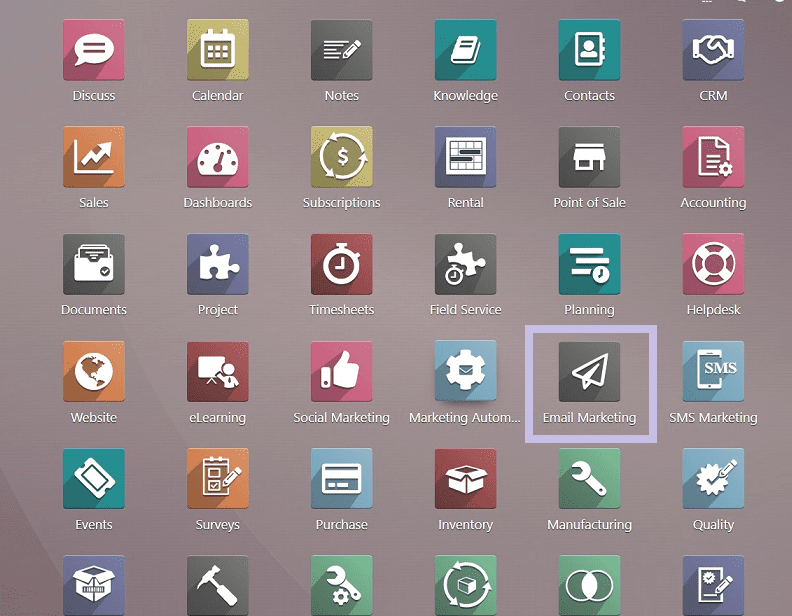
After opening the module, you can see the Module homepage, as shown in the screenshot below.

The previously created mailings will be displayed in a list view with details about each mailing, such as the Date, Subject, Responsible, Sent, Delivered, Opened, Closed, Replied, and Status. The page can be viewed in Kanban, List, Graphical, or Calendar modes. The options for these views are on the right side of the page.
You can sort using the Group By and Filters options based on your requirement.
Configuration Settings
We can activate the bulk mailing function from the settings. so let’s move on to the settings page from the Configuration menu, as illustrated in the screenshot below.

You can choose from settings like Settings, Link Tracker, Blacklisted Email Addresses, and Favourite Filters under the Configuration menu.

The Settings option receives some features under these options, including Mailing Campaigns, Blacklist Option when Unsubscribing, Dedicated Server, and 24H Stat Mailing Reports, respectively, as illustrated in the above screenshot.
Mailing Campaigns: We can enable the option to manage bulk mailings. This will open a Campaign menu in the Email Marketing platform.
Blacklist option when unsubscribing: This option allows recipients to blacklist themselves while unsubscribing from a certain campaign.
Dedicated Server: we can choose a dedicated, outgoing mail server for your mass mailing. This can be done by configuring a new Outgoing mail Server.
24H Stat Mailing Reports: Monitor undeliverable emails from the last 24 hours and be notified when they bounce.
After activating the required settings, save your changes using the “SAVE” button.
Favorite Filters
You can define the appropriate rules to filter the recipients while creating the mailing by using the option of favorite filters. By using the star icon, you can simply add the basis to your list of favorites. To create new favorite functions, use the “Favorite Filters” option available in the Configuration menu, as depicted below.

The NEW button will open a page from which you can create a new filter option.

Enter the Filter Name, Recipient Model that can be selected from the dropdown list. And you can give the filter condition in the Domain Name area. After completing the details, save the filter using the save icon provided on the uppermost part of the page.
Creating a Campaign and Sending Bulk Mail
After activating the Mass Mailing from the settings page, you will get a “ Campaign” menu on the main bar. Click on the menu for creating new campaigns. We can see the list of already-created campaigns on the Campaign page. Both Knaban and List views are available for viewing the page.

From the above screenshot, you can see the Campaign menu homepage in Kanban mode. The website offers campaigns based on different stages. You can view many stages, including New, Schedule, Design, and Sent, in that order. You could also create new stages based on your requirements. These stages are displayed in card form in Kanban view. You will find information in each box, including, Name of the Campaign, Number of Mailings, Number of Clicked emails, Opportunities, Revenues, and Quotations. You will see three dots indicating a menu from the right side of each card which contains Edit, Delete, and Color buttons to indicate the importance of the campaign in the Kanban card.
Odoo provides Filter, Group By, and Favorites options to effectively filter your required data. you can also create customized filters using the Add a Custom Filter option, as depicted in the screenshot below.

To create a Campaign, Click on the NEW button available in the upper-left corner of the Campaign page. this may open a campaign configuration window, as shown below.
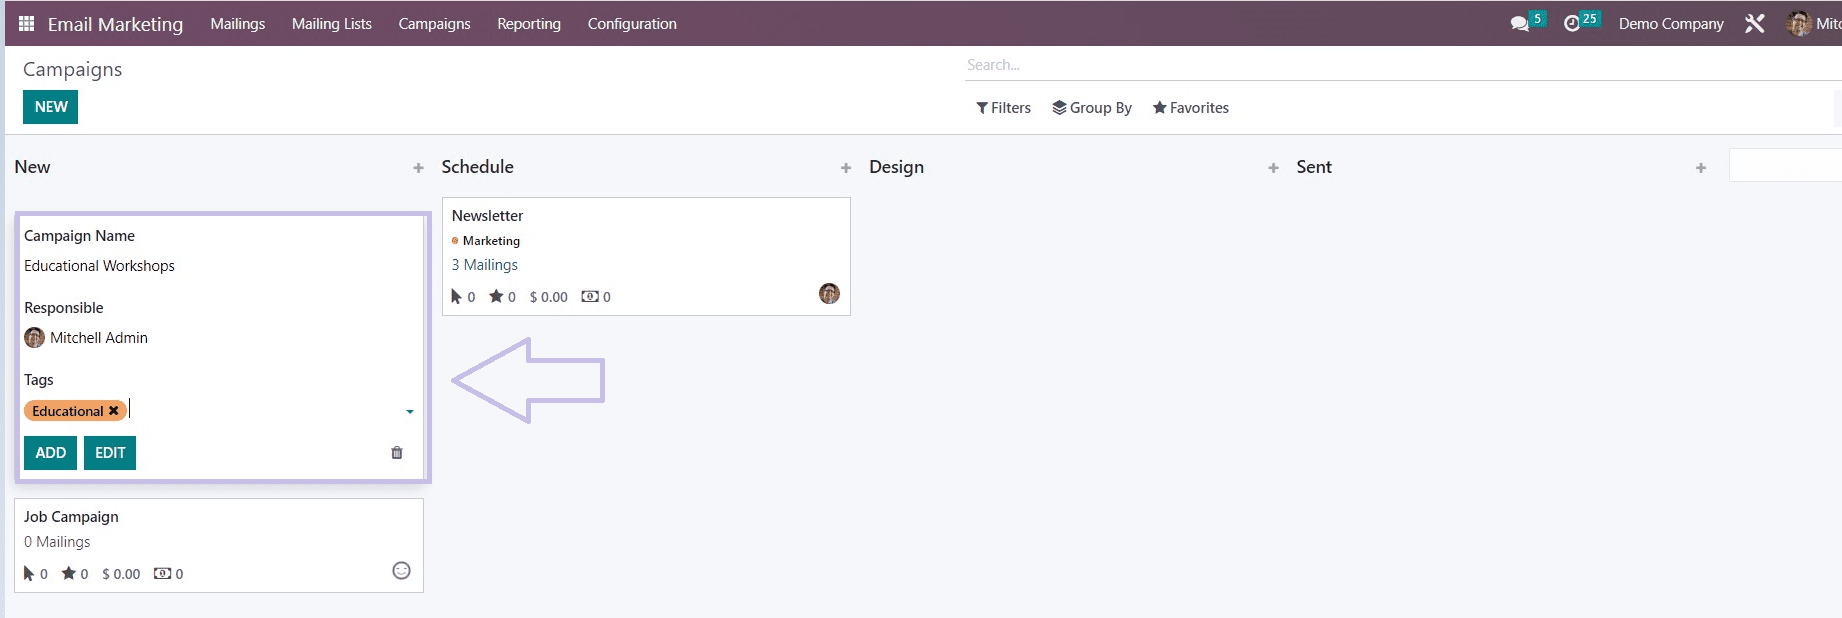
You can provide the Campaign Name that you want to create, the Responsible person Name, and Tags to denote the type of the Campaign. After completing the process, click on the ADD button, as shown in the above screenshot. Now click on the newly created Campaign’s Kanban card.

Clicking on the Kanban card will open the Campaign page, as illustrated in the screenshot below. You can see the Mailing List of the Campaign from the Campaign page. But in this scenario, we haven’t added any mailing list in this campaign. So now, let’s create a new mailing list and campaign.

You can use the NEW button to make a brand-new list and configure the Campaign mail.
The NEW button will open a Mailing Configuration form with three Tab sections, as depicted in the screenshot below.
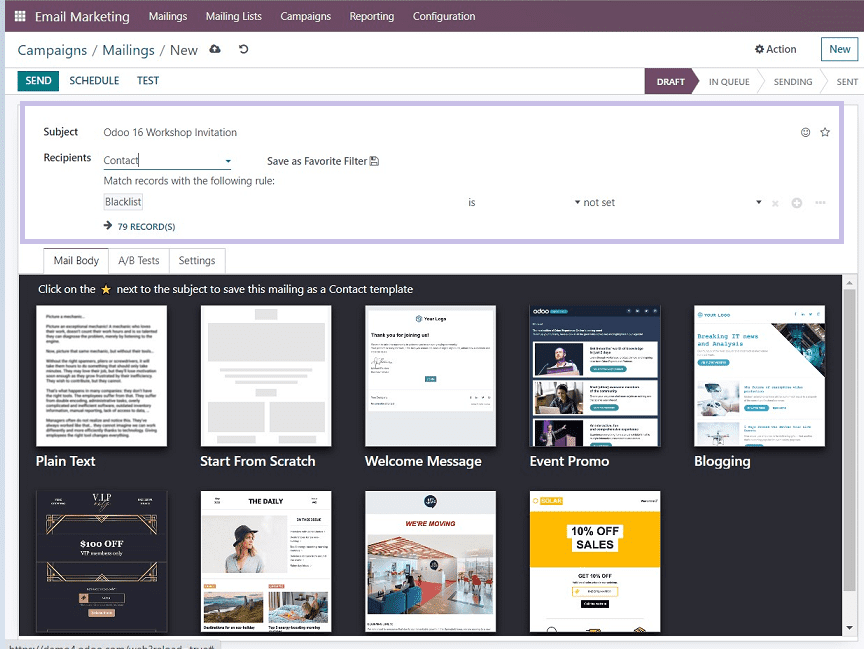
Subject line: You can provide a mail subject on the Subject line, and also it is possible to add emojis from the smiley icon available at the end of the Subject line.
Recipients: Fill in the recipient types or choose from the dropdown menu on the data field, such as Contact, Applicant, Chatter Model for SMS gateway, Event registration, Event Track, and so on. Select the Contacts option from the dropdown menu if you want to send a bulk mailing to all of your contacts. You may also create customized filter conditions and add custom filter options to send messages to certain contacts in a contact list.
Select Mailing Lists: You can specify the email lists in this section. Open the dropdown menu that contains all of the default mailing lists. You can request a mailing list from the list supplied. You can also utilize the Mailing Lists option to customize a mailing list.
Now we can check the Tabs section in detail.
Mail Body tab
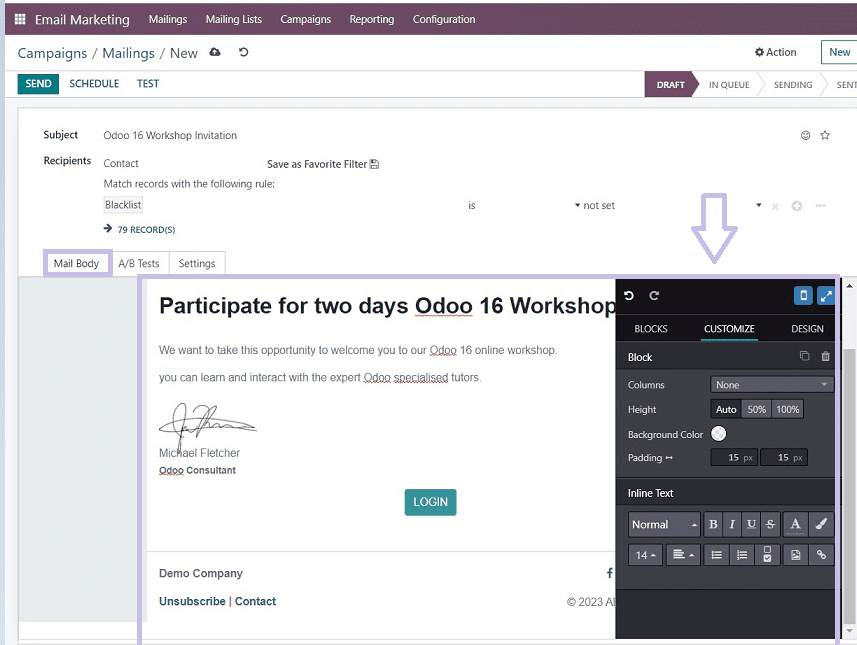
We can create any type of mail body using the multiple templates provided by the Odoo platform. Users can choose their design from the inbuilt mail body templates by just dragging it and dropping it into the text area or customizing their own mail content.
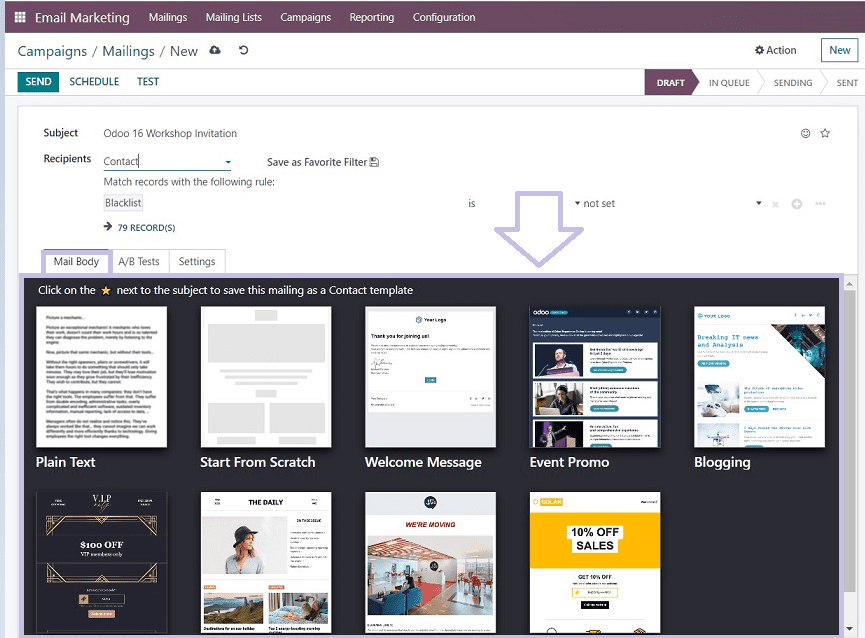
After selecting the Mail body, you can start editing your mail contents using the inbuilt editing tools offered by the Odoo platform from the right corner of the main editing area labeled in the screenshot below.
A/B Tests Tab
Users can use Odoo A/B testing to publish two versions of identical pages at the same time and compare the results to work out their effectiveness. Users can enable or disable this feature by checking the box on this tab, as shown below.
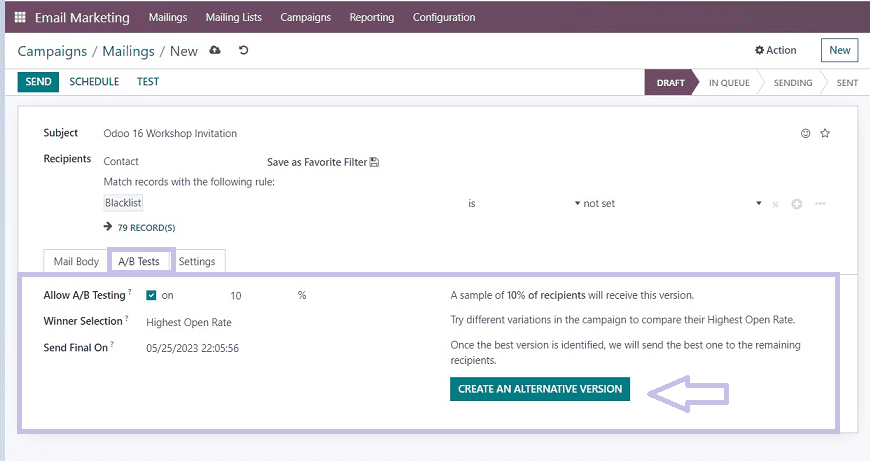
After activating A/B testing, you can specify the Winner Selection procedure based on the numerous ways available in the field’s drop-down list, and in the Send Final On section, you can enter a Final date in the “Send Final On” data column on which the recipient will get the message announcing the winner. If required, you’ll be able to use the “CREATE an alternate VERSION” button to make another version of a similar mail which will open the same configuration form as we discussed above.
Settings Tab
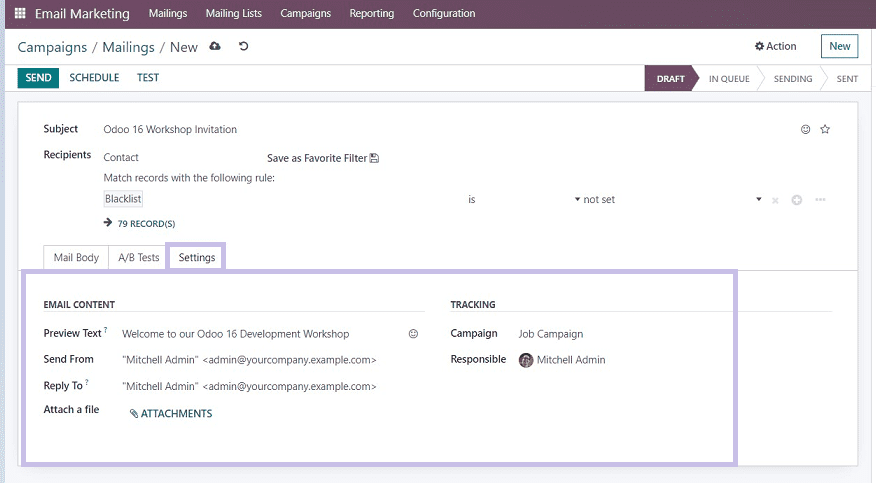
This tab helps you to configure Email content and Tracking details, such as
Preview Text: You can edit the email preview text which appears while receiving the mail in this line.
Send From: Provide the sender’s mail address.
Reply To: Mention the recipient’s address.
Attach a File: You can attach files or documents from your device using the “ATTACHMENTS” button.
Campaign: Select a Campaign Name from the dropdown list given, or you can enter the new campaign name.
Responsible: Mention the responsible person’s name who is in charge of this campaign.
Save your details using the save icon available on the upper left side of the page, as you can see from the screenshot below.
Save your details after entering the required data. Now our new Campaign or Bulk Mailing section has been successfully created. We can send or schedule the mailings using SEND and SCHEDULE buttons, respectively, from the upper left corner of the form illustrated below.

In this scenario, we are going to send the mailings, so click on the SEND button. The SEND button will open a dialogue box to confirm the mailing procedure, as shown below.
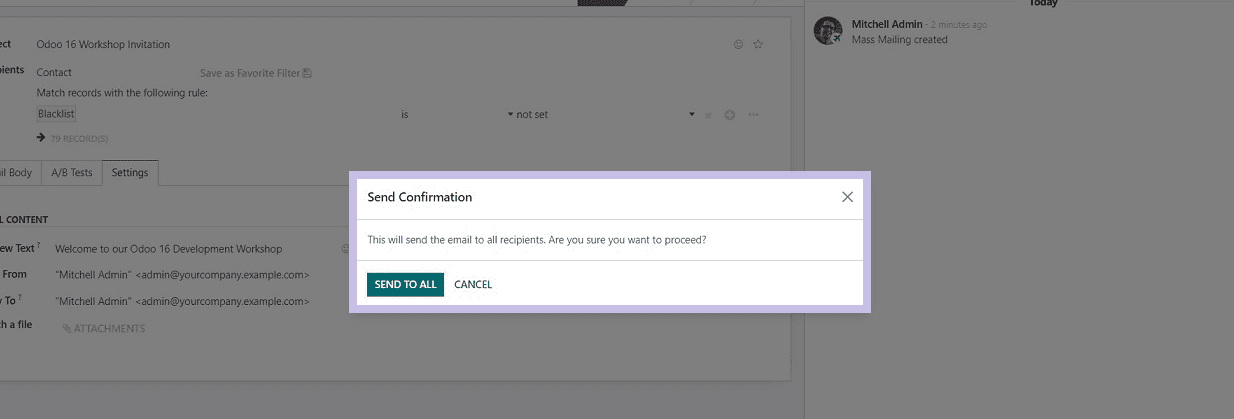
Click the SEND ALL button to confirm the mailing to send.
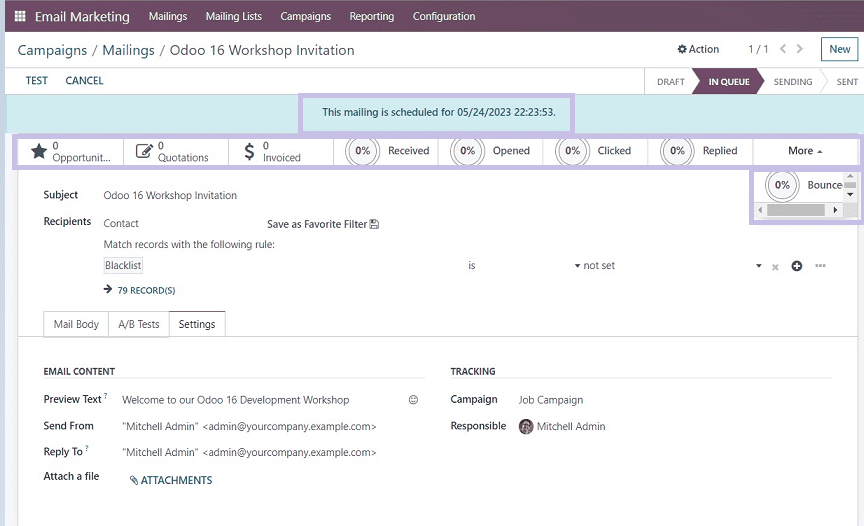
Immediately after sending the mail, you can see there are some smart buttons will have appeared at the top of the Campaign Configuration form, such as Opportunities, Quotations, Invoiced, Received, Opened, Clicked, Replied, and Bounce you can see the percentage of emails which comes under each category.

Now we can see the campaign has been created and added to the Campaign dashboard page, as illustrated in the above screenshot. We can click on the Campaign Kanban Card for managing and creating other campaigns under this category that will open a page, as shown below.
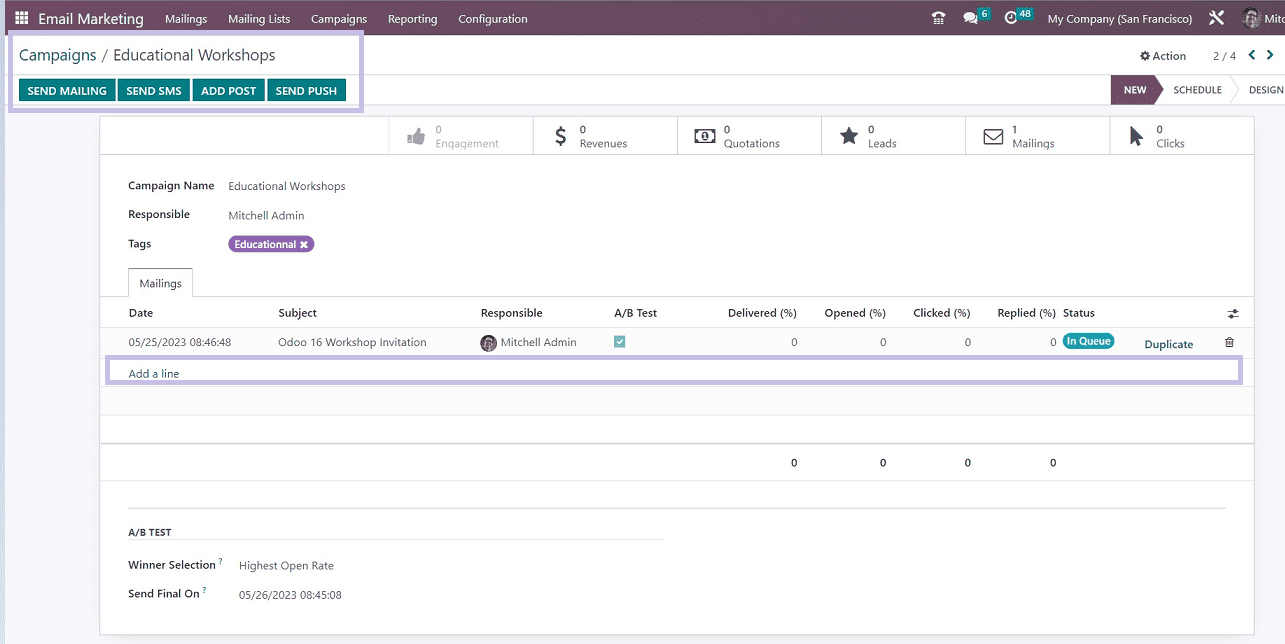
You can create another similar campaign within the same category using the “Add a Line” option available within the above form. you’ll get a new campaign configuration form immediately after clicking the Add a Line button. So you can follow the same steps as we discussed above.
The steps are necessary to make an email campaign and send bulk mailings using the Odoo 16 Email Marketing Module are covered in this blog. The extensive feature set offered by this Odoo application allows users to handle their internet marketing campaigns with ease.


