Most companies move forward with digital technologies in the modern world. It speeds up all office activities and updates the management process. The signature of the client/customer is necessary for any written communications of a business, and the owner evaluates it. A sign is essential to indicate a person’s identity in a professional or trustworthy manner. To sign an office document manually will take a lot of time. We can boost up the document signing digitally using an Odoo ERP system. Odoo 15 Sign module lets you quickly sign up for your documents and approve them and integrations.
This blog enables you to identify the Configuration feature in the Odoo 15 Sign module
Users can sign the document within less time using the Odoo 15 Sign module, and a few clicks let you sign your documents fastly with the Odoo database. Let’s examine the Configuration feature in the Odoo 15 Sign module.
Odoo 15 Sign Dashboard
The Odoo 15 Sign module dashboard shows the details of all Templates, and users can upload a pdf to sign. In addition, it is easy to sort the templates based on Tags on the left side of the window. The Template screen is visible in both the List and Kanban views. We can access details of each template, including Attachment, Signature items and more, using the List view as displayed in the screenshot below.
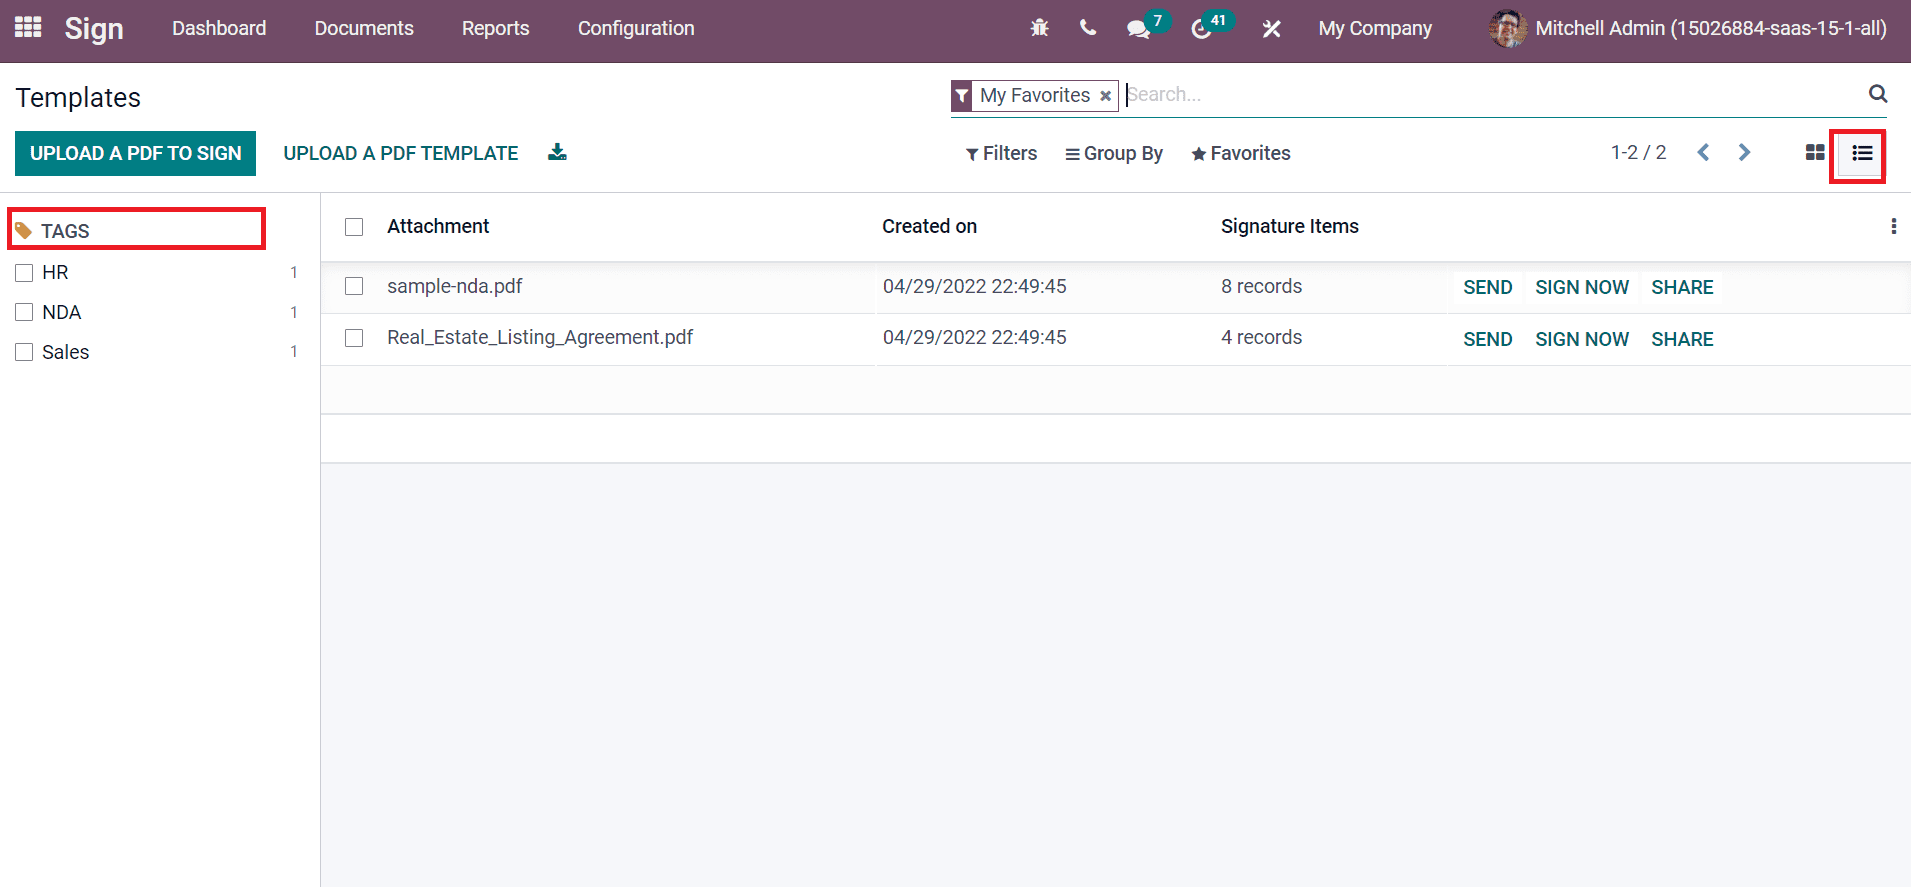
It is possible to share the document using the SHARE icon and sign it quickly using the Sign Now icon.
Configuration in Odoo 15 Sign Module
We can manage the Settings of the Odoo 15 Sign module from the Configuration tab. The configuration feature of the Sign module consists of Signature Field Types, Roles and Request Items. Users can customize documents and boost the productivity of their business with the advanced features in Odoo 15.
Settings
Users can manage the sign settings from the Settings window of the Sign dashboard. Choose the Settings menu inside the Configuration tab. We can display standard conditions of signature requests by activating the Sign Default Terms and Conditions option in the Settings window. These conditions are arranged as per the Terms in Email and Terms as Web Page. We can add the Terms and Conditions in the open space below the title Terms & Conditions, as depicted in the screenshot below.
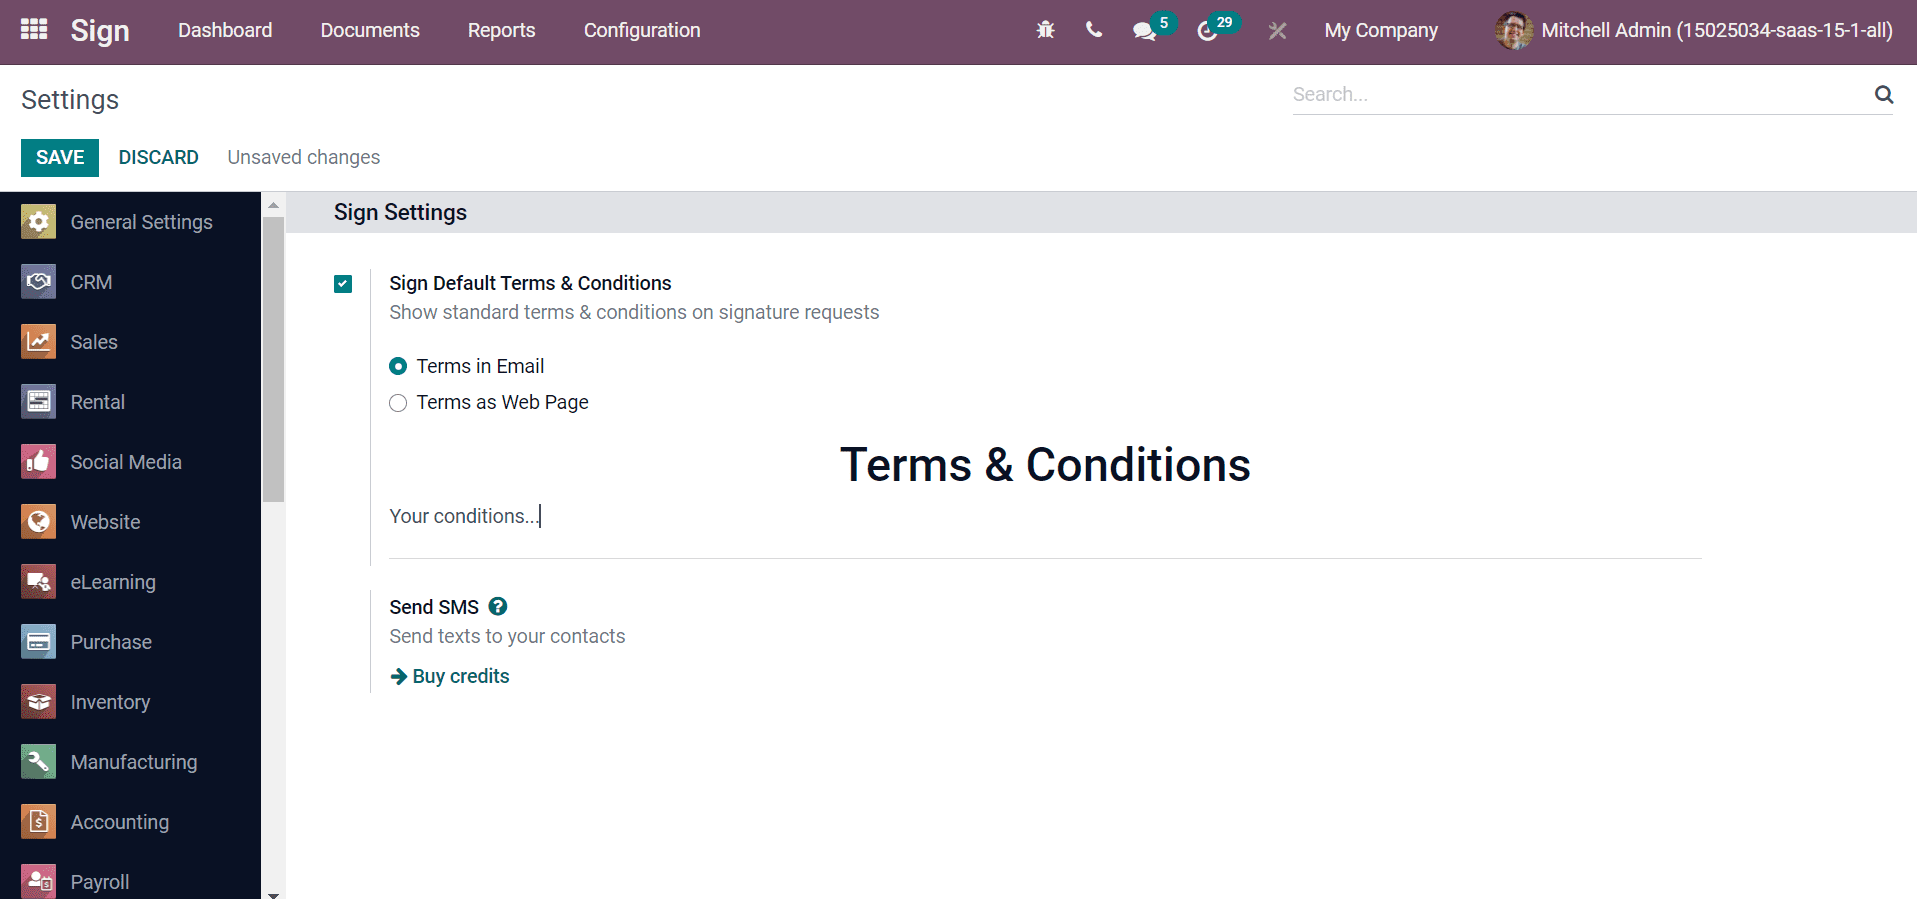
The content is displayed at the bottom of each signature request email by activating the Terms in Email option. On the other hand, a link leading to your document shows at the end of the signature request email activated by selecting Terms as Web Page. We can send the text messages to contacts from your database using the Send SMS option. It is possible to buy credits for SMS by registering your account with Odoo. Select the Save icon after making your changes on the Settings window.
Field Types
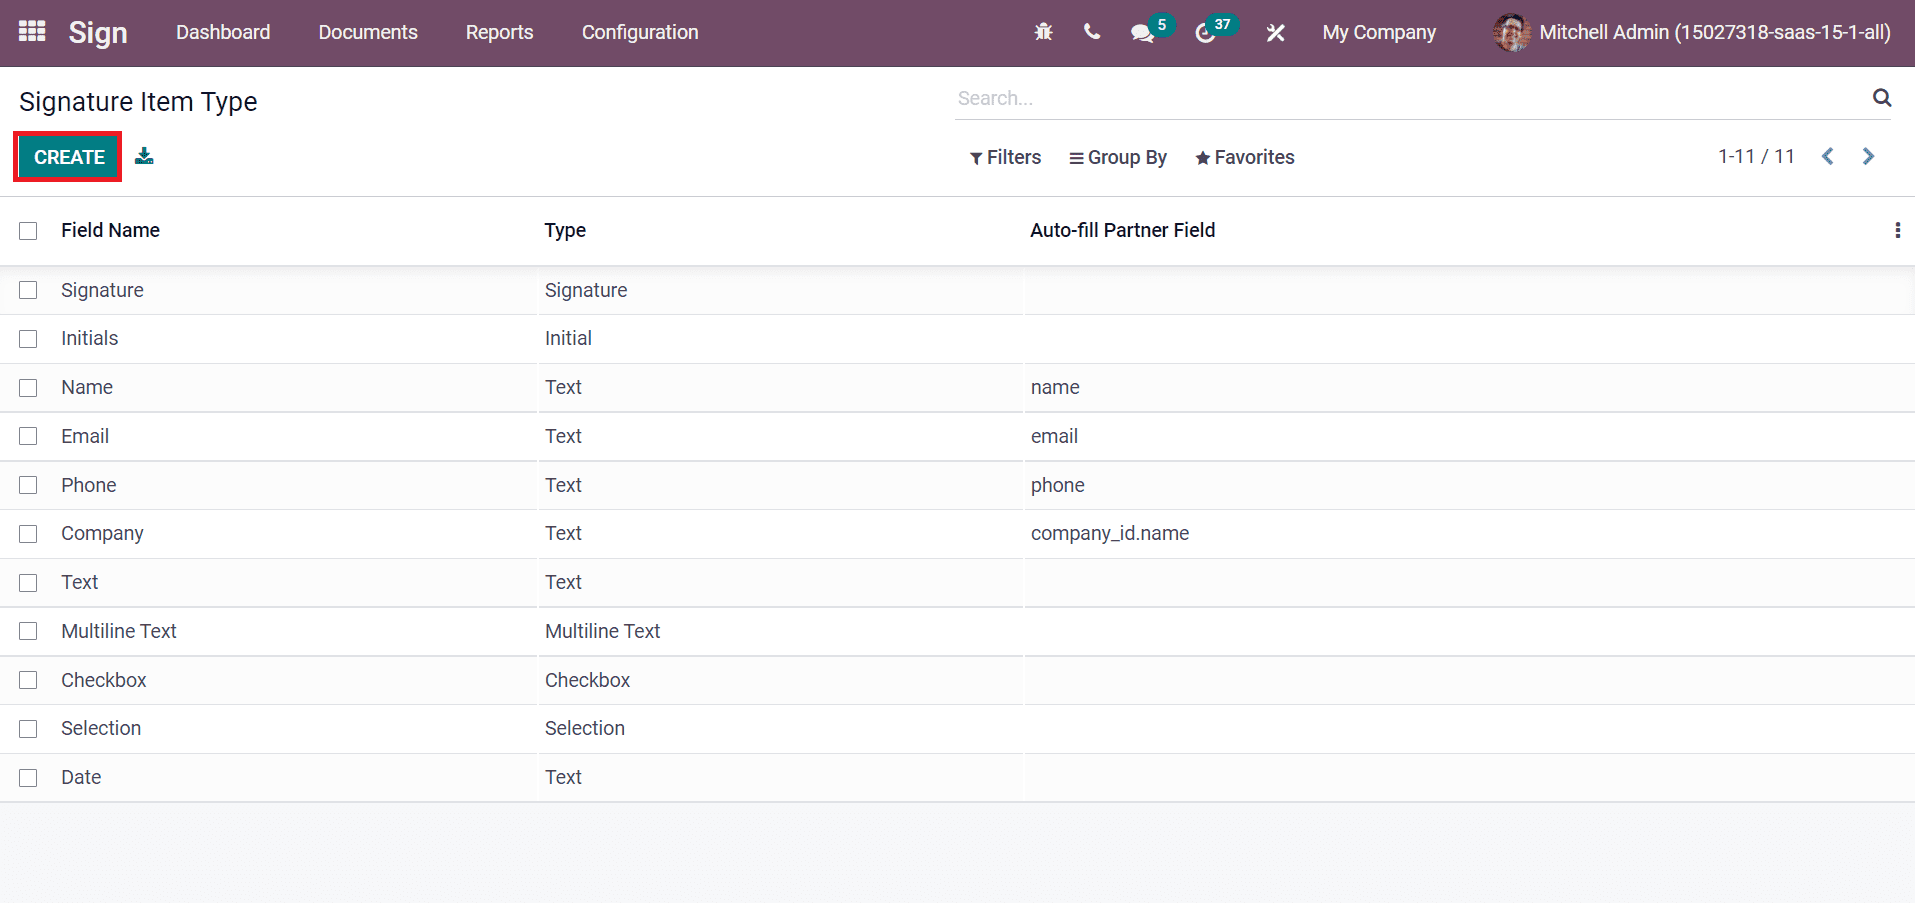
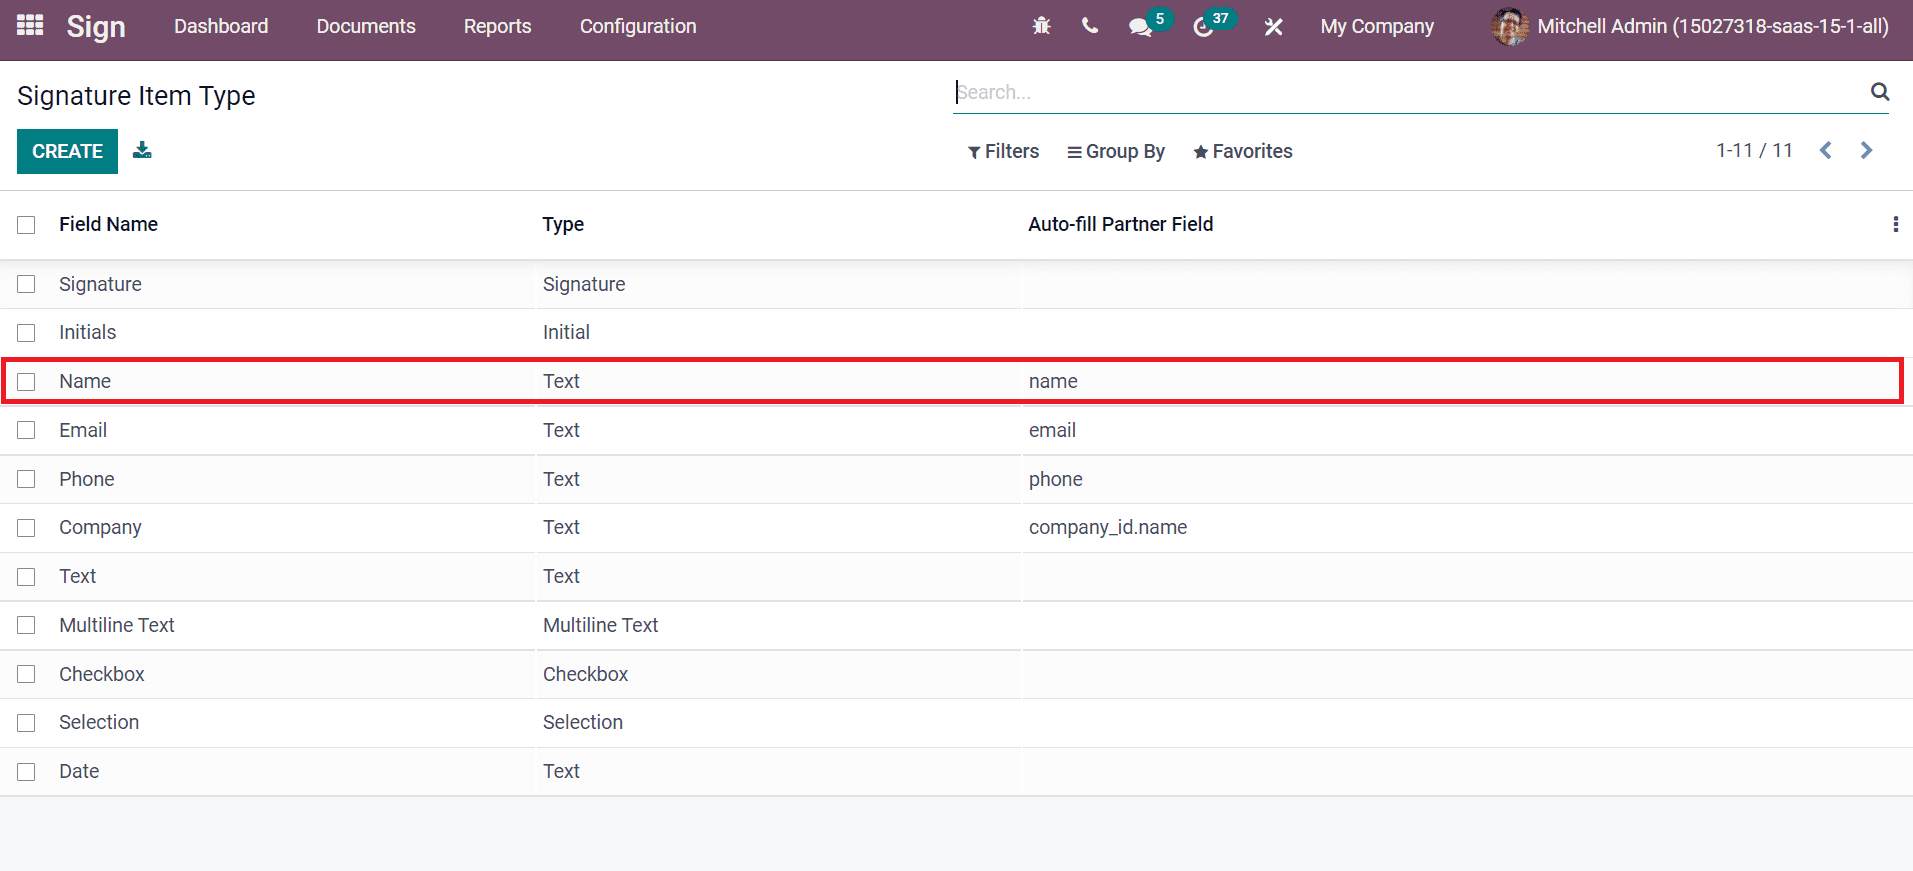
Signature Item Types are shown in the top of a document in boxes like signature initials, text, date, email and more. All these are pre-existing fields that we had set by default. The list of all created Signature Item Types is visible by clicking on the Field Types menu in the Configuration tab. You can view the details such as Type, Field Name, and Auto-fill Partner Field. Users can generate a new Signature Item Type by selecting the Create icon, denoted in the screenshot below.
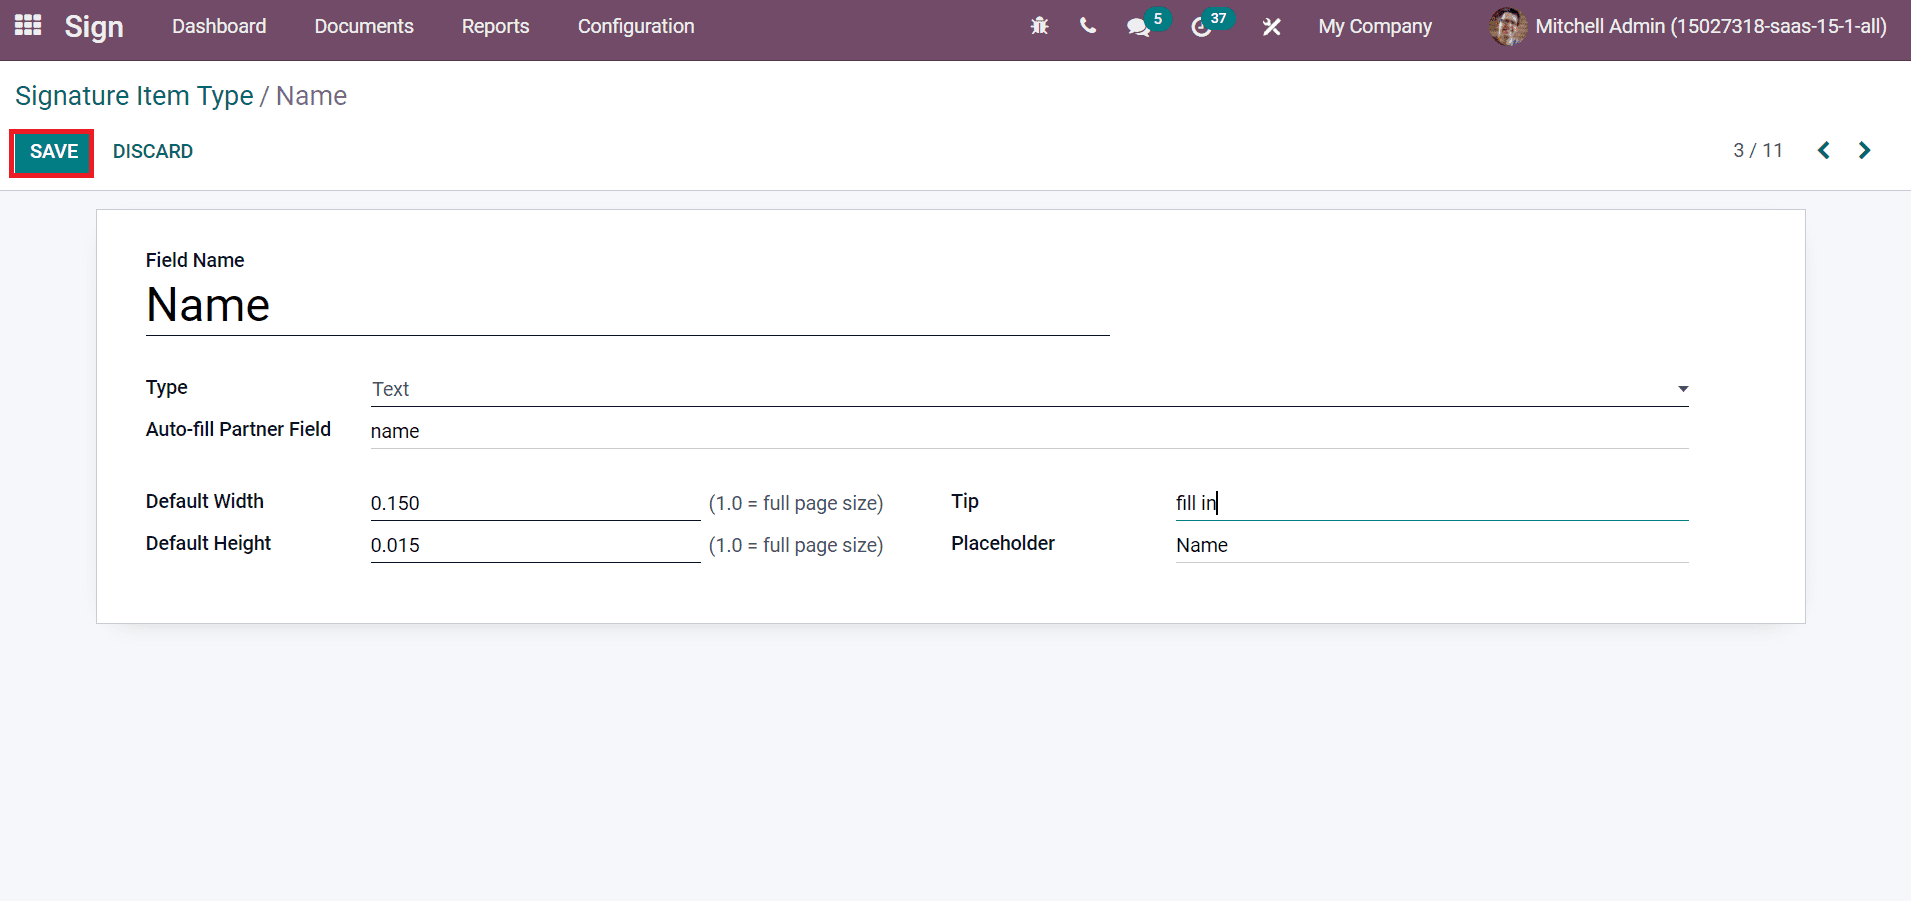
After choosing the Create icon, a new window of Signature Item Type appears before you. Let’s create a Signature Item Type as ‘Name’. Here, add Field Name, and Type based on your created Signature Item Type. We can auto-complete the Signature field at the signature period using Auto-fill Partner Field. It is the technical name of a partner model field. Later, enter the Default Width and Height of the Signature Item Type. You can also add Tip or Placeholder details for a Signature Item Type and click on the Save icon as portrayed in the screenshot below.
The created type ‘Name’ is viewable in the Signature Item Type window, as portrayed in the screenshot below.
Roles
The parties who sign a specific field in a document are the Signature Item role. These parties include customers, employees, companies and more. To access Signature Item Role data, select the Roles menu in the Configuration tab. Users can see the information of each Signature Item Role, such as Role name, Color, SMS Authentication and more. You can formulate a new Signature Item Role by choosing the Create icon. A new space opens at the end of the Signature Item Role, as shown in the screenshot below.
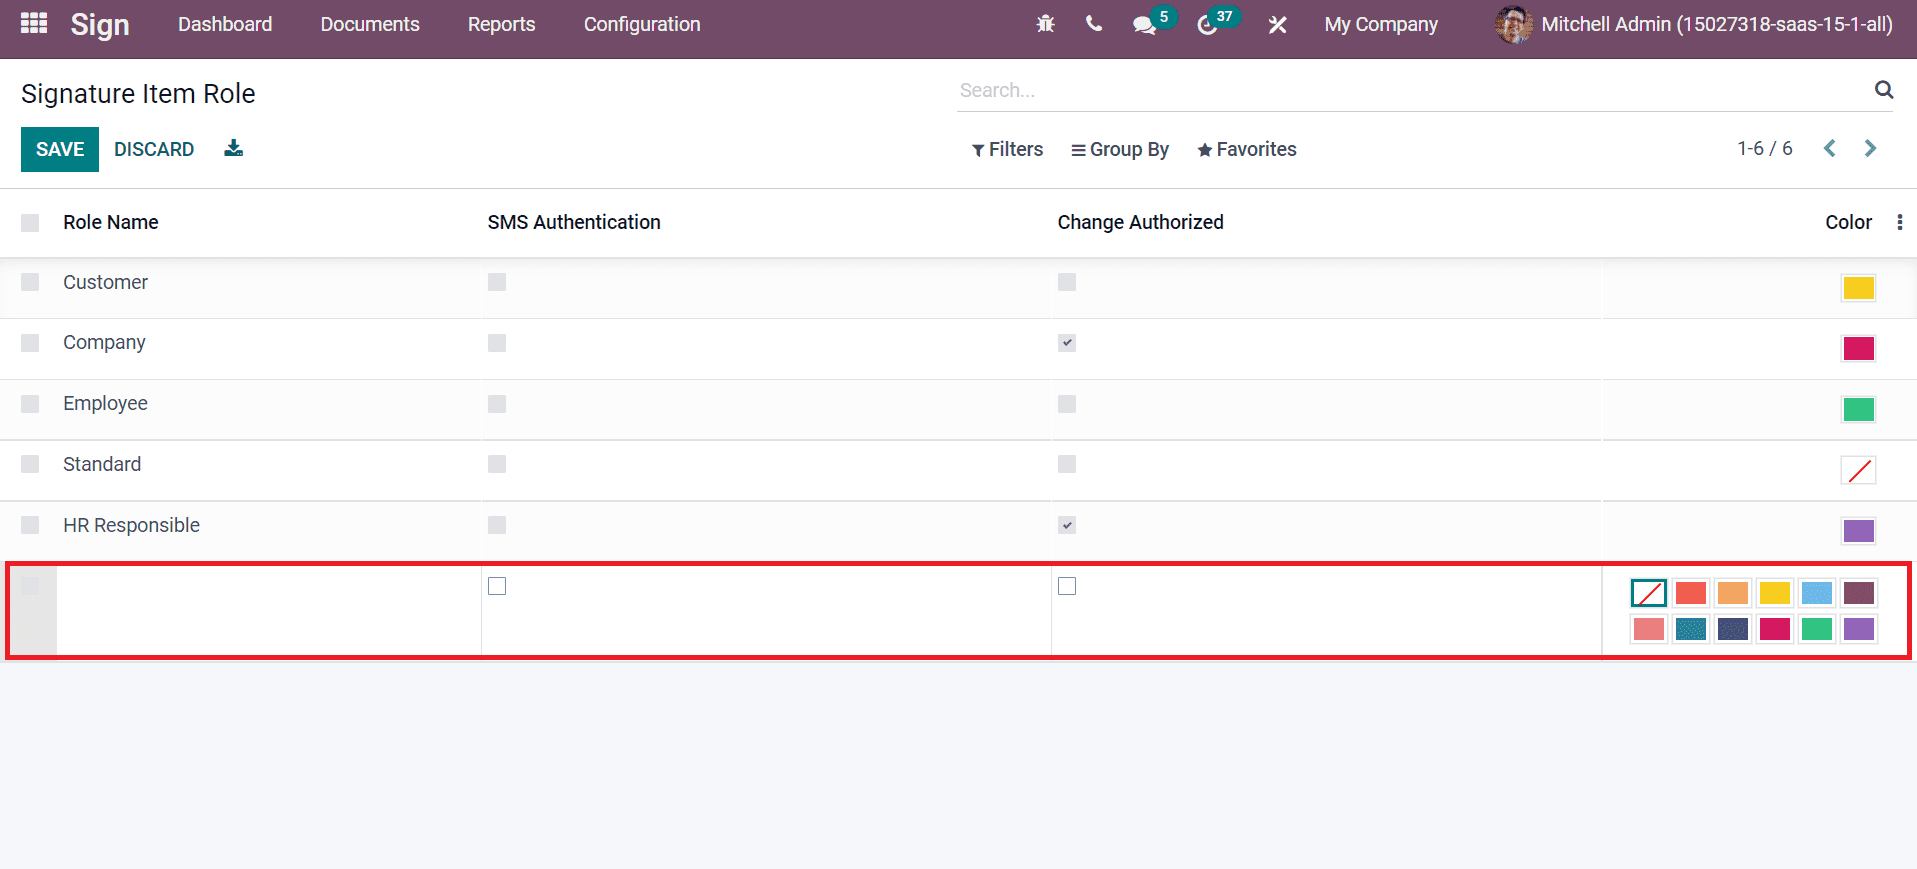
Here, add the Role Name and choose a Color as your interest. Users can choose any colour or no colour for a Signature Item Role. You can also enable SMS Authentication and Change Authorized for a Signature Item Role. After entering these details, the created Signature Item Role is visible at the end of the Signature Item Role window, as illustrated in the screenshot below.
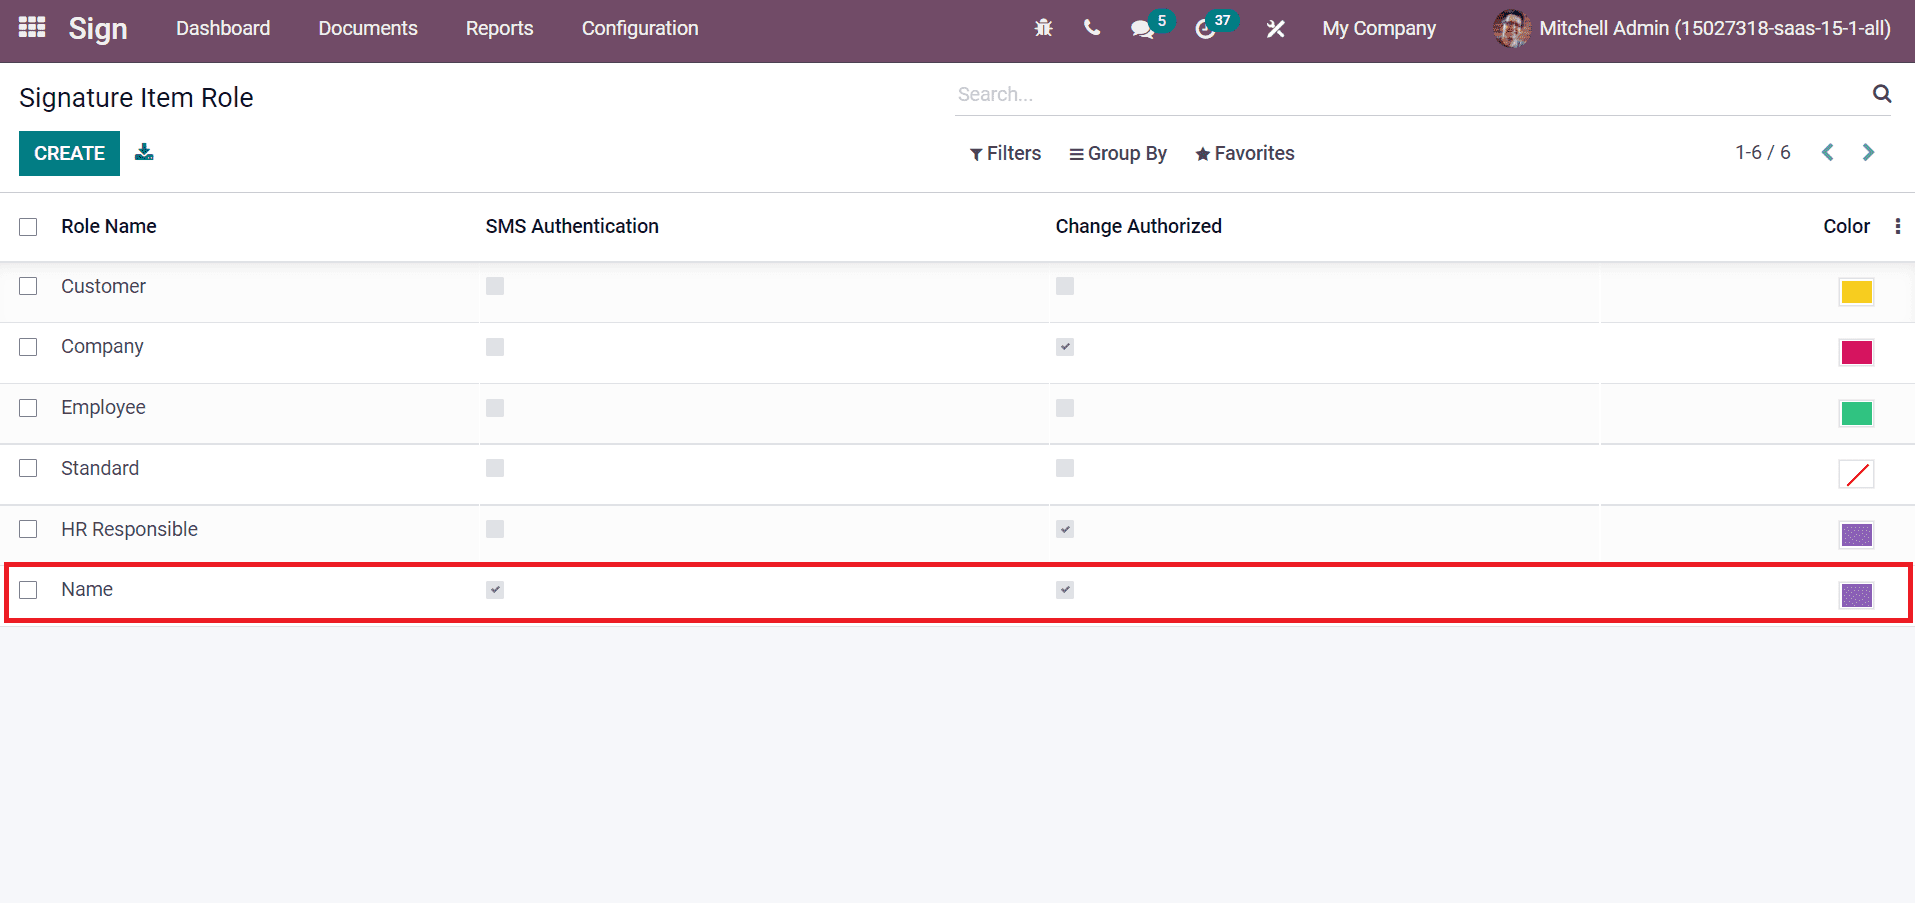
The three-dot button at the end ensures you add additional fields using the Odoo 15 Studio module. Users can download the data by clicking on the Export All icon near to CREATE option.
Signature Request Items
All created Signature Request Items are visible in the Signature Request Items window. We can access the information regarding each Signature Request Item, such as Contact, Role, State and more, as depicted in the screenshot below.
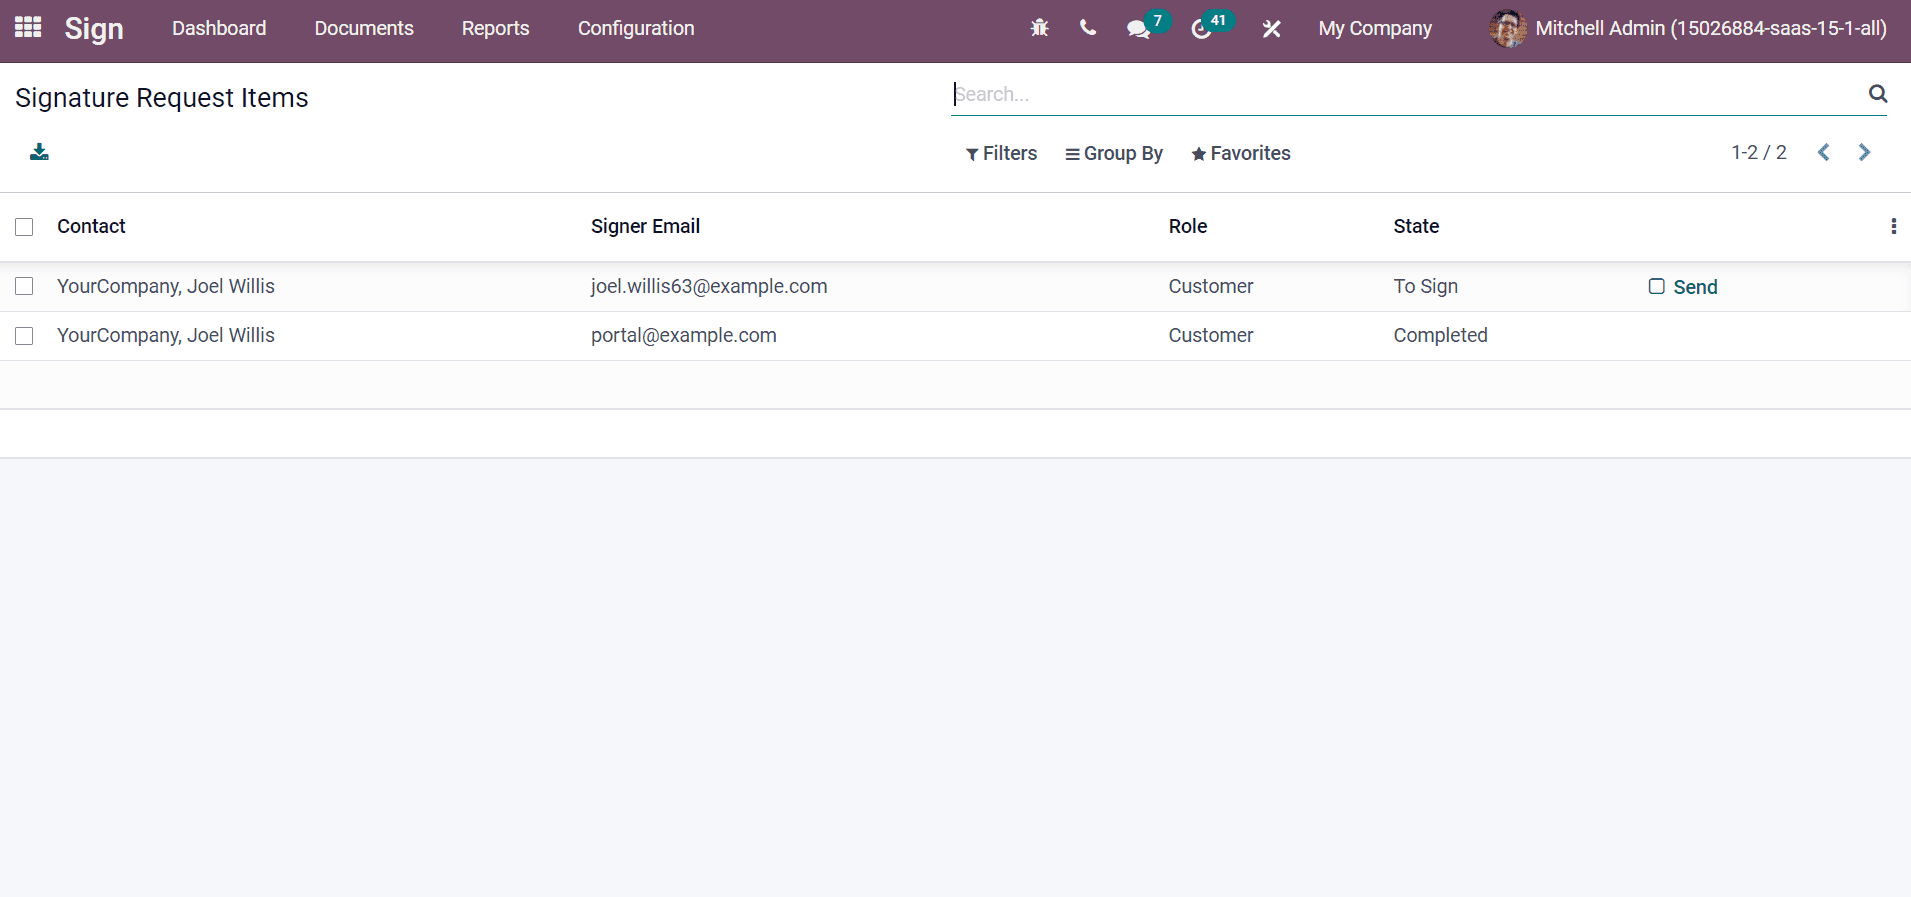
Users can export the data by selecting a particular Signature Request Item near the box in the Contact name. You can export the data using advanced features in the Odoo 15 Sign module. After selecting the Signature Request Items, click on the Export icon from the Action menu as denoted in the screenshot below.
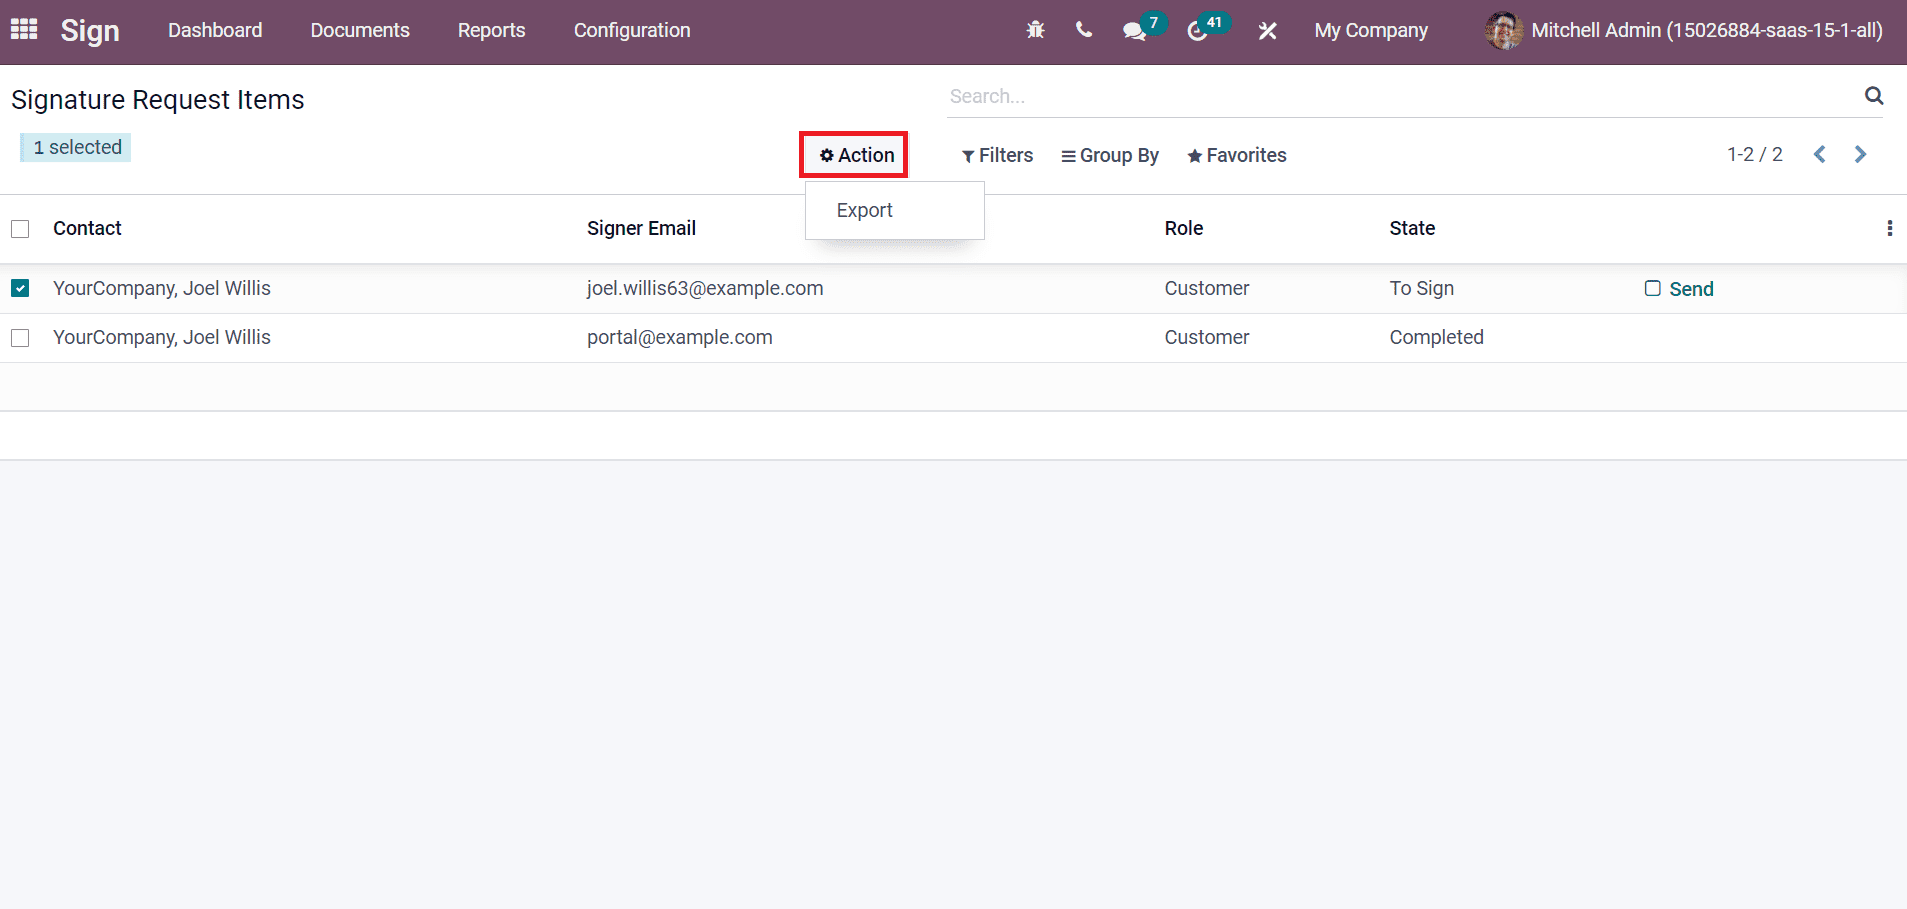
You can choose the respective field in the Export Data window and select the Export Data as CSV or XLSX. We can add the template below the Field to Export Section. Later, click on the Export icon in the Export Data window, as denoted in the screenshot below.
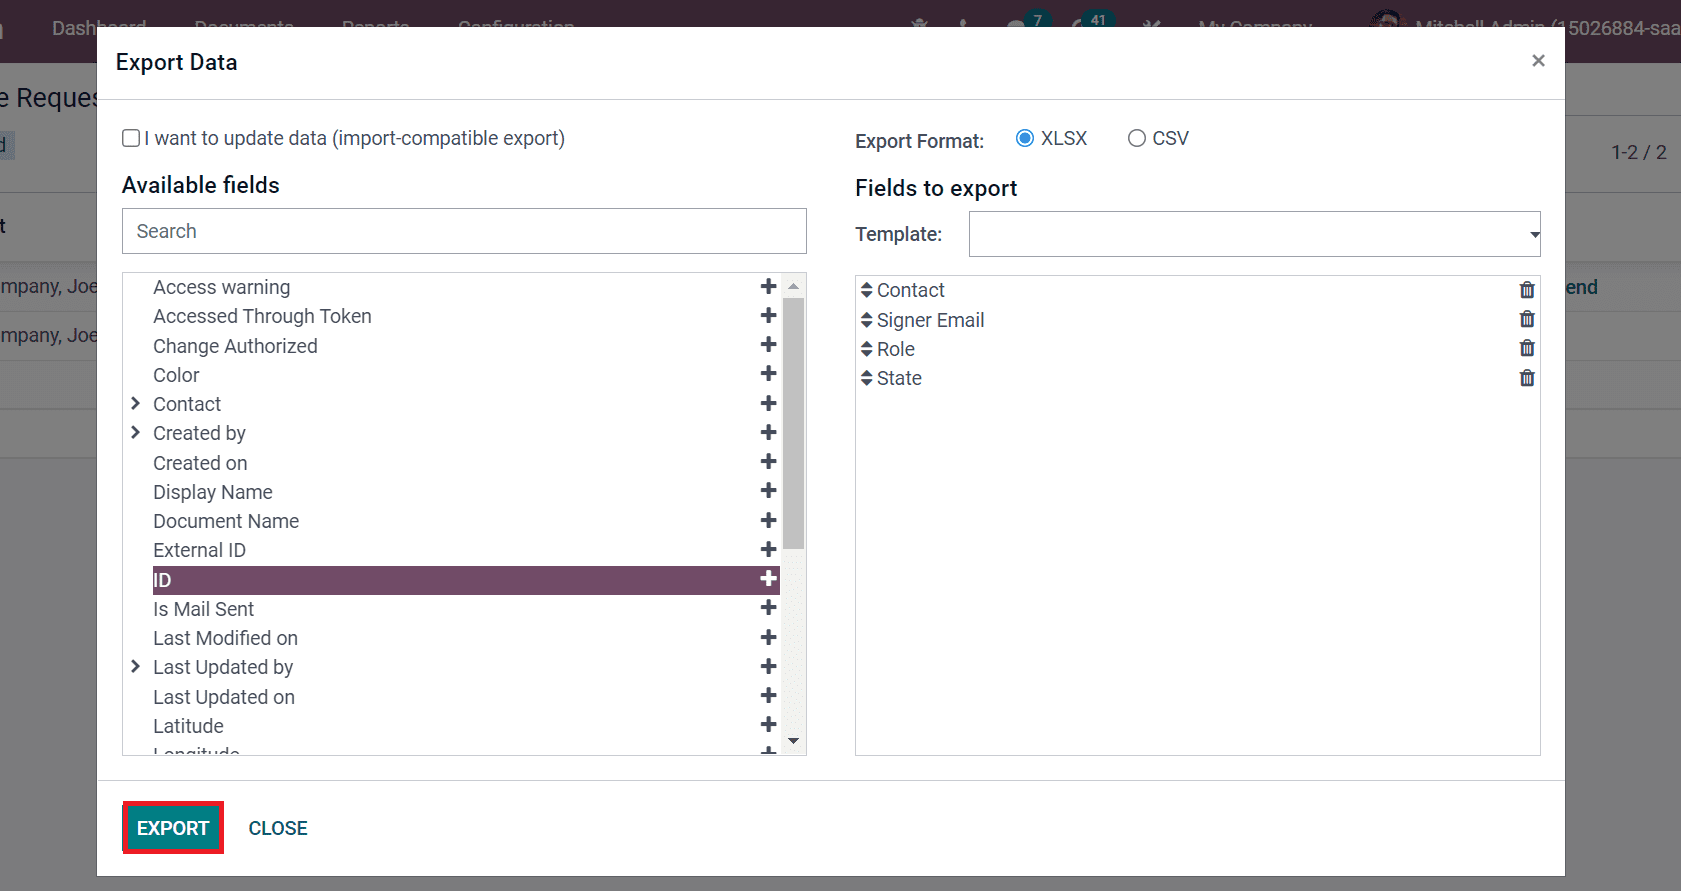
The data is downloaded into your system based on the Export Format. You can evaluate the Signature Item Request using the downloaded Excel file.
Configuration feature in Odoo 15 Sign module manages the Signature Request Items, Field Types, Roles and more. The document approval and signing will be an easy task with the assistance of the Odoo 15 Sign module. Users did not spend much more time signing a document with the support of an ERP system.


