Odoo is a popular open-source ERP software platform used by multinational corporations. It is a complete set of business models and applications that encompasses managing warehouses, employees, sales, accounting, customer relationship management, and the management of projects. The Odoo project management module simplifies the process of managing raw materials, products, and supply lines. It allows for real-time project tracking and organization. Let’s look at how the Odoo project management module makes it simple for businesses to communicate with clients.
Odoo’s project management module has basic functionality for managing numerous projects.
The Odoo project management software provides a user-friendly dashboard that displays all projects as well as the number of works assigned to each project. A project is an activity carried out by an organization’s staff.
It is possible to evaluate team performance and keep track of customer satisfaction by asking customers to rate the assistance and project they received from a team. Customers may get a general picture of the team’s performance by publishing ratings on the portal. To enable the Customer Ratings on tasks, go to the settings of the Project module and enable the feature from the Analytics section, as shown below.
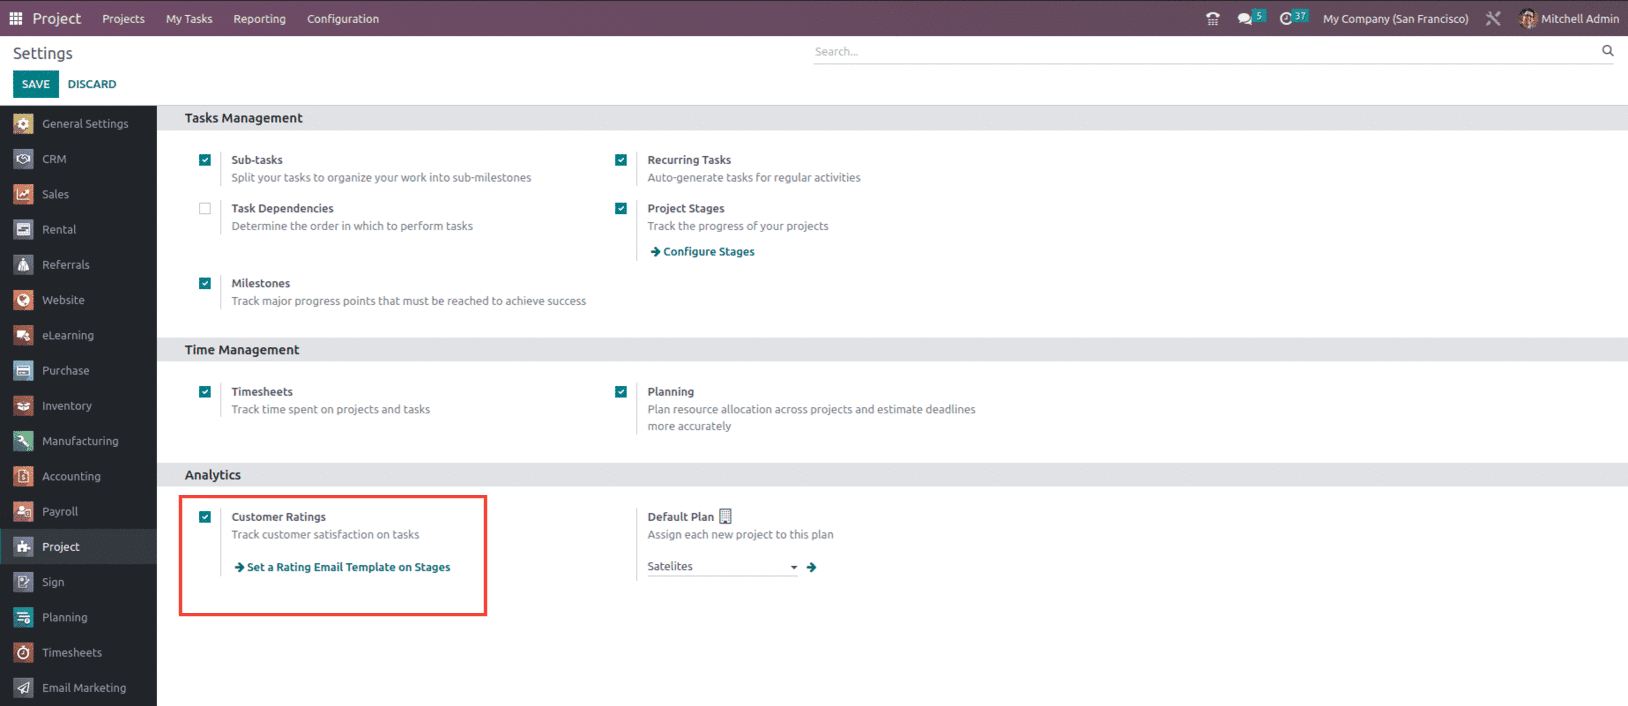
With the feature of Customer rating enabled, one can also set up the Rating email templates at different stages of the task.
Let us see how we can allow customers to rate the tasks of the predefined projects. For that, create a Project from the Project menu. Fill in the project name in the provided field. If you wish to bill clients for this project, check the Billable box. By enabling the Timesheets feature, you may record time on tasks within this project. By activating the Planning option, you may plan your resources on project tasks. Finally, click on the Create Project option to start a new project and open a new window where you can add tasks to it.

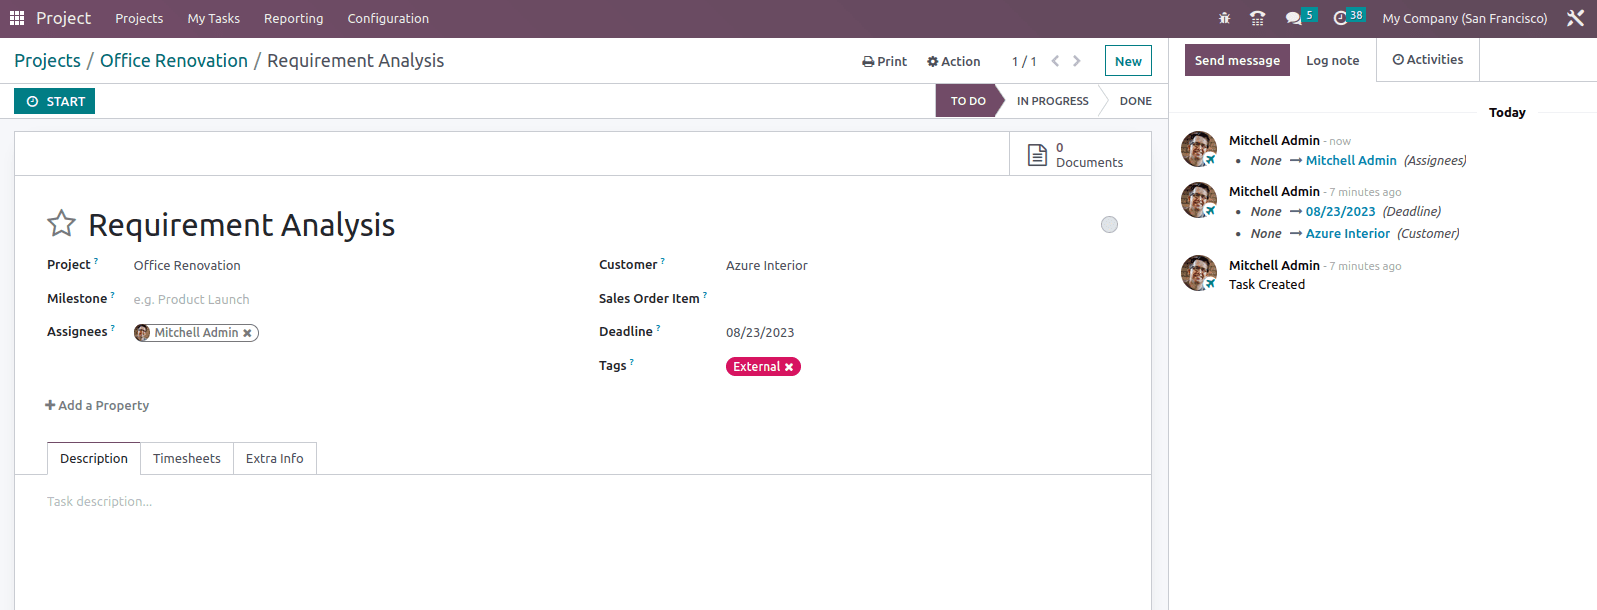
Let us create a project named Office Renovation. Afterward, you may specify stages for the tasks before generating them for the project. You can do this by entering the stage name in the provided field and clicking the Add button. Adding new tasks under a specific stage is simple and easy with the plus icon. You must provide the Task Title and Assignees in the appropriate areas. You can add additional information by clicking the Edit button, as shown below.

Here, you may find the names of the tasks, projects, and assignees. You may enter Milestone in the provided field, which will assist you in automatically delivering your services when a milestone is met by attaching it to a sales order item. Provide the customer’s name and the sales order item in order to invoice the relevant client for the time spent on the project. Set a deadline for the project and label it appropriately.
Once the given task is completed and ready to move to the next stage of the project.
While doing so we need to update the same to the client with regards to the task status and seek their suggestion or rating on the completed task.
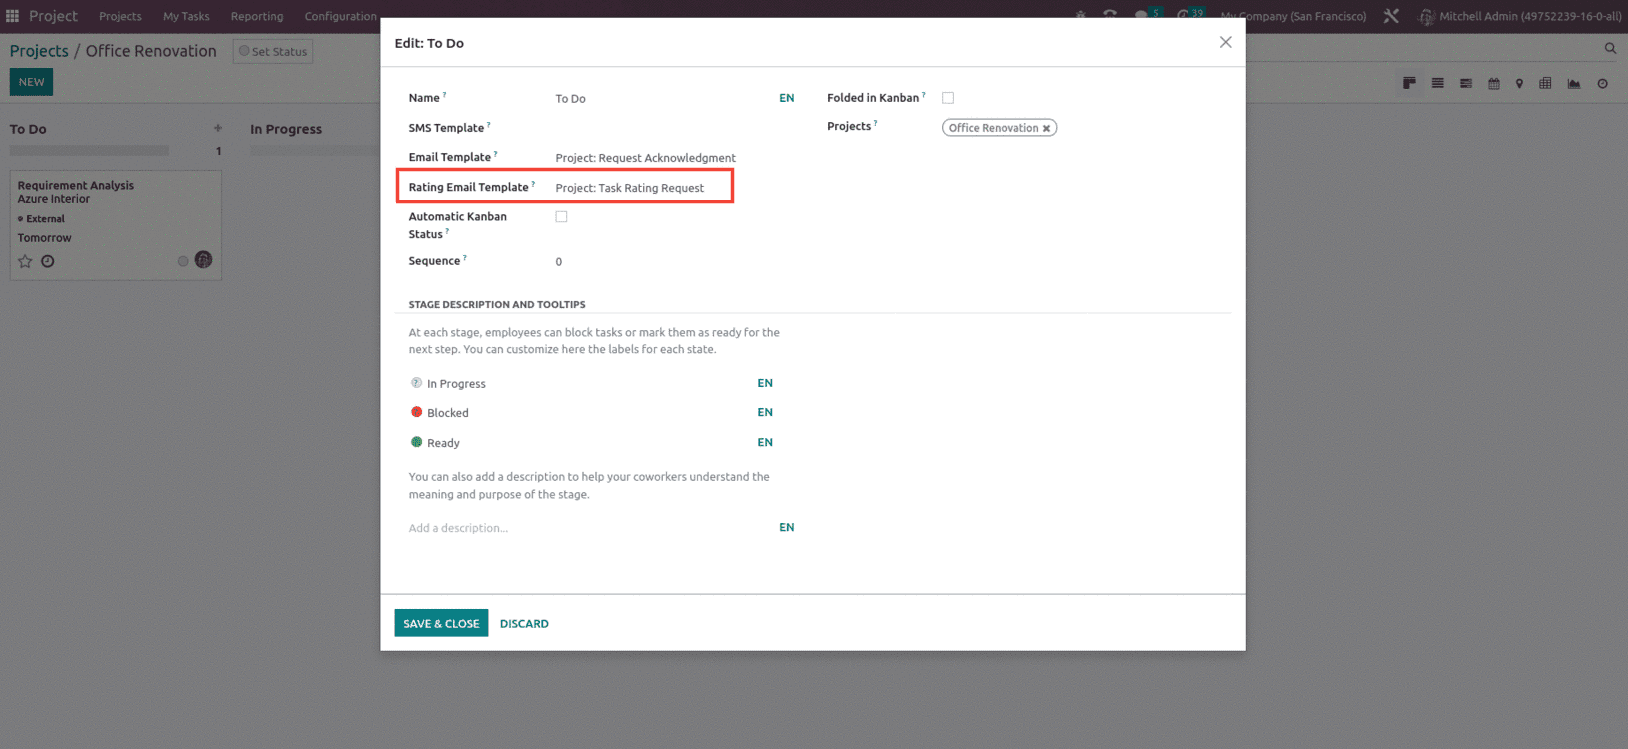
For that, we can set a Rating Email template for the customer on each stage of the Task, which will allow the customer to add upon their review and rating for the task. When we change the task from one stage to another, it automatically sends an email to the Client to add to their review if the Rating Email template is mentioned in each stage settings, as shown below.
Now let’s move the stage for the task created from the To Do to In Progress stage, When doing so, we can see that the customer will receive a mail, which is the Satisfactory Survey, to mark the stratification of the customer on the task, as shown below.
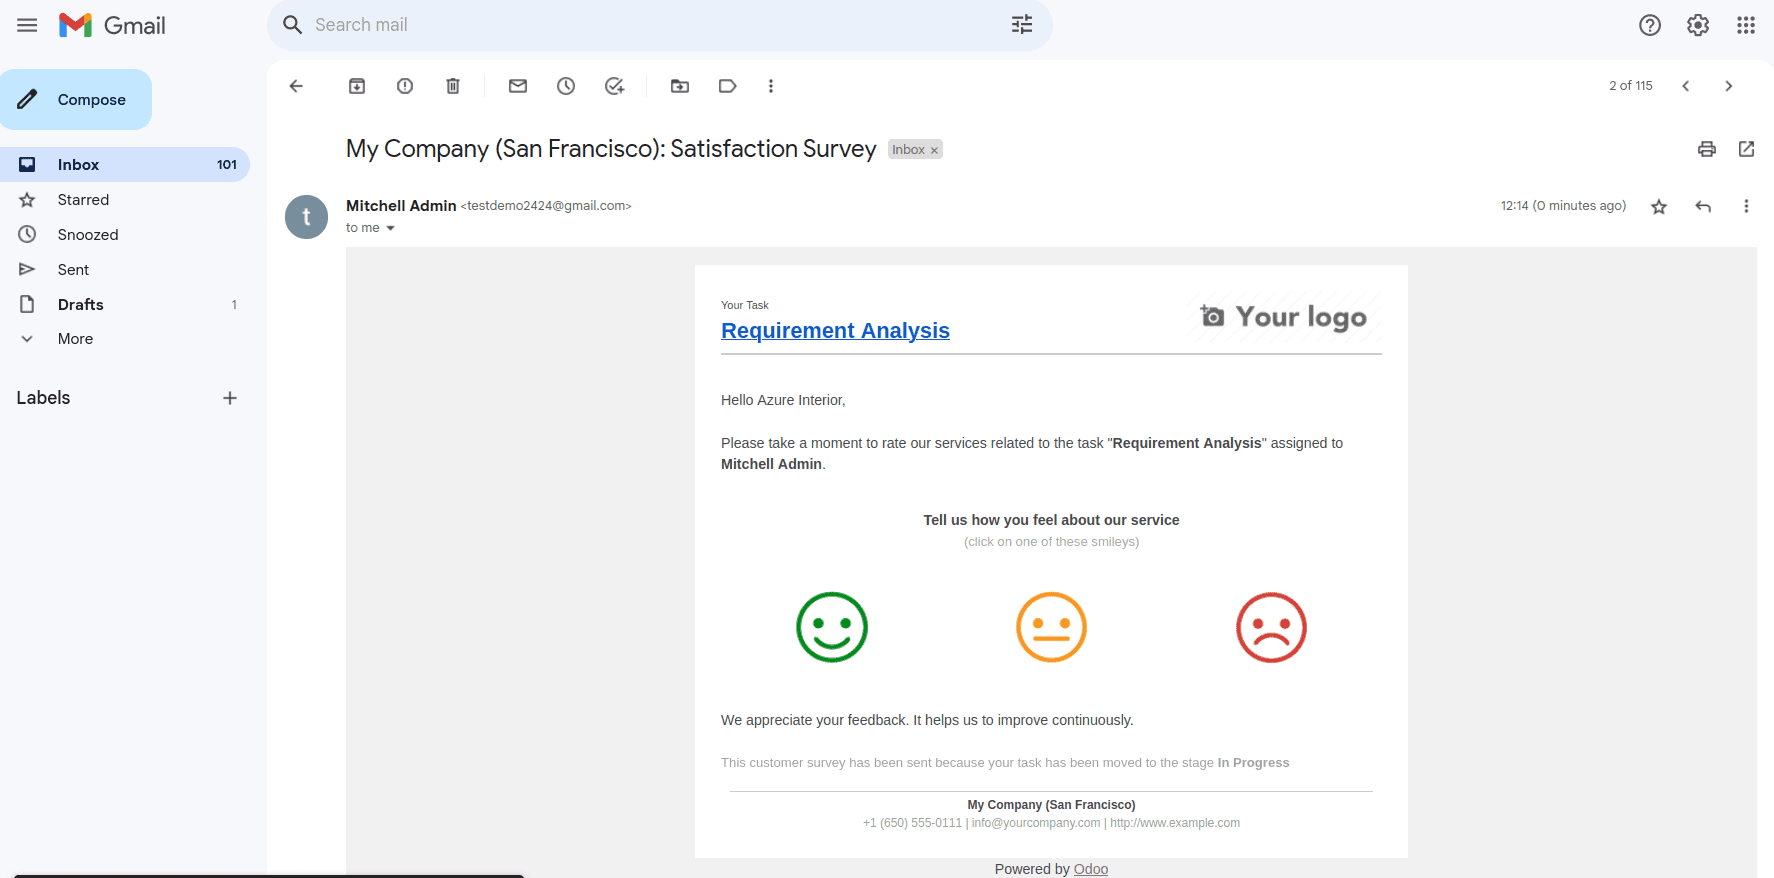
The customer can mark the comment about the service and the task with appropriate feedback by selecting the smiley faces, which will redirect to the page where the customer can add their feedback as shown below.
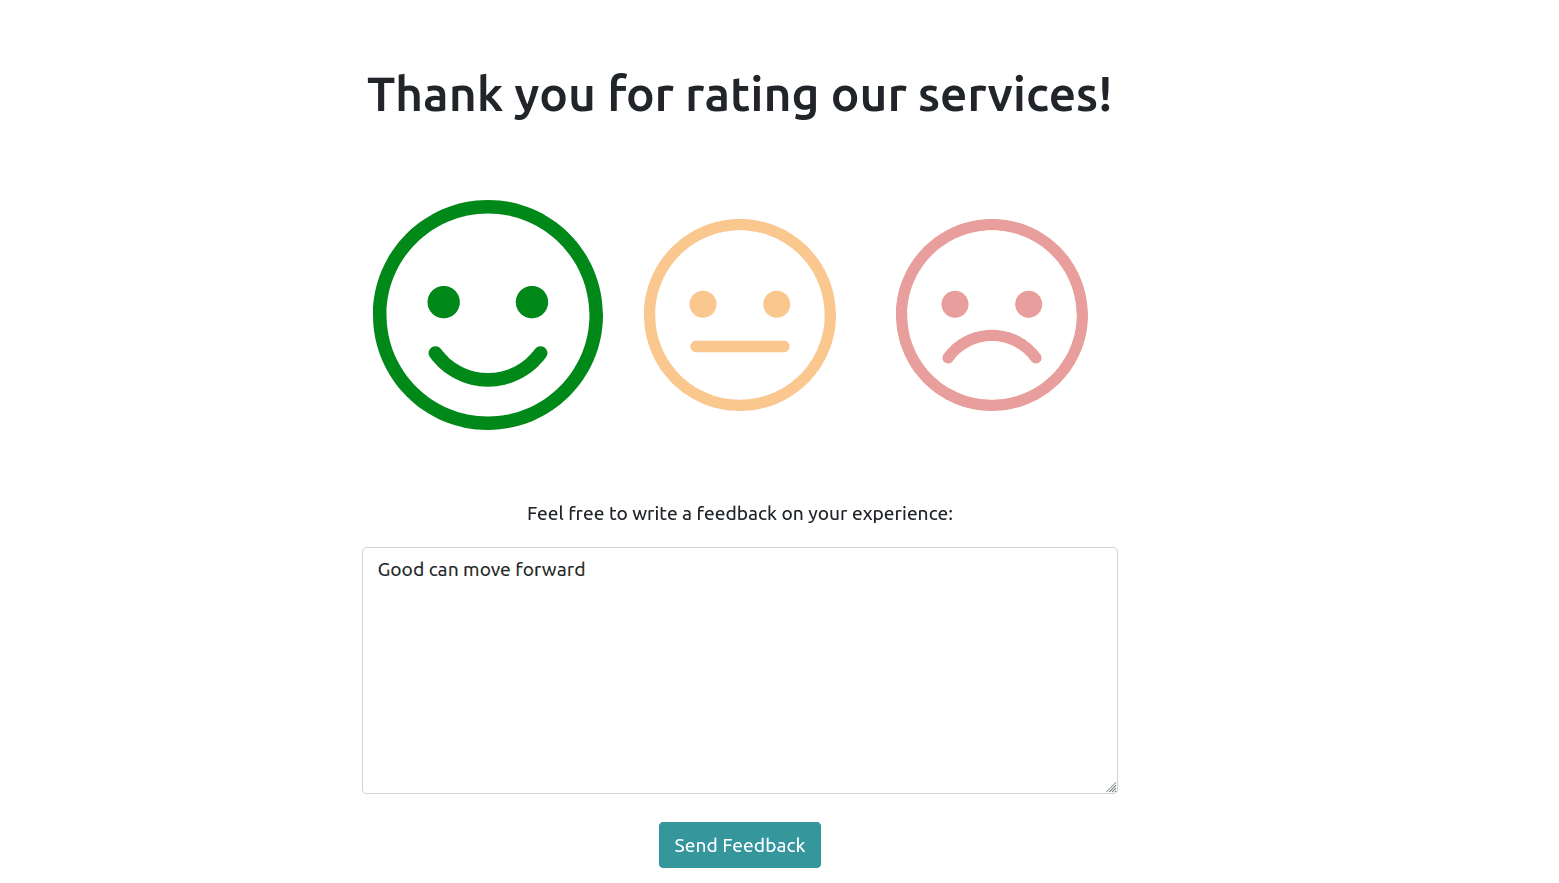
Once the feedback is added, if we check the task, we can see that the smiley symbol will be added to the task, as shown below.
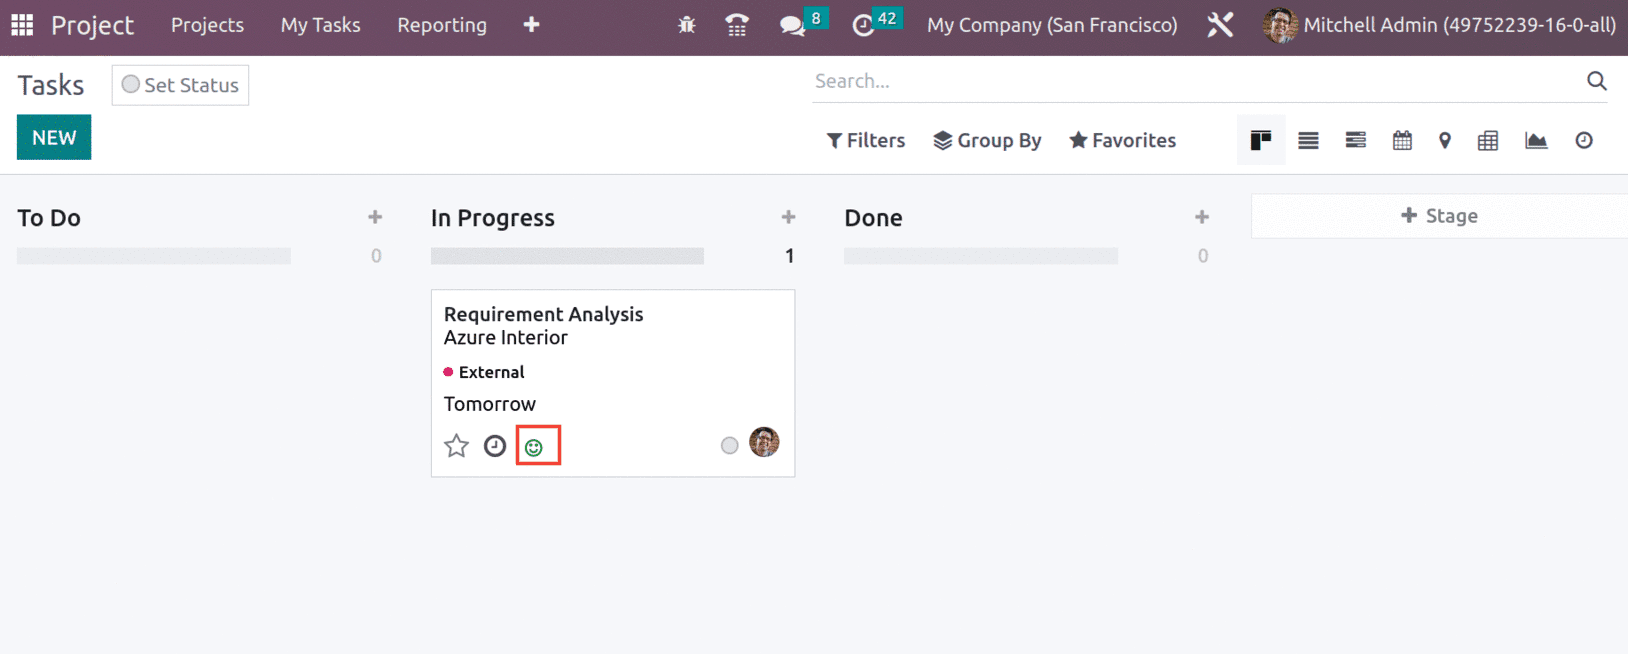
When we open the task, we can see that a new smart button will appear, which shows the Satisfied last rating of the customer, and we can also view the remark made by the customer under the message area, as shown below.

The Satisfied Last rating smart button shows details like Assigned to, Project, Task, Rating, Submitted On, Customer, and the Comment.

This is how you can Track Customer Satisfaction on tasks with the Odoo 16 Project module.


