Communication is very important for a business. Email is the fastest way to transfer information. Main advantages of email communication are:
– Cheap
– Fast
– Easy
– Convenient
– Easy to replicate
In this blog you will learn about:
- 1. Create an Email Template to Send the Email in odoo 13
- 2. Add a Button to Send the Email
- 3. How to Send an Email Through the Wizard in Odoo 13
Odoo gives an option to send email in the modules so that for most of the process, customers can track it even through email. So it is important to give an option to send emails while customizing a module. Here, I am going to explain how to send an email with the click of a button. I will also be explaining how to send an email from a wizard.
Let us discuss it with an example:
Create an Email Template to Send the Email in Odoo 13
Here, I created a model test, an email with the module name test_email. First, we have to create an email template to send the email:
<odoo><data noupdate="1"><!--Email template --><record id="email_template" model="mail.template"><field name="name">Email Template</field><field name="model_id" ref="test_email.model_test_email"/><field name="email_from">${(object.company_id.email |safe}</field><field name="email_to" >${object.partner_id.email}</field><field name="subject">Ref ${object.name or 'n/a' }</field><field name="auto_delete" eval="True"/><field name="lang">${object.partner_id.lang}</field><field name="body_html"><![CDATA[<p>Hi</p><br/><p>Here is the details of open invoices</p><br/>]]></field></record></data></odoo>
While creating the email template, one has to fill the field email_from. Since we send an email directly from the code, we have to fill the field email_to in the email template itself. Also, we can define the body for the email template as per the requirement.
To know more about email template, please refer the blog Creating Email Templates in Odoo
Add a Button to Send the Email
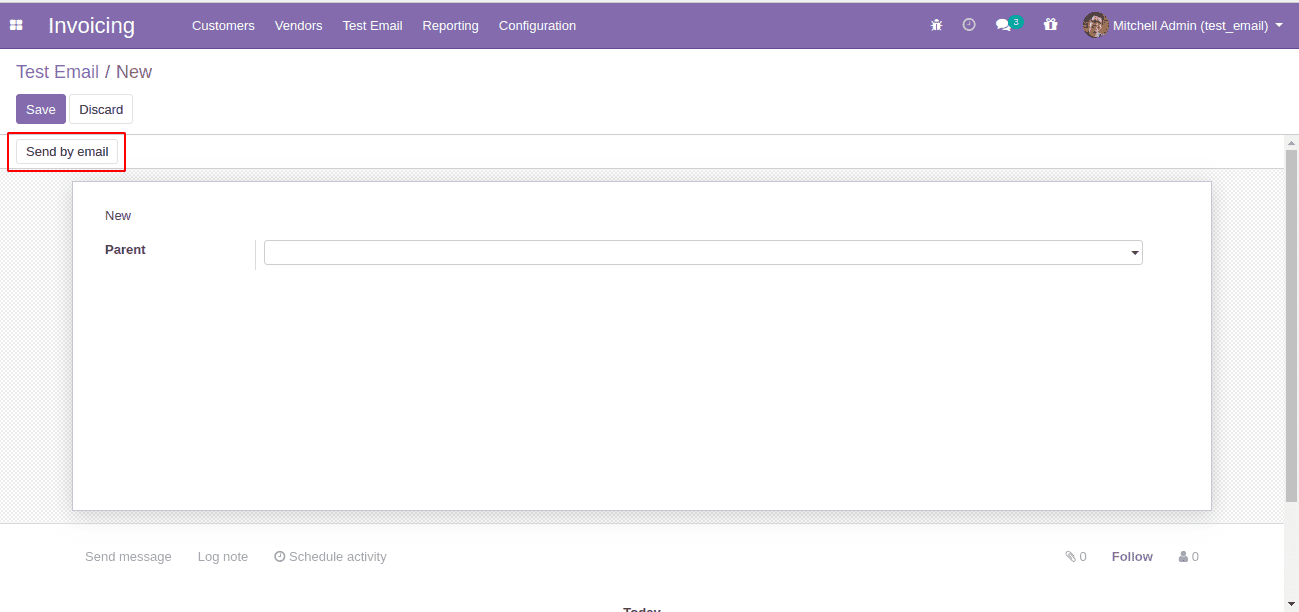
Next is to add the button ‘to send by email,’ for that let’s check the XML code to add a button in the form view:
<?xml version="1.0" encoding="utf-8"?><odoo><data><record id="view_test_email_form" model="ir.ui.view"><field name="name">test.email.form</field><field name="model">test.email</field><field name="arch" type="xml"><form><header><button name="action_send_email" string="Send by email" type="object"/></header><sheet><field name="name" readonly="1"/><div><group><field name="partner_id"/></group></div></sheet><div class="oe_chatter"><field name="message_follower_ids" widget="mail_followers"/><field name="activity_ids" widget="mail_activity"/><field name="message_ids" widget="mail_thread"/></div></form></field></record></data></odoo>

Here, we added a button with the name “action_send_email” ie “Send by email” in the type object. Next is to define the method in the .py file
def action_send_email(self):mail_template = self.env.ref('test_email.email_template')mail_template.send_mail(self.id, force_send=True)
How to Send an Email Through the Wizard in Odoo 13
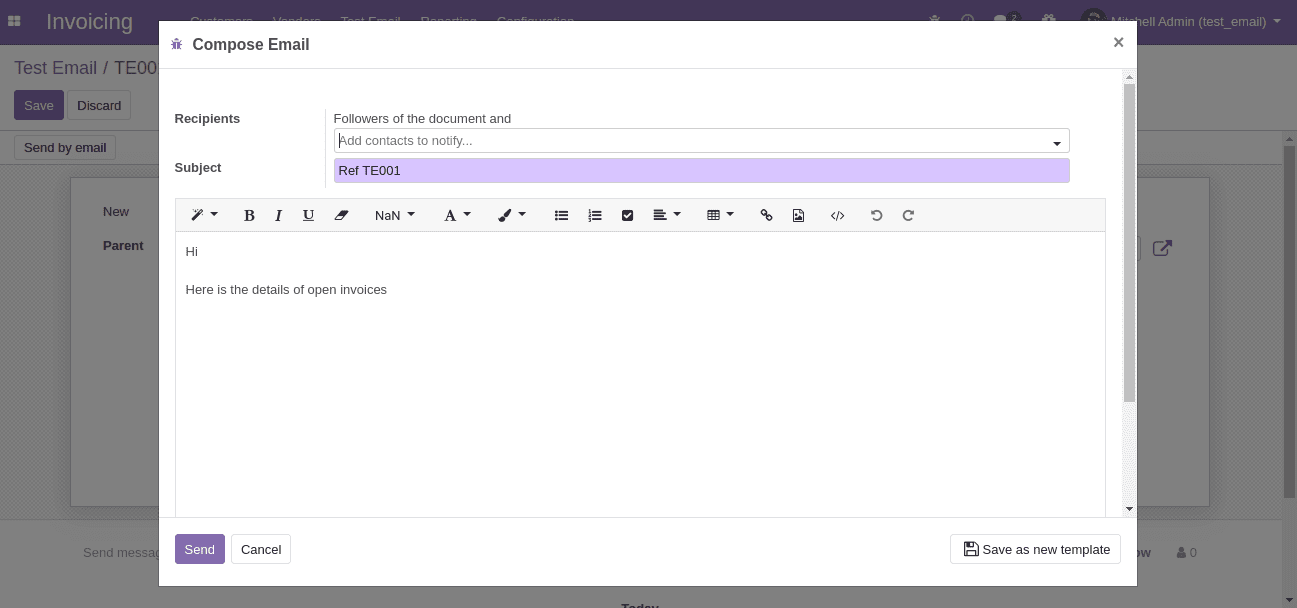
def action_send_email(self):'''This function opens a window to compose an email, with the emai template message loaded by default'''self.ensure_one()ir_model_data = self.env['ir.model.data']try:template_id =ir_model_data.get_object_reference('test_email', 'email_template')[1]except ValueError:template_id = Falsetry:compose_form_id = ir_model_data.get_object_reference('mail', 'email_compose_message_wizard_form')[1]except ValueError:compose_form_id = Falsectx = {'default_model': 'test.email','default_res_id': self.ids[0],'default_use_template': bool(template_id),'default_template_id': template_id,'default_composition_mode': 'comment',}return {'name': _('Compose Email'),'type': 'ir.actions.act_window','view_mode': 'form','res_model': 'mail.compose.message','views': [(compose_form_id, 'form')],'view_id': compose_form_id,'target': 'new','context': ctx,}

In the email wizard, one can add the contacts to which email has to be sent and click on send.


