A lead is the first step to a future business deal. When a client makes an enquiry about the service or products that the company provides, that can be defined as a lead. This lead may have a chance to become an opportunity. Lead generation and its management are important things for a company to be successful.
Suppose if you are running a company and you got an enquiry regarding your product. So this enquiry is a lead. On follow-up this lead through email, calling or through a meeting, will make a possibility of business with the client. Thus the lead is converted to opportunity and further sales procedures are followed by this. So with the proper analysis and management of the initial step, a ‘lead’ creates the business.
Pre-stages of sales
The pre-stages of sales of a company depend on the essence of the company. The different stages before the sale include:
1) Lead generation
2) Follow up on the lead through mediums like call/email
3) Arranging a meeting for discussion
4) Sending Quotation
All these steps are followed to convert the lead to a successful business deal.
In this blog, I will be discussing the lead generation and later how the lead is managed in Odoo 13.
So first install the Sales module and Odoo CRM module for Odoo Apps store.
In the CRM module, you can create leads, convert them to opportunities, and once the opportunity is won, a sales quotation can be made from it.
When CRM opens you can see the pipeline of current leads at various stages. Go to CRM> Configuration > Settings > CRM > Enable Leads.

Now an option ‘Lead’ appears in the taskbar. One can create leads directly from CRM and leads can be generated through email as well.
A lead is created by the salesperson from CRM itself, CRM > Leads > Create. This will open a lead creation form as shown below.
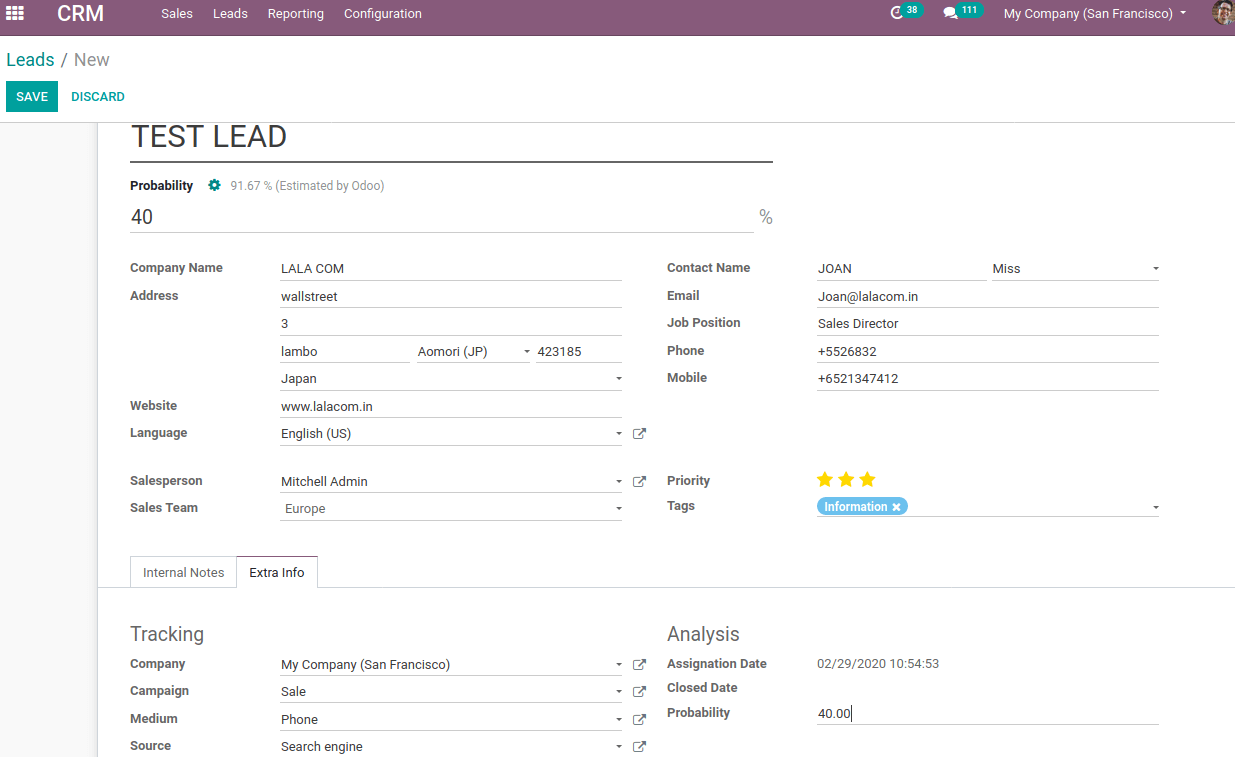
Add particulars like lead name and probability of this lead to convert it into an opportunity. Also, add details of the company for whom this lead is generated by the salesperson, including Company name, Address, Contact Name, Email, Job Description, Contact numbers, Website, Language, Salesperson and Sales team. Also can assign priority and tags to the lead depending on its importance.
Under internal notes, one can provide notes, if needed, for communication within the fir. At extra info tab, one can add tracking details. That is from which campaign this lead generation came from and the relevant details.
Click on save once all particulars are entered. Thus lead is created.
Now we want to create an opportunity from this lead.
By clicking on CONVERT TO OPPORTUNITY, lead can be converted to an opportunity.
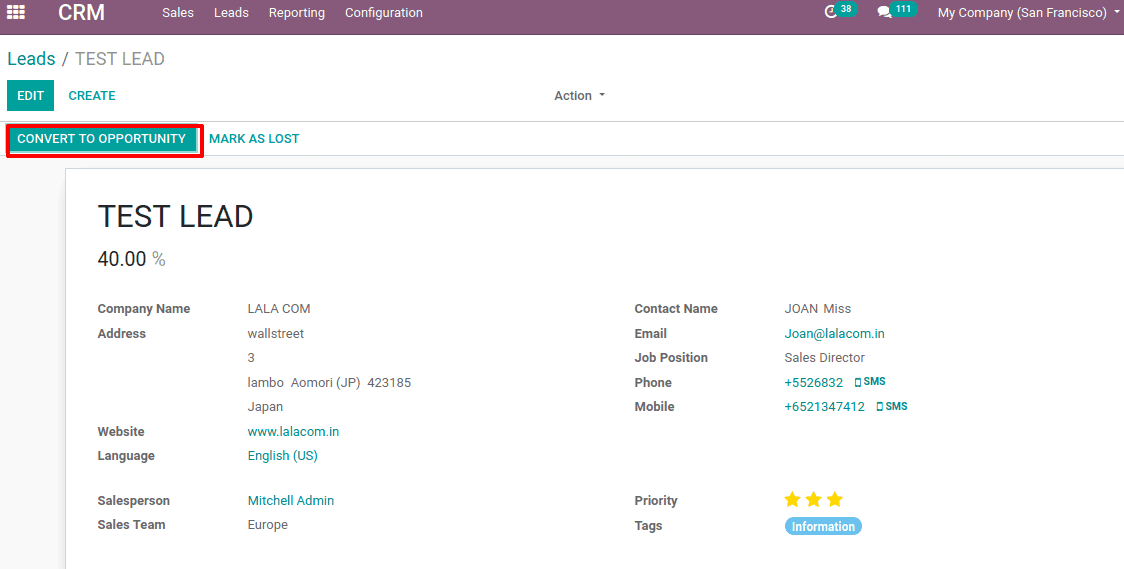
An opportunity is the next stage of the lead, which has more possibility to become a sales order in the future. When we click on CONVERT TO OPPORTUNITY another wizard opens as below.
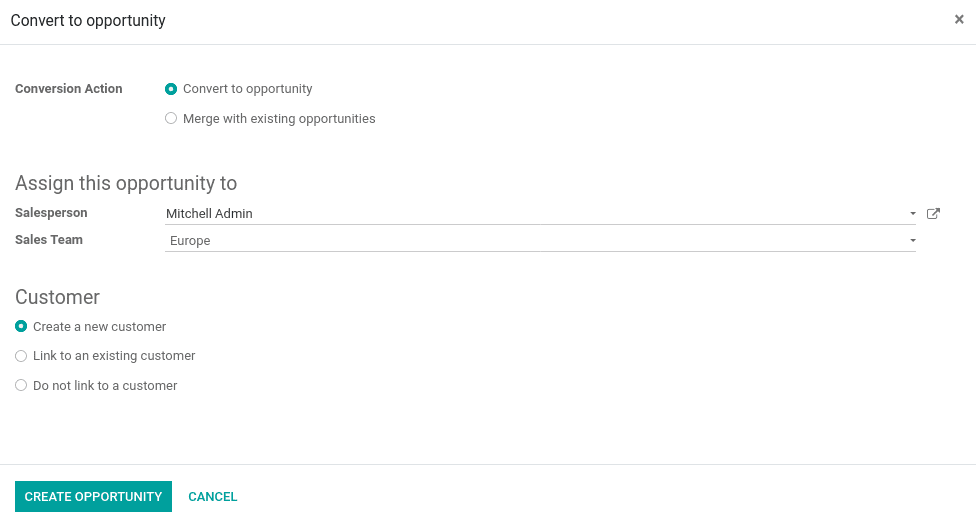
Here we can change or assign the responsible salesperson for this opportunity. Sometimes the new lead generated can be merged with an existing opportunity. They can be configured using ‘Conversion Action’. Either the new lead can be converted to a separate opportunity or can be merged with an existing opportunity.
Also, this opportunity can be linked to a customer by creating a new customer, or not linking to anyone or can be linked to an existing customer. Click on CREATE OPPORTUNITY. Thus the lead becomes an opportunity
From now the possibility for a business is more trivial and the opportunity is now put in the pipeline. Go to CRM > Sales > Pipelines. You can find the created opportunity in the pipeline.
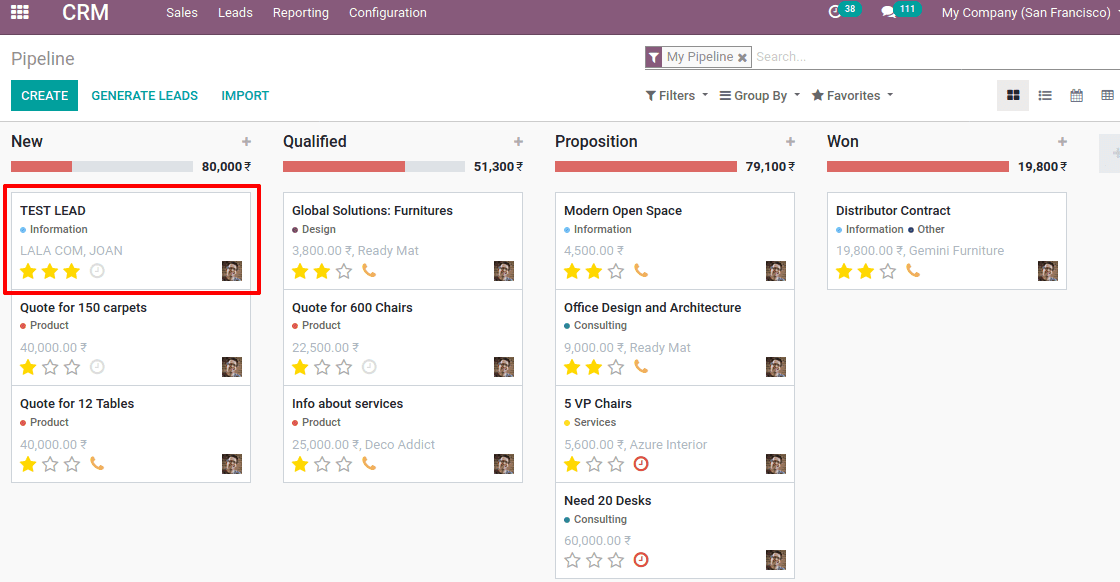
One can schedule activity for the opportunity and according to the progress of discussion, the pipeline stages are changed from new to qualified/Proposition/Won. You can change the pipeline stages by simply drag and drop procedure. The pipeline stages are the stages through which the opportunity moves from its initial stage ‘new’ to ’won’ stage.
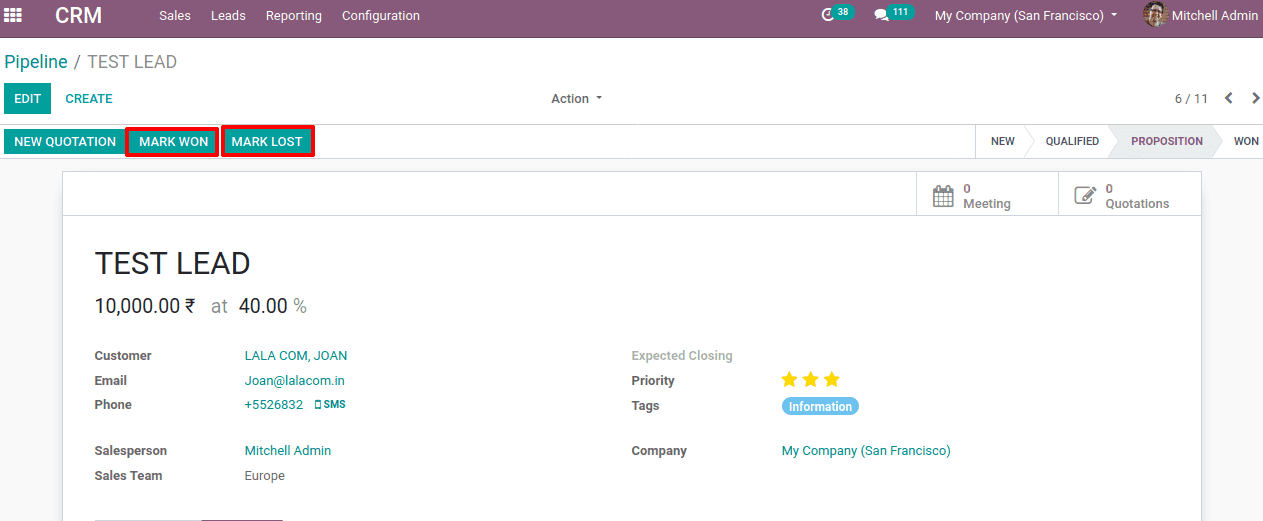
At every stage in the pipeline, you can schedule meetings and quotations if needed. Also, the responsible person can mark the opportunity as won or lost from any stage of the pipeline itself.
Once the salesperson marks the opportunity as lost by clicking MARK LOST, he will record the reason too.

If the salesperson marks the opportunity as won by clicking MARK WON, the next step will be sending quotations, confirming the sale and making the payment.
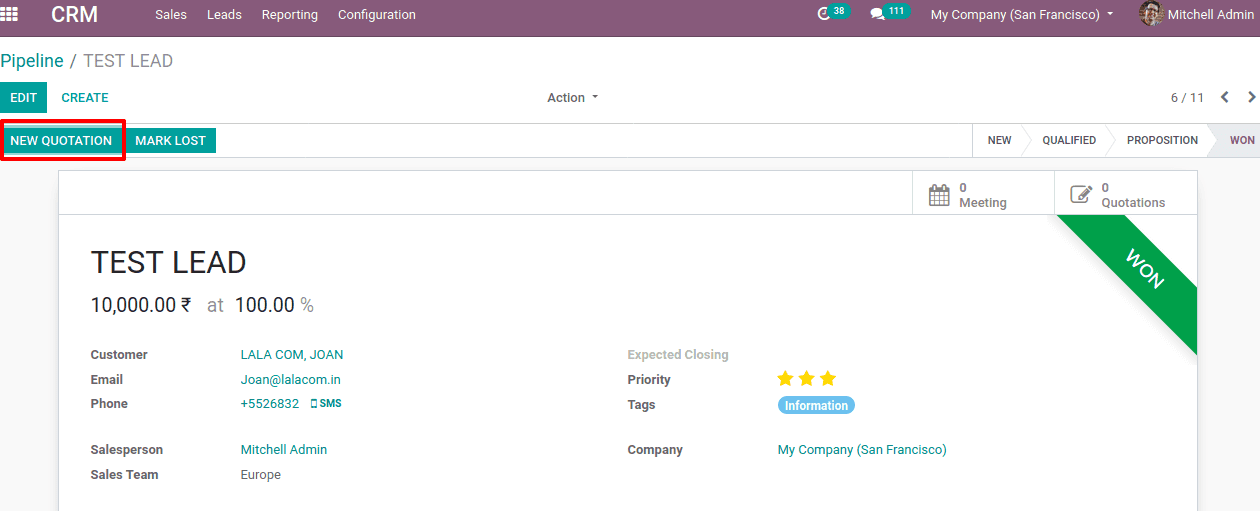
When the quotation is sent to the client and once it is approved by the client, we can create a sale order against it and later invoice as well.
Lead Analysis
The workflow of a lead is shown below. Once the leads are converted to an opportunity, it is brought in to a user-defined pipeline. There different activities like email, meeting or call can be scheduled. Depending on those procedures it may go to a lost or won state.
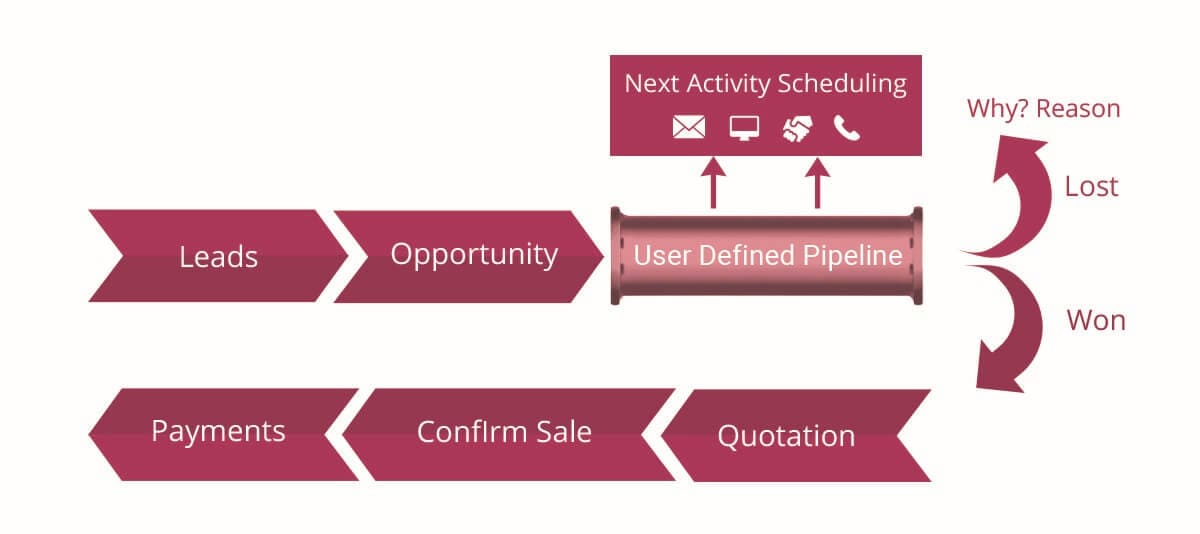
For the lost state, the reason for loosing should be mentioned and for the won state, the quotation will be sent to the client. On approval from the client-side, confirm the sale and make payment accordingly.
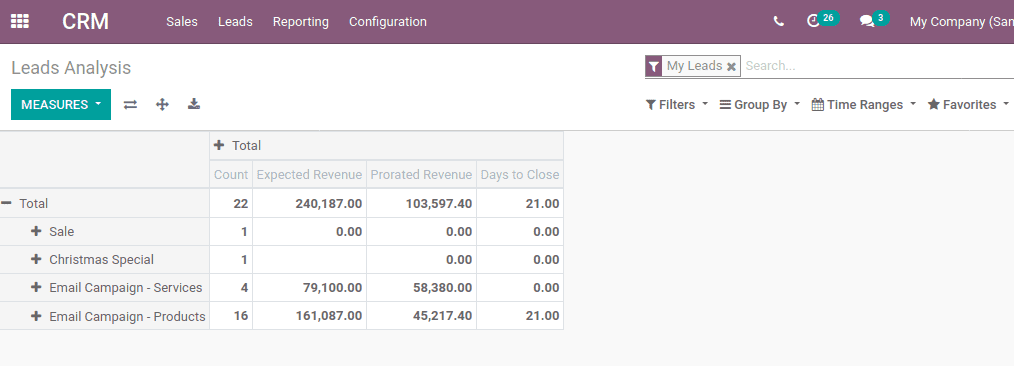
Odoo facilitates lead analysis tools under Reporting, CRM > Reporting >Leads.
The analysis report over the lead is shown below.
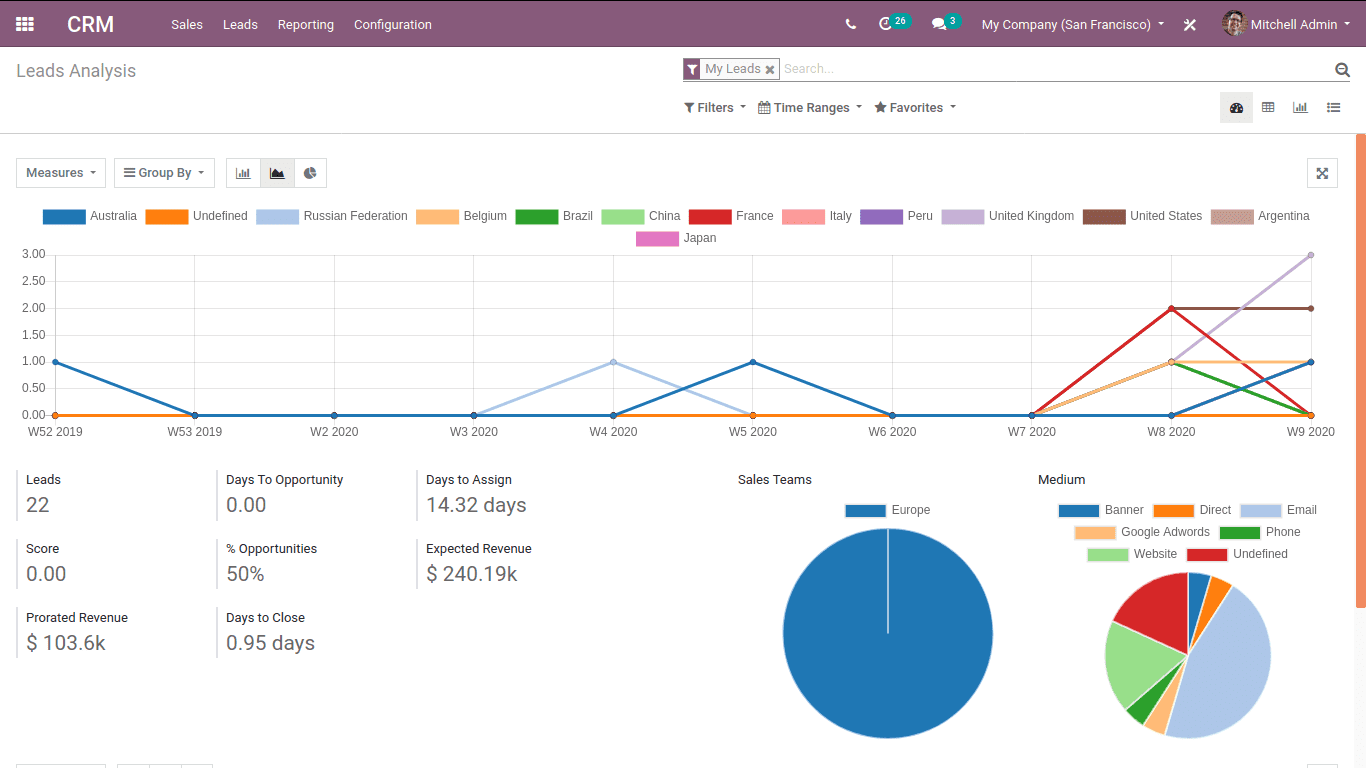
We can use filters and ‘Group by’ options to customize this report. Also, you can have views like dashboard view, pivot view, graph view, list view etc.
The tabular form shown below is based on the campaign where lead is generated. One can generate tabular form under different measures.
