The designing of details within an invoice of a customer after quotation creation is a quotation layout. By making a clear layout, customers can access information about quotation orders accurately. It is necessary to generate a quotation layout when developing a sales order for a customer or client. We can manage the layout of quotations in a company with the help of ERP software. Odoo 16 Sales module assists you in simply setting document layout in a quotation. Within less time, we can send the quotation to customers based on their requirements in layout design.
This blog emphasizes the setting of Quotation Layout within the Odoo 16 Sales module.
The customization of quotations has become an easy process for users within the Odoo 16 Sales application. Management of Quotation templates, attributes, sales team, products, and more is made possible through the Sales application. Let’s view the steps to set up a Quotation Template in the Odoo 16 Sales module.
To Customize Quotation Layout in Odoo 16 Sales
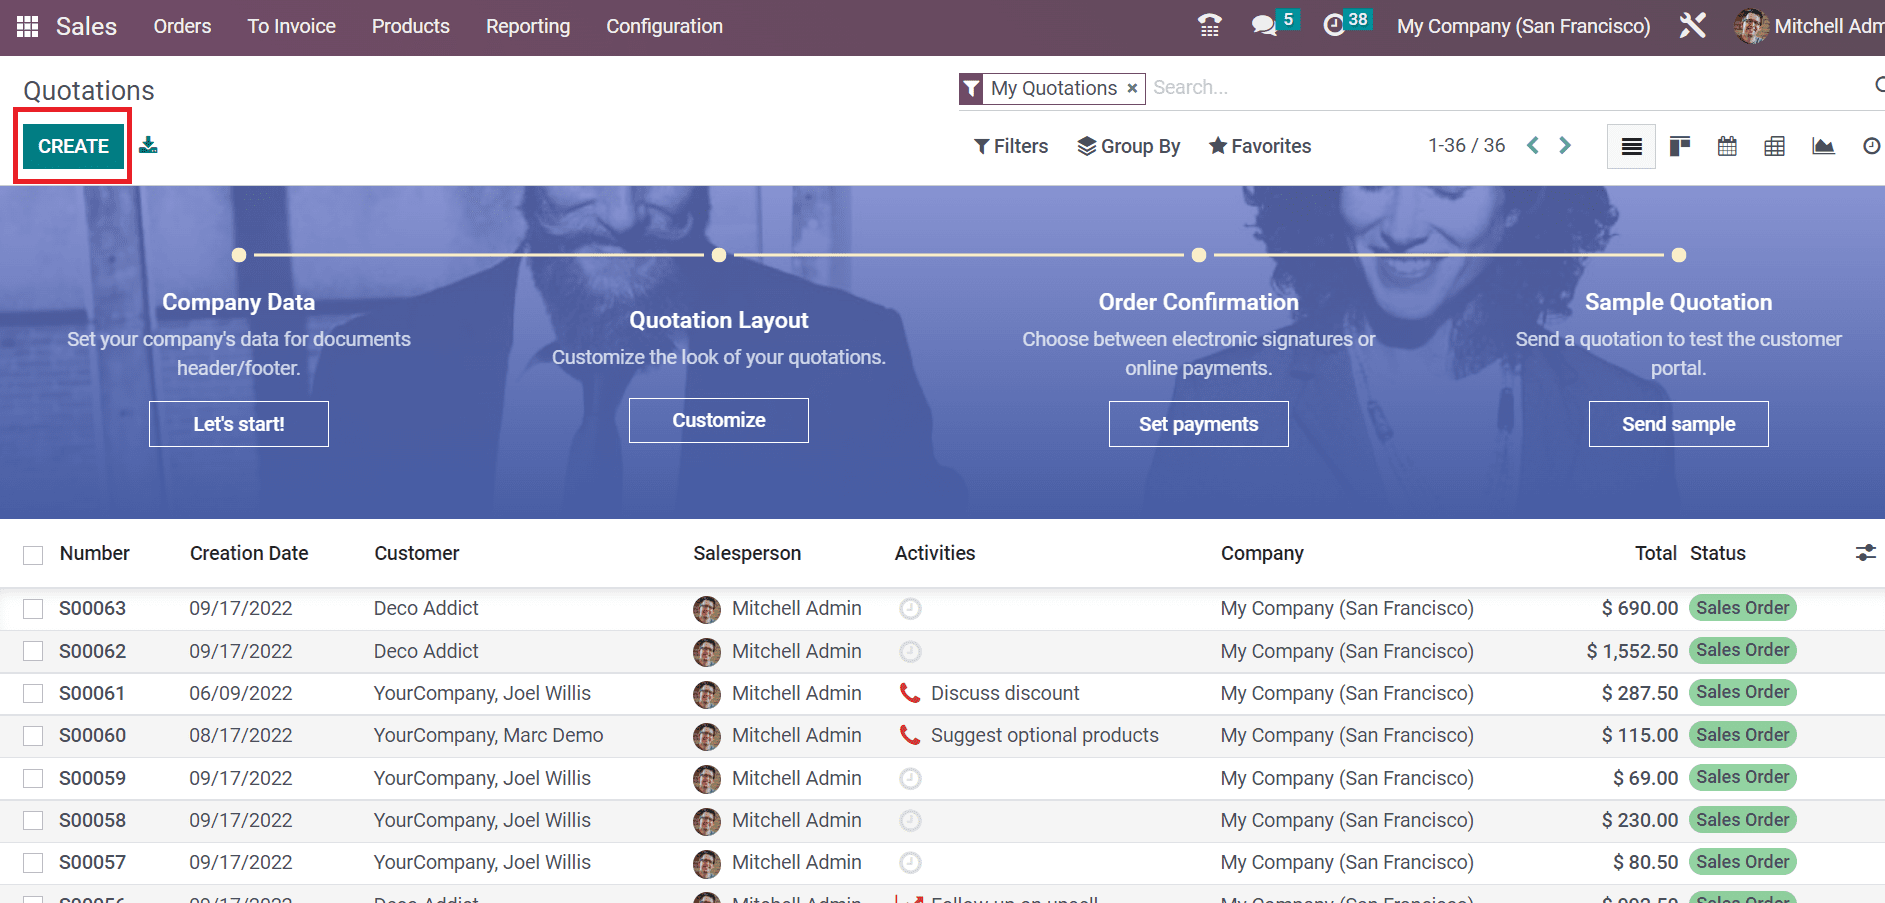
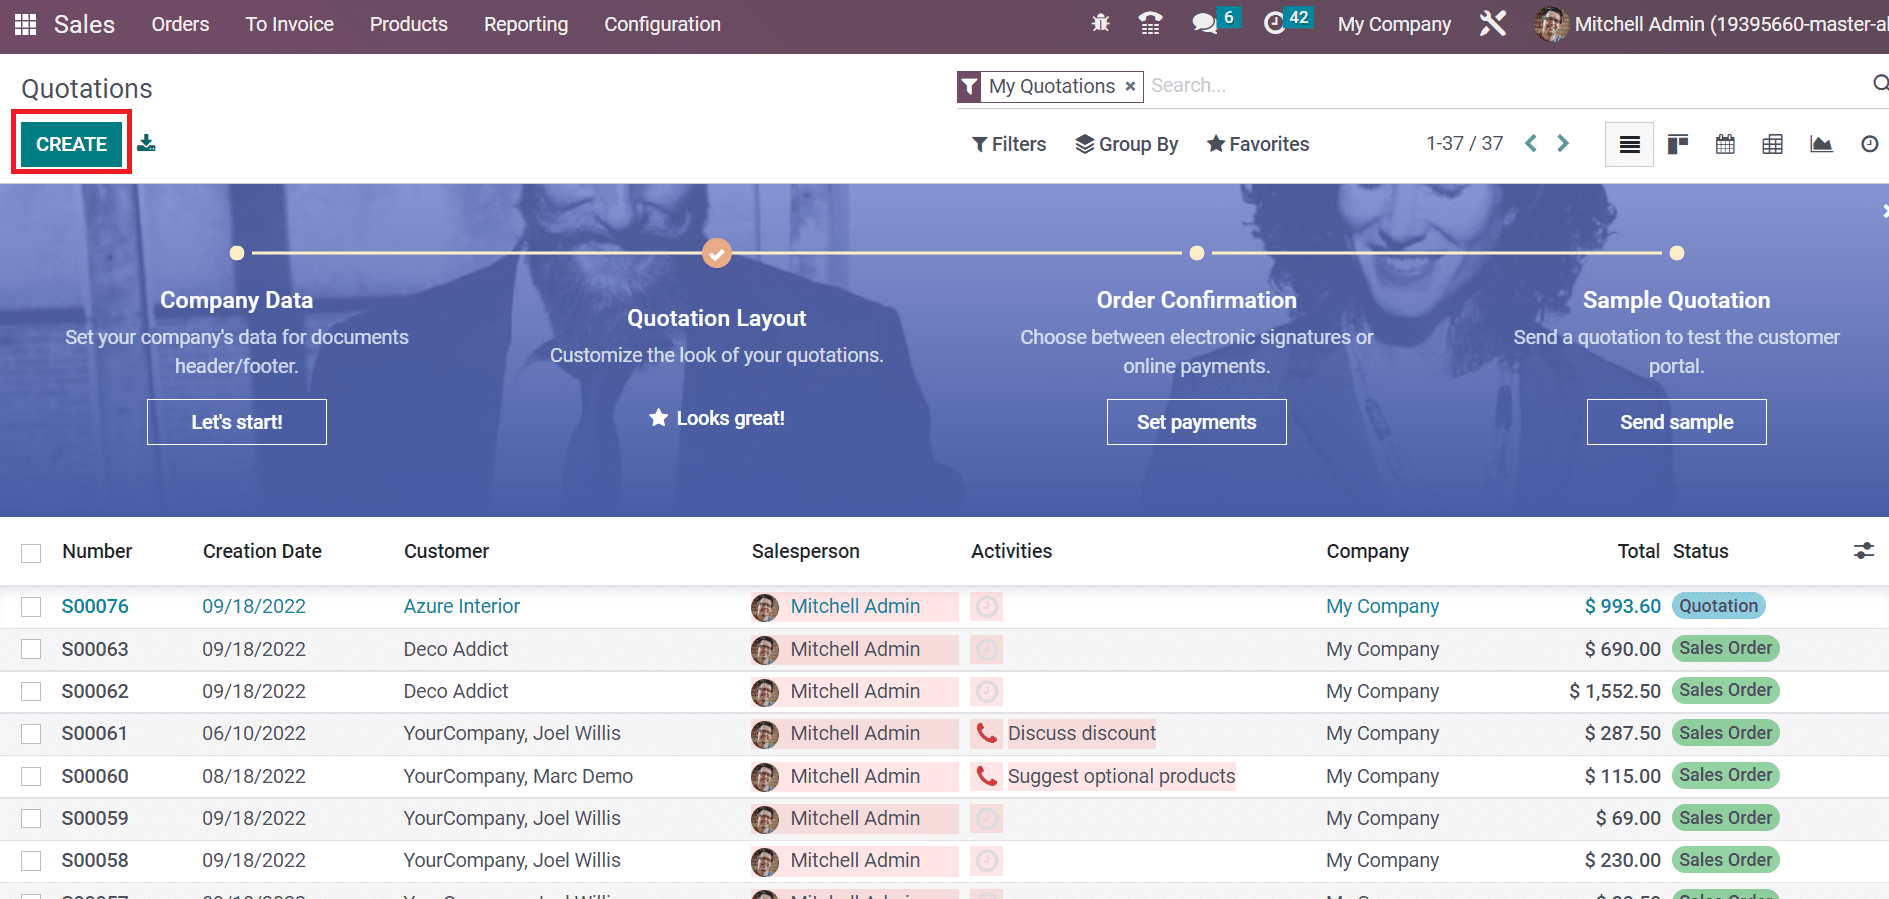
Customizing the look of quotations for customers is vital to improving business productivity. Before developing a quotation, we must design the quotation layout. Choose the Quotations menu in the Orders menu, and the list of all quotations is viewable to the user. Inside the Quotations window, it is possible to set company data, quotation layout, order confirmation and send it to the customer. The data of each quotation, such as Number, Company, Status, Salesperson, and more, are viewable to a user. By clicking on the CREATE button, we can develop a new quotation for a customer, as described in the screenshot below.
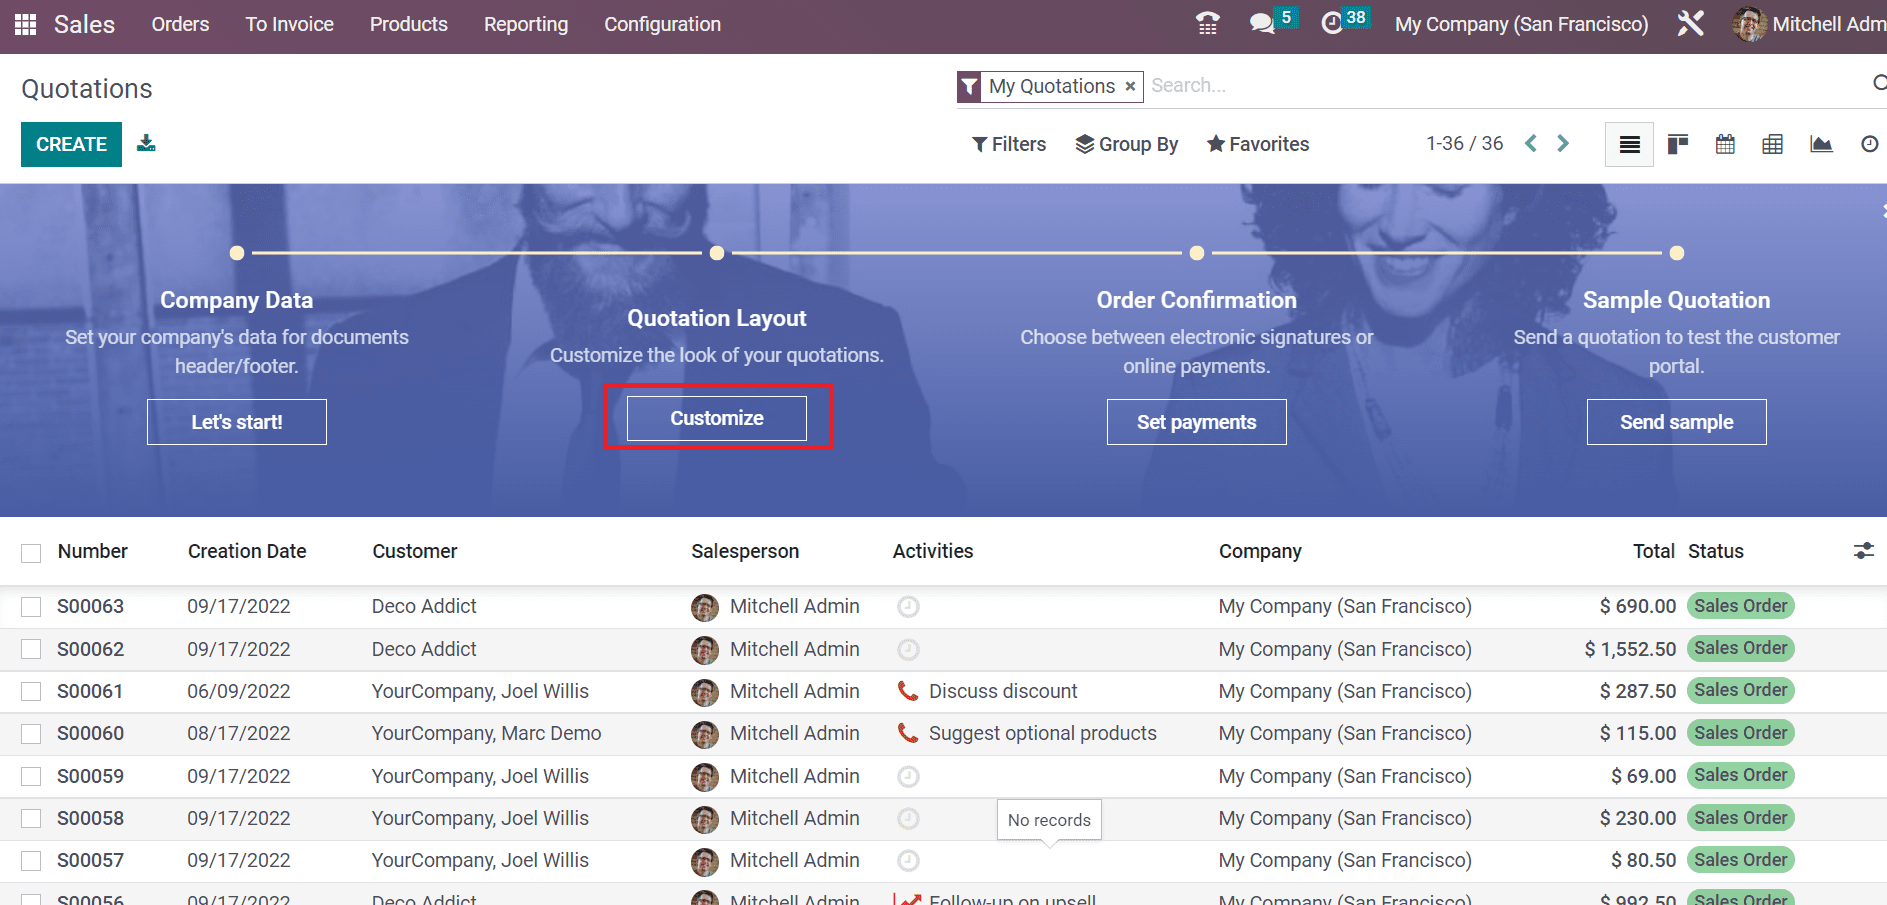
Users can customize the look of a quotation by clicking on the Customize icon below the Quotation Layout section. To develop a new quotation layout, click the Customize button in the Quotation window as defined in the screenshot below.
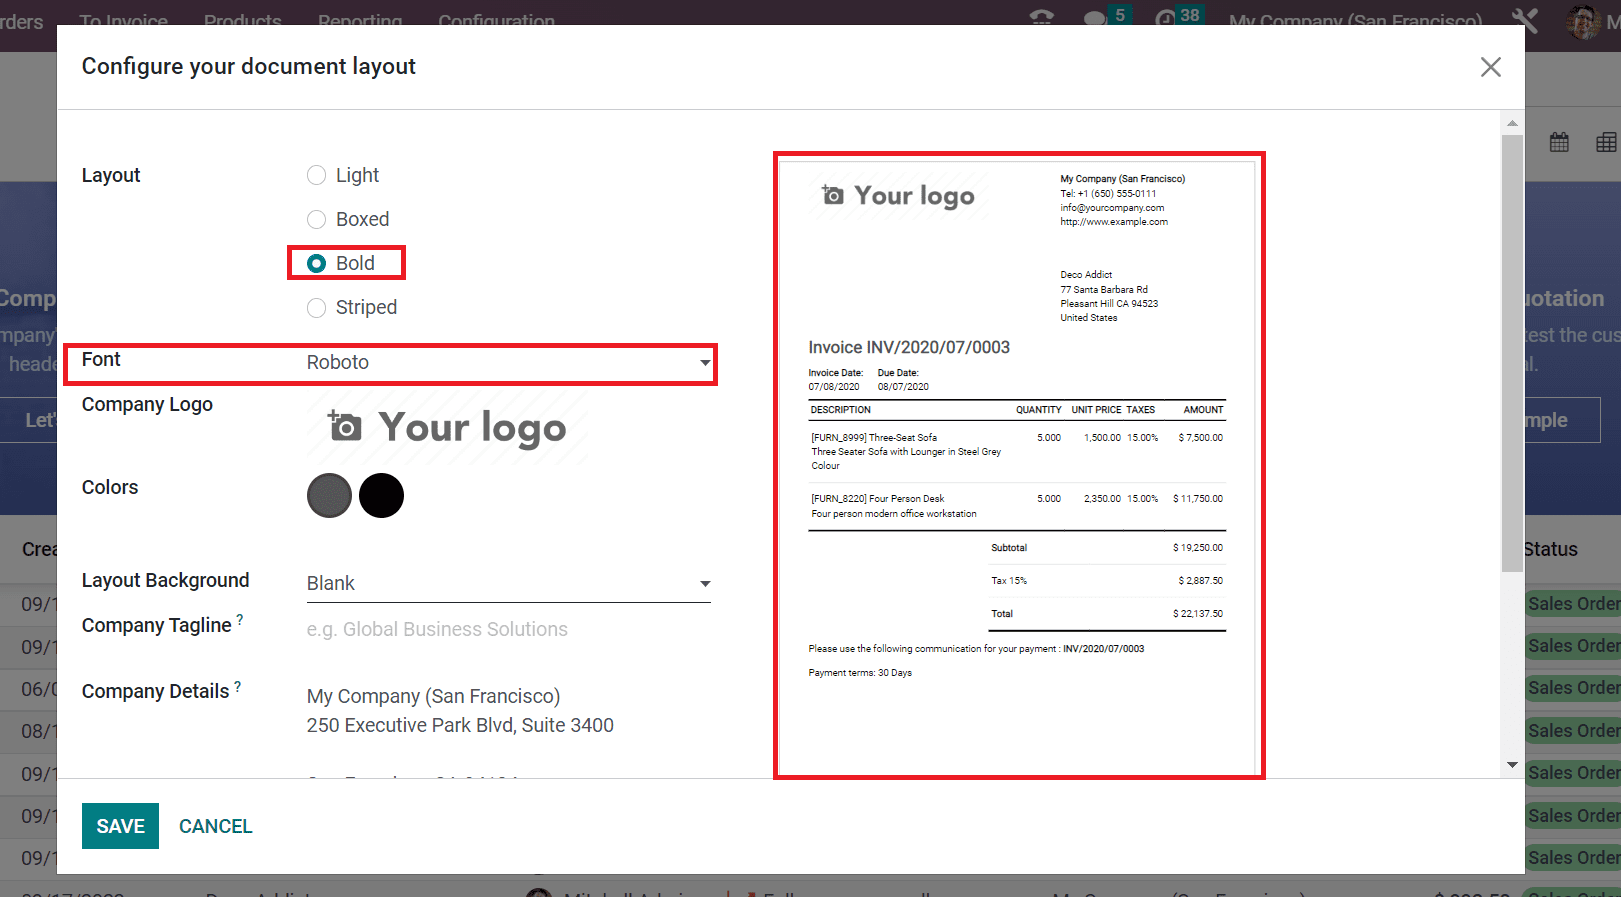
In the new window, we can configure the document layout for a customer’s invoice. You can set the Layout as Light, Boxed, Bold, and Striped. We choose the Bold option inside the Layout field and select Roboto Font as described in the screenshot below.
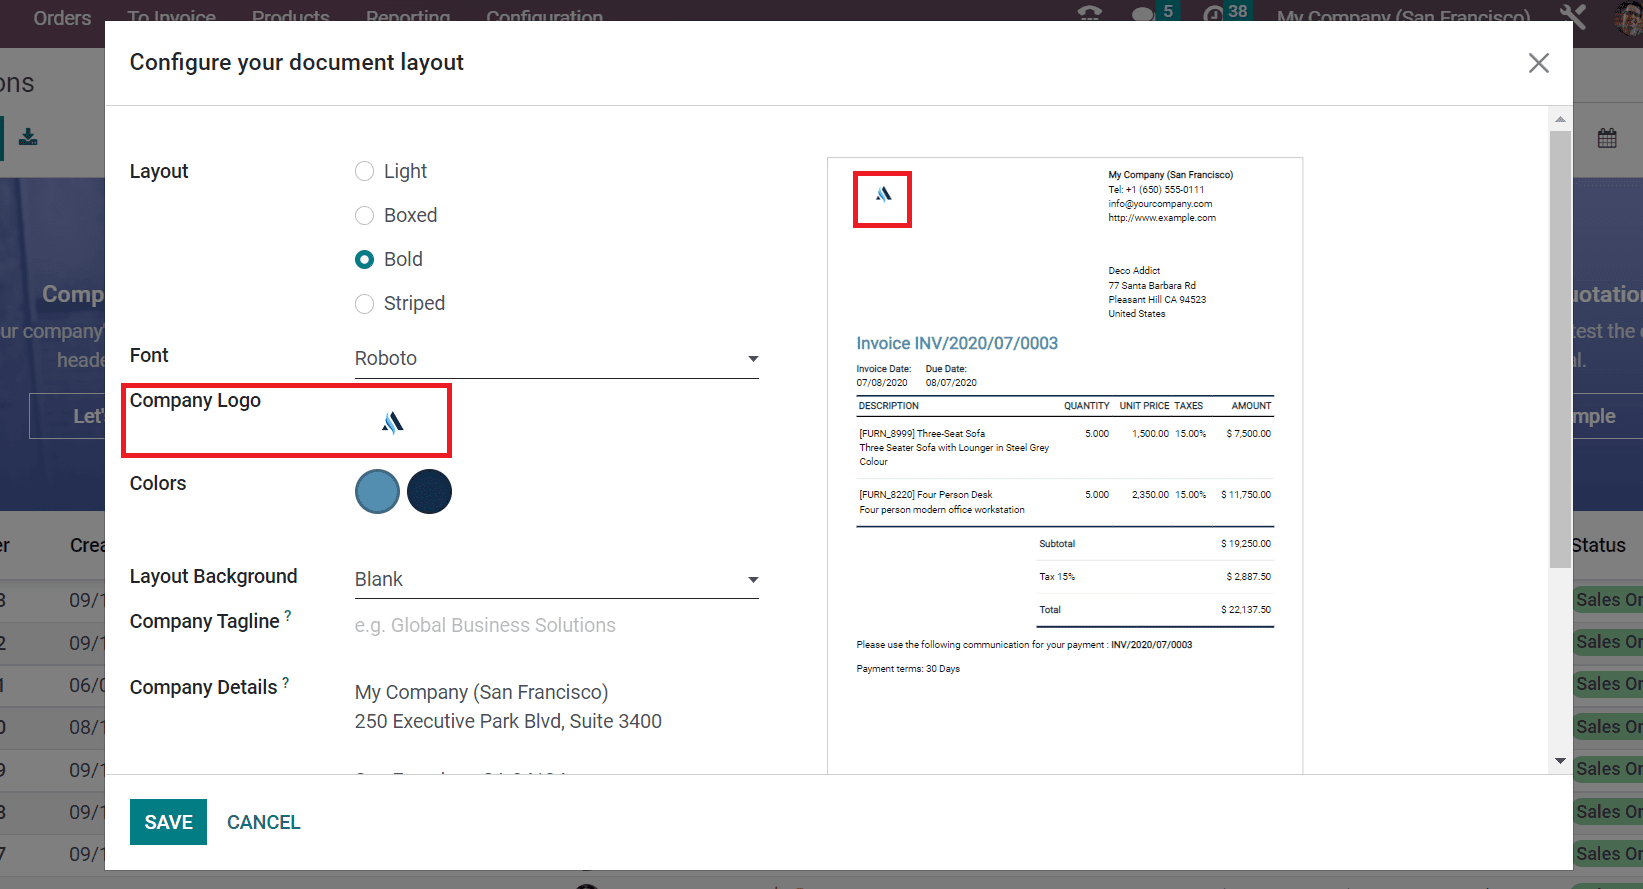
Users can see the selected layout and font on the right side as a document preview. By clicking on the Edit icon in the Company Logo field, you can upload your firm’s logo. The selected symbol is also visible in the document preview, as demonstrated in the screenshot below.
Next, we can choose specific colors for the document layout by clicking on the circle button in the Colors field. After clicking on the Circle icon, a pop-up window opens for you, and choose the specific color. The selected color is viewable inside the circle in the Colors field, as specified in the screenshot below.
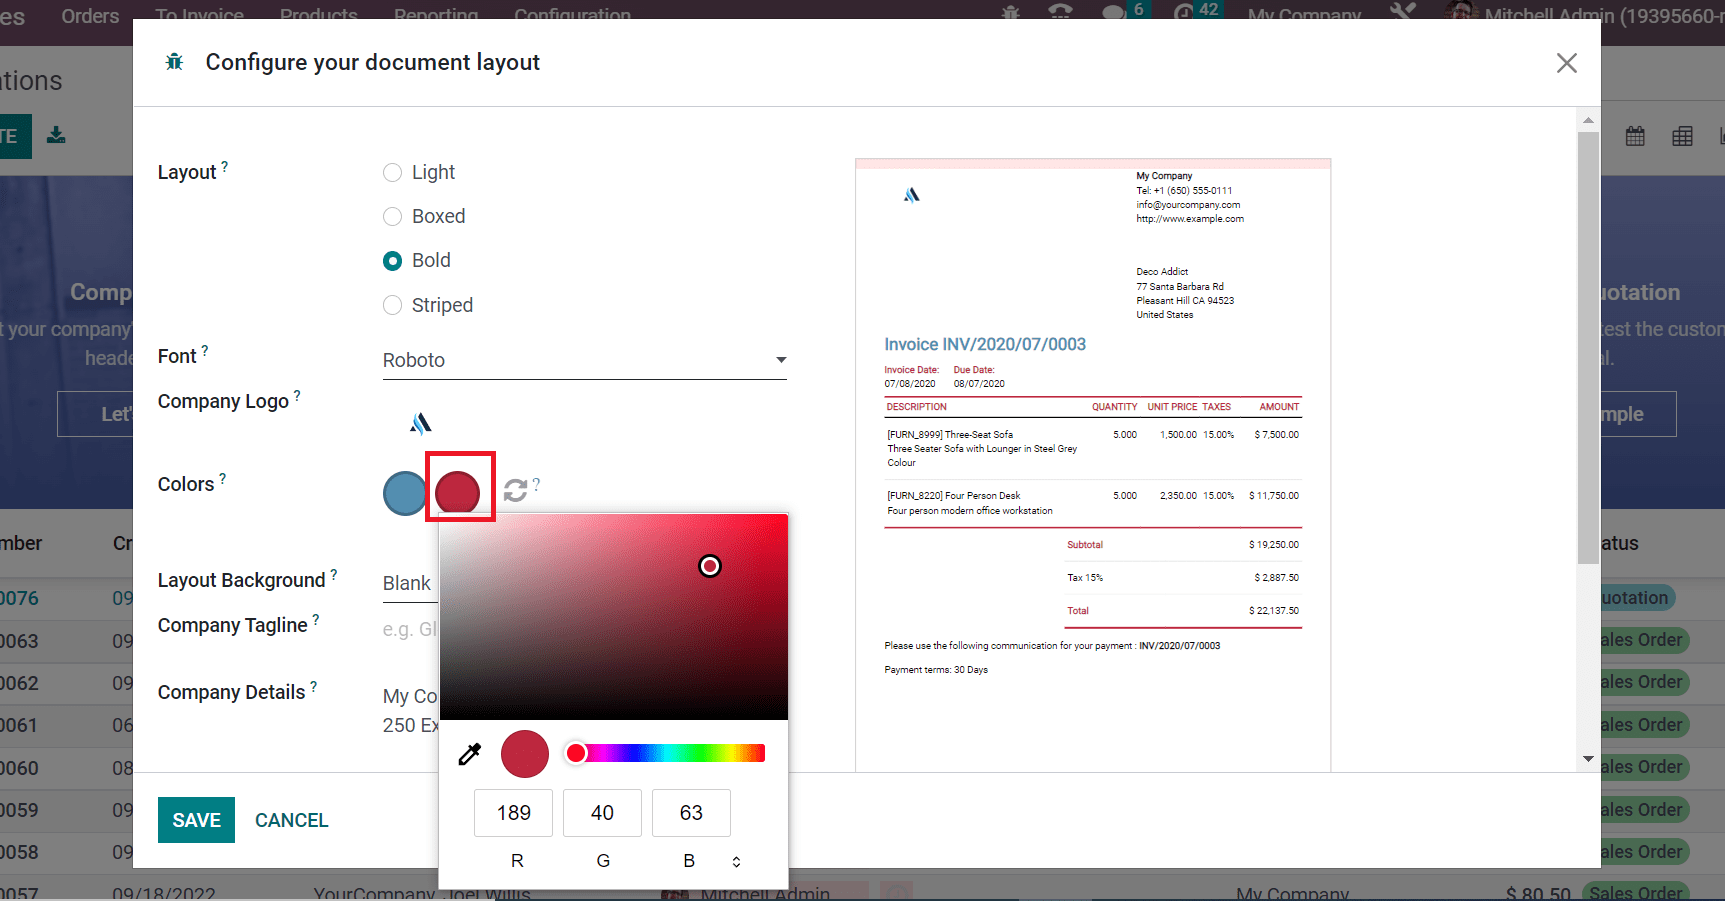
Here, we select the red color from the box, and the respective color is accessible inside the circle. You can view the chosen colors within the preview of the document layout on the right end. Next, pick the background layout for the document in the Layout Background field. We selected the document’s Geometric Layout Background and added the Company Tagline.
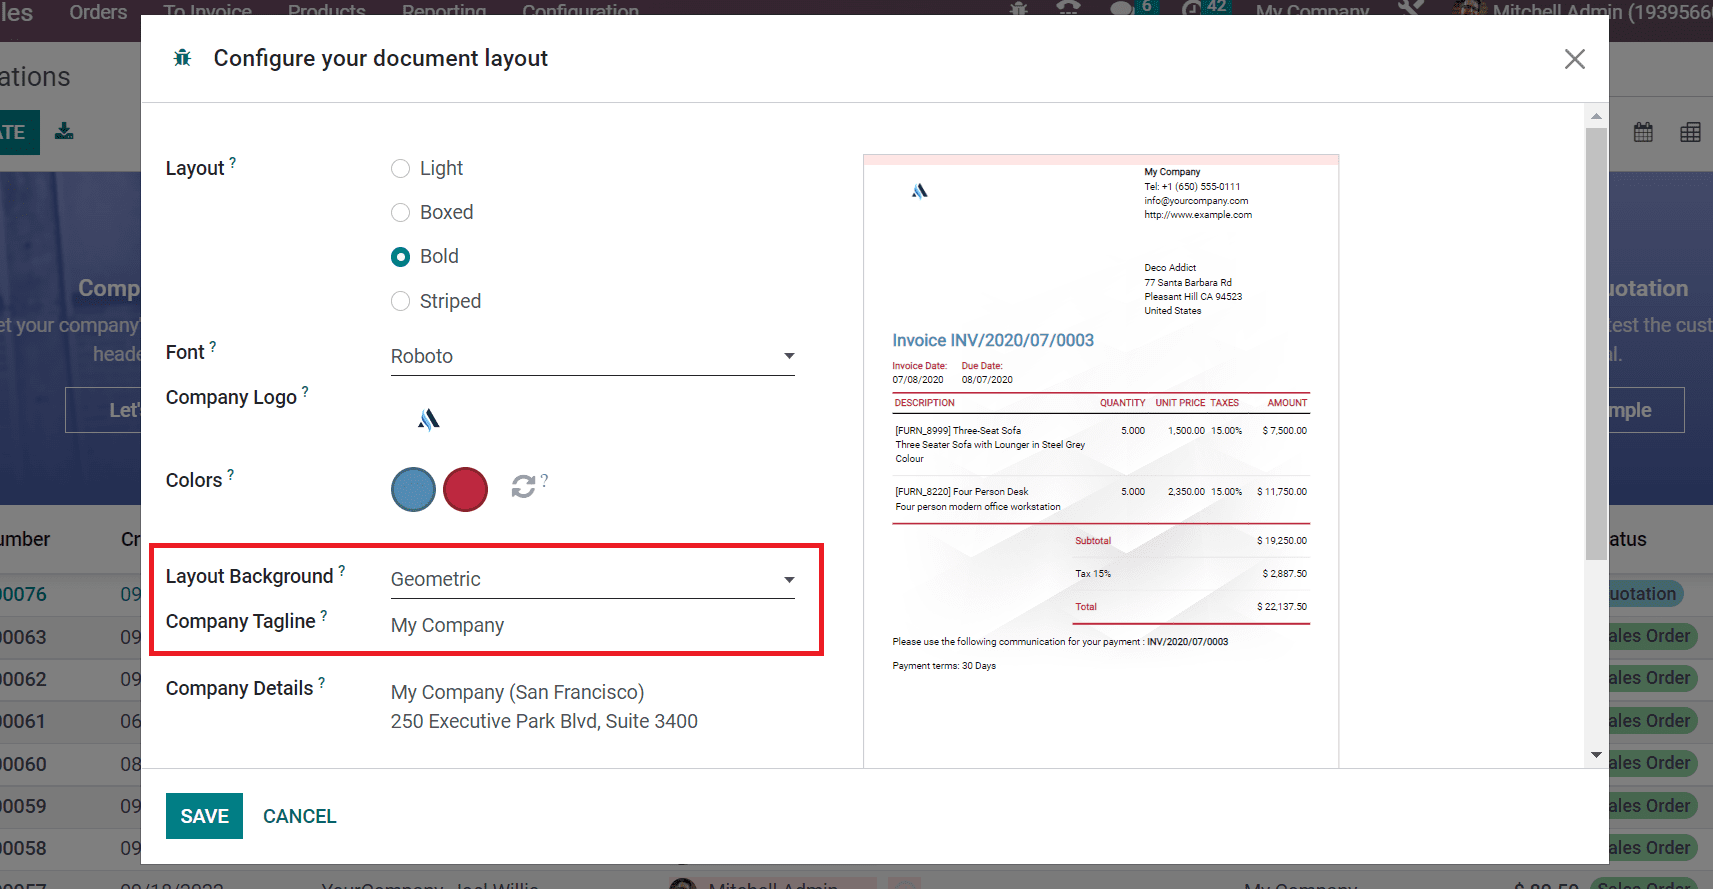
The address of the firm is automatically visible in the Company Details field. At the top of the report, the user can identify the header text. In contrast, you can obtain the link of a company in the Footer field. At the end of a report, the bottom text of company data is visible to all.
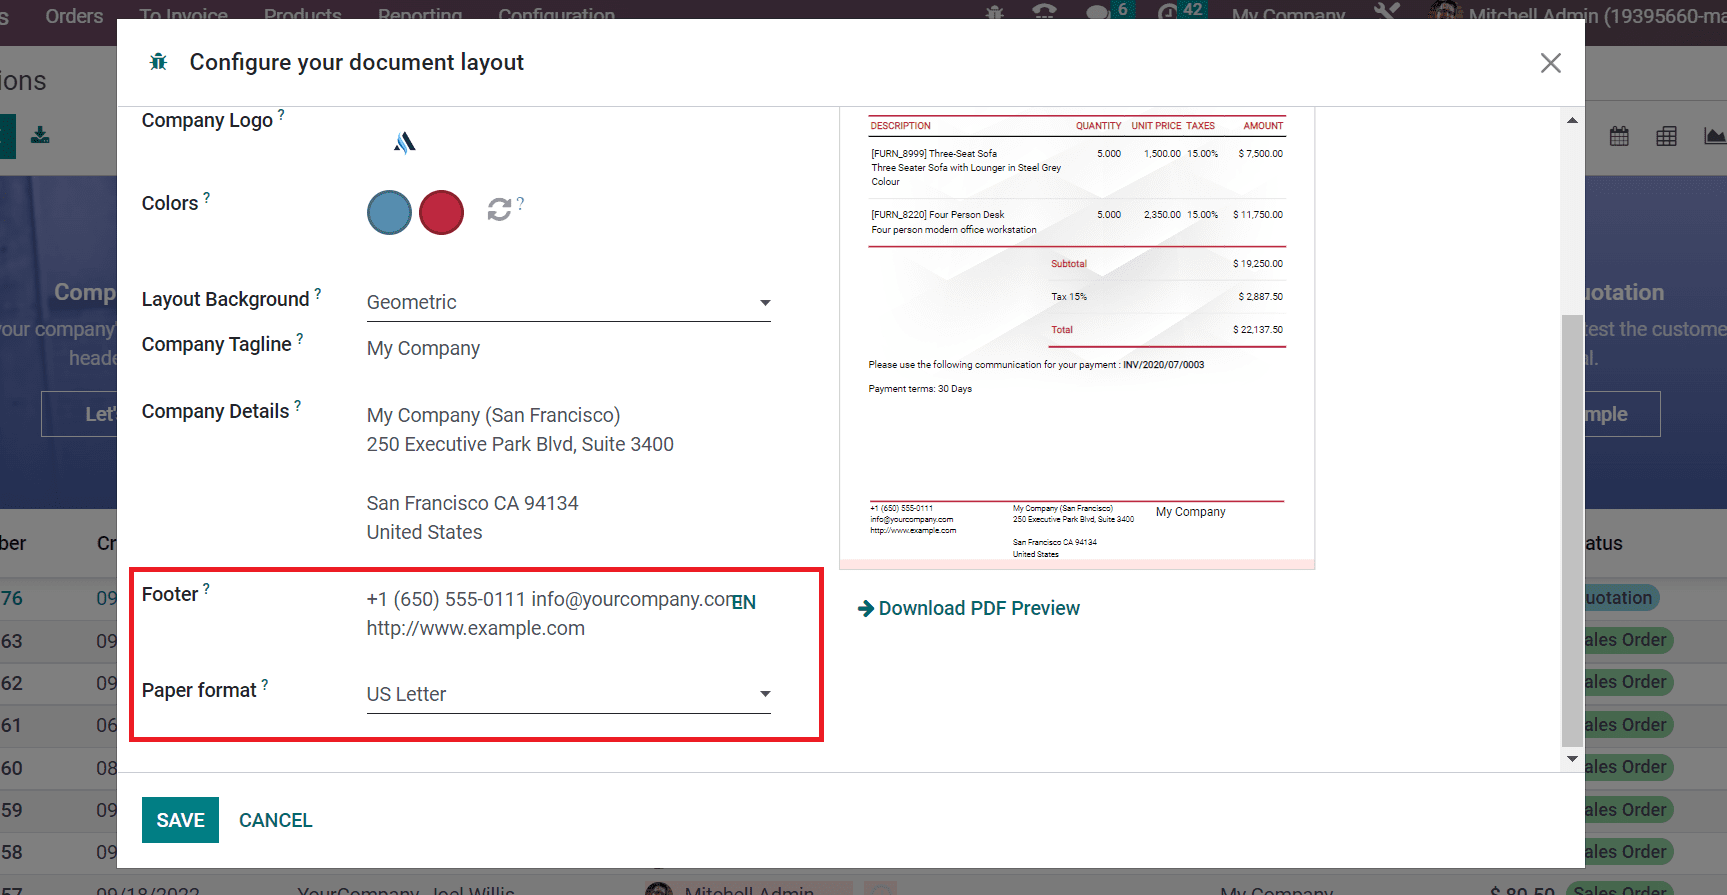
After choosing your format for the document within the Paper Format field, click the SAVE button, as denoted in the screenshot below.
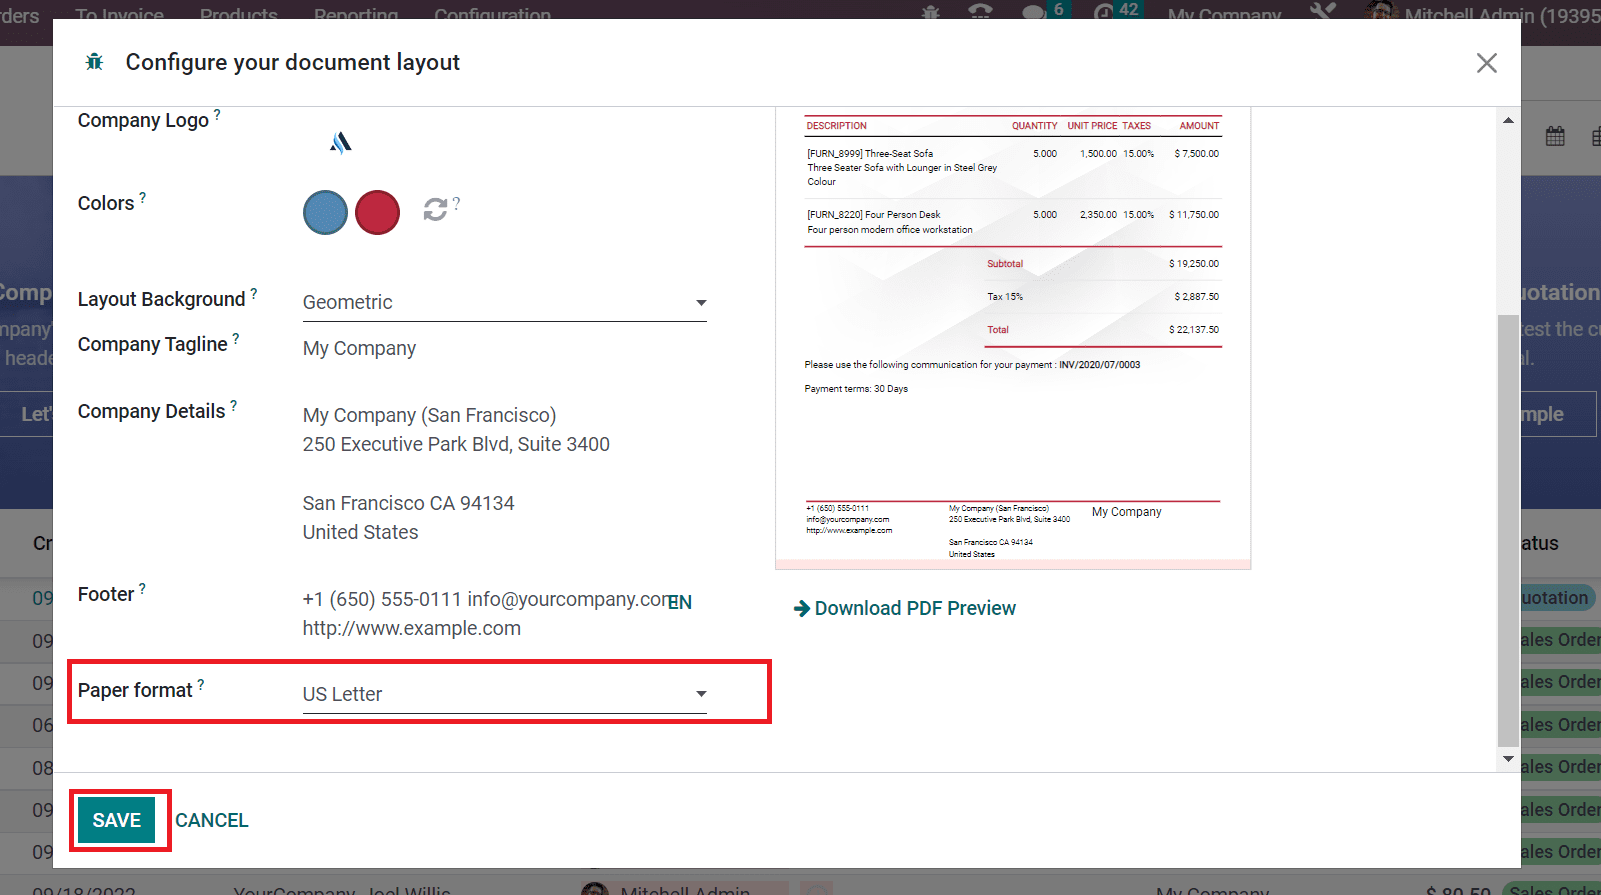
So, we can quickly design the layout of a quotation in Odoo 16 Sales. Now, we can generate and quotation and see the layout after printing out the invoice.
How to Access Quotation Layout in the Odoo 16 Sales?
We must generate a new quotation for a customer to get the created quotation layout. Click the Quotations menu in the Orders tab, and the record of all created quotations is accessible to a user. We can view the data of each quotation, including Number, Customer, Company, Status, Activities, and more. Select the CREATE button to develop a new quotation for a customer, as marked in the screenshot below.
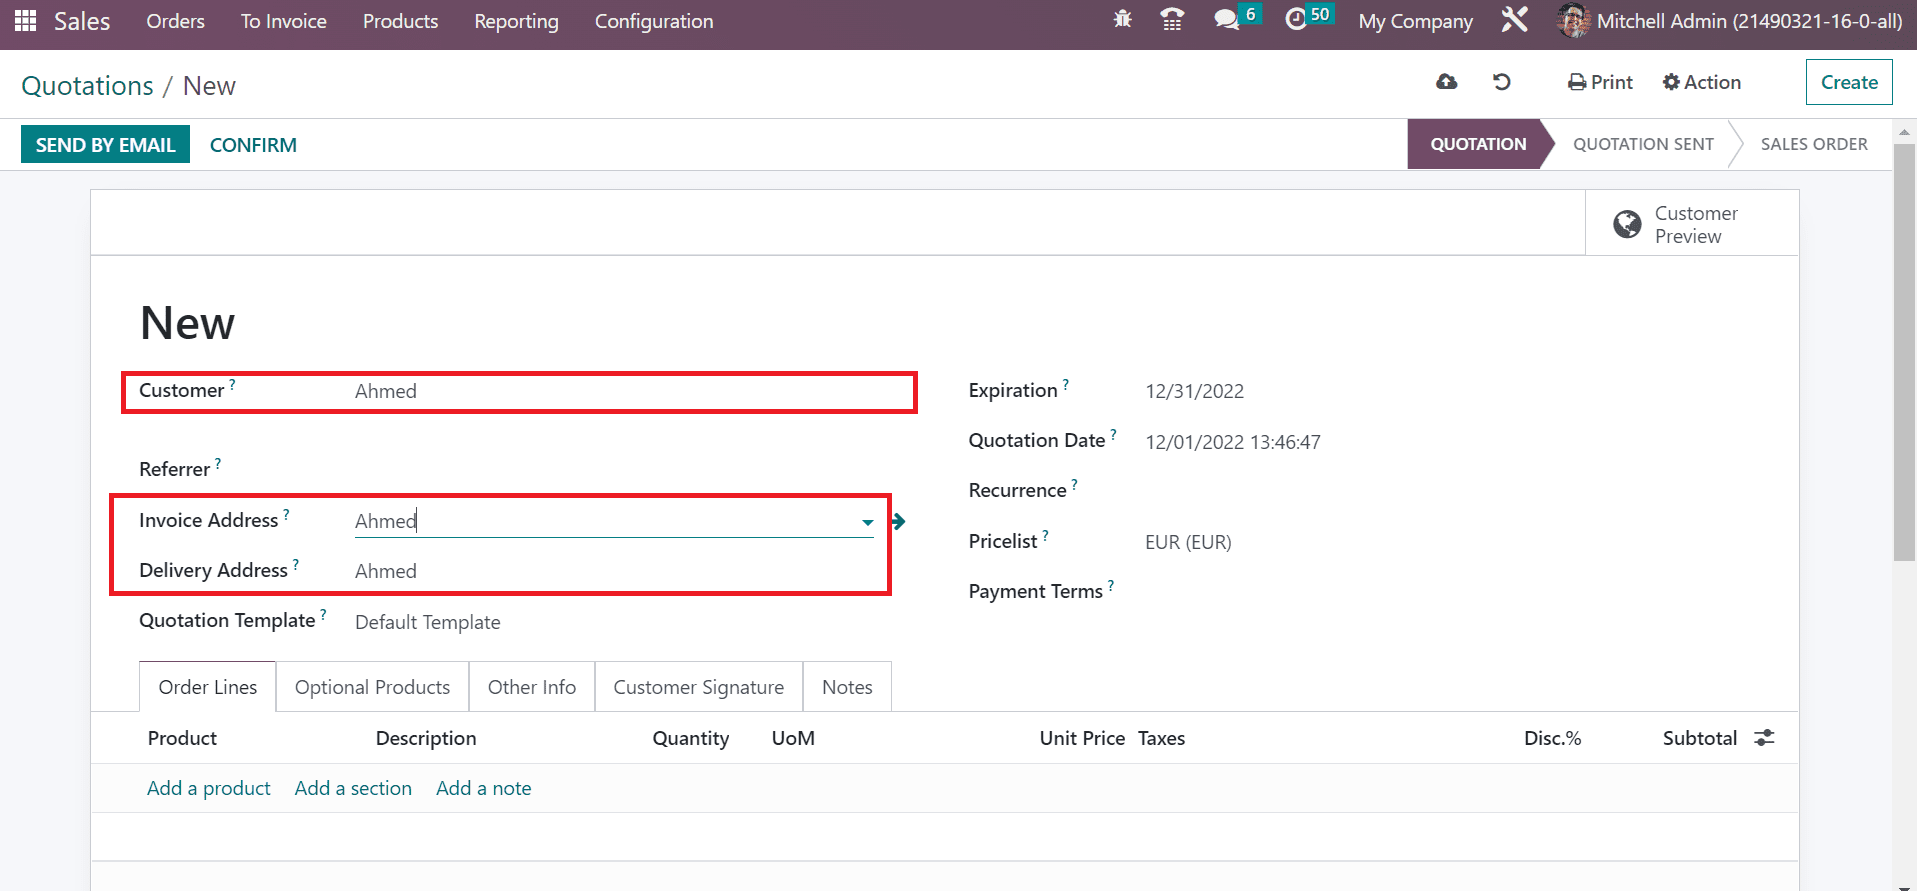
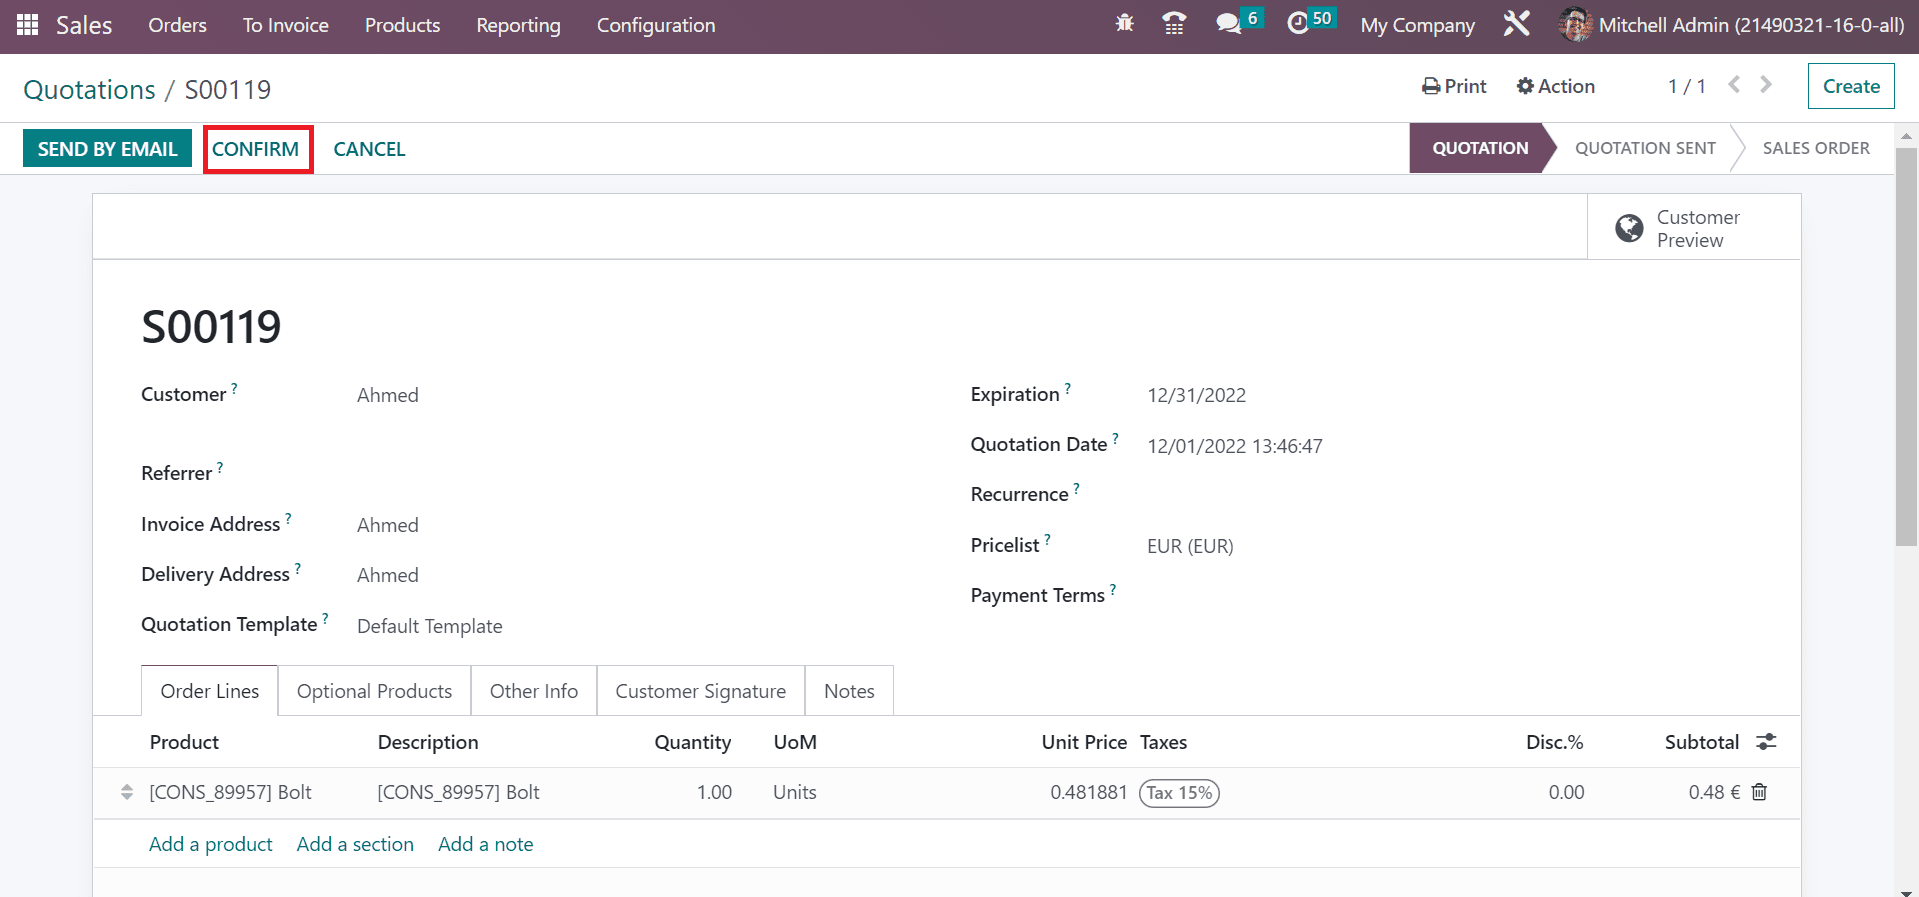
On the new page, pick the Customer as Ahmed. Ahmed’s Invoice and Delivery Address are available to you automatically in the Quotation window.
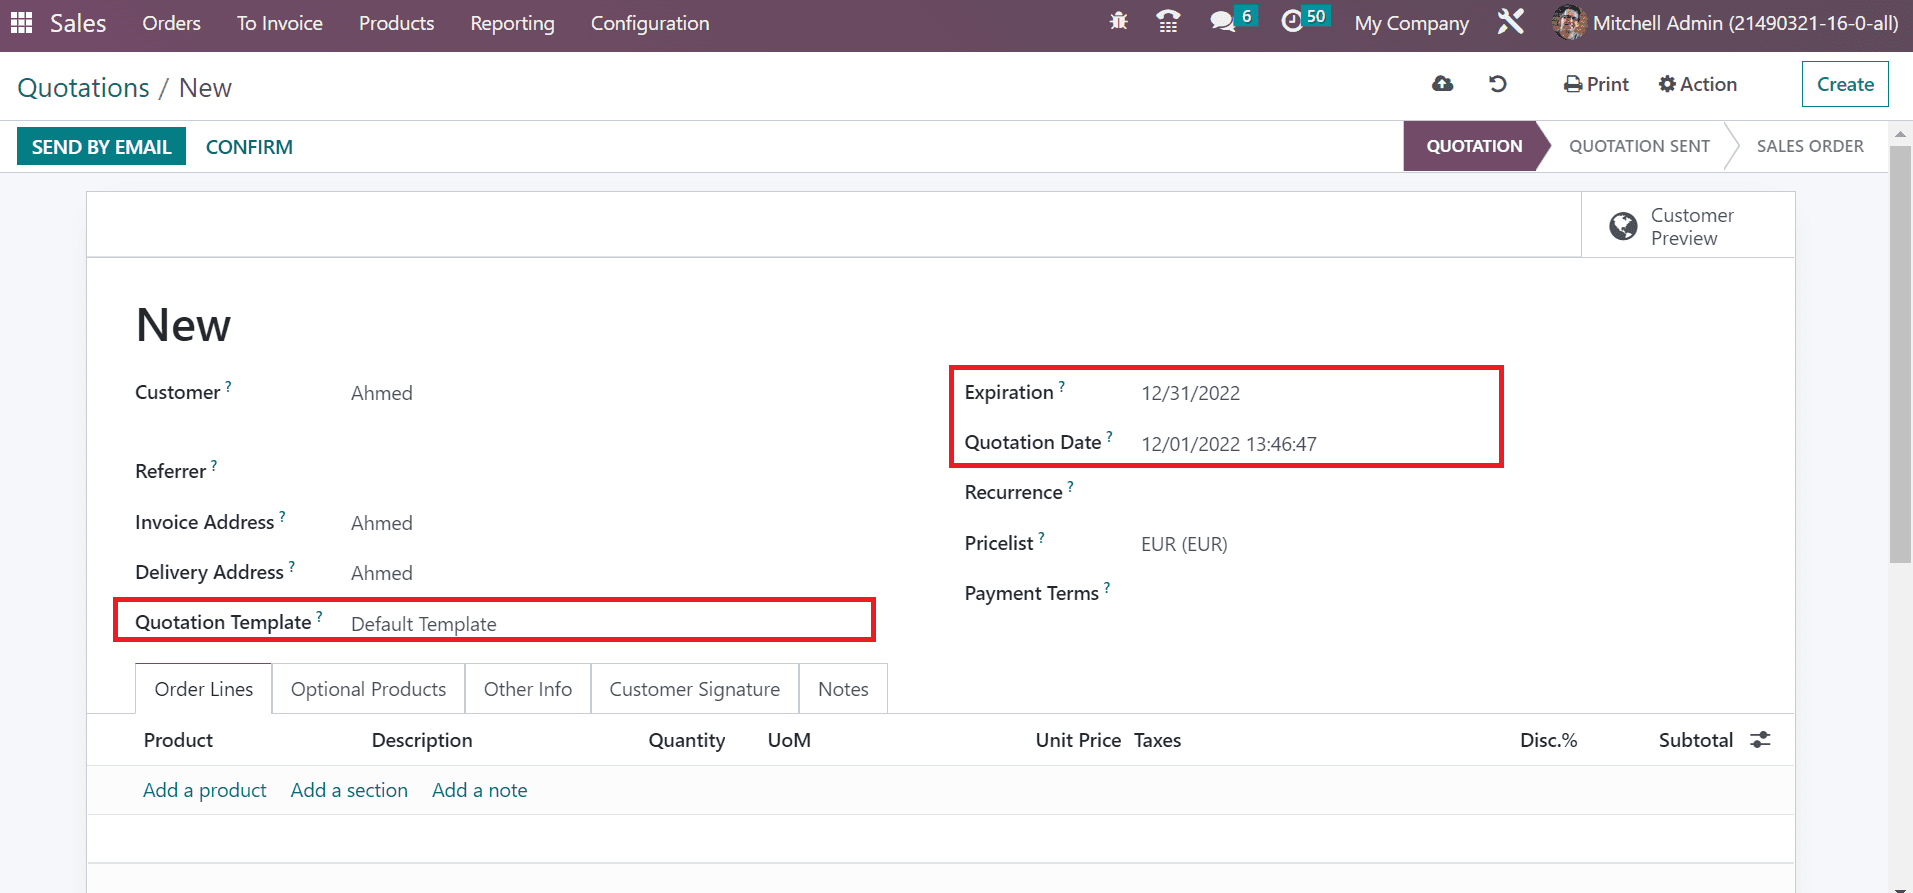
Set your Quotation Template and apply the end date in the Expiration field. Later, select the created date in the Quotation Date field, as the screenshot shows below.
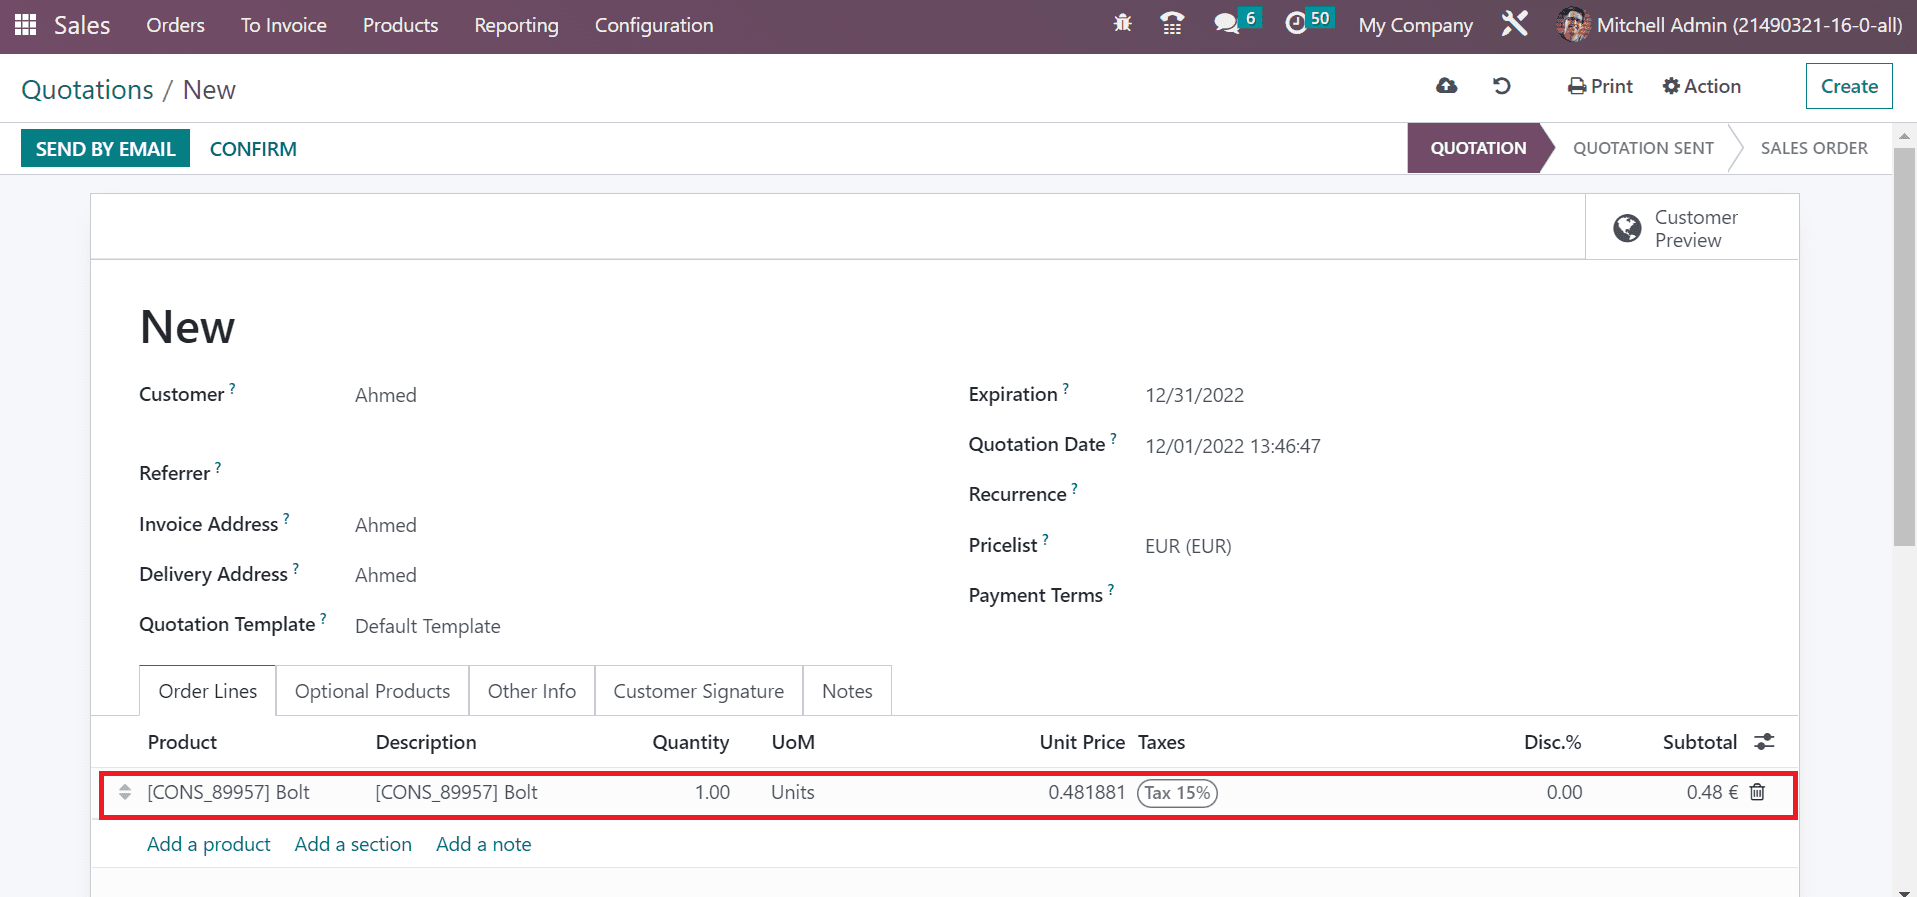
You can pick the item by selecting on the Add a product icon below the Order Lines tab. After selecting your product, the data of quotation is saved in the Quotations window manually.
Validate your order by choosing the CONFIRM icon in the Quotations window, as presented in the screenshot below.
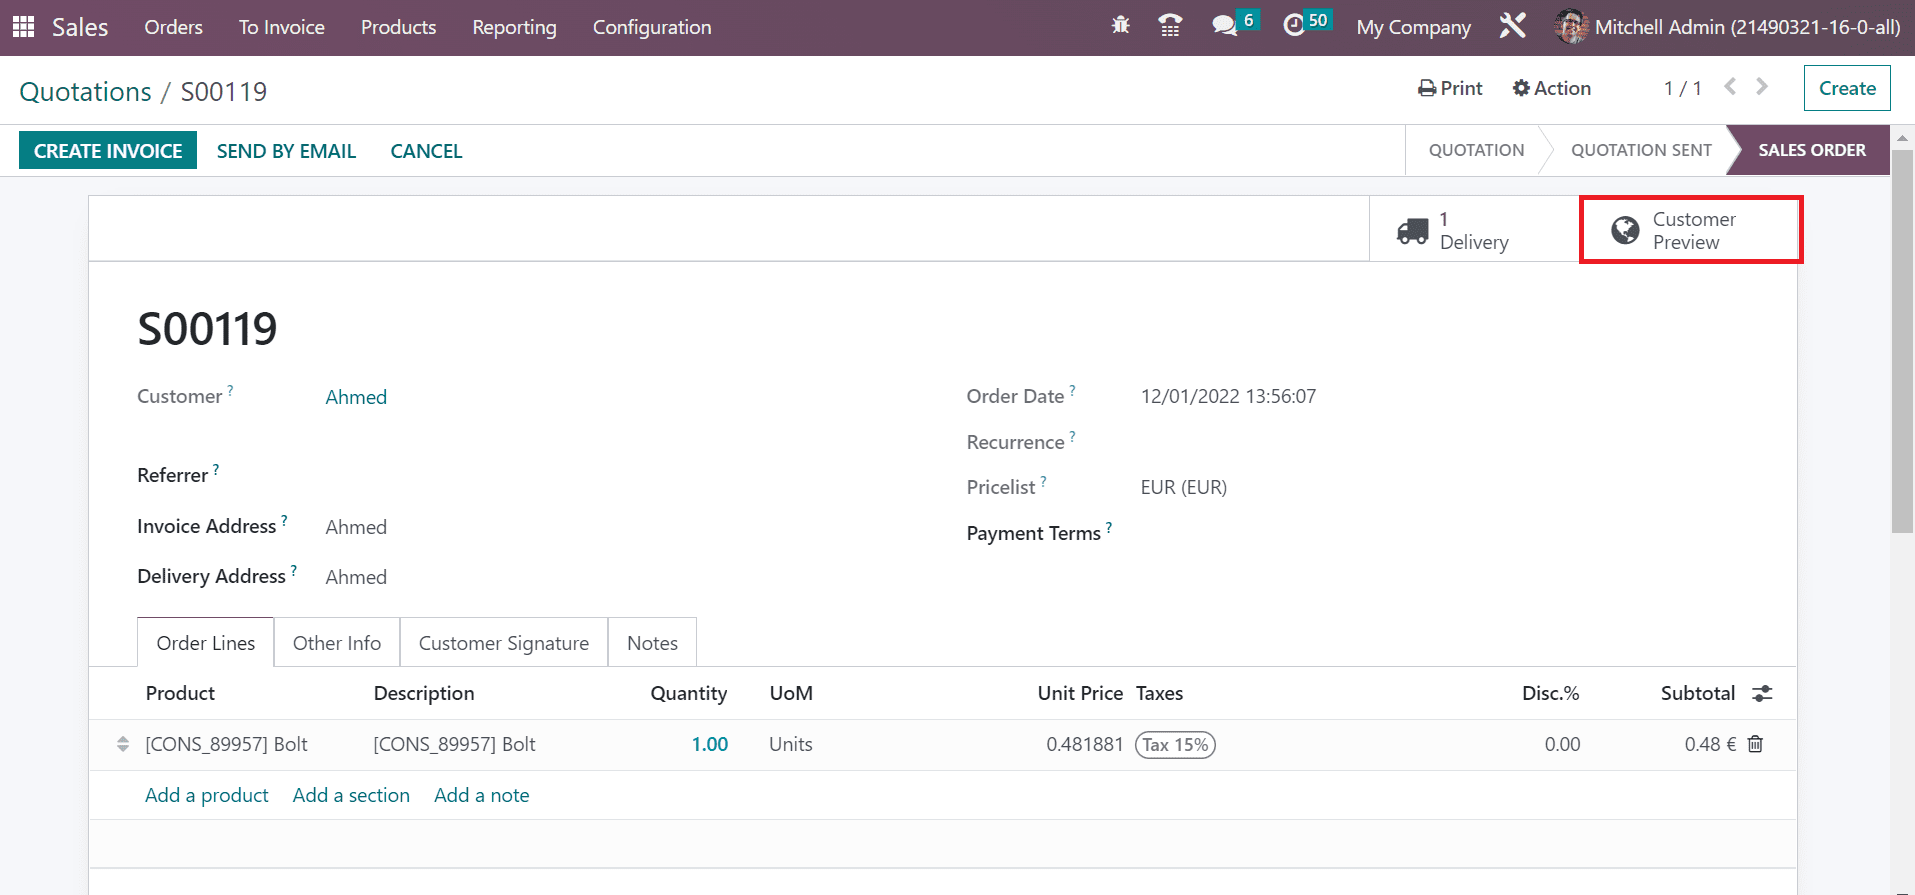
We can view that stage changes into SALES ORDER, and one Delivery is generated. Users can obtain a preview of a quotation for a customer by clicking on the Customer Preview icon in the Quotations window, as defined in the screenshot below.
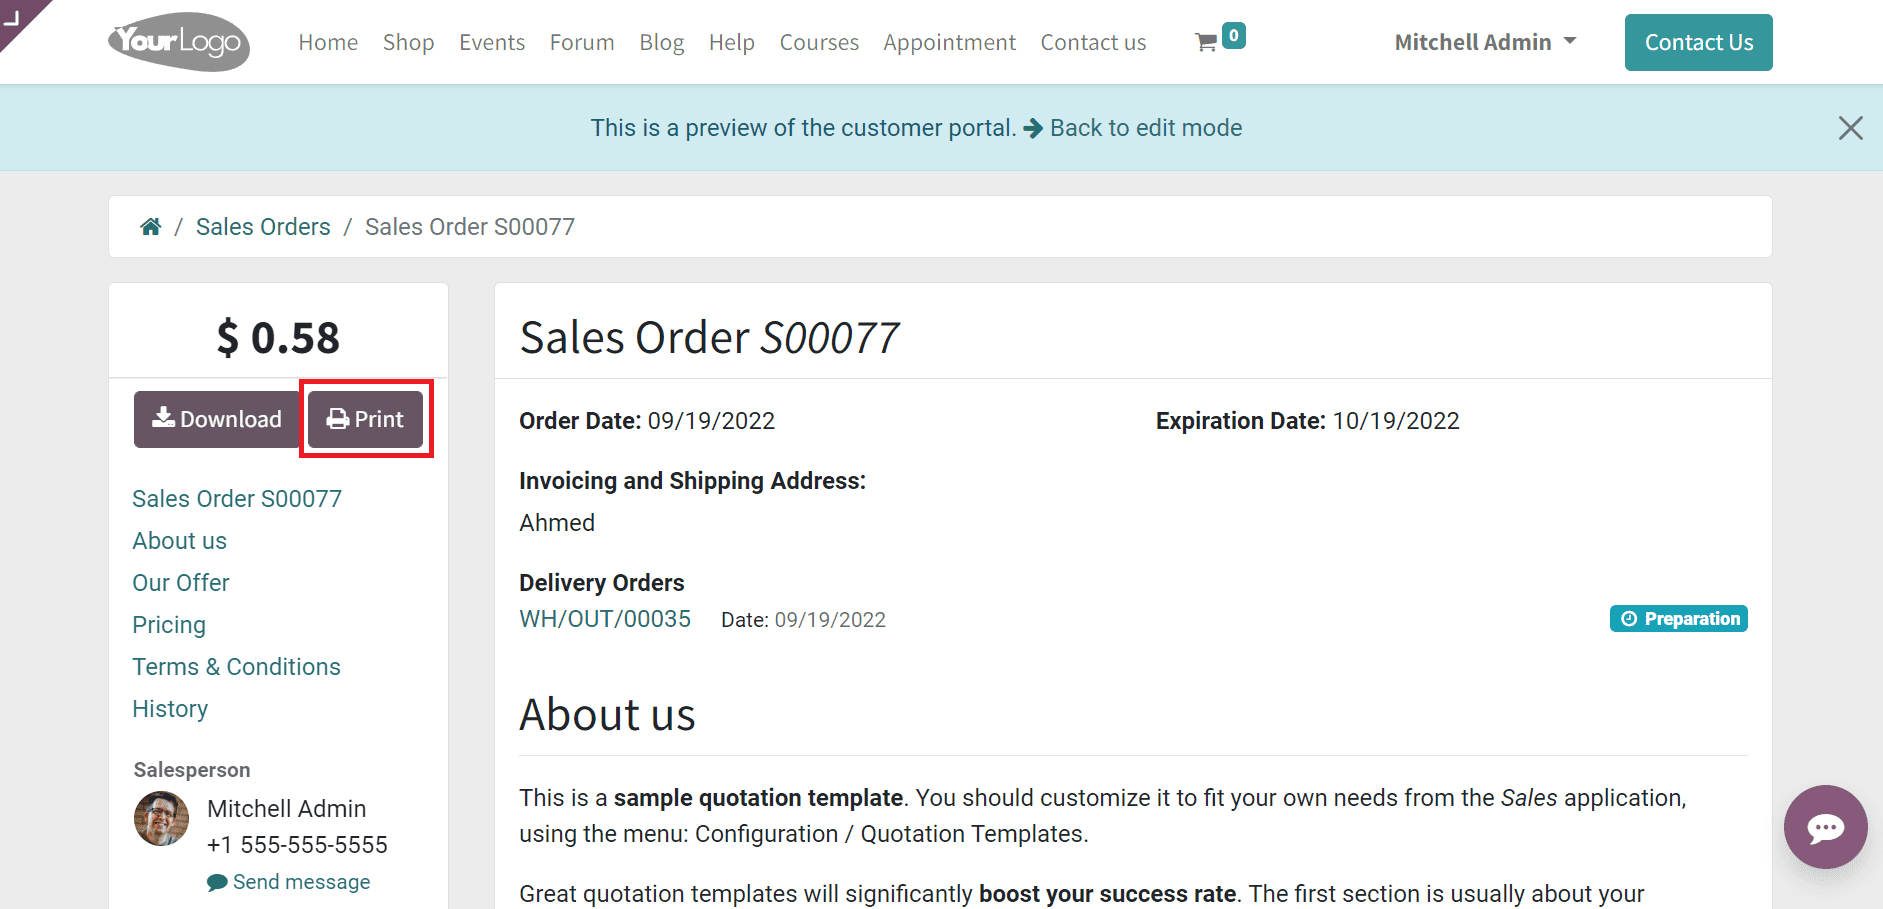
On the Customer Portal page, you can see the Sales Order details such as Order Date, Delivery Address, Expiration Date, Invoicing, and Shipping Address. The user can acquire the quotation information by clicking on the PRINT icon in the Customer portal window.
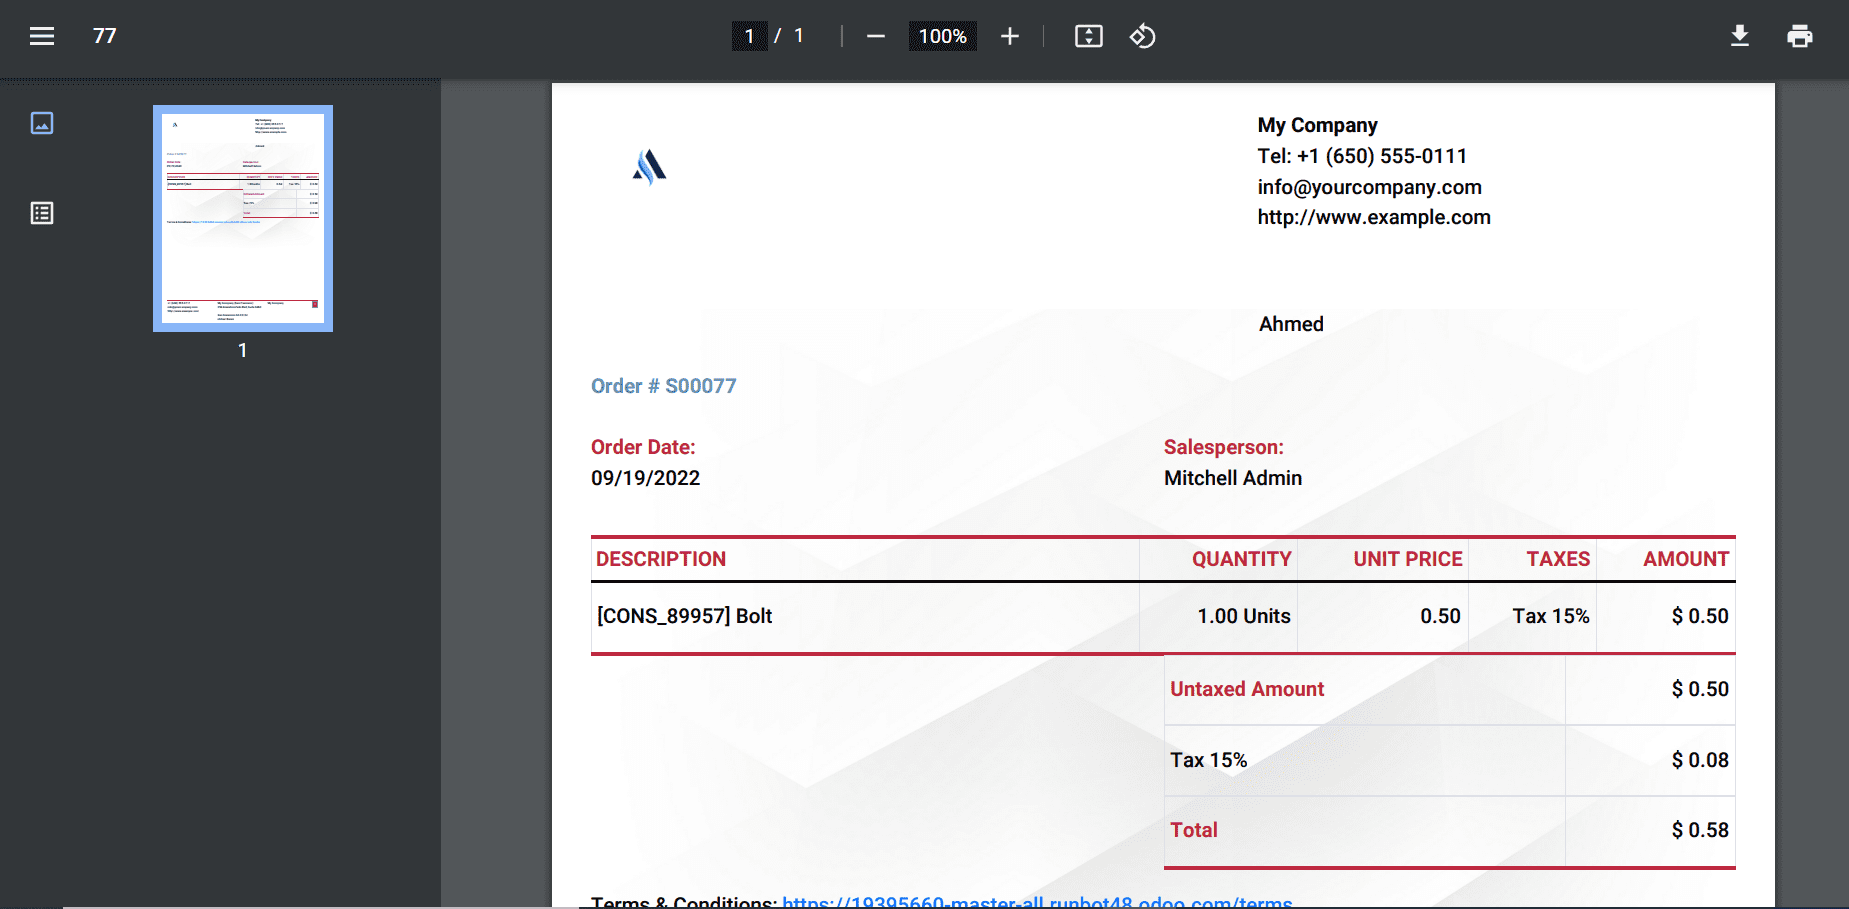
The quotation file opens on a new page, showing a design of the previous quotation layout.
It is possible to print out quotations through another method. Choose the Quotation/Order menu inside the Print tab of the Quotations window, as pointed out in the screenshot below.
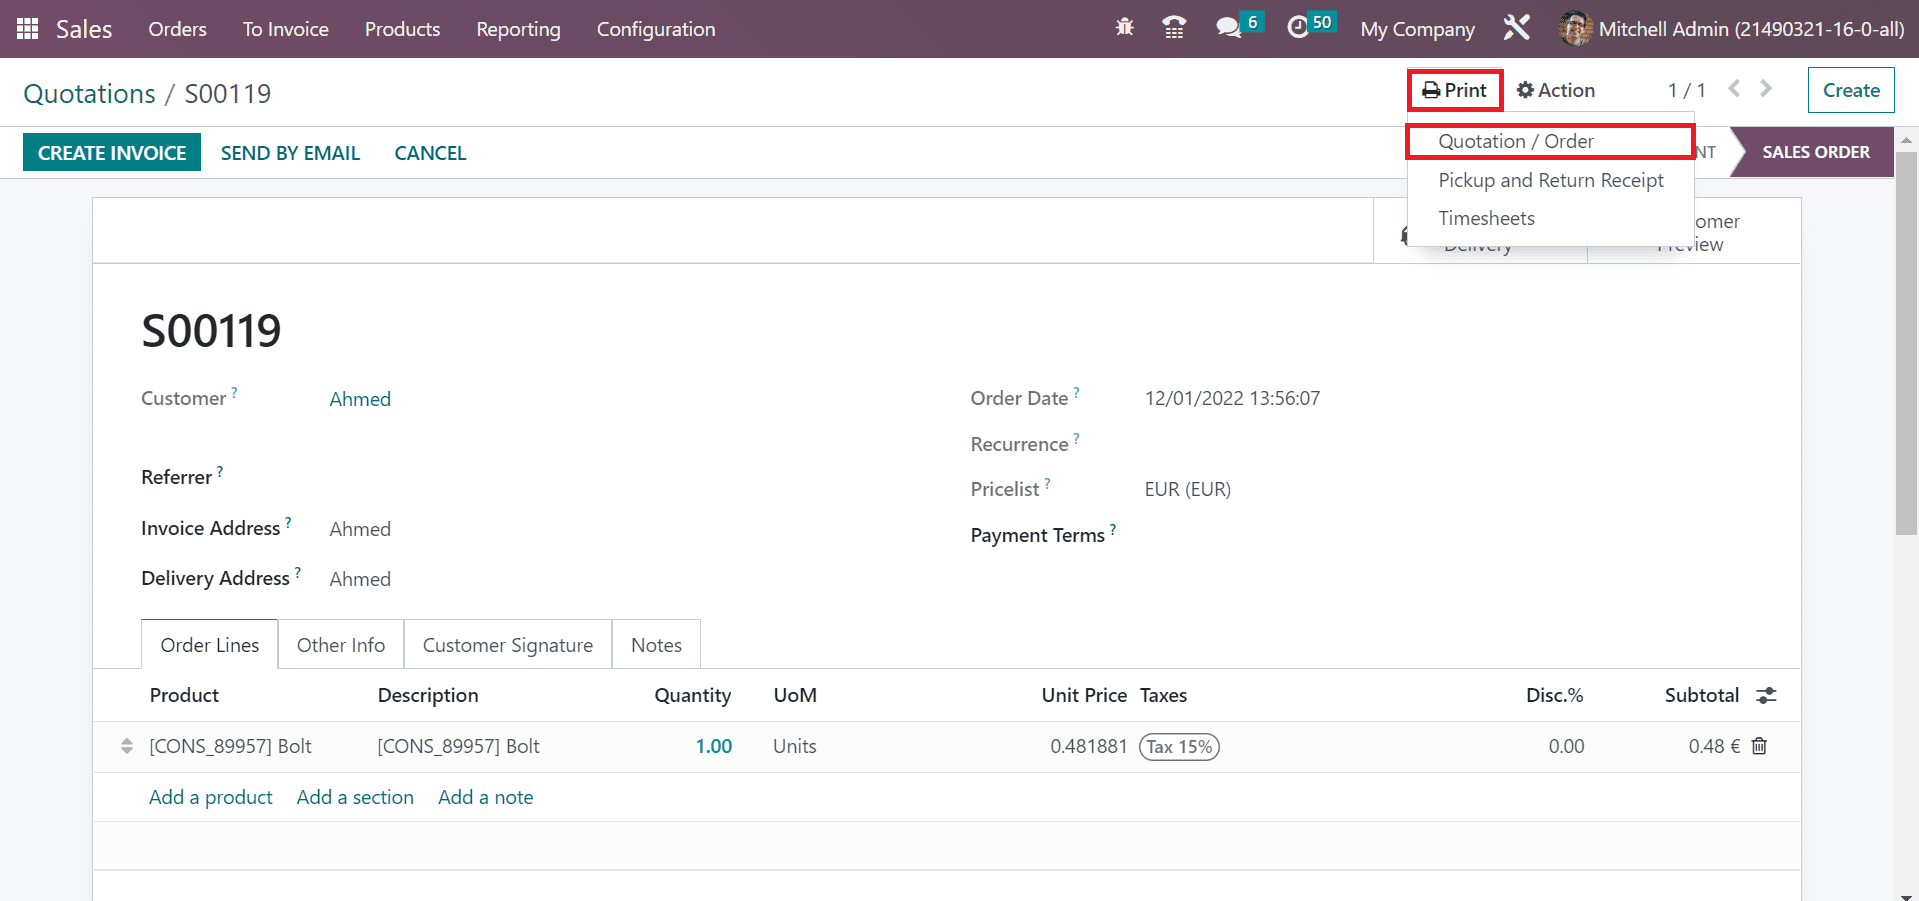
After pressing the Quotation/Order menu, the sales order details are downloaded into your system. The downloaded document consists of information we added when developing the quotation layout. Users can view the added logo, colors, company details, and more in the created quotation layout on the downloaded printout.
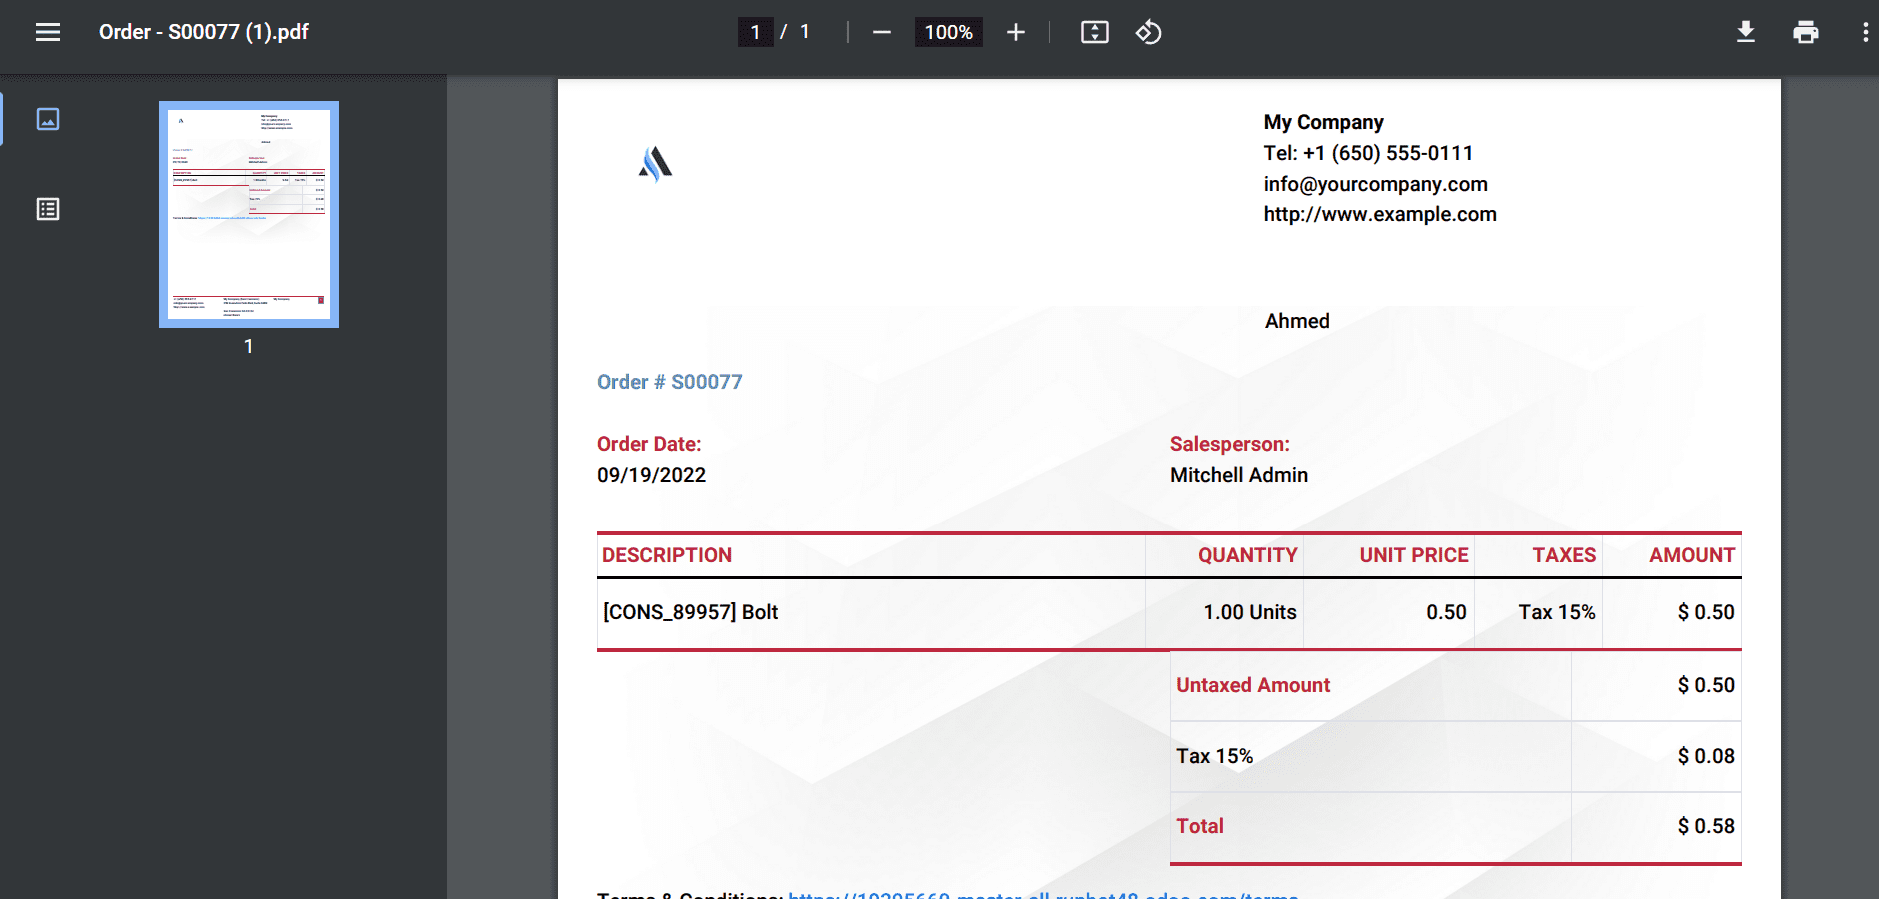
Hence, management of quotation layout is an easy task using Odoo 16 Sales.
Users can design a quotation layout in a quotation with the help of Odoo 16 Sales. It is easy to customize quotation layouts for clients, customers, or other providers in a business.


