The money obtained in return for the work done by an employee is referred to as earnings. After paying the taxes, an individual or company receives the profit. Earnings act as a primary part of employee payslips provided by a firm. The wages for each employee are different based on their work experience. So, earnings management in a large organization becomes the most demanding task after generating a payslip. By installing ERP software, your worries related to payslip configuration are an easy process. Users can efficiently manage employees’ salaries in a payslip using the Odoo 16 Payroll module.
This blog assists user in setting earnings in a Payslip of an employee in a US Company within Odoo 16 Payroll.
The Payroll module of Odoo 16 is an effective way to administer a pay statement for an employee. It is easy to calculate the earnings, deductions, allowances, and more for each worker with the usage of the Odoo 16 Payroll module. Let’s examine the procedure of setting an employee’s earnings in a US Company.
Outline of Earnings in a Payslip of an Employee within a US Company
The base salary of an employee in a company is termed earnings. In the United States, earnings are divided into non-taxable earnings and taxable earnings considered allowances. An employee’s wages earned during a tax year is a taxable income. All types of compensation in the form of services, property, and cash are under taxable earnings. Some examples are wages, salary, dividends, interests, etc.
The received income not subject to taxation is referred to as non-taxable income. This type of earnings will not be taxed. The items such as gifts, meals, welfare payments, inheritance, and more come under the non-taxable earnings category. So, applying non-taxable and taxable earnings is necessary inside an employee payslip of a US company.
Steps to Create a Payroll Structure for a US employee in Odoo 16
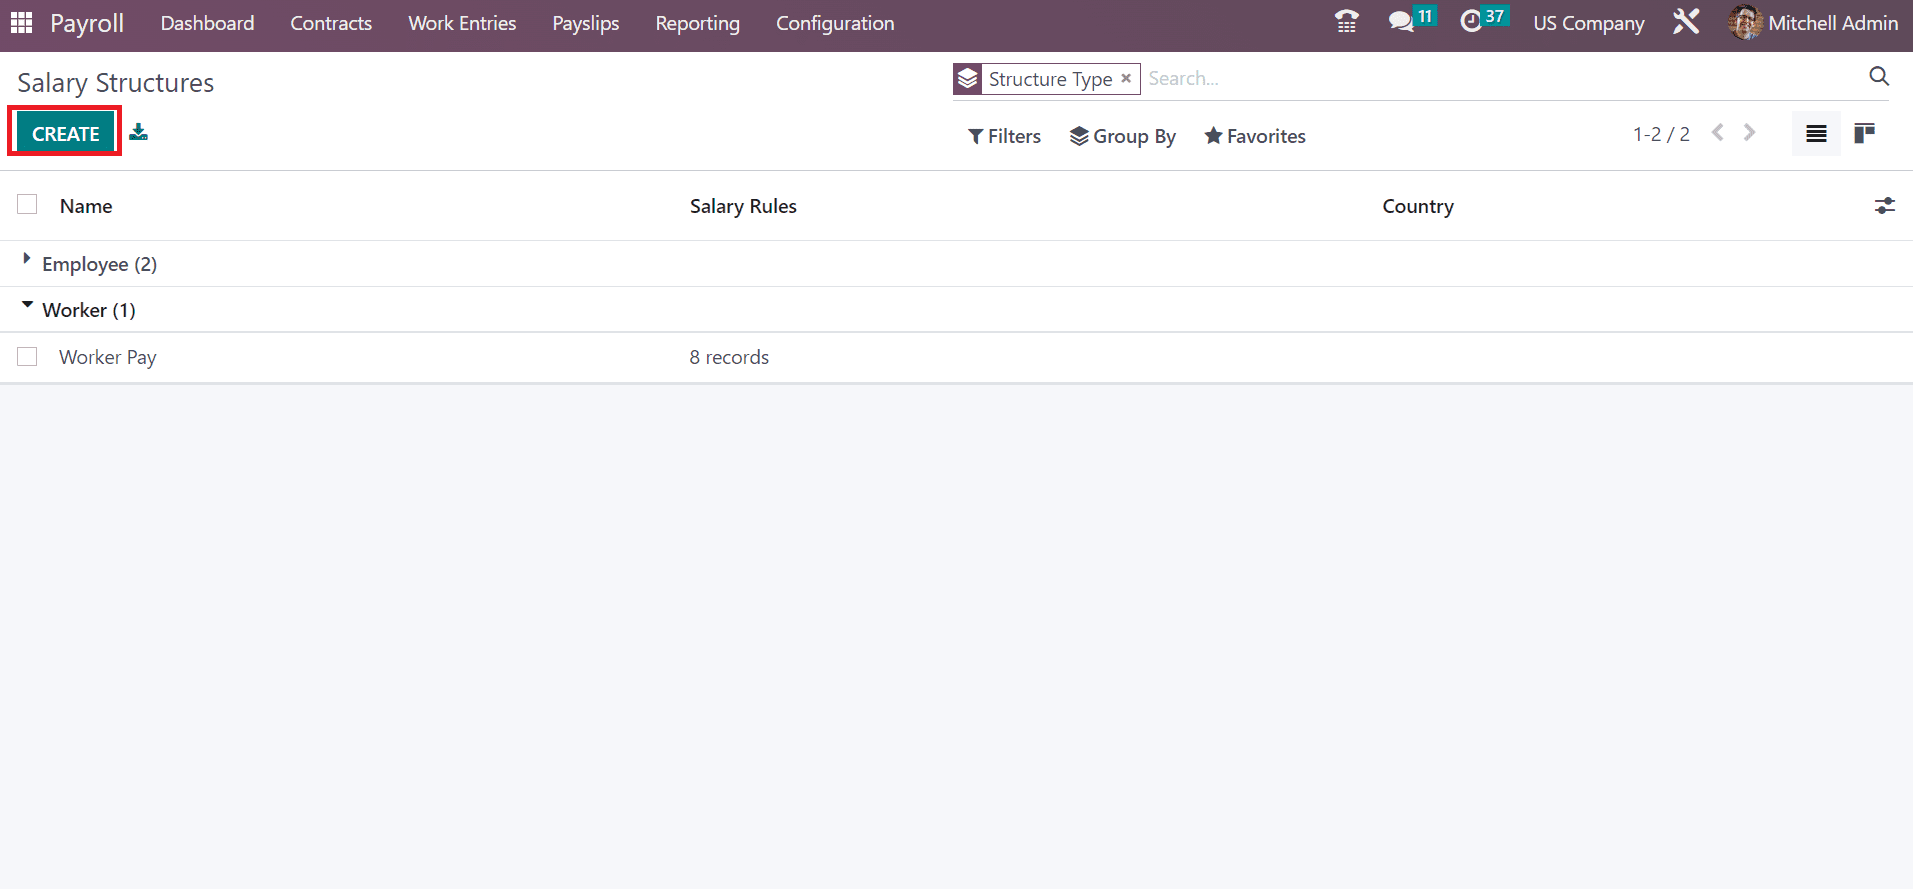
Users can easily create the structure for a worker or employee once selecting the Structures menu in Configuration. In the Salary Structures window, you can obtain information about each salary structure, including Country, Name, and Salary Rules. Choose the CREATE icon to produce a new salary structure for your employee, as marked in the screenshot below.
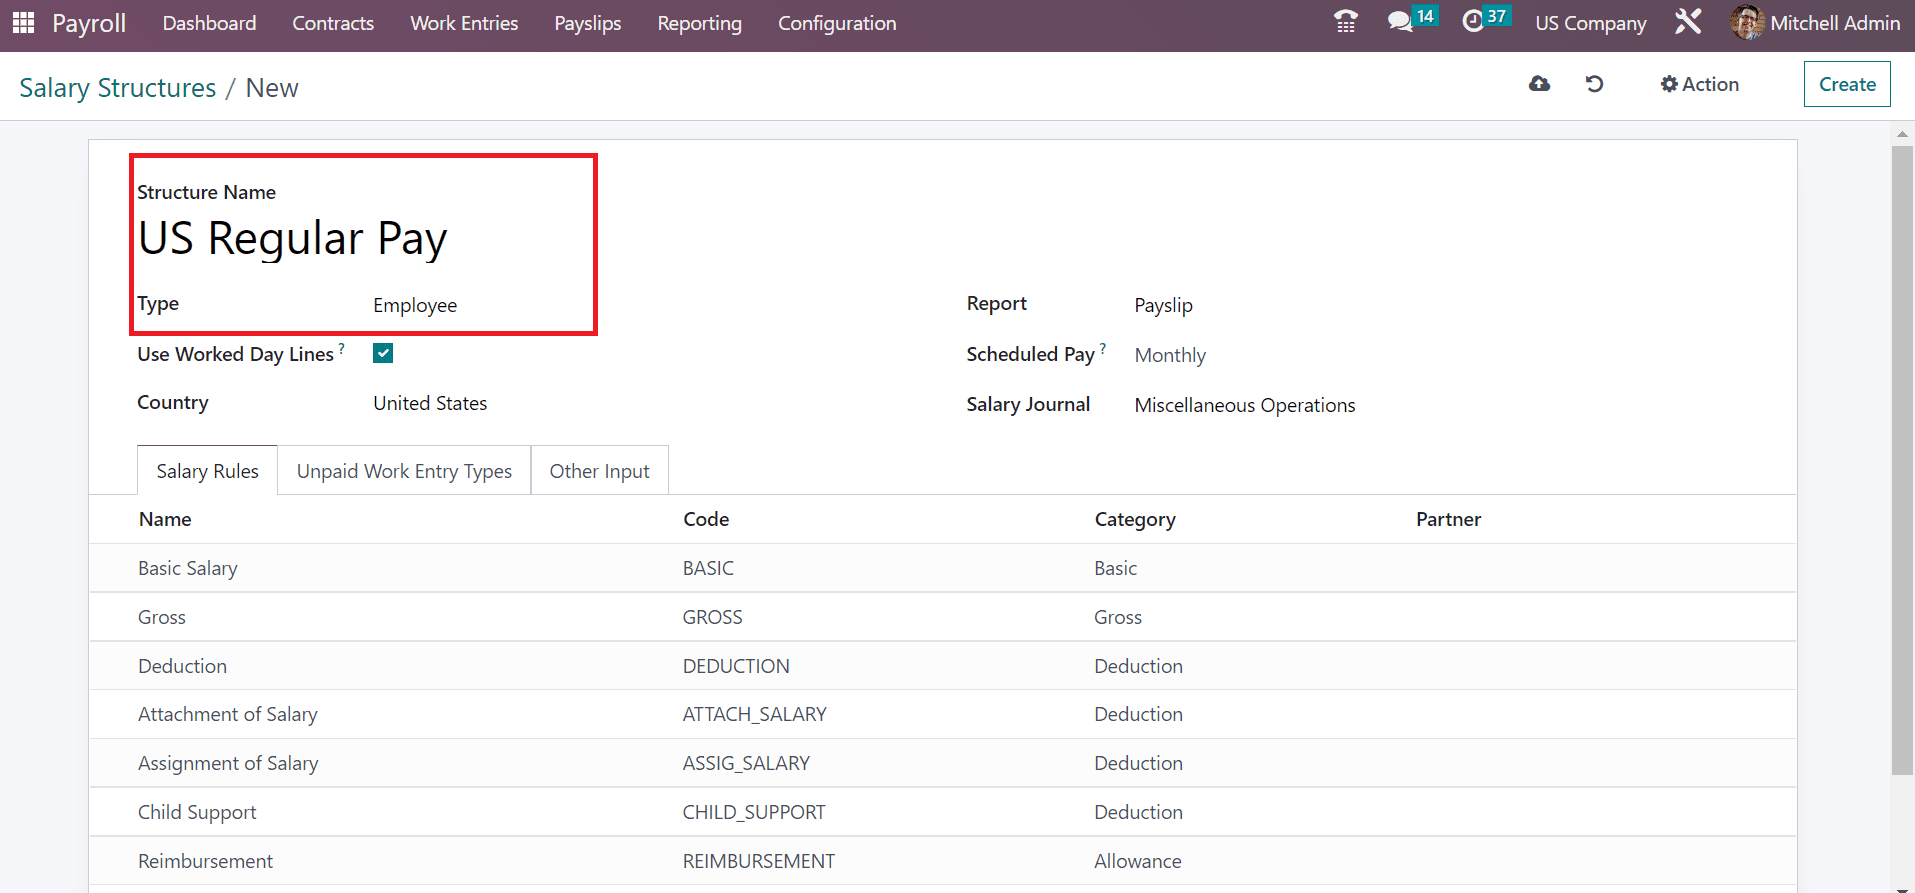
In the open window, enter the title of your structure as US Regular Pay in the Structure Name field. You can select the type of structure as an employee in the Type option, as noted in the screenshot below.
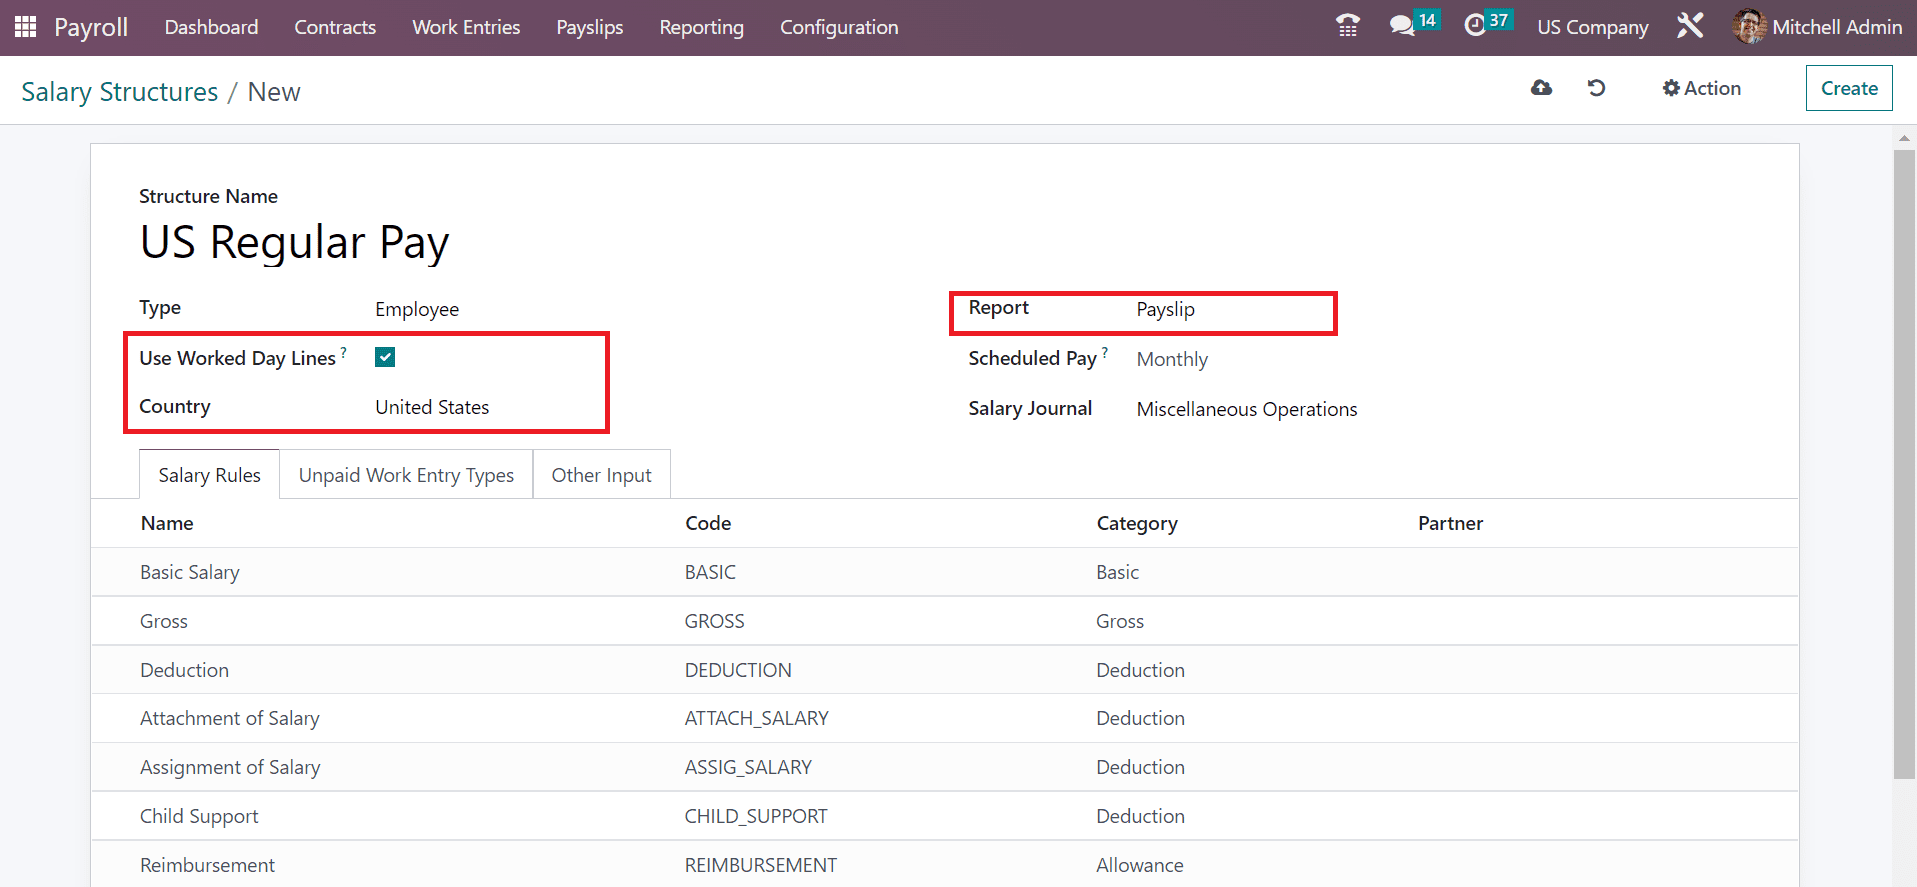
You must enable the Use Worked Day Lines option to show the work days on payslips. Moreover, pick your country of the company as the United States. You must select the Payslip option as the Report of salary structure US Regular Pay.
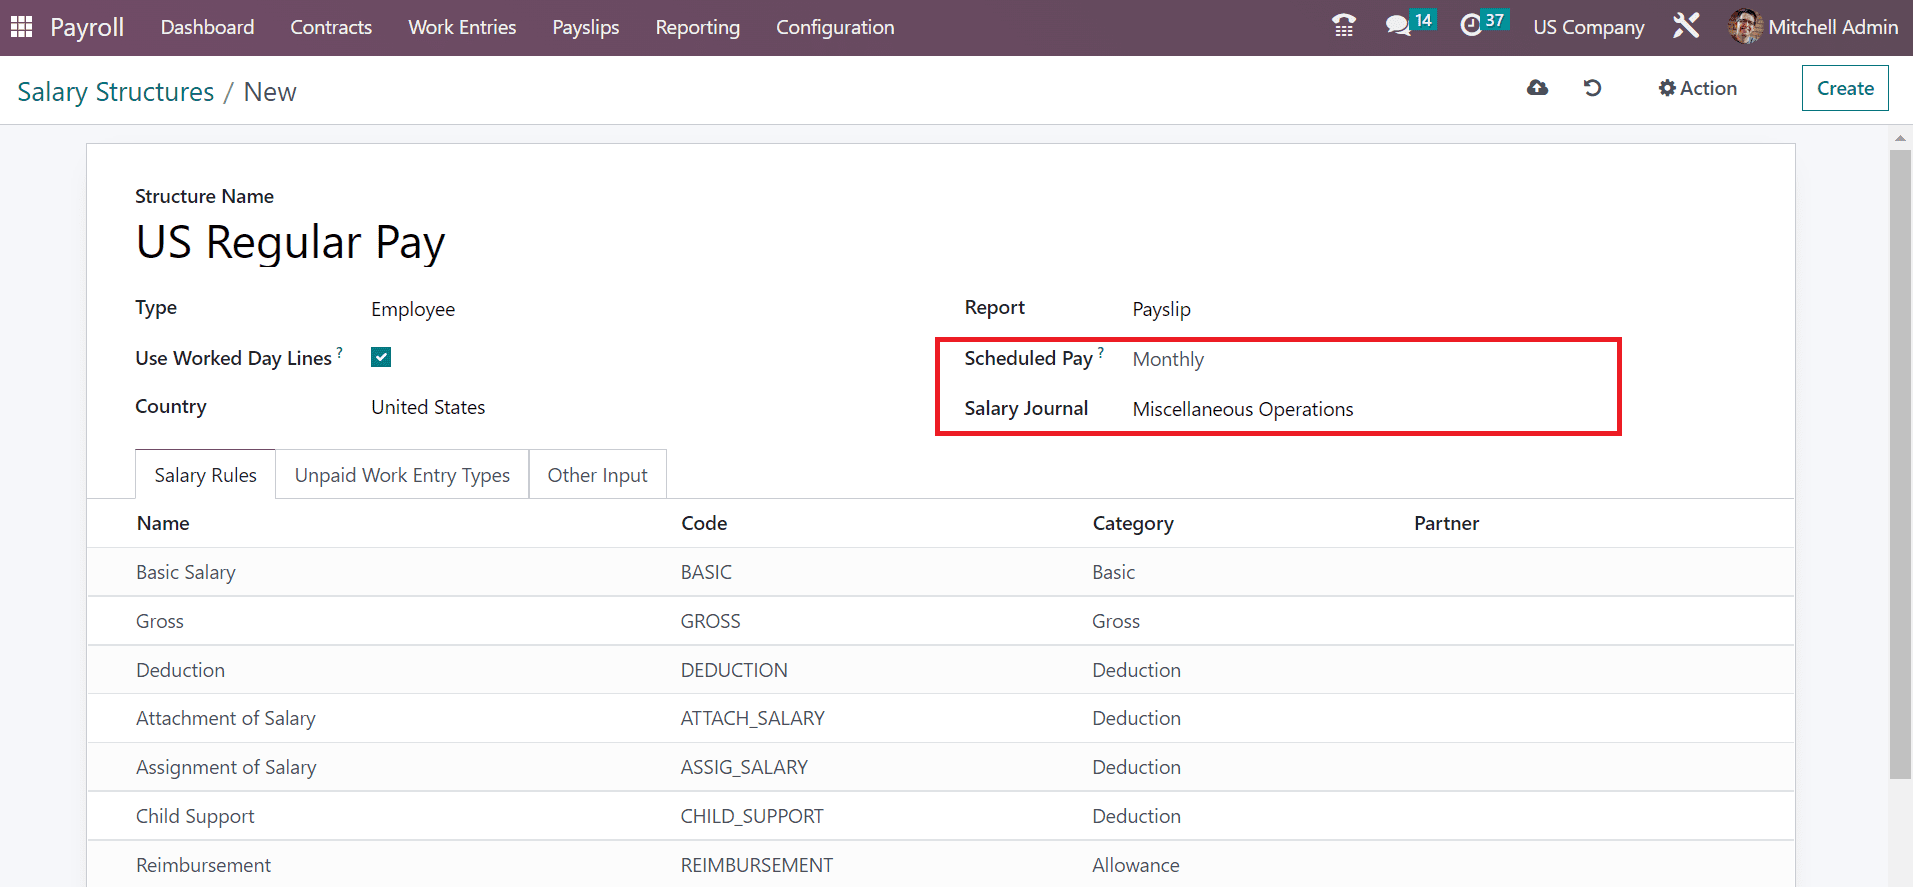
It is possible to define the repetition of wage payment as Monthly, Annually, Bi-weekly, Weekly, and more from the Scheduled Pay field. Choose the Monthly option for the salary structure of your employee and set the journal as Miscellaneous Operations in the Salary Journal field, as indicated in the screenshot below.
After clicking on the Add a line option, the user can describe several salary rules for the US Regular Pay salary structure.
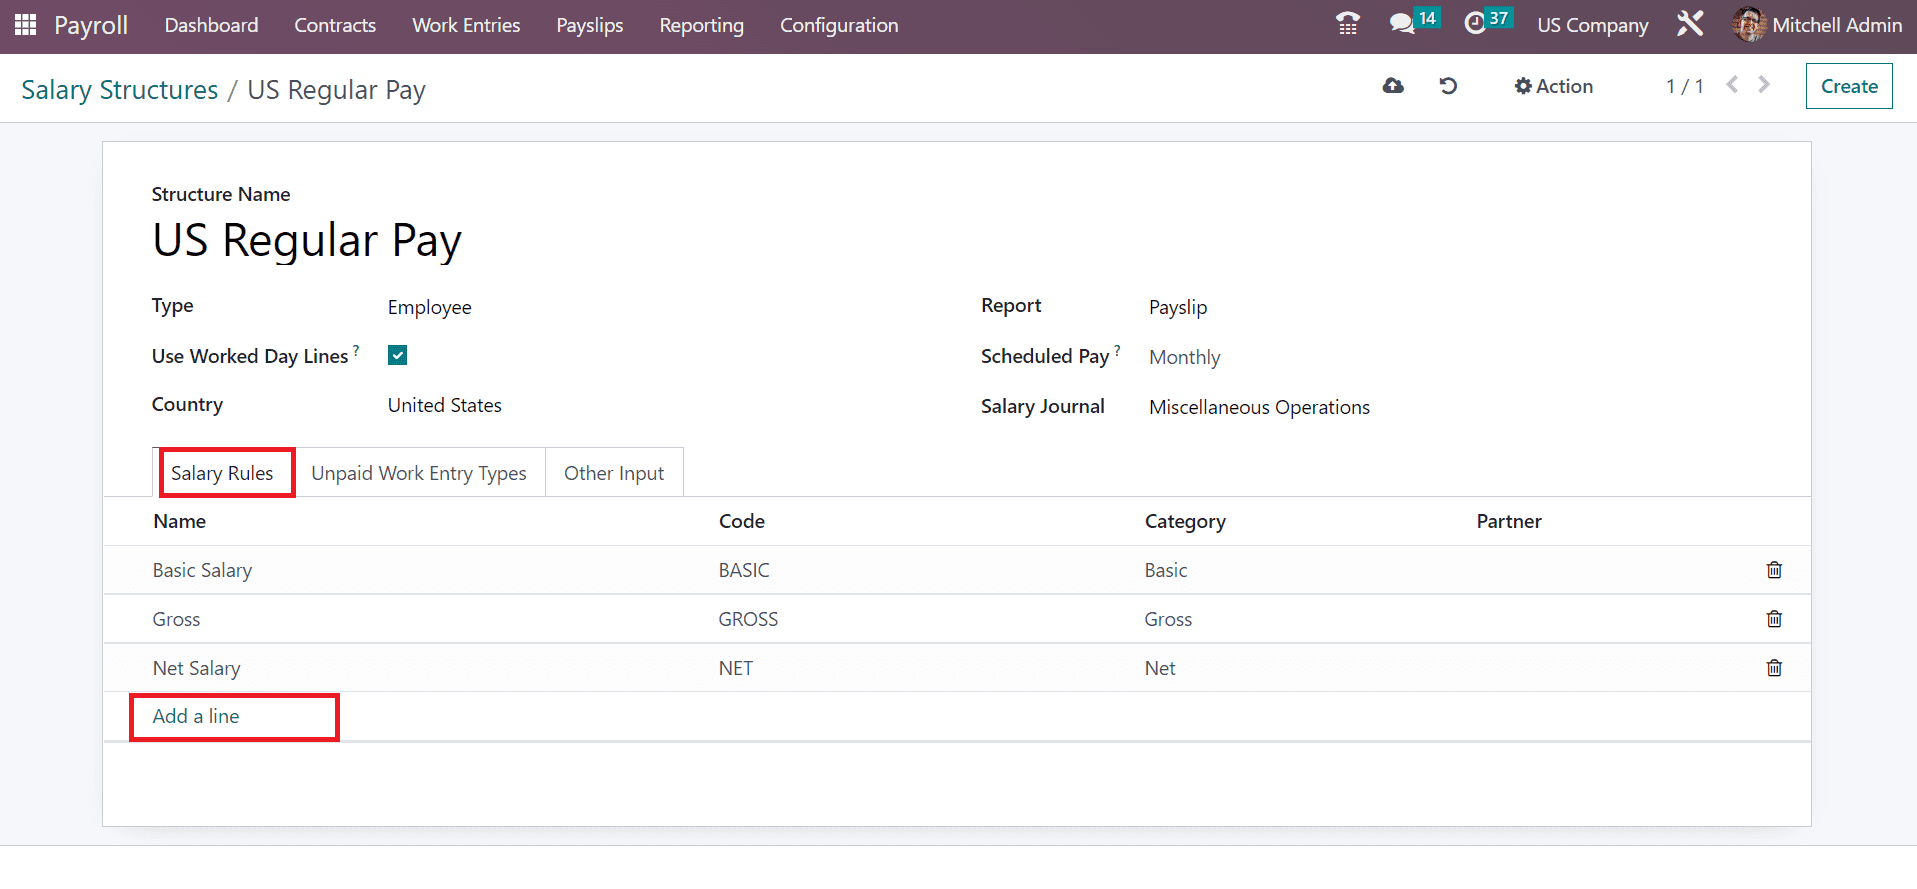
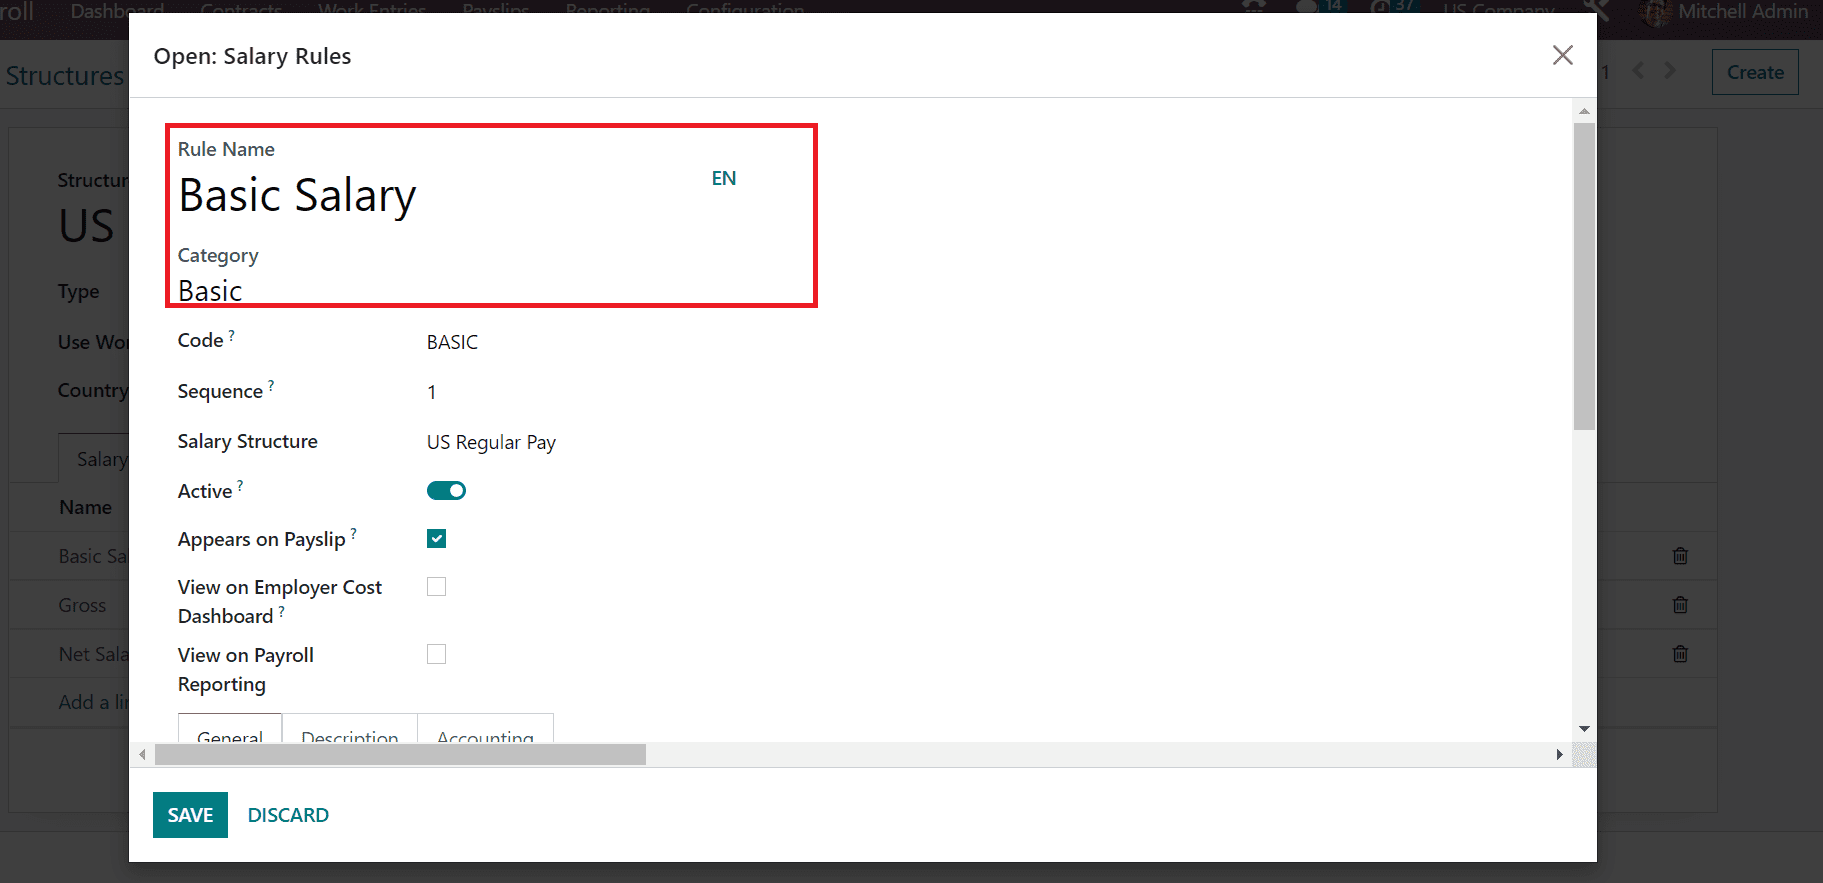
After selecting the Add a line option, we can apply each salary rule separately. In the Salary Rules window, enter Basic Salary as a rule in the Rule Name field. Pick the category of Basic Salary rule name as Basic, as described in the screenshot below.
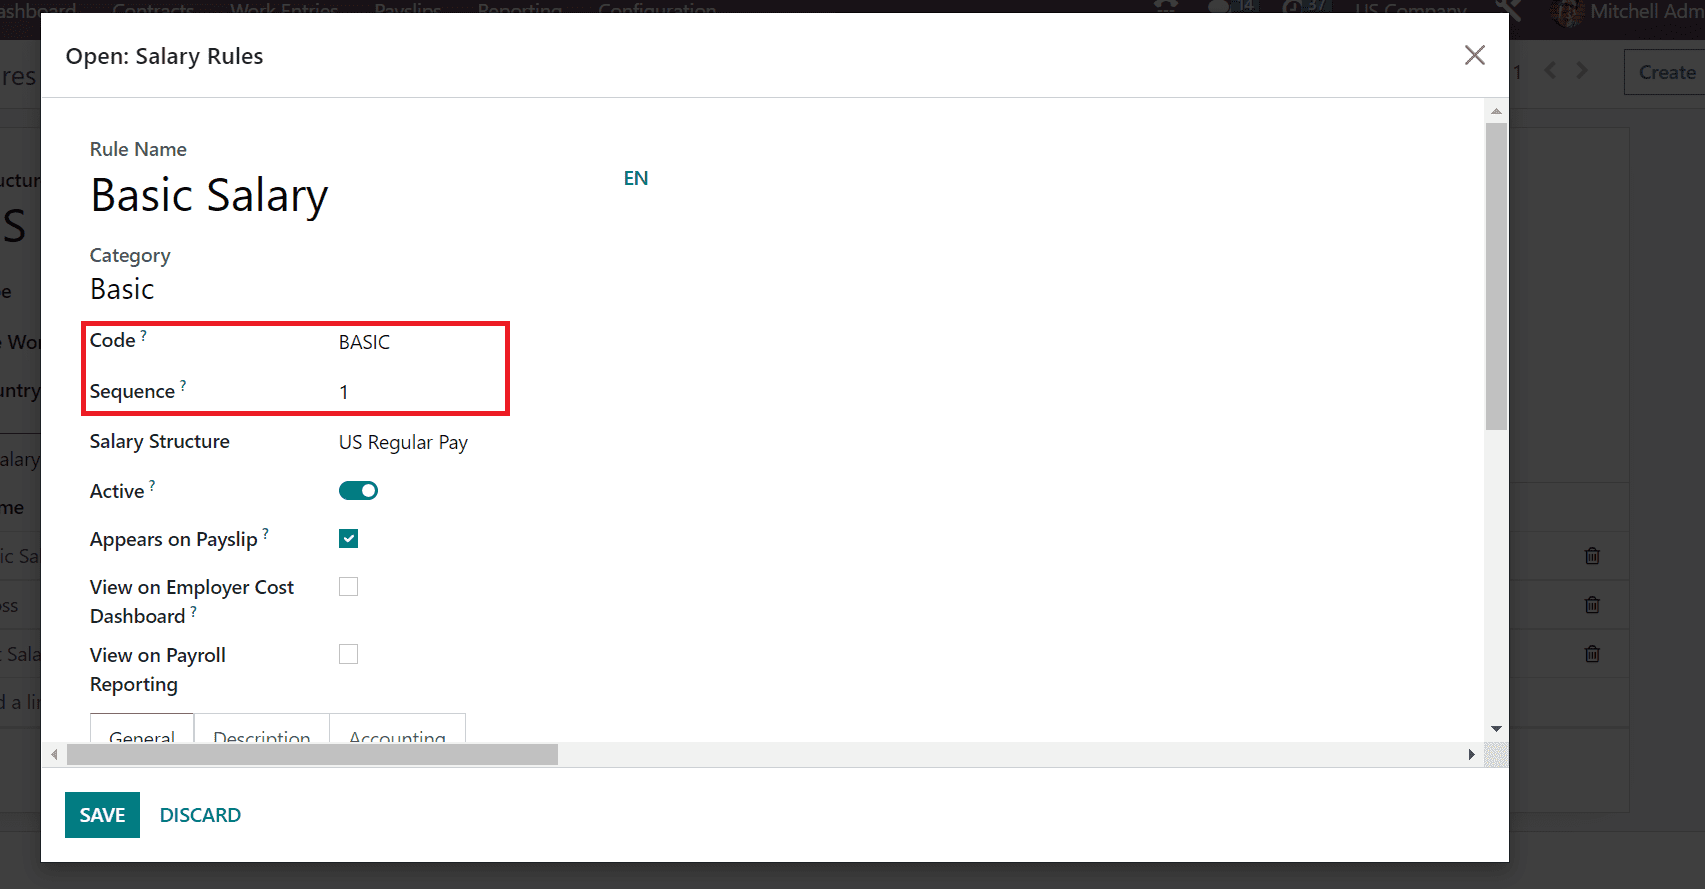
We can specify a code for your basic salary rules as the reference in the Code field. You can add BASIC as the Code for Basic Salary and enter a sequence number for calculation in the Sequence field as 1.
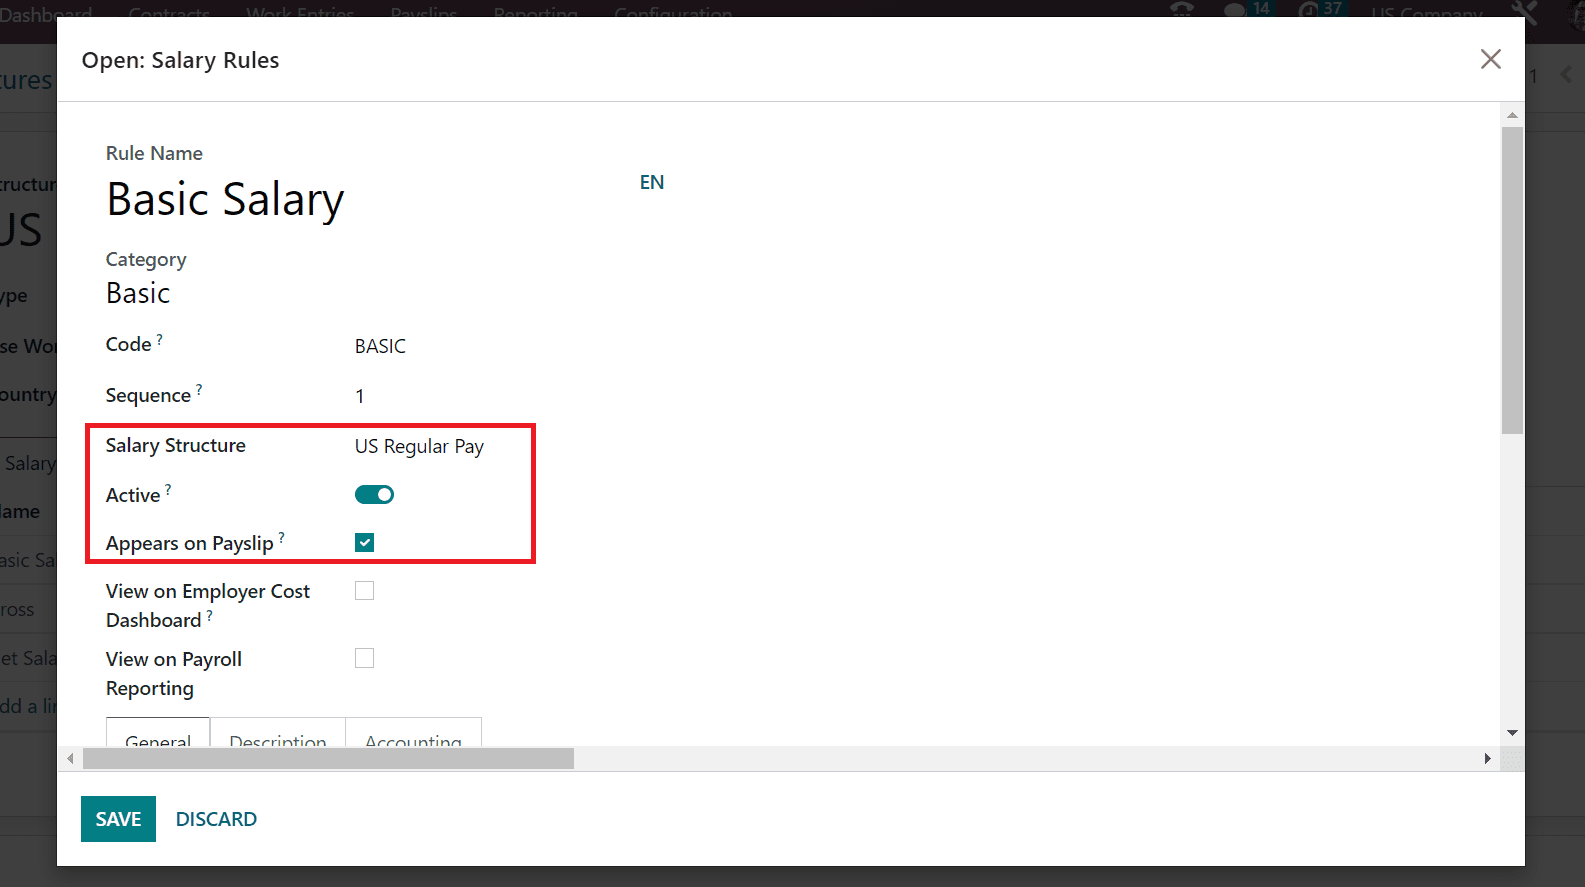
You must select the US Regular Pay structure from the Salary Structure option in the Salary Rules window. Also, you can run the specific salary rule once enabled the Active field. To access your Basic Salary rule on a pay statement, activate the Appears on Payslip option, as mentioned in the screenshot below.
Inside the General tab, we can set the computations and conditions for your rule. We set the Always True option in the Condition Based on the field under the CONDITIONS section. Later, we can impart the computation method for your Basic salary rule below the COMPUTATION section.
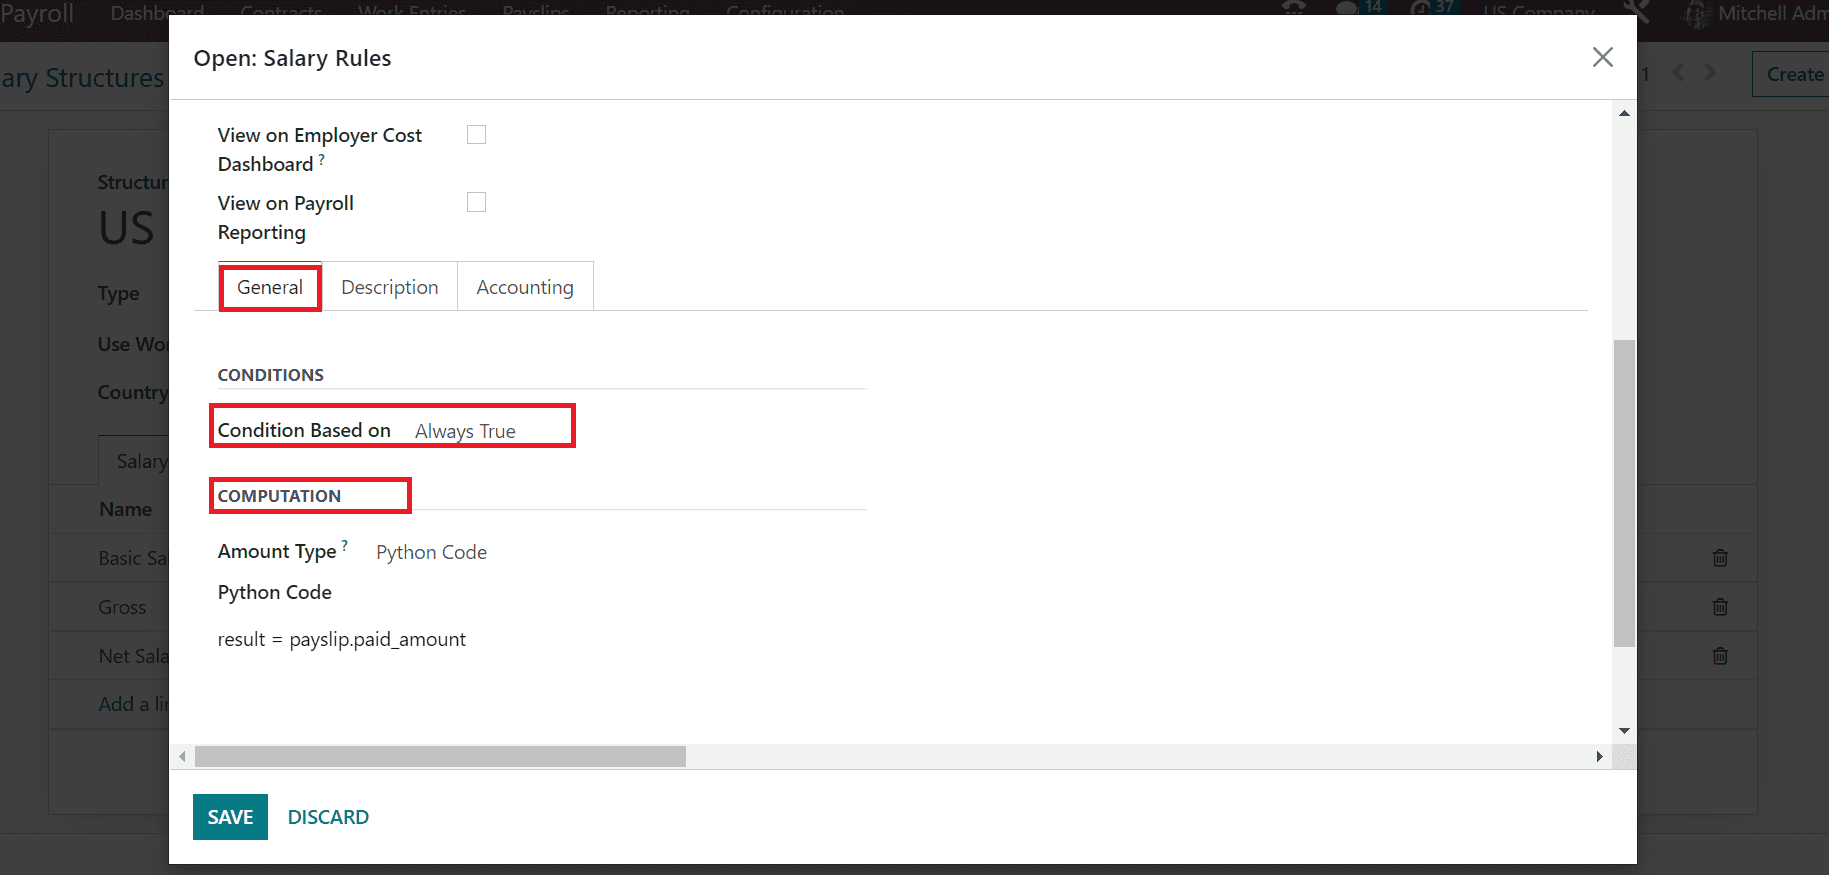
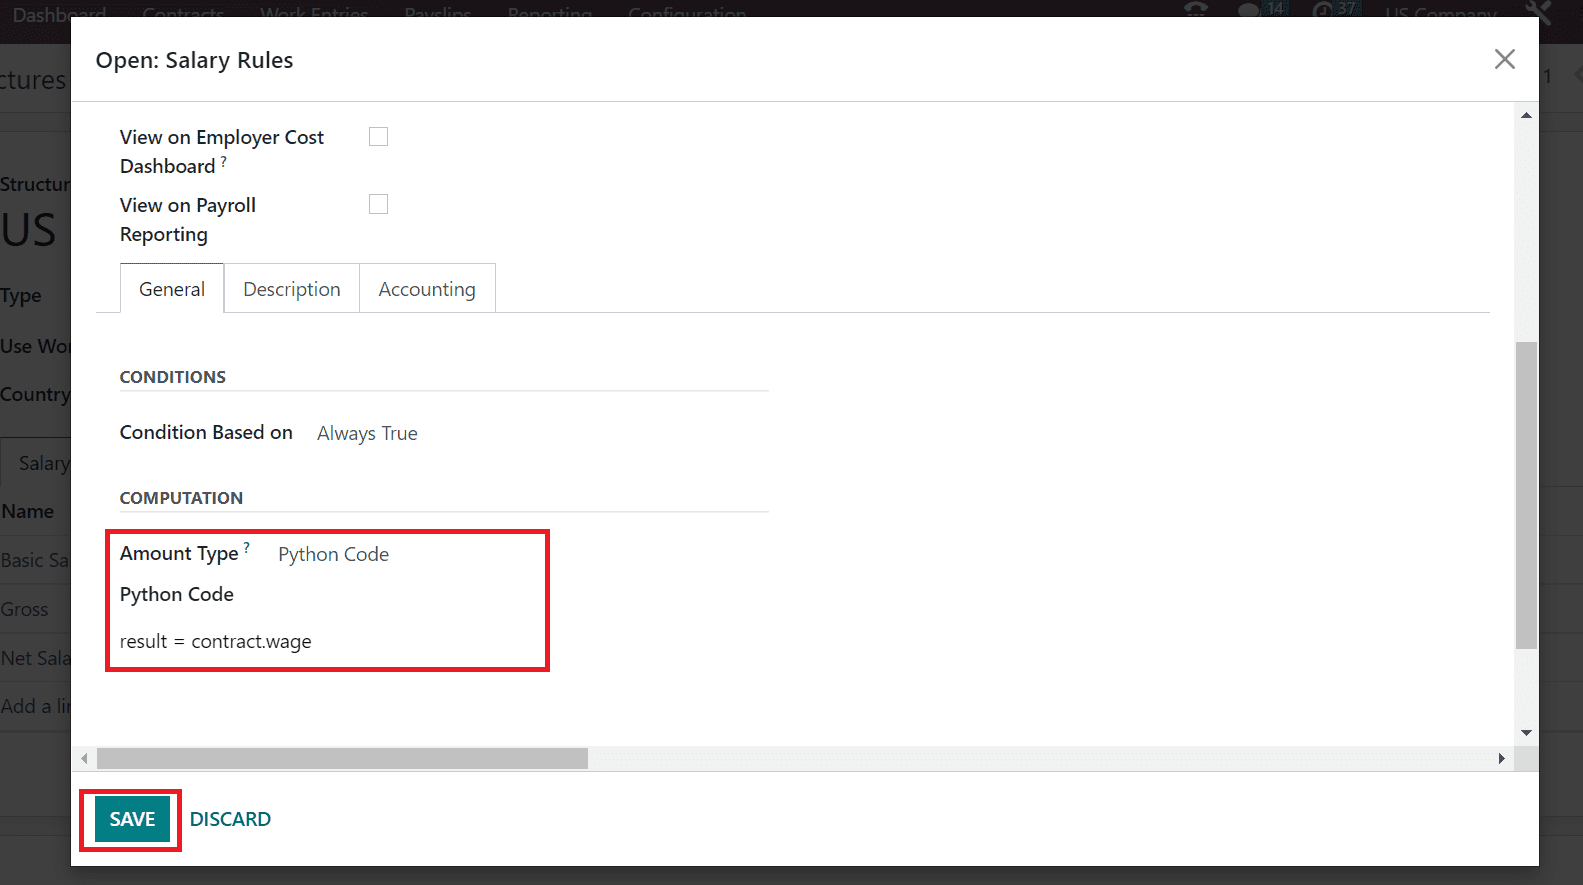
You can set the Python Code option for the computation method within the Amount Type field. A Python code field appears when a user chooses the Python Code as the calculation method. In the Python Code option, add ‘result = contract.wage’ for the Configuration of the basic salary. After mentioning your computation, press the SAVE icon in the Salary Rules window, as depicted in the screenshot below.
To Add Taxable and Non-Taxable Earnings as a Salary Rule for Employee Payslip
Once creating a salary structure, we can easily specify the taxable and non-taxable earnings for an employee in a payslip. Choose your salary structure from the Odoo 16 Payroll module and create salary rules as taxable and non-taxable earnings below the Salary Rules section.
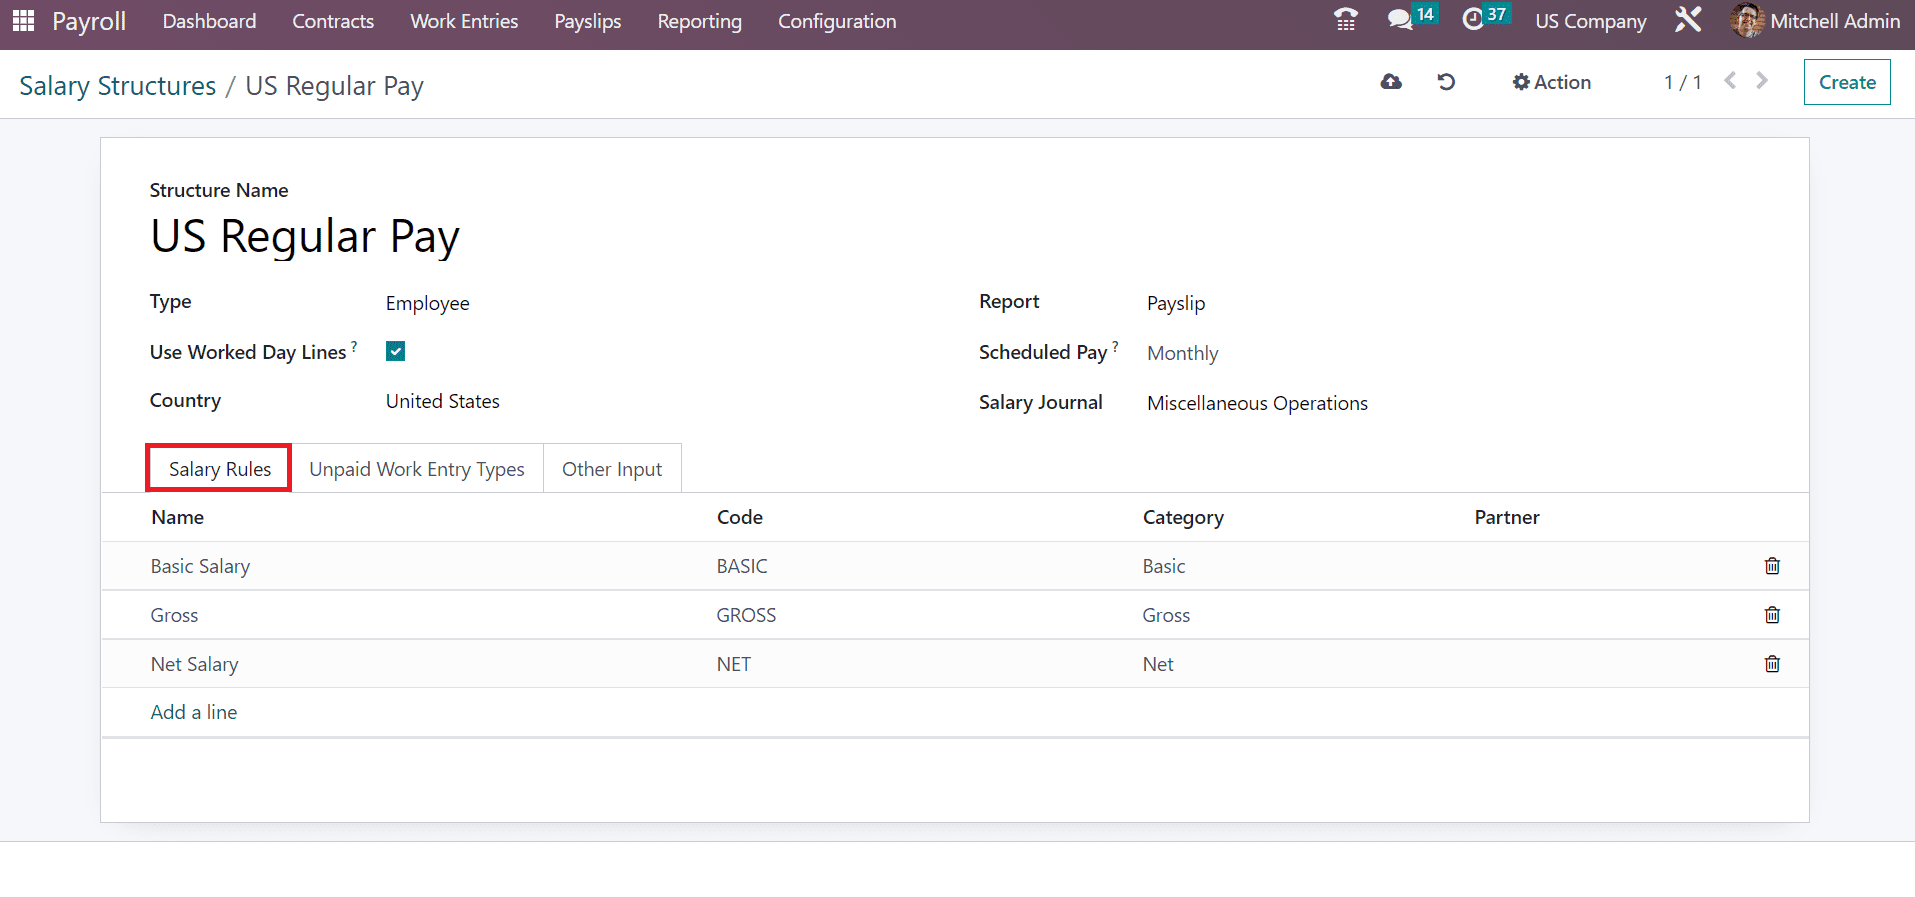
Here, we choose the US Regular Pay salary structure, and a Salary rules window appears to you after selecting the Add a line option. Add the Rule Name as Taxable Earnings on the open page and select the Category as Allowance for your rule, as illustrated in the screenshot below.
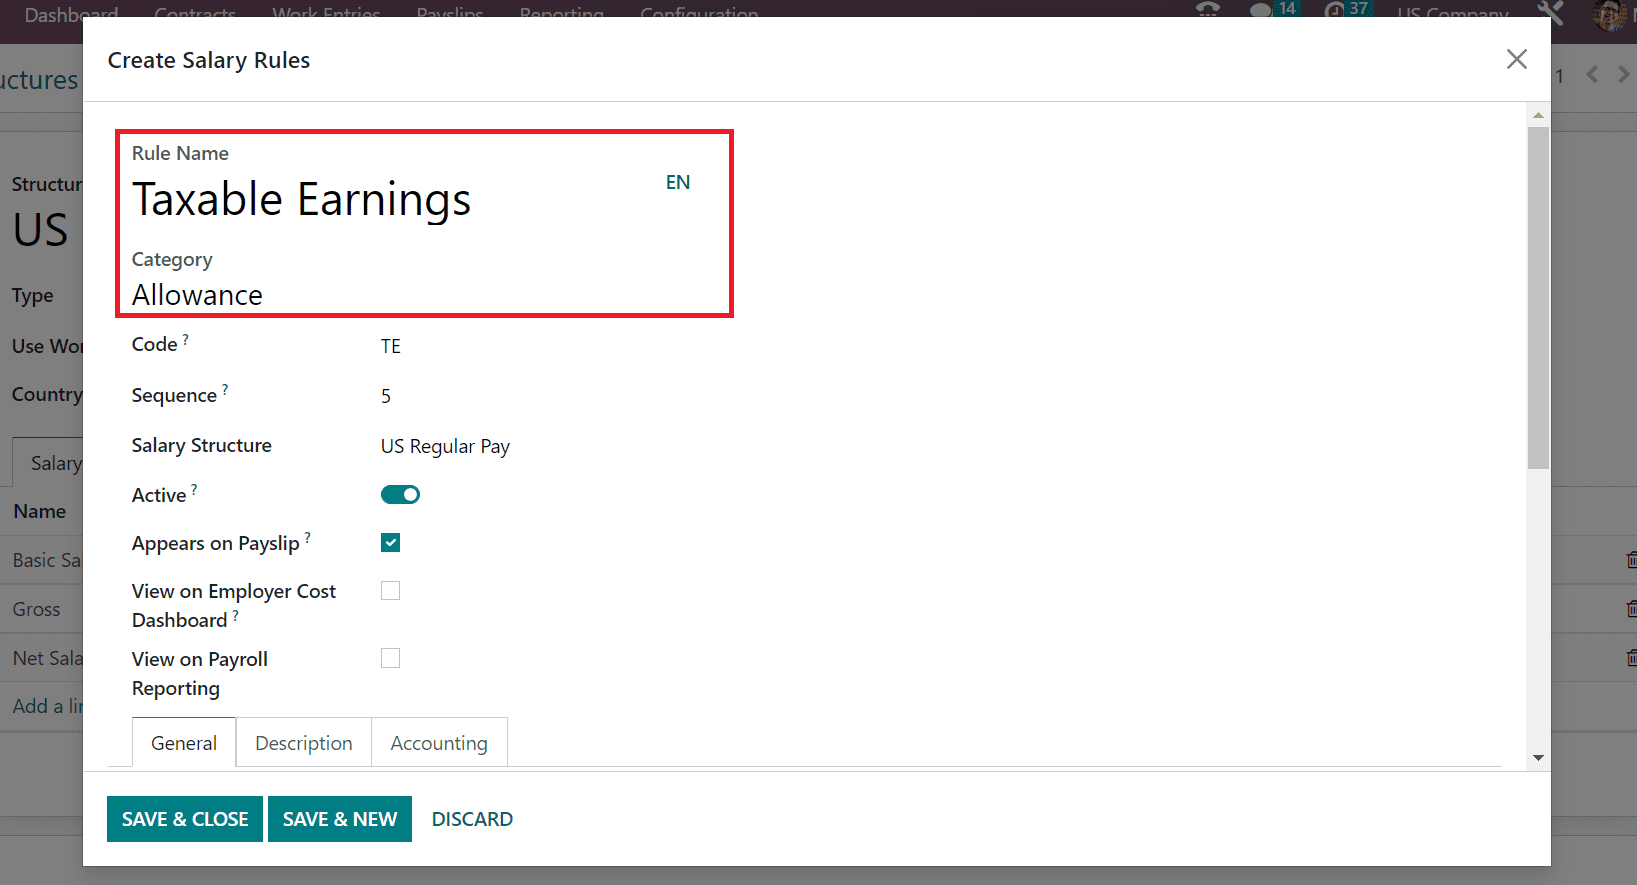
Mention the reference for your salary rule in Code as TE. Additionally, set a number for the salary rule sequence as 10 in the Sequence option. Afterward, pick US Regular Pay as your Salary Structure for the Taxable Earnings rule.
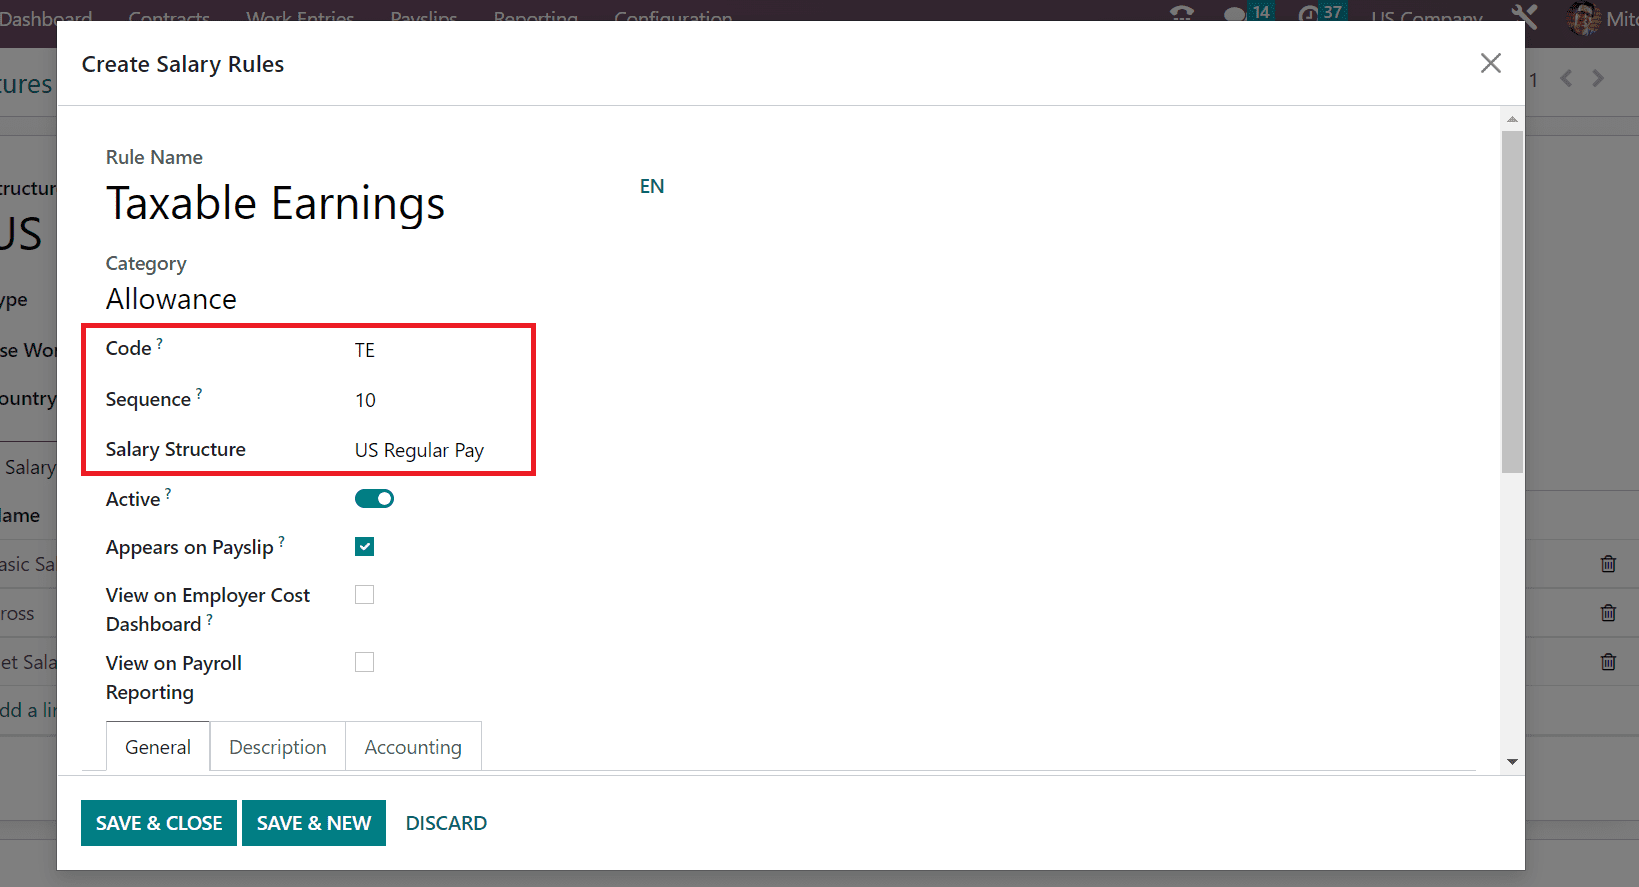
Enable the Appears on Payslip option to view the Taxable Earnings salary rule on employee payslips. Next, the user can apply the Condition for taxable earnings rule below the General tab. In the Condition Based on field, pick the Always True option as the Condition for the salary rule.
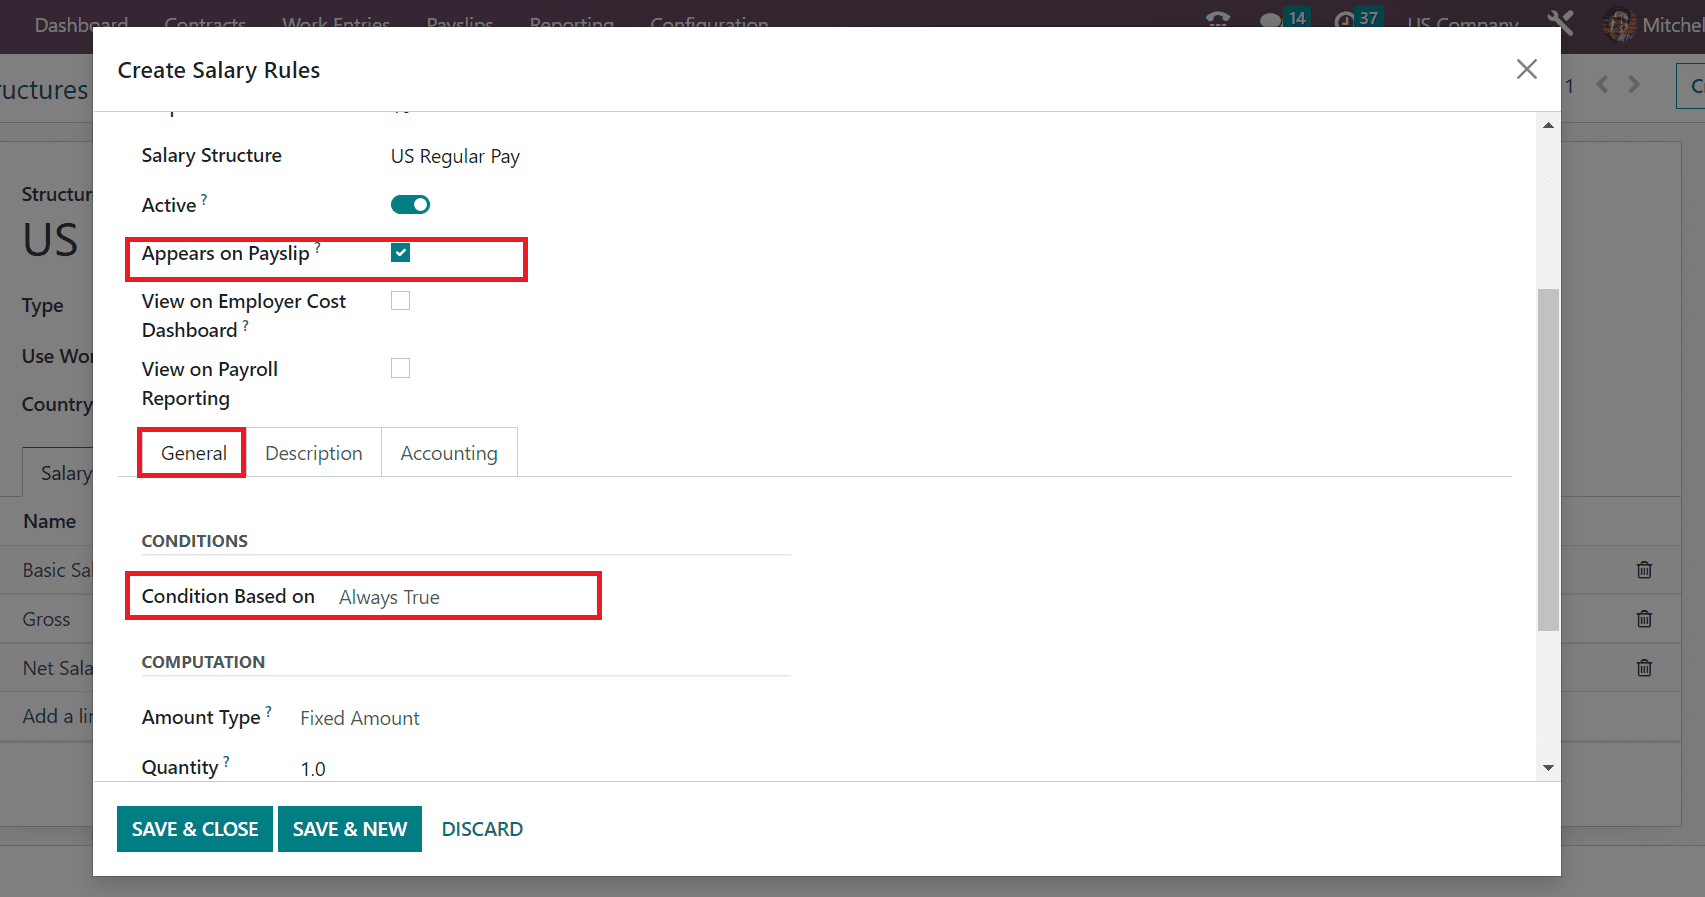
Under the COMPUTATION section, we can enter the calculation method for Taxable earnings in the Amount Type field. Choose the Fixed Amount option within the Amount Type to compute the salary rule. A Quantity option opens to you after selecting the Fixed Amount Type. Enter one Quantity and mention the total amount for taxable earnings in the Fixed Amount field.
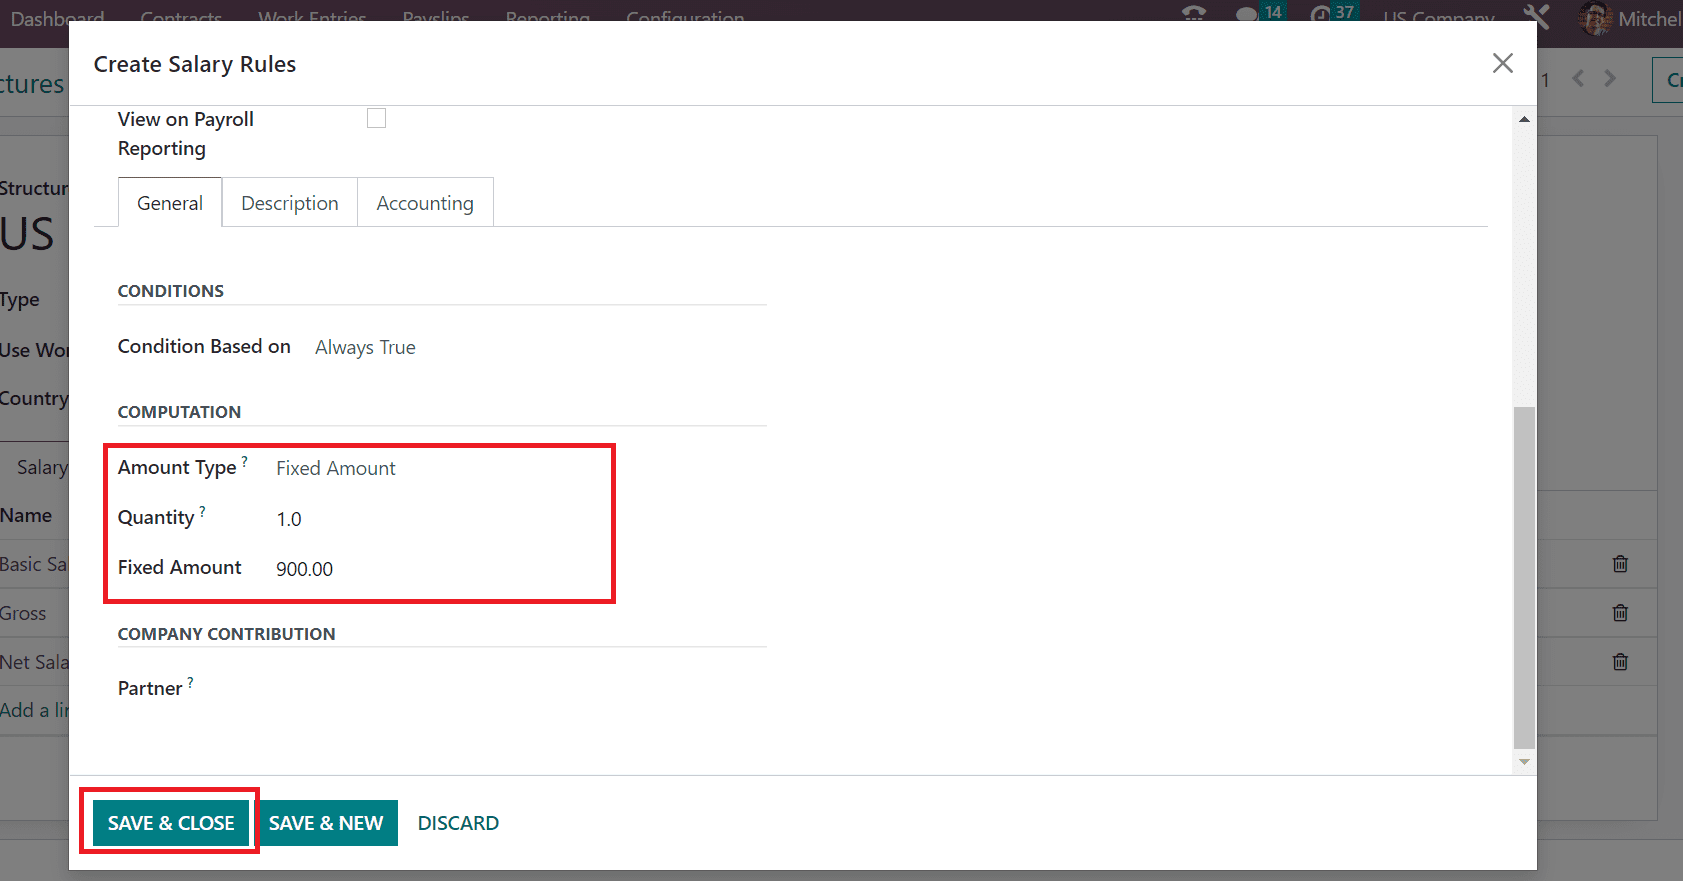
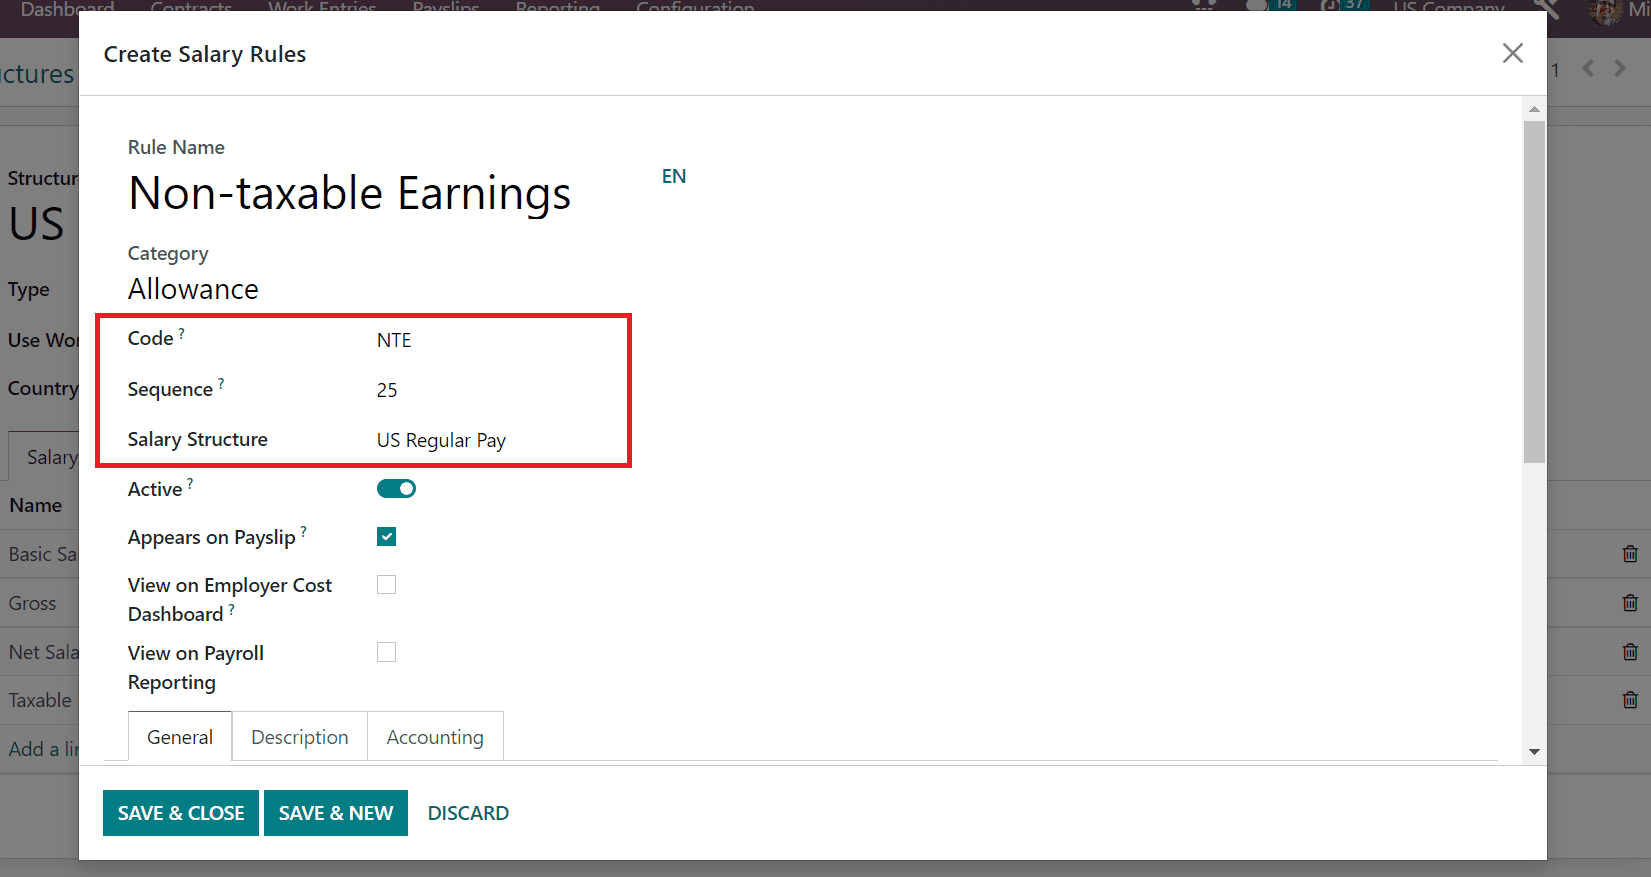
Click the SAVE & CLOSE button in the Salary Rules window, as shown in the above screenshot. Next, we can create Non-taxable Earnings as a Salary rule under the US Regular Pay structure. Enter Non-Taxable Earnings below the Rule Name option and set the Allowance option inside the Category field as portrayed in the screenshot below.
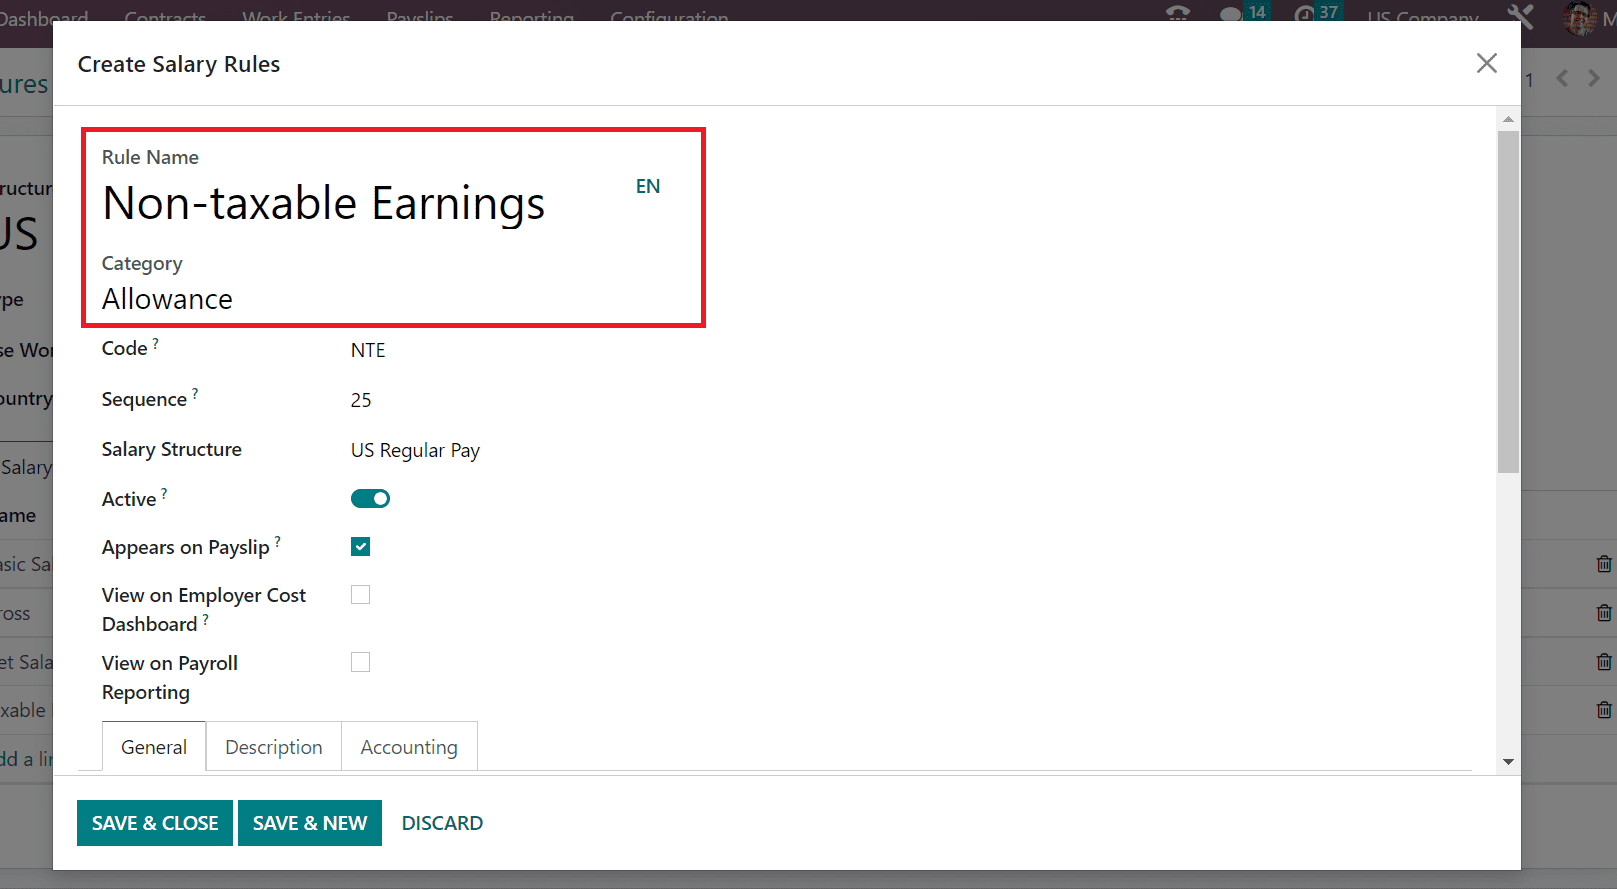
We can add the sequence number for your rule as 25 in the Sequence option. Furthermore, apply the Code NTE for the Non-taxable Earnings rule. Make sure to set the US Regular Pay as the Salary structure for the Non-taxable Earnings rule.
Inside the General section, you can specify Condition based on always true. We can determine the computation as per a fixed amount for the salary rule. So, select Fixed Amount as the Amount Type and add the Quantity or your total amount for Non-taxable Earnings as defined in the screenshot below.
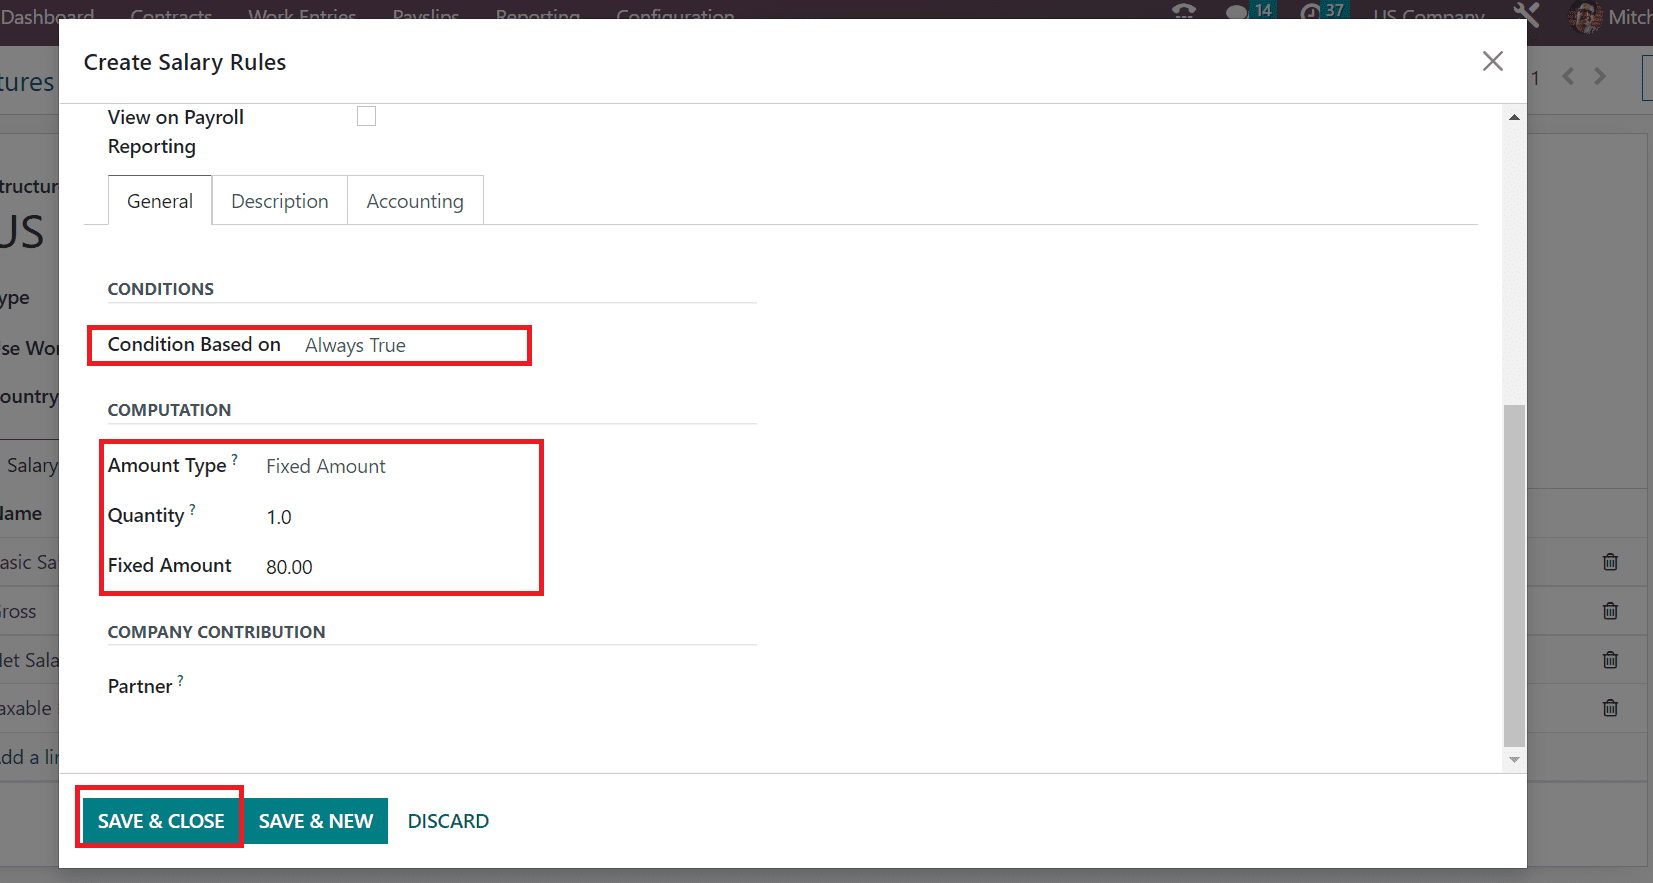
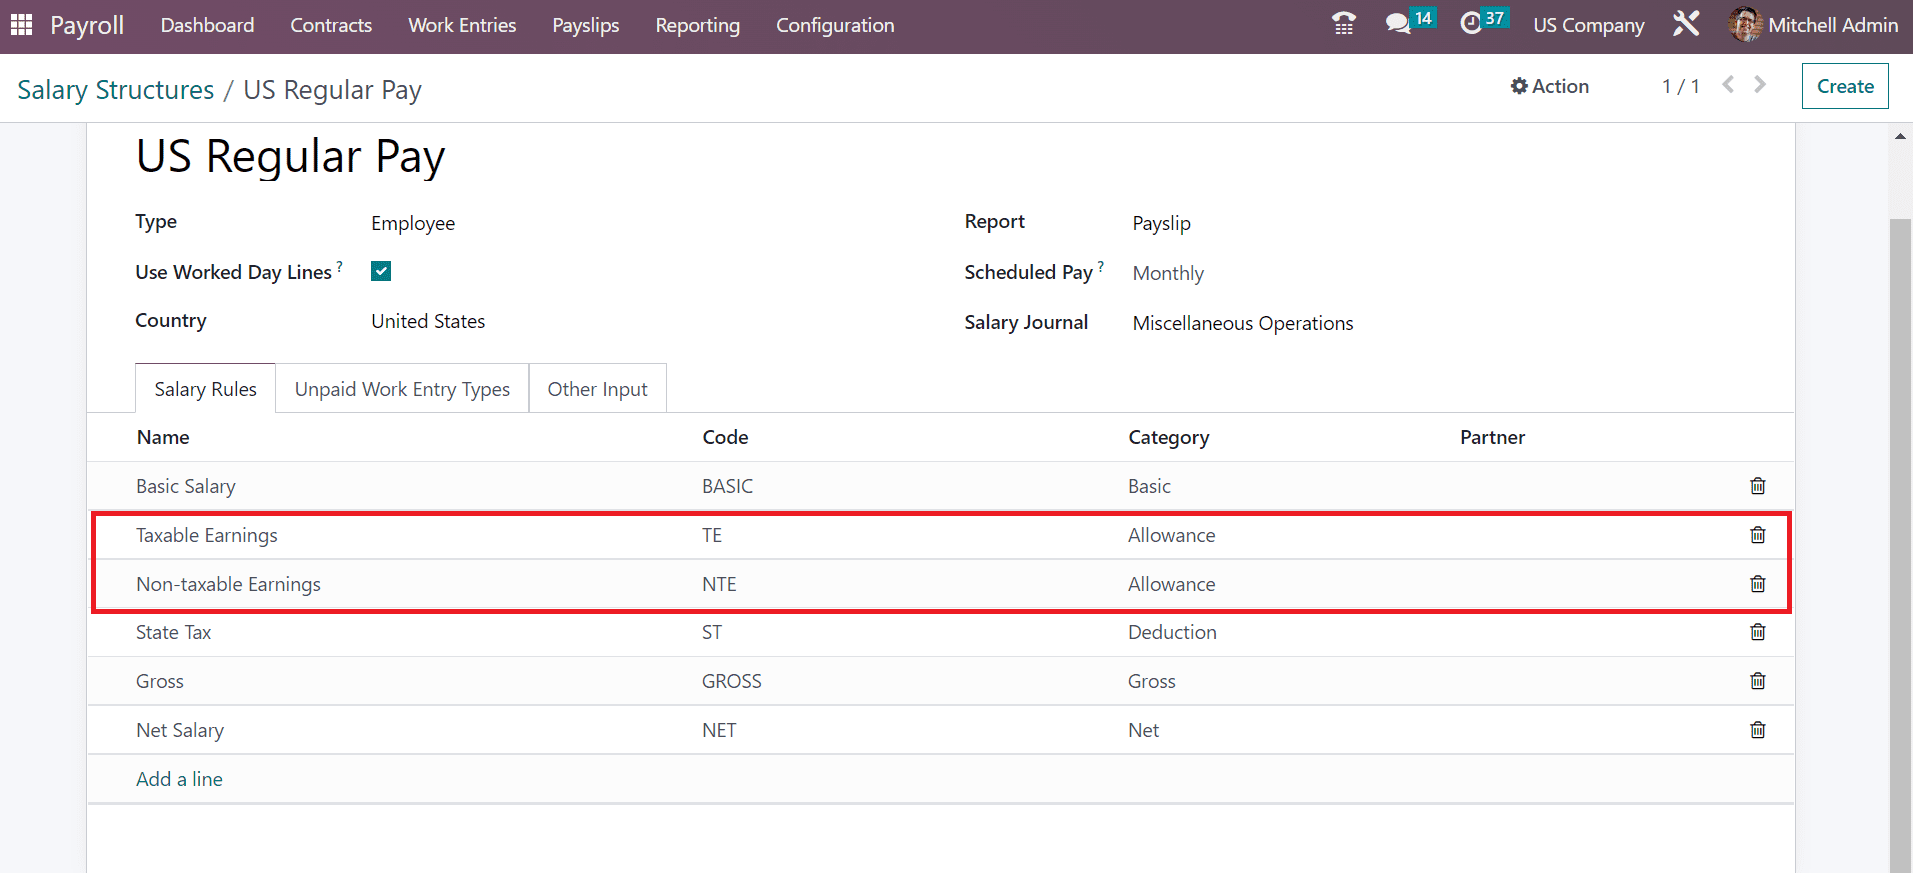
Select the SAVE & CLOSE icon to secure your information about the salary rule. All the created earnings salary rules are viewable in the main window, and details are saved automatically in the Odoo 16.
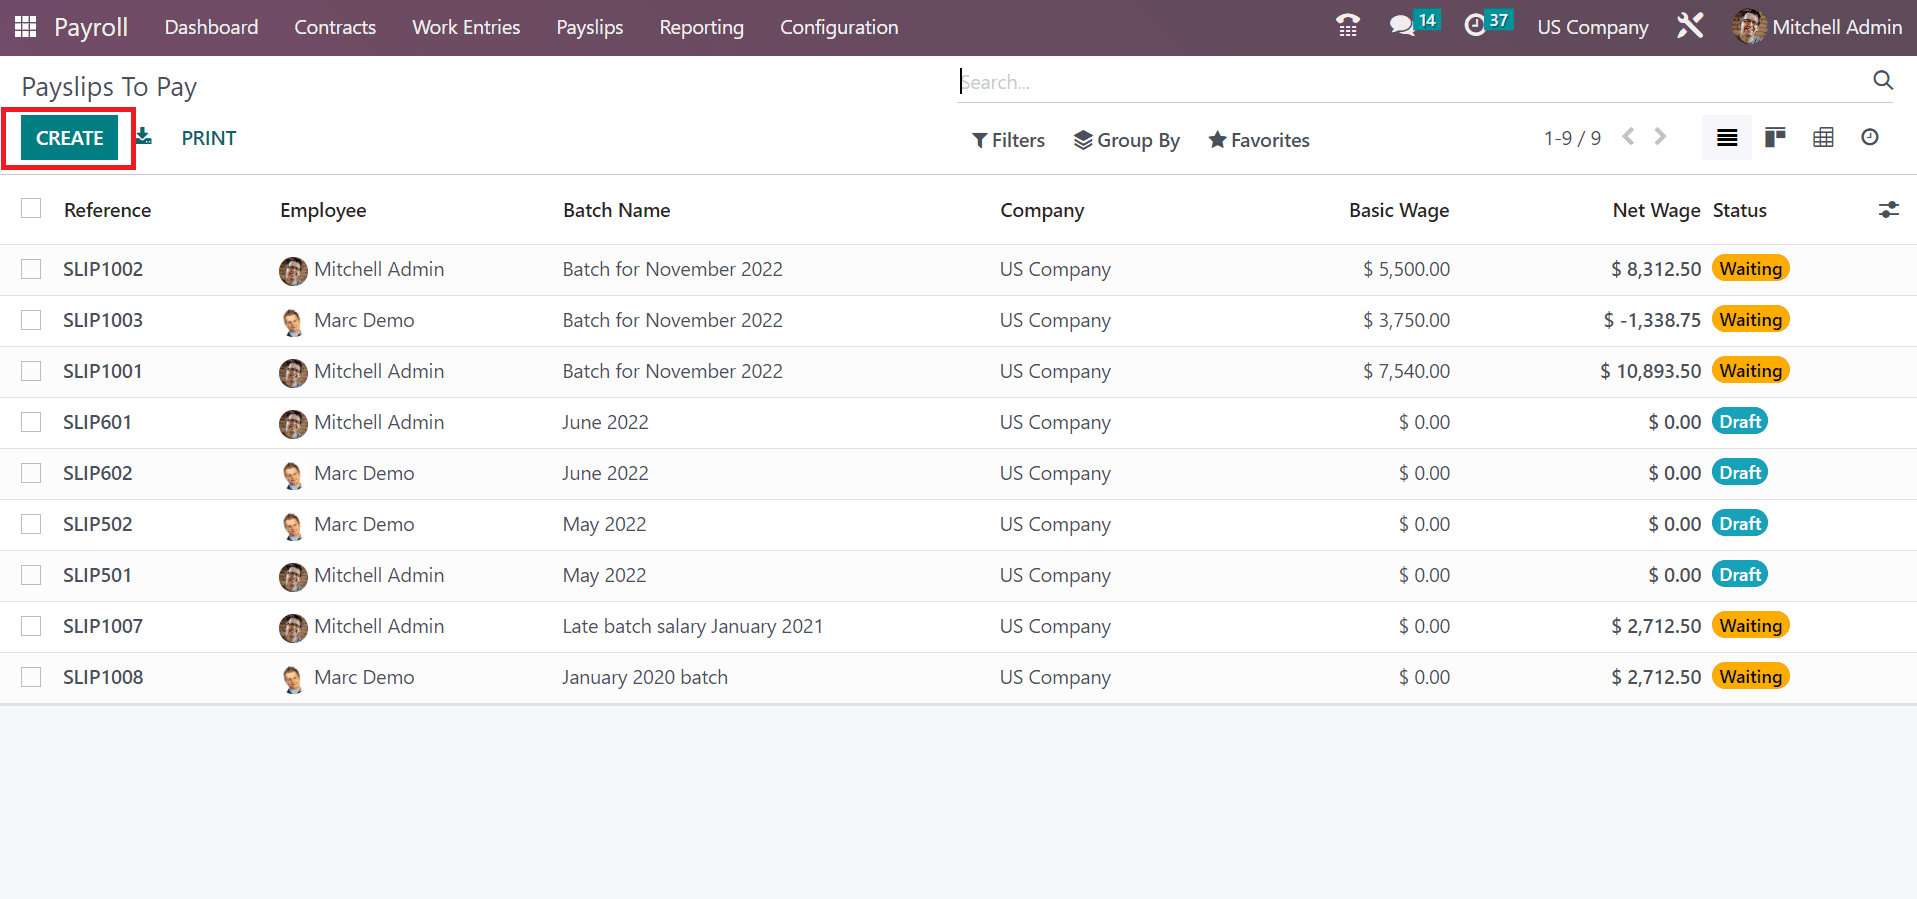
Now, we can develop payslips for the worker after clicking on the To Pay menu under the Payslips tab. By pressing the CREATE button, we can formulate a new payslip for an employee in a US Company.
In the new screen, enter your Employee name as Anita Oliver. After that, set the time of your employee payslip in the Period field.
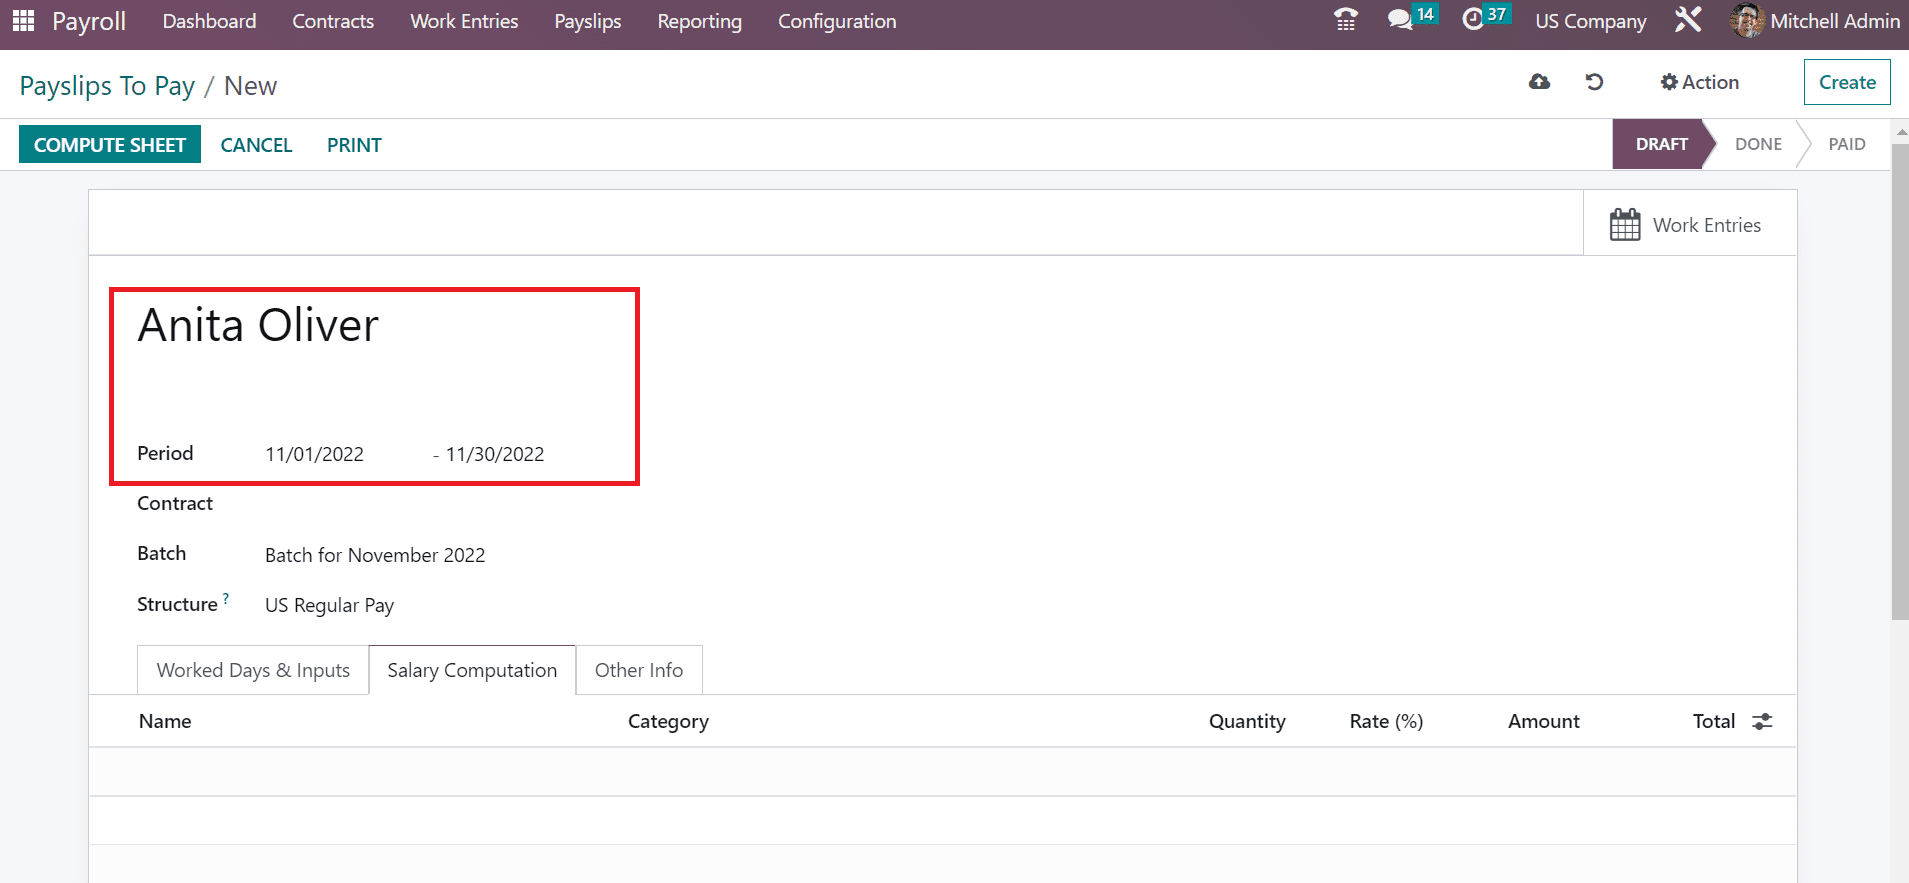
Choose the Batch for your payslip as Batch for November 2022. Also, pick the US Regular Pay salary structure for the employee payslip.
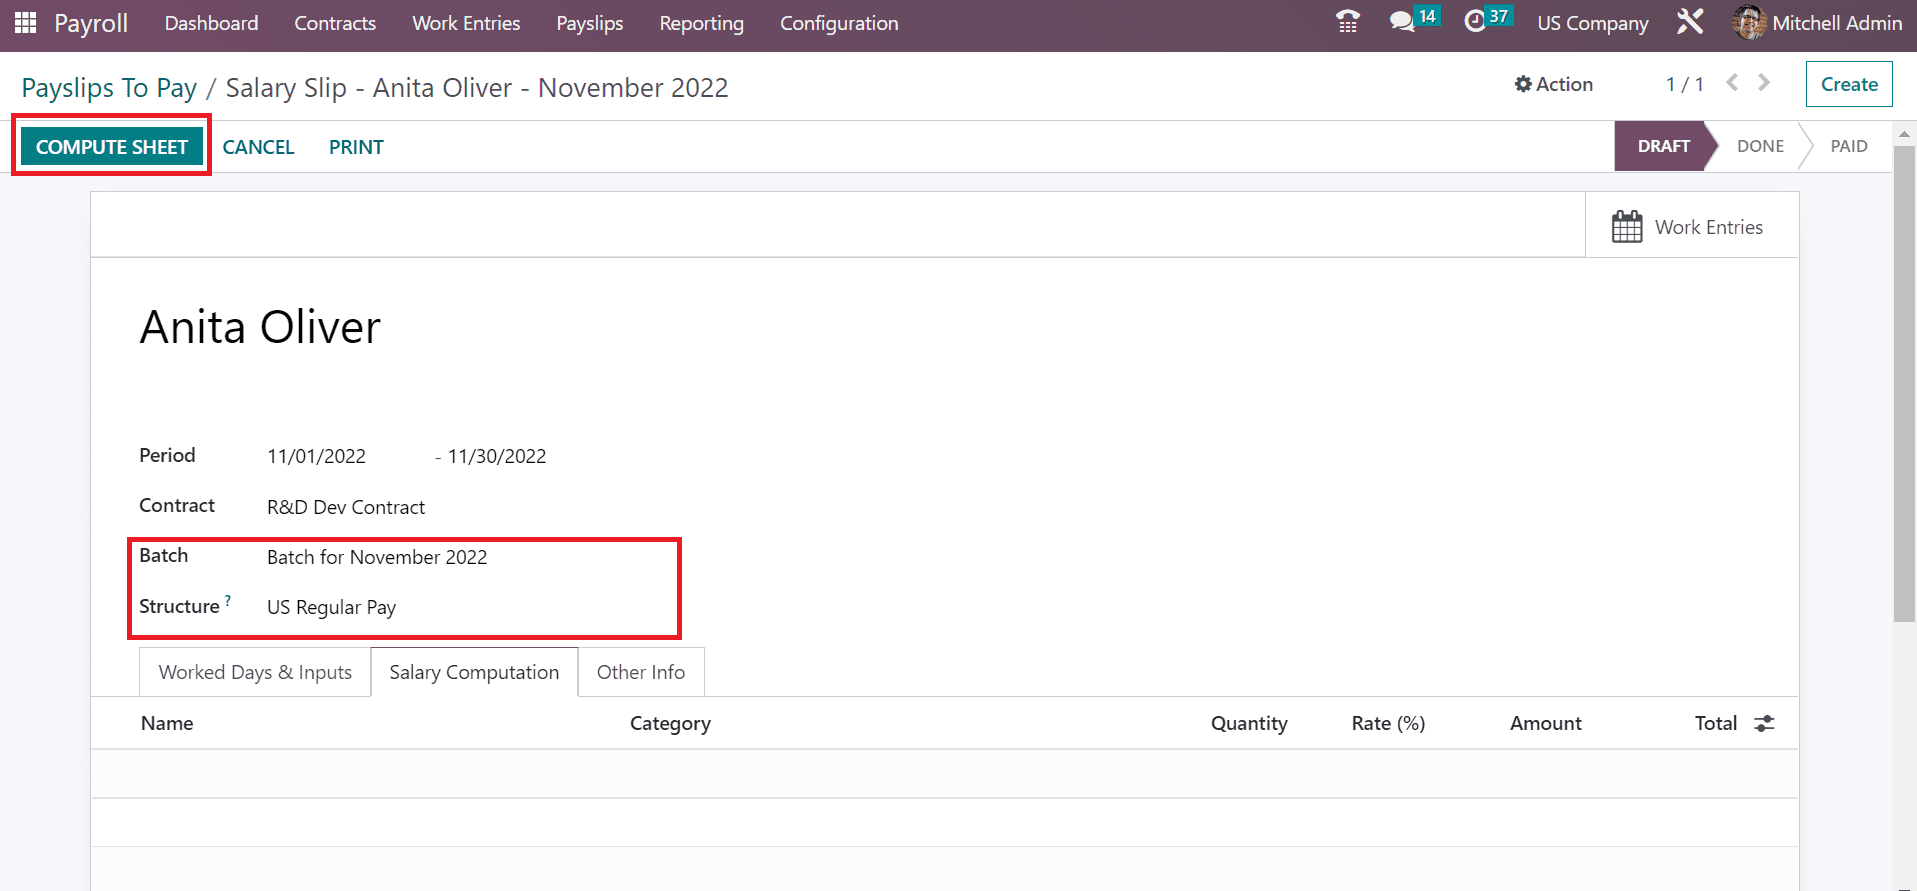
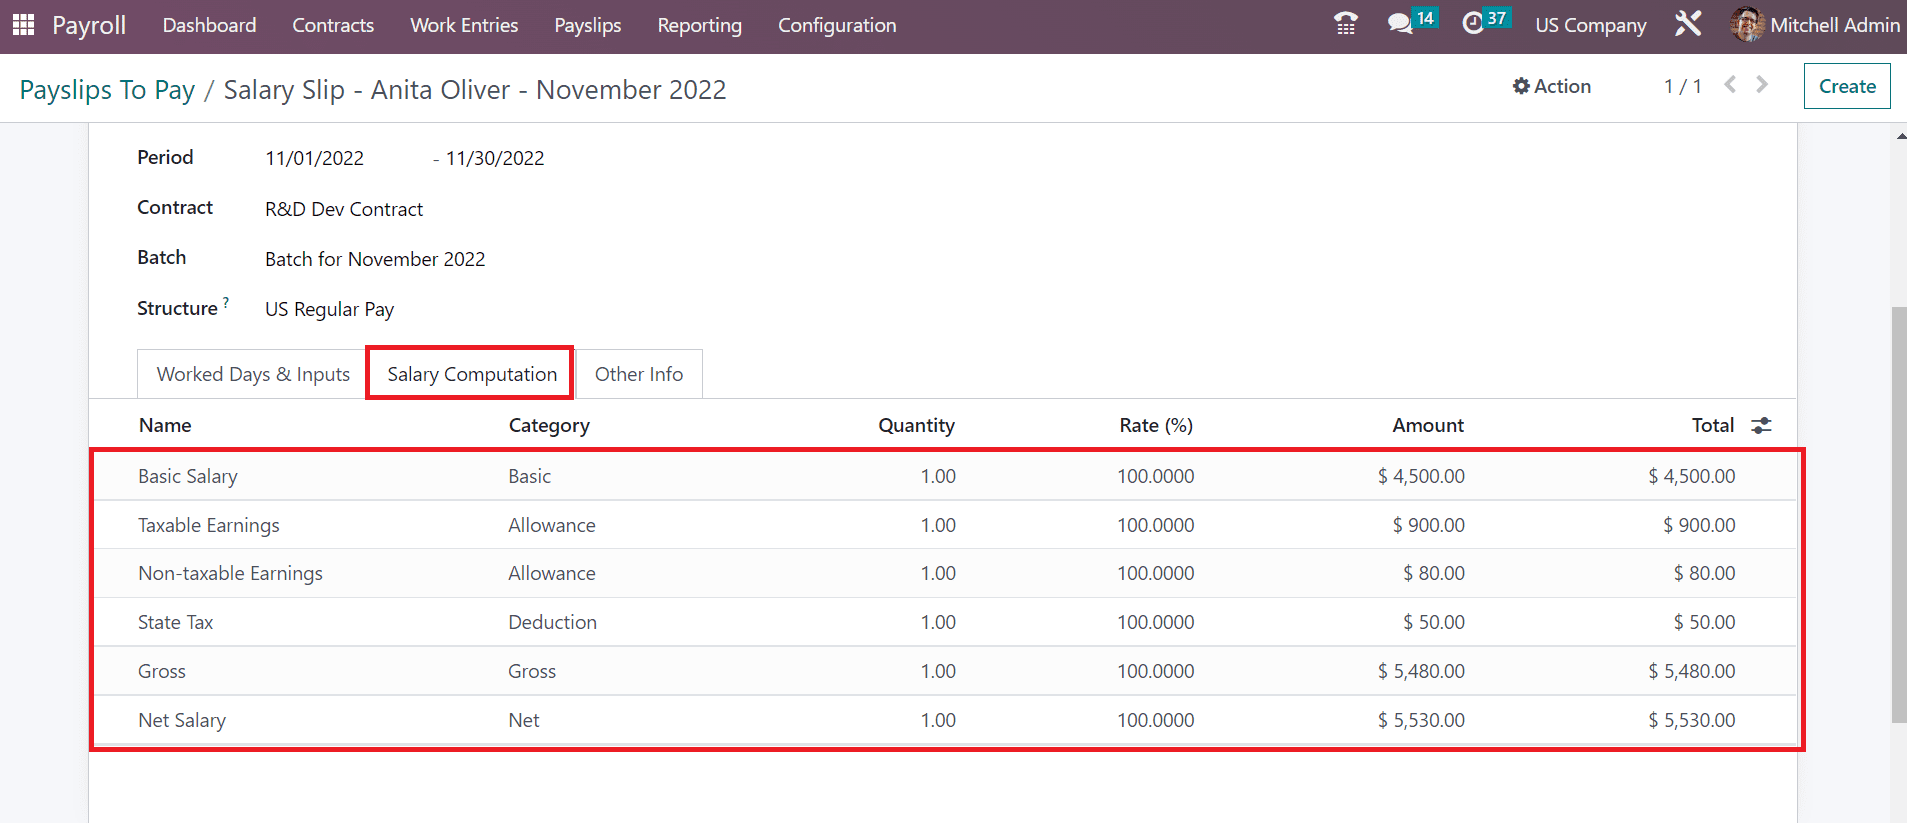
Click the COMPUTE SHEET button after applying the vital data of the payslip. Payslip lines are computed after selecting the COMPUTE SHEET icon. You can obtain all the computations of each salary rule for the US Regular Pay structure of employees below the Salary Computation section.
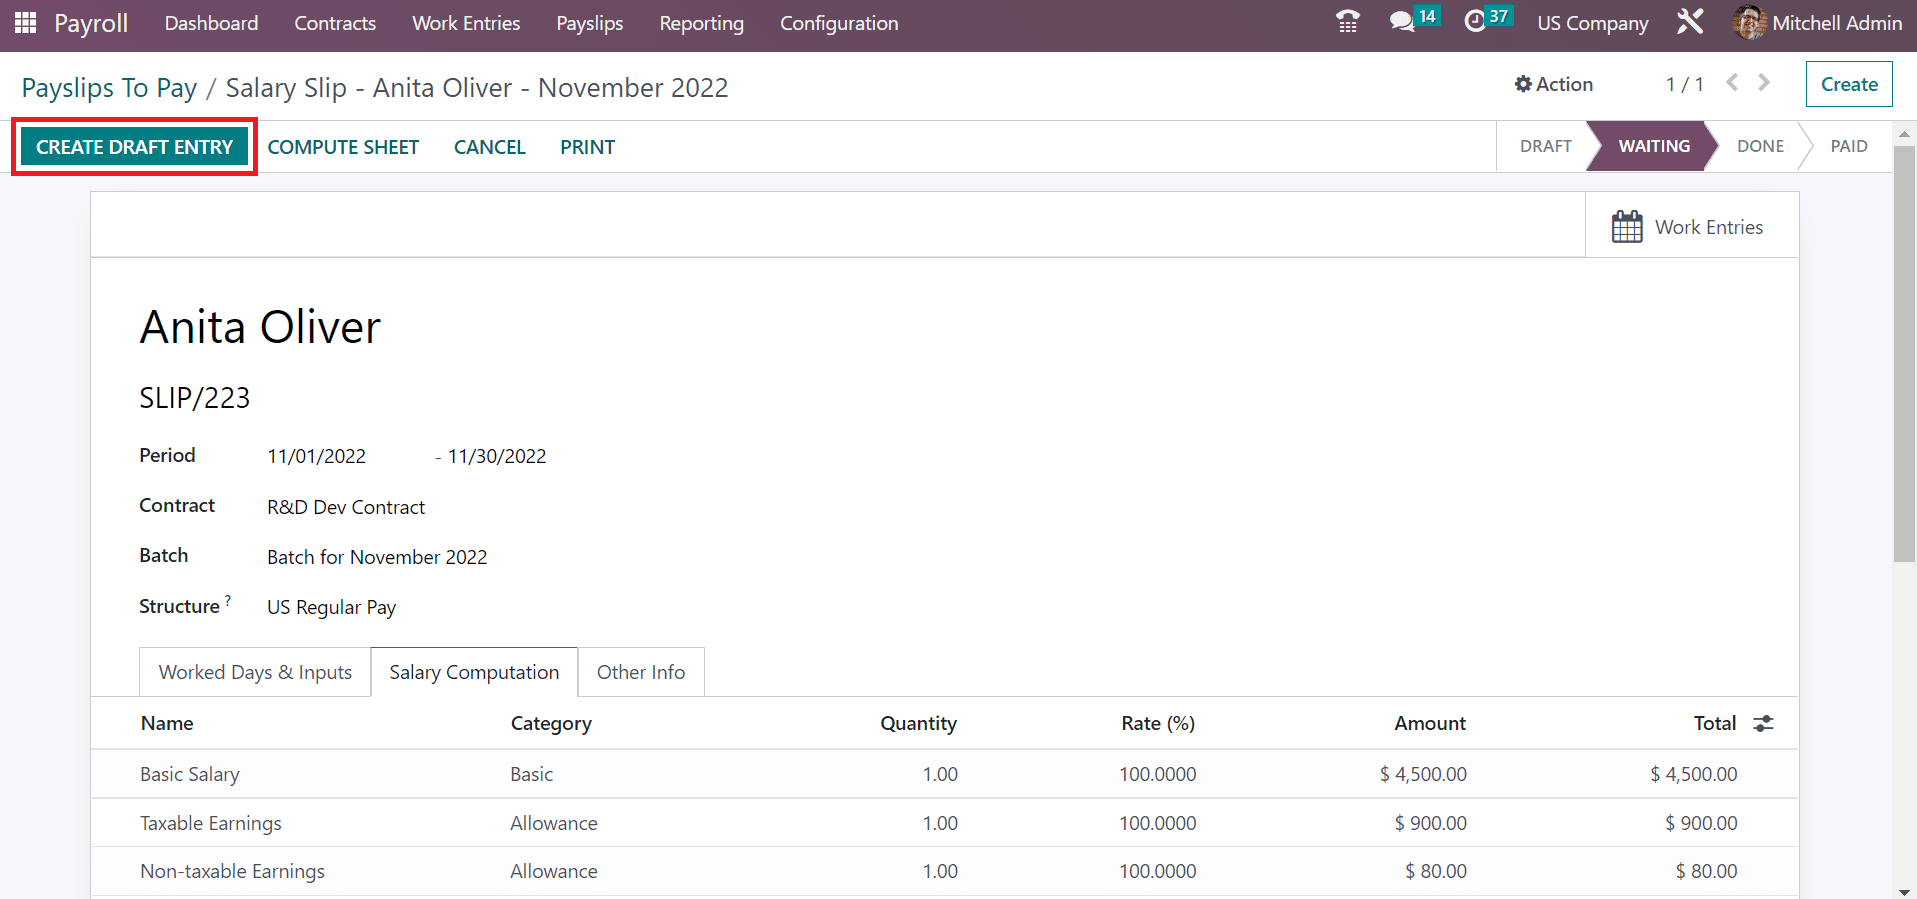
Users can confirm the payslip once choosing the CREATE DRAFT ENTRY icon on the Payslips to Pay window.
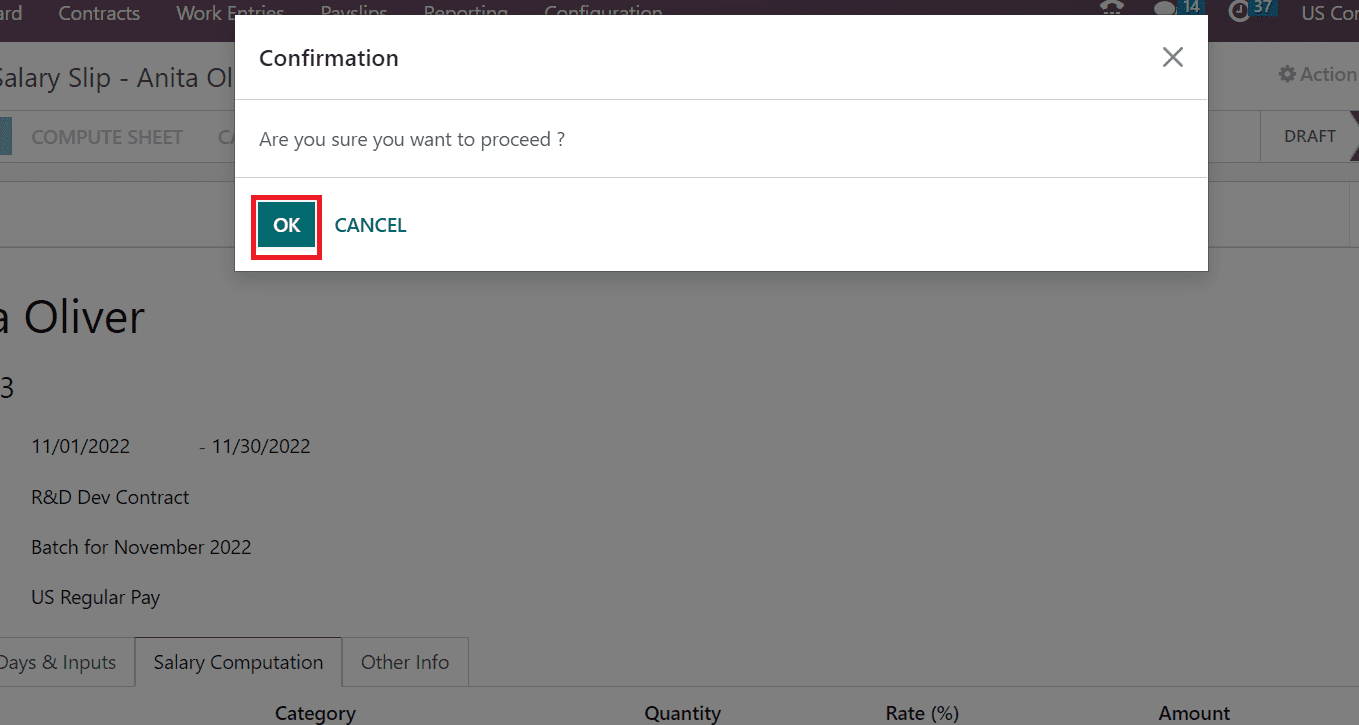
A confirmation page opens to the user, and clicks the OK button to proceed with your payslip for employee Anita Oliver.
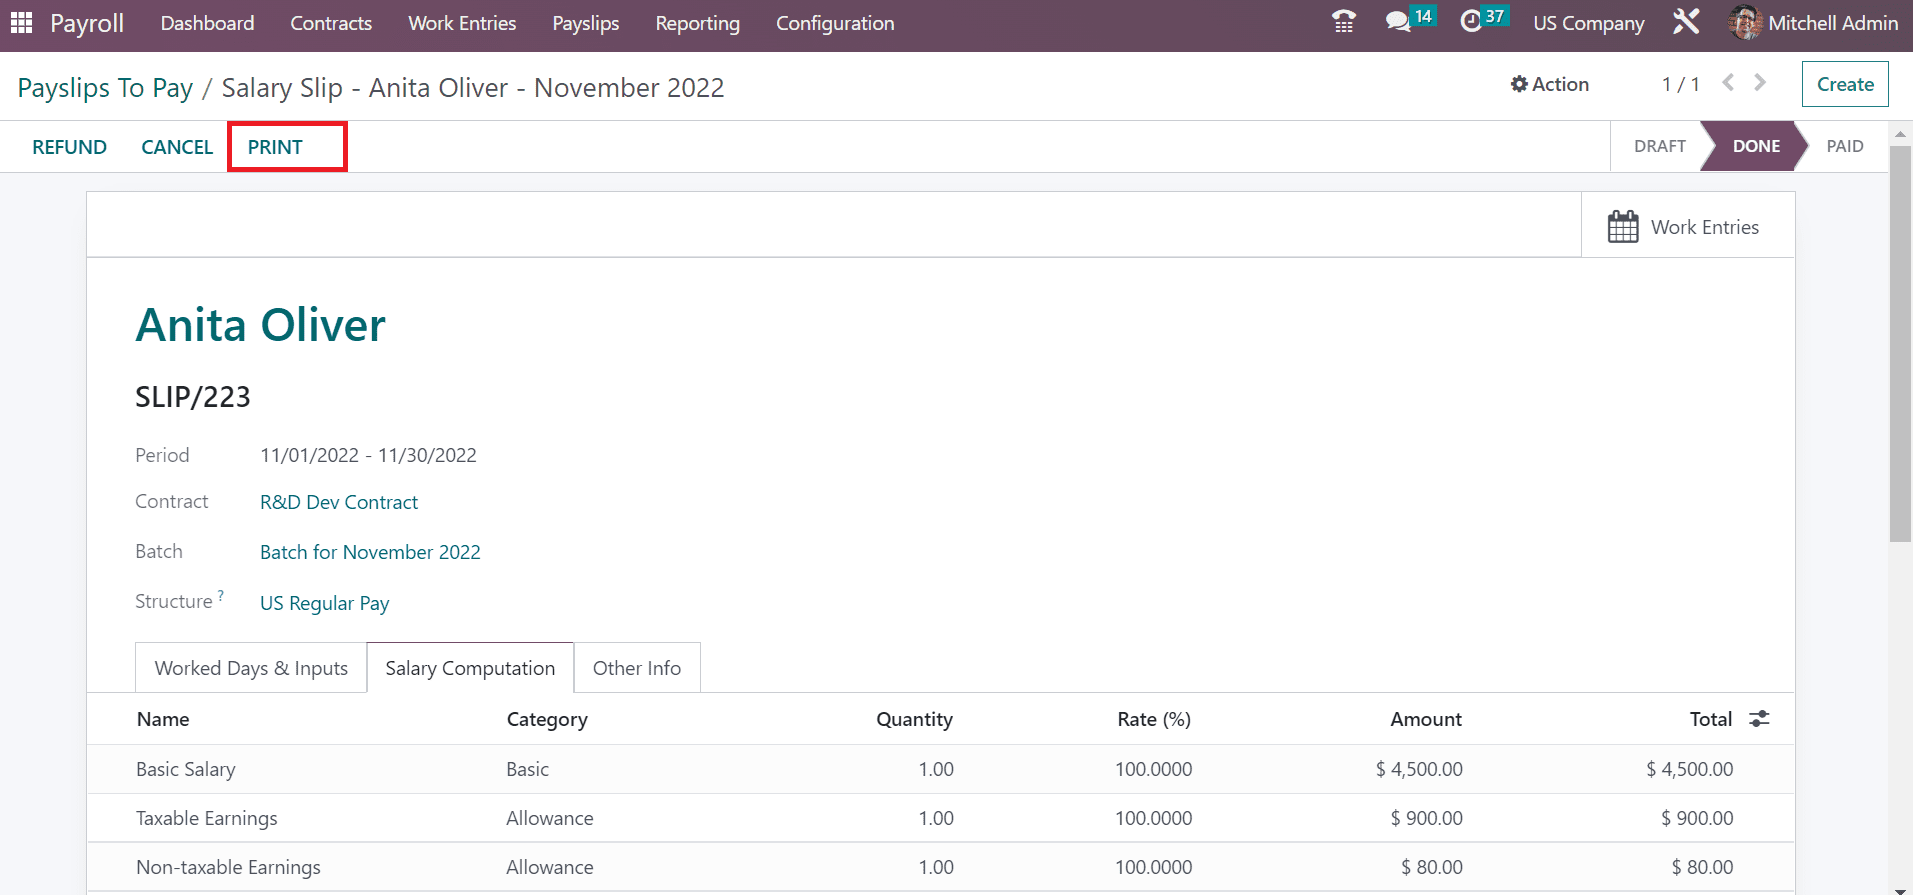
Hence, the payslip for employee Anita Oliver was created easily in Odoo 16. Choose the PRINT button in the Salary Slip window to get a copy of the payslip.
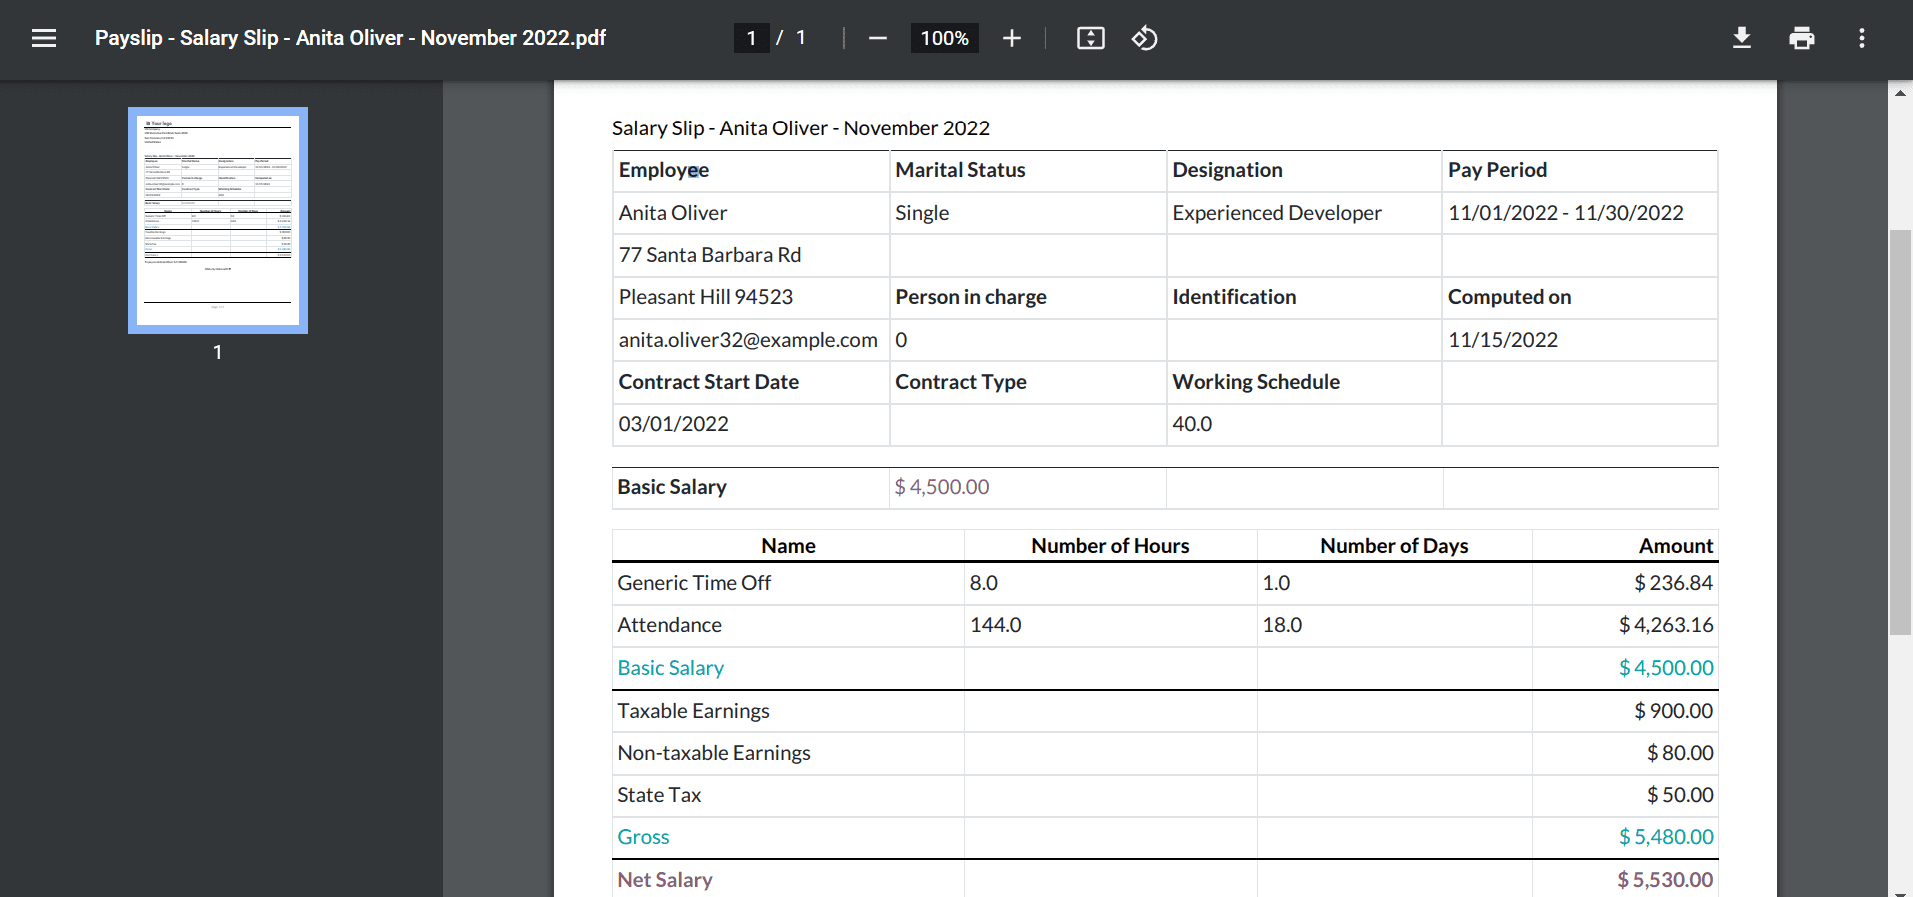
The printout of your salary slip is downloaded into the system, as signified in the screenshot below.
Odoo 16 Payroll module helps calculate employees’ earnings on a company’s salary slip. A firm can boost the procedure of employees’ salary slip management with the use of Odoo ERP software.


