Appointment is a module in the Odoo app store that helps you prepare the appointments efficiently. In Odoo 13, this module of ‘Appointment’ is integrated into the module of ‘Calendar’. At the moment, it is only available in the Enterprise version of Odoo ERP. This can be extended towards any business process and is quite beneficial in facilitating a smooth flow between customer and business. Using this app, schedules can be better managed and consumers can get in contact with you in no time or in only a few taps.
How to Configure Online Appointments
First of all, we need to install the module of ‘Appointment’ from the Odoo App store. When we install it, it will be integrated with the calendar module.
Online scheduling of appointments by clients
To schedule, a new appointment go to Website -> configuration -> Online appointments

Here click on the ‘Create’ button to create a new appointment.
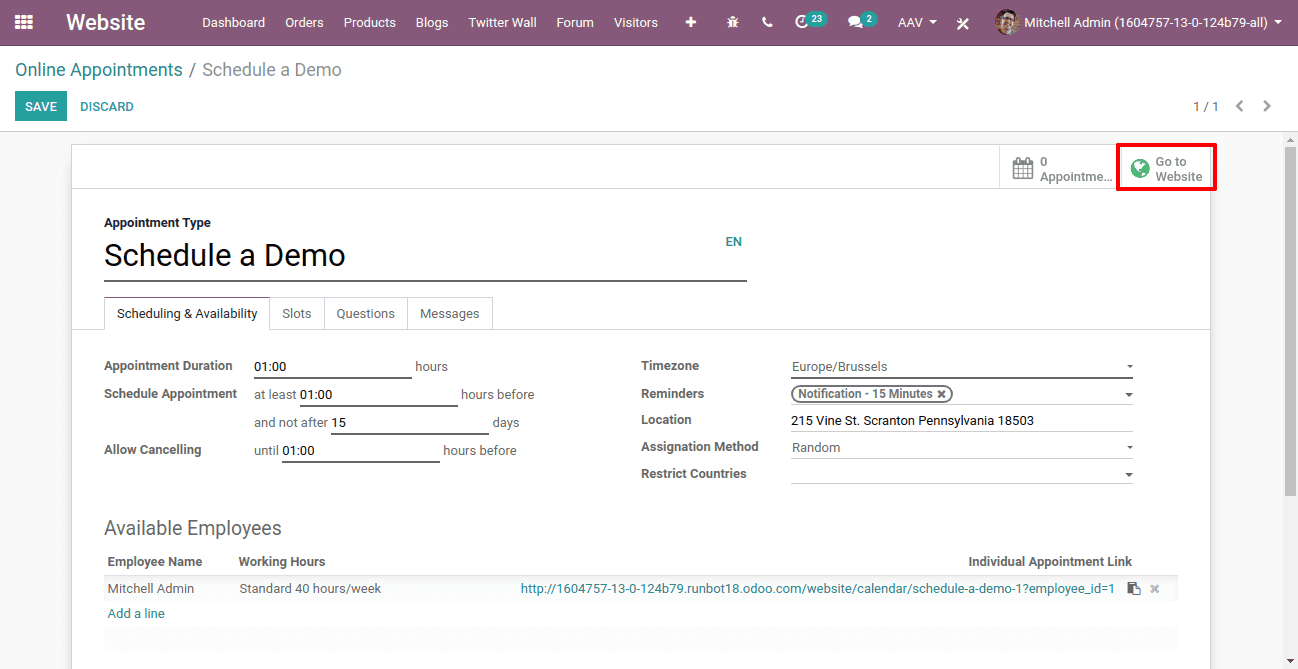
Then a new form to schedule an appointment will appear.
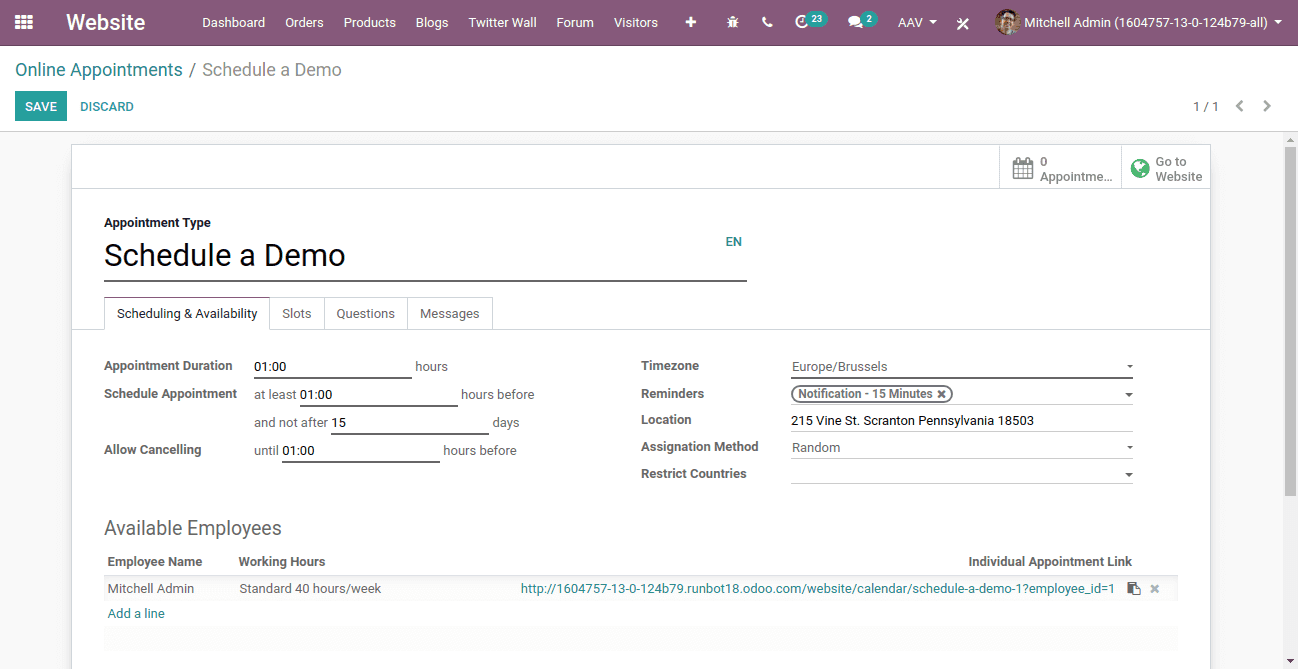
Here I’ve created a demo appointment.
Scheduling Appointments
Fill in all the mandatory fields.
Scheduling and Availability
You should include the duration of the meeting, available staff, timezone, notes, location, etc. in this section.
The time zone determines the venue for the appointment.
Include staff eligible for appointments.
There are two types of methods available to allocate employees. These can either be assigned automatically or can be chosen by customers.
Slots
Here we are able to enter the time of appointments in days.
Questions
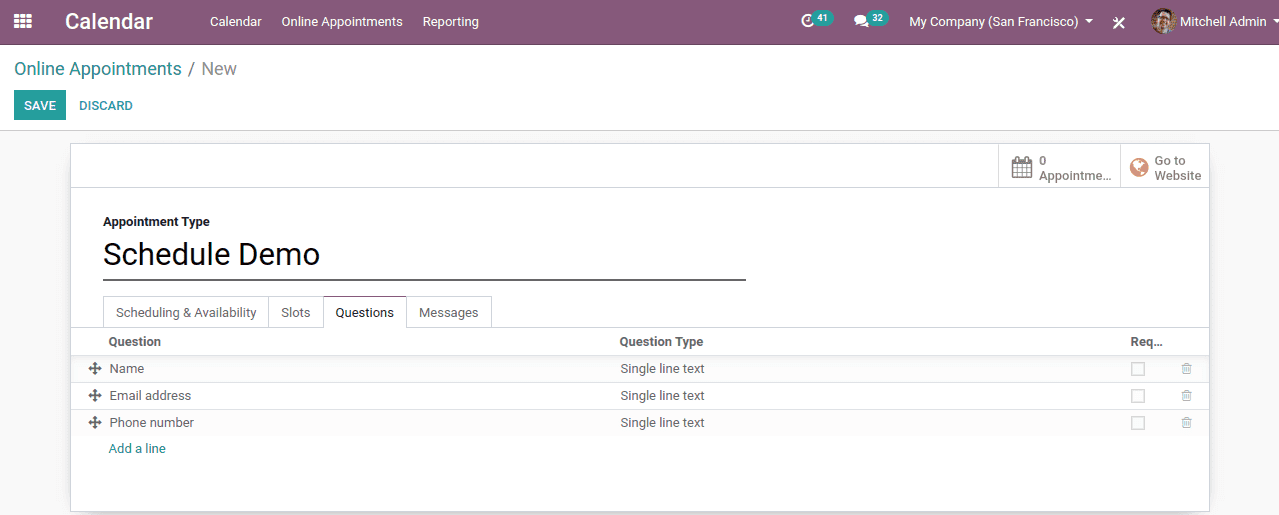
Here we can enter the questions that are to be asked to customers while creating appointments.
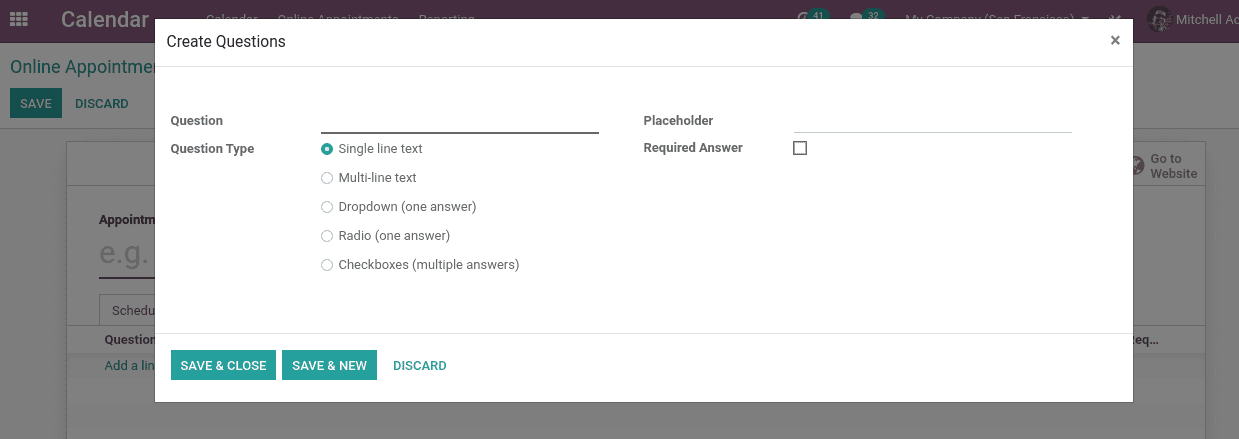
These are the questions,
Messages
Via the Online appointment form, we are able to attach and send any message to customers.
Publishing the Appointment
By clicking on the go-to website button, we can publish the appointment schedules on the website.
On the website, we are able to see it like this.
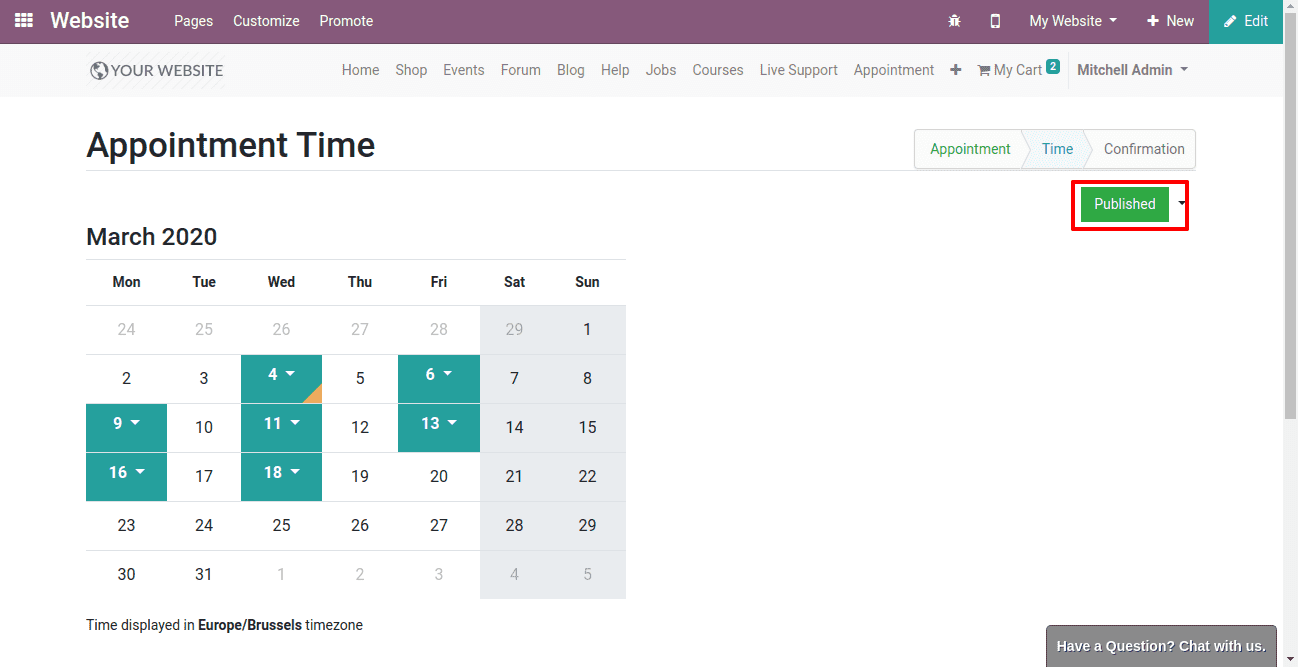
Here we shall publish the appointments on the website by clicking on the “Published” button.
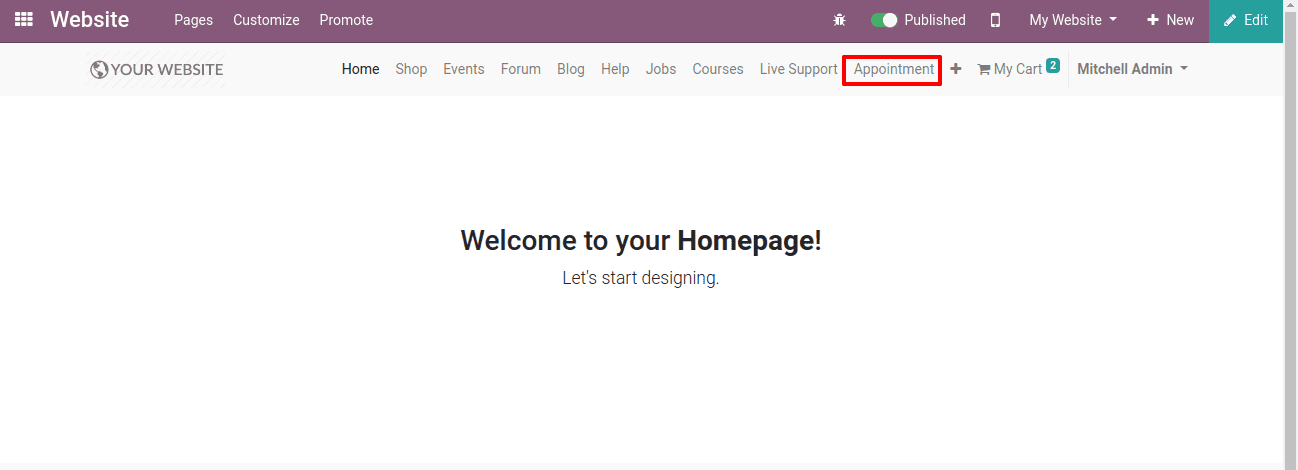
A visitor can create appointments directly from the website. For that click on the appointments in the menu bar of the website.
Clicking on it we will get a page of appointment. There we can choose the appointments and view the availability.
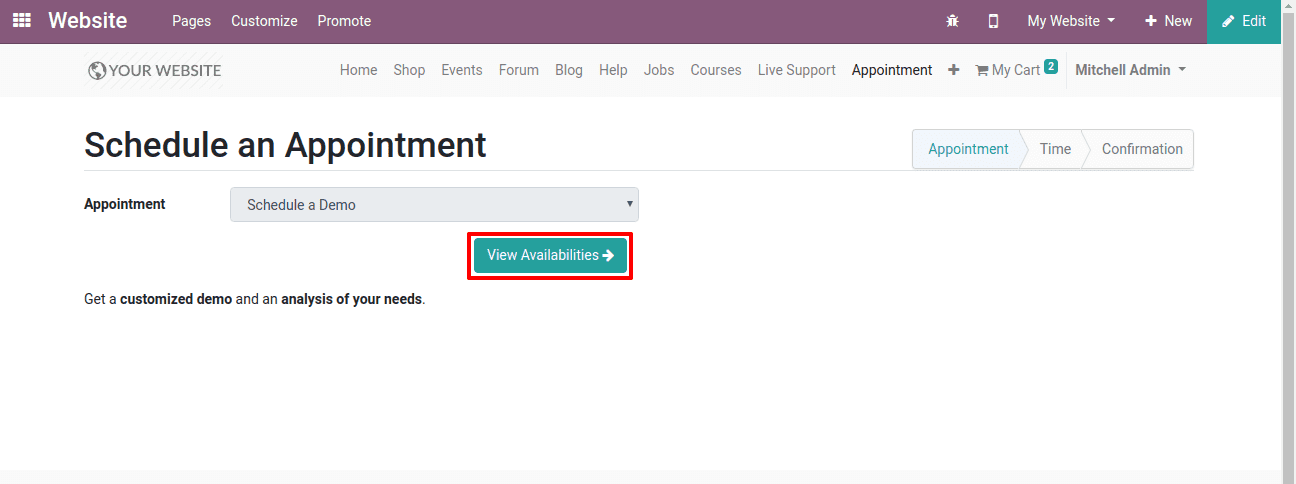
Once clicked, various details of the appointment can be seen and pick the one that meets your requirements, and click on “View Availability”.
You will then be guided to the Online Appointment form and then you will be able to see the questions you generated in the Appointment form. You shall fill the details and ‘Confirm’ it.
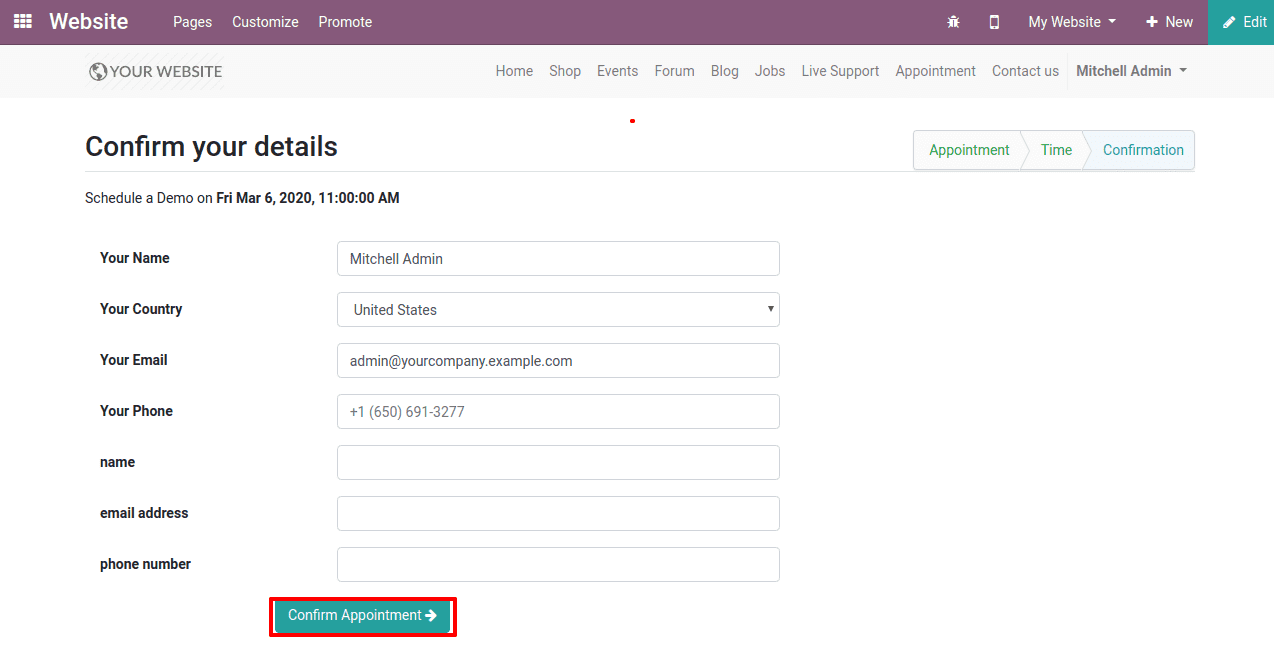
Now if you want to confirm the order click on the “Confirm Appointment” button here.
Once the appointment is registered, you can get a positive appointment update and there are also possibilities to attach this to google calendar or cancel/reschedule.
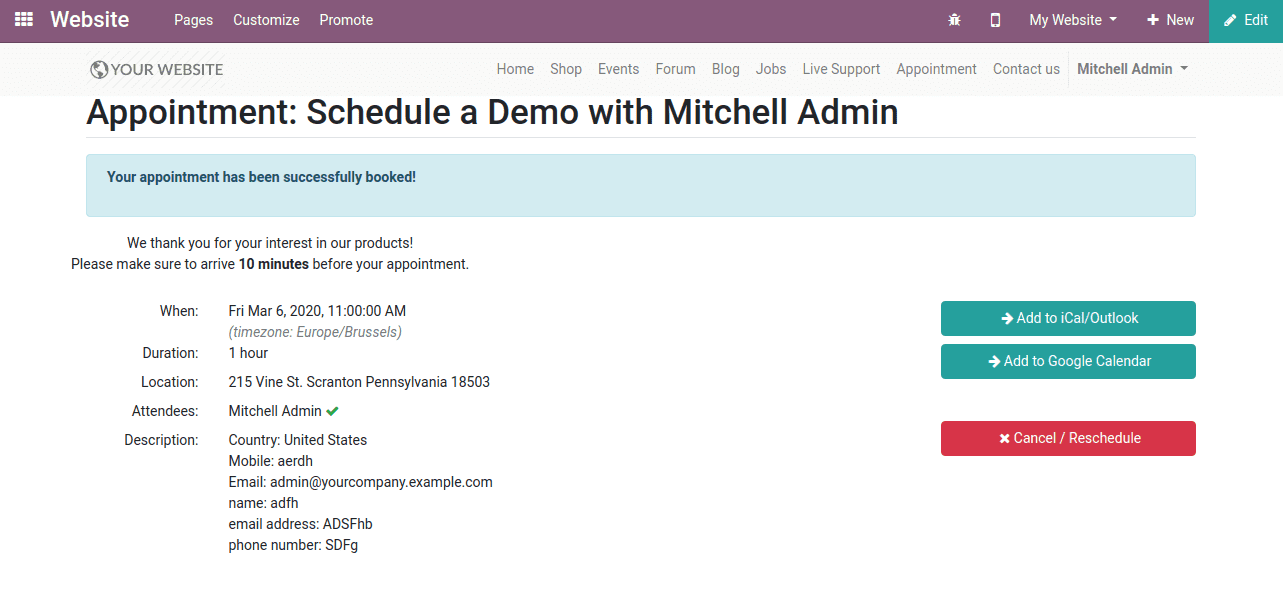
Now we have completed the process on the website. Now when we check it in the calendar we can see the newly scheduled appointment there.
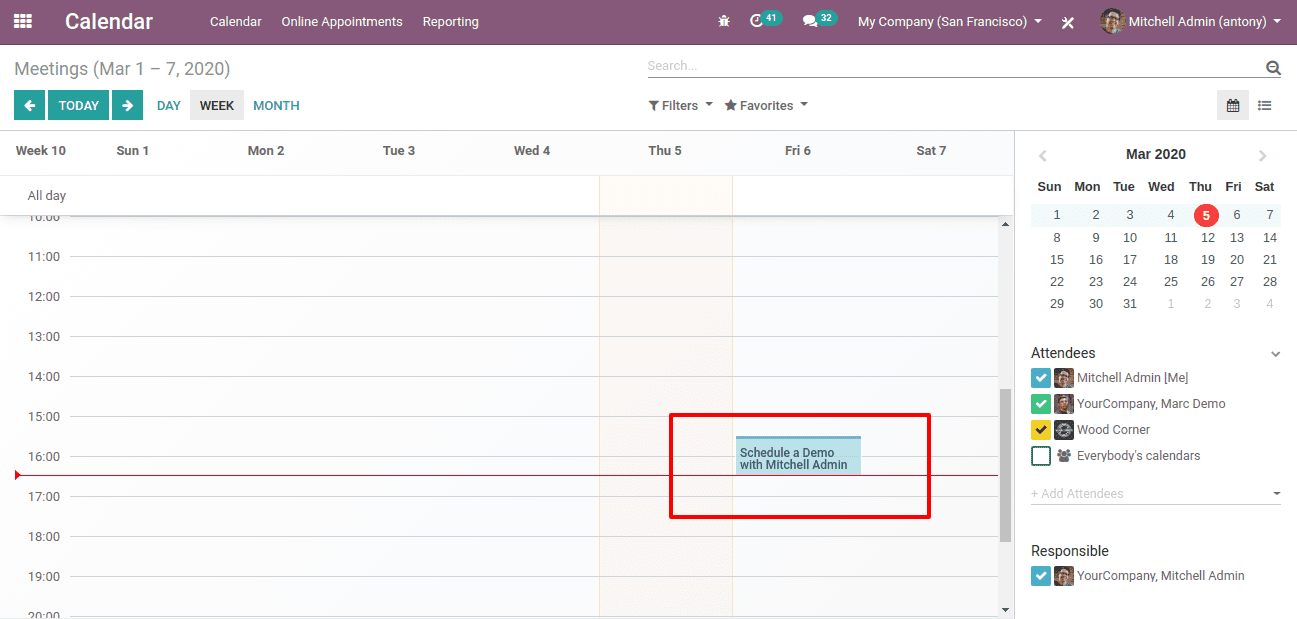
So this is all about the ‘Online Appointment Scheduling system in Odoo 13’.


