In Odoo we can execute server actions, an intriguing feature using which the customers can meet their requirements. In this blog let me discuss the functionality and how to use various parameters in server actions accordingly.
Server Actions are actions that can be executed automatically. These actions are added to the ‘Action’ contextual menu.
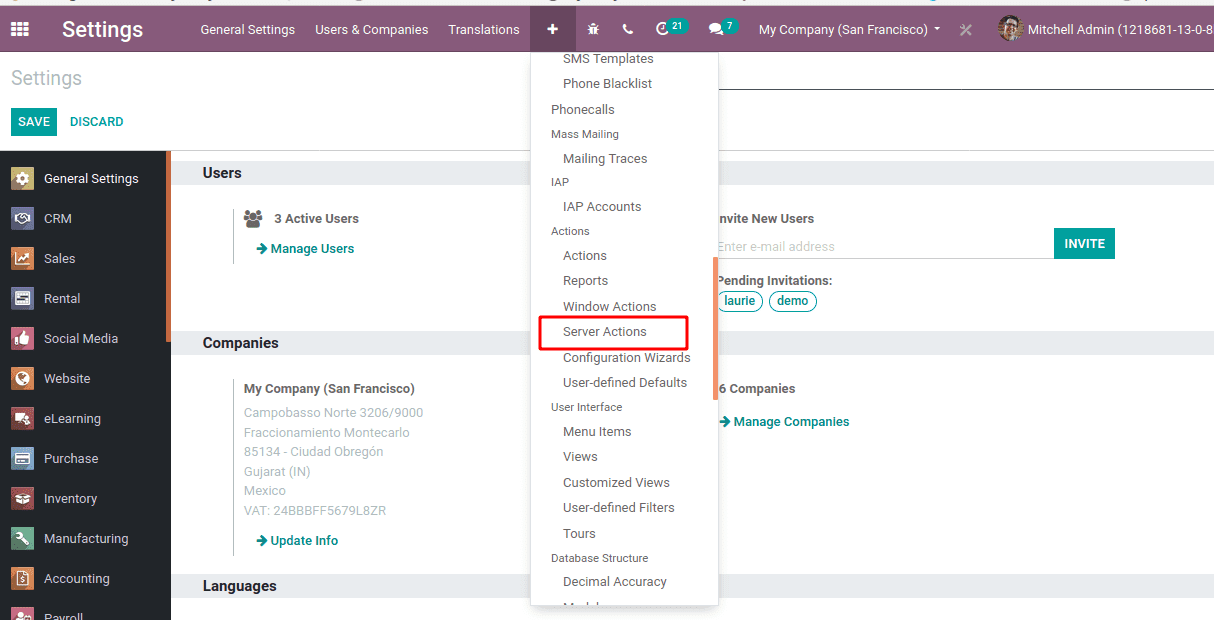
The available server actions are:
1. Update the record
2. Create a new record
3. Execute Python Code
4. Execute several actions
5. Send Email
6. Add Followers
7. Create the next Activity
8. Send SMS text Message
To create a server action create a data record in data.xml file as shown below:
<?xml version="1.0" encoding="utf-8"?><odoo><data><record id="action_set_salesperson" model="ir.actions.server"><field name="name">Set Sales Person</field><field name="model_id" ref="base.model_res_partner"/><field name="state">code</field></record></data></odoo>
model_id – Model linked to the action.
name – Name of the server action.
state – The field name ‘state’ specifies the type of server action.
We can also add server actions easily via the user interface. In order to create a server action activate the developer mode, go to Settings –> Technical –>Server Actions.
Let’s see the purpose and how each of the server actions works.
Update the record
In the above example suppose if I want to set salesperson for some of my partners. I can easily specify it using ‘Update the record’ action.
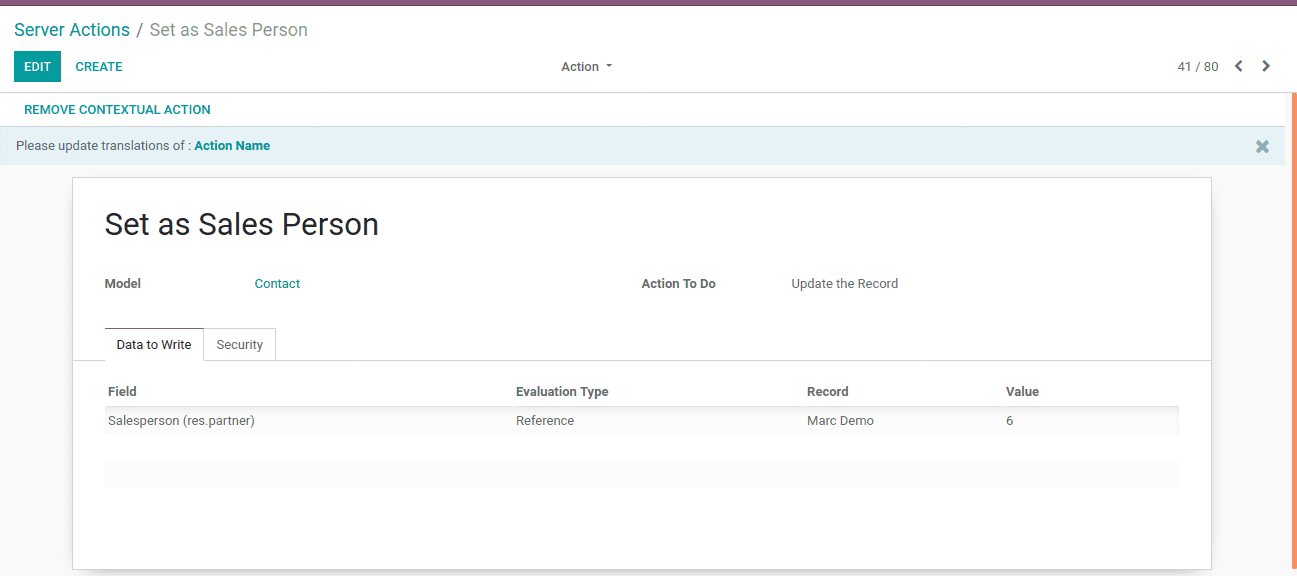
Field – Specify the fields that you need to update
Evaluation Type – It is the type of value to be updated and is of 3 types. If Value, it specifies ‘Value’ field as a literal value. If Reference, it allows you to select the existing values in the ‘Record’ field. If Python Expression, then the Value field is interpreted as a python expression.
The field state is specified as:
<field name="state">object_write</field>
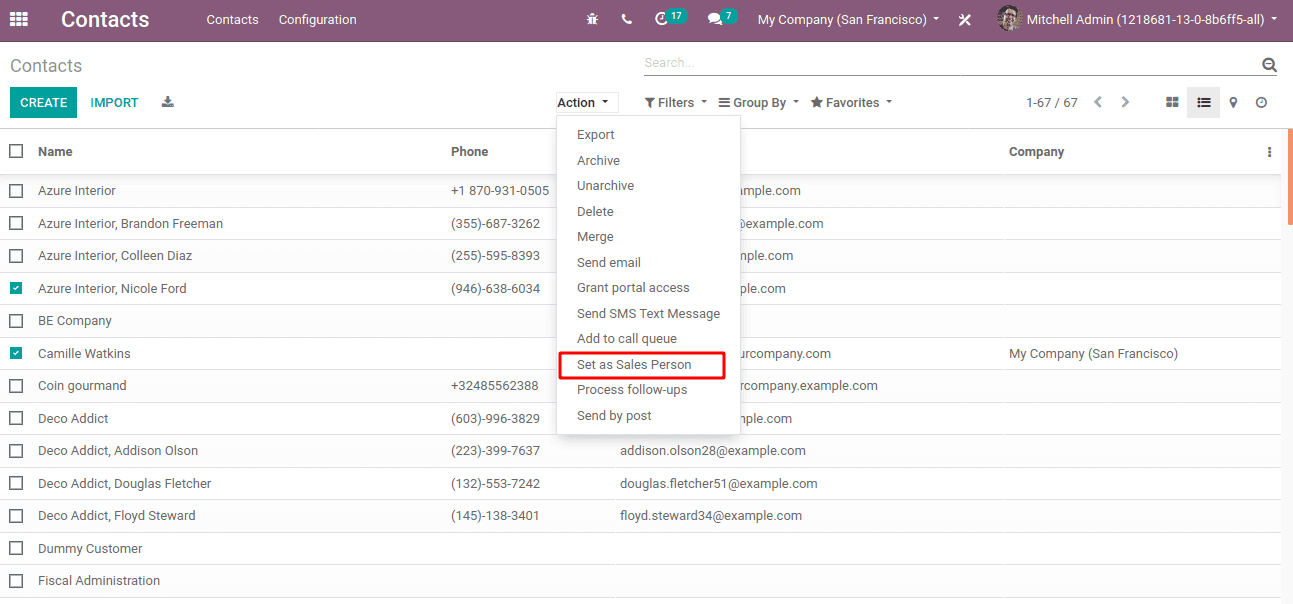
Now add the server action to the Contextual menu using the ‘Create Contextual Action’ button. After adding the button you can see that the menu appears under the Action button of partners. Now you can perform the server action on multiple records. In our case, we can set the salesperson as ‘Marc Demo’ for the selected partners.
Send Email
This action helps us to send emails to partners.
The field state is specified as:
<field name="state">email</field>
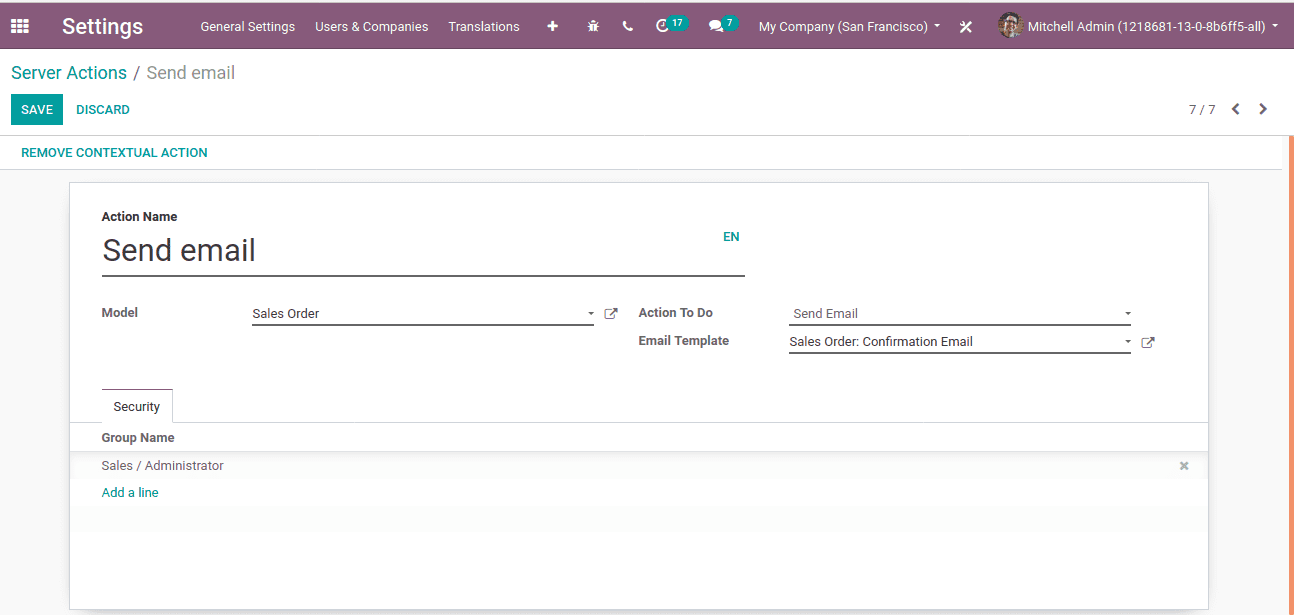
Create a server action with Action To-Do as ‘Send Email’, choose the model for which you want to perform the server action. In case of email choose the required email template.
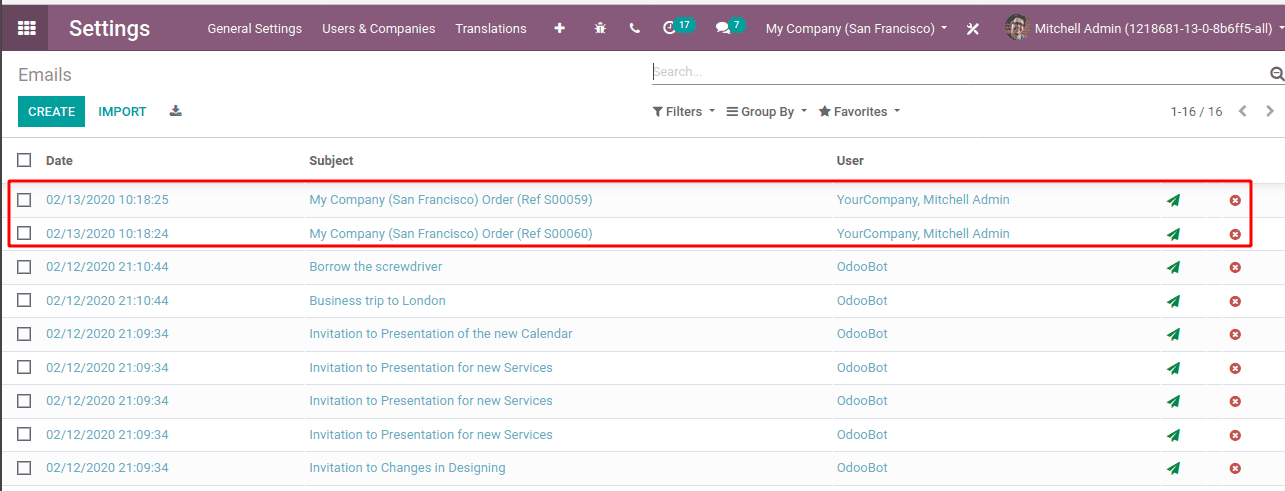
Now when you create the contextual menu you can send bulk email using server action.

You can see that emails have been created.
Add Followers
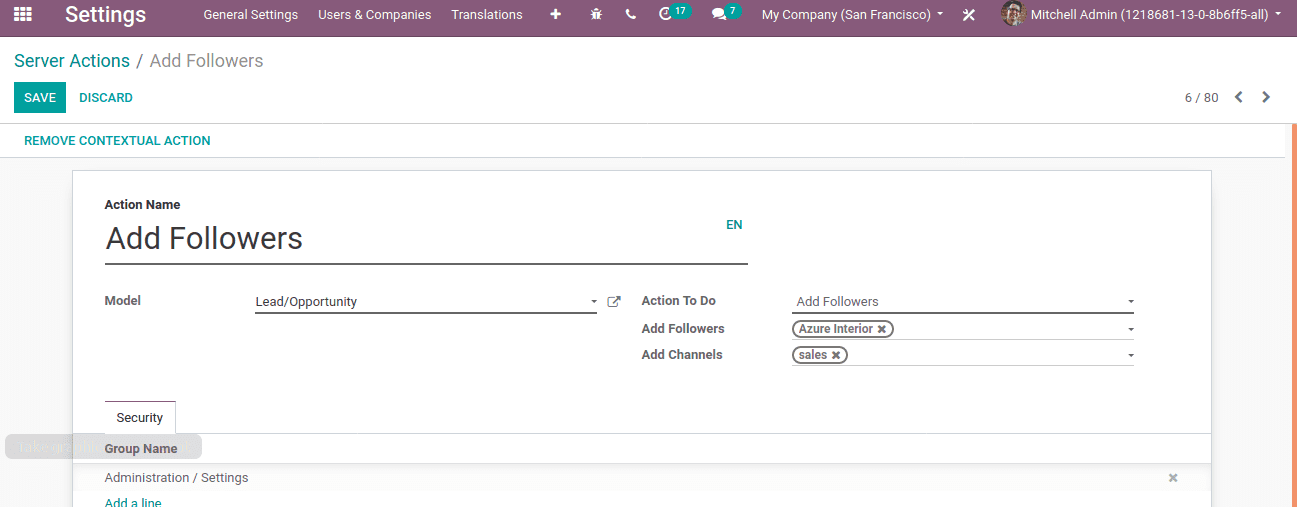
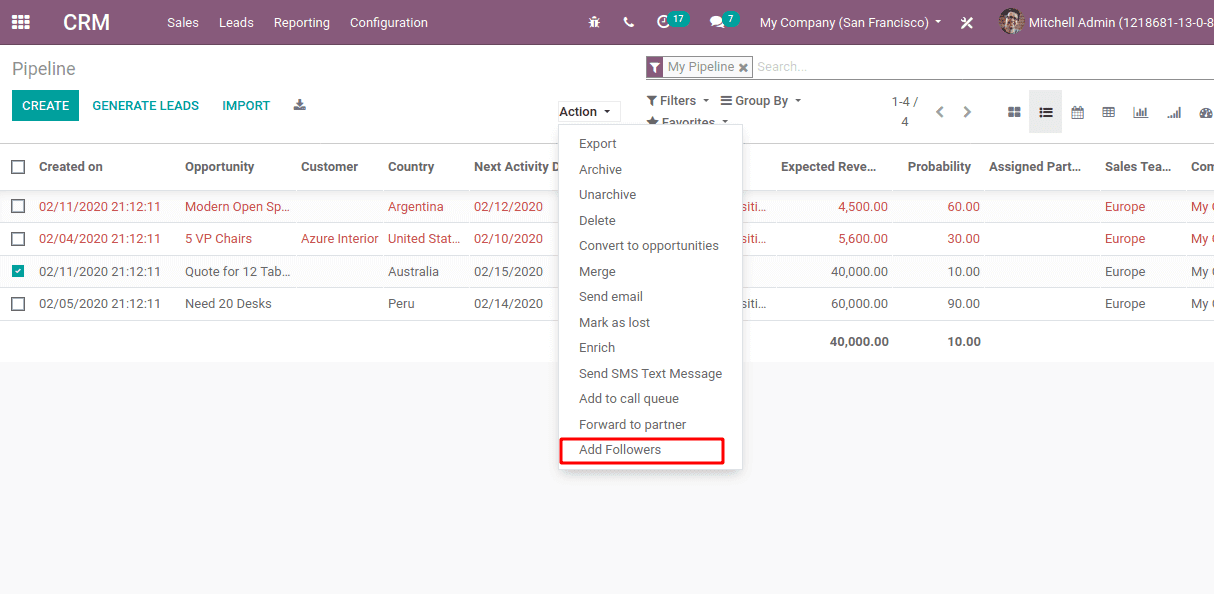
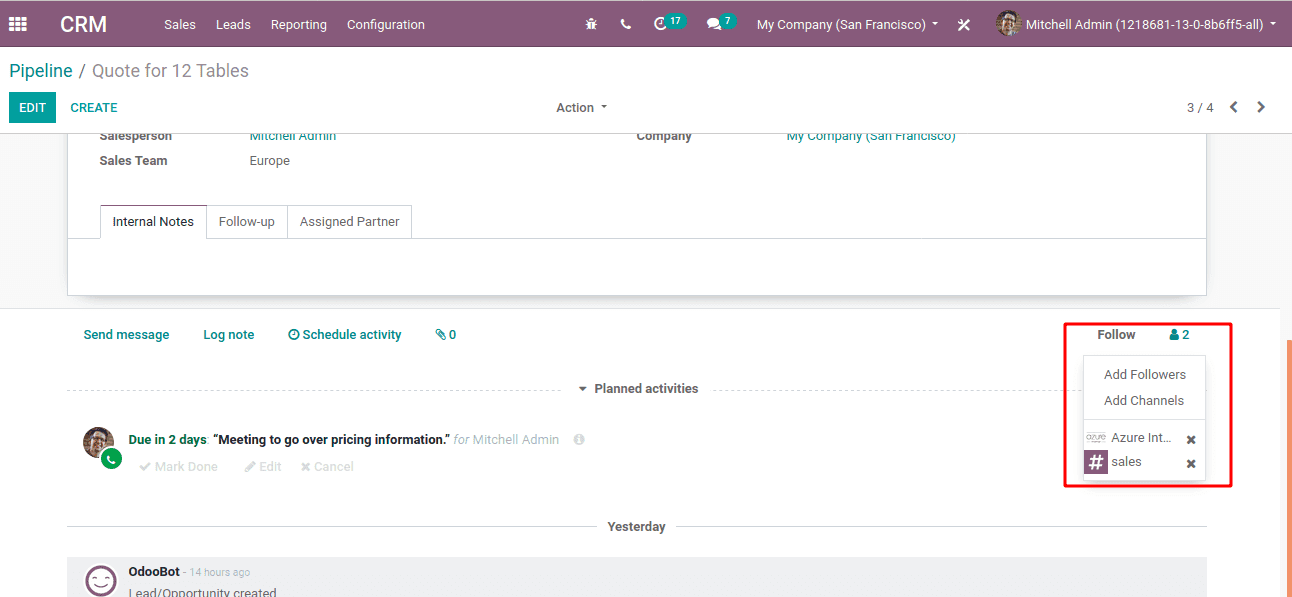
This action helps you to add followers and channels. In order to create followers add the required sales team and followers in server action.
The field state is specified as:
<field name="state">followers</field>
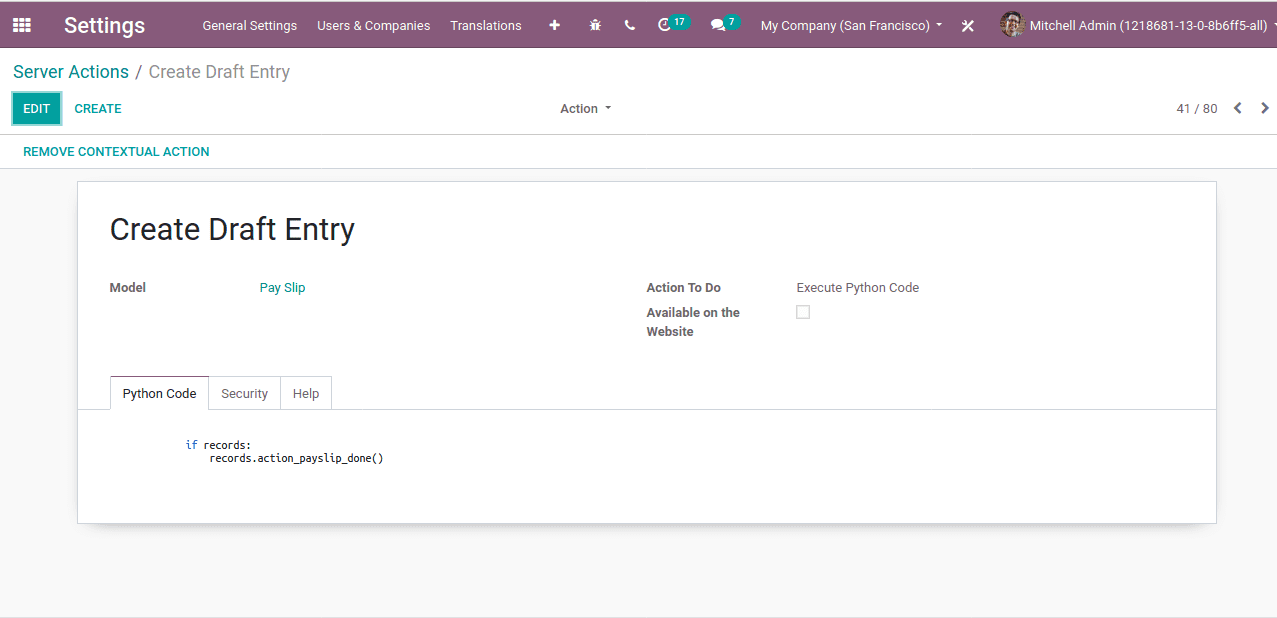
Execute Python Code
The server action helps to execute python code.
The field state is specified as:
<field name="state">code</field>
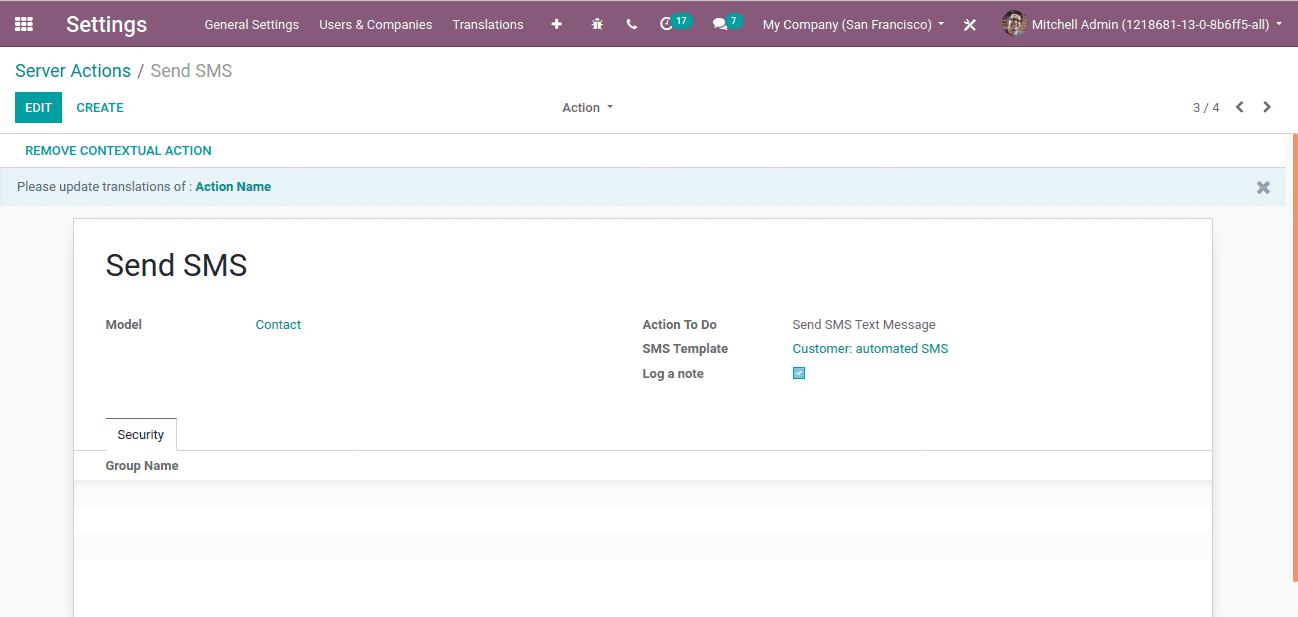
Send SMS Text Message
It helps to send text messages in bulk.
The field state is specified as:
<field name="state">sms</field>
Specify the SMS template.
Create Next Activity
It helps to schedule the next activity.
The field state is specified as:
<field name="state">next_activity</field>
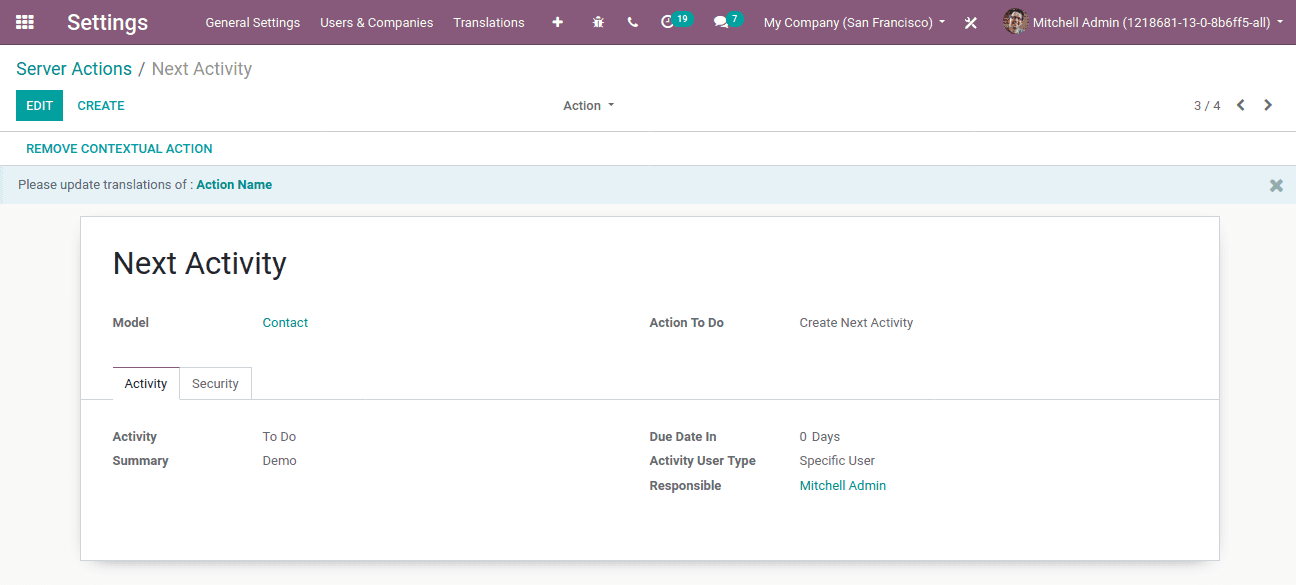
You can specify the activity, due dates, etc in the server action.
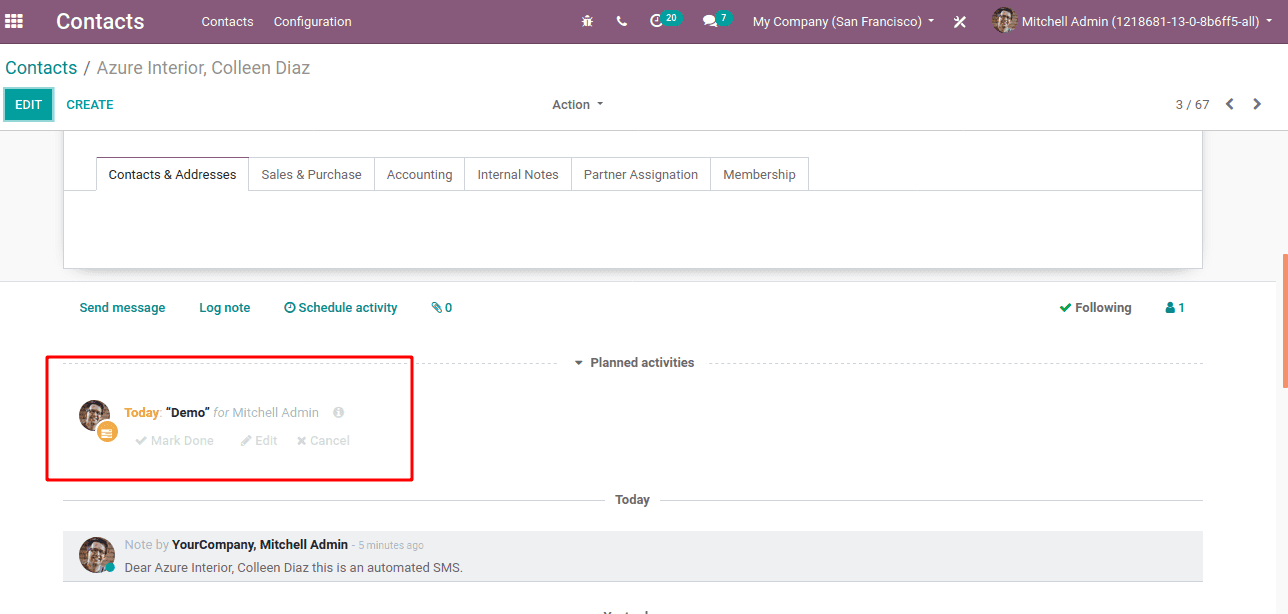
The next activity is scheduled as ‘Demo’.
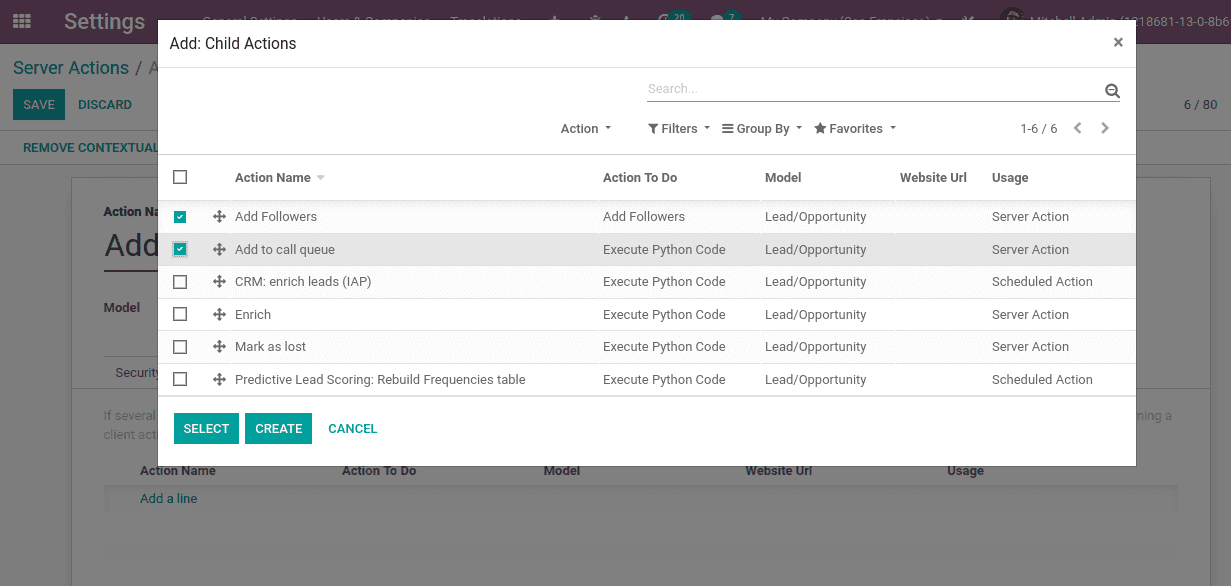
Execute several actions
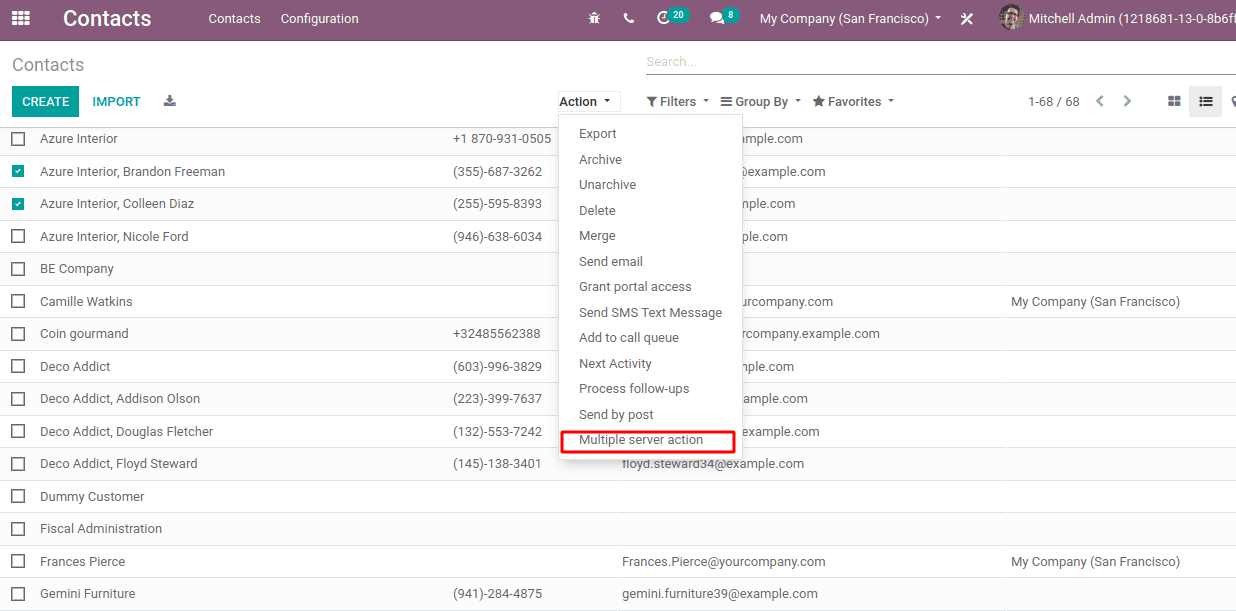
The action helps you to perform several server actions at a time.
Once the required model is selected the possible actions that can be performed are listed in server actions.
The field is specified as:
<field name="state">multi</field>
Here multiple server actions can be performed using a single contextual menu.
Create a new Record
It creates a new record. Specify the target model where you want the record to be created.
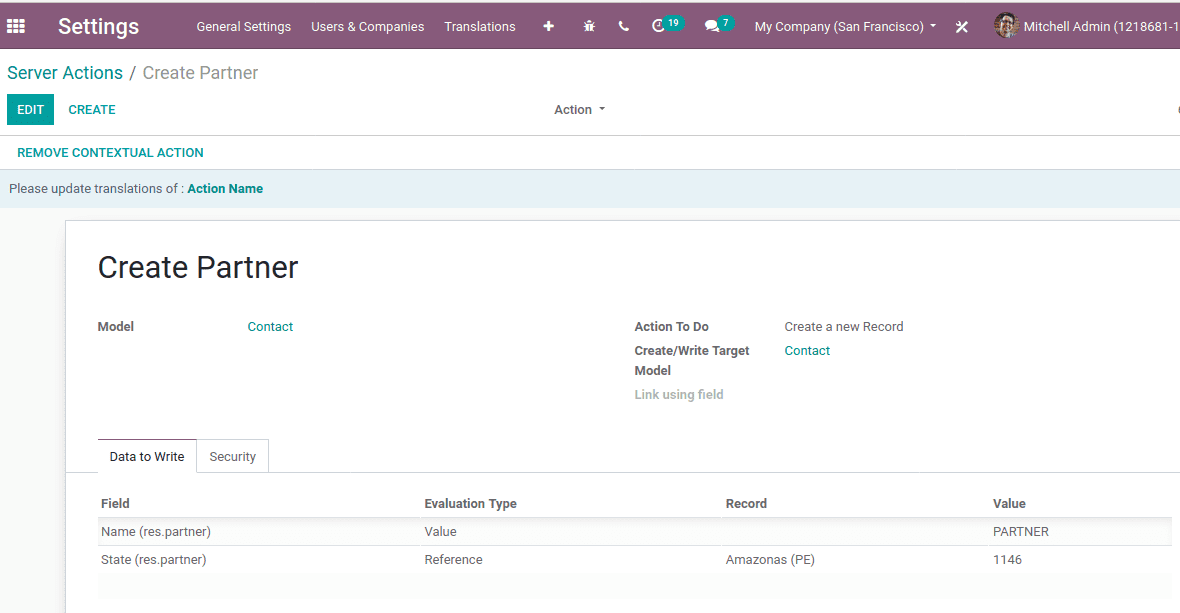
The field is specified as:
<field name="state">object_create</field>


