Recruitment is one business task that revolves around numerous administrative works and follow-ups. It is quite tedious for the recruitment management team to carry the recruitment process without the help of a software that looks after enlisting procedures. Odoo HR automates the entire recruitment process in a company, making it much easier to handle, unlike compared to traditional recruitment procedures.
Recruitment module in Odoo allows you to receive applications from a wide range of sources, making it easier the gathering of candidate data and choosing them wisely. With the help of the application, one can easily analyze from which source the candidate comes from, thereby optimize the recruitment budget in accordance with it. It also allows you to keep track of submitted applications and follow every applicant based on an automatically built database of skills and profiles with indexed documents for that purpose.
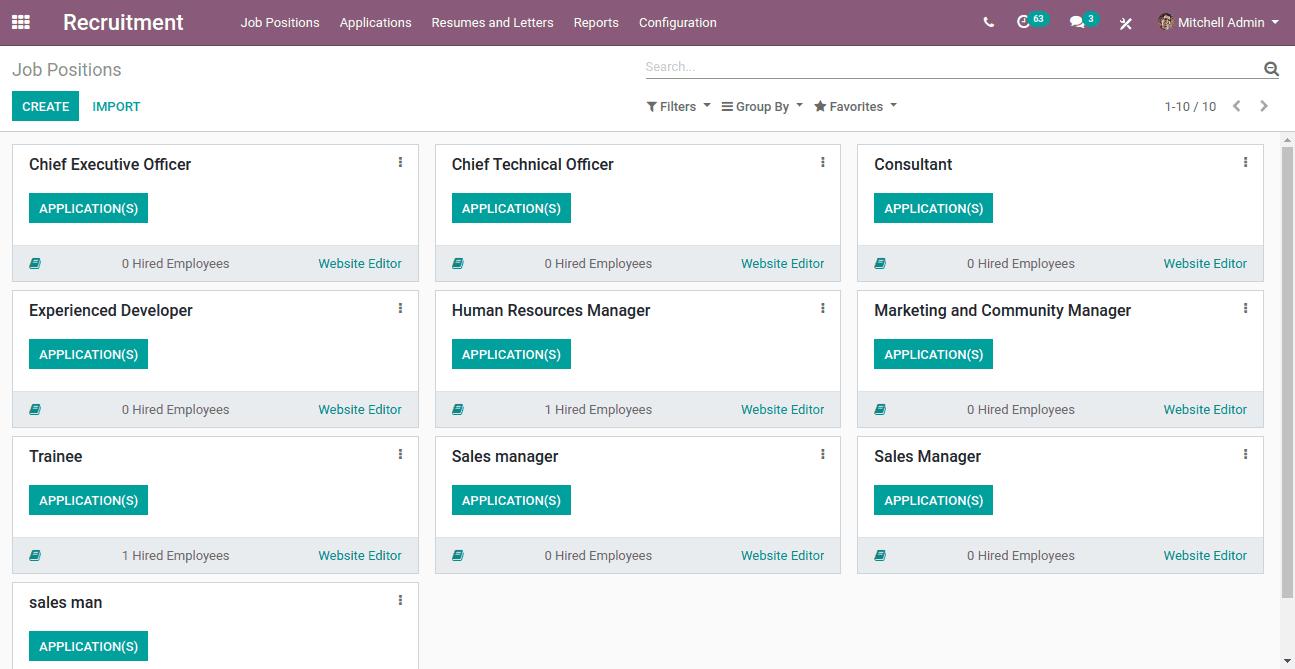
After the installation of Odoo HR Recruitment module, soon you see is a menu titled “Job Positions” which gives you an overview of all the job positions that you are currently recruiting.
Using the Create button you can create new job positions or simply go to the Configuration -> Job Positions and here you can specify the details for the position through the following form.
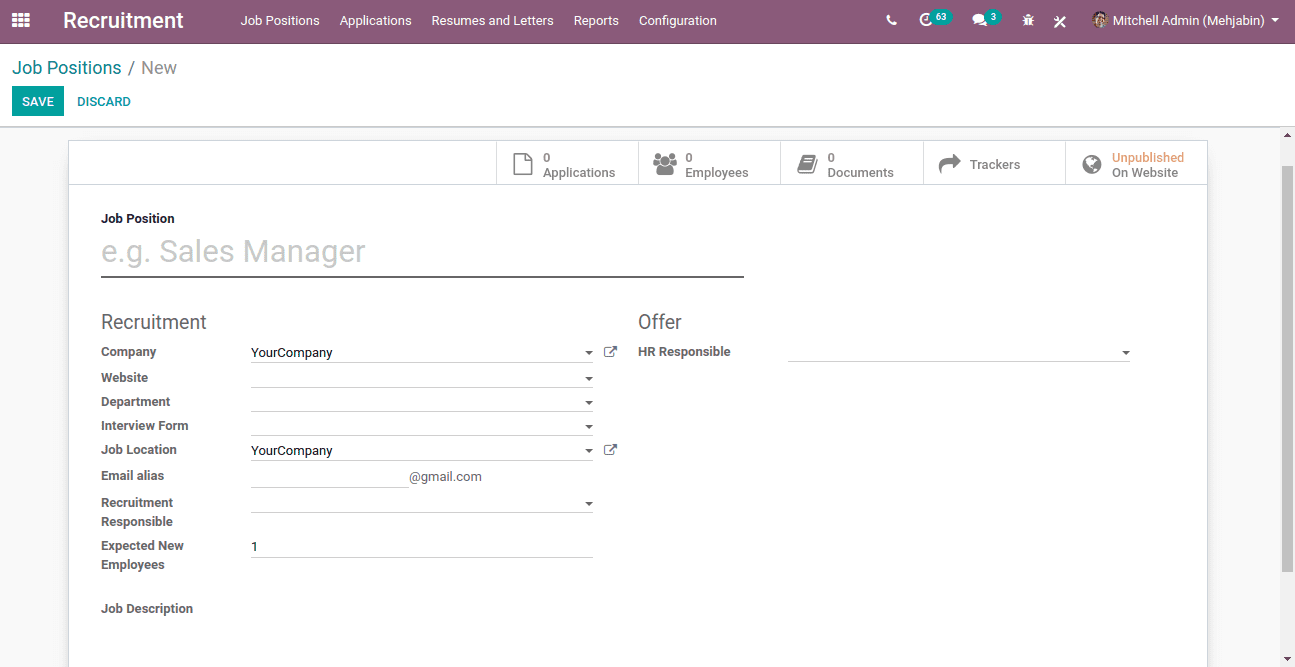
Job Position: Here specify the name of the job position.
Company: Company responsible for the recruitment
Website: Select the website on which this job position should be published in case of a multi-company environment or in case of multi-website.
Interview for: Choose an interview form for this job position and you will be able to print/answer this interview from all applicants who apply for this job.
Job Location: Address where employees are working.
Email alias: The name of email alias for this job position. Applicants can send resume to this email address, it will create an application automatically.
Expected New Employees: Number of new employees you expect to recruit.
HR Responsible: Person responsible for validating the employee’s contracts.
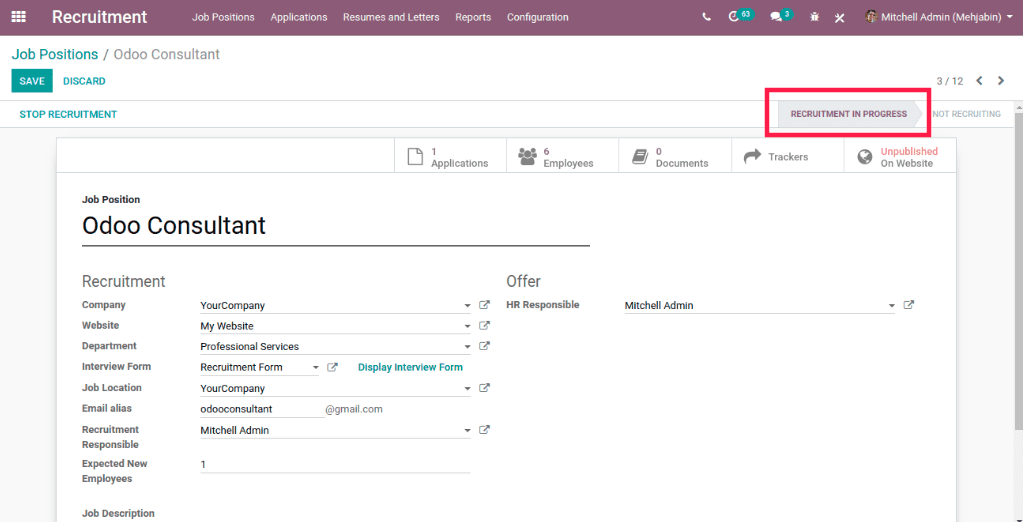
Once you have saved, you can see that the Recruitment is in progress as shown above. You can check all the Applications, Employees and Documents. You can also add some trackers so that you get to know what medium your applicants are using.
Now in the dashboard, you can see the created job position. In the dashboard, you can easily know how many employees are hired and can directly go to the applicants and can see if there are any documents uploaded by the applicants.
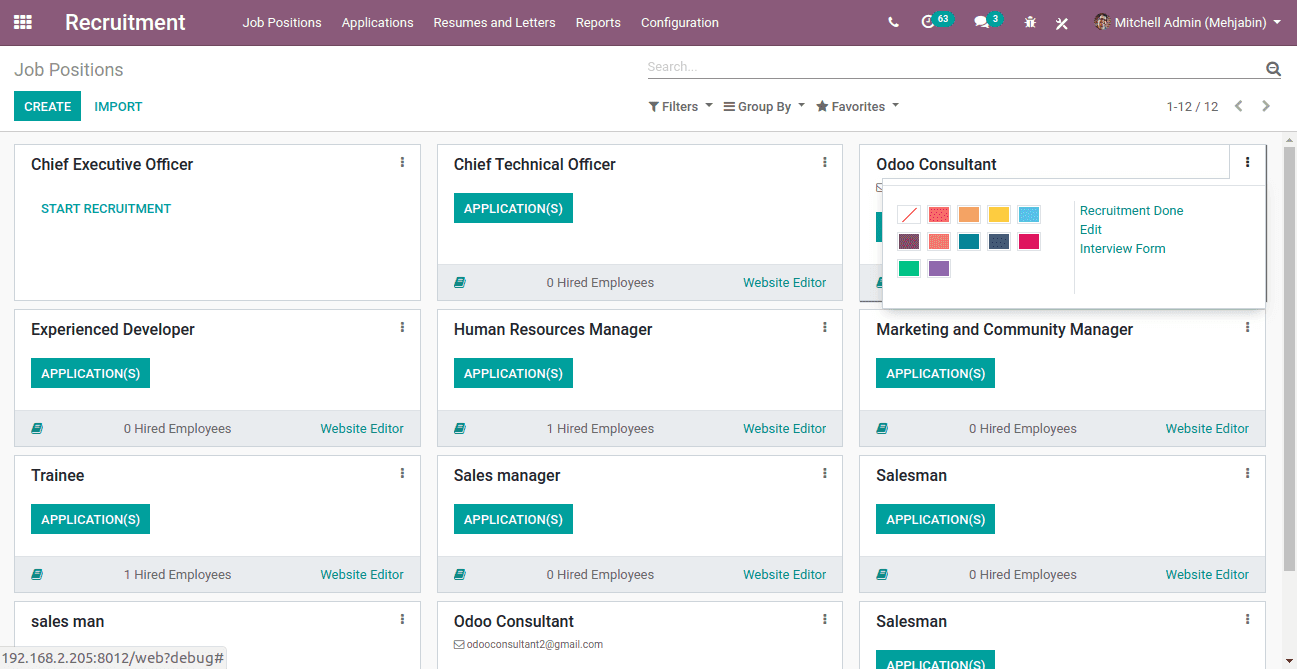
By clicking on the three little dots on the job position you can see Recruitment Done, Edit and Interview form. You can mark the recruitment as done by simply clicking on the Recruitment Done and can directly go to the settings form via clicking the Edit. You can also manage the Interview form from the dashboard.
Now publish the Job created under Job Position in the website. For that, click on the website button which is now in an unpublished state. After clicking the button, it will redirect you to the website.
Simply by clicking on the toggle, you can publish the job position.
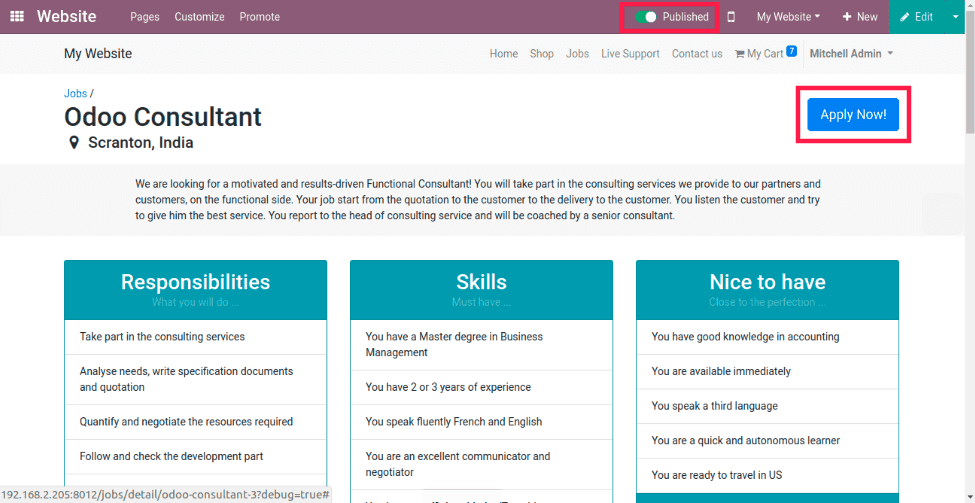
By clicking on the Apply Now button, you can apply for the respective job position.
You will be redirected to the Job application form as shown below.
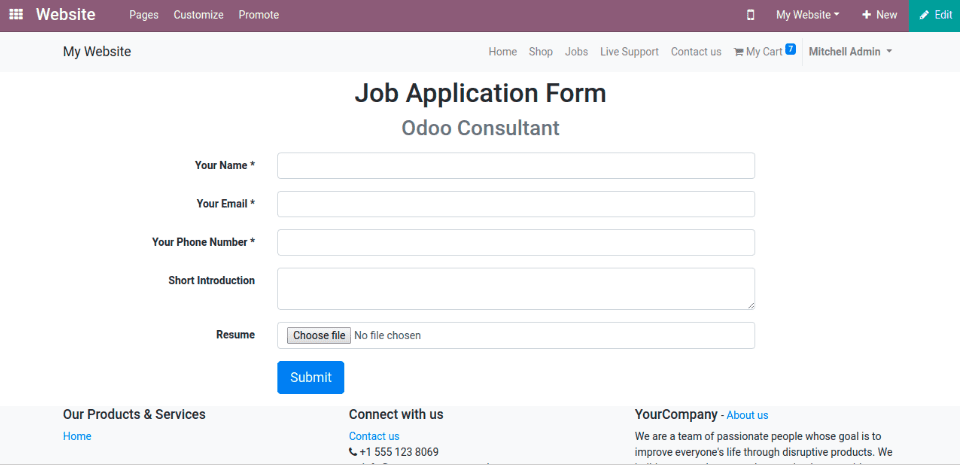
In the job application form, you can enter the necessary details like name, email, contact, a short introduction, etc. and can attach resume. You can also customize the application form.
On submitting the application form, you can see the application in the overview of the recruitment module under the created job position. Go ahead and look at the application.
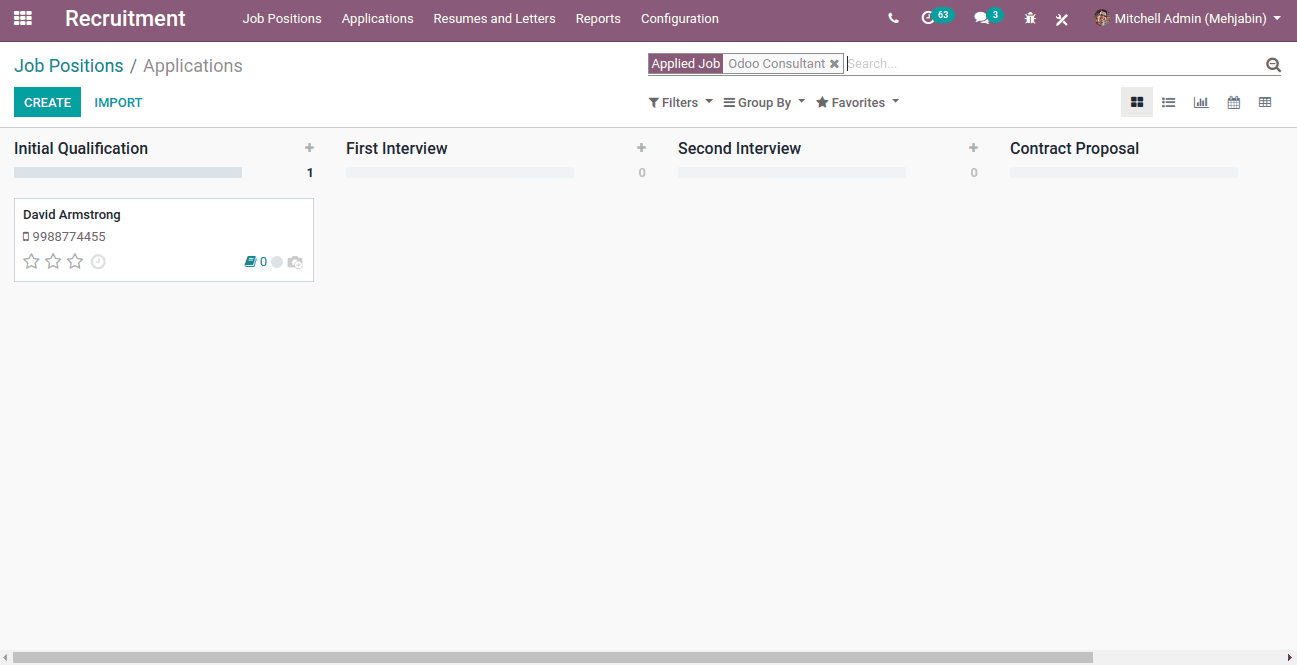
Here you can see different stages of the recruitment process. You can simply drag and drop between each stage.
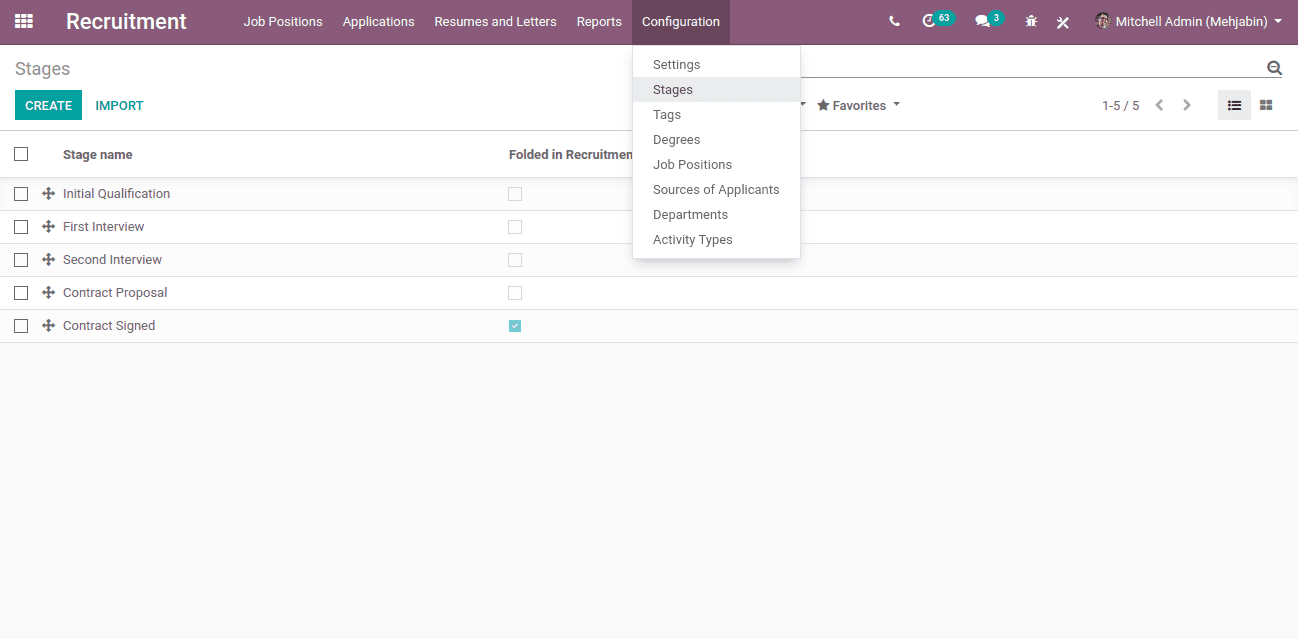
You can also create new stages as per your need from Configuration -> Stages.
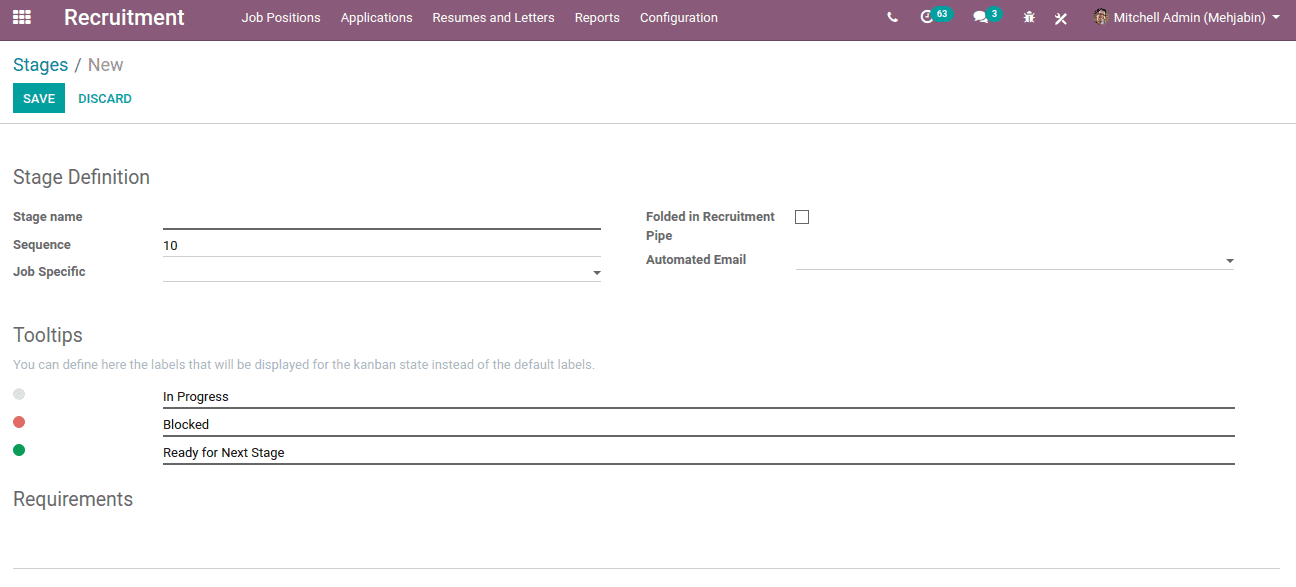
Stage Name: Give the stage name.
Sequence: Give the sequence order when displaying a list of stages.
Job Specific: Specific job that uses this stage. Other jobs will not use this stage.
Folded in recruitment pipe: You can fold this stage in the Kanban view when there are no records to display in this stage.
Automated Email: If set, a message is posted on the applicant using the template when the applicant is set to the stage.
You also can define the labels that will be displayed for the Kanban state instead of the default labels.
Now while opening the application, you can see a lot of information regarding the application as shown in below.
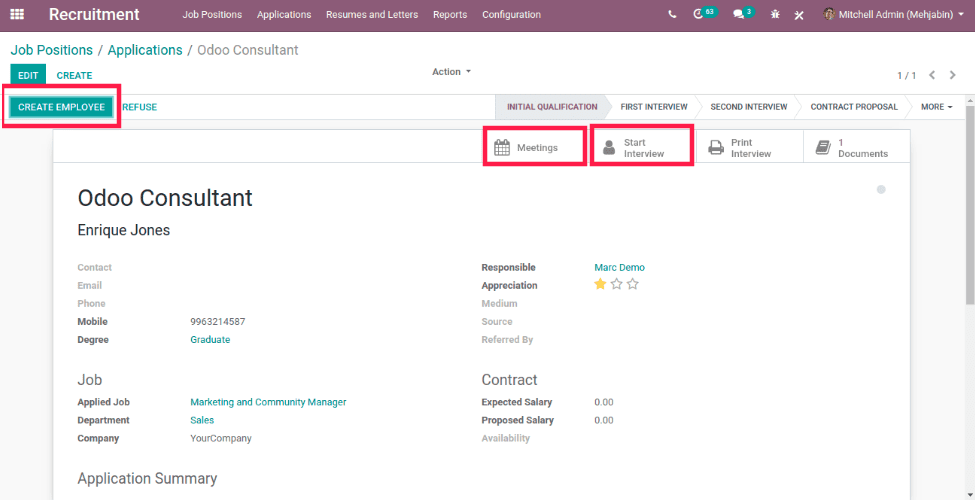
Here you can specify the medium and source for the job position and can also set the referred person if the applicant is referred by someone.
And after the first or second interview, you might have the ability to have an expected salary or proposed salary. You can also arrange meetings and start an interview directly from here itself.
You can change the stages directly from here or in the pipeline. You can pass the applicant through different stages and can create as an employee by clicking the create employee button at the top left as shown above.
In Resumes, under the Letter menu, you can see all the resumes and letters that have been uploaded.
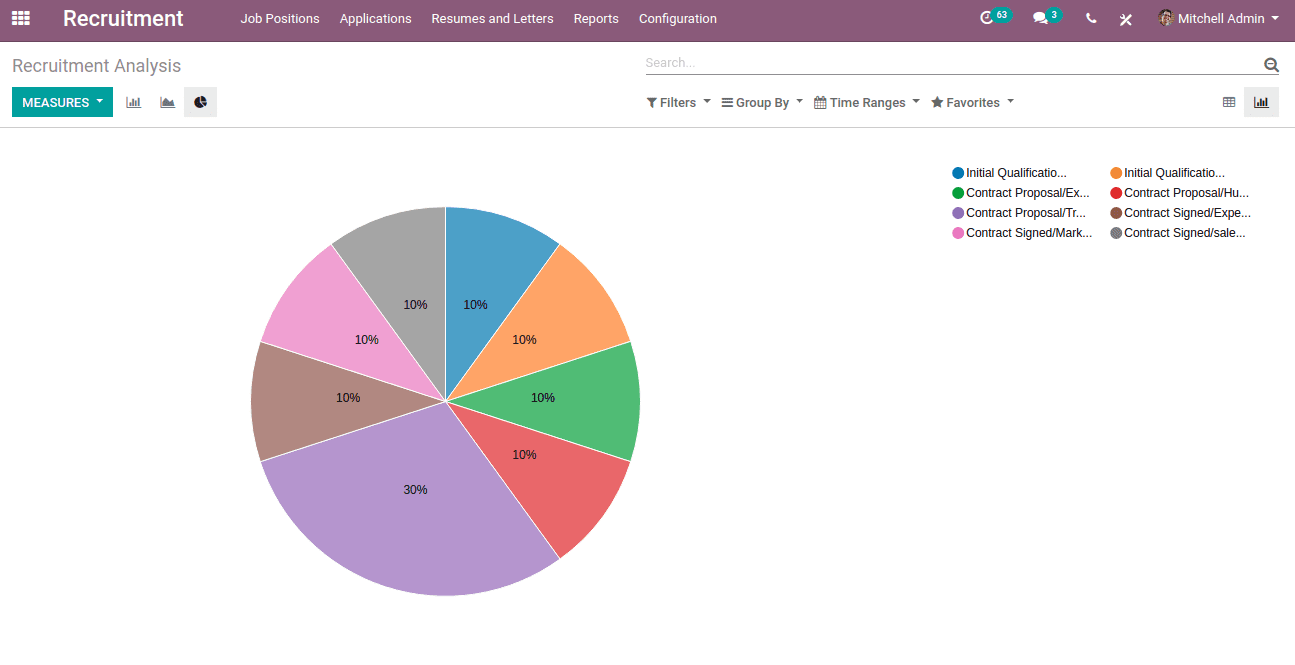
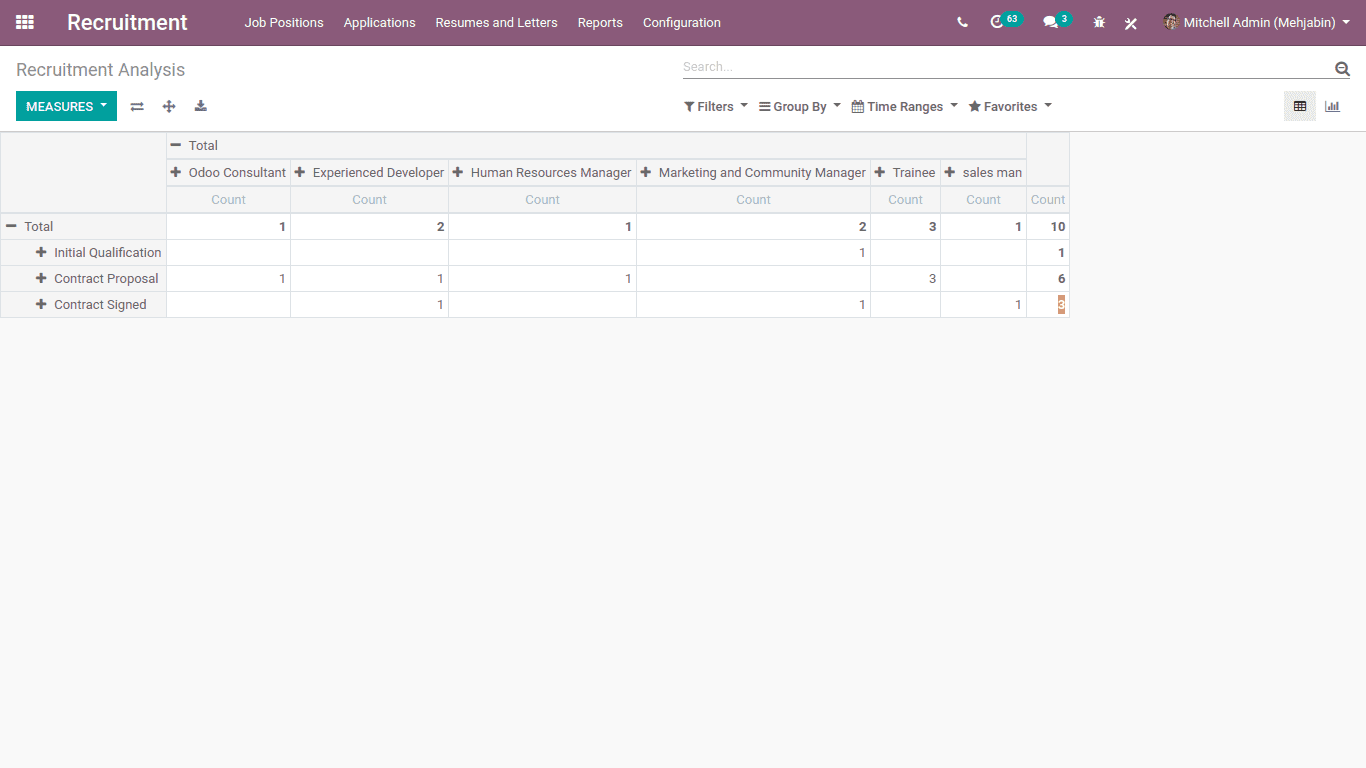
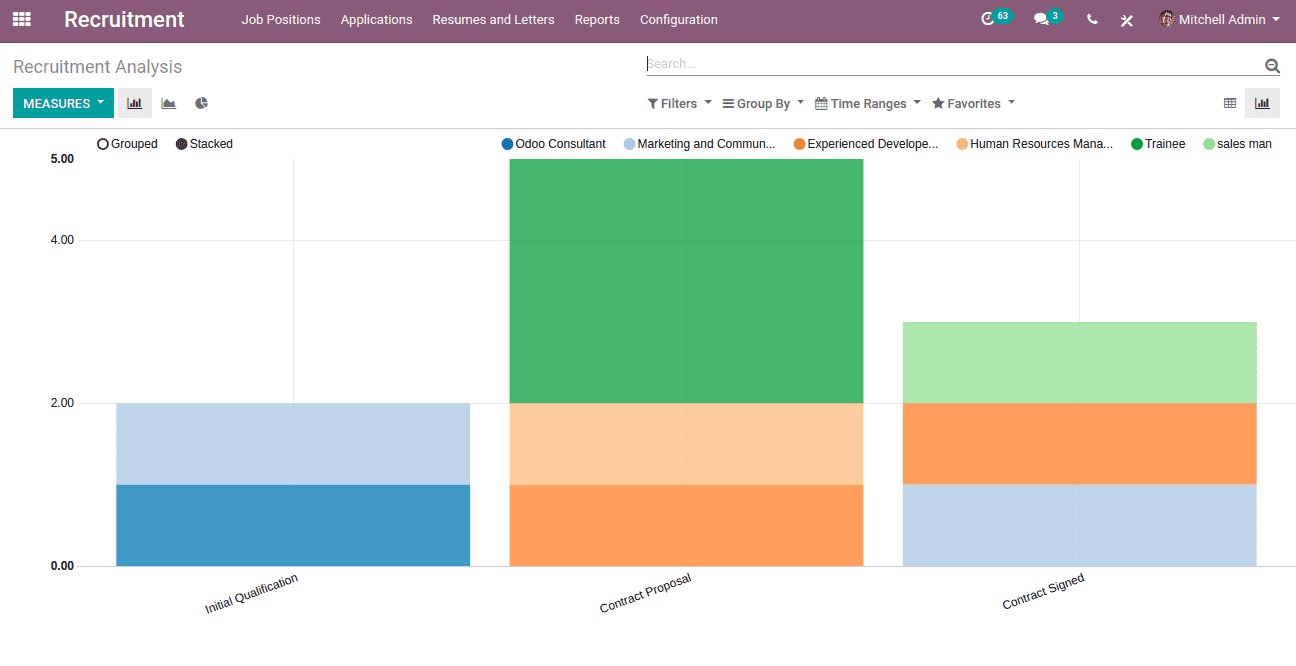
In Reporting, you get the Recruitment analysis as pivot and graph views as following.
Pivot View:
Bar Graph:
Pie Chart:
